

Blooming gel has transformed what’s possible for home nail artists and professionals alike—it’s one of those rare products that makes creating intricate, salon-quality designs feel genuinely achievable. If you’ve scrolled through nail art inspiration and spotted those mesmerizing watercolor effects, marble patterns, and soft floral designs, there’s a good chance blooming gel was the secret behind them.
The beauty of this technique is that it doesn’t require advanced artistic skills or years of practice. What it does require is understanding exactly how the product works, having the right supplies on hand, and learning a few strategic techniques that separate mediocre designs from stunning ones. Whether you’re a complete beginner or someone who’s been doing gel nails for a while, this guide will walk you through everything you need to know to create blooming gel nail art that looks professional and feels effortless.
What Blooming Gel Actually Is and How It Works
Blooming gel is a thin, clear gel polish formulation designed specifically to allow gel polish colors to spread and blend like watercolors on your nails. Think of it as the bridge between a traditional base coat and your colored gel polish—it’s viscous enough to apply smoothly but thin enough to let colors disperse naturally when you place them on top.
The magic happens because of its unique consistency. When you apply colored gel polish to uncured blooming gel, the colors don’t sit on top as a solid layer. Instead, they slowly spread outward in organic, fluid patterns, creating those signature soft gradients and marbled effects that look so stunning. The longer you wait before curing, the more the colors bloom and blend together—you’re literally giving the gel time to do the artistic work for you.
This is fundamentally different from trying to create the same effects with regular gel polish, which sits where you place it. Blooming gel removes the pressure of being “perfect” because the product is designed to disperse and blend naturally. That means even if your initial dot placement isn’t exactly where you envisioned it, the blooming effect will soften the lines and create something beautiful anyway.
The product cures like any other gel under a UV or LED lamp, so once you cure it, the design is locked in place permanently. You’re not working with something temporary—these designs last as long as a regular gel manicure, typically two to three weeks on natural nails.
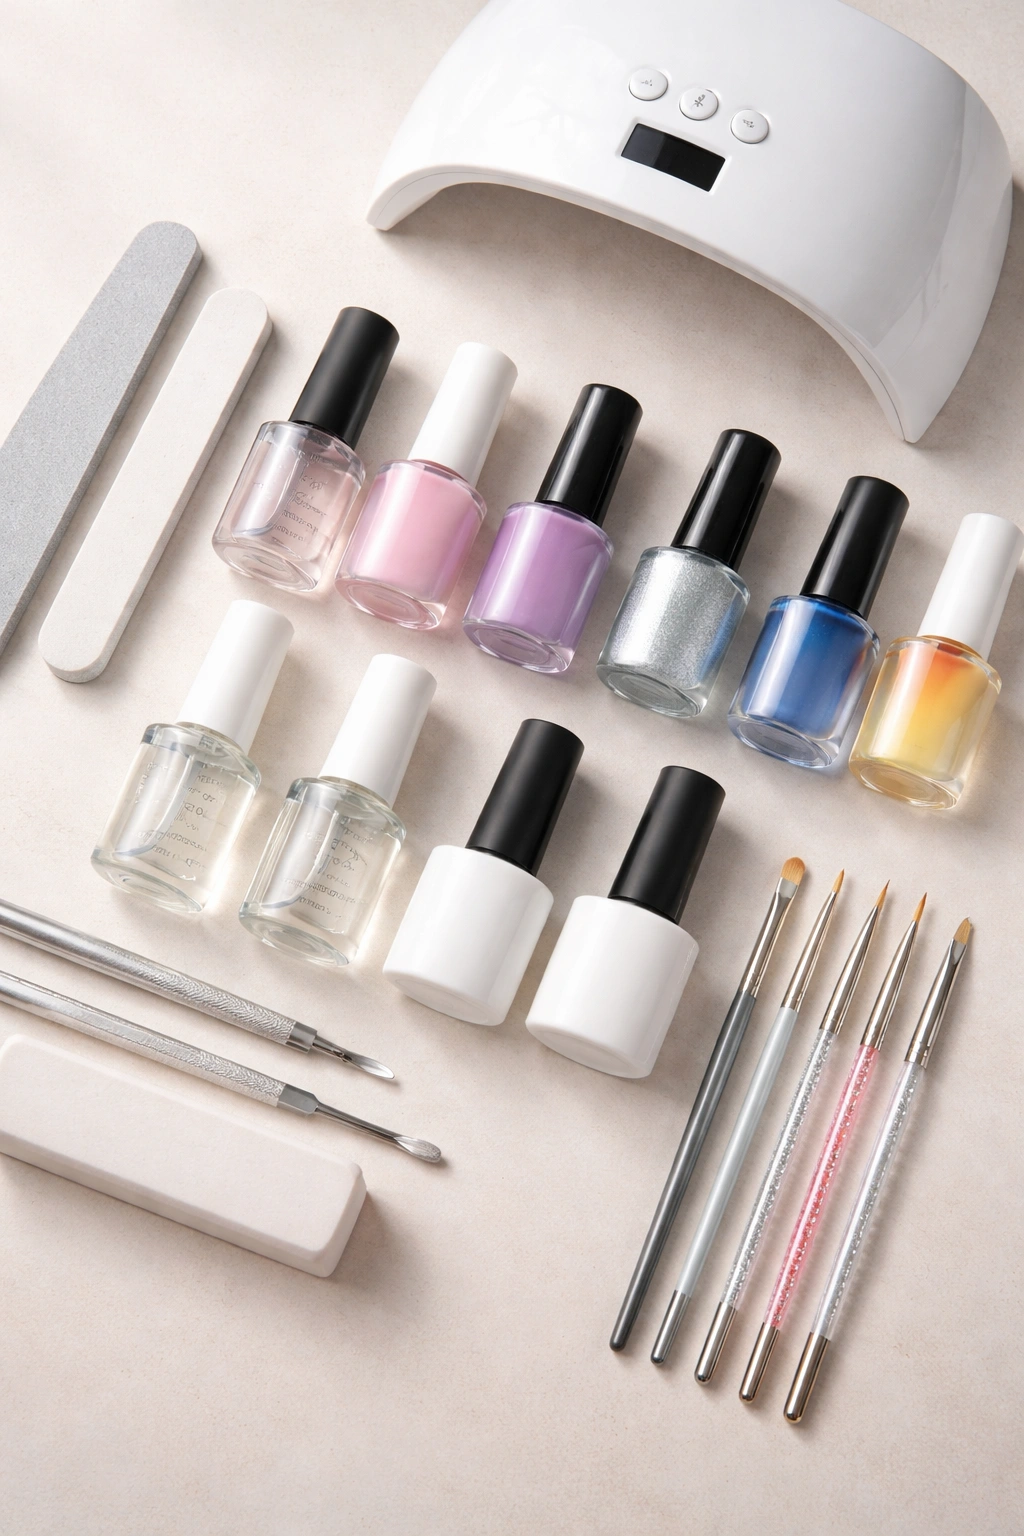
Essential Supplies and Tools You’ll Need
Before you even think about applying blooming gel, gather all your materials. Running back and forth looking for tools mid-manicure breaks your workflow and can cause the blooming gel to start curing unevenly, ruining your design.
The absolute essentials are blooming gel itself, gel polish in at least 2-3 colors, a base coat, a no-wipe top coat, and a UV or LED lamp. You’ll also need basic nail prep supplies—a file, buffer, cuticle pusher, and nail cleanser. Without these, your base won’t adhere properly and your design will lift within days.
For application tools, a fine detail brush or liner brush is almost mandatory for precise color placement. Many people also swear by dotting tools, which come in various sizes and allow you to create everything from tiny dots to larger, more organic shapes. A flat brush gives you different effects than a detail brush—experiment to see what works for your designs.
Optional but genuinely helpful items include a lint-free wipe soaked in cleanser for removing mistakes before they cure, cuticle oil for finishing touches, and nail art stickers or foils if you want to add embellishments after the blooming effect.
The lamp you use matters more than most people realize. LED lamps cure gel faster than UV lamps—typically 30-60 seconds versus 60-120 seconds. This is relevant to blooming gel because faster curing means less time for colors to spread. If you have a slower UV lamp and want more bloom time, that actually works in your favor. With LED, you’ll want to work quickly once you apply colors.
Preparing Your Nails for Blooming Gel Application
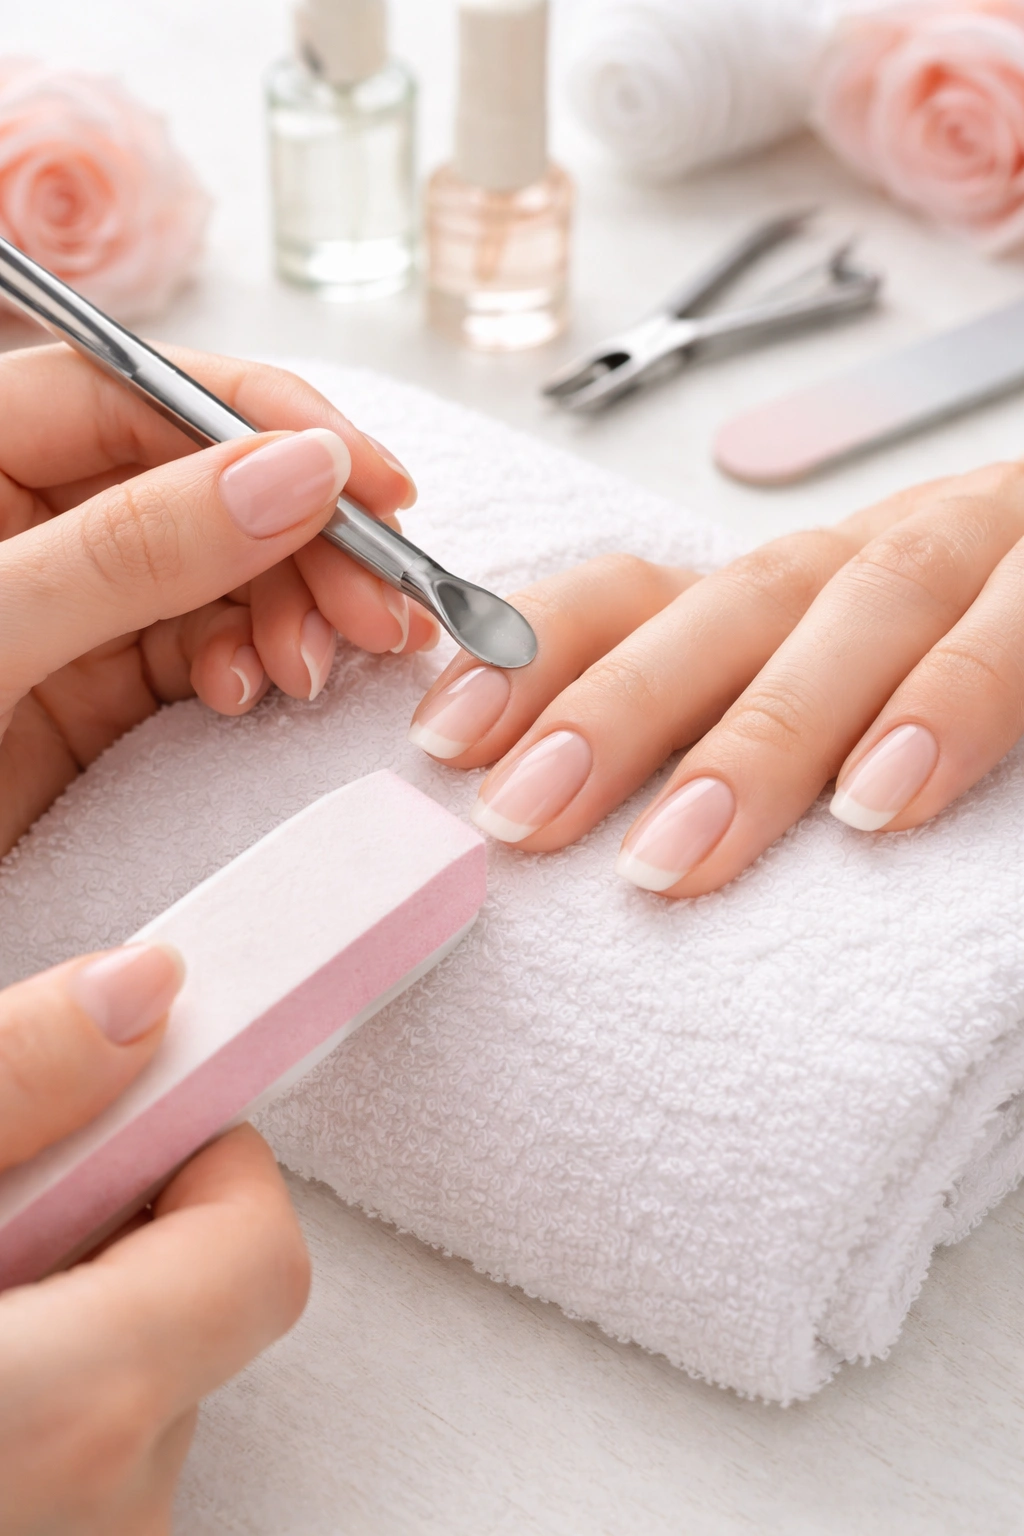
Preparation is genuinely non-negotiable for blooming gel. Poor nail prep is the #1 reason designs lift prematurely or don’t adhere properly, and blooming gel manicures are no exception.
Start by removing any old polish completely. Push back your cuticles firmly but gently, using a cuticle pusher to create a clean workspace. If you have excess cuticle skin, trim it away with proper cuticle nippers—don’t just push it back and hope for the best. Shape your nails to your preferred length and style using a quality nail file, working in one direction to avoid splitting and peeling.
Once your nails are shaped, buff the entire nail plate with a fine-grit buffer. This removes the natural shine and micro-ridges on your nail surface, creating texture that gel polish can grip onto. Don’t skip this step—it’s the difference between a manicure that lasts three weeks and one that starts lifting after three days. Buff gently but thoroughly, covering the entire nail from base to tip.
Clean your nails with a nail cleanser or dehydrator wipe. This removes dust from buffing, oils from your skin, and any residue that might interfere with adhesion. Even if your nails feel clean, there’s invisible debris. A proper cleanser wipe removes it all, creating the perfect surface for your base coat to bond.
Some nail technicians recommend applying a pH bond or primer as an extra step. This is optional but genuinely helpful if your nails are naturally oily or you have a history of gel polish lifting. It creates an additional adhesive layer between your nail plate and the base coat.
Applying Your Base Color Correctly
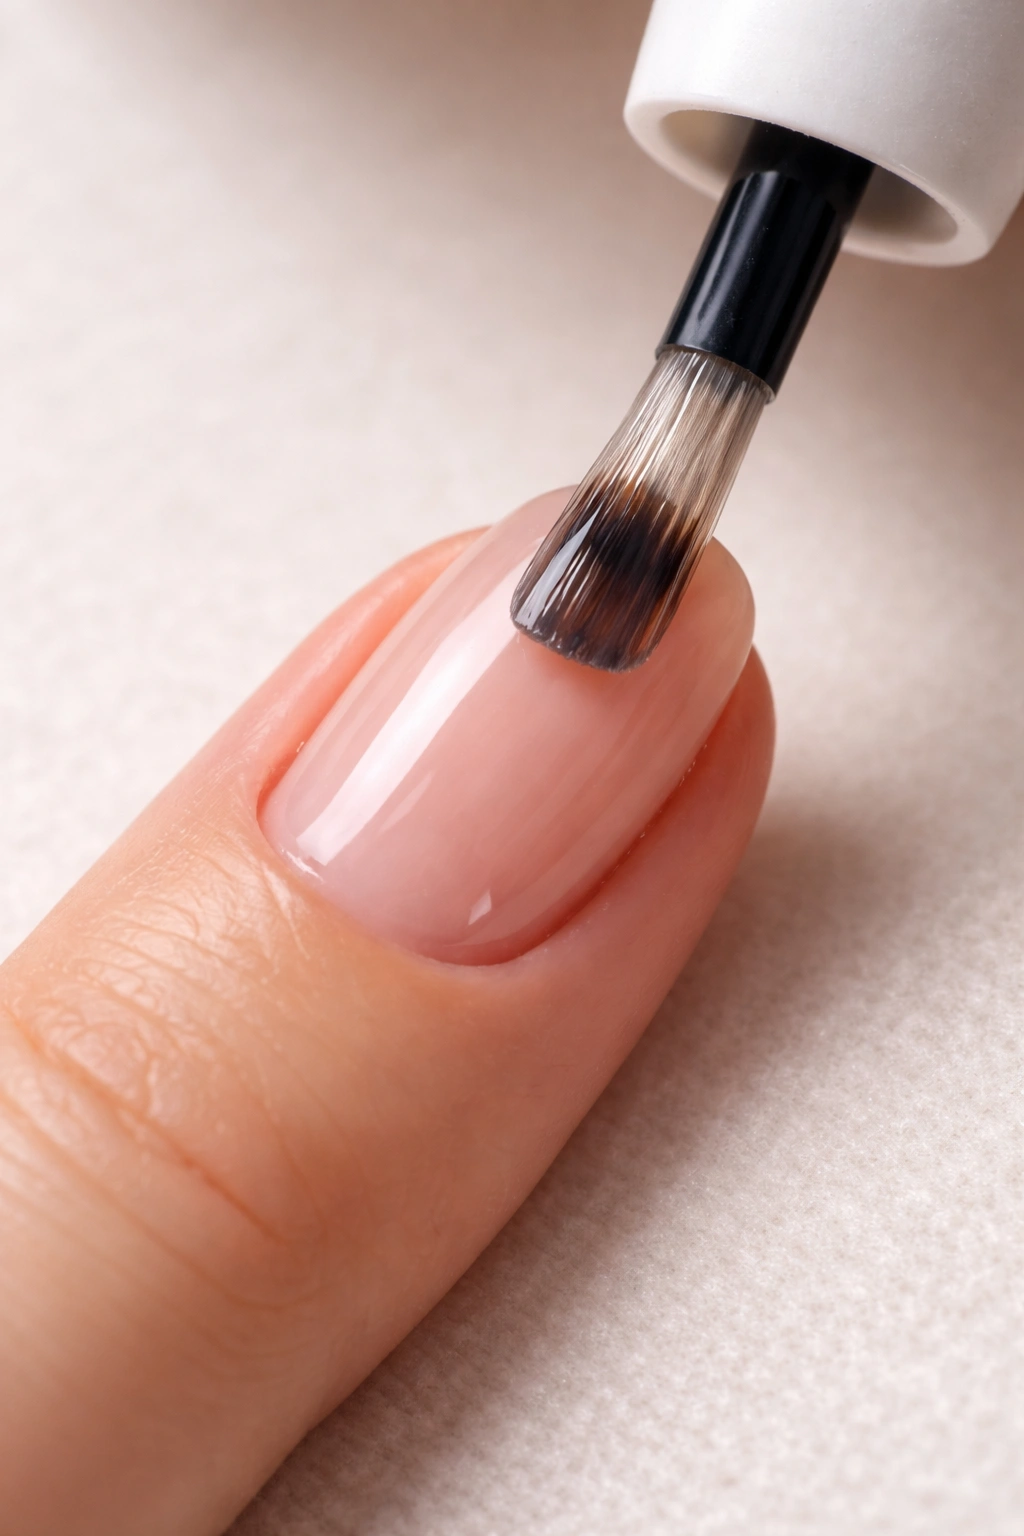
Your base color is the foundation for everything that comes next, so it deserves careful attention. Apply a thin layer of base coat first, curing it for 60 seconds under your lamp (120 seconds under UV). The base coat creates adhesion and provides a smooth surface for your color.
Place your brush in the center of the nail and push the product down toward the cuticle first, keeping the brush nearly flat against the nail plate. Then pull the product up along each side toward the tip, sealing the edges. The base coat should reach the cuticle and the sides without touching your skin—if it does, gently remove it with a micro brush dipped in cleanser before curing.
Once your base coat is cured, apply your first layer of colored gel polish. Roll the bottle between your palms—don’t shake it, because shaking introduces air bubbles. Use the same application technique: center, down to cuticle, then up and out to the sides and tip. Cure for 60 seconds.
For most colors, one layer provides decent opacity. If you want deeper, richer color, apply a second thin layer rather than one thick coat. Thin layers cure more evenly and look more professional. If you apply one very thick layer, it can look clumpy and won’t cure properly in the center. Cure each layer separately for the full 60 seconds. Wait until you see that cured layer before applying the next.
Don’t touch or mess with your base color once it’s cured. It’s done—it’s not going anywhere. This is the stable foundation everything else sits on.
The Blooming Gel Layer: The Most Important Step
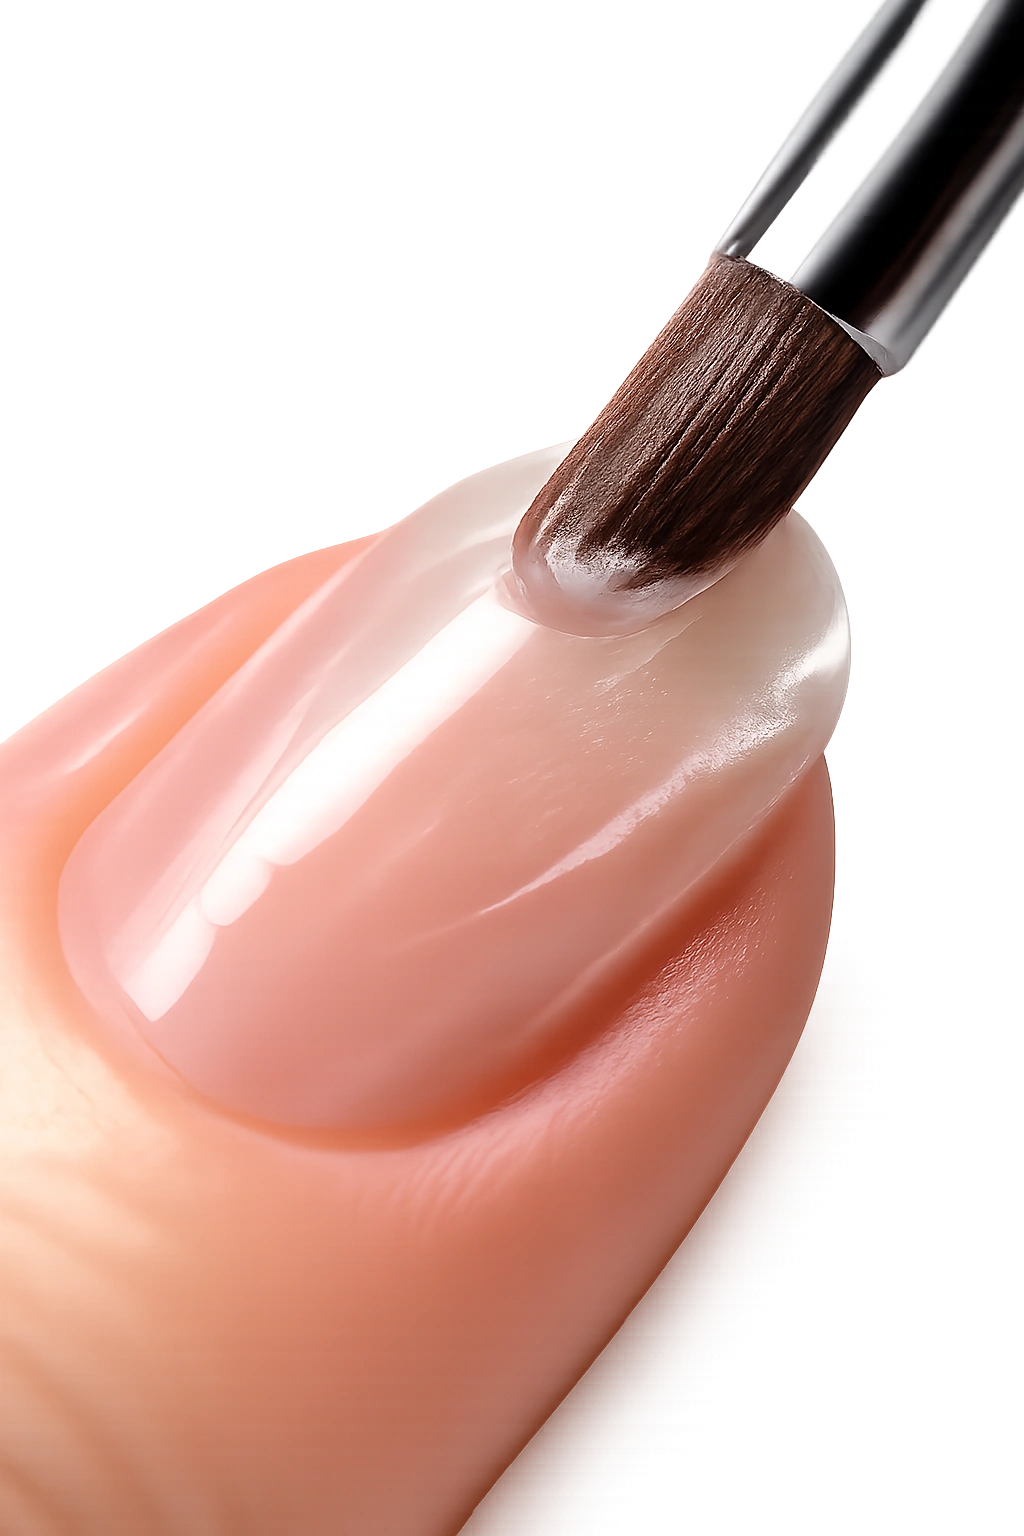
This is where the actual magic begins, and it’s the single most important step in the entire process. Apply a thin, even layer of blooming gel over your cured base color—and do not cure it yet. This is crucial.
The thickness of your blooming gel layer directly controls how much your colors will spread. Apply it too thick and the colors won’t disperse properly—they’ll sit on top and the design will look clumpy and undefined. Apply it too thin and colors might not spread enough, giving you a less dramatic effect. Aim for the same thickness you’d use for a regular coat of gel polish.
Use the same application technique: brush in the center, push toward the cuticle, pull toward the sides and tip. Make sure it covers the entire nail evenly and reaches the edges without touching your skin. The blooming gel will be clear, so you might not see it easily, but you’ll feel it on the nail plate.
Here’s the key difference: do not put this layer under the lamp yet. Leave it uncured. This is what allows the magic to happen. When you place your colored gel polish on top of uncured blooming gel, the blooming gel acts as a medium that lets the colors float and spread instead of just sitting on the surface.
Some nail artists apply blooming gel over a cured base color, while others skip the cured base color layer and apply blooming gel directly over a cured base coat. Both work, but having a colored base coat beneath gives you more control over the final look. The base color becomes the underlying tone that all your blooming effects sit on top of.
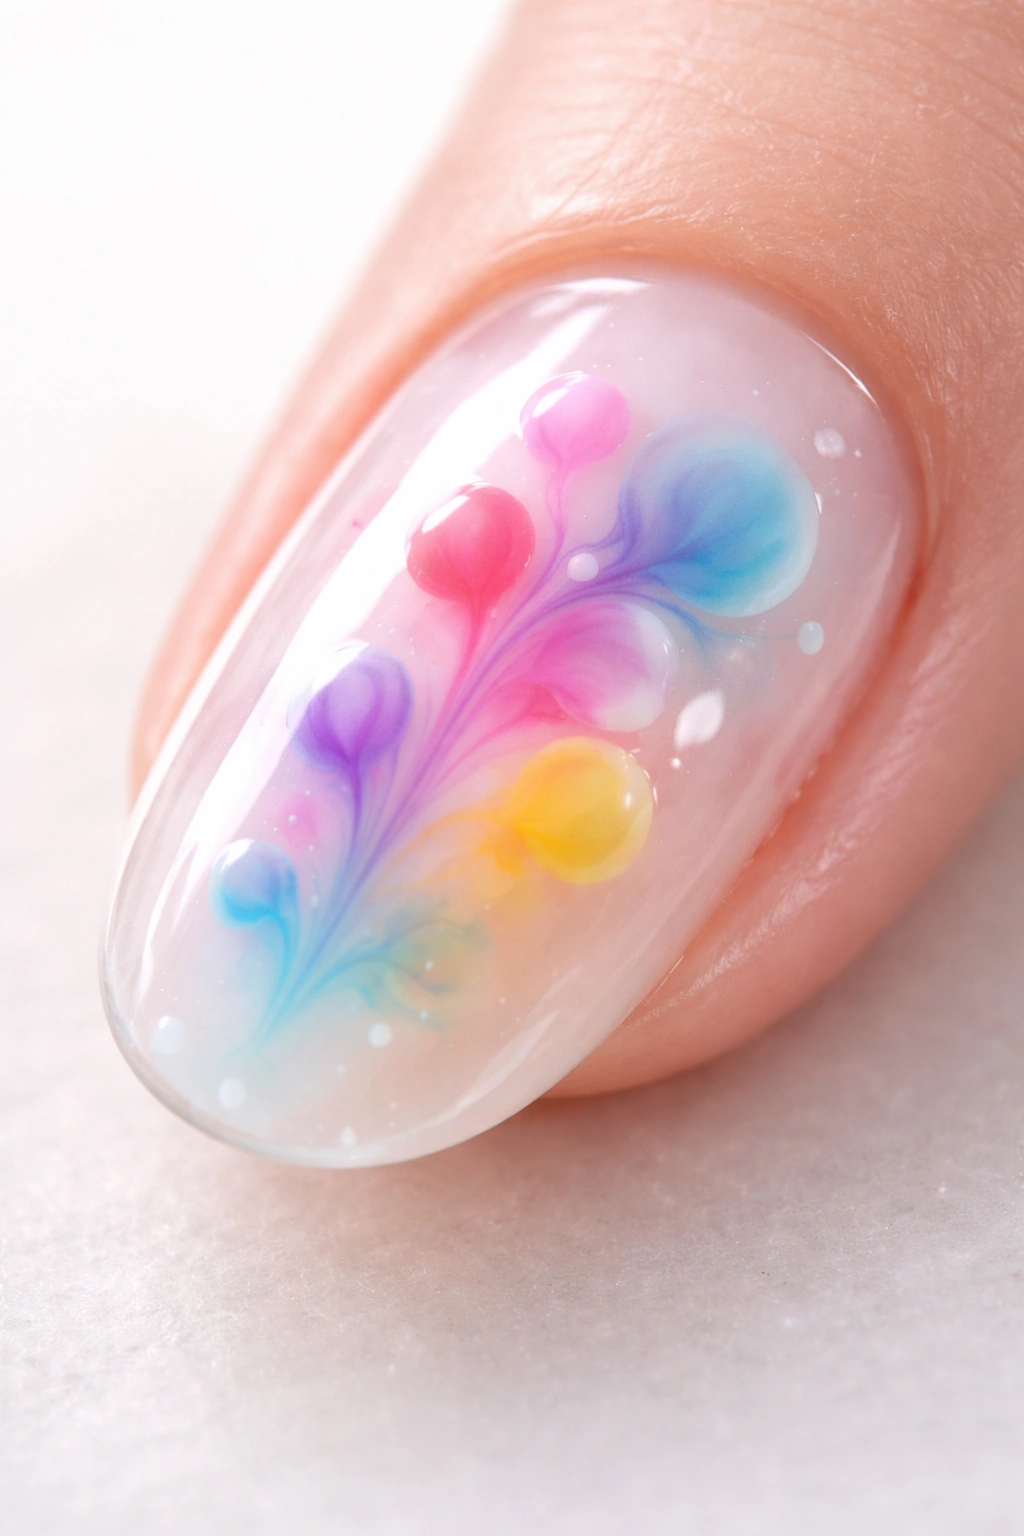
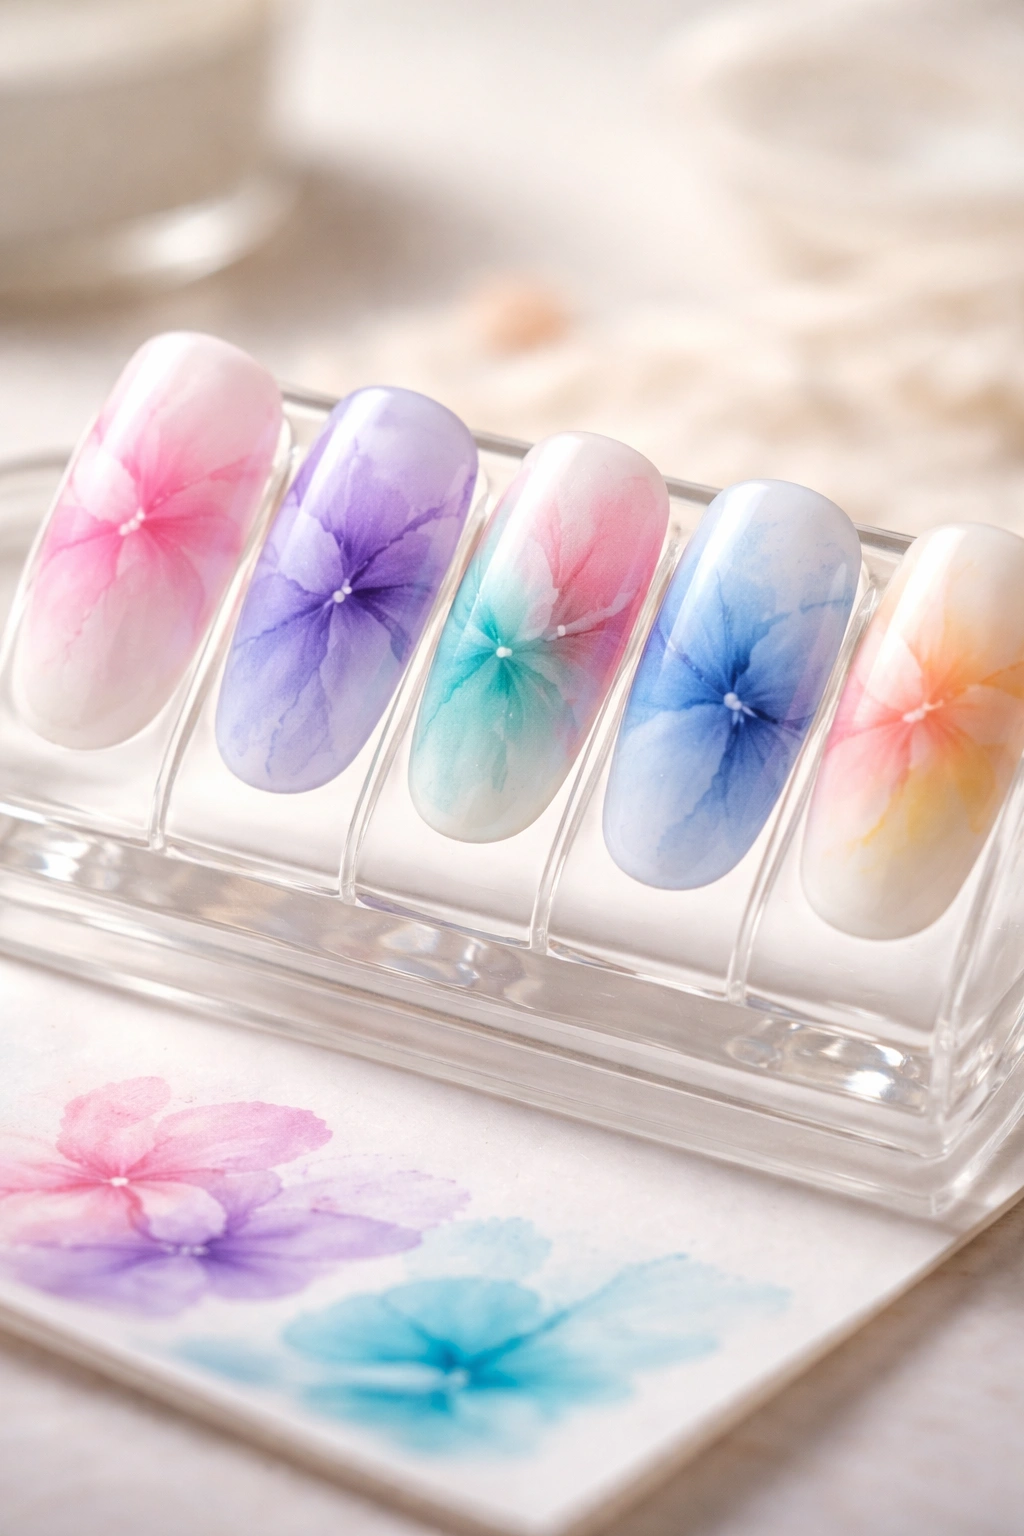
Creating Beautiful Watercolor Effects
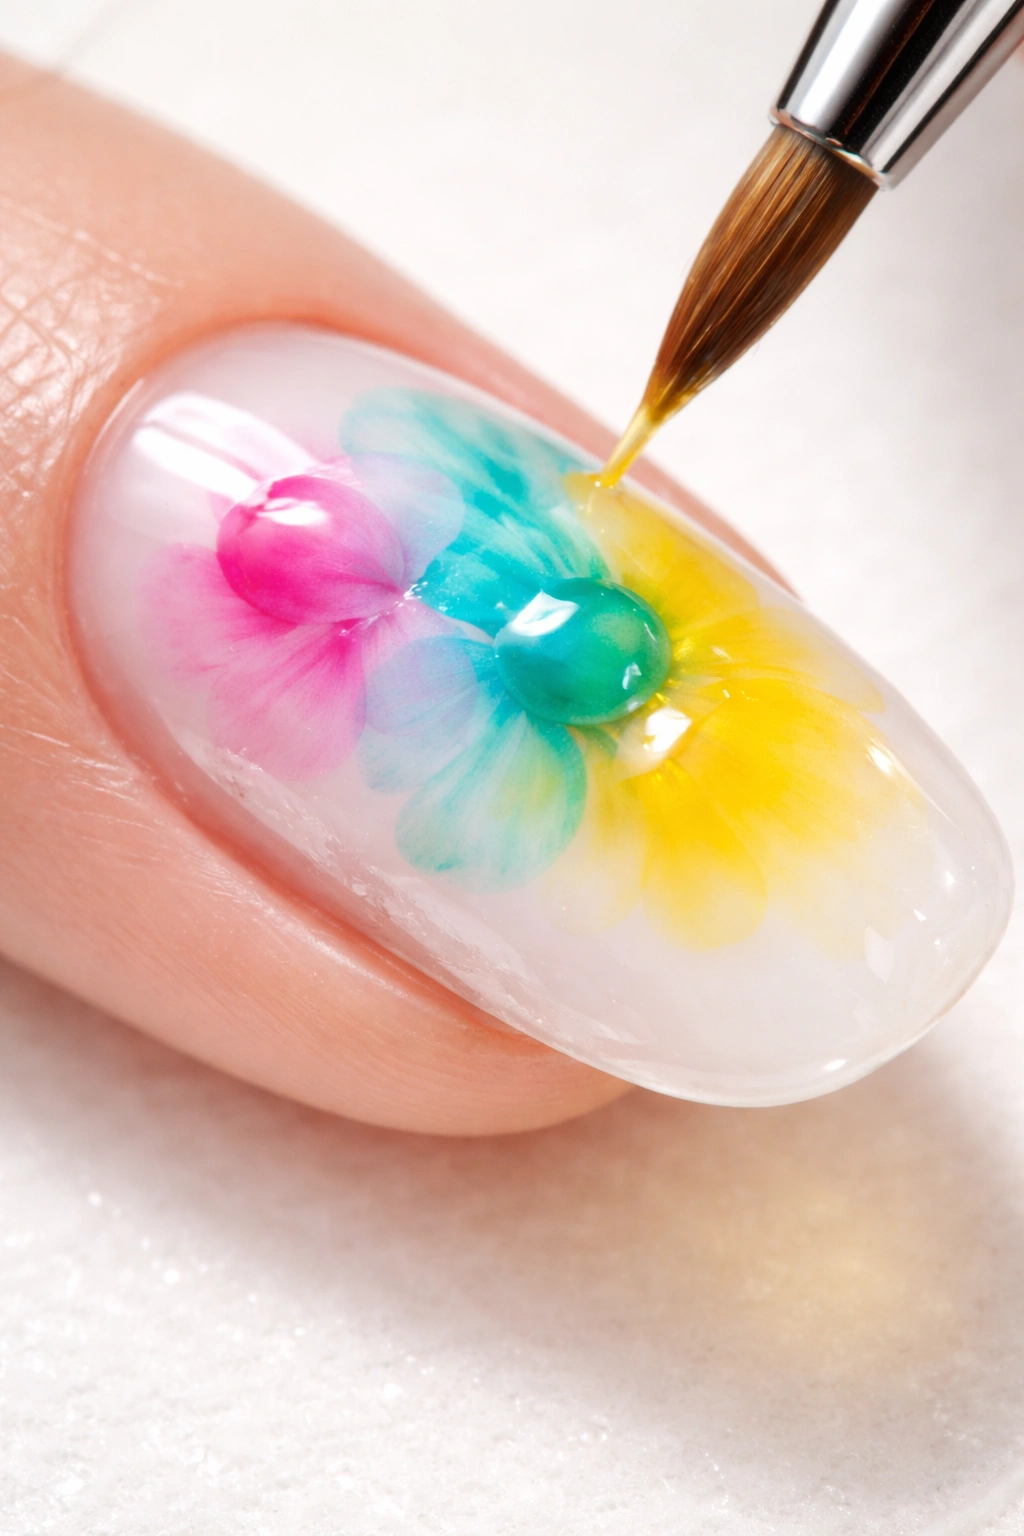
The simplest and most popular way to use blooming gel is to create soft watercolor effects that look like an artist hand-painted your nails. This is beginner-friendly and produces results that look far more complicated than they actually are.
Once your uncured blooming gel layer is applied, choose 2-3 gel polish colors that complement each other. Drop small amounts of each color onto your blooming gel using a detail brush, liner brush, or dotting tool. You don’t need much product—a tiny dot or short stroke is enough to create a beautiful bloom.
Place the colors strategically but don’t overthink the placement. The blooming effect will soften and blend wherever the colors end up. Some people like to place colors in a pattern; others place them more randomly. Both approaches work. The product does the blending work for you, so you can be less precious about exact placement than you might be with regular gel art.
Once you’ve placed all your colors, wait 10-30 seconds and watch them bloom. You’ll actually see the colors start to spread and blend at the edges. If you like the effect, stop and cure. If you want more spread, wait a bit longer. The longer you wait before curing, the more the colors will disperse, but there’s a limit—they won’t bloom forever. Once the gel starts to set slightly, the spread slows down.
If your colors don’t spread as much as you’d like, you can add another layer. Apply more uncured blooming gel on top, add more gel polish colors, and repeat. This creates more dimensional, layered effects with deeper color mixing.
Pro tip: Work on one finger at a time. This prevents the blooming gel from curing unevenly across your hand and gives you maximum control. Once you’re happy with one nail, you can flash-cure it for 10 seconds under the lamp to lock in the design before moving to the next finger.
Marble and Abstract Swirl Designs
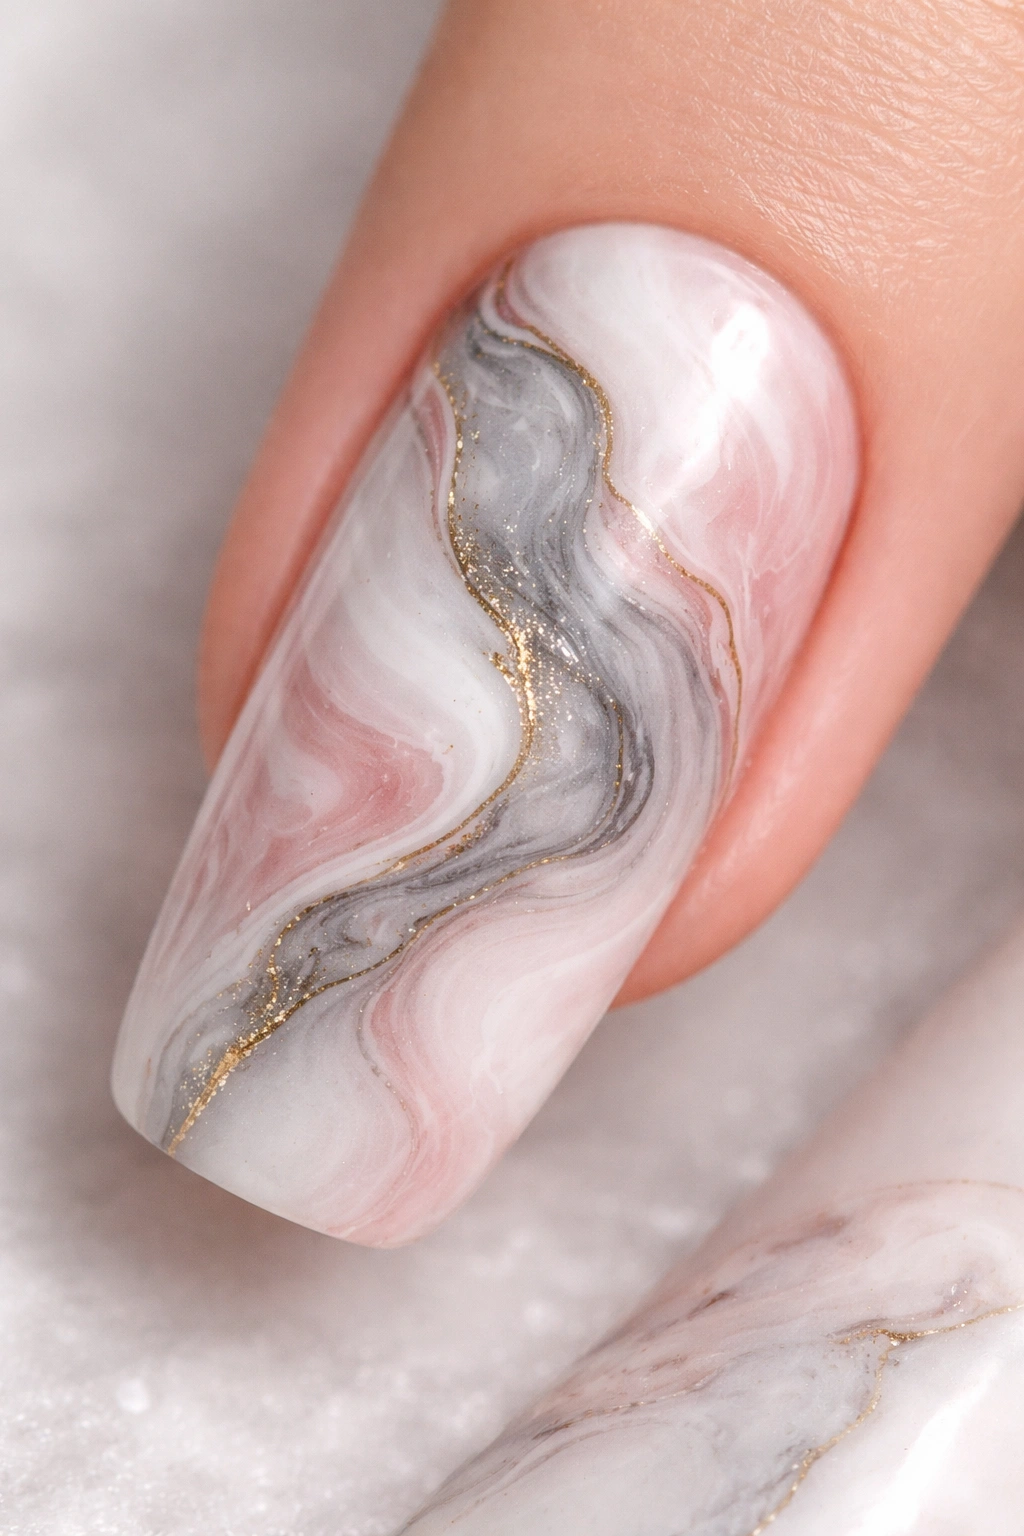
Marble effects are stunning and incredibly easy to achieve with blooming gel. The key is using complementary colors and allowing the product to do most of the work for you.
For a classic marble look, apply your uncured blooming gel layer and place 3-4 different gel polish colors on the nail—either in dots or in small strokes. You might use white, soft gray, pale pink, and a hint of gold, for example. Let these colors bloom naturally.
If you want more intentional swirling, use a detail brush or even just the tip of a micro brush to gently drag one color into another. Don’t aggressively swirl or you’ll disrupt the blooming effect. A gentle, light touch is all you need. You’re guiding the colors slightly, not fighting the product. The blooming gel wants to spread and blend naturally—your job is just to suggest directions.
Abstract swirls work best when you embrace imperfection. The whole point is that each nail looks unique and organic. Drop colors, let them bloom, maybe drag through them once or twice with a brush, and cure. No two swirls will ever be identical, which is what makes the look so appealing.
For more dramatic marble effects, use high-contrast colors—black with white, deep navy with gold, burgundy with cream. The visual contrast makes the marbling more pronounced. For softer, more subtle marble, use colors in the same family—various shades of pink, or different neutrals.
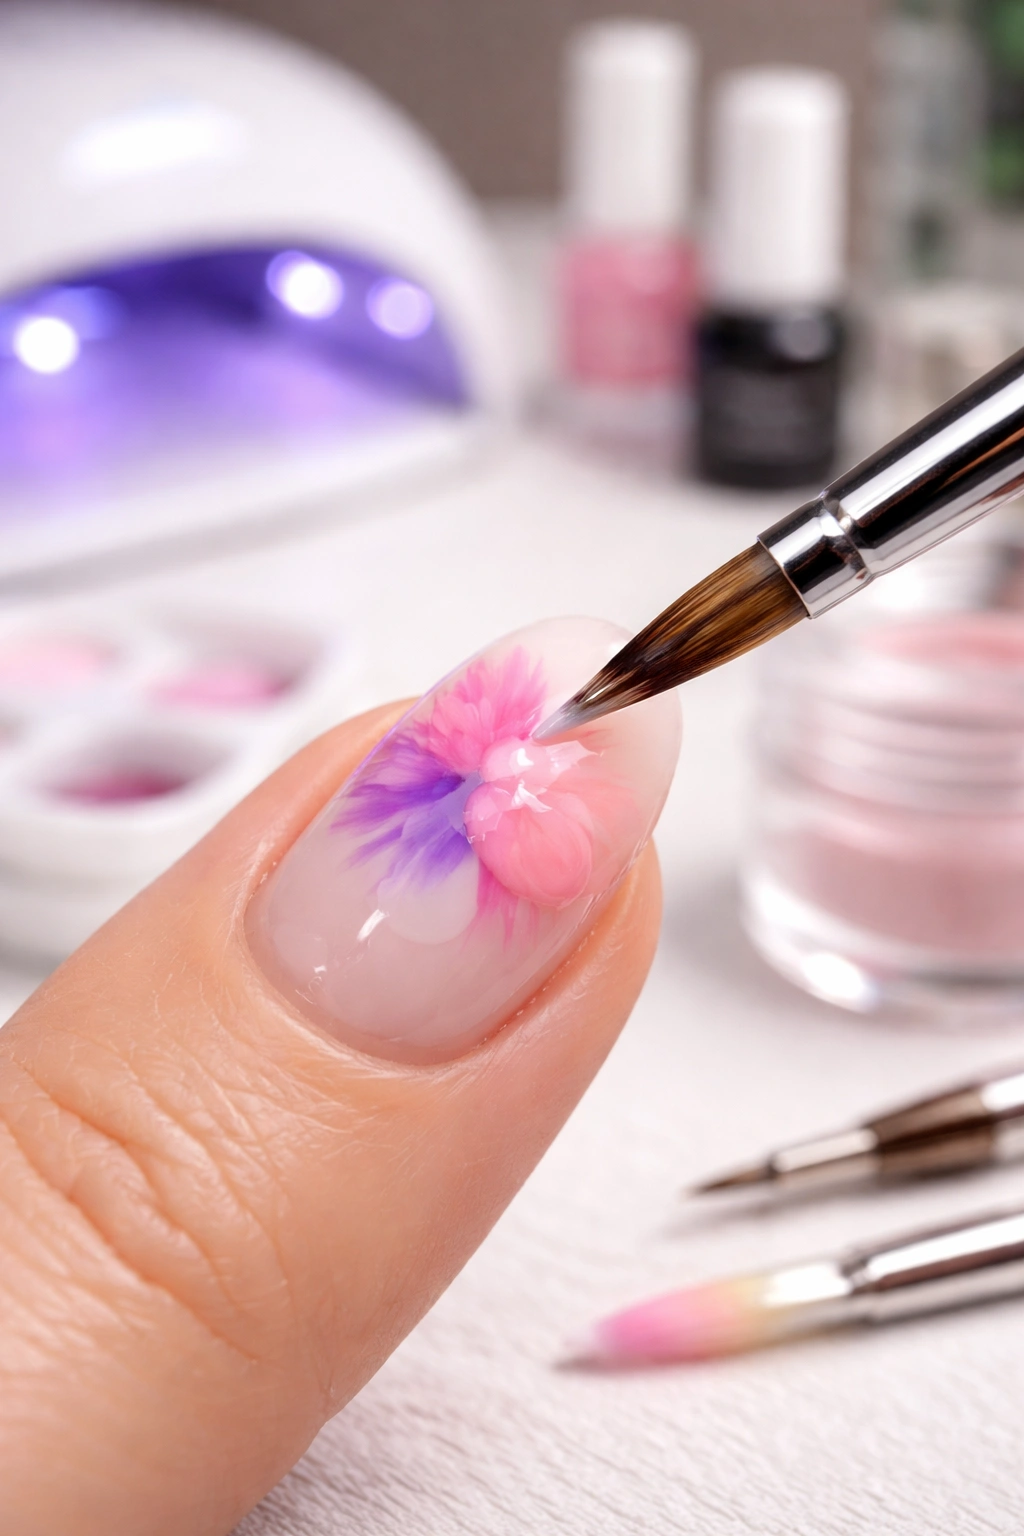
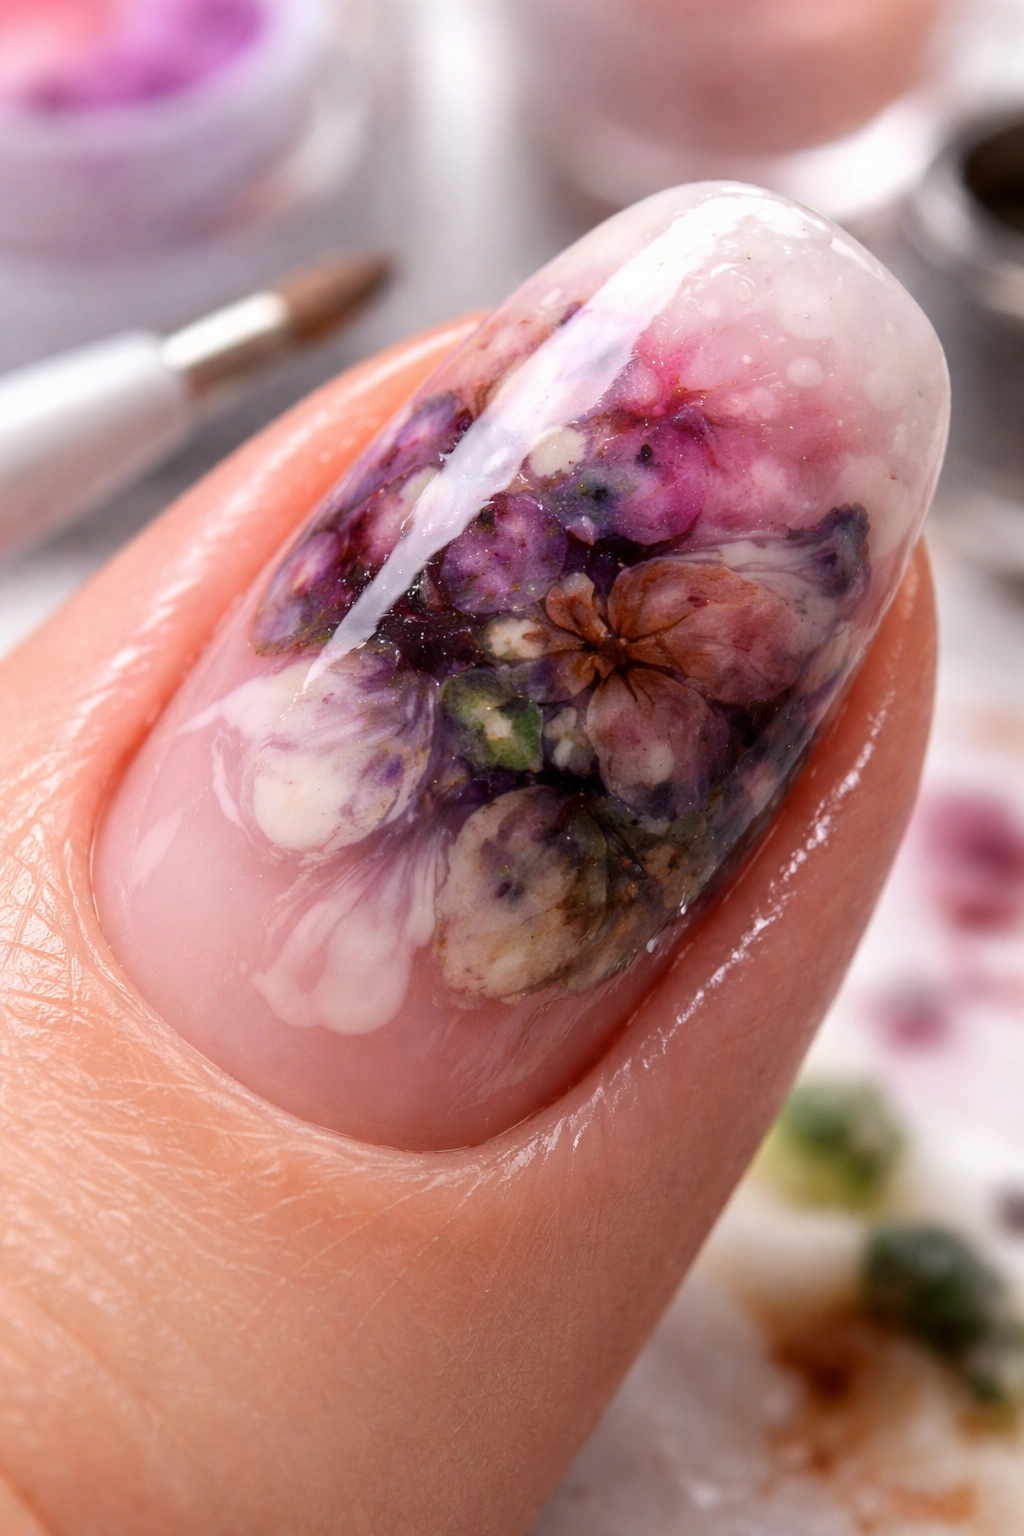
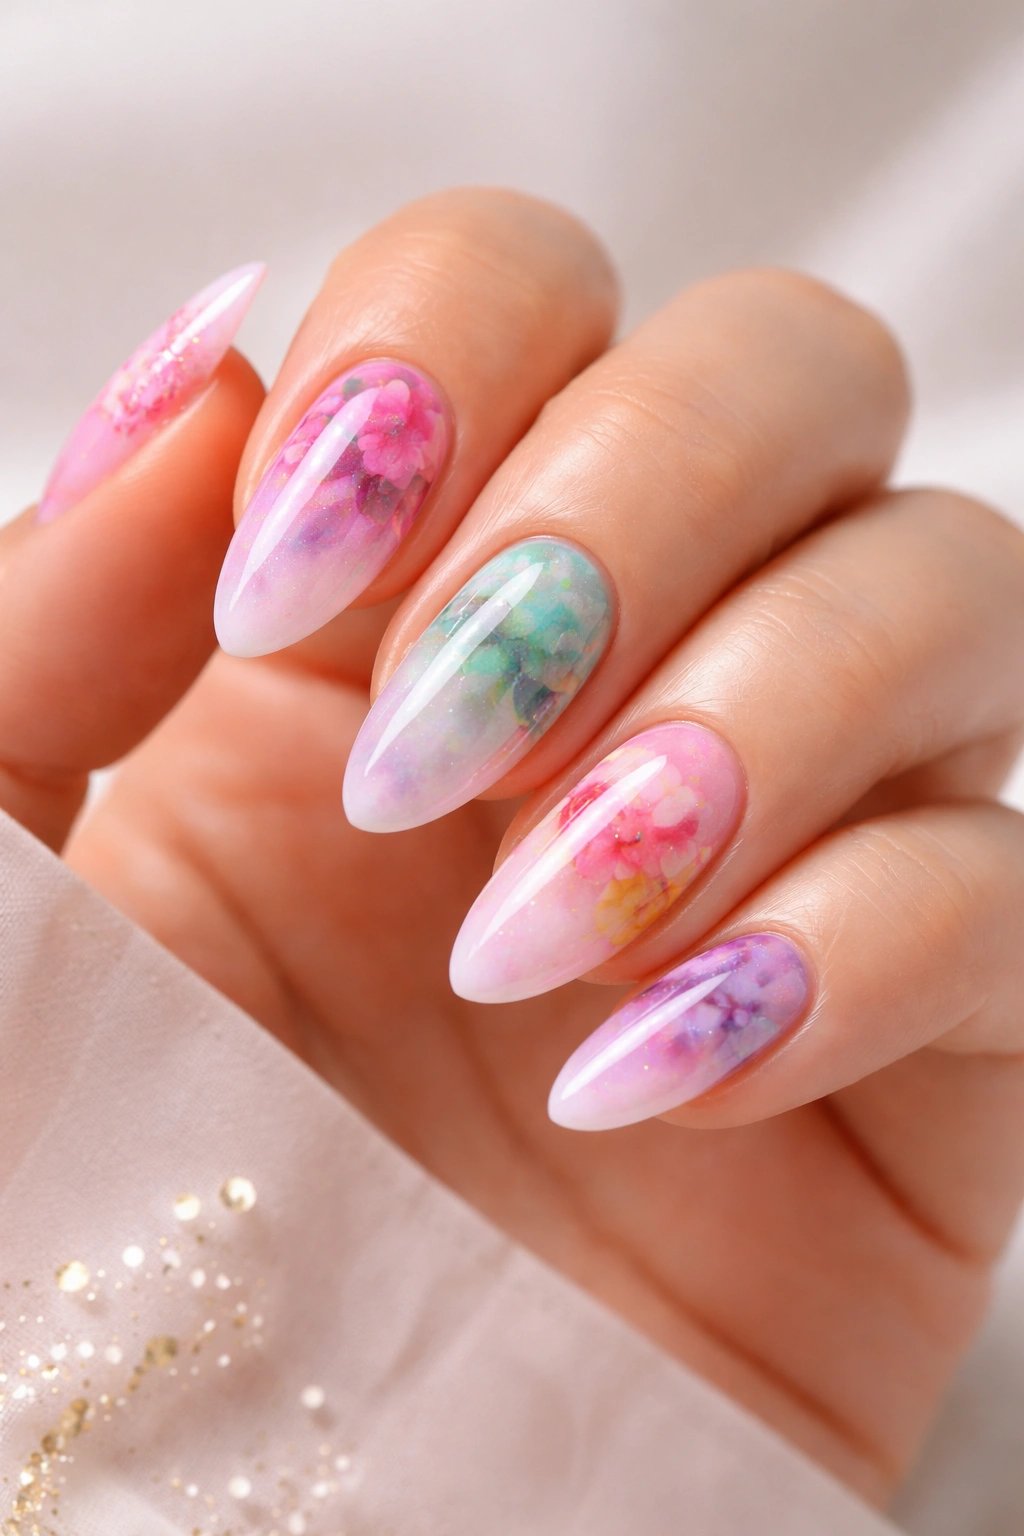
Floral Nail Art with Blooming Gel
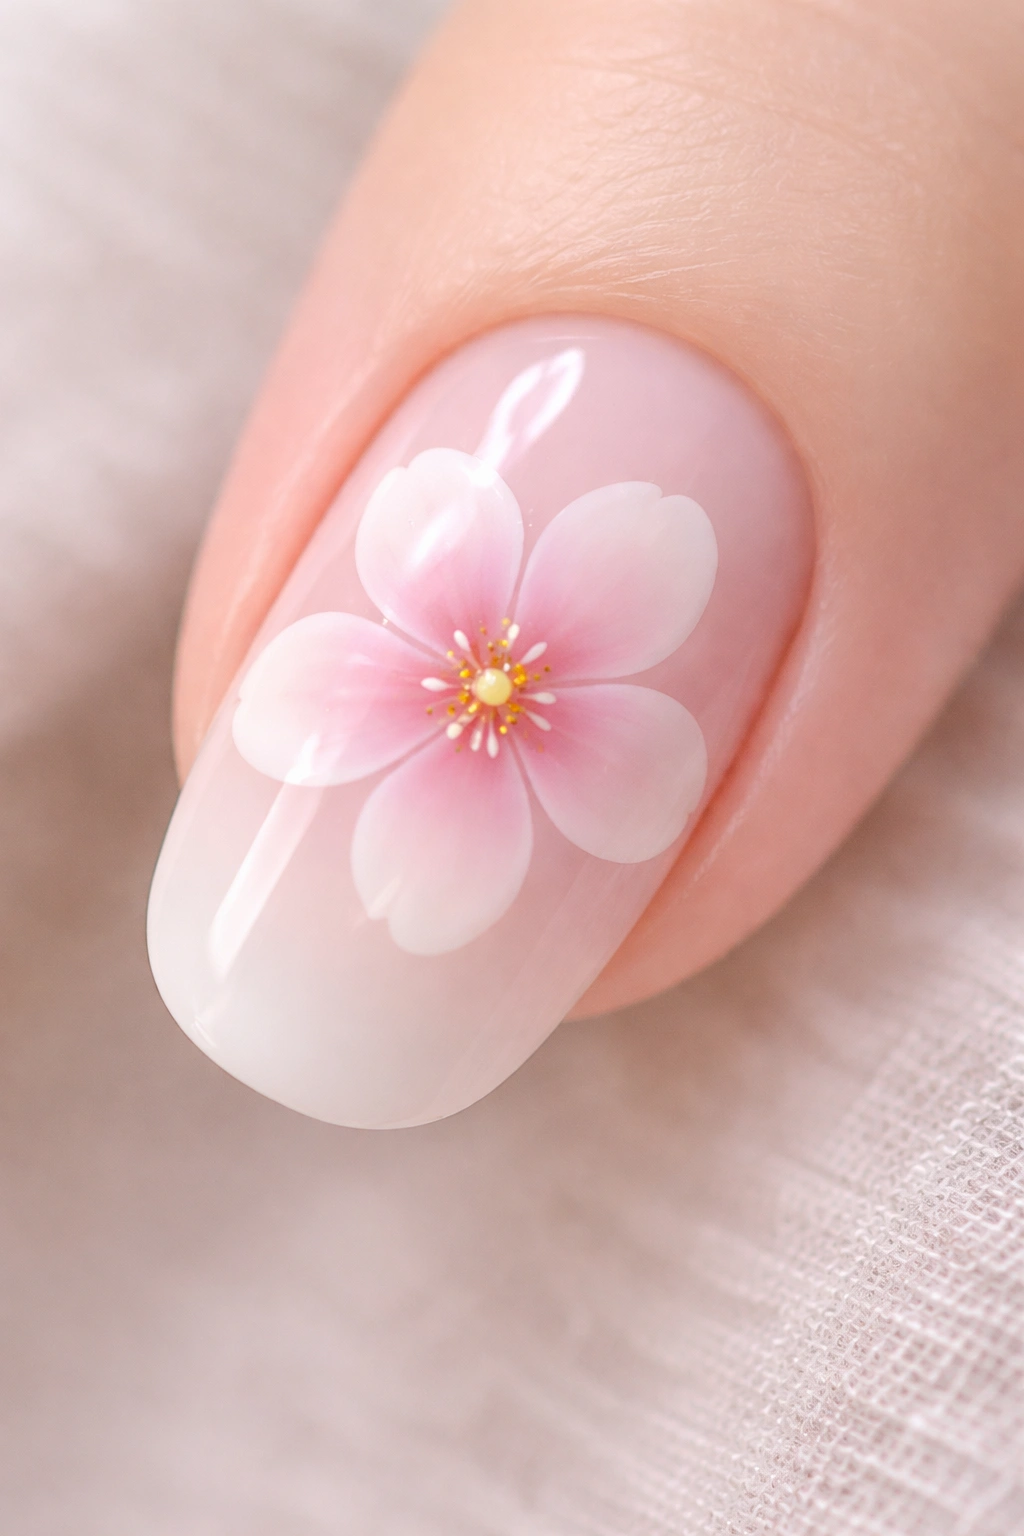
Creating flowers with blooming gel is where this product really shines, and it’s surprisingly forgiving even if you’re not confident in your painting skills.
For a simple five-petal flower, start with your uncured blooming gel layer. Using a small dotting tool, place five dots in a circle pattern—imagine the five points of a star. Space them evenly around where you want the flower to sit. Use one color for the petals.
Then place a different, contrasting color dot in the very center. The blooming gel will spread these dots slightly, creating soft petals that blend at the edges. The center dot will bloom outward a bit, creating that flower center. Cure and you’ve got a flower.
Make the design more interesting by varying the colors. You could use a coral color for petals and a golden yellow center. Or pink petals with a bright white center. Or any combination of colors you love. The blooming effect softens the transitions and creates that painted, artistic look.
For more elaborate flowers, you can apply additional layers. After you cure your first flower, apply another layer of uncured blooming gel and add more petals or more detail around the original flower. You can build up depth and complexity this way. Some nail artists create entire bouquets by layering flowers at different angles and in different colors.
Leave enough space around each flower for the bloom to spread without the petals running together. If you want flowers to overlap slightly, that works too—just be intentional about it.
Tortoiseshell Patterns and Animal Prints
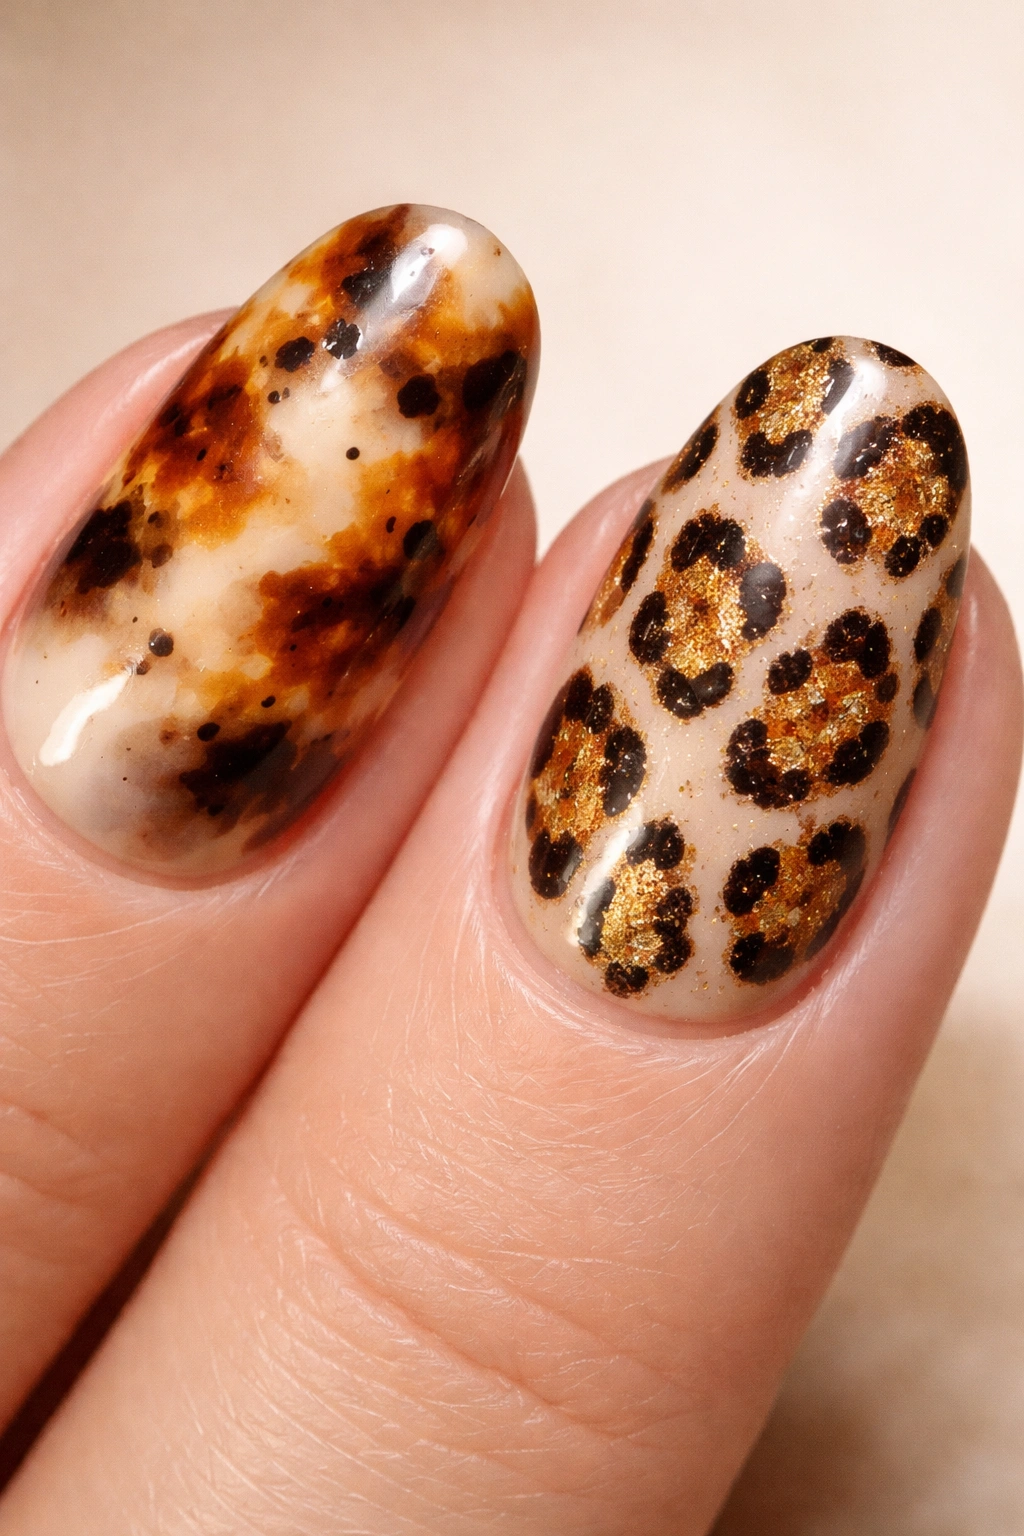
Tortoiseshell is one of the most requested blooming gel designs because it looks luxurious and complex, but it’s actually quite straightforward once you understand the basic technique.
Start with a neutral base color—ivory, vanilla, pale beige, or white works beautifully for traditional tortoiseshell. Cure your base, then apply your uncured blooming gel layer. Now you’re ready to add the tortoiseshell effect.
Using a detail brush, apply warm brown and amber colors in irregular patches across the nail. Then add small touches of black in and around the brown areas. The irregularity is the point—tortoiseshell is naturally organic and unpredictable, so don’t try to make it perfect. Let the shapes be asymmetrical.
The blooming gel will blend these colors together, creating that signature marbled tortoiseshell pattern. The colors will soften at the edges where they meet, creating natural-looking transitions. Cure once you’re happy with the pattern.
For animal prints, the same principle applies but with different color palettes. A leopard print uses warm golds, oranges, and blacks. A cheetah uses more subtle browns and tans. A snake pattern uses greens and blacks or browns and blacks. Place the colors strategically to create the pattern you want, then let blooming gel do the blending.
The difference between tortoiseshell and animal prints is mainly the color choices and the slightly more intentional placement of pattern elements. But they all rely on the same blooming gel principle: let the product spread the colors and soften the edges.
Tie-Dye and Colorblock Designs
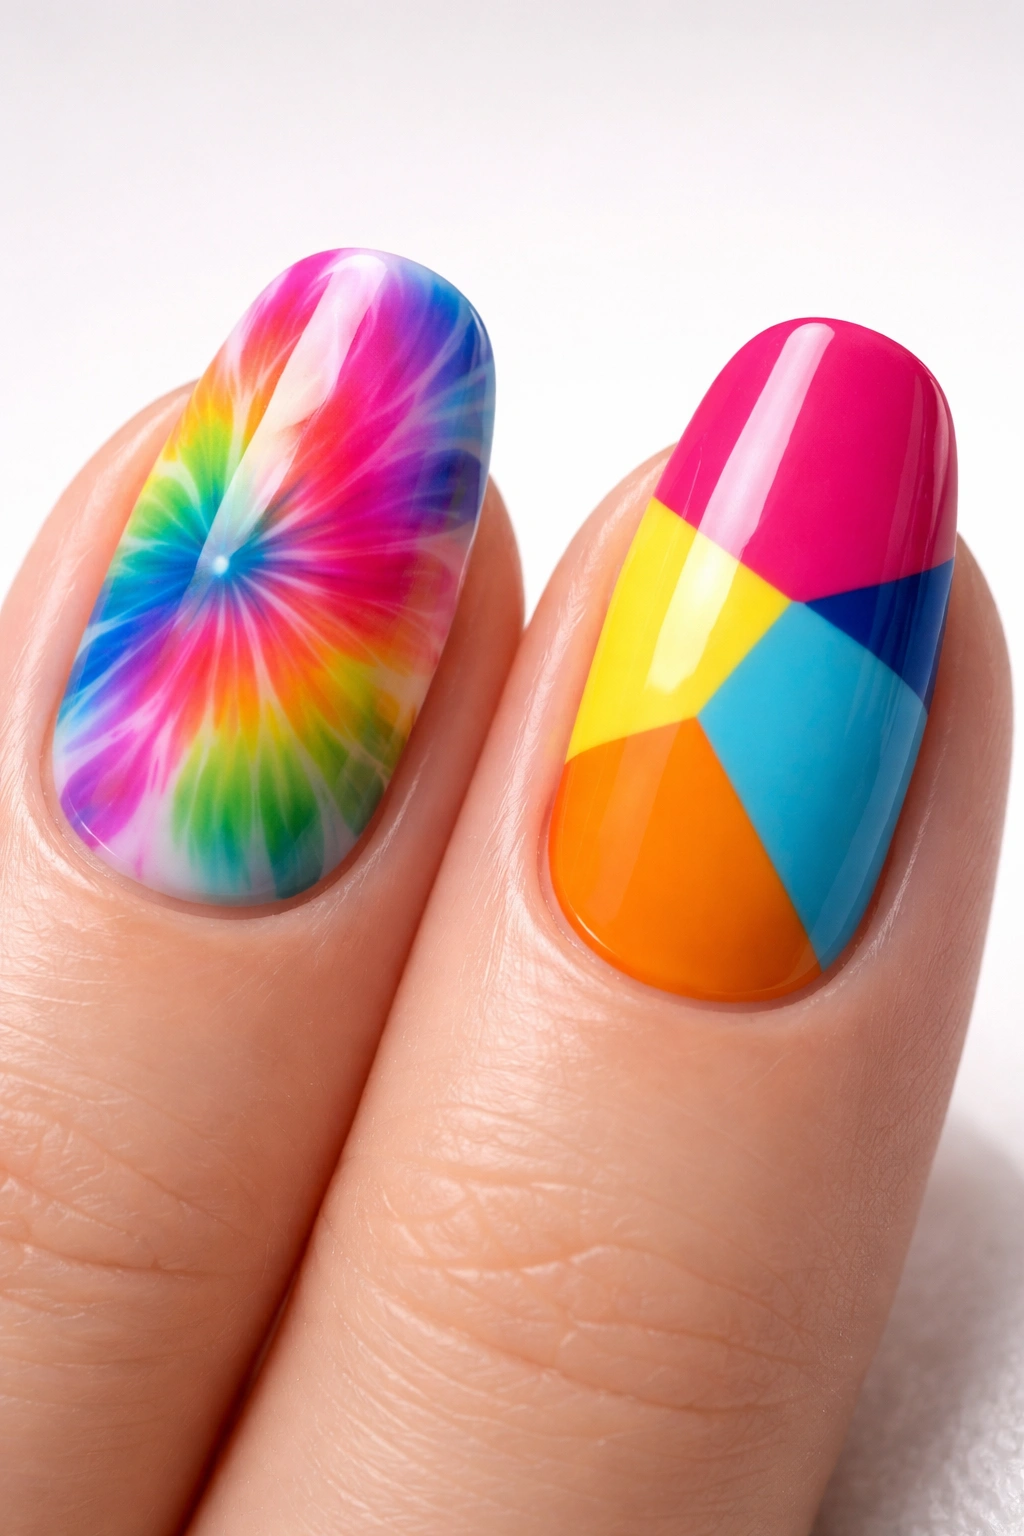
Tie-dye nails are fun, bold, and perfect if you love bright colors or want something that really stands out. They look complex but require no special skills—just color choice and patience for the blooming effect to work.
For tie-dye, use bright, contrasting colors. Neon pink, electric blue, lime green, and yellow together create that classic tie-dye vibe. Apply your uncured blooming gel and place small dots of each color across the nail, leaving some space between them so they can bloom and spread independently.
Then use a detail brush to gently drag through the colors from the dots toward the center or edges of the nail. This creates those radiating lines you see in actual tie-dye. The blooming gel will spread the colors and create that watercolor blend, so the dragged lines won’t be harsh or hard-edged. They’ll be soft and diffused.
For colorblock designs, the approach is slightly different. You’re creating distinct blocks or sections of color rather than a blended watercolor effect. Apply your uncured blooming gel and place colors in more organized lines or sections rather than scattered dots. You might do horizontal stripes of different colors, or diagonal blocks, or sections of color in different areas of the nail.
The blooming gel will still soften the edges between colors, creating that signature soft look even in a more structured design. This is the beauty of blooming gel—it works for both organic, free-form designs and more intentional, structured patterns. The product adapts to what you’re trying to create.
Pro Tips to Master Blooming Gel
Becoming skilled with blooming gel comes down to understanding a few key principles and then practicing until they become second nature.
Work one nail at a time. This is possibly the most important tip. If you apply blooming gel to all five fingers at once, some will start to cure before others, causing uneven spreading. By working one finger at a time, you control exactly how much time each blooming effect has to develop before curing.
Keep your lamp nearby and your supplies organized. Once you apply your blooming gel, you don’t have time to search for colors or tools. Have everything laid out and ready before you start. The moment you apply gel polish to uncured blooming gel, the clock is ticking, though you do have a reasonable window—usually 10-30 seconds before the spreading slows significantly.
Understand your lamp’s curing speed. LED lamps cure faster than UV lamps. If you have a fast LED lamp, colors won’t have as much time to spread as with a slower UV lamp. This isn’t bad—it just means you need to work faster or be more intentional about timing. Some people actually prefer this because they have less worry about over-spreading.
Use blooming gel sparingly. A little goes a long way. You don’t need thick, globby layers of blooming gel. A thin, even coat is all you need. Thin application gives you better control and produces better-looking results than thick application.
Pay attention to color combinations. Not all color combinations work well with blooming gel. Colors that are too similar in tone won’t create enough visual contrast to look interesting. Colors that are too different might look chaotic. Spend time thinking about which colors complement each other before you apply them.
Clean your brushes between colors if you don’t want colors to muddy together. If you want colors to mix and blend, then skip the brush cleaning and use the same brush for multiple colors. Let the tool choice dictate how much color mixing you get.
Common Mistakes That Ruin Blooming Gel Designs
Even experienced nail artists make blooming gel mistakes. Knowing what to avoid saves you time and product.
Applying blooming gel too thick is the most common error. When it’s too thick, gel polish won’t disperse properly. The colors sit on top rather than spreading into the blooming gel, creating a clumpy, undefined look. Always apply a thin, even layer.
Applying blooming gel and then curing it immediately before adding colors defeats the entire purpose. The gel polish must go on uncured blooming gel for the blooming effect to happen. If you cure the blooming gel first, it becomes just another base coat and won’t spread your colors at all.
Using regular nail polish instead of gel polish won’t work. Regular polish won’t spread the same way and can’t cure under a UV or LED lamp. Blooming gel is designed to work specifically with gel polish. Using the wrong product will cause your design to fail.
Waiting too long before curing can cause over-spreading where colors blend together so much they become muddy. This is less common than under-spreading, but it happens. If your colors look perfect, cure immediately. Don’t wait around hoping for more spread.
Touching the uncured gel or trying to fix something after you’ve placed your colors can disrupt the blooming effect. Once you’ve placed your colors, step back and let the blooming gel do its job. Resist the urge to fiddle with it.
Not allowing adequate curing time between layers causes designs to shift and crack. Always cure each layer for the full time recommended by your lamp manufacturer—typically 60 seconds for LED and 120 seconds for UV.
Sealing Your Design with Top Coat
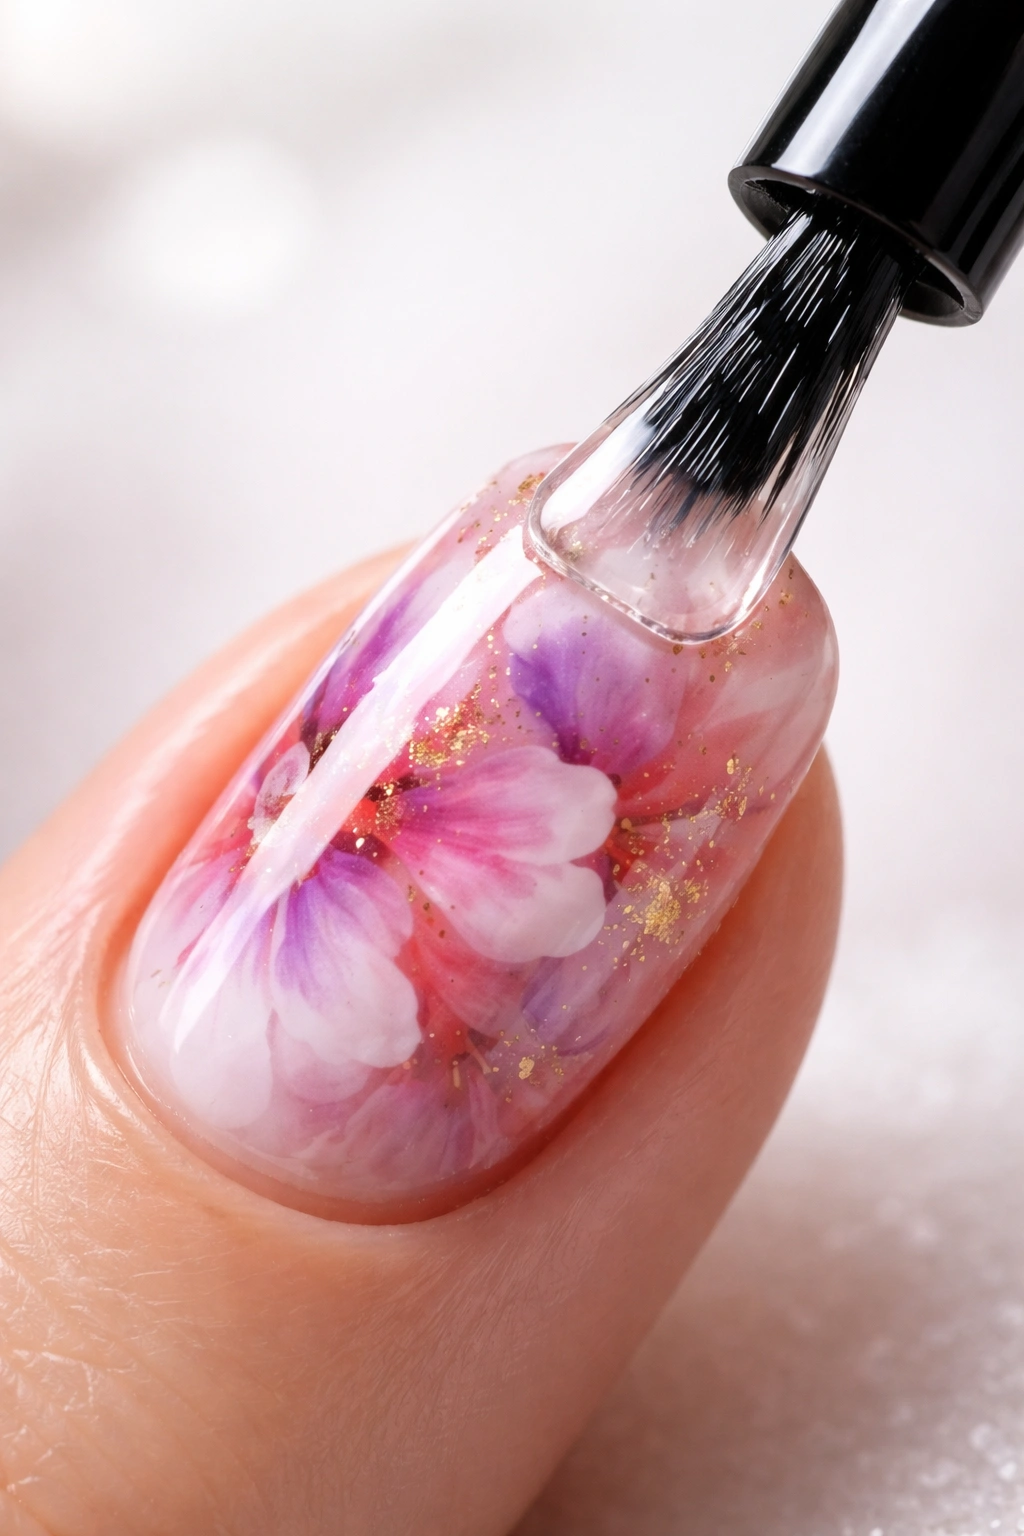
The final step—and one that’s often rushed—is applying your top coat. This step is crucial because it protects your design and gives it that beautiful glossy shine that makes blooming gel manicures look so professional.
Once you’re completely happy with your blooming gel design and you’ve cured it, apply a no-wipe top coat using the same application technique you used for your base and blooming gel layers. Make sure the top coat reaches all edges and is sealed at the tips. This prevents your design from chipping and peeling prematurely.
Cure your top coat for the full recommended time—usually 60 seconds under LED or 120 seconds under UV. Don’t rush this step. Proper curing ensures your manicure lasts the full two to three weeks.
If your top coat leaves a sticky residue (some formulations do), gently wipe it away with a lint-free wipe after it’s fully cured. Some top coats are “no-wipe,” meaning they don’t leave a sticky layer—these are often preferred for blooming gel designs because they let the design shine without extra steps.
For an extra finishing touch, apply cuticle oil around your nail edges. This doesn’t just look professional—it keeps your cuticles hydrated and makes the overall manicure look more refined.
Removing Blooming Gel Manicures Properly
When it’s time to remove your blooming gel manicure, the removal process is the same as for any gel polish, but it’s worth doing correctly to avoid damaging your nails.
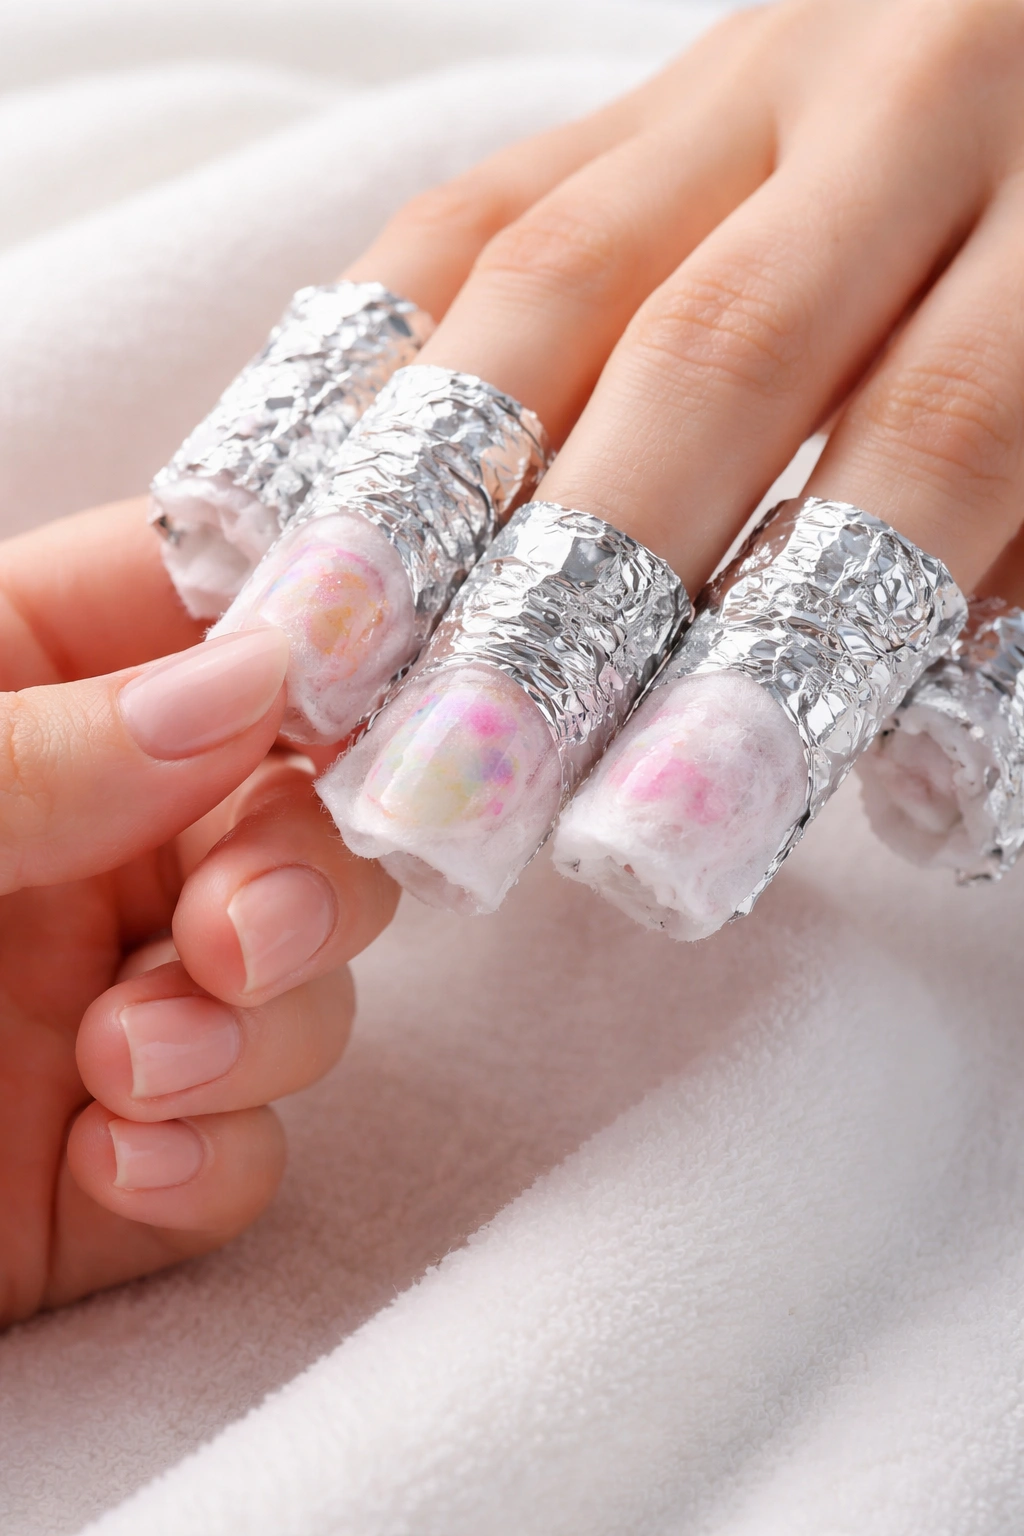
Soak your nails in acetone for 10-15 minutes. Use a bowl of pure acetone or an acetone-soaked cotton pad wrapped around each finger. The gel will soften and begin to lift. Once the gel is sufficiently softened, gently push it off using a wooden cuticle stick or pusher—never pick or peel at the gel with your nails or metal tools, as this damages the nail plate underneath.
If gel remains stuck after soaking, soak a bit longer. Don’t force it off—patience during removal prevents nail damage. Forcing dried gel off tears away layers of your nail plate and makes future manicures more difficult.
Once the gel is completely removed, wash your hands thoroughly to remove all acetone residue. Acetone is drying, so moisturize your nails and cuticles well after removal. Use a hydrating cuticle oil and hand cream to restore moisture.
Wait at least a day or two before applying a new gel manicure. This gives your nails time to recover and rehydrate after the acetone soak. Applying gel too frequently without breaks causes brittle, weak nails.
Practice Techniques for Building Confidence
Like any skill, blooming gel mastery comes with practice. The first few times you use it, the results might not be perfect—and that’s completely normal.
Start with simple designs. A two-color watercolor effect teaches you how the product behaves without overwhelming you with color choices. Once you’re comfortable, try three colors. Then experiment with placement and spread timing. Build complexity gradually rather than diving into intricate multi-layered designs immediately.
Keep a notebook or digital record of what works and what doesn’t. Note which color combinations look good together, how long you waited before curing, what brush strokes created the effects you liked. This documentation becomes your personal reference guide for creating designs you love.
Practice on practice nails rather than on yourself initially if you’re nervous. You can buy false nail tips to practice on—they cost very little and let you experiment without the pressure of wearing your experiments on your actual nails.
Watch videos of other nail artists using blooming gel. Seeing the technique in motion and watching timing differences helps you understand the product better than reading about it alone. Everyone develops their own style and preferences over time.
Don’t get discouraged by failed designs. Blooming gel is forgiving—even accidental effects often look interesting. The worst thing that happens is you don’t like the design and you remove it and try again. You’re not stuck with a bad design forever.
Final Thoughts
Blooming gel represents a real shift in what’s possible for home nail artists. It takes designs that once required professional training and experience and makes them genuinely accessible to anyone willing to learn and practice. The product does so much of the artistic work for you that your job becomes more about understanding how to guide it than about having perfect brush control.
The most important takeaway is this: blooming gel works best when you work with it rather than against it. Don’t try to force perfection or over-control the spread. Apply a thin layer, place your colors thoughtfully, give the product time to do what it’s designed to do, and cure when you’re happy with the effect. That’s it.
Your first blooming gel designs might not be museum-quality art, but they’ll likely surprise you with how professional they look. With each manicure, you’ll develop an intuition for timing, color choices, and layering. Within a handful of attempts, you’ll be creating designs that rival anything you’d see in a salon. That’s the real magic of blooming gel—it makes beautiful nail art feel achievable for everyone, regardless of background or artistic training.
