

Creating custom nail art transforms your nails from a simple beauty statement into a genuine extension of your personality and style. Whether you’re preparing for a special occasion, expressing your creativity on a daily basis, or just tired of seeing the same generic designs everywhere, designing your own nail art gives you complete control over the final look. The beauty of custom nail design is that you don’t need advanced artistic skills or expensive professional equipment—you just need a clear vision, the right tools, and the confidence to experiment.
The shift from salon-dependent manicures to DIY custom designs has become increasingly accessible thanks to both traditional design methods and modern digital tools. You can paint entirely by hand using simple supplies you likely already have at home, use stencils and stickers to create clean lines without the shaky hand syndrome, or leverage AI-powered nail generators that bring your ideas to life in seconds. The key is understanding your options, knowing what materials work best for different techniques, and having a structured approach to move from inspiration to finished nails.
Understanding Your Personal Style and Aesthetic
Before you pick up a single brush or open a design tool, the first step is clarifying what style actually resonates with you. Your nail design should feel like you—whether that means minimalist and elegant, bold and chaotic, playful and whimsical, or sophisticated and understated. Many people make the mistake of copying designs they see on social media without considering whether those aesthetics actually match their personal taste or lifestyle.
Ask yourself specific questions: What colors do you naturally gravitate toward in your wardrobe? Do you prefer jewelry that’s delicate and understated, or do you like statement pieces that demand attention? Are you someone who changes up your look frequently, or do you stick with classic, timeless styles? What emotions or moods do your favorite designs evoke? These answers will guide every decision you make, from color selection to pattern complexity to finishing details.
Consider your daily environment too. If you work in a conservative professional setting, an intricate glitter explosion might not fit the vibe, whereas a subtle geometric accent or gradient could be perfect. If you’re in a creative field, you have more freedom to experiment with bold colors and unconventional patterns. Your lifestyle matters equally—if you’re constantly working with your hands or doing outdoor activities, you’ll want designs that hold up better and don’t require excessive detailing that catches on things.
Gathering Essential Tools and Materials for Design Work

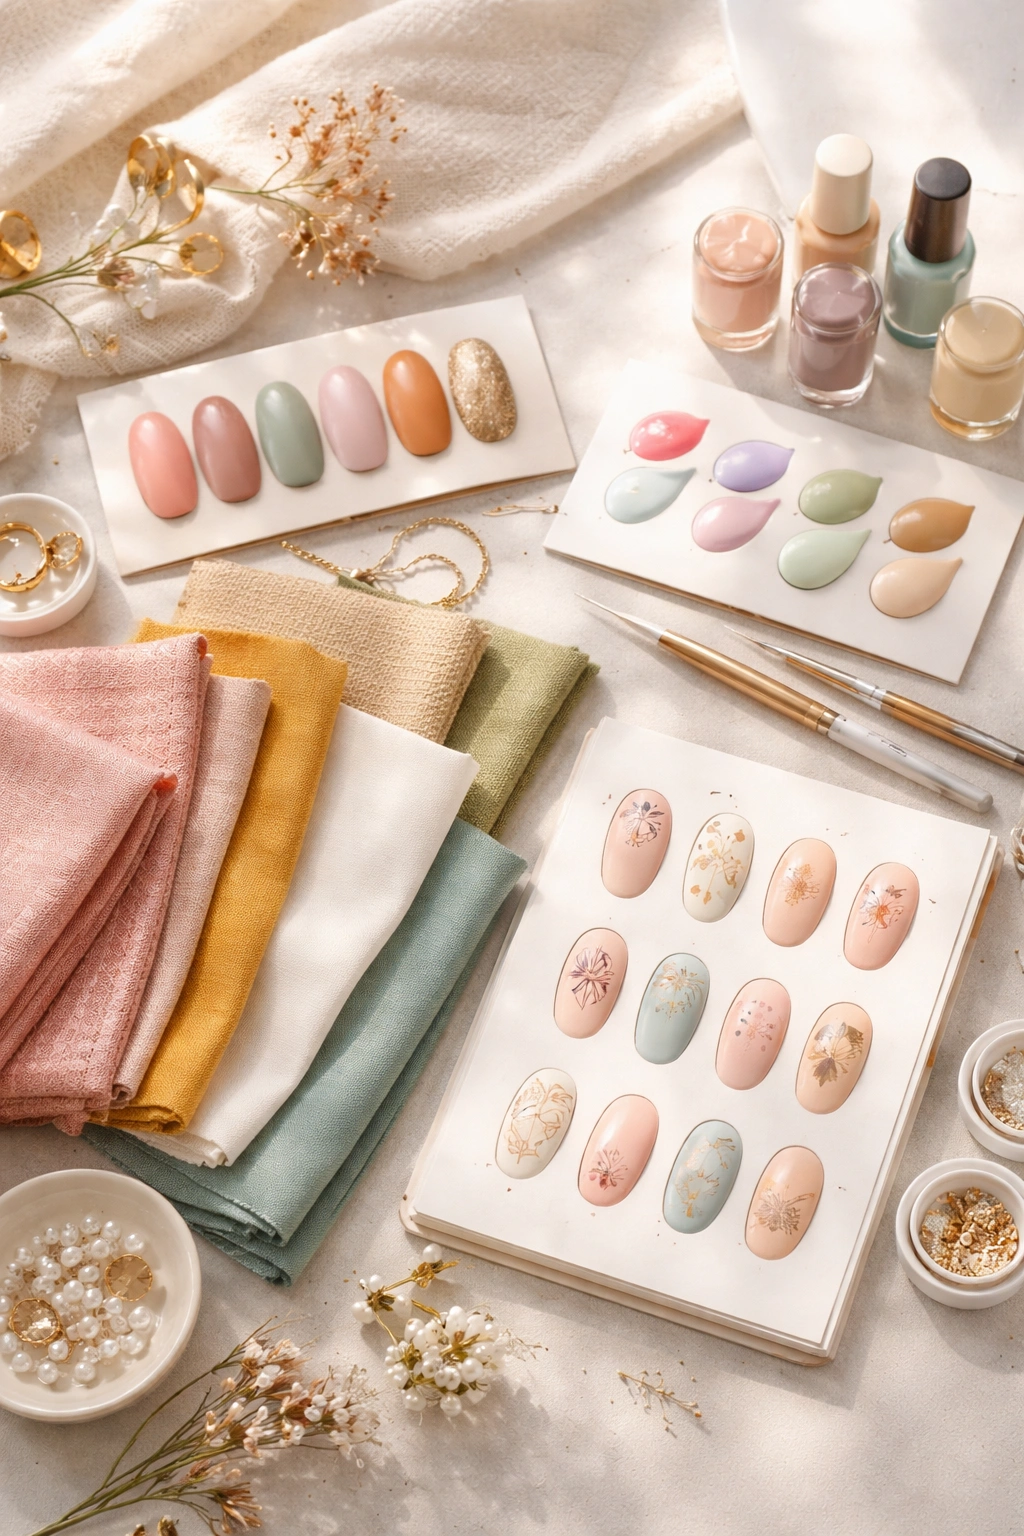
You don’t need a massive collection to start designing custom nail art, but having the right foundational tools makes the process infinitely easier and more enjoyable. The quality of your materials directly impacts the quality of your results, so investing in even a few good-quality items will serve you better than a huge collection of cheap supplies.
For Basic Hand-Painted Designs: Base coat and top coat are non-negotiable—they protect your nails and make polish adhere better while giving your design longevity. Nail polish in various colors is obviously essential, and you’ll want to choose formulas that apply smoothly without excessive streaking. Nail brushes and stripers in different sizes let you create lines of varying thickness with precision. A few dotting tools in different diameters allow you to make perfectly uniform dots for polka dot patterns, flowers, and detail work. If you don’t have dotting tools, bobby pins, toothpicks, and even pencil erasers can work in a pinch—though they’re less precise.
For Stencil and Sticker-Based Designs: French manicure stickers, geometric stencil tape, and specialty nail stickers eliminate the need for steady-hand precision. Nail glue or tacky gel helps stickers and embellishments stay put. Tweezers make positioning small stickers and rhinestones far easier than using your fingers. Nail file and buffer keep edges clean and smooth.
For Advanced Techniques: A makeup sponge becomes your secret weapon for gradient and ombre effects, allowing you to blend colors seamlessly. Acetone on a brush helps you thin or manipulate wet polish for watercolor effects and cleanup. Striping tape creates perfectly straight lines and geometric shapes without the shaking-hand problem. Stamping plates and stampers let you replicate intricate designs consistently once you master the technique.
For Digital Design Work: A smartphone or tablet is often sufficient for using AI nail generators and design apps. If you’re creating custom printed nail wraps, you’ll need access to design software (free options like Canva work beautifully) and knowledge of your printer’s capabilities or the ability to upload designs to a professional printing service.
Finding Design Inspiration Without Losing Your Originality
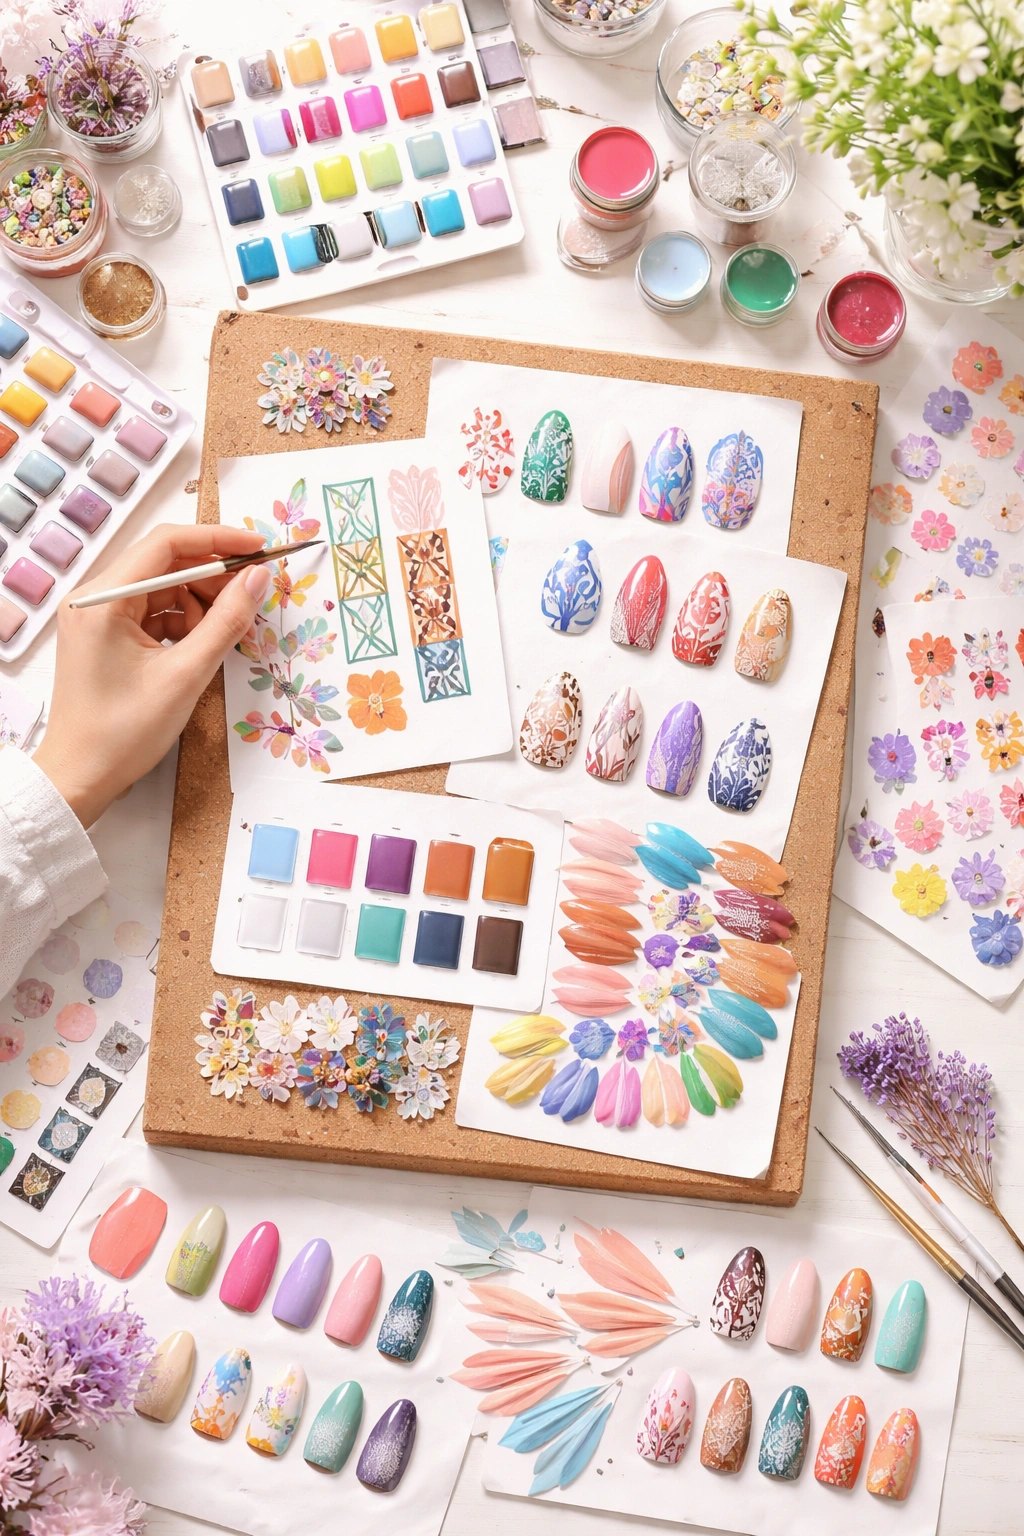
Inspiration is everywhere, but the art is channeling it into something that feels authentically yours rather than just copying what you see. The worst designs come from following trends mindlessly without considering whether they actually appeal to you personally. The best designs happen when you combine multiple sources of inspiration into a unique hybrid that expresses your individual taste.
Visual Inspiration Sources: Pinterest, Instagram, and TikTok overflow with nail art content, and following accounts that align with your aesthetic creates a constant stream of ideas. Rather than pinning one design you love wholesale, save multiple designs and look for patterns—maybe you notice you’re drawn to everything with metallic accents, or perhaps every design you save includes negative space. These patterns reveal your actual preferences. Books on nail art offer both inspiration and instructional detail. Fashion magazines and runway photography show color combinations and design philosophies that translate beautifully to nails. Nature—flowers, minerals, landscapes, animals—provides endless pattern and color inspiration.
Non-Visual Inspiration: Sometimes the best nail designs come from non-visual sources. A song you’re obsessed with might inspire a color palette or theme. A movie, book, or show you love could spark a character-inspired design. Your favorite dessert, a trip you took, or an object that holds meaning to you all become design material. This personal connection makes your nails feel genuinely expressive rather than generic.
The Remix Approach: The most original designs often come from combining elements from multiple sources. Maybe you love the color scheme from one design, the pattern structure from another, and a specific technique from a third, then you synthesize all three into something entirely new. This approach keeps you from creating a direct copy while still drawing on the inspiration that excites you.
Avoid the trap of redesigning something just because it’s trending. Your nails will look dated quickly if they’re chasing fleeting trends rather than reflecting enduring personal style. The designs that stand the test of time are the ones that feel true to who you are.
Learning Basic Design Principles for Visual Balance
Understanding a few fundamental design principles takes your custom nail art from “okay” to “genuinely polished and intentional.” You don’t need to be a professional designer, but knowing how color, shape, and space work together elevates everything you create.
Balance and Symmetry: Balance doesn’t mean everything has to be perfectly symmetrical—in fact, asymmetrical balance is often more interesting. But your design should feel stable and intentional. If you’re placing an accent on one nail, consider whether the overall composition feels weighed correctly. A tiny accent on a mostly empty nail might feel unbalanced, whereas an accent that takes up perhaps one-third of the nail feels properly anchored. Symmetrical designs feel formal and polished, while asymmetrical designs feel modern and artistic.
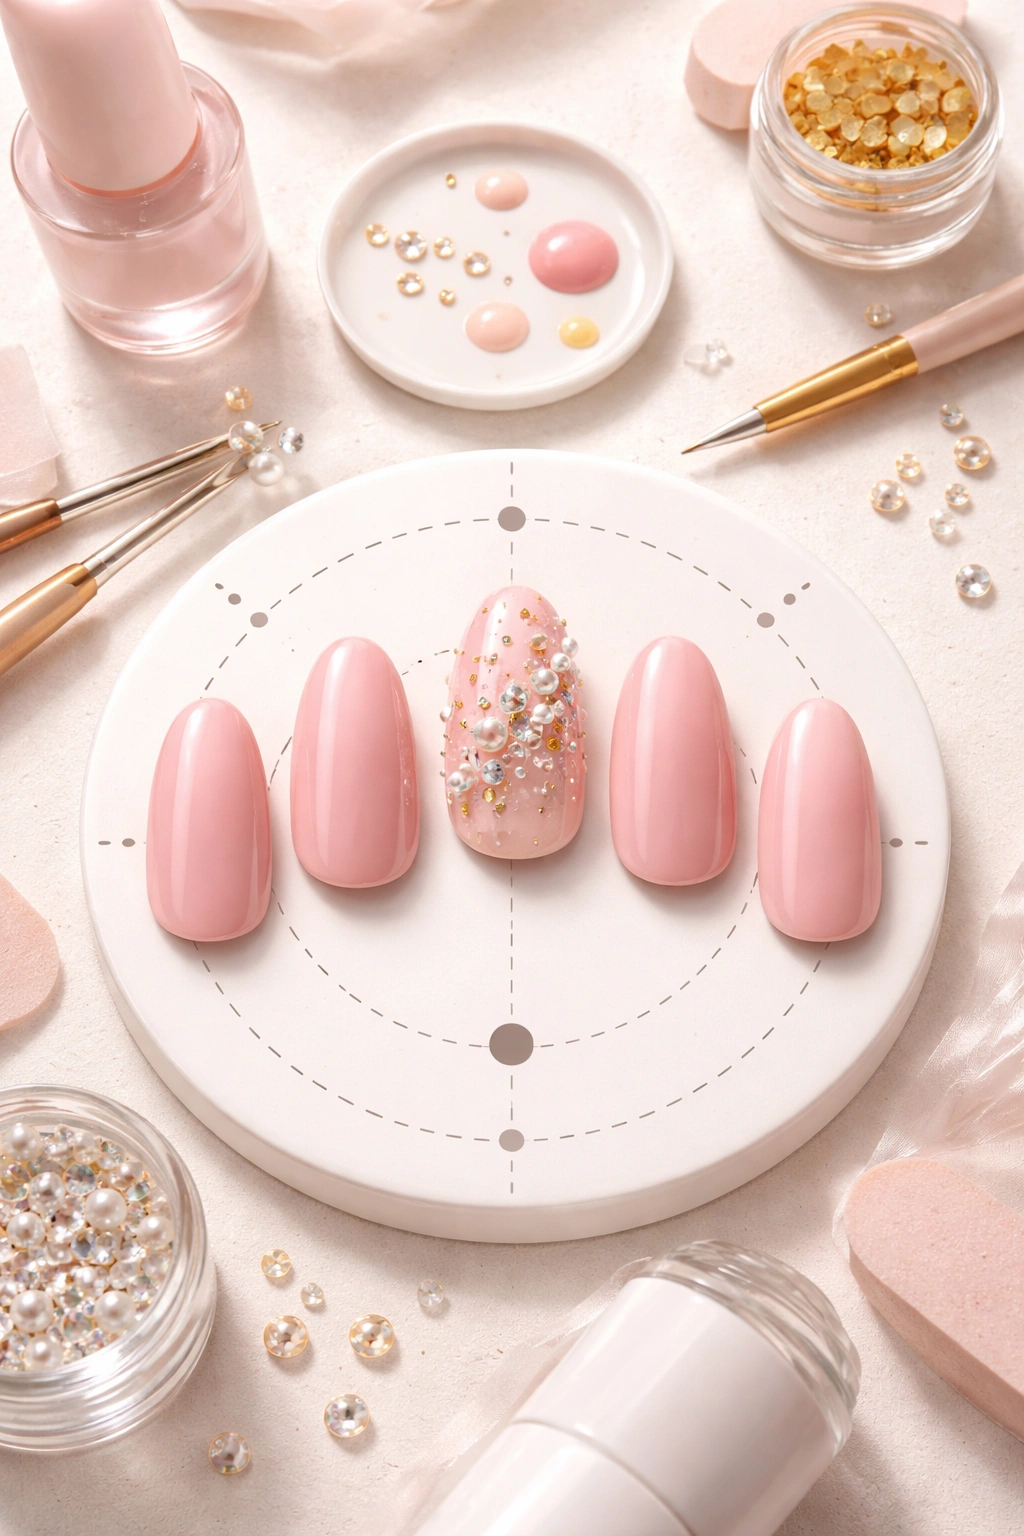
Focal Points: Every nail doesn’t need to be equally detailed. In fact, most successful designs have a clear focal point—usually one or two accent nails that are more elaborate, while the remaining nails are simpler, allowing the eye to rest. Your ring finger or middle finger is often the natural focal point, so that’s a great place to put your most detailed work. The other nails support rather than compete.
Negative Space: This is perhaps the most underrated element of custom nail design. Negative space—the area you don’t fill with color or pattern—is just as important as the decorated area. It gives your eye somewhere to rest and prevents your nails from feeling cluttered or overwhelming. A design with generous negative space feels contemporary and intentional, whereas designs that cover every millimeter can feel chaotic.
Scale and Proportion: The size of your design elements matters relative to the nail size. A tiny delicate pattern disappears and looks unfinished on a large nail, whereas an oversized pattern overwhelms a smaller nail. As a general rule, your largest design element should be roughly one-third the size of your nail for proper proportion. This leaves room for the design to feel significant without dominating the entire nail.
Mastering Color Theory for Nail Art
Color is perhaps the most powerful tool in your custom nail design toolkit, and understanding basic color theory helps you make intentional choices that create harmony rather than clashing. You don’t need to be a color expert, but grasping a few key concepts transforms your design outcomes.
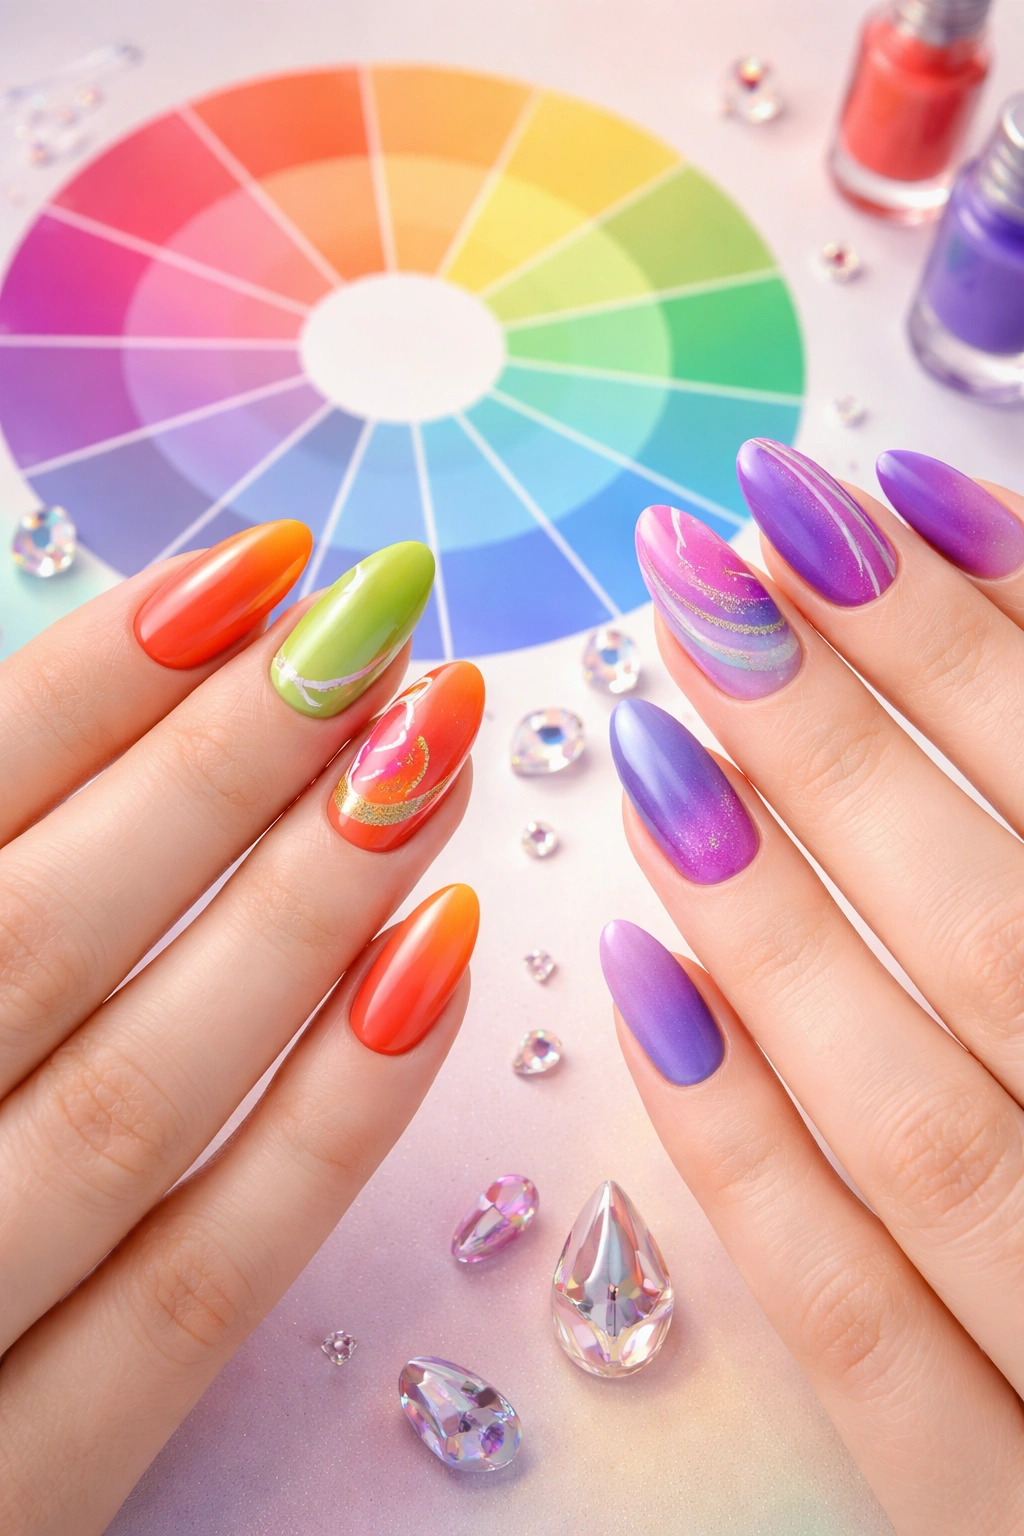
Complementary Colors: Colors opposite each other on the color wheel—like blue and orange, or red and green—create high contrast and vibrant energy. These combinations pop and draw attention, perfect when you want your nails to make a statement. However, complementary colors can feel chaotic if you’re not careful with the balance. Usually, one color should dominate while the other is an accent.
Analogous Colors: Colors that sit next to each other on the color wheel—like blue, blue-green, and green—create harmony and feel naturally coordinated. These combinations feel sophisticated and intentional, making them perfect for designs where you want elegance rather than bold impact. Analogous color schemes rarely look wrong together, which is why they’re beginner-friendly.
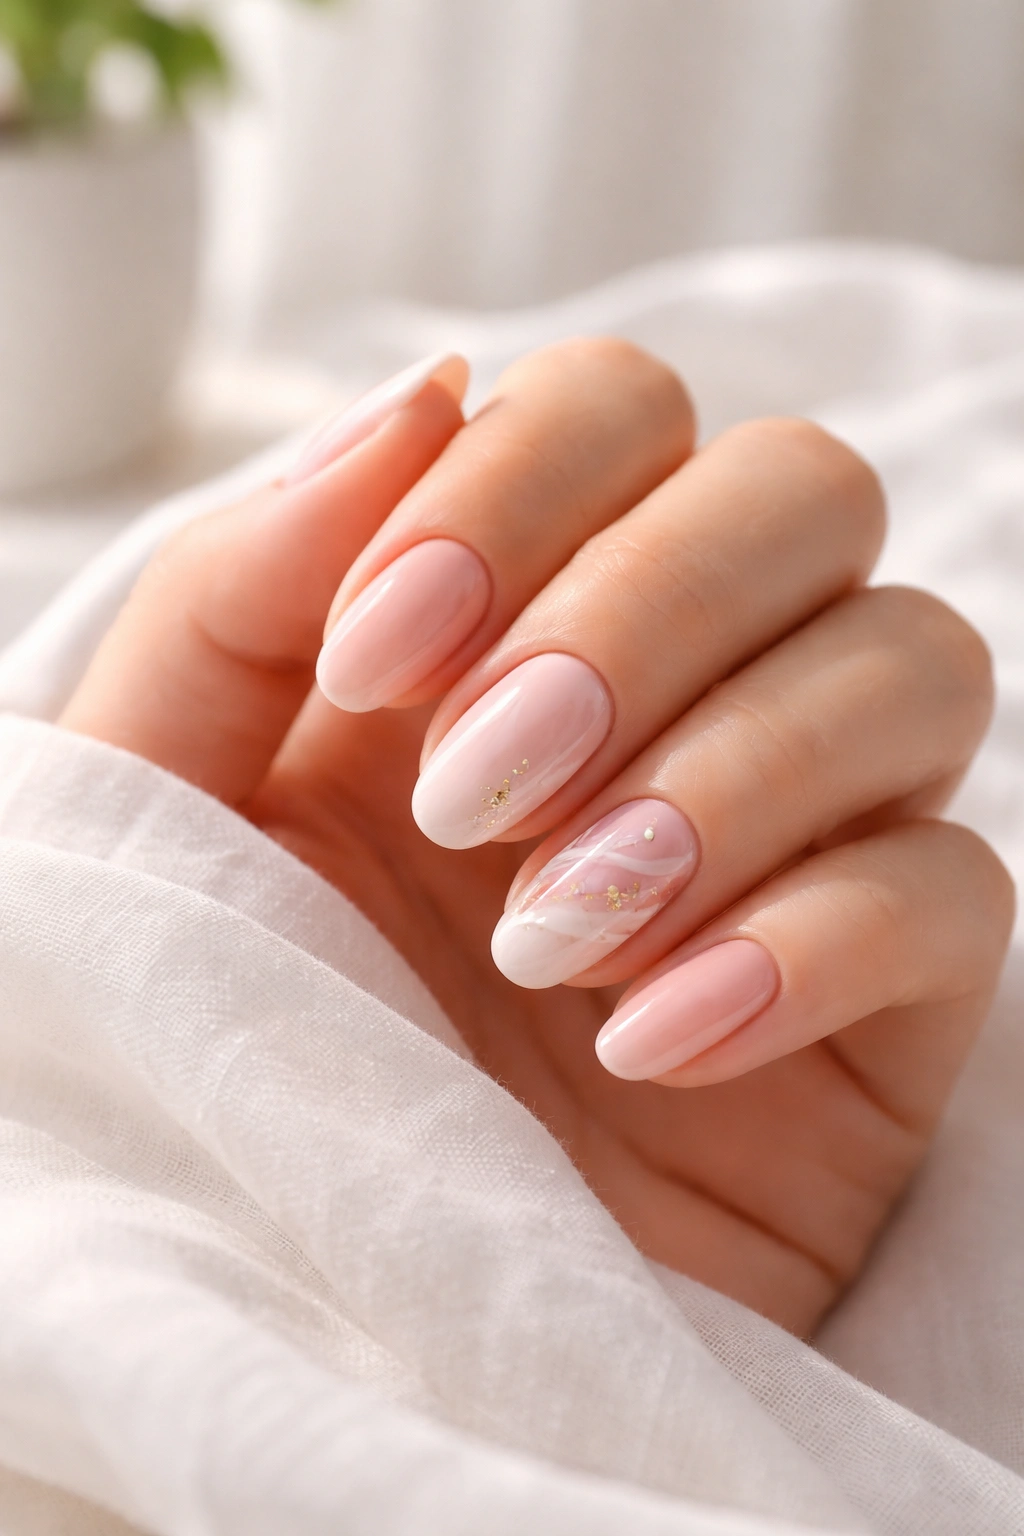
Monochromatic Designs: Using different shades and tints of a single color creates depth and visual interest while feeling extremely cohesive and polished. A navy base with light blue accents and white highlights feels intentional and professional. This approach works beautifully for minimalist designs.
The 60-30-10 Rule: Borrowed from interior design, this principle works beautifully for nail art. Choose one dominant color (60%), a secondary color (30%), and an accent color (10%). This creates visual interest while maintaining harmony. For example, a nude base (60%), blush pink details (30%), and gold accents (10%) feels balanced and sophisticated.
Saturation and Value: Highly saturated (bright, intense) colors demand attention and energy, while desaturated (muted, soft) colors feel calming and sophisticated. The value of a color—how light or dark it is—matters equally. High contrast (very dark colors against very light ones) creates drama, while colors of similar value create subtlety. You can use these principles intentionally to create the mood you want.
Creating Simple Hand-Painted Patterns
Starting with simple patterns builds confidence and foundational skills before you move to more complex designs. The beauty of hand-painting is the organic, slightly imperfect quality—it doesn’t need to be flawless to look intentional.
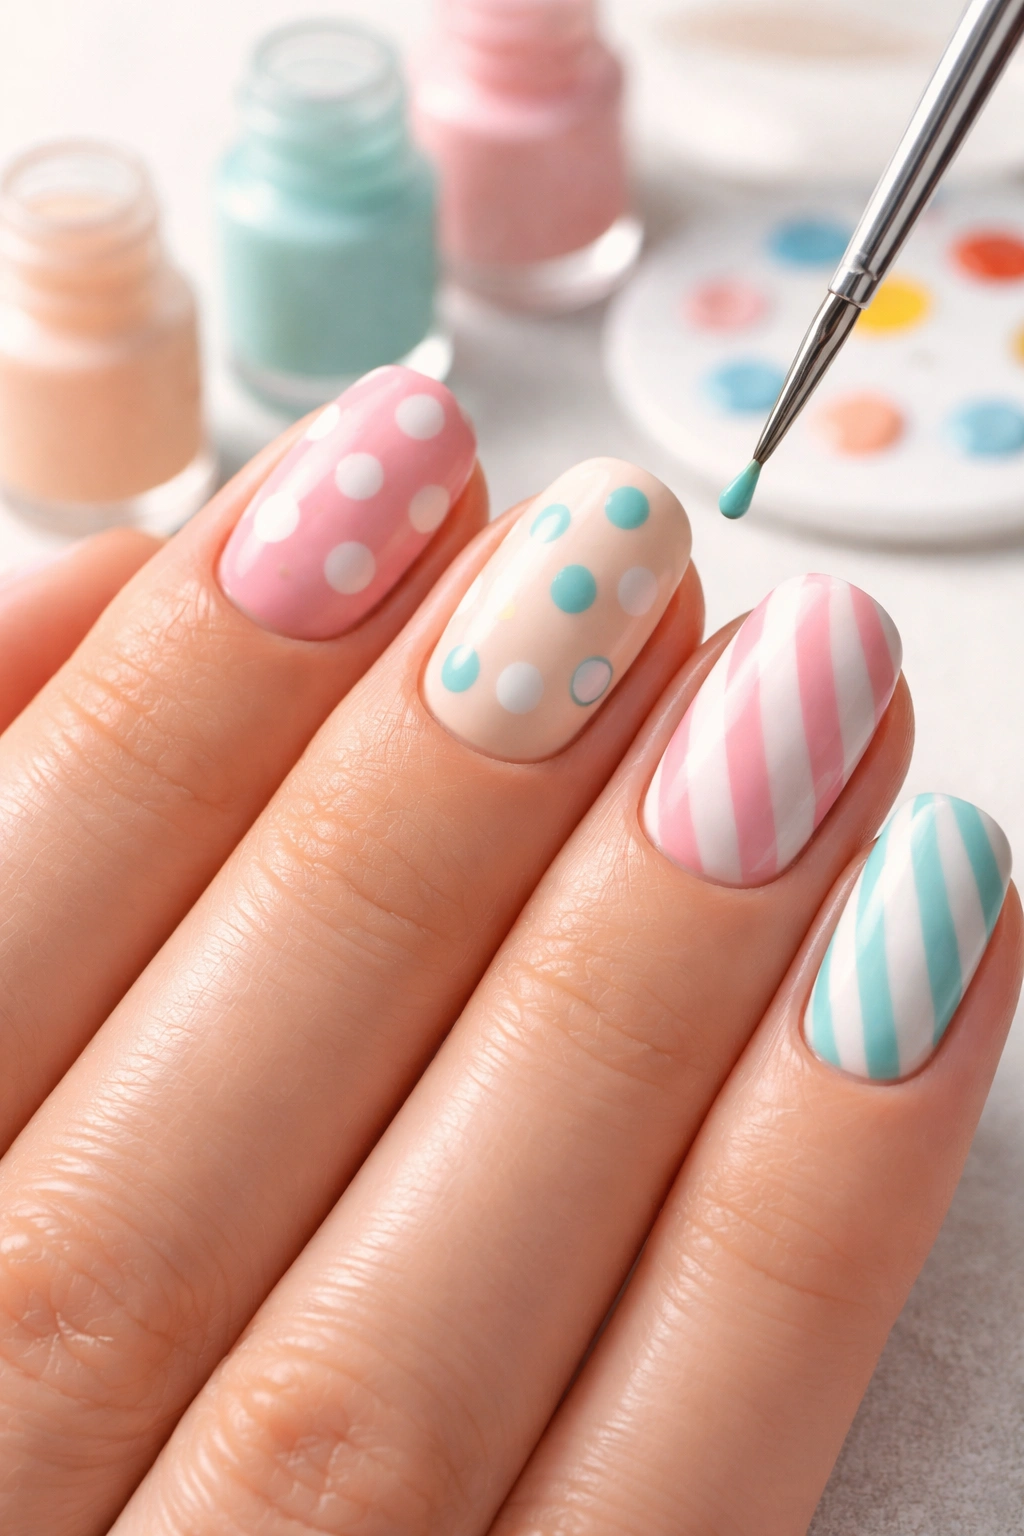
Polka Dots: This is the true beginner design, and it’s deceptively versatile. Use a dotting tool, bobby pin, or toothpick to create dots in contrasting colors over a base. The magic is varying the dot sizes and spacing—uniform, perfectly spaced dots can look a bit sterile, whereas dots of varying sizes with organic spacing feel playful and intentional. You can create dots that fade (dip your tool once and apply several dots without reloading) for a dimensional effect.
Lines and Stripes: Simple vertical, horizontal, or diagonal stripes are deceptively elegant and require only a fine brush or striping tool. The key is steadying your hand by resting your pinky on the table and moving the brush rather than your fingers. Try varying stripe thickness or combining striped nails with solid color nails for visual interest. Tape creates perfectly straight lines without requiring a steady hand—place tape where you want the line to be, paint, and remove while slightly wet.
Geometric Shapes: Triangles, squares, and chevron patterns work beautifully and feel contemporary. Use tape as stencils for clean edges, or hand-paint using thin brushes and steady strokes. Geometric designs often benefit from limiting your color palette to two or three colors for maximum impact.
Gradient and Ombre: This technique looks complex but is surprisingly simple. Apply your darkest color to the base of the nail. Using a makeup sponge, apply a medium tone to the middle, and a light tone to the tip, slightly overlapping each application for a blended effect. The sponge’s texture naturally blends the colors. Apply top coat while the polish is still slightly wet to further blend the colors together.
Floral Designs: Simple flowers can be created with dots arranged in circles. Five dots in a circle become petals; add a contrasting dot in the center for the flower’s heart. You can create leaves with two green dots connected by a curved line. These don’t need to be botanically accurate—stylized, imperfect flowers often feel more charming than overly precise ones.
Exploring Advanced Techniques That Elevate Your Designs
Once you’re comfortable with basics, advanced techniques open up possibilities for truly sophisticated custom designs. These techniques require practice, but they’re absolutely learnable with patience.
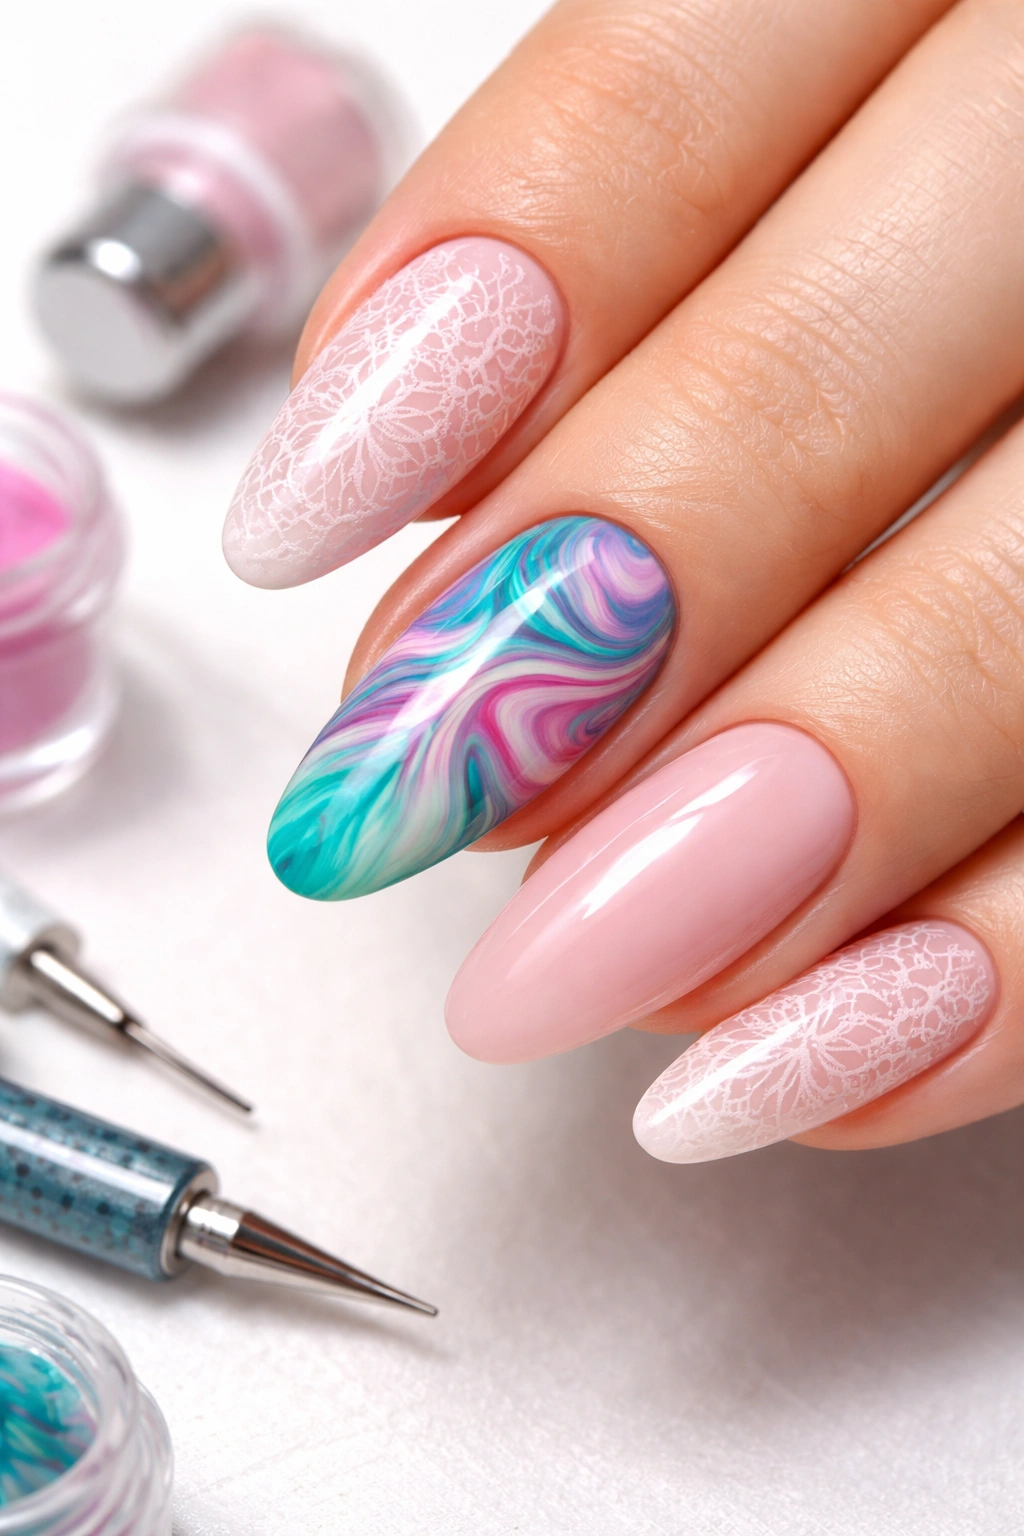
Water Marble Effect: This creates an organic, fluid pattern that’s impossible to replicate exactly, which is part of its charm. Fill a cup with room temperature water, drop nail polish into it, and use a toothpick to drag through the drops in patterns—spider webs and flower designs are popular. Coat your fingers with petroleum jelly, then press your nails against the design and submerge briefly. The polish adheres to your nails while staying off your skin. This technique has a learning curve, but once you understand the physics, you can create designs that look professionally artistic.
Stamping: Nail stamping plates allow you to transfer intricate designs consistently. You roll the stamper across a plate inked with stamping polish, then roll it onto your nail. The initial investment in quality plates and a good stamper pays off because you can create detailed patterns that would take ages to hand-paint. The key is using stamping polish (which has the right consistency) and a firm rolling motion.
Sponging for Texture: Beyond gradients, sponging creates abstract textures and clouds. Dab a damp sponge into various colors and bounce it across your nail for a stippled effect. This technique embraces imperfection and creates interesting, artistic results.
Dry Brush Effects: This creates delicate, wispy patterns perfect for feathers, grass, or abstract art. Load your brush with very little polish, then drag it across the nail so only the brush tips touch, leaving gaps. The result feels painterly and intentional.
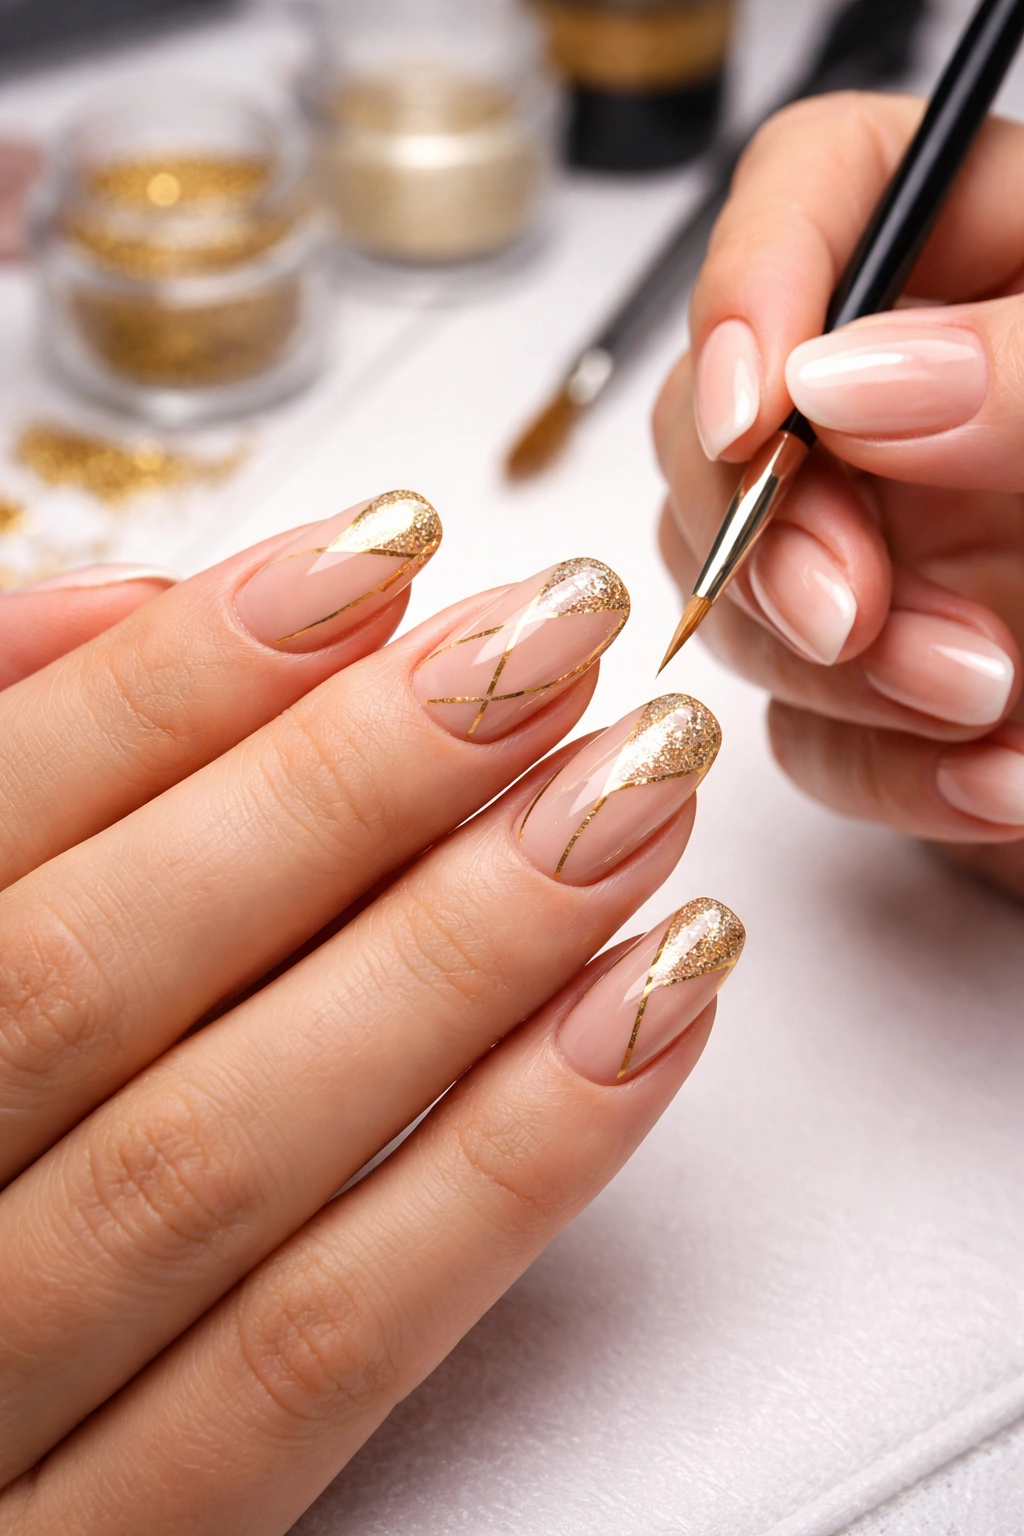
Foiling: Foil transfers create metallic accents with minimal effort. Apply foil glue to a design, let it get tacky, then press foil onto the glue. The foil adheres only where the glue is, creating perfect metallic patterns without the precision required for brush work.
Using Digital Tools and AI Nail Generators

Modern technology has democratized custom nail design in ways that would have seemed impossible a few years ago. You no longer need to be able to draw or paint by hand—you can describe your vision and have AI interpret it, or use design apps to create layouts before committing to actual polish.
AI Nail Generators: Tools that use artificial intelligence let you input a detailed description of what you want (“pastel purple with minimalist black lines and gold foil accents”) and generate realistic previews. Services like Fotor’s AI nail generator, NailDesignsAI, and InsaMind create photorealistic images of how designs will look on actual nails. You can describe skin tone, nail shape, style, color palette, technique, and theme, and the AI generates multiple options. This is phenomenal for testing ideas before committing to supplies or salon appointments. The technology has advanced to where results are genuinely useful for decision-making rather than just entertaining.
Design Apps and Software: Canva and similar tools let you create templates for custom nail wraps or printed designs. You upload an image, arrange it to fit nail-sized rectangles (usually 9:16 ratio), and send to a printing service that creates custom nail wraps or press-on nails with your exact design. This is perfect if you’ve designed something that’s difficult to hand-paint or replicate manually.
Virtual Try-On Technology: Some tools let you upload a photo of your hand and virtually try on different designs before deciding. This removes the anxiety of committing to a salon appointment only to discover the design doesn’t suit you in real life. You can test multiple designs and variations quickly.
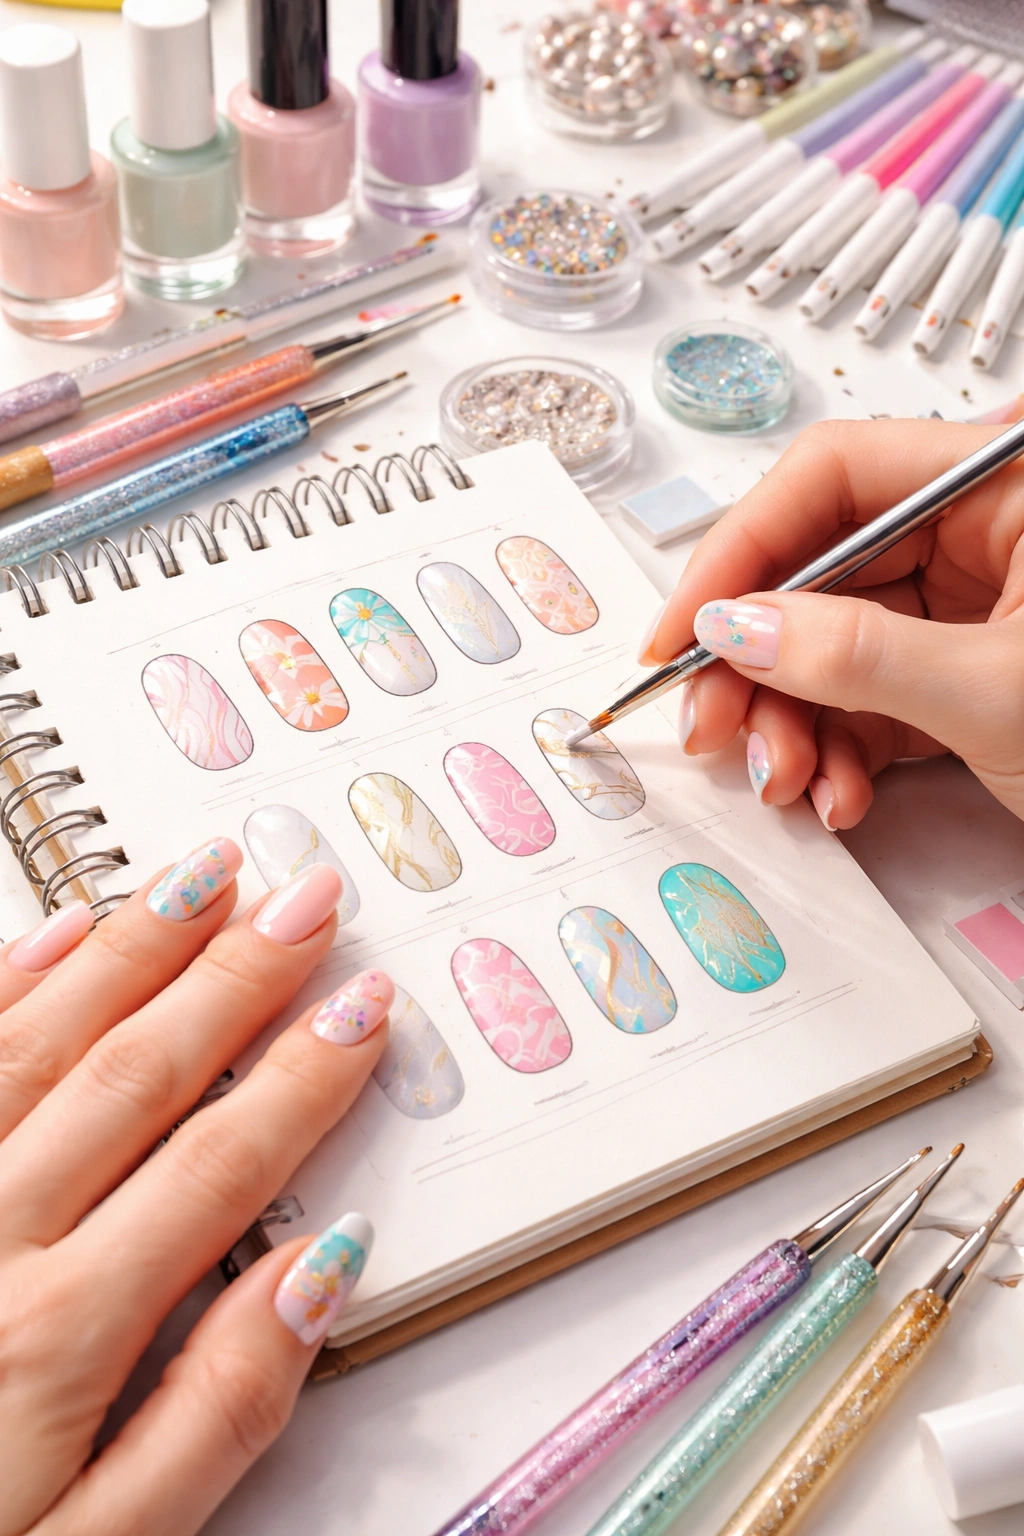
Design Boards and Mood Boards: Use Pinterest boards or apps like Are.na to collect color combinations, patterns, and inspirational images that resonate with you. Reviewing your collected images helps identify patterns in your taste and serves as reference material when designing.
Working with Stencils, Stickers, and Templates
For those who don’t want the pressure of hand-painting or who want designs with perfectly clean lines, stencils and stickers eliminate technical skill requirements while maintaining design control. These tools range from basic French manicure guides to complex geometric stencil sets.
Nail Stickers and Decals: Pre-made stickers let you create designs instantly without any painting skill. The key is proper application—apply them to polish that’s still slightly tacky so they adhere smoothly without bubbles or wrinkles. Use a toothpick to smooth out any air bubbles. Seal with top coat to prevent peeling. You can layer multiple stickers or combine stickers with hand-painted elements for hybrid designs.
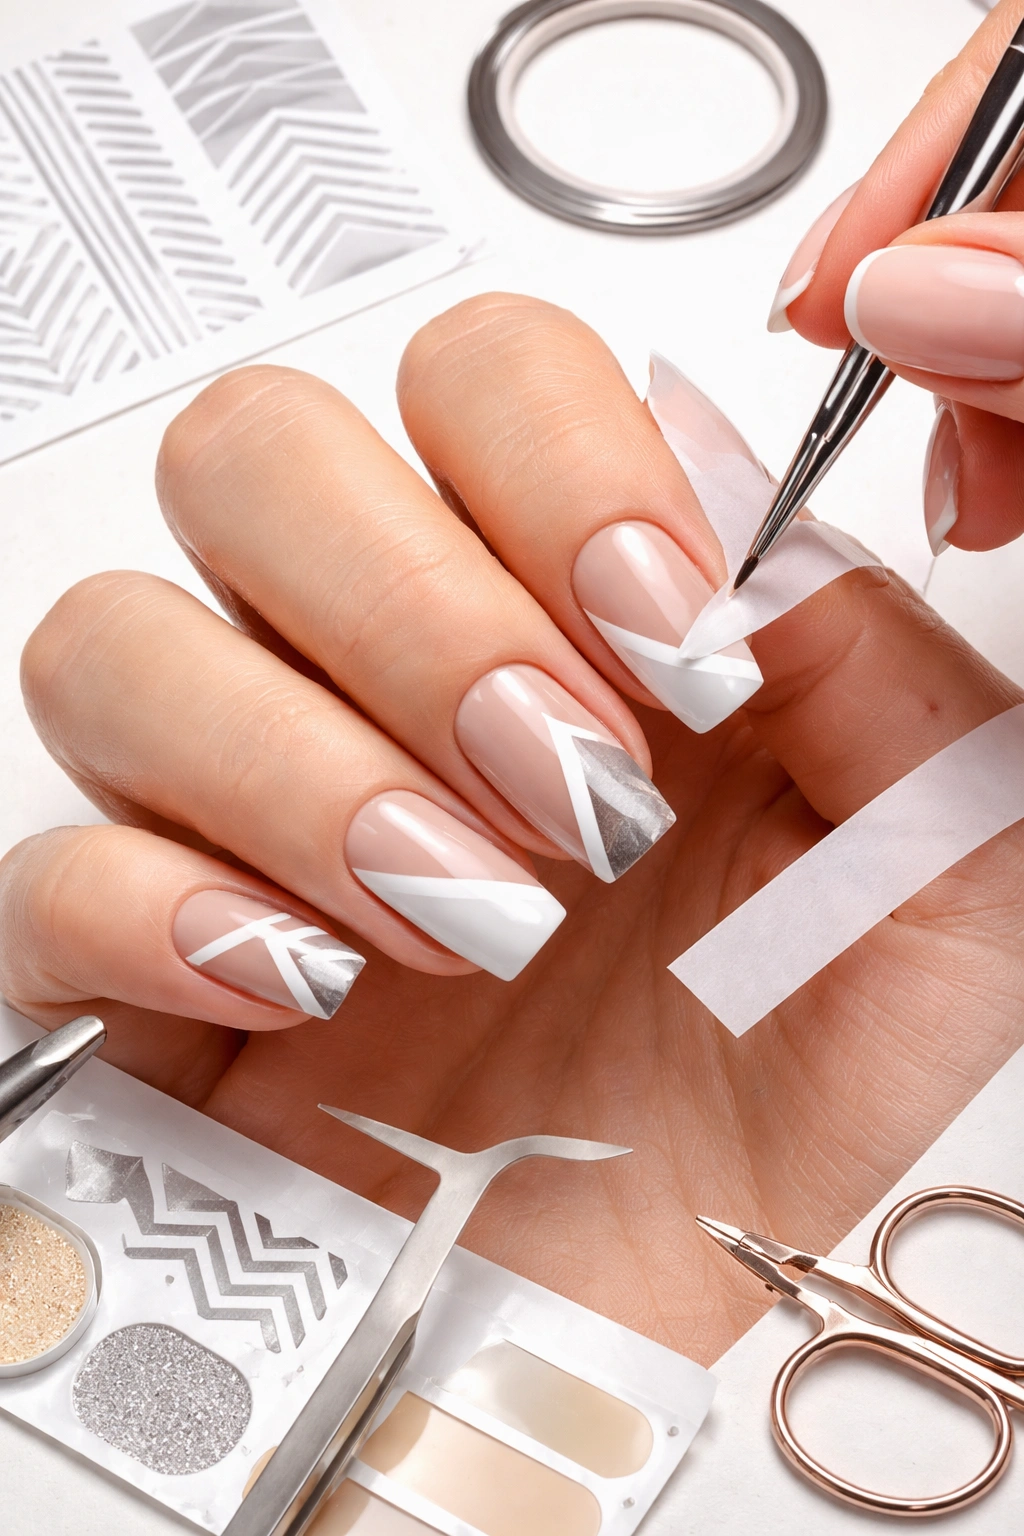
Stencil Tape: Thin, removable tape creates perfectly straight lines, geometric shapes, and clean edges. Place tape strategically on your nail, paint around or through it, then remove while the polish is slightly wet. This prevents paint from seeping under the tape edges. Stencil tape is especially useful for French tips, half-moons, geometric color-blocking, and striped designs.
Negative Space Designs: Template-based negative space designs deliberately leave parts of the nail unpainted, creating modern, minimalist looks. Place stencils to define the unpainted areas, paint the rest, then remove the stencil. The negative space becomes the design itself. This technique creates sophisticated results with minimal effort.
Specialty Tools: Dotting tools in various sizes create uniform dots, diamonds, and small shapes far more easily than freehand methods. Striping brushes with long, thin bristles let you paint thin, precise lines. Marbling tools help create specific patterns. These tools aren’t expensive but make a significant difference in outcome precision.
Personalizing Store-Bought and Commercial Designs

Not every design needs to be entirely custom from scratch. Personalizing existing commercial designs—whether they’re nail wraps, stickers, or designs you see online—is a totally valid approach that combines inspiration with your creative input.
Adding Personal Touches to Nail Wraps: Commercial nail wraps are often gorgeous but generic. Elevate them by adding hand-painted accents—maybe dots around the edges, a thin line of contrasting color, or metallic highlights. Apply the wrap first, then add your custom details over top, sealed with top coat. This creates something that feels unique while saving you the work of creating the entire design.
Combining Multiple Design Elements: Take the color scheme from one design, the pattern style from another, and the accent element from a third to create something that’s a synthesis of your inspirations but entirely new. This approach avoids direct copying while channeling what excites you about multiple designs.
Customizing with Embellishments: A simple solid mani becomes custom when you add rhinestones, studs, pearls, or foil accents. The base design is the canvas; your embellishments create the personality. This is especially effective for special occasions where you want something distinctive without necessarily having intricate artwork.
Modifying Techniques: Take a simple design and modify it—change the colors, add more or fewer elements, scale patterns differently, or combine it with another technique. A basic polka dot design becomes something new when you execute it in metallics instead of pastels, or add just three large dots instead of many small ones.
Troubleshooting Common Custom Design Mistakes
Even experienced nail artists make mistakes. Knowing what typically goes wrong and how to prevent or fix it keeps your frustration low and your success rate high.
Streaky, Uneven Base Coats: This is usually caused by thin applications or using old, separated polish. Always apply in thin layers rather than one thick coat—two thin coats look smoother than one gloppy coat. Let each layer dry between applications. Shake your polish bottle gently or roll it between your hands rather than shaking vigorously, which introduces bubbles and separates the pigment.
Polish Bleeding Under Stencils: This happens when tape or stencils don’t adhere tightly to your nail. Press stencils down firmly before painting, and let base polish dry completely before applying stencil tape. Some people swear by lightly wetting the stencil before applying it—the moisture helps seal the edges. Paint perpendicular to the stencil edge using dabbing motions rather than sliding strokes to minimize seeping.
Colors Muddying When You Blend: Blending two colors works beautifully only if they’re compatible or if you use a transitional color between them. Opposite colors on the color wheel blend to muddy brown, whereas adjacent colors blend smoothly. If colors are fighting, add white to both for a softer blend, or use a very light transitional shade between them.
Uneven Dots and Shapes: This often stems from not loading your tool with enough polish or loading too much. The polish should bead on the tool. Practice on a piece of plastic or practice nail wheels before committing to your actual nails. Let your hand rest on the table to steady it, and move slowly and deliberately rather than quickly.
Chipping and Peeling: Poor adhesion usually means you skipped base coat or your nails had oils on them. Always start with clean, preferably slightly buffed nails. Base coat creates a tacky surface that polish adheres to much better than the smooth nail surface. Similarly, top coat should be applied while polish is still slightly wet—this helps it seal and protects against chipping.
Smudging During Application: Rushing is the enemy. Let each layer dry completely before applying the next. If you’re impatient, use quick-dry top coats or UV/LED curing for gel polish. When painting details, don’t let your hands touch the nail until everything is fully dry. Rest your hands on a clean surface, not directly on your leg or other nails.
Embellishments Falling Off: Rhinestones and studs need proper adhesion. Use nail glue specifically designed for nails rather than general craft glue. Apply glue to the embellishment, press it firmly onto the nail while the polish is still slightly sticky, and hold pressure for several seconds. Seal with top coat once dry. If embellishments keep falling off, you’re probably not using enough glue or not pressing firmly enough during application.
Bringing Your Design to a Professional Nail Artist
Even if you love doing your own nails, sometimes you want to work with a professional to bring a complex custom design to life. Communicating your vision clearly is crucial for getting results you love.
Preparing Your Design Brief: Bring visual references—screenshots, photos, color swatches. The more specific you can be, the better. Rather than saying “something sparkly and elegant,” describe exactly what you envision: “nude base with gold geometric accents on the ring and middle fingers, and gold glitter on just the tips.” Include your preferred nail shape, length, and finish (matte, glossy, shimmer).
Discussing Budget and Timeline: Complex custom designs take longer than simple manicures and may cost more. Be upfront about what you’re willing to spend and how much time you want to spend in the chair. A skilled artist can suggest modifications that achieve your vision more efficiently.
Bringing a Design to Show: If you’ve used an AI nail generator or created a digital design, bring that image to your appointment. Real-world results won’t be pixel-perfect matches, but the image gives your artist a clear target to work toward. If you can’t bring a digital image, detailed verbal description combined with written notes helps.
Communication During the Appointment: Let your artist work without hovering, but don’t hesitate to speak up if something isn’t matching your vision. Mid-design adjustments are far easier than fixing something after it’s complete. Many artists appreciate feedback because it helps them deliver exactly what you want.
After Your Appointment: Once you have a professional version of your custom design, you can use photos as reference for recreating it yourself at home, or you can return for regular touch-ups while maintaining the design.
Perfecting Your Design Process and Building Confidence
Becoming skilled at custom nail design is a cumulative process. Each design you create teaches you something, whether it’s about color combinations that work, techniques you need to practice more, or what your actual aesthetic preferences are versus what you thought they were.
Keep a digital or physical record of designs you create—photos show you what’s worked and what hasn’t. Note what techniques you used, which polishes, how long it took, and whether you’d do anything differently next time. Over time, you’ll develop an intuitive sense for what works and what needs adjustment before you commit.
Accept that some designs won’t turn out as envisioned, and that’s completely fine. Every professional nail artist started where you are, creating designs that didn’t work perfectly. The ones who became skilled kept practicing. The ones who became truly excellent also studied what they did wrong and adjusted. Your perceived failures are actually data gathering.
Set aside dedicated time to practice when you don’t have anywhere to be, rather than stressing yourself by designing nails you need to look perfect immediately. When you practice with low stakes, you learn faster and enjoy the process more. Once you’re confident, you can tackle designs for special occasions with the knowledge that you’ve already worked through the learning curve.
Final Thoughts
Designing your own custom nail art is genuinely accessible to anyone willing to invest a little time in understanding the basics. You don’t need expensive equipment, professional training, or even particular artistic talent—you need clarity about your vision, the right tools for the technique you’ve chosen, and willingness to experiment until you nail it (pun absolutely intended).
Start simple with designs that build your confidence and foundational skills. Master dots, lines, and simple color combinations before tackling complex techniques. Use inspiration deliberately rather than copying wholesale, and always remember that your personal style should guide every choice. Whether you hand-paint every detail, rely entirely on stickers and stencils, or use digital tools to generate designs, the goal is the same: nails that feel authentically yours and bring you joy every time you look at your hands.
The beautiful part about custom nail design is that it’s genuinely forgiving. Unlike a haircut or permanent tattoo, nail designs last three to four weeks at most, which means you can experiment fearlessly. Try colors you’ve never considered, test techniques that intimidate you, and embrace the occasional design that doesn’t work exactly as planned. These “failures” are where real learning happens, and they pave the way for your next design to be even better. Your hands deserve nails that express who you are—and now you have the knowledge and confidence to make that happen.
