

Nail stickers have completely transformed what’s possible with DIY manicures at home. Gone are the days when you needed either professional-level painting skills or a salon appointment to get intricate, gorgeous nail art. These self-adhesive decals let you achieve looks that would take a manicurist hours to hand-paint, and you can do it yourself in minutes. But here’s the thing—application matters enormously. The difference between a manicure that looks professional and polished versus one that peels, bubbles, or looks sloppy comes down to technique. If you’ve ever applied a nail sticker and watched it lift at the edges within days, the problem almost certainly wasn’t the sticker itself. It was the method. Let me walk you through exactly how to apply nail stickers so they look flawless, last as long as your regular manicure, and actually stay put.
Nail Stickers vs. Nail Wraps: Understanding What You’re Working With
Before you even open a sticker sheet, it’s essential to understand exactly what you’re holding. Nail stickers and nail wraps sound like the same thing, but they’re fundamentally different products that require different approaches. Nail stickers (also called nail decals) are small adhesive designs that cover only a portion of your nail—typically the center, the tips, or scattered across the surface. They come applied to a clear backing sheet and you peel each individual sticker away to apply it over your already-polished nails.
Nail wraps, by contrast, cover your entire nail from cuticle to tip. They’re typically made from vinyl or printed material and often come sized for each individual finger. Wraps are applied directly over bare nails and don’t require any base coat or polish underneath. The application process for wraps is fundamentally different from stickers, and mixing up the two approaches will result in disappointment. This guide focuses exclusively on nail stickers—those decorative accent pieces that layer over your polish for instant nail art.
The beauty of nail stickers is their versatility. You can apply them over bare nails, polished nails, gel polish, shellac, acrylics, or even press-ons. They work on any nail shape and length. That flexibility is why they’ve become so popular—they genuinely work for everyone, provided you follow the correct application steps.
Preparing Your Nails Is Non-Negotiable
The most critical step in nail sticker application isn’t actually the sticker application itself—it’s the preparation. This is where most people fail without even realizing it. Your nails are naturally covered in oils. Your hands pick up moisturizer, sunscreen, soap residue, dust, and countless other substances throughout the day. All of that sits on your nail surface and creates a barrier between the sticker’s adhesive and your nail. If you skip proper preparation, the sticker will never fully adhere, no matter how carefully you smooth it down.
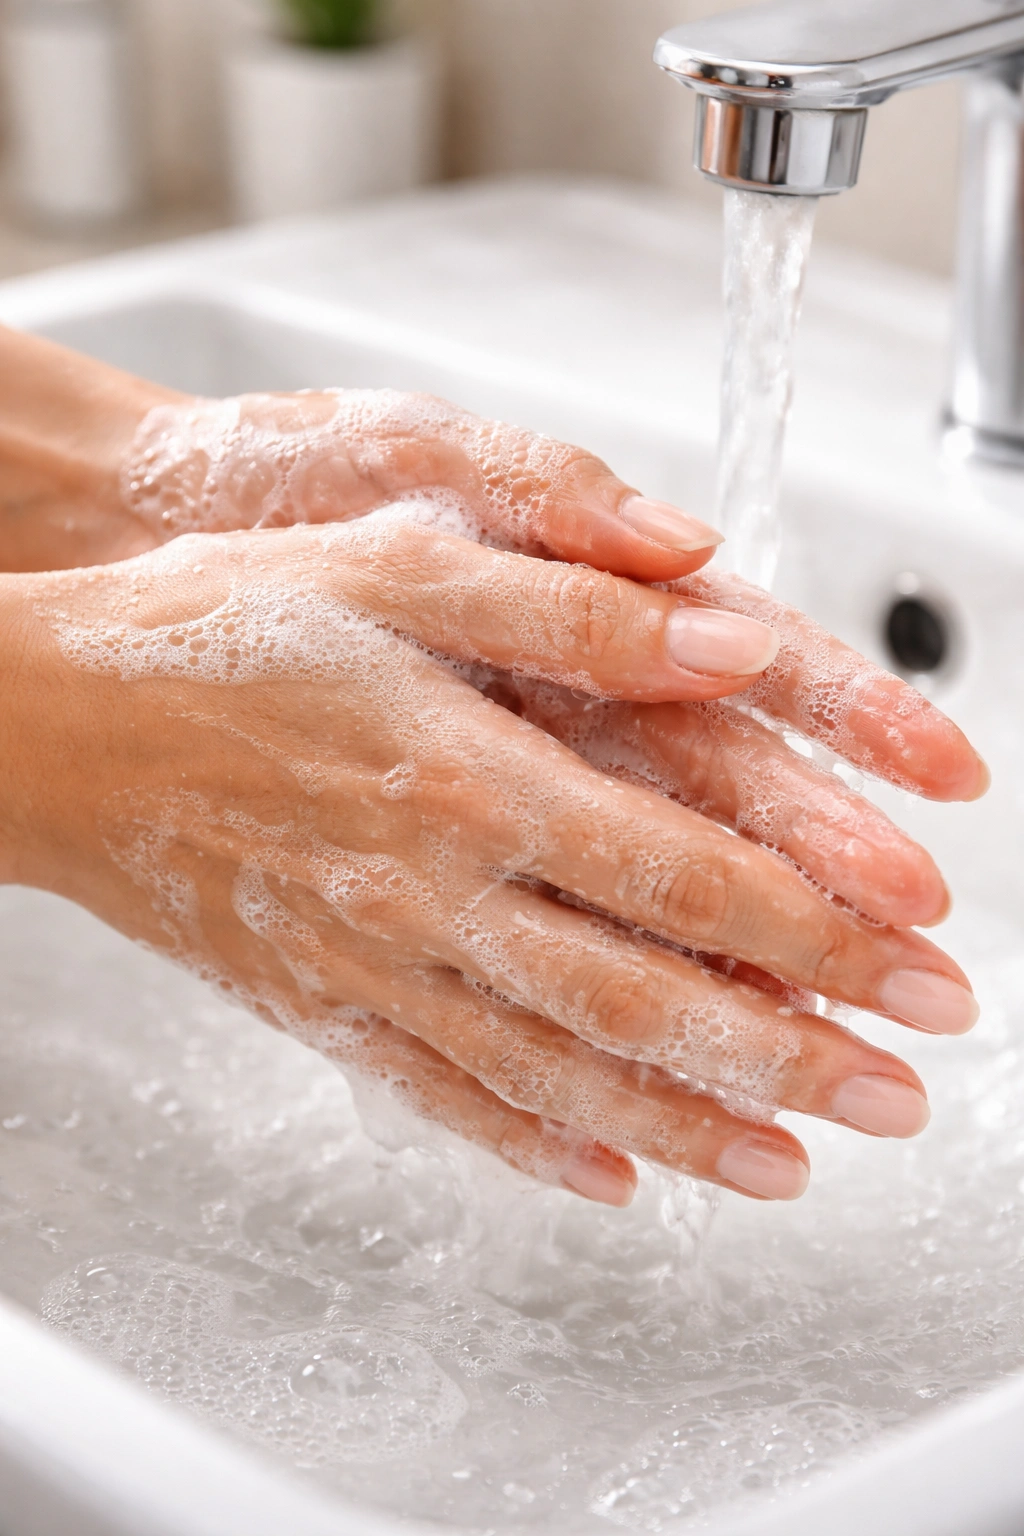
Start by thoroughly washing your hands with soap and water. This sounds obvious, but most people don’t wash their hands before applying stickers—they just start applying them. Wash your hands as if you’re about to do surgery. Get under the nails. Dry them completely with a clean towel. Any moisture left behind will interfere with adhesion.
Next, remove any old polish. Use a gentle, non-acetone nail polish remover if you’re worried about drying out your nails, or regular acetone if you don’t mind. The key is completely clearing away any color, shine, or residue from previous manicures. Don’t skip this even if your nails look bare—old polish can leave an invisible film. Once you’ve removed all polish, wash your hands again and dry them thoroughly.
The Nail File and Buffing Step Everyone Overlooks
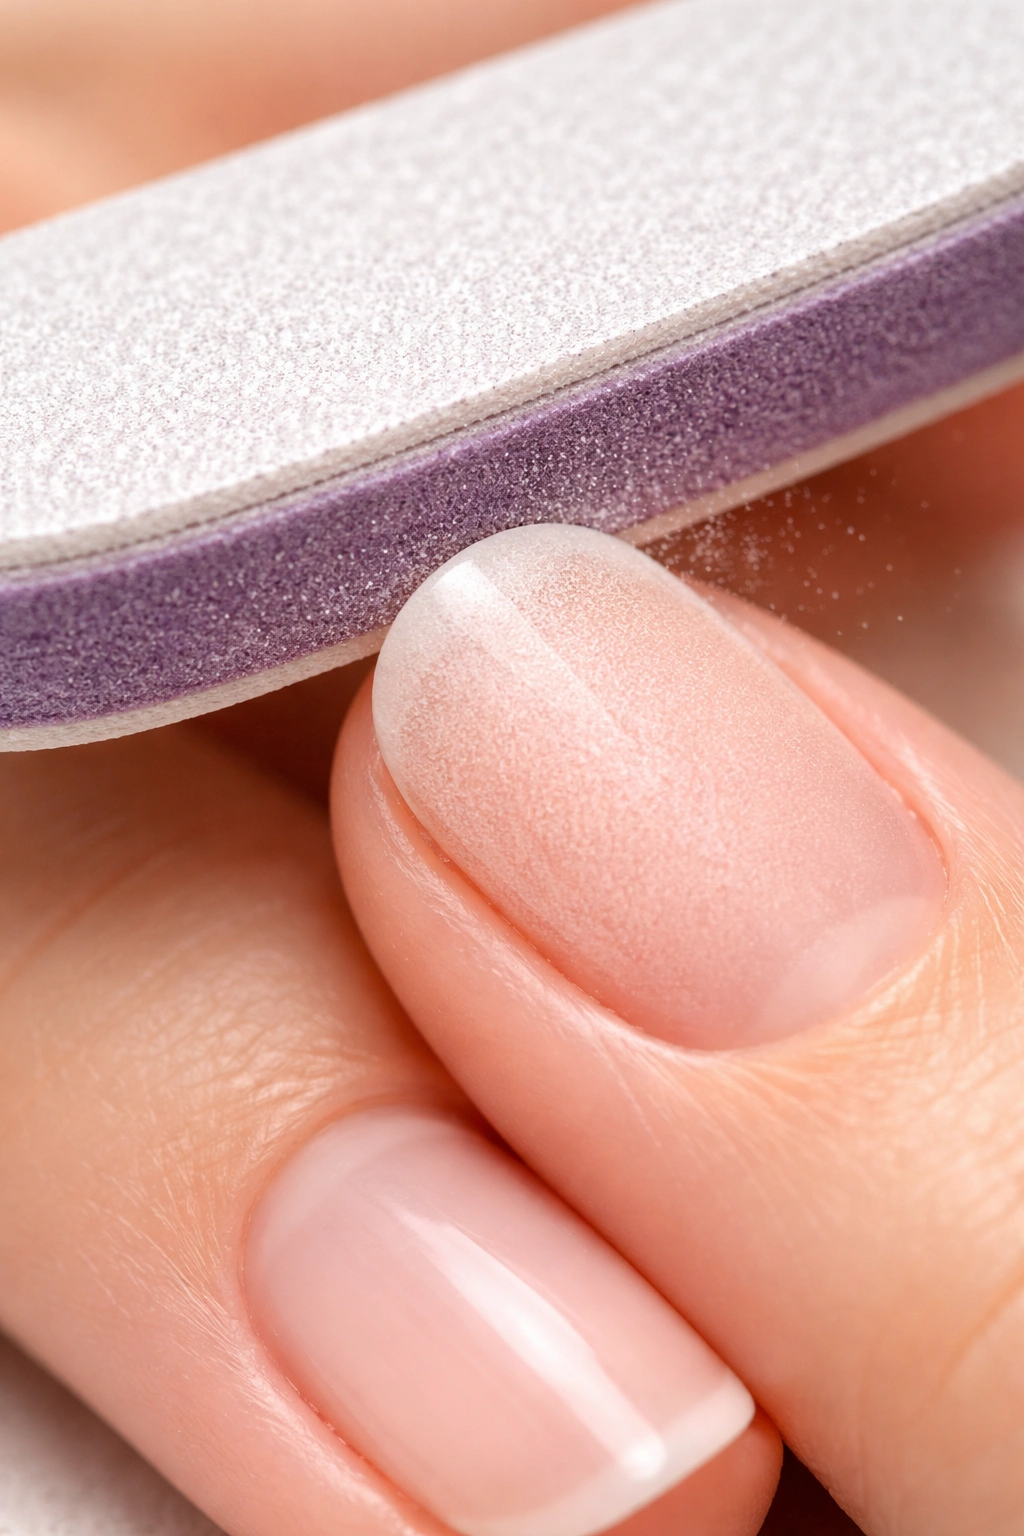
After your nails are clean, you need to file them into your desired shape and length. Use a nail file to trim and shape your nails to whatever length and style works for you. File in one direction only—moving back and forth creates micro-tears in the nail edge that can weaken them. Once you’ve got your shape right, lightly buff the nail surface with a soft buffer or the buffing side of your nail file.
This buffing step is crucial and often skipped. Buffing removes ridges, smooths the surface, and creates microscopic texture that helps the sticker adhere better. You’re not trying to remove the shine entirely or damage the nail—you’re just barely texturing the surface. Think of it like creating tiny anchoring points for the adhesive to grip. A few light passes with a buffer is all you need. Heavy buffing can damage your nails.
Push Back Your Cuticles for Maximum Sticker Real Estate
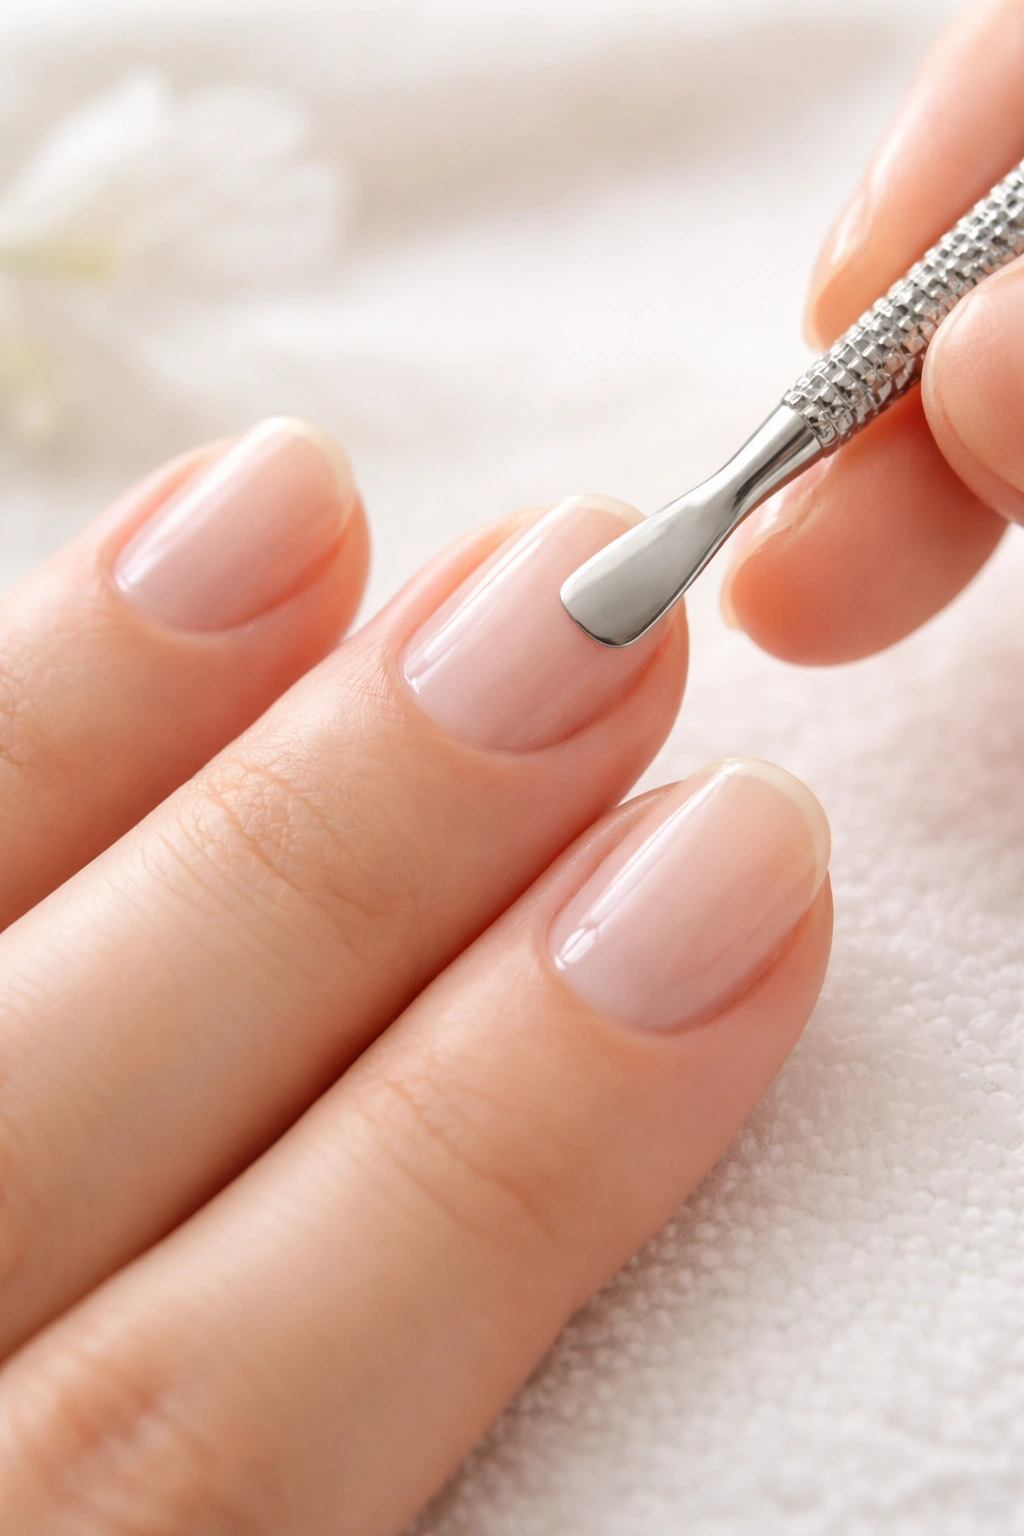
Gently push back your cuticles using a cuticle pusher or even an old orange stick. You’re creating a smooth surface at the base of the nail where the sticker will sit. Don’t be aggressive—you’re not trying to remove cuticles or damage the nail bed. Just create a clean line between your nail and the cuticle. This gives the sticker more nail surface to grip and prevents it from sitting partially on skin, which would cause it to lift prematurely.
If you have thick cuticles or hangnails, address those before applying stickers. Gently trim any hanging skin with cuticle nippers, but again—gentle is the operative word. The whole point of this prep is to create an ideal adhesive surface. A rough, damaged cuticle area will work against you every single time.
A Base Coat Creates a Foundation for Success
Here’s where expert advice splits into two camps, and I’ll give you both options. Some professionals recommend applying a clear base coat or clear polish before you apply nail stickers. Others say you can apply stickers directly over bare nails. The truth is: a base coat genuinely helps, especially if you have naturally oily nail beds or if you want your stickers to last the full two to three weeks.
The base coat does several things. It gives the sticker a polished, slightly sticky surface to adhere to, rather than the smooth, oil-covered surface of a natural nail. It creates a protective barrier between the sticker adhesive and your actual nail, which means sticker removal won’t cause any damage to your nail plate. And it helps prevent the sticker from peeling at the edges. If you do use a base coat, choose a clear one or a sheer, neutral shade. Apply a thin coat, and crucially, let it dry completely before you move to the next step. A wet or tacky base coat will interfere with sticker adhesion, not help it.
That said, if your nails aren’t particularly oily and you want maximum sticker longevity, the base coat absolutely makes a difference. Wait at least ten minutes (longer if you can) before applying stickers over a base coat.
The Final Cleanse: Why an Alcohol Wipe Matters
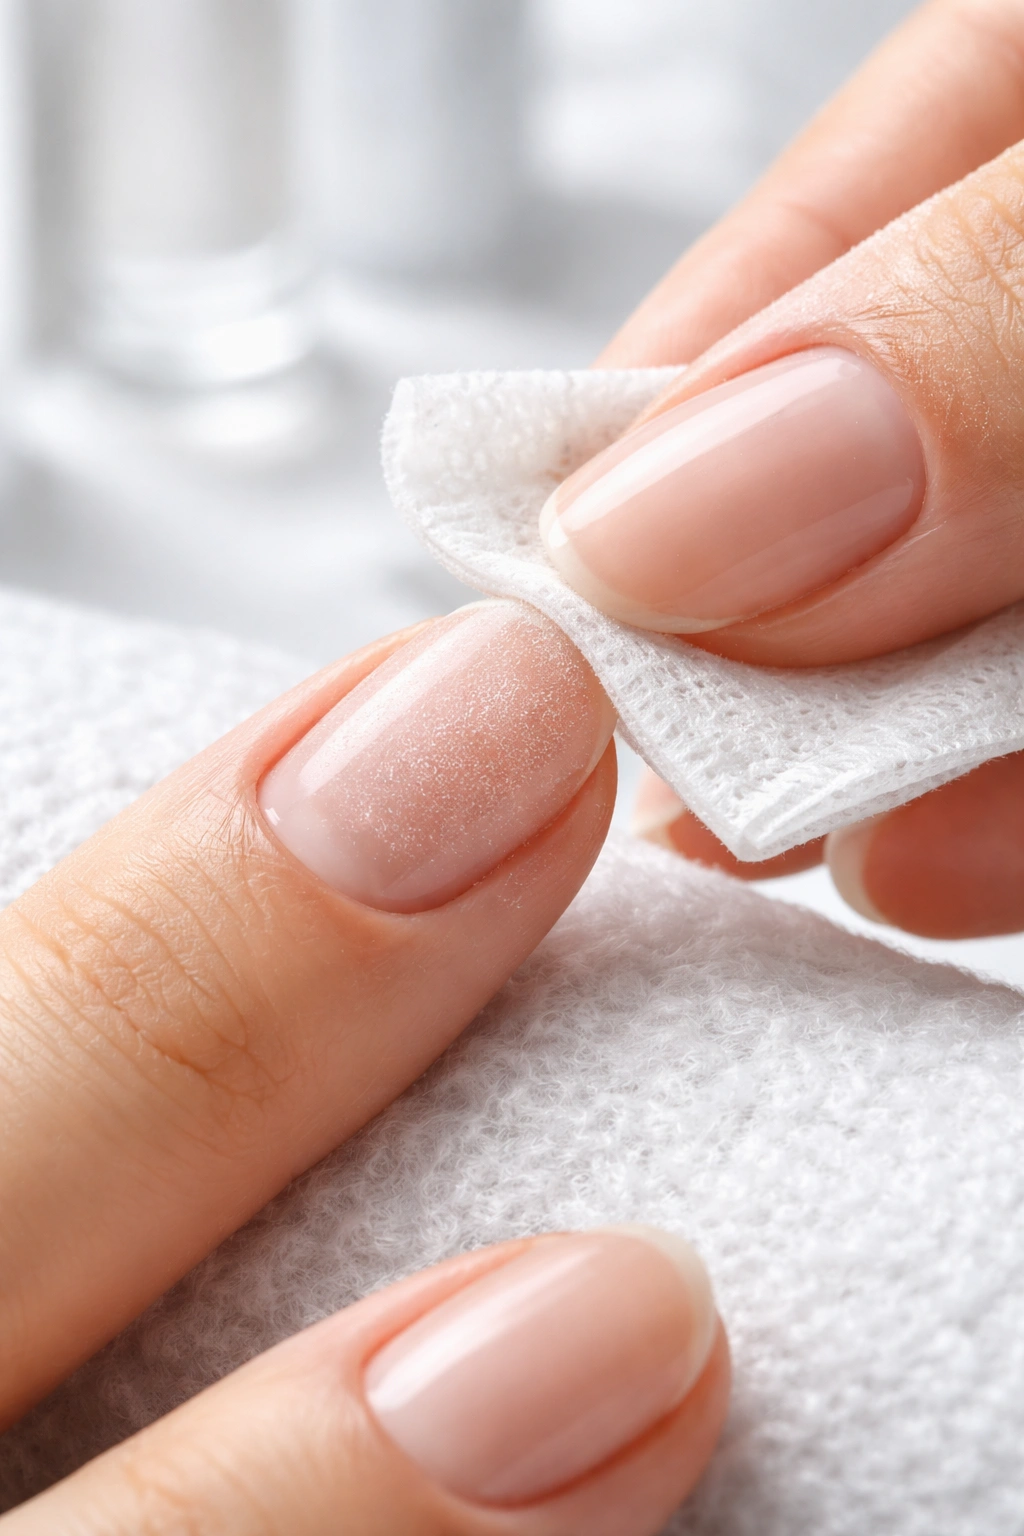
After all your filing, buffing, and cuticle work, you’re nearly there. But here comes the step that truly separates professionals from beginners: the final cleanse. Wipe your nails down with an alcohol pad, cotton ball soaked in rubbing alcohol, or even a nail dehydrator if you have one. This removes the fine dust created by filing and buffing, plus any lingering oils or residue from your skin.
You’ve essentially just created a micro-textured surface—and you don’t want that texture to be clogged with dust and oil. A quick alcohol wipe cleans everything away and leaves a clean surface ready for adhesion. Let the alcohol dry completely. Now your nails are genuinely ready for stickers.
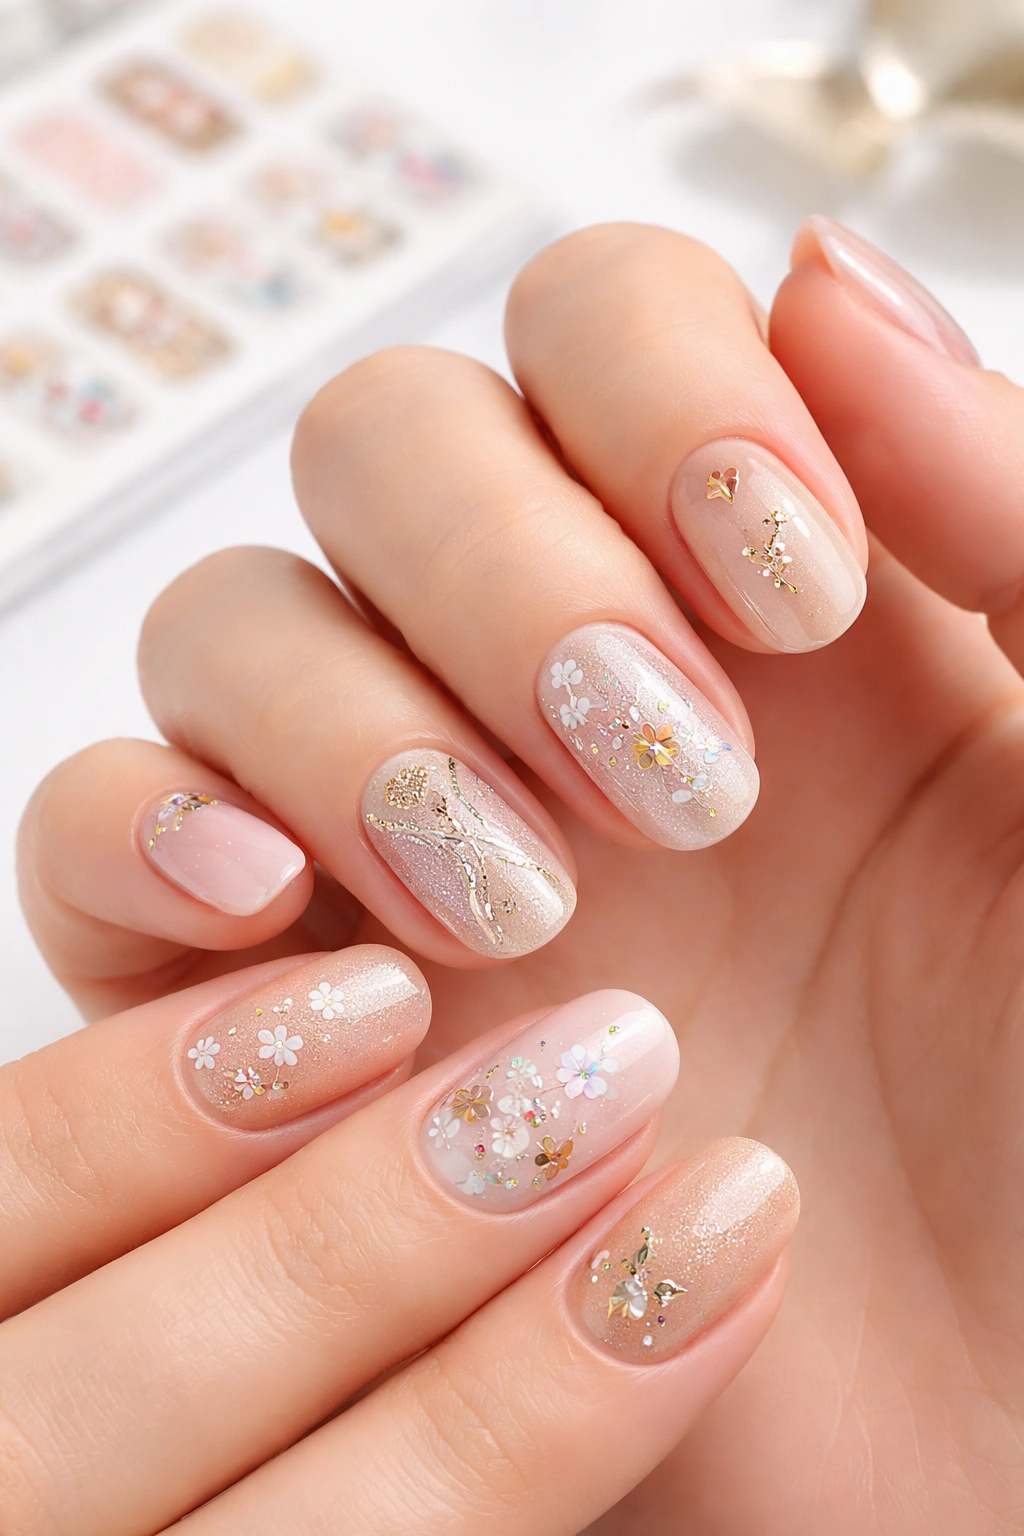
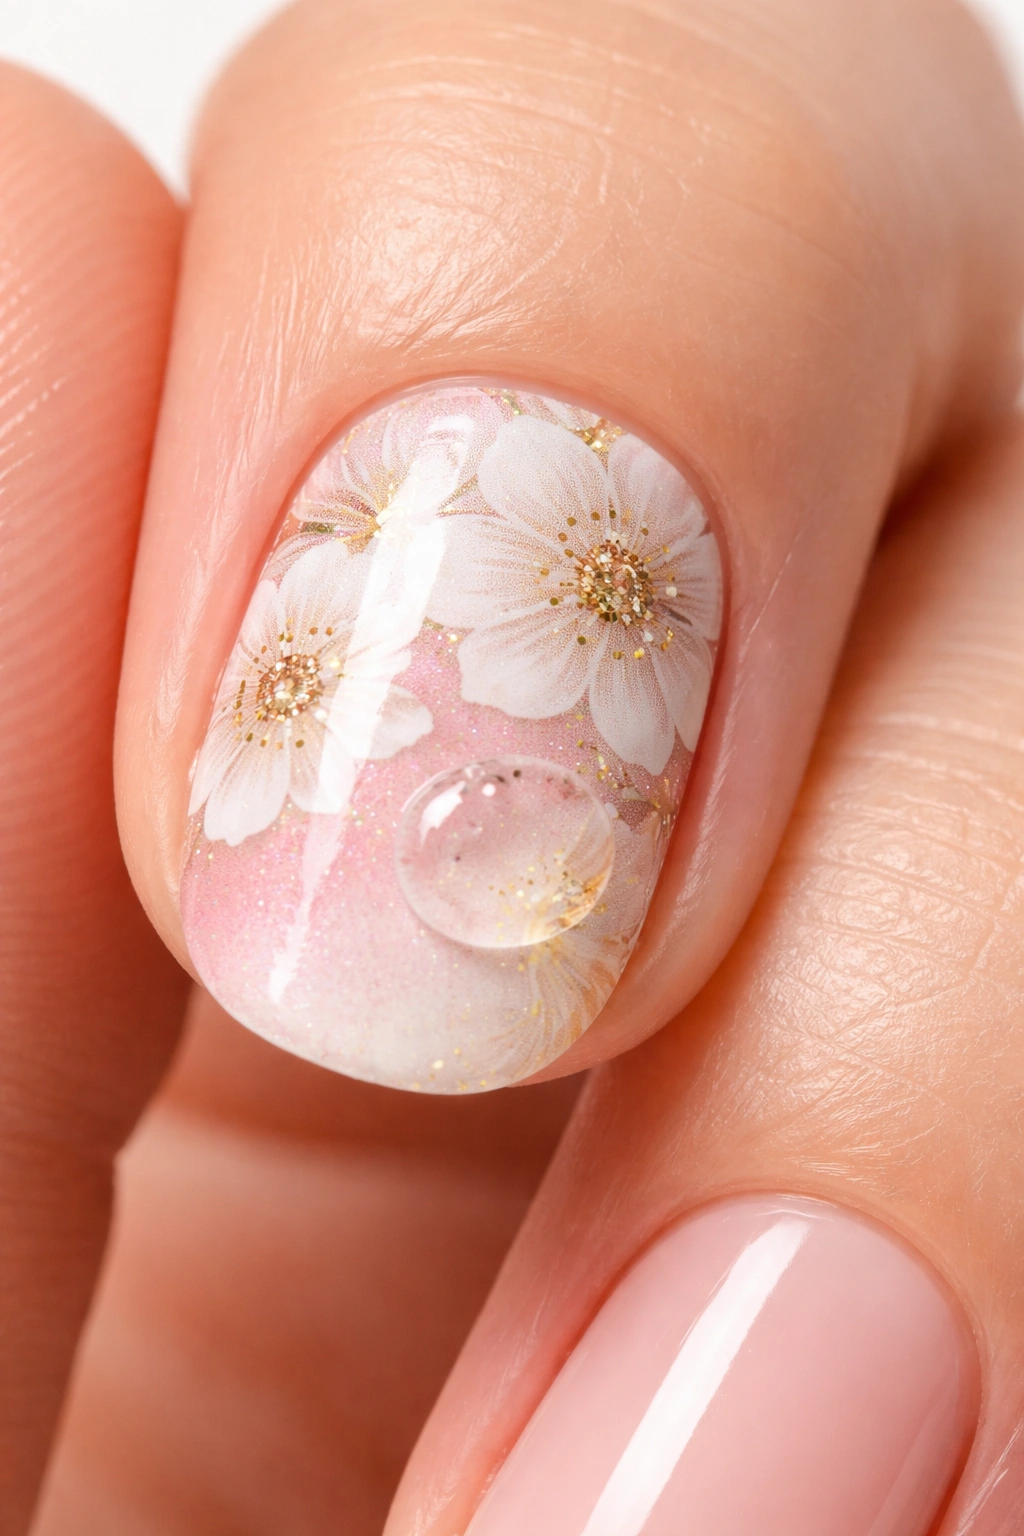
Choosing the Right Sticker Size and Design
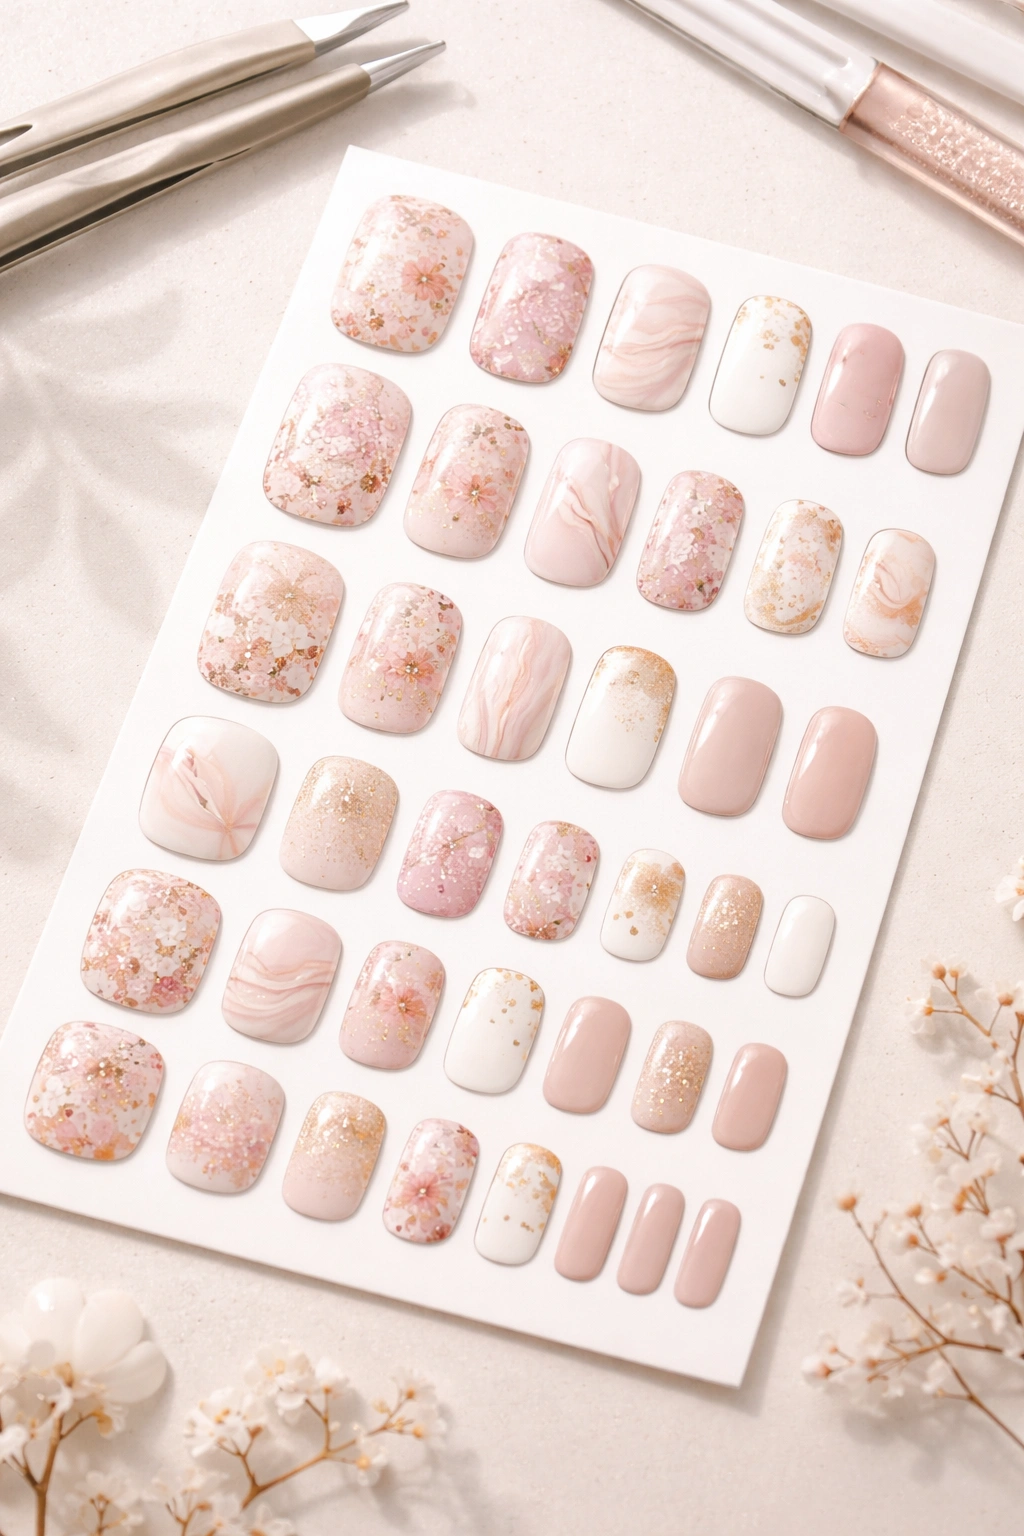
Open your nail sticker sheet and look at your options. Most quality sticker sets come with multiple sizes for different nail sizes. Choose stickers that are slightly smaller than your actual nail, not the same size and definitely not larger. If a sticker is larger than your nail, it will overlap onto your skin, and that’s where peeling starts. The sticker will catch on fabric, rub against your other hand, and peel up at the edges almost immediately.
Hold each sticker option up to each nail and find the size that covers your nail with just a tiny margin of space around the edges. For longer nails, you might use a larger sticker. For shorter nails, go smaller. And if you can’t find a perfect size, choose slightly smaller over slightly larger—you can always layer stickers or use accent stickers strategically. Oversized stickers are your enemy.
Also consider the design itself. Intricate, detailed designs look best on longer nails where there’s actually surface area to display them. On short nails, simpler patterns like dots, lines, or small florals work better. Large, elaborate designs on tiny nails look awkward and waste the sticker’s potential. Think about how the design will actually look on your nail before you commit to peeling it off the sheet.
The Essential Tools That Make Application Easier
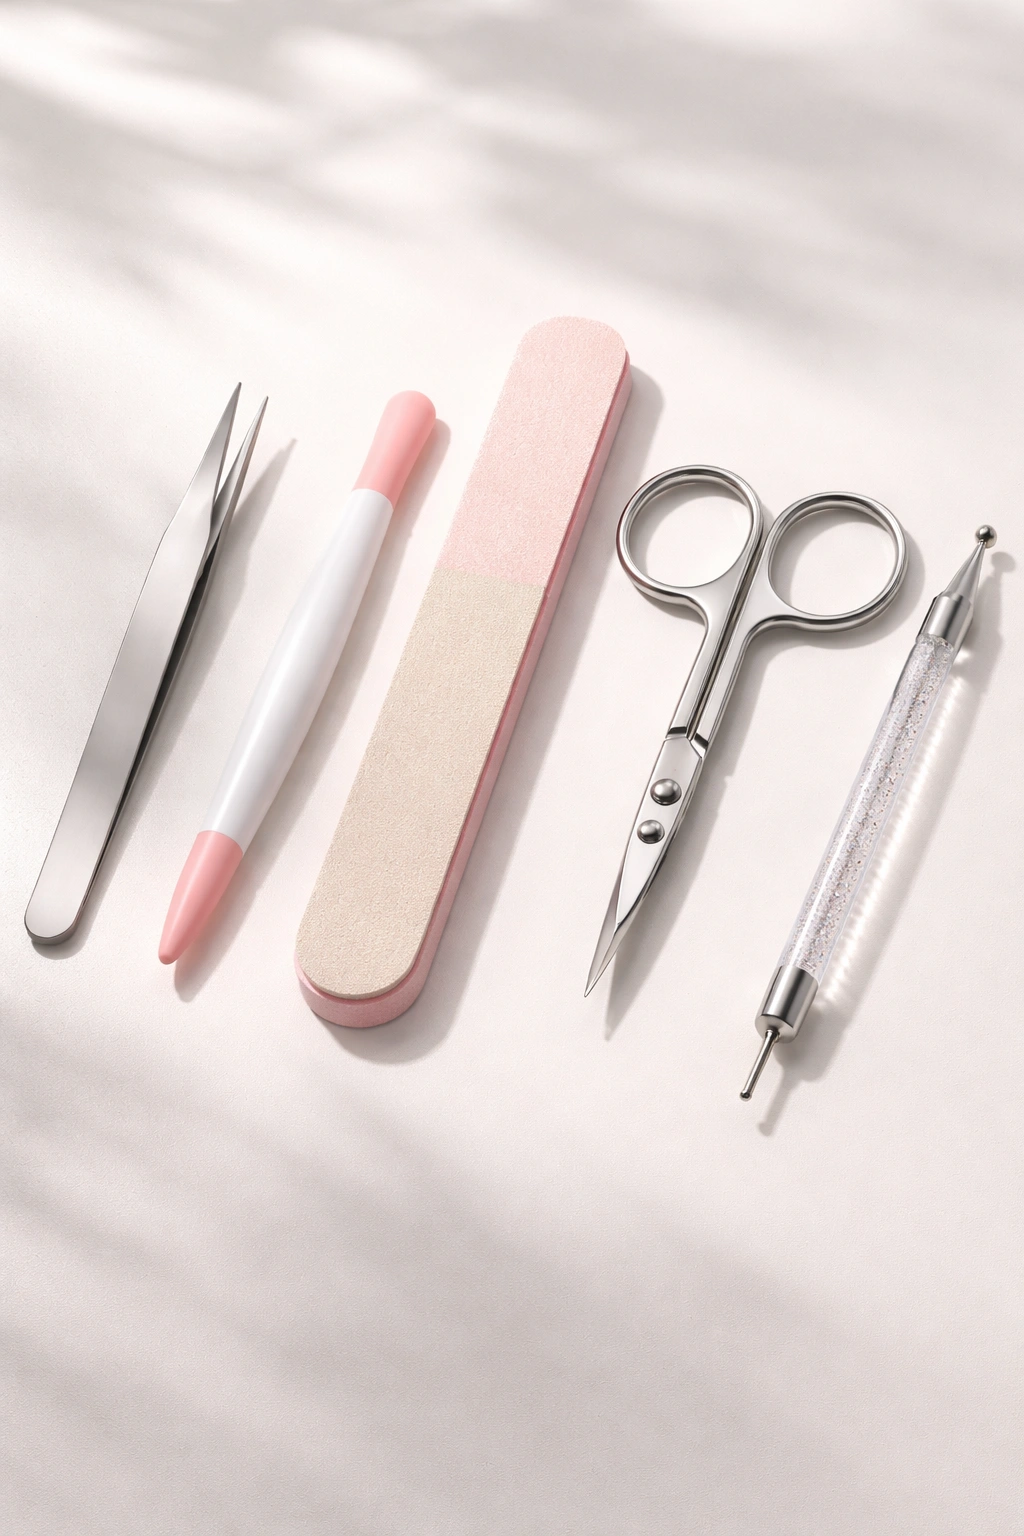
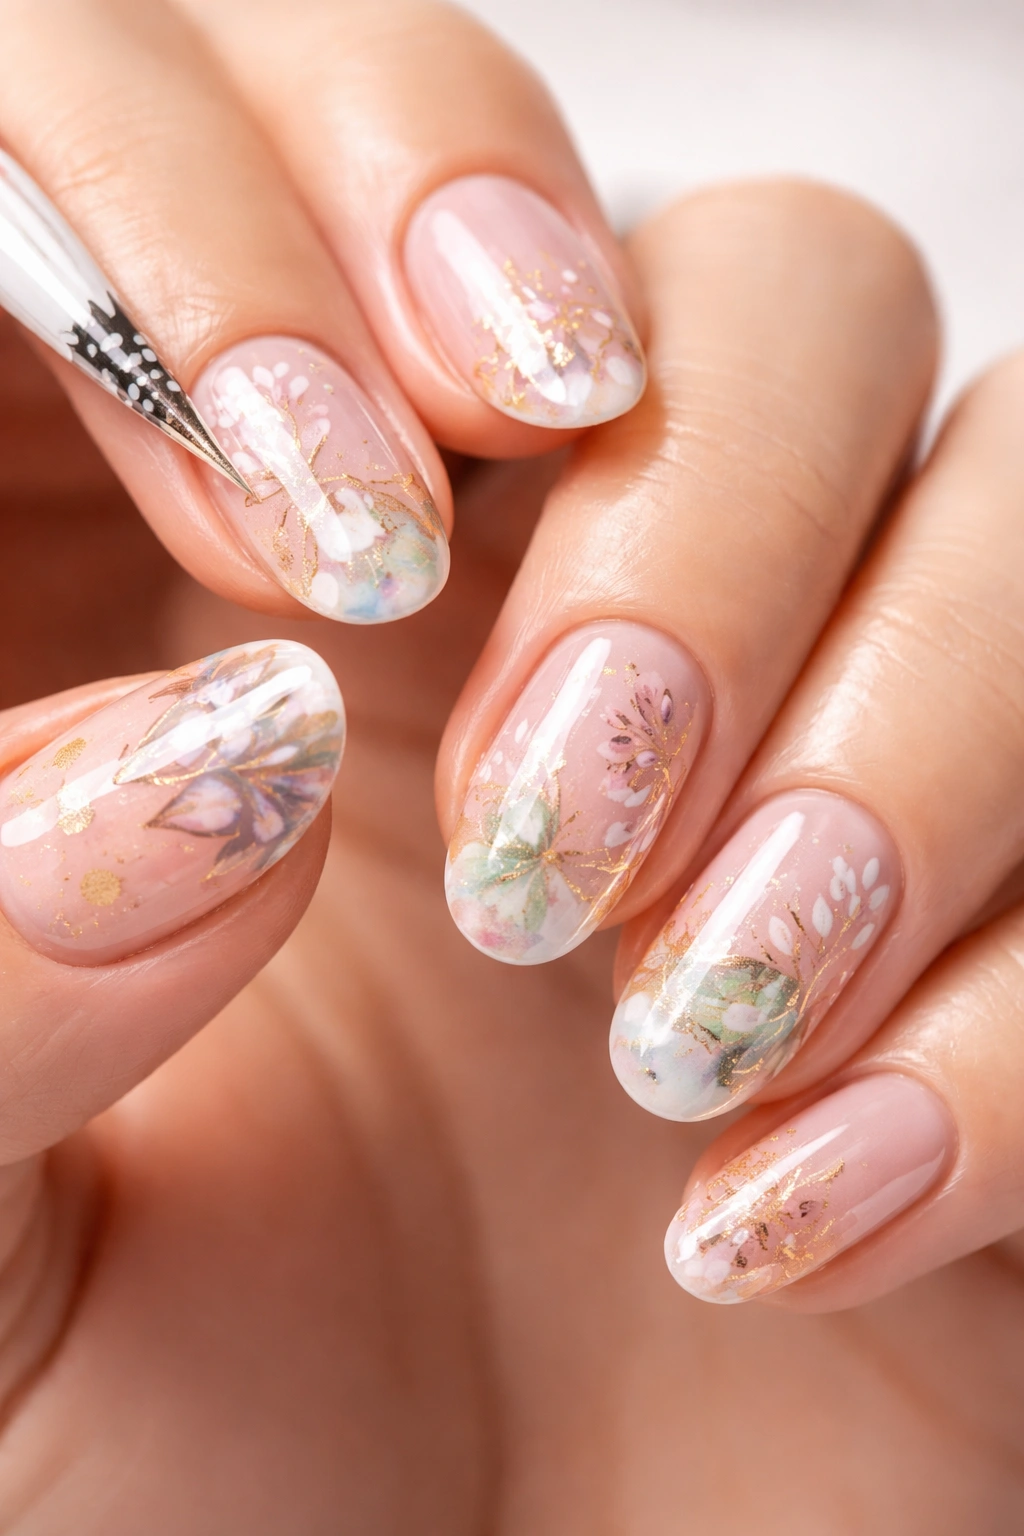
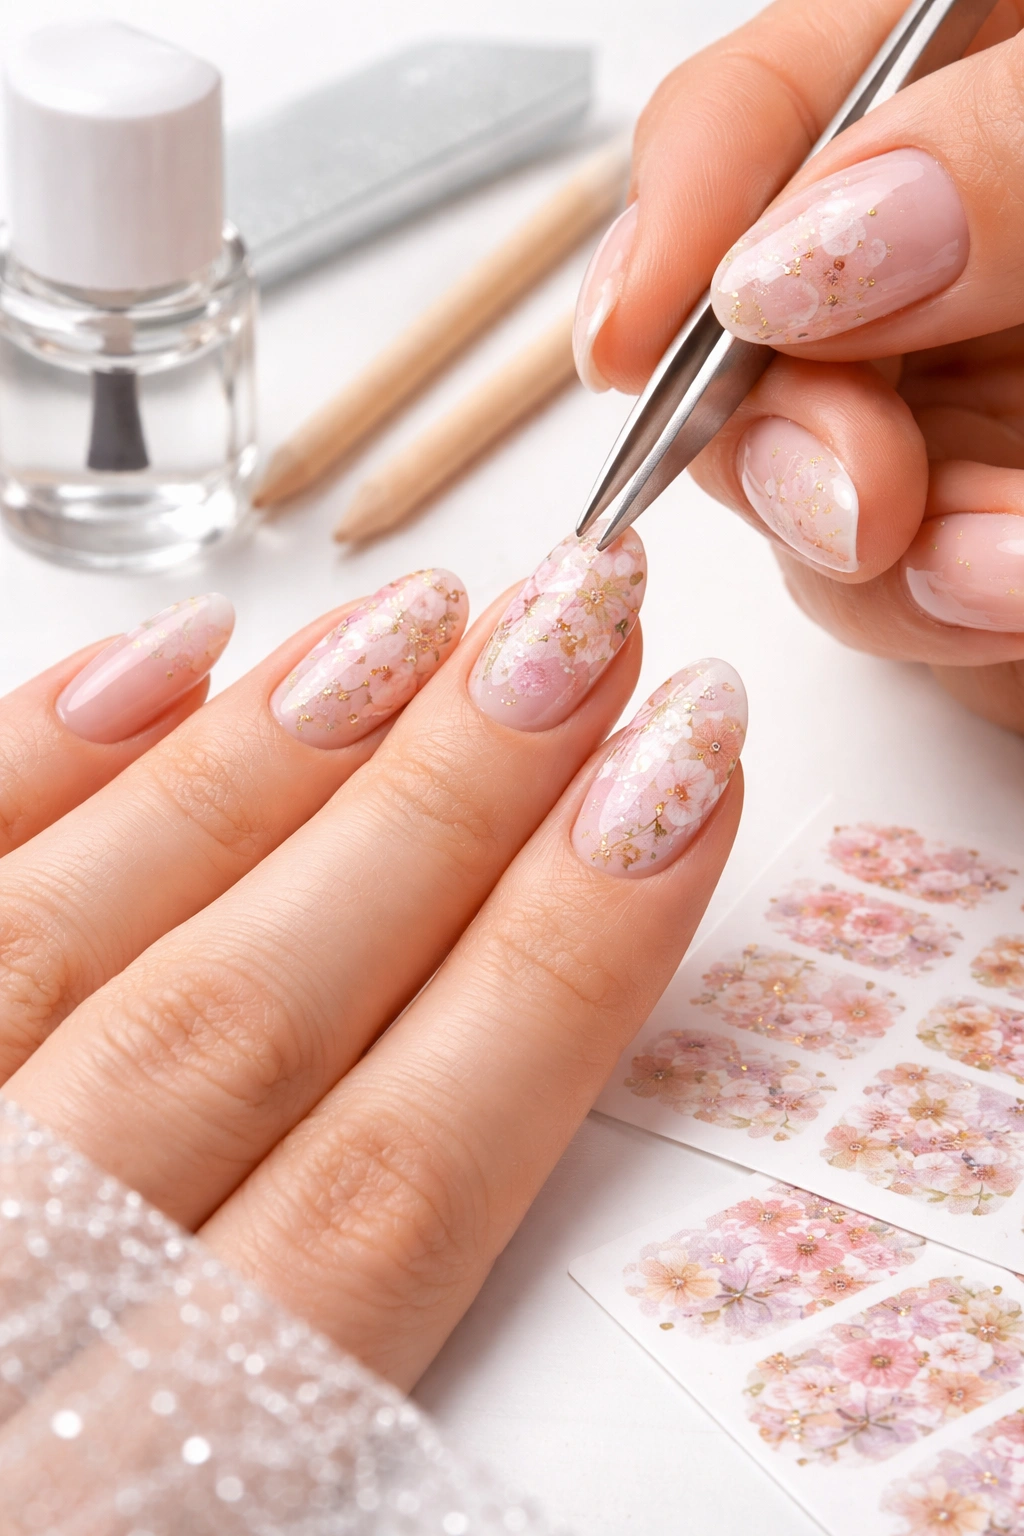
You don’t need much, but the right tools genuinely transform the application experience. At minimum, you need tweezers and a silicone tool or soft pusher. Tweezers allow you to hold and position the sticker without touching the adhesive side with your fingers. Every time your bare fingers touch the adhesive, you transfer oils that reduce stickiness. Tweezers give you precision and keep your hands out of the way.
A silicone tool (sometimes called a cuticle pusher or just a smooth, flat tool) is essential for smoothing out the sticker once it’s positioned. Never use an orange stick or anything sharp to smooth down a sticker—the rigid material can scratch or tear the delicate sticker. A silicone tool is soft and gentle while still providing enough pressure to firmly press the sticker down and eliminate air bubbles.
You’ll also want a nail file for trimming excess sticker material, and a top coat (clear polish) for sealing. Small scissors can be helpful for trimming stubborn sticker edges before you file them, but this is optional. Some people love using a dotting tool for pressing stickers into place—it gives you a smaller contact point and more control. The key is having at least tweezers and a silicone tool. Everything else is a bonus.
Positioning Your Sticker: The Foundation of Perfect Application
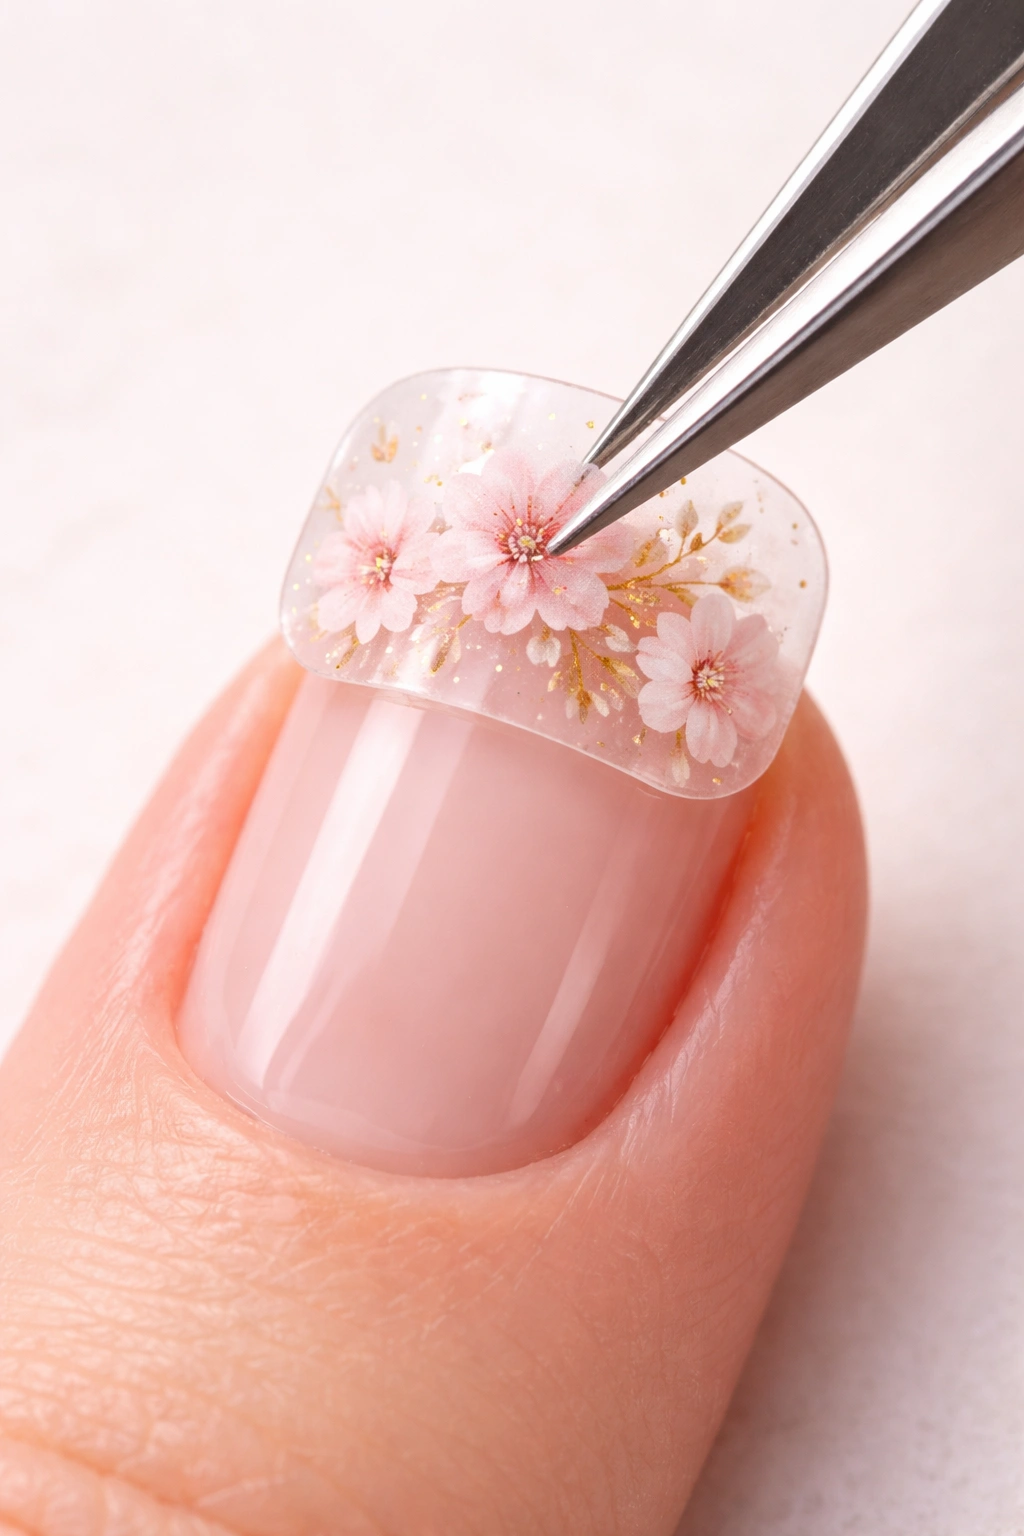
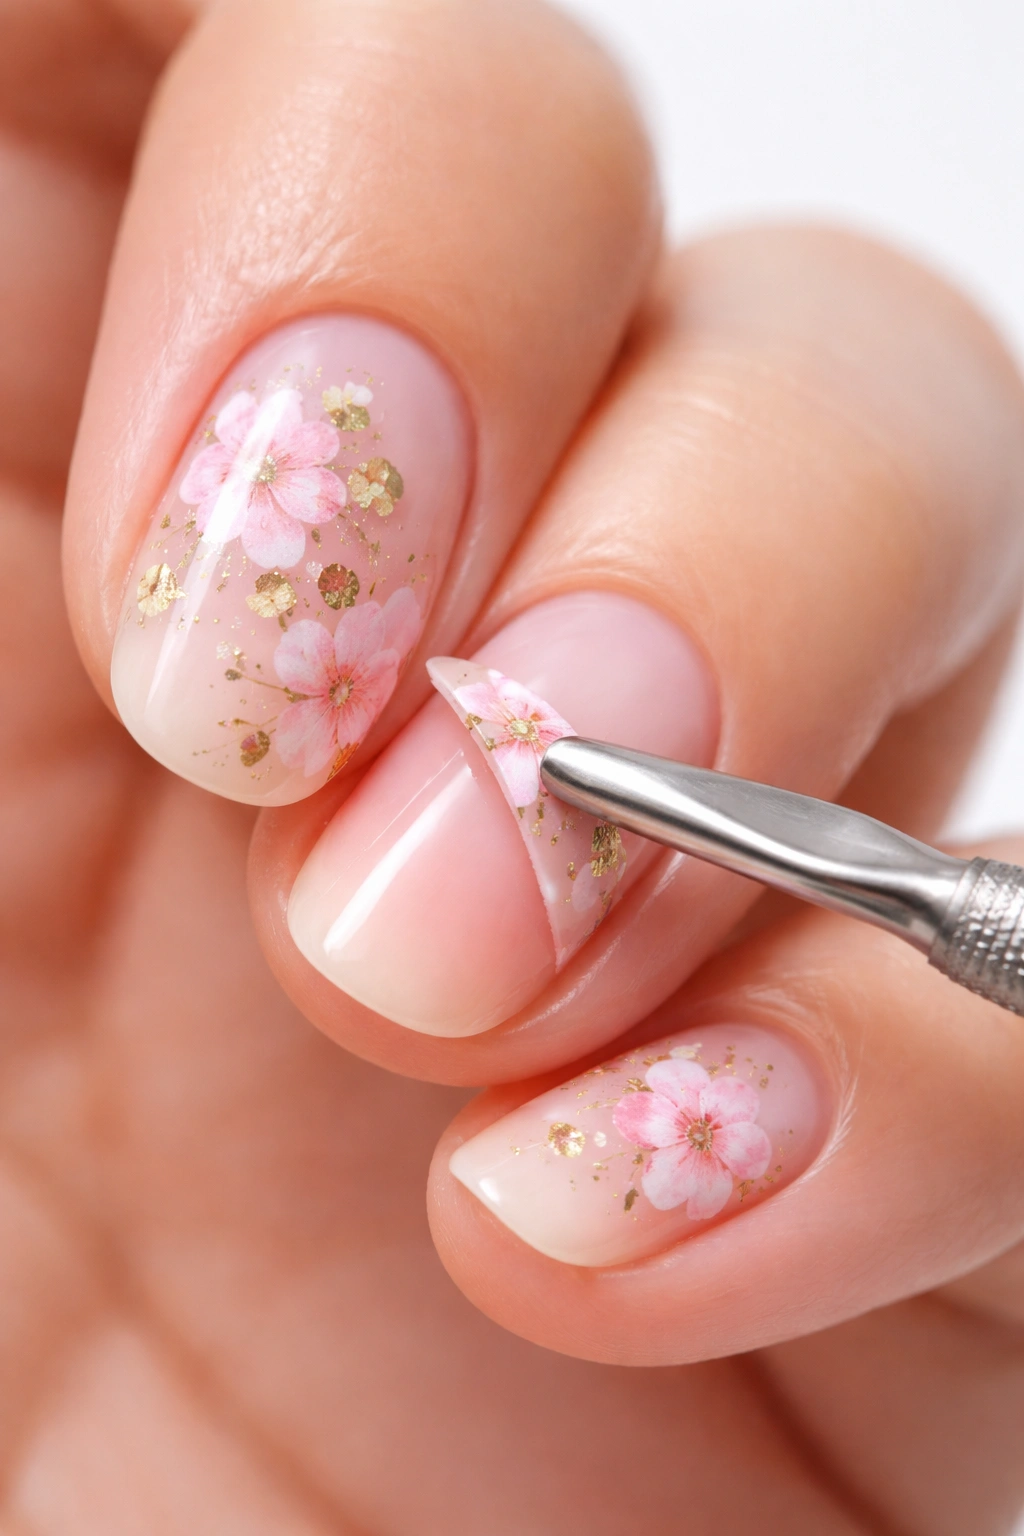
Remove your chosen sticker from the clear backing sheet using tweezers. Hold it by the very edge, keeping your fingers away from the sticky side. Position it over your nail and get a good look at exactly where it will sit. Don’t just slap it down—take a moment to visualize the placement.
For most stickers, you want them positioned with the bottom edge aligned with but not touching your cuticle. If the sticker design has a specific top and bottom, orient it correctly. Some designs look intentionally off-center or positioned toward the tips—honor that design choice. If it’s an abstract or all-over pattern, center it as much as possible.
Once you’re 100% happy with the position, gently lower the sticker onto your nail while still holding it with tweezers. Don’t drop it or slap it down. Lower it slowly and deliberately. When it makes contact with your nail, you still have a moment to adjust slightly before you press it fully down. This is your chance to get the placement exactly right.
Smoothing Out Air Bubbles: The Technique That Matters Most
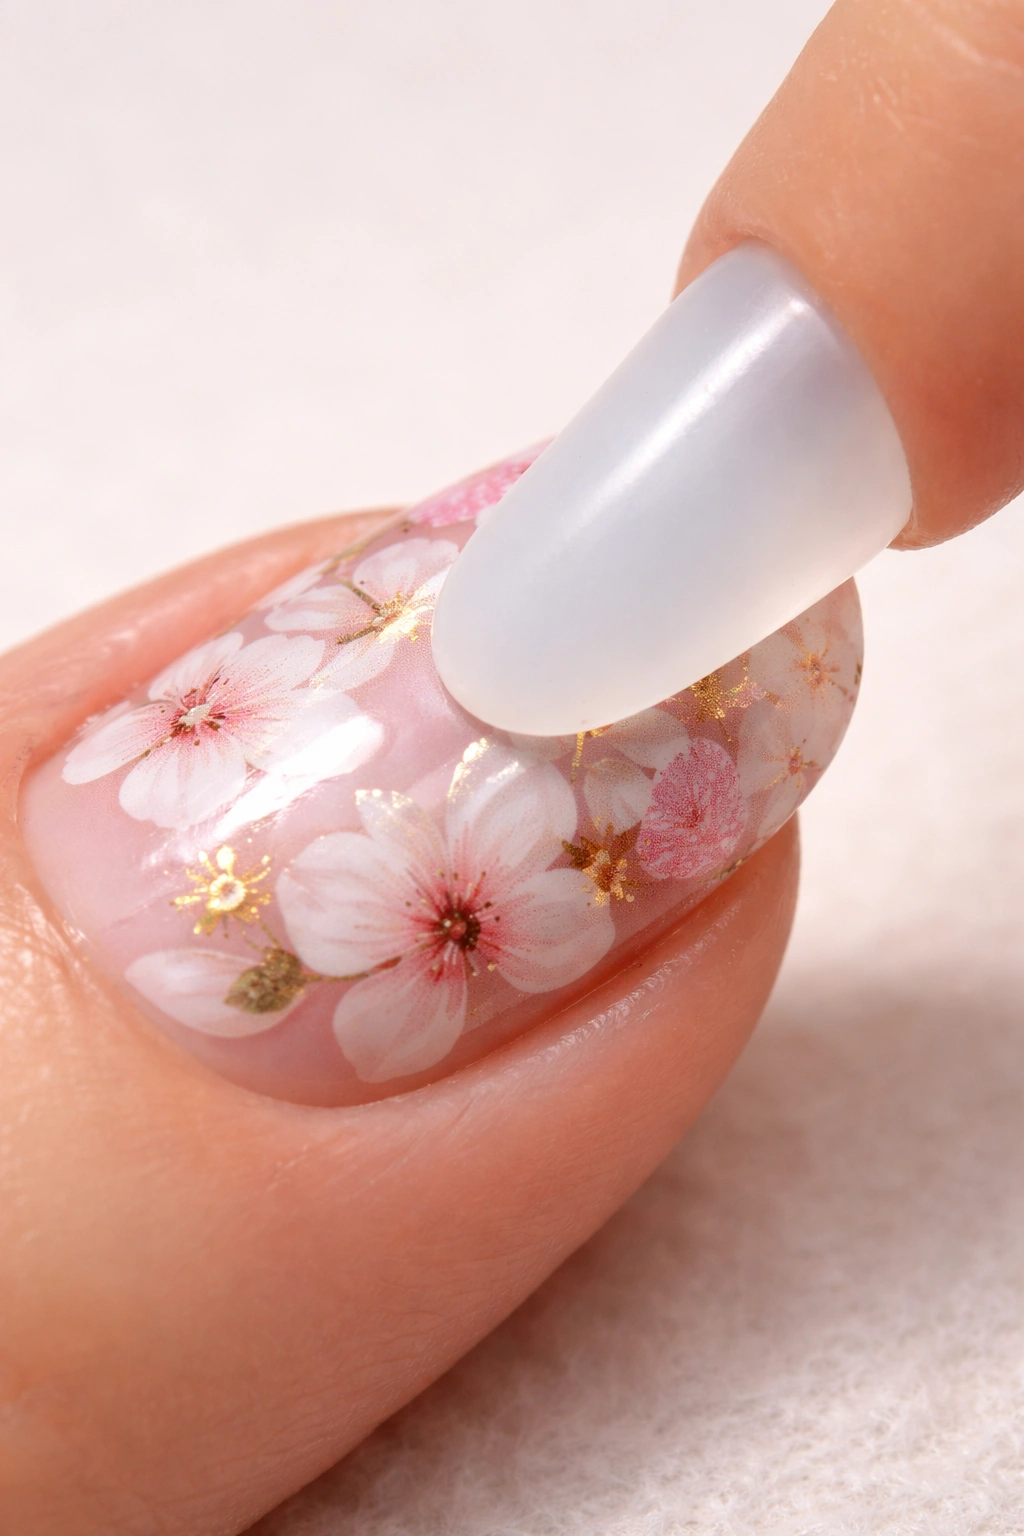
This is where the magic happens. With your silicone tool, press the sticker down starting at the center of the sticker and moving outward toward the edges. The goal is to push out any air trapped under the sticker. Air bubbles create visible pockets under the sticker that catch light, look unprofessional, and provide a spot where the sticker can eventually peel up.
For most stickers, start at the center and use gentle, firm pressure to smooth outward in all directions—toward the tip, toward the cuticle, and toward the sides. Think of it like smoothing a sticker on a laptop—you want all the air out. For longer, thinner stickers (like stripe designs or long geometric patterns), work from bottom to top or left to right depending on the orientation. Use slow, deliberate strokes rather than quick scrubbing motions.
If you notice a bubble that won’t come out, try gently lifting just that section with a tweezers edge and re-smoothing it. Sometimes a persistent bubble just needs a different angle of pressure. Once the sticker is completely smooth with no visible air pockets and no wrinkles, you’re ready for the next step. This smoothing process typically takes 30 seconds to a minute per nail—don’t rush it.
Trimming Excess for a Professional Finish
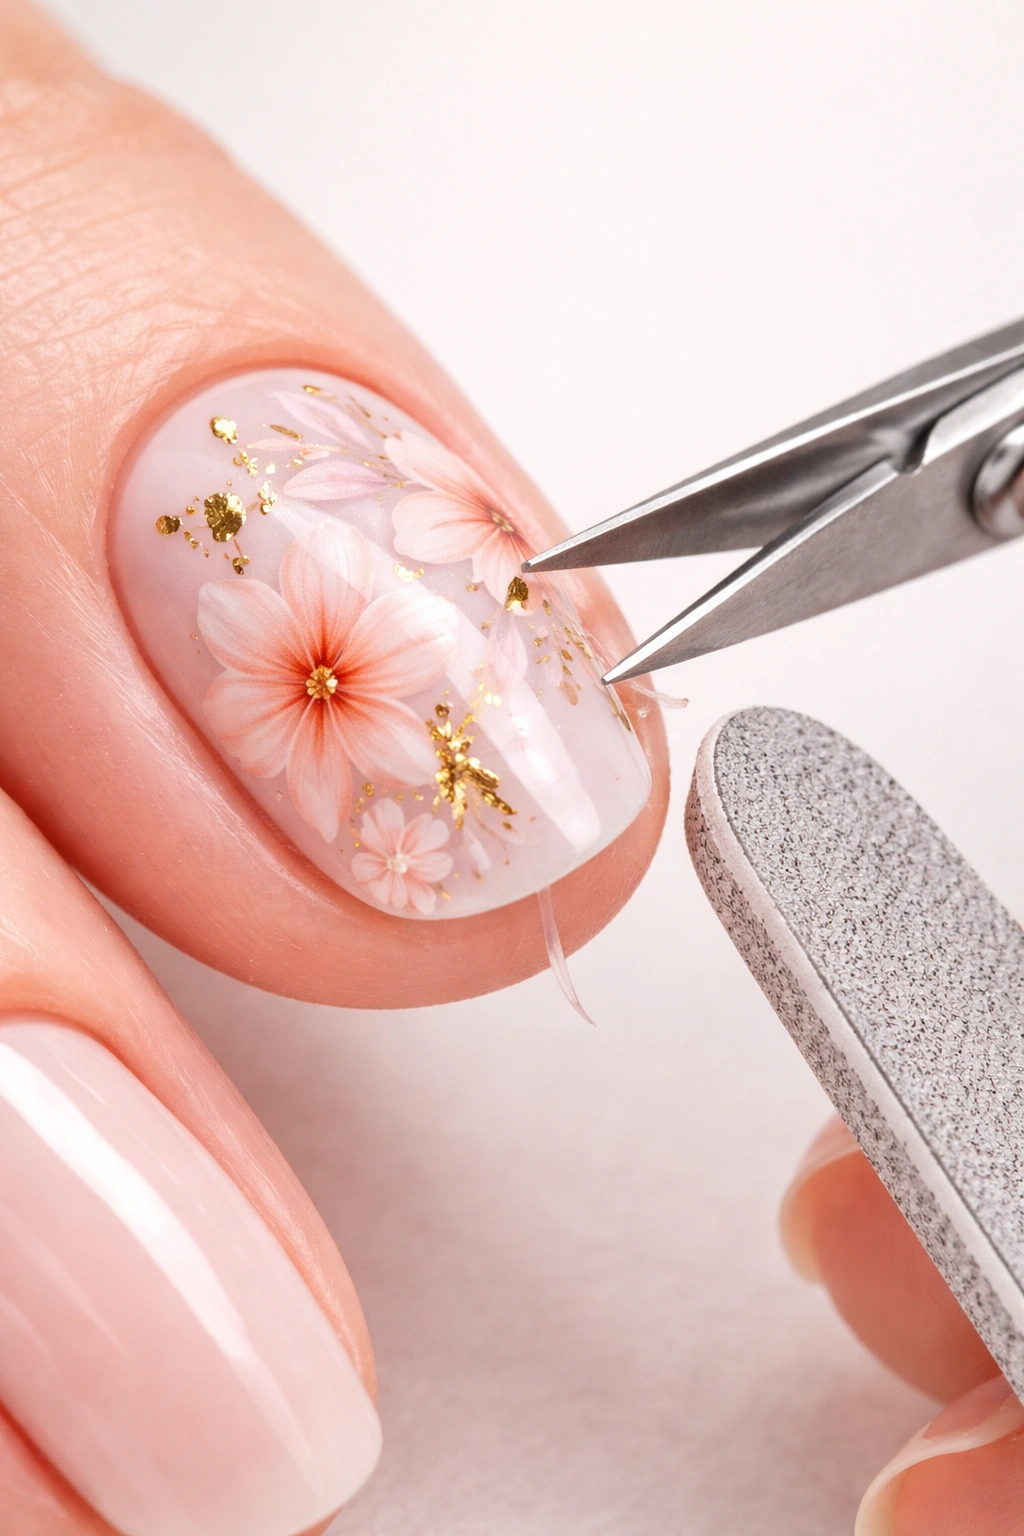
Once the sticker is smoothly applied, look at the edges. If the sticker extends beyond your nail edge or covers any skin at the sides, it needs trimming. Use your nail file to file away excess material, always filing in a downward motion from the nail toward the free edge. File in one direction only—don’t saw back and forth, which can damage the sticker edges and create peeling points.
For larger excess material, you can use small, sharp scissors to trim first, then fine-tune with the file. The goal is a sticker that sits perfectly within your nail boundaries with no overhang onto skin and no gaps at the edges. If the sticker design goes right to your nail tip, file carefully at the very edge so the sticker ends exactly where your nail ends. This precise trimming is what separates DIY-looking manicures from salon-quality results.
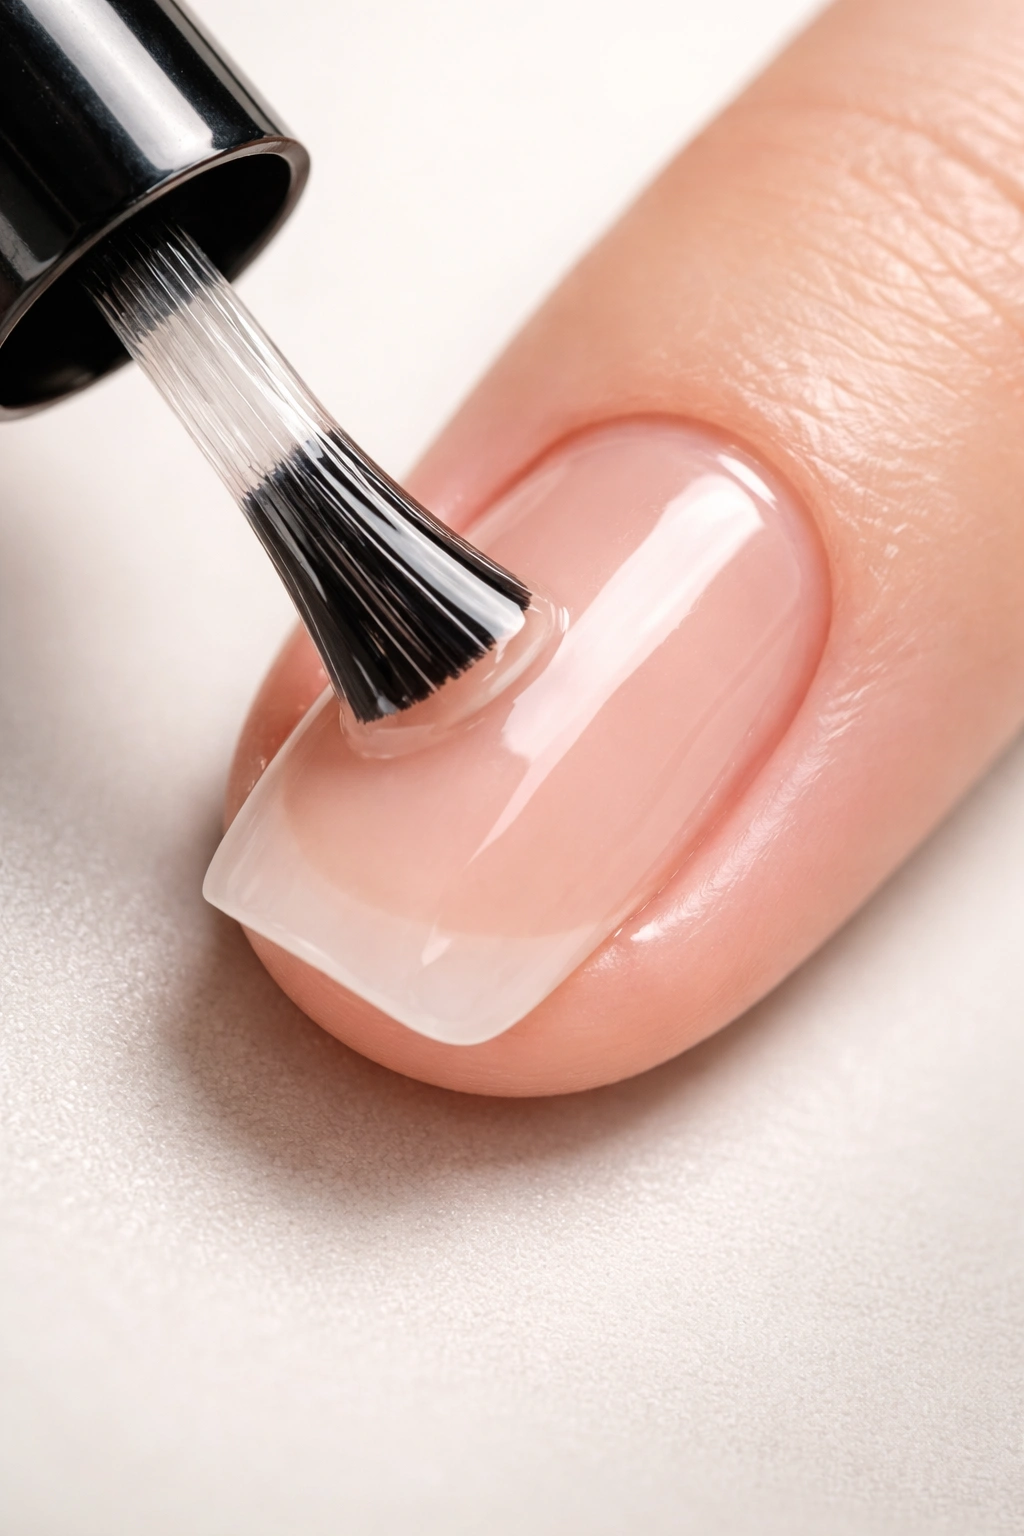
Sealing With Top Coat: The Secret to Longevity
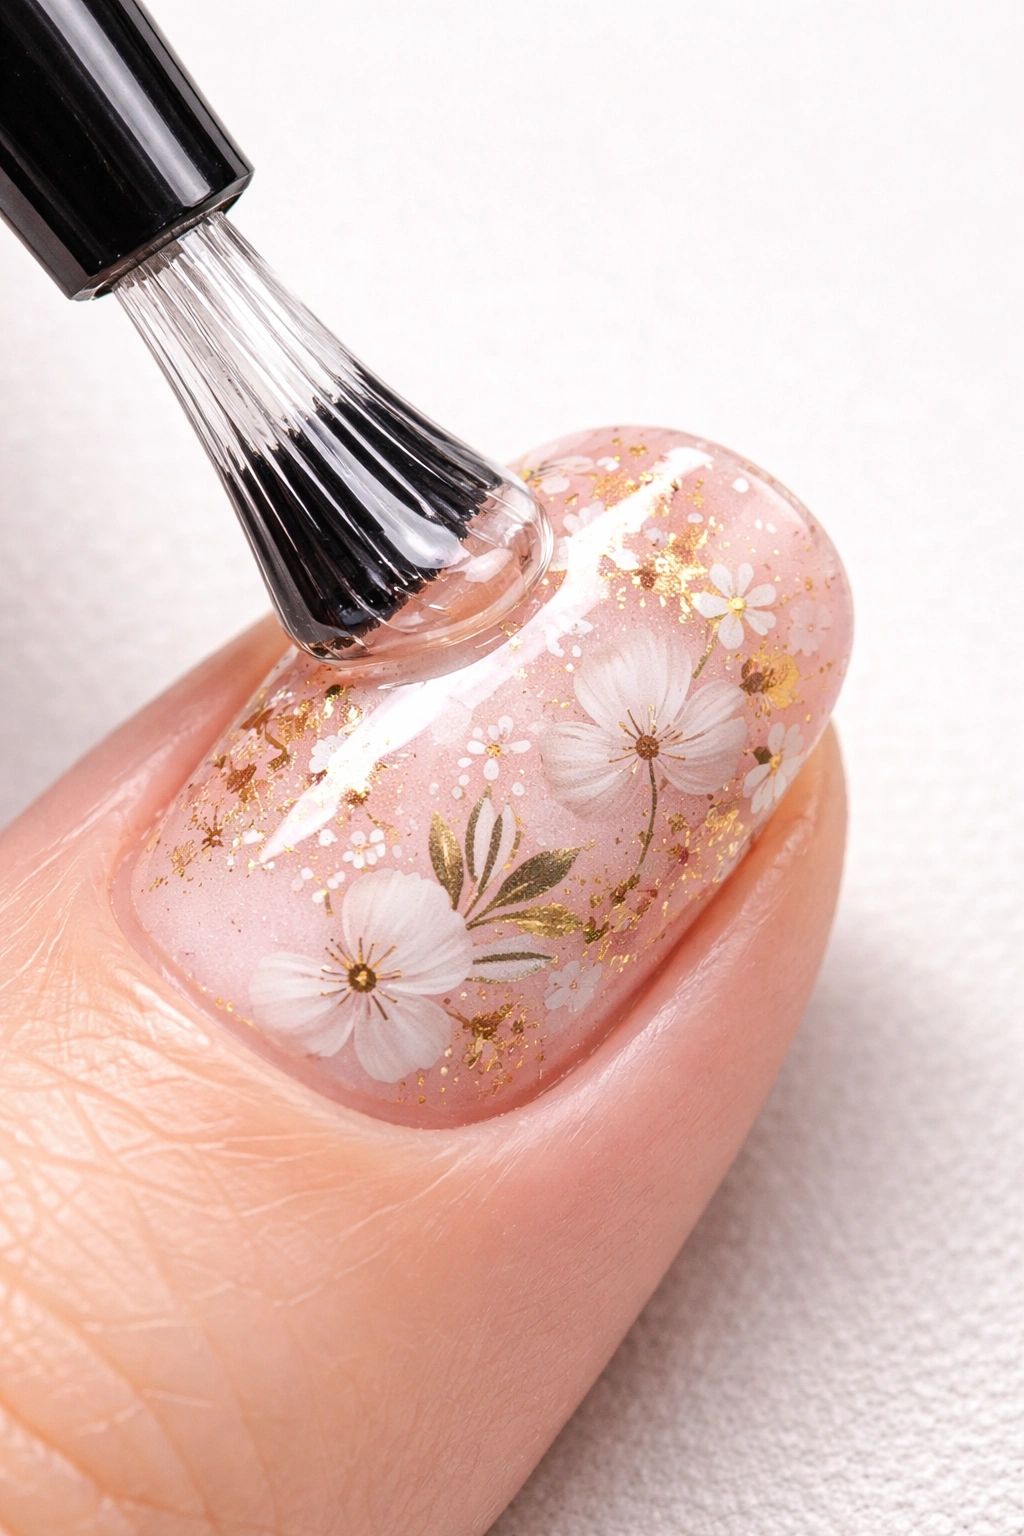
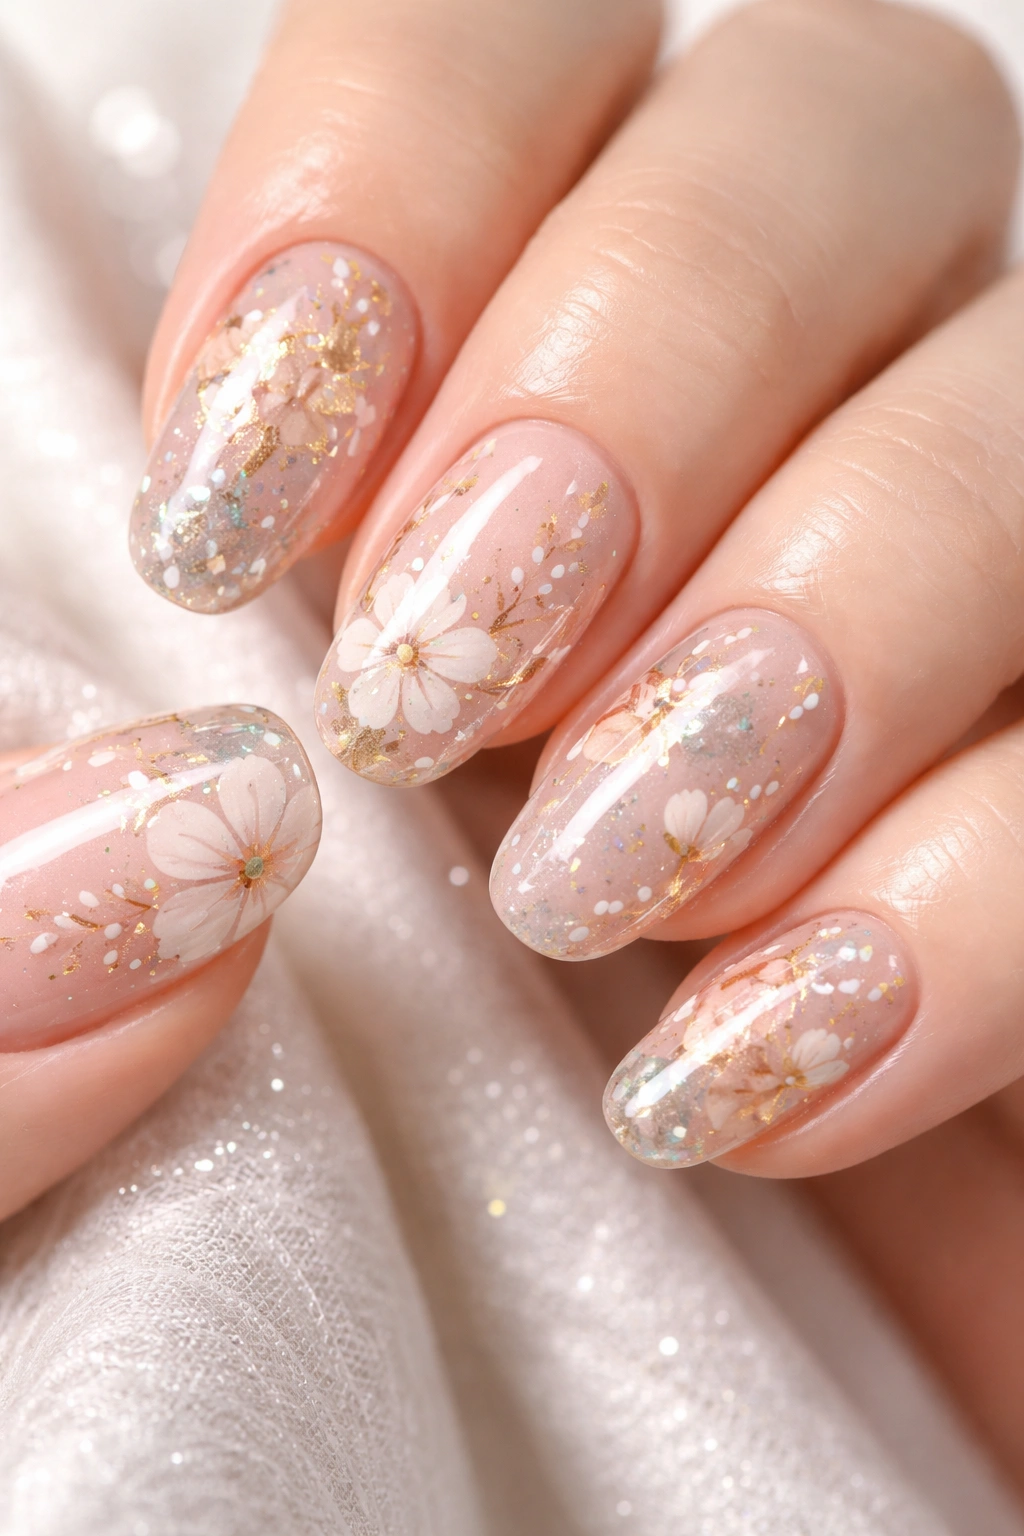
After your sticker is perfectly positioned, smoothed, and trimmed, apply a clear top coat over the entire nail, including the sticker. This step isn’t optional if you want the sticker to last. The top coat seals the sticker edges to your nail, preventing them from catching on fabric or peeling up during daily activities. It also fills in any micro-gaps around the sticker edges and creates a smooth, polished surface.
Apply at least two coats of top coat for maximum protection. The first coat seals the sticker. The second coat creates a super-glossy, durable finish and ensures complete protection. Some professionals recommend three coats for maximum longevity, especially on accent nails where stickers tend to take more contact and wear. Allow each coat to dry completely before applying the next.
If you’re using gel polish or shellac, use a gel-compatible top coat and cure it under your UV or LED lamp according to the product instructions. If you’re using regular nail polish, choose a good quality top coat that dries quickly and hard. The top coat is not an afterthought—it’s the final protective seal that determines how long your sticker lasts.
How Long Stickers Actually Last: Realistic Expectations
With proper application and top coat protection, nail stickers typically last two to three weeks, which is the same duration as a regular manicure. Some high-quality stickers with excellent adhesive can last even longer—up to three or four weeks—if you’re careful with your hands and reapply a fresh top coat layer every few days.
Without a top coat, stickers might last a week to ten days before you notice edge lifting or peeling. The top coat makes an enormous difference. It’s not just about shine—it’s genuinely protecting the sticker from water exposure, chemical exposure, and physical wear.
The longevity also depends on your daily activities. If you’re constantly washing dishes, swimming, or using your nails as tools (which you shouldn’t, but many people do), stickers won’t last as long. If you’re gentler with your hands and avoid excessive water exposure, they’ll last toward the longer end of that range. Some people get three to four weeks out of a single nail sticker application by being very careful and resealing with fresh top coat regularly.
Common Mistakes That Sabotage Your Results
Most people who struggle with nail stickers make one of a few predictable mistakes. The most common is skipping proper nail preparation. You can’t polish your nails, immediately slap on a sticker, and expect it to adhere well. Those natural oils are your enemy. Always clean, file, buff, and cleanse your nails before sticker application.
Another frequent mistake is choosing stickers that are too large for your nails. Oversized stickers overlap onto skin, catch on everything, and peel immediately. Choose slightly smaller and trim if needed. Never choose larger expecting it to work out.
Not smoothing out air bubbles thoroughly is another culprit. Those trapped air pockets eventually become peeling spots. Take your time smoothing from the center outward, and be patient if a bubble requires multiple attempts to eliminate.
Skipping top coat is perhaps the most common mistake that leads to premature peeling. Top coat isn’t optional. It’s the protective seal that makes stickers actually last. If you don’t use it, you’re essentially accepting that your stickers will peel within days.
Finally, many people don’t let their base coat dry completely before applying stickers. A tacky, wet base coat interferes with sticker adhesion, not helps it. Wait ten to fifteen minutes minimum.
Removing Stickers Without Damaging Your Nails
When it’s time for sticker removal, do it carefully. You can use several methods. The gentlest approach is to soak your nails in warm, soapy water for ten to fifteen minutes, which softens the adhesive. Then gently peel the sticker from one corner using a cuticle pusher, moving slowly and carefully. If you feel resistance, soak for another few minutes rather than forcing it.
For stubborn stickers, use acetone. Soak a cotton ball in acetone, place it on the sticker, and wrap your finger with foil. Wait ten to fifteen minutes, then gently lift the sticker with a wooden cuticle tool. Move slowly—you’re not trying to speed the process. The acetone does the work; you just guide it away.
Alternatively, soak in warm water with a few drops of dish soap, which is less harsh than acetone. After soaking for twenty minutes, the sticker should lift away easily. Never use sharp tools to scrape stickers off, and never peel them off dry without softening the adhesive first. Improper removal is the fastest way to damage your nail plate.
After removal, your nails will likely feel dry from acetone exposure. Apply a good cuticle oil or nail moisturizer to replenish lost moisture. Some people use coconut oil or lemon juice in warm water as a gentler removal method that leaves nails less dried out. Whatever method you choose, be patient and gentle during removal—your nails will thank you.
Making Your Stickers Last Even Longer
Beyond applying a solid top coat, several habits extend sticker longevity. Avoid submerging your hands in very hot water for at least six to eight hours after application. Hot water can soften the adhesive before it’s fully set. After that initial period, lukewarm water is fine, but try to minimize extended soaking in hot water.
Wear gloves when doing dishes or cleaning to protect your stickers from prolonged water exposure and harsh chemicals. Chlorinated water (from swimming pools) is particularly hard on stickers and can degrade the adhesive quickly. If you know you’ll be swimming, plan to apply stickers after you’re done with water-heavy activities.
Reapply a fresh top coat layer every few days. This reinforces the seal, fills in any micro-chips or cracks in the existing top coat, and dramatically extends sticker life. Many people who get four weeks out of stickers are resealing every three to four days. It’s a small effort that pays off enormously.
Handle your nails gently. Don’t use them as tools for opening packages, scratching off labels, or any of those things we all do sometimes. File rather than tear sticker edges if they catch. Think of your sticker manicure as something that deserves a bit of care, not something to be rough with.
Moisturize your hands and cuticles regularly. Dry nails and cuticles are more prone to peeling and cracking, which can take your stickers with them. A good hand cream or cuticle oil applied daily keeps the area around your nails healthy and resilient.
The Bottom Line: Master These Steps and You’ll Never Have Sticker Problems Again
Flawless nail sticker application really comes down to one simple principle: preparation, precision, and sealing. Spend the time to prepare your nails properly—clean them, file them, buff them, and cleanse them one final time with alcohol. Choose stickers sized appropriately for your nails. Position them carefully, smooth out every air bubble, trim any excess, and seal with multiple coats of top coat.
It sounds like a multi-step process, and it is, but once you’ve done it a few times it becomes automatic. You’re looking at maybe five to ten minutes of actual work per hand, and the result is a professional-quality manicure that lasts two to three weeks. That’s genuinely impressive for a DIY project, and it’s absolutely achievable once you understand the technique.
The difference between a nail sticker application that looks cheap and peels within days versus one that looks salon-perfect and lasts weeks isn’t the stickers themselves—it’s the method. Nail stickers from reputable brands are all genuinely good products. The quality difference comes entirely from how they’re applied. Now that you know exactly what to do, you’ve got this. Your next manicure is going to look amazing and actually last.
