

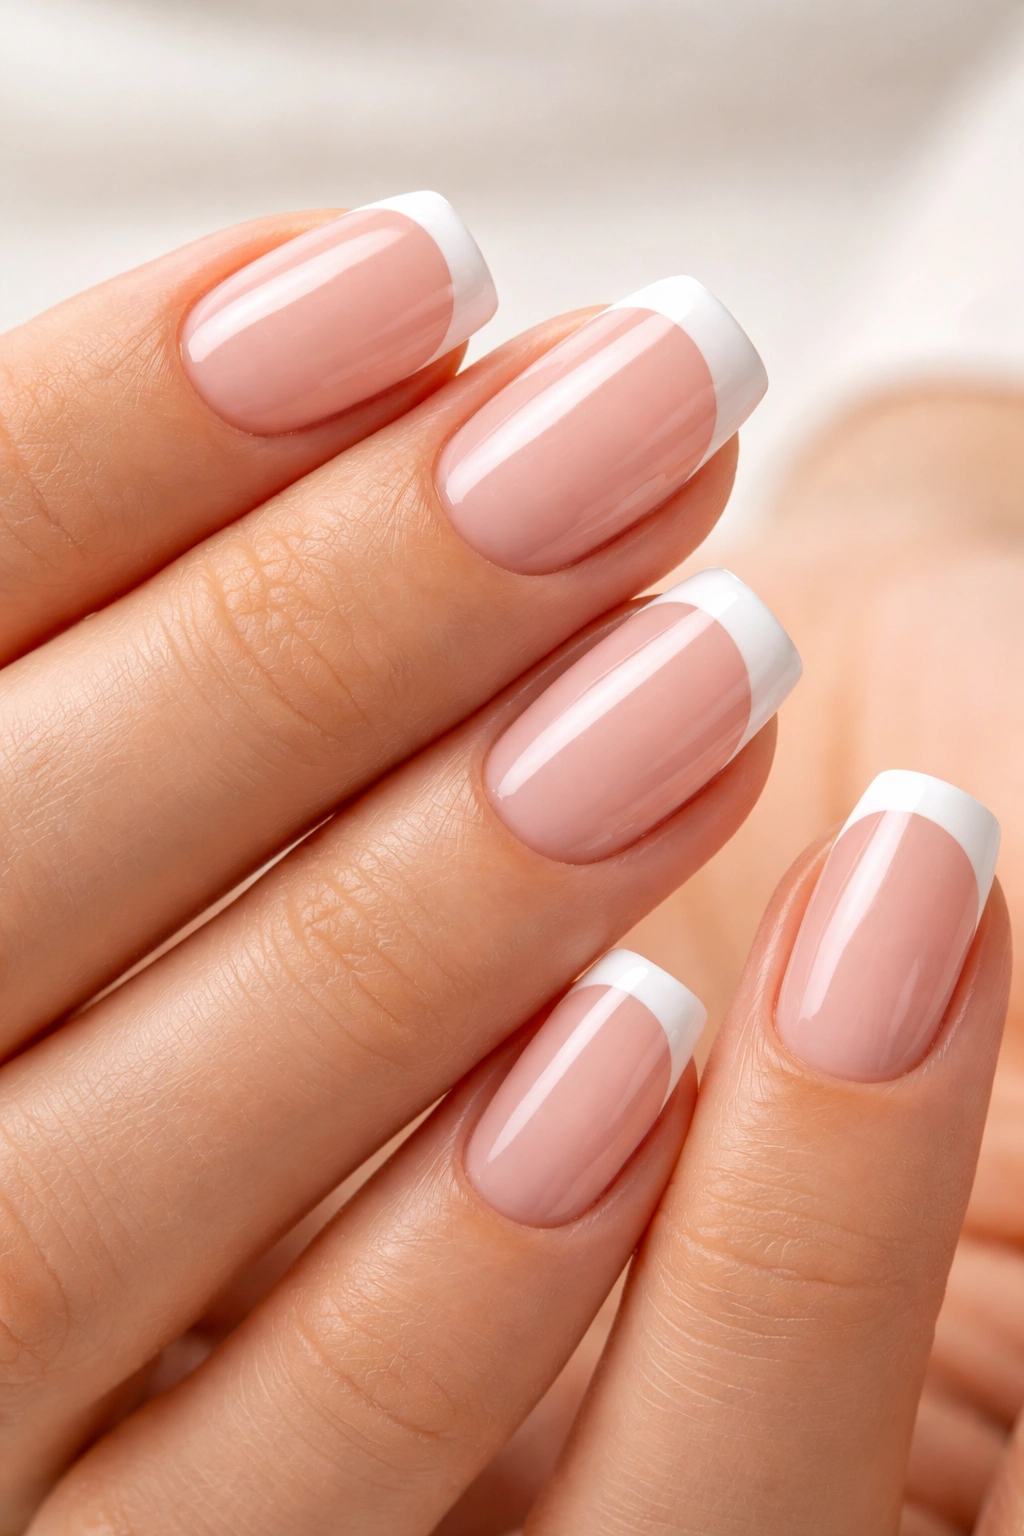
You’ve seen them everywhere—those crisp, elegant white tips paired with a soft pink base that somehow make any outfit look more put-together. French tip nails have been around since the 1930s, and they’re not going anywhere. Why? They’re timeless, versatile, and surprisingly easy to recreate at home once you know the tricks.
Forget what you’ve heard about needing a steady hand or years of practice. With the right approach and a few smart shortcuts, you can nail this look (pun intended) without spending a fortune at the salon. Whether you’re prepping for a wedding, a job interview, or just want your hands to look polished for everyday life, mastering French tips at home puts you in control.
Here’s the thing—most tutorials skip over the little details that actually make the difference between a so-so manicure and one that looks professionally done. We’re going to change that.
Why French Tips Work for Everyone

French manicures have staying power for a reason. They elongate your fingers, complement every skin tone, and pair with literally anything in your closet. Max Factor originally created this look in Hollywood so actresses could wear one nail style that matched multiple costume changes. Pretty clever, right?
The beauty of French tips lies in their simplicity. You’re not committing to a bold color that might clash with tomorrow’s outfit. Instead, you’re enhancing what’s already there—your natural nail—with just enough polish to look intentional and refined.
Short nails? No problem. The French manicure actually works better on shorter lengths because you’re not trying to paint a thick white stripe. A thin white line along your free edge creates the illusion of length without any awkward proportions.
What You’ll Actually Need (and What You Can Skip)
Let’s talk supplies. You don’t need to buy out the beauty store, but having the right tools makes this whole process smoother.
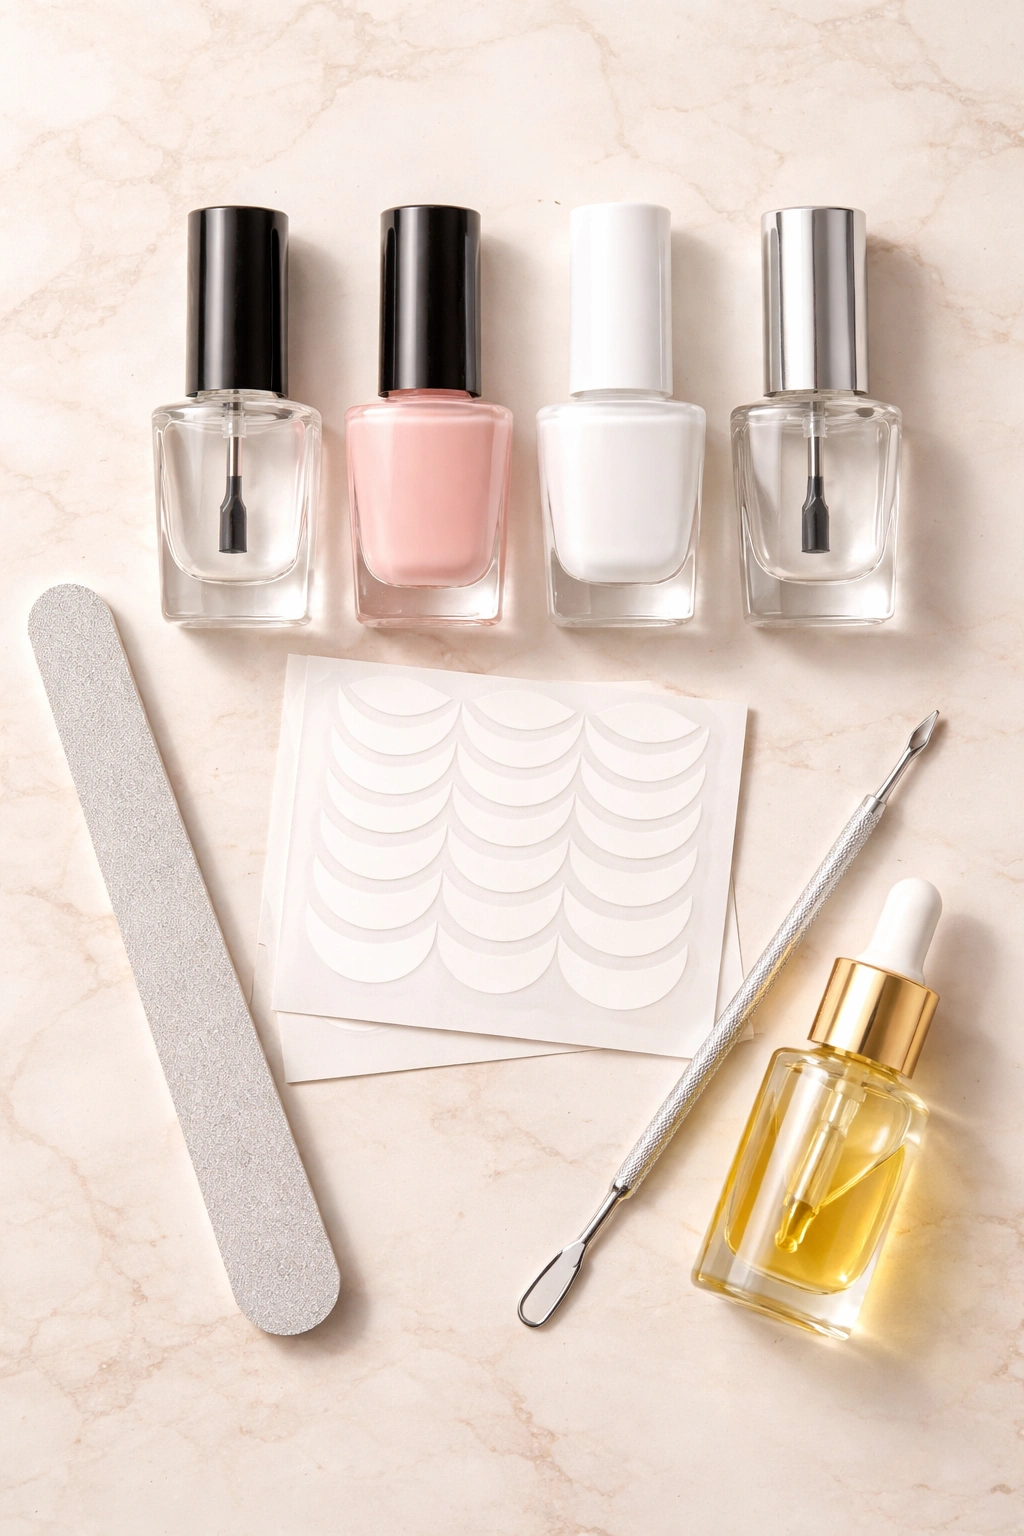
Essential items include a base coat, a sheer pink or nude polish, white polish, and a good top coat. The base coat protects your nails from staining and helps everything else stick better. Your top coat seals the deal and adds that glossy, just-left-the-salon shine.
For creating those crisp lines, you’ve got options. French tip guides are inexpensive stick-on stencils that curve perfectly along your nail. Alternatively, regular scotch tape works in a pinch, though painter’s tape is gentler on your base coat. Some people swear by rubber bands twisted around their fingertips.
You’ll also want a nail file, buffer, cuticle pusher, and cuticle oil. Don’t skip the oil—hydrated cuticles make your whole manicure look more professional. Keep cotton swabs and nail polish remover handy for cleanup. Trust me, you’ll use them.
One tool that’s optional but genuinely helpful? A fine detail brush or nail art striper. These thin brushes give you control that a standard polish brush can’t match. You can pick one up for a few dollars, and it’ll last forever.
Prepping Your Nails Makes or Breaks the Look
This step feels tedious, but it’s where salon manicures differ from home jobs. Professionals never skip prep, and neither should you.
Start by removing any old polish completely. Use an acetone-free remover if possible—acetone dries out your nails and makes them brittle over time. Get into the edges and around your cuticles where color likes to hide. Even clear polish can affect how your new manicure adheres.
Next, trim your nails to an even length. You don’t need a ton of length for French tips to look good. In fact, mid-length almond or short square shapes are easiest to work with because the smile line (that curved white tip) follows your natural nail shape.
File your nails in one direction rather than sawing back and forth. This prevents splitting and gives you smoother edges. Round or square is totally up to you—both work beautifully with French tips.
The Cuticle Step You Can’t Skip
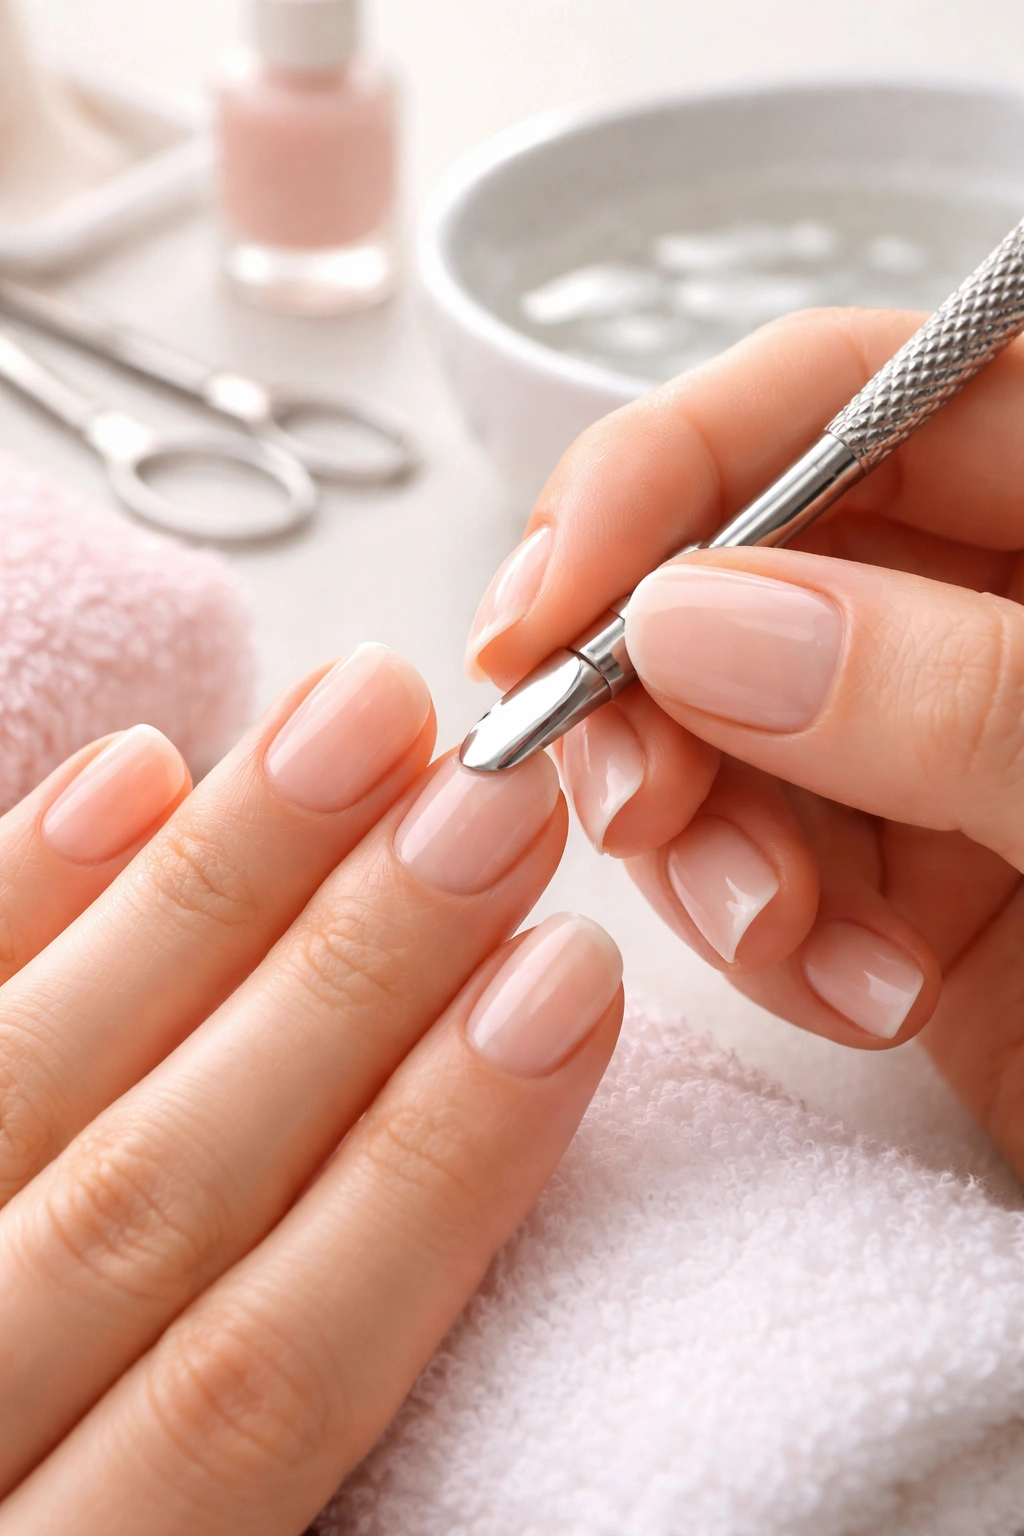
Soak your fingertips in warm water for about five minutes. This softens your cuticles so they’re easier to push back. Add a drop of cuticle oil or regular olive oil to the water if you want to get fancy.
Use a cuticle pusher to gently push back the cuticle line. This isn’t about cutting anything—just gently coaxing the cuticle back to expose more of your nail plate. This makes your nails look longer and gives you a cleaner canvas.
Never cut or trim your cuticles at home. Seriously. Cuticles protect your nail matrix (where new nail grows from) from bacteria and infection. Cutting them can lead to ridges, discoloration, or worse. Just push them back and call it good.
Massage a bit of cuticle oil around each nail. Then—and this is crucial—wipe your nails down with rubbing alcohol or nail polish remover on a cotton pad. This removes any oils or residue that could prevent your polish from sticking.
Buffing: The Secret to Longevity
Grab a high-grit buffer and lightly buff the surface of your nails, focusing on the area near your cuticles. This removes any shine and creates a slightly rough texture for polish to grip.
The keyword here is lightly. You’re not trying to file down layers of your nail. Think of it as giving the surface a gentle scuff, nothing more. If you use too much pressure or a low-grit buffer, you’ll damage your nails and make them thinner.
Buffed nails help your manicure last up to a week longer. Skipping this step is like painting a wall without primer—technically possible, but the results won’t hold up.
The Classic Method: How to Paint French Tips
Time for the main event. You’ve prepped your nails, so now they’re ready for color.
Start with your base coat. Apply a thin, even layer from cuticle to tip, making sure to cap the free edge (run the brush along the tip of your nail). This step matters more than you think—it prevents yellowing, strengthens your nails, and gives your polish something to grab onto.
Wait two full minutes for it to dry. Patience pays off here. Rushing leads to smudges, dents, and general frustration.
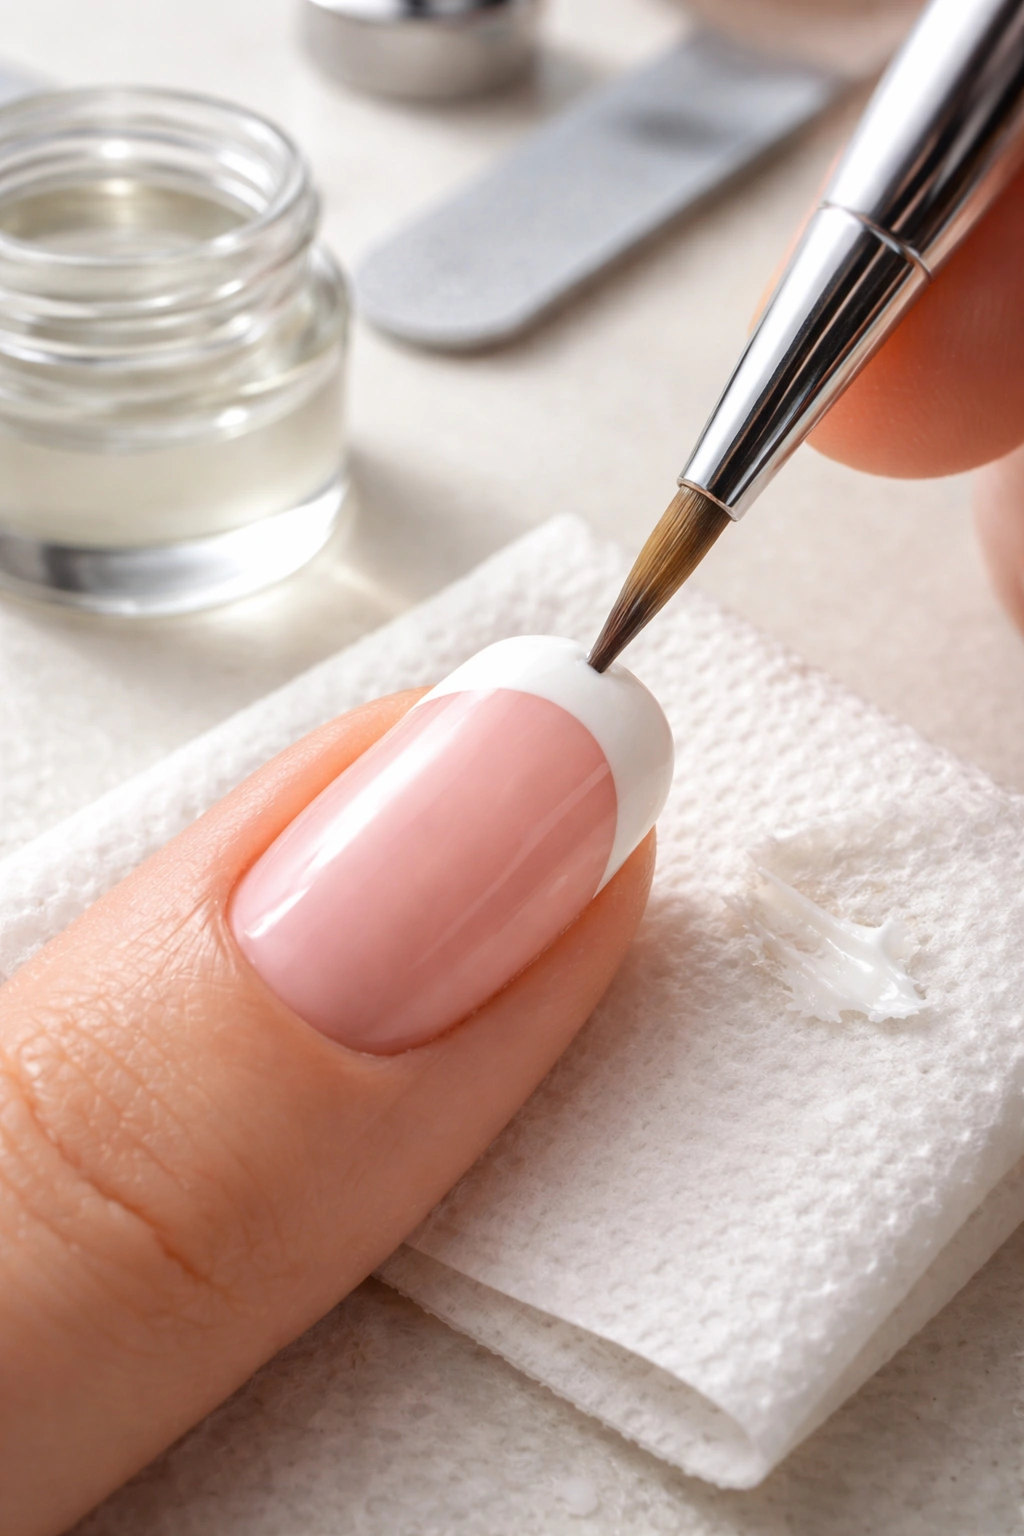
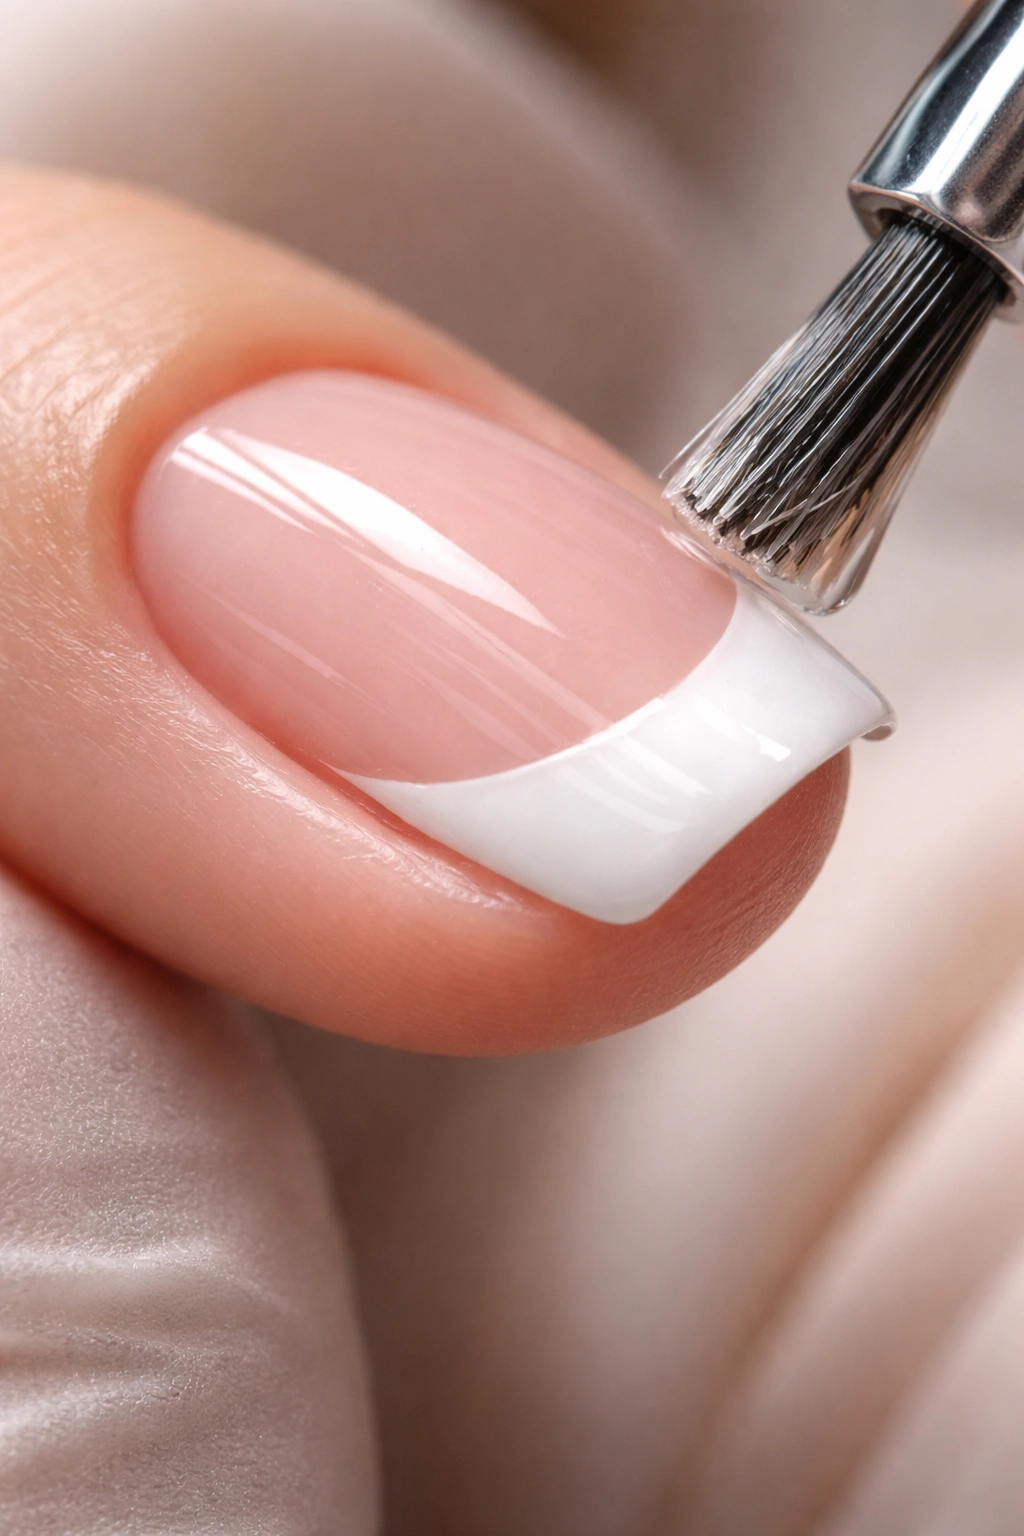
Painting the Tips
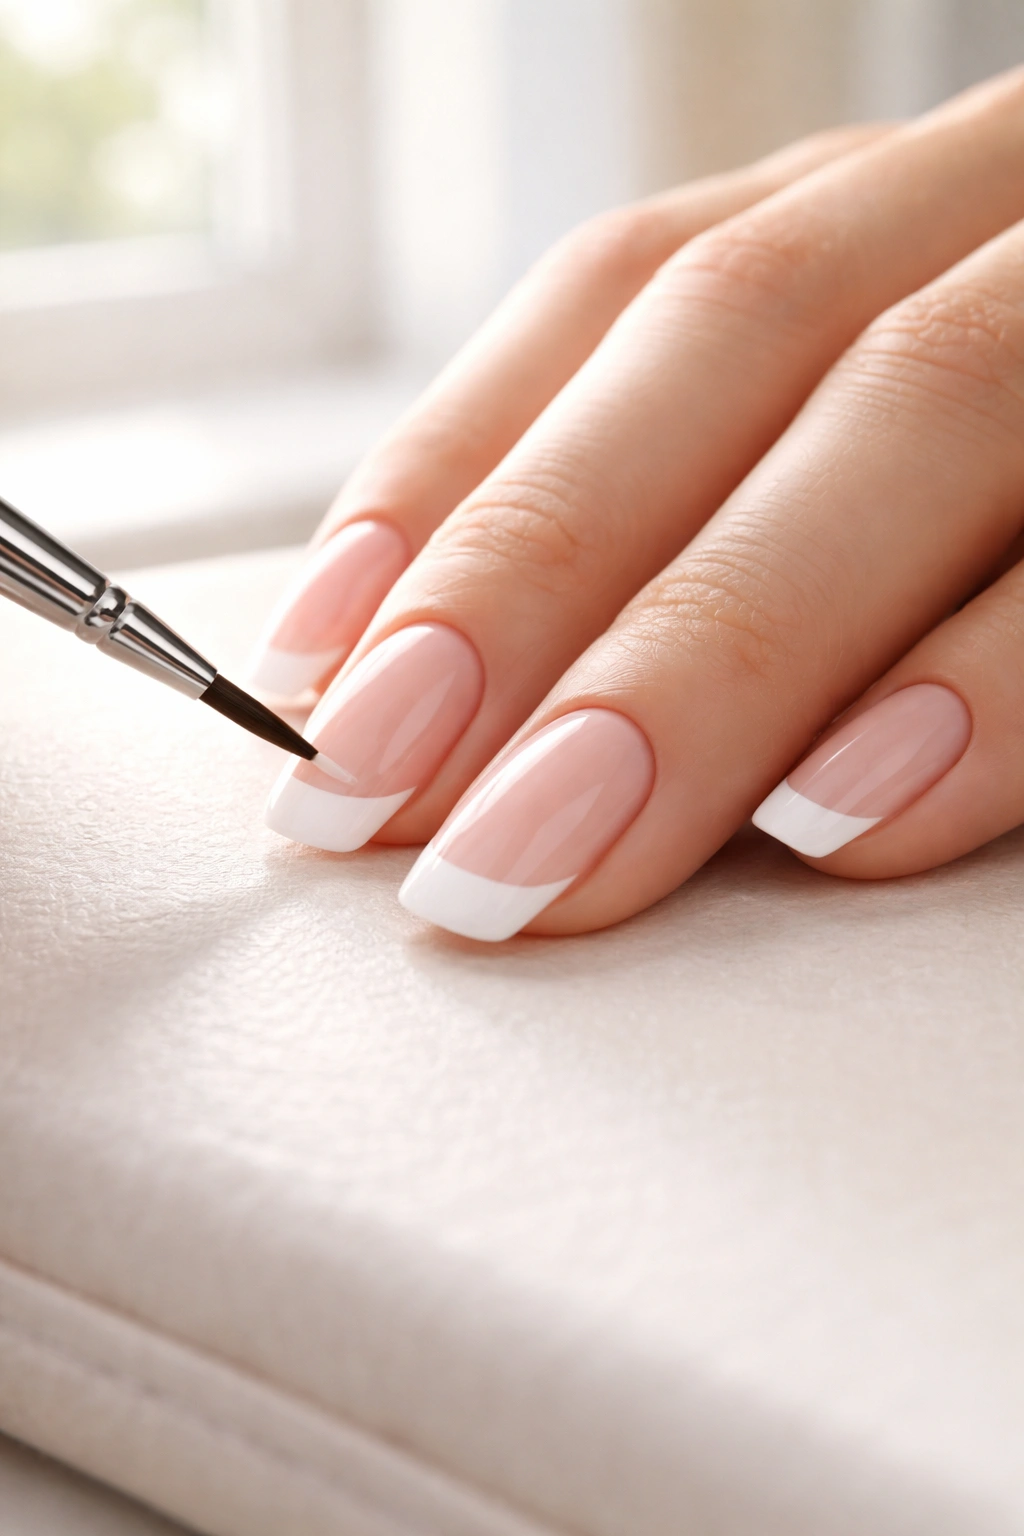
Here’s where it gets fun. Rest your hand on a flat surface to keep it steady. Dip your brush into white polish, wipe off excess on the bottle’s rim, and get ready to paint your first tip.
Start at one side of your nail and paint across to the other side in a smooth, curved motion. Here’s the trick that makes this easier: instead of moving the brush, keep it relatively still and rotate your finger under it. This lets the curve of the tip match your natural nail shape.
The white tip should start where your natural nail white begins—roughly where your nail separates from your finger. Some people like thicker tips, others prefer barely-there slivers. There’s no wrong answer here.
If your first coat looks streaky or uneven, don’t panic. Let it dry completely, then add a second thin coat. Two thin coats always look better than one thick, goopy layer.
Adding the Nude or Pink Base
Once your white tips are completely dry (give them at least three minutes), it’s time for the sheer coat. Pick a soft pink, peachy nude, or even a sheer beige polish. The classic choice is a barely-there pink that enhances your natural nail color.
Apply one or two coats over your entire nail, including the white tips. This might seem counterintuitive—won’t it mess up your white?—but it actually softens the stark white line and makes everything look more natural and blended.
The sheer color also hides any imperfections in your nail bed. Got a yellowish tint or ridges? The pink coat camouflages all of it. This is how salon manicures always look so polished.
Sealing Everything In
Your top coat is your best friend. Apply a thin layer over each nail, making sure to cap the free edge again. This seals your design, adds incredible shine, and protects your manicure from chips.
Some people like to apply top coat every other day to extend their manicure’s life. If you’re someone whose tips chip easily, this habit is worth adopting.
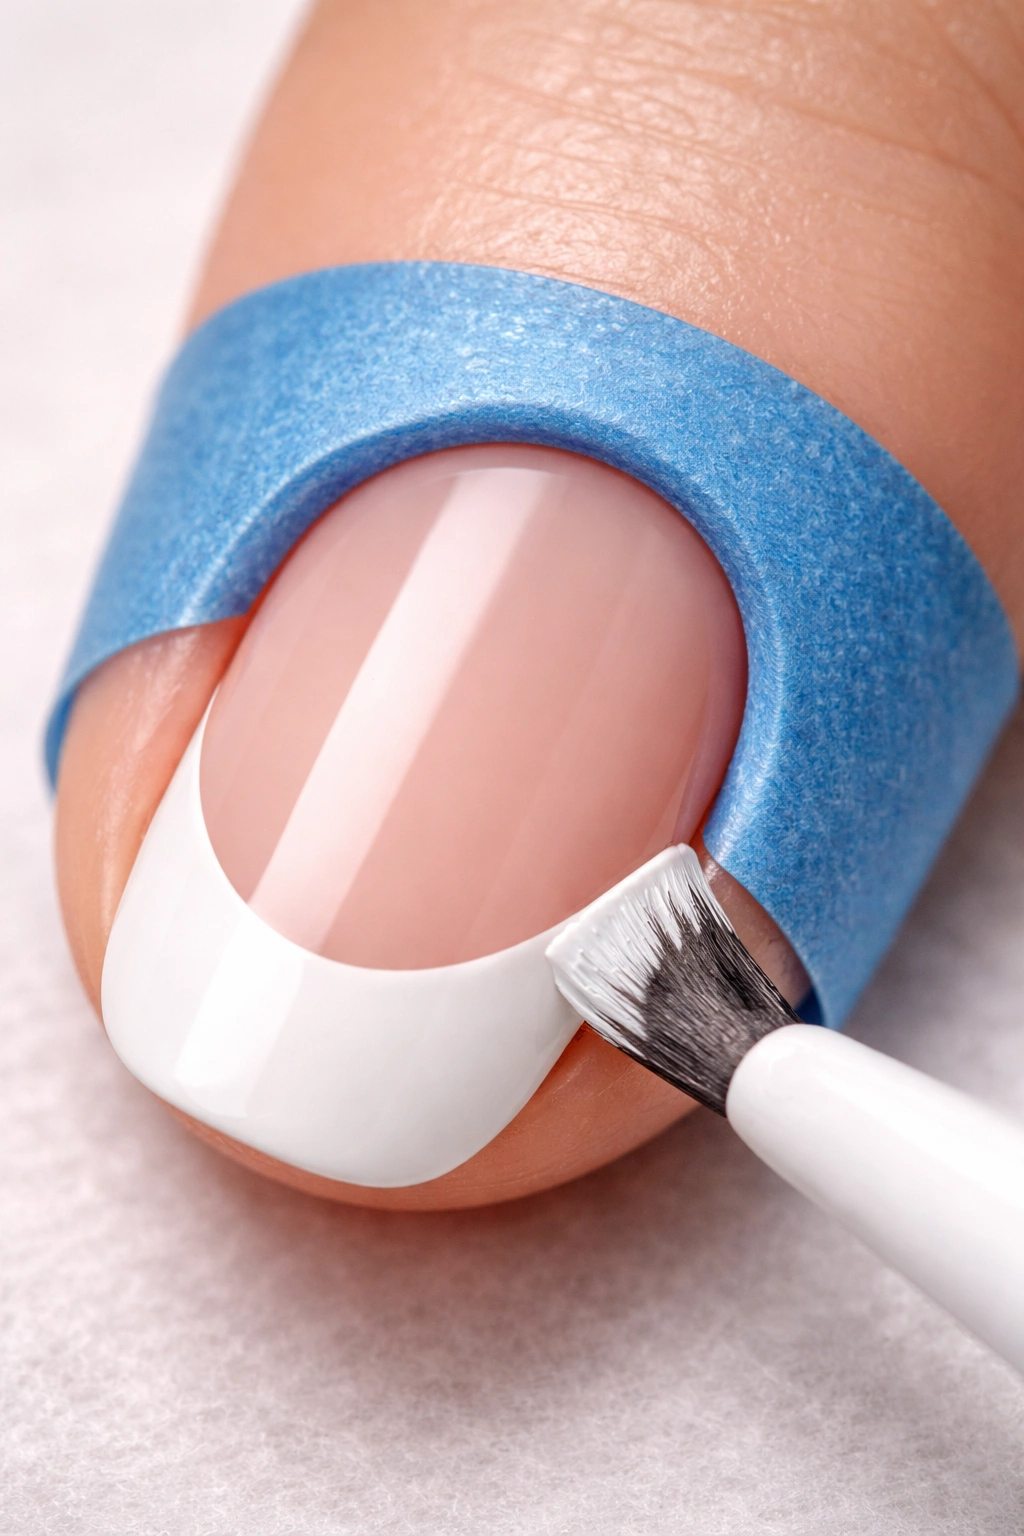
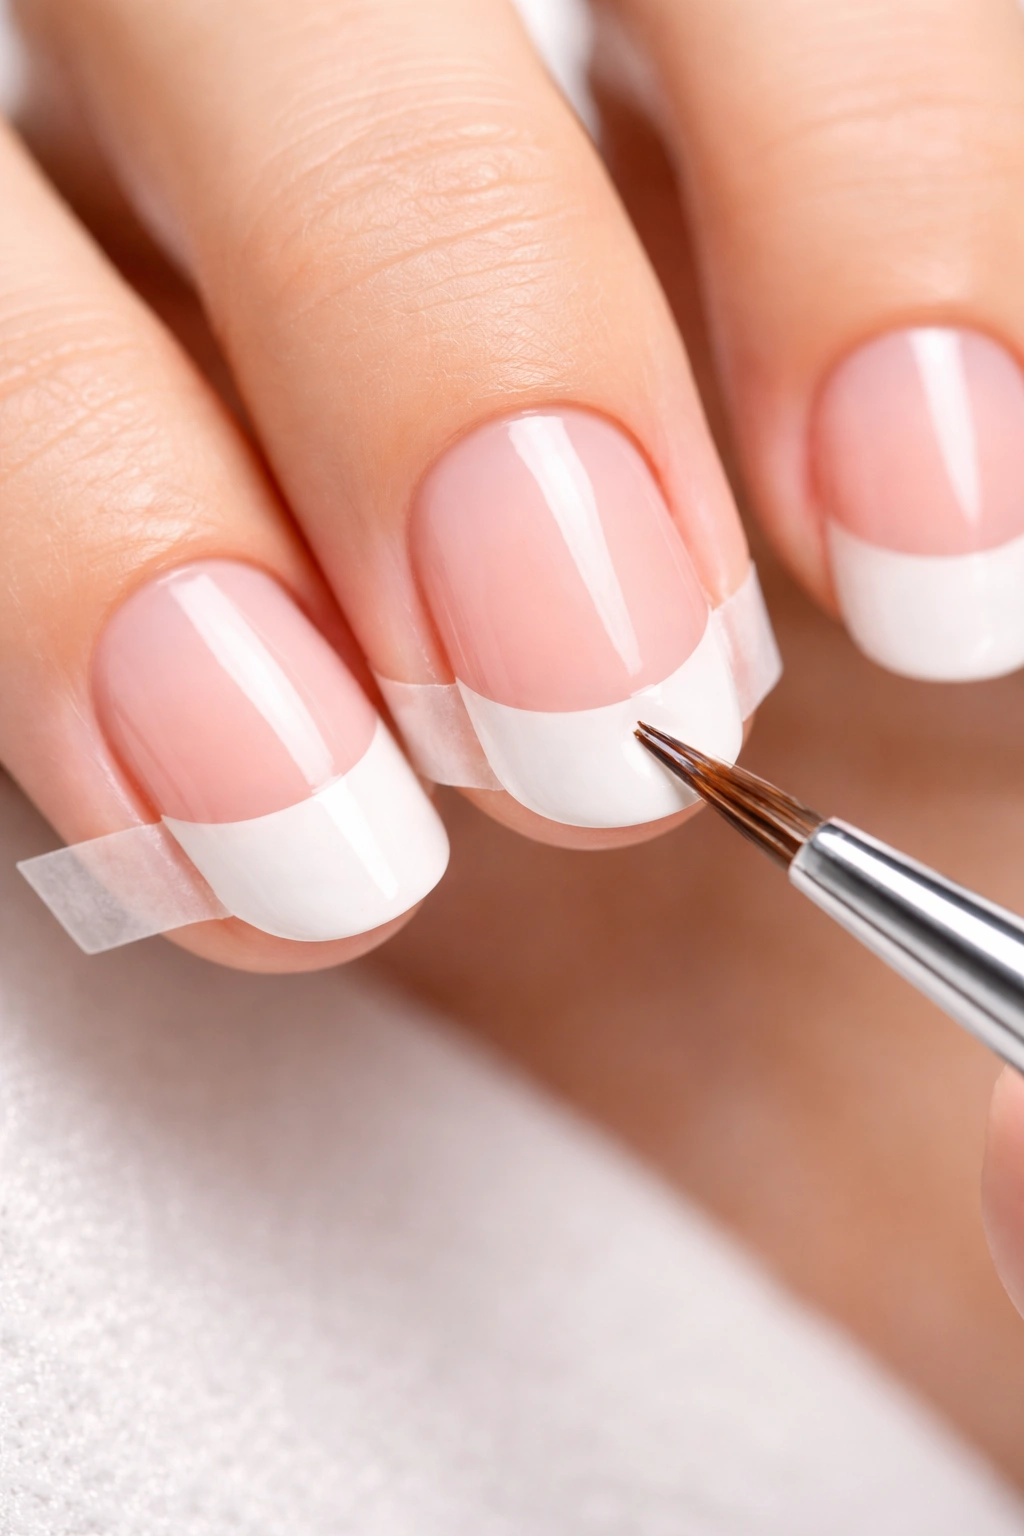
Using Guides and Stencils for Perfect Lines
Let’s be real—not everyone has a steady hand. That’s where French tip guides come in clutch.
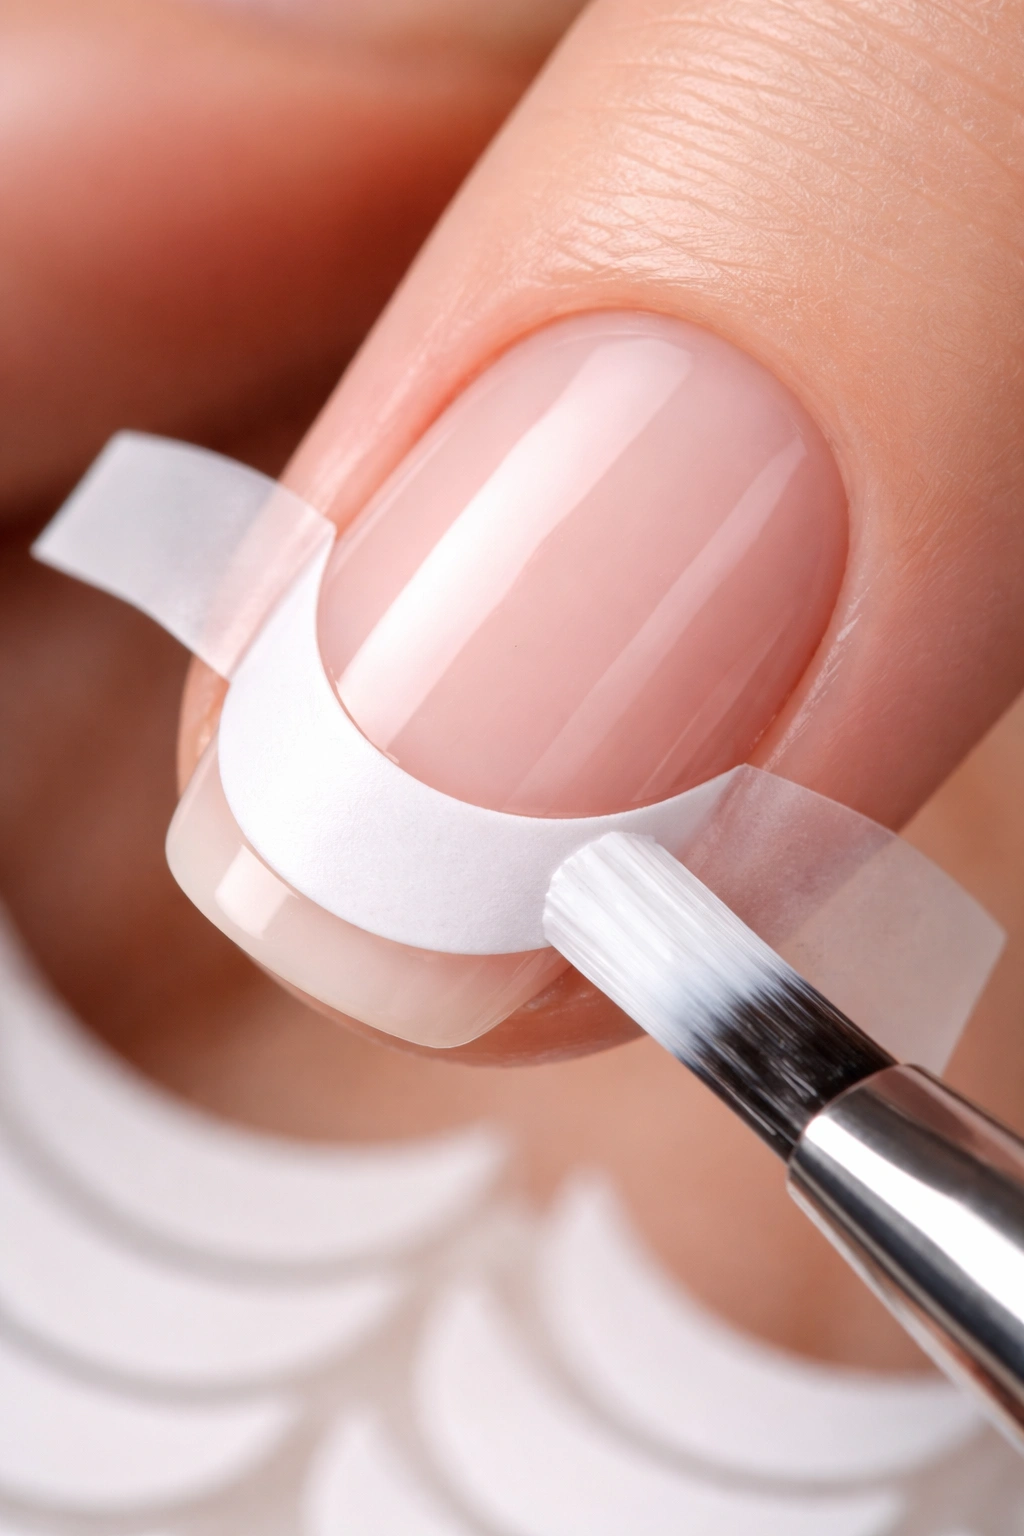
These are small, curved sticker strips designed specifically for French manicures. They stick to your nail just below where you want your white tip to start, creating a perfect stencil.
Here’s how to use them: apply your base coat and let it dry. Then apply your sheer nude or pink color over your whole nail and let that dry completely. Now press the guide sticker onto your nail, making sure the edges are sealed down. Paint your white polish over the exposed tip and onto the sticker.
The magic happens when you peel off the sticker before the white polish dries completely. Pull it away gently at an angle, and you’re left with a crisp, clean line that looks professionally painted.
You can buy French tip guides at any drugstore or beauty supply shop. They’re reusable for multiple nails, though they lose stickiness eventually. A pack usually runs under ten dollars and lasts for several manicures.
Smart Shortcuts That Actually Work
French tip nails don’t have to be complicated. A few clever hacks can save you time and deliver better results.
The Tape Method
Regular scotch tape or painter’s tape works surprisingly well as a DIY guide. Cut a piece large enough to cover most of your nail, leaving just the tip exposed. Press it down firmly—air bubbles will cause the polish to seep under and ruin your line.
Paint your white tip, wait about 30 seconds for it to set, then carefully peel away the tape. The timing matters here. Too wet and the polish will smudge when you remove the tape. Too dry and the tape might lift some polish with it.
Painter’s tape is gentler than regular tape and less likely to pull up your base color. If you do a lot of nail art at home, keep a roll on hand.
The Stamper Shortcut
Nail stamping kits have changed the home manicure game. These tools let you transfer designs—including perfect French tips—onto your nails without freehand painting.
You apply white polish to a stamping plate that has French tip designs etched into it. A squishy silicone stamper picks up the design, and you press it onto your nail. The whole process takes seconds per nail.
Stamping gives you flawless, symmetrical French tips every single time. The initial investment is higher than buying guides or tape, but if you love doing your nails at home, it’s worth considering.
The French Manicure Pen
These pens look like markers and work exactly how you’d expect. After applying your sheer base color, you use the French manicure pen to draw the white tip directly onto your nail.
The pen gives you more control than a polish brush, and the color is slightly softer and more natural-looking than stark white polish. Draw your curved line first, then color in the tip. Simple.
The downside? The white isn’t quite as opaque as regular polish. If you love a bright, crisp white tip, stick with traditional polish. But for a softer, more understated look, these pens are handy.
Fixing Mistakes Without Starting Over
Even with guides and tricks, things can go sideways. Your hand bumps the table, the line turns out wobbly, or you get polish on your skin. Happens to everyone.
Keep a detail brush and some nail polish remover within reach. When you spot a mistake, dip the brush in remover, wipe off the excess on a paper towel, and use it like an eraser to clean up wonky lines or polish that strayed onto your skin.
This works best before you apply your top coat. Once everything’s sealed, cleanup becomes trickier. Do your quality control check before the final step.
If your white tip looks too thick or extends too far down your nail, you can actually shrink it with this method. Carefully remove some of the white polish using your cleanup brush until you’re happy with the shape.
Another trick? Let your mistakes dry completely, then paint over them. Cover the whole nail with your nude or pink shade again to hide the error, then redo the white tip. It’s not starting from scratch, and the extra layers won’t show once you add top coat.
Making Your French Manicure Last Two Weeks (or More)
You’ve spent time creating a beautiful manicure. Now let’s make it last.
The number one reason French tips chip quickly? Skipping the base coat or top coat. Both are non-negotiable if you want longevity. They’re not optional extras—they’re essential layers that protect your design.
Capping the free edge matters more than most people realize. Every time you apply base coat, color, or top coat, run the brush along the very tip of your nail. This seals the edge where chips most commonly start.
Wear gloves when you’re doing dishes, cleaning, or gardening. Water and harsh chemicals break down nail polish faster than anything else. Even just a few minutes of dish duty without gloves can cause lifting and peeling.
Daily Maintenance That Takes Seconds
Apply a thin layer of top coat every two to three days. This refreshes the shine and adds another protective barrier. Your manicure will look freshly done for days longer.
Keep your hands and cuticles moisturized. Dry skin pulls at your polish and makes it more likely to chip. A good hand cream and cuticle oil should be part of your daily routine, not just manicure day.
Avoid using your nails as tools. Don’t pick at stickers, pry open cans, or scratch off labels. Every time you use your nails for something they’re not meant to do, you risk chipping your polish—or worse, damaging the nail itself.
Creative Twists on the Classic French
Once you’ve mastered the basic French manicure, it’s fun to play with variations. The technique stays the same, but swapping colors or textures creates completely different looks.
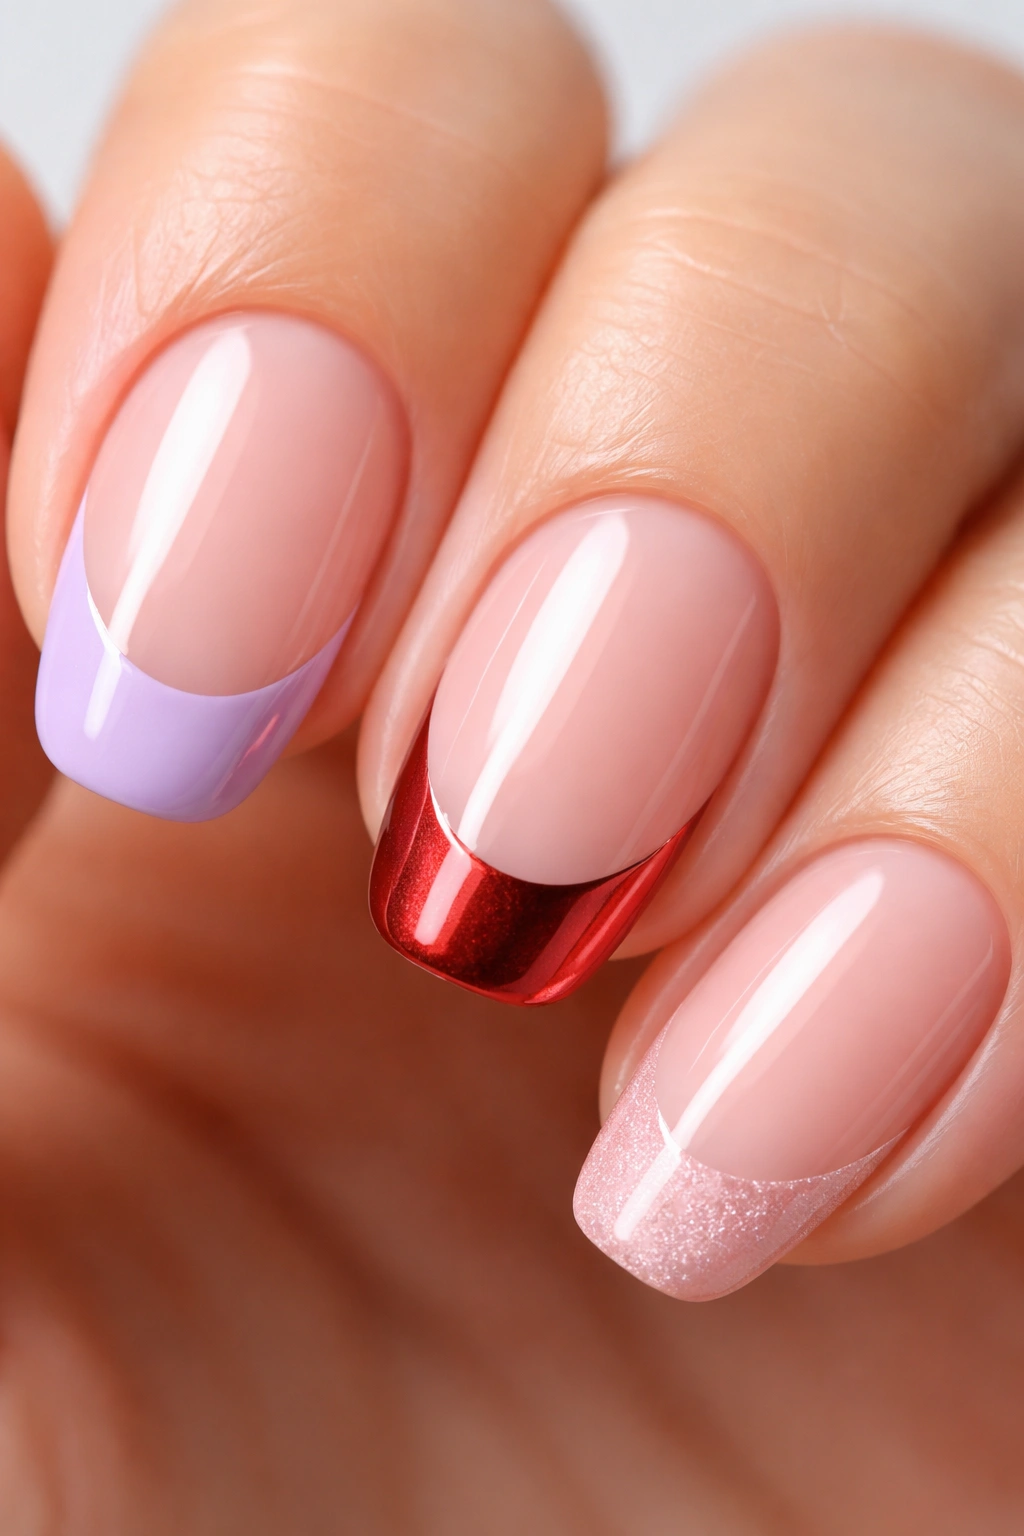
Colored French Tips
Who says French tips have to be white? Swap the white for any color you love—pastels for spring, jewel tones for fall, metallics for a night out. The classic curved tip shape works with literally any shade.
Try soft lavender tips with a nude base for a feminine, modern look. Or go bold with black tips over a sheer pink base for an edgy vibe. Red tips scream vintage glamour.
The beauty of colored French tips is that they’re still recognizable as a French manicure, but they feel more current and personalized.
Reverse French Manicure
Instead of painting the tip, paint a curved line along your cuticle area. This “reverse” French mani highlights the base of your nail rather than the tip.
It’s actually easier to do than traditional French tips because you’re painting along your natural cuticle line, which acts as a guide. You can use the same stencils or tape method, just positioned differently.
Reverse French manicures look especially cool with contrasting colors. Think gold along the base with nude on the rest of the nail, or white half-moons with a bold red covering the tip and middle.
Glitter and Metallic Accents
Add some sparkle by using glitter polish for your tips instead of solid white. A fine silver or gold glitter creates a glamorous effect that’s still office-appropriate.
Or keep the white tips but add a thin metallic stripe right along the edge where the white meets the pink. A gold or silver striping brush creates this detail in seconds and elevates the whole look.
You can also apply tiny rhinestones or nail art stickers to one or two accent nails. Keep it minimal—French manicures are all about understated elegance.
Ombré French Tips
This trendy variation gradually fades the white into the pink base instead of having a distinct line. It creates a soft, dreamy effect that’s gentler than the traditional French.
You’ll need a makeup sponge for this. Paint white polish on the tip of the sponge, then dab it onto your nail tip, bouncing it gently to blend the color. The white will be most opaque at the very tip and fade as it moves down the nail.
Apply your sheer pink over the whole nail to smooth everything out, then seal with top coat. The result is a modern, gradient French manicure that looks intricate but takes minutes.
Troubleshooting Common French Tip Frustrations
Your white polish looks streaky no matter how many coats you apply. The fix: Make sure you’re using a high-quality white polish. Cheap whites are notoriously sheer and streaky. Brands that specialize in nail art tend to have better opacity. Apply thin coats and let each dry completely before adding another.
Your tips are never even or symmetrical across all fingers. The fix: This is where guides or tape really help. Freehand painting takes practice and a good eye. If symmetry frustrates you, use tools to create uniform tips rather than fighting with a brush.
Your manicure chips within two days. The fix: You’re probably getting water or oil on your nails too soon after painting. Wait at least an hour before exposing your nails to water. Also double-check that you’re using base and top coat, capping your free edges, and avoiding activities that stress your nails.
The white tips look too stark and obvious. The fix: Make sure you’re applying that sheer pink or nude coat over the white tips. This softens the whole look and blends everything together. You can also try an off-white or cream color instead of pure white for a more natural effect.
When to Choose Gel or Dip for French Tips
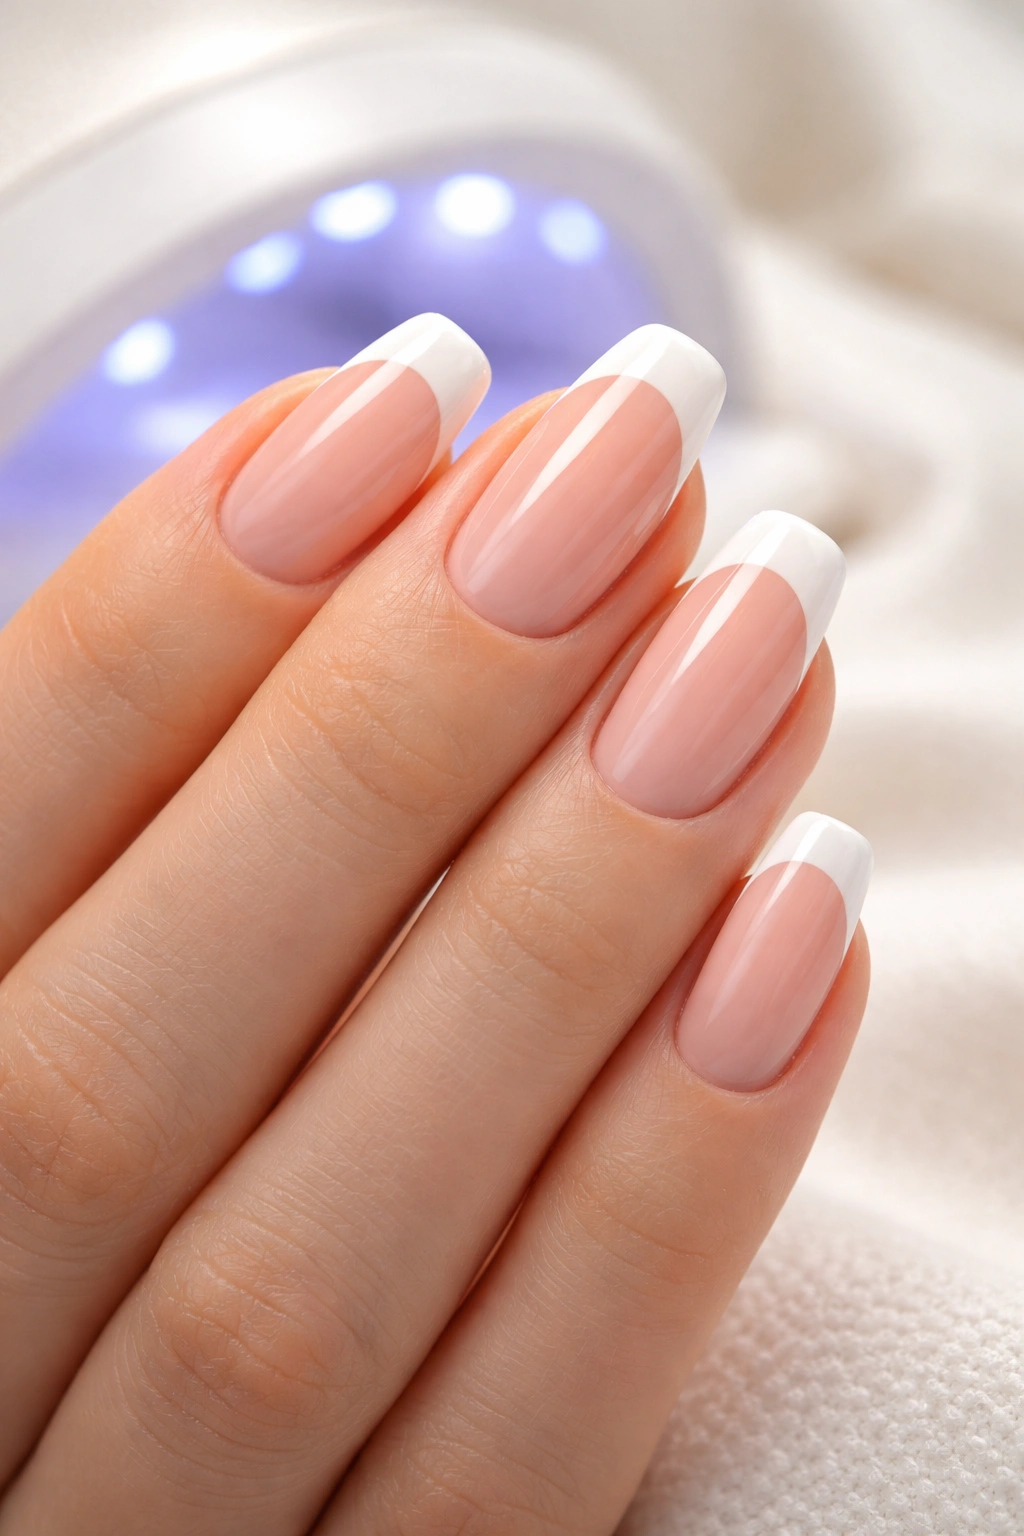
Regular nail polish French manicures last about a week with proper care. If you need something longer-lasting, gel or dip powder systems might be worth exploring.
Gel French manicures require UV or LED lamps to cure the polish. They last two to three weeks without chipping and stay glossy the entire time. You can buy at-home gel kits that include everything you need, including French tip guides designed for gel application.
The process is similar to regular polish—prep, base, color, top coat—but each layer cures under the lamp. Removal requires soaking in acetone, which is harsher on your nails than regular remover.
Dip powder French manicures involve dipping your nail into colored powder that adheres to a special base coat. They’re incredibly durable—lasting three to four weeks—and don’t require UV lamps. The technique is trickier to master at home, though. Many professionals consider dip powder the gold standard for French tips because of its durability.
Both options cost more upfront than regular polish, but they dramatically reduce how often you need to redo your nails. If you’re someone whose hands are in water constantly or who can’t be bothered with weekly touch-ups, they’re worth considering.
Your French Manicure Toolkit Checklist
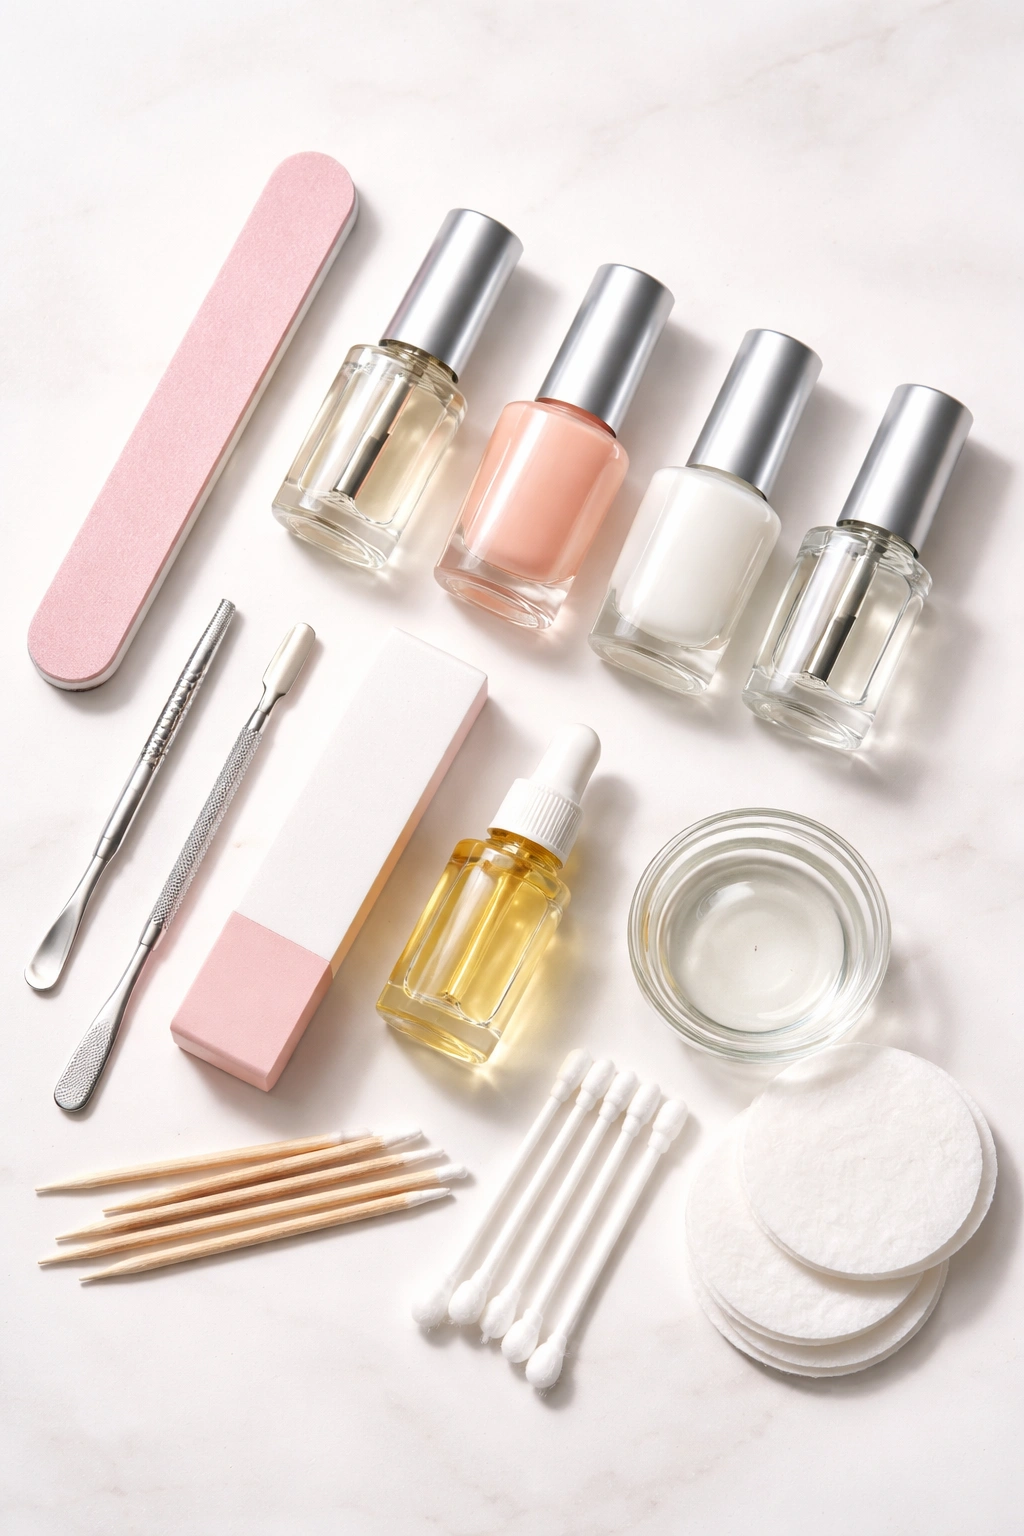
Let’s recap what you actually need versus what’s nice to have.
Must-haves: base coat, sheer pink or nude polish, opaque white polish, top coat, nail file, buffer, cuticle pusher, cuticle oil, cotton swabs, and nail polish remover. This basic kit lets you create classic French tips.
Helpful additions: French tip guides or tape, a fine detail brush, a dust brush for cleanup, and a good hand cream. These make the process easier and your results more professional.
Optional splurges: nail stamping kit, gel or dip powder system, French manicure pens, and a UV lamp for faster drying. Nice to have but not necessary for gorgeous results.
You can start with the basics and add tools as you figure out what works for your skill level and preferences. Don’t feel like you need to buy everything at once.
Final Thoughts
French tip nails at home aren’t some impossible salon secret. With the right prep work, decent tools, and a bit of patience, you can absolutely create a manicure that looks professionally done.
The first time might not be perfect, and that’s completely fine. Your technique will improve each time you practice. The wobbles will straighten out, your timing will get better, and soon you’ll be cranking out flawless French tips without thinking twice.
The real beauty of mastering this at home? Freedom. You can redo your nails whenever you want, experiment with different colors and styles, and save money you’d otherwise spend at the salon. Plus, there’s something satisfying about looking down at your hands and knowing you created that polished look yourself.
So grab your supplies, put on a good playlist, and give it a shot. Your hands are about to look amazing.
