

Short nails don’t have to mean boring nails — especially when you’ve got the right shape working in your favor. The squoval shape strikes that perfect balance between the practical durability of square nails and the elegant softness of oval nails, making it an ideal choice whether you’re trying to grow out your natural nails or prefer to keep them intentionally short. When paired with dip powder, which is naturally thicker and more protective than regular polish, you get a nail look that’s genuinely hard to mess up while still looking intentional and polished.
The thing is, achieving that squoval shape with dip powder requires a slightly different approach than painting regular nails. You can’t just apply the powder and hope the shape magically appears — you need to set up the foundation correctly from the start and understand how to work with the specific properties of dip powder during application and finishing. The good news is that once you understand the technique, short squoval dip nails become one of the easiest manicure styles to maintain, and they actually look more professional than longer, showier nails.
In this guide, we’re going to walk through exactly how to achieve that perfectly shaped, short squoval nail aesthetic using dip powder — from the initial nail preparation through the finishing touches that make the shape really shine. Whether you’re doing this at home or want to understand the process before visiting a nail technician, the steps are straightforward and the results are worth the careful attention to detail.
Why Squoval Nails Work So Well With Dip Powder
Before you start filing and dipping, it helps to understand why squoval is genuinely the ideal shape for short dip powder nails — and why dip powder itself is the ideal formula for keeping that shape looking sharp over time.
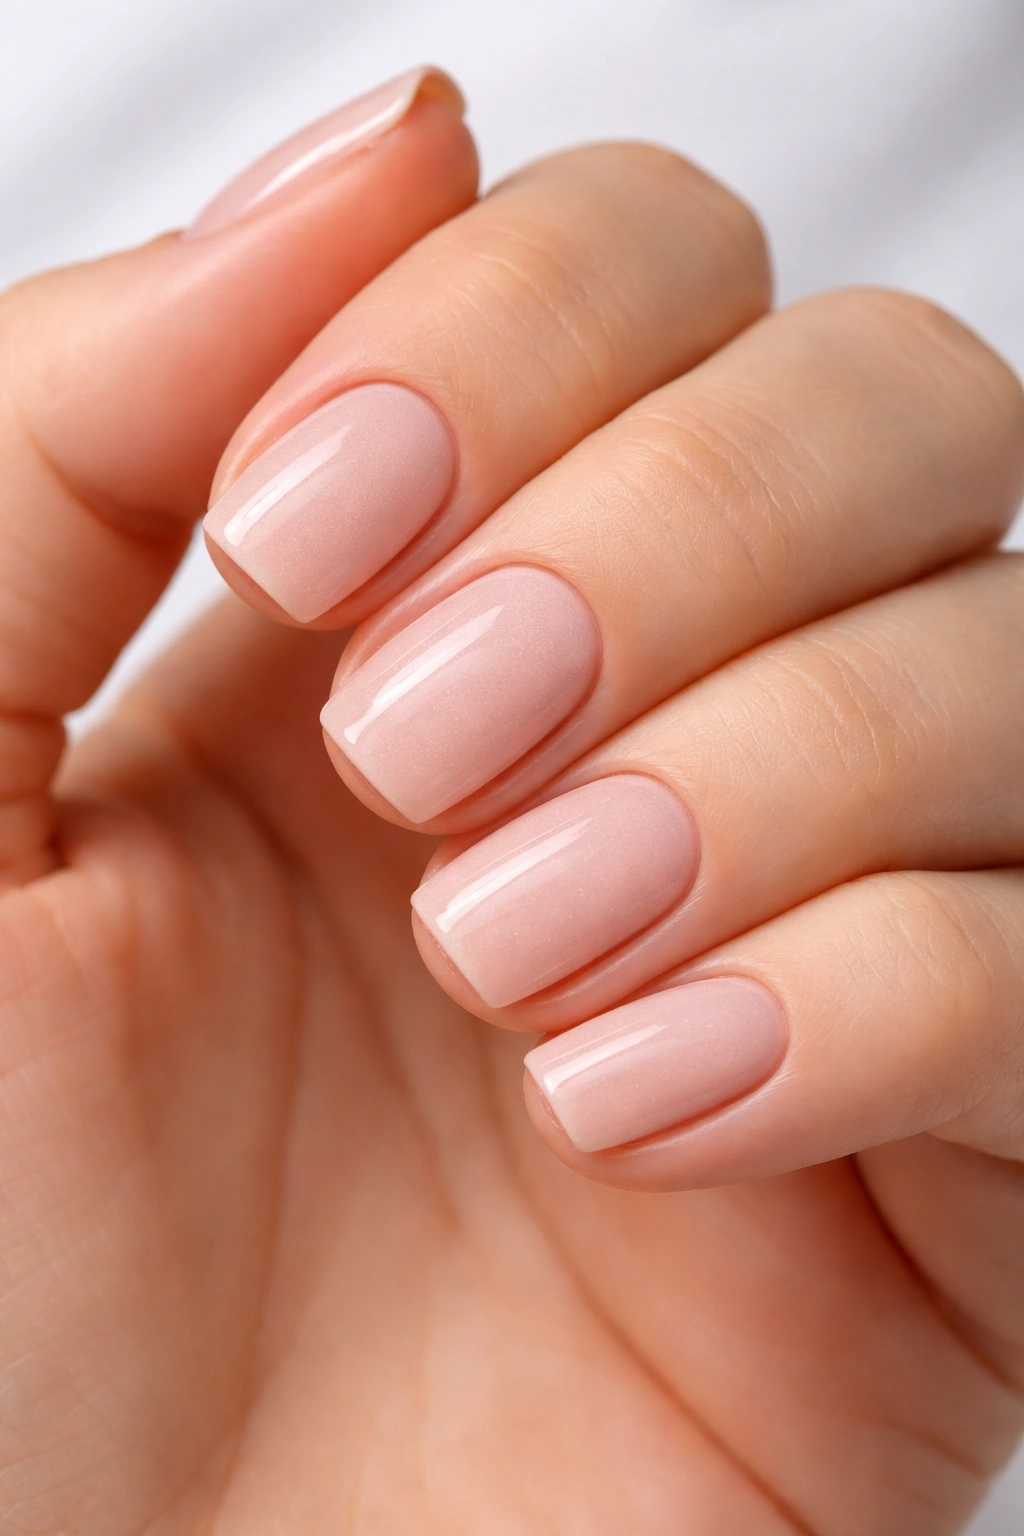
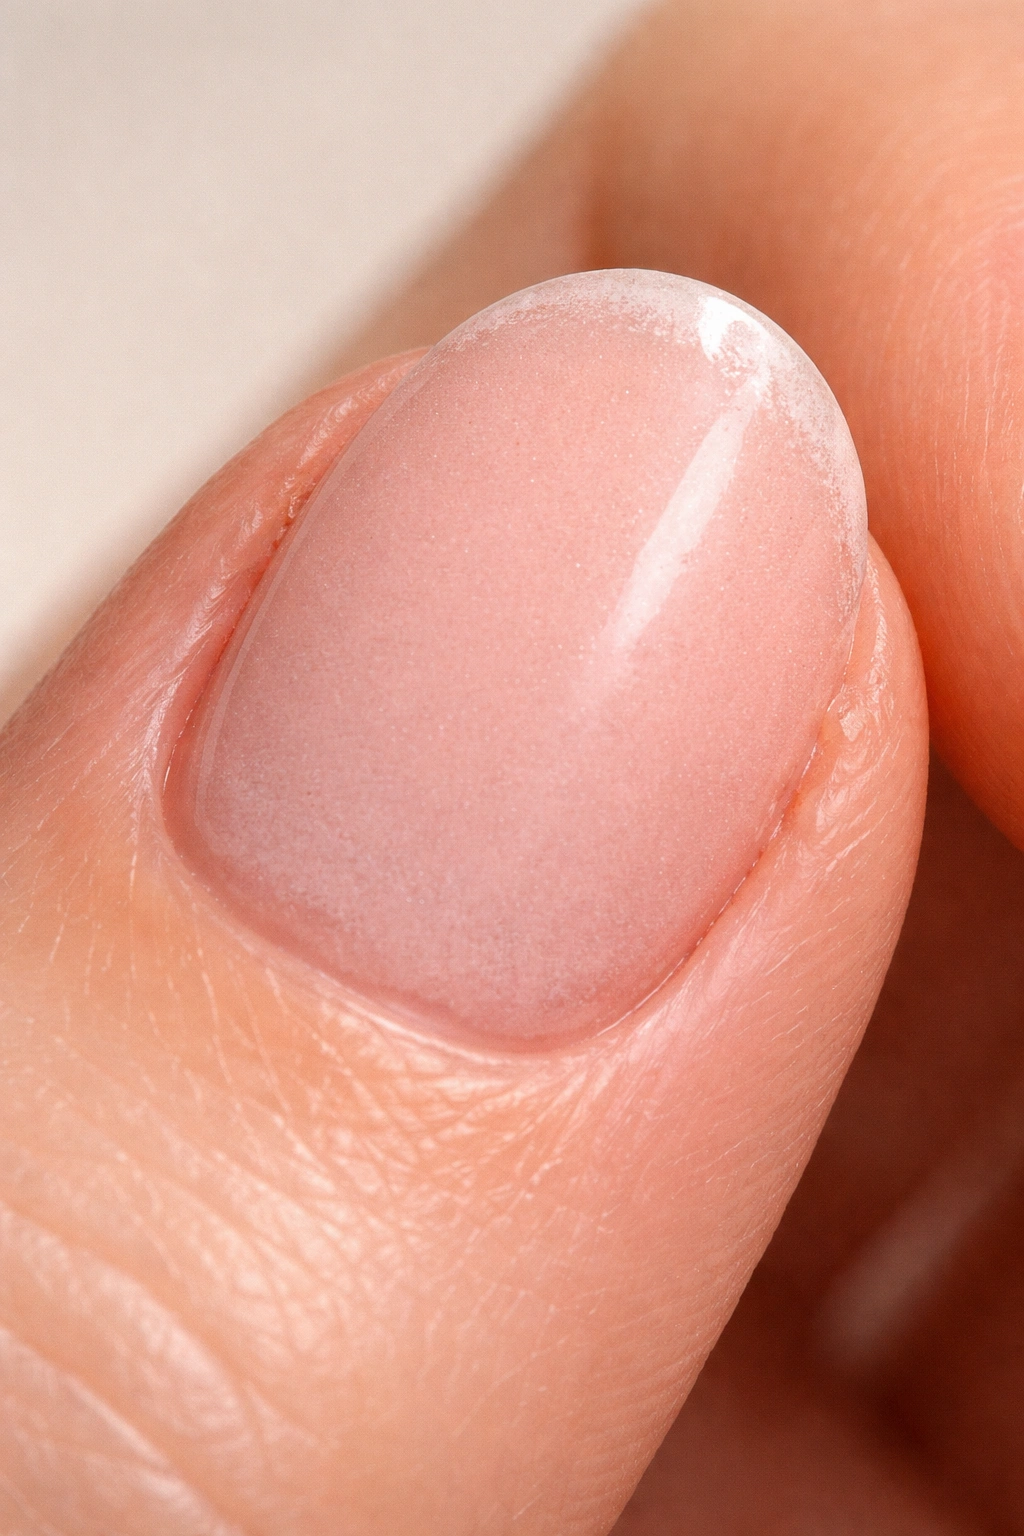
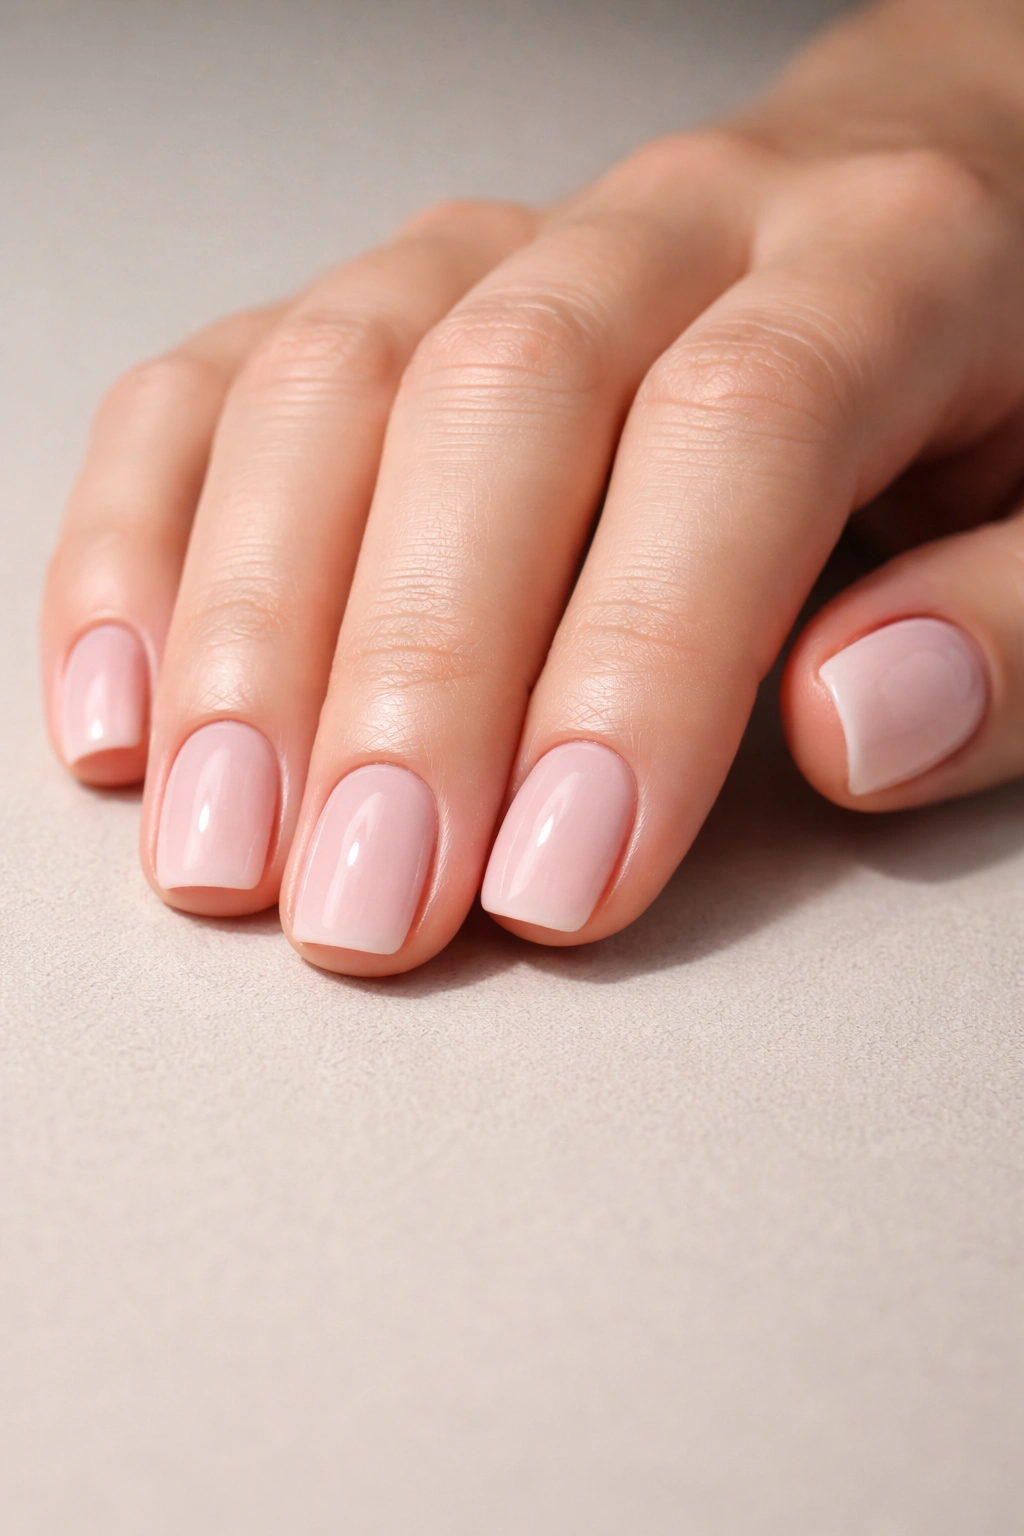
Squoval nails combine the straight edges of a square nail with the gently rounded corners of an oval nail. The straight edge along the tip gives you the visual length and geometric sophistication that makes short nails look intentional, while those softly rounded corners prevent the brittleness and breaking that square nails are prone to. It’s a shape that looks modern and polished, not stubby, even at lengths as short as a quarter-inch past the fingertip.
Dip powder is thicker and structurally stronger than gel polish or regular lacquer. Because of this thickness, it holds the shape of your nail — especially those crucial rounded corners — far more durably than thinner formulas. The powder literally sets into whatever shape you create, then hardens into a protective shell that won’t chip or peel the way softer polishes will. This means you can actually maintain clean, crisp squoval edges for the entire three-to-four-week wear time without the shape degrading.
The adhesion also matters. Dip powder clings to the nail in a way that makes it nearly impossible to chip accidentally. With short nails, where there’s less nail surface to protect the free edge, this strong adhesion becomes genuinely important. You’re less likely to catch the edge on something and damage the manicure, which means your carefully shaped nails stay shaped.
Short nails in a squoval shape also read as intentional and groomed rather than unfinished. There’s a visual confidence that comes with short, well-maintained nails — they suggest someone who prioritizes function and cleanliness over length. Paired with a clean dip powder finish, they look professional, modern, and deliberately styled. It’s a look that works equally well for someone who needs short nails for practical reasons (artists, musicians, healthcare workers) and someone who simply prefers the aesthetic.
Gathering the Right Dip Powder Materials and Tools
You can’t create the perfect squoval shape without the right equipment, and some tools make a genuinely massive difference in how your nails turn out. It’s not about accumulating a huge collection — it’s about having the specific tools that solve the actual problems you’ll encounter.
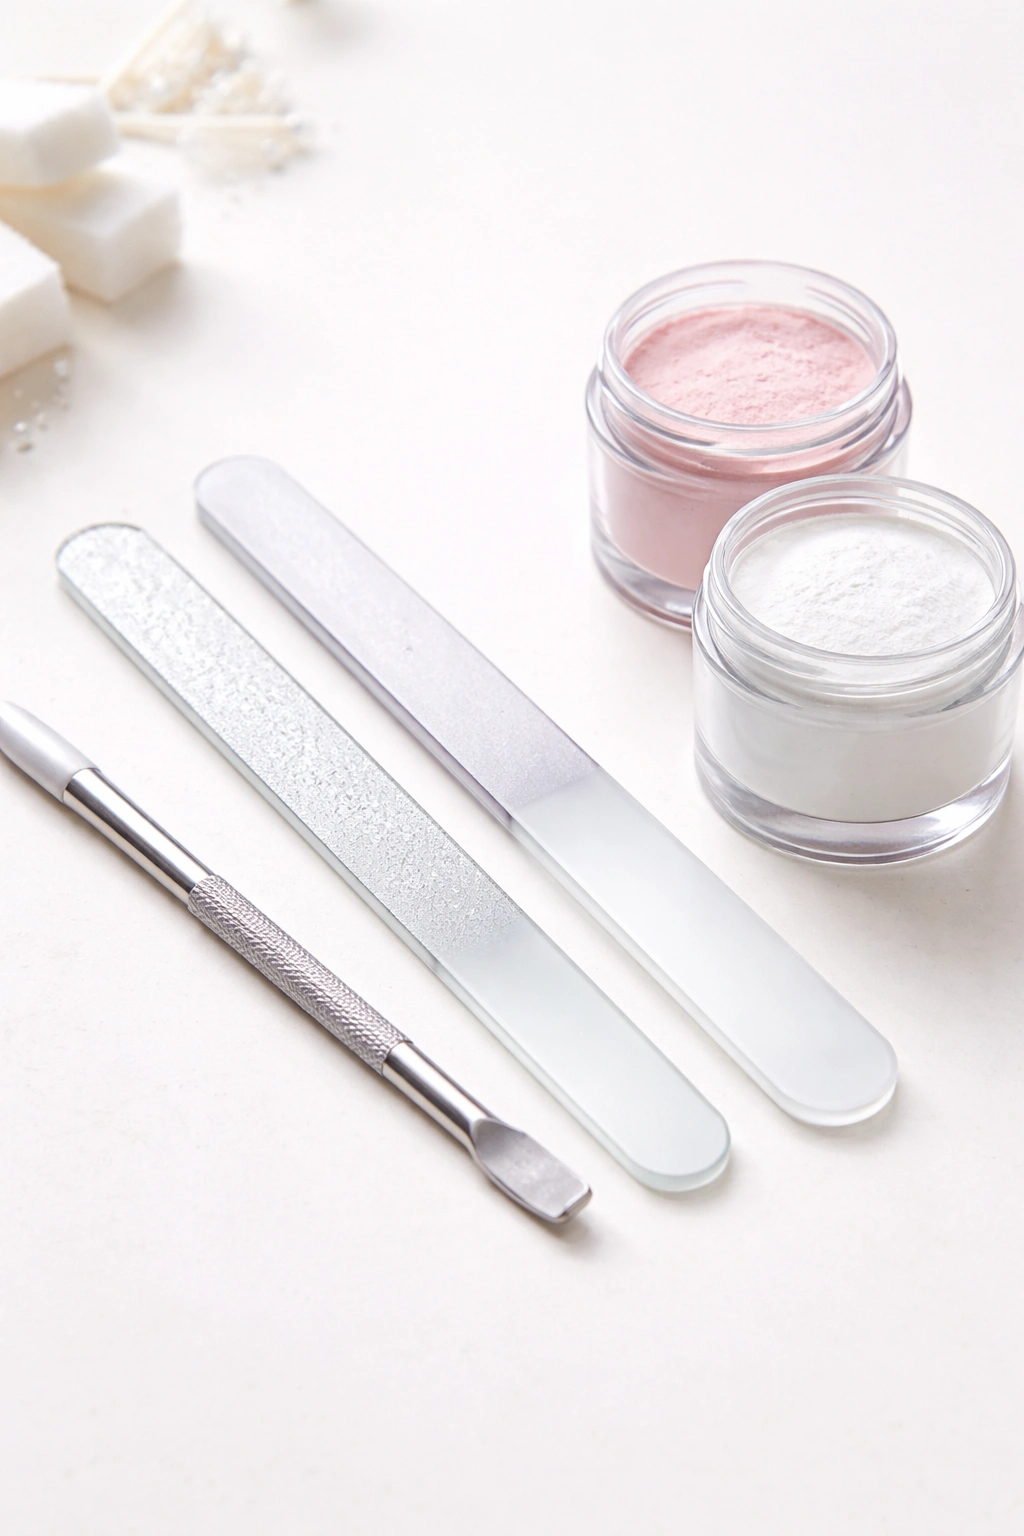
Start with nail files. You’ll need at least two: a 180-grit file (medium-coarse) for the initial shaping work, and a 240-grit or higher file (fine) for smoothing and refining those corners into the soft, rounded finish that makes squoval actually work. The 180 removes length and creates the basic shape quickly, while the higher-grit file creates that polished, salon-quality edge that prevents snags and looks refined. A glass file is ideal because it seals the keratin at the edge of your nail, preventing peeling and splitting better than metal files do.
You’ll need dip powder in your chosen color, plus the essential dip powder system: base coat (activator), the actual powder, and top coat (sealer). Some systems also include a separate final shine coat, which creates an extra glossy finish. Don’t skip any of these steps — each layer serves a specific structural purpose. The base coat creates adhesion, the powder builds color and thickness, and the sealer hardens everything into that hard, protective finish.
A brush for removing excess powder is critical. After you dip your nail into the powder jar, you’ll have a lot of loose powder sitting on the nail surface. A soft brush — the kind that comes with most dip powder kits — sweeps away that excess without disrupting the layer you’ve already created. This step directly affects your final finish quality.
You also need nail dehydrator or a rubbing alcohol to prep the nail surface, removing any oils or moisture that would prevent the base coat from sticking properly. Many people skip this, then wonder why their dip powder is chipping. This single step makes an enormous difference in longevity.
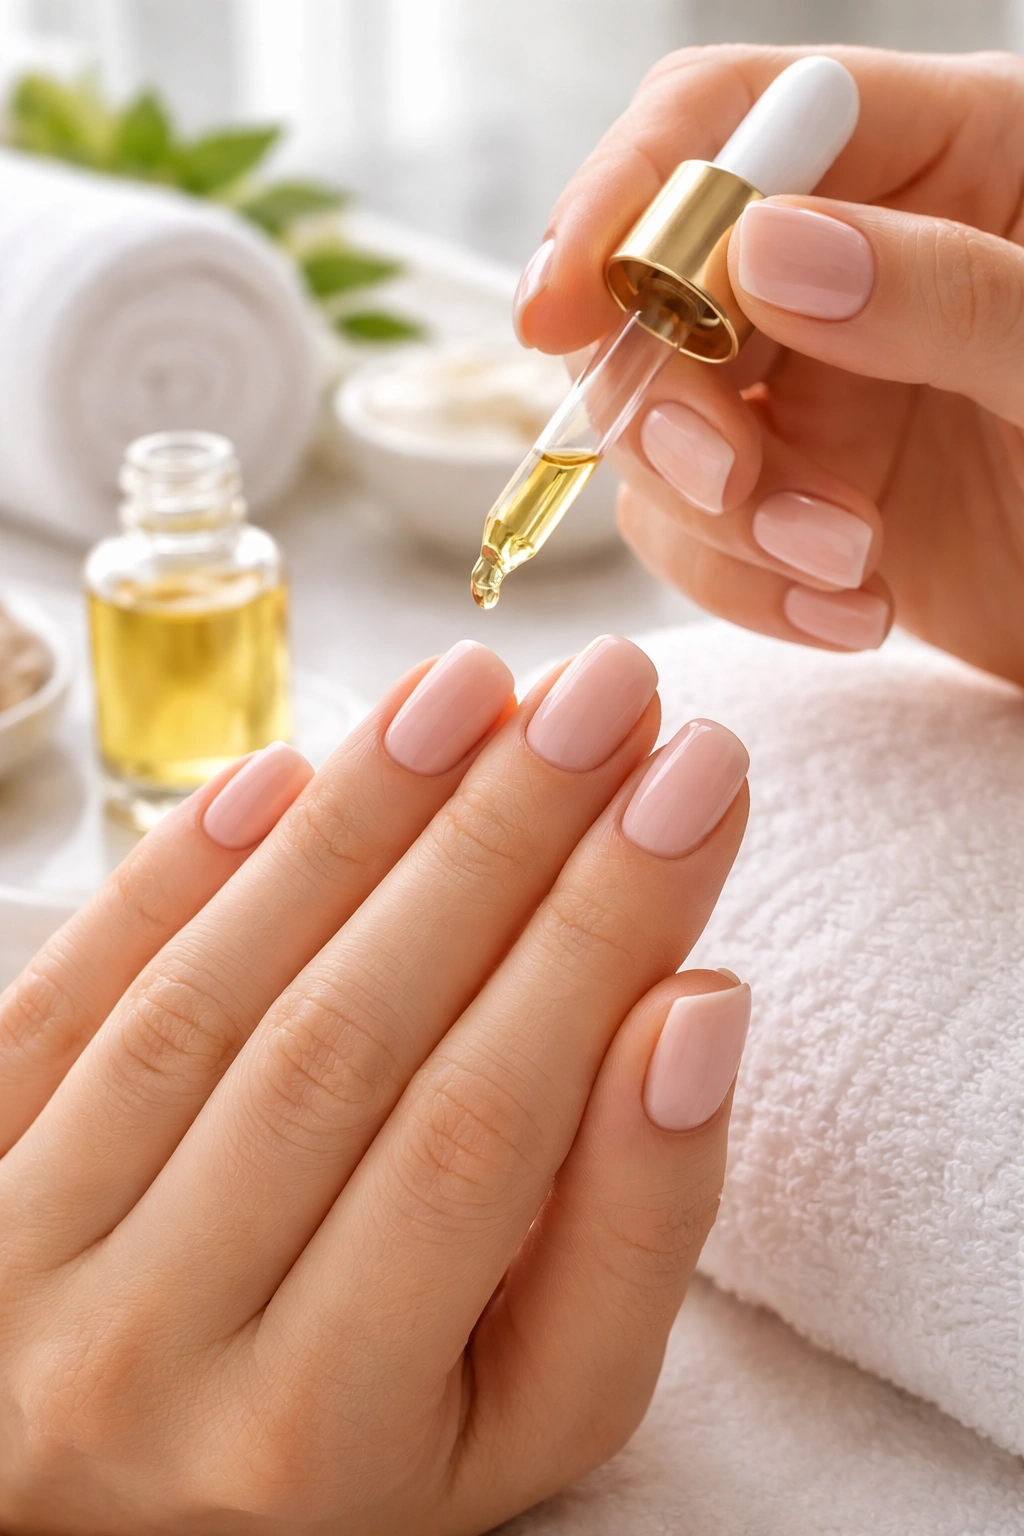
Keep cuticle oil or a good hand cream nearby. You’ll use this throughout the process to prevent the dehydrator from over-drying your skin, and again at the very end to soften the cuticles and give your finished nails that polished, groomed appearance.
A nail buffer (a 4-way buffer with different grits) helps smooth and shine the nail surface during the initial prep and also helps create an even base for color application. Finally, keep nail clippers or scissors on hand if you’re starting from longer nails and need to trim before shaping.
Preparing Your Natural Nails for the Dip Powder Application
The foundation determines everything. Even perfect dip powder technique can’t save a manicure that started with poor nail prep, so this step is where you invest your patience.
Start by removing any existing polish. If you’re wearing regular polish, use a gentle remover and let it soak for a few minutes — don’t scrub aggressively or you’ll damage the nail surface. If you’re wearing gel or dip powder, you’ll need to soak those off using acetone. The acetone soak method is simple: fill a small bowl with acetone, soak your fingertips for 10–15 minutes (with regular breaks to let them breathe), then gently push the softened polish away from the nail with a wooden stick. Scraping hard or forcing it off damages the nail plate.
Once your nails are bare, assess their length and condition. If you’re starting with longer nails that you want to shorten into the squoval shape, trim them down to your desired finished length first using nail clippers. You want to remove the bulk of the length with clippers because filing alone takes forever when you’ve got significant length to remove. Cut straight across — you’ll soften those edges and create the squoval curve in the next step.
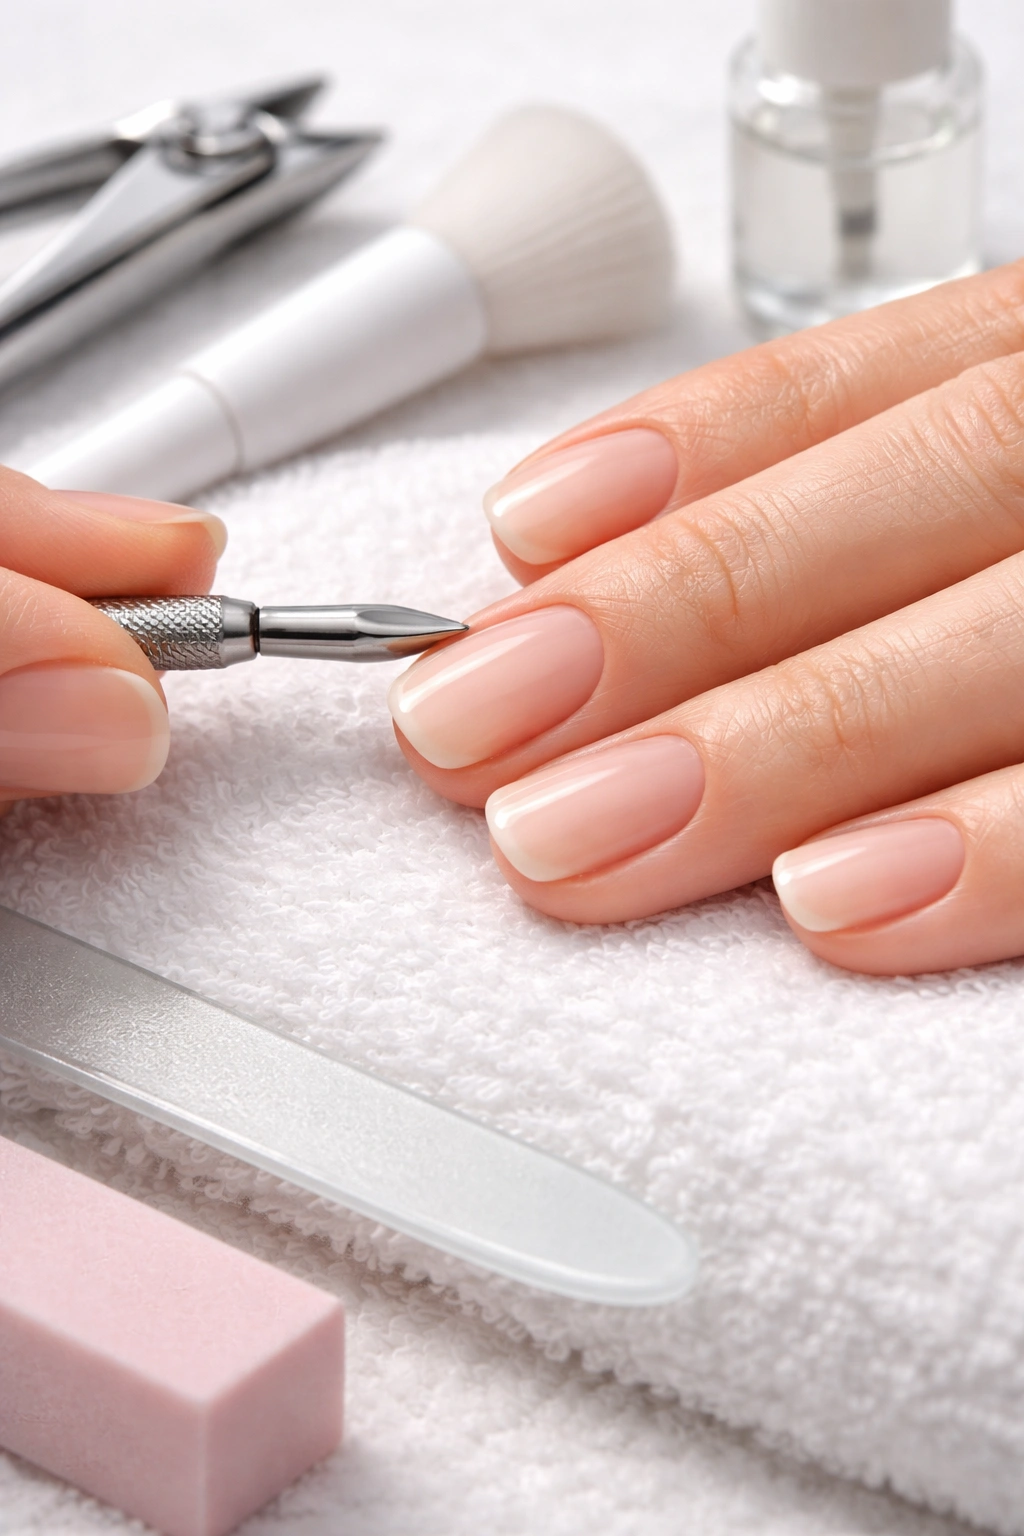
Trim your cuticles gently, or if you prefer not to trim, at least push them back using a cuticle pusher so they’re no longer covering the base of your nail plate. Dip powder adheres best when it’s applied directly to visible nail, not hidden under cuticle tissue. If you have hangnails or ragged cuticle skin, gently trim those too — they’ll catch on things and split if you leave them.
Now file and shape the edges of your nail beds using a gentler touch. You’re not doing the final shaping yet — you’re just removing any rough edges left from trimming and creating a smooth surface to work with. Use light, gentle strokes directed toward the center of the nail from both sides. Filing in a seesaw motion (back and forth across the edge) creates splits and weakness; always file in one direction, from the outer edge toward the center.
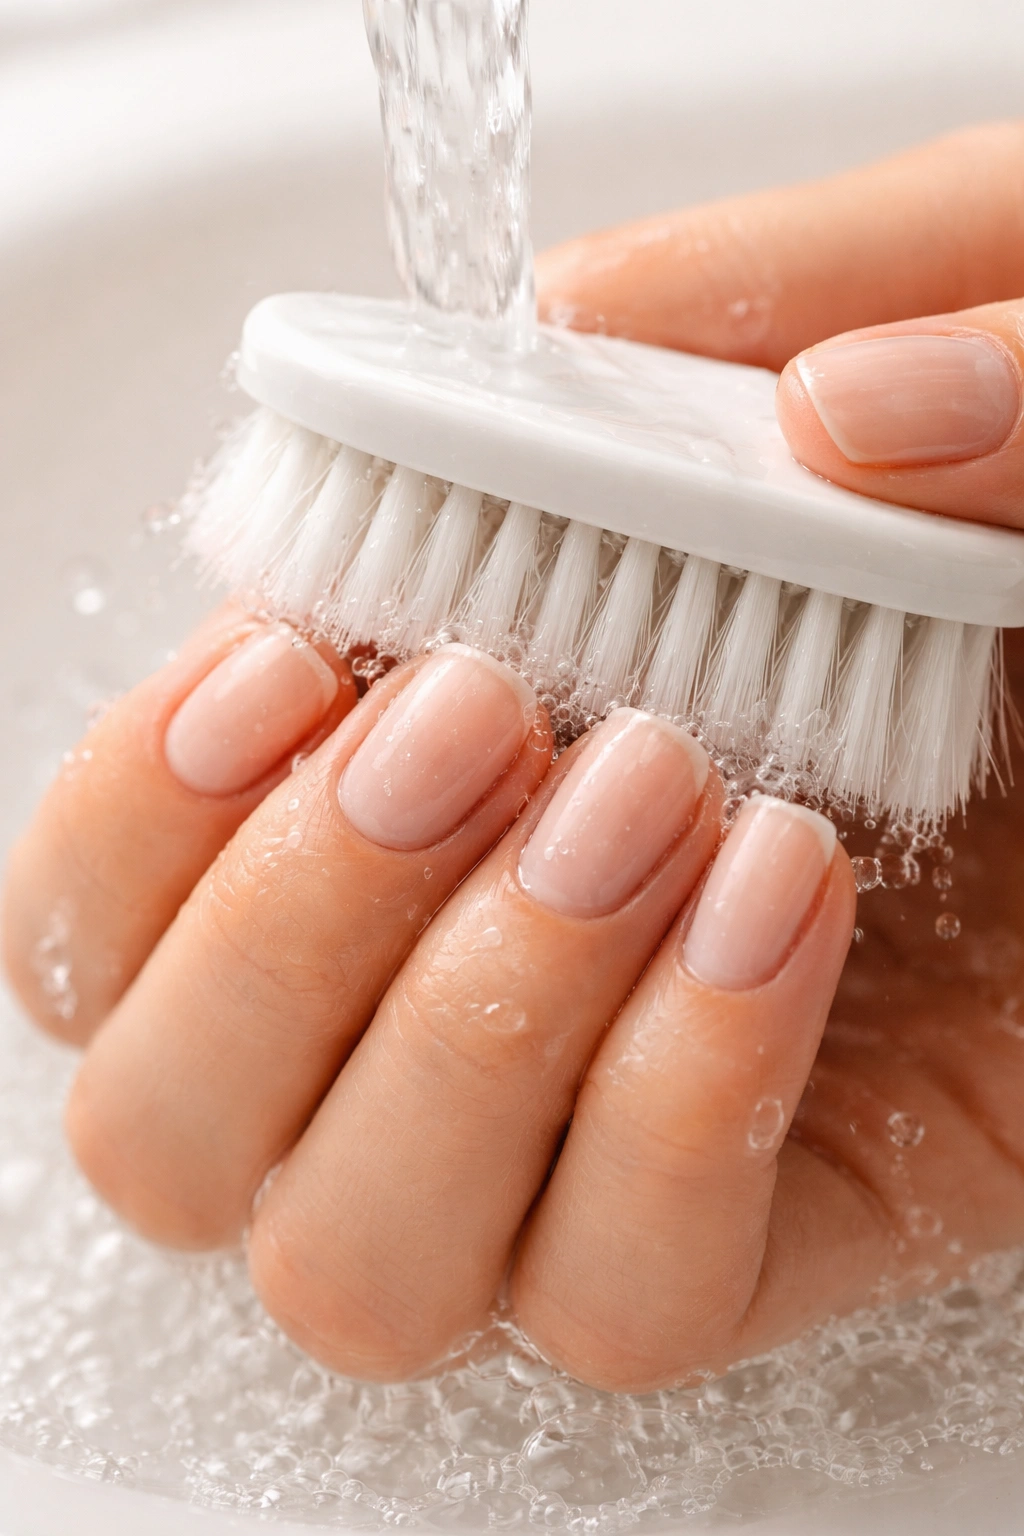
Wash your hands thoroughly with soap and warm water. This removes all the nail dust created by filing, plus any skin oils that naturally accumulate. Dry completely — even a tiny bit of moisture will interfere with the dip powder base coat adhesion.
If your nails are thin, prone to peeling, or generally weak, consider applying a strengthening treatment or a thin base layer of clear gel before the dip powder. This extra foundation provides additional structure and is especially helpful if you’re new to short nails and worried about durability. Wait a few minutes and hydrate the skin around your nails — use a cuticle oil or hand cream to soften any dry skin. The dehydrator you’re about to apply is going to pull moisture from your skin, so you want to start this step well-hydrated.
Filing Your Nails Into the Perfect Squoval Shape
This is where the look actually gets created. Filing technique determines whether your nails read as “intentionally shaped” or “oops, they broke.”
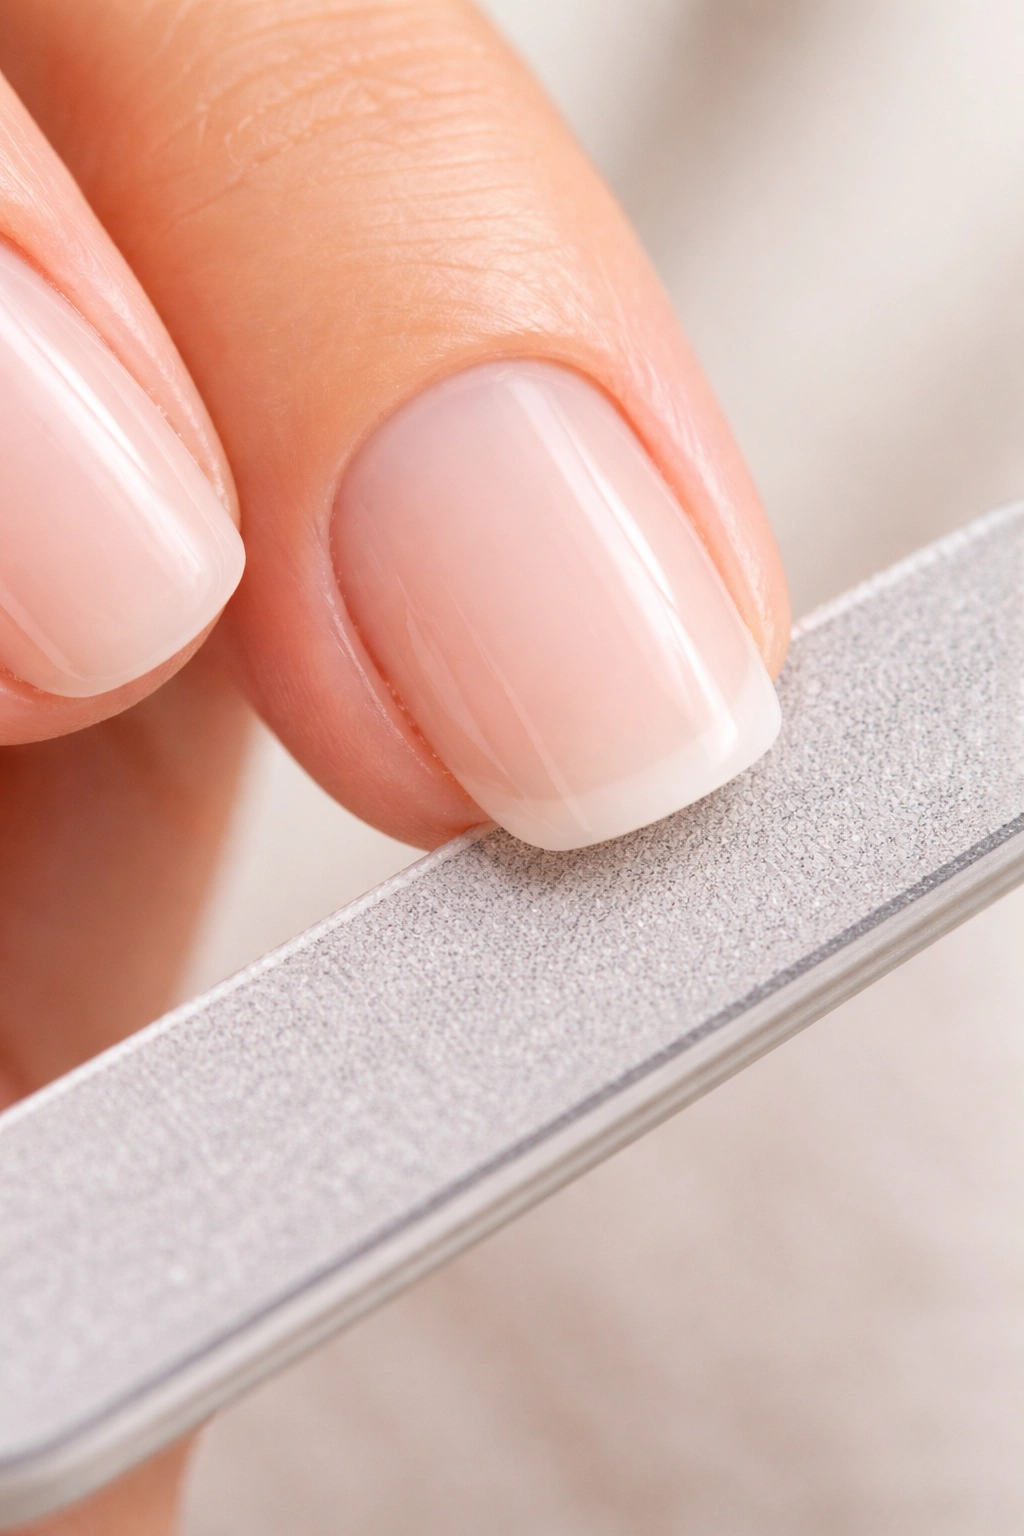
Begin with your medium-coarse 180-grit file. Holding the file at a very slight angle — just a few degrees from perpendicular to your nail edge — file from the outer corner of your nail toward the center. Don’t saw back and forth; make deliberate, one-directional strokes. The angle matters because it’s creating the slight beveled edge that makes the shape look finished and prevents chipping. File one corner completely, then flip your hand and file the opposite corner with the same technique. Step back and look at the overall shape — you’re aiming for a nail edge that looks roughly square right now, with the corners still fairly sharp.
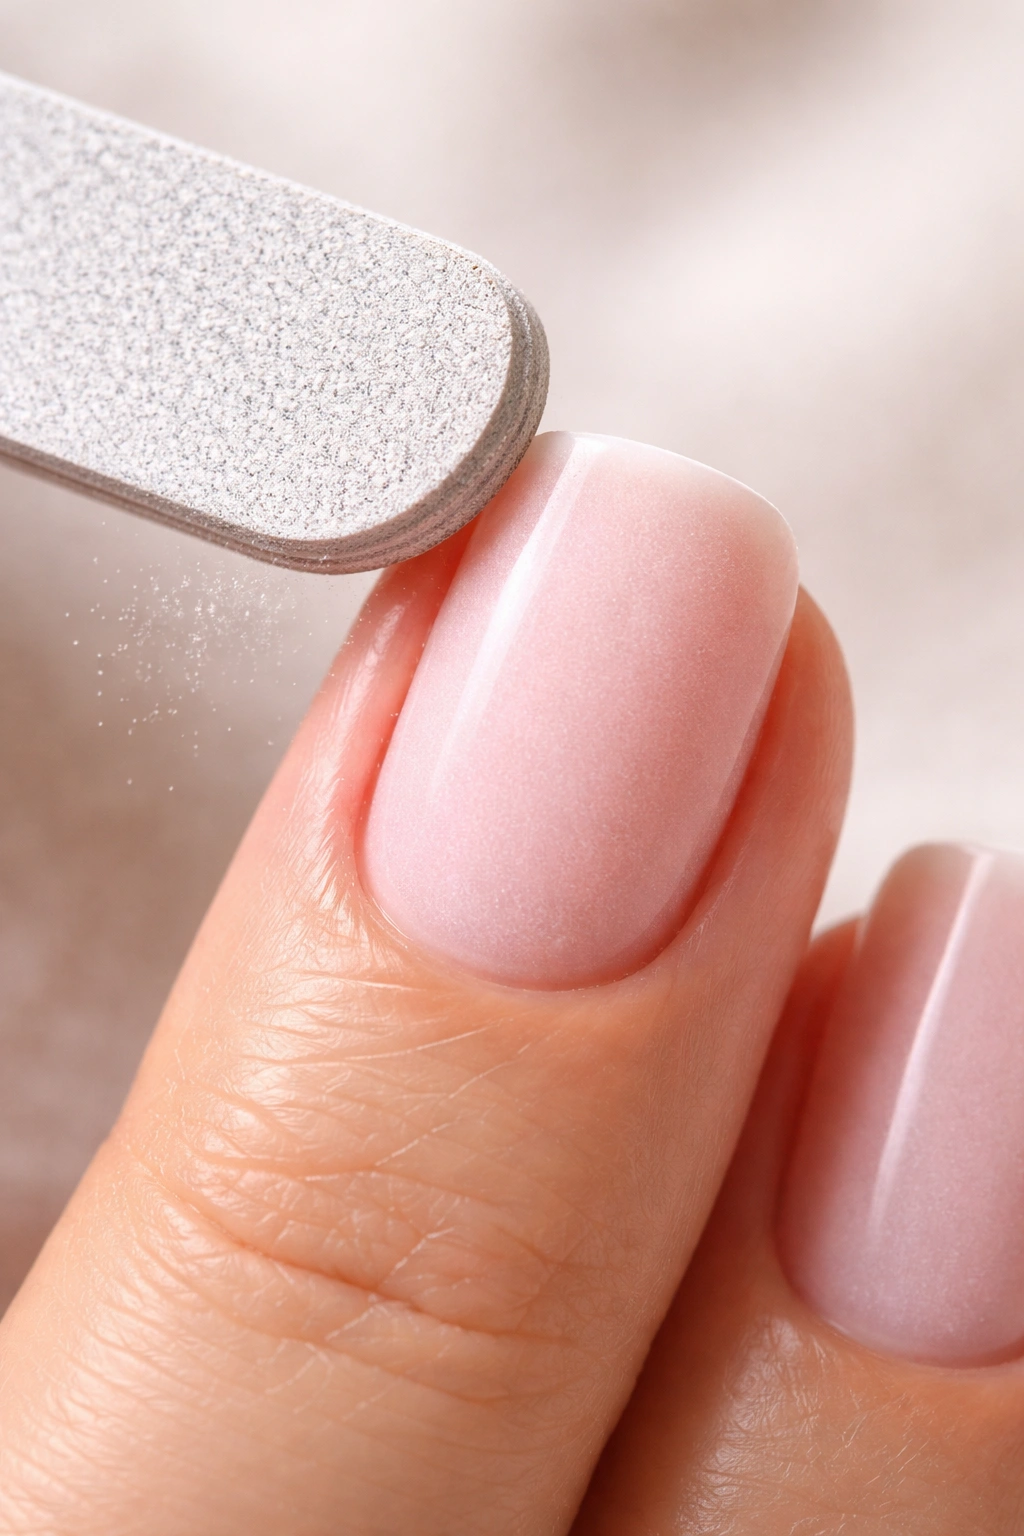
Next comes the crucial step that actually creates the squoval: rounding those sharp corners into soft curves. Switch to your higher-grit file (240-grit or higher) for this work. Hold the file parallel to the edge of your nail and gently round each corner using light, controlled strokes. You’re not rounding the entire corner — you’re softening it, creating a subtle curve that flows from the straight edge into that rounded corner. The curve should be gentle and gradual, not a sharp quarter-circle. Think of it as a soft transition, not a dramatic round.
The geometry here is specific: the top half of your nail (from the cuticle line to about midway down the nail) should remain relatively straight, and then from that midpoint down to the free edge, the sides should curve gently toward those rounded corners. This creates the visual effect of elongation even on short nails — your eye reads the straighter center as length, even though the actual nail is quite short.
Use a 4-way buffer or a fine file to smooth the nail surface itself — not just the edge. Gently buff the top surface of the nail with light, circular motions. This serves multiple purposes: it removes any ridges or imperfections in the nail plate, creates a slightly textured surface that helps the dip powder base coat adhere better, and visually smooths out any discoloration or irregularities in the nail itself.
Step back and assess the overall shape. The nail should look like a subtle blend: mostly square in proportion, but with corners soft enough that they don’t look sharp or aggressive. If your nails are naturally short, the squoval shape should be barely wider at the base than at the tip — any significant width difference will make short nails look stubby rather than intentional.
The most common filing mistake is rounding too much, which turns squoval into oval. You want softly rounded corners, not a fully rounded nail shape. Remember: the straight edge is doing the visual work of making short nails look intentional, so preserve that straight edge and only soften the transition at the corners.
Cleaning and Prepping the Nail Surface
The difference between dip powder that lasts four weeks and dip powder that starts chipping in two weeks is almost always preparation. This step takes five minutes and completely changes your results.
After filing, you’ll have fine nail dust covering everything. Wash your hands again under warm running water, using a soft brush or even an old toothbrush to gently brush across your nails while rinsing. The goal is removing every speck of dust — it’s invisible to the naked eye, but it absolutely interferes with adhesion. Dry your hands completely using a clean towel, then let your hands air-dry for another minute to ensure you’re genuinely starting dry.
Now use your nail dehydrator or rubbing alcohol. Dip powder systems typically include a dehydrator liquid that serves the same purpose as rubbing alcohol but usually includes additional ingredients that support adhesion. Apply it to each nail using the applicator bottle or a small brush, coating the entire nail surface including the nail bed (the pink part) and the free edge (the white tip). The nail should look noticeably darker and slightly shiny from the dehydrator. Some people worry this is too much moisture, but remember — dehydrators remove moisture from the nail, not add it. The shine is temporary and dries almost immediately.
After applying the dehydrator, do not touch your nails. Even the oils from your fingertips will compromise adhesion. This is where many people accidentally sabotage their own manicure. If you need to adjust something or move hair out of your face, use your knuckles or palms, not your fingertips.
Some dip powder systems include a separate primer or binding agent that you apply after the dehydrator. If yours does, apply it now according to the package directions. If not, you’ll skip straight to the base coat. The binding agent isn’t absolutely essential for most people, but it does provide extra security, particularly if you have naturally oily nails or you’re redoing your manicure more frequently than every four weeks.
You’re now about two minutes away from actually dipping your nails. The care you’ve taken in prep work is about to pay off in a manicure that genuinely lasts.
Applying the Base Coat Layer
The base coat is what everything else adheres to, which means getting this layer right is non-negotiable.
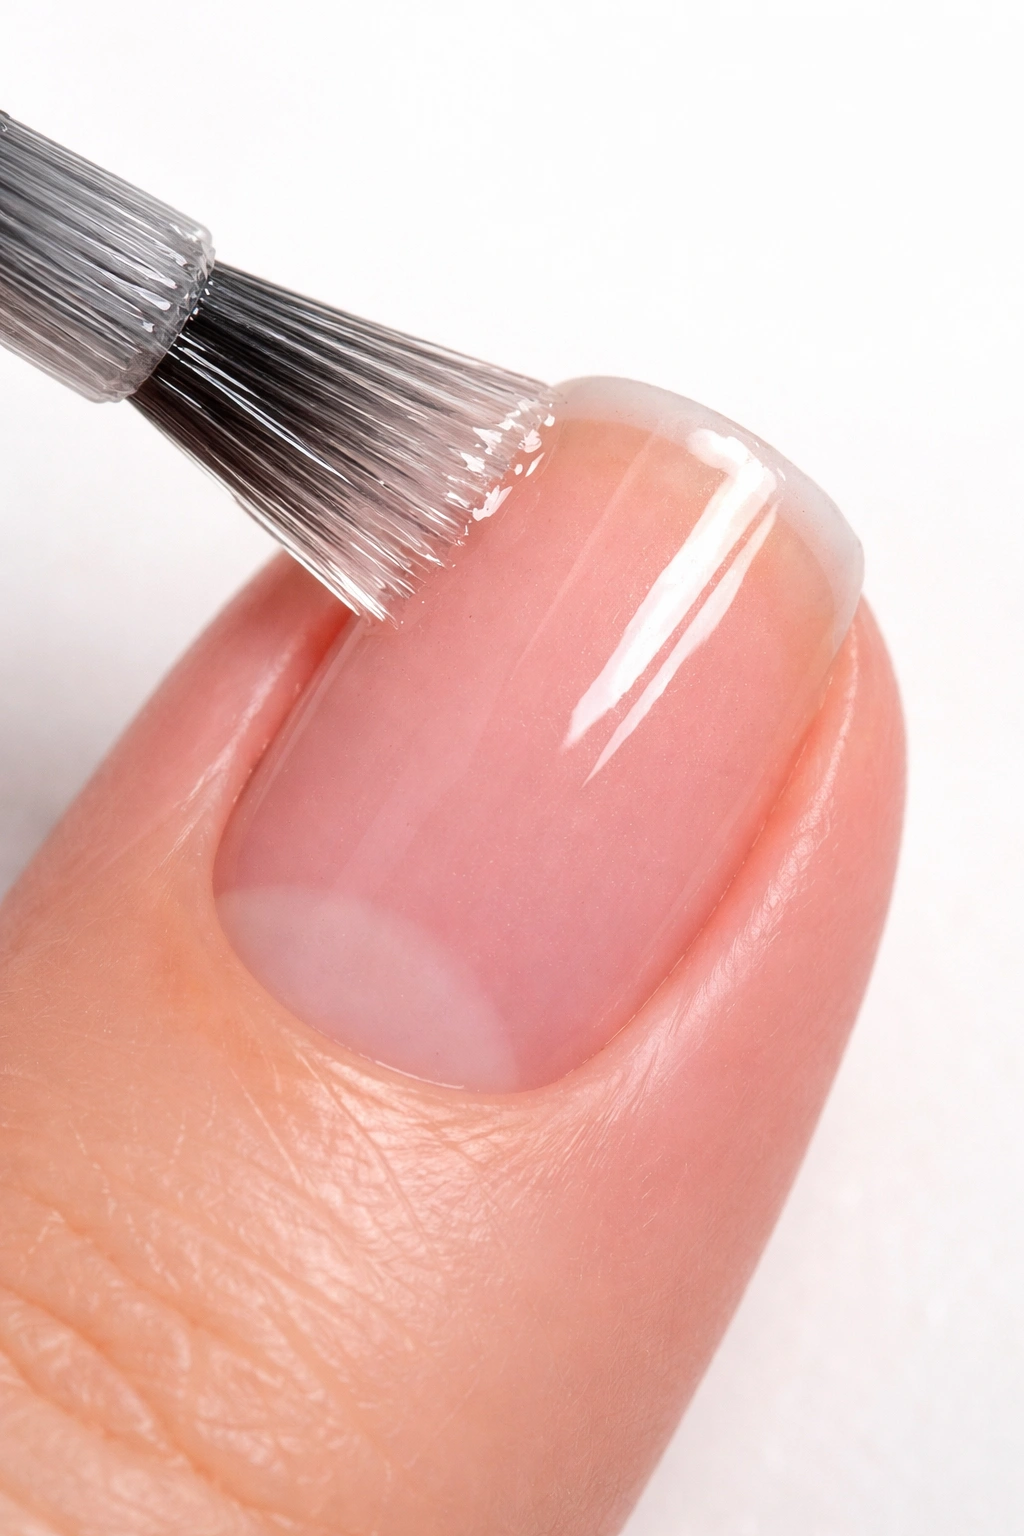
Use the applicator brush that comes with your dip powder system to apply the base coat (also called activator) directly to your nail. Start at the cuticle line and sweep the brush toward the tip, coating the entire nail surface. You want a thin, even coat — thick is not better. The base coat should look wet and glossy on the nail. If you see thick, clumpy layers forming, you’re using too much. One smooth, thin coat is ideal.
After coating all your nails with the base coat, wait about 30 seconds before moving to the next step. The exact timing varies slightly between different dip powder systems, so check your kit’s instructions, but 30 seconds is the standard. The base coat needs just enough time to set slightly so it’s tacky but not so wet that it runs.
As soon as that brief wait is over, you’re ready to dip. Keep your hands steady and confident — hesitation makes the process harder. Move on to the dipping step while the base coat is still in that perfect tacky state.
Getting Your First Dip Powder Application Right
This is where the visible color and thickness actually happen. For short squoval nails, technique here directly affects how defined your shape looks.
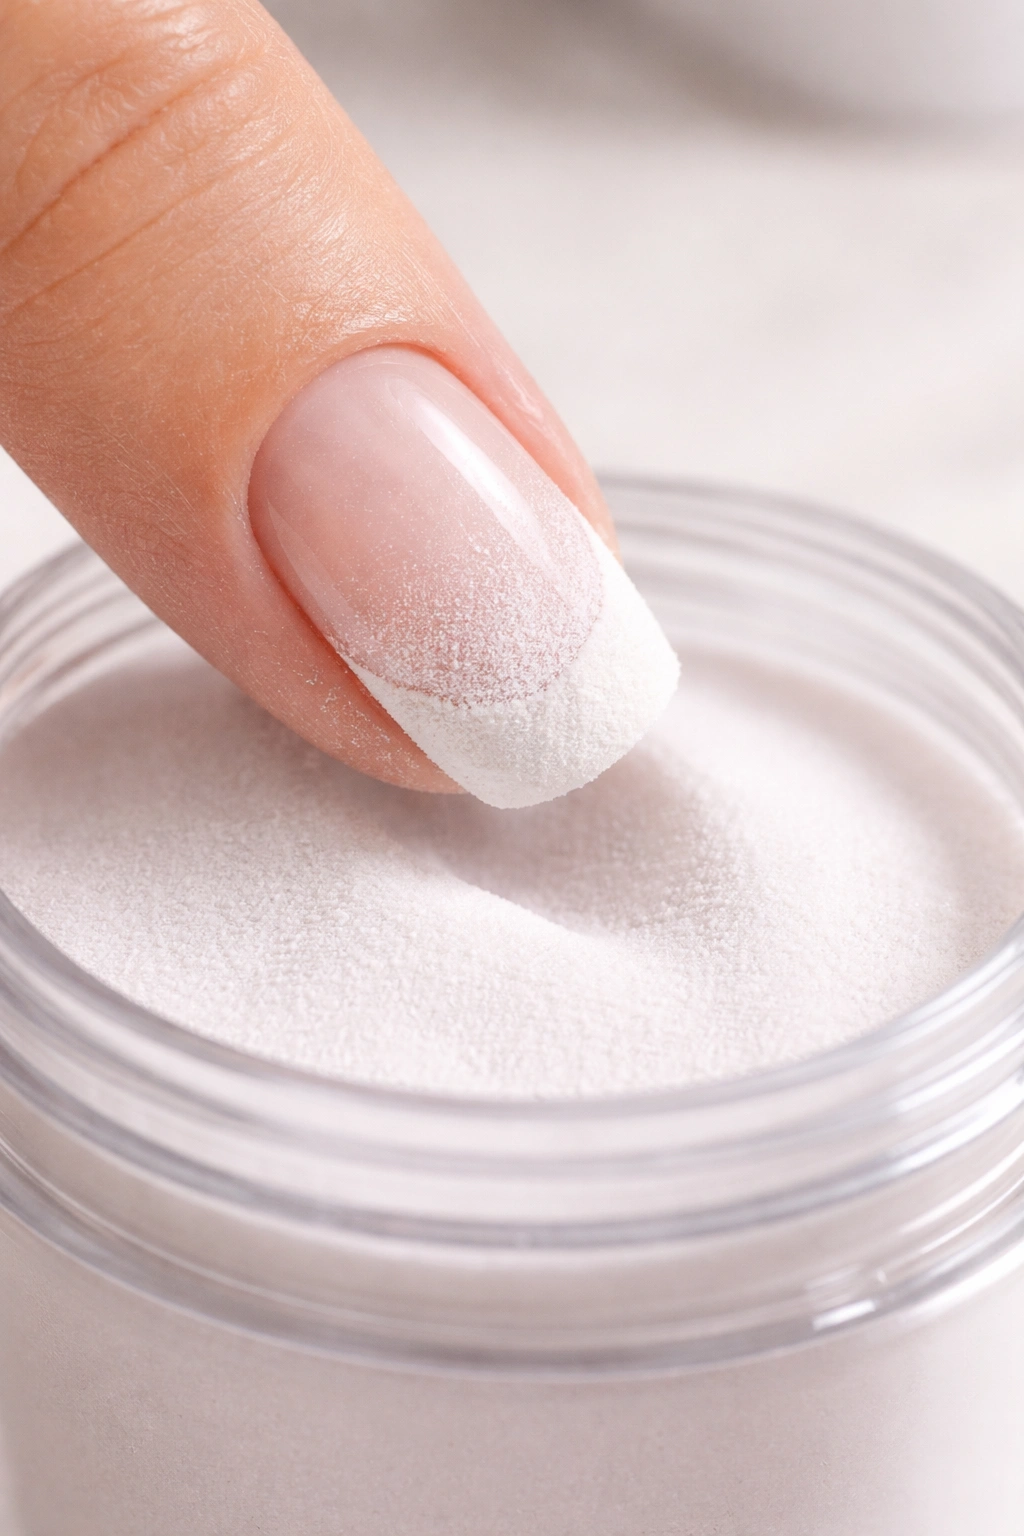
Angle your finger so it’s pointing downward at approximately 45 degrees, with the tip heading into the powder jar first. This angle matters because it allows the powder to coat the edges of your nail evenly — if you dip straight down, the corners often get less powder than the center. Immerse your nail into the powder with one smooth, confident motion, pushing down until the powder reaches your cuticle line. Hold it there for just one full second — longer isn’t better and risks over-saturating the base coat.
Pull your nail out of the powder using the same angled motion you used to go in, keeping the nail at roughly 45 degrees. The powder will be clinging all over the nail — that’s correct. Your nail should look dramatically thicker and noticeably darker than it actually is right now.
Tap excess powder off your nail by gently tapping the sides of your finger against the edge of the powder jar. Tap gently — you’re not trying to excavate powder, just remove the loose stuff that isn’t firmly adhered. The powder that falls away is the excess; the powder that stays is what’s actually coating your nail.
Now use your soft brush to sweep away any remaining loose powder from the nail surface and, importantly, from around your cuticle line and under your free edge. Brush gently in the direction from the cuticle toward the tip, removing loose powder without disrupting the layer you’ve created. Pay special attention to the free edge (the white tip) — loose powder around the edges creates an unfinished look.
You now have one coat of powder on each nail. For short nails with squoval shaping, two to three coats of powder usually creates the ideal thickness — enough to be protective and durable, not so much that the nails feel thick or heavy or look disproportionately bulky on short fingers.
Building Strength With Subsequent Coats
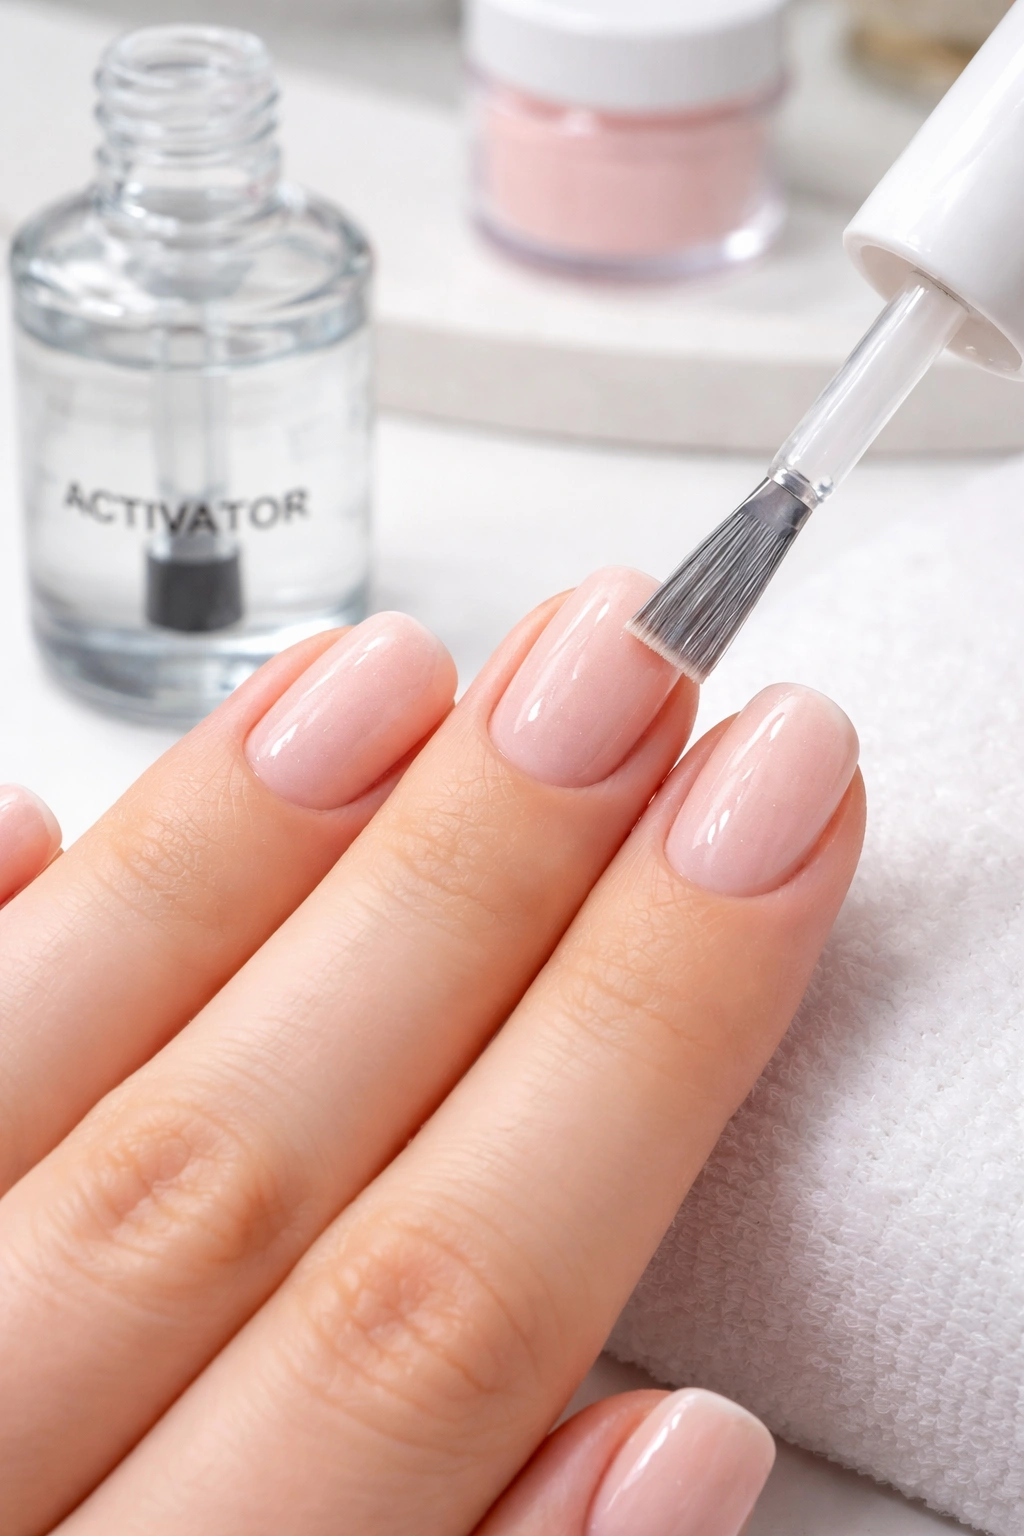
Each additional coat needs a specific intermediate step: the activator (sometimes called a hardener or resin). This is a clear liquid that hardens the powder layer you just applied.
Using the applicator brush from your activator bottle, apply a thin coat of activator to each nail that already has powder on it. Brush from the cuticle to the tip, coating the entire nail surface evenly. The activator will cause the powder to harden and change slightly in color — it often looks darker and shinier as the activator sets. This process takes just 10–15 seconds. You’ll actually see the color transition happen, which is satisfying and lets you know the powder is hardening.
Once the activator is dry to the touch, repeat the exact dipping process: angled immersion into the powder, tap excess away, brush off loose powder. Each layer should feel smoother and more refined than the last because you’re building on a hardened base rather than a tacky one.
After your second coat is brushed clean, apply activator again. Wait for it to fully harden (usually 15–20 seconds), then decide whether you need a third coat. For short squoval nails, two coats typically creates ideal thickness — the nail is protective but not noticeably bulky. Three coats creates extra durability if you work with your hands or are prone to damaging your nails, but it’s not essential for most people.
The key to multiple coats looking seamless is even coverage on each layer. If you’re uneven with your dipping — say, the center gets powder but the edges don’t — that unevenness becomes more pronounced with each additional coat. Take your time with each dip to ensure the whole nail gets coated evenly, especially those carefully created squoval edges.
Between coats, avoid touching your nails and keep them out of water. The activator is hardening the powder, but the overall structure isn’t fully set until you apply the final sealer coat, which comes next.
Creating That Smooth, Sealed Top Finish
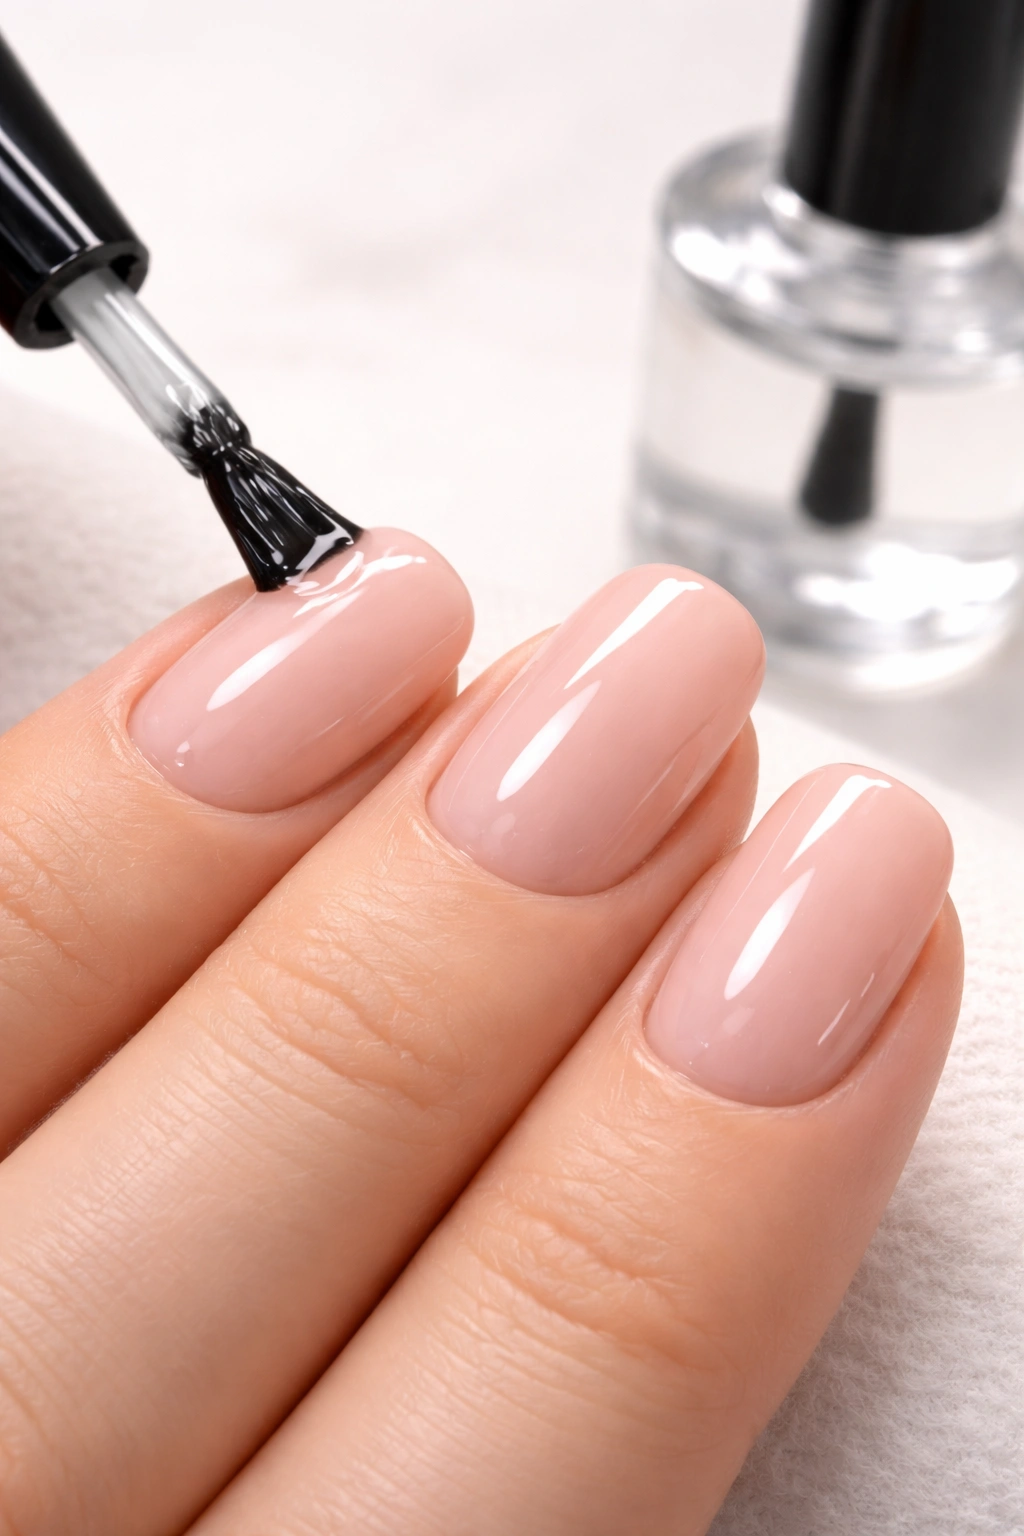
The top coat (sealer) is what transforms your built-up powder layers into a smooth, hard, glossy surface that lasts for weeks. This step is absolutely critical.
Using the top coat applicator brush, apply a generous coat of top coat to each nail. Unlike the base coat and intermediate coats, you’re not trying to minimize the top coat — you want a visible, noticeable layer that fully seals all the powder beneath it. Start at the cuticle and sweep toward the tip, then sweep from the sides toward the center, ensuring every millimeter of the nail surface gets covered. The top coat should look wet and glossy on your nail.
The top coat immediately begins to harden, and the transformation is dramatic. Within about 30–45 seconds, your nails will go from looking dull and chalky (the powdery appearance) to looking shiny and smooth (the final sealed appearance). The color also looks richer and more saturated once the sealer is dry because light is reflecting off the sealed surface rather than being absorbed by loose powder particles.
Once the top coat is fully dry — and you’ll be able to tell because the shine is complete and the surface feels hard to the touch — you can move on to the final refinement step.
Some dip powder systems include a final shine coat or gloss layer. If yours does, apply this after the sealer has dried. It creates an extra-glossy, mirror-like finish that’s purely aesthetic — your nails will already be durable without it, but it adds that high-shine salon finish that’s especially noticeable in certain lighting.
Refining the Edge and Shape After Dipping
You’ve created a solid dip powder base, but the final refinement is what makes your squoval shape actually look intentional and professional-quality.
Using your fine-grit file (240-grit or higher), you’re going to refine two specific areas:
The free edge (the white tip) needs cleaning up. During the dipping process, you’ve got powder on the edges and underneath the nail, and the overall edge might look slightly jagged or thick. File gently along the edge of the free edge, smoothing any irregularities and creating a clean, even line. File from the side toward the center so you’re not directing the movement away from the nail, which would cause splitting.
The corners need the most attention. These are where the squoval shape is defined. Using your fine file held roughly parallel to the corner, gently refine the curve on each corner. You’re not adding more rounding — you’re smoothing and refining the curve you created before dipping. This creates that soft, intentional rounded corner that distinguishes squoval from square.
After filing, you may notice the shine has dulled slightly where you filed. Use a buffer or buffing block to gently smooth these areas, restoring the shine and creating a seamless finish. Light buffing strokes in the direction of the nail growth (from cuticle to tip) blend any file marks back into the glossy finish.
Stand back and assess the overall look. Your squoval shape should be clearly visible: straight sides running most of the length of the nail, soft rounded corners, and a clean, even free edge that doesn’t look thick or chunky. The whole nail should be smooth and glossy with no visible texture or layers.
Caring for Short Squoval Dip Powder Nails Long-Term
Your manicure isn’t finished once you leave the salon or complete the application — how you care for it during the next three to four weeks determines whether it stays beautiful or starts degrading.
Moisturize consistently. The dehydrator and dip powder process pull moisture from your nails and surrounding skin, so using cuticle oil or hand cream daily (or multiple times daily) is essential. Apply it to your cuticles and the skin around your nails, and occasionally massage a tiny amount into the nail surface itself. This keeps your cuticles healthy, prevents hangnails and peeling, and actually extends the lifespan of your manicure because you’re preventing the cuticle from getting ragged and catching the edge of the dip powder.
Protect your nails from extreme water exposure. Wearing gloves when washing dishes, showering, or doing prolonged water-based activities prevents the dip powder from softening and becoming more prone to lifting. Water softens the seal over time, and extended water exposure is one of the main reasons dip powder starts separating from the nail before four weeks are up.
File your nails when they grow out, not because they’re breaking. As your natural nail grows out, the dip powder stays in place, creating a visible gap between the cuticle line and where the dip powder starts. Every two to three weeks, you can use a fine file to gently file along that regrowth area, which helps the manicure blend and prevents that hard line from becoming too noticeable. This is different from removing the entire manicure — you’re just softening the transition.
Don’t use your nails as tools. Short nails are sturdier than long nails and less prone to breaking, but they’re not indestructible. Avoid using them to open things, peel stickers, or scratch off dried paint. Use actual tools for those tasks and your manicure will last dramatically longer.
When the dip powder starts lifting or chipping near the edges, resist the urge to pick at it. Picking pulls off layers prematurely and damages the remaining manicure. Instead, file the lifted edge smooth and apply a tiny bit of clear top coat to that spot, or simply wait until the manicure is due for removal and start fresh.
Remove your dip powder properly when you’re ready for a fresh set or a break. Soaking in acetone for 10–15 minutes softens the dip powder so it slides off without damaging your nails. Don’t force it or dig at it — soak longer if needed, then gently push the softened powder away. Harsh removal is the fastest way to develop thin, peeling nails that won’t support future manicures.
Common Mistakes When Shaping Short Dip Nails
Understanding what goes wrong helps you avoid the pitfalls that trip up most people attempting this for the first time.
Rounding too much is the single most common mistake. You end up with oval nails instead of squoval, and on short nails, that shape reads as small and round rather than intentional and polished. Remember that squoval is mostly square with softly rounded corners, not primarily rounded. If you catch yourself creating an oval shape, file the sides straighter and keep more of that straight edge.
Filing too aggressively during the final refinement step is another common problem. After you’ve worked hard to create a precise shape during dipping, you can accidentally undo it by over-filing the final details. Use light pressure and short strokes, particularly on the corners. You’re refining, not reshaping.
Applying uneven powder coats creates visible texture and an imprecise shape. If your first or second coat isn’t fully even across the entire nail, you’ll see bumps or uneven thickness when the powder is sealed. Take your time dipping and make sure you’re rotating your hand slightly so every part of the nail gets thoroughly coated. If one spot looks under-dipped, that’s a sign to re-dip that nail or plan for an additional coat.
Skipping or rushing the surface prep is the fastest way to get chipping within two weeks. Taking five minutes to carefully dehydrate, prime, and dry your nails might feel tedious, but it makes the difference between manicures that last three weeks and manicures that last four weeks. Most chipping happens because the base coat wasn’t fully adhered to the nail plate from the start.
Creating a dip powder seal that’s too thin leaves you with a manicure that feels fragile. If you’re only doing one coat of powder plus the sealer, you’re likely not getting the durability that makes short squoval nails actually practical. Aim for two coats of powder minimum, with proper activator between each layer.
Not accounting for the fact that short nails look even shorter when they’re too rounded. If you really love the oval shape, that’s fine — but recognize that on short nails, oval reads differently than on medium or long nails. Squoval gives short nails the visual illusion of slightly more length because the straight edge engages your eye in a way that all-rounded shapes don’t.
Final Thoughts
Getting short squoval nails with dip powder is entirely about precision and understanding why each step matters, not about innate talent or special equipment. The shape comes from careful filing using the right technique, the durability comes from meticulous surface preparation, and the lasting power comes from proper sealing and maintenance.
The beauty of short squoval dip nails is that they’re genuinely practical while still looking intentional and groomed. You get the visual sophistication of a shaped nail without the fragility or inconvenience of length. The dip powder formula provides protective thickness that keeps that shape looking crisp and defined for weeks, and the combination of these two elements creates a manicure style that’s become genuinely popular among people who actually use their hands for things — artists, musicians, healthcare workers, parents, and anyone who doesn’t want to sacrifice a polished appearance for functionality.
Once you’ve done this a few times, the process becomes faster and more intuitive, and you’ll develop your own small tweaks and preferences. Maybe you prefer three coats instead of two, or you like your corners softer than the standard squoval curve. Those adjustments are completely fine — you’re building on a solid foundation, not reinventing the wheel. Start with the process exactly as described here, nail it, and then experiment from there. The rewards are a manicure that actually lasts, looks professional, and doesn’t require constant upkeep between applications.
