

Shaping your nails at home doesn’t require a trip to the salon or a professional manicurist. With the right technique and proper tools, you can create beautifully rounded nails that look polished and intentional. The key lies in understanding how your nails grow, what type of file works best, and the specific filing motion that creates a smooth, curved edge rather than an uneven or jagged one.
Many people assume that filing nails is straightforward—you grab a file and go back and forth until the edge is short. In reality, the direction you file, the angle of the file, the pressure you apply, and the shape of your file itself all dramatically influence whether you end up with elegant rounded nails or damaged, weakened edges that chip and break within days. Rounded nails are often considered the most flattering and forgiving shape because they suit nearly every hand shape and nail length, they’re stronger than sharp points, and they photograph beautifully. Understanding the fundamentals will transform your at-home nail care from a chore into a satisfying ritual that keeps your nails looking salon-quality.
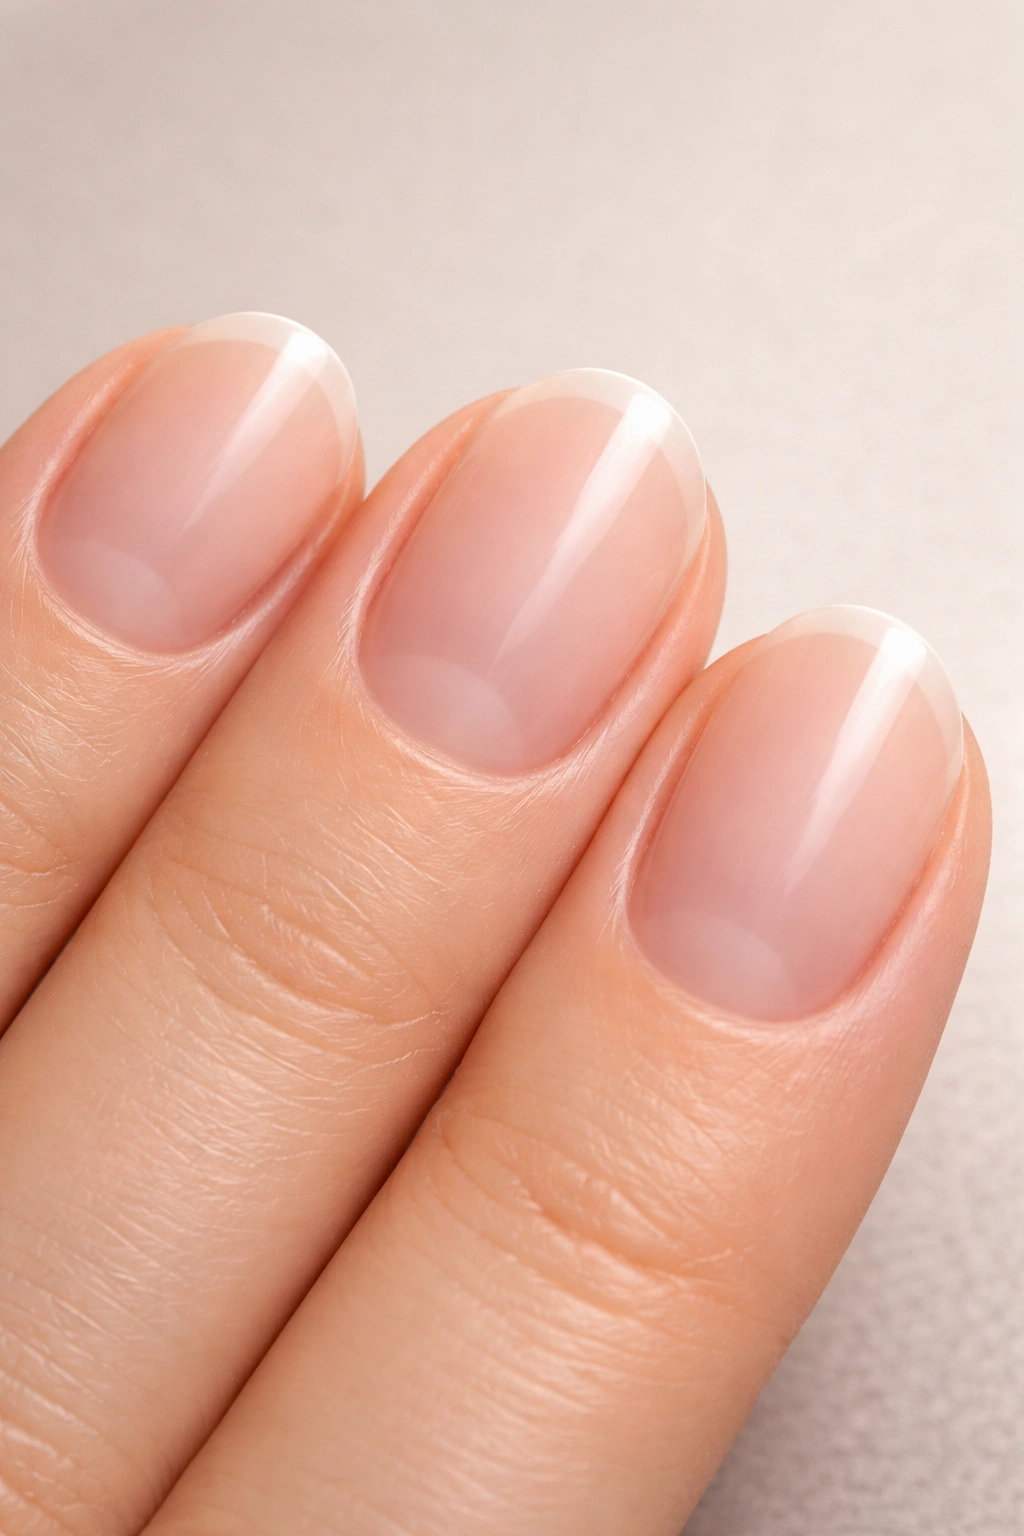
Understanding Why Rounded Nails Are Worth the Effort
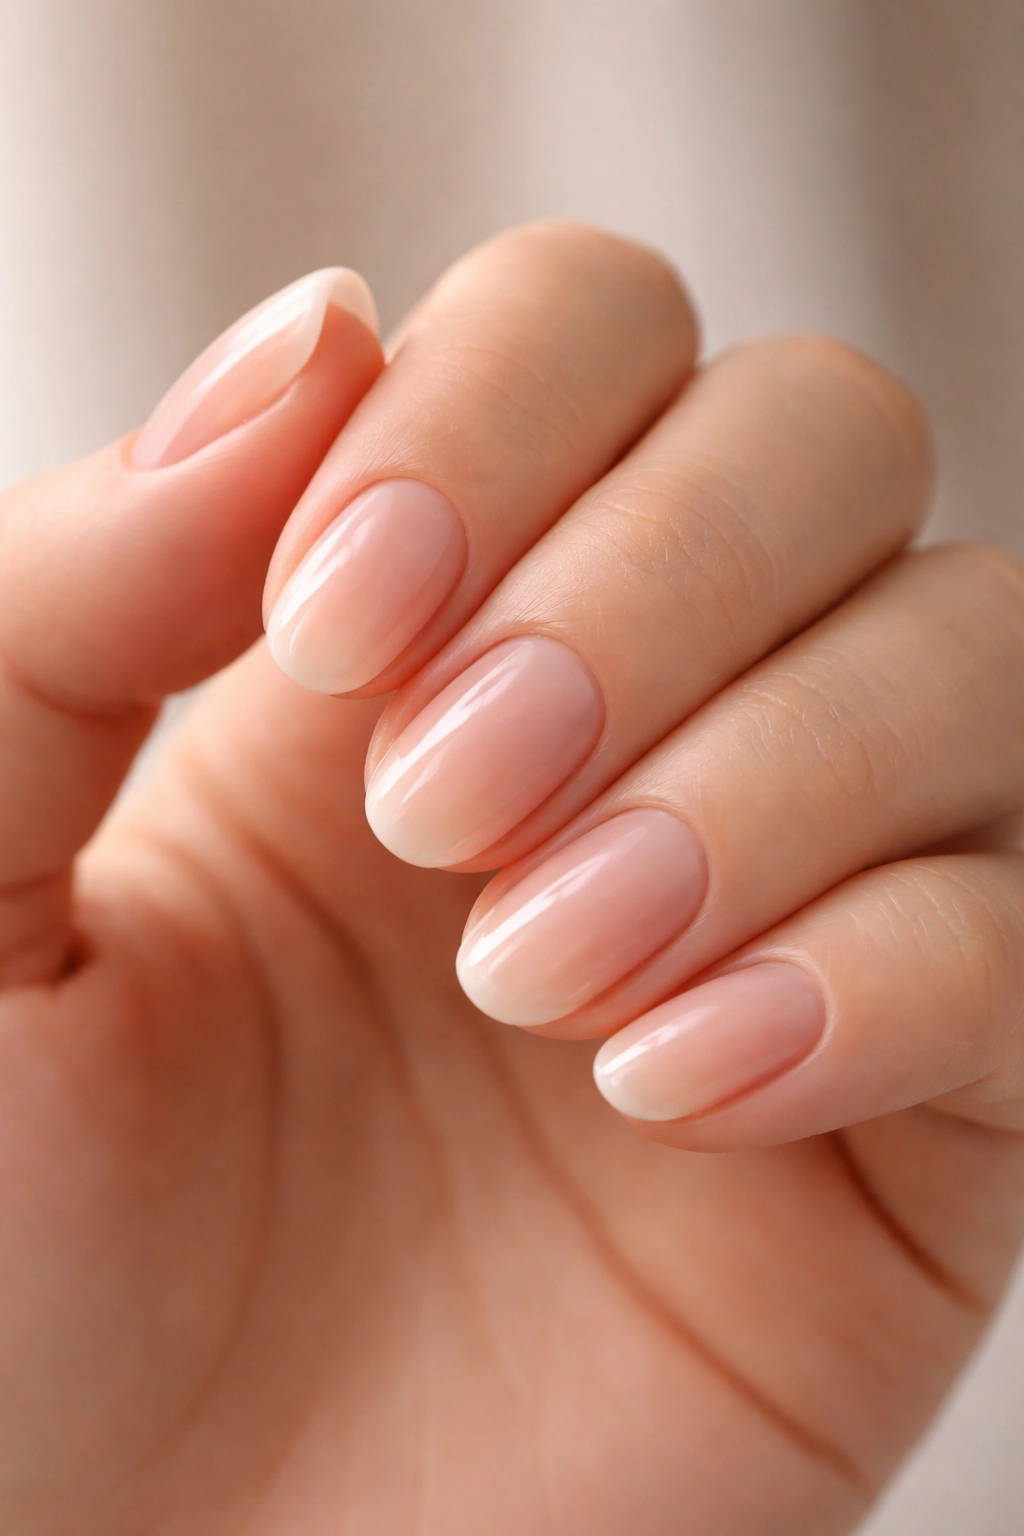
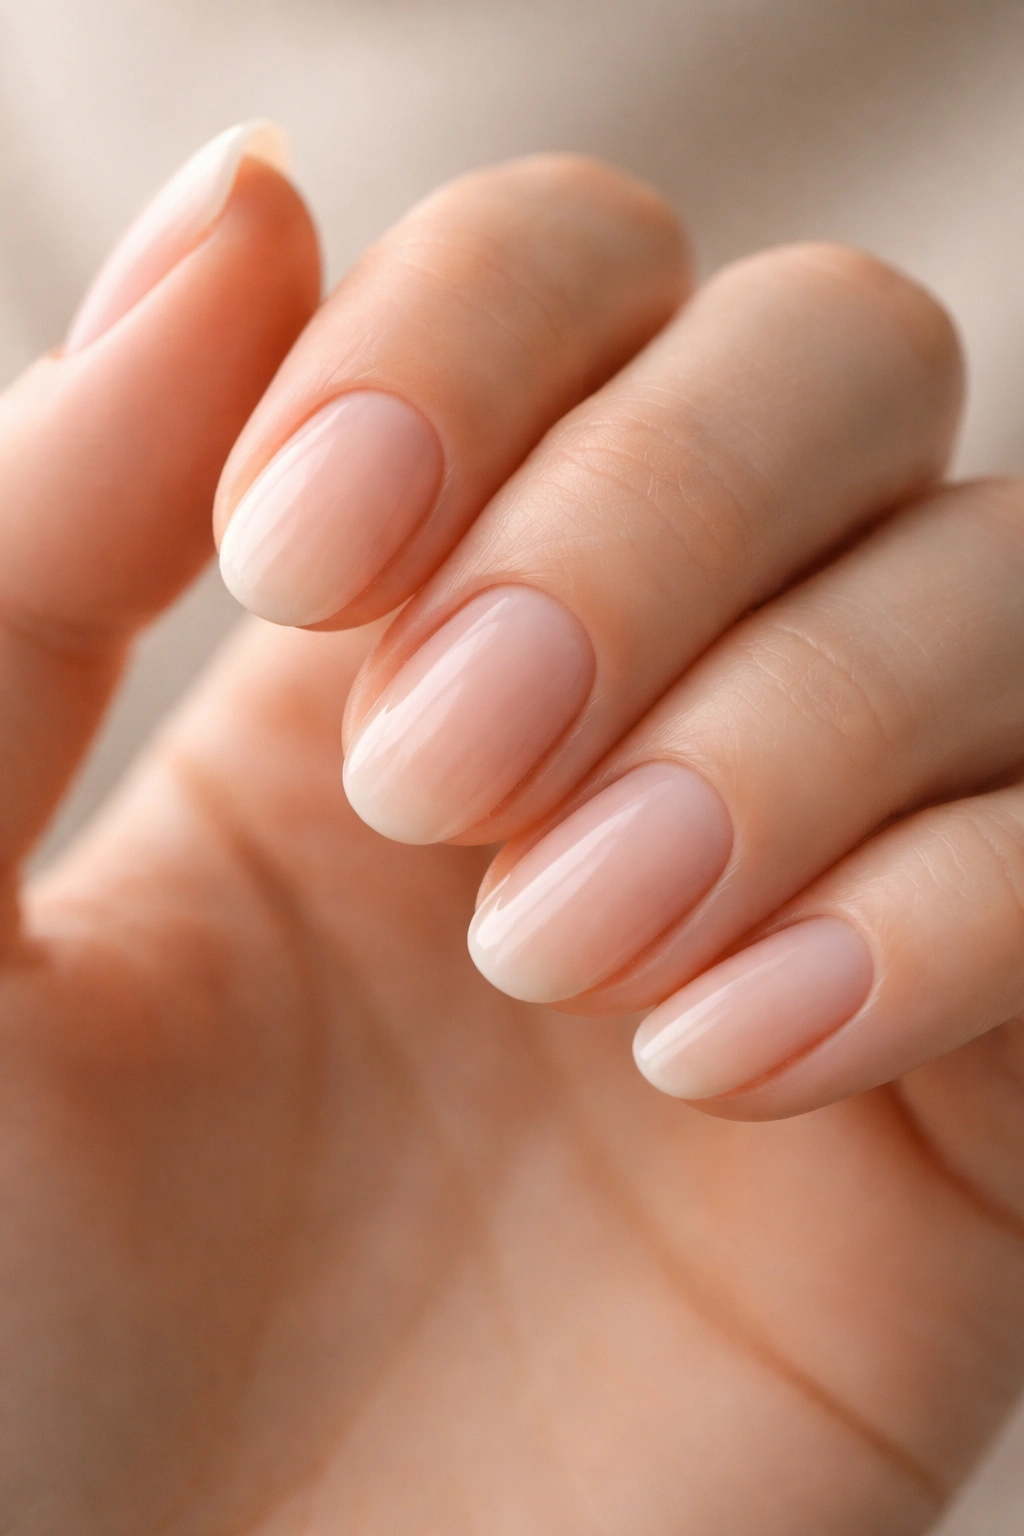
Rounded nails aren’t just aesthetically pleasing—they’re actually the most practical shape for everyday living. When your nail edges are curved rather than square or pointed, they’re far less likely to catch on fabric, break unexpectedly, or poke you when you’re typing or touching your face. The rounded shape distributes stress across the edge of the nail more evenly, which means less breakage and longer-lasting manicures between shaping sessions.
From a visual standpoint, rounded nails elongate your fingers and create a softer, more polished appearance than square nails while being more wearable than pointed or coffin shapes. They work beautifully whether you prefer nude polish, bold colors, or nail art. The curve also means your nails are less likely to bend backward if you bump them—the rounded edge naturally guides pressure downward and sideways rather than directly onto the vulnerable free edge.
Beyond the practical benefits, shaping your nails consistently trains them to grow in stronger. When you file correctly, you seal the edge of your nail and create smooth keratin layers that resist splitting and peeling. Neglect this step, and your nails will naturally develop microteams and rough edges that spread upward into the nail body, causing damage that takes weeks to grow out.
Choosing the Right File for Your Nails
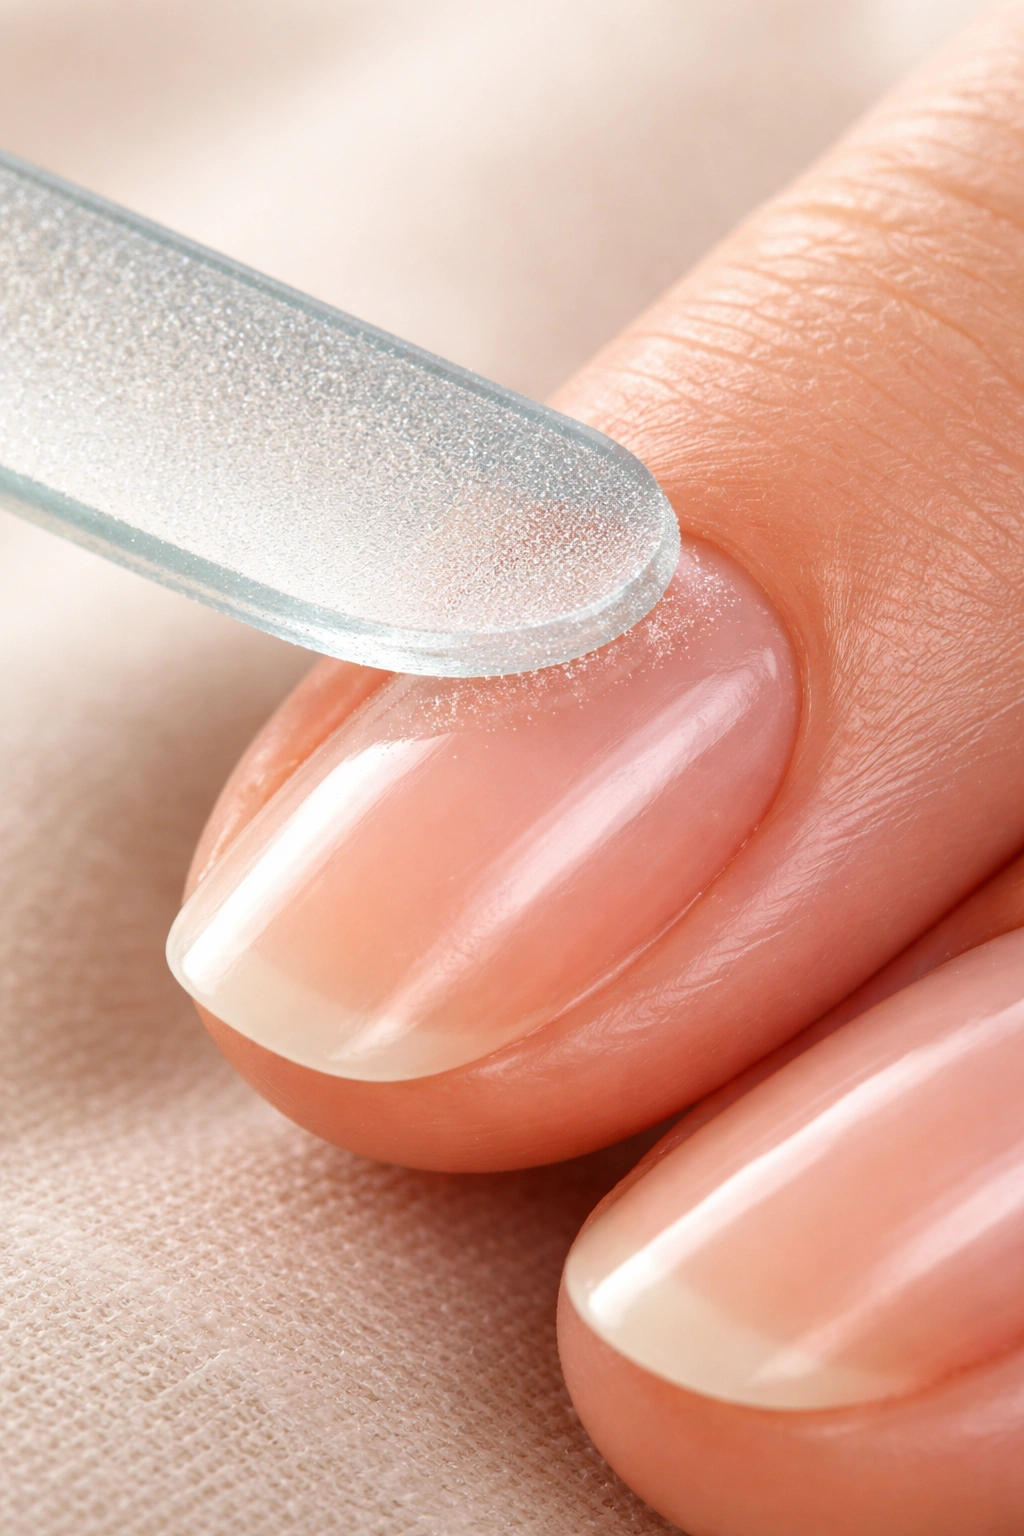
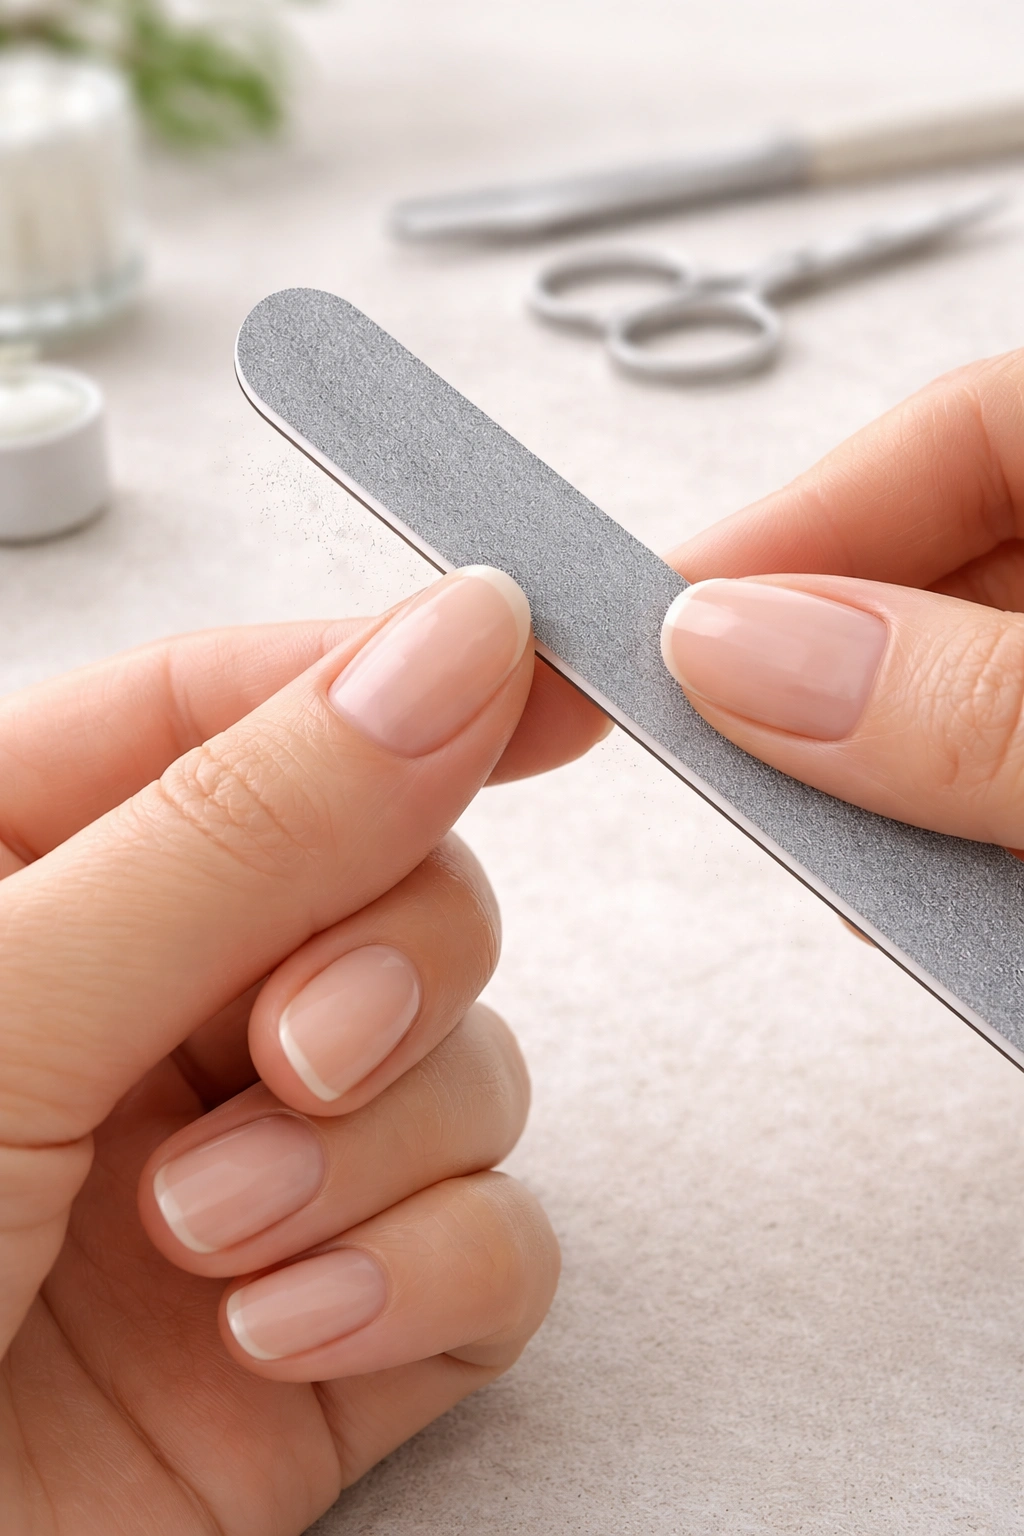
Not all nail files are created equal, and using the wrong type can seriously damage your nails. The most important distinction is between metal files and glass/crystal files. Metal files, particularly cheap steel ones, have a rough surface that tears the keratin at the edge of your nail, creating microscopic splits and breaks that weaken your nail structure. Glass files, on the other hand, seal the keratin edge as you file, leaving it smooth and intact.
If you’re serious about healthy nails, invest in a glass nail file or a crystal file (often branded as sapphire or ceramic). They cost more upfront than metal files—usually $8 to $15—but they last for years and make an enormous difference in nail health. A quality glass file won’t break when dropped on tile (unlike cheaper crystal versions) and won’t shed particles into your nail edge.
The grit of your file also matters. Grit refers to how fine or coarse the file’s surface is, usually marked as a number like 180, 220, or 320. Higher numbers mean finer, smoother grit. For natural nails, you want a file between 180 and 220 grit—fine enough to avoid tearing but textured enough to shape your nails efficiently. Files marked 100 grit or lower are too coarse for natural nails and should only be used on artificial nails or very thick, damaged edges.
The shape of the file matters too. A slightly beveled or curved file—not perfectly flat—naturally guides you toward the rounded shape you’re trying to create. Some people prefer a slightly tapered file that’s wider at the handle and narrower at the tip, which allows for more precise control.
Preparing Your Nails and Hands Before Filing
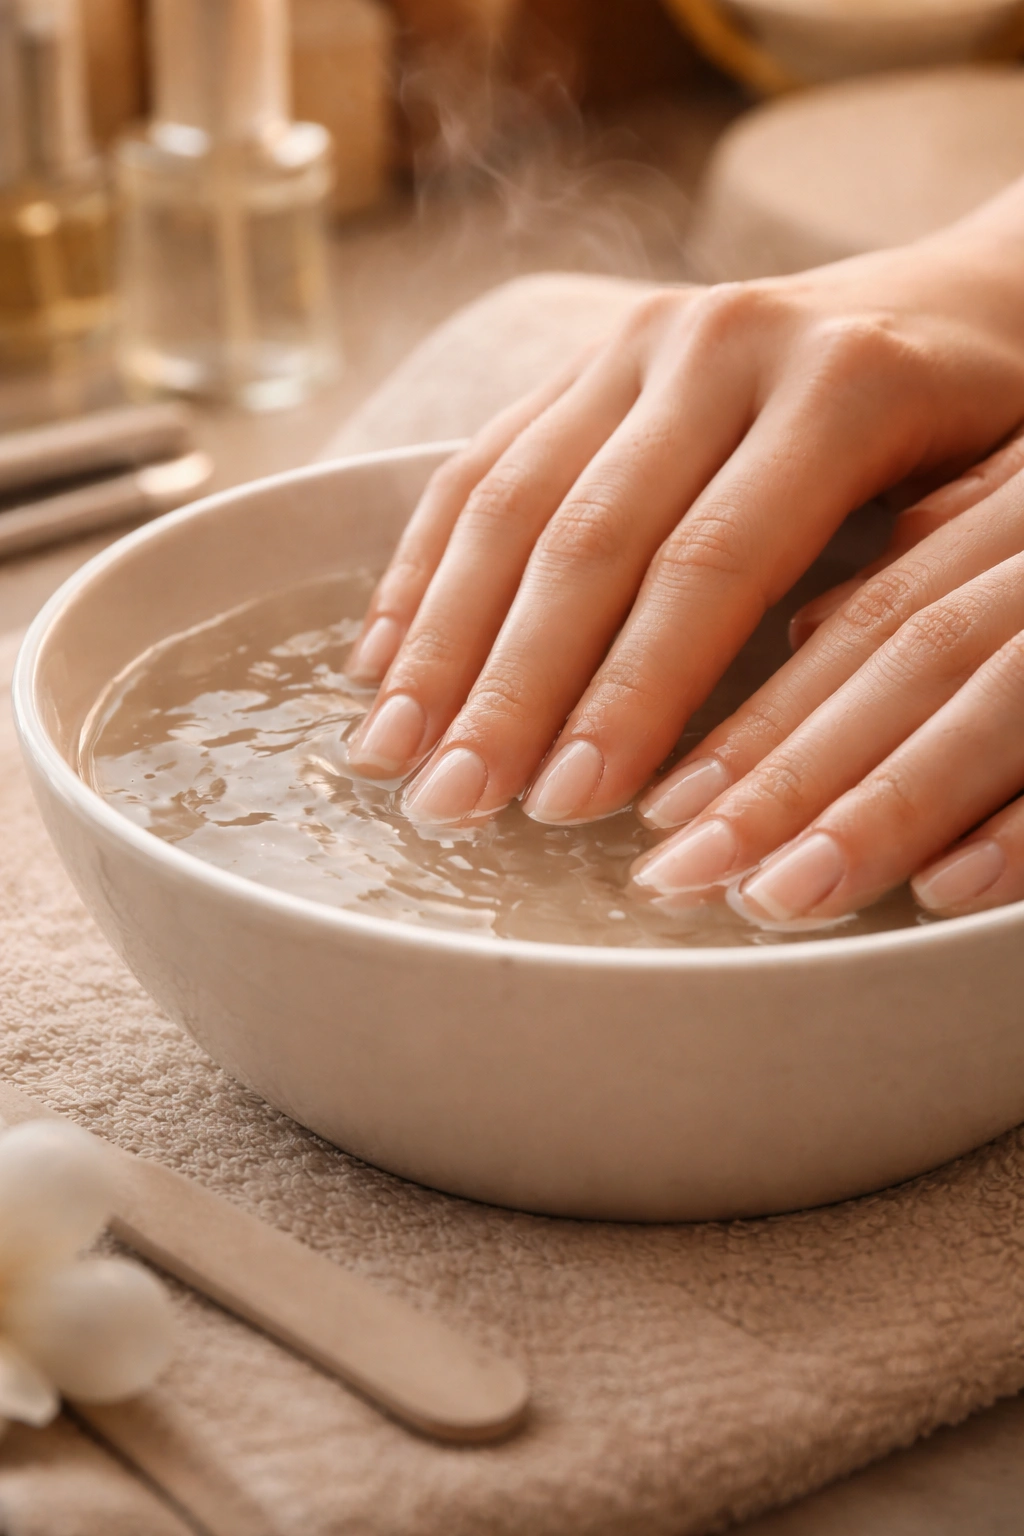
Attempting to file dry, unprepared nails leads to splitting, uneven shaping, and frustration. Start by soaking your hands in lukewarm water for 5 to 10 minutes to soften your nails and make them more pliable. This hydration prevents the keratin from becoming brittle and splitting under the pressure of the file.
Pat your hands dry completely—wet nails are harder to control and shape precisely, and moisture can interfere with your ability to see the nail edge clearly. If your nails have old polish on them, remove it completely with acetone-free remover or a gentle remover and let them dry for a few minutes before beginning.
Push your cuticles back gently using a wooden cuticle pusher or an orange stick. You don’t need to remove them entirely, but they should be pushed back far enough that you can see your entire free edge clearly and file it without the cuticle getting in the way. A stubborn cuticle in the wrong place can cause you to file at an uneven angle.
Make sure your hands are warm and the room is well-lit. Cold hands mean tense muscles, which makes it harder to maintain steady, controlled pressure and angle. Good lighting is critical because you need to see exactly where your nail edge is and whether you’re creating the curve you want.
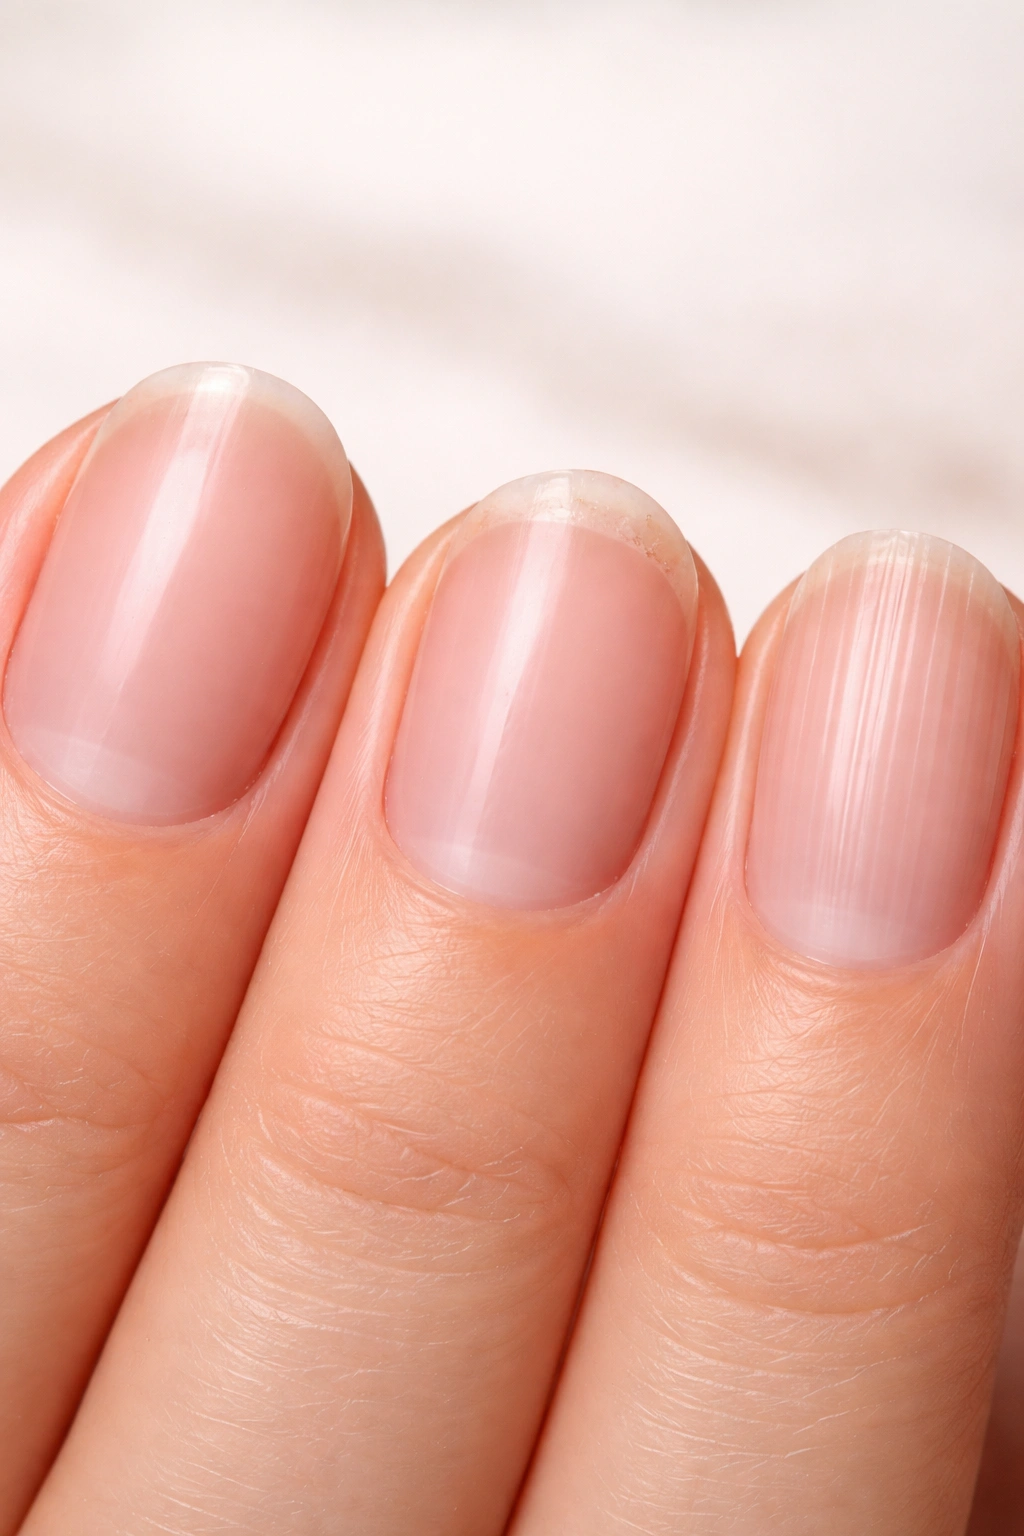
Understanding Your Nail’s Natural Contour
Every person’s nails have a natural curve to them when viewed from above. Your nails aren’t perfectly flat—they have subtle ridges and a slight barrel shape. Understanding this natural contour helps you work with your nails rather than against them when you’re trying to create rounded edges.
The apex of your nail (the highest point when you look at your nail from the side) is typically about one-third to halfway down your nail from the cuticle. As you file, you want to maintain this natural apex while creating smooth rounded edges—not flattening it or changing your nail’s structure dramatically.
Look at your nails from multiple angles before you start filing. Face your palms down and look at the edge—you should see how wide your free edge is and whether it’s even across both sides. Turn your hands sideways and look at the profile of your nails to see how much length you’re working with. This assessment helps you make intentional decisions about how much to file off and whether your nails are even enough that one single shaping will work or whether you need to file them shorter to make them even first.
If your nails are very uneven—with one finger significantly longer than the others—it’s often better to file the longest ones shorter first to create an even baseline, then shape them all to your desired rounded shape. Trying to create a perfect rounded shape on nails of uneven length will frustrate you and likely lead to over-filing.
The Proper Angle and Grip for Filing
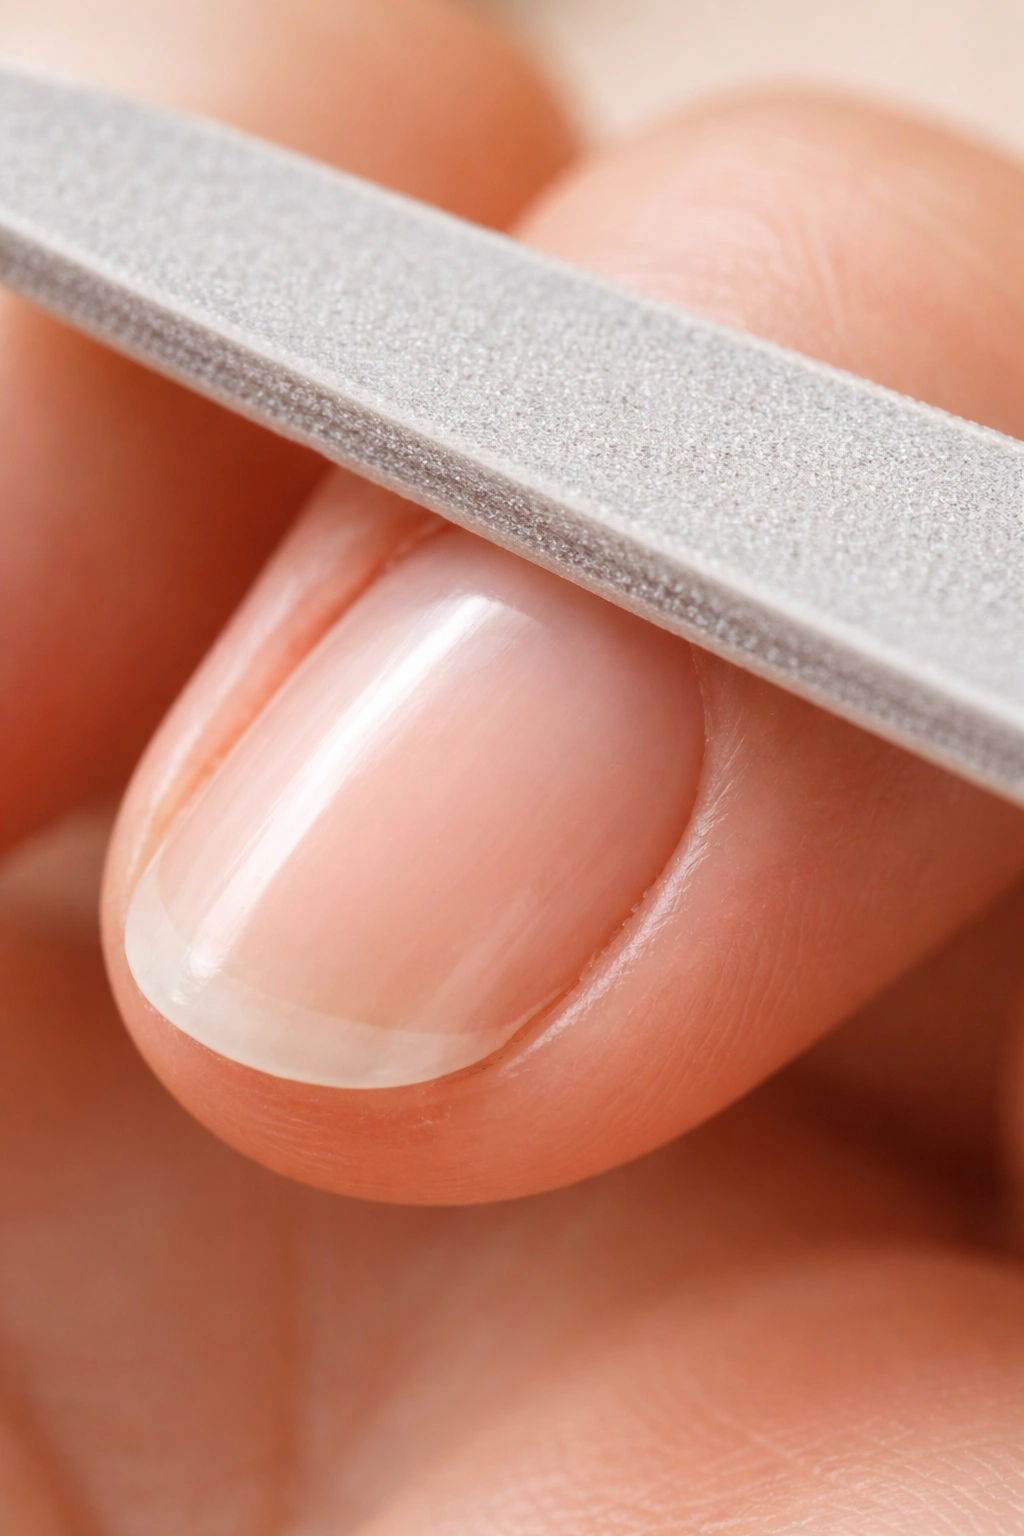
How you hold your file directly influences whether you’ll create a smooth rounded edge or a jagged, damaged one. Your file should make contact with your nail at approximately 45 degrees—not perfectly perpendicular, not flush with the nail surface, but somewhere in between. This angle allows you to shape the edge while sealing the keratin.
Grip your file with your fingers relaxed and your wrist slightly bent, not rigid. Your hand should rest comfortably, not with muscles tensed. The file should feel like an extension of your hand, not a tool you’re fighting with. Many people grip files far too tightly, which leads to shaky, inconsistent strokes and uneven filing.
Hold your filing hand steady and move the file toward your nail in smooth, controlled strokes. Most people find it easier to move the file rather than their nail hand—keep your hand being filed relatively still and let your filing hand do the work. This gives you better control and more consistent pressure.
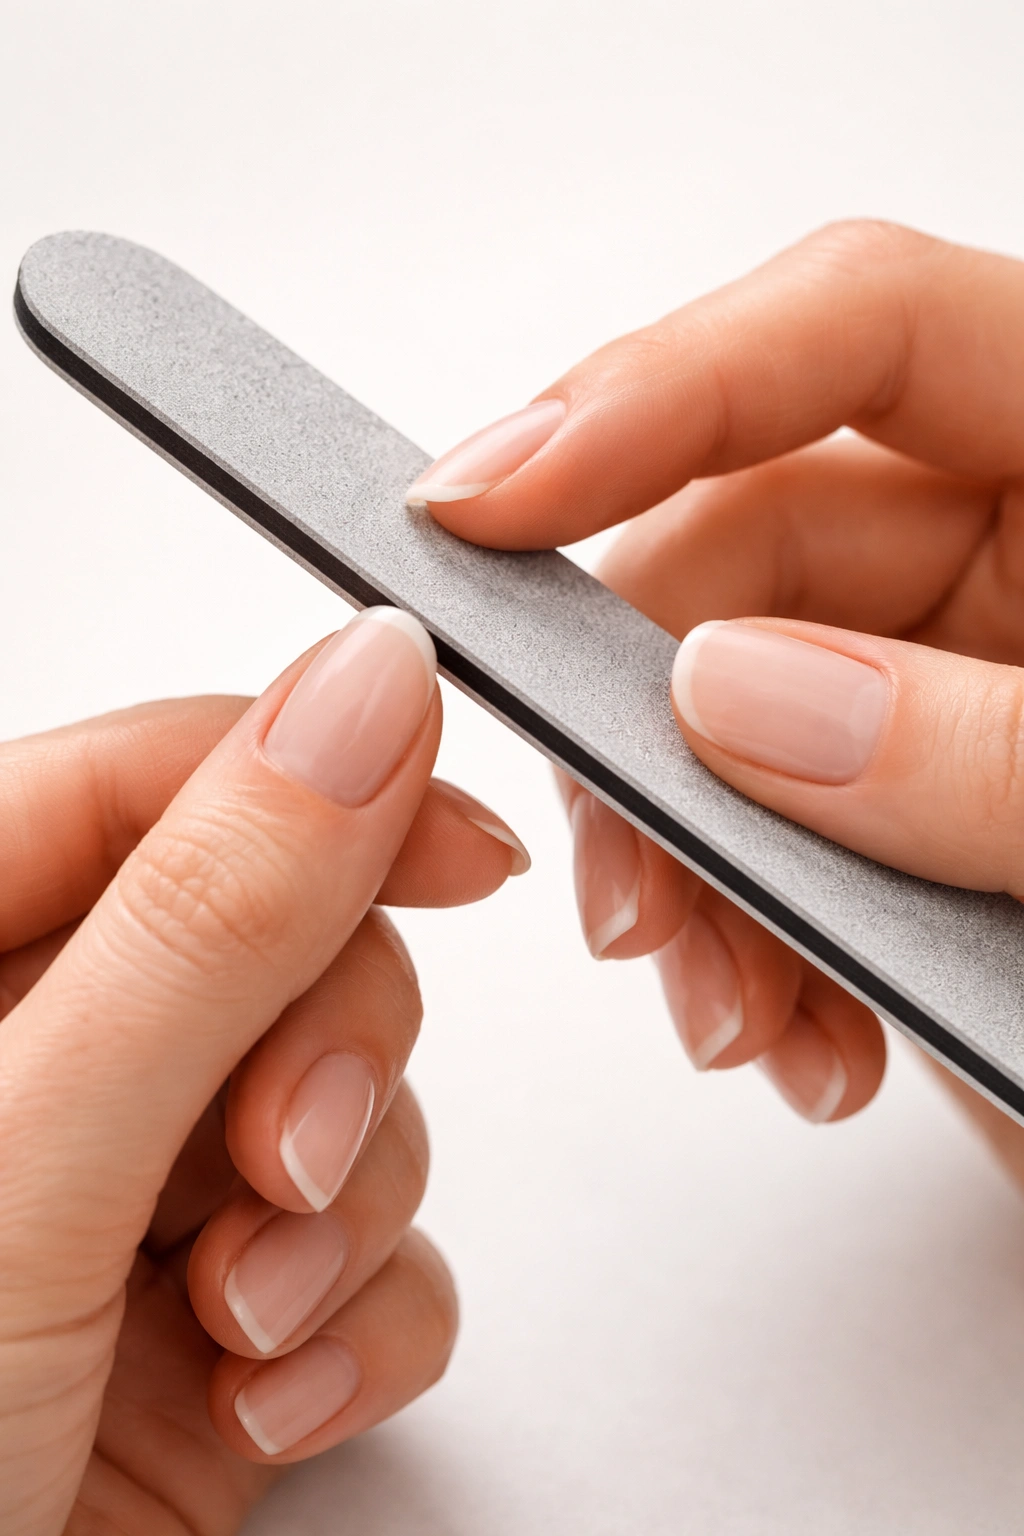
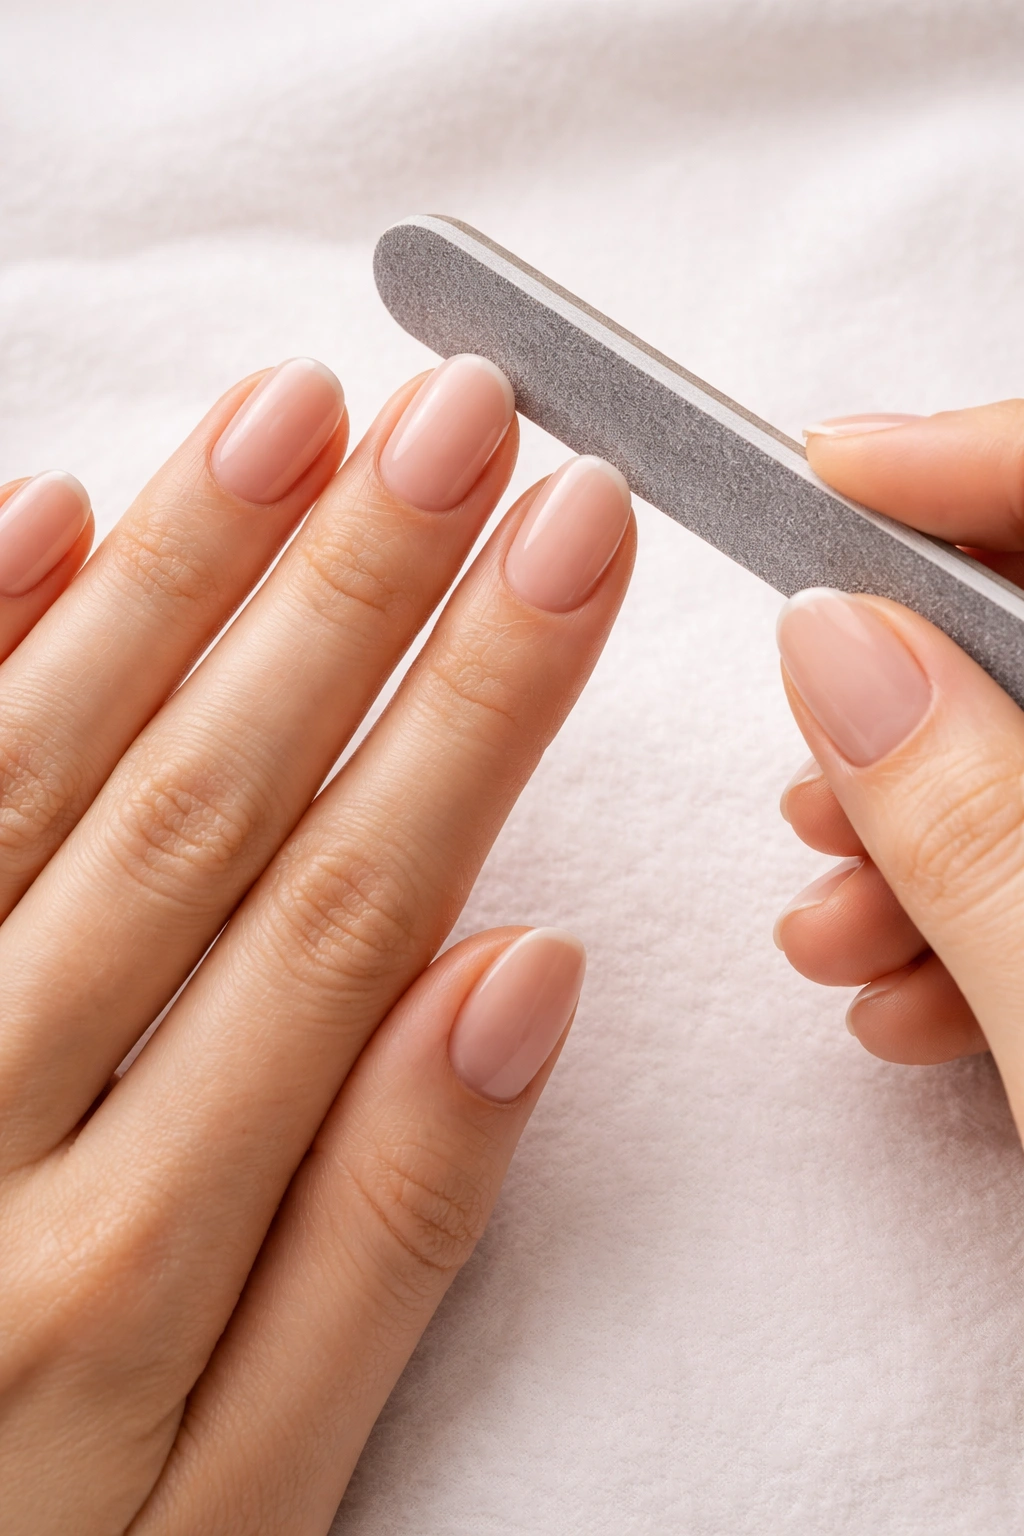
Position your file so it’s working on the outer corner and edge of your nail, not directly on top of the free edge or underneath it. You want the file to be making contact from the side of your nail edge, working across toward the center. This positioning ensures you’re shaping the side of the nail while building the rounded contour naturally.
Mastering the One-Direction Filing Technique
The single most important filing technique is this: always file in one direction, never sawing back and forth. This is the golden rule that separates healthy nails from damaged ones.
When you file back and forth—rubbing the file across your nail edge repeatedly in both directions—you’re essentially scratching and tearing at the keratin. This causes splitting, weakening, and rough, frayed edges that feel unpleasant and look dull. It doesn’t matter how gentle you think you’re being; sawing motion is inherently damaging to nails.
Instead, work from the outer corner toward the center of your nail, using smooth strokes that always move in the same direction. File one side from the corner toward the middle, then rotate your hand slightly and file the other side from its corner toward the middle. This one-directional approach seals and shapes the keratin edge without tearing it.
Each stroke should be deliberate and controlled, taking the file from the outer part of your nail edge toward the center with moderate pressure—not light, tentative pressure and not aggressive pressure, but steady, intentional contact. Most people need somewhere between 10 and 30 strokes per side to achieve the rounded shape they want, depending on how much shaping is needed and how thick their nails are.
The rhythm matters. Some people find it helpful to establish a gentle, steady pace—one smooth stroke per second or so—rather than working frantically or hesitantly. A consistent pace helps you maintain even pressure and creates a more satisfying, meditative experience.
Creating the Rounded Shape: The Two-Side Technique
To create a truly rounded nail, you need to file both visible sides of your nail edge, not just one. Imagine your nail from the end—you’re looking at a small rectangle of nail. The two long sides of that rectangle are what you’ll file to create the rounded curve.
Start with one side of your nail (let’s say the thumb side if you’re working on a finger). Position your file at roughly 45 degrees and begin at the outer corner of that side, using smooth one-directional strokes toward the center. The file should be shaping the outer edge while slightly moving upward and inward as you stroke toward the middle.
After 15 to 20 strokes on that side, check your progress. You should see the sharp corner starting to round into a curve. The goal isn’t to round it completely with those first strokes—you’re building the curve gradually.
Rotate your hand or reposition it so you can access the opposite side (the pinky side). Repeat the same technique on that side, filing from the outer corner toward the center with the same one-directional motion. Your goal is symmetry—both sides should have roughly the same amount of curve and should meet in the center with a smooth, continuous rounded edge.
Check your work by looking at your nail from the end. You should see a gentle curve from one side to the other, not a sharp peak in the middle or a flat edge. If the curve isn’t smooth or feels uneven, take a few more strokes on whichever side needs additional shaping.
The most common mistake people make is filing too much on one side and not enough on the other, creating an asymmetrical shape. Take your time here—it’s better to file several light passes per side than to do aggressive filing that removes too much material.
Refining the Curve for a Perfect Rounded Edge
Once you’ve created the basic rounded shape, it’s time to refine it into something truly polished. This is where patience and attention to detail separate good nail shaping from great nail shaping.
Look at your nail from multiple angles—straight on, from the sides, and from above. Are both sides of the curve smooth and even, or is there a flat spot on one side? Is the curve gradual and elegant, or does it dip sharply in the middle? Does it match the curve on your other nails, or is there variation?
Fine-tune by taking additional gentle strokes on any areas that need smoothing. If one side is flatter than the other, give that side a few more passes. If the very tip has a slightly flat spot where the two curves meet, a few light strokes down the middle can soften that and create a more seamless curve.
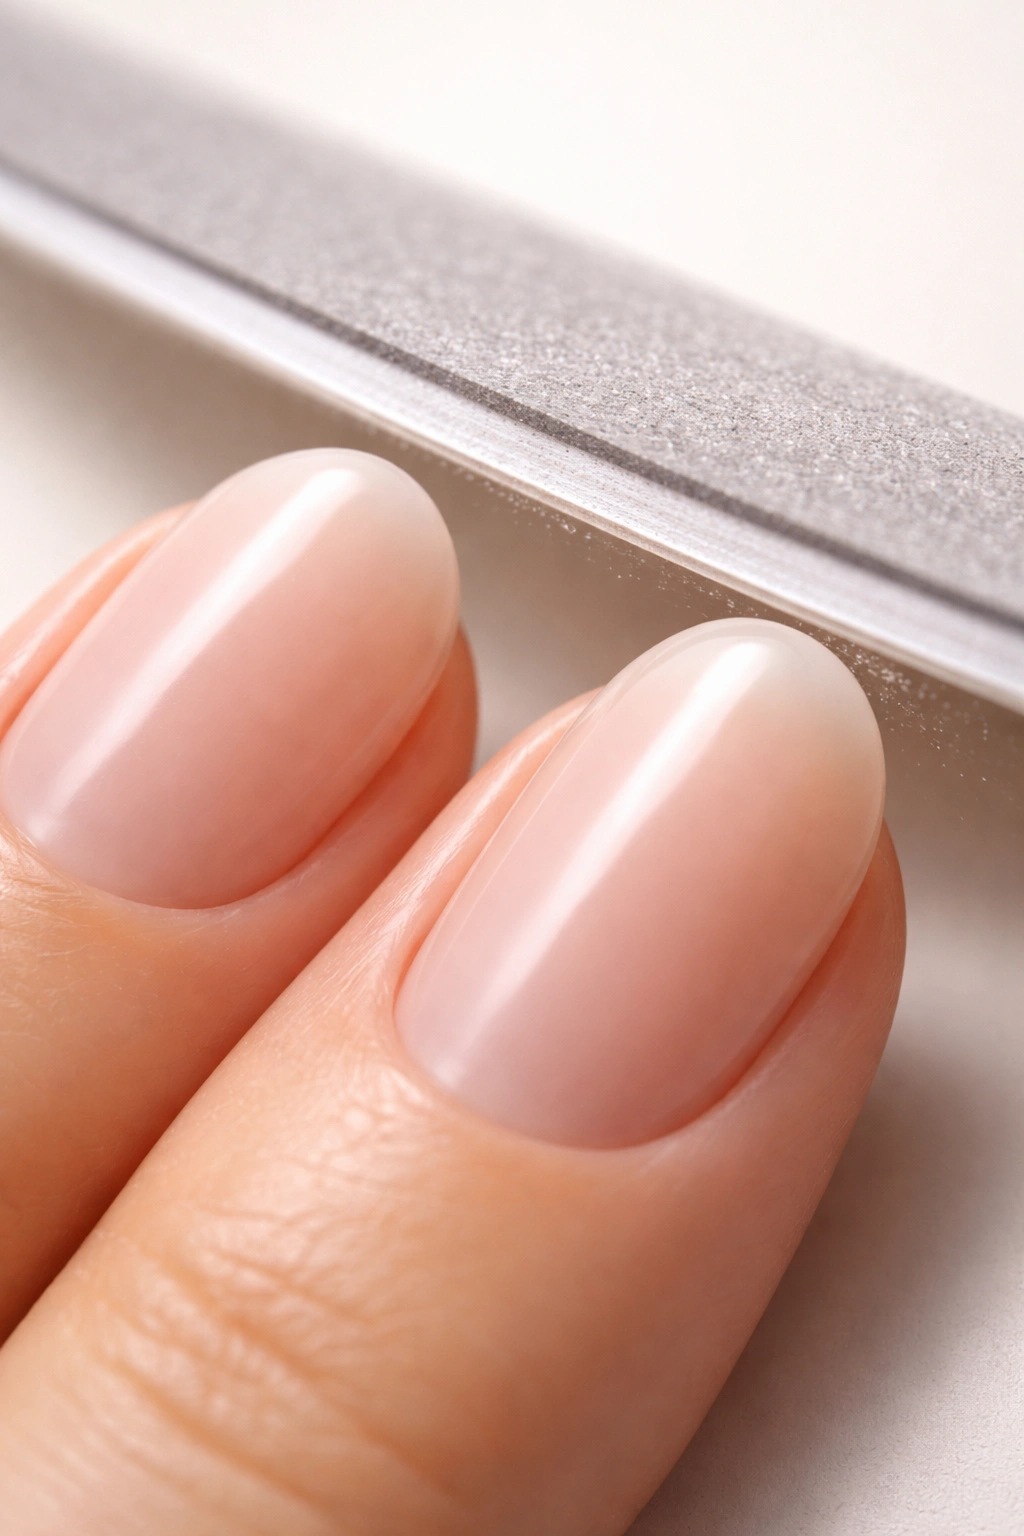
The edge should feel smooth when you run your finger across it—no snags, catches, or rough spots. If you feel any roughness, it means the keratin edge isn’t fully sealed, and a few more passes with your file will smooth it. Sometimes running your file lightly along the very tip (perpendicular to your nail, almost stroking downward along the edge rather than across it) can seal any remaining rough areas.
Pay attention to the overall proportions. The rounded curve should be gentle and gradual, not an exaggerated blob shape. Think of it as a soft quarter-circle—the curve is visible but not dramatic, elegant but not theatrical.
Filing Each Finger to Ensure Consistency
When you’re shaping multiple nails, consistency across all fingers creates the polished, intentional look of a salon manicure. This means making sure all your nails have approximately the same length and the same rounded shape.
File your nails one at a time, but compare each one to the previous one before moving on. If your index finger is noticeably shorter than your middle finger, adjust the middle finger to match. If one thumb is more rounded than the other, spend a moment refining the less-curved one.
Work through all ten nails systematically rather than jumping around randomly. Many people prefer to do all fingers on one hand first, then move to the other hand. This approach helps you develop consistency because you’re repeating the same motion and building muscle memory.
Once you’ve completed all nails with the basic rounded shape, do a second pass where you look at all ten nails together and refine any inconsistencies. This comparative approach ensures that your nails look like a cohesive set rather than ten individual experiments.
Sealing the Edge and Preventing Splitting
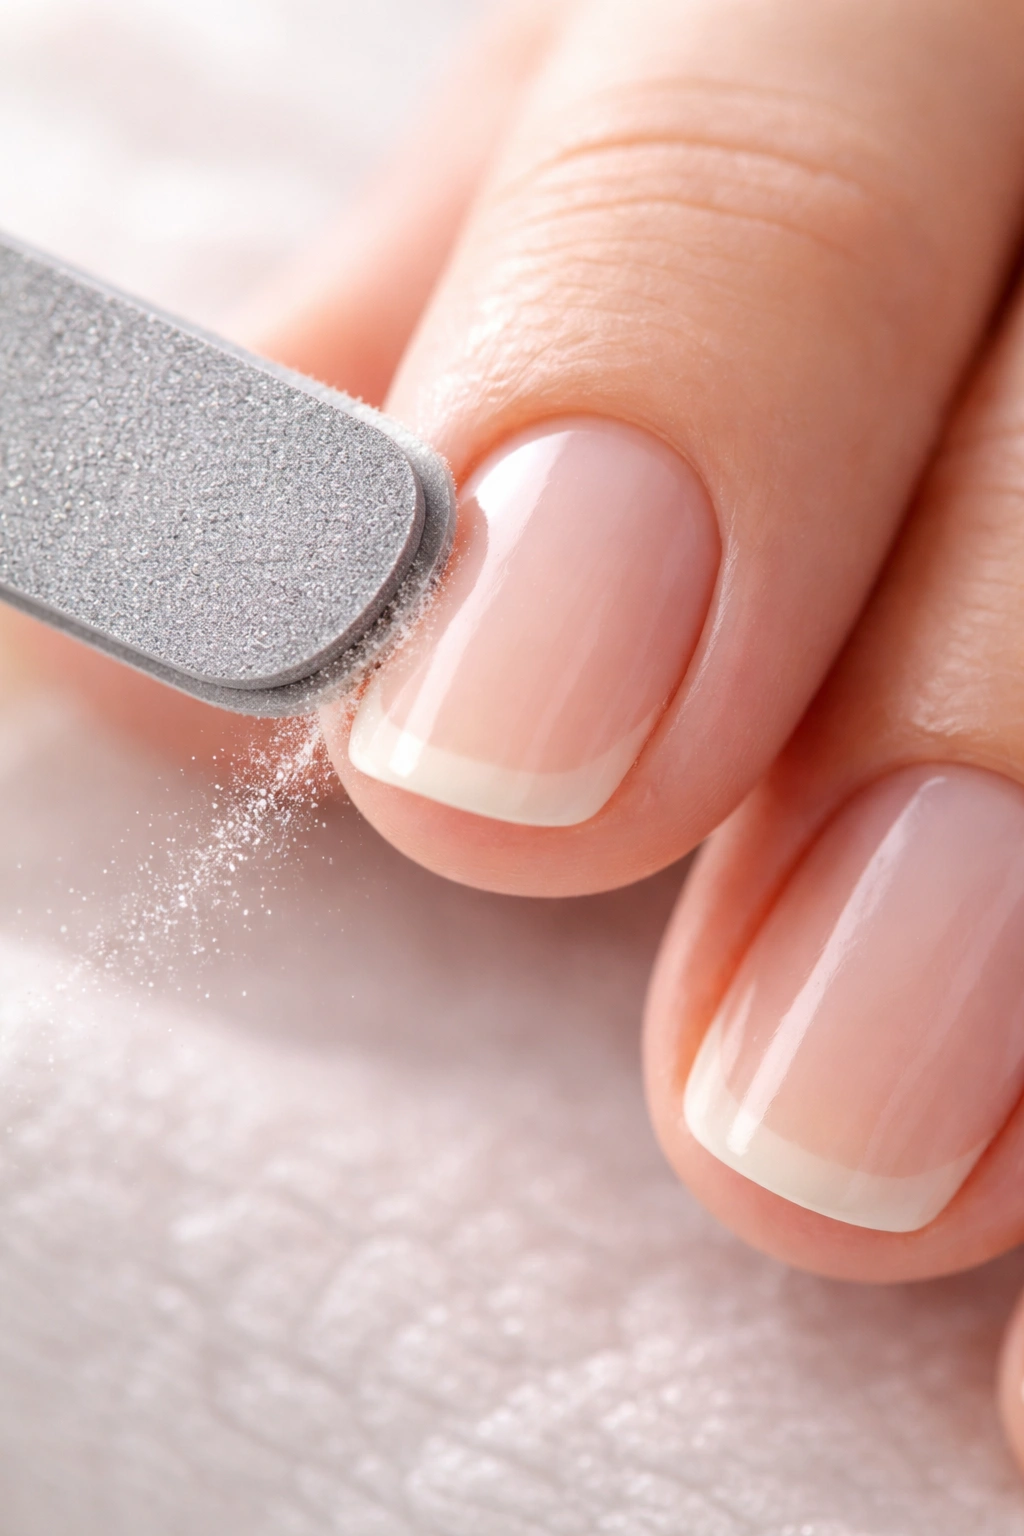
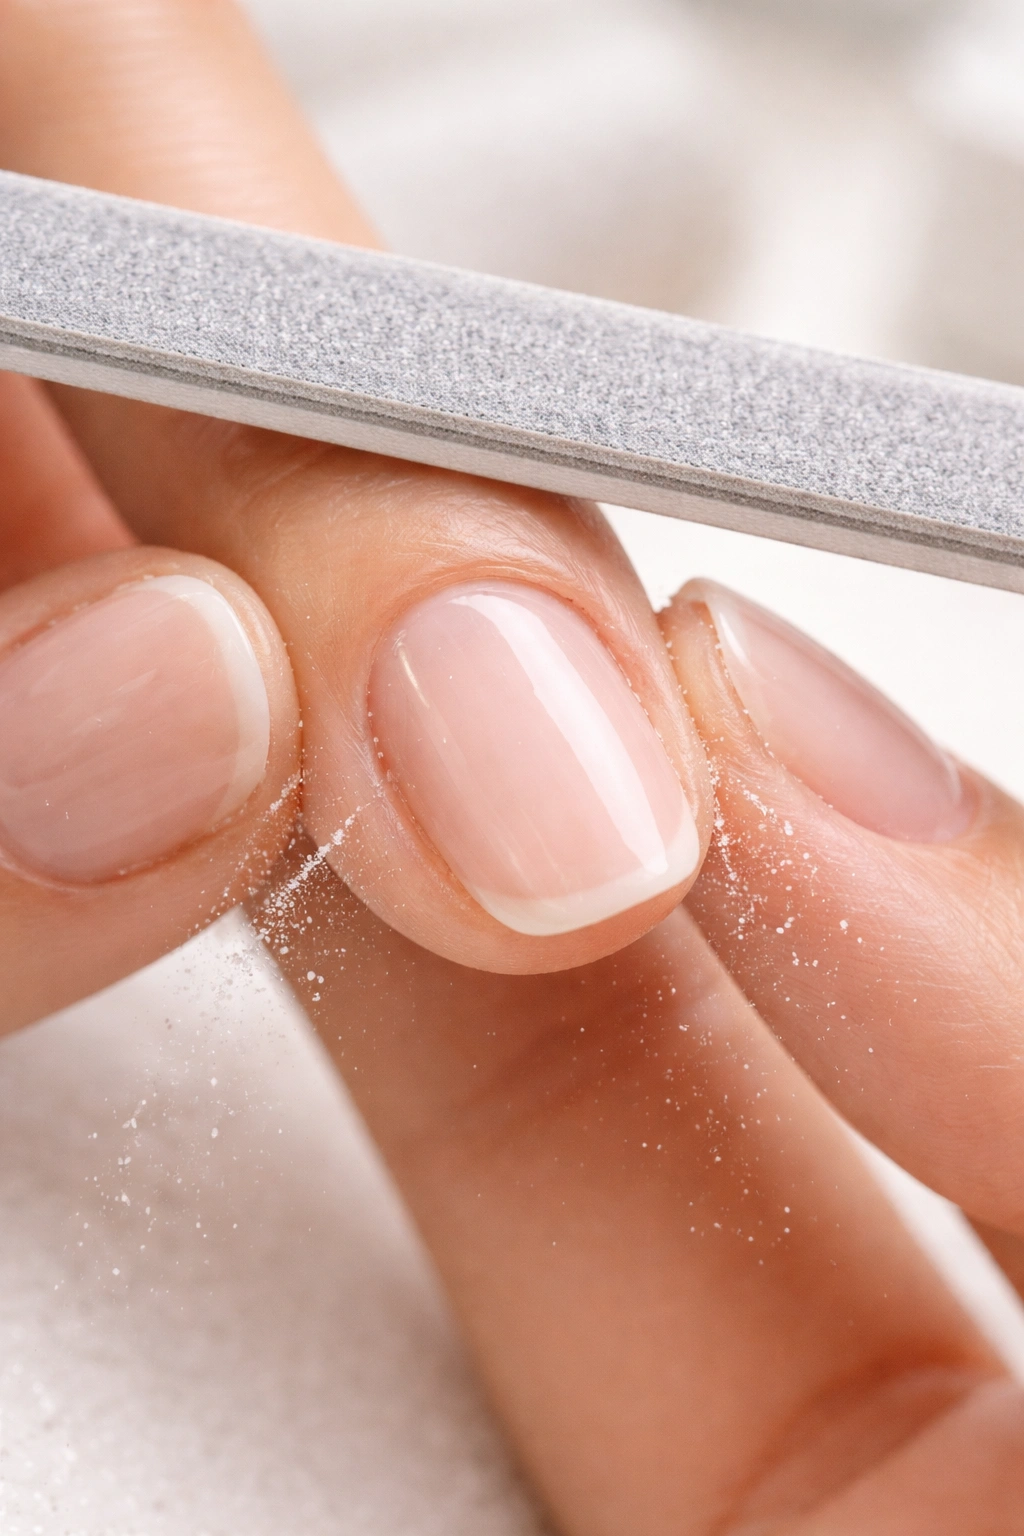
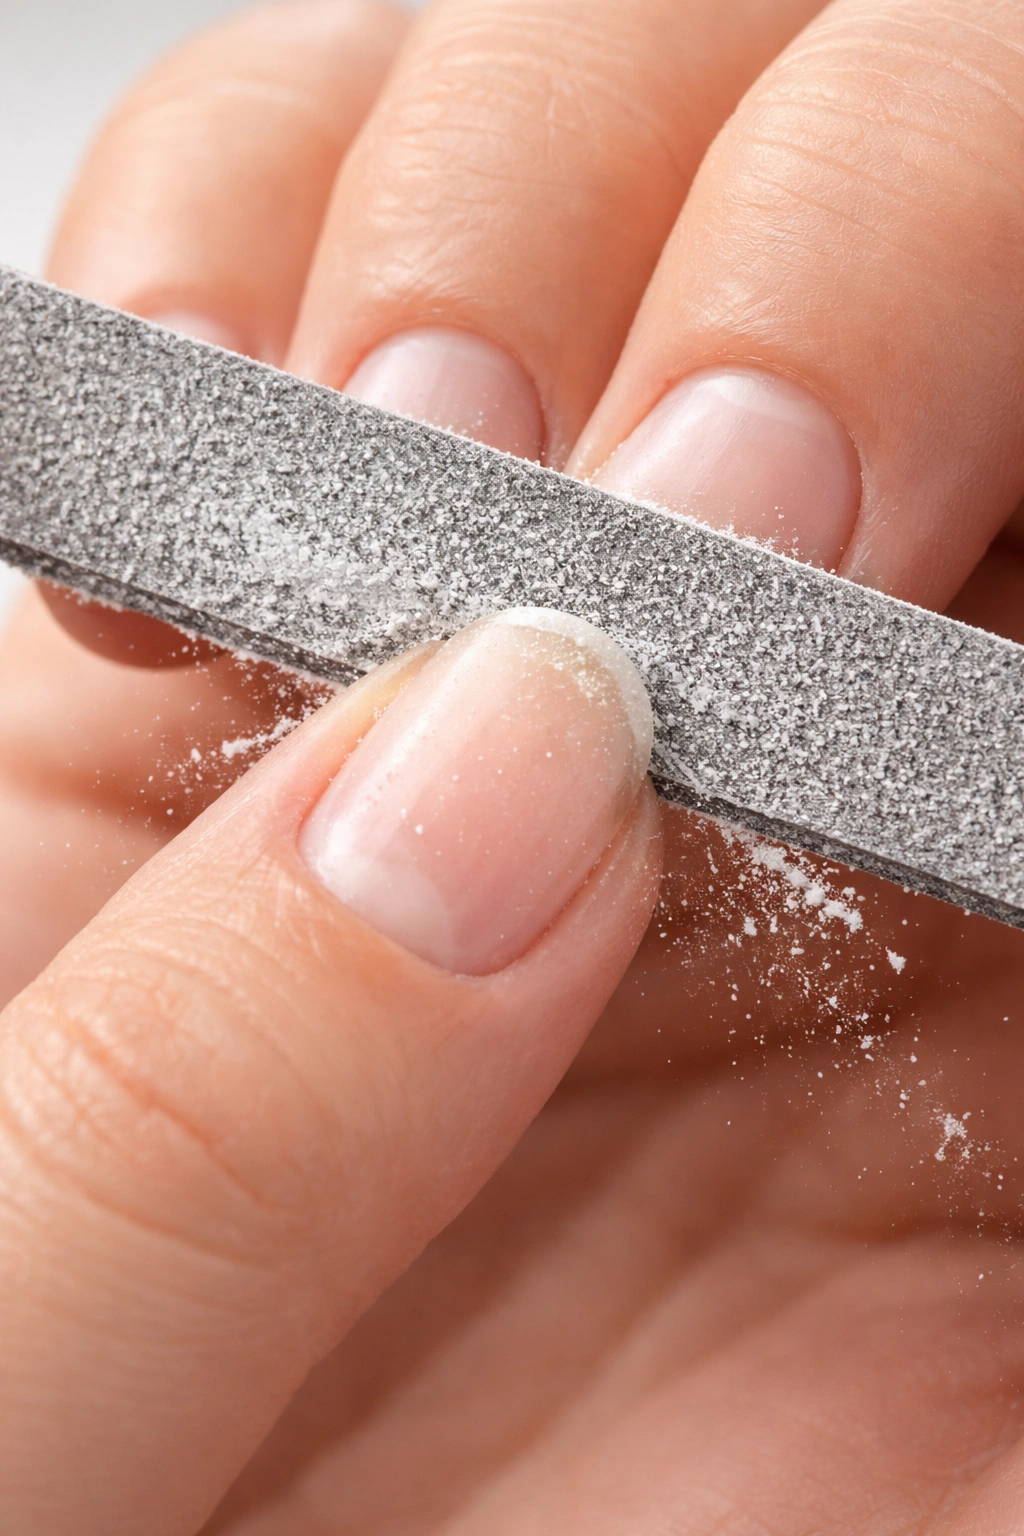
After you’ve shaped your nails to the rounded edge you want, take one final pass with your file to seal any remaining rough spots. Use very light pressure and smooth strokes, focusing on the actual edge of the nail where your file makes contact with the free edge.
This final sealing pass is what makes your nails feel smooth to the touch and look polished under any lighting. It’s the difference between nails that look DIY and nails that look professionally groomed. Take 5 to 10 light strokes per nail, barely pressing the file against the edge, focusing on creating that seal.
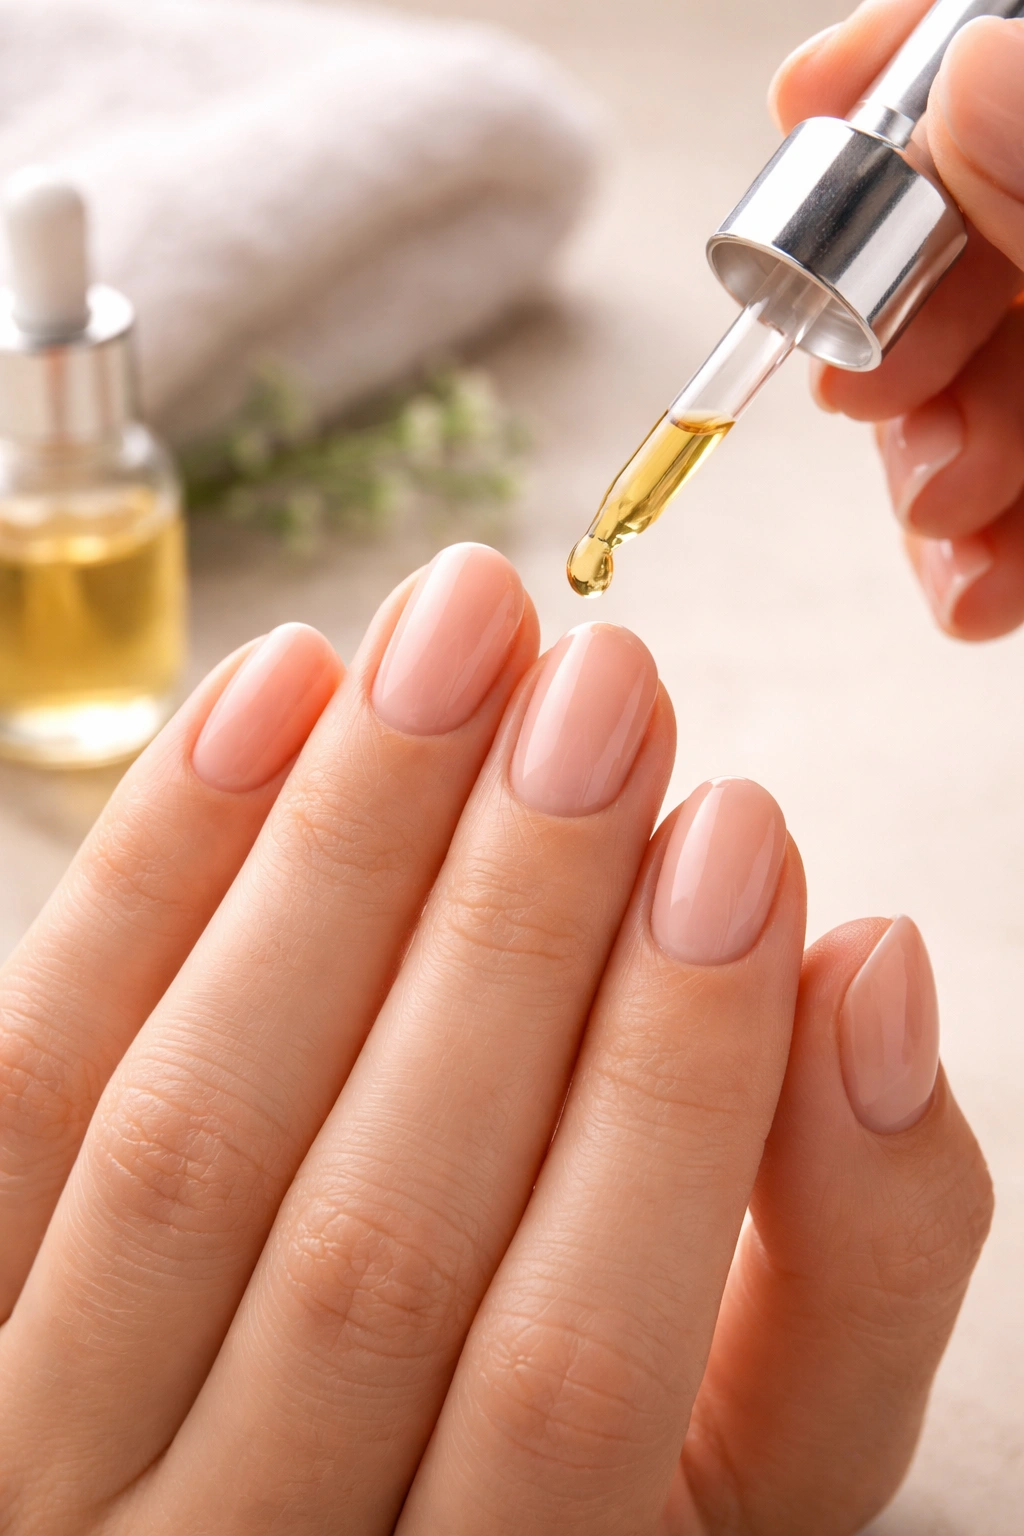
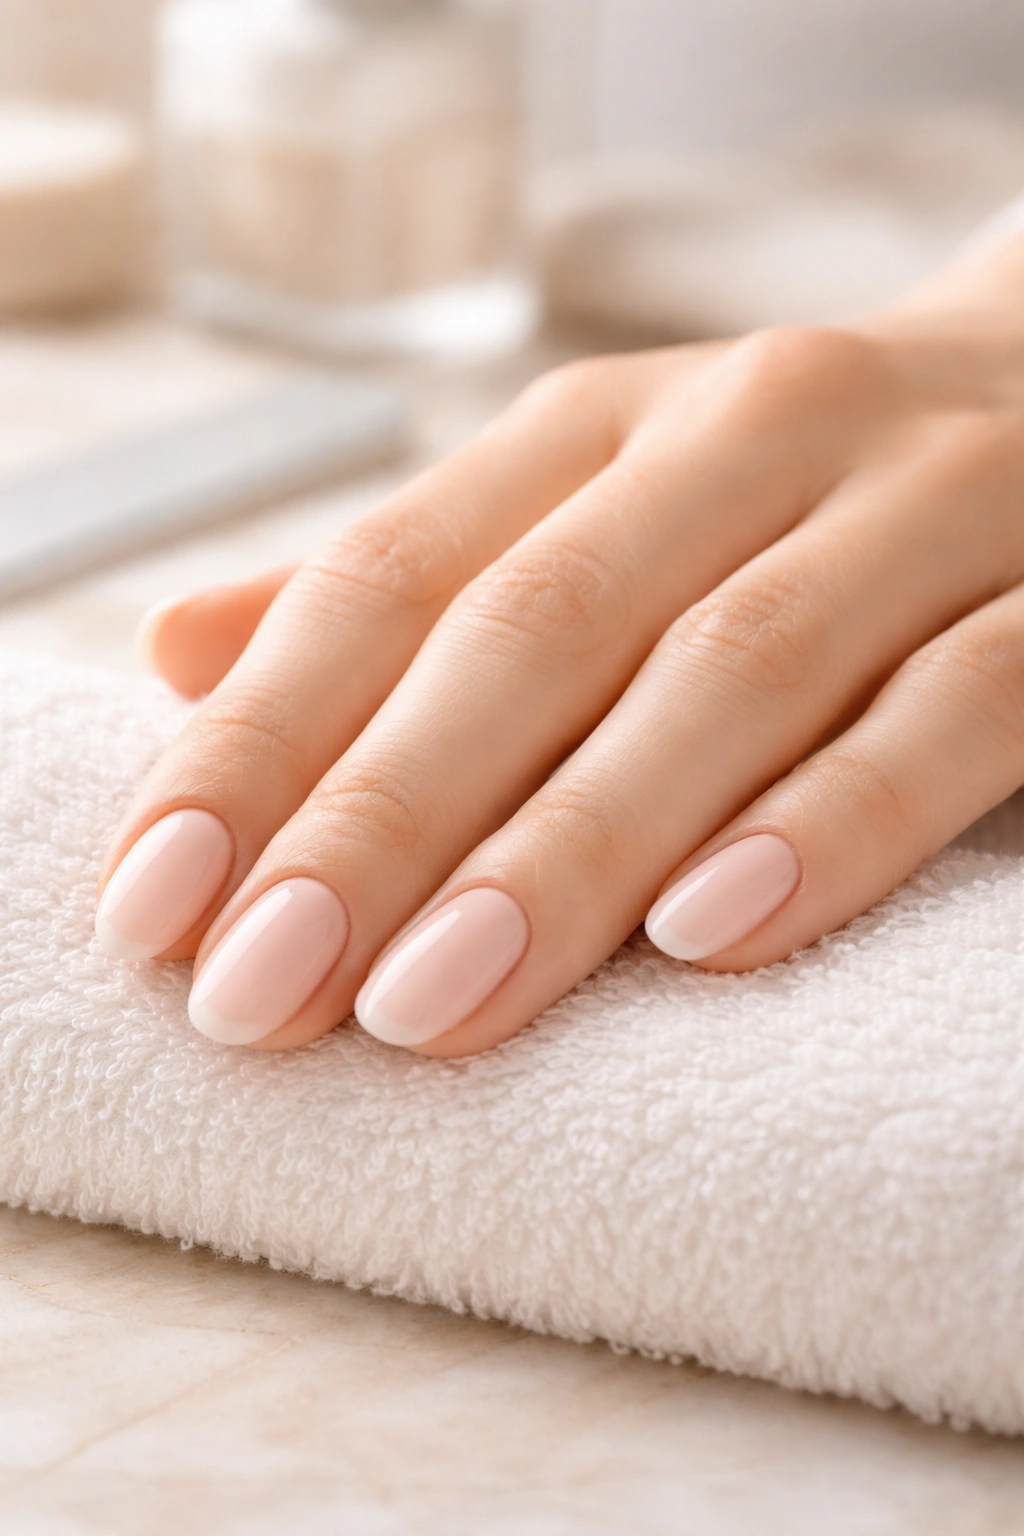
After filing, moisturize your nails and cuticles immediately with a nail oil or cuticle balm. The filing process removes some moisture from your nails, and replenishing that hydration right away helps prevent brittleness and splitting. Massage the oil around your cuticles and along the edge you just filed, working it in gently.
This immediate moisturizing step is crucial for maintaining your freshly filed nails. It keeps the keratin flexible and less prone to cracking or peeling over the coming days.
Common Filing Mistakes That Damage Your Nails
Even well-intentioned people often make filing mistakes that undermine their nail health. The most common is the sawing back-and-forth motion we discussed earlier. It’s tempting because it feels like you’re making progress quickly, but it’s genuinely harmful to your nails.
Another frequent mistake is filing wet nails. Some people think water softens nails and makes filing easier, but wet nails are actually softer and more prone to tearing. Always wait until your nails are completely dry before filing.
Filing too aggressively—using heavy pressure and trying to shape your nails in just a few strokes—is another way people damage them. Your nails don’t need to be shaped in one quick session. Multiple light passes with gentle pressure create better results and healthier nails than a few aggressive passes.
Using a file that’s too coarse is also harmful, especially on natural nails. If your file feels like it’s ripping or shredding as you file, it’s too coarse. Upgrade to a finer grit or switch to a glass file if you’re using metal.
Some people make the mistake of filing on the underside of their nail, thinking they’re cleaning it up. Avoid this—filing underneath exposes a more fragile layer of the nail and can cause severe damage. Keep your filing strictly to the outer edge and top surface.
Finally, many people neglect aftercare. Filing creates tiny cracks and removes protective moisture from your nails. If you file but don’t follow up with cuticle oil or moisturizing treatment, your nails will become brittle and weak within days.
Maintaining Your Rounded Nails Between Shaping Sessions
Once you’ve achieved beautifully rounded nails, keeping them that way requires consistent maintenance—though far less work than you might expect.
File your nails every 7 to 10 days, or whenever you notice the edges becoming slightly rough or starting to grow out noticeably. Regular maintenance filing takes just a few minutes and prevents your nails from getting out of control or developing rough edges that can snag on things.
Between filing sessions, be mindful of activities that stress your nail edges. Wearing gloves when you wash dishes, do gardening, or clean protects your nails from prolonged water exposure and harsh chemicals. Avoid using your nails as tools to open things, scratch off labels, or pick at surfaces—these habits break nails and ruin your rounded shape.
Keep your nails moisturized throughout the day. A quick application of cuticle oil or hand cream every evening maintains the hydration that keeps your nails flexible and prevents brittleness. Many people find that keeping a small bottle of oil at their desk or bedside makes it easy to incorporate this into their routine.
If you notice rough spots or catching edges developing between filing sessions, resist the urge to file aggressively. Instead, use a fine-grit file to gently smooth the problem area with just 3 to 5 light strokes. This quick touch-up prevents small issues from becoming major damage.
How Nail Health Impacts Your Shaping Results
Healthy nails are exponentially easier to shape and maintain than nails that are already damaged or weak. If your nails are peeling, splitting, or breaking frequently, focusing on nail health will dramatically improve your results.
Hydration is foundational to nail health. Nails that are well-moisturized are more flexible and less prone to splitting or breaking during the filing process. They also hold a rounded shape better and look shinier and more lustrous. Drink enough water throughout the day and use cuticle oil or hand cream regularly.
Your diet impacts nail health too, though less directly than people often claim. Adequate protein intake supports the keratin structure that nails are made from. Biotin and B vitamins contribute to nail strength, though the evidence for specific supplementation is mixed. Rather than chasing specific nutrients, focus on eating a balanced diet rich in whole foods and staying hydrated.
Avoid harsh chemicals and excessive water exposure. Frequent, prolonged contact with water, detergents, and harsh cleaners weakens nails and makes them brittle. When you must use these substances—cleaning, washing dishes, etc.—wear cotton-lined rubber gloves to protect your nails.
If your nails are severely damaged or weak, give them a break from filing and polish while you rebuild their health. This might mean keeping them shorter for a few weeks and focusing on moisturizing and protection. Once they’ve grown out stronger, you can resume your regular shaping routine.
When to File and When to Trim
There’s a difference between filing your nails to shape and length, and trimming them with nail clippers. Understanding when to use which tool prevents damage and gives you better results.
File your nails when you want to shape them (creating the rounded curve), refine the length, or address rough edges. Filing gives you precision and control and doesn’t stress the nail structure if done correctly.
Use nail clippers only when your nails are very long and you need to remove a significant amount of length—usually more than a quarter-inch. Clippers create a shock at the very edge of your nail that can cause splitting to travel up into the nail body. For this reason, it’s wise to clip only if absolutely necessary, then immediately file the edge to seal it and prevent damage.
Many nail professionals recommend clipping as little as possible, preferring to shape nails primarily through filing. If you keep your nails at a manageable length and file them regularly, you rarely need clippers at all.
If you do use clippers, always follow up immediately with filing to seal the edge that the clippers created. Don’t let that rough edge sit exposed—it will split and damage your nail within hours.
Adapting Your Technique for Different Nail Types
Everyone’s nails are slightly different, and adapting your technique to your specific nail type yields better results than a one-size-fits-all approach.
Thick, strong nails can tolerate slightly more aggressive filing and need more pressure to shape effectively. You might use longer strokes and slightly firmer contact with the file. These nails can handle a slightly coarser grit without damage, though glass files are still ideal.
Thin, brittle nails require a much lighter touch. Use very gentle pressure, shorter strokes, and a fine-grit glass file. Take more time shaping these nails—multiple light passes are better than fewer aggressive passes. These nails are more prone to splitting, so regular moisturizing is crucial.
Textured or ridged nails might benefit from a slightly coarser file to smooth the texture while shaping. However, still use one-directional strokes and moderate pressure. If your nails have deep ridges, they may have an underlying health issue—consider consulting a dermatologist if the ridges are severe or painful.
Wide nails need more deliberate curve on each side to create a proportional rounded shape. You might need more strokes per side to achieve the curve you want. Wide nails typically look best with a gentle, gradual curve rather than a sharp rounded edge.
Narrow nails can support a slightly more pronounced curve and look elegant with a smoother, more defined rounded edge. The technique is the same, but the aesthetic result will look different based on your nail width.
The Role of Polish and Color in Showing Off Your Work

Once you’ve shaped your nails beautifully, choosing the right polish and application technique showcases your work.
Nude and neutral shades emphasize the shape of your nail and the natural beauty of the curve you’ve created. If you want your shaping technique to be the star, choose understated colors that let the nail shape shine.
Bold colors and dark shades make the rounded edge less visually prominent but can look stunning. A deep burgundy or classic red nail polish shows off rounded nails beautifully and creates a timeless, polished look.
Glossy finishes highlight the shape more than matte finishes because they catch light and emphasize the contour. If you want your rounded nails to be visible and impressive, a high-gloss polish accentuates the curve.
Nail art and designs can either highlight or hide your shaping, depending on what you choose. Thin, elegant line designs or minimalist art shows off the rounded edge, while heavy, textured, or complicated designs might hide your work.
The key is applying polish carefully so that your brush strokes follow the curve of your nail, emphasizing the rounded edge rather than creating thick, uneven lines that obscure the shape. Paint in one smooth stroke down the center, then one stroke along each side, rather than multiple fussy strokes that can obscure the beautiful curve you worked to create.
Troubleshooting Uneven or Difficult Shapes

Sometimes despite your best efforts, your nails don’t cooperate with your shaping plans. Understanding what’s happening helps you adjust your approach.
One side curves more than the other: This is often a case of uneven filing. Take a few extra passes on the flatter side, checking frequently to avoid over-filing. It’s easier to add more curve than to remove it.
The center peak is too sharp: The two rounded sides are meeting in a point rather than a smooth curve. This usually means you need to file slightly along the very tip, working perpendicular to your nail to soften and round that center point. Take very light strokes to avoid flattening your nail.
The edges feel rough after filing: Your file might be too coarse, or you haven’t taken the final sealing strokes. Try switching to a finer-grit file and taking additional light passes along the edge. If you’re using a metal file, consider upgrading to a glass file.
The shape looks different on each hand: This is usually a coordination issue—your non-dominant hand isn’t maintaining the same angle or pressure as your dominant hand. Film yourself filing to see what you’re doing differently, or ask a friend to watch and give feedback.
Your nails won’t hold the rounded shape: This typically indicates that your nails are too weak or that your cuticles are pushing the shape out of alignment. Focus on nail health and moisturizing, and consider pushing your cuticles back more thoroughly to reduce cuticle pressure on the nail edge.
Final Thoughts
Shaping beautiful rounded nails at home is entirely achievable once you understand the mechanics of filing and commit to using the proper technique. The difference between disappointing DIY results and salon-quality nails comes down to three things: using the right file (glass, appropriate grit), applying the right technique (one-directional strokes, proper angle), and maintaining consistency (regular touch-ups, moisturizing, taking care with your nails).
The initial investment in a quality glass nail file pays dividends because it transforms your entire nail care experience. You’ll see results immediately—smoother edges, healthier-looking nails, and shapes that you’re proud to show off. More importantly, you’re protecting your nails’ long-term health, preventing the damage that comes from using the wrong tools or technique.
As you develop your nail shaping routine, your muscle memory will improve and the process will become faster and easier. What takes 15 minutes when you’re learning will become a quick 5-minute touch-up session once you’ve practiced a few times. Many people find the repetitive, meditative nature of filing their nails to be genuinely relaxing—a moment of intentional self-care that costs nothing beyond the initial file investment.
The rounded shape is forgiving, elegant, and practical, which is why it remains the most popular nail shape across different ages, styles, and preferences. Once you’ve mastered shaping your nails to this classic silhouette, you can confidently maintain them between salon visits or skip salon visits entirely if you prefer. Your nails become an expression of your attention to detail and personal care—and that’s something worth taking a few extra minutes to perfect.
