

If you’ve been scrolling through nail inspiration and kept coming back to photos of nails that somehow look both modern and elegant — they probably had a squoval shape. It’s the shape that seems to have everything: the polished geometry of a square, the practical durability of an oval, and an undeniable sophistication that works for literally any hand shape or lifestyle.
Here’s what most people don’t realize: getting that perfect squoval isn’t actually complicated. It’s not something you need to pay a nail technician for every time, and it doesn’t require any special tools beyond what you probably already have at home. The trick is understanding the exact technique — where to file, how much pressure to apply, and the specific angle that makes the squoval look intentional instead of like you just gave up halfway through choosing a shape.
The squoval has absolutely dominated nail design over the past several years, and for good reason. It photographs beautifully, feels comfortable, protects the free edge better than a sharp stiletto ever could, and somehow flatters a wider range of nail beds than almost any other shape out there. Whether you’ve never filed your own nails before or you’ve been doing DIY manicures forever, learning to create a true squoval will completely change what you can do with your nails at home.
What Is a Squoval Nail Shape (and Why It’s Worth Trying)

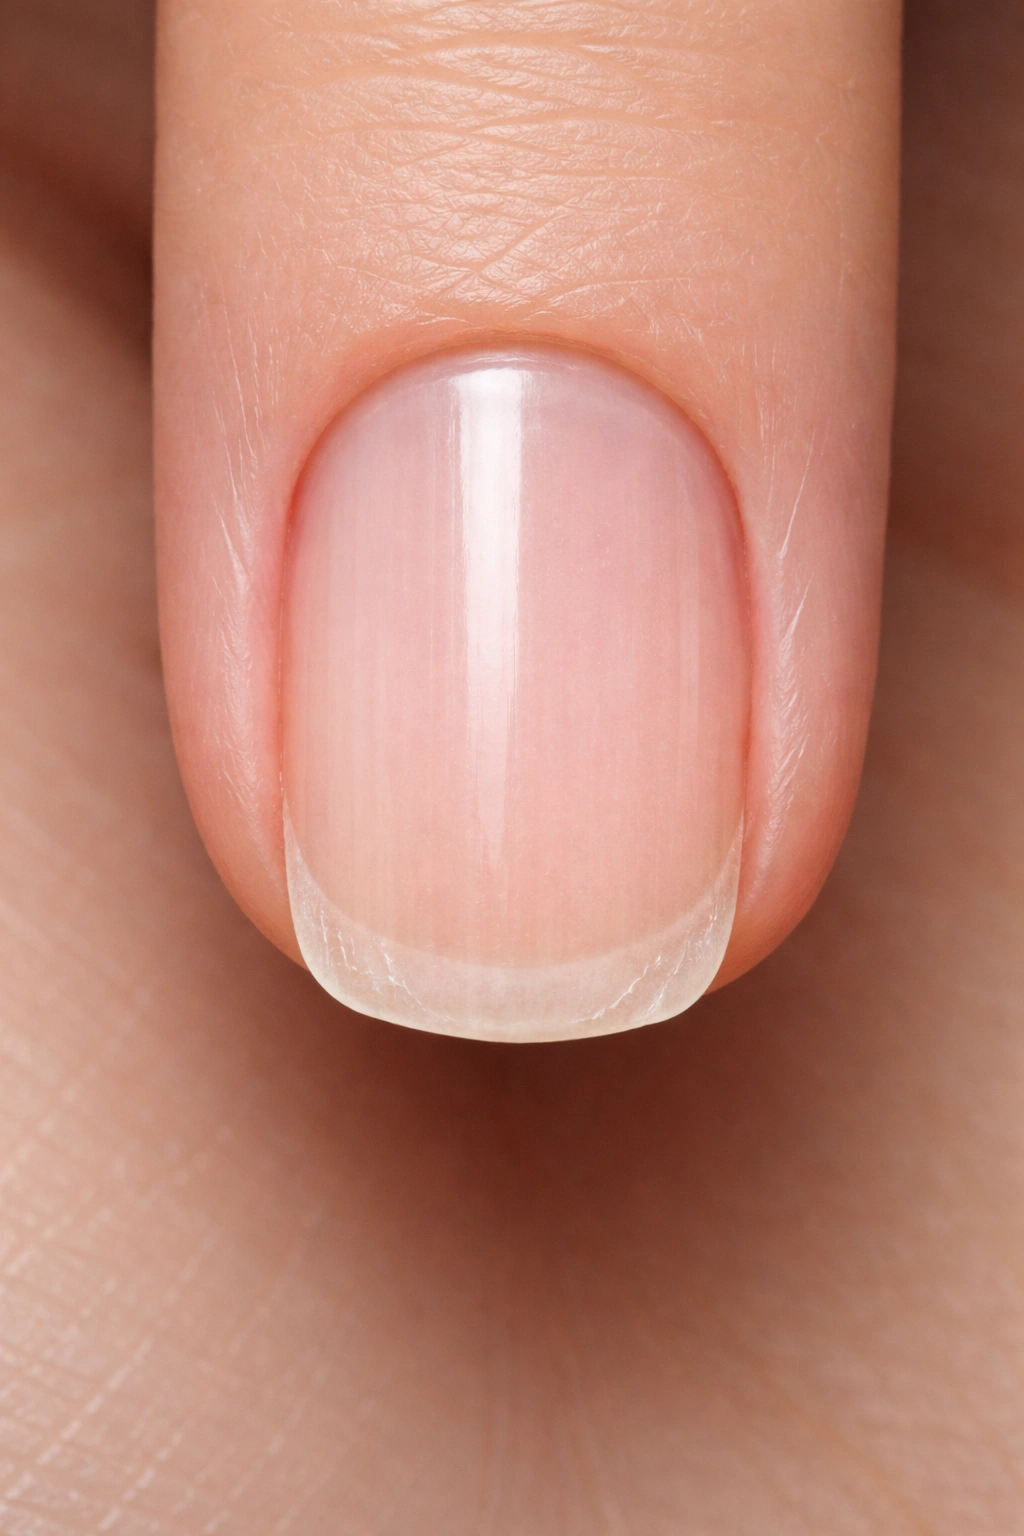
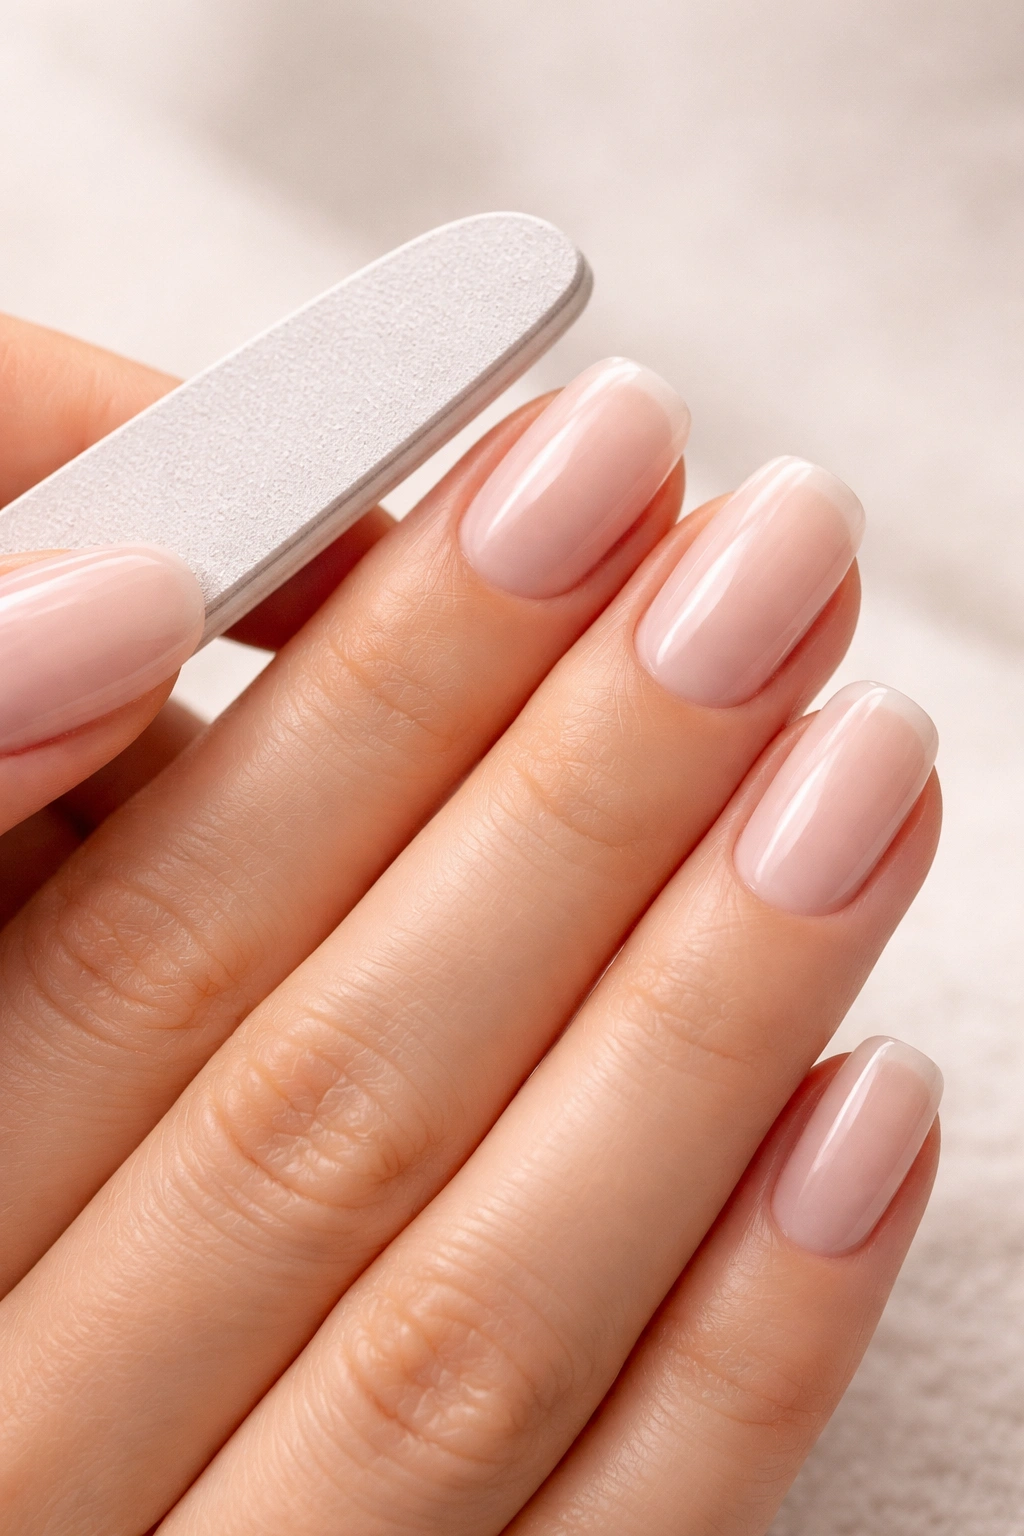
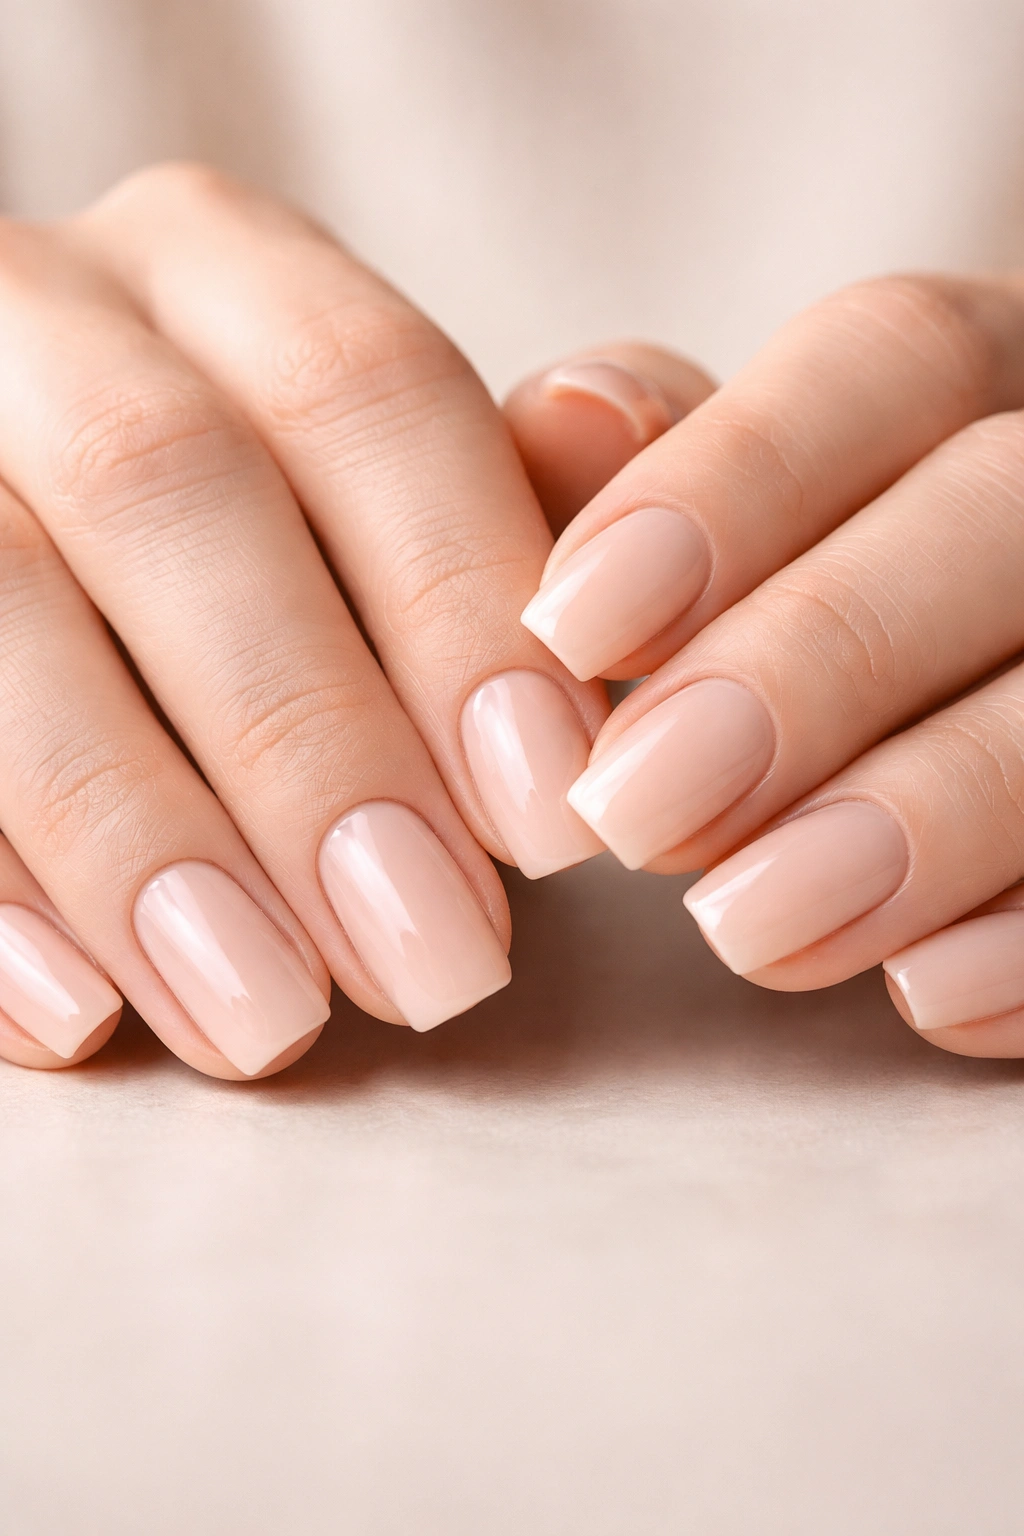
A squoval is exactly what the name suggests: a hybrid between a square and an oval that gives you the clean geometric appeal of one shape with the softer wearability of the other. The top of the nail (the free edge) stays relatively straight and defined, like a square manicure, but instead of sharp corners, you have rounded edges that transition smoothly into the sides of the nail.
The best way to picture it is to imagine a traditional square manicure, then imagine gently pressing a thumb on each top corner to soften it — that’s your squoval. It’s not as dramatic a rounding as a true oval, and it’s not as severe and pointy as a square. It lives right in that sweet middle ground that somehow works better than both of its parent shapes for most people.
What makes the squoval genuinely practical is durability. Unlike pointed nail shapes that catch on fabric, hair, and everything else, the rounded corners prevent snags while maintaining that sharp, intentional look. Unlike a true oval or almond shape, the squoval’s straighter top edge and more defined sides photograph incredibly well and look intentional — not soft or rounded by accident. You get a shape that looks refined and carefully chosen, which is exactly the vibe everyone wants.
The squoval also works with virtually any nail length. You can do a subtle squoval on shorter, practical nails, or an elongated version if you prefer length. It suits wide nail beds, narrow beds, short fingers, long fingers, and every hand shape in between. There’s genuinely no reason not to try it if you’re looking for a shape that’s flattering, functional, and fashionable all at once.
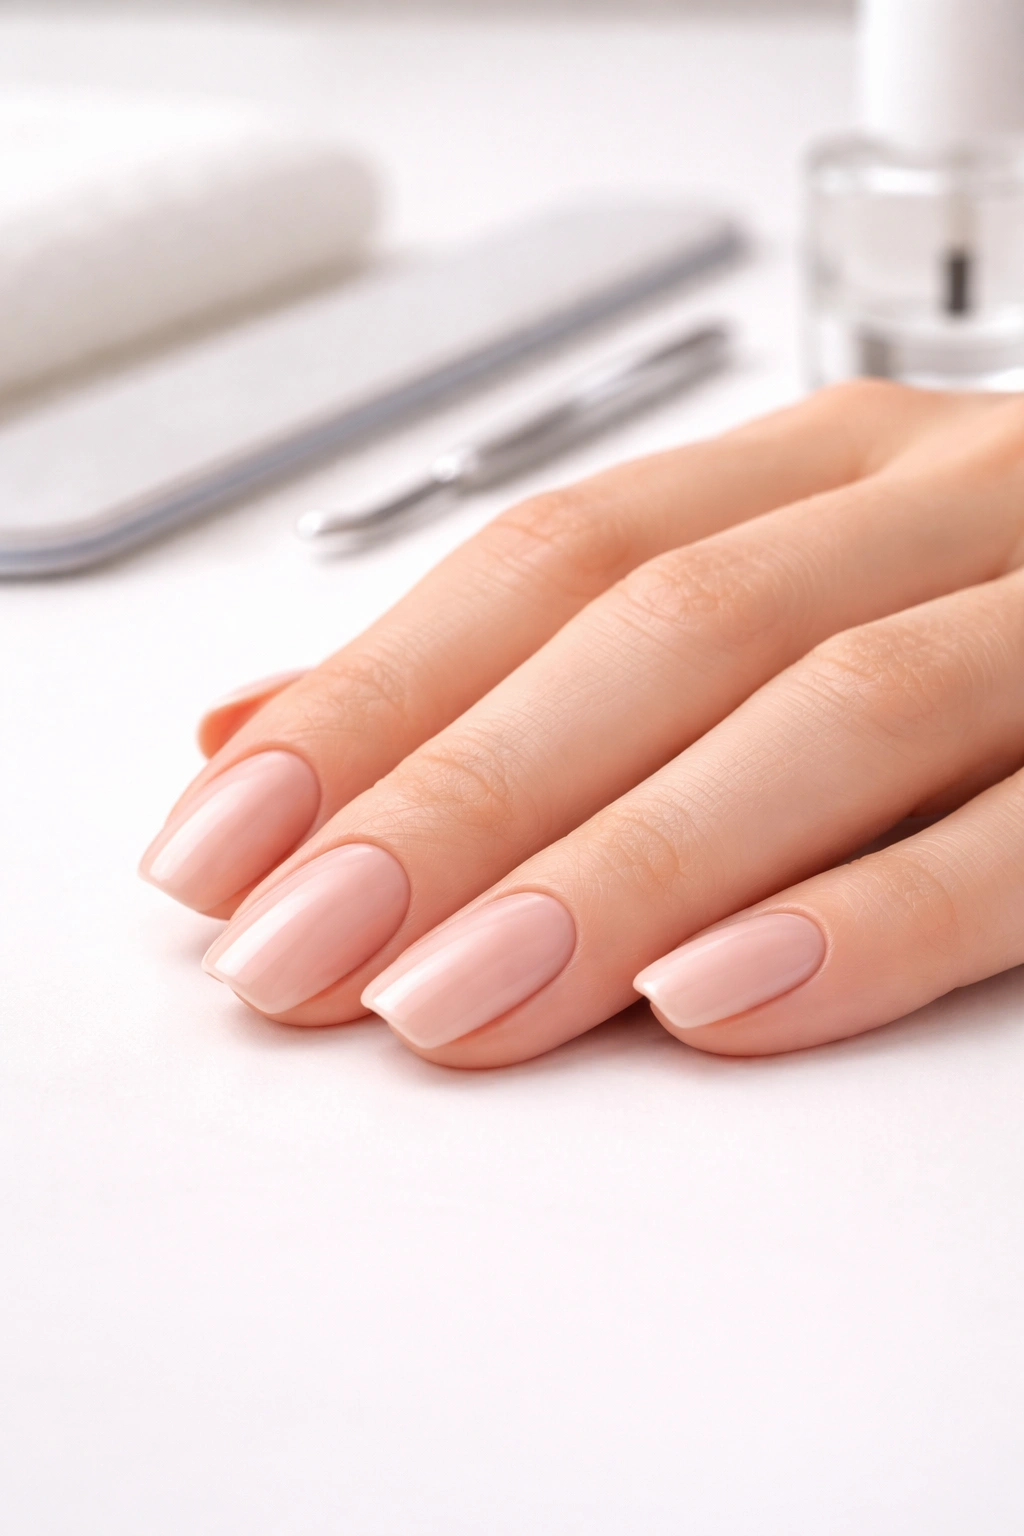
Essential Tools You Need Before You Start
You don’t need an elaborate toolkit to file a great squoval — but you do need the right tools, and there’s a meaningful difference between a nail file that’ll work and one that’ll actually give you results.
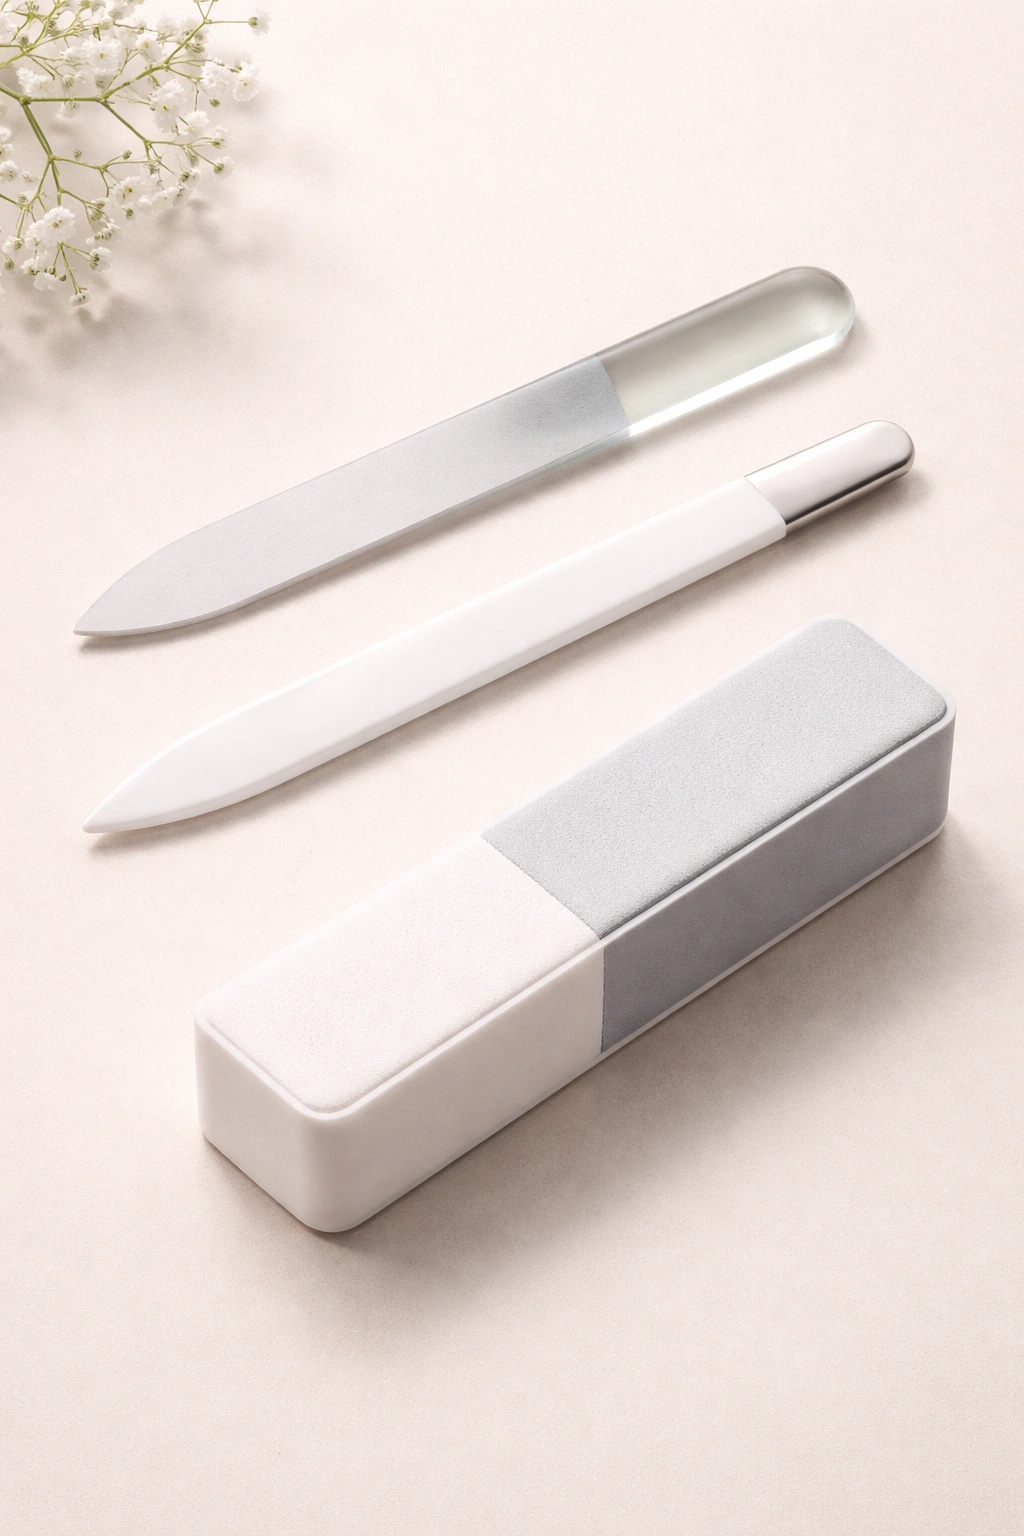
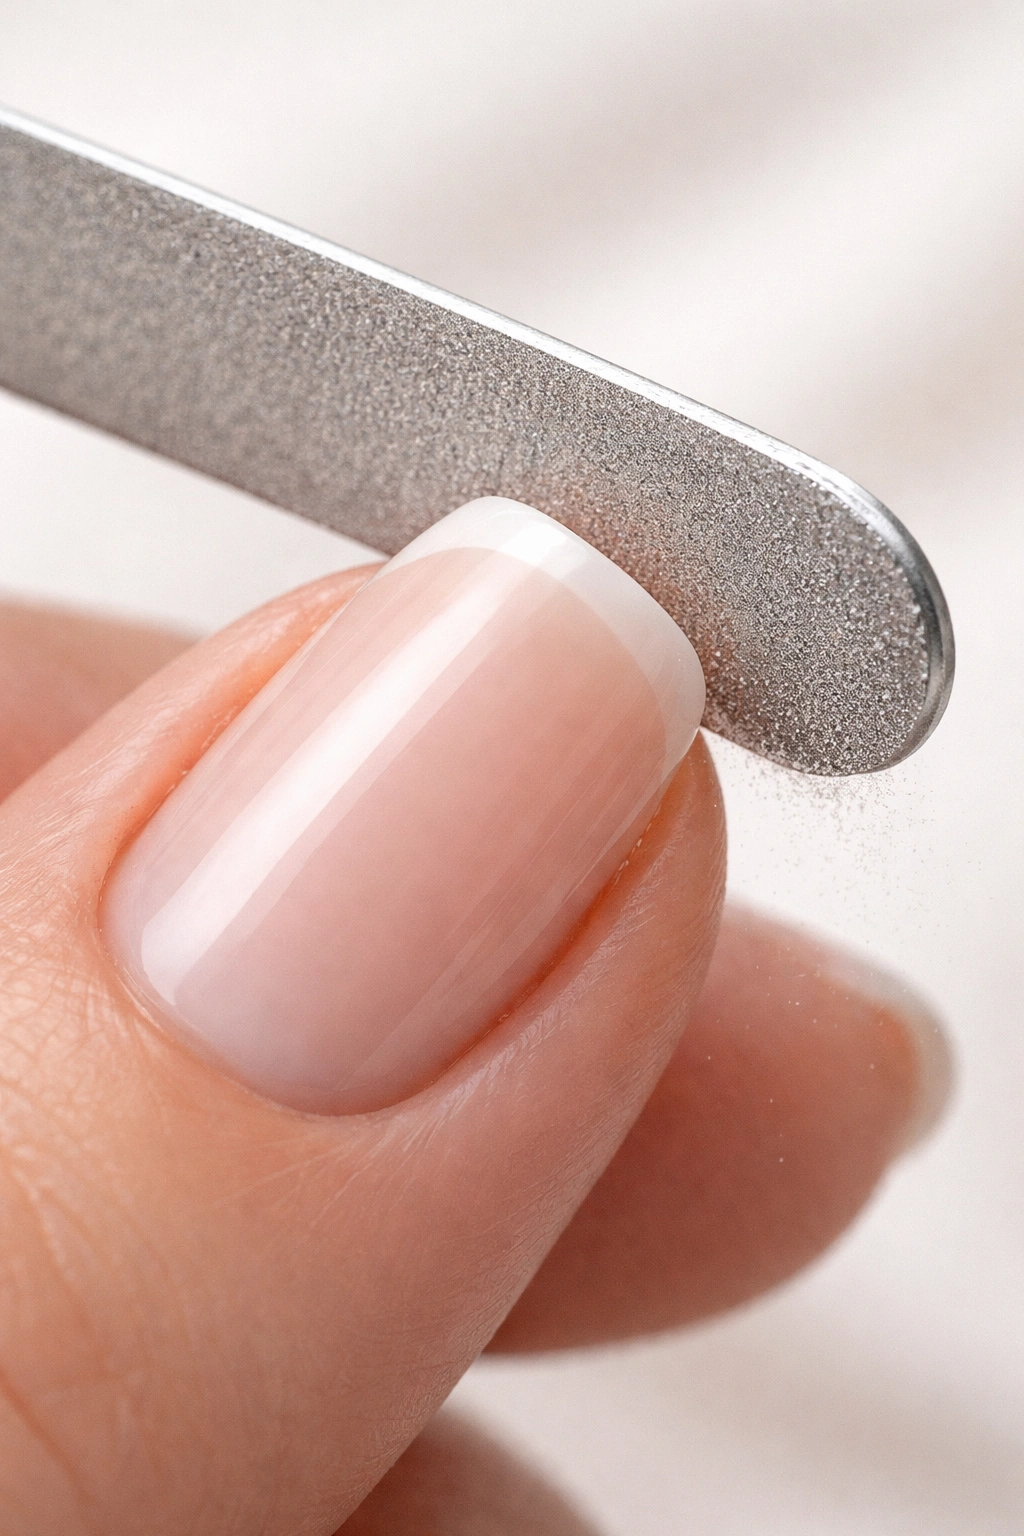
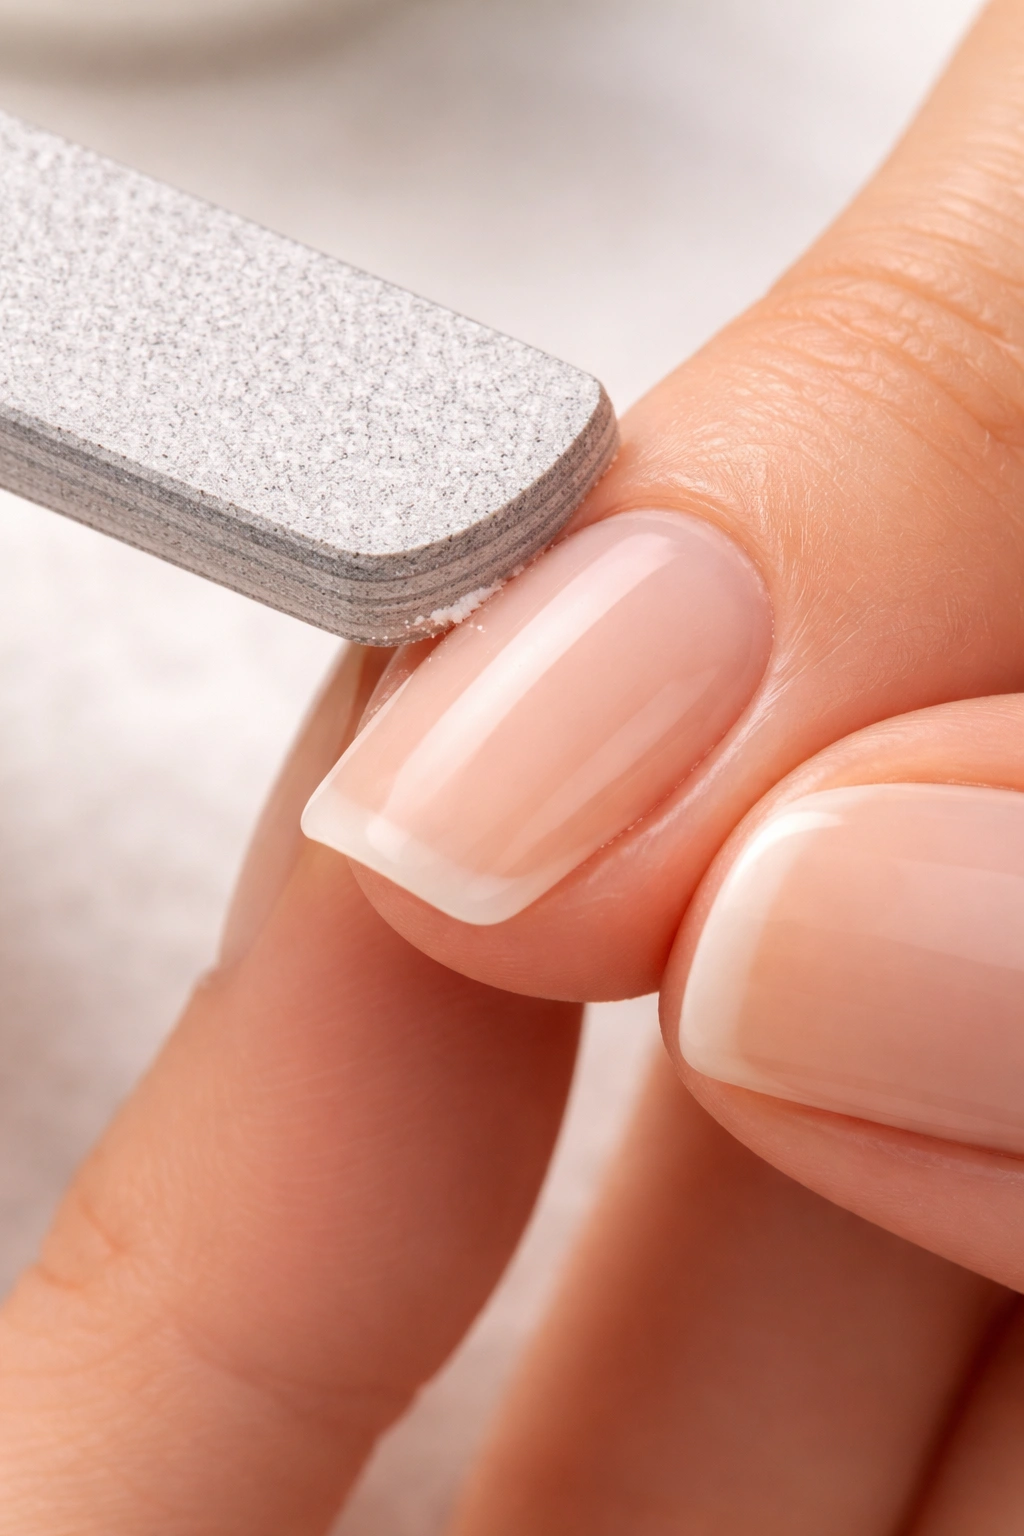
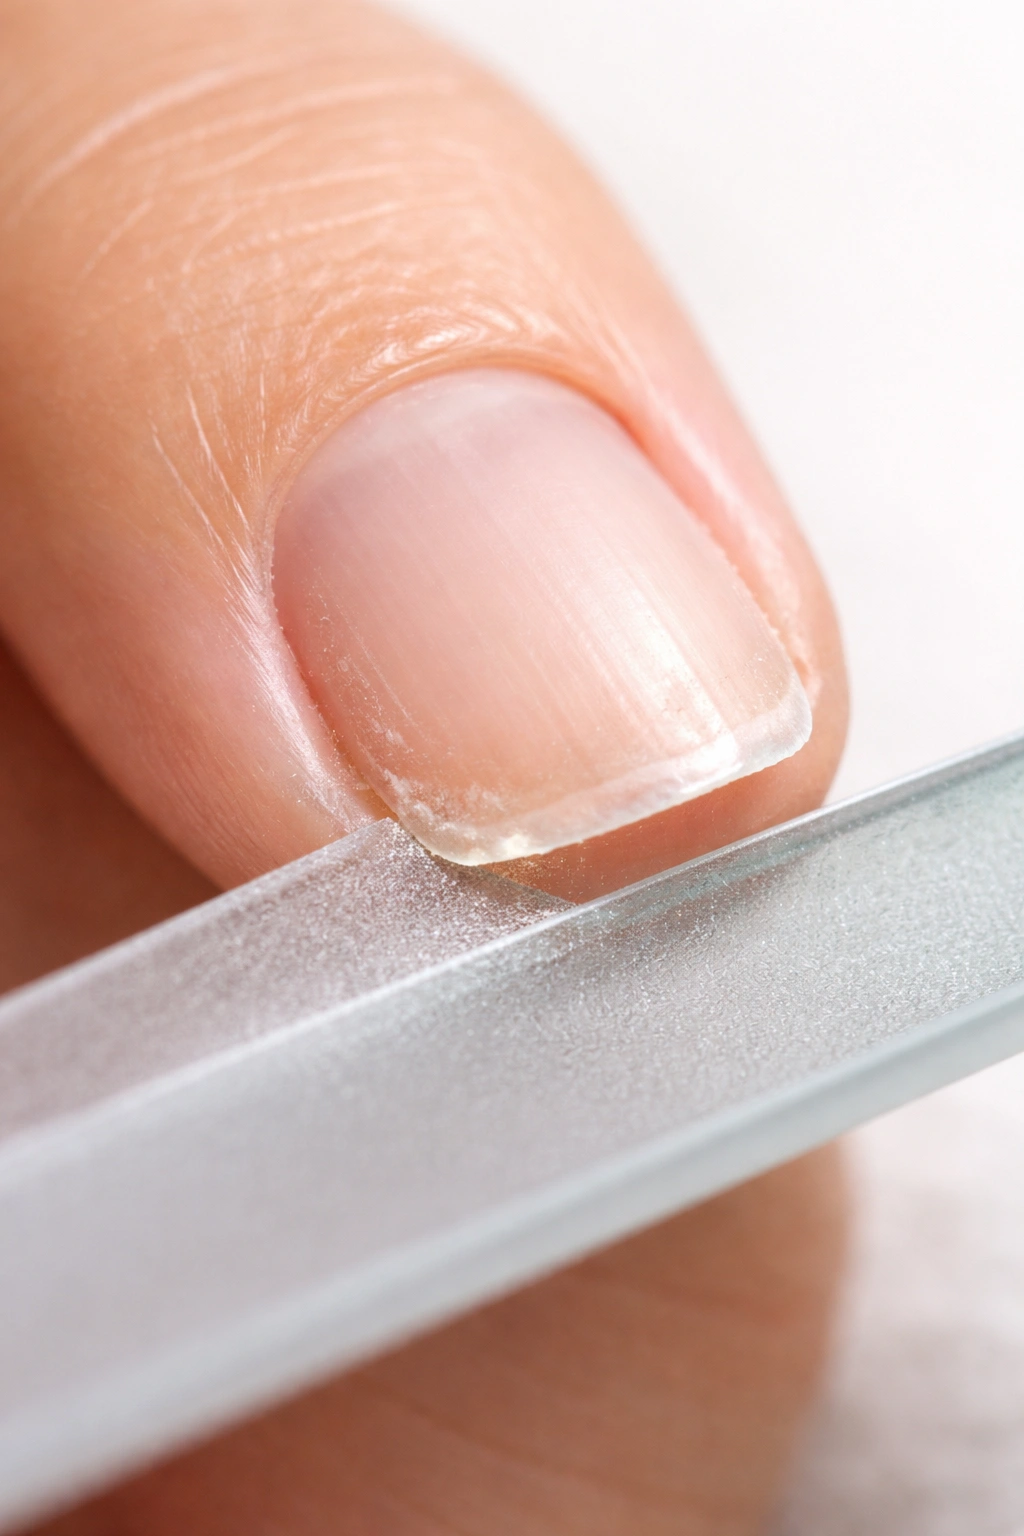
A high-quality nail file is non-negotiable. The grit matters more than most people realize. For shaping and initial filing, grab a file between 240-320 grit — this is fine enough to prevent excessive splitting but coarse enough to cut through nail growth efficiently. Avoid metal files entirely; they might feel sturdy, but they’re genuinely damaging to nails and tend to create splits and peeling at the free edge. Instead, invest in either a glass nail file (the gold standard) or a high-quality crystal or ceramic file. These glide smoothly across the nail, seal the edges of keratin, and prevent the splitting that metal causes.
A nail buffer is your second essential tool. This is different from your file — it’s meant for smoothing and polishing rather than shaping. Use it to smooth the transition from straight edge to rounded corners and to eliminate any rough spots your file created. A buffer also helps seal the edge of the nail, which prevents peeling and keeps your manicure looking flawless for longer.
You’ll also want nail clippers or scissors if you’re starting with longer growth and need to bring your nails to a workable length first. Filing alone from extremely long nails takes forever and wastes your file; a quick trim first makes the actual filing process much faster. A good pair of nail clippers or cuticle scissors speeds everything up.
A nail brush and some warm water might seem basic, but they’re essential. You want completely clean nails before you start filing, and any dust or debris under the nails will affect your filing technique and results. Brush them thoroughly, get under the free edge, and dry completely before touching a file to them.
Finally, keep cuticle cream or hand lotion nearby. Filing creates dryness, and applying cream afterward keeps your nails and hands comfortable. It also gives you a moment to assess your work without the distracting dryness.
How to Prepare Your Nails for Filing
Starting with proper preparation takes only a few extra minutes and completely changes how smoothly the filing process goes. You can’t achieve a clean, precise squoval with nails that aren’t ready.
First, wash your hands thoroughly with warm water and a nail brush, paying special attention to underneath the nails and around the cuticle. Any soap residue, dust, or debris will catch on your file and throw off your angle. Let your hands dry completely — filing damp nails is nearly impossible and can cause uneven results. Damp nails are also softer and more prone to peeling.
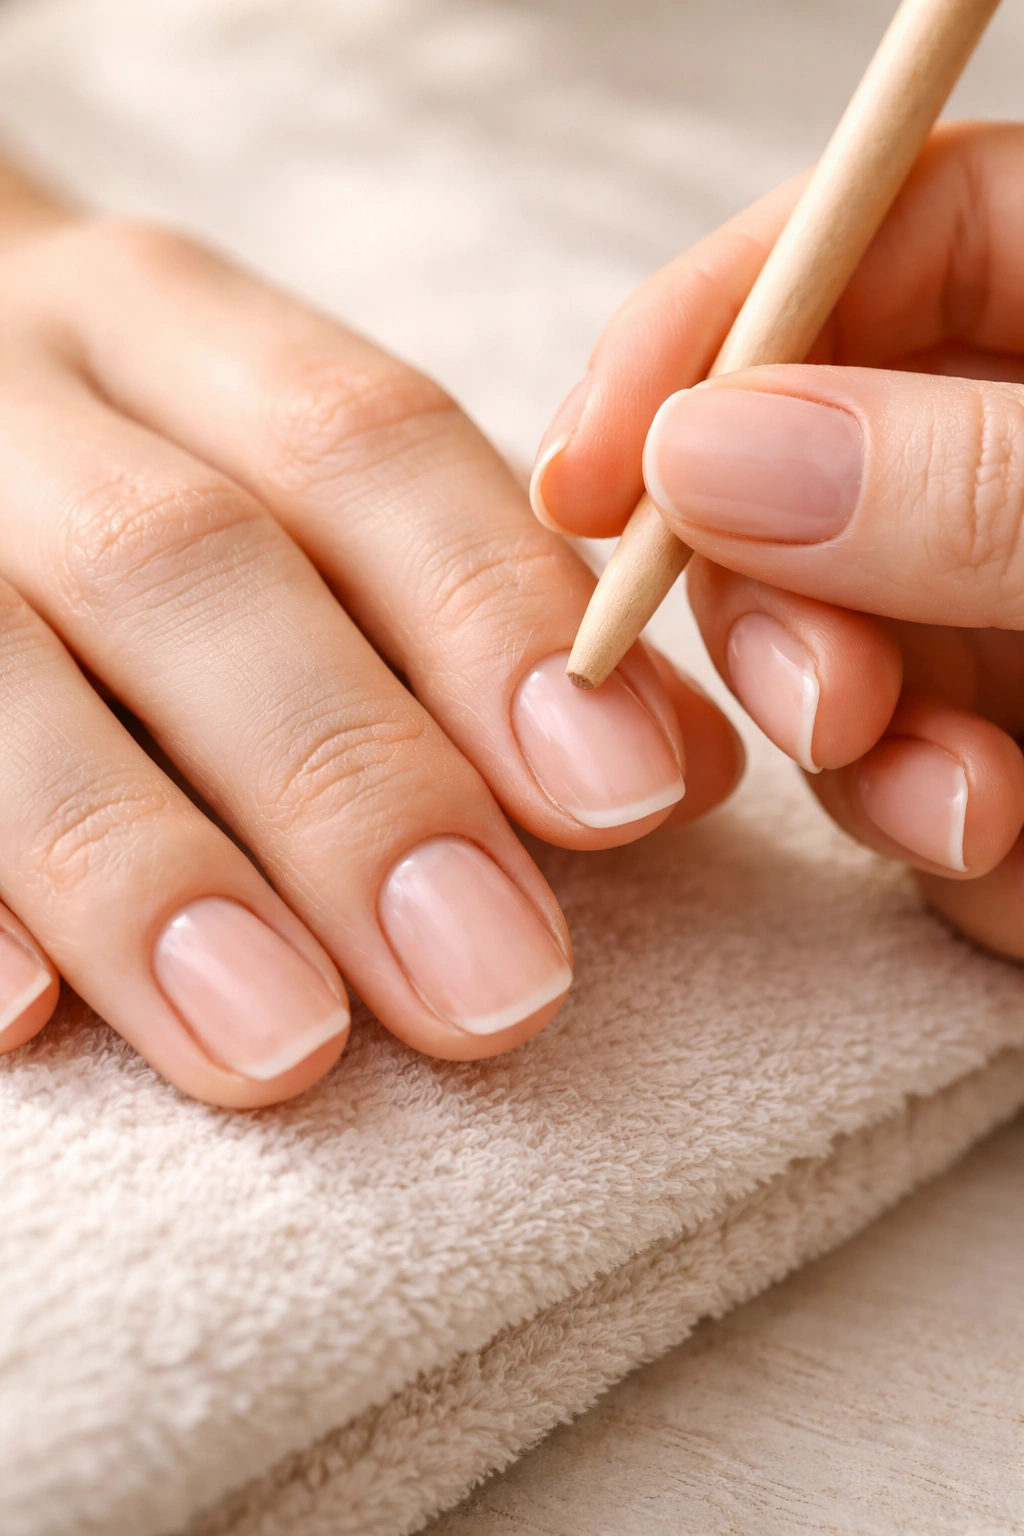
If your nails have been painted, you need to remove that polish first. Dried polish creates an uneven surface that your file will slip on, and trying to file through polish wastes your file and damages the tool. Use a non-acetone remover if you can — acetone is very drying, and you want your nails in optimal condition for shaping. Push back your cuticles gently using a wooden cuticle pusher, working around the entire base of each nail. Cuticles that extend too far onto the nail bed make it harder to see exactly where your nail edge is, and they can affect your filing accuracy.
If you’re working with very long nails and want to bring them down significantly, clip them first to within roughly a quarter-inch of where you want the final length to be. This saves your file from having to grind through excessive length. Leave the quarter-inch extra because you’ll do the final precision filing with your nail file afterward.
Examine each nail for damage — tears, peeling, or extreme brittleness. Heavily damaged nails might need an extra light touch. If a nail has a tear that goes beyond the visible free edge, you may need to file that nail quite a bit shorter to remove the damaged part, but that’s fine; it’ll grow back strong. Push your hands away from you on a firm, flat surface like a table or desk — this is your filing surface. You need a stable, non-moving base to work consistently.
The Right Filing Technique for Squoval Nails
The technique you use while filing matters more than the tool itself. This is where most people go wrong without realizing it.
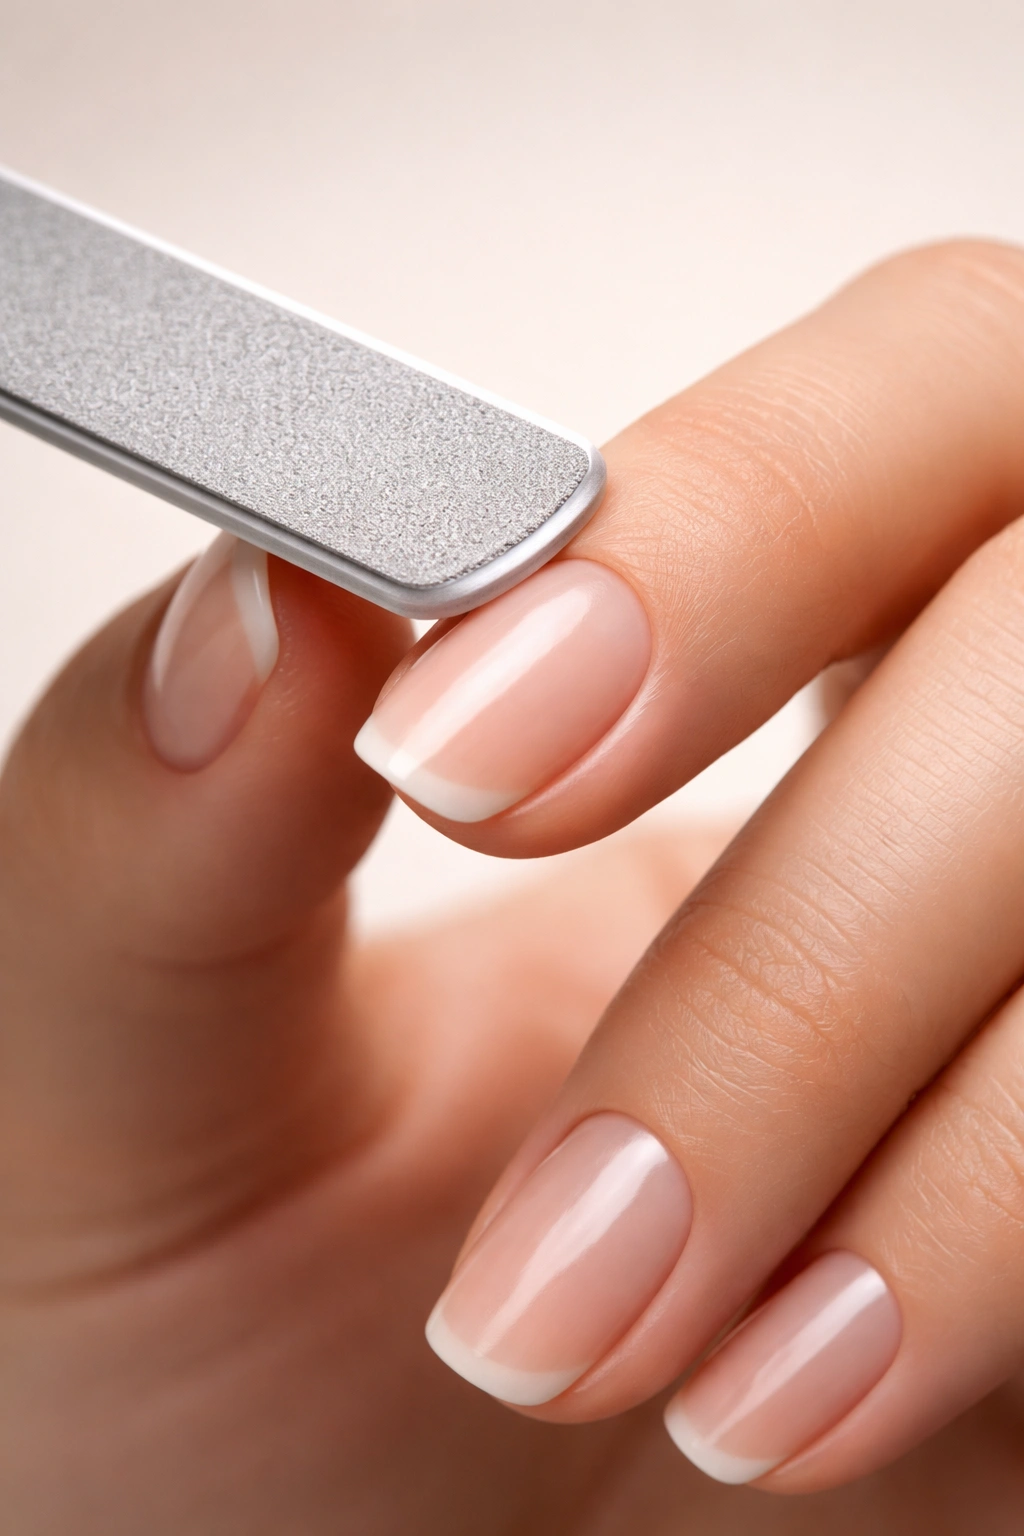
Hold your file at a 45-degree angle to the edge of the nail, not perpendicular and not flat. This angle is key — it allows the file to work through the nail smoothly without digging in or creating stress points. The angle helps the file glide along the edge rather than chopping into it, and it naturally guides you toward the shape you’re trying to create.
Use one directional motion rather than sawing back and forth. This is absolutely critical. Filing back and forth across the edge creates micro-tears and peeling because it repeatedly disrupts the keratin layers. Instead, file in one direction only — from the outer edge of the nail toward the center. File the left side toward the middle, lift the file away, and then file the right side toward the middle. This one-directional approach seals the edge as it files and prevents peeling.
Aim for light, consistent pressure rather than heavy scrubbing motions. Your file does the work; you don’t need to press hard. In fact, pressing too hard makes your hand fatigue quickly and actually takes longer because you’re not letting the file’s grit do its job. Light pressure, repeated passes, and patience give you the best results and the smoothest edge.
Work on the free edge only — that’s the part of the nail extending past your fingertip. Never file the top surface of the nail or anywhere near the cuticle area. The only exception is very gentle, finishing touches with a buffer to smooth the transition once you’ve created your shape.
File in multiple light passes rather than trying to accomplish your shape in just a few aggressive passes. This gives you more control, prevents mistakes, and lets you see the shape developing as you go. You can always file more, but you can’t add length back, so taking your time prevents disasters.
Creating the Straight Edge of the Squoval
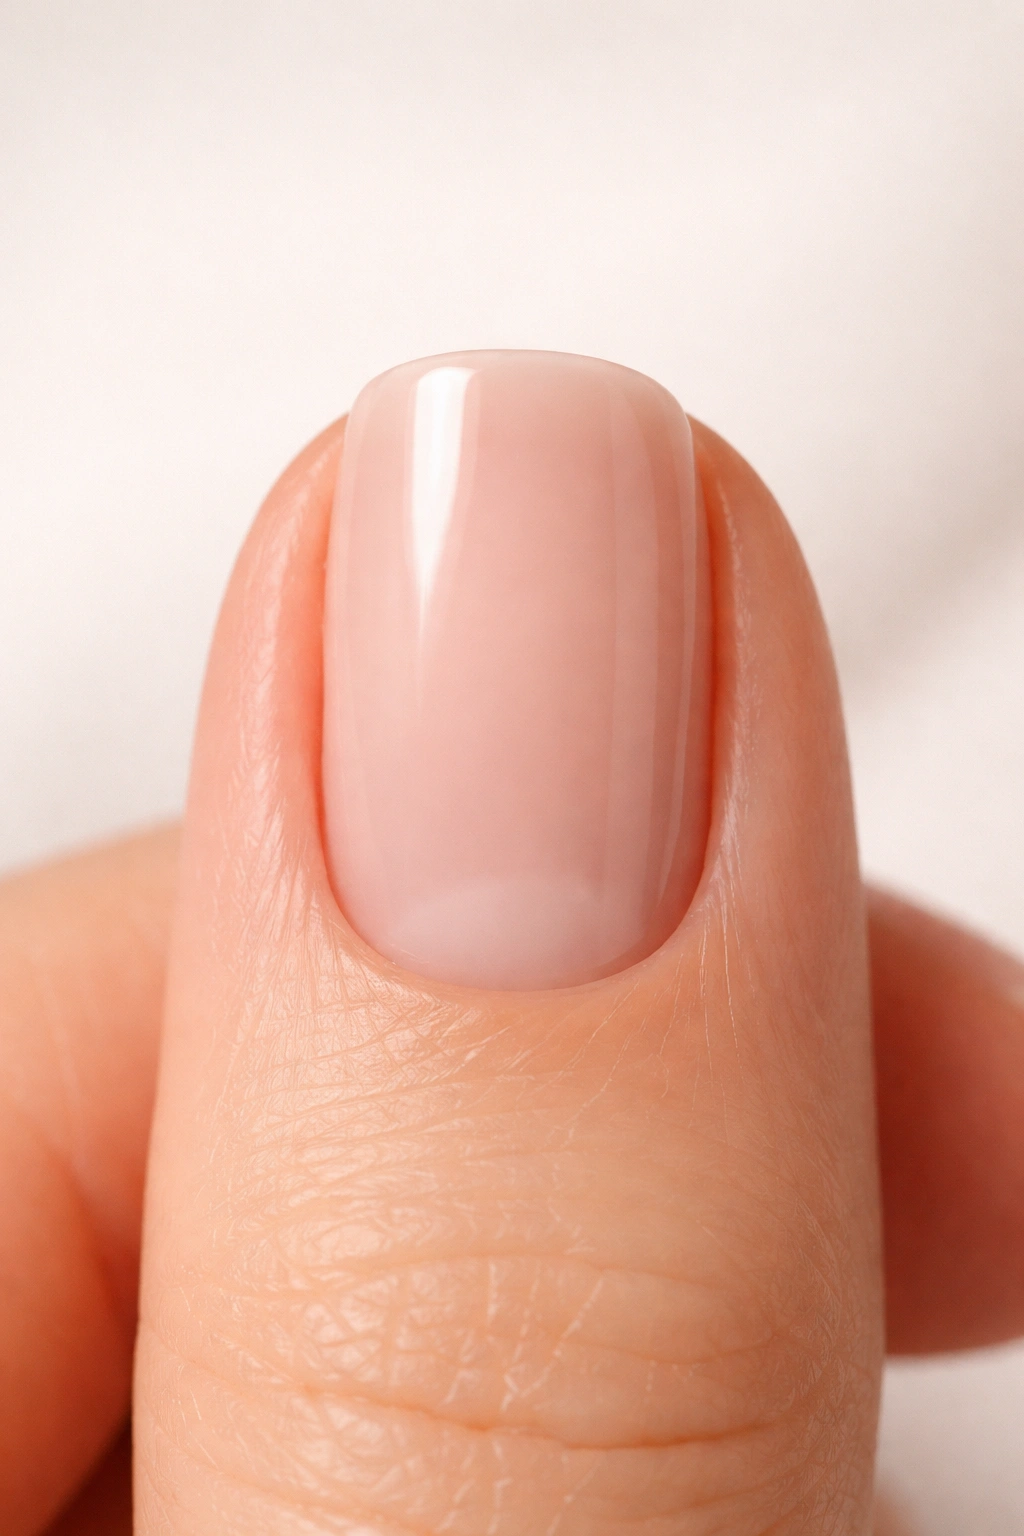
The defining characteristic of a squoval is the relatively straight edge across the top of the nail. This is what distinguishes it from an oval (which curves) and gives it that geometric, intentional look.
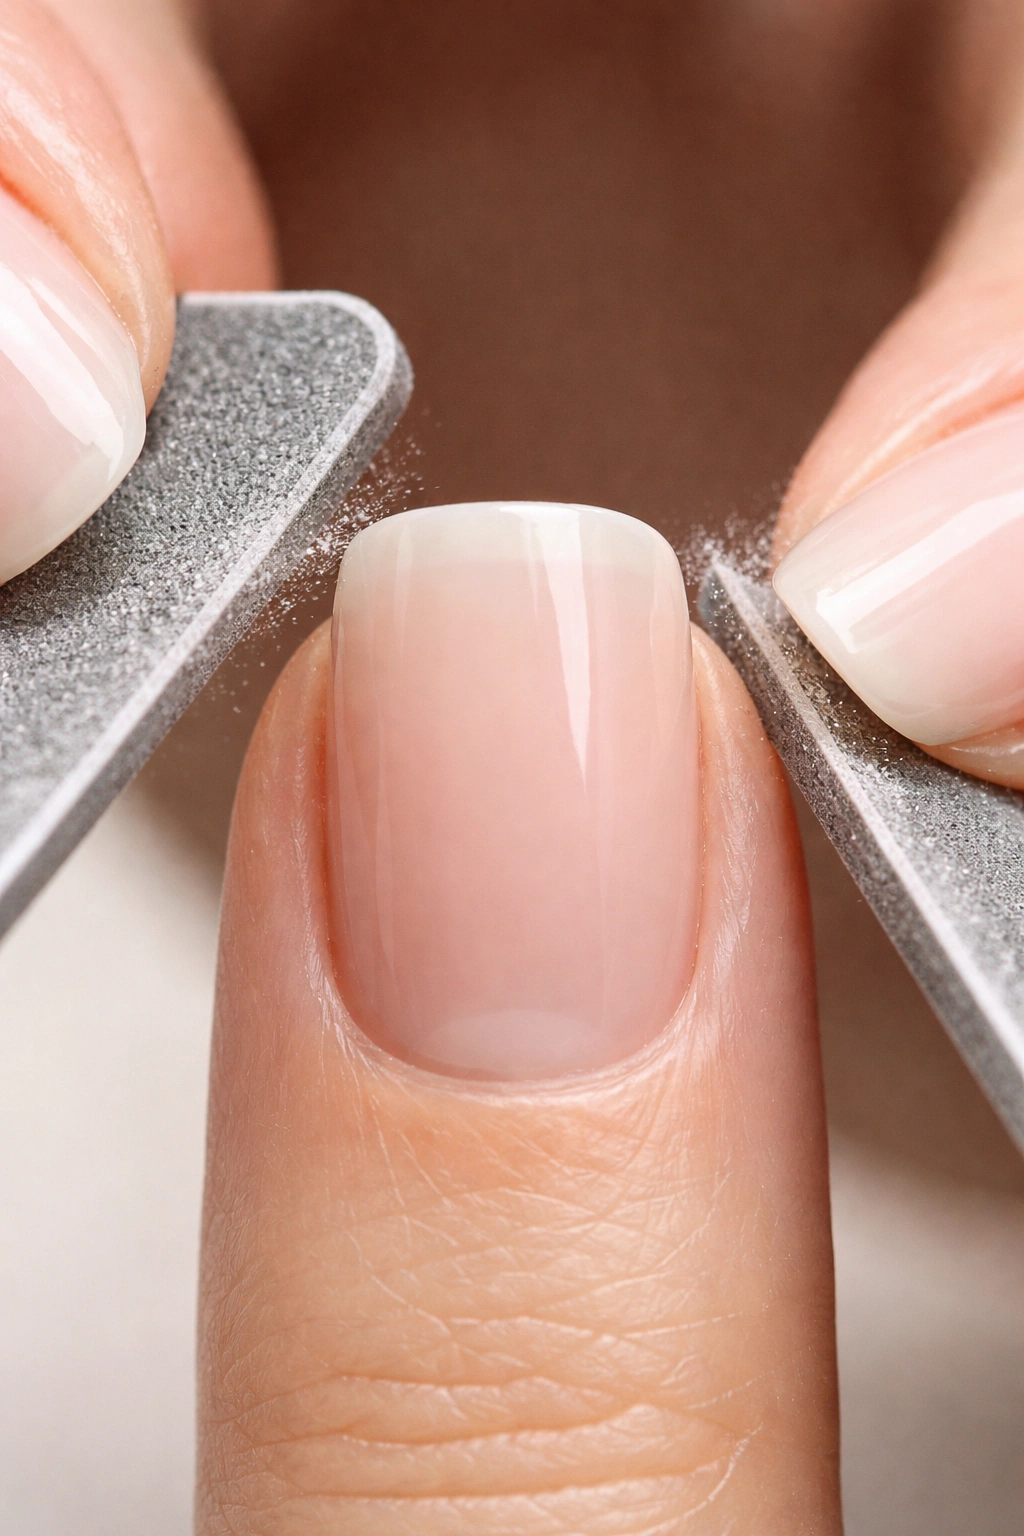
Start by identifying the center point of your nail’s free edge — the middle of the white tip. This is your anchor point. You want to maintain roughly equal length on both sides of this center point. File from the left outer corner toward this center point, using your one-directional filing technique. Make multiple light passes, paying attention to how the edge is developing. You’re not trying to create a razor-sharp straight line; you’re creating a relatively straight edge with very subtle, gentle curves at the transition points.
Once you’ve shaped the left side, file from the right outer corner toward the center in the same way. The goal is symmetry — when you look at your nail straight on, the top edge should look evenly balanced left to right. This is where people often make their first mistake: they accidentally create an edge that’s longer on one side or angled slightly. Check your progress frequently by looking at your nail straight on, not at an angle.
The straight edge doesn’t need to be perfectly precise; a very slight and gentle curve along the free edge is actually more elegant than a ruler-straight line. What matters is that it reads as intentional and geometric, not soft and rounded like an oval would be. You’re aiming for that 70% straight, 30% subtly curved feeling that makes the squoval distinctly itself.
The length of your straight edge is where personal preference comes in. Some people prefer a longer straight section that’s very angular, while others prefer a shorter straight section with more generous rounding at the corners. There’s no single “correct” version — it’s more about what looks best proportionally on your hand. As a starting point, aim for the straight edge to take up roughly the middle two-thirds of the nail width, with the corner rounding taking up the remaining third on each side.
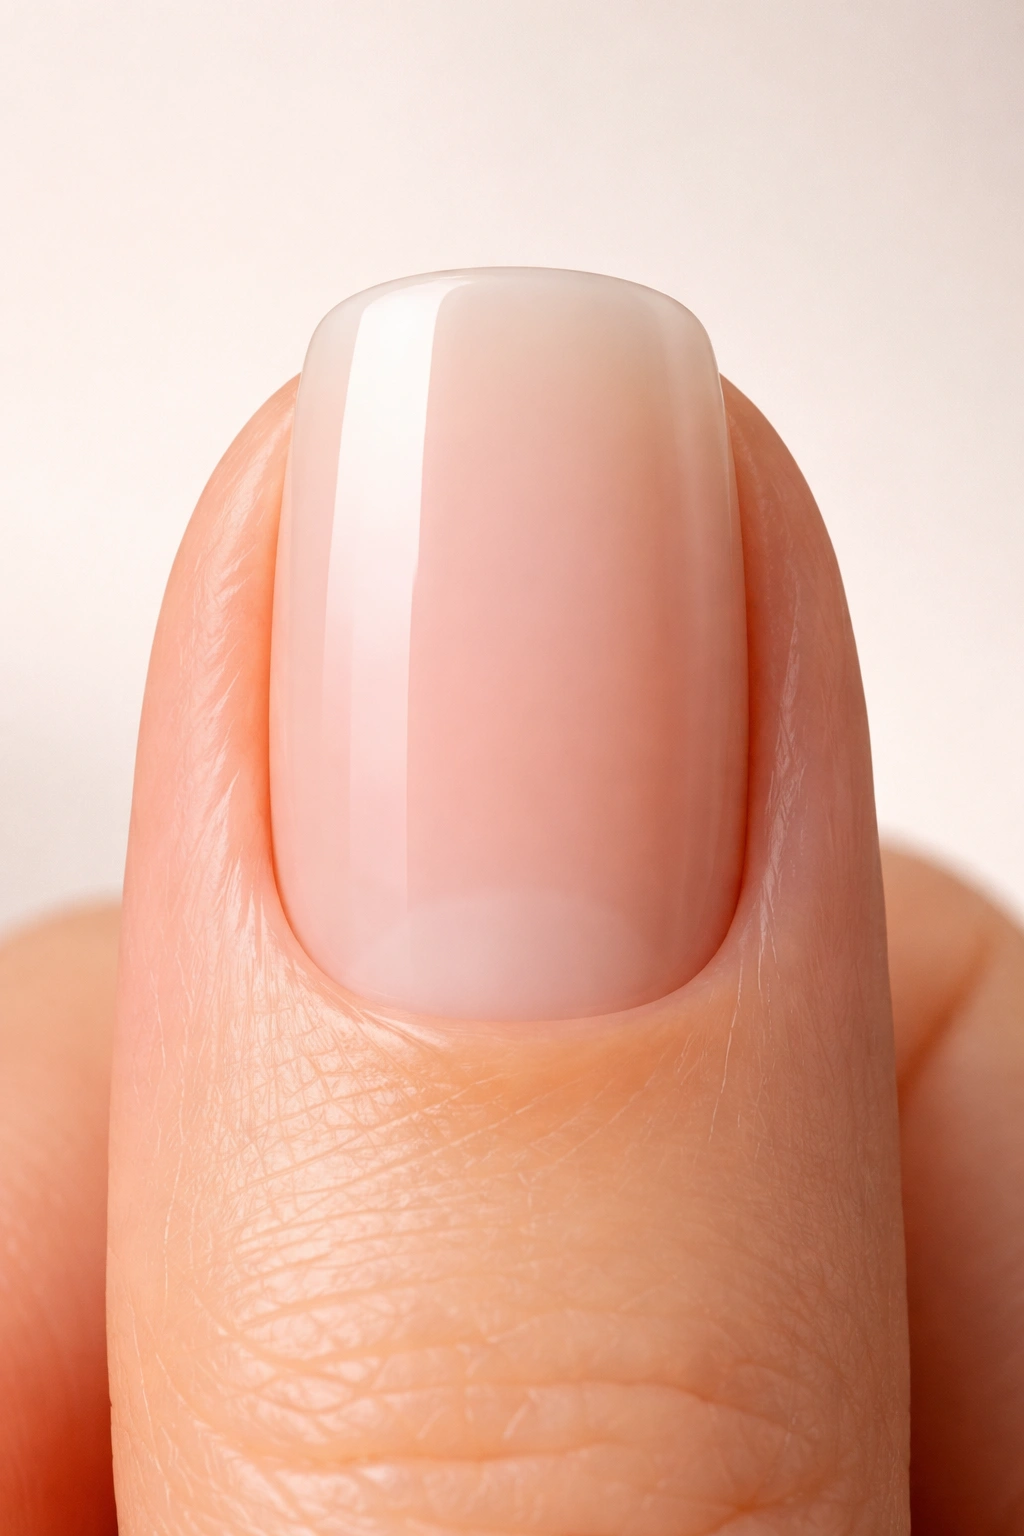
Rounding the Corners for That Perfect Square-Circle Balance
This is the step that actually separates a squoval from a square. The corners are where the geometry meets the softness, and getting them right is what makes the whole shape work.
Assess your current corner angles before you start rounding them. Your straight edge filing has left you with two sharp corners where the straight top meets the sides of the nail. These need to be softened, but not eliminated. You want a smooth transition, not dramatic rounding.
File each corner with the same one-directional technique, but this time you’re working from the corner inward at an angle rather than straight across. Angle your file so it hits the corner and naturally guides along both the top edge and the side of the nail simultaneously. This creates a naturally rounded transition rather than a visible line where two separate surfaces meet.
Make multiple light passes on each corner, checking your progress as you go. The corners should feel smooth when you run your thumb over them, and they shouldn’t snag on anything. The rounding should happen gradually — you’re not trying to create a dramatic curve that turns your squoval into an oval. You’re creating a subtle softness that prevents the shape from looking too severe.
The exact amount of rounding depends on your nail length and your aesthetic preference. Shorter nails often look better with more generous rounding because the angles would otherwise look stubby. Longer nails can handle more precise, sharper corners. There’s no single rule — it’s about proportion and what looks balanced on your hand.
Once both corners are rounded, run your buffer gently over the entire free edge to smooth any file marks and create an even surface. This is just finishing work; don’t try to reshape anything with the buffer. You’re smoothing, not re-filing. The buffer should feel soft and polishing, not aggressive.
How to File the Sides to Create Definition
The sides of your nail are what give the squoval its distinctive geometry and keep it from looking like an oval with thick edges. Most people skip this step, but it’s genuinely what makes the difference between a squoval and a less defined shape.
Look at your nail from the side and from above simultaneously. From above, the sides should show a clear line running down both sides of the nail from the rounded corners toward the cuticle. From the side, you should see definition rather than a soft, rounded profile.
File the sides very lightly and conservatively — you’re creating subtle definition, not carving deep grooves. Use a gentle downward stroke from the corner toward the cuticle on each side. This naturally draws down from where your corners are and reinforces that geometric structure. You’re not removing much length or thickness; you’re just adding that touch of intentional shaping that makes the squoval read as deliberate.
Don’t overwork this step. The sides are already fairly defined from your initial shaping. You’re just enhancing what’s already there. Two or three light passes on each side per nail is usually enough. You want the nail to look shaped and geometric, not like you’ve carved away the sides aggressively.
The sides should feel smooth and proportional, not sharp or overly angular. You’re creating definition, not weaponizing your nails. The goal is a look of intentional shaping, not visible carving.
Common Mistakes That Ruin the Squoval Shape
Even with the best intention, it’s easy to accidentally veer away from a true squoval. Knowing what to watch for prevents you from undoing your work.
The most common mistake is filing too much rounding onto the corners and accidentally turning your squoval into an oval. People often worry that sharp corners will snag, so they round them more than necessary. Remember: the squoval’s whole point is that it maintains the geometry of a square while keeping the practicality of an oval. If you round the corners too much, you’ve lost that defining characteristic.
Another frequent error is creating an uneven edge where one side is longer or at a different angle than the other. This happens when you don’t frequently check your progress straight-on. File a little, check straight ahead (not at an angle), and adjust. This takes longer but prevents asymmetrical disasters.
Filing with a back-and-forth sawing motion creates peeling and splitting that undermines your whole manicure. This is a habit many people have from filing fingernails casually for years. Commit to one-directional filing from the start; it genuinely makes a difference.
People also often file too aggressively, trying to create their shape in just a few heavy passes. This wastes your file, creates rough edges, and often means you’ve filed unevenly because you lost control. Multiple light passes are always better.
Not maintaining equal length as you shape is another trap. It’s easy to focus on one side and create a nail that’s slightly longer or tilted. Frequently step back and look at the overall shape, not just the section you’re currently working on.
Finally, many people skip the finishing buffer step and end up with visible file marks and a rough edge. Two minutes with a buffer transforms your filing work from looking homemade to looking professional. It’s worth the minimal extra time.
Filing Damaged or Brittle Nails Into a Squoval
Not everyone starts with perfect, healthy nails, and that’s okay. Damaged or brittle nails can absolutely be filed into a squoval — you just need to adjust your technique slightly.
If your nails are peeling or splitting, file even more conservatively and in even lighter passes than usual. Your nails are already structurally compromised, and aggressive filing will make the peeling worse. You’re aiming for the shape, not the speed. Patience is essential with damaged nails.
Use a finer-grit file (320 grit or higher) rather than a coarser one if your nails are brittle. The gentler abrasion is less traumatic to the keratin structure. A glass file is especially important here because it seals the edge better than other materials.
Consider filing from underneath the nail (the underside of the free edge) rather than from the top. This technique reduces peeling because you’re working against the direction that peeling happens naturally. Angle your file upward from underneath and make gentle passes along the edge. This takes more time but produces significantly smoother results on compromised nails.
Don’t try to create your full desired length if your nails are damaged. Instead, file them shorter (even very short if necessary), get them healthy, and let them grow back to your target length. It’s frustrating, but trying to work with damaged length just means you’ll be filing them even shorter anyway as the damage breaks away.
Apply cuticle oil or hand lotion very frequently while filing damaged nails. The moisture helps keep the keratin pliable and less prone to splitting. After you finish filing, use a hydrating nail treatment or oil and reapply it multiple times daily for the next few days.
Maintaining Your Squoval Shape Between Salon Visits
Getting the squoval right once is satisfying, but keeping it looking intentional requires a little maintenance. The good news is that maintenance is much faster than creating the shape initially.
File your nails roughly every 7-10 days to maintain your squoval shape as they grow. You’re not reshaping; you’re just preserving the edges as new nail growth extends past your fingertip. This is much quicker than the initial shaping — literally 5 minutes for all ten nails. Use the same one-directional filing technique on the new growth, maintaining the straight edge and rounded corners you’ve already created.
Between filings, avoid using your nails as tools. This is the number one thing that damages a carefully maintained shape. Don’t pick at things, scratch labels, or use your nails to open things. This habit immediately creates rough edges, peeling, and asymmetry that undoes your shaping work.
Keep your nails moisturized throughout the day. Dry nails are more prone to peeling and splitting, which ruins your shape faster. Use a hand lotion or cuticle oil regularly — even just a quick application after you wash your hands makes a difference.
Trim any signs of peeling immediately with the finest nail clippers you have. A small amount of peeling that you catch early can be removed in seconds. If you ignore it, it spreads upward and forces you to file away much more nail. Catching it early keeps your shape intact and your nails healthy.
If you notice your nails becoming rough or splitting despite your care, consider taking a brief break from filing and just letting them grow out for a couple of weeks while you focus on keeping them moisturized. Sometimes nails need recovery time, especially if you’ve been filing frequently. There’s no shame in pausing your shape maintenance to rebuild your nail health.
Adjusting Squoval Length to Match Your Lifestyle
The ideal squoval length is different for everyone depending on how they actually use their hands day to day.
If you type constantly, cook, or work with your hands, longer nails might be impractical regardless of shape. A short squoval (roughly ¼-inch of free edge) is elegant, super functional, and doesn’t compromise your ability to do anything. Short squovals photograph beautifully and still read as intentional; they’re not a compromise.
If you’re primarily desk-based and don’t need nails for manual work, you have more freedom. A medium squoval (roughly ½-inch to ¾-inch of free edge) balances beauty with practicality. You get visible length, the shape is clear and distinctive, and daily life isn’t complicated.
If you’re willing to be more careful with your hands and don’t engage in activities that are hard on nails, you can push toward a longer squoval (roughly ¾-inch to 1-inch of free edge). The longer the nails, the more dramatic the shape and the more dramatic any nail art or color becomes. Just be honest about whether you can realistically maintain that length without constant breakage.
Your nail bed length also factors in. Shorter nail beds suit shorter squovals proportionally; longer nail beds can carry more dramatic length. Look at your hand with the nail filed into your chosen shape and check the proportions. Does it look balanced, or does it feel like the nails are too short or too long for your hand? Adjust accordingly.
Remember that you can always file your nails shorter if the length isn’t working for you, but you can’t add length back. Start slightly longer than you think you need, wear that length for a few days, and then adjust downward if it’s not practical. This lets you find the perfect length before committing to filing shorter.
Squoval for Different Nail Sizes and Hand Shapes
The beauty of the squoval is that it’s genuinely flattering on virtually every hand, but small adjustments make it even better suited to your specific proportions.
Wide nail beds can absolutely rock a squoval, especially one with a longer straight edge and more angular corners. The width is balanced by the geometry of the shape, and the straight top edge makes the nails read as intentional and sophisticated rather than pudgy. Don’t fight your natural nail width; instead, emphasize the shape’s geometry.
Narrow nail beds look stunning with a softer squoval that has a shorter straight edge and more generous corner rounding. This prevents the nails from looking too angular or sharp relative to their width. The softer version is more flattering proportionally.
Short fingers benefit from a shorter squoval (in terms of free edge length) that’s not too angular. Very long nails on short fingers can look disproportionate regardless of shape, but a practical-length squoval with nice proportions is extremely flattering. The geometry and intentionality of the shape actually helps short fingers look more sophisticated.
Long fingers can carry longer squovals and more angular shapes beautifully. The extra length and room on the hand means you have more space to work with. You can push toward a more dramatic straight edge and sharper corners if that’s your aesthetic.
Square hands (where your hand width and length are roughly proportional) suit a classic squoval beautifully. The shape complements your natural hand shape and enhances it. Go for a balanced version without making it too angular or too rounded.
Rectangular hands (longer and narrower) benefit from a slightly softer squoval that’s not too aggressive in the corners. The softness balances the natural angular quality of your hand shape.
Round hands suit a more geometric squoval with clear definition in the straight edge and corners. The shape’s geometry contrasts nicely with your natural hand roundness and creates balance.
Ultimately, there’s no “wrong” squoval for any hand shape. What matters is that it feels good on you and makes you feel confident. The adjustments above are just guidelines to help you dial in what’s most flattering, but honestly, the squoval is hard to mess up proportionally. Most variations look good on most people.
Pairing Nail Art and Color With the Squoval Shape
The squoval shape is a phenomenal canvas for nail art and color because of its balanced proportions and clean geometry.
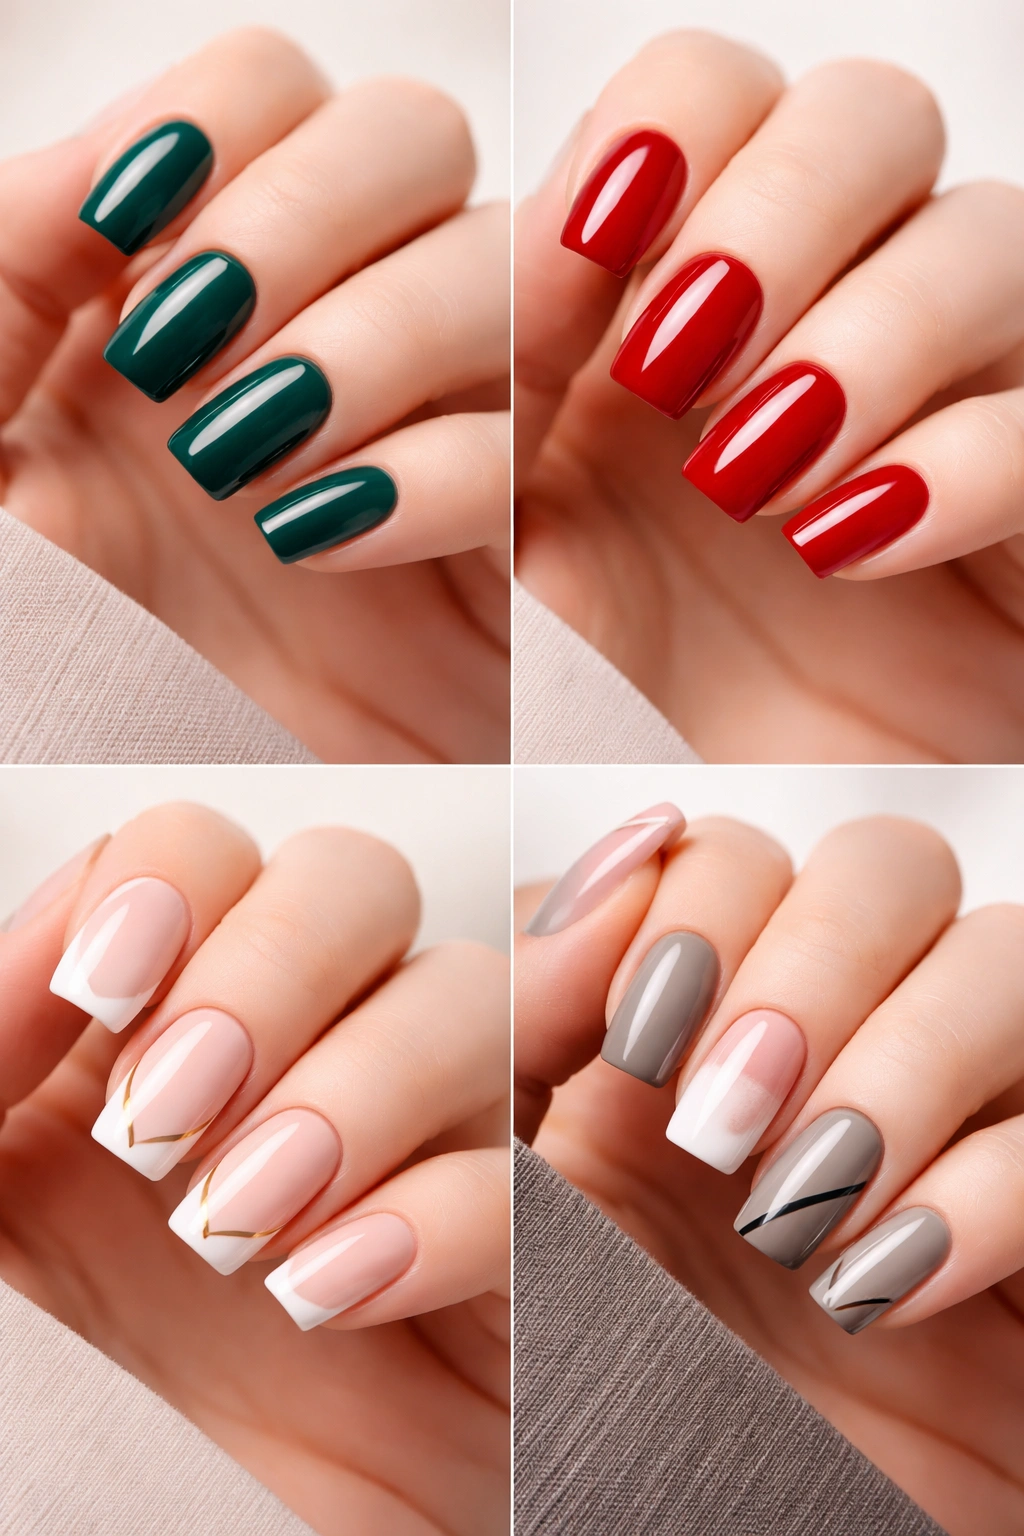
Solid colors look absolutely stunning on squoval nails because the shape itself is the design. A rich jewel tone, a classic red, a sophisticated nude, or a trendy shade all look intentional and polished on this shape. The geometry of the nail makes even simple color choices feel elevated. This is actually why the squoval has become such a popular choice for people who prefer minimalist, color-focused nails.
Geometric nail art is made for the squoval. Stripes, color blocks, negative space designs, and linear patterns all align beautifully with the shape’s clean lines. The straight edge of the squoval provides a natural alignment for geometric designs, and the rounded corners add visual interest without disrupting the geometry.
Gradient and ombre designs work beautifully because the squoval’s dimensions provide good canvas space without being so long that gradients look stretched. The shape’s proportions mean gradients don’t overwhelm the nail.
Delicate, minimal designs like thin lines, single dots, or small accents look refined on squovals. The shape’s sophistication means you don’t need busy designs to make it interesting. Less is often more with this shape.
French manicures (the classic white-tipped version and all modern variations) are absolutely gorgeous on squovals. The straight edge of the squoval provides a perfect line for the white tip, and the shape is elegant enough to carry the classic look beautifully. Modern French designs with colors other than white also look fantastic.
All-over glitter or sparkle designs work well because the squoval’s size gives a decent amount of space for sparkle without being so long that it looks over-the-top. The shape reads as sophisticated enough to carry embellished designs.
The one thing to avoid is super intricate, detailed nail art that’s meant for long coffin or ballerina nails. The squoval’s moderate length means highly detailed designs can feel cramped. But honestly, that’s not really a limitation — it just means the squoval steers you toward designs that are more refined anyway, which is entirely a good thing.
Final Thoughts
Filing a perfect squoval comes down to understanding the shape conceptually (straight edge plus rounded corners equals intentional geometry), having decent tools, and using proper one-directional filing technique. None of that is complicated, and none of it requires special talent or artistic ability. It’s purely technique, and technique is learnable.
The first time you file a true squoval, it might take you 20-30 minutes to get all ten nails shaped correctly. Your second time takes 15 minutes. By your fifth time, you’re down to 10 minutes, and it becomes automatic. The time investment is minimal, and the payoff is nails that look professionally done every single day.
What really sells the squoval, though, is how practical it is. You get a shape that looks expensive and intentional while being genuinely durable and functional. No snags, no breakage from sharp corners, no feeling like your nails are getting in the way of your actual life. The squoval is the shape that lets you have beautiful, long-looking nails without sacrificing anything.
Start with one nail if you’re nervous. File it until it looks exactly how you want it, study what made it work, and then replicate that technique on the rest. You’ve got this — and by your next filing session, your hands will look like you’ve been doing squovals forever.
