

Looking rich doesn’t mean spending rich. And nowhere is that more true than with your nails.
You know that feeling when someone’s manicure just looks expensive? Like they dropped serious cash at some bougie salon? The secret is: they probably didn’t. The difference between a luxury-looking manicure and a cheap-looking one has nothing to do with price tags and everything to do with color choice, application, and a few simple tricks.
I’ve tested countless drugstore polishes and salon shades, and I can tell you with absolute certainty that a $5 bottle can look just as stunning as a $25 one. It’s all about knowing which shades naturally read as luxurious and how to apply them like you mean business.
The wealthy-looking manicure isn’t about nail art that screams for attention. It’s about that quiet, polished elegance—the kind that makes people assume you have your life together. Clean lines. Rich colors. Glossy finishes. Perfectly groomed cuticles.
Let’s dive into ten nail ideas that’ll make your hands look like they belong to someone who casually owns a Birkin—even if you’re working with a Target budget.
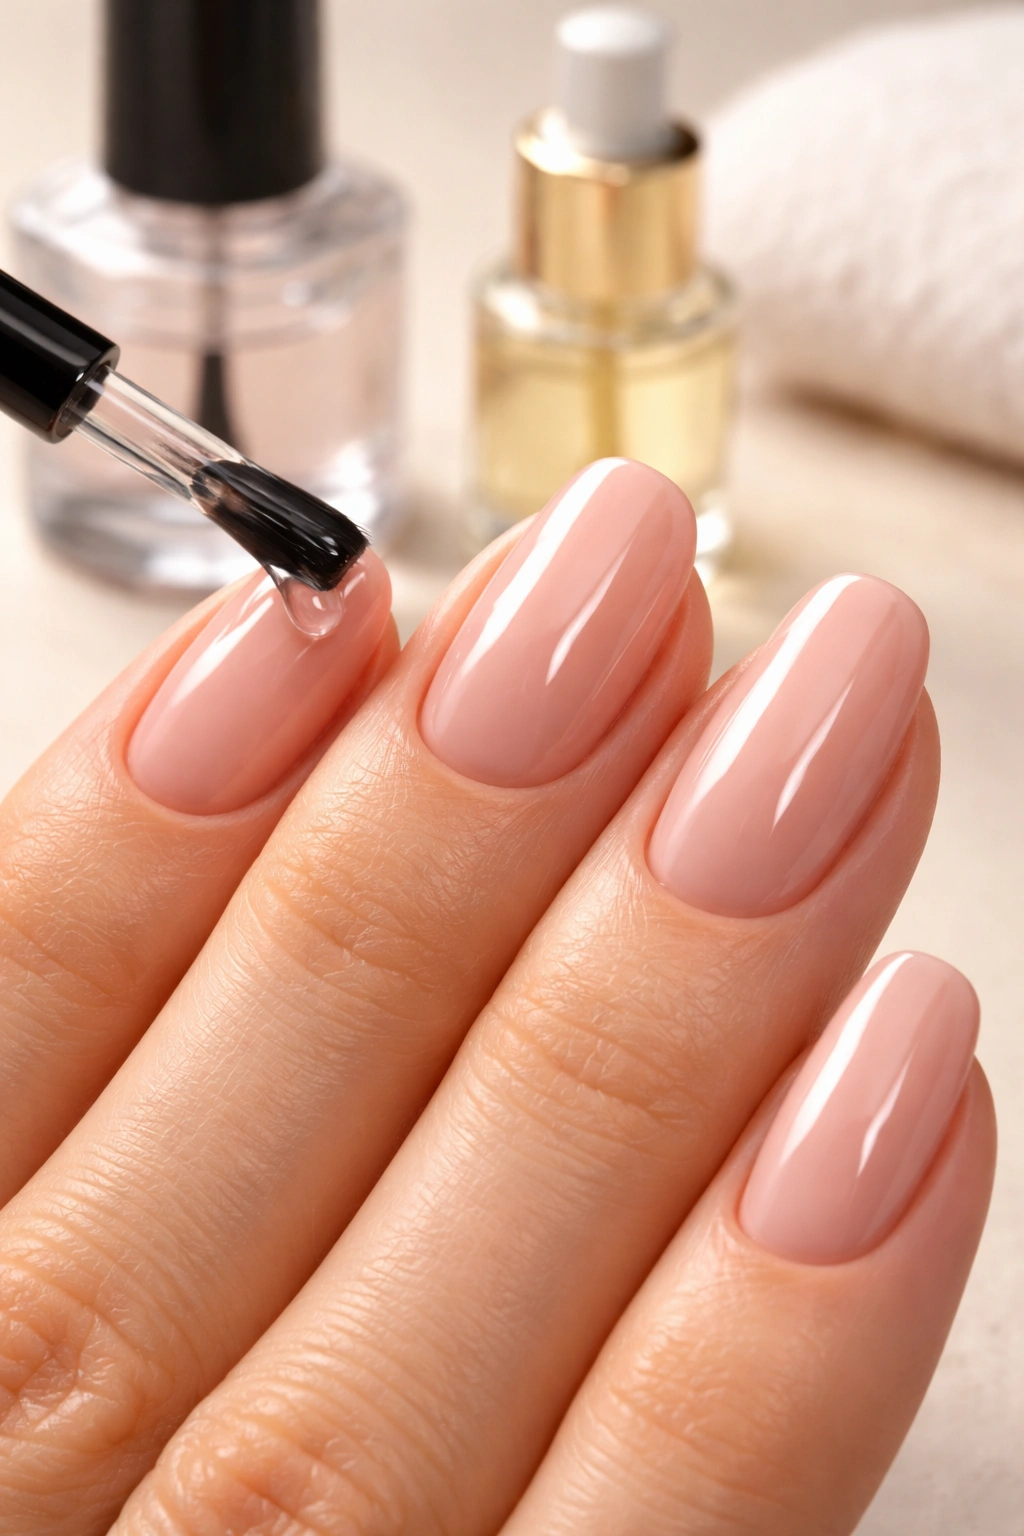
1. Classic Nude That Matches Your Undertones

Nude nails are the ultimate old-money flex, but here’s the catch: the wrong nude will expose you faster than a fake designer bag.
The shade has to match your skin’s undertones perfectly. If it’s too pink, too yellow, or too gray for your complexion, it’s not a nude—it’s a mistake. A proper nude makes your fingers look longer, sleeker, and effortlessly polished.
Why It Works
Nude polish gives you that “your nails but better” effect. It’s the manicure equivalent of a luxury foundation—invisible yet transformative. This shade works everywhere: boardroom, brunch, wedding, Tuesday morning grocery run.
The key is finding your nude. Cool-toned skin looks gorgeous in pink-based nudes. Warm-toned beauties shine in peachy or beige shades. Deeper skin tones absolutely glow in rich caramels and taupes.
Application Tips
Go sheer rather than opaque for the most expensive look. Two thin coats beat one thick coat every single time. And please, for the love of all things chic, moisturize those cuticles.
Drugstore brands like Essie’s Ballet Slippers or Sally Hansen’s Naked Ambition deliver that high-end finish without the high-end price. The polish itself matters less than the prep work—buffed nails and pushed-back cuticles are non-negotiable.
Pro tip: If you can’t decide between two nude shades, go with the lighter one. It’s more forgiving and grows out better.
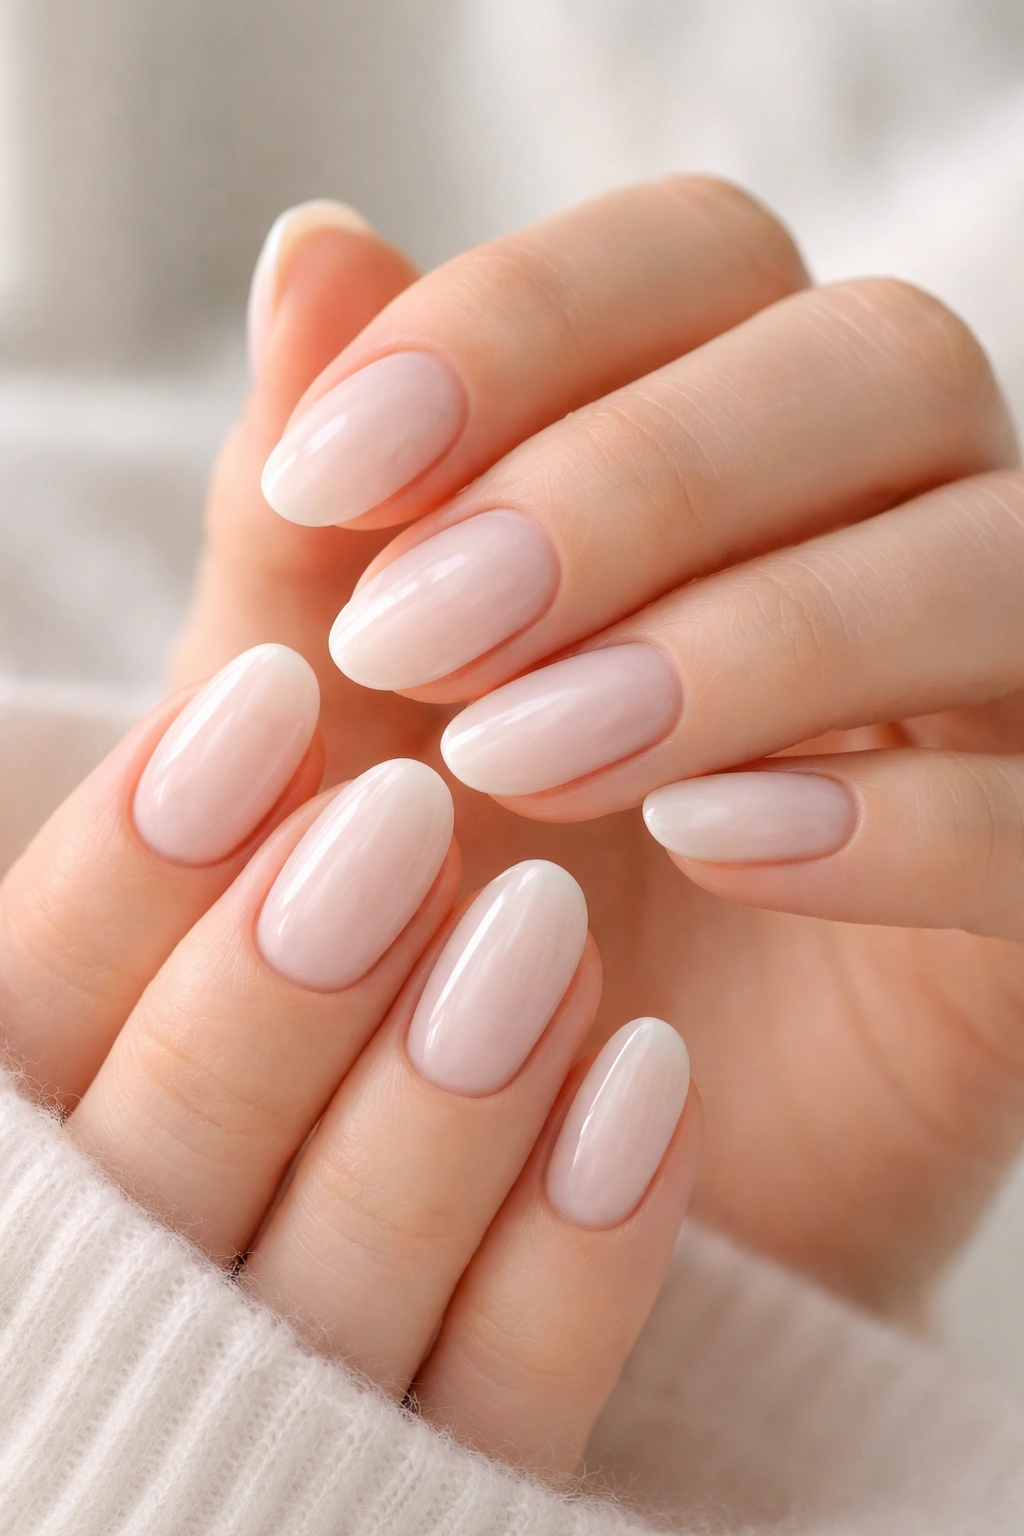
2. Sheer Milky Pink
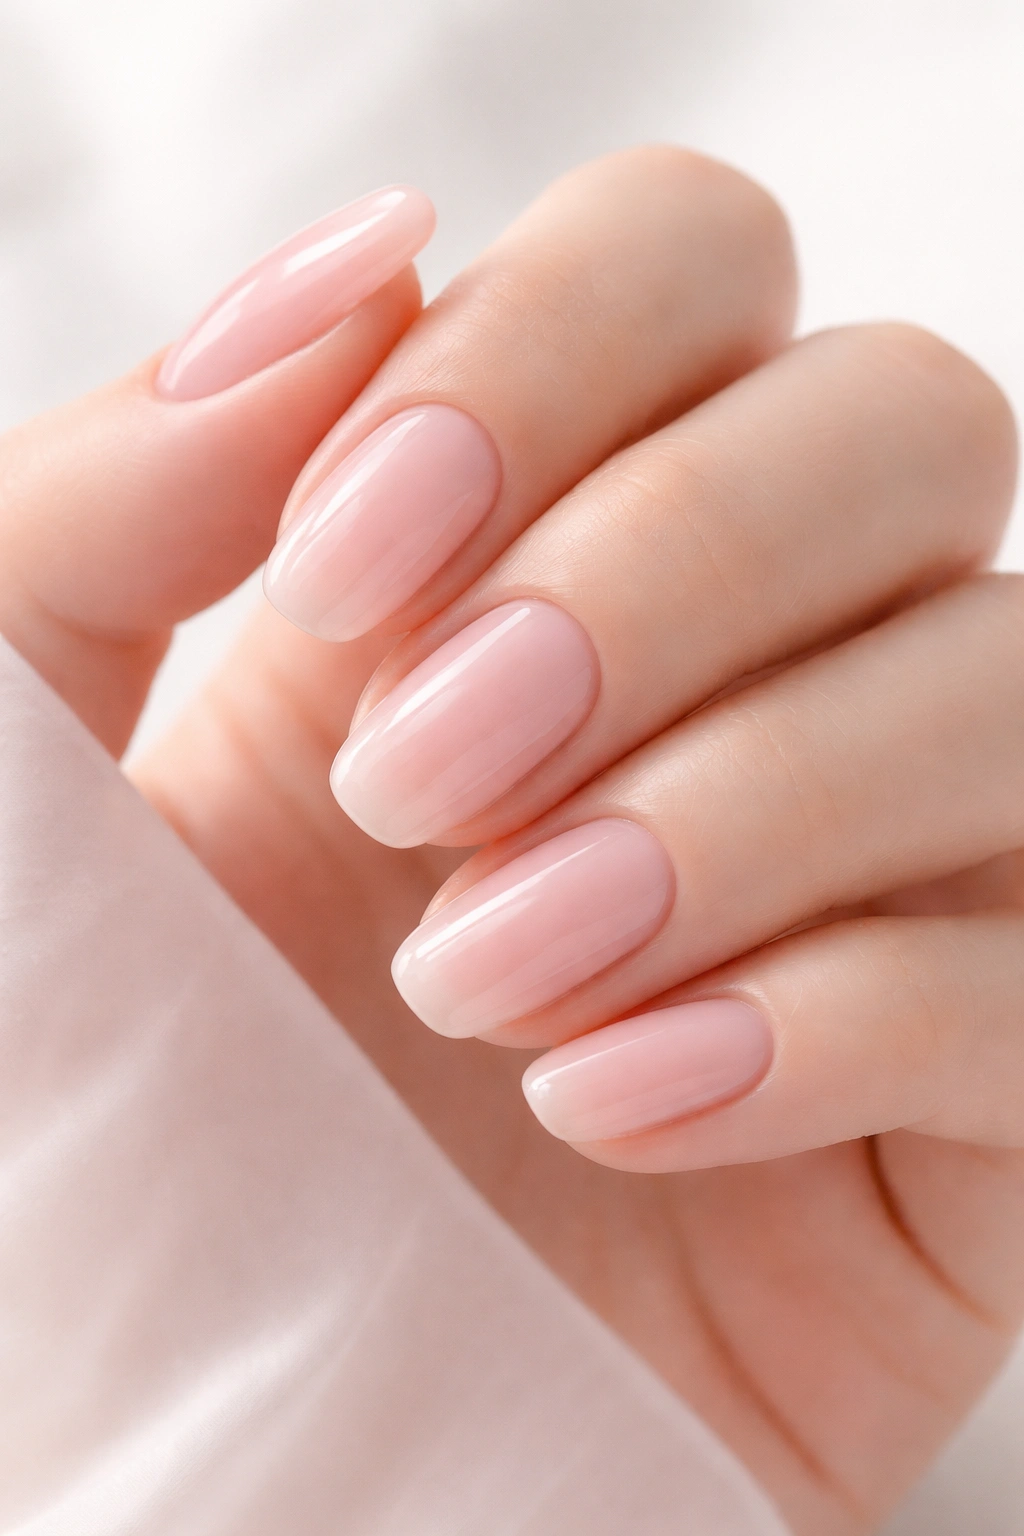
Milky pink is softer, more translucent, and infinitely chicer than basic baby pink. This shade has serious “I casually own a vintage Chanel bag” energy.
The difference between milky pink and regular pink is subtle but crucial. Milky shades are semi-sheer with a cloudy, opalescent quality. They blur imperfections on your nail bed while still looking intentional and polished.
What Makes It Special
This shade works across all skin tones and pairs with literally everything in your closet. It’s feminine without being precious, modern without being trendy. Celebrities and their manicurists swear by soft pink for good reason—it always looks put-together.
The translucent quality means small application mistakes basically disappear. You’re not trying to achieve perfect opacity, so streaks and unevenness won’t haunt you.
How to Get the Look
Apply two to three thin layers over a clear base coat. Don’t try to make it fully opaque—that sheer, milky quality is the whole point. Let each coat dry completely before adding the next.
Finish with a glossy top coat for that fresh-from-the-salon shine. Matte milky pink can work, but glossy will always look more expensive. Brands like OPI’s Bubble Bath or Essie’s Allure deliver this look for under $10.
Fun fact: Essie’s Ballet Slippers was reportedly the late Queen Elizabeth II’s go-to shade. If it’s good enough for royalty, it’s good enough for us.
3. Deep Burgundy for Drama
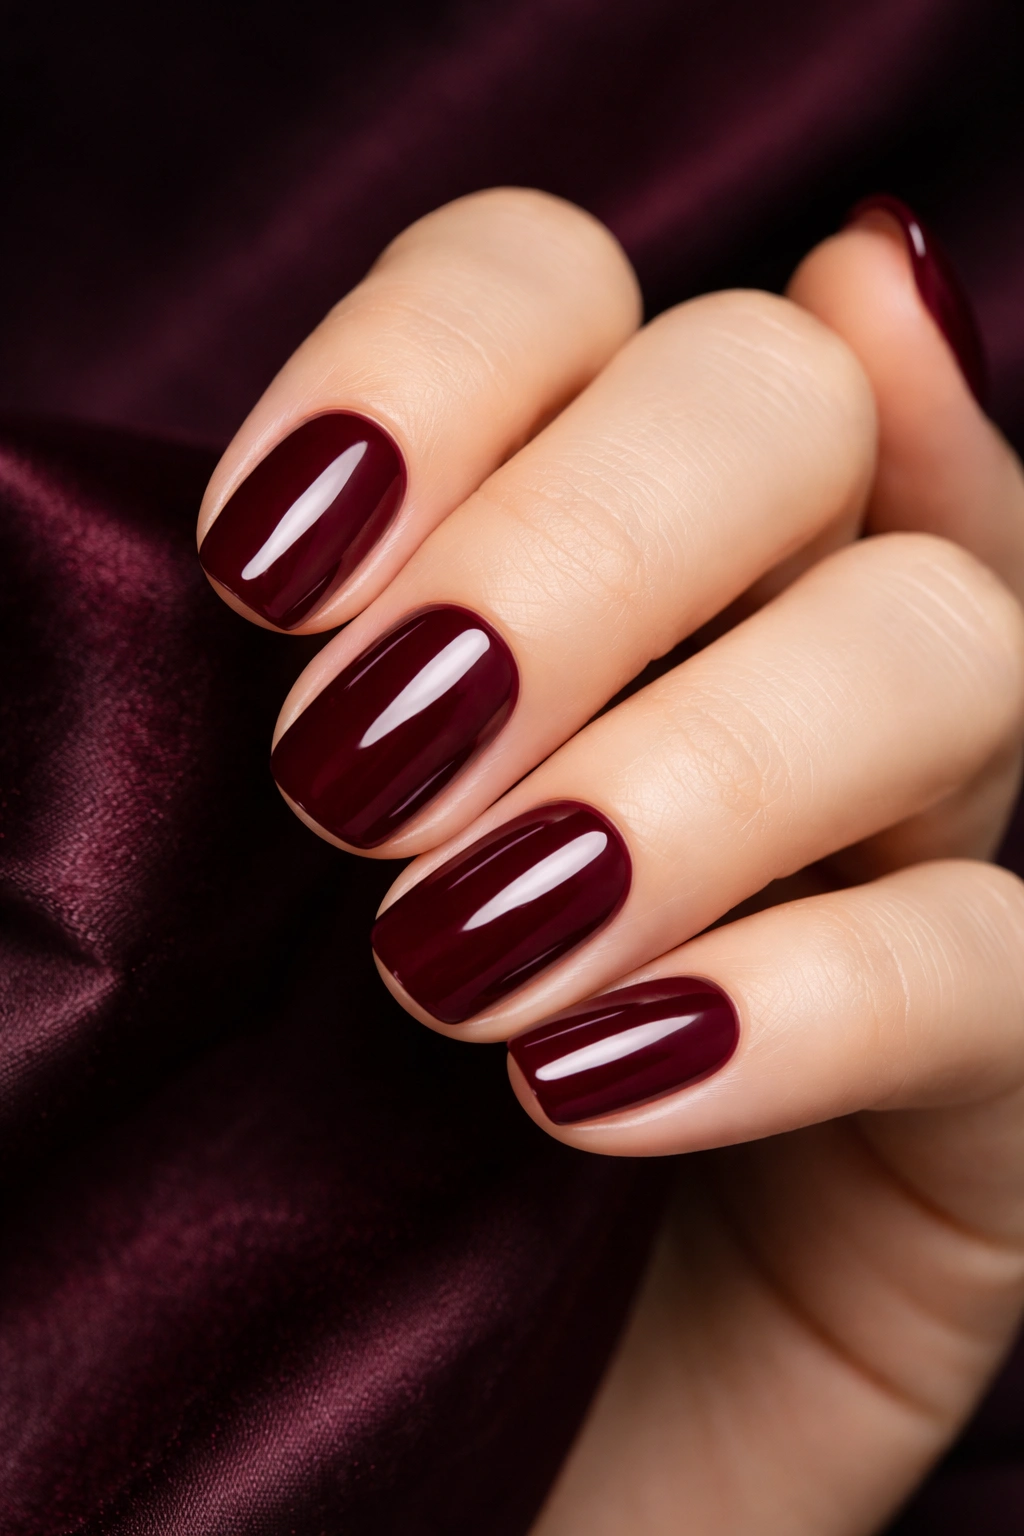
Burgundy nails scream luxury and confidence. This is the shade of CEOs, wine collectors, and anyone who’s never questioned their own worth.
Deep, wine-toned burgundy has cool undertones that make it look rich and intentional. Avoid anything too warm or muddy—those shades veer into cheap territory fast. You want oxblood, deep cherry, or wine barrel, not brick red.
Why It Stands Out
Burgundy adds drama without feeling costume-y. It’s bold enough to make a statement but sophisticated enough for any setting. This shade works beautifully against all skin tones, deepening and complementing rather than clashing.
The color has serious staying power in terms of style. While neon shades scream “2019 festival season,” burgundy remains timelessly elegant.
Best Practices
Stick to short or medium-length nails to keep things luxe instead of vampy. Super long stilettos in deep burgundy can tip into Halloween territory. Square or almond shapes work beautifully.
Always go glossy. Matte burgundy can look interesting, but high-shine burgundy looks expensive. Two coats should do it—this shade usually has excellent pigmentation. Brands like Essie’s Bordeaux or Sally Hansen’s Pat on the Black deliver gorgeous burgundy for under $9.
Pro tip: Burgundy shows every chip and imperfection, so don’t skip your base coat. It’ll help the color go on smoothly and protect against staining.
4. Glossy Black With High-Shine Finish
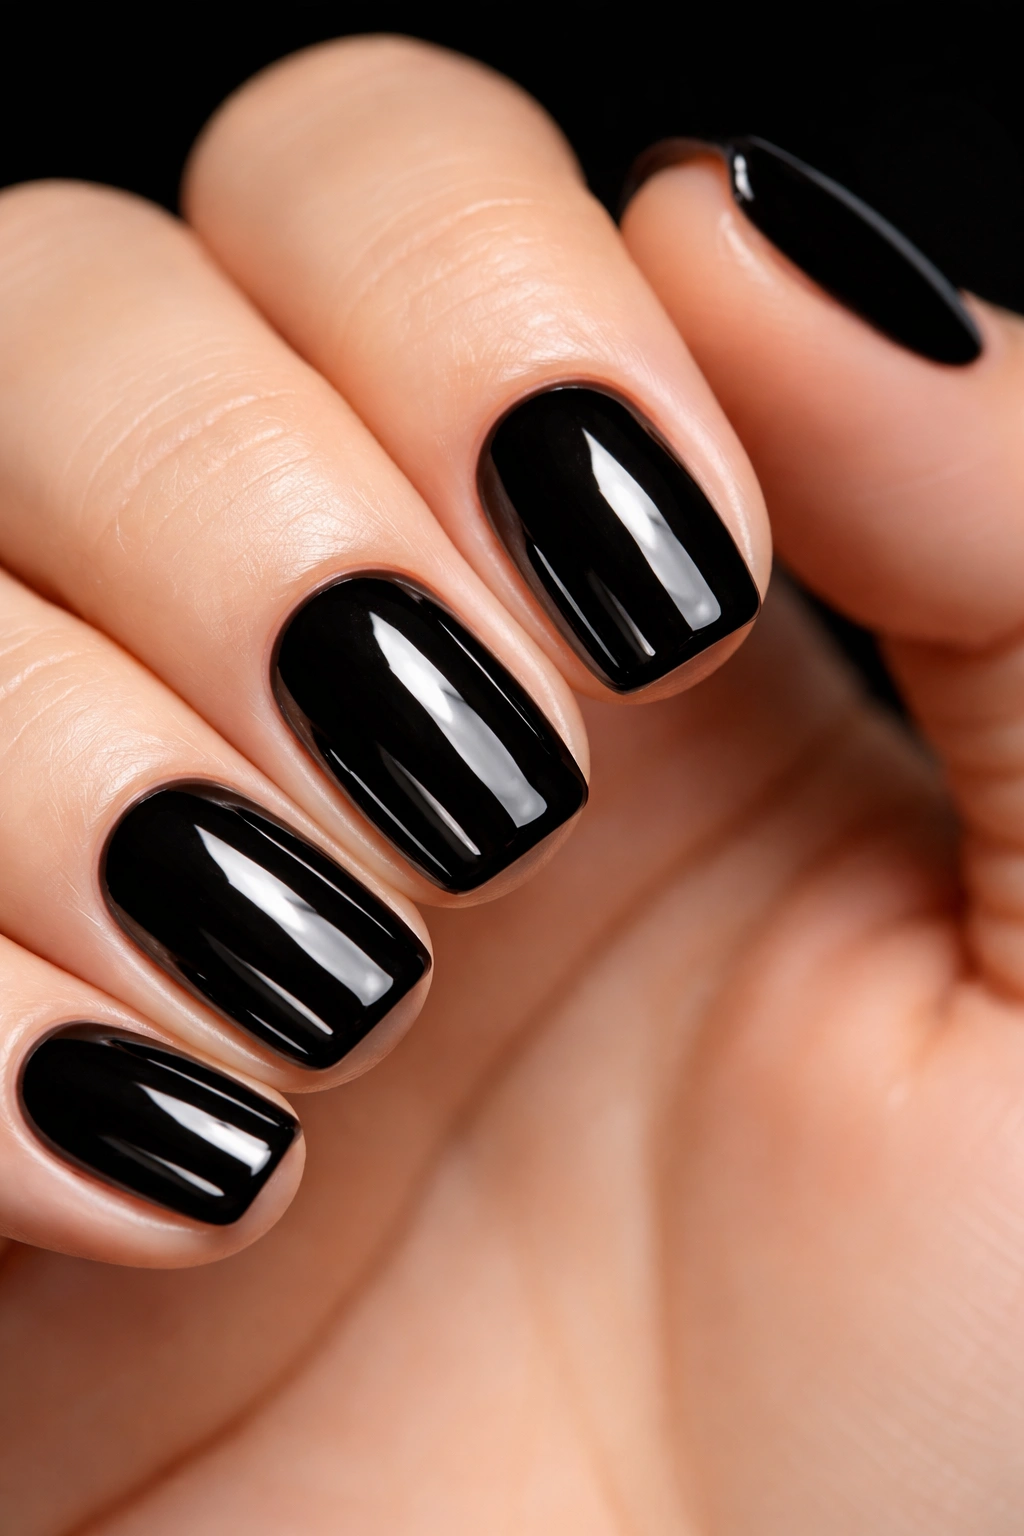
Black nails walk a fine line between expensive-sleek and one-chip-away-from-disaster. The secret to keeping them on the luxury side? Shine so intense you can check your teeth in it.
Patent leather levels of gloss are mandatory here. That glass-like, mirror finish transforms black from edgy to elegant. Skip the matte—it can look cool but rarely looks wealthy.
What Makes It Work
High-shine black has serious power energy. It’s sophisticated, bold, and gives off major “I know exactly what I want” vibes. The key is keeping your nails short to medium length with a clean shape.
Long, uneven, or chipped black nails instantly cheapen the look. But short, glossy black nails on perfectly manicured hands? That’s editorial-level chic.
Application Advice
Black shows everything—streaks, bubbles, uneven application. Take your time with thin, even coats. Two coats of color plus a thick, glossy top coat will give you that expensive finish.
Clean up your cuticles obsessively. Dry, ragged cuticles destroy the illusion of an expensive black manicure faster than anything else. Keep a cuticle oil handy and use it daily.
Wet n Wild’s Black Creme or Sally Hansen’s Black Out are both under $5 and deliver excellent opacity. Pair with Seche Vite top coat for that mirror shine.
5. Chocolate Brown Neutrals
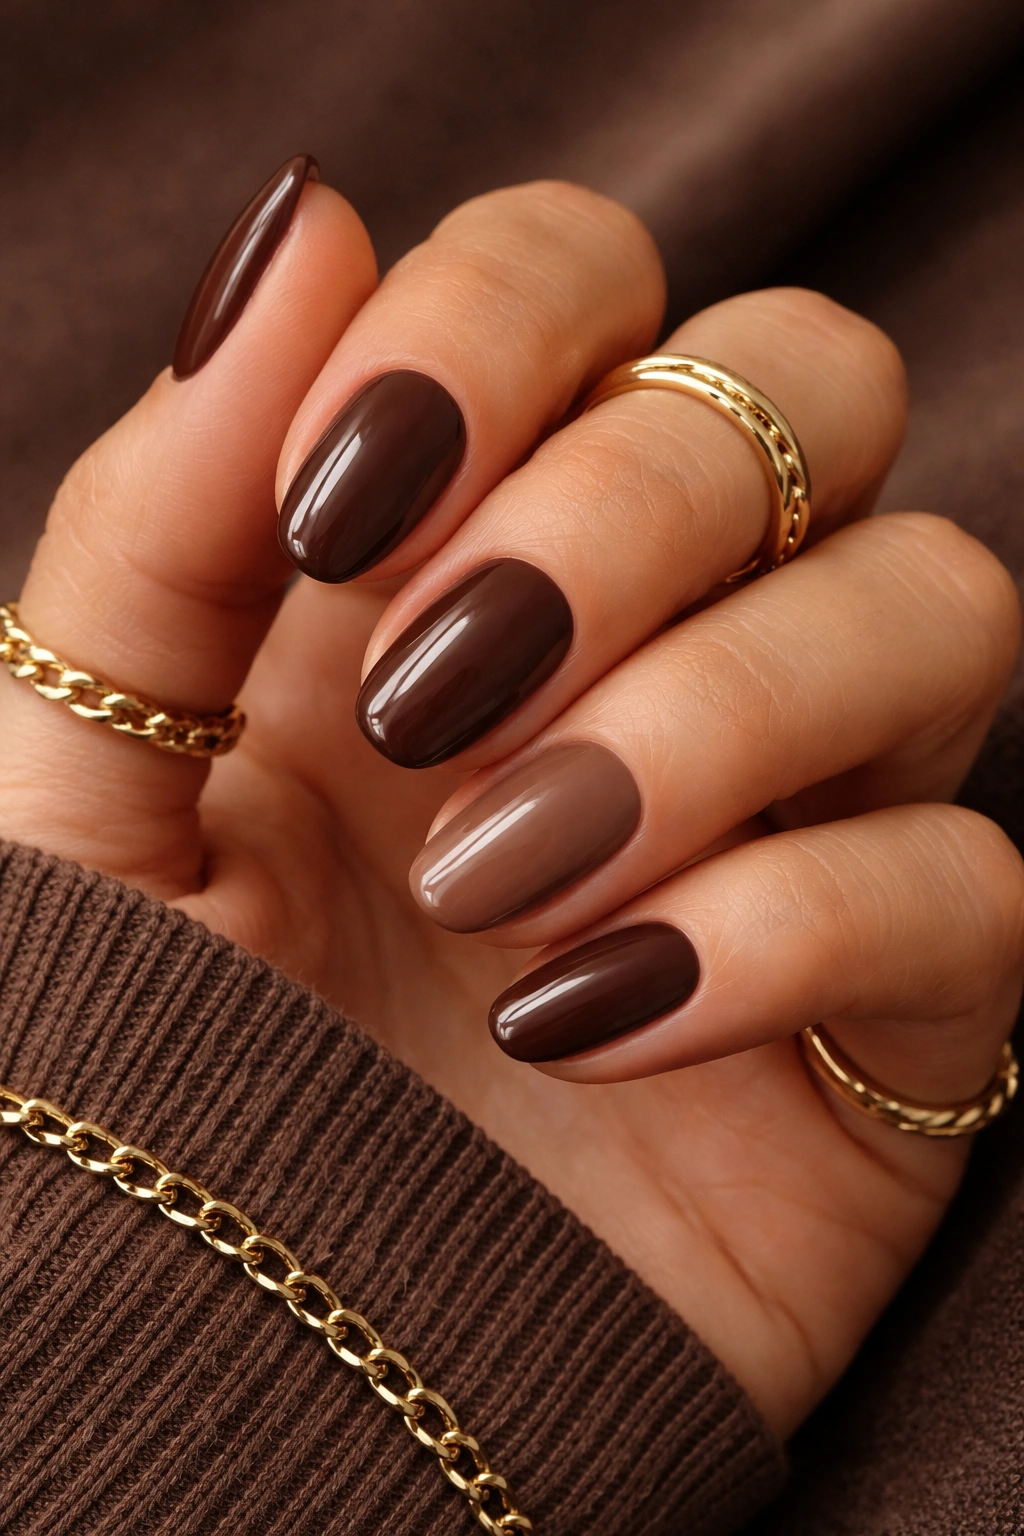
Brown nails are quiet luxury personified. Every shade of brown—espresso, latte, chocolate, cocoa—looks expensive when done right.
Cool-toned chocolatey browns always feel more elevated than warm, orange-leaning browns. Think rich dark chocolate rather than caramel. These shades give “I own a designer trench coat” and “this bag is vintage, not thrifted.”
Key Benefits
Brown works across seasons and pairs beautifully with gold jewelry. It’s unexpected enough to feel interesting but neutral enough to go with everything. Deeper browns have that bold, powerful edge while lighter browns give soft, minimalist elegance.
The shade photographs beautifully and looks intentional rather than accidental. Unlike some neutrals that can read as “forgot to paint my nails,” brown always looks like a deliberate choice.
Getting It Right
Keep your cuticles moisturized—dry hands and brown polish will instantly turn your manicure from “expensive” to “neglected furniture.” Seriously, cuticle oil is your best friend here.
Go for medium to short lengths. Brown on super long nails can feel heavy. Almond or square shapes work beautifully. And always, always finish with a glossy top coat.
Sally Hansen’s Mocha Latte or Essie’s Partner in Crime deliver gorgeous brown shades for under $10. Two coats give you full opacity with a luxurious depth.
6. Navy Blue for Dark Sophistication
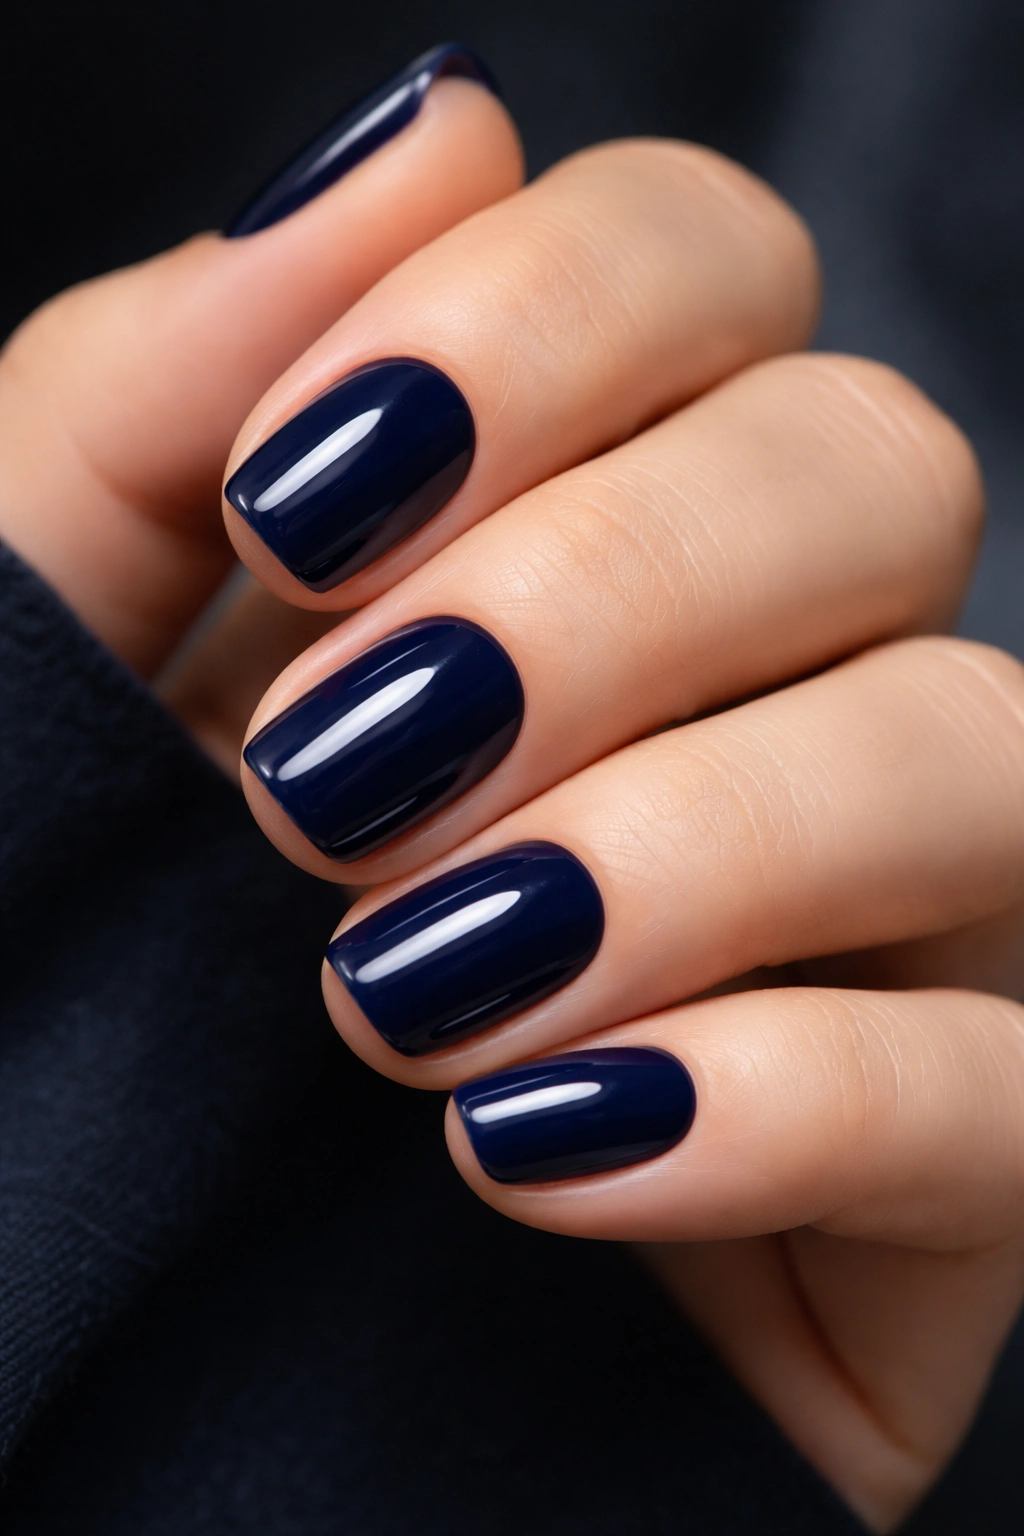
Navy blue gives you all the boldness of black but with more sophistication and subtlety. It’s deep enough to feel moody yet cool enough to stay effortlessly chic.
This shade channels serious high-fashion energy. It’s what people who wear cashmere sweaters and invest in timeless pieces choose when they want color without chaos.
Why Choose Navy
Navy works as a neutral but feels more interesting than black. It complements every skin tone and pairs beautifully with both silver and gold jewelry. The shade has serious versatility—dressy enough for formal events but understated enough for everyday wear.
Deep navy reads as intentional and polished. It’s the opposite of trying too hard, which is exactly what makes it look expensive.
How to Apply
High-shine is essential. Matte navy can look dull and lifeless, while glossy navy gives that fresh-from-the-salon luxury. Apply two thin coats for full coverage without thickness.
Keep nails short to medium length. Super long navy nails can start looking costume-y. Square or oval shapes maintain that sophisticated vibe.
Essie’s After School Boy Blazer or Sally Hansen’s Navy Baby are both excellent options under $10. Pair with a high-gloss top coat and you’re golden.
Note: Navy shows chips less obviously than black, making it slightly more forgiving as it wears.
7. Milky White for Clean-Girl Energy
There’s stark, chalky white, and then there’s milky white. If you can’t tell the difference, you’ve been missing out on one of the chicest nail shades around.
Milky white is soft, translucent, and gives off that effortless clean-girl aesthetic. It’s the shade that makes people assume you spend way too much on skincare and candles (in a good way).
What Sets It Apart
Milky white polish applies with a sheer, cloudy quality rather than thick opacity. It creates that soft, ethereal look that’s become synonymous with minimalist luxury. The shade feels fresh and modern without trying too hard.
This color is incredibly forgiving. Small application imperfections blend right in thanks to the semi-sheer finish. It’s one of the most low-maintenance “high-maintenance” looks you can achieve.
Application Must-Knows
Apply thin layers—two to three coats work best. If you slap on too much product, you’ll end up with a chunky, chalky mess instead of that gorgeous translucent finish. Patience is everything here.
Anything thick or goopy will instantly look cheap. Find a polish with a smooth, thin formula that applies easily. Keep your cuticles impeccably groomed since the light color draws attention to any dryness or hangnails.
Essie’s Marshmallow or OPI’s Funny Bunny deliver beautiful milky white for under $12. The key is finding a formula that’s sheer but buildable.
8. Classic Pillar Box Red
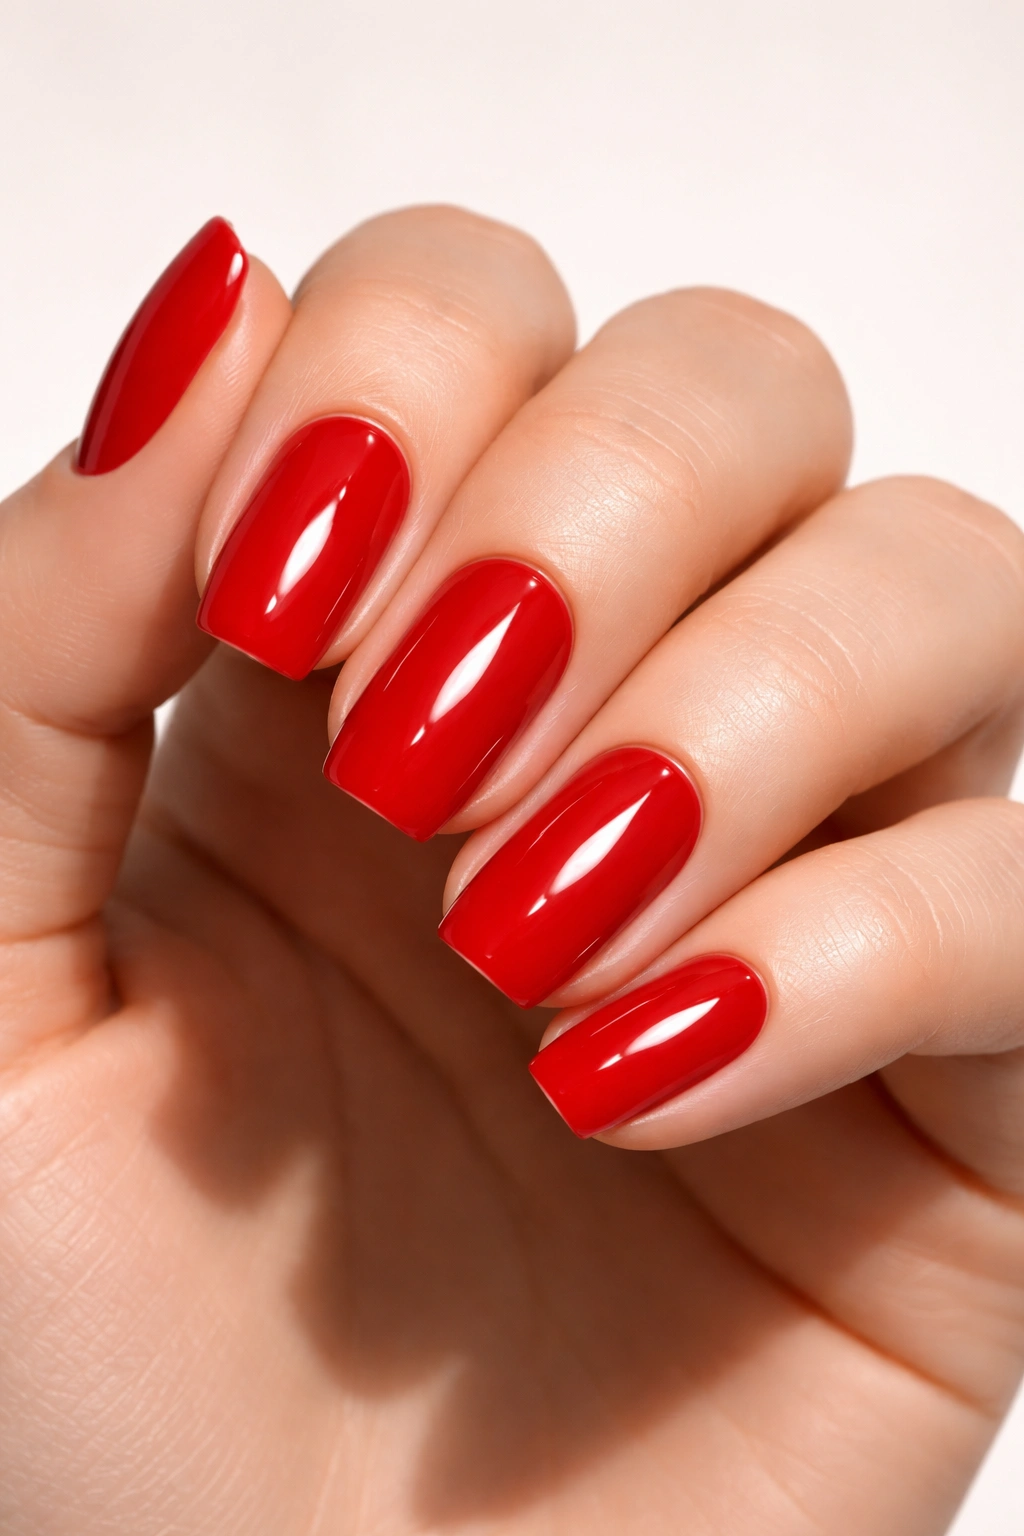
Red nails are arguably the most iconic expensive-looking manicure. But not all reds are created equal, and the wrong shade will betray you instantly.
True pillar box red—not too orange, not too blue, just perfectly balanced—looks good on everyone. It’s the shade of confidence, power, and knowing exactly who you are.
Why Red Works
Classic red is timeless. While trends come and go, a perfect red manicure remains perpetually chic. It adds polish to any outfit and commands attention without saying a word.
The right red elevates your entire look. It makes jeans and a t-shirt feel intentional. It gives power suit energy even if you’re wearing athleisure.
Getting It Perfect
Application needs to be flawless—red shows every mistake. Use three thin coats rather than two thick ones. Take your time with cleanup around the cuticles. Keep your brush strokes smooth and even.
High-shine finish is mandatory. Glitter, shimmer, or matte instantly cheapens the look. You want glossy, glass-like perfection.
Essie’s Wicked or Revlon’s Red provide gorgeous classic reds for under $10. If you struggle with application, consider getting this one done professionally and using cheaper shades for at-home manicures.
Pro tip: Red polish stains like crazy. Always use a base coat, and if staining happens, buff it gently with a nail buffer.
9. Simple French Tips With a Twist
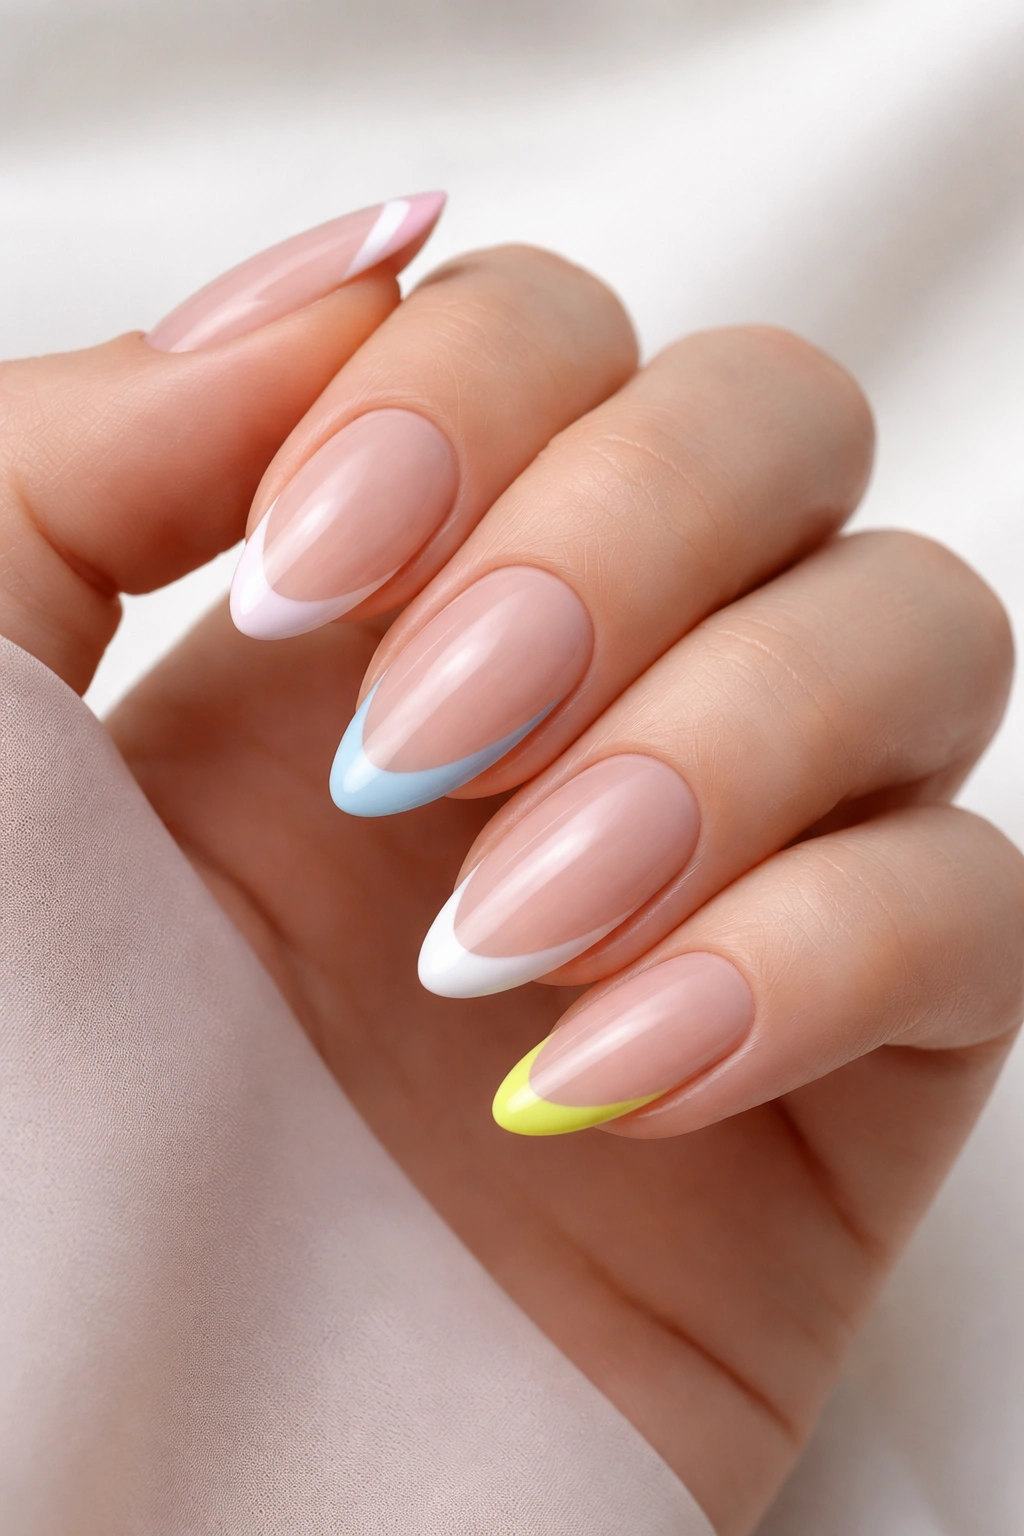
French tips get a bad rap, but updated versions look incredibly chic and expensive. The secret is keeping the tip thin and the execution clean.
Modern French manicures play with color, placement, and proportions. Think micro-thin tips, colored tips instead of white, or tips placed at an angle rather than following the nail edge.
Why It’s Effective
French tips are universally flattering and make fingers look longer and more elegant. The negative space keeps things feeling light and airy rather than heavy.
This style grows out beautifully, giving you more wear time between manicures. As your nails grow, the design still looks intentional rather than messy.
How to Nail It
Keep tips ultra-thin for a modern, expensive look. Thick white tips read dated and cheap. Use striping tape or guides to get clean lines if your hand isn’t steady.
Try colored tips for something unexpected—navy, burgundy, or even chocolate brown. Or place your tip diagonally across one corner for an editorial twist.
Essie’s Blanc for white tips or OPI’s Alpine Snow both work beautifully. Pair with your favorite nude base. Use a thin nail art brush for precision if the polish brush feels too wide.
Fun fact: Multicolor French tips—using different shades on each nail—give you that expensive salon look without requiring much skill.
10. Minimalist Nail Art With Dots or Lines

Sometimes you want something more interesting than a solid color but don’t have the skills or budget for intricate nail art. Enter: simple dots and lines.
Minimalist nail art looks intentional and artistic without requiring steady hands or fancy tools. A few well-placed dots or a single metallic stripe transforms a basic manicure into something special.
What Makes It Special
Simple geometric designs add visual interest without overwhelming your nails. They feel modern and fresh while remaining totally wearable for any occasion.
This approach gives you creative freedom without the pressure of perfection. Abstract designs are supposed to be imperfect—that’s part of their charm.
Creating the Look
Use a toothpick or dotting tool for perfectly round dots in varying sizes. Start with a solid base color, let it dry completely, then add dots in a contrasting shade.
For lines, grab a thin nail art brush or striping brush. A single metallic line down the center or diagonal across the nail looks incredibly chic. Gold or silver work beautifully against any base color.
Press-on nail stickers are another genius hack. They give you complex-looking designs without any actual work. Just stick them on over dried polish and seal with top coat.
Keep your nail art to one or two accent nails for the most sophisticated look. Covering every nail can feel busy. Balance is everything.
Pro tip: If you mess up, just add more dots or lines until it looks intentionally abstract. Confidence sells the look.
Final Thoughts
Expensive-looking nails have nothing to do with how much you spend and everything to do with how you execute them. The right shade, glossy finish, and proper nail care beat a pricey salon visit every time.
Invest your money in good base and top coats rather than expensive polish. A $5 color with a quality top coat looks better than a $25 polish applied poorly over bare nails.
Your cuticles matter more than your polish brand. Keep them moisturized, pushed back, and clean. Dry, raggedy cuticles destroy any illusion of luxury faster than anything else.
Remember: the wealthiest-looking manicures whisper rather than shout. Choose classic shades, keep your application clean, and let that high-shine finish do the talking.
