

You’ve scrolled past hundreds of jaw-dropping nail designs, only to realize they all require fancy brushes, dotting tools, or a mini art studio’s worth of supplies. Here’s the good news: creating salon-worthy nails doesn’t mean investing in professional equipment or spending hours perfecting your technique. Your kitchen drawers and bathroom cabinet already hold everything you need to transform plain nails into eye-catching designs.
The beauty of tool-free nail art lies in its accessibility. A bobby pin becomes a precision dotting instrument. A makeup sponge transforms into an ombre creator. Even a plastic sandwich bag can help you achieve marbled effects that look like you spent serious money at a salon. These aren’t just workarounds – they’re legitimate techniques that nail artists use when they want quick, creative results without fuss.
What makes these designs perfect for anyone is their forgiving nature. Unlike intricate hand-painted art that demands steady hands and artistic skill, these methods embrace imperfection. Slightly uneven dots? That’s part of the charm. Colors that blend unexpectedly? Even better. You’re about to discover that the gap between “I wish I could do that” and “I actually did that” is smaller than you think.
1. Classic Polka Dot Nails
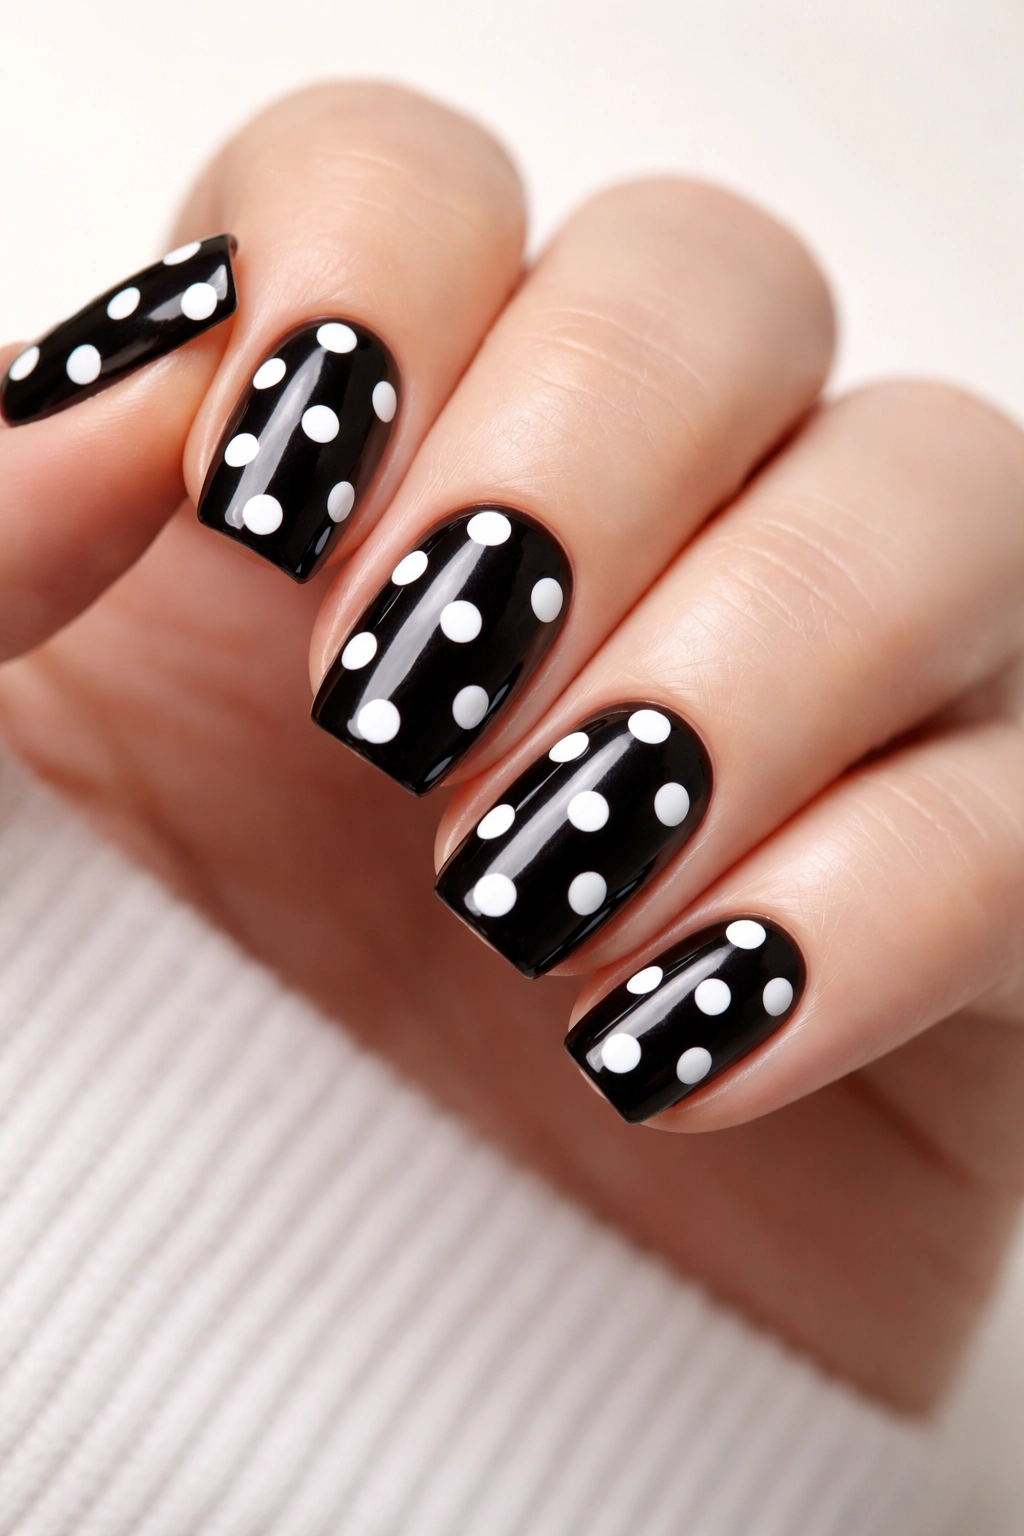
Polka dots are the ultimate starter design that somehow never looks basic. All you need is a bobby pin – yes, the same one holding back your hair – and suddenly you’re creating perfectly round dots with professional-looking spacing.
The trick is using the rounded end of the bobby pin as your stamping tool. Dip it into your polish bottle, tap off excess on the bottle’s rim, and press gently onto your dried base color. Each dot comes out crisp and uniform because the bobby pin’s curved tip naturally creates that circular shape.
Why This Design Works Every Time
Bobby pins give you control that brushes can’t match. The small surface area means you won’t accidentally create blobs, and you can space your dots however you like – scattered randomly for a playful look, lined up in rows for something geometric, or clustered in corners for subtle detail. Toothpicks work too, though they create slightly smaller dots.
Quick Styling Tips
- Use contrasting colors for maximum impact (white dots on black, gold on navy)
- Try different dot sizes by using the pin’s tip versus its rounded end
- Create ombre dots by transitioning from dark to light shades across your nails
- Add dots only to accent nails if full coverage feels overwhelming
Pro tip: Wait until your base coat is completely dry before dotting, or you’ll drag the base color and muddy your design.
2. Gradient Ombre Effect
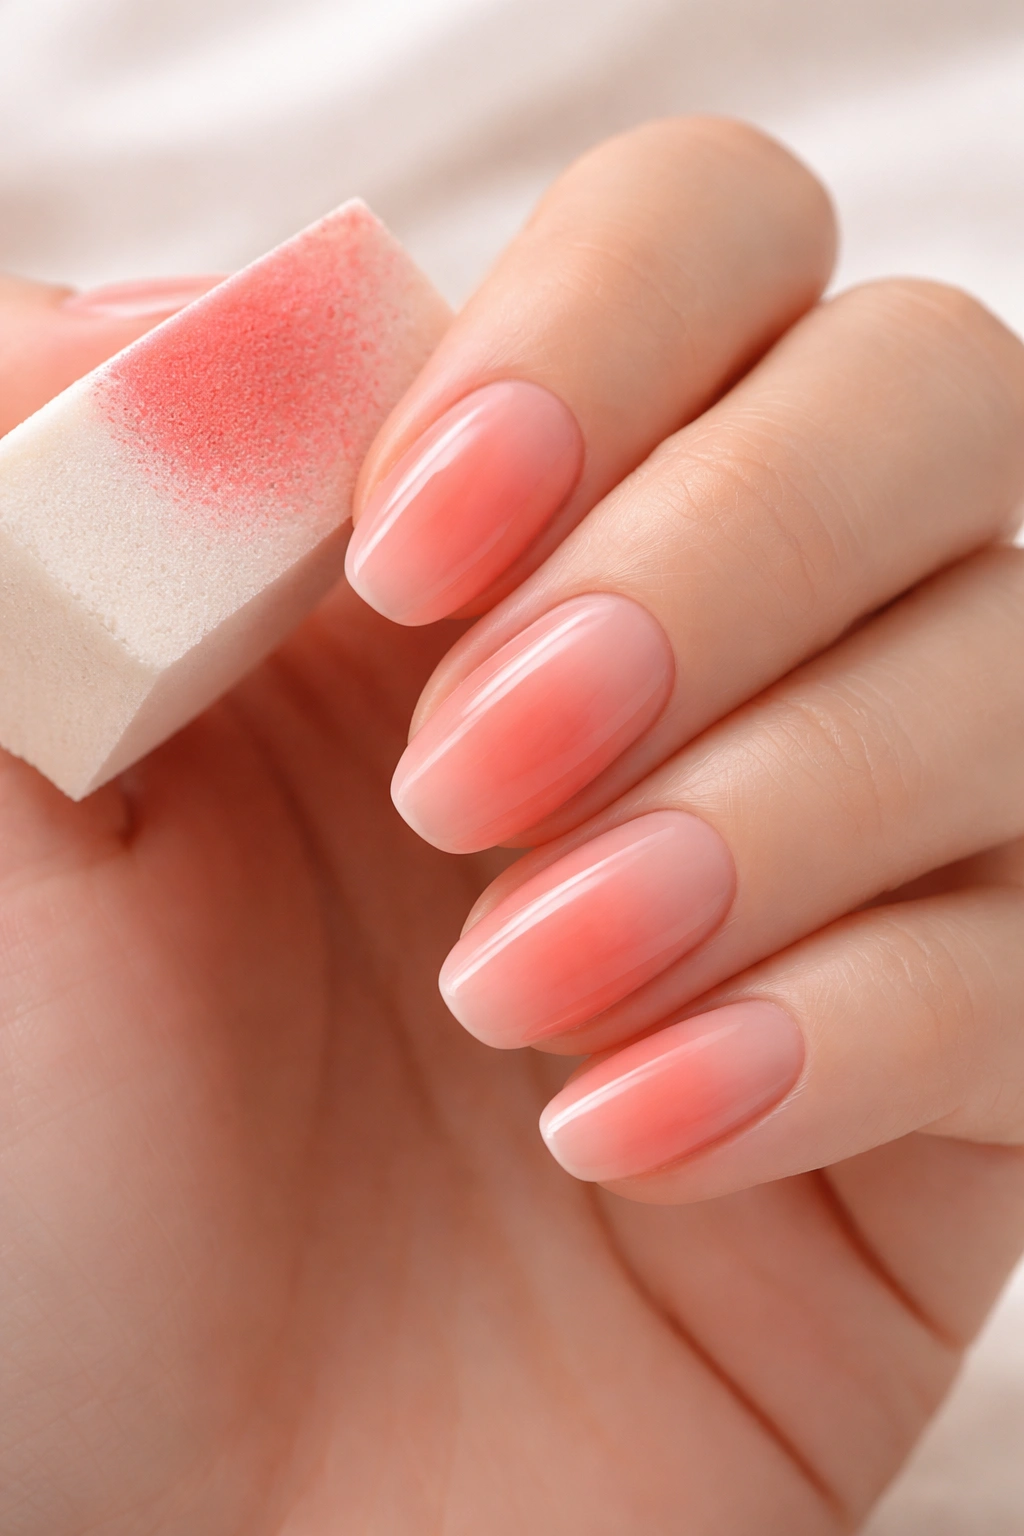
Ombre nails look complicated, but they’re shockingly simple with a makeup sponge. This technique gives you that seamless color fade without needing an airbrush or steady hand for blending.
Cut a small wedge from any makeup sponge – the cheap triangular ones work perfectly. Paint thick stripes of your chosen colors side-by-side on a piece of plastic or a ziplock bag. Press your sponge into these stripes, then dab it onto your nail in a gentle bouncing motion.
The sponge’s texture does the blending work automatically. Each dab transfers slightly less color, creating that soft fade between shades. You’ll notice the colors merge beautifully where they meet, giving you a gradient that rivals expensive gel manicures.
What Makes It So Easy
There’s no precise brushwork involved. The dabbing motion is forgiving – even if you’re not careful, the colors still blend naturally. You can go bold with contrasting shades or keep it subtle with tones in the same color family.
Color Combinations That Shine
- Sunset vibes: coral into yellow into pale pink
- Ocean depth: navy into teal into white
- Monochrome magic: three shades of the same color from dark to light
- Metallic fade: rose gold into champagne
Fair warning: This technique uses more polish than regular application and gets messy around your cuticles. Apply petroleum jelly or liquid latex around your nails first for easy cleanup.
3. Smooshed Marble Magic
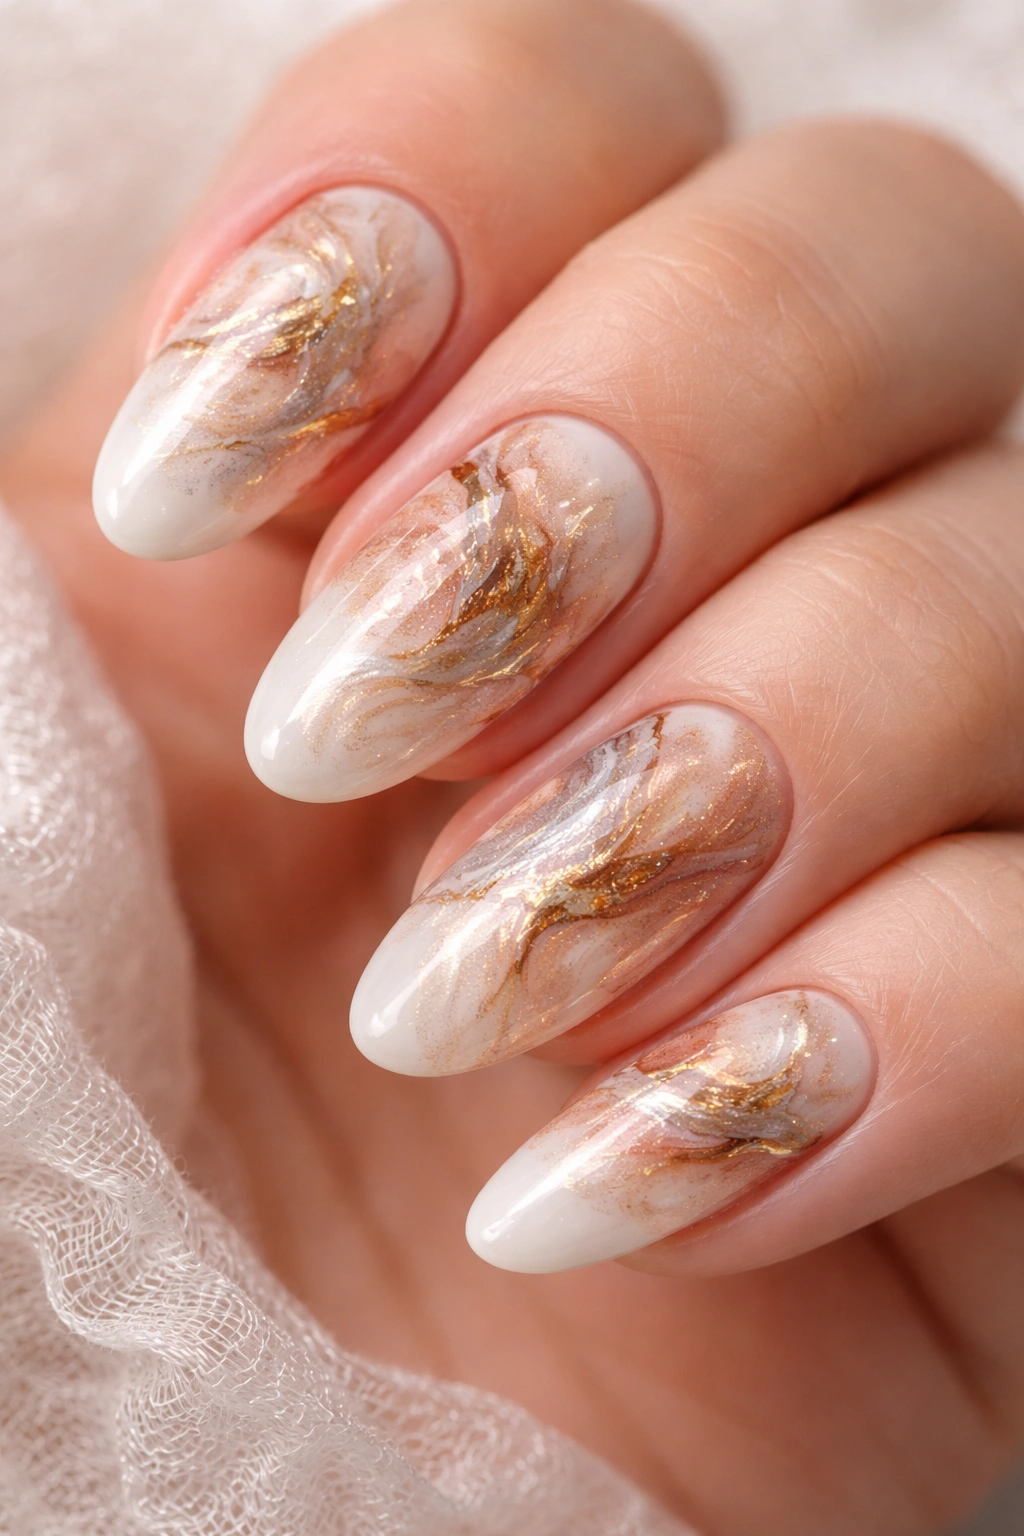
The plastic bag marble technique – sometimes called “smoosh nails” – creates unpredictable, abstract patterns that look intentionally artistic. It’s perfect for those days when you want something unique without planning an exact design.
Paint your base color completely. While it’s still slightly tacky, drip 2-3 colors of polish onto a plastic bag or sandwich wrap. Press your nail into this polish puddle and wiggle it slightly. The plastic texture creates organic swirls and blends as the colors squish together.
Why It’s Actually Brilliant
Every single nail comes out different, giving you a custom set that nobody else has. The randomness is the point – you can’t mess it up because there’s no “right” way for it to look. Plus, it uses up those nearly-empty polish bottles sitting in your drawer.
How to Get the Best Results
Start with a light or shimmery base coat for depth. Metallic or holographic bases make the marbled colors pop beautifully. Don’t press too hard – a gentle smoosh preserves distinct color sections rather than muddying everything together.
- Work quickly before the dripped polish dries on the plastic
- Use a cotton swab dipped in acetone for quick cuticle cleanup
- Try monochromatic schemes (all blues, all purples) for sophisticated results
- Layer shimmer polish on top for extra dimension
4. French Tips with a Twist
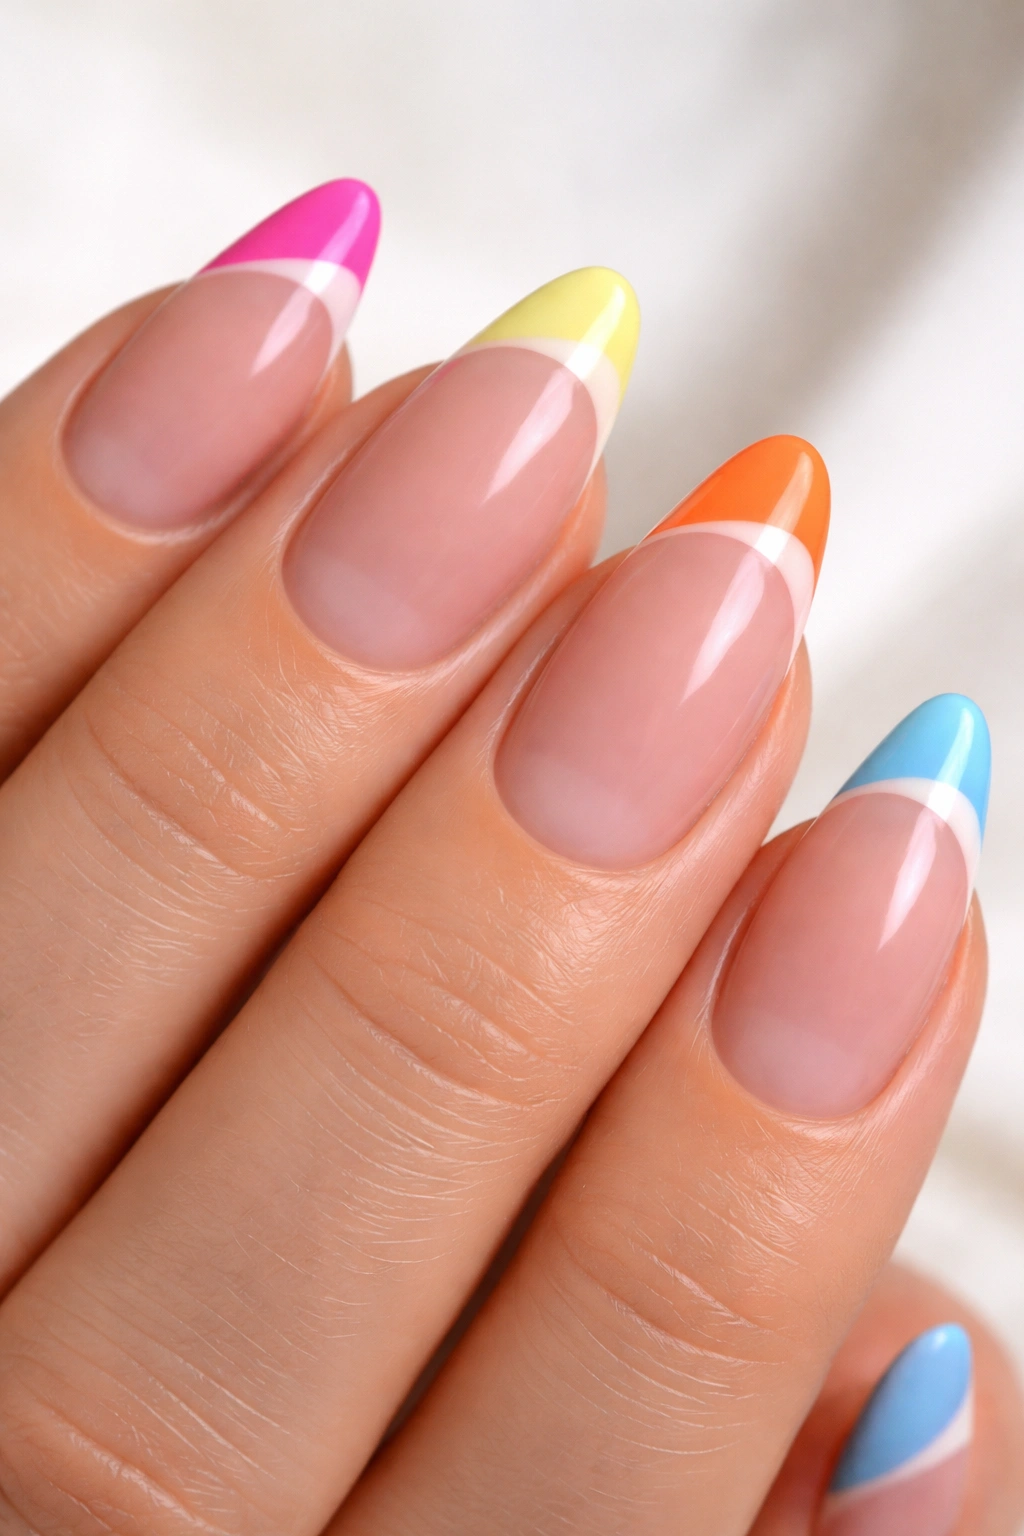
Creating French tips without guides or tape is easier than you think, especially when you skip the traditional straight line. Use your polish brush to paint a curved or angled tip freehand – the slight imperfections read as modern and intentional rather than mistakes.
The secret is confidence. Wipe your brush so it’s not overloaded, then sweep it across your nail tip in one smooth motion. If the line wobbles, that’s actually on-trend. Irregular French tips have become a style statement rather than something to fix.
Modern French Variations
Forget the standard white tip. Try bold colors, multiple thin lines in different shades, or even dots along the tip line instead of a solid stripe. Heart-shaped tips – where you paint two curves meeting in a point – add sweetness without being overly complicated.
Beginner-Friendly Approach
Paint your tip color first, then clean up the edges with a cotton swab dipped in remover rather than trying for perfection on the first pass. This backwards method takes pressure off and gives you more control over the final shape.
Pro tip: Slightly angle your brush when painting the tip curve to naturally follow your nail’s shape, making the line look more intentional.
5. Rainbow Thread Swirls
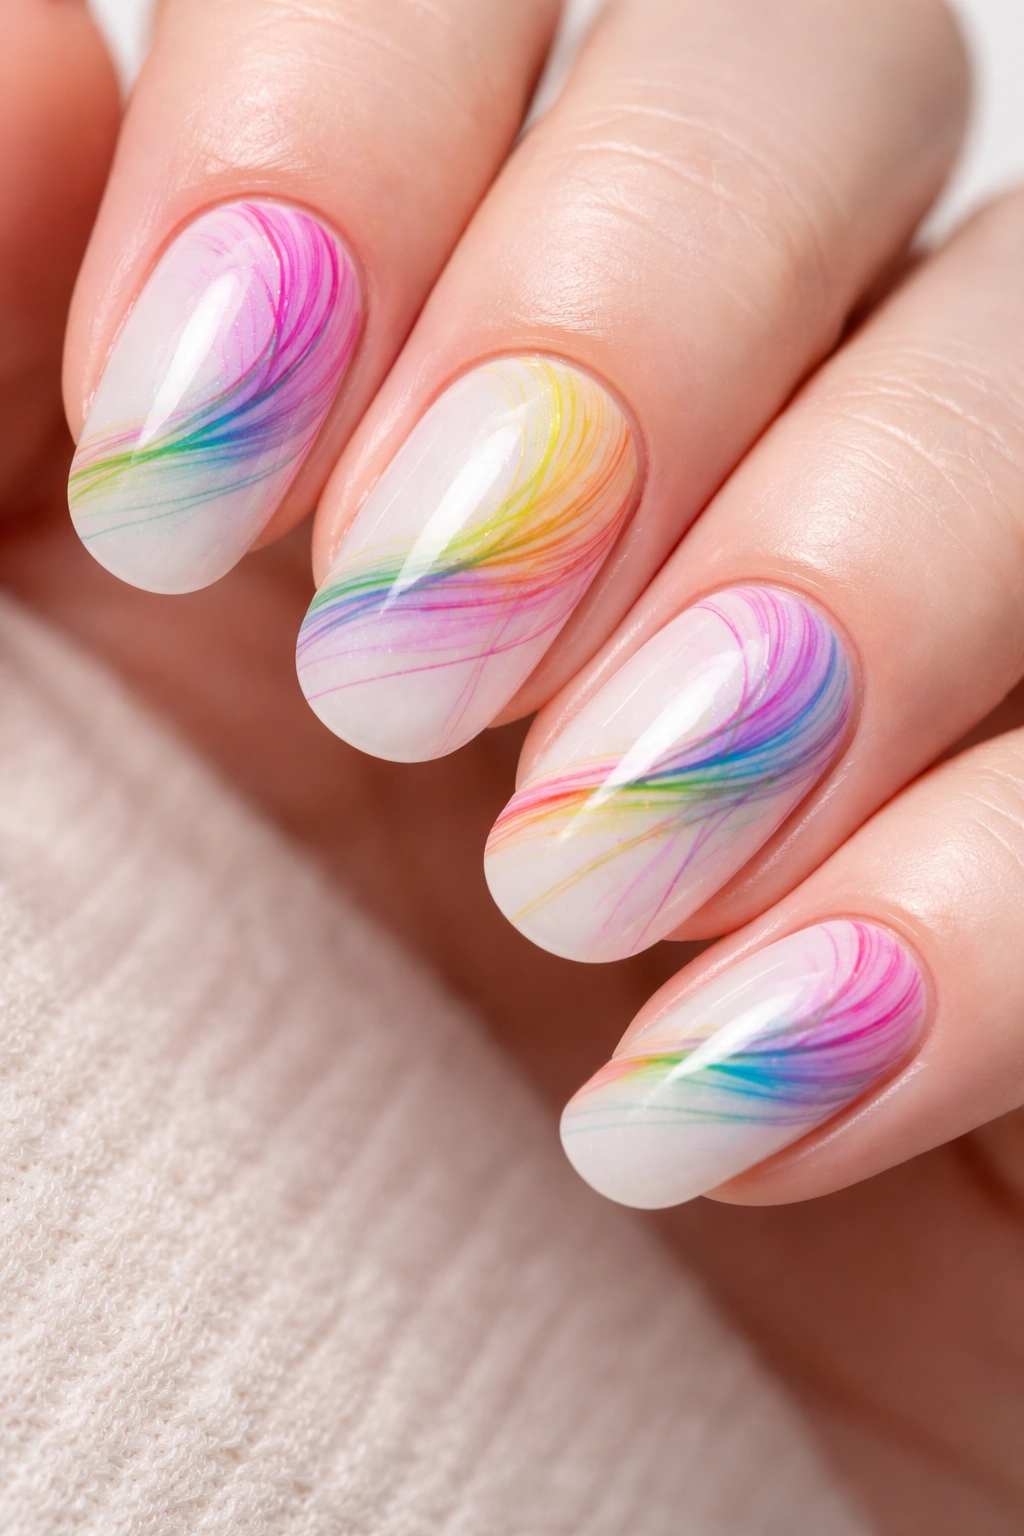
This technique sounds odd but creates stunning, marbled effects that resemble expensive water marble designs. You’ll need plain thread (sewing thread, embroidery floss, even dental floss works) and a few polish colors.
Apply your base color and let it dry. Drip your accent colors onto the nail while wet, then drag a piece of thread across the surface in swirling or zigzag motions. The thread pulls the colors into delicate, feathered patterns without mixing them completely.
The thread’s thin diameter creates finer lines than any brush could manage. As you drag it, the colors follow and blend at their edges while maintaining distinct sections. It gives you that intricate, hand-painted look with basically zero artistic skill required.
What to Expect
Each nail becomes a miniature abstract painting. The colors stretch and pull in unexpected ways, creating depth and movement. Lighter threads work better than dark ones because you can see where you’re dragging through the polish.
Thread Technique Tips
- Use a piece about 6 inches long for good control
- Drag steadily in one direction rather than back and forth
- Wipe the thread between drags to prevent color buildup
- Try spirals, straight lines, or figure-eight motions
Fun fact: This technique was popularized by nail artists looking for water marble results without the mess of actually submerging nails in water.
6. Splatter Paint Effect
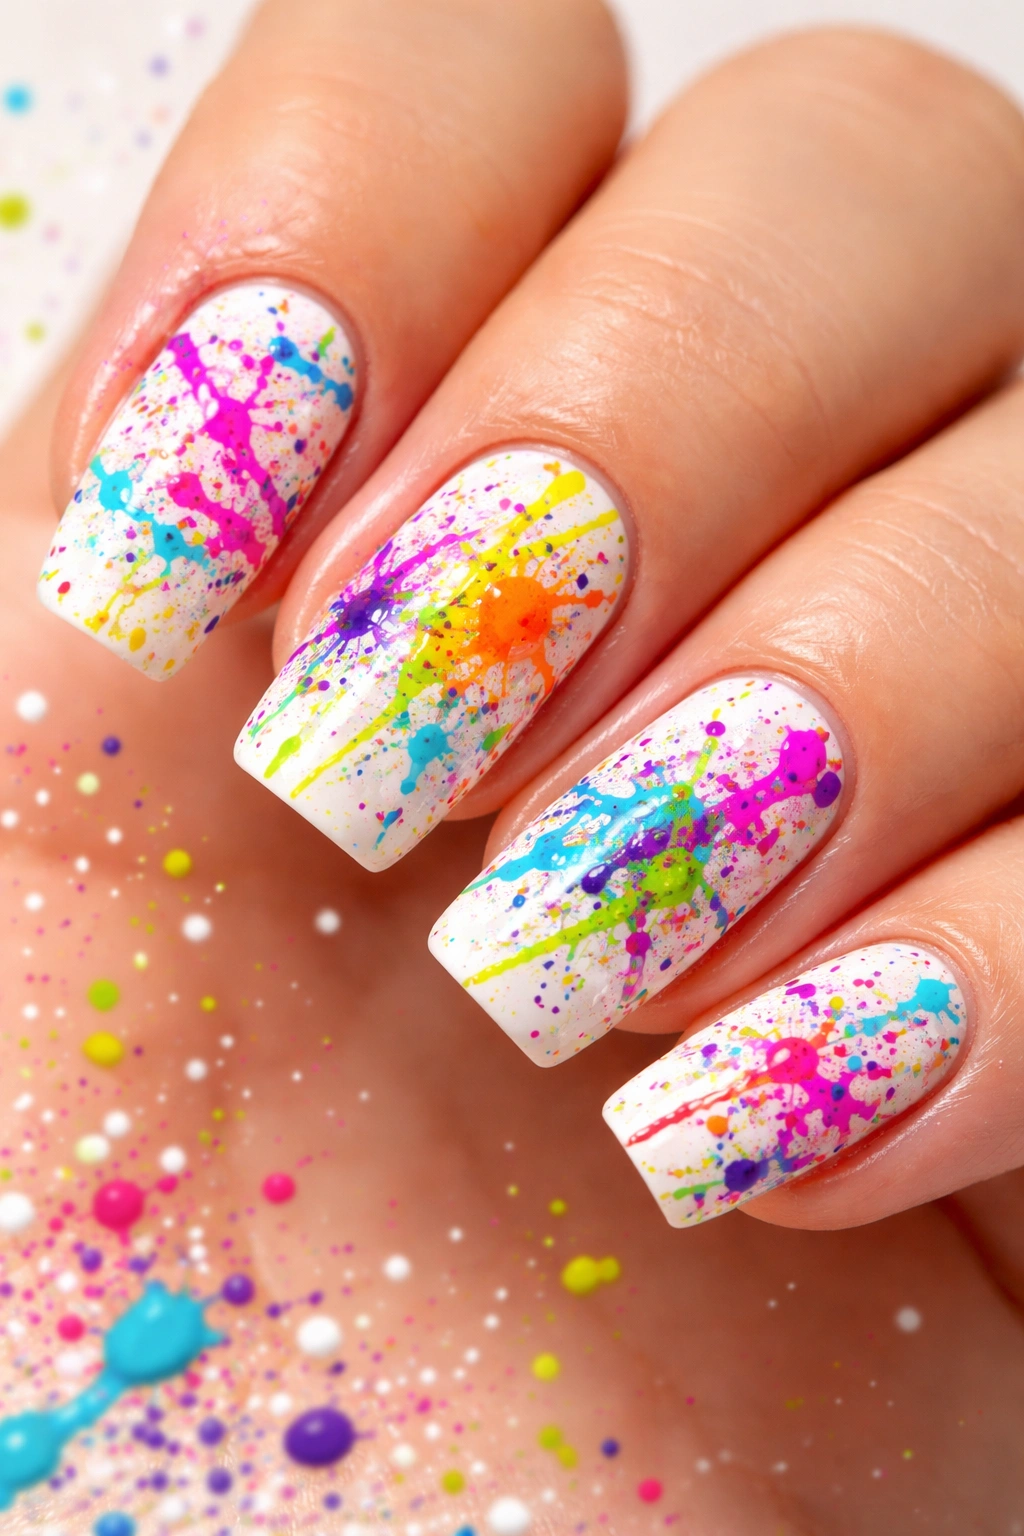
Remember art class? This grown-up version uses a drinking straw to blow polish across your nails in paint-splatter patterns. It’s messy, chaotic, and surprisingly addictive once you see the results.
Paint your base coat fully. Load your straw’s end with polish by dipping it into the bottle. Hold the straw a few inches from your nail and blow sharply. The polish sprays out in fine droplets and streaks, creating an organic splatter pattern.
Why It’s So Satisfying
There’s something freeing about intentionally flinging paint around. The technique works with any color combination, though high contrast (bright colors on black or white) gives the most dramatic results. Each nail looks energetic and festival-ready.
Making Splatter Art Work
Use paper straws rather than plastic – they don’t retain as much polish in the tube. Work over newspaper or an old towel because this technique is genuinely messy. Apply petroleum jelly around your nails beforehand or embrace the cleanup session afterward.
- Blow from different angles for varied splatter directions
- Layer multiple colors for depth
- Use one accent color or go wild with four or five
- Try thick splatters mixed with fine speckles by varying your blowing force
7. Confetti Sprinkle Nails
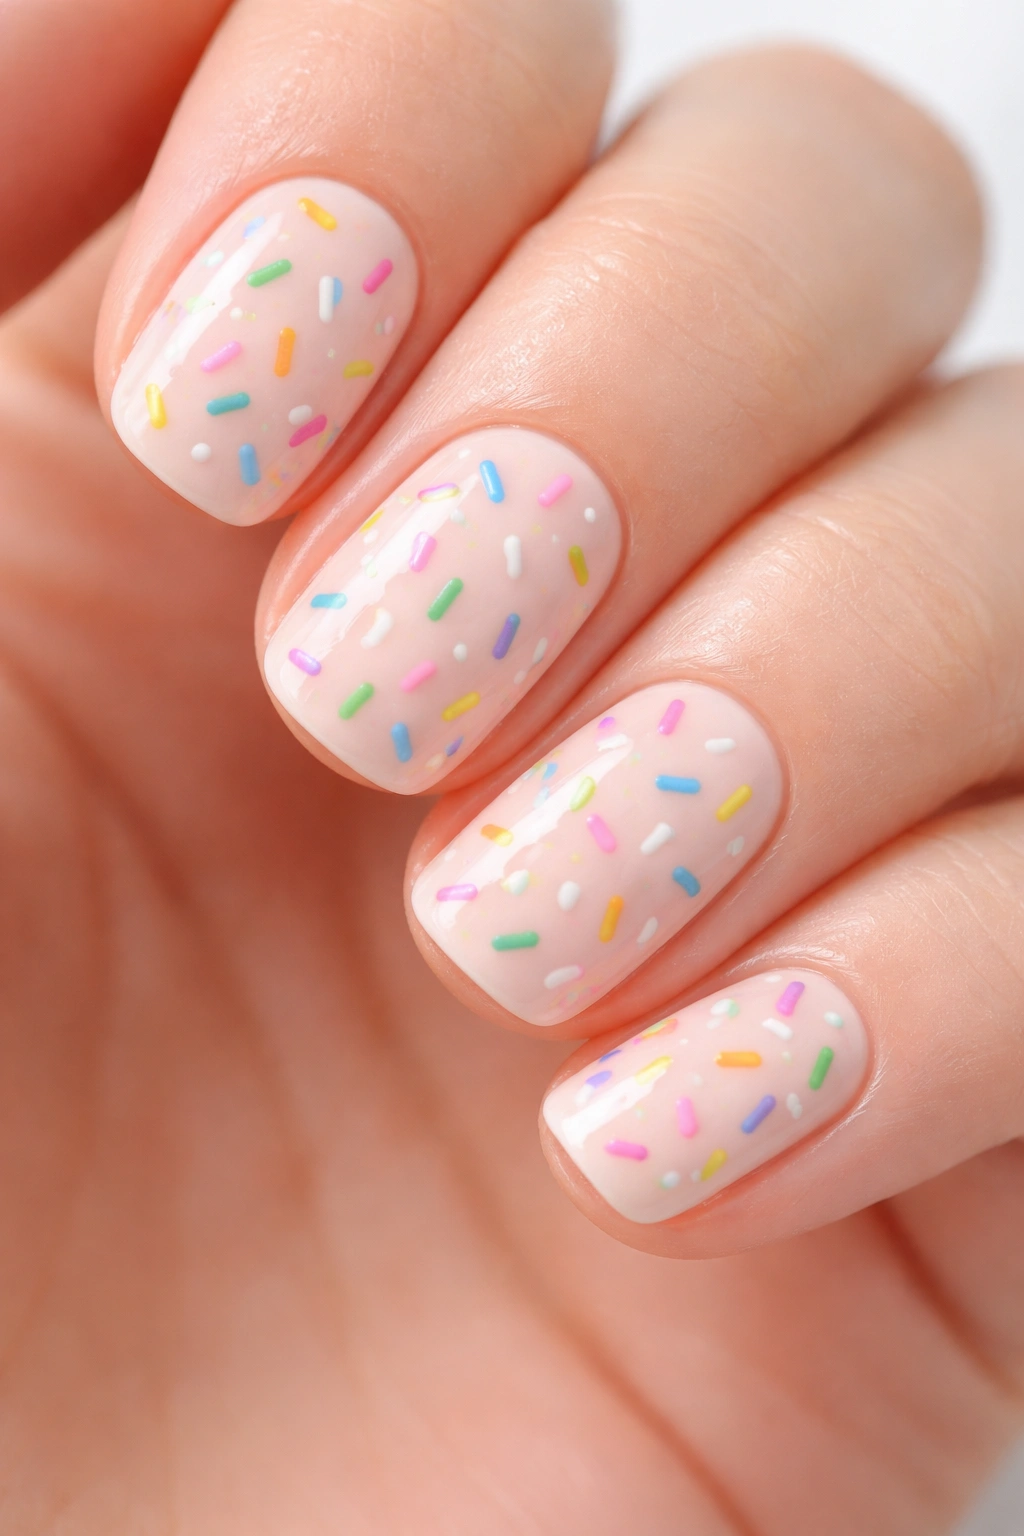
This design mimics the look of rainbow sprinkles scattered on cupcakes – cheerful, colorful, and ridiculously easy with just a toothpick or the tip of a bobby pin.
Choose a neutral or pastel base, then use your toothpick to draw tiny dashes and lines in various bright colors all over the nail. These little strokes, placed randomly, create the illusion of those cylindrical sugar sprinkles. No precision needed – sprinkles fall randomly anyway.
The key is variety. Use at least four or five different colors and scatter them at different angles. Some vertical, some diagonal, some horizontal. The randomness prevents it from looking like a pattern and maintains that “tossed confetti” vibe.
Perfect For Celebrations
This design screams fun without being childish. It works for birthdays, summer parties, or just when you need a mood boost. The pastel-on-white combination feels sweet and feminine, while neon sprinkles on black base look bold and modern.
Sprinkle Success Strategy
Keep your toothpick lines short – about 2-3mm long – to maintain the sprinkle illusion. If they get too long, they start looking like abstract dashes instead. Work in small sections so you don’t accidentally place all your “sprinkles” in one area.
Pro tip: Add a glossy top coat to make the colors pop and give dimension to those tiny lines.
8. Color Block Geometry
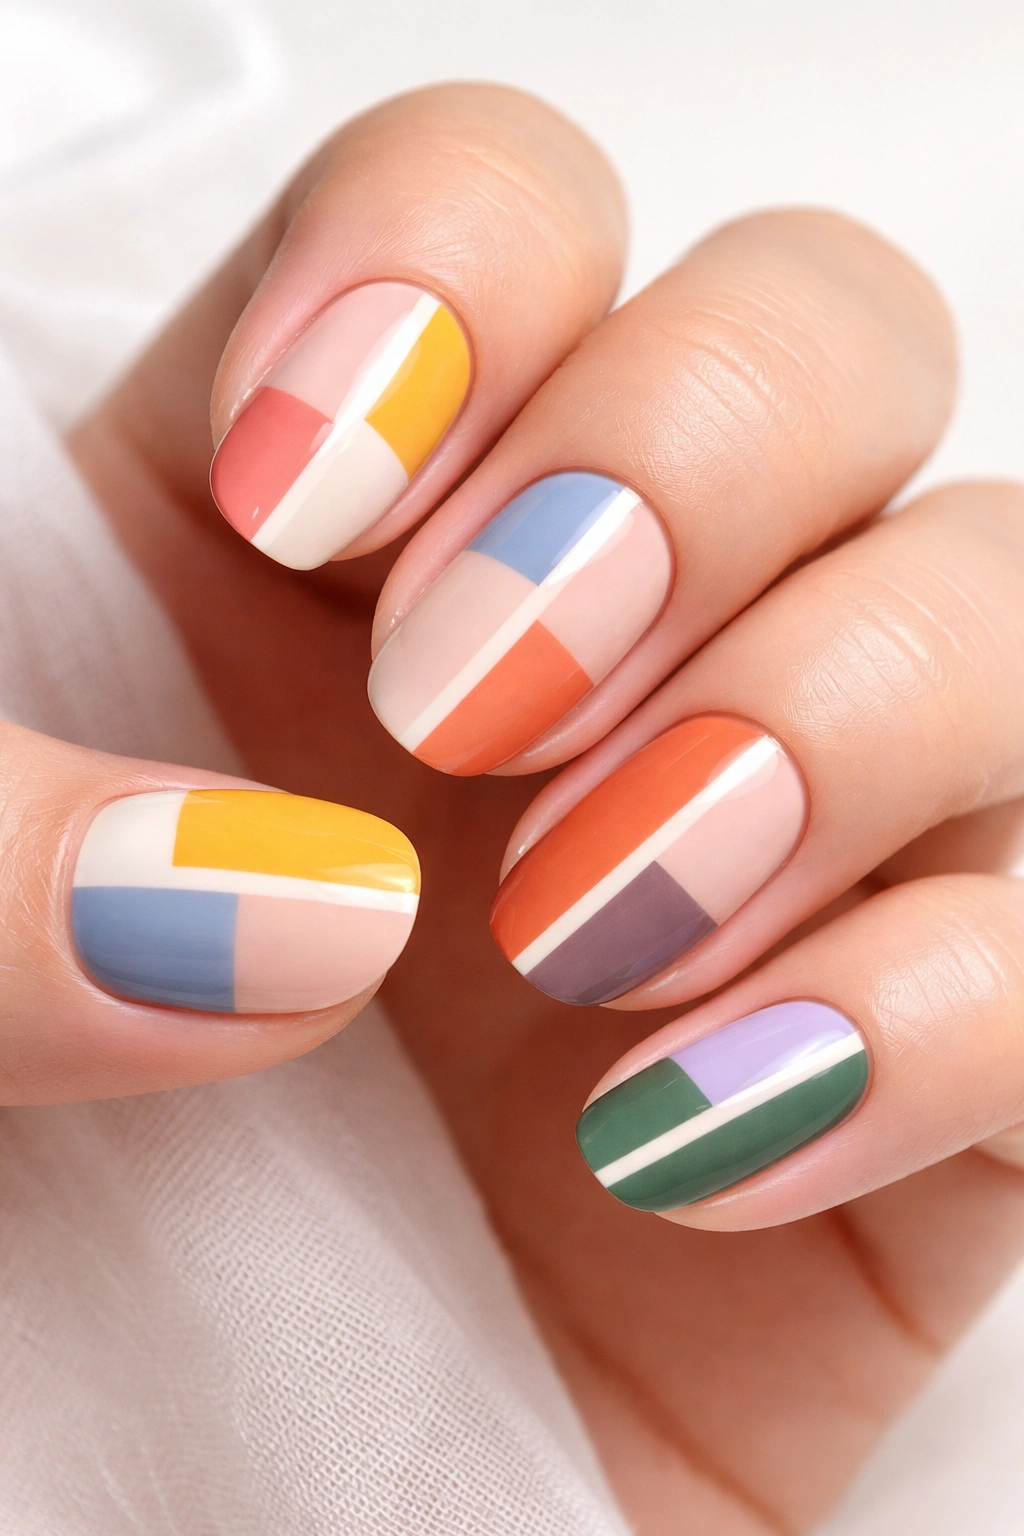
Geometric designs sound intimidating, but simple color blocking requires only your polish brush and a steady-ish hand. You’re essentially dividing your nail into sections and filling each with a different color.
Paint your base color, then use the corner of your brush to outline sections – triangles, rectangles, or diagonal splits. Fill in these sections with contrasting shades. The edges don’t need to be razor-sharp; slight wobbles add handmade charm.
Why Geometry Works
Our eyes automatically see geometric shapes as intentional design rather than accidents. Even imperfect triangles read as modern art. This style looks particularly striking on short nails where there’s limited space for detailed artwork.
Simple Blocking Ideas
Try a diagonal split across each nail in two colors. Paint alternating triangles meeting at the center. Create a color-blocked French tip with two or three horizontal sections. Or divide nails vertically down the middle for bold contrast.
- Stick to two or three colors maximum per nail
- Use tape as a guide if freehand feels scary (though it’s technically a tool!)
- Matte and glossy finishes of the same color create subtle blocks
- Negative space (leaving part of your nail unpainted) counts as a “color”
9. Dotted Flower Garden
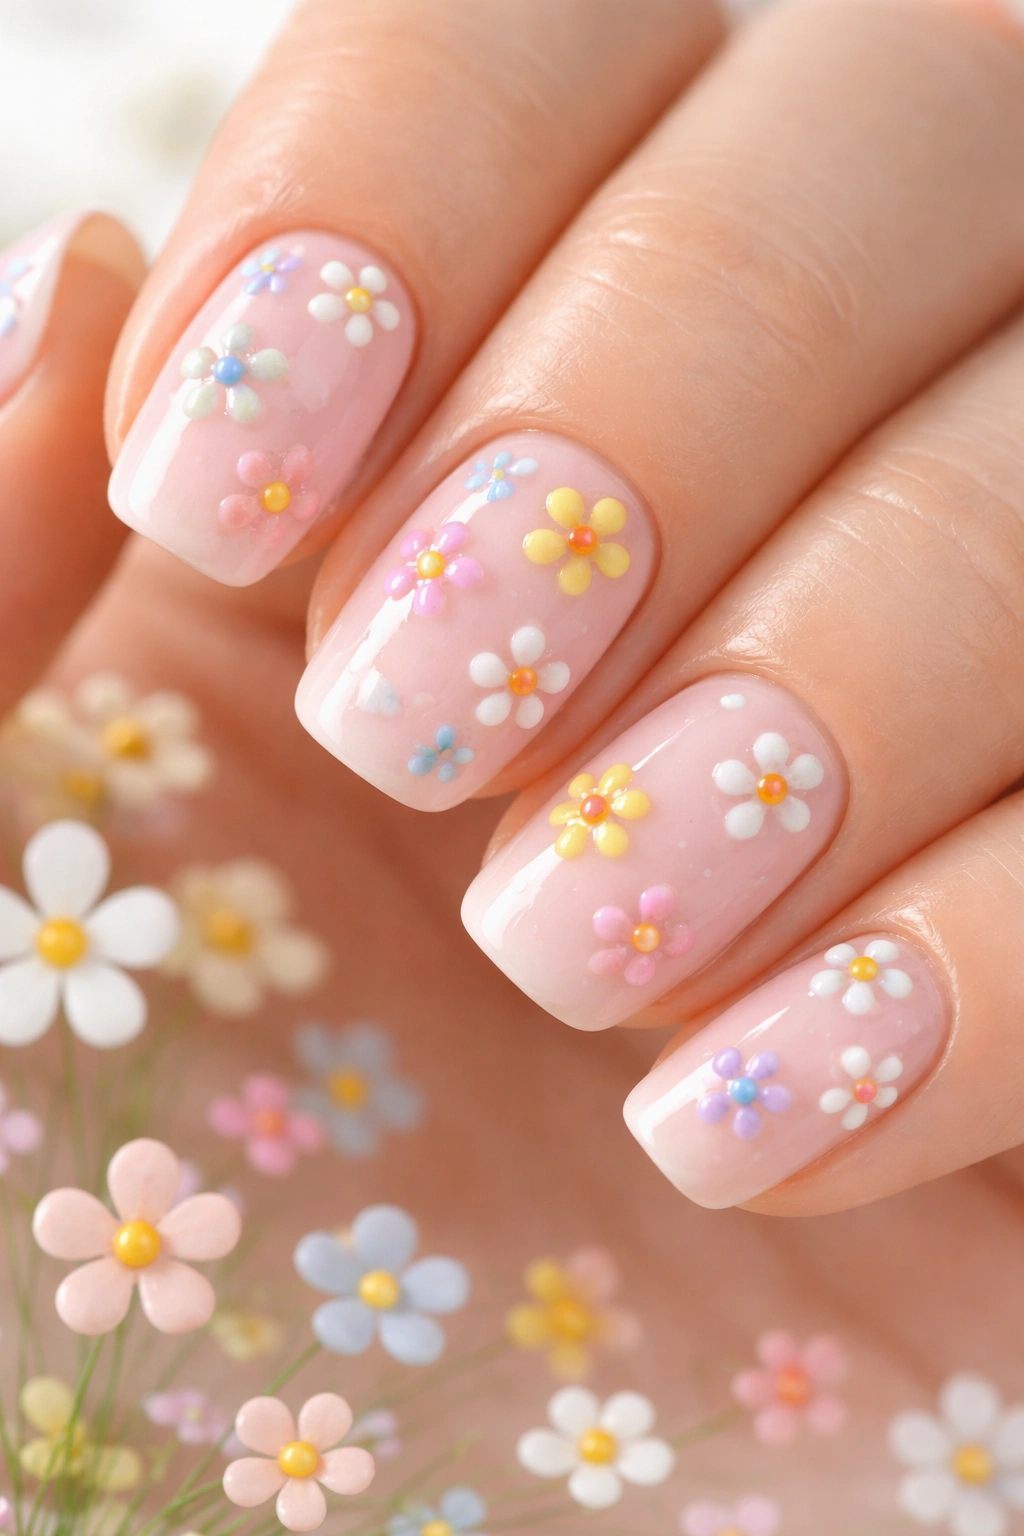
Flowers seem complicated, but dots arranged in simple patterns create convincing blooms without any drawing skills. Five dots in a circle make a flower – really, that’s all there is to it.
Use your trusty bobby pin or toothpick to create clusters of dots arranged as petals around a central dot in a contrasting color. Three to five “petal” dots around one “center” dot instantly reads as a flower to our pattern-seeking brains.
Creating Floral Dimension
Layer different sized dots – larger petals with smaller centers, or vice versa. Scatter flowers at different scales across your nails rather than making them all identical. Add tiny dots as leaves or fill space between flowers with miniature blooms.
Beginner-Friendly Florals
Start with just one or two flowers per nail until you get comfortable with spacing. You don’t need green leaves or stems – flowers floating on a colored background look whimsical and modern. White flowers on pastel bases feel spring-ready, while bold colors on black give a folk art vibe.
Fun fact: Five-petal flowers are easiest and most recognizable, but three-dot triangles also read as abstract blooms if you’re feeling minimalist.
10. Starburst Mandala
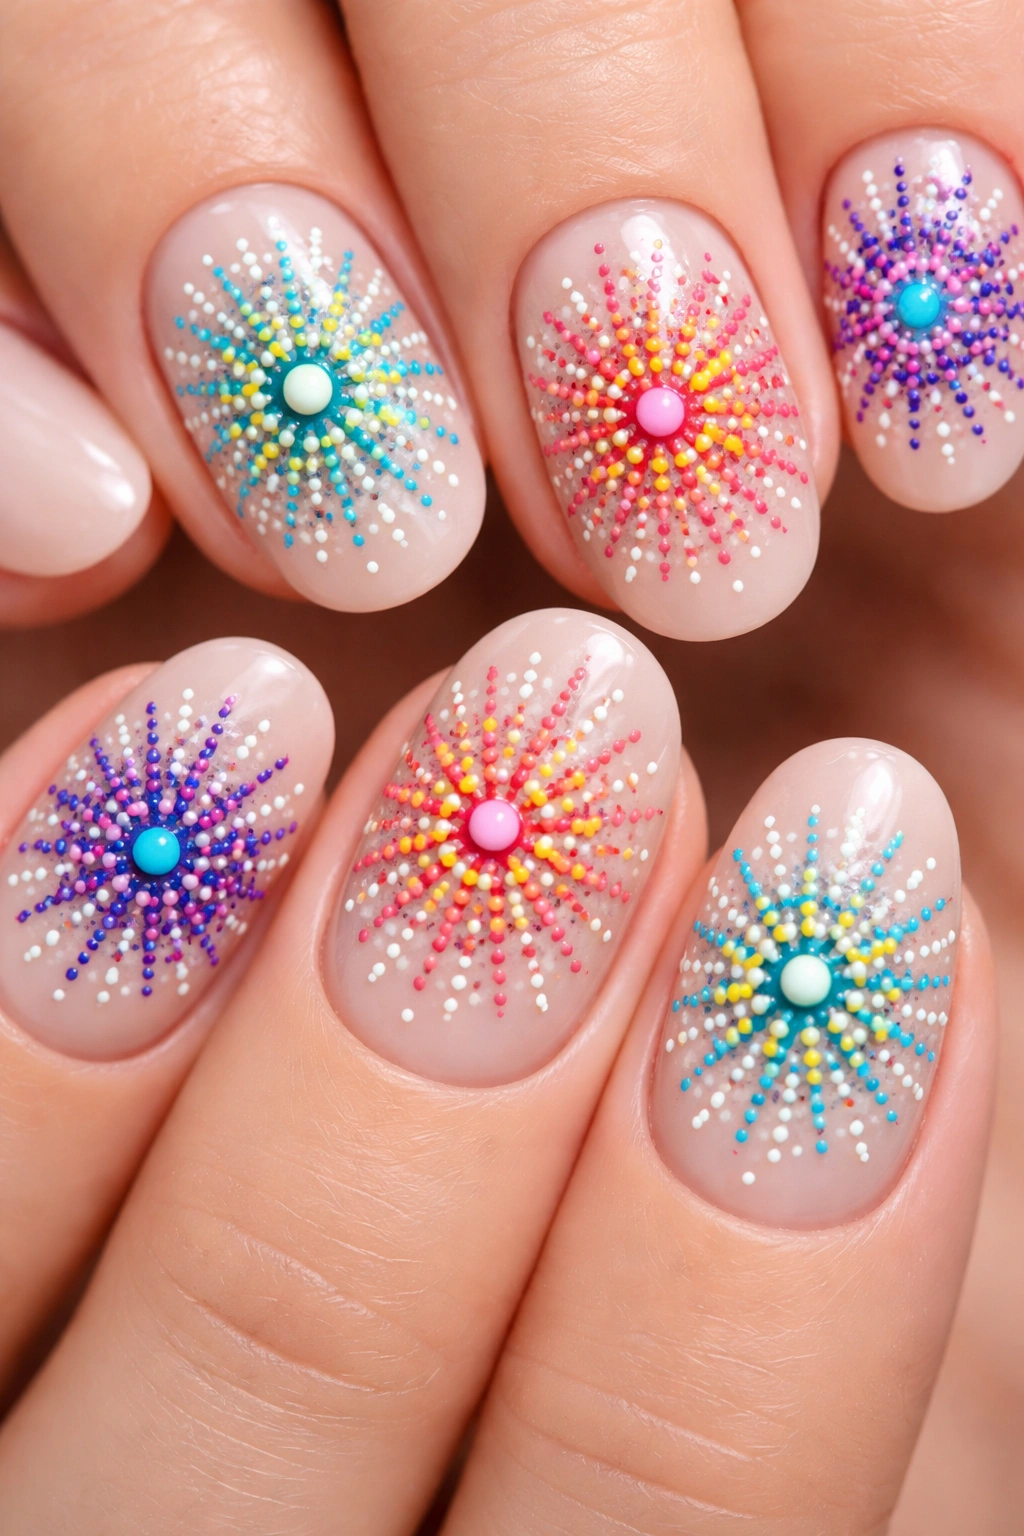
This design creates intricate-looking medallions using only dots arranged in radiating patterns. It looks meditative and detailed but follows a simple formula: dots getting smaller as they move outward from a center point.
Start with one large dot in the center of your nail (or off-center for variety). Surround it with a circle of slightly smaller dots in a contrasting color. Add another ring of even smaller dots in your first color. Continue alternating colors and decreasing dot sizes.
The radiating pattern tricks the eye into seeing complexity. Each ring takes maybe 10 seconds to complete, but the finished product looks like you labored over intricate mandala art for an hour.
Why This Impresses People
The symmetry feels intentional and artistic. Most people assume you used multiple specialized tools when you actually just used one bobby pin and basic spacing. The design works equally well centered on each nail or placed as an accent on just one or two fingers.
Starburst Secrets
You don’t need perfect circles of dots – slightly uneven spacing adds organic appeal. Use two high-contrast colors that alternate for maximum impact. Try metallic gold or silver as one of your colors for extra drama.
11. One-Stroke Swipes
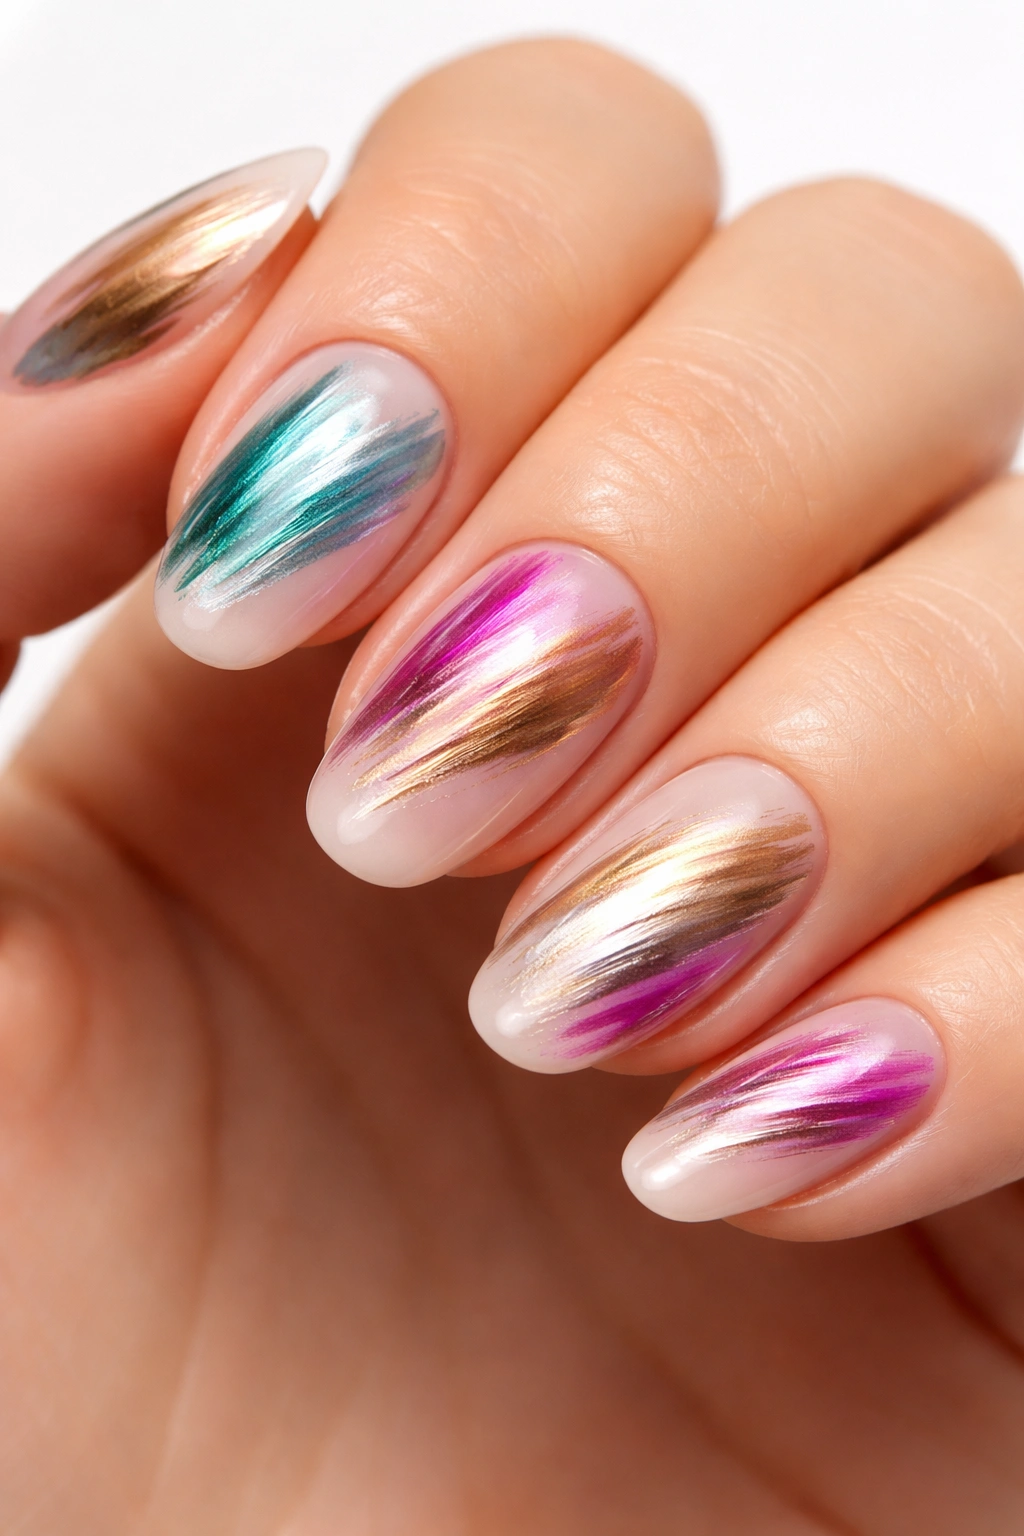
Sometimes the simplest approach looks the most sophisticated. Random brush swipes in metallic or contrasting colors over a base create abstract, gallery-worthy nails in seconds.
Paint your base color completely. Before it dries, load your brush with an accent color and swipe it across the nail in confident strokes – diagonal, curved, or straight. The wet-on-wet technique means the colors blend slightly at their edges while maintaining distinct strokes.
The Art of Casual Strokes
Resist the urge to go back and “fix” your swipes. The beauty lies in their spontaneity and variation. Think of it like calligraphy – each stroke is a single confident motion. Some nails might have one bold swipe, others might have several thin ones.
Swipe Style Inspiration
Try metallic gold swipes over burgundy for elegance. White brushstrokes on sage green feel fresh and modern. Use the same base color on all nails but vary your swipe colors for coordinated variety.
- Wipe your brush to different fullness levels for thick and thin strokes
- Diagonal swipes elongate short nails visually
- Keep swipes to 1-3 per nail to avoid crowding
- Let strokes run off the nail edge for a carefree vibe
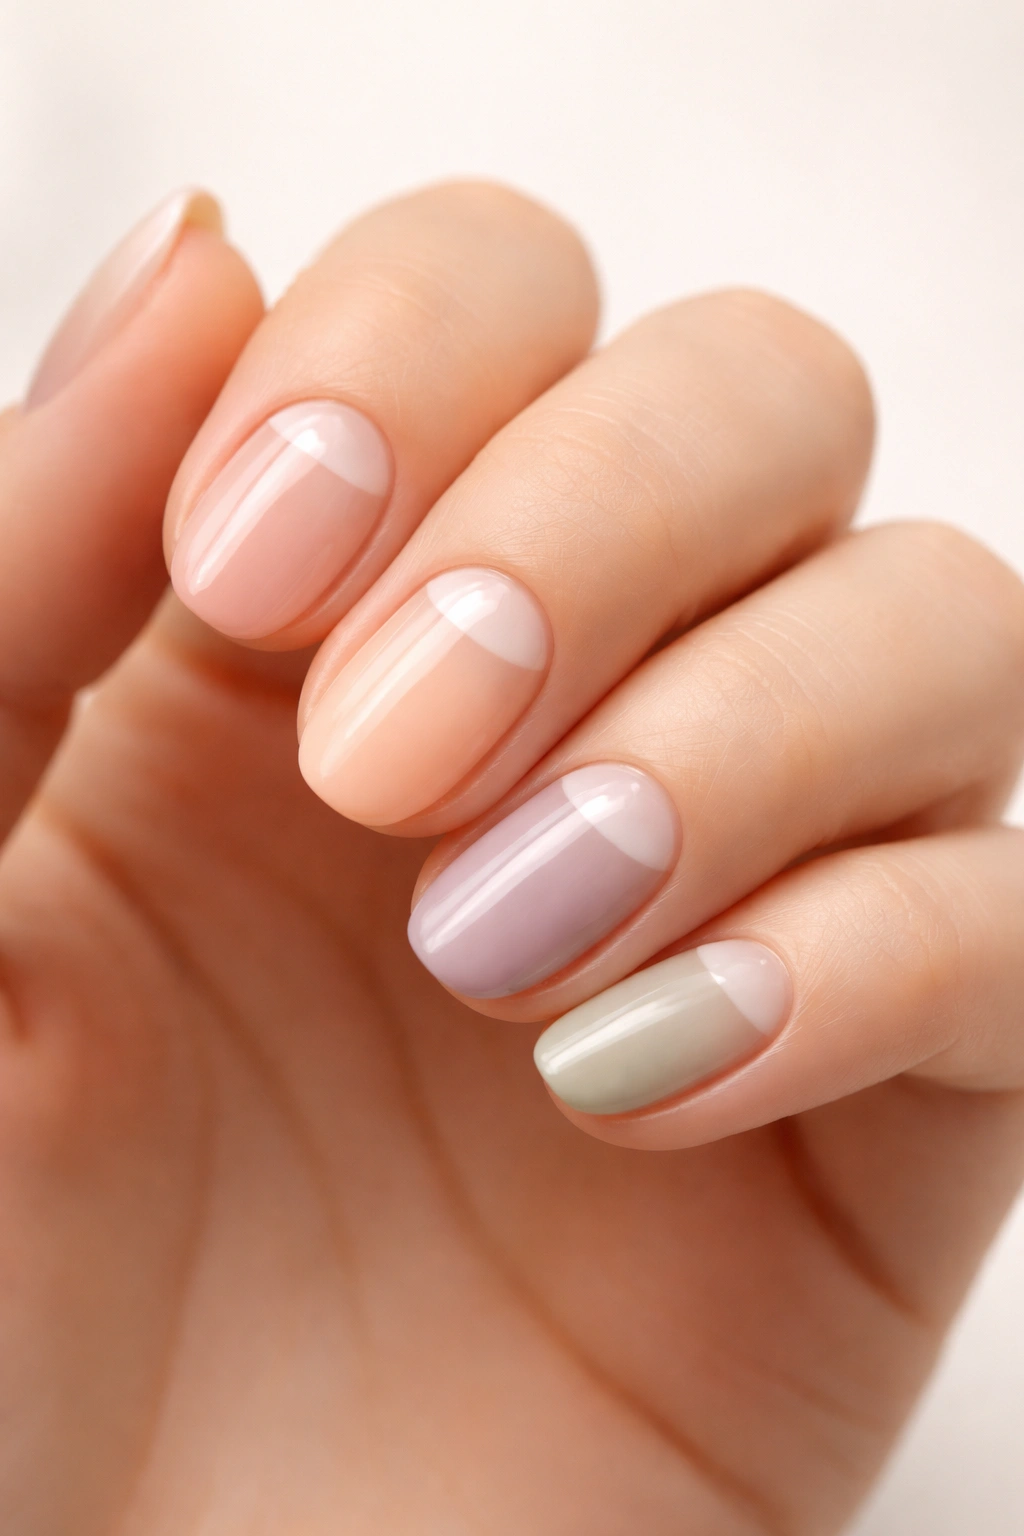
12. Rainbow Skittles
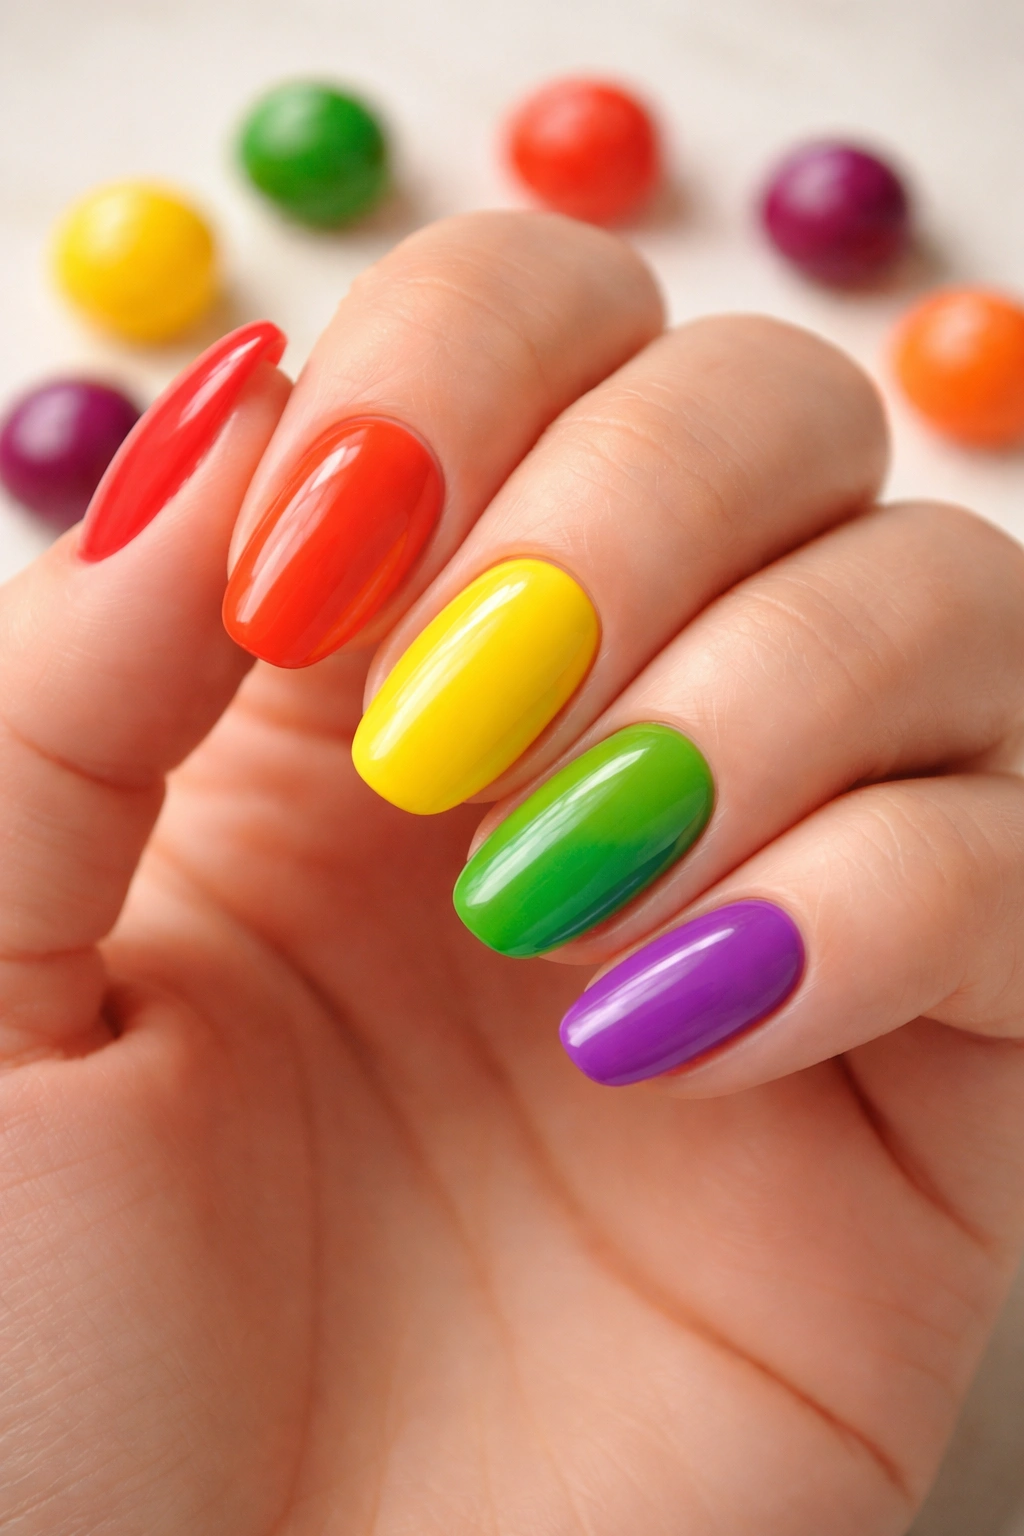
When you can’t choose just one color, don’t. Skittle manicures – where each nail gets a different shade – are having a moment precisely because they embrace indecision and make it stylish.
The approach is straightforward: paint each nail a different color from your chosen palette. The trick to making it look cohesive rather than random is picking shades with something in common – all pastels, all jewel tones, all from the same brand’s collection.
Making Skittles Work
Think of it as curating a color story across your fingertips. You’re not just grabbing random bottles; you’re creating a gradient (light to dark thumb to pinky) or a themed collection (all shades of blue, or warm tones progressing through the spectrum).
Skittle Success Formula
Choose five colors that share an undertone or mood. Arrange them intentionally – either in a gradient flow or with your boldest shade as an accent on the ring finger. This prevents the “I spilled my polish collection” look and gives you “I made a deliberate design choice” energy.
Pro tip: Skittles are perfect for using up bottles that are running low since you only need enough for one nail per color.
13. Half-Moon Negative Space
Negative space designs leverage your natural nail as part of the art. The half-moon technique leaves the base of your nail unpainted while coloring the tip and middle, creating an elegant reverse French look.
Start painting about 2-3mm above your cuticle rather than at the base. The curved line your brush naturally makes becomes the design element. You’re essentially doing a French manicure in reverse, and the slight wobble in that curve reads as organic and hand-crafted.
Why Negative Space Feels Modern
Showing your natural nail creates breathing room in the design and makes bold colors less overwhelming. It also means your manicure looks intentional as it grows out rather than obviously needing a touch-up.
Negative Space Variations
Try leaving the tip bare instead of the base. Paint a vertical stripe down the center, leaving both sides exposed. Or paint just the outer edges of your nail, creating a border around unpainted middle space. Each variation feels current and artistic.
- Use sheer or nude polish in the “negative” space for subtle enhancement
- Clean up edges with a brush dipped in remover for crisp lines
- Metallic colors in negative space designs feel particularly high-fashion
- Combine with dots or tiny details in the colored sections
14. Tri-Color Chevron
Chevrons look sharp and graphic but you can create them using just the flat edge of your polish brush. Stack three colors in angled stripes across your nail, with each color meeting in a point.
Paint thin diagonal stripes in your first color from one corner. Add your second color at a slightly different angle meeting the first. Finish with your third color filling the remaining space. The angles don’t need to be mathematically precise – close enough creates the chevron effect.
Getting That Crisp Look
The flat brush edge is your friend here. Use it like a paint scraper, laying color down in smooth bands rather than trying to outline shapes first. Let each color dry slightly before adding the next to prevent muddy blending.
Chevron Color Combinations
Metallics mixed with mattes create textural interest. Ombré chevrons (three shades of the same color) feel subtle and expensive. High contrast – black, white, and bright pink – makes a bold statement that photographs beautifully.
Fair warning: Your first attempt might look wonky. By the third nail, you’ll have the angle figured out and can circle back to fix the early ones if needed.
15. Simple Cherry Accent
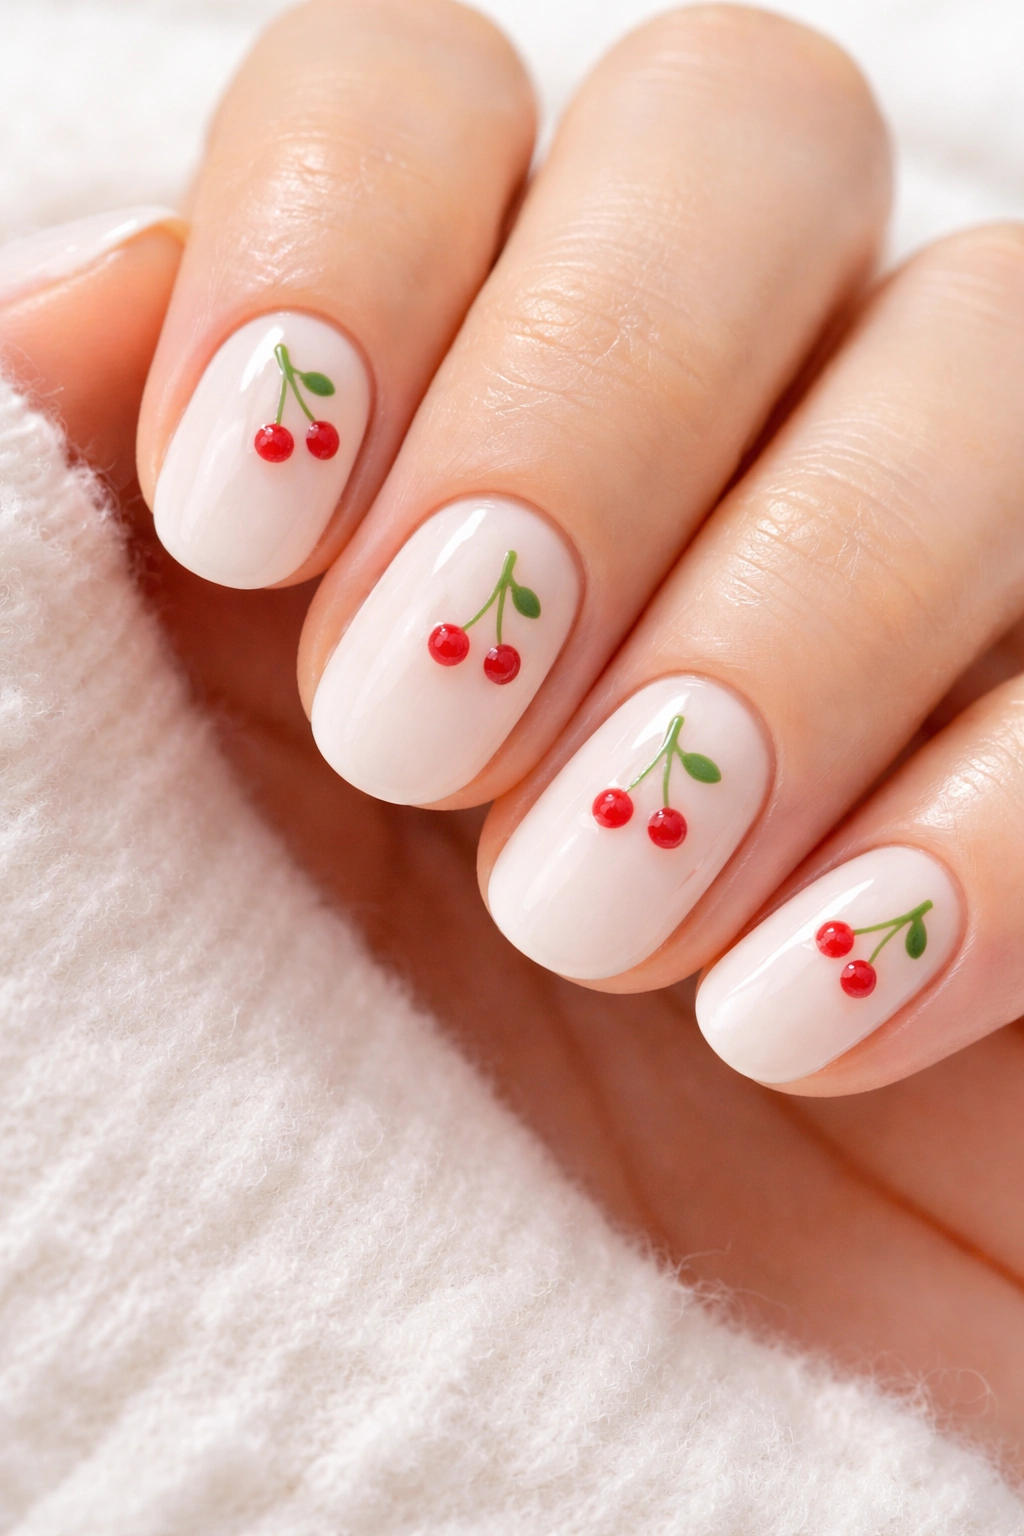
Sometimes one cute detail is all you need. Tiny cherries created with just dots and a line are endlessly charming without requiring artistic ability.
Use your dotting tool (bobby pin) to place two red dots close together on your nail. With your polish brush tip or a toothpick, draw a thin curved line connecting the top of both dots – that’s your cherry stem. Add a tiny leaf detail if you’re feeling ambitious, though it’s not necessary.
The beauty of this design is its flexibility. Add cherries to just your ring fingers as an accent. Scatter tiny cherry pairs randomly across all your nails. Create one large cherry pair per nail. Whatever your style, cherries read as playful and vintage-inspired.
Making Cherries Pop
A light blue, white, or cream base lets the red cherries stand out. Use brown or dark green for stems rather than black to keep the vintage picnic vibe. A glossy top coat makes the cherries look shiny and dimensional, like real fruit.
Accent Nail Strategy
If full cherry nails feel too busy, paint all nails one solid color and add cherries only to your ring fingers or thumbs. This gives you the fun detail without overwhelming your hands. It’s the perfect balance of cute and wearable.
Final Thoughts
Your nail art journey doesn’t require a shopping spree or art school degree. Every design here uses items you already own, proving that creativity matters more than equipment. The bobby pins, sponges, toothpicks, and plastic bags in your home transform into legitimate nail art tools with just a shift in perspective.
Start with whichever design sparks your curiosity – maybe the forgiving chaos of splatter nails or the meditative rhythm of dotted flowers. There’s no progression you need to follow or skill level you need to reach. Each technique stands alone and welcomes beginners exactly as they are.
The best part? These aren’t temporary skills you’ll abandon once you buy “proper” tools. Many nail artists who own full collections of professional brushes and stamps still reach for a bobby pin when they want quick dots or grab a makeup sponge for gradients. These methods aren’t substitutes for the “real thing” – they are the real thing, just more accessible and honestly, more fun.
