

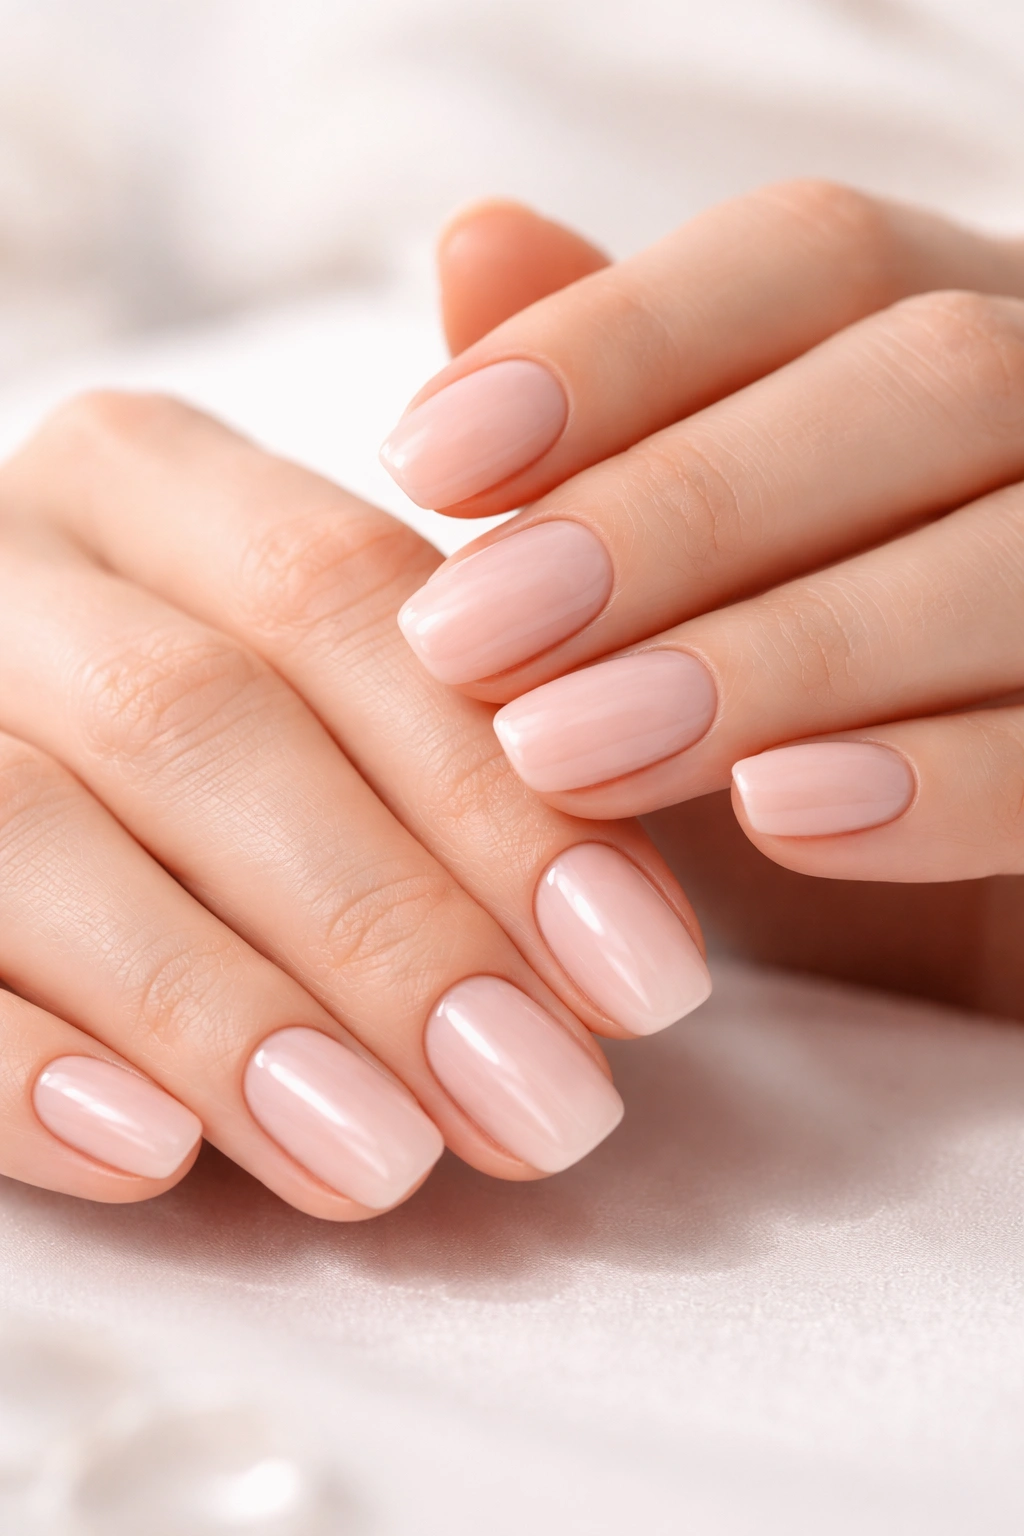
There’s nothing quite like that fresh-from-the-salon feeling when your nails are perfectly polished, gleaming, and flawless. But then reality sets in—within days, you notice that first tiny chip at the edge, and suddenly your beautiful manicure is on borrowed time. If you’ve ever wondered why some people seem to keep their nails picture-perfect for weeks while yours deteriorates in days, the secret isn’t magic. It’s preparation, technique, and intentional daily habits.
The truth is, a two-week manicure isn’t just about luck or expensive salon treatments. With the right approach to prepping your nails, applying polish strategically, and protecting your hands afterward, you can absolutely achieve gorgeous, chip-resistant nails that stay fresh and vibrant for fourteen full days. This isn’t theory—it’s something professional manicurists have been doing for years, and the techniques translate perfectly to at-home manicures.
What separates a manicure that lasts two weeks from one that chips within days? It comes down to understanding how nail polish actually works, respecting the science behind adhesion and durability, and following a deliberate step-by-step process. The good news is that none of this requires special skills or expensive products. You just need to know what actually matters and what doesn’t.
Understanding Why Manicures Chip and Peel
Before diving into the solutions, it’s worth understanding the mechanics of what causes manicures to fail. Nail polish is a carefully formulated combination of solvents, polymers, plasticizers, and pigments designed to form a durable, colorful shell on your nail plate. When that formula is applied correctly, it bonds tightly and flexes slightly as your nails naturally bend throughout daily life. When something goes wrong, it’s usually because the bond between the polish and your nail has been compromised from the very beginning.
The biggest culprit is improper nail preparation. Nails are naturally porous, and when they’re covered with oils, moisture, or residue from previous polish, the new polish has nowhere to properly adhere. It sits on the surface like a coat of paint on a dusty wall—it looks okay at first, but it’s destined to chip and peel because there’s no real grip.
Another major reason manicures fail is that nails are living, flexible structures. Throughout the day, your nails bend slightly as you use your hands. The polish needs to flex with them. If you apply the polish too thick, it becomes rigid and brittle, cracking and lifting at the edges instead of moving naturally with the nail. This is why salon professionals specifically recommend thin coats, not heavy ones—it seems counterintuitive, but it’s the foundation of longevity.
Water exposure is another significant factor. Nails are genuinely porous despite feeling hard, and prolonged contact with water causes them to expand and absorb moisture. When they dry afterward, they contract back to their original size. This constant swelling and shrinking creates stress on the polish seal, causing it to lift, peel, and chip around the edges and cuticle line.
Finally, many people unwittingly damage their manicures through simple daily habits they don’t even think about. Using your nails to open packages, typing aggressively, or letting your hands soak in hot bathwater—these all contribute to premature wear. Understanding these failure points is half the battle. Once you know what’s actually damaging your manicure, you can prevent it.
Prepare Your Nails Before Any Polish Touches Them
The single most important phase of a long-lasting manicure happens before you ever open the polish bottle. Professional manicurists and nail educators consistently emphasize that preparation determines everything. This step alone can be the difference between nails that last four days and nails that last fourteen.
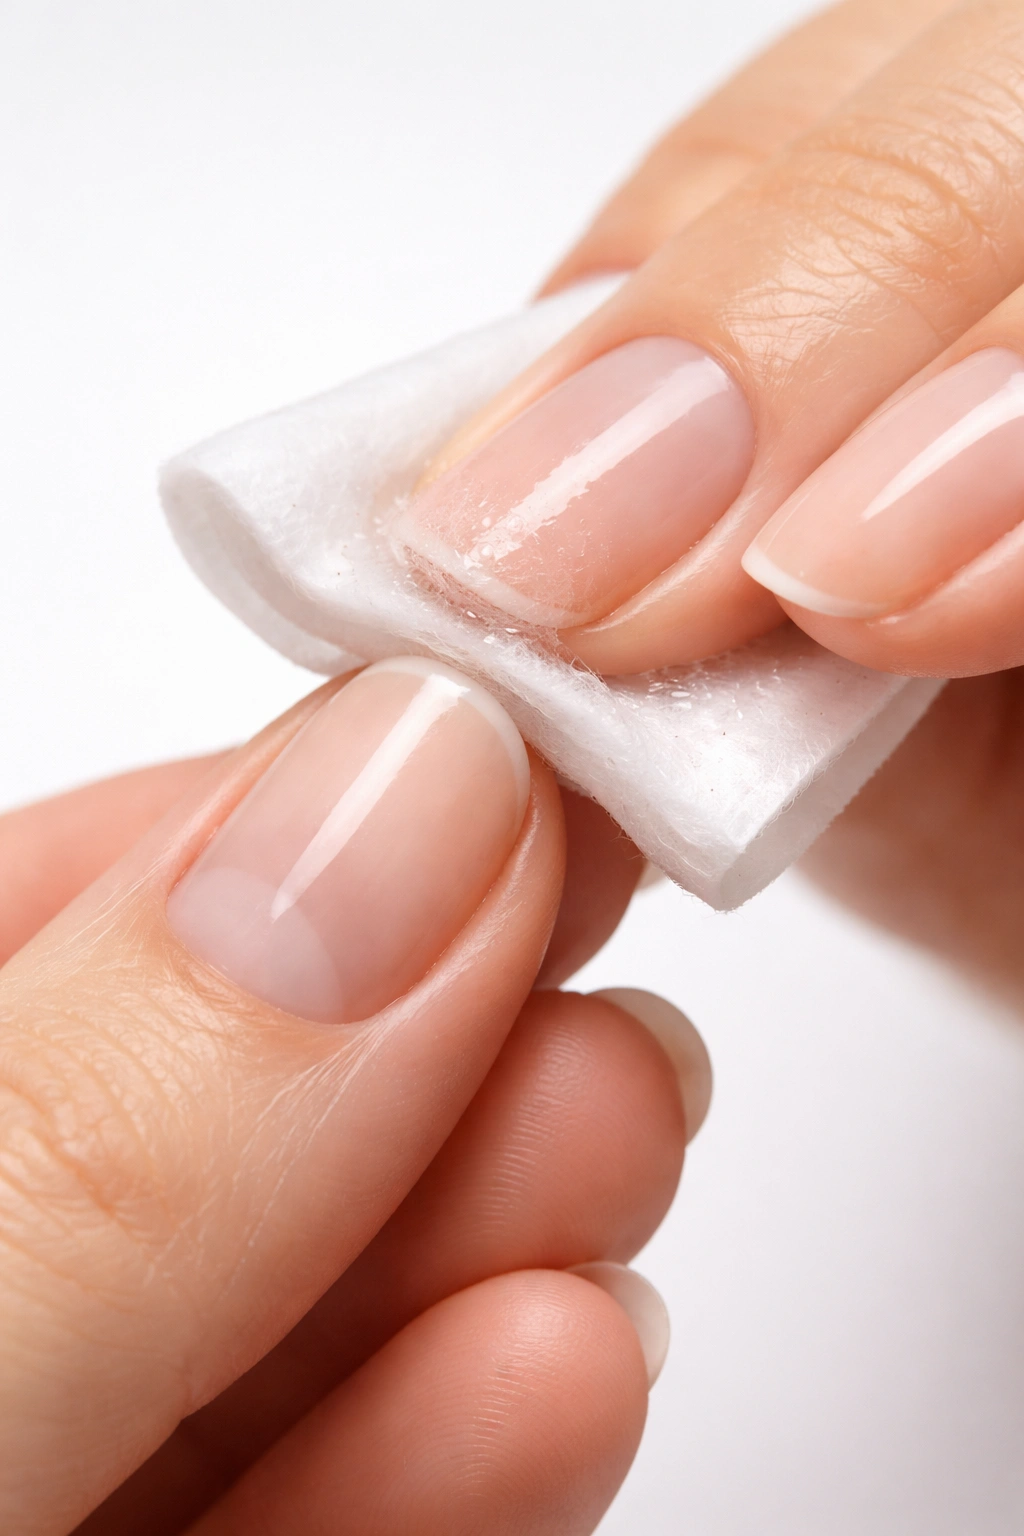
Start by completely removing any traces of old polish using a good nail polish remover and a lint-free cotton pad. Don’t rush this step—wipe each nail thoroughly until there’s absolutely nothing left. Many people miss residue in the corners and along the edges, which then interferes with new polish adhesion. If you can see any color or shine remaining, keep wiping.
Next, wash your hands thoroughly with soap and warm water and dry them completely with a clean towel. After drying, take a fresh cotton pad and wipe down each nail with either alcohol or a nail dehydrator product. This is a game-changing step that many at-home manicurists skip. Any trace of oil, lotion, or moisture will prevent your polish from bonding properly. You’re creating a completely clean, dry, oil-free surface. Be especially thorough around the cuticle area and the free edge (the tip of the nail that extends past your finger).
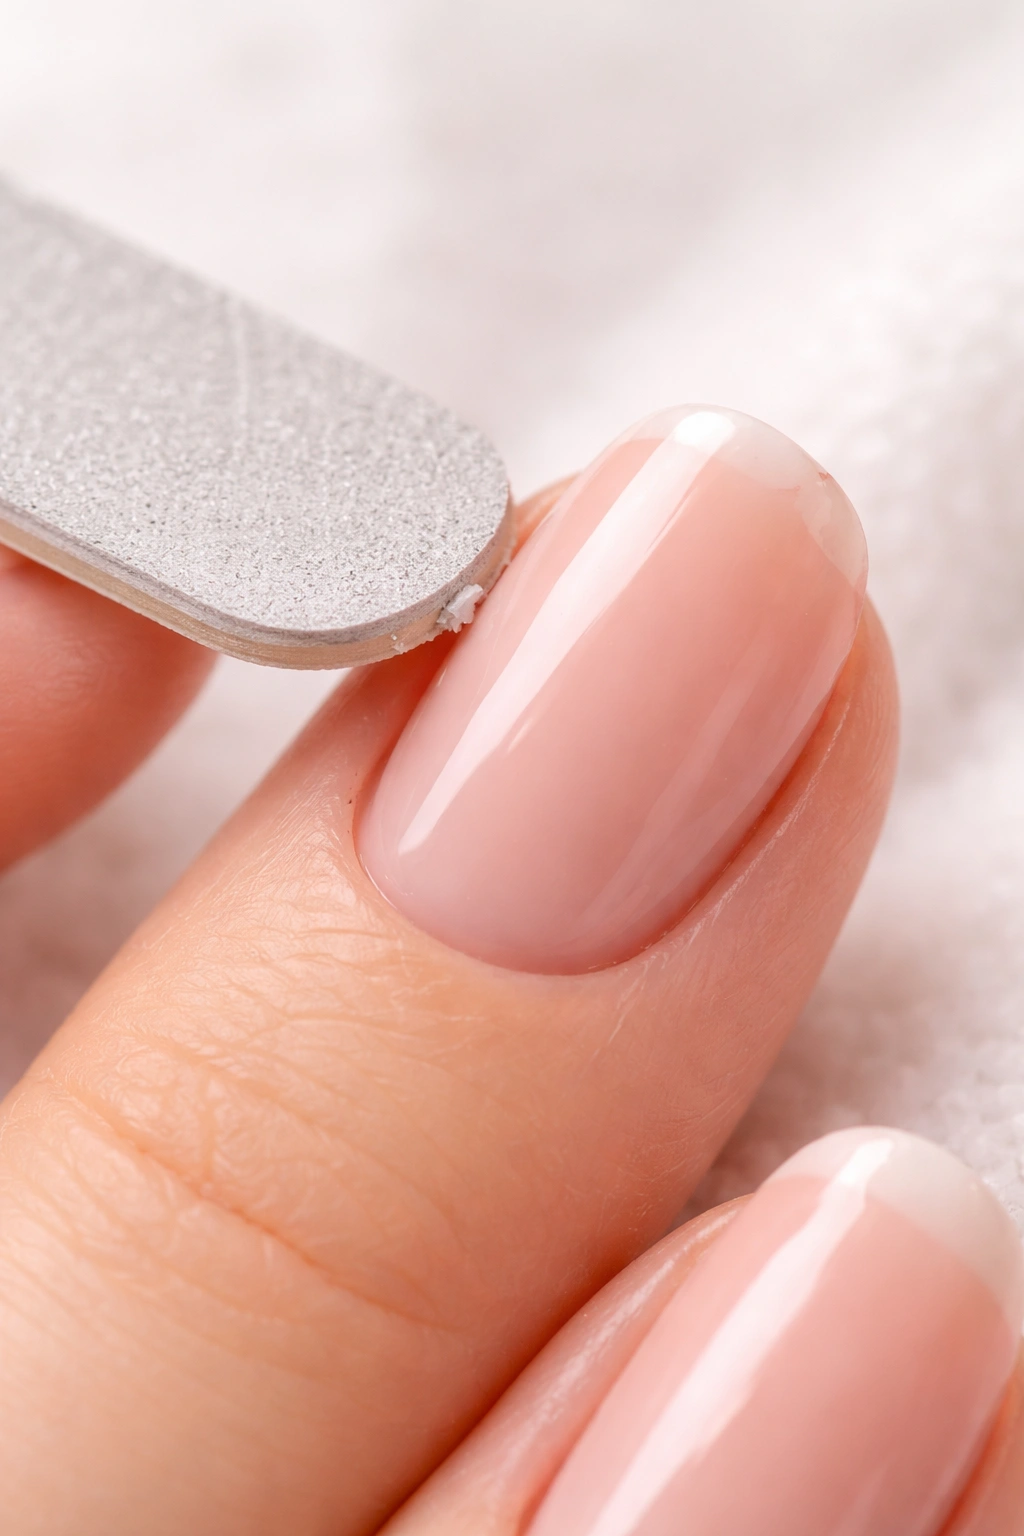
After cleaning, trim and file your nails to your desired length and shape. Here’s where technique matters: always file in one consistent direction, from the outer edge toward the center, rather than sawing back and forth. This prevents splitting and micro-tears in the nail plate. If you want a round or oval shape, keep the corners smooth—sharp angles and points are more prone to breakage. For maximum durability, shorter nails are your friend. They simply break and chip less frequently because they encounter less stress during daily use.
Push back your cuticles gently using a wooden cuticle pusher or a stainless steel pusher. Don’t cut your cuticles entirely—that can actually cause them to grow back thicker and stronger next time, and it removes your natural protective barrier. Just gently separate them from the nail plate so the polish can bond to more of the nail surface.
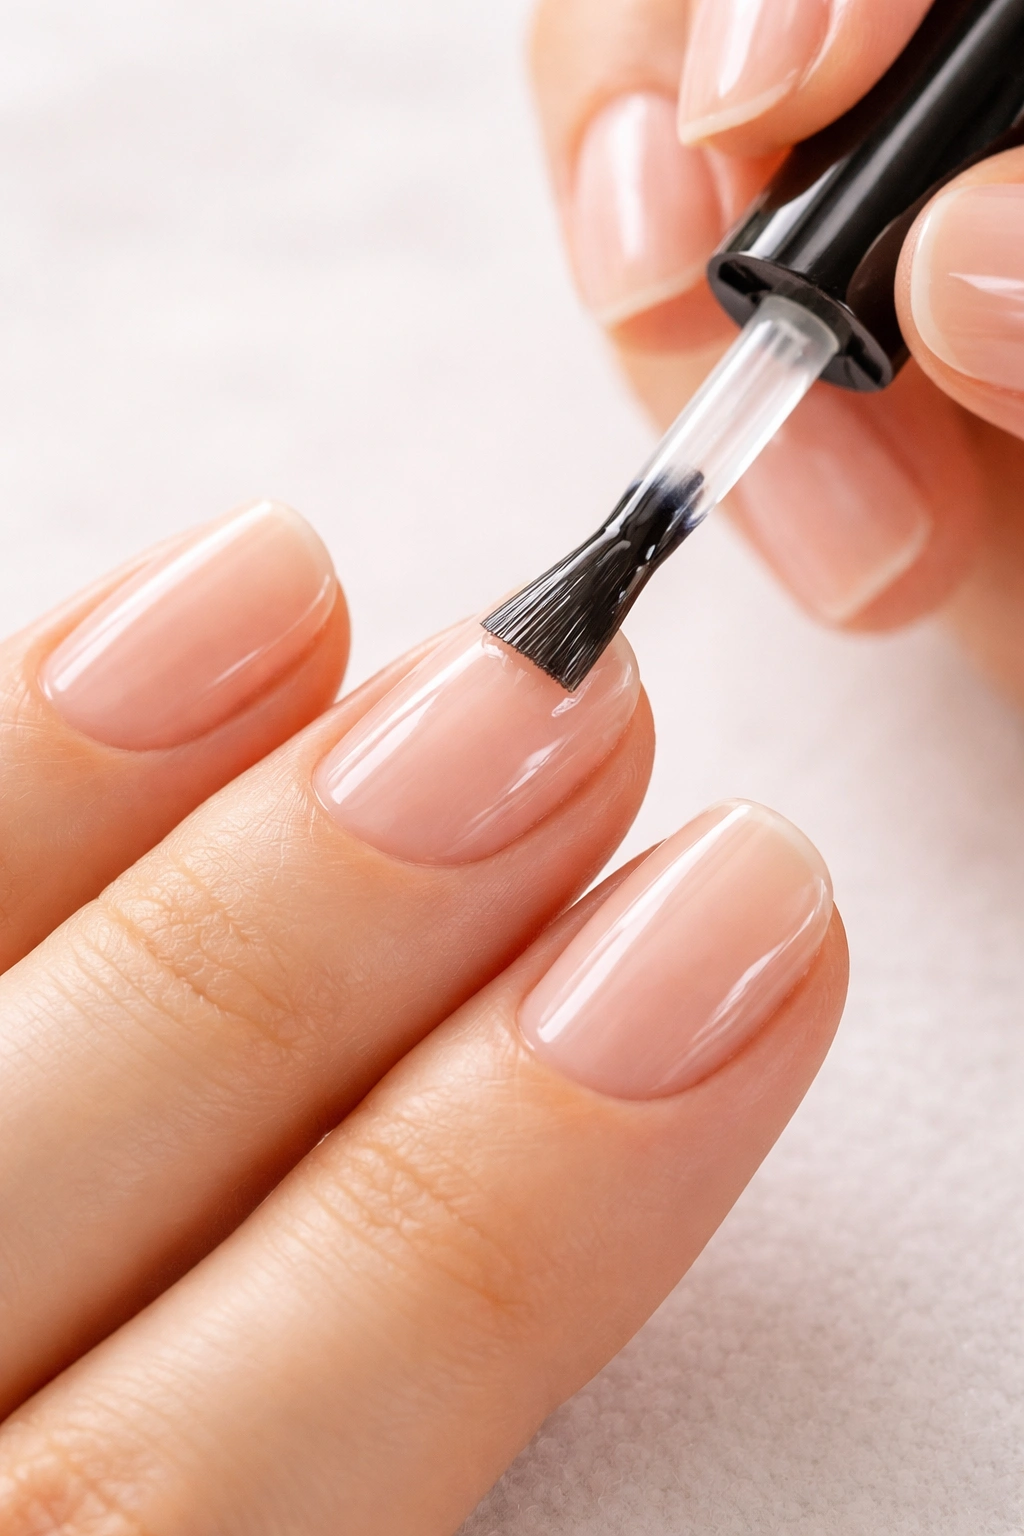
Now comes an optional but highly recommended step: light buffing. Use a fine-grit buffer (240-grit or higher) and buff the entire nail surface very lightly. This removes any remaining oils and natural shine, creating a slightly textured surface that polish grips much more effectively. Don’t buff aggressively—you’re not trying to sand down your nails, just slightly roughen the surface.
Finally, wash your hands one more time with soap and water to remove any dust from filing and buffing, then dry thoroughly. Some professionals recommend a final wipe with alcohol. You want your nail plate to be completely pristine before polish touches it.
Choose the Right Base Coat as Your Foundation
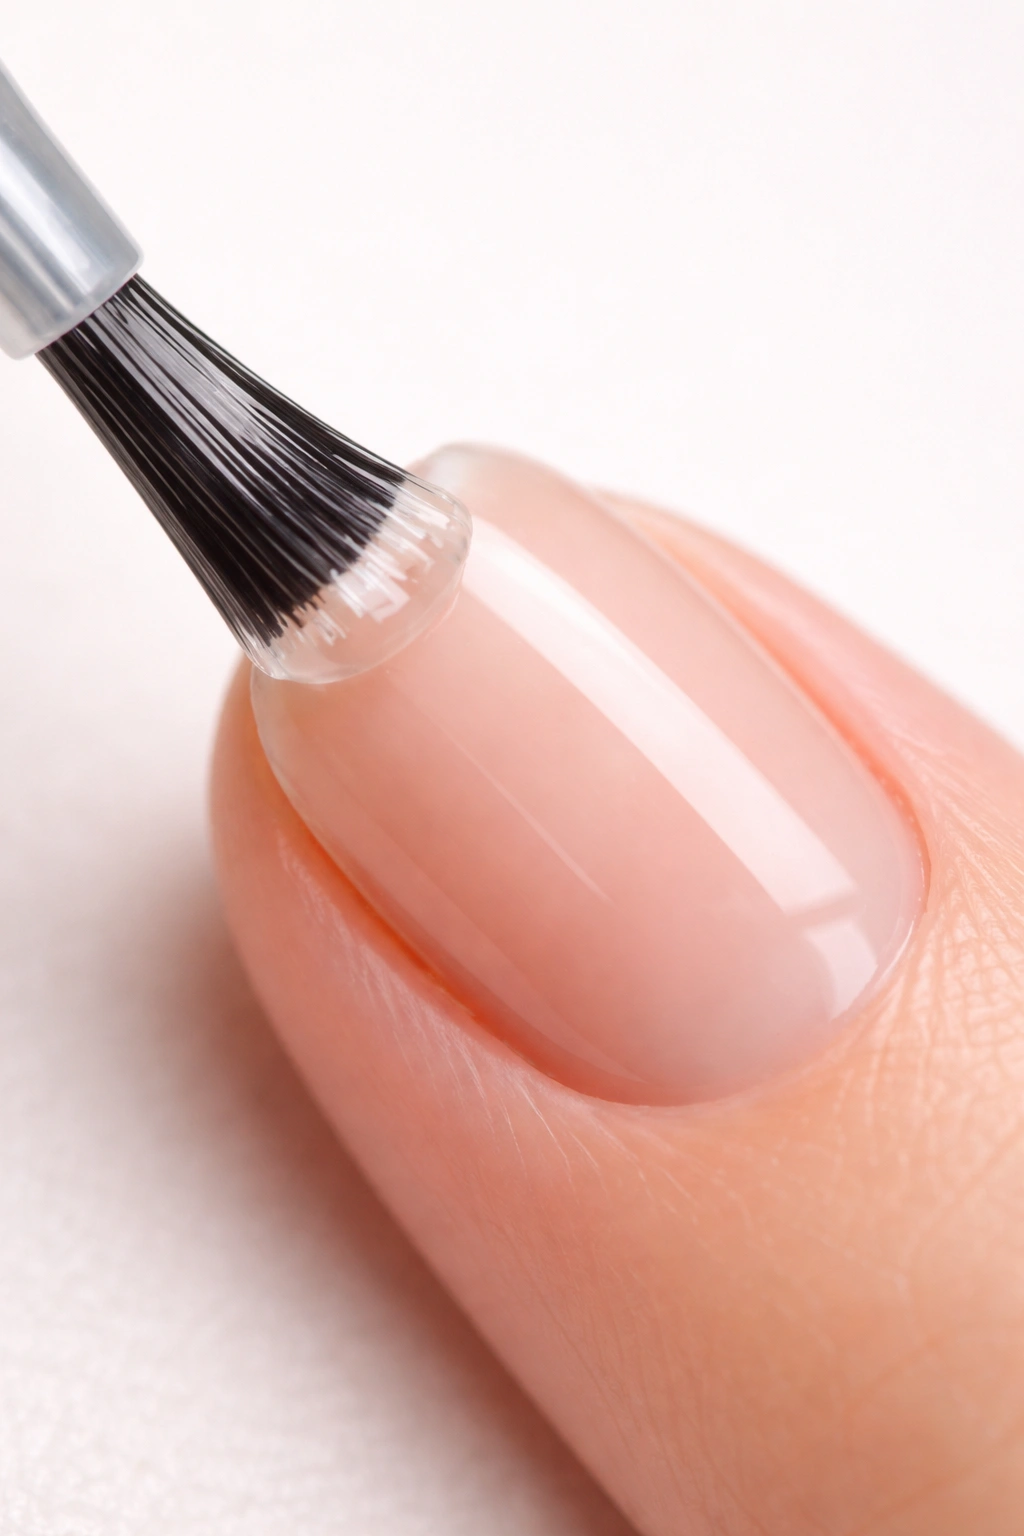
Base coat is where many people cut corners, either using a cheap formula or skipping it entirely. This is a critical mistake because the base coat is arguably more important than the polish itself. It’s your insurance policy for a long-lasting manicure.
A quality base coat does several things simultaneously. It creates a smooth, even surface on top of your nail plate so polish adheres properly and looks more opaque. It provides a grippy, rubberized layer that anchors the polish and prevents it from sliding around or lifting prematurely. It protects your nails from staining, especially important if you wear dark or heavily pigmented colors. And it nourishes and strengthens your actual nails with vitamins and minerals, which means your nails are healthier and more resistant to chipping from within.
Look for base coats specifically formulated with words like “strengthening,” “adhesive,” or “grip.” Some of the most reliable options in the professional nail world include products designed with advanced adhesion technology or fortified with ingredients like ginkgo biloba, vitamin E, or avocado oil. These aren’t just marketing buzzwords—they actually work. A strengthening base coat can noticeably improve how your nails feel and perform within just a few days of use.
Apply your base coat in a thin, even layer, making sure to wrap it around the free edge (the tip of your nail). Allow it to dry completely before applying polish—don’t rush this. The base coat needs to be fully set and sticky before color goes on top. If you apply polish while the base coat is still wet, they won’t bond properly together.
One often-overlooked detail: if your nails are particularly weak, brittle, or prone to peeling, consider using a base coat specifically formulated for damaged nails, or even skip directly to a nail strengthening treatment for a few days before your manicure. Some people actually apply strengthening treatments every night for a week before their manicure, which noticeably improves how well the polish adheres and lasts.
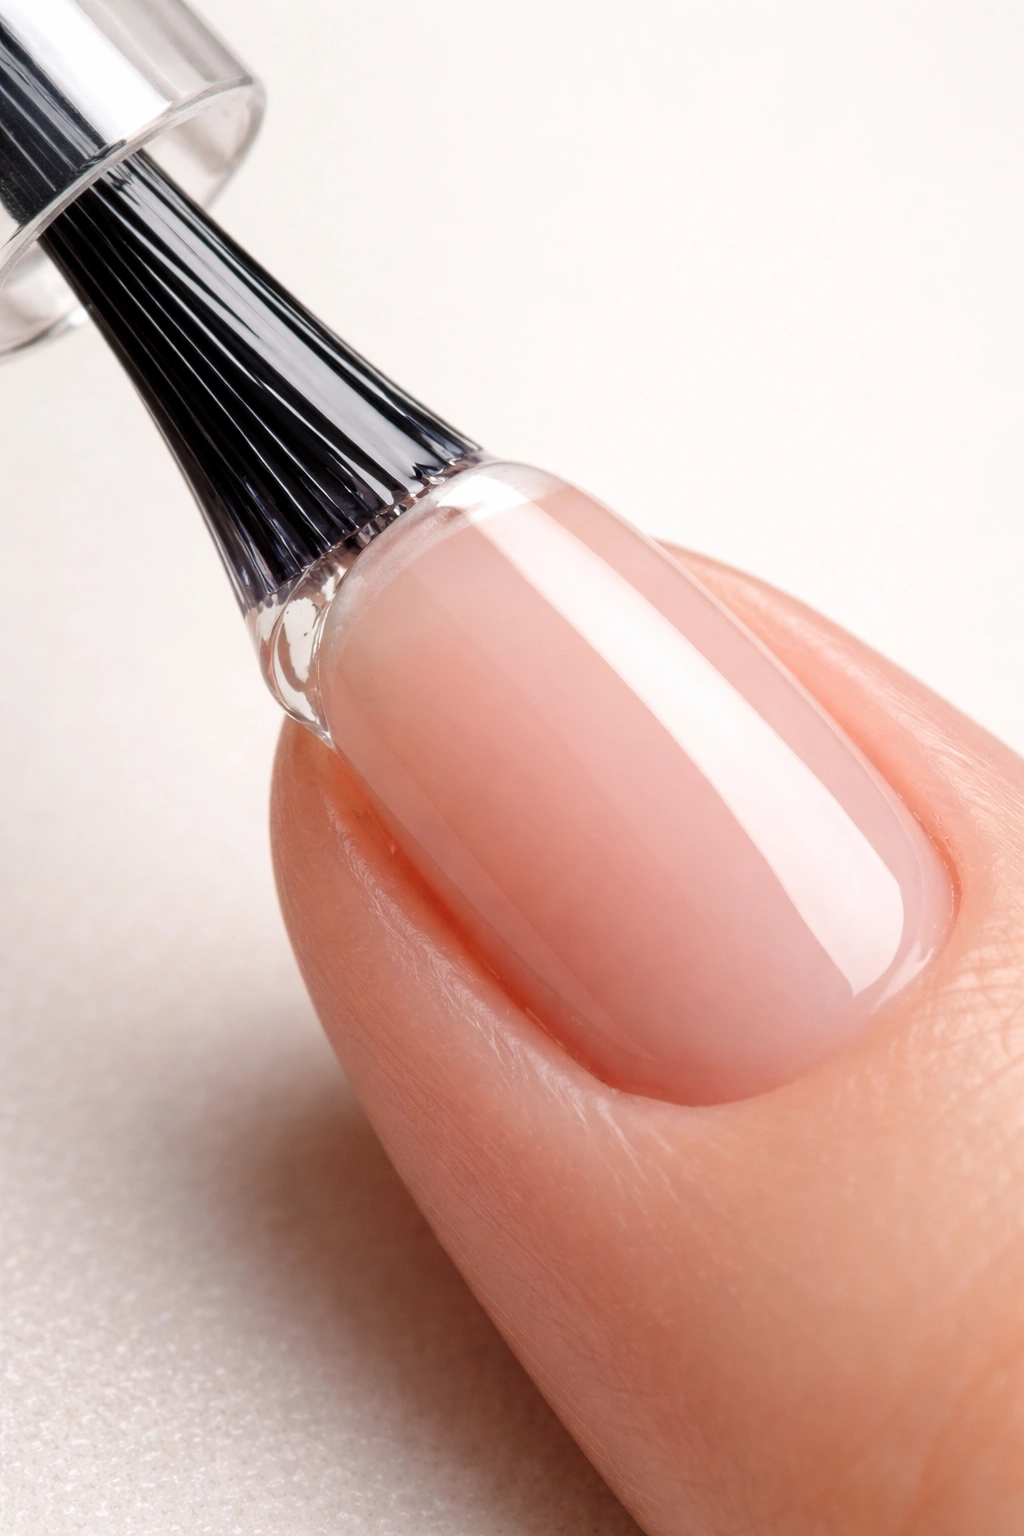
Apply Nail Polish in Thin, Even Coats
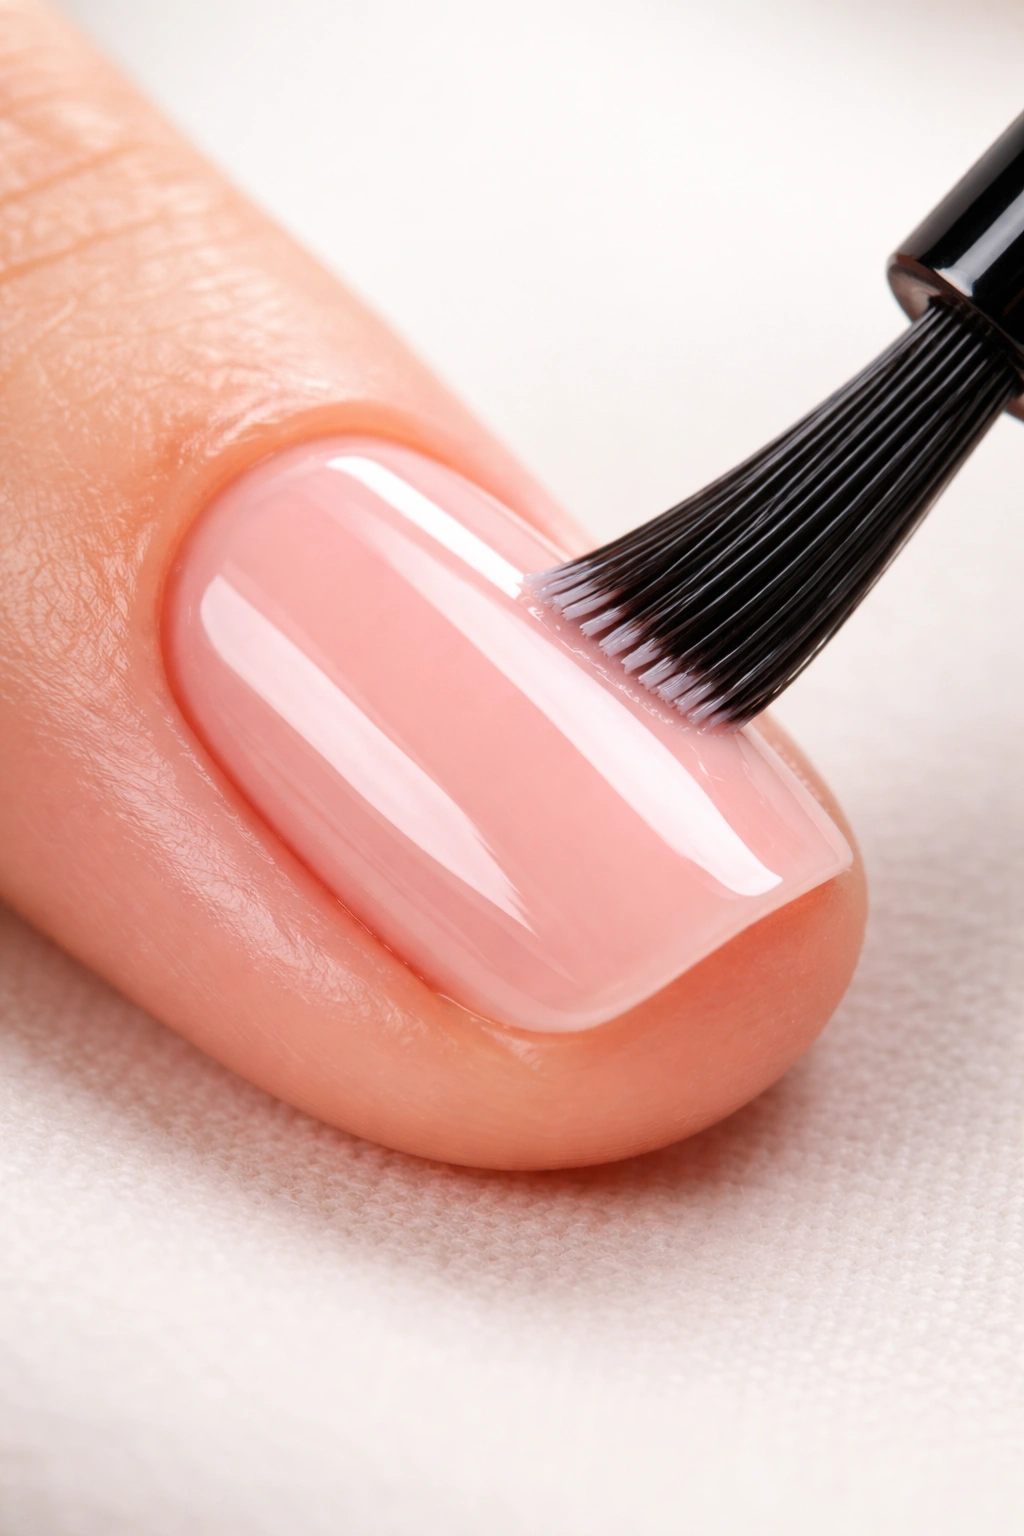
This is where conventional wisdom often misleads people. Most people assume that applying thick polish will give better coverage and last longer. The opposite is actually true. Thick coats of polish dry unevenly, stay tacky longer, develop air bubbles that cause chipping, and are far more prone to peeling. Thin coats look even better, dry faster, cure properly throughout, and adhere much more durably.
The technique is straightforward: pour a small amount of polish onto the brush—roughly the size of a small pea. Touch it to your nail bed and spread it evenly with smooth, deliberate brush strokes. Your goal is to achieve full coverage with visible color but not a thick, glossy layer. If you see the nail showing through in spots, that’s fine. A second coat will even it out.
Use three smooth strokes if you can: one down the center of the nail from base to tip, then one along each side. Avoid applying too much pressure or working the brush back and forth repeatedly. The more you manipulate the polish, the more likely you are to create bubbles or unevenness.
Let the first coat dry to a matte finish before applying the second coat. This usually takes three to five minutes, depending on the brand and thickness of your application. Then apply the second coat using the same technique—thin, even, smooth strokes. Two properly applied thin coats will look far better and last far longer than one thick coat.
Many people worry that thin coats won’t provide enough pigment, especially with lighter colors. The reality is that professional formulas (even affordable ones) are designed to show color properly in two thin coats. If you find yourself needing three coats, your formula might not be ideal, or you’re applying it too thinly.
Wait for the second coat to dry to a matte finish before applying your top coat. Patience here is non-negotiable—rushing this step is one of the most common ways manicures get dented or smudged before they’re even fully set.
Master the Top Coat Technique for Superior Protection
Top coat is often treated like the final step, a nice finishing touch. In reality, it’s absolutely essential to a two-week manicure. Without it, your polish is vulnerable to chipping, fading, and peeling. With a quality top coat properly applied and maintained, your manicure becomes dramatically more durable.
The best kept secret is that top coat isn’t a one-time application. Many people think you apply it once and you’re done for two weeks. This is why their manicures fail. Top coat wears thin, particularly at the edges and tips where your nails encounter the most wear and tear. The solution is to reapply a fresh, thin layer every two to three days, which extends the life of your manicure significantly.
When applying your initial top coat, use the same thin-coat technique as the polish. Don’t slather it on thickly—a smooth, thin layer is all you need. Make sure to wrap it around the free edge and slightly underneath the tip of the nail, as this creates a seal that prevents water and debris from getting underneath the polish.
Choose a top coat formulated for chip resistance and durability. Some options are specifically designed to provide a gel-like finish without requiring UV light to cure. These are worth the investment because they genuinely do create a harder, more protective surface. Other people swear by layering two different top coats—first a gel-like topcoat that provides flexibility, then a fast-drying topcoat that creates a hard exterior shield. This combination creates maximum protection.
Allow your first top coat application to dry completely (usually six to ten minutes depending on the formula) before using your hands for anything demanding.
Wrap and Seal the Nail Edges for Extra Durability
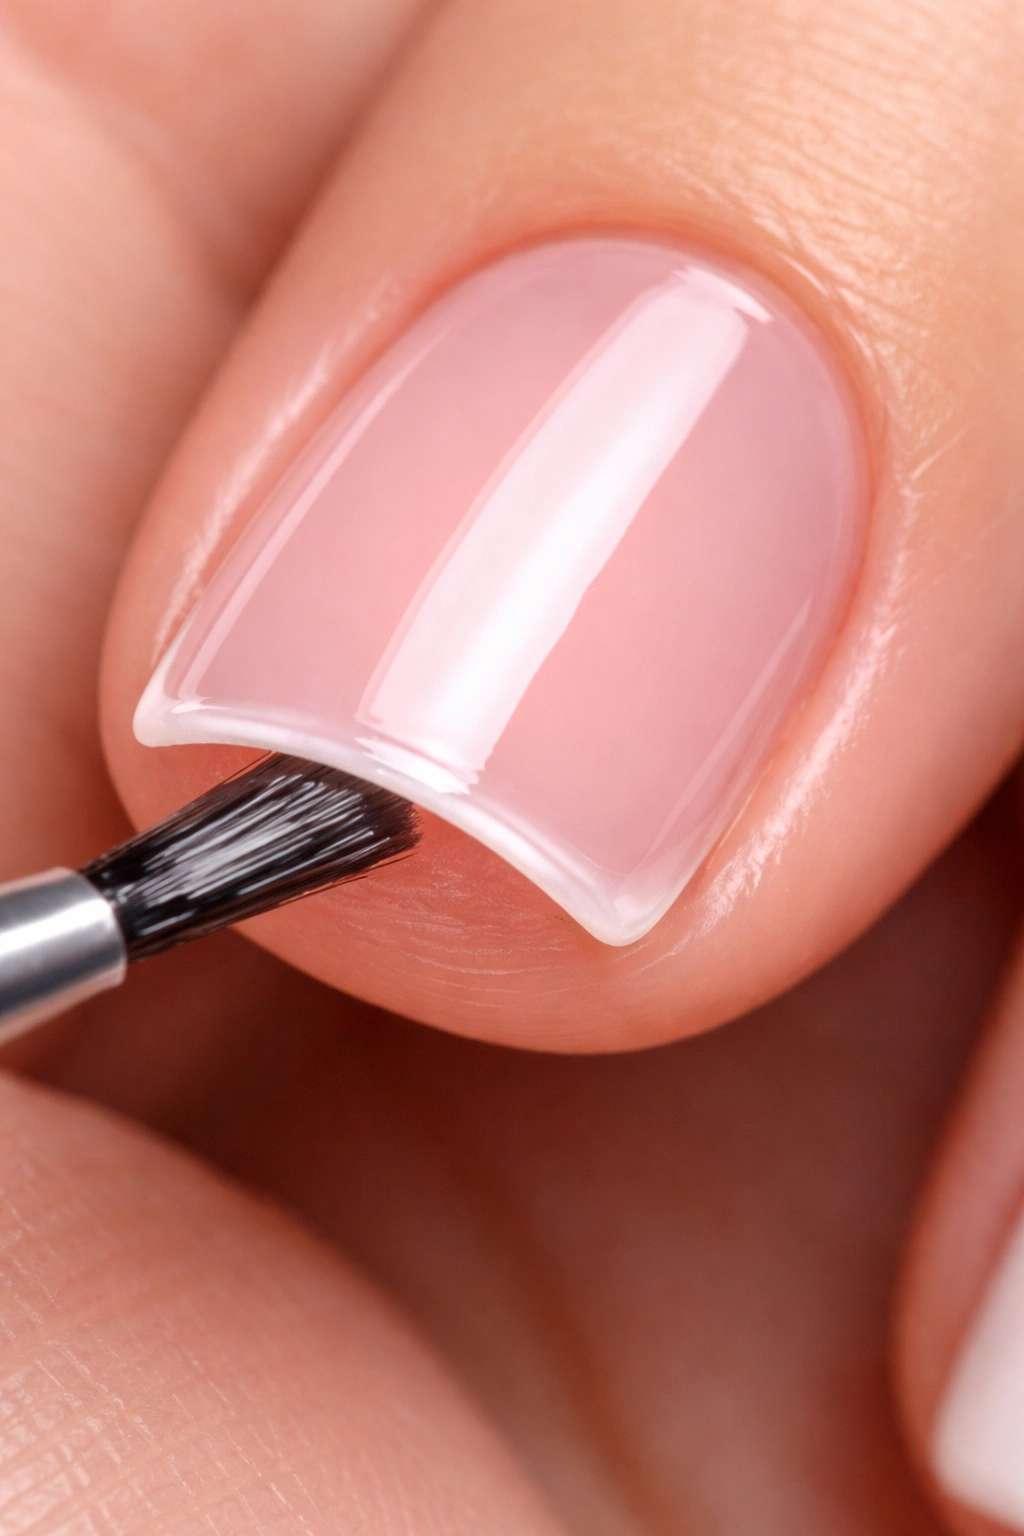
Here’s a detail that makes a measurable difference: how you apply polish to the edge and tip of your nail. Many people paint to the edge of the nail and stop. Professionals wrap the polish slightly underneath the tip, creating an almost-seal between the polish and the underside of the free edge.
This technique serves two purposes. First, it prevents water and debris from getting underneath the polish, which is one of the main causes of peeling. Second, it distributes stress more evenly when your nails tap or press against things, reducing the likelihood of the polish lifting or chipping at the edge.
When applying your base coat, polish, and top coat, intentionally wrap each layer around the free edge. Use a very light touch—you don’t need to load the brush with product. A thin layer wrapped underneath is all that’s needed. This takes maybe an extra five seconds per nail but provides significant protection.
This also explains why shorter nails last longer. The less free edge you have, the less area that’s exposed to water, chemicals, and mechanical stress. Long nails have a much larger free edge that extends further from the protection of your fingertip, making them more vulnerable to catching on things and chipping.
Let Your Manicure Fully Cure and Dry Completely
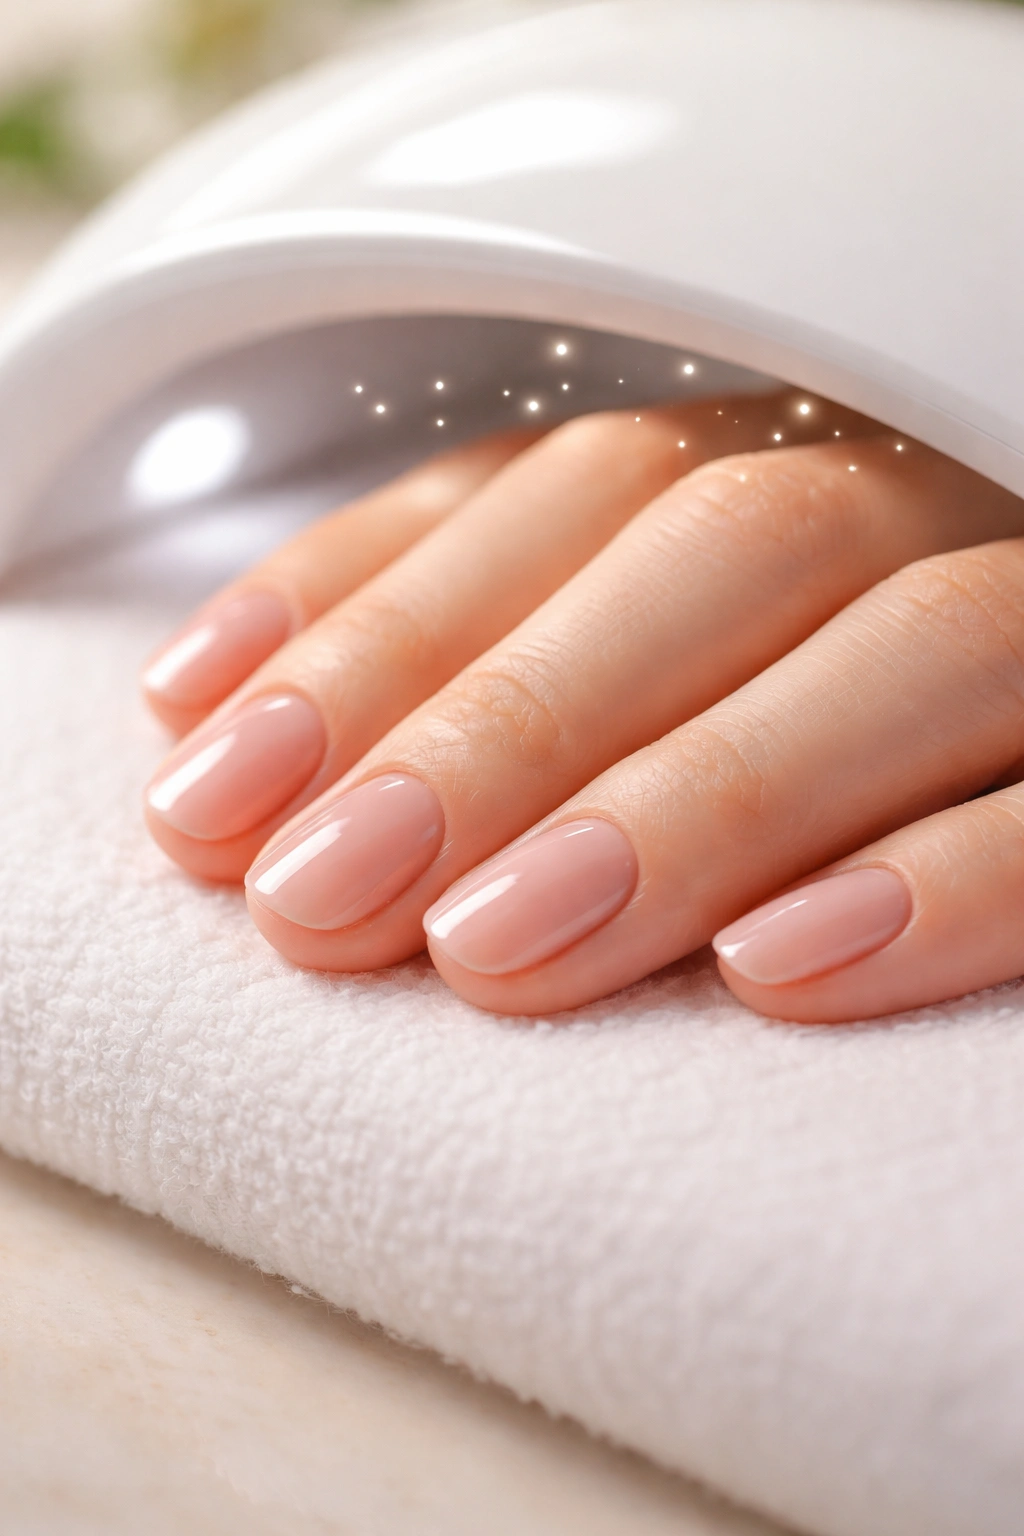
One of the most overlooked factors in manicure longevity is giving your nails enough time to fully set before exposing them to normal wear and tear. Even if polish feels dry to the touch after a few minutes, it isn’t actually hardened throughout. Most traditional nail polish takes nearly an hour to fully cure and harden completely.
Many people leave the salon or finish their at-home manicure and immediately dive back into their day—typing, doing dishes, applying lotion, opening packages. These activities put stress on polish that hasn’t fully hardened yet, causing it to dent, smudge, or crack from the inside before it’s even properly set.
The solution is simple but requires patience: give your nails at least thirty minutes of gentle activity after finishing your manicure, and ideally a full hour. During this time, avoid typing heavily, don’t submerge your hands in water, don’t apply hand lotion or other products to your hands, and try not to bump your nails against anything.
If you’re in a rush, you can try an ice water bath. Fill a bowl with ice water, submerge your nails for three to four minutes, and the cold water will speed up the drying process while also hardening the polish more than it would with air drying alone. This is a legitimate speed-up technique that actually works—when the water begins to bead up on the surface of your nails, you’ll know they’re properly hardened.
After your manicure fully dries and cures, you can return to normal activities, but still be relatively gentle with your nails for the first twenty-four hours. Your nails are fully hardened by this point, but the initial days of a manicure are when it’s most vulnerable to damage from careless habits.
Protect Your Nails From Water and Chemicals Daily
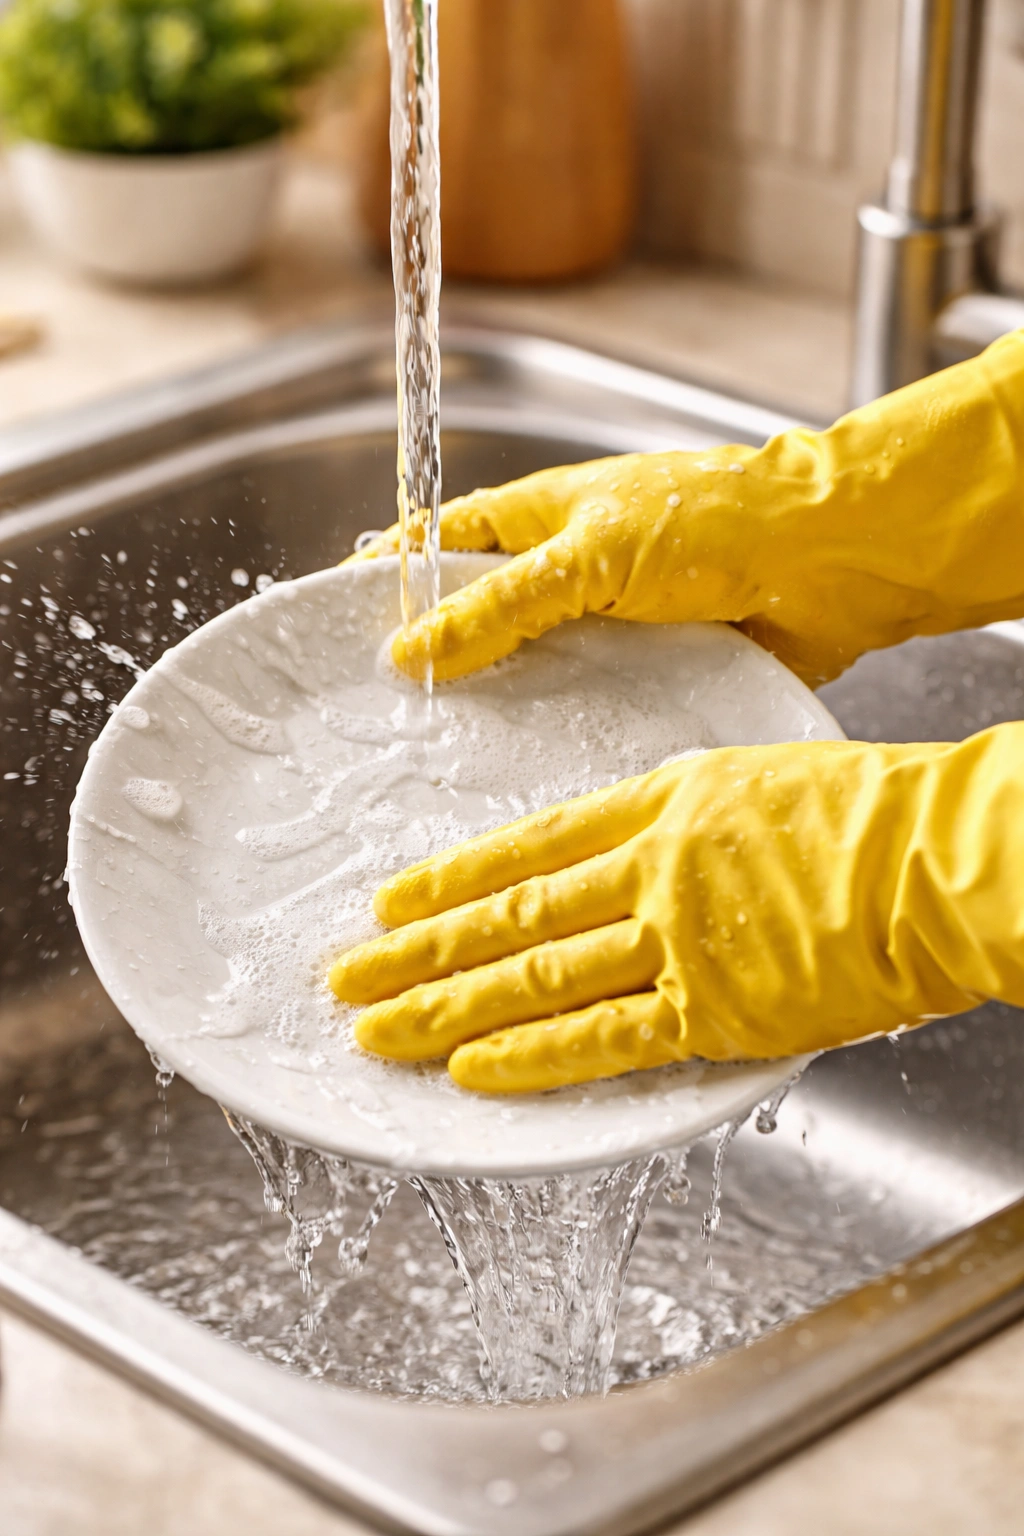
Water is one of the primary enemies of a long-lasting manicure, yet most people expose their nails to prolonged water contact multiple times per day without protection. When nails are submerged in water for significant periods, they absorb the moisture and swell. When they dry afterward, they contract back down. This constant expanding and contracting creates stress on the polish seal, causing it to lift, peel, and chip.
The solution is straightforward: wear rubber or latex gloves whenever your hands will be in water for more than a few minutes. This includes washing dishes, doing laundry, cleaning, gardening, or taking long baths or showers. Keep gloves easily accessible in your kitchen, bathroom, and near your laundry area so you’ll actually remember to use them.
Beyond water, harsh chemicals accelerate the deterioration of your manicure. Cleaning products, hand sanitizers used excessively, paint thinners, and other strong solvents can break down the polish. If you’re doing any kind of chemical work, wear gloves. It takes two seconds and makes a dramatic difference in how long your manicure lasts.
Even everyday activities matter. When washing your hands (which you should absolutely do regularly), pat your nails gently dry with a towel rather than rubbing them aggressively. Avoid very hot water, which opens up the nail plate and makes it more porous. If you’re a frequent hand-washer, consider doing a final gentle pat dry and then applying a quick touch of cuticle oil to replace lost moisture.
Reapply Top Coat Every 2-3 Days to Extend Longevity
This is the maintenance secret that makes the difference between a one-week manicure and a two-week manicure. Many people don’t realize they can extend their manicure simply by refreshing the top coat every few days. Top coat is the sacrificial layer that takes the brunt of daily wear—it protects the actual color underneath. When top coat wears thin, the color becomes vulnerable to chipping.
Every two to three days, apply a fresh, thin layer of top coat to all your nails. This only takes a couple of minutes and requires no other products or prep work. Just open the bottle and apply it exactly as you did initially—thin, even strokes, wrapping around the free edge.
This simple habit accomplishes multiple things simultaneously. It refreshes the protective seal over your color, hiding minor surface imperfections and scratches in the old top coat. It brings back the gloss and shine that naturally dulls over time, making your manicure look freshly done. It rebuilds the barrier against water and chemicals. And it genuinely extends the wearable life of your polish by at least several days.
Many people who claim their manicures last two weeks are simply doing this one thing—refreshing top coat consistently throughout the week. It’s not complicated, it’s not expensive, and it works remarkably well. Set a phone reminder if you’re prone to forgetting, or just make it part of your nighttime routine like applying lotion or brushing your teeth.
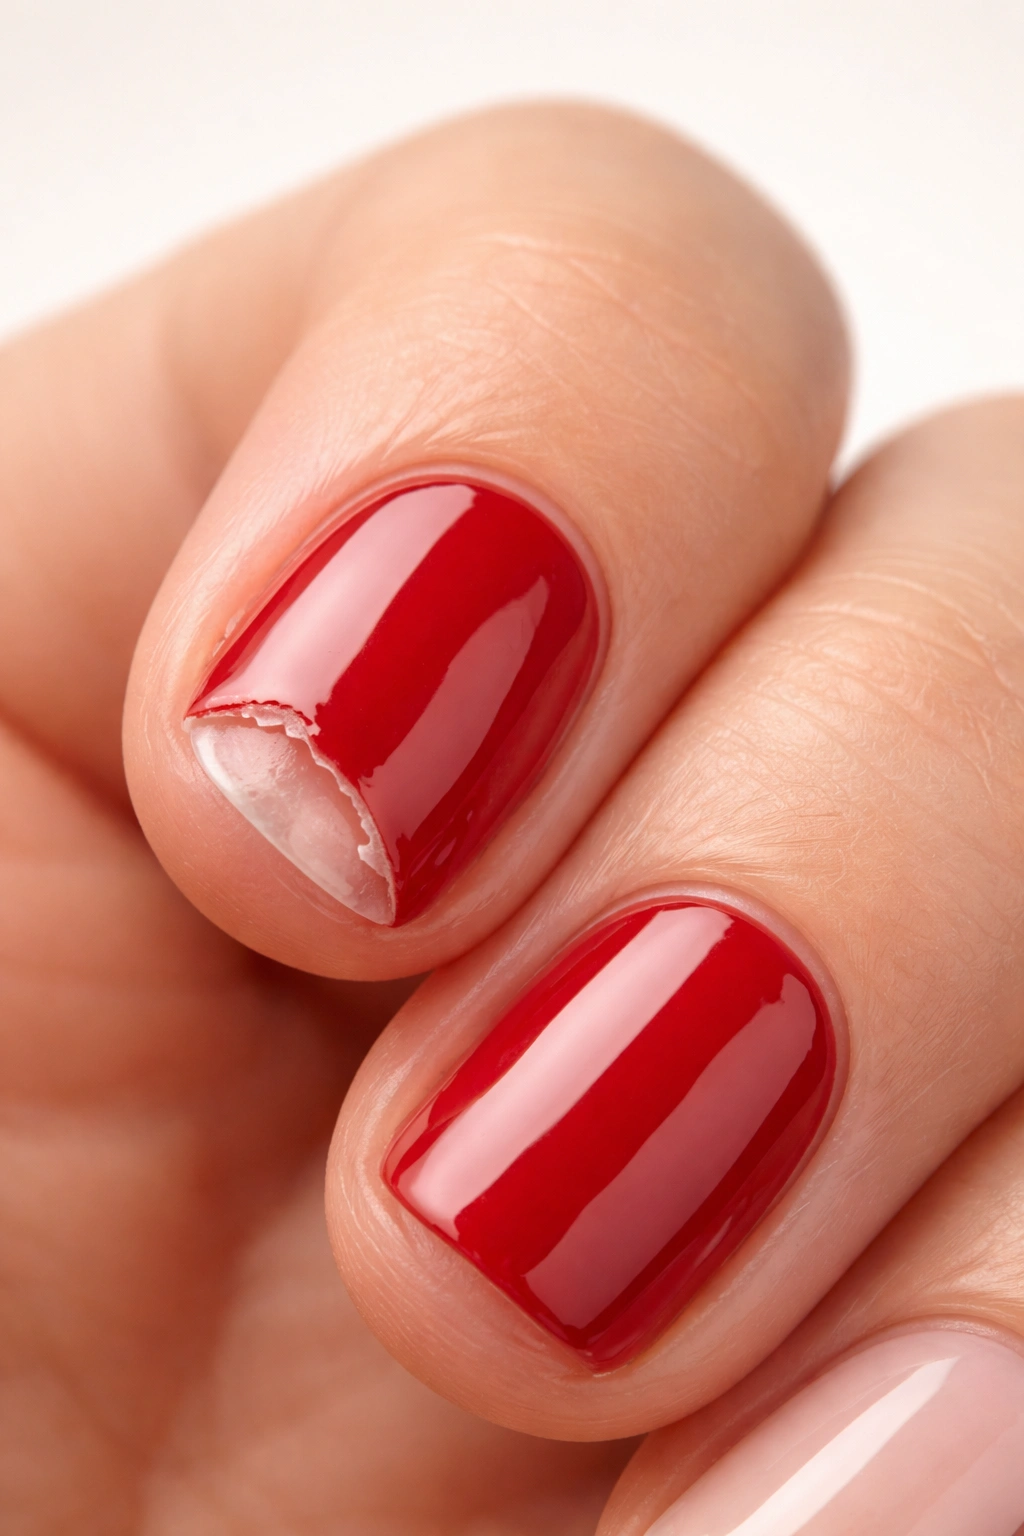
Handle Chips Immediately Before They Spread and Worsen
No matter how carefully you protect your nails, eventually a chip will happen. What you do in the next few hours determines whether this ends your manicure or extends it further. If you let a chip sit and ignore it, you’re far more likely to pick at it unconsciously, which causes it to spread and worsen. Within a day or two, what started as a tiny chip can become a large damaged area.
The moment you notice a chip, take action. If it’s a very small chip at the free edge, use a nail file to smooth down the damaged area and then apply a fresh top coat layer. This seals the repaired area and prevents the chip from spreading. Often, a simple top coat reapplication is all that’s needed for minor chips.
If the chip is larger or extends into the color, you have a couple of options. You can either file down that nail shorter (so the damaged area is removed entirely) and then touch up the color and top coat, or you can carefully apply polish color to just the damaged area and seal it with top coat. The filing option is simpler and less noticeable than trying to patch just one area.
What you absolutely shouldn’t do is leave a chip alone and hope it doesn’t get worse. It will. Or pick at the edge of the chip to try to remove the loose polish—this only makes it worse. Instead, take thirty seconds to address it immediately, and you’ll often be able to extend your manicure by another week.
Maintain Hydration and Nail Health Between Manicures
Your nails’ health directly affects how well polish adheres and how long it lasts. Nails that are dry, brittle, and weak are far more prone to breaking, chipping, and peeling. Nails that are well-hydrated, strong, and flexible can bend with daily stress without cracking, and they hold polish more durably.
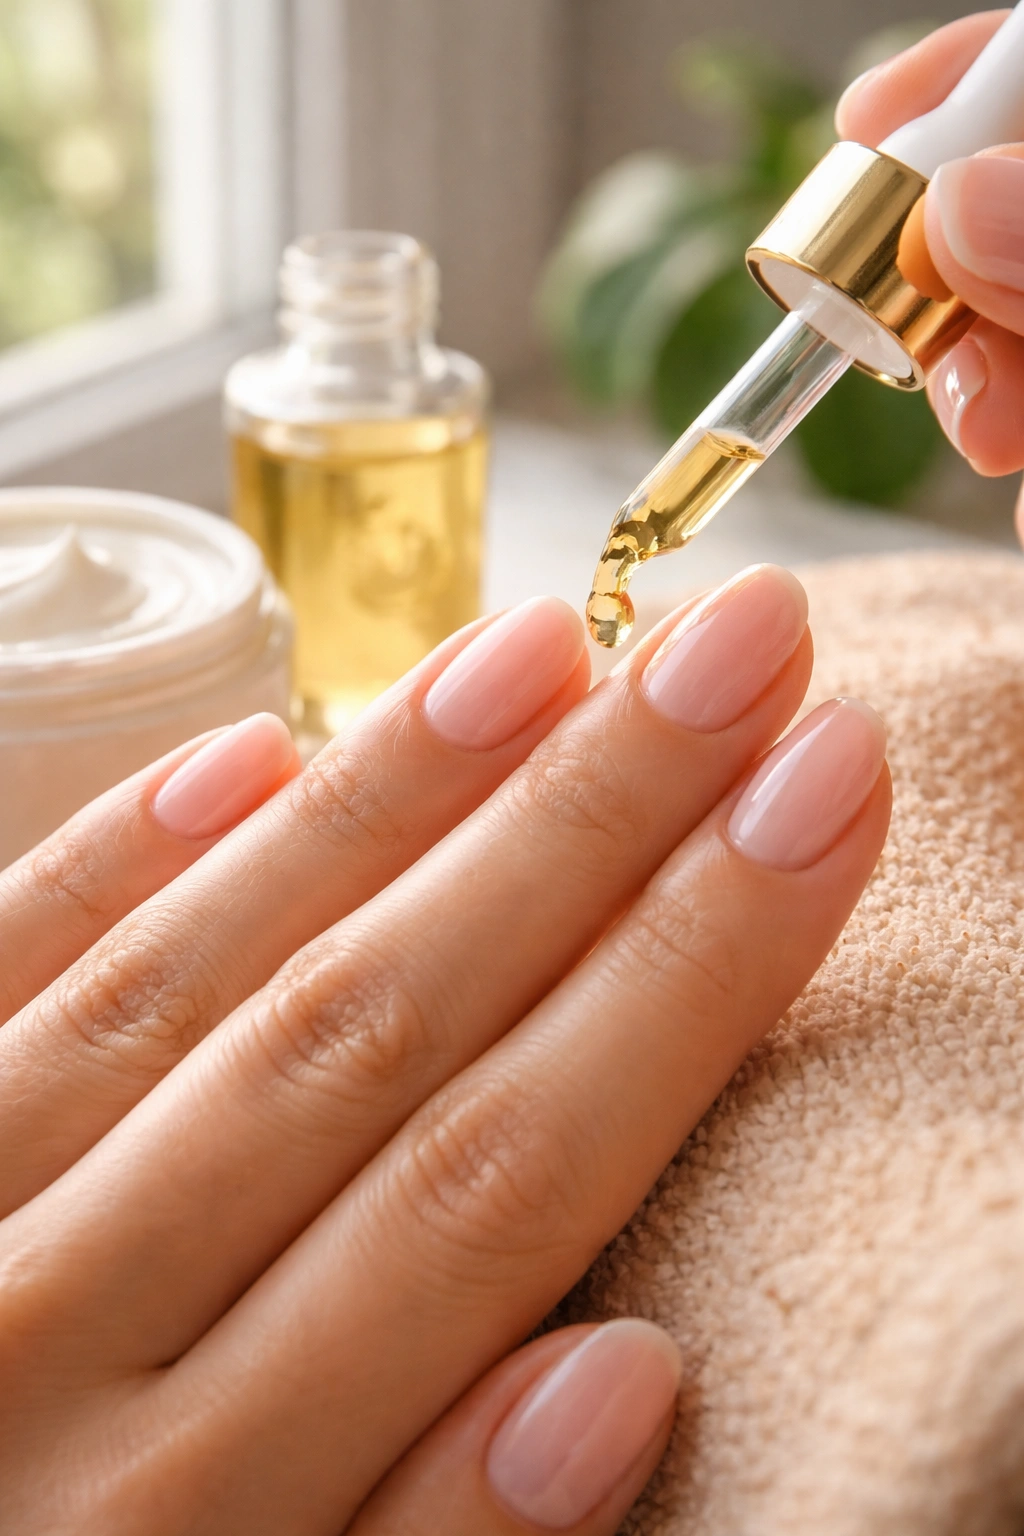
The easiest way to maintain nail health is to use cuticle oil consistently. Apply it to your cuticles and the skin surrounding your nails at least once daily, ideally twice (morning and night). Cuticle oil hydrates the cuticle area, which allows nails to grow in healthier, and it keeps your nails from becoming dry and brittle. Many people stash cuticle oil in multiple locations—bathroom, bedroom, desk, car—so they actually use it regularly.
Beyond cuticle oil, use a good hand cream regularly, especially if your hands tend to be dry. Dry cuticles and skin encourage picking, which damages both your manicure and your nails underneath. Keeping the entire hand and nail area well-moisturized is a simple preventive measure that pays dividends.
Some people also use nail strengthening treatments between manicures. These are clear formulas designed to be worn like polish, applying a protective layer while you’re not wearing color. If your nails are particularly weak, using a strengthening treatment for several days before your manicure starts can genuinely improve how long the polish lasts.
Biotin supplementation has research backing it as a way to improve nail thickness and strength over time. If you struggle with weak nails, discussing biotin supplements with your doctor might be worth exploring. Eating biotin-rich foods like eggs, almonds, salmon, and sweet potatoes certainly doesn’t hurt, and many people report seeing improvements in nail health within a few weeks.
Avoid Using Your Nails as Tools at All Costs
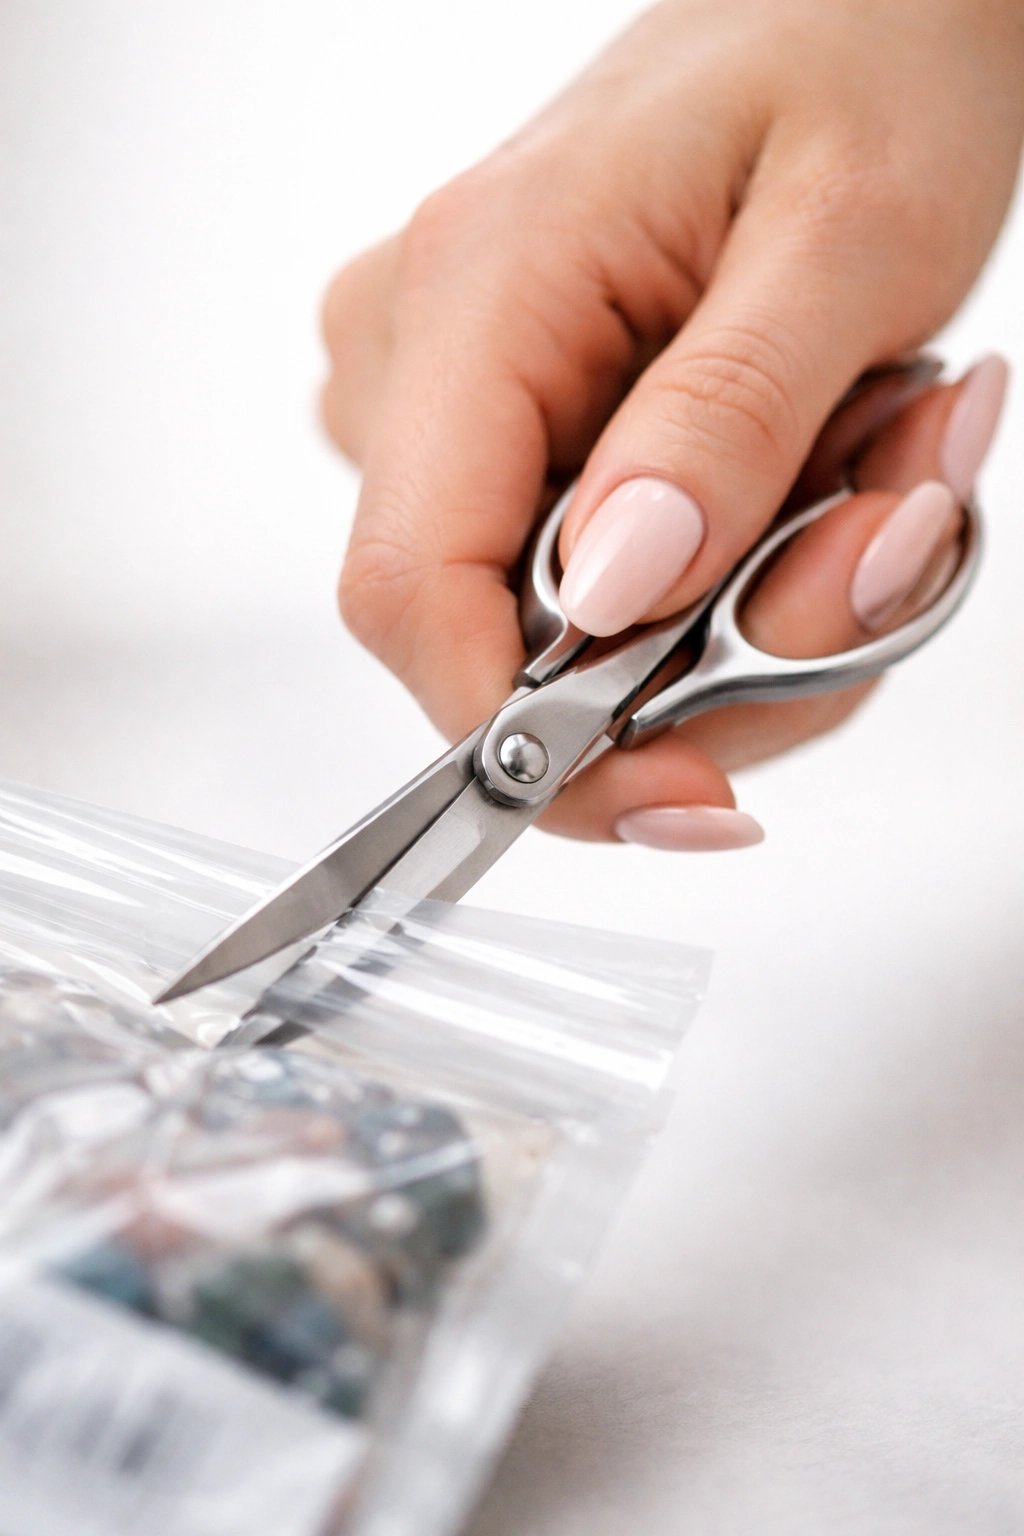
One of the easiest ways to damage a manicure is also one of the most common habits—using your nails as tools. Opening packages, peeling stickers, scratching off labels, typing aggressively, picking at things—all of these put stress on your nails and cause chips. The tip of your nail is the most vulnerable area, and every time you use it to pry or scrape something, you’re risking damage.
Train yourself to use the pads of your fingers instead of your nails for any task that would normally tempt you to use your nails as a tool. Opening a package? Use scissors or a knife. Peeling a sticker? Use a plastic scraper or your fingertip. Picking something off a surface? Use your fingernail from the pad of your finger, not the pointed tip. These small habit changes make a measurable difference in how often your manicures chip.
For people who type extensively for work, be mindful of how you strike keys. Aggressive, hard typing puts more stress on your nails than gentle, controlled keystrokes. You don’t need to change your typing speed, but approaching the keyboard with a bit more awareness of where your fingertips are and how hard you’re striking can help.
Similarly, be careful when washing your hands or touching your face. A gentle touch is better than rough scrubbing. Your manicured nails are at their most delicate the first few days, but even afterward, treating them gently extends their life.
Final Thoughts
A two-week manicure isn’t a mysterious goal that only salon professionals can achieve. It’s the straightforward result of respecting your nails’ needs, following a deliberate application process, and protecting them from the specific things that cause chips and peeling.
The foundation is thorough preparation—clean nails, dry nails, oil-free nails. Build from there with a quality base coat that provides grip and nourishment. Apply thin, even coats of color, allowing each layer to dry properly. Seal everything with a protective top coat that you’ll refresh every few days. Wrap the free edge to create a water-resistant seal. Let everything cure fully before demanding anything from your hands.
Then, throughout the two weeks, protect your nails from water, chemicals, and careless use. Reapply top coat on schedule. Handle any chips immediately. Keep your hands and cuticles moisturized so your nails stay flexible and healthy.
These aren’t complicated techniques or expensive products. They’re habits and awareness. Once you’ve done a two-week manicure a couple of times, the process becomes automatic. You’ll stop wondering why your nails don’t last and start taking for granted that they do. That’s when you know you’ve truly mastered the technique.
