

Getting a perfect long round nail shape is absolutely achievable at home, but it requires the right technique, the right tools, and a bit of patience. The frustration most people encounter isn’t that it’s impossible — it’s that they’re either filing too aggressively, using the wrong file grit, or approaching the curve incorrectly. Once you understand the actual mechanics of how to shape a curved nail edge without creating weak spots or ragged ends, the process becomes straightforward and repeatable. This guide walks you through every step, from assessing your starting point to maintaining your shape over weeks of growth.
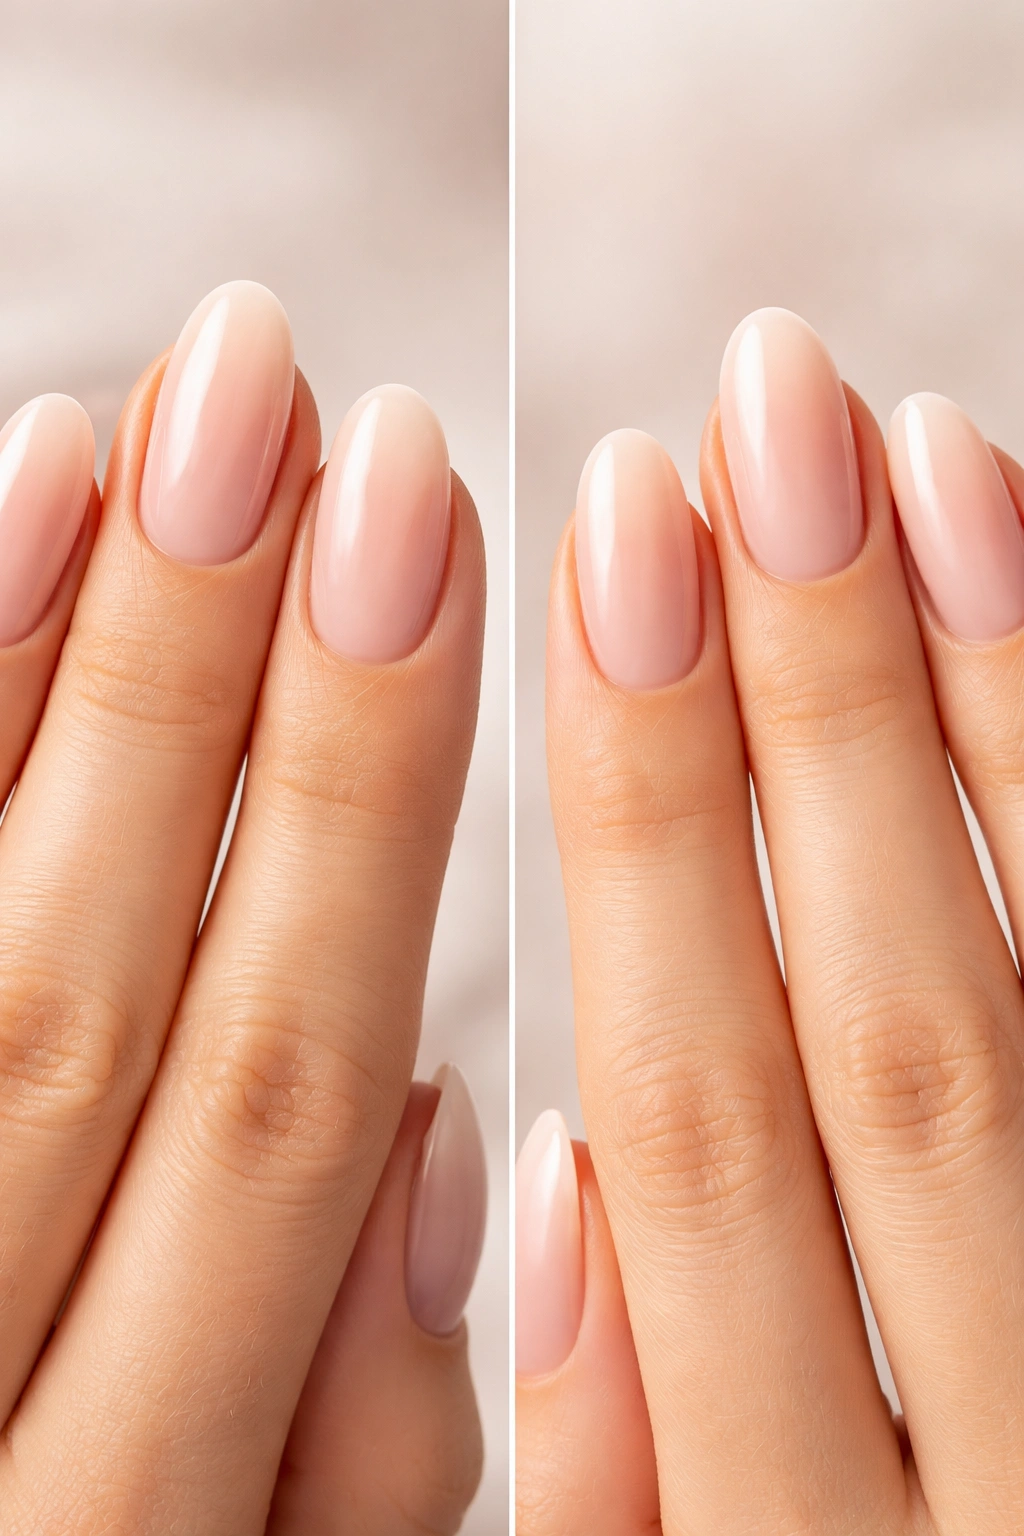
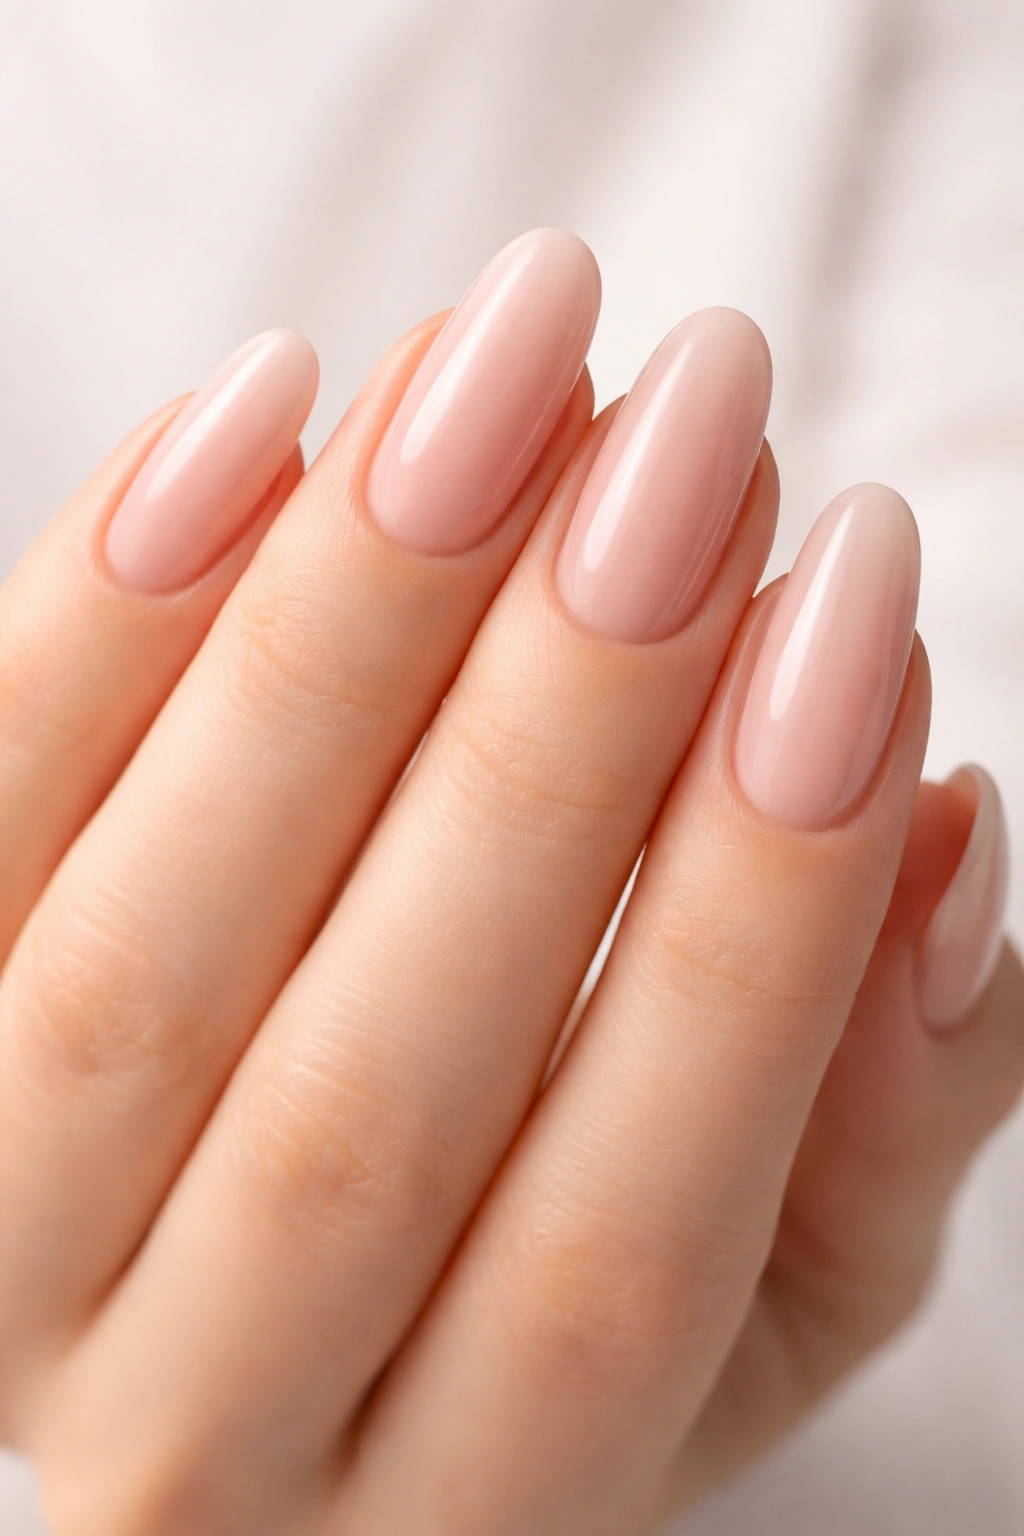
The long round shape has become increasingly popular because it strikes a genuine balance: it’s more elegant and refined than short nails, but far more practical and durable than pointed or stiletto shapes. You get length without the breakage risk that comes with extreme angles. The curve is flattering on virtually every hand shape and nail bed length, which is why you’ll see this look across professional settings, creative fields, and everyday life. The difference between a mediocre long round and a truly polished one comes down to precision — specifically, the consistency of your curve and the quality of your edge.
Understand Why Nail Shape Matters for Durability
The shape of your nail directly determines where stress concentrates as your nails grow and as you use your hands throughout the day. A round shape distributes pressure evenly along the free edge, which is why nails with this shape tend to break less frequently than sharper or more angular shapes. When you have sharp corners or a squared-off shape, those corners become stress points — they catch on things, they flex differently under pressure, and they’re the first places you’ll see chipping and breakage.
With a long round shape, the curved edge means there’s no single weak point bearing all the stress. Think of it like the difference between a sharp corner on a table and a rounded edge — the rounded version is naturally more resistant to impact and damage. This is especially important if you work with your hands, do a lot of typing, or engage in any activity that puts pressure on your nails.
The longer your nails are, the more critical the shape becomes for preventing breaks. A poorly shaped long nail is a breakage waiting to happen, while a well-executed long round nail can last weeks without a single chip.
Assess Your Current Nail Length and Starting Point
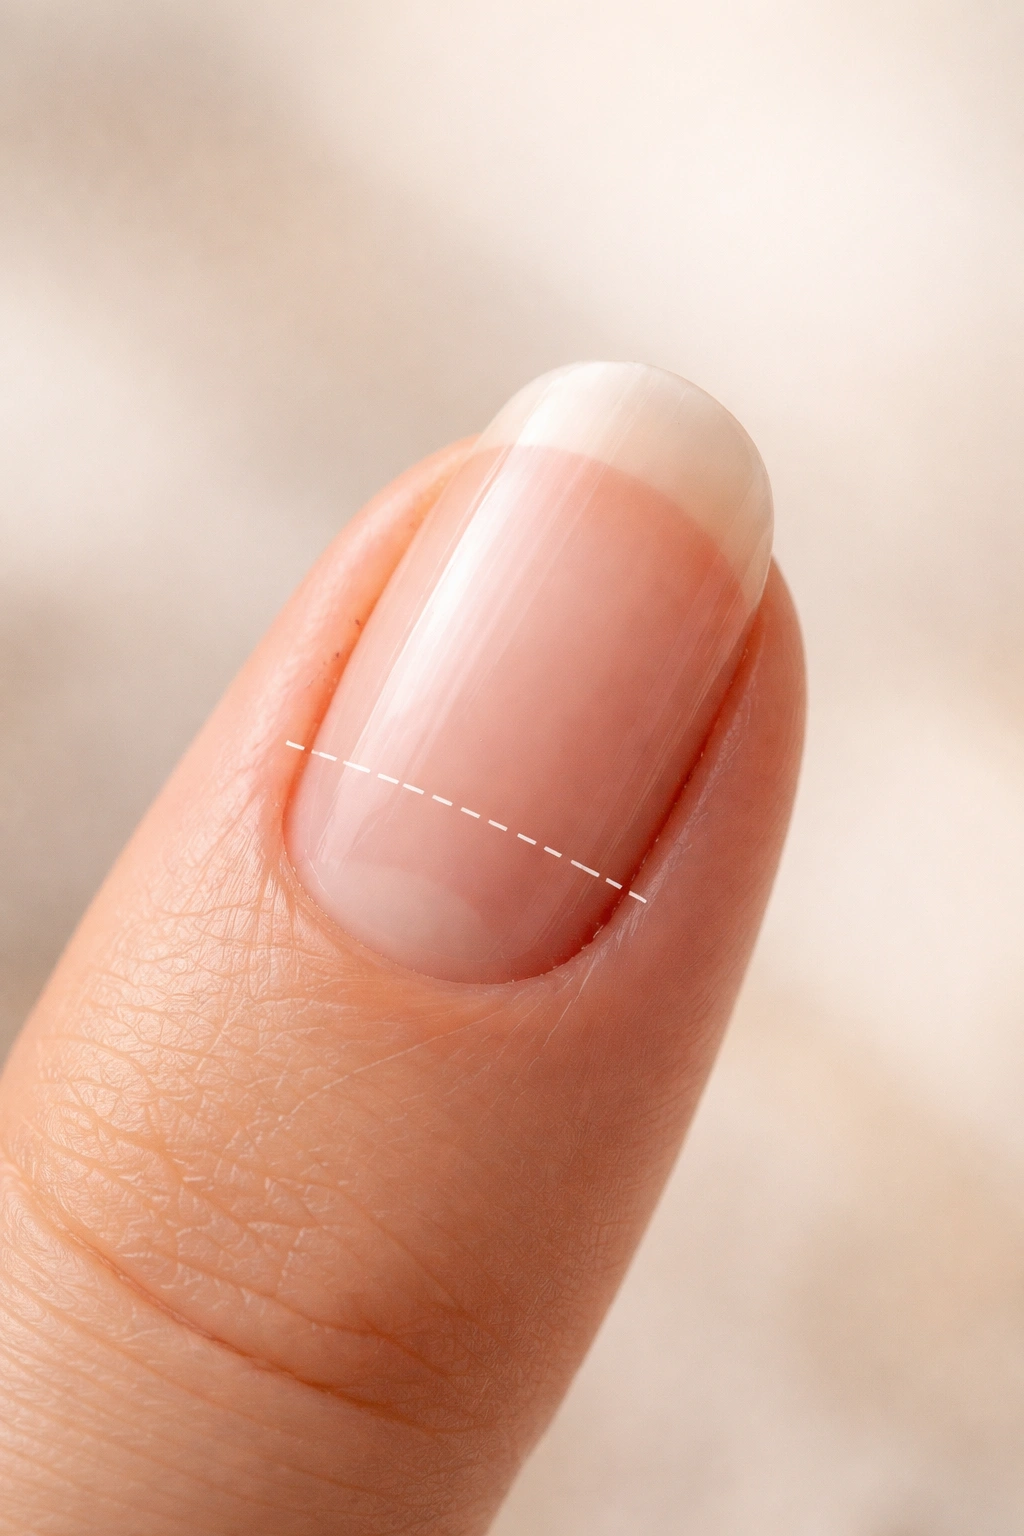
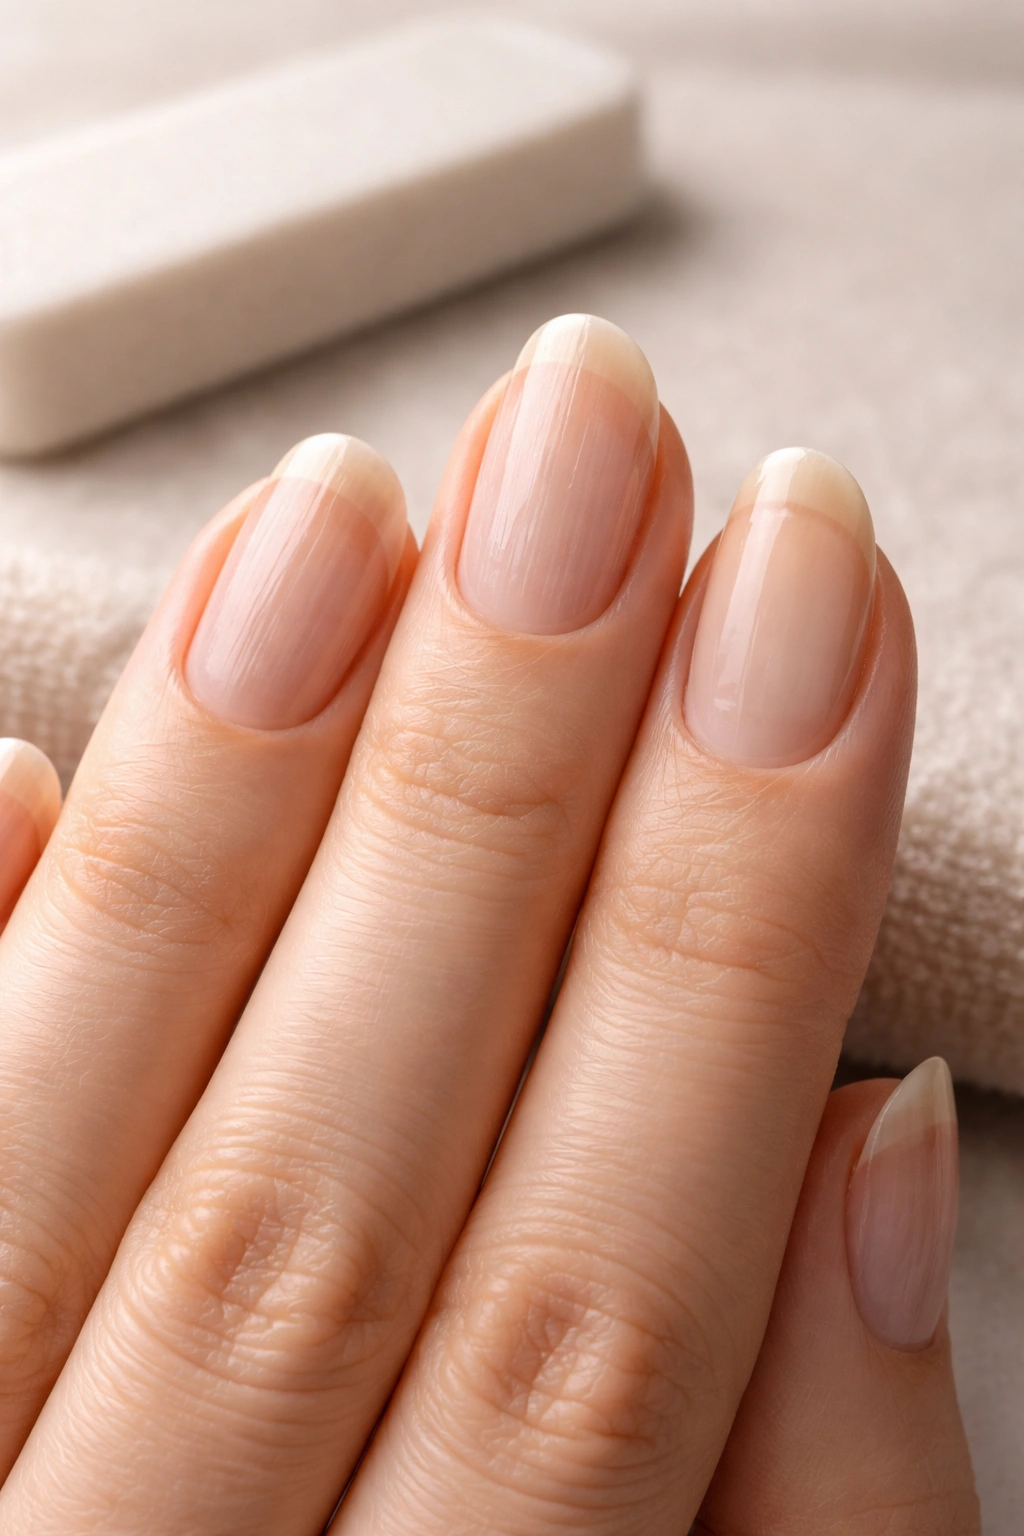
Before you begin shaping, you need an honest assessment of where you’re starting. Look at your nails straight on in good lighting — you want to see the actual nail bed and the free edge (the part that extends past your fingertip). Ideally, you want at least 2-3 millimeters of free edge to work with for creating a proper round shape. If your nails are currently very short or you’re starting from a natural, unmanicured state, understand that you’ll need to let them grow slightly before you can achieve a truly long round shape with good proportions.
Check for any existing damage, ridges, or irregularities along the nail surface. If you have peeling or flaking nails, you may need to address that with proper hydration and care before pursuing length. Splitting at the edges is especially important to note — if your nails are already splitting at the sides, shaping alone won’t fix it; you’ll need to strengthen them first through consistent moisturizing and potentially a break from polish or gel.
Look at the width of your nail beds. Wider nail beds often look more proportional with slightly rounder curves, while narrower beds might benefit from a gentler, more subtle curve. This isn’t a strict rule, but it helps you visualize what the final shape should look like on your specific hands.
Gather the Right Tools for Precision Shaping

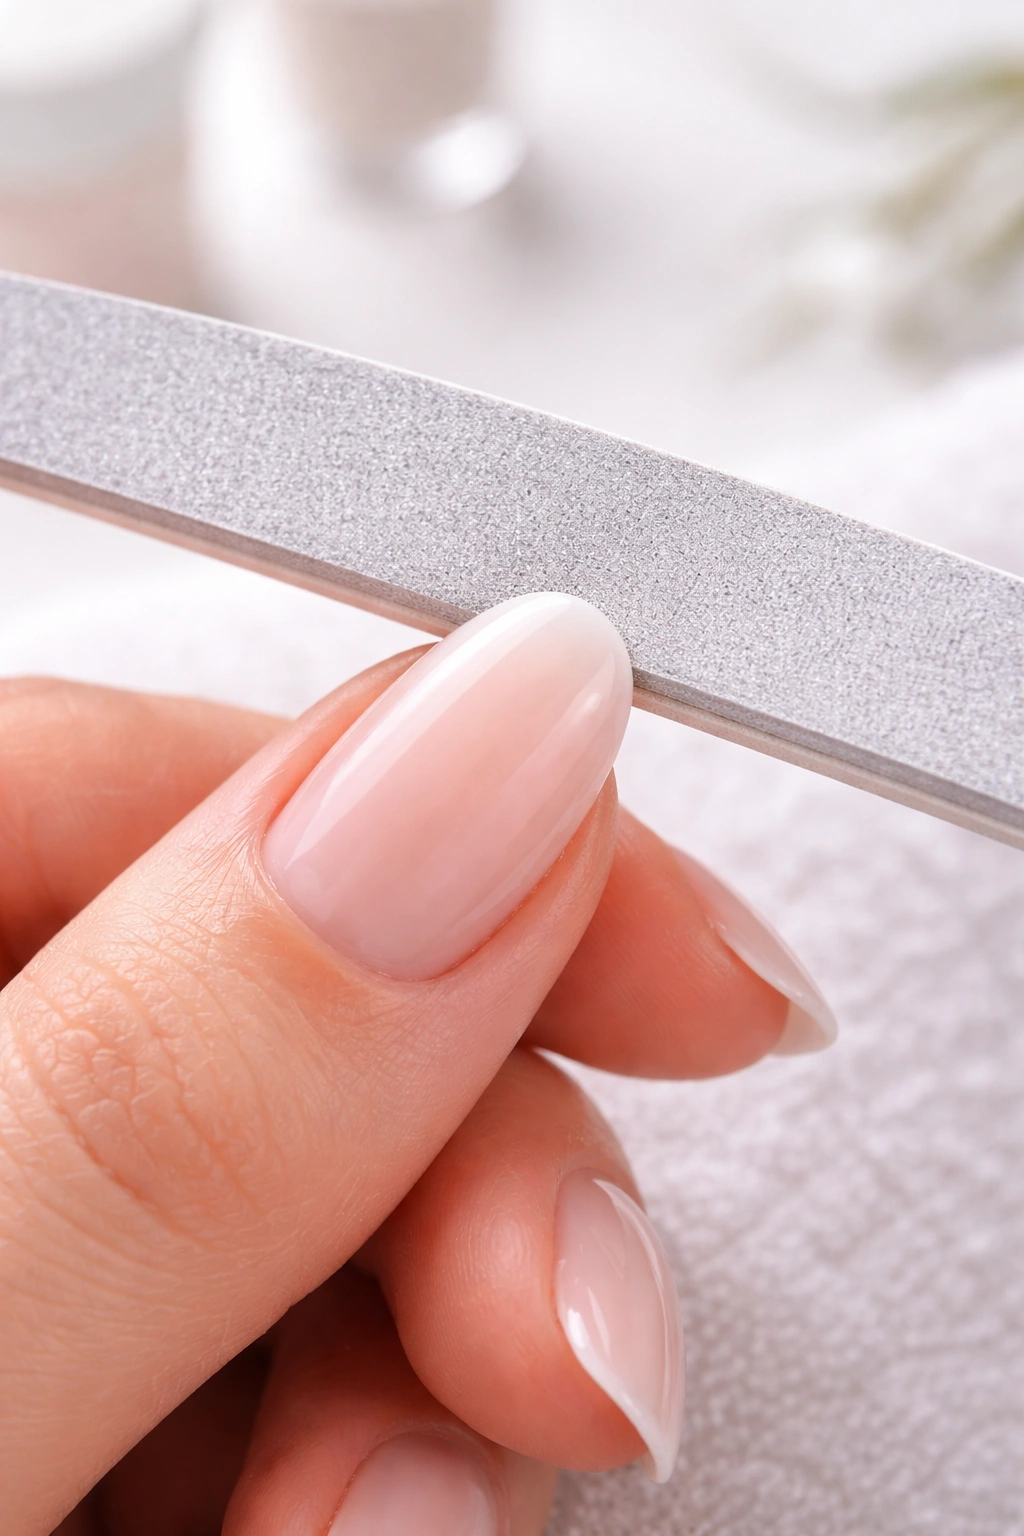
You absolutely need a quality nail file — and the type matters far more than you’d think. A metal file is faster but can cause splitting and peeling, especially on longer nails. A glass or crystal file is the gold standard because it creates a smooth, sealed edge that resists splitting and peeling. The slightly rougher texture of a glass file also gives you more control than a super-smooth metal file, making it easier to shape gradually rather than aggressively.
Pick a file with a grit of 220 or higher — this means a gentler, finer file. Lower grits (like 80 or 120) are too aggressive for shaping and will damage the edge. For long nails, you want to work incrementally, and a finer grit encourages that. A 280-400 grit file is actually ideal for finishing work.
Beyond the file, grab a nail buffer or polishing block. This isn’t strictly necessary for shaping, but it smooths the very edge of the nail and seals it, which dramatically improves durability. A standard four-sided buffer works perfectly — each side has a different grit, and you use them in sequence.
You’ll also want a cuticle oil or nail oil to apply after shaping. Filing, even done well, creates micro-damage along the edge. Oil seals that damage and keeps moisture in, which prevents peeling and splitting. Keep a soft nail brush on hand too — as you file, dust accumulates, and brushing it away lets you see the true shape as it develops.
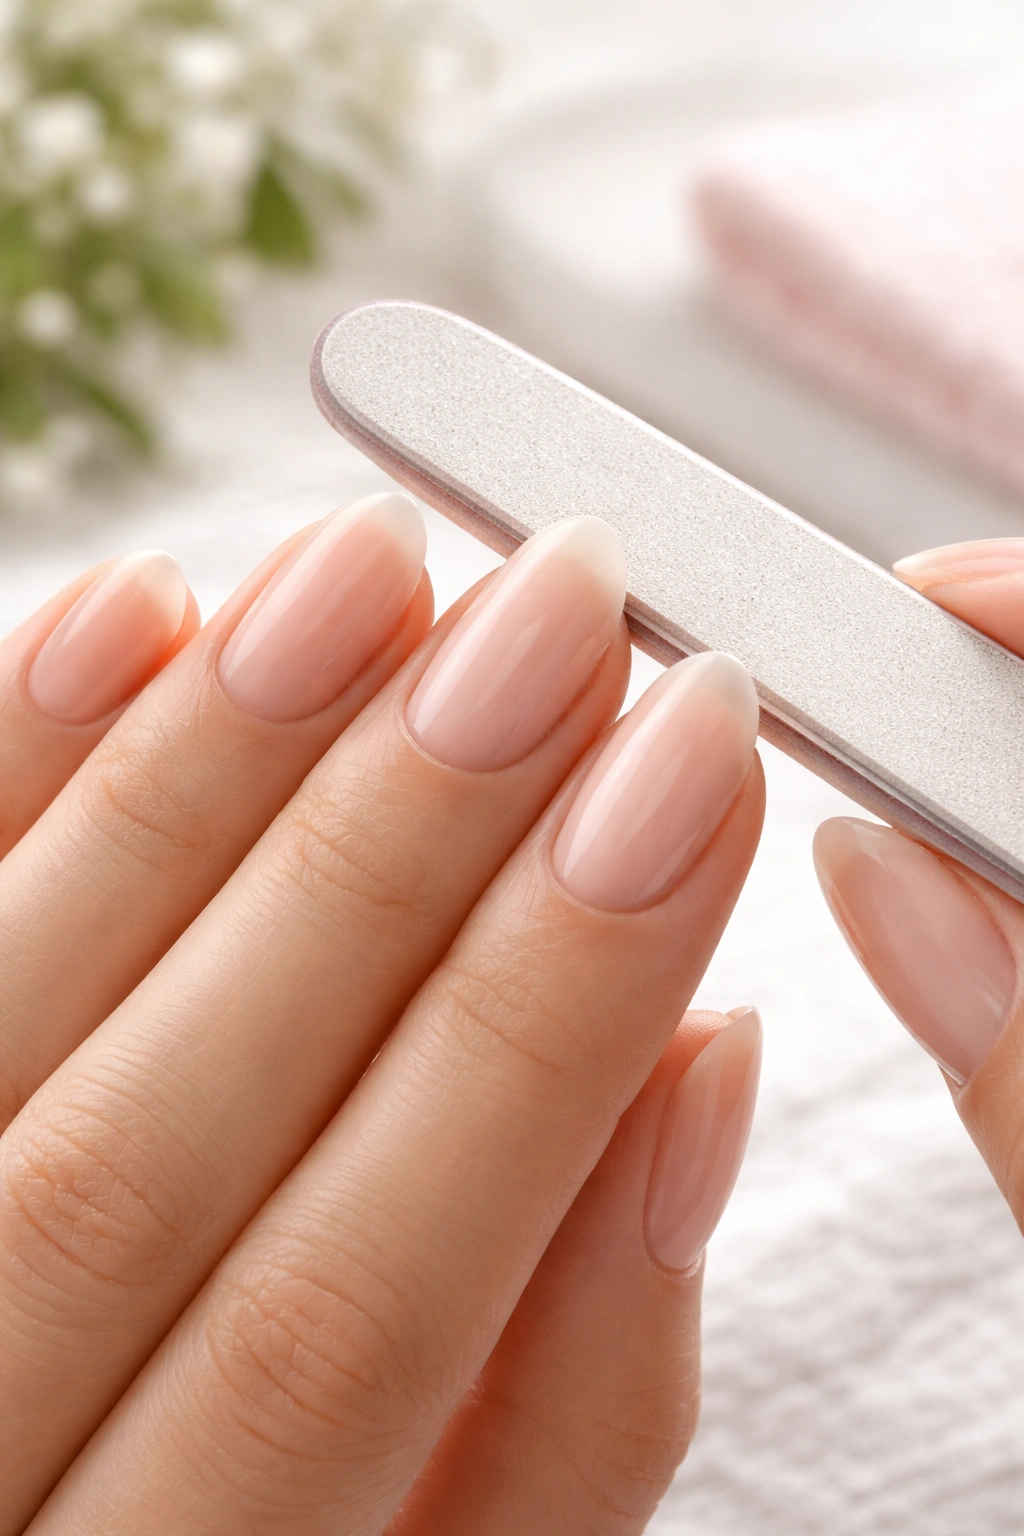
Start With the Sides: Creating the Gentle Taper
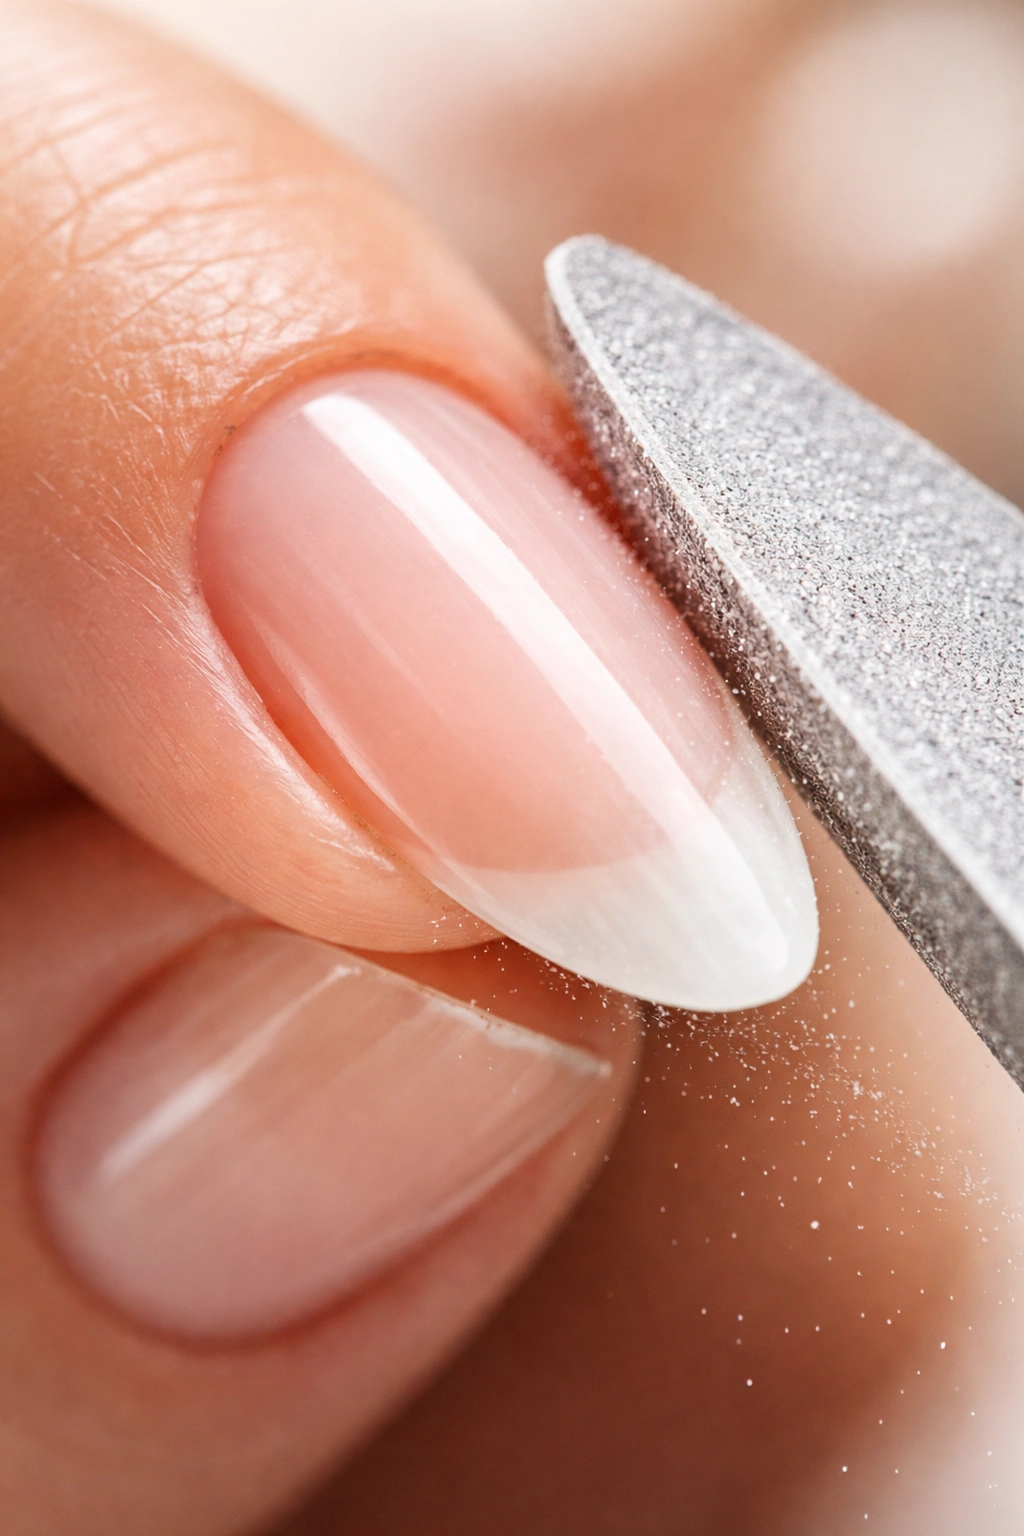
The foundation of a great long round shape is getting the sides right. This is where many people go wrong — they focus entirely on the tip and ignore the sides, creating a nail that looks more almond-shaped or pointed than truly round.
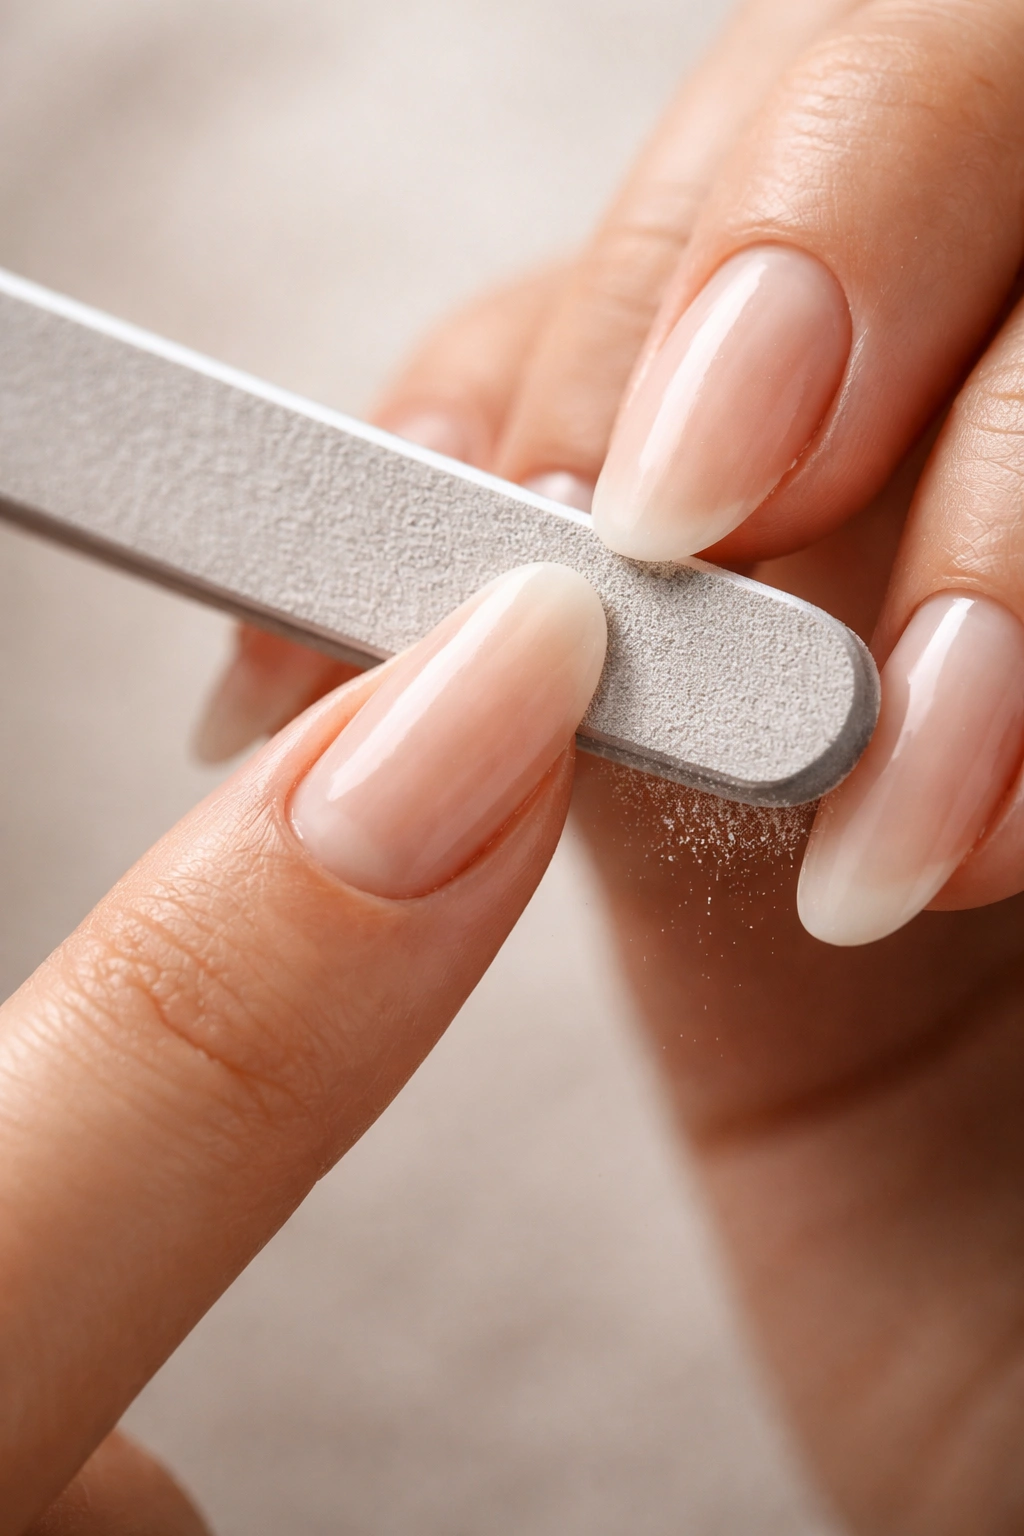
Hold your file at a 45-degree angle to the side edge of the nail, working from the outer edge toward the center. You’re not filing straight across; you’re creating a gentle diagonal line that tapers inward as it approaches the tip. Make light, deliberate strokes — 3-5 strokes per side is usually enough. You’re removing just a tiny bit of nail with each pass, and that’s the right approach.
Work both sides equally, checking frequently to ensure symmetry. Look at your nail from directly above to assess whether both sides are tapering at the same rate and angle. This is where your long round shape either starts to look polished or starts to look lopsided.
The taper should be subtle — you’re not trying to create a sharp point. The sides should gradually angle inward, narrowing the nail width as you move from the base toward the tip. If you’re creating dramatic, steep angles on the sides, you’re working too aggressively. The taper should be so gradual that someone looking at your nails wouldn’t consciously think “the sides are angled” — they’d just see a naturally elegant shape.
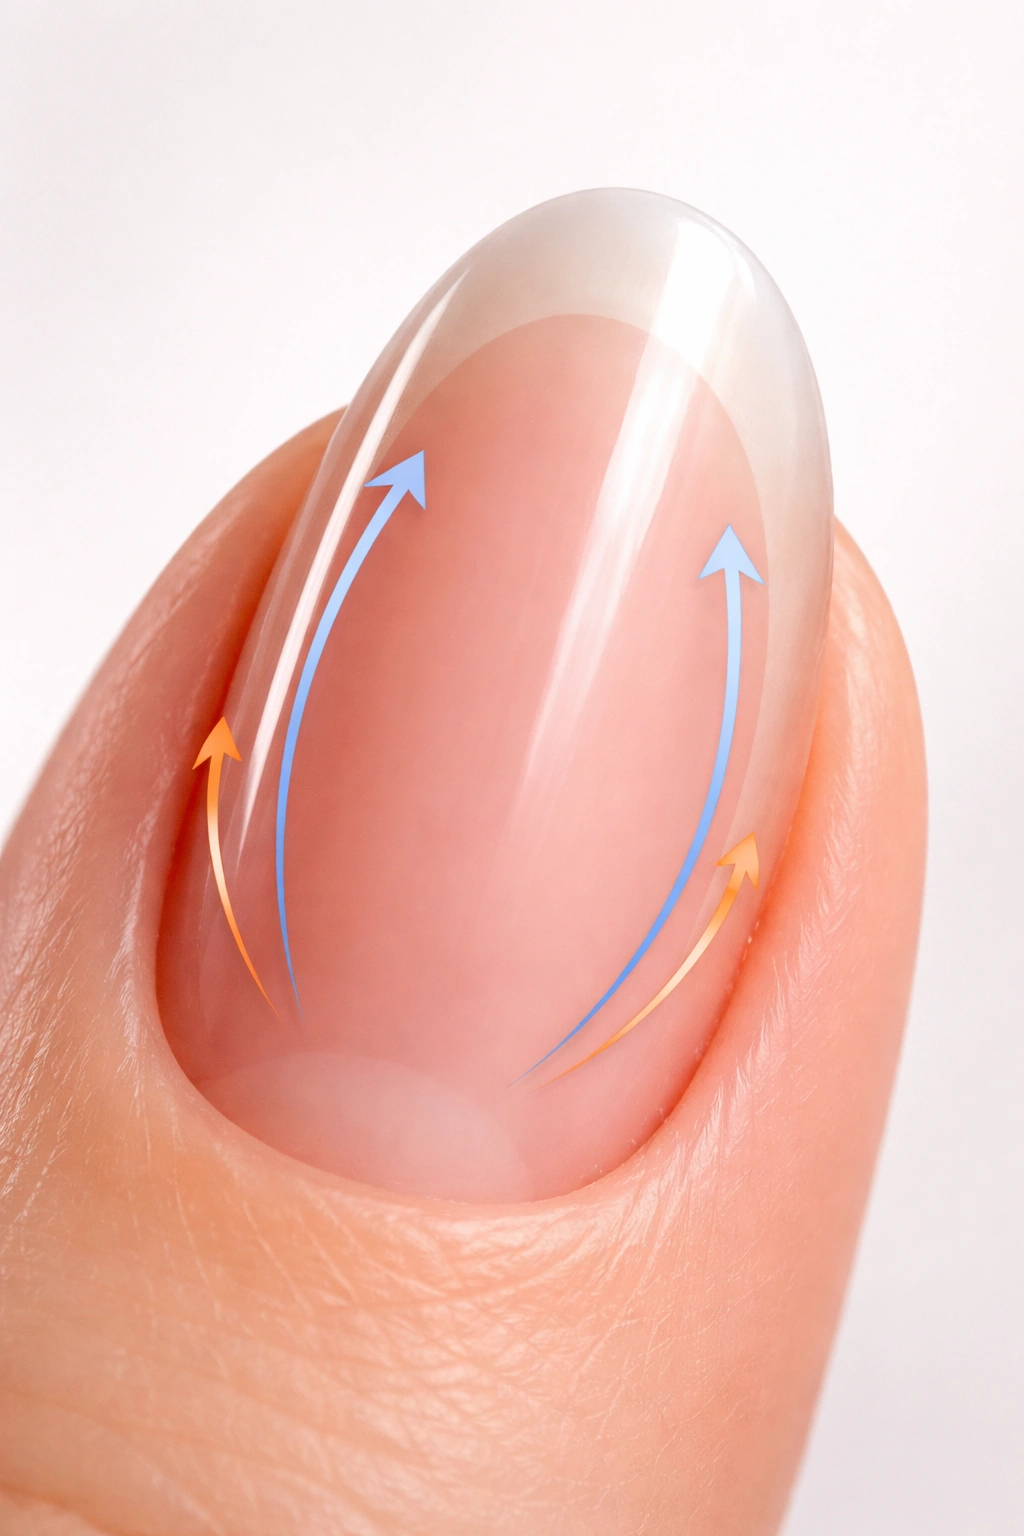
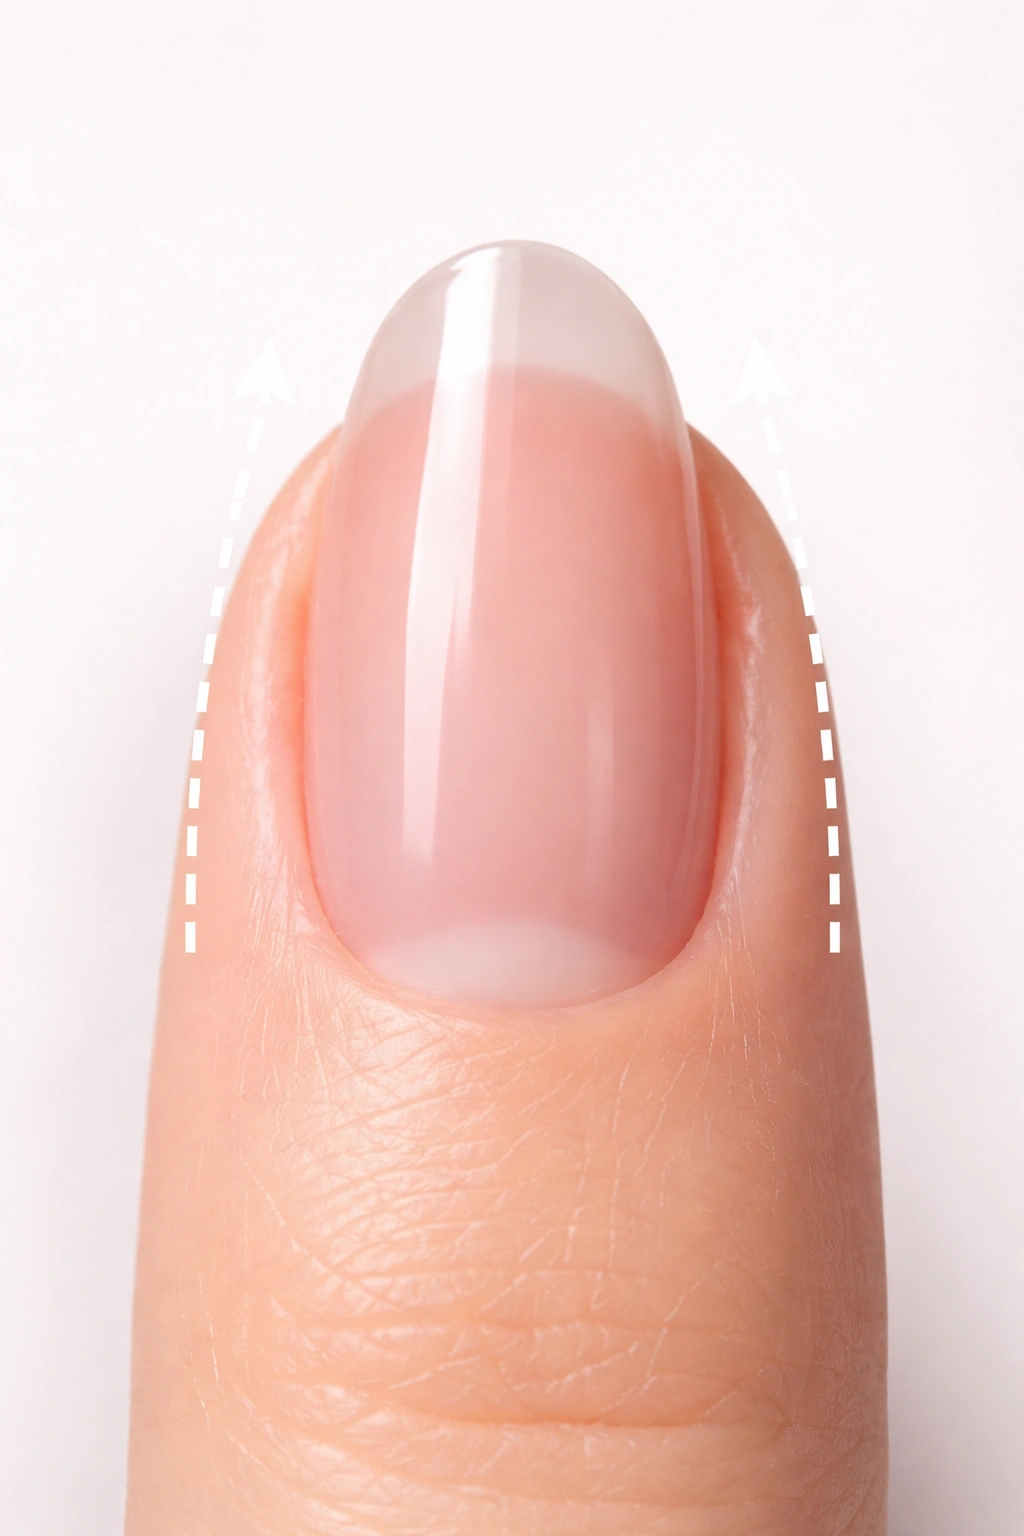
Shape the Tip: The Heart of the Curve
This is where the actual rounding happens, and it’s the part that determines whether your nails look professionally finished or slightly amateur. The goal is a smooth, even curve across the entire tip — not a curve that dips in the middle, not a curve that’s more angular on one side.
Hold your file at a slight angle to the tip, and use a rocking motion rather than long, aggressive strokes. Start from one side corner and file toward the center with a gentle curved motion. Rotate your file angle slightly as you move across, so you’re always working at roughly 45 degrees to the edge. This rocking motion creates a curve naturally instead of trying to file a curve as a separate shape.
Work from both sides toward the center, and the curve will gradually emerge. Check your progress frequently — look at the nail from the side to see the profile of the curve, and look from above to see if the curve is symmetrical. The curve should feel natural when you run your finger across it; there shouldn’t be any flat spots or sudden angle changes.
Many people file too much at this stage. Remember, you’re creating a subtle curve on a long nail, not shaping clay. A few passes with light pressure will do far more good than aggressive filing. You can always file more; you can’t unfil a nail.
Refine the Curve for Perfect Symmetry
Once you’ve created the basic round shape, step back and assess the overall symmetry. The curve should be the same width from one corner to the other, and the roundness should feel consistent. Hold your hands in front of you with your nails visible, and tilt slightly to see the shape from different angles.
If one side of the curve is more angular than the other, return to that side with a few gentle strokes. If the curve dips too much in the middle, file very lightly along the center tip to shallow out the curve. These refinements should be extremely subtle — you’re making micro-adjustments at this point, not major changes.
The goal is that the tip of your nail forms a smooth, even semicircle. Imagine a compass drawing a perfect arc — that’s the curve you’re after. In reality, it won’t be mathematically perfect, and that’s fine; the human eye won’t see the difference. But aim for that mental image.
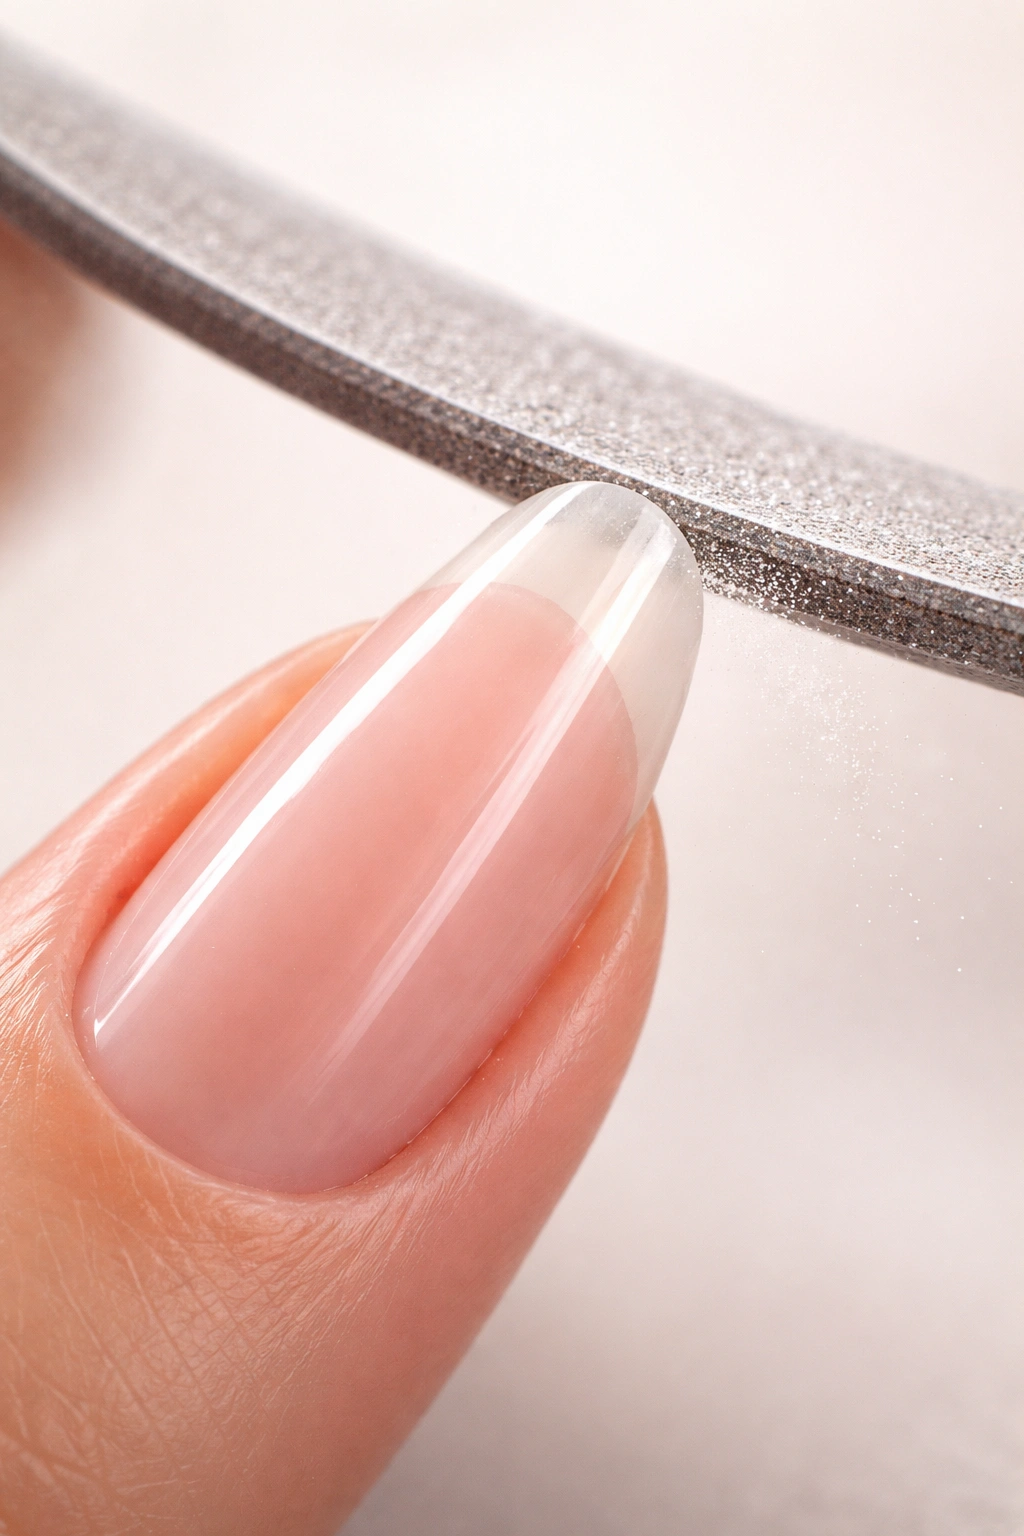
Use a Finer File for Finishing Work
Switch to a finer file (280-400 grit) to finish the shaping work. This finer grit smooths out any micro-scratches left by the initial shaping file and creates a more refined edge. Make very light passes across the entire tip and sides, following the curve you’ve established rather than trying to change it.
This finishing pass shouldn’t take more than a minute or two. You’re not reshaping; you’re smoothing. Think of it like the difference between sanding a piece of wood with 80-grit sandpaper and then finishing with 220-grit — the second pass creates the polished result.
Pay special attention to the side edges. These often show scratches from the previous filing, and a few light passes with the fine file will make them gleam. The overall nail should look smooth to the eye, not dull or scratched.
Polish the Edge With a Nail Buffer

A nail buffer finishes the job and creates durability. A standard four-sided buffer has progressively finer grits on each side — typically starting around 180-220 grit and progressing to 400+ grit on the final side. Start with the coarser side and work toward the finest.
Use light, gentle motions following the curve of your nail. You’re not trying to change the shape; you’re sealing the edge and creating shine. The finest side of the buffer will create a subtle sheen and seal the nail edge, which is the secret to preventing peeling and splitting.
Spend about 20-30 seconds per nail on the finishing side of the buffer. The result should be a smooth, slightly shiny edge that feels sealed rather than rough. This extra step is what separates DIY nails from salon-quality results.
Hydrate and Seal With Cuticle Oil
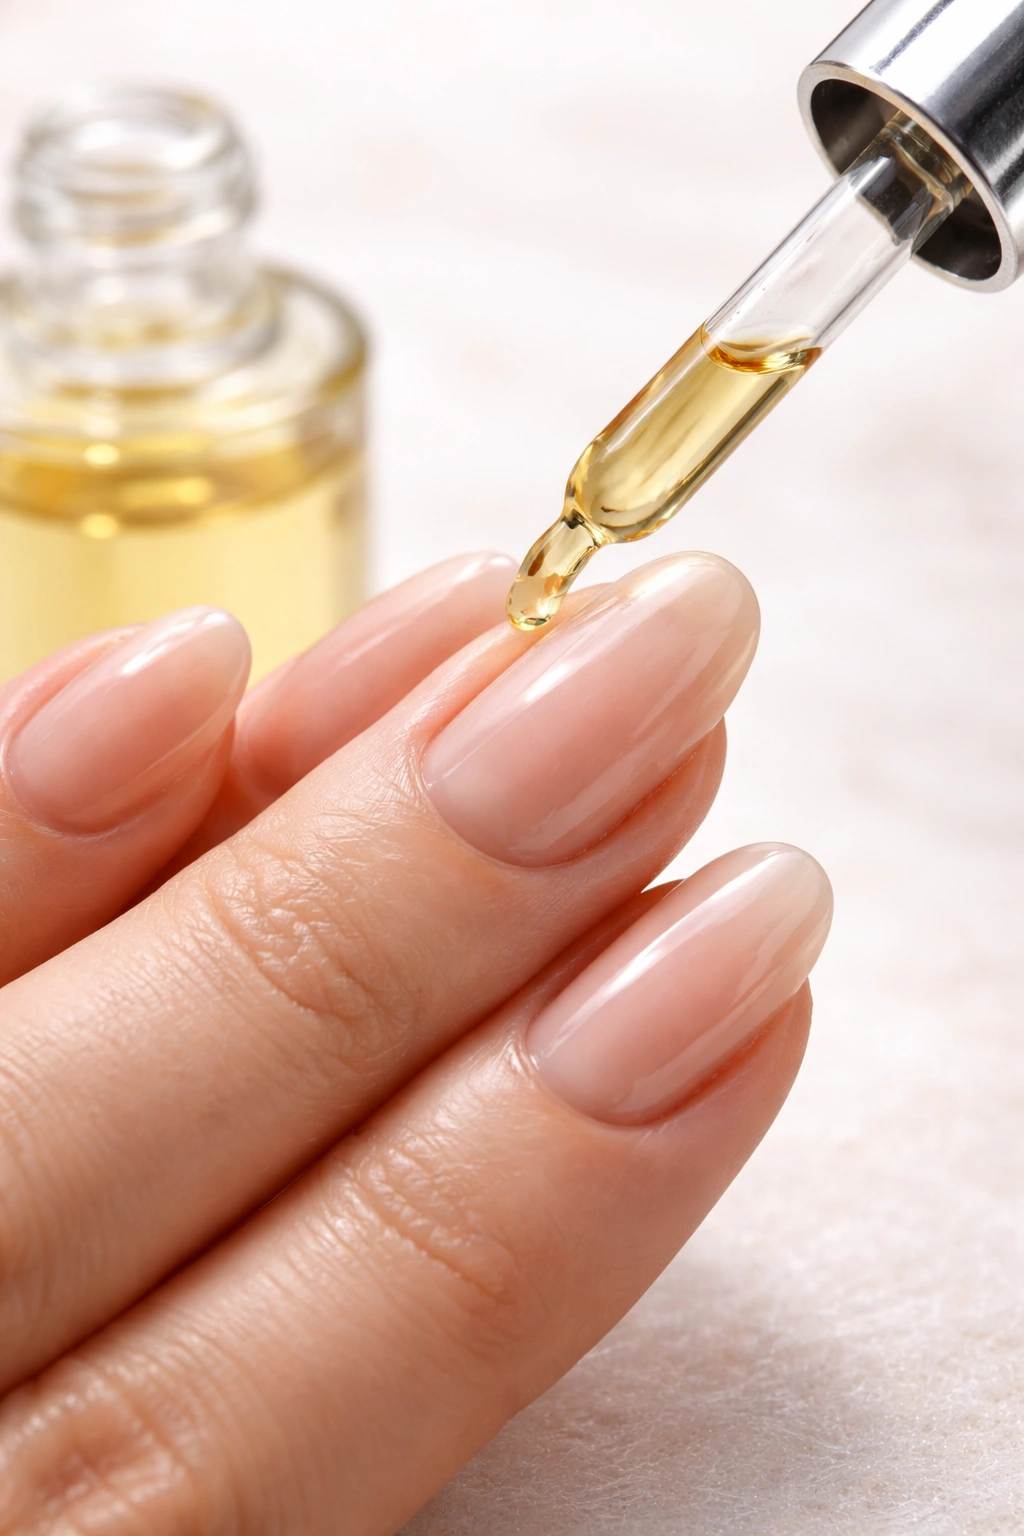
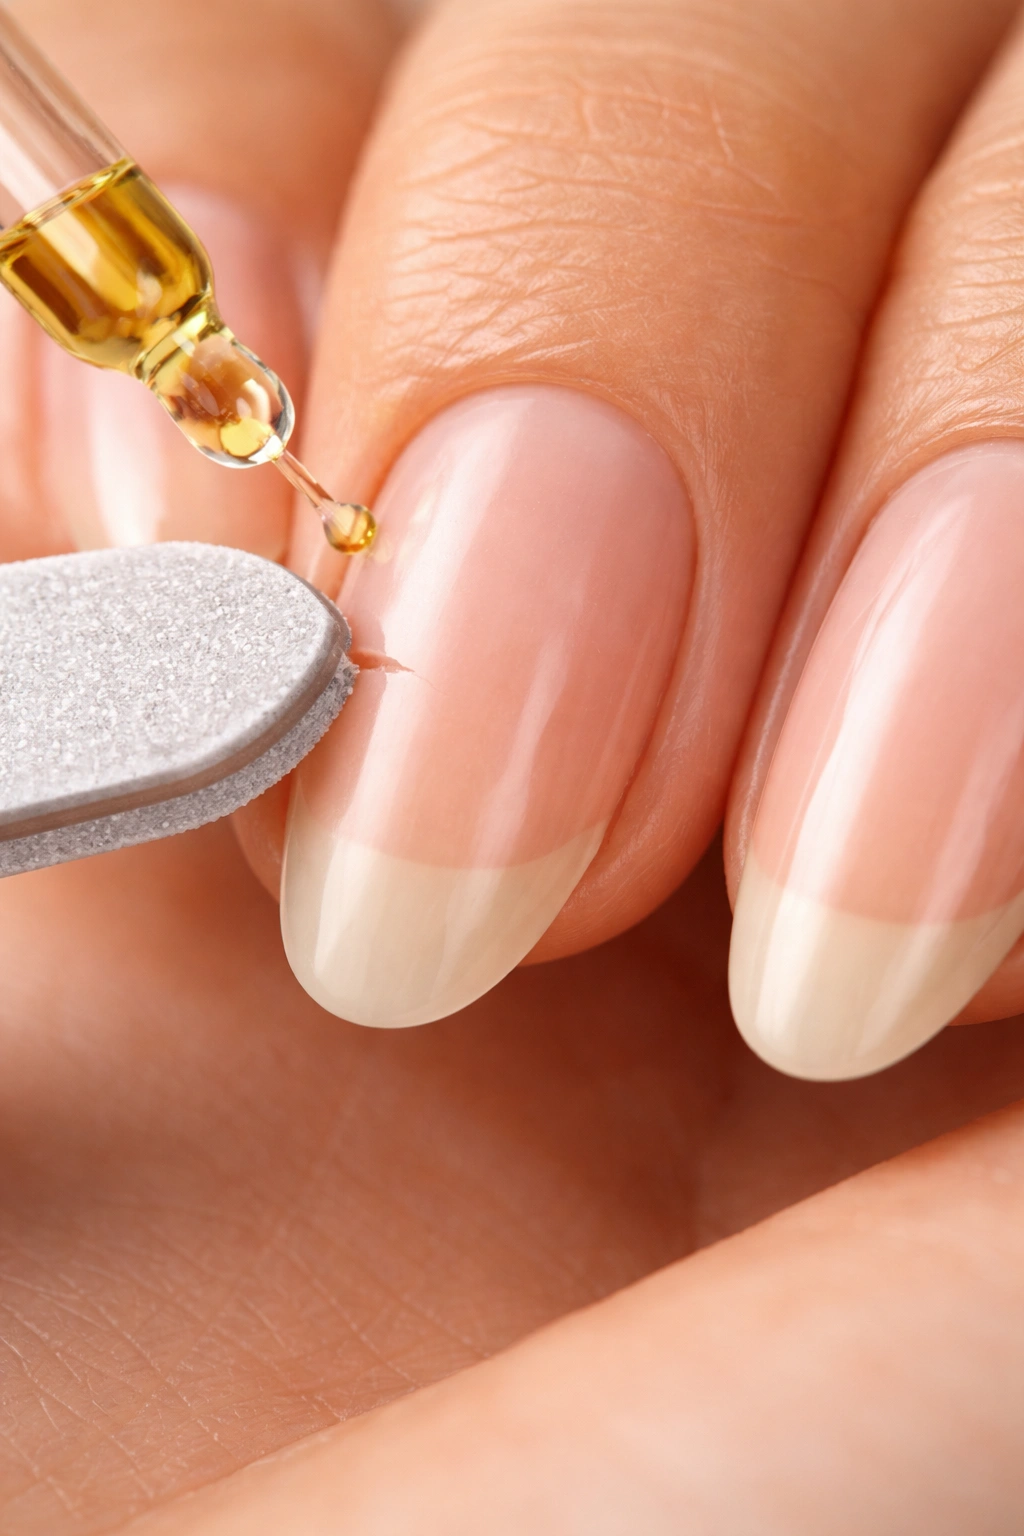
After all that filing and buffing, your nails need moisture. The filing process removes moisture from the nail, and the buffing heats up the keratin. Applying cuticle oil or nail oil immediately after shaping seals in moisture and prevents the peeling and splitting that so often happens on newly shaped nails.
Work the oil into the edge that you just shaped, paying special attention to the corners and sides. Let it soak in for a minute or two before doing anything else. This is genuinely one of the most important steps for maintaining your shape long-term. Nails that are dehydrated will peel and split, ruining even the most perfect shape, while well-hydrated nails stay strong and maintain their shape beautifully.
Apply cuticle oil once daily for the first few days after shaping, then transition to several times per week as maintenance. This habit alone makes a massive difference in how long your long round shape lasts.
Maintain Your Shape as Nails Grow
Your nails will grow roughly 3 millimeters per month, and as they grow, the sides will start to look less tapered and the curve can gradually flatten out. Plan on a light maintenance shaping every 2-3 weeks to keep the shape consistent.
The maintenance shaping is much gentler than the initial shaping. You’re just evening out any irregularities that developed as the nail grew, not reshaping the entire nail. A few light strokes on each side and along the curve are usually all that’s needed. At this point, you can use your regular file (220-280 grit) rather than the finer finishing file.
Many people make the mistake of ignoring maintenance and then suddenly their nails look shapeless. Consistent, light maintenance prevents that. Think of it like keeping a garden — regular light pruning keeps it looking neat, while waiting until it’s completely overgrown requires harsh cutting.
Avoid These Common Shaping Mistakes
The most common mistake is filing too aggressively. People see that their nails aren’t perfectly round yet and keep filing, when actually they need to make light adjustments and reassess. Aggressive filing weakens the edge and can cause splitting. Work gently, step back frequently, and trust that gradual progress gets better results than forcing it.
Another frequent error is uneven shaping. One side ends up more curved than the other, or the curve dips unevenly. This usually happens because people work more on one side than the other, or because they’re not checking for symmetry as they go. Make symmetry checks part of your process — after every few strokes, look at the nail straight-on and from above.
Using the wrong file is a huge problem. Metal files can work, but they’re harder to control and more likely to cause splitting. A glass file feels gentler in your hand and gives you more precision. If you only ever buy one nail file, make it a glass one.
Many people also skip the buffing and oil step, thinking those are purely cosmetic. They’re not — they’re functional. The buffing seals the edge so it doesn’t peel, and the oil keeps moisture in. These steps are the difference between nails that stay beautiful for weeks and nails that start falling apart in days.
Handle Breakage and Splits in Your Long Round Shape
Even with perfect shaping and maintenance, the occasional break or split happens. The key is managing it without destroying your shape. If you break a nail, resist the urge to file the entire nail shorter. Instead, file just the broken part smooth — round the rough edge lightly and oil thoroughly. Your nail will grow back, and in the meantime, your shape remains intact on the rest of your nails.
If you notice a split starting to develop along the side or edge, catch it early. File the split area smooth and seal it with oil. A tiny split that’s sealed often stops progressing and doesn’t affect your overall shape. Ignoring it usually means it spreads, and then you’re forced to file your entire nail shorter.
If a break is catastrophic — if the whole tip breaks off at an angle — you have to shorten that nail to match. But you can maintain your round shape on the shorter nail, and it will grow back to full length while keeping its shape.
Adjust Your Shape for Specific Nail Bed Widths
A long round shape works universally, but there’s a subtle variation worth considering. If your nail beds are very wide, you can create a slightly more pronounced curve — almost approaching an oval but still distinctly round. This actually looks more proportional on wider nail beds.
If your nail beds are narrow or your fingers are slender, a gentler, subtler curve often looks more elegant. The principle is the same, but the curve is shallower. People with narrow nails sometimes worry that a round shape will look too chunky, but a well-executed long round shape always looks refined, regardless of nail width.
Ultimately, the best shape is whichever one makes you feel confident when you look at your hands. The shaping technique is the same; you’re just adjusting how pronounced the curve is.
Protect Your Shape During Daily Life
Long nails, even in a durable round shape, need some protection. Avoid using your nails as tools — no opening cans, peeling stickers, or digging into things. Each time you use a nail as a tool, you’re putting stress on the edge that it’s not designed to handle.
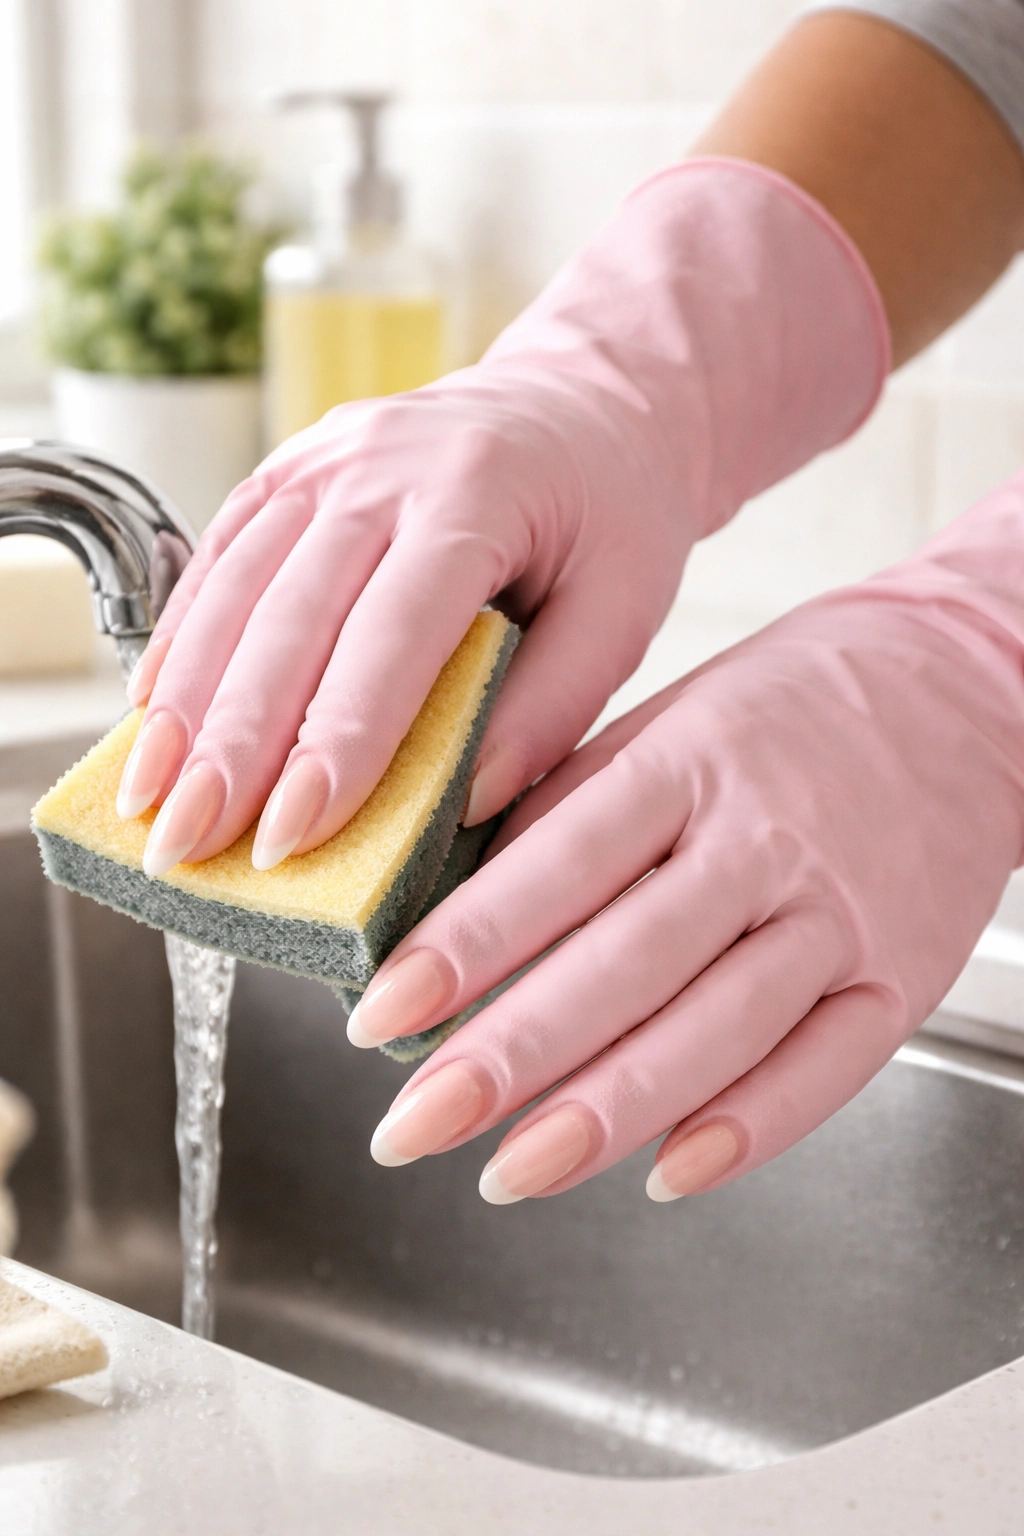
Wear gloves when doing dishes or cleaning. The combination of warm water, harsh cleaners, and mechanical friction is brutal on nails and will cause peeling, splitting, and breaking. This single habit — wearing gloves — extends the lifespan of your nails dramatically.
Keep your nails hydrated throughout the day. If you work in a dry environment or wash your hands frequently, apply cuticle oil several times during the day. Hydrated nails are strong nails; dehydrated nails are brittle and prone to breaking.
If you wear polish, choose a quality formula and remove it gently. Cheap polish and harsh removal processes both damage nails. If you prefer to wear your nails bare, that’s actually better for long-term nail health, but if you do polish them, be intentional about protecting them.
Shape Maintenance for Different Nail Conditions
If your nails are naturally thin or weak, a long round shape still works, but you may need to keep the length slightly shorter than you’d like. A thin nail can break at any length, but shorter length reduces the leverage and stress. As you strengthen your nails through consistent care, you can gradually grow them longer.
If your nails have ridges or texture, those will show more on long nails. You can’t sand away ridges — they’re structural — but you can work with them. Some people with ridged nails find that a subtle buffing keeps them less visible. The good news is that ridges don’t compromise the durability of a long round shape.
If you have peeling or flaking nails, address that before pursuing length. Peel-prone nails need consistent oil, possibly a nail-strengthening treatment, and definitely protective gloves during water exposure. Once your nails are healthy and non-peeling, long round shapes become much more maintainable.
Final Thoughts
A beautiful long round shape is within reach at home with proper technique and the right tools. The process isn’t complicated — it’s shaping the sides gradually, creating an even curve on the tip, and finishing with buffing and oil. What separates a mediocre attempt from a salon-quality result is patience, symmetry checking, and following through with maintenance and protection.
The shape itself is forgiving because it distributes stress evenly, making it one of the most durable nail shapes you can wear at length. Once you understand the mechanics of how to create and maintain that curve, you’ll develop the confidence to keep your nails looking polished for weeks at a time. The investment in a quality glass file and the habit of applying cuticle oil consistently will pay dividends in how long your shape actually lasts. Your hands are always visible, and taking the time to maintain them properly is genuinely one of the easiest forms of self-care that has an immediate impact on how polished and put-together you look.
