

Breaking a nail can feel like a minor catastrophe—one moment you’re admiring your manicure, the next you’re staring at a jagged break that seems to ruin everything. But here’s the thing that most people don’t realize: you don’t have to rush to a salon or resign yourself to cutting all your nails short. A broken nail, whether it’s a clean snap, a painful split, or a jagged tear, is absolutely fixable at home with supplies you probably already have lying around. The right technique applied correctly can keep your nails looking polished and feeling strong while the damaged part grows out over the coming weeks.
The difference between a nail repair that holds up and one that fails within hours comes down to understanding the right methods, having clean tools, and knowing exactly which technique works best for your specific type of break. Whether you’re dealing with a snap at the free edge, a crack running through the nail bed, or a complete detachment, there’s a proven solution. Some of these repairs will last just a few days, while others can hold strong for two weeks or more with proper care. The key is matching the method to the damage, preparing your nail properly, and having realistic expectations about how long each fix will last.
Understanding Why Nails Break in the First Place
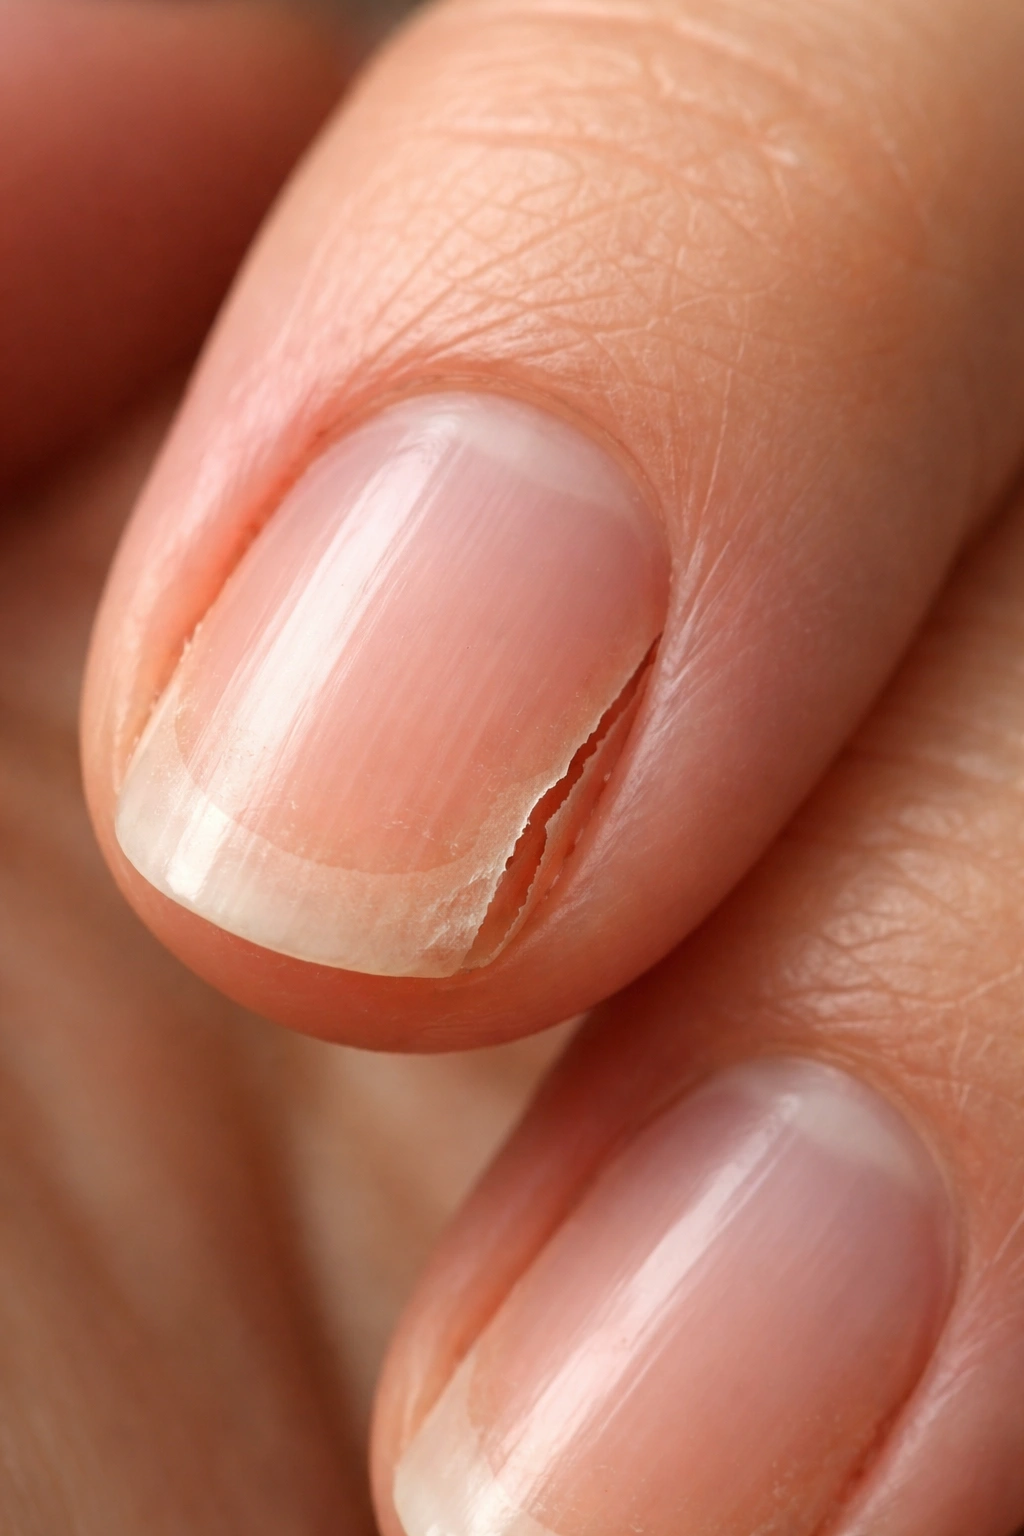
Before jumping into fixes, it helps to understand what actually causes nails to break. This knowledge does more than satisfy curiosity—it helps you prevent future breaks and choose the right repair strategy for your specific situation.
Nails become brittle and prone to breaking when they’re exposed to harsh chemicals regularly. Acetone-based nail polish remover, strong cleaning products, and even prolonged contact with water all strip nails of moisture and make them fragile. If you’ve had gel polish or acrylics on continuously for months without a break, your natural nails underneath are likely dehydrated and weakened. The removal process for these products, if done carelessly, can cause damage before you even notice a break.
Your daily habits matter far more than most people realize. Using your nails as tools to open containers, scrape off labels, or pick at things creates stress fractures that eventually snap. Tapping your nails on hard surfaces, rubbing them frequently against rough textures, or even sleeping with your hands in a clenched fist can lead to unexpected breaks. Even something as simple as washing dishes without gloves exposes nails to temperature changes and soap residue that softens the keratin structure.
The structure of your nail itself also plays a role. Nails naturally become more brittle with age due to slower cell regeneration. Diet matters too—insufficient protein, B vitamins, iron, and zinc will directly impact how strong your nails grow. If you’ve been under stress, sleeping poorly, or recovering from illness, your nails show these effects quickly. The nail bed (the skin underneath the nail) and the nail matrix (where new nail cells form) need proper circulation and nutrition to produce healthy keratin.
Environmental factors add another layer. Humidity changes, seasonal dryness, and even your local climate affect how much moisture your nails retain. People in dry climates often notice more breakage unless they compensate with extra moisturizing. Cold weather tightens the skin around nails, making them more prone to cracking. Understanding your nails’ weakness helps you not only repair current breaks but prevent the next one.
The Tea Bag Method: A Time-Tested DIY Repair
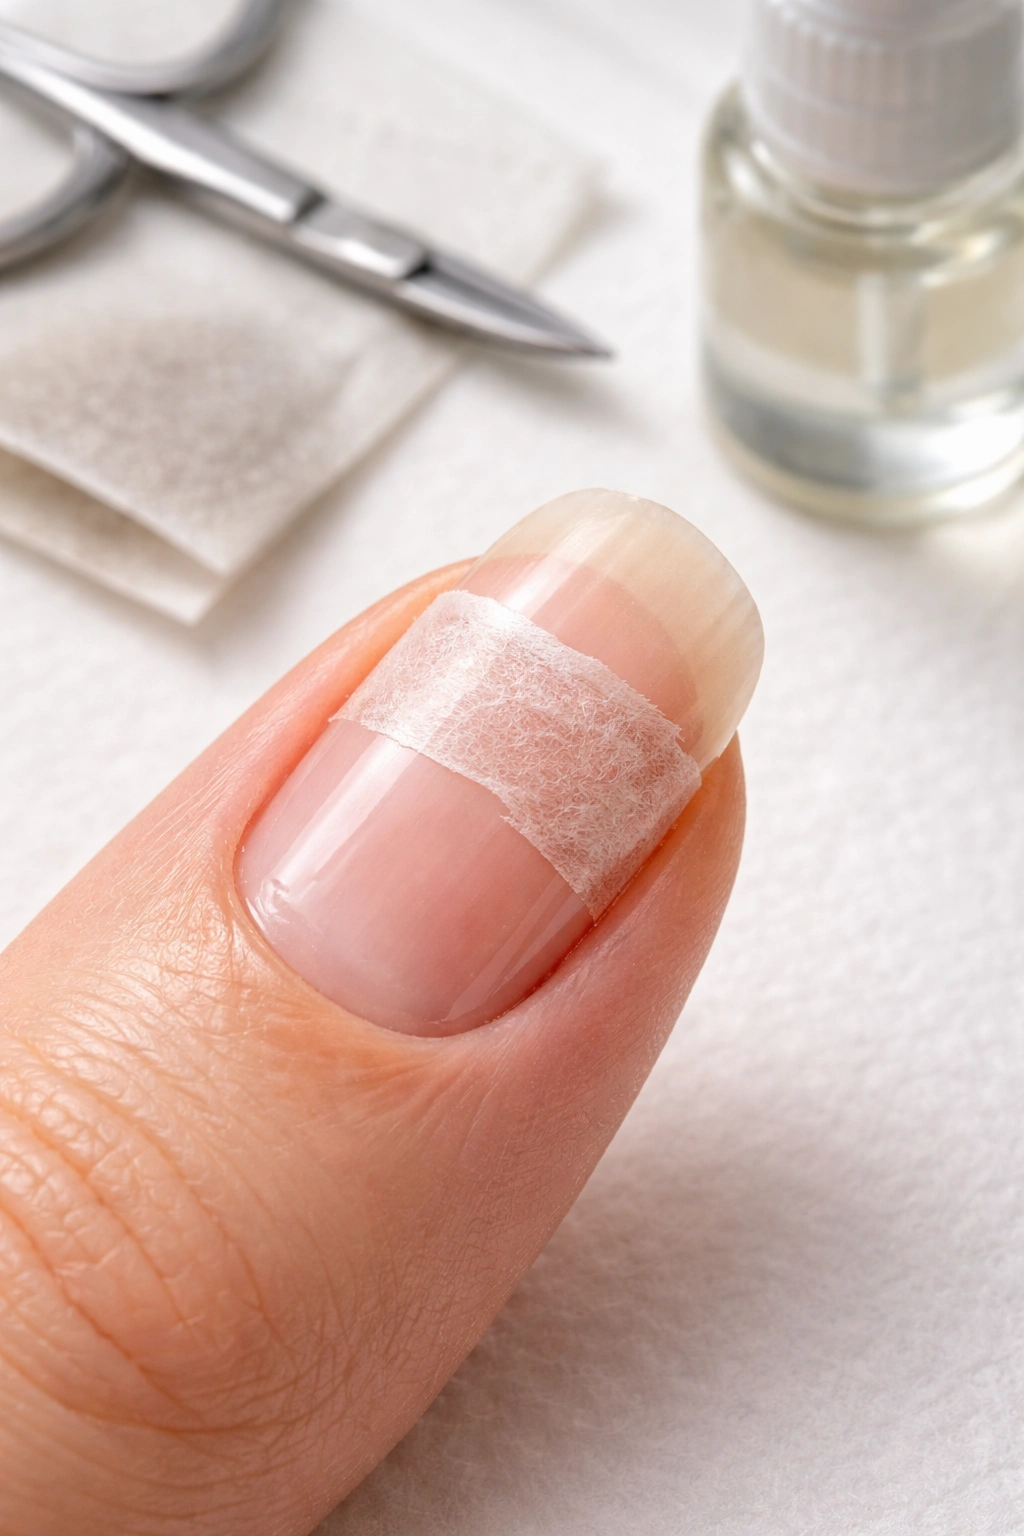
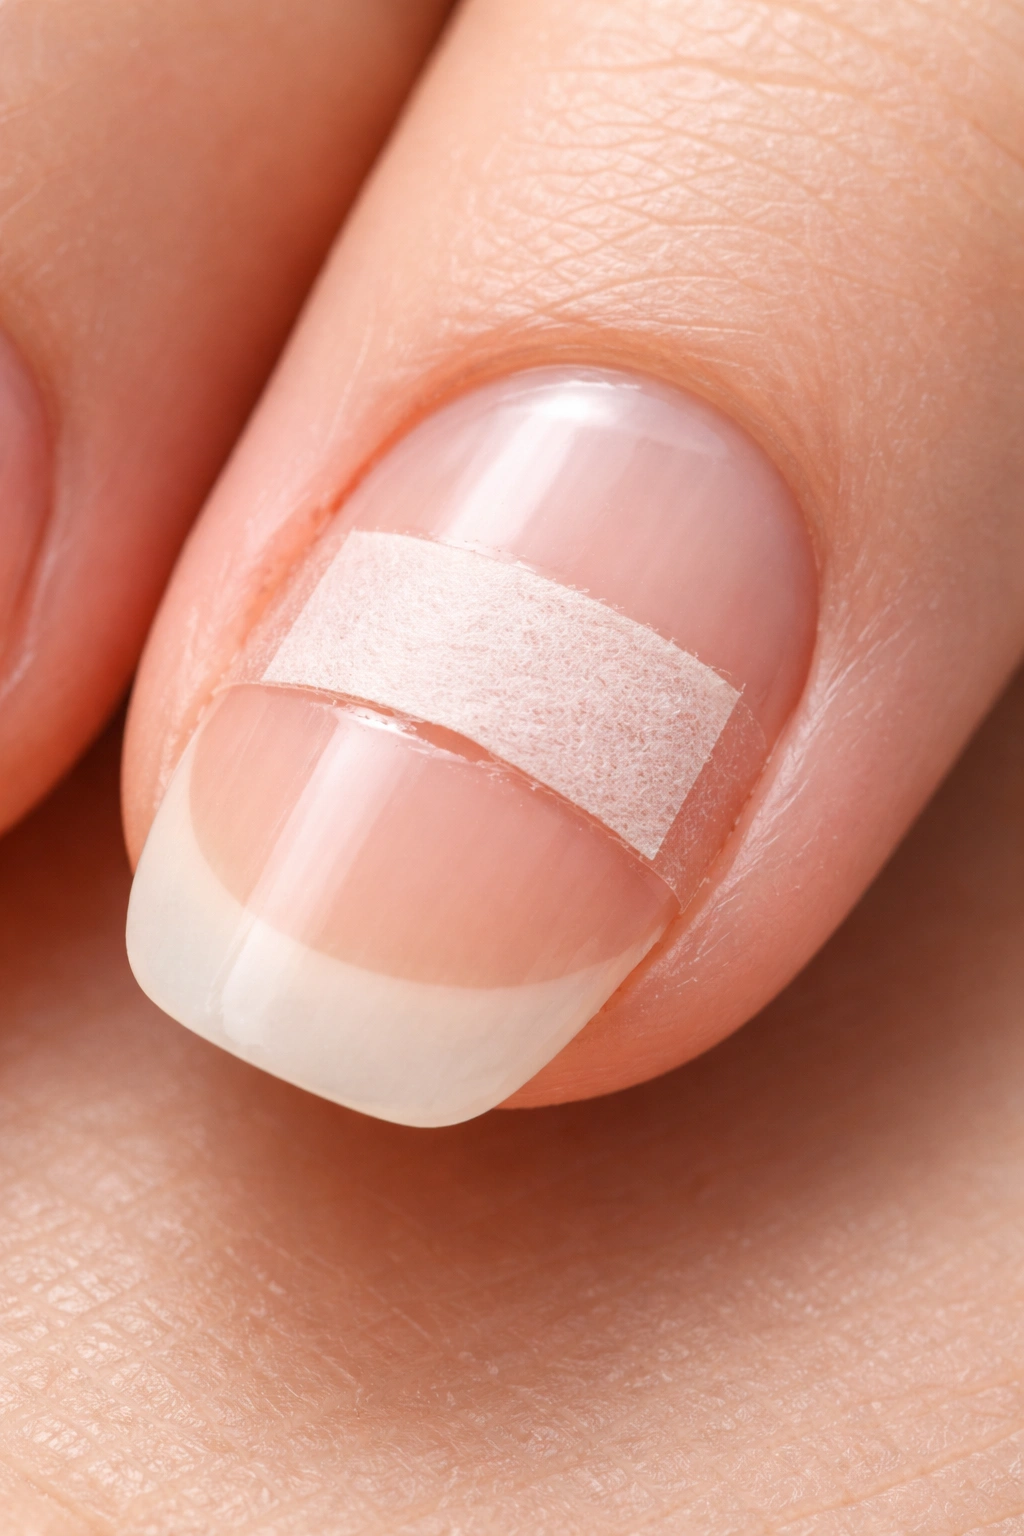
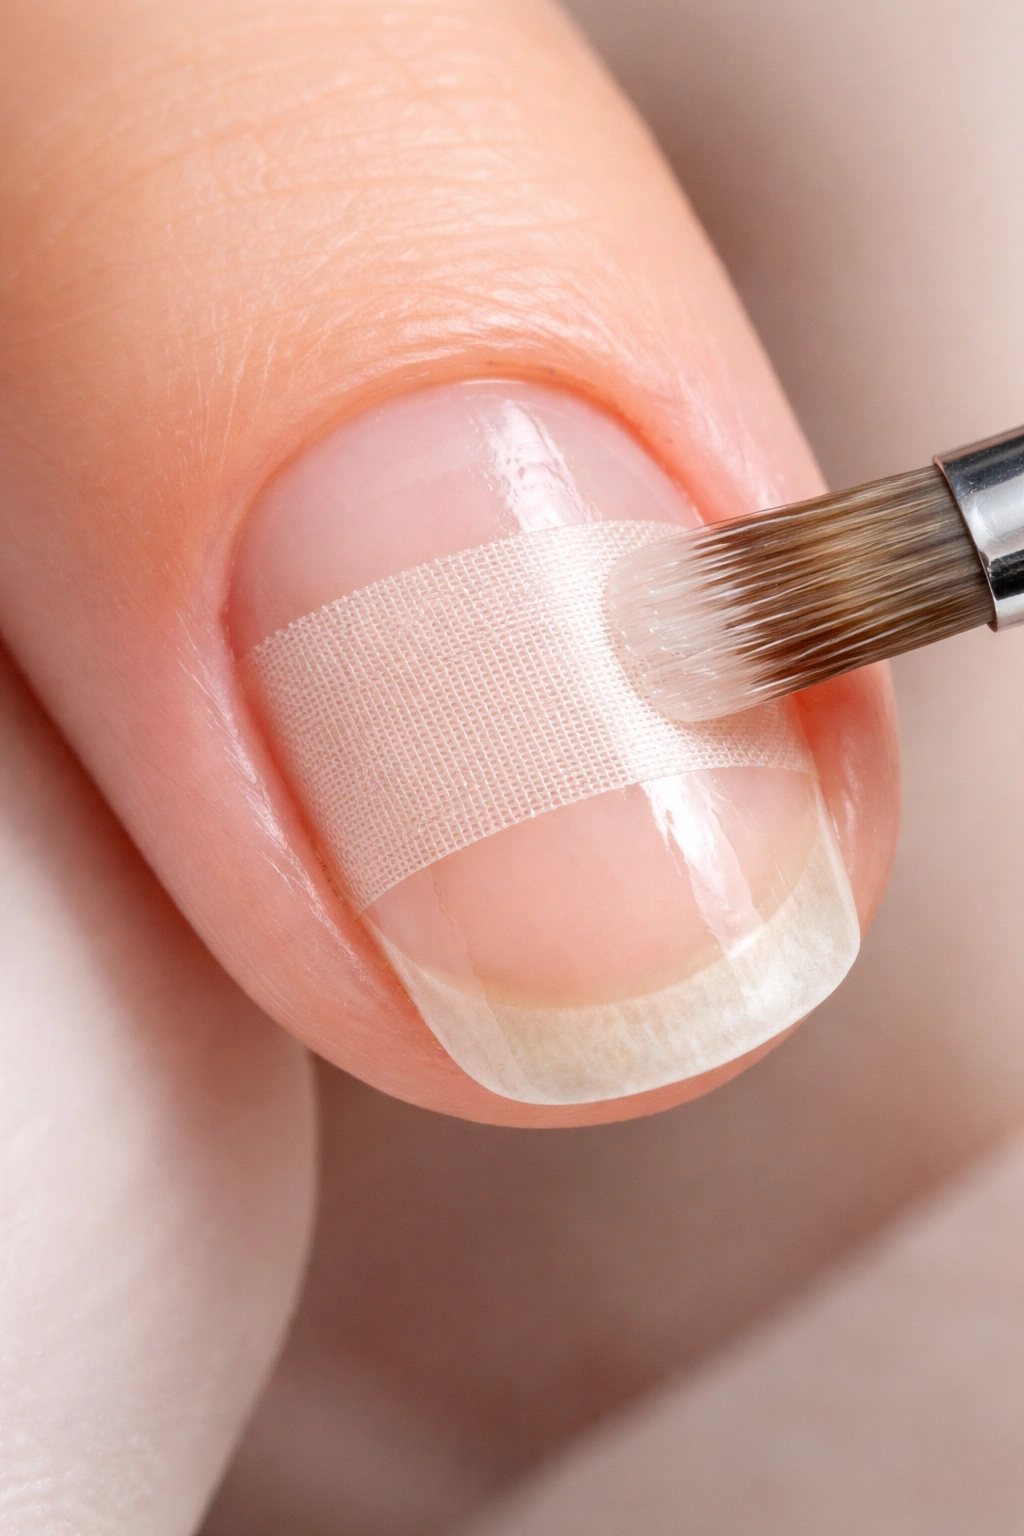
The tea bag method is the gold standard for at-home nail repair, and for good reason—it’s inexpensive, uses materials most people have at home, and actually works surprisingly well. The thin, woven fabric of a dried tea bag is remarkably strong once bonded to your nail, and it grows with your nail as it extends, so you don’t lose length while healing.
Start by gathering a clean, dry tea bag. Black tea, green tea, chamomile—the type doesn’t matter; what matters is the structural integrity of the bag itself. Empty the contents completely and let the bag dry fully before you work with it. Using tweezers, carefully cut a piece of the tea bag just large enough to cover the broken area. If your break is small, you might need only a postage-stamp-sized piece. If the crack runs along the nail, you may want to cut a slightly larger rectangle so it has good coverage.
Clean your nail thoroughly with nail polish remover or rubbing alcohol on a cotton pad. This removes oils, dirt, and any remaining polish that could interfere with adhesion. Let it dry completely—don’t skip this step. Using a nail file, gently smooth any rough edges around the break itself. Work carefully here; you’re not trying to reshape the entire nail, just remove snags that could catch on the tea bag.
Apply a thin layer of nail glue or super glue directly across the broken area. If you’re using nail glue, you might prefer brush-on varieties over squeeze bottles because they give you more precise control. Spread the glue evenly so it covers the entire break. Using your tweezers, carefully lay the tea bag piece down onto the wet glue. Press it gently into place, working out any air bubbles as you go. This is slightly messy—embrace it. Once it’s positioned, apply another thin layer of glue over the top of the tea bag patch, saturating it so the bond becomes strong.
Let this dry completely. The glue needs at least a few minutes to cure, and longer is better. Once fully dry, use a nail buffer to gently smooth the entire nail. You’re working carefully here because too much pressure can tear through the thin tea bag, undoing your work. Buff gently in one direction, smoothing out any bumps or edges left by the glue and fabric. Switch to the fine side of your buffer to make it even smoother.
This repair will hold for approximately two to three weeks, allowing your nail to grow past the break point so you can eventually trim away the damaged section. Paint over the tea bag with clear polish, then add your regular colored polish. The tea bag is virtually invisible once sealed under polish, and nobody will notice you’ve made a repair.
Using Nail Glue for Quick, Temporary Fixes
If your nail broke cleanly and both pieces are intact, nail glue offers the fastest temporary repair. This method works best when the break is clean rather than jagged, and when you’re mainly trying to buy time until you can visit a salon or until the nail grows enough to trim away the damage.
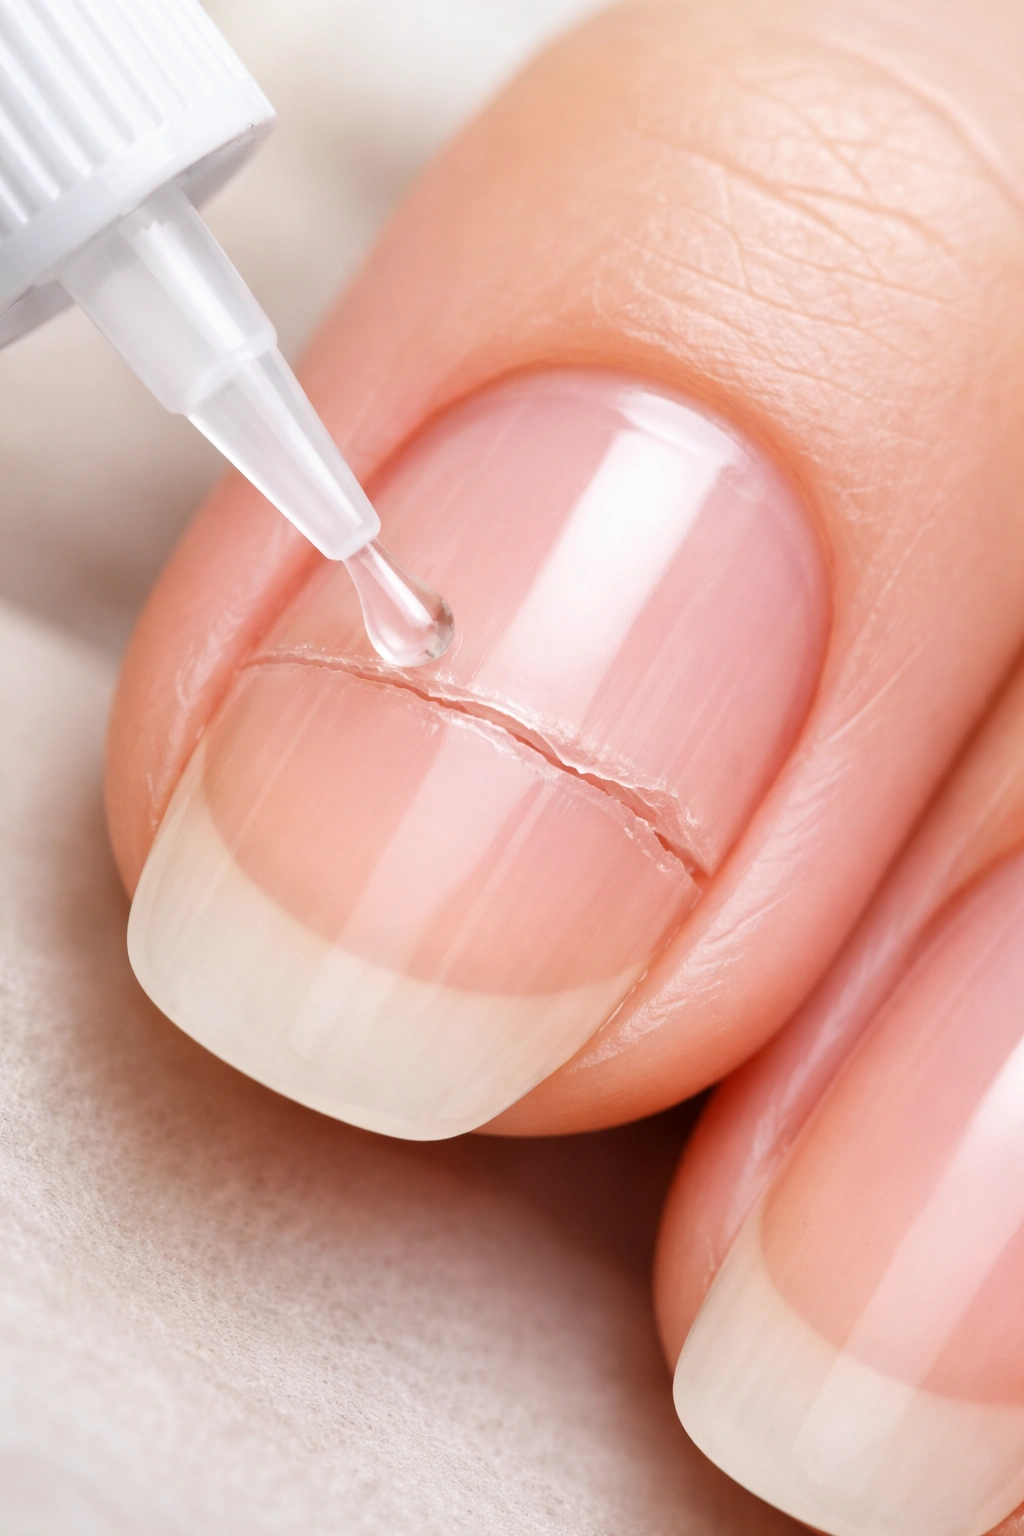
Wash your nail with warm water and dry it thoroughly. Soak the nail in warm water for about a minute to soften it slightly—this helps the broken edges make better contact. Pat dry with a clean towel. Inspect the break carefully; if either edge is crumbly or splintered, you’ll want to trim those edges with nail clippers or file them smooth first. Rough edges won’t bond as well.
Apply a thin layer of nail glue to one or both broken edges, then press the broken piece gently but firmly back into place. Hold it there for 30 to 60 seconds. This is uncomfortable and sometimes painful if the break extends to the nail bed, but holding steady is essential for a proper bond. Once you’re confident it’s adhered, remove any excess glue with a cotton swab or Q-tip. Use a file to smooth the seam where the two pieces meet.
This is where people get impatient and make mistakes. Let the glue fully cure before using your hand normally. Most nail glues set to a handling strength within 5 to 10 minutes, but they continue to harden for several hours. Applying nail polish actually helps—use at least two coats of clear base coat or a protective top coat to seal and reinforce the glued area.
The honesty here is that this fix is temporary. You might get three to five days of normal use out of it, sometimes longer if you’re very careful with that hand. The glue bond will eventually weaken from exposure to water, soap, and the constant flexing of your nail. When it starts to separate, you can either reglue it again or transition to one of the more durable repair methods.
The Coffee Filter Technique for Seamless Patches
The coffee filter method works almost identically to the tea bag approach, with the advantage that coffee filter material is sometimes slightly more pliable and easier to cut. If you don’t have a tea bag, a paper coffee filter serves as an excellent backup.
Cut a small square or rectangle from a clean, dry coffee filter. The material should be large enough to cover the entire break, but trim it to fit your nail shape so it blends naturally once sealed. Clean your nail with polish remover and let it dry. Apply a thin layer of nail glue or clear polish across the break.
Using tweezers, carefully lay the coffee filter piece down onto the wet adhesive. Smooth out any bubbles or wrinkles. Apply another layer of adhesive over the top, saturating the filter material so it bonds completely to the nail. This is crucial—the adhesive needs to penetrate through the porous material to create a strong bond.
Once dry, buff the nail gently to smooth the surface. The coffee filter is slightly thicker than a tea bag in some cases, so you might need to buff a bit more carefully to avoid tearing through it. Once smooth, apply clear base coat, then your regular polish.
Coffee filters sometimes have a slightly different texture than tea bags and may be slightly less invisible once dried, but the repair strength is comparable. This method lasts about as long as the tea bag method—two to three weeks of reasonable use.
Silk Wrap Application for Structural Support
Silk wraps offer a more refined approach to nail repair, though they require purchasing actual silk wrap material (available at beauty supply stores or online). Unlike tea bags and coffee filters, silk wraps are specifically designed for nail reinforcement, making them slightly more durable and refined.
Cut a piece of silk wrap to the size of your break, slightly larger than the damaged area. Clean your nail thoroughly with alcohol or polish remover. Buff the nail gently to create a slightly rough surface—this helps adhesion dramatically. Apply a thin layer of nail glue across the broken area and roughly where you’ll place the silk.
Peel off the backing from the silk wrap and carefully lay it onto the wet glue, pressing gently to remove air bubbles. Apply another layer of glue over the silk, saturating it completely. Let this cure fully—silk wraps may take slightly longer to dry than tea bags due to their denser weave.
Once dry, buff the entire nail with a nail file and buffer until it’s completely smooth. The silk wrap creates a very strong repair and can be invisible once properly buffed and sealed with polish. This method often lasts three to four weeks with normal use, making it one of the more durable at-home options.
Dip Powder: A Stronger Solution for Deep Breaks
For a nail that’s broken deeper into the nail bed or in a way that the above methods won’t adequately support, dip powder offers exceptional strength. This method requires dip powder and dip base/bond products, but it creates a salon-quality repair that lasts considerably longer.
Clean your nail with nail polish remover and let it dry completely. Apply a thin layer of nail glue to bond the broken pieces together if applicable. Using a nail file, gently buff your entire nail to create a slightly rough surface—this improves adhesion significantly. Apply a thin, even coat of dip bond across the entire nail, not just the break.
Dip your finger into the fill powder, coating the nail evenly. Let this dry, then dust off excess powder with a soft brush. Apply another layer of dip bond, and dip again for reinforcement. The double-dip method creates a very hard, protective layer over the break.
Finish with a dip protective seal coat according to your product instructions. Once cured, buff the nail smooth if needed, and apply your nail polish in your preferred color. This repair creates an extremely durable fix that can last four to six weeks, though dip powder itself typically lasts this long anyway, so you’re getting durability comparable to a full dip manicure on that one nail.
When Taping Your Nail Is the Right Quick Fix
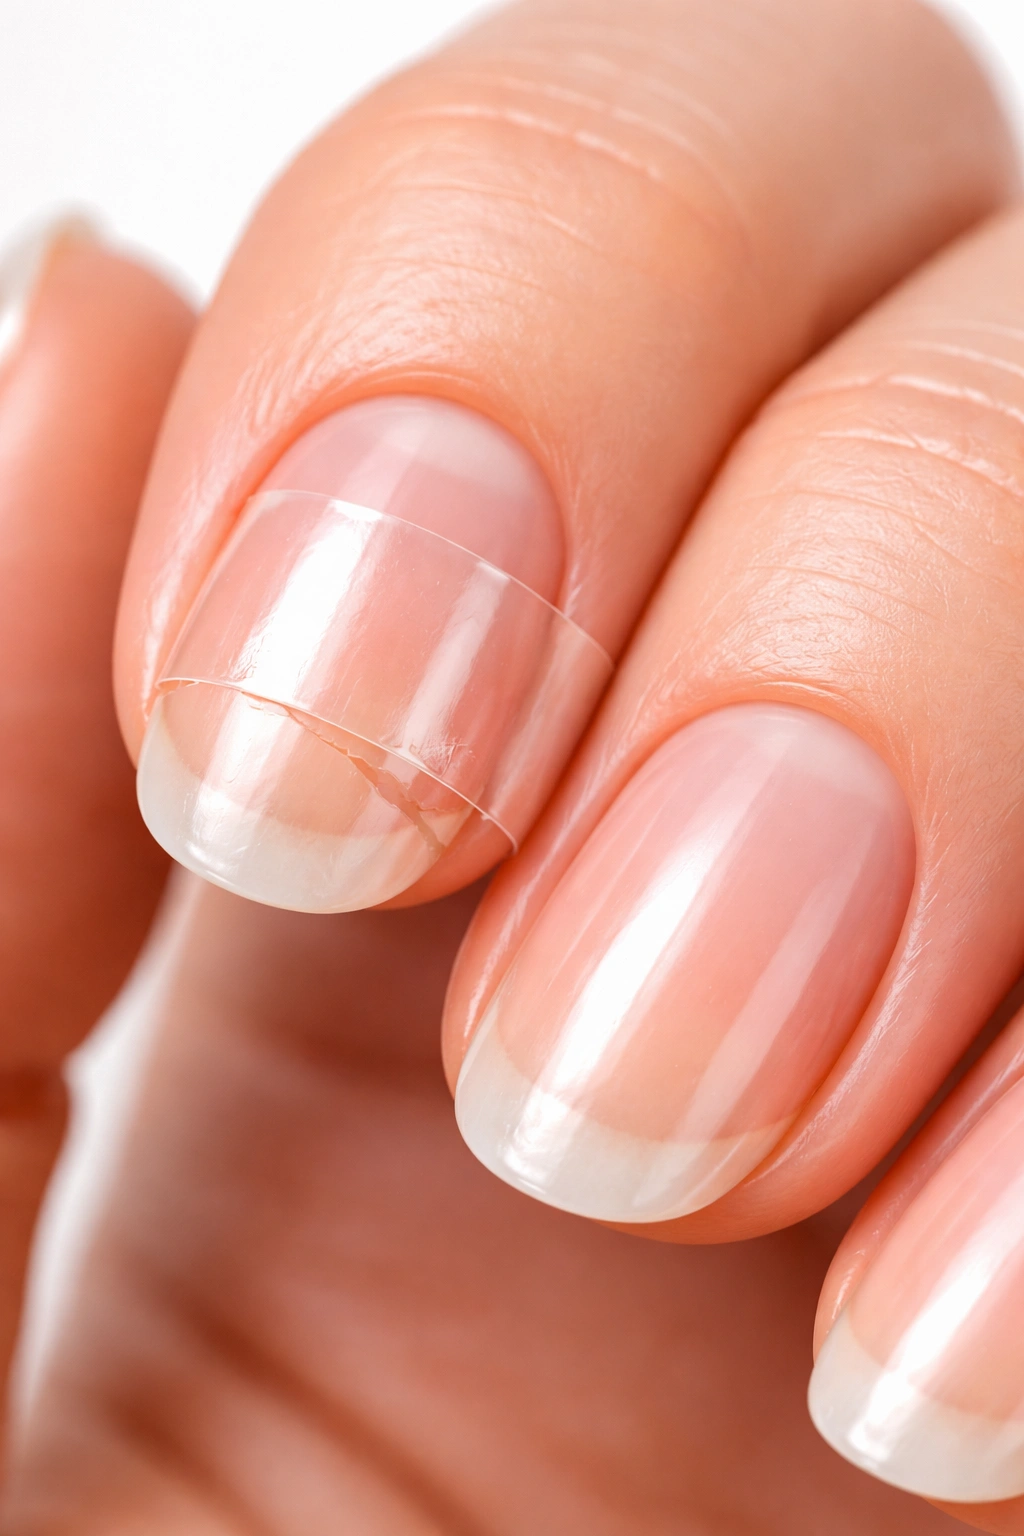
Clear tape is the fastest emergency repair when you break a nail at work, in class, or anywhere far from home without access to better supplies. It’s not a long-term solution, but it will stabilize the break and prevent further damage for hours or even a day or two.
Cut a small piece of clear tape (Scotch tape, gift-wrap tape, or medical tape all work) just large enough to cover the break. Using tweezers or your fingers, apply it to the nail so it covers the entire broken area. Wrap the tape around the nail if possible, securing it to both the top and underside of the nail for maximum stability. Press it down firmly to ensure good adhesion.
Trim any excess tape away from the edges with nail scissors, and try to make the edges lay flat so they don’t catch on things. File the tape smooth if there are any rough spots. This fix will typically last anywhere from a few hours to about two days depending on how much your nails encounter water and friction.
Tape doesn’t work well with regular nail polish—polish won’t adhere properly to the tape surface. But this method is honestly the best choice when you need a five-minute emergency fix and nothing else is available. Once you get home, you can transition to one of the more permanent repairs.
Using Press-On Nails to Hide Damage
When a nail has broken completely off or is damaged so severely that repair seems pointless, press-on nails offer an elegant solution. Press-ons aren’t just fashion anymore—modern versions are well-designed, durable, and feel remarkably natural.
Remove any remaining old polish and wash your nail with warm soapy water, then dry thoroughly. Push back your cuticles gently (never cut them—this causes infection risk). File your nail short so it’s completely smooth and flush with your fingertip. The smoother your natural nail, the better the press-on will adhere and the longer it will last.
Depending on whether you’re using adhesive tabs or liquid glue, follow the product instructions. For tabs, peel and apply to the press-on nail, then press down firmly onto your natural nail for 15 seconds. For glue, apply a small drop to both the press-on and your natural nail, wait a few seconds for it to become tacky, then press together firmly.
A quality press-on nail will last one to two weeks, giving your natural nail underneath time to heal and grow past the break. When you’re ready to remove it, do so gently by soaking in warm water with a bit of cuticle oil or by slowly peeling away a corner while applying gentle pressure to the natural nail. Removing carelessly can cause additional breakage to your natural nail.
How to File and Buff a Repaired Nail Properly
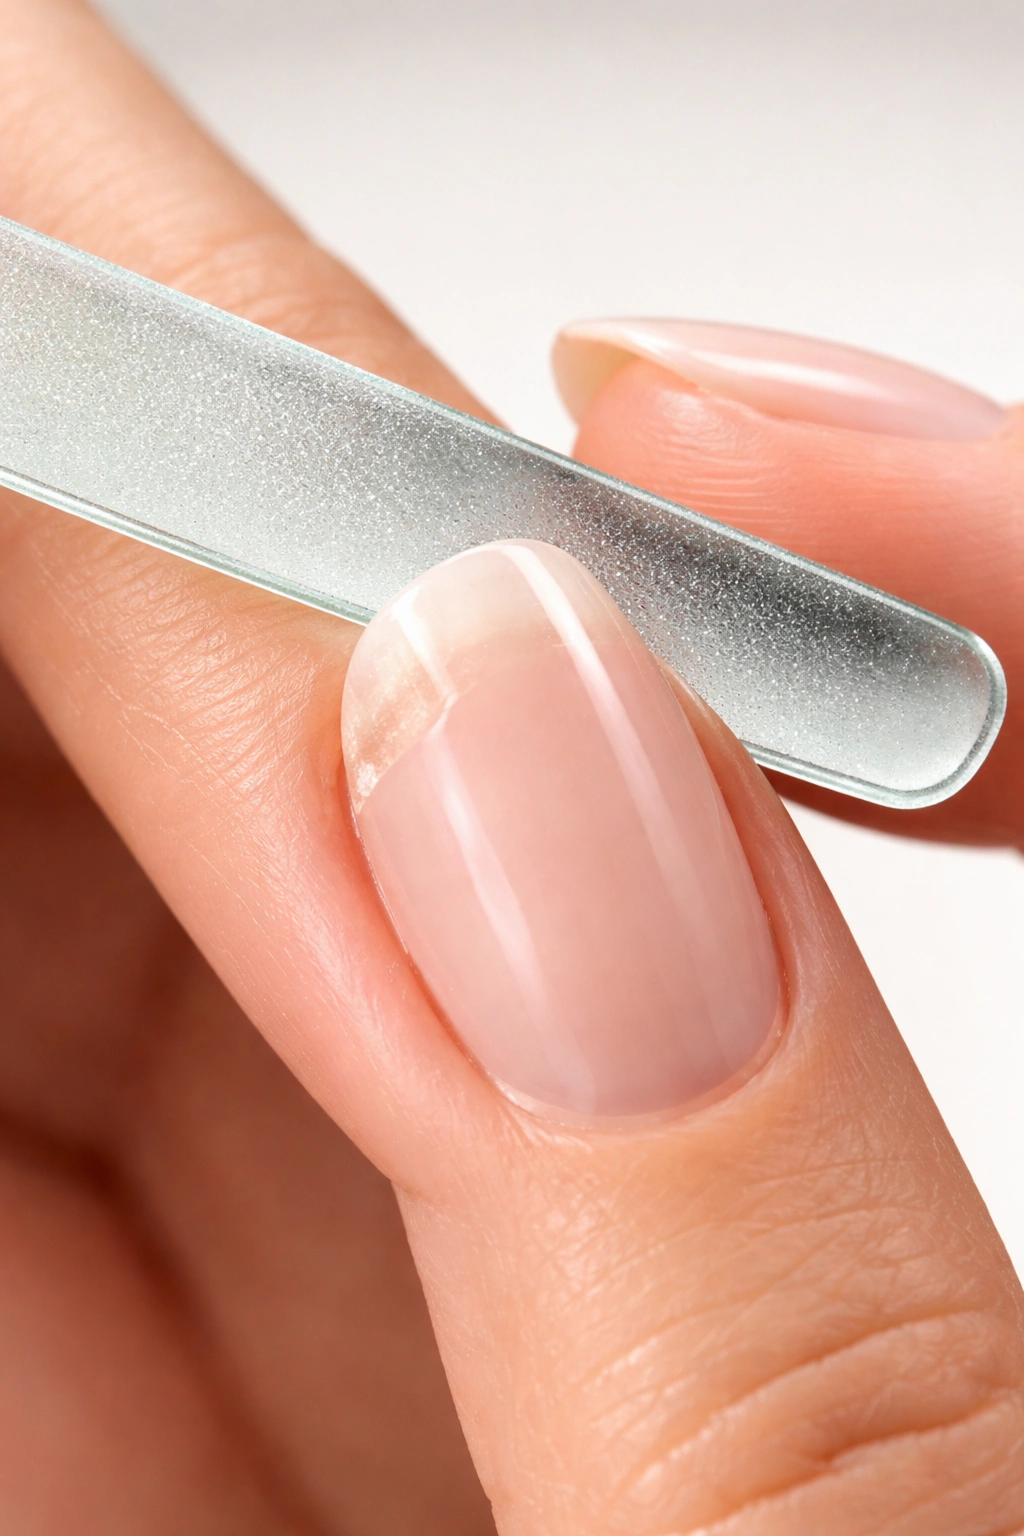
Proper filing and buffing makes the difference between a repair that looks obvious and one that’s virtually invisible. Many people rush this step, which is why their repairs look rough or obvious.
Use a glass or crystal file rather than a metal file or emery board. Glass files don’t create microscopic tears and splitting along the nail edge the way traditional metal files do. Move the file in one direction only—from the outer edge of the nail toward the center. Going back and forth with an emery board creates stress points and weakens the nail further.
Work gently around the repaired area. You’re not trying to reshape the nail at this point, just remove any rough edges or bumps. File in long, smooth strokes. Once the edges are smooth, switch to a nail buffer. The buffer has multiple sides—typically a rough side for initial smoothing, and a fine polishing side for the final finish.
Use the rough side first to remove any remaining imperfections, buffing in circular motions. Once smooth, switch to the fine side and buff the entire nail until it’s glossy and even. This polishing creates a smoother surface for polish to adhere to and makes the whole nail look healthy and cared-for. The entire buffing process should feel gentle and take several minutes—rushing this step defeats the purpose.
Knowing When to Trim Instead of Repair
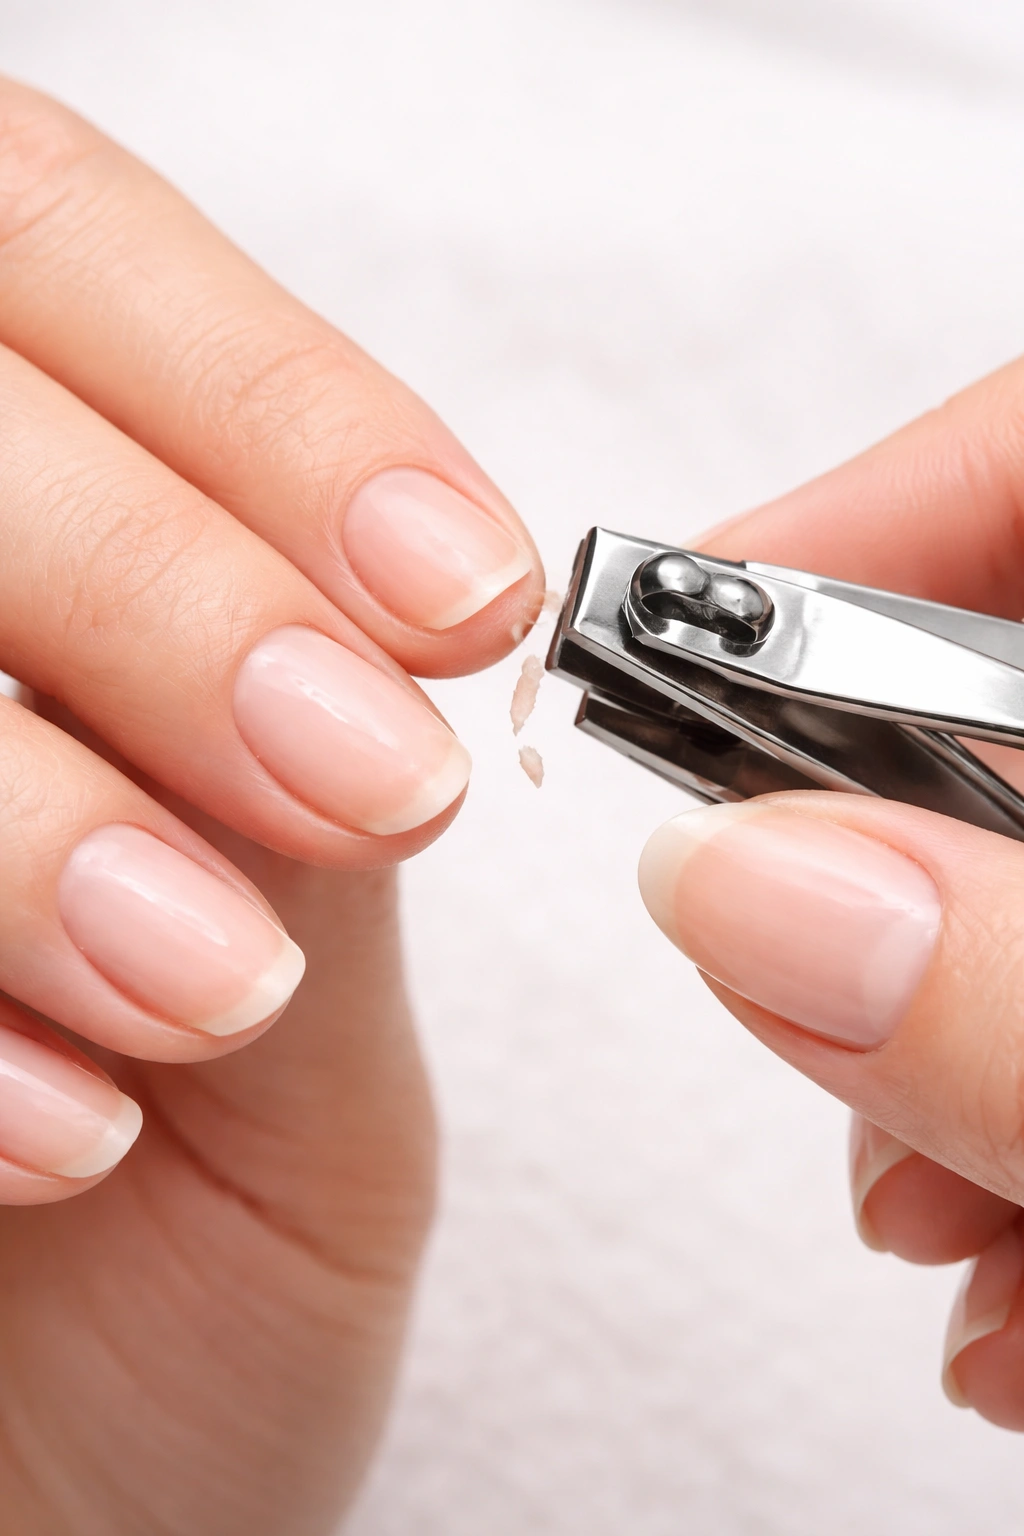
Sometimes the most realistic choice is to trim the broken nail and file your other nails to match. This isn’t giving up—it’s making a smart decision about your nail health. If the break is severe, extends well into the nail bed, causes bleeding, or is so jagged that no repair method will fully conceal it, trimming is often the better choice.
Use a pair of sharp nail clippers to trim the nail down past the break line, removing the damaged section entirely. File the edge smooth and round, then trim your other nails to match this new length. This prevents the visual imbalance of having one much shorter nail among long ones. The uniformity actually looks intentional and polished.
Once trimmed, apply a strengthening base coat and allow your nails to grow back together over the next month or so. During this time, focus on nail care—moisturize daily, protect your nails from harsh products, and avoid using them as tools. You’ll be amazed at how quickly nails grow back when you’re actively trying to grow them out and protecting them from damage.
Trimming is particularly smart if the break involves significant bleeding or injury to the nail bed, as these situations need time and protection to heal properly rather than aggressive repair attempts that could complicate healing.
Essential Tools and Supplies You’ll Need

Having the right supplies on hand means you can fix a broken nail within minutes rather than panicking or canceling plans. Build a simple nail repair kit and keep it accessible.
The absolute essentials are: nail glue or super glue (brush-on is best for precision), a clean, dry tea bag or coffee filter, tweezers for handling small pieces, a nail file (glass or crystal), a nail buffer, clear nail polish, and nail polish remover or rubbing alcohol. Most of these items cost just a few dollars, and a single bottle of nail glue will repair dozens of nails.
Optional but genuinely helpful additions include silk wrap (more durable than tea bags), dip powder and base products (if you already use dip nails), press-on nails in your size (for severe breaks), nail scissors for trimming damaged pieces, cotton swabs for cleanup, and cuticle oil (for post-repair nail care). Keep these supplies in a small container in an easily accessible location—your bathroom drawer, a purse, a desk drawer at work.
Having supplies ready means that when you break a nail, you fix it immediately rather than letting it worsen while you search for materials. A break that’s fixed within an hour is much stronger and cleaner than one that’s been damaged further over several hours.
Preventing Future Breaks: Long-Term Nail Care
The best broken nail is the one that never happens. Prevention requires a multi-pronged approach focused on keeping nails moisturized, protected, and strong.
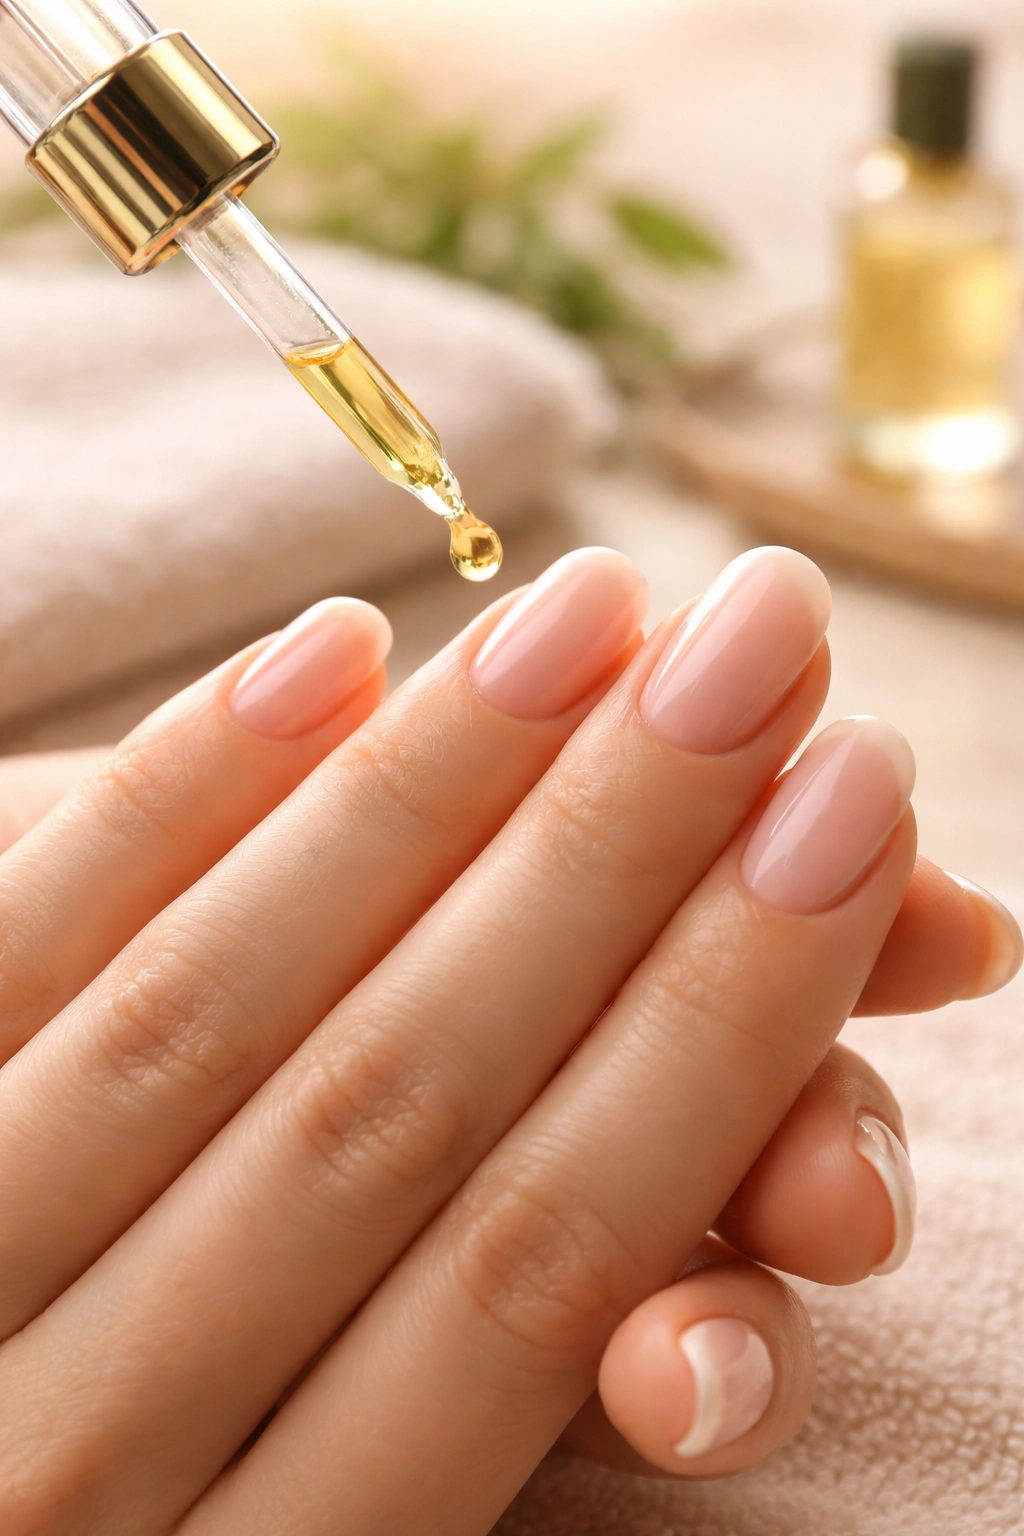
Moisturize your nails and cuticles every single day. Apply cuticle oil, hand lotion, or even coconut oil directly to your nails and the skin around them. This sounds simple, but it’s genuinely the most important nail health practice. Dry nails are brittle nails, and brittle nails break. Oil penetrates and moisturizes more effectively than lotion, but any moisturizing product helps.
Wear gloves when doing dishes, cleaning, gardening, or handling harsh chemicals. Water and soap strip oils from nails, and repeated cycles of wetting and drying make them extremely brittle. Even wearing cotton-lined gloves during hand washing prevents significant damage. When you shower or bathe, limit soaking time to 15-20 minutes, as prolonged water exposure softens nails and makes them prone to tearing.
Stop using your nails as tools. Using them to open containers, scrape off labels, pick at things, or poke at surfaces creates micro-damage that eventually manifests as breaks. This habit is remarkably hard to break, but consciously training yourself to use actual tools instead adds years to your nail health.
Trim your nails regularly to keep them at a manageable length. Shorter nails are exponentially less likely to snag and break than long ones. Round the tips rather than creating sharp points or straight edges. Rounded tips are structurally stronger and far less likely to catch on things.
Consider what you’re eating. Nails need protein, iron, biotin, zinc, and B vitamins to grow strong. If you’re consistently low in any of these nutrients, your nails will reflect it through brittleness and breakage. A basic multivitamin plus a focus on protein intake can dramatically improve nail strength within weeks.
Finally, give your nails regular breaks from polish and treatments. Continuous gel manicures or acrylics, while gorgeous, prevent your nails from breathing and can lead to chronic brittleness. Alternate treatments with periods of polish-free, product-free nail time. This allows your nails to rehydrate and rebuild their natural strength.
Final Thoughts
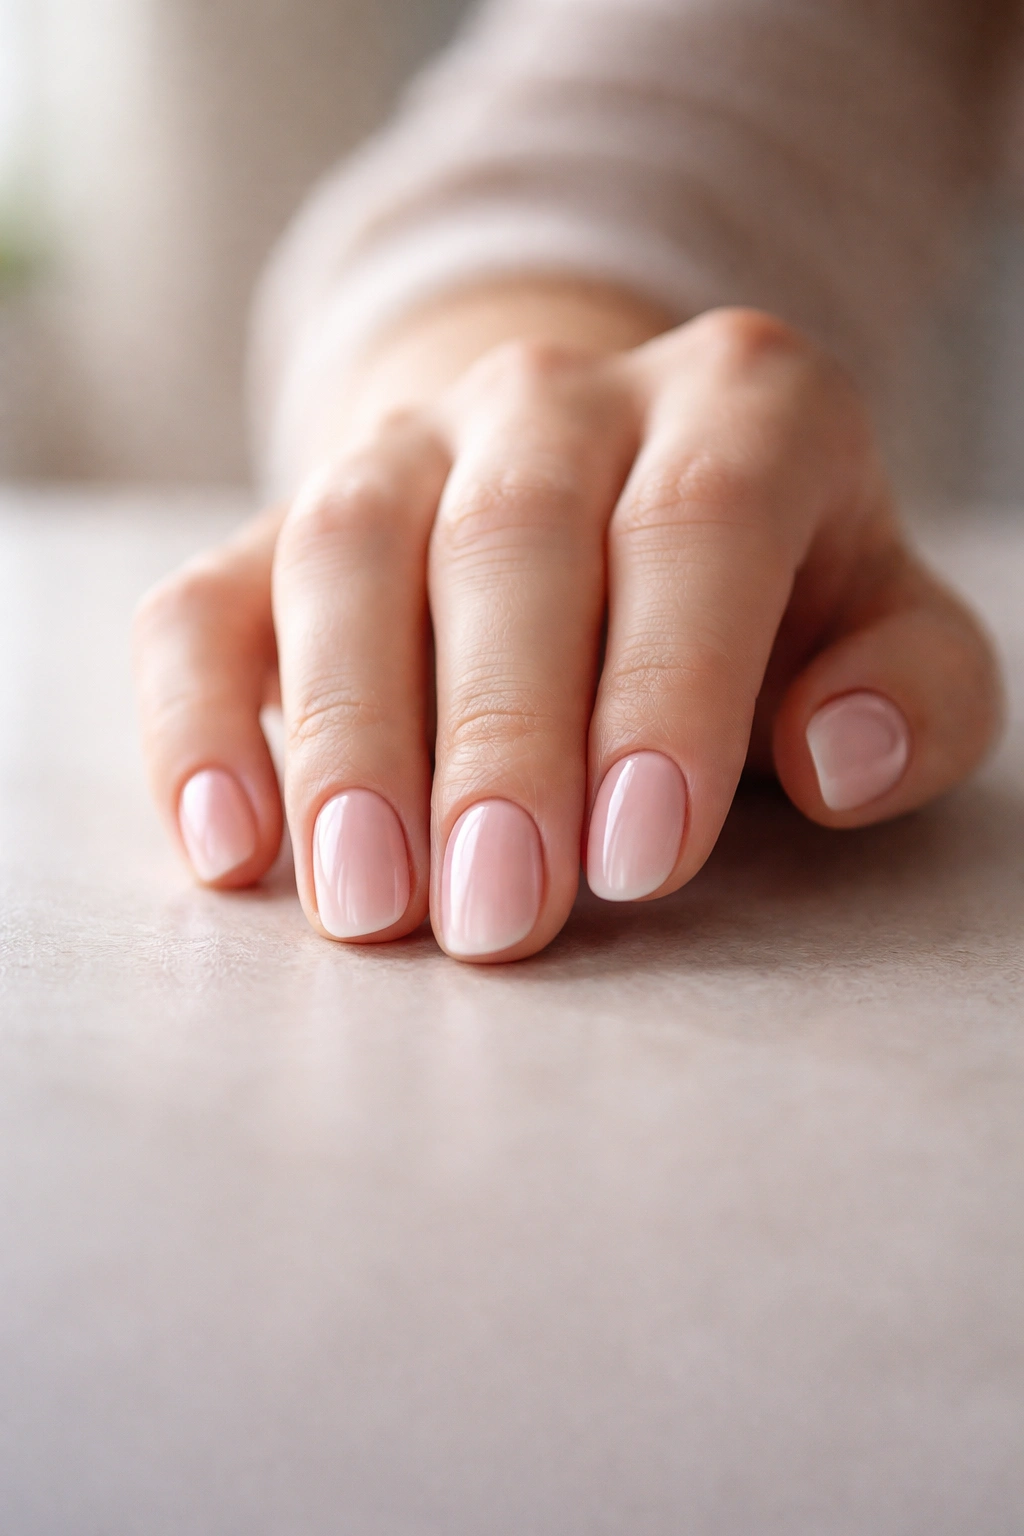
A broken nail doesn’t mean your manicure is ruined or that you’ll spend weeks with short, mismatched nails. With the right repair method applied correctly, you can keep your nails looking polished and feeling strong while the damaged section grows out. Whether you choose the simple tea bag method for a quick fix, the durable dip powder approach for serious damage, or the elegant press-on solution for complete breaks, you have options that actually work.
The real skill lies in matching the repair method to your specific break—understanding what the damage actually is and choosing accordingly. A simple crack warrants the tea bag method. A deep break needs dip powder. A completely detached nail benefits from a press-on. Learn to assess your break accurately, prepare your nail properly, and apply your chosen method patiently rather than rushing.
Equally important is the prevention work that happens between breaks. Daily moisturizing, protective gloves, careful handling, and a nutrient-rich diet are genuinely transformative for nail health. Many people who feel cursed with weak, breakage-prone nails actually just need consistent care. Within a few weeks of daily moisturizing alone, you’ll likely notice your nails feel stronger and break less frequently.
You’re absolutely capable of fixing your own nails, and doing so saves time, money, and the frustration of working around your salon’s schedule. Keep your repair supplies accessible, know your methods, and approach each break with the confidence that you can handle it.
