

Creating 3D flower nails might look intimidating if you’re watching someone skilled at the salon, but the truth is that anyone with a steady hand and a little patience can sculpt beautiful dimensional flowers onto their own nails at home. The first time I tried this technique, I was shocked at how forgiving the process actually is—the gel lets you wipe away mistakes before curing, and there’s something deeply satisfying about watching a tiny, translucent petal take shape under your brush. What looks like advanced salon magic is really just a series of simple, repeatable steps that build on each other. This isn’t about having perfect artistic ability; it’s about understanding how the gel behaves, working slowly, and letting yourself practice without pressure.
The beauty of 3D flower nail art is that it transforms your manicure from something you might admire for a few minutes into a piece of wearable sculpture that catches the light differently every time you move your hands. The dimensional petals create texture and depth that flat nail polish simply can’t match, and once you understand the basic technique, you can adapt it endlessly—different flower types, color variations, multiple blooms per nail, metallic details, the possibilities keep growing as your confidence builds.
Why 3D Flower Nails Are Worth Trying

Three-dimensional flower nails represent something special in the world of at-home nail art. Unlike flat designs that rely on precise painting skills, 3D sculpting is tactile and forgiving in ways that might surprise you. You’re actually building something rather than just drawing, which feels fundamentally different and more satisfying.
The visual impact of dimensional nail art is genuinely stunning. Light bounces off the raised petals in ways that create movement and depth—your nails literally shimmer differently as you move your hands throughout the day. A coworker will notice and ask what you did to your nails in a way they might not with even a perfectly executed flat design. This is the kind of detail that reads as intentional, creative, and luxurious.
The longevity is another major benefit. Because you’re using gel and properly sealing the design with a thick top coat, these flowers hold up beautifully for two to three weeks without chipping or losing their shape. The structure is surprisingly durable for everyday wear—your hands will be touching things, you’ll be typing and grabbing things, and those petals will stay intact.
Why Beginners Can Actually Master This
The technique looks complex, but it’s genuinely beginner-friendly. You’re not hand-painting intricate details or trying to get symmetrical lines perfectly straight. Instead, you’re placing small beads of gel and gently shaping them with a brush—repetitive, forgiving, and totally learnable. Most people nail this technique within their first or second attempt, especially if they practice on a nail swatch stick before committing to their actual nails.
The margin for error is wide because gel is so workable. Before you cure (set) each layer, you can wipe it away completely and start that step over. There’s almost no permanent commitment until you press that curing lamp button, which removes a ton of the anxiety that comes with nail art.
Essential Tools and Materials You’ll Need
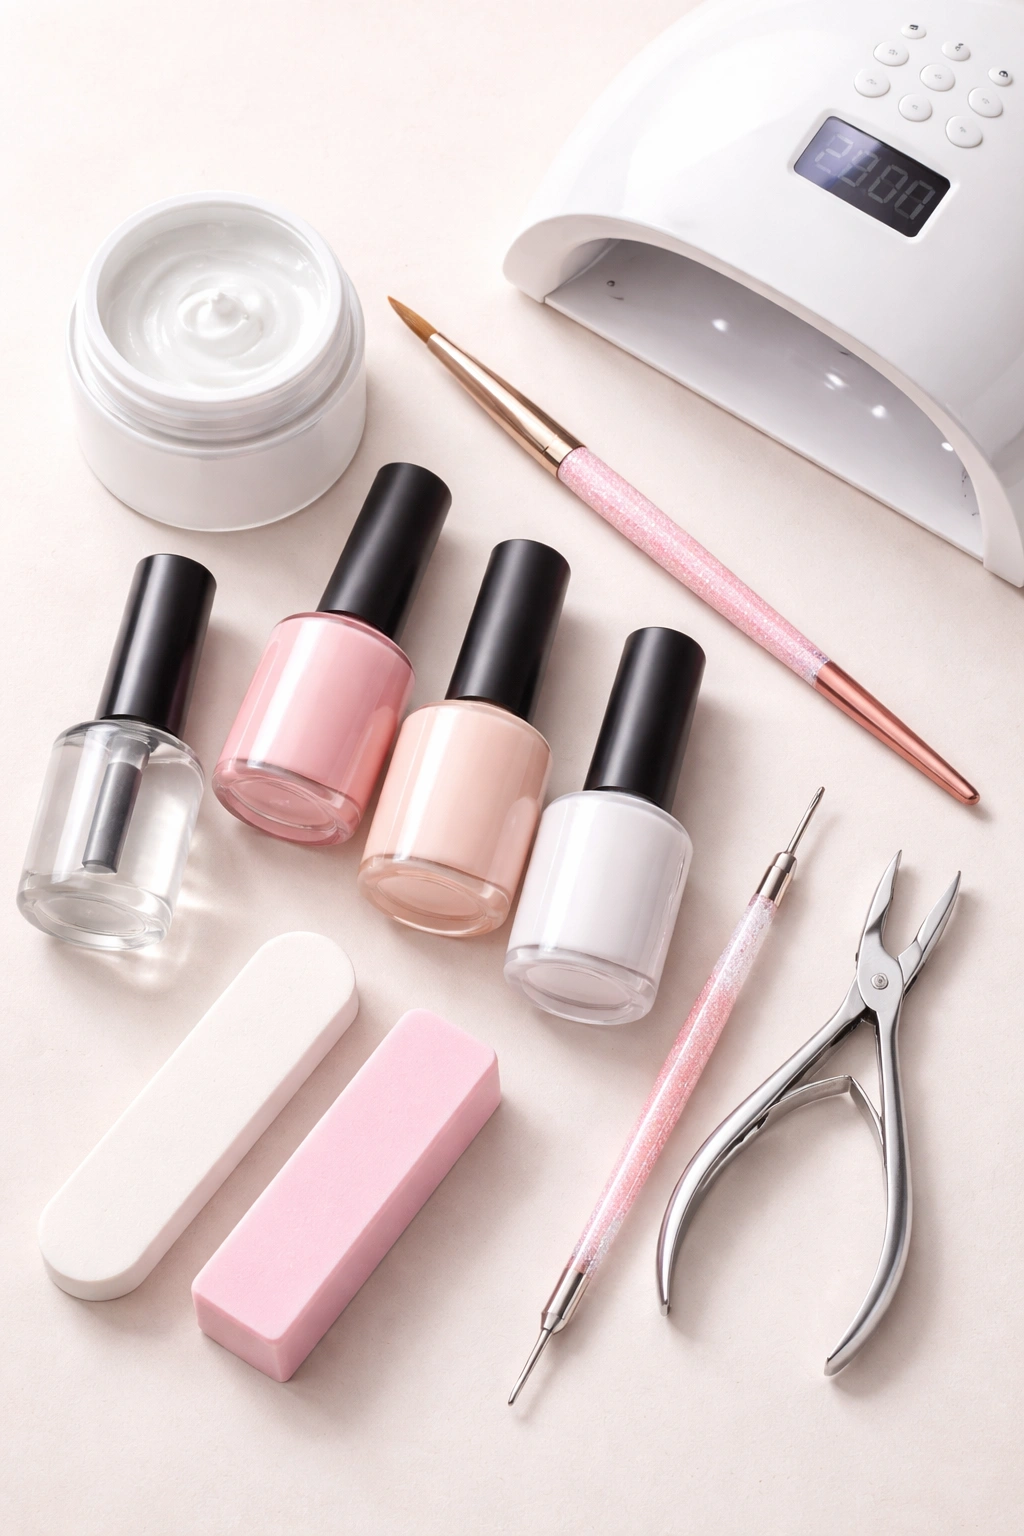
Setting yourself up with the right supplies makes this whole process infinitely easier. You don’t need an expensive arsenal—just quality versions of a few specific items. Think of this as assembling your at-home nail artist’s toolkit.
The absolute essentials are a high-viscosity 3D sculpting gel (also called carving gel or builder gel), a fine-tipped nail art brush, a UV or LED curing lamp, a dotting tool, and a base color gel. Everything else is supporting, but these items are non-negotiable.
Nail Prep and Filing Tools
You’ll want a quality nail file—something that won’t leave rough edges or cause splitting. A buffer is essential for gently removing shine from the nail plate so your base coat adheres properly. A cuticle pusher or wooden stick helps you clean up the cuticle area without being too aggressive. These items are cheap and worth having in your collection.
Gel Products: The Foundation of Everything
Your base coat should be designed specifically for gel systems—this protects your actual nail plate from staining and helps the gel layers stick to your nail without lifting. Apply this super thin and cure it completely.
Choose a nude base color that’s slightly sheer or milky white. This creates a neutral canvas for your flowers while making the white sculpting gel pop visually. You’ll apply this in two thin coats, curing after each one. The goal is even color without thickness—thick base coats can make your entire manicure feel bulky.
The white 3D sculpting gel is the star of the entire show. This needs to be a high-viscosity formula that holds shape when you place it on the nail—don’t pick a regular gel that flows like liquid. Look for products marketed specifically as “carving gel,” “builder gel,” or “sculpting gel.” The thickness of this gel is what lets you actually sculpt petals instead of having them collapse.
A sheer pink gel adds that delicate, lifelike color wash that makes flowers look natural and dimensional. You’ll use just a tiny amount, brushing it over the white petals to create depth and gradient.
Your no-wipe top coat seals everything and gives that glossy, salon-quality finish. This is what protects all your hard work and ensures your nails last those full two to three weeks.
Brushes, Tools, and Equipment
A fine-tipped nail art brush with a slightly flattened shape is essential for sculpting those petals. The brush needs to be flexible enough to shape the gel smoothly but firm enough to give you control. Many people default to too-large brushes—you want something relatively small and precise.
A dotting tool picks up perfect, uniform beads of gel. You could technically use a brush, but a dotting tool gives you more consistent results, especially when you’re just starting out. They’re inexpensive and worth having.
Your UV or LED curing lamp is a major piece of equipment. LED lamps are faster and preferable—they cure gel in 30-60 seconds versus 2-3 minutes with UV. If you’re going to be doing this regularly, the time savings alone make an LED lamp worth the investment.
Optional Details
Tiny metallic beads (gold, silver, or rose gold) add a sophisticated finishing touch to the flower center. You’ll need a tiny amount of nail glue or clear gel to adhere them. Some people skip this entirely and create a center dot with sheer pink or white gel instead—both look beautiful.
Isopropyl alcohol comes in handy if your brush gets sticky or doesn’t glide smoothly. You only need a tiny amount—just dip the very tip of your brush into it and wipe away excess before touching the gel.
Preparing Your Nails for 3D Art
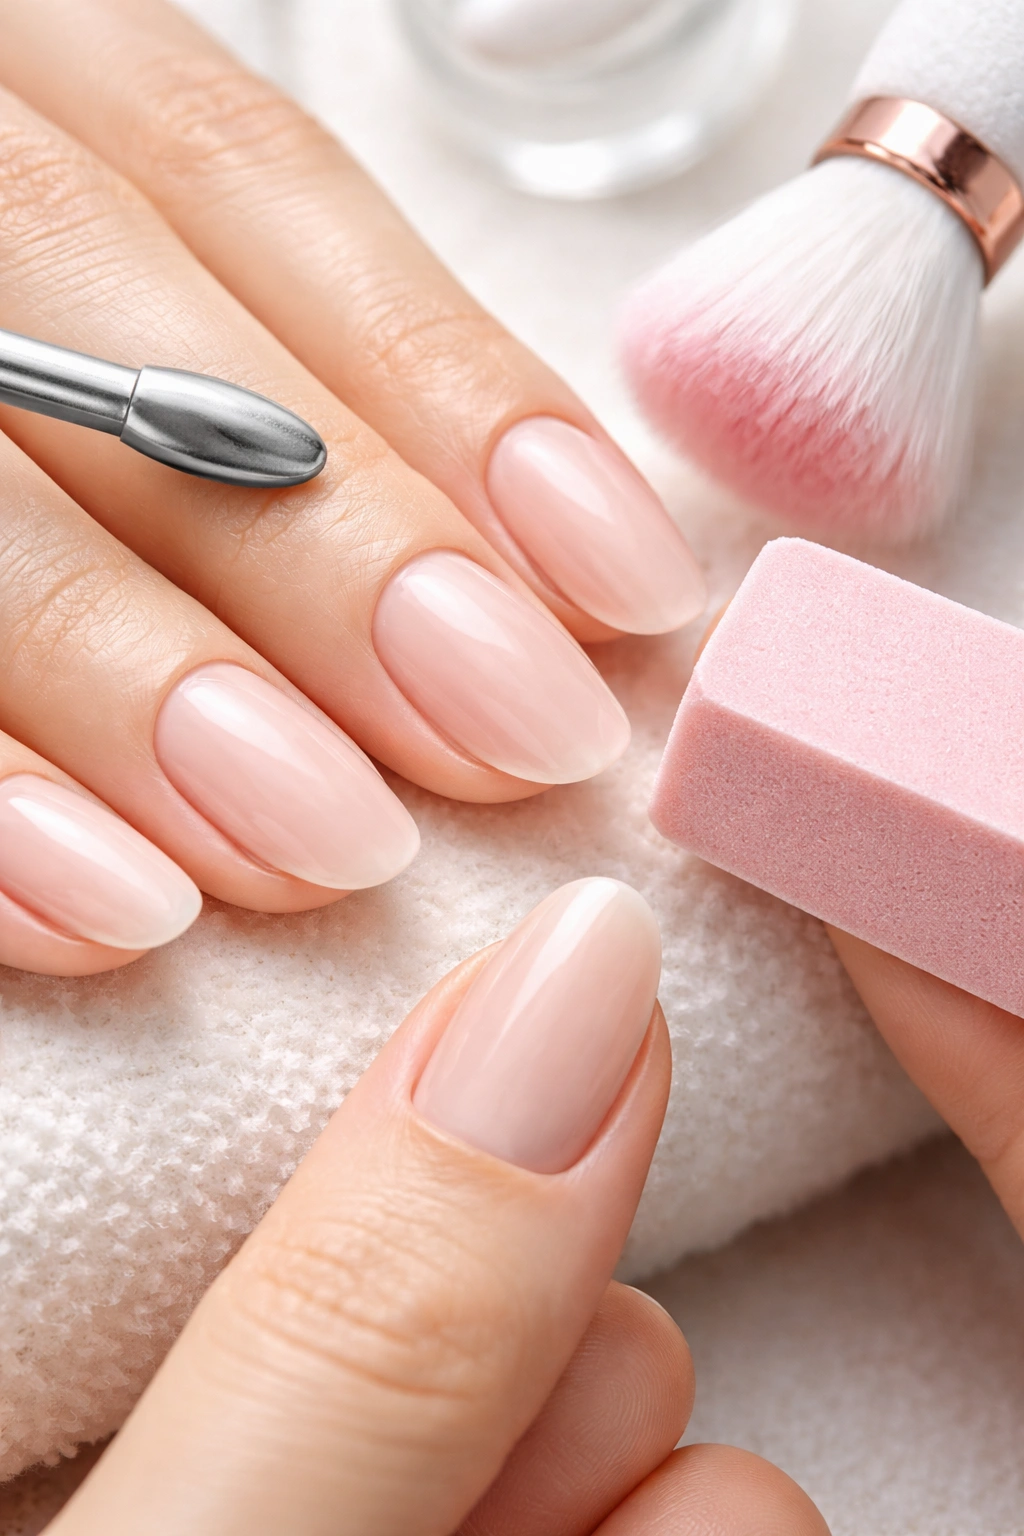
Nail preparation is genuinely the difference between a design that lasts three weeks flawlessly and one that lifts or chips within days. Don’t skip this step even though it feels boring compared to the creative part—proper prep is what transforms this from a fun experiment into a durable manicure.
Start with freshly washed hands and naked nails—no previous polish, no residue. File your nails into your preferred shape. This design looks particularly stunning on almond or oval shapes because those shapes showcase the dimensional petals beautifully, but it works on any shape you love.
Push back your cuticles gently but thoroughly. Use your cuticle pusher to move the cuticle tissue away from the nail plate so gel can adhere directly to the nail and not to cuticle skin. This is a detail that matters for longevity—gel that overlaps onto skin tends to lift first.
Buff the nail plate lightly to remove the natural shine. You’re not trying to roughen the nail or create a matte texture—just a light, gentle buffing that removes that glossy shine. This roughness gives the base coat something to grip and prevents lifting.
Cleanse your nails with a lint-free wipe and either nail dehydrator or 70% isopropyl alcohol. You want to remove any dust, oils, or residue from the filing and buffing process. This cleansing step is genuinely important, not just a marketing gimmick. Oily nails are the number-one reason gel lifts prematurely.
Let your nails dry completely—at least a minute of air-drying after cleansing. Some people use a nail dryer, but honestly, a minute of patience is enough.
Creating the Perfect Base Color
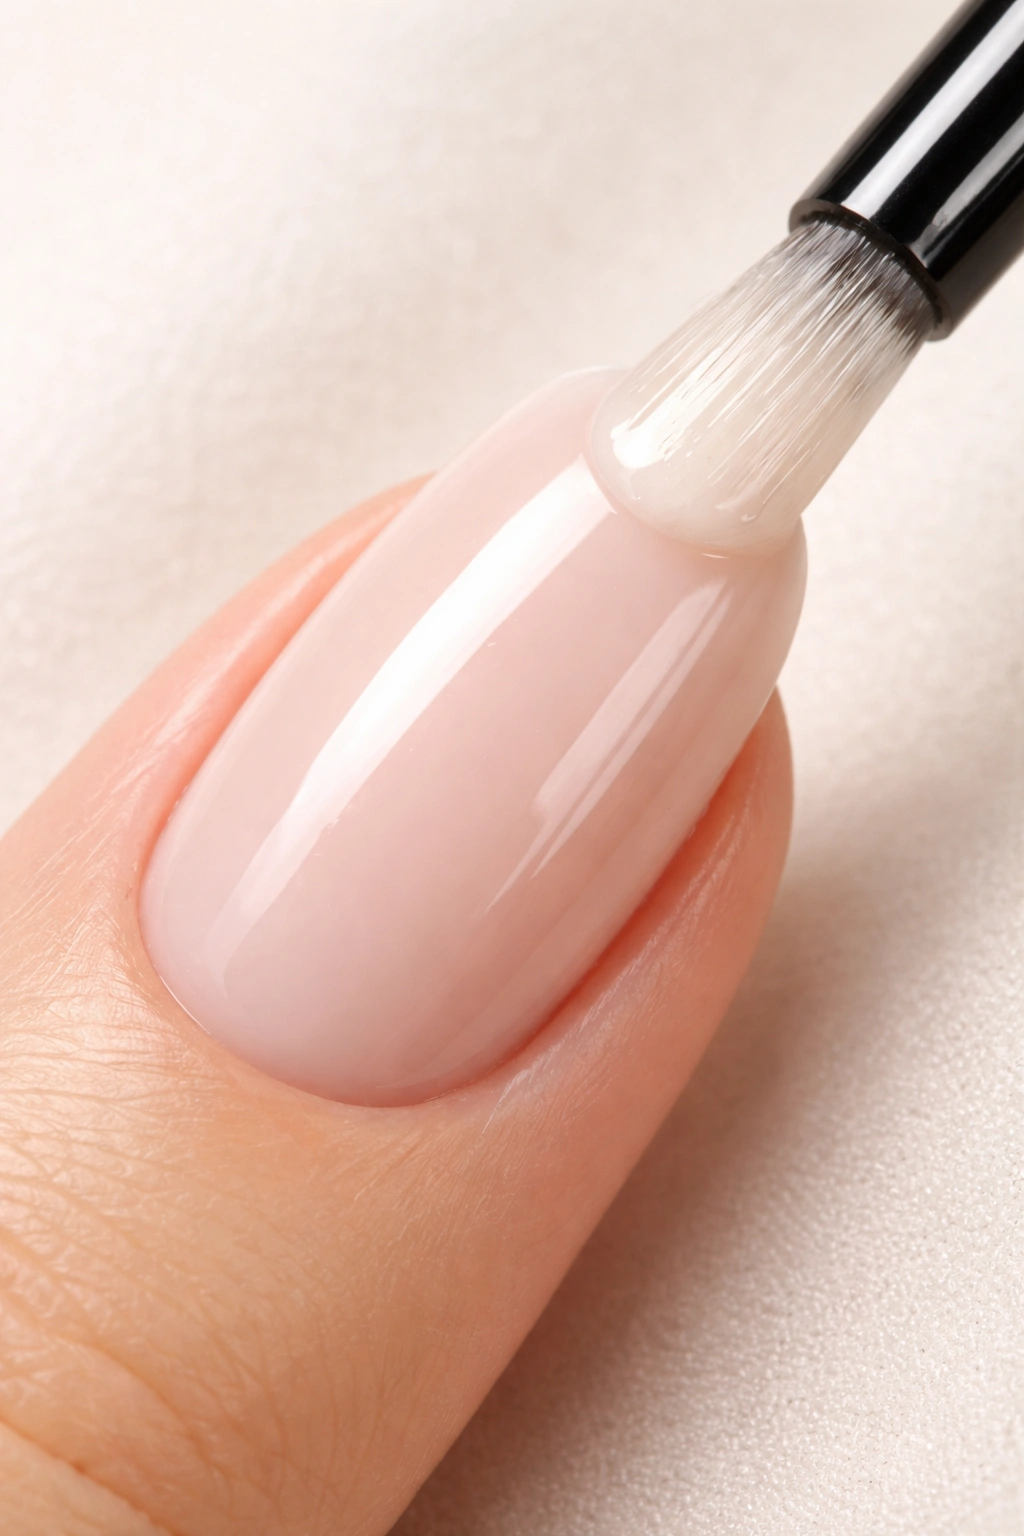
Your base color is the canvas for your entire design, so it deserves attention. Apply your base coat first—a super thin, even layer that you cure completely according to your product’s instructions (usually 30-60 seconds under LED).
Now apply your first coat of nude or milky white gel. Here’s the key: thin, thin, thin. You’re tempted to apply one thick coat, but two thin coats always look better and cure more evenly. Brush the gel on in smooth strokes from the nail bed toward the tip, then cure it completely.
Apply your second coat the same way—smooth, even, and thin. Cure again. You should have nice, opaque color without any bumpy texture or pooling. The finish should feel smooth to the touch.
Wipe or don’t wipe? Check your top coat instructions. Some products are “no-wipe,” meaning you cure them and they stay sticky (which is actually helpful for your next layer). Others are “wipe” versions, and you use a lint-free wipe with alcohol to remove the sticky residue after curing. For this project, a no-wipe base is more convenient because you want that slightly tacky surface for your sculpting gel to grip.
Placing Your Foundation Gel Beads
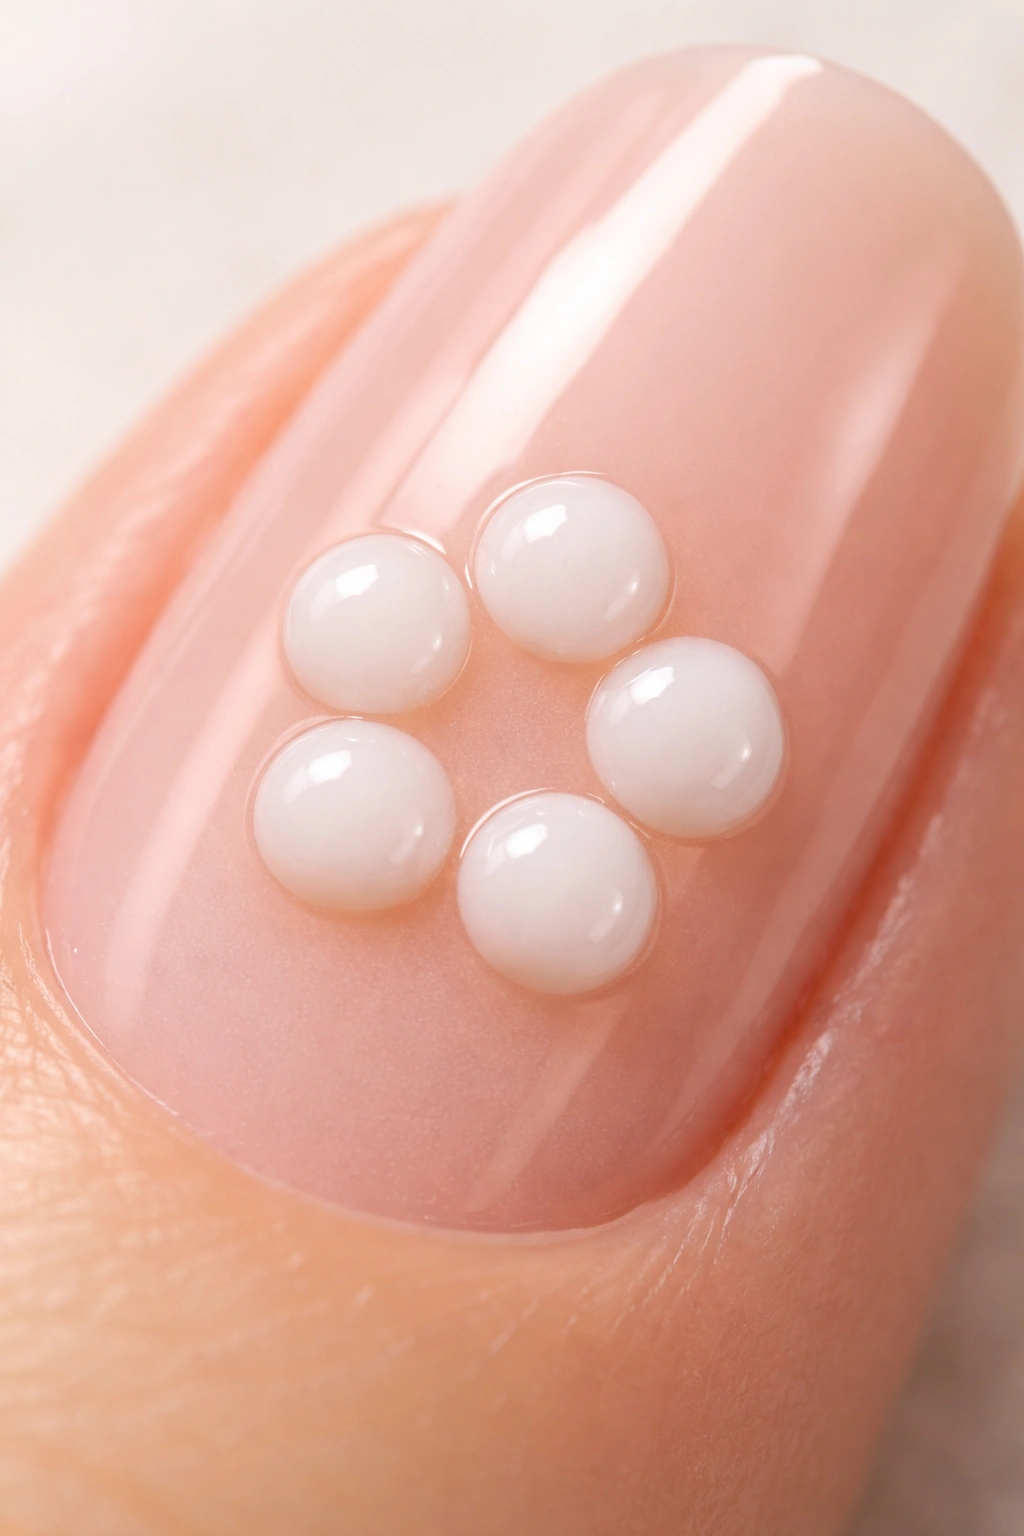
This step is where your flower actually begins to take root, and it’s simpler than you might think. You’re creating five small dots of sculpting gel arranged in a circle—these become your petals.
Using your dotting tool, pick up a small amount of white 3D sculpting gel. The amount should be roughly the size of a small pea—bigger than a grain of rice, smaller than a lentil. If you’re unsure, start smaller. You can always add more gel; it’s harder to remove a bead that’s too large.
Place five beads in a circle on your nail, spacing them evenly. Leave a tiny empty space in the very center—this is where your flower’s center will go later. The beads don’t need to be perfectly symmetrical; flowers in nature aren’t perfectly symmetrical either. They just need to be roughly the same size and arranged in a circular pattern.
Don’t cure yet. This is important. You want to shape all five petals before curing so you can make adjustments if needed. If one bead isn’t positioned quite right, you can nudge it slightly with your dotting tool before you commit to the cure.
Look at your arrangement. Do the beads look evenly spaced? Can you see how they’ll form petals? If something feels off, adjust before moving forward. This is the moment to fix positioning issues.
Sculpting Individual Petals
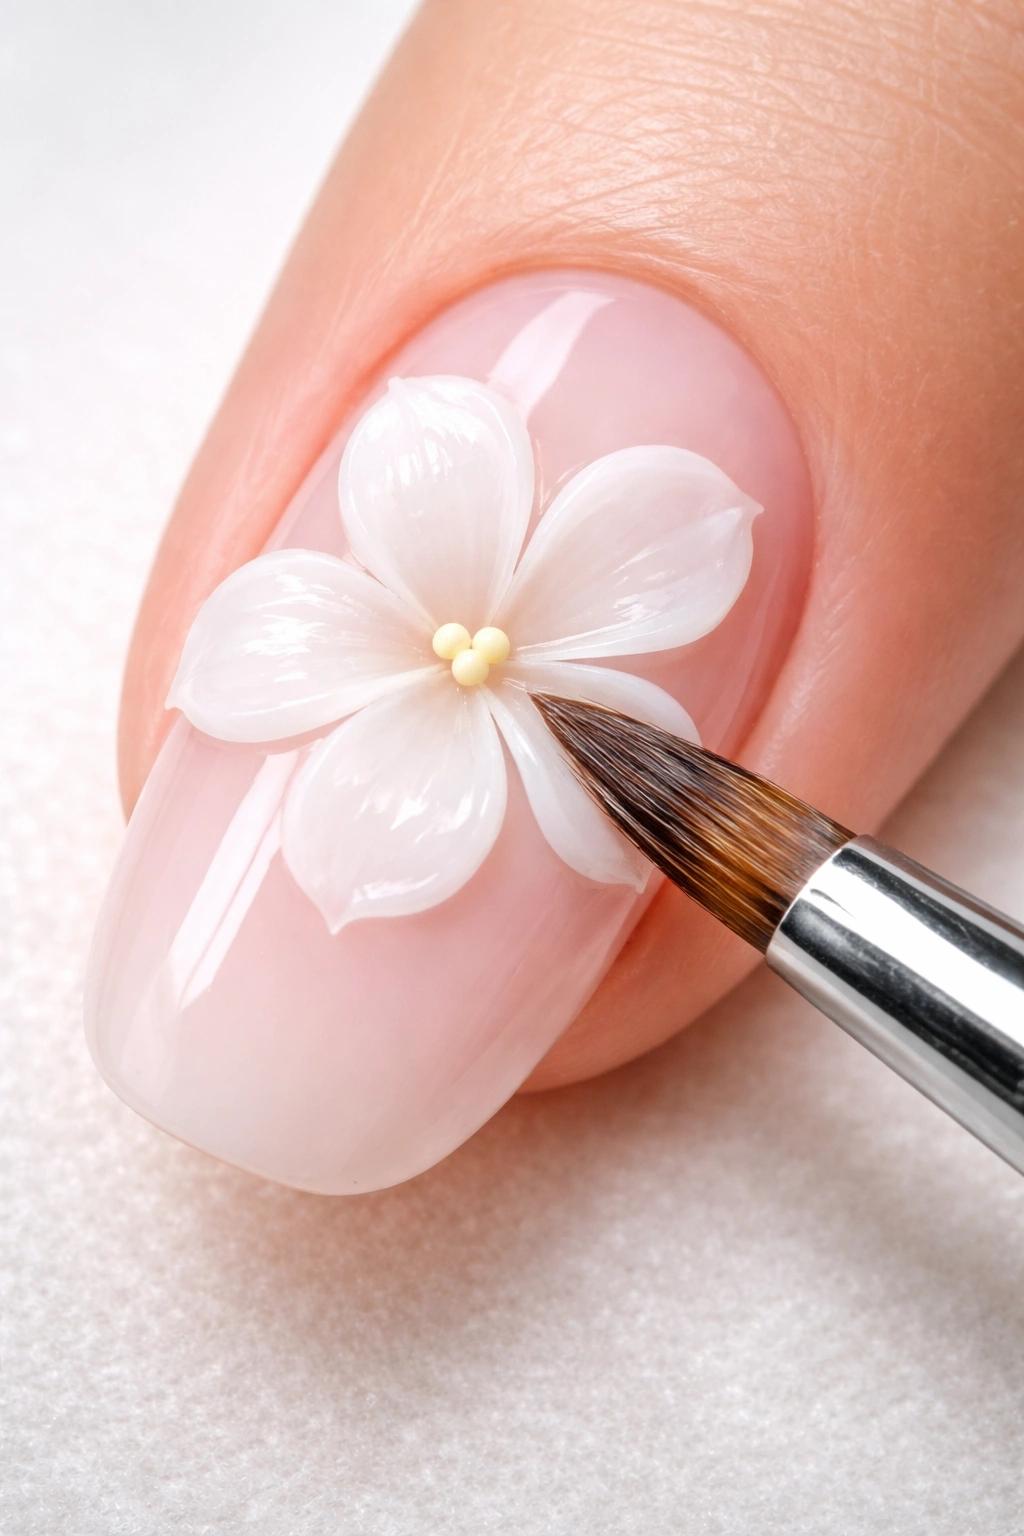
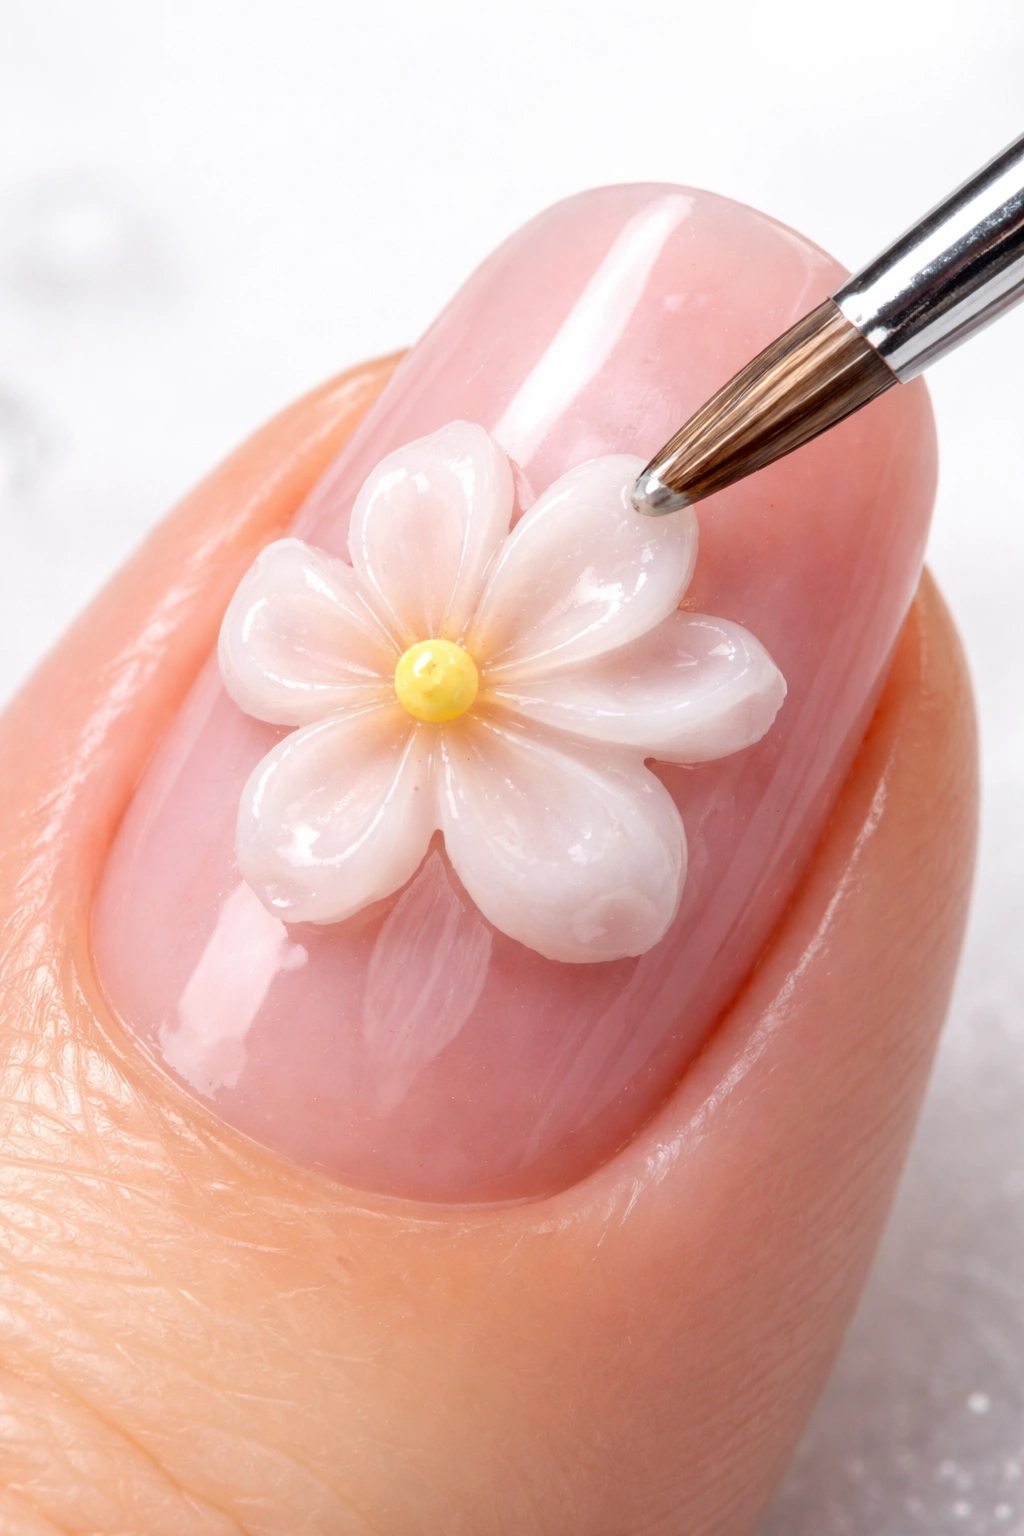
This is the moment where the magic actually happens, and I promise it’s less intimidating than it sounds. You’re simply taking the brush, pressing gently into a bead, and pulling outward—that’s it.
Start with one bead. Take your fine-tipped nail art brush and gently press down in the very center of one bead, using just light pressure. You’re not trying to flatten the bead; you’re creating a small dimple in the center.
Pull the brush outward and slightly upward, elongating that bead into a petal shape. The motion is smooth and confident—a single, deliberate stroke in one direction. This pulling motion creates an elongated teardrop or petal shape from the round bead.
The key is a light touch. If you press hard or overwork the gel, you’ll lose the height and dimension that makes 3D flowers beautiful. Think of it like gently persuading the gel rather than aggressively sculpting. One confident stroke does more than five hesitant ones.
Repeat for all five beads until you have a complete flower shape with five dimensional petals radiating from the center. Take a moment to look at the overall shape. Do the petals feel balanced? Are they all roughly the same size and length? Make tiny adjustments with your brush if needed—you can still wipe away and reshape before curing.
If you absolutely hate how a petal looks, you can gently wipe it away with a lint-free wipe before curing and place a fresh bead to try again. This is the beauty of working with gel before curing—mistakes are completely reversible.
Once you’re happy with the shape, cure the entire flower under your lamp for a full cure. Once this sets, the shape is locked in and you move to the next step. Watching that flower set and become permanent is genuinely satisfying.
Adding Color to Your Flowers
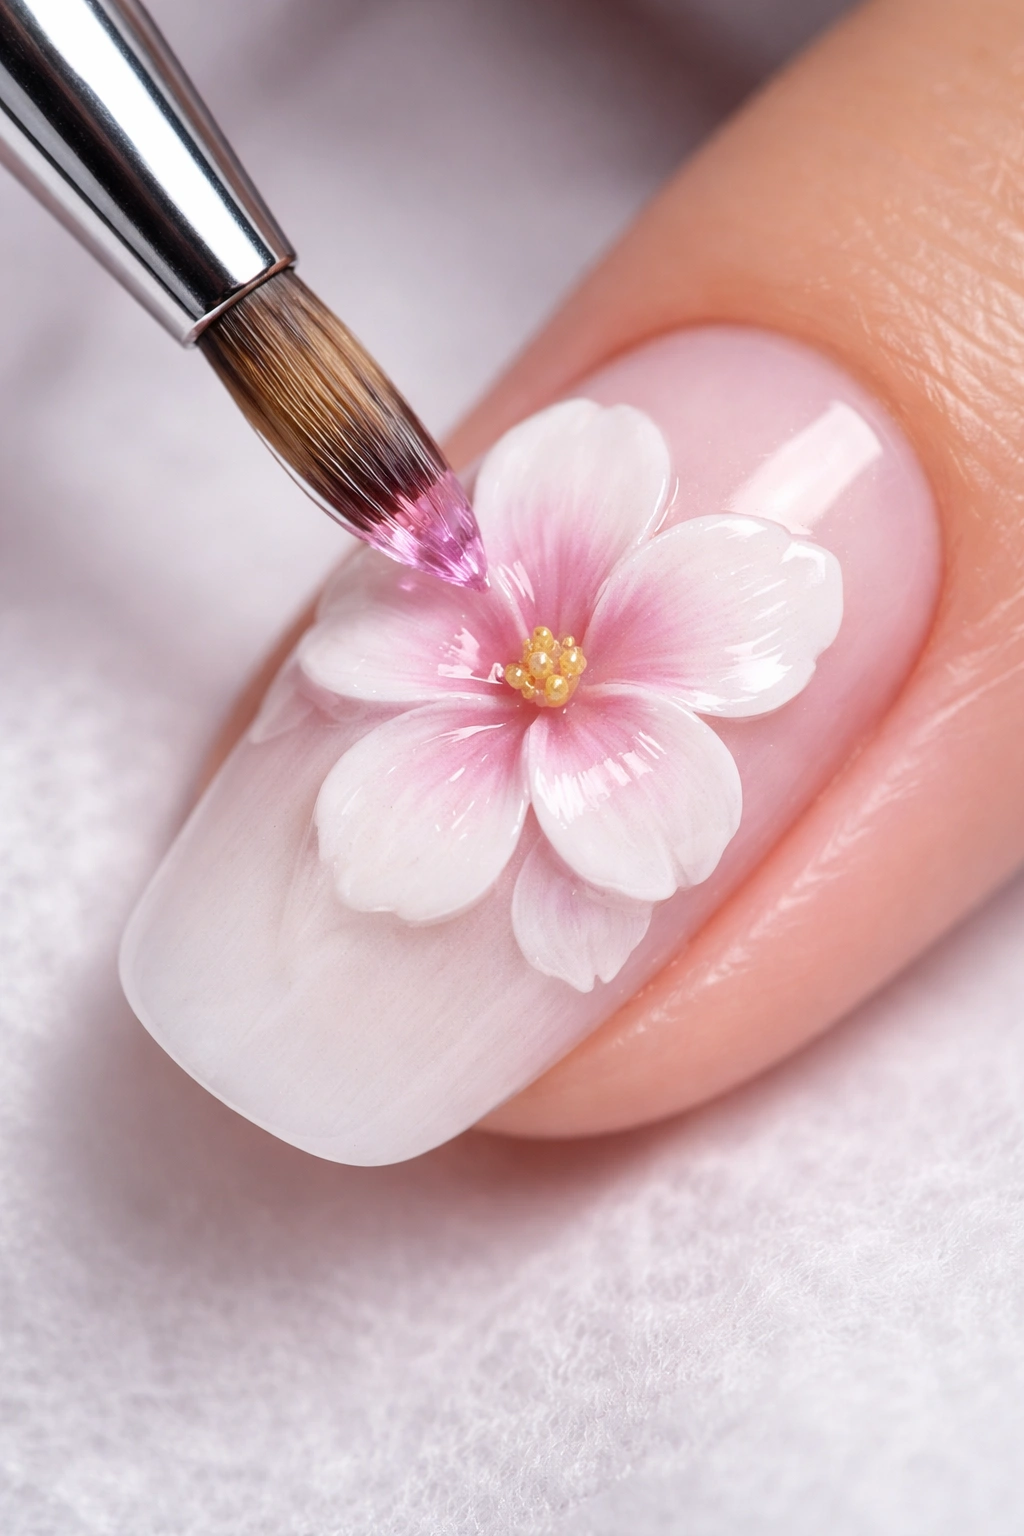
This step is optional, but it transforms white petals into something that looks like an actual flower. A delicate wash of color gives the bloom depth, dimension, and that sophisticated, lifelike quality.
Take a very small amount of sheer pink gel on the tip of your nail art brush—we’re talking barely visible. You could also use other colors here: soft peach, ivory, pale yellow, even very diluted white. The color should be sheer enough that it tints without completely hiding the white beneath.
Delicately paint the gel over the white petals, allowing the color to pool slightly toward the center of the flower. This creates a natural gradient—darker toward the center where petals overlap, lighter at the edges. This mimics how real flowers have depth and shading.
You’re not trying to create perfect, even coverage. Slight variation is actually what makes this look natural and beautiful. Some petals might have more color than others, and that’s exactly what you want.
Cure this layer completely. The color is now set, and you’re ready for the final details.
Creating the Flower Center
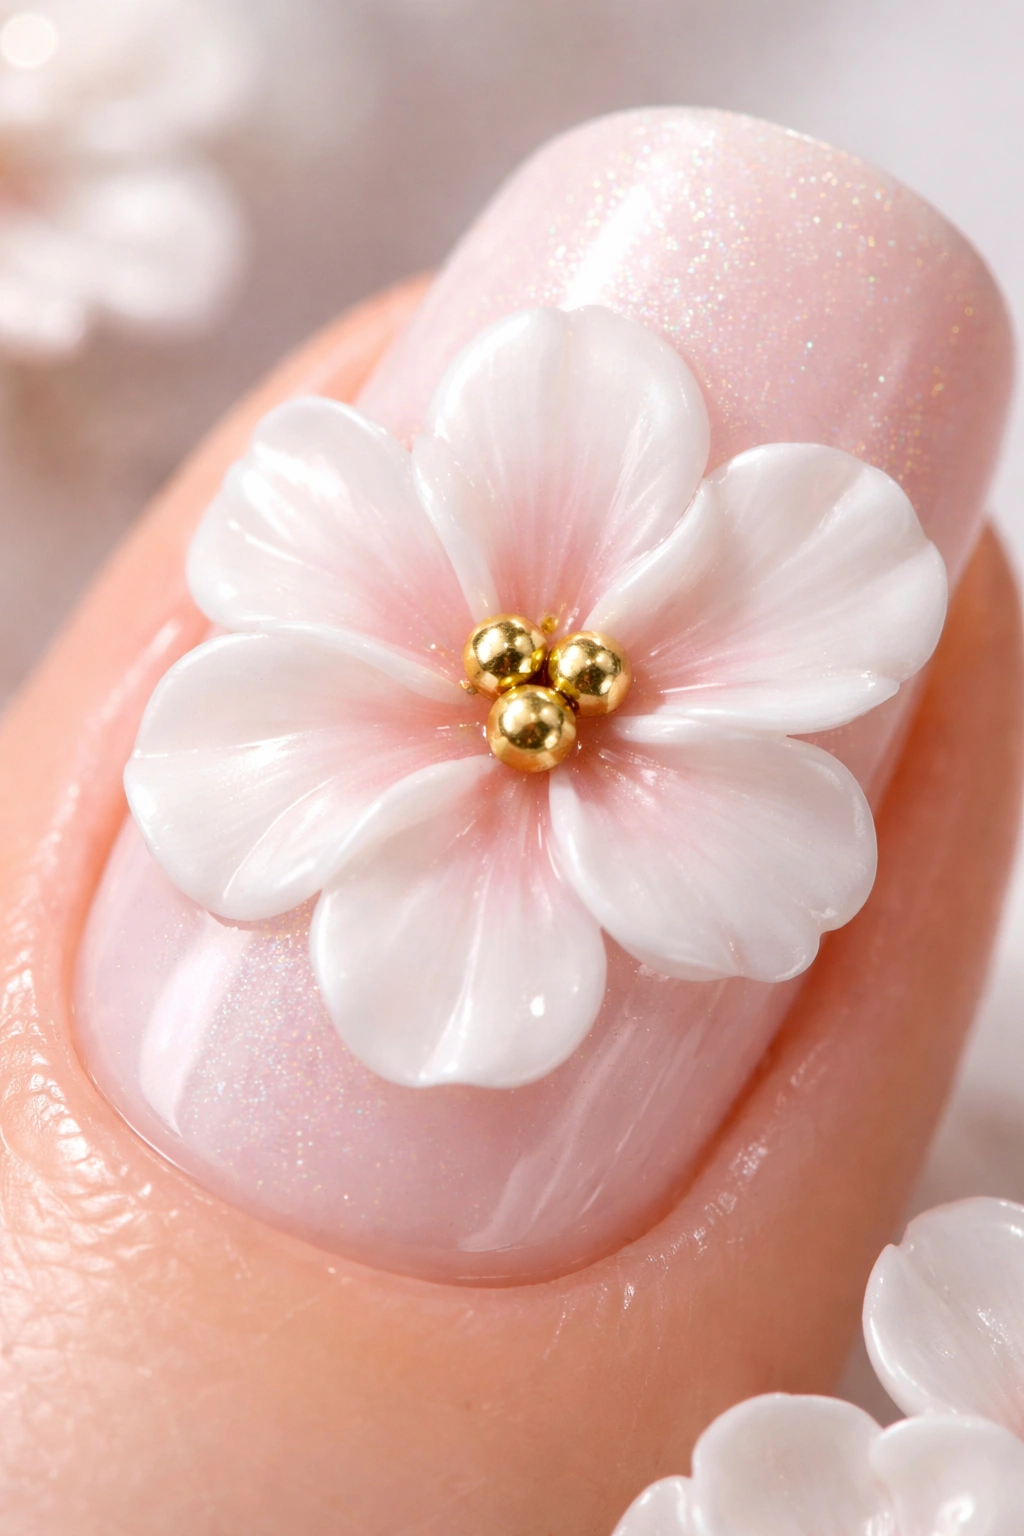
The flower center is the finishing touch that elevates your design from pretty to polished. You have two options: decorative metallic beads or a gel-based center.
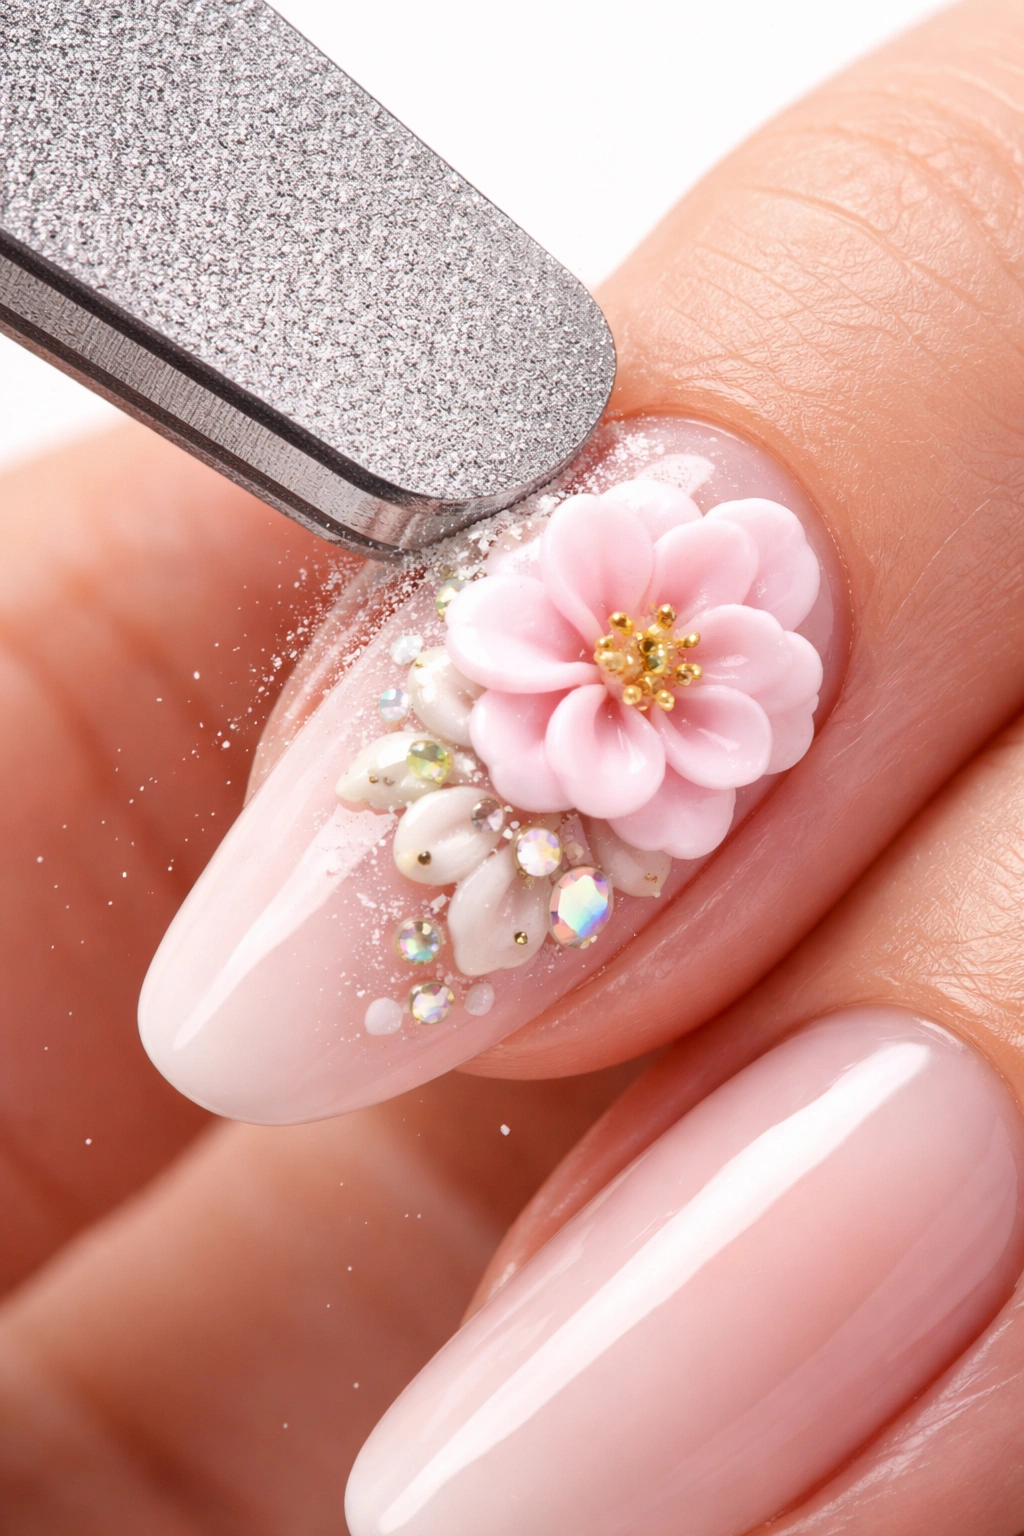
Using Metallic Beads
This is the option from the tutorial and it’s genuinely elegant. Using a tiny amount of nail glue or clear gel as adhesive, carefully pick up three small metallic beads (gold, silver, or rose gold work beautifully) with your dotting tool.
Place them in the very center of the flower, arranging them in a tight trio. The metallic shine catches light and adds a luxurious, intentional detail. Arrange them so they’re touching and centered rather than scattered around.
Cure one final time to secure them firmly in place. Once cured, these beads aren’t going anywhere.
Creating a Gel-Based Center
If you don’t have beads or prefer a less textured option, you can create a center dot instead. Use your dotting tool to place a single small dot of white or sheer pink gel in the center of the flower. You could even use a slightly darker color here for contrast. Cure it, and you have a beautiful, subtle center that lets the petals be the star.
Sealing Your Design with Top Coat
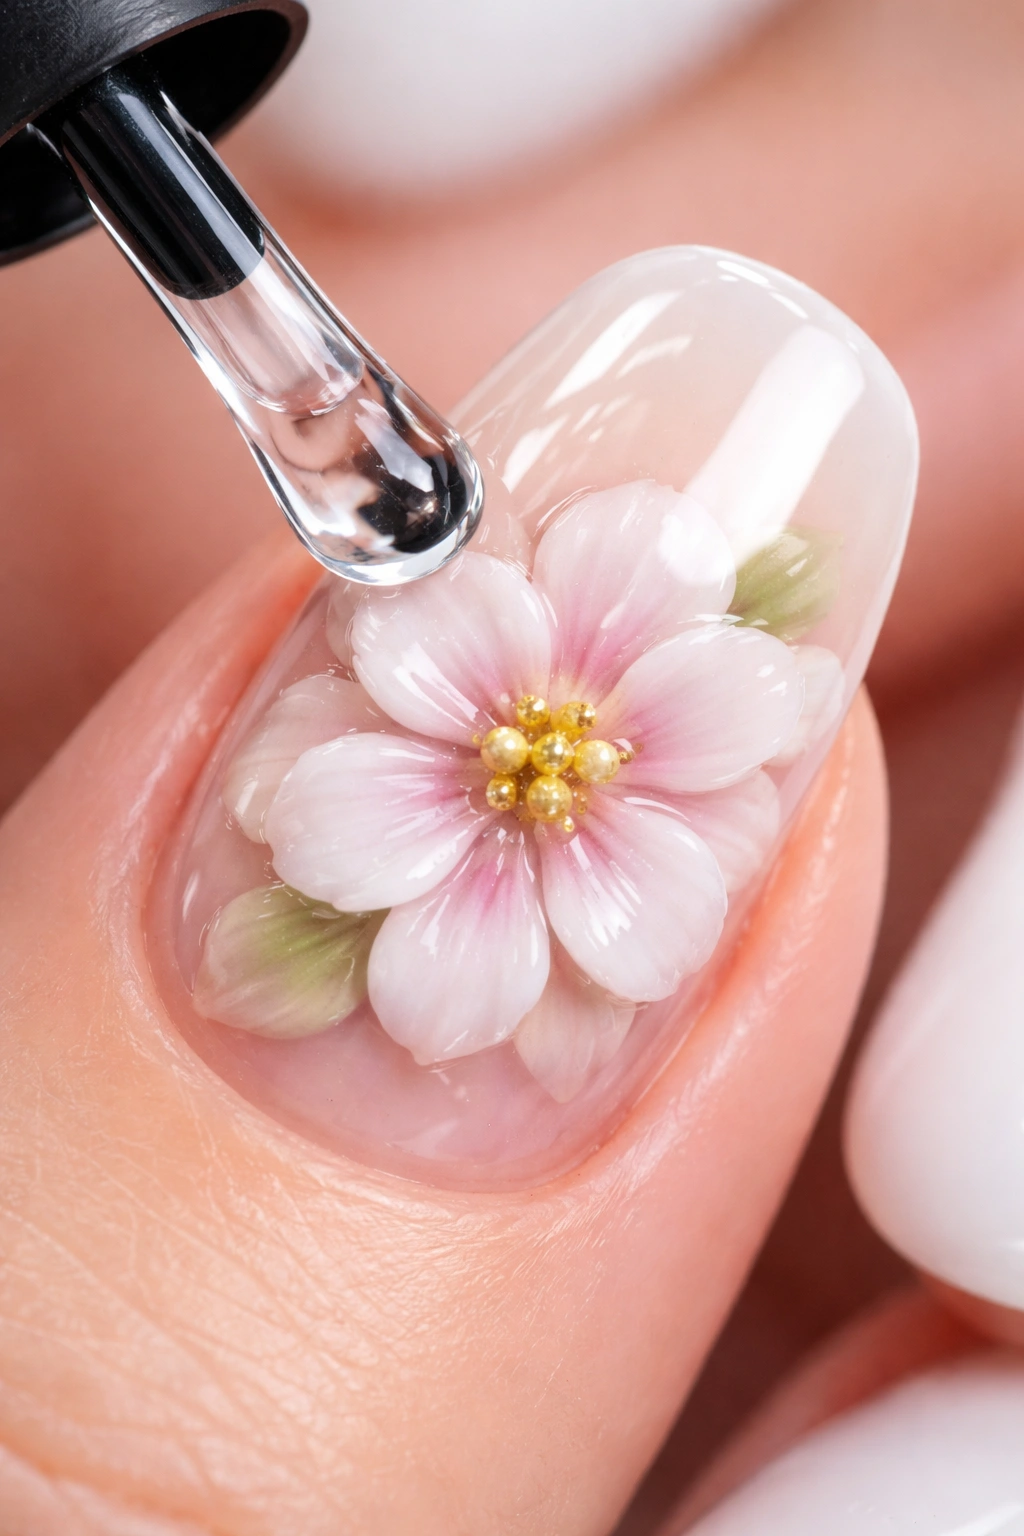
This final step is what ensures a salon-quality finish and longevity. Without proper sealing, your beautiful flowers would be vulnerable to chipping and dull quickly.
Apply a generous layer of no-wipe top coat over the entire nail, being generous with the amount. Don’t skimp here—you want enough product to fully cover and seal everything.
Float the top coat carefully over the 3D flower. Instead of brushing it on aggressively, use gentle, floating motions that let the top coat flow into all the crevices and around the dimensional petals without flattening them. Think of it like a protective glaze that’s carefully settling over your art rather than being painted onto it.
The top coat should cover all the white sculpting gel and wrap around the beads or center dot, creating one unified, glossy surface. You’re essentially encasing your entire design in a protective, shiny seal.
Do a final, thorough cure under your lamp—give it the full time (usually 60 seconds under LED). This final cure is what activates the top coat’s protective properties and locks in that high-gloss shine.
Congratulations—you’ve officially created a 3D flower nail design that looks like it came from a salon. Your nails now have dimensional, sculptural petals that catch light in constantly shifting ways.
Common Beginner Mistakes and How to Fix Them
Even experienced nail artists occasionally hit snags with this technique. Knowing what can go wrong and how to fix it removes the anxiety and lets you troubleshoot confidently.
Your Petals Look Clumpy or Too Thick
This is usually because your initial sculpting gel bead was too large. The solution going forward is to start with a smaller amount of gel—you can always add another thin layer for more dimension, but it’s hard to remove gel you’ve already placed. Start with a bead roughly the size of a grain of rice and build from there.
If you’re in the middle of sculpting right now, you can gently wipe away the clumpy bead with a lint-free wipe and replace it with a fresh, smaller amount before curing.
The Gel is Sticky and Hard to Shape
Your brush might be too dry, or the gel might be picking up lint. Dip the very tip of your brush into a small amount of isopropyl alcohol to help it glide more smoothly through the gel. Wipe off any excess alcohol on a lint-free wipe before touching the gel again—you want just a hint of moisture, not a wet brush.
If your gel keeps picking up fibers, make sure you’re using truly lint-free wipes. Paper towels and regular tissues leave fibers that get stuck in gel. Switch to wipes specifically designed for nail work.
Your Flower Looks Flat Without Dimension
You’re likely pressing too hard when you shape the petals. The goal is a light, confident touch that elongates the bead without flattening it. If you’re using significant pressure, you’re essentially crushing the gel back down.
Try using just the weight of your brush without pressing. Let the gel flow outward because you’re pulling it, not because you’re compressing it from above. If a petal already lost its height before curing, you can gently wipe it away before you cure and try again.
Your Petals Look Uneven or Lopsided
This is the most common beginner concern, and honestly? It’s not really a problem. Flowers in nature aren’t perfectly symmetrical, and slight irregularities actually make your design look more realistic and artistic. But if you genuinely want more symmetry, practice on nail swatch sticks before committing to your actual nails—the more you sculpt, the more intuitive your hand becomes.
Color Won’t Stay on the White Petals
If your sheer pink color seems to bead up instead of coating the white gel, your white layer probably isn’t fully cured or your brush is too wet. Make sure your sculpting gel layer is 100% cured before applying color on top. Also, avoid using alcohol on your brush right before applying color—just use a clean, dry brush.
Caring for Your 3D Nails

Once you’ve created these beautiful flowers, you naturally want to keep them looking flawless for those full two to three weeks they’re designed to last.
Avoid prolonged water exposure directly after you finish your manicure—wait at least 24 hours before doing activities like swimming or soaking your hands. Once the design is fully set, you can do normal hand activities, but long soaks in hot water can gradually soften the seal on your top coat.
Wear gloves for cleaning and dish-washing. This protects both your nails and the design. Water and harsh cleaners are fine for cured gel, but gloves save you the wear and tear.
Use your nails as they are meant to be used—as nails, not tools. Don’t use them to open cans, scrape off labels, or dig into things. Treat them slightly more gently than you would a natural manicure, especially the dimensional flower portions which are technically more fragile than flat polish.
Apply cuticle oil regularly—every couple of days if possible. This keeps your nails hydrated, your cuticles healthy, and extends the life of your manicure. The oil doesn’t harm cured gel; it’s actually beneficial.
If you notice the top coat starting to wear or peel at the edges, don’t panic—this is normal after a couple of weeks. It doesn’t mean your design is ruined; it just means you’re reaching the end of your manicure’s life.
Removing 3D Nail Art Safely
Proper removal is genuinely important for your long-term nail health. Never pick, peel, or force off 3D nail art—this will damage your actual nail plate underneath.
Use a hand file or e-file to gently file down the bulky 3D parts of the flowers until they’re nearly flush with your nail. This takes patience because you’re dealing with sculptured gel which is thicker than regular polish, but patience prevents damage to your natural nail beneath.
Once the 3D portions are filed down, proceed with a standard gel removal process. Soak your nails in acetone-soaked cotton pads wrapped in foil for 10-15 minutes, then gently nudge away the softened gel with a wooden stick or cuticle pusher. You’re removing the entire gel layer at this point, not just the flowers.
Never use an e-file aggressively on your actual nail plate. You’re only removing the gel, not sculpting your natural nail. If you’re nervous about filing, many salons will remove gel nails for you affordably—it’s worth paying for professional removal if you’re worried about damaging your nails.
After removal, your natural nails might feel slightly thin or soft. This is temporary and completely normal. Use cuticle oil and hand cream liberally for a week or two, and avoid doing another gel manicure immediately—give your nails a break to fully harden.
Taking Your Designs Further
Once you master basic 3D flower nails, the design possibilities multiply. You’re not limited to single flowers or white petals.
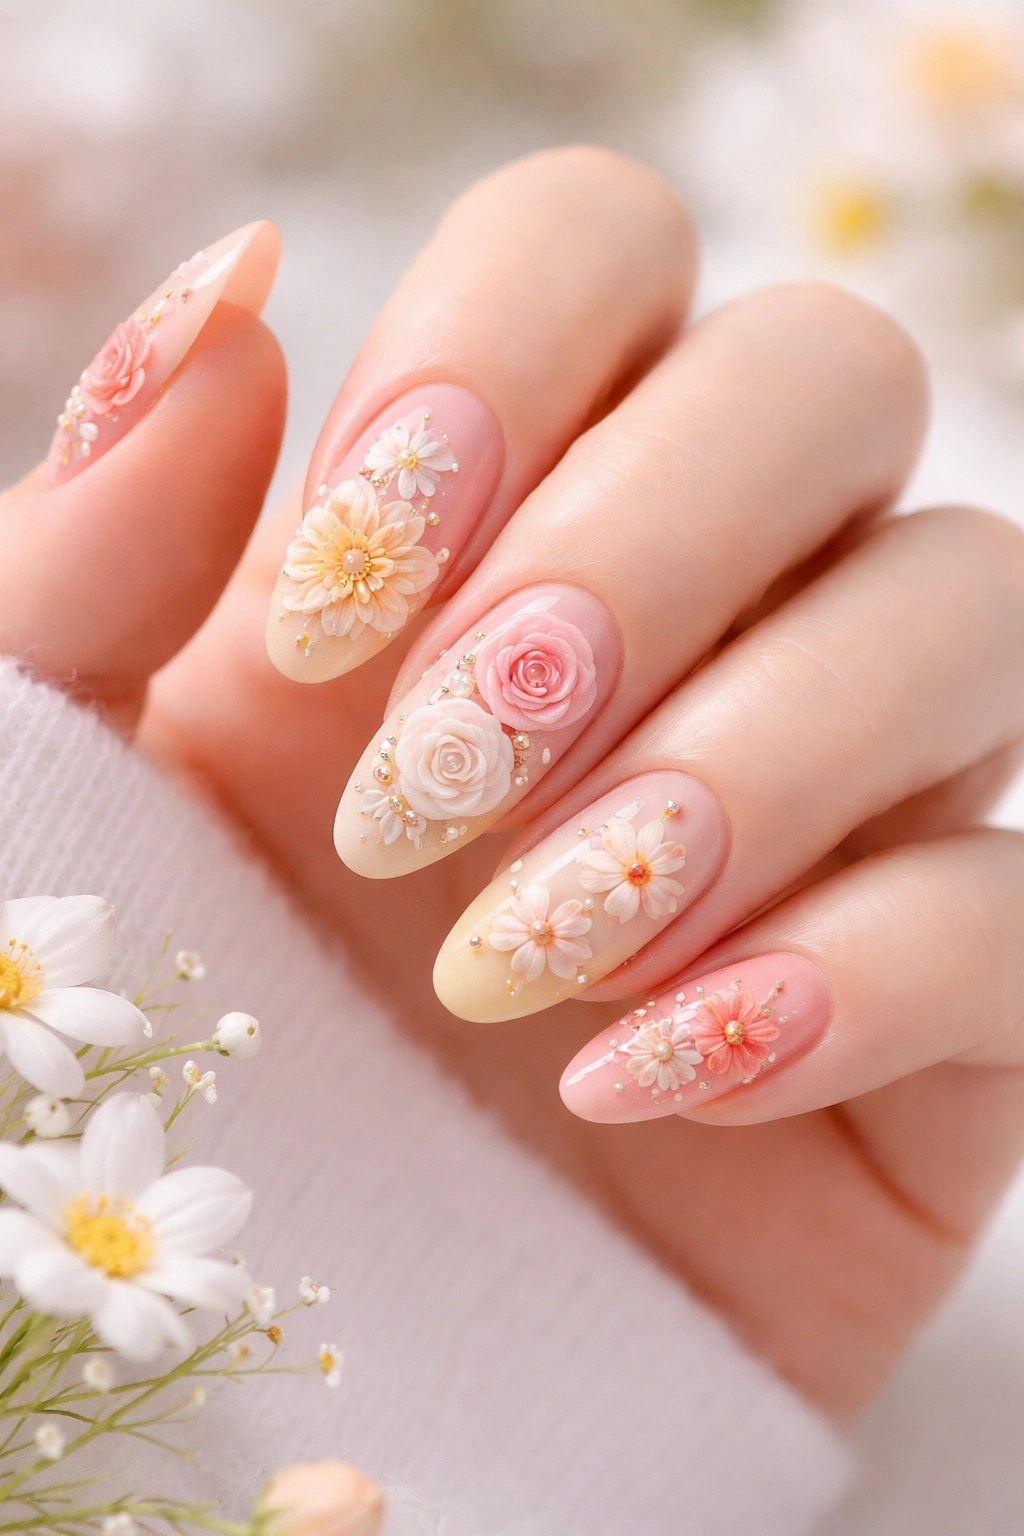
Try different flower types. Once you understand the five-petal technique, you can experiment with roses (more layers, tighter petals), dahlias (more petals arranged differently), or wildflowers. Each has its own sculptural personality.
Play with color combinations. What if you used sheer coral instead of pink? Or pale yellow? Or peachy tones? The sculpting technique stays the same; only the color palette changes. You could even create ombré flowers where each petal has a different tint.
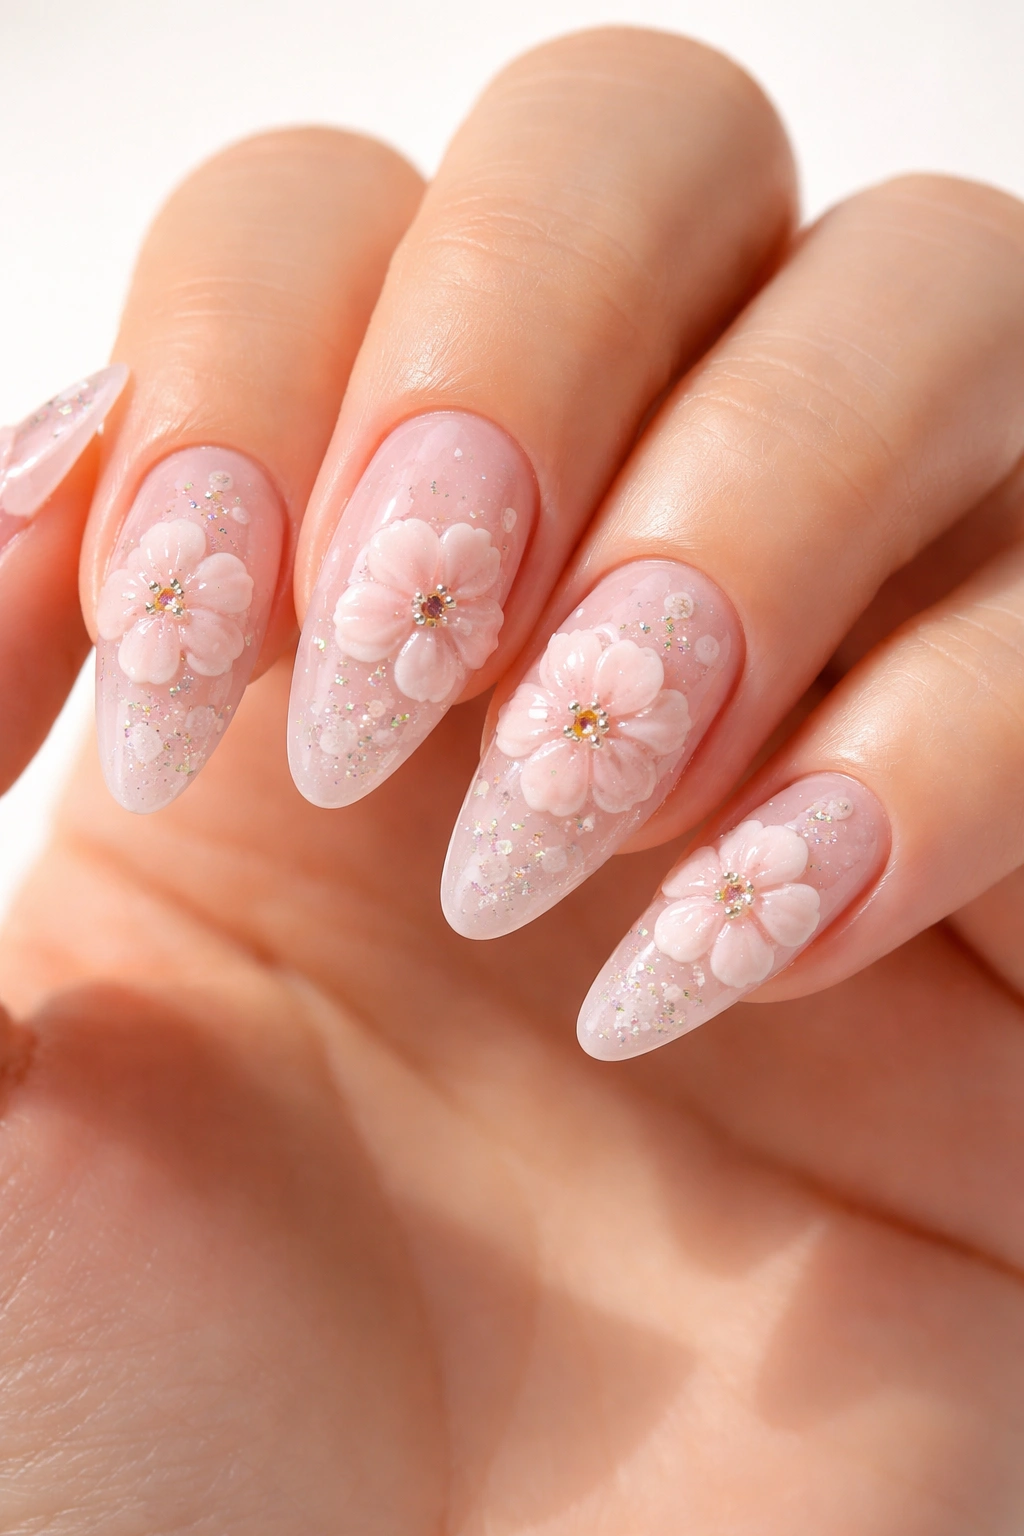
Add multiple flowers. A thumb with one large flower and four fingers with smaller flowers is stunning. Or scattered flowers across all five nails. You’re creating a full manicure design, not just individual nail art.
Experiment with accents. What if you added tiny gold lines between petals? Or baby pearls around the flower base? These little details are where you develop your own style and signature.
Try negative space designs. Leave the bottom half of your nail as just the base color and the flower on top—the contrast is clean and modern.
The technique you’ve learned is genuinely the foundation for unlimited creativity. Once your hands know how to sculpt gel into petals, your imagination is really the only limit.
Final Thoughts
Creating 3D flower nails is genuinely one of those skills that feels intimidating before you try it but becomes surprisingly natural the moment you understand the technique. You’re not trying to paint a masterpiece—you’re simply placing gel, shaping it gently, and letting the material do what it’s designed to do. The gel does most of the work once you understand how to direct it.
The most important thing is patience and a willingness to practice without pressure. Your first flower might not be perfect, and that’s completely fine. Your fifth flower will be noticeably better. By your tenth attempt, you’ll be sculpting without thinking, and the muscle memory in your hands will take over.
The beautiful part about this design is that it genuinely impresses people. You’re not just wearing polish—you’re wearing dimensional, sculptural nail art that catches light and moves with your hands throughout the day. It’s the kind of detail that reads as intentional, creative, and luxurious, and you made it yourself in your own home. That combination of beauty, durability, and the pride of creating something yourself is what makes 3D flower nails worth the learning curve.
