

Dip powder nails have become a go-to at-home manicure method because they’re faster than traditional polish, more durable than gel, and surprisingly forgiving for beginners. The squoval shape—that perfect hybrid between a square and an oval—has taken over because it’s universally flattering, practical for daily life, and honestly, just looks polished and intentional. What makes doing dip powder nails in squoval shape at home so appealing is that you get a salon-quality finish without the salon price tag or the wait, and the whole process takes about 30 to 45 minutes once you know what you’re doing.
The beauty of dip powder is that the color actually sinks into your nail, creating a hard-shell finish that lasts three to four weeks without chipping—something regular polish can’t compete with. The squoval shape specifically gives you enough surface area to show off color and nail art, but the slightly rounded edges mean it’s less prone to breaking than a sharp almond or coffin shape. If you’ve been hesitant about trying dip powder at home or worried about getting that shape right, the good news is that with the right technique and tools, it’s absolutely achievable. You’ll get consistent, beautiful results every single time once you practice the process a few times.
Gathering Your Dip Powder Supplies and Tools
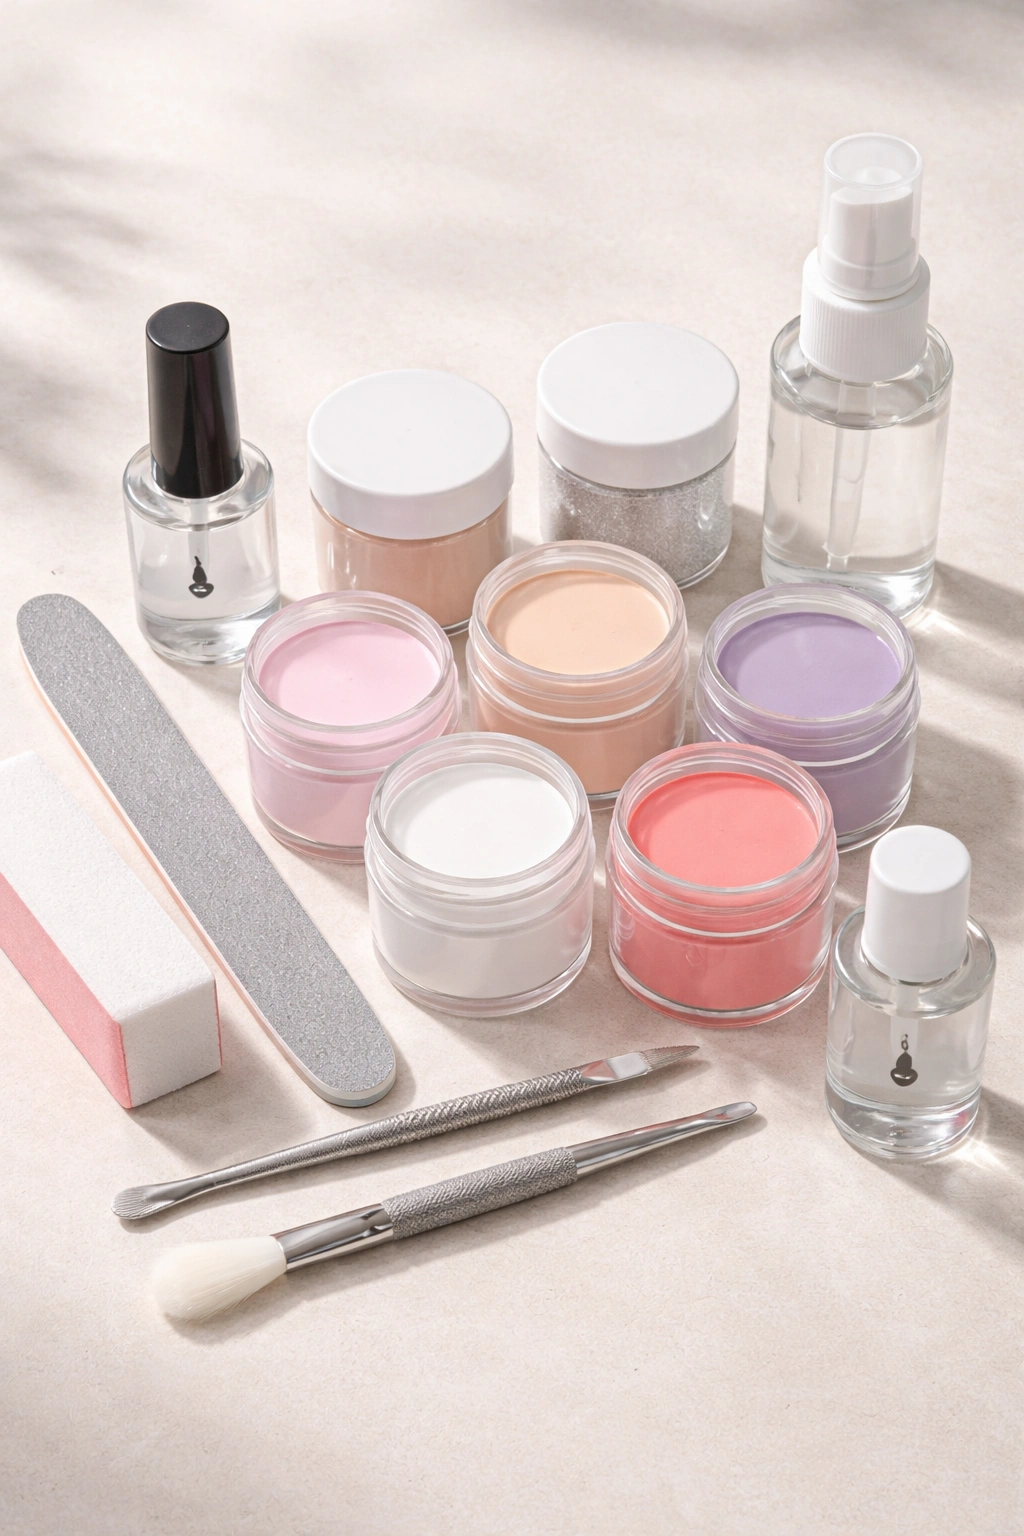
You’ll need a specific set of supplies before you start—this isn’t a project where you can improvise with regular manicure tools and expect great results. The most essential items are a dip powder system (base coat, dip powder in your chosen color, and activator/top coat), a nail file, a cuticle pusher or metal tool, nail dehydrator, and some kind of buffer. Many brands sell complete kits that include everything bundled together, which is honestly the easiest route if you’re starting from scratch.
For the powder itself, investment matters here. Cheap dip powders tend to be chalky, don’t adhere properly, and can look streaky or patchy. Quality brands like SNS, Kiara Sky, or Revel give smooth, opaque coverage and last longer on your nails. You don’t need a million colors—pick one or two to start with and expand your collection as you get comfortable.
Beyond the powder system, you’ll want a nail file specifically for shaping (not those thin metal files from your junk drawer), a good cuticle pusher or metal spatula tool, and something to dehydrate your nails before dipping. Some people use rubbing alcohol, but a dedicated nail dehydrator spray is worth the investment because it works faster and more consistently. You’ll also need a small container or dipping pot—many systems include one, but if yours doesn’t, a shallow dish or even a small ceramic bowl works fine in a pinch.
Have some paper towels or lint-free wipes on hand because you’ll be wiping powder off your brush repeatedly during the process. A UV lamp isn’t necessary for dip powder the way it is for gel, but many people use one anyway to speed up the curing process between coats. Most importantly, set yourself up in a well-ventilated space—open a window or work near a fan—because dip powder does have fumes, though they’re less intense than gel or acrylics.
Preparing Your Nails for Perfect Adhesion
This step is where most people get sloppy, and it’s actually the foundation for whether your dip powder will stick properly and last the full three weeks. Start by removing any old polish or product from your nails. If you’re coming from gel or previous dip powder, use an acetone-based remover or file it off carefully—don’t rush this part because you don’t want to damage your nail bed.
Once your nails are bare, wash your hands thoroughly with soap and water to remove any oil, lotion, or residue. Dry them completely with a clean towel. This is essential because moisture and oils prevent the base coat from adhering, which means your dip powder won’t stick and you’ll get lifting within days.
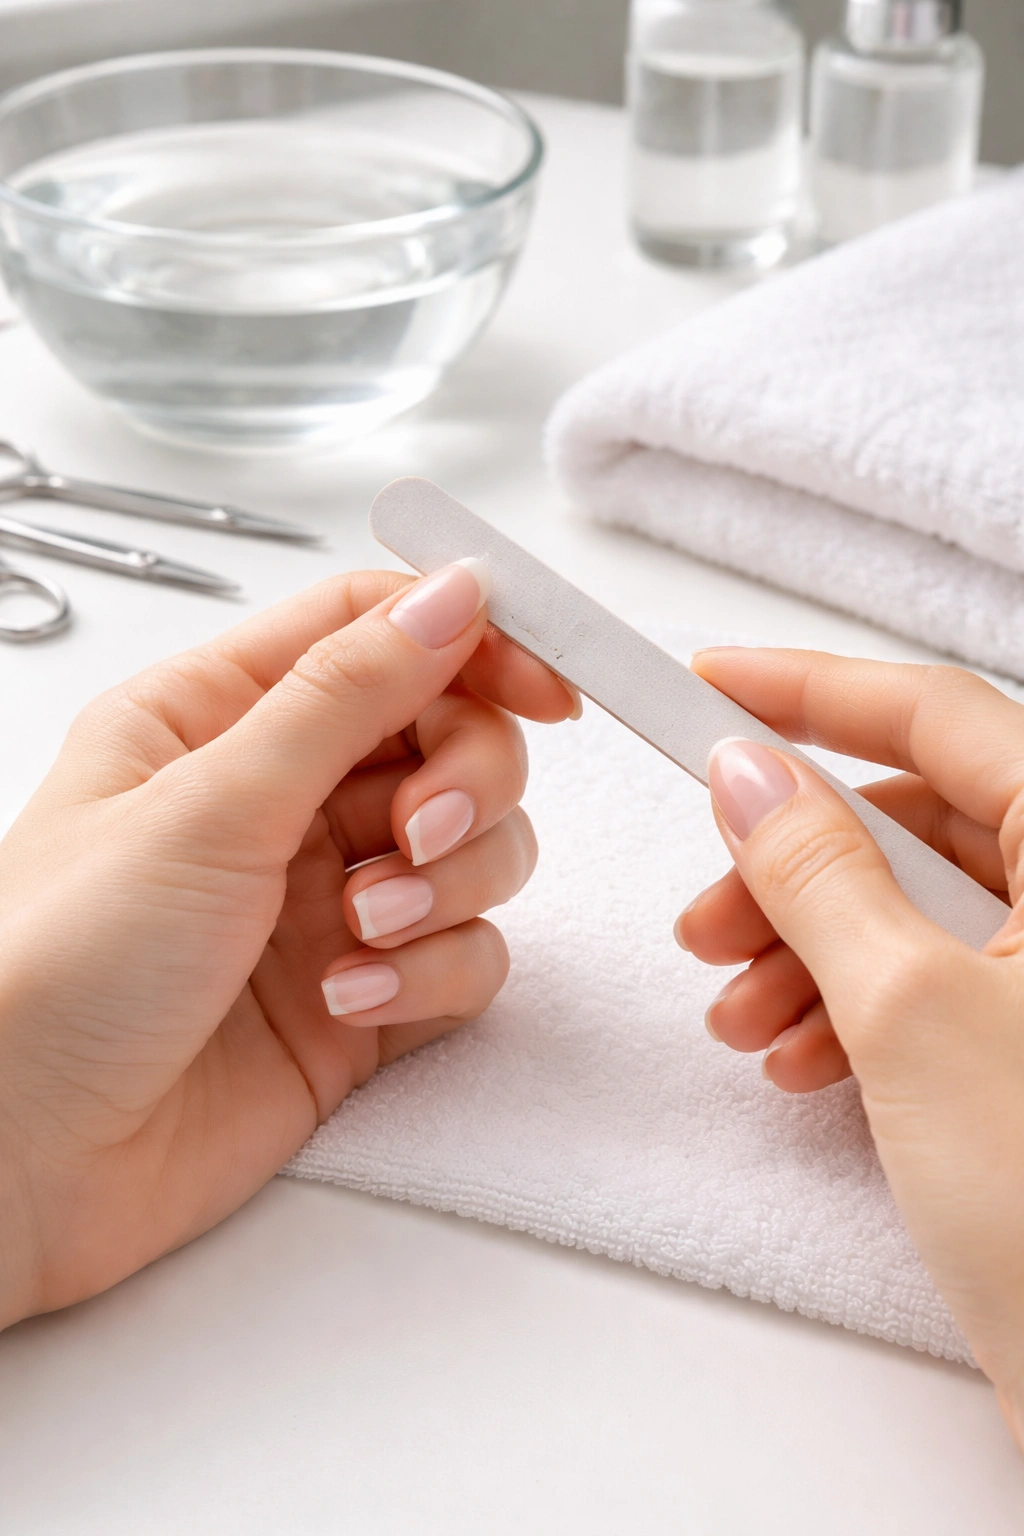
Now file your nails into a squoval shape. The squoval shape isn’t hard to achieve—it’s basically taking a square nail and rounding the corners slightly. File straight across the top to create a squared-off edge, then very gently round those sharp corners with a few light strokes of the file at a 45-degree angle. The key is to barely round them—you’re not creating a dramatic curve like you would with an oval. You want the overall shape to still read as mostly square but feel softer and less sharp when the corners catch on things. File from the outer edge toward the center on each side, using long, smooth strokes rather than a back-and-forth sawing motion, which can cause splitting and weakening.
Keep your nails to a moderate length—ideally about one-eighth of an inch past your fingertip, give or take. Dip powder can work on longer nails, but when you’re starting out, shorter nails are easier to manage and less likely to break before the powder has fully hardened.
Pushing Back Cuticles and Creating Clean Nail Canvas
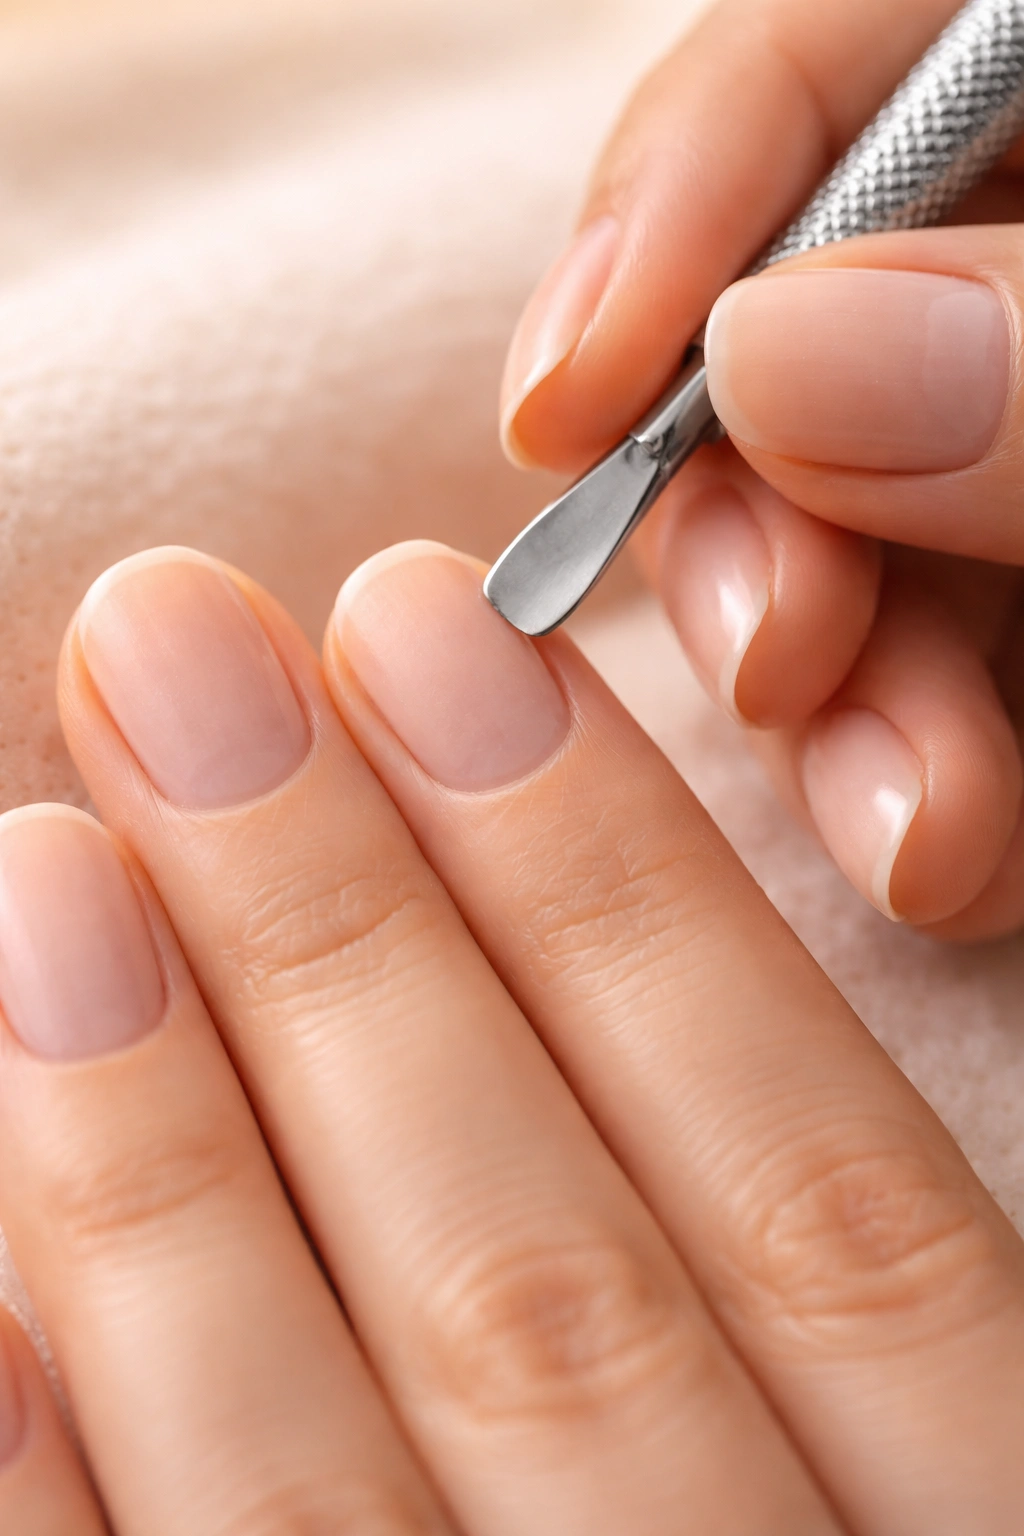
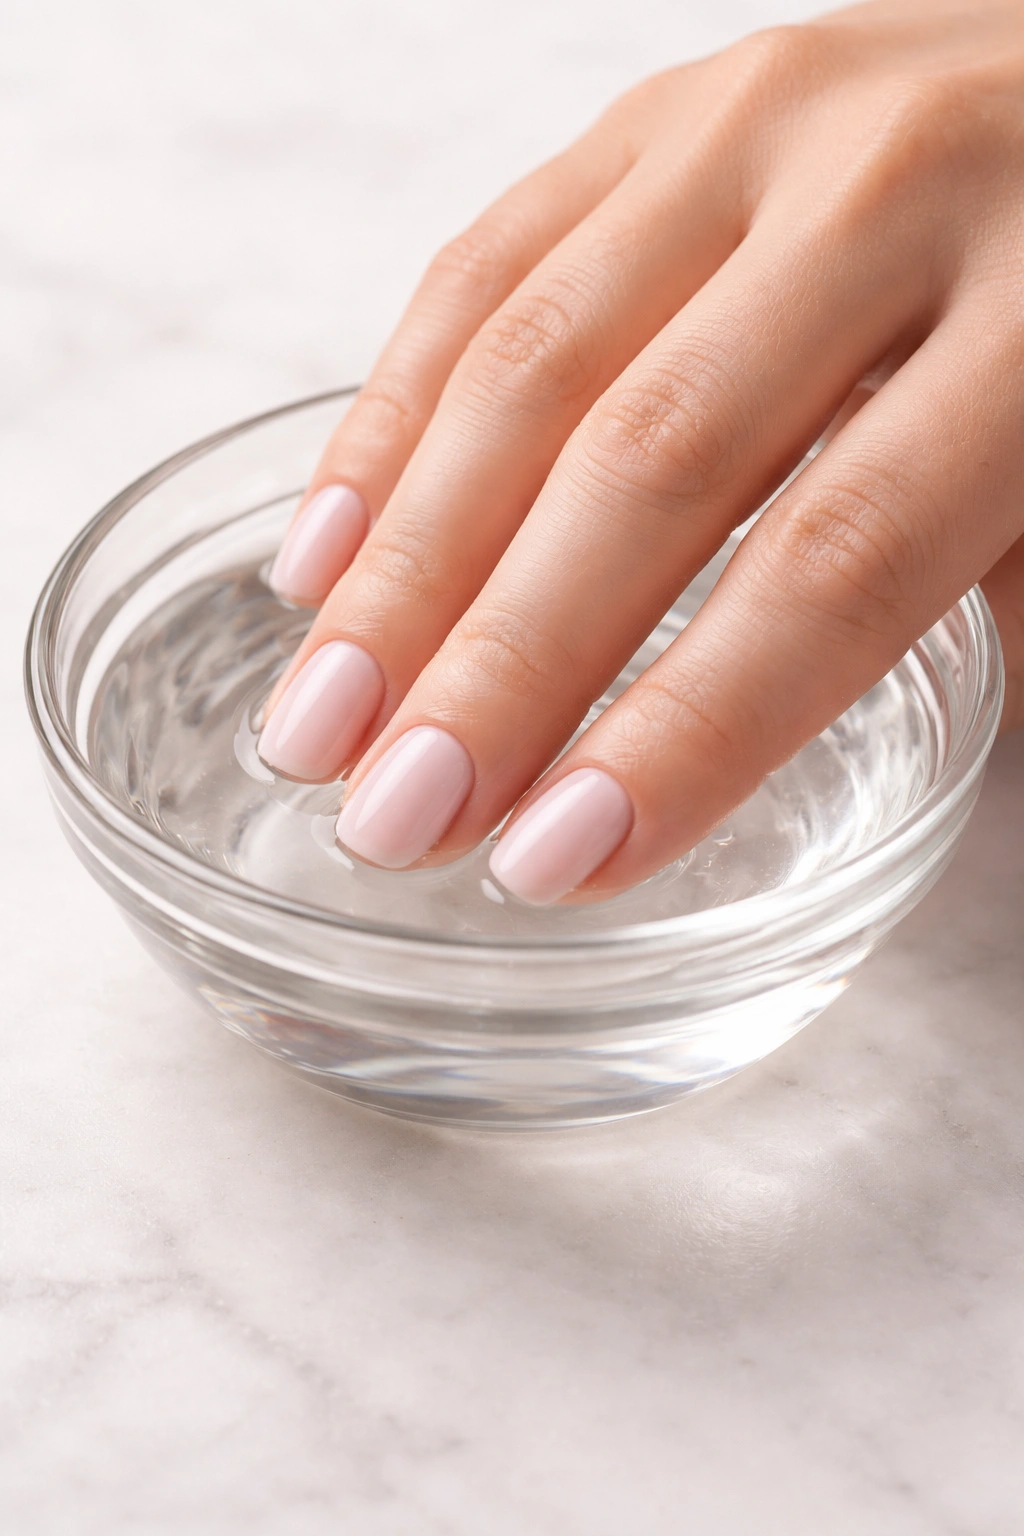
Push your cuticles back gently but thoroughly because cuticles can get in the way of adhesion and create an uneven surface. Use a cuticle pusher or a metal nail tool—never use your fingernail or a sharp object that could damage the cuticle tissue. Soak your fingers in warm water for a minute or two first if your cuticles are particularly stubborn; this softens them and makes pushing back much easier without causing irritation.
Once your cuticles are pushed back, use a buffer or a nail buffer block to gently roughen the surface of your nail. You’re not trying to sand it down heavily—just enough to create a slightly matte finish instead of a shiny one. This texture helps the base coat and powder adhere better. Buffer in gentle circular motions across the entire nail surface, being careful not to buff too hard near the edges where nails are thinner and more prone to damage.
After buffering, wipe away all the dust with a damp paper towel or lint-free wipe. Your nail should feel slightly rough to the touch but look clean. At this point, you can apply the nail dehydrator spray if you have one—this removes any remaining moisture and oils and truly sets you up for the best adhesion. Spray it on, wait 30 seconds for it to dry, and you’re ready for the next step.
Applying Your Base Coat Evenly and Thoroughly
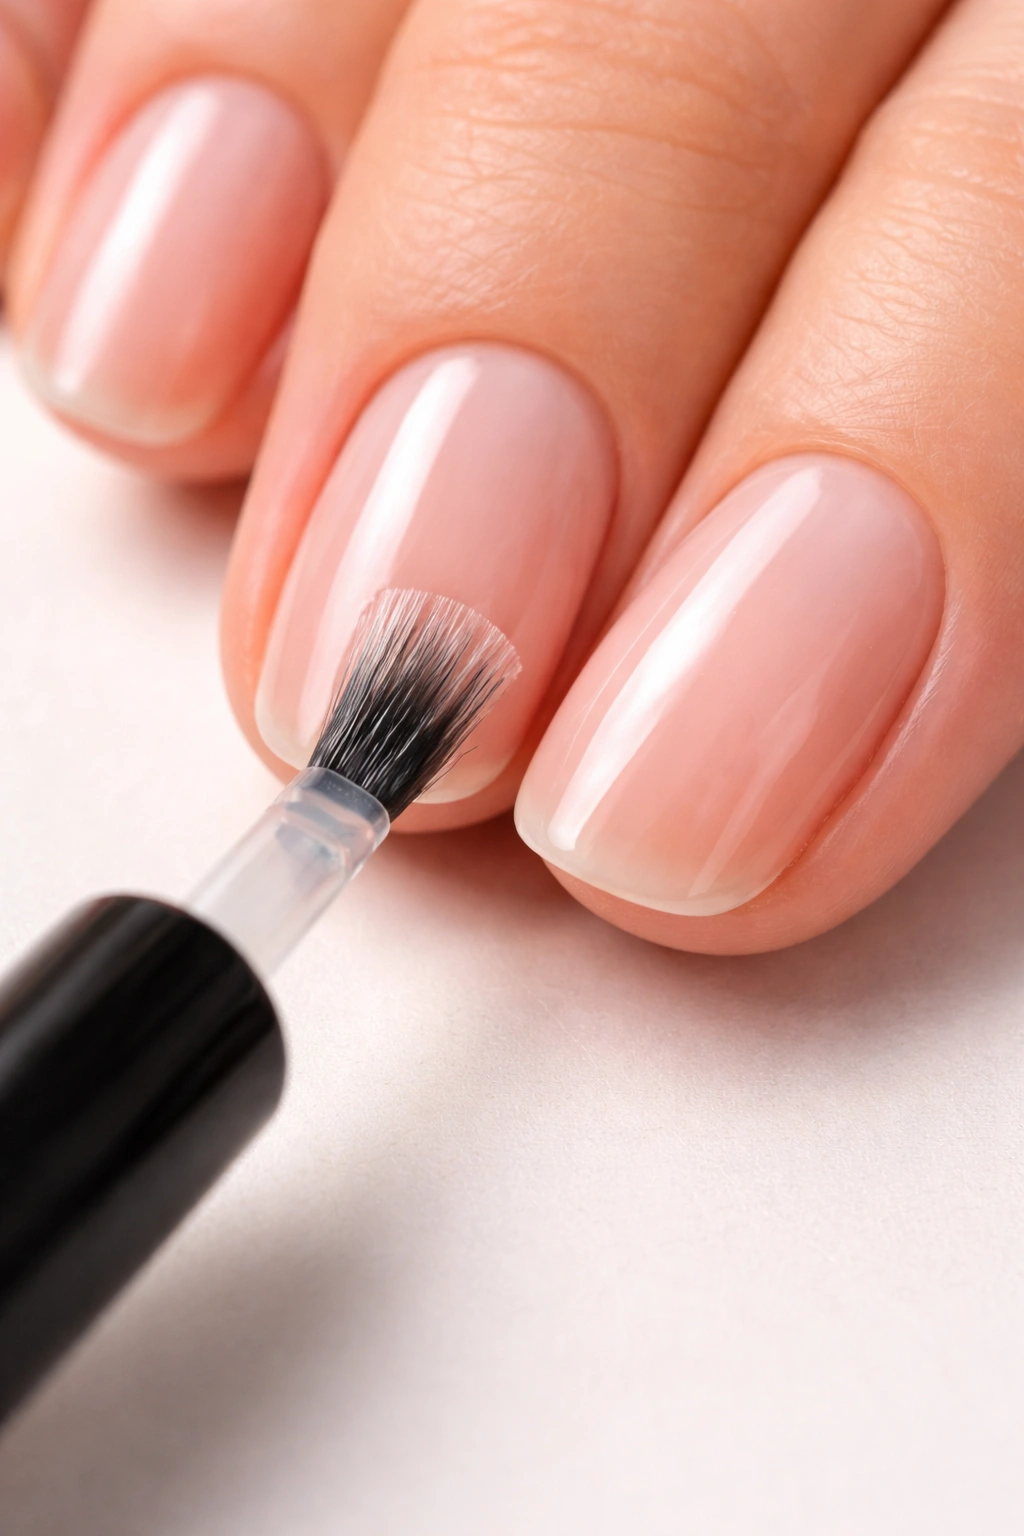
The base coat is what the dip powder sticks to, so this layer absolutely has to be done right. Most dip powder systems include a base coat that’s thicker than regular nail polish and specifically formulated to bond with the powder. Don’t use a regular nail polish base coat here—it won’t work the same way.
Apply a thin, even layer of base coat to all ten nails. Use smooth, deliberate strokes—start in the middle of your nail and stroke outward toward the tip, then go back and coat the sides. Make sure you cover the entire nail surface, including the edges. The layer should be complete but not so thick that it’s gloopy. If you apply it too thin, you’ll need more coats and the final result might look streaky; too thick and it takes longer to dry and can pool under the nail edges.
The exact drying time varies by brand, so check your product instructions. Some base coats dry in seconds; others need a minute or two. Don’t move on to dipping until the base coat feels completely dry and set—if it’s still tacky, the powder won’t grab properly.
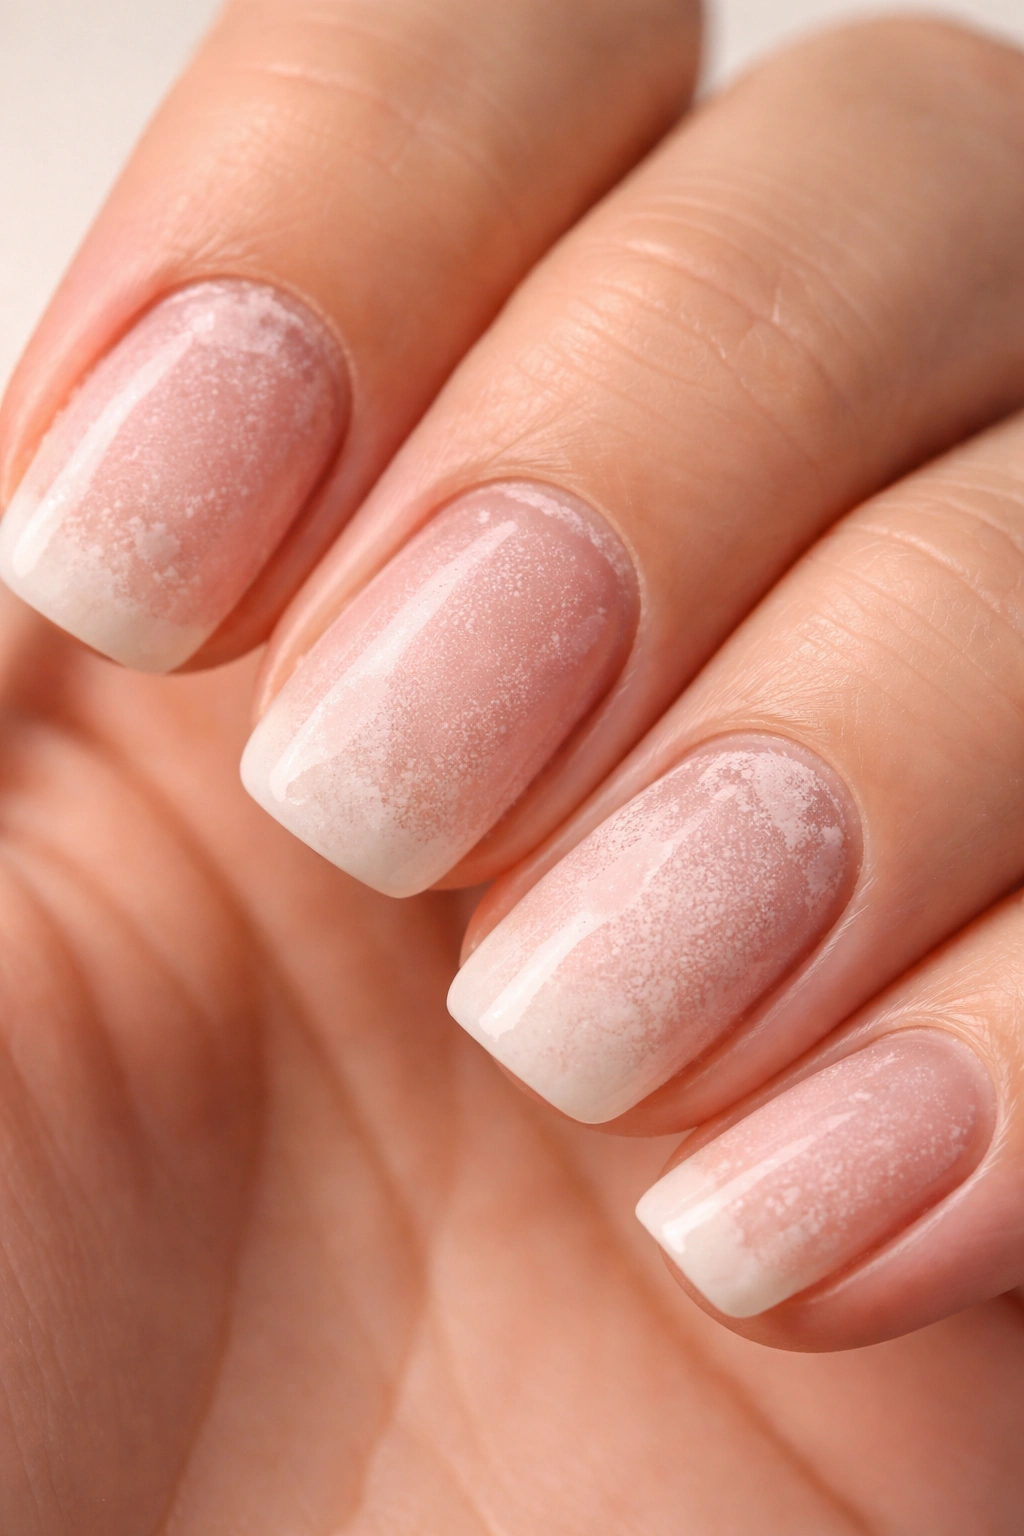
The Dip Process: Getting That First Layer of Color
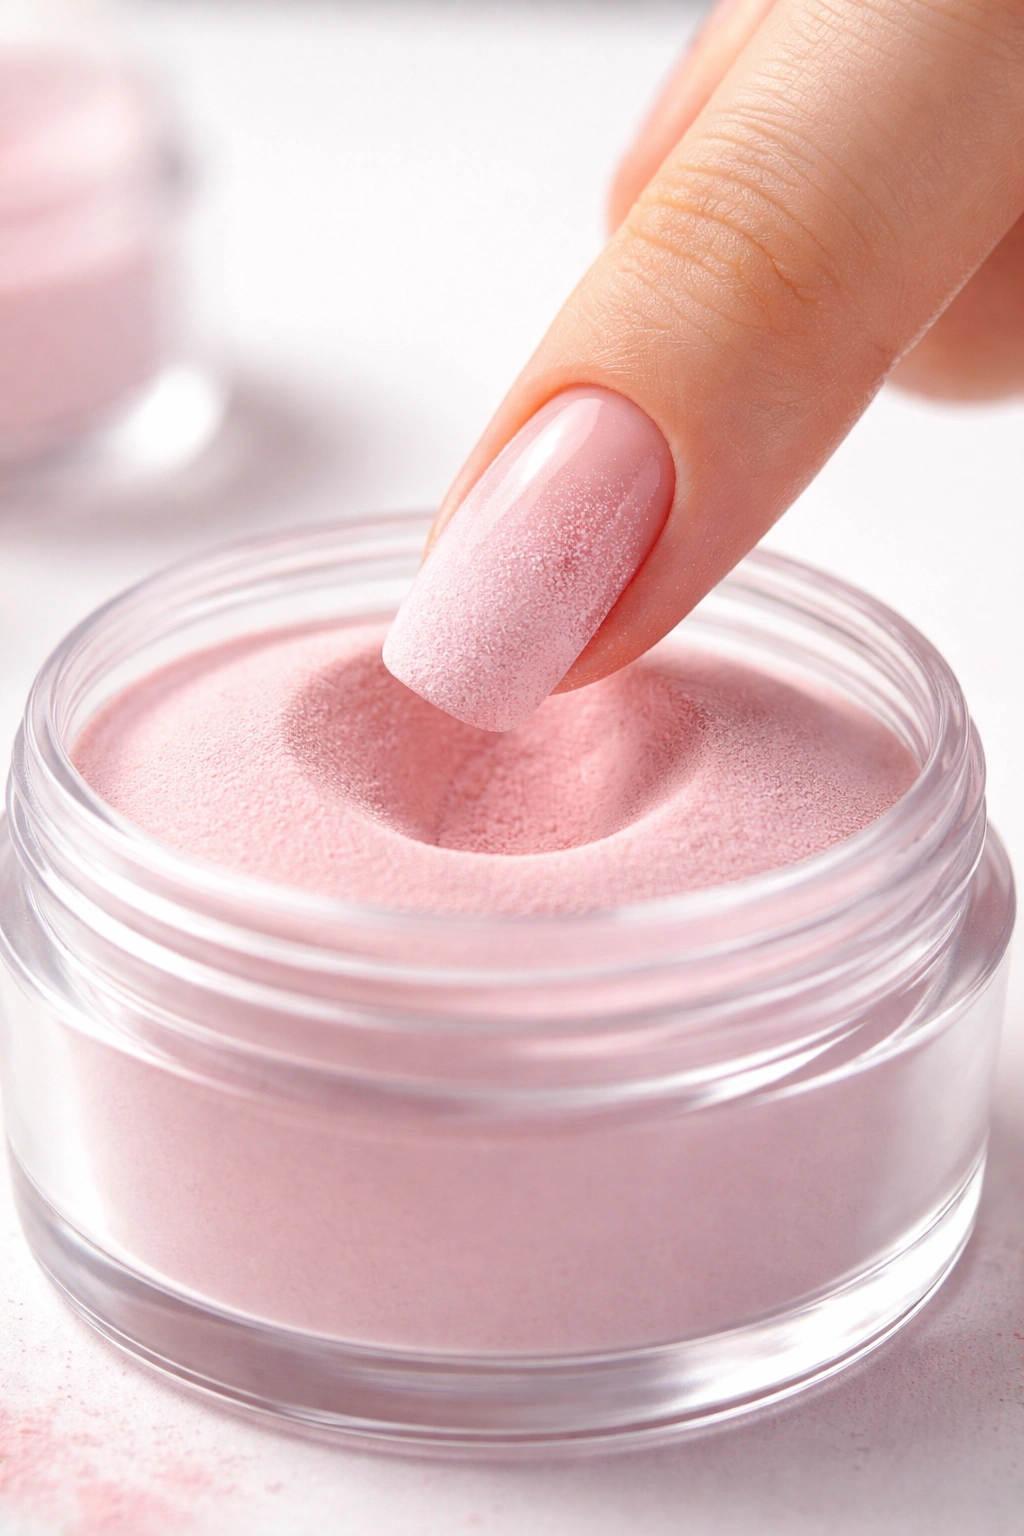
Here’s where the actual color and magic happen. Open your dip powder container and make sure the powder is loose and accessible—if you’re using a jarred powder, you might want to pour some into a shallow dipping pot so you can coat your nail more easily.
Hold your finger at a 45-degree angle and dip your nail into the powder, rolling it slightly as you go in to ensure the entire surface gets coated. The base coat should be sticky enough that powder clings to it immediately. Once your nail is in, give it a gentle wiggle to make sure powder gets into all the crevices and edges, then pull your finger out slowly. Tap off any excess powder back into the container—you want powder left on your nail, but not a huge glob hanging off the sides.
Inspect your first coat. It should cover the nail fairly evenly, though it’s normal if it looks a bit lighter or has minor spots that need a second coat. If you see bare spots where no powder stuck, your base coat may not have been sticky enough—you might need to reapply base coat and try again on that nail.
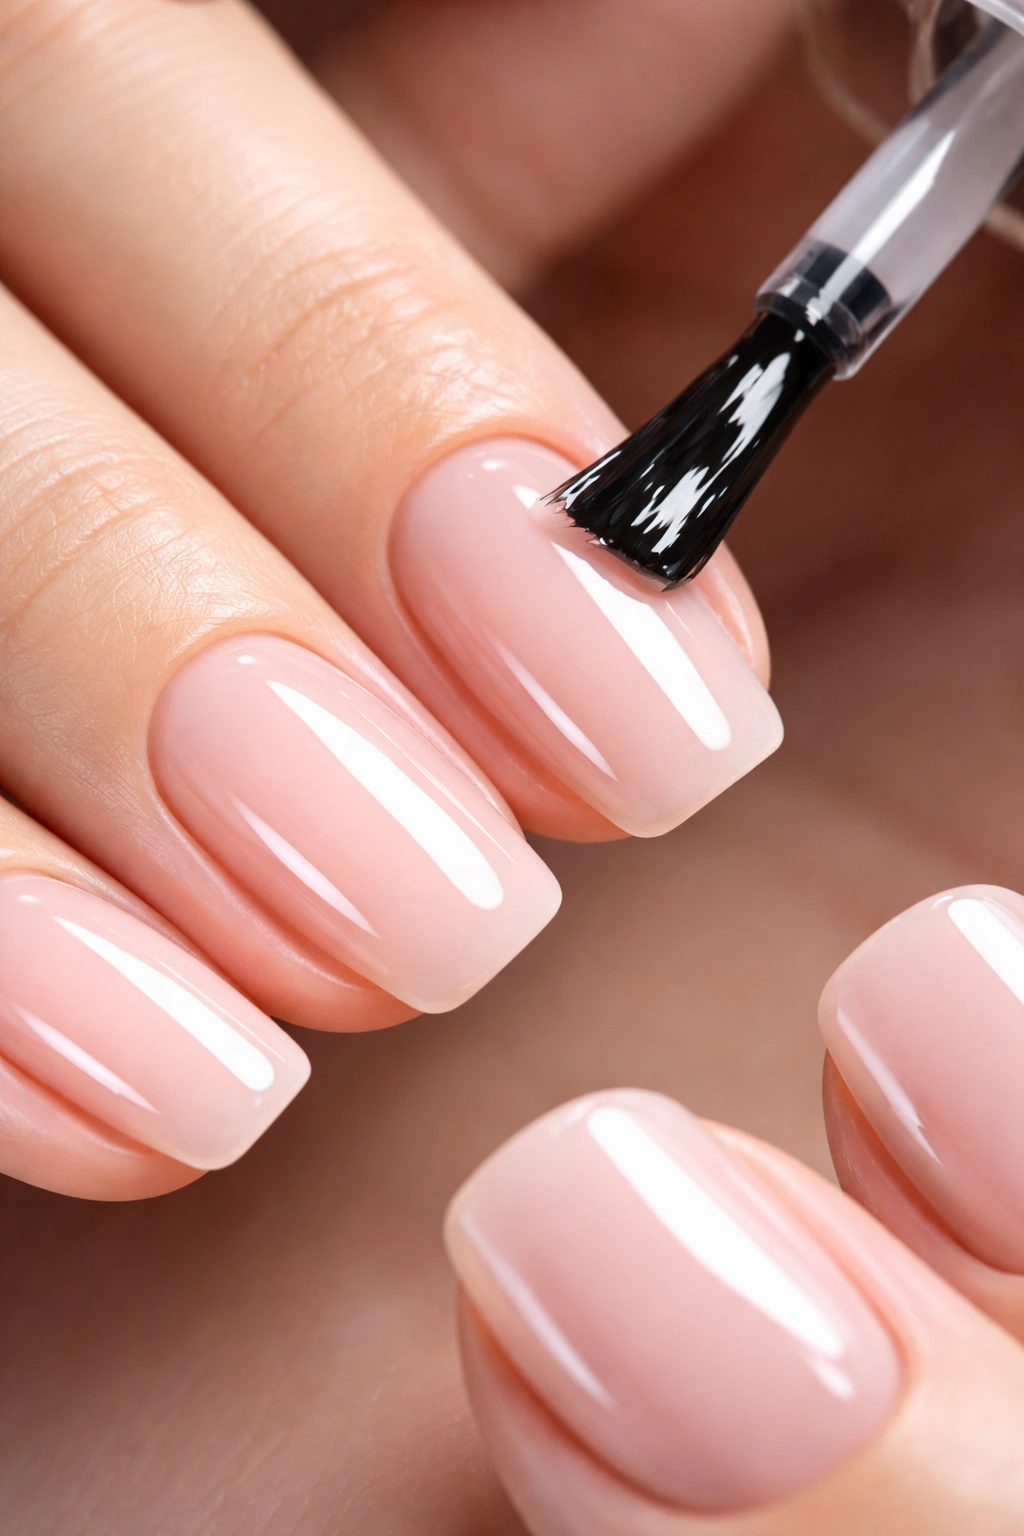
Sealing Each Layer With Activator Liquid
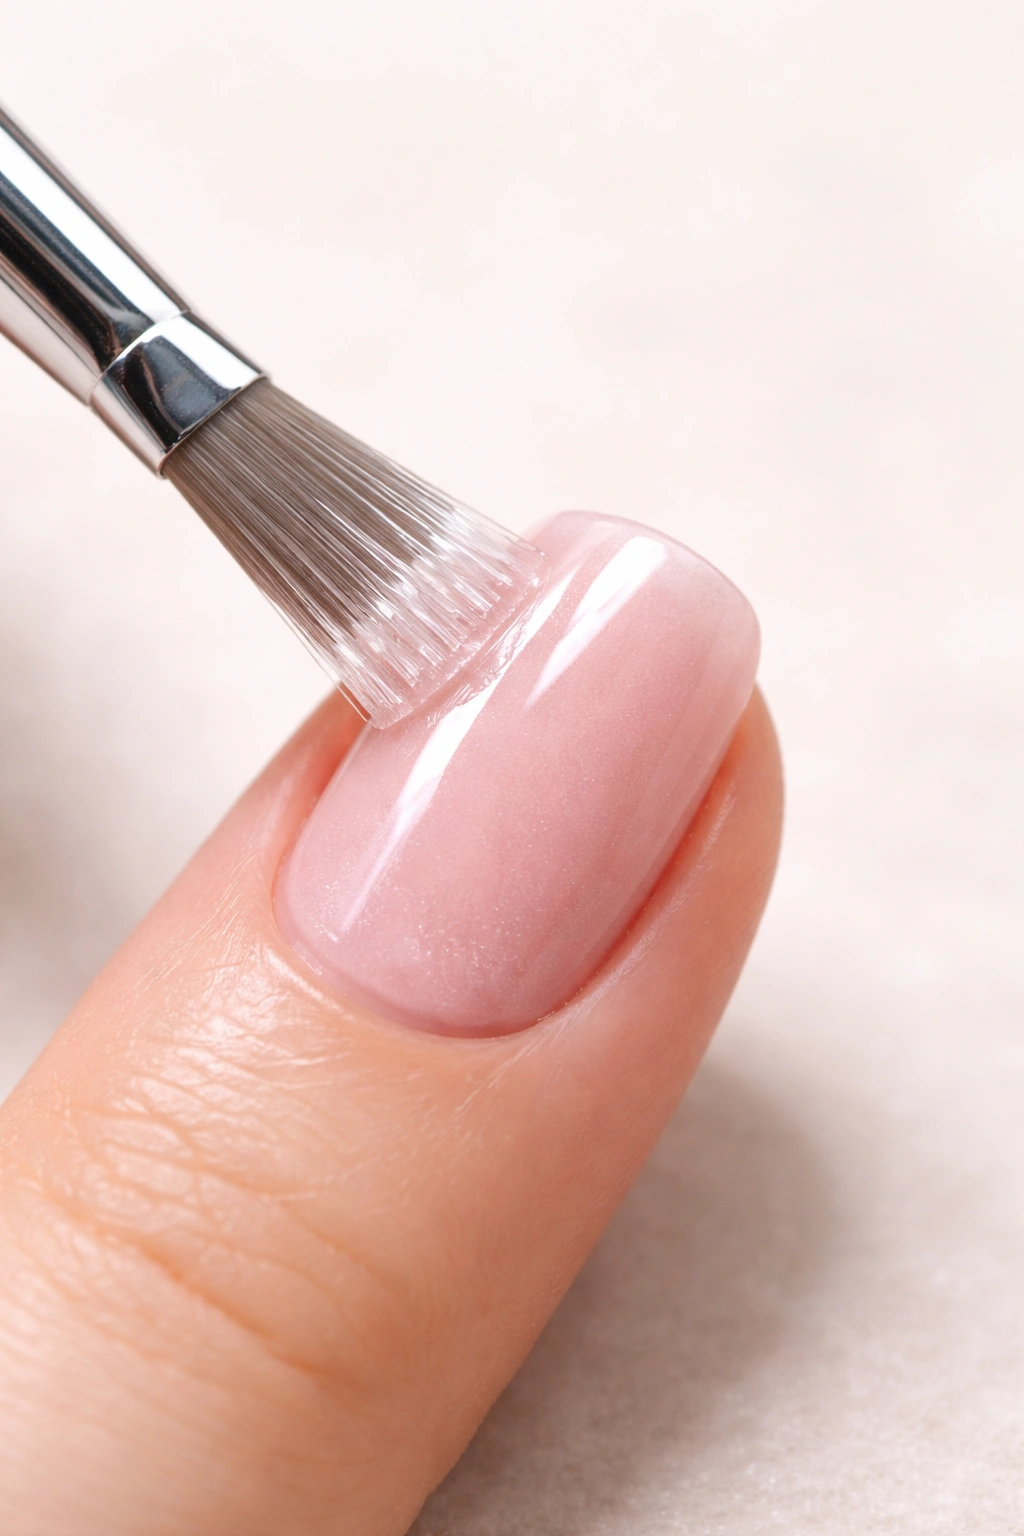
After your first dip, you need to apply an activator (also called a seal or top coat liquid) that hardens the powder and makes it set. This is a crucial step that many beginners rush through or skip, and it’s why their dip nails don’t last. The activator chemically bonds the powder and creates that hard shell.
Brush the activator across the entire nail surface using a small brush or applicator that comes with your system. The brush strokes should be deliberate and smooth—paint it on like you’re applying regular nail polish. Make sure you get into the edges and around the cuticle area. Let it dry completely. Most activators dry within 30 seconds to a minute, but again, check your product to be sure.
Once the activator is dry, the powder should feel noticeably harder. This is the point where you can do a quick inspection and decide if you want to add another coat of color. Most people do at least two coats of powder to get full, opaque coverage, especially with lighter colors like pastels or nudes.
Building up Additional Coats for Full Coverage and Color Depth
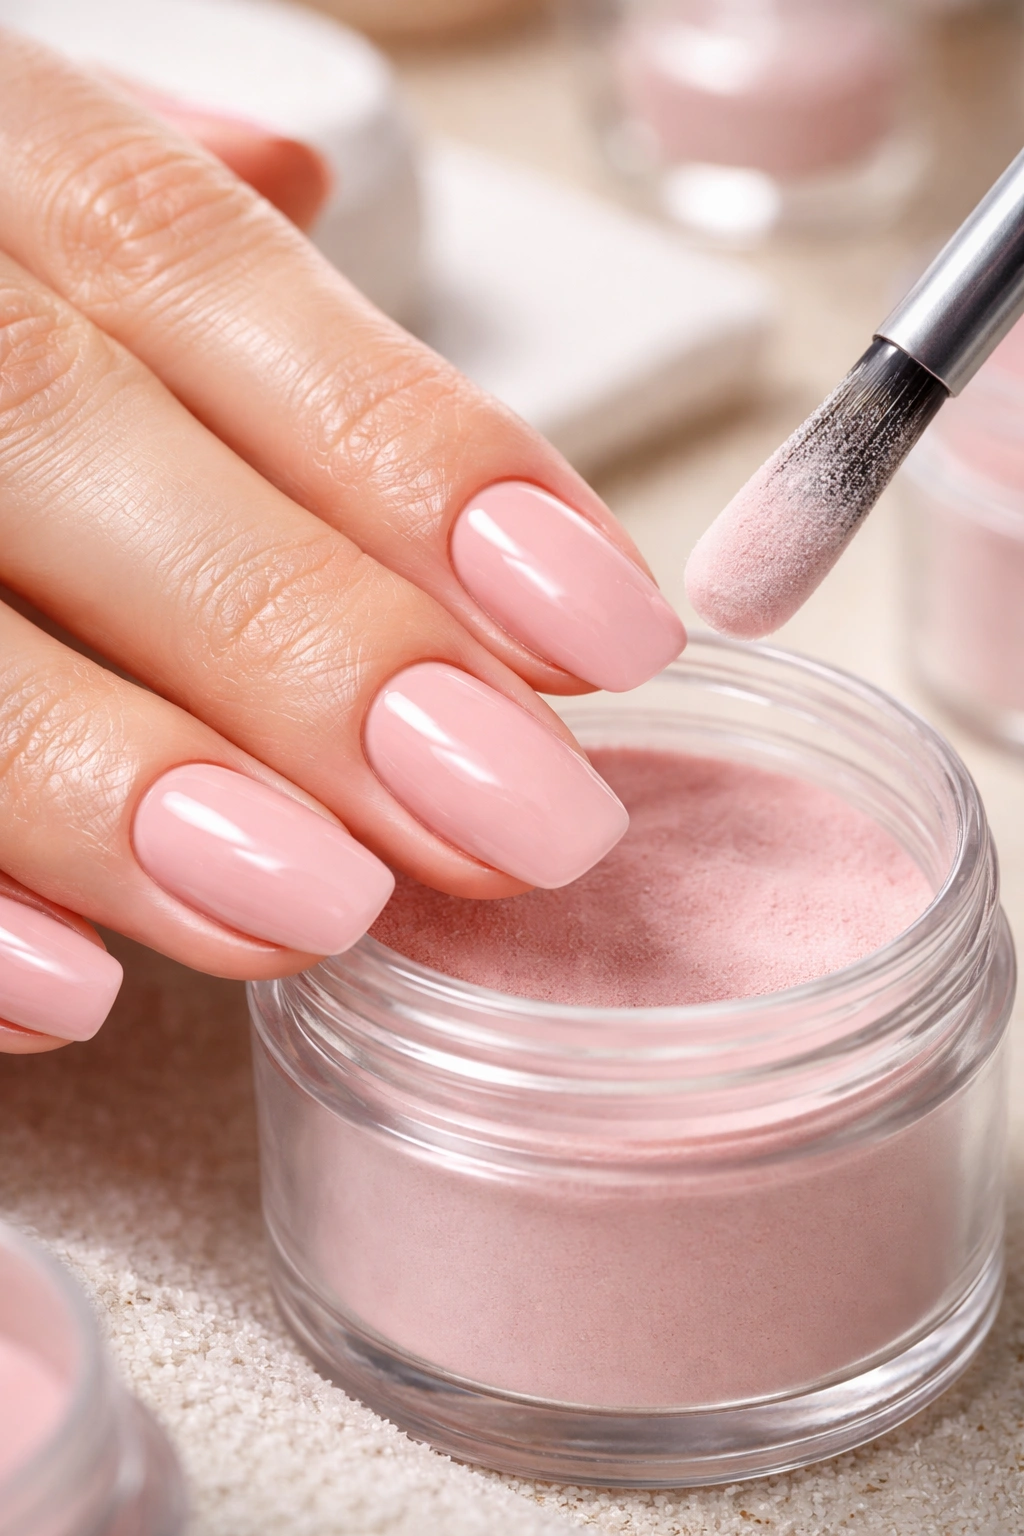
For your second layer, apply another coat of base coat to the nails that need more color. It doesn’t need to be as thick as the first one—just enough to make the surface sticky again. Then dip into the powder one more time, tap off the excess, and inspect the coverage.
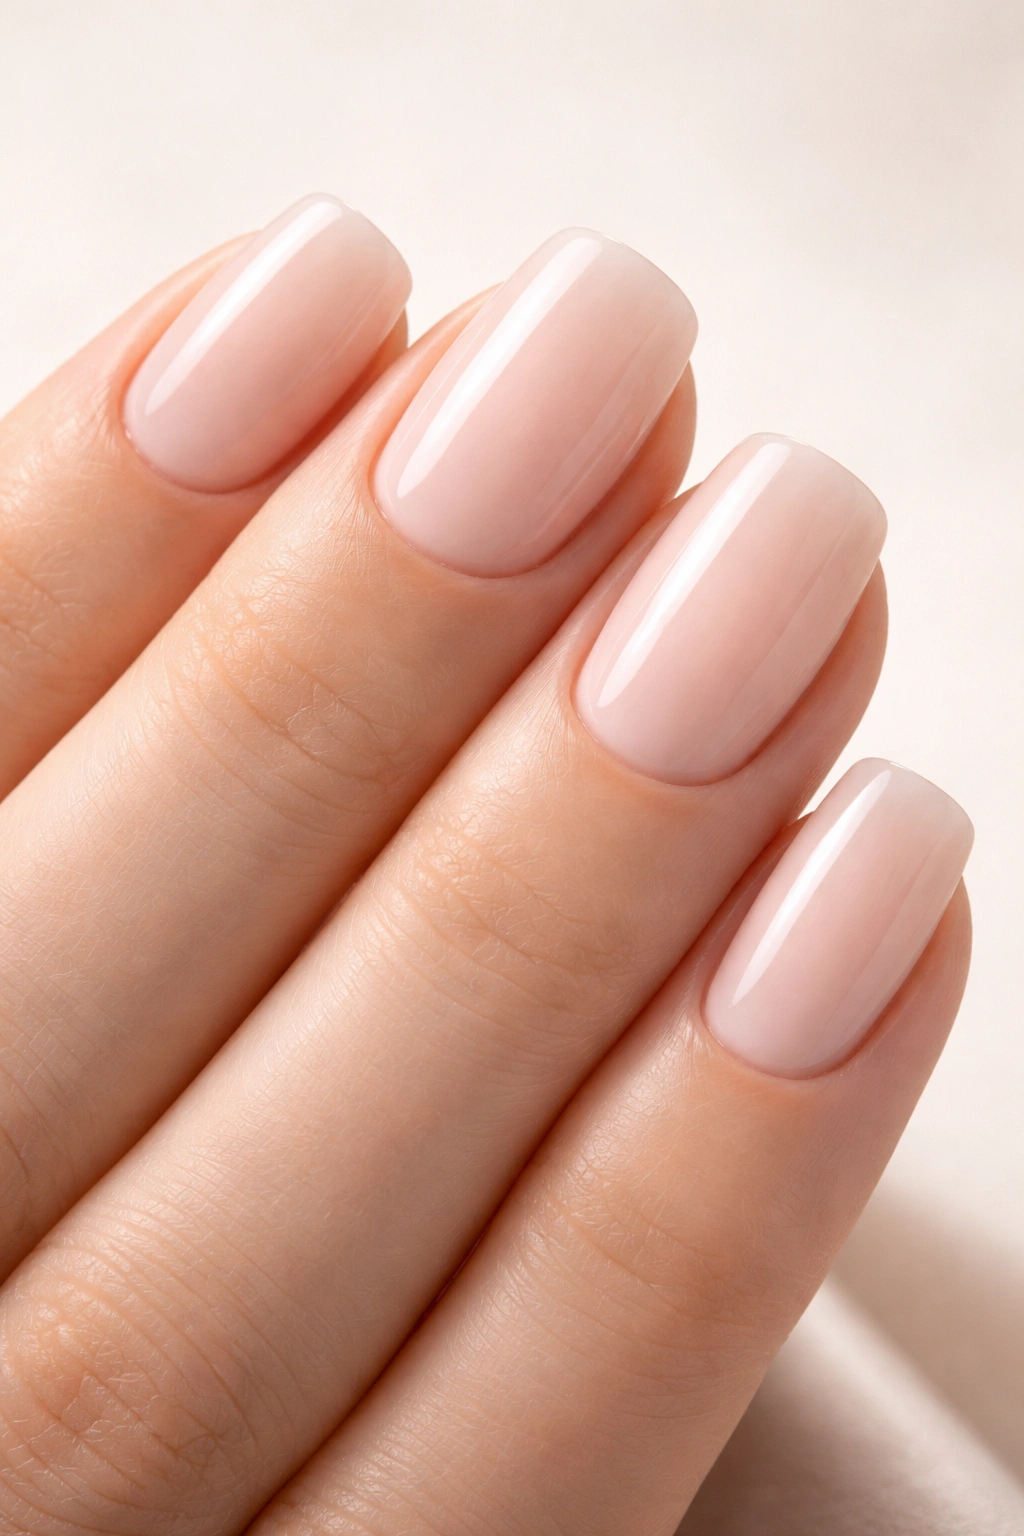
After two coats, most colors are fully opaque and look salon-quality. Some people do three coats, especially if they’re using a very light color or want extra intensity and depth. Each time you add a coat, you’re repeating the same process: thin base coat, dip, tap excess, apply activator, let it dry.
The key to avoiding a thick, plasticky-looking finish is using thin base coats and tapping off excess powder genuinely well. You want color and coverage, not bulk. If your nails start looking like they have a thick shell or feel heavy on your fingers, you’ve probably gone too thick with the base coat or aren’t tapping off enough powder.
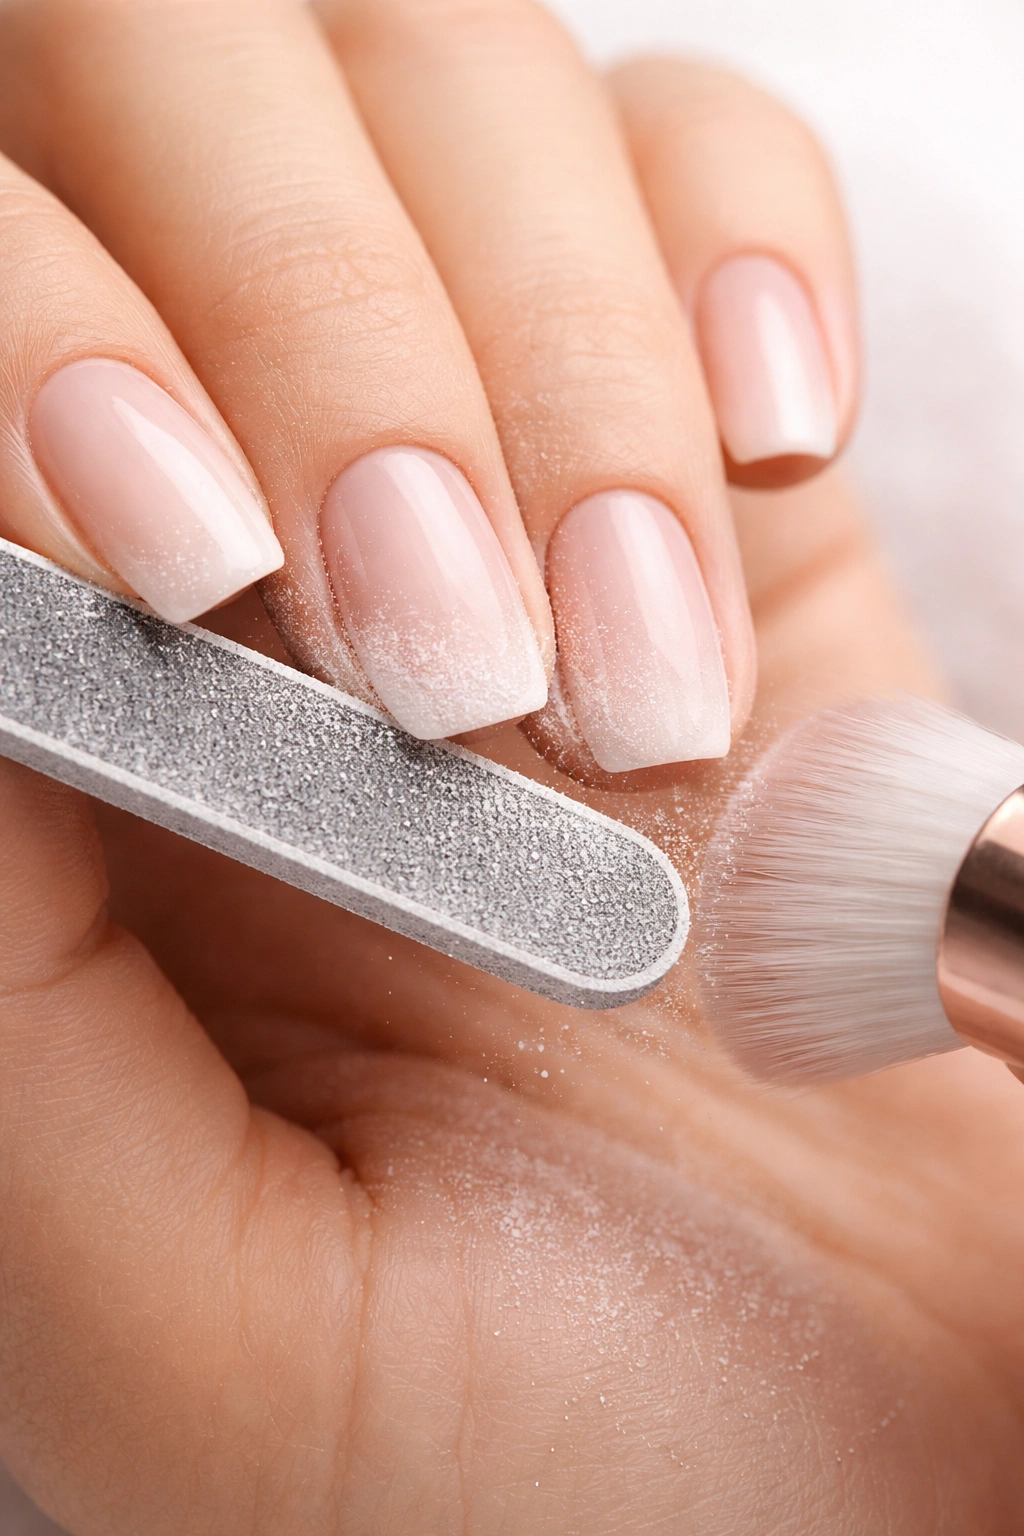
Removing Excess Powder and Cleaning Up Edges
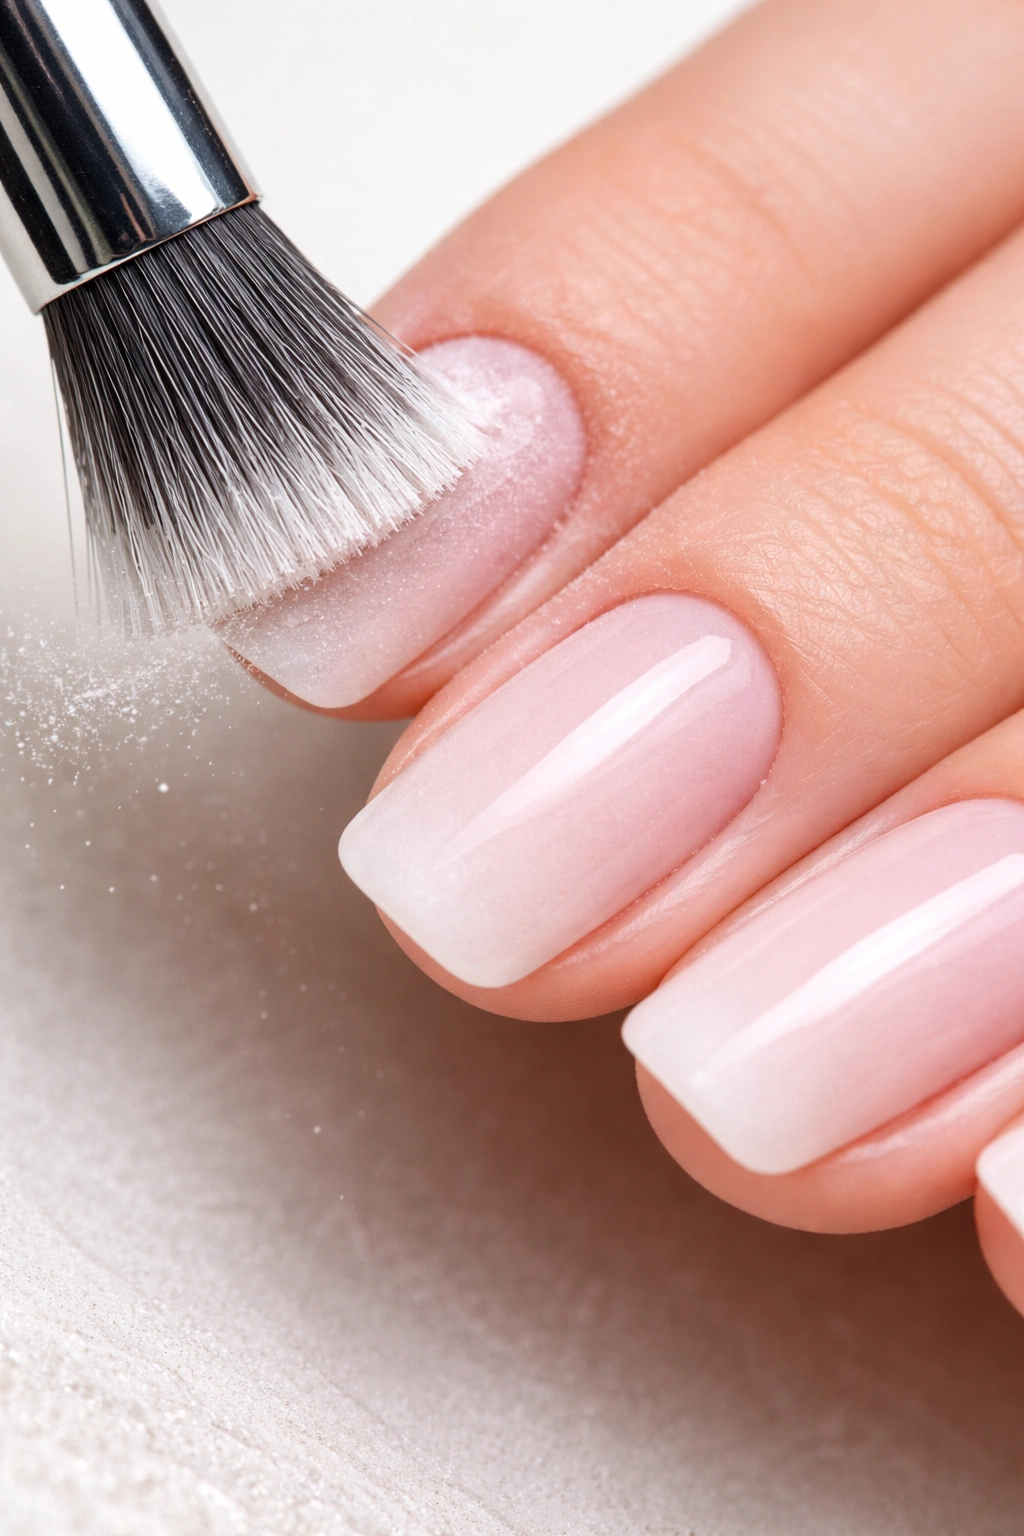
Once you’ve got your color to where you want it, you need to clean up the excess powder that’s probably accumulated around your cuticles, under the nail edge, and on your skin. This is the detail work that separates a professional-looking manicure from a DIY mess.
Use a stiff-bristled brush (most dip powder kits include one specifically for this) or an old toothbrush to brush away excess powder. Brush in the direction from your cuticle toward the tip, and pay special attention to the edges and sides. Some powder dust will fly everywhere—that’s fine, just brush it away and keep going. The goal is to get clean lines where the nail color starts and your skin begins.
Once you’ve brushed off the loose powder, apply a final coat of activator to seal everything and create a smooth, finished surface. This final activation is what truly locks everything in. Paint it on just like the previous activator coats, let it dry completely, and you’re almost done.
Filing and Shaping the Nail Edges to Perfection
Now that your powder is sealed and hardened, you can refine the shape and make sure the edges are smooth and even. Using your nail file, carefully file the tip of each nail to ensure they’re all the same length and have consistent squoval proportions. Check that all the corners are evenly rounded and that the overall shape looks balanced on your hand.
File any rough edges along the sides of the nail where powder may have settled unevenly or where the powder layer meets your skin. The file will kick up a bit of powder dust, but that’s normal. Work gently—you’re not trying to reshape dramatically, just refining what’s already there. If you filed during prep and are happy with the shape, you might barely need to touch the edges now.
Once you’re happy with the shape, do a final brush-off to remove any powder dust. You should have smooth, clean lines and a polished appearance.
Adding a Final Top Coat for Shine and Durability
Most dip powder systems include a glossy top coat that goes on after everything else is done. This gives your nails that beautiful shine and adds an extra layer of protection. If your system doesn’t include a separate top coat, the final activator coat usually provides enough shine on its own.
Apply the glossy top coat with smooth, even strokes across the entire nail surface. It should go on smoothly and dry quickly. This is the final step that makes your nails look truly finished and professional—suddenly everything looks sealed, polished, and perfect.
Some people prefer a matte finish instead of glossy. If that’s you, skip the glossy top coat or use a matte top coat instead. Both look beautiful; it’s just a preference thing.
Caring for Your Freshly Manicured Nails Immediately After
The first 24 hours after you finish your mani is the critical period where the coating is still fully hardening and setting. During this time, try to avoid getting your nails wet or submerging them in water if possible. You can wash your hands with care, but don’t soak them or do the dishes or take a long bath right away.
Also avoid putting too much pressure or stress on your nails during the first day—no hard impacts, no aggressive typing, no heavy lifting. This isn’t about the polish being fragile; it’s about giving the layers time to bond completely and harden.
After the first day, you’re good to go about your normal life. Dip powder is incredibly durable and stands up to regular daily wear beautifully. Just treat your nails normally—wash your hands, do the dishes, go about your business.
Extending Your Manicure’s Lifespan With Smart Habits
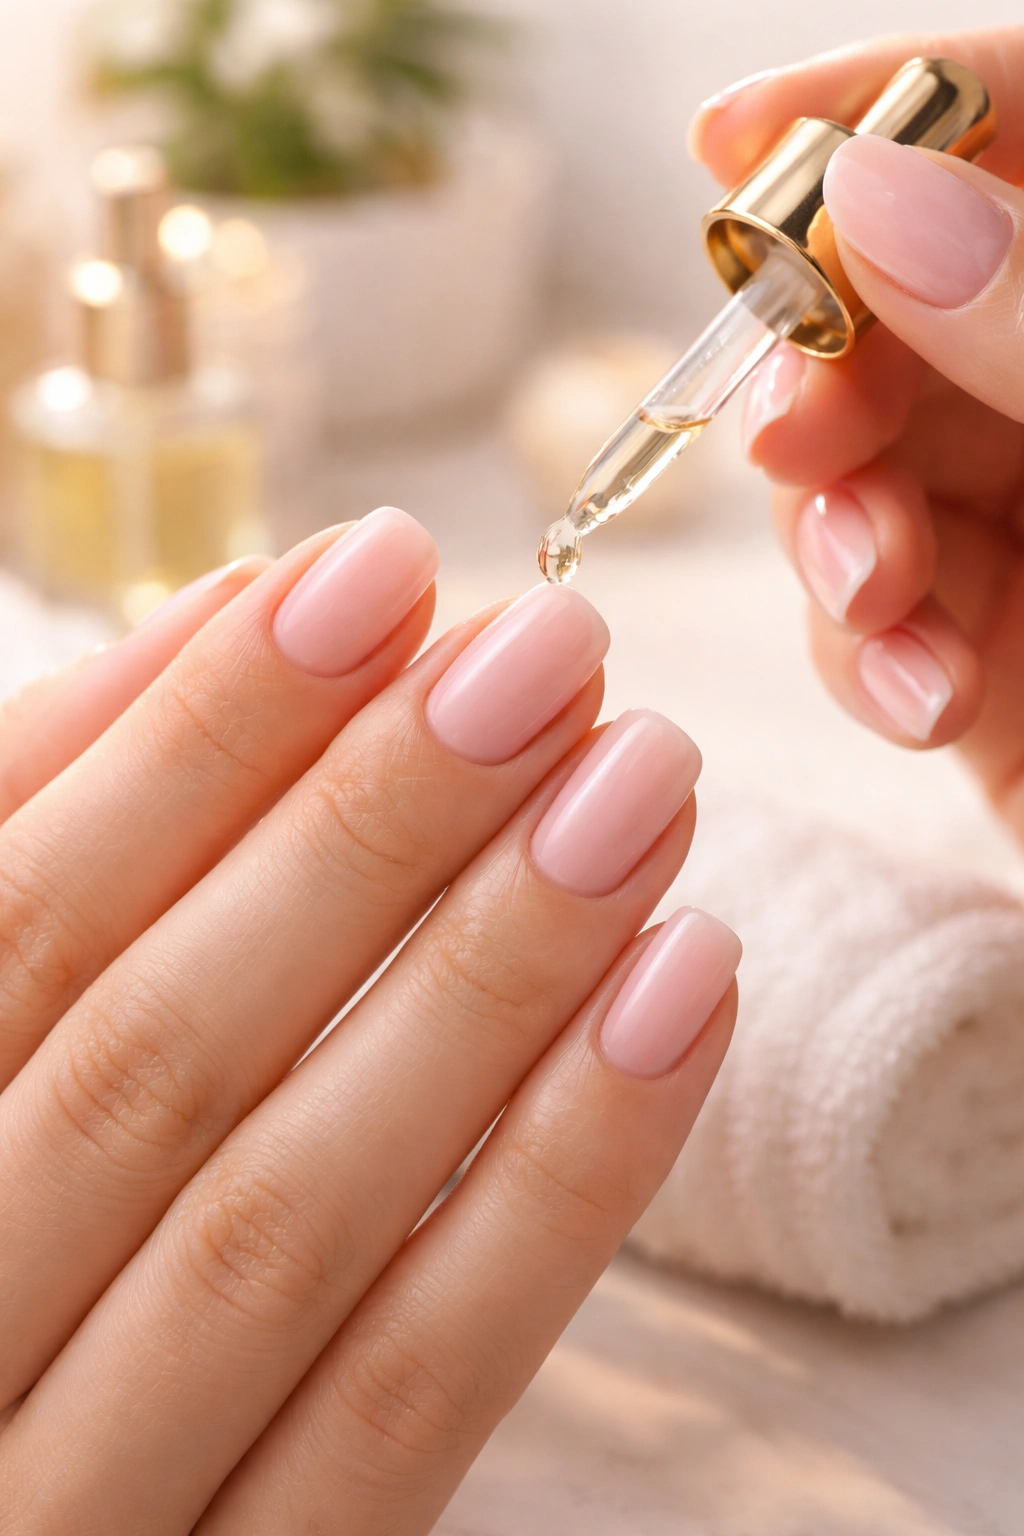
A well-done dip powder manicure typically lasts three to four weeks, but you can extend it with good habits. Keep your cuticles moisturized by applying cuticle oil or hand cream daily—this keeps your nails hydrated and flexible, which makes them less likely to break or peel. The dip coating itself doesn’t dry out nails the way gel can, but the skin around your nails needs care.
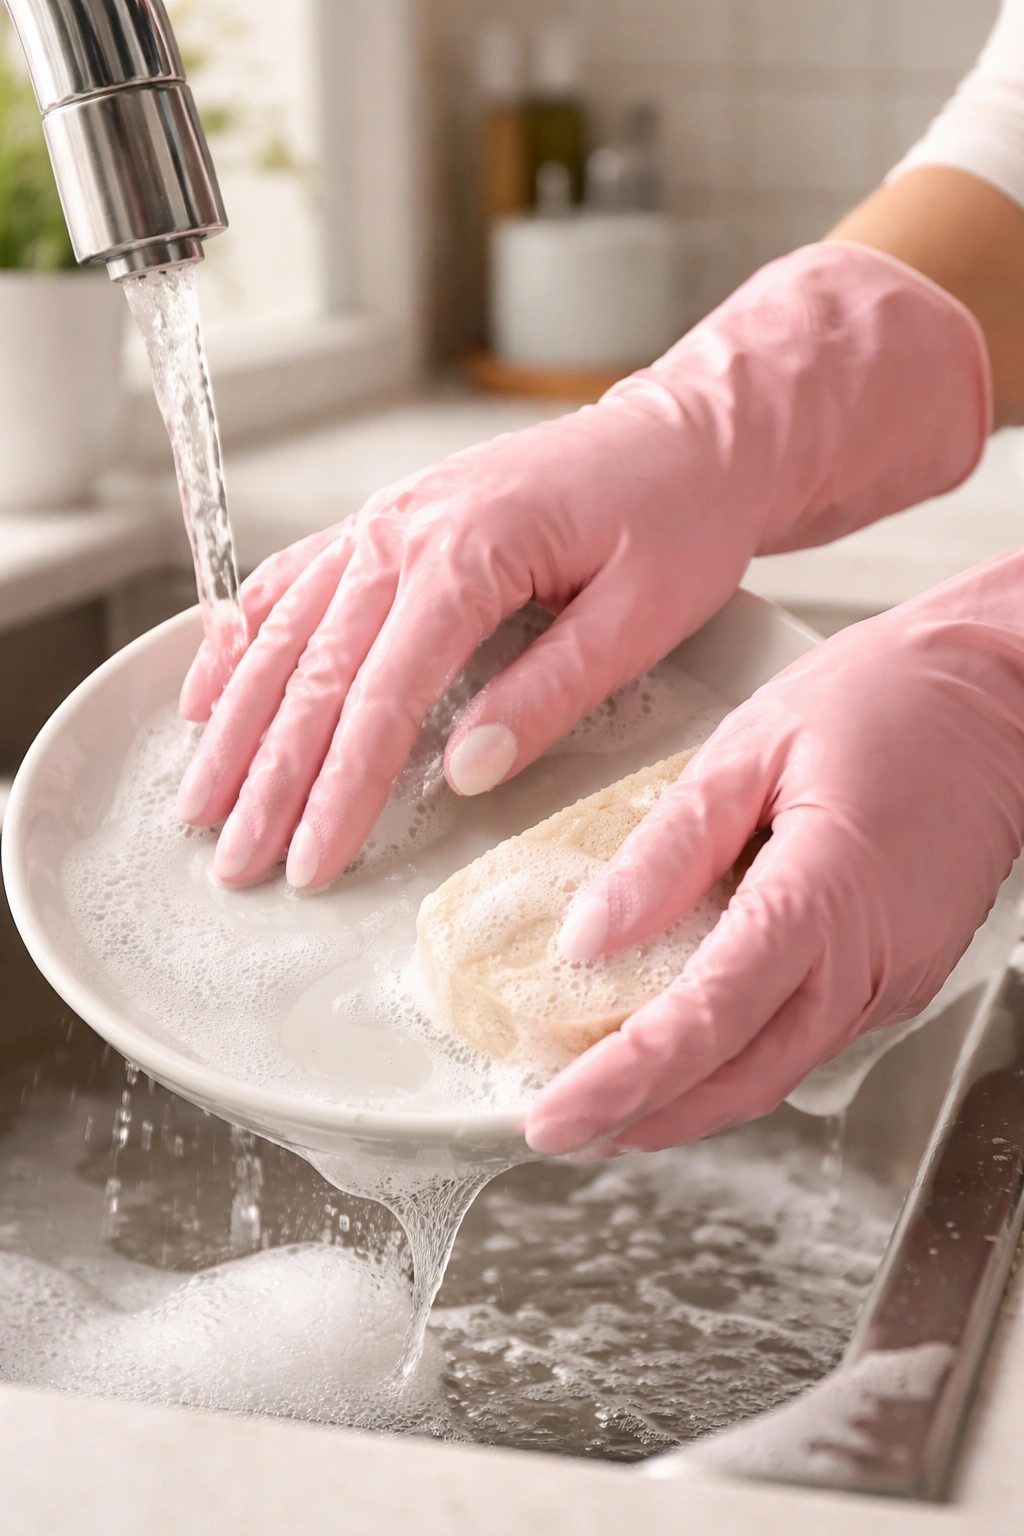
Wear gloves when you’re doing dishes or cleaning with harsh chemicals—prolonged exposure to hot water and harsh soaps can cause the edges of your manicure to lift sooner. This is the biggest culprit for premature lifting, more so than just normal daily activity.
If you notice the edges starting to lift or peel after a couple weeks, you can sometimes touch them up with a thin layer of base coat, a quick dip, and a coat of activator to seal that area back down. It won’t last as long as a full manicure, but it can buy you another week or so of wear.
Removing Your Dip Powder Nails Properly Without Damage
When you’re ready to take off your mani, removal is crucial because doing it wrong can seriously damage your natural nails. The dip coating is hard and won’t just chip off like regular polish, so you need to soak it off.
The traditional method is acetone soaking. Pour pure acetone into a small bowl and soak your fingertips for 15 to 20 minutes. The coating will gradually soften and loosen. Every few minutes, gently rub the softened coating with your fingertip or a cuticle pusher—don’t scrape aggressively or pick at it, just gently encourage it to come loose. Once the coating is soft enough, it should peel away cleanly.
Some people find acetone drying to their skin and nails, so follow up with a deep moisturizing treatment afterward. Apply cuticle oil or a rich hand cream and massage it in. If your nails feel thin or weak after removal, give them a break from any polish for a few days and keep moisturizing.
There are also non-acetone removal methods sold by dip powder brands that are supposedly gentler. These work for some people, though acetone tends to be faster and more effective. Choose whichever method feels right for your nails.
Troubleshooting Common Dip Powder Mistakes
If your dip powder nails aren’t sticking or keep lifting after a few days, the culprit is usually either not enough nail dehydration before you start or too-thick base coat layers. Go back to the prep step and make sure you’re really removing all oil and moisture from your nails. Use a dehydrator spray if you can; it makes a huge difference.
If your color looks patchy or streaky even after multiple coats, you might not be dipping fully into the powder—make sure your entire nail surface is making contact with the powder each time. You could also try thinning your base coat slightly; if it’s too thick, the powder doesn’t stick evenly.
If your nails look thick, plasticky, or feel heavy, you’ve probably used too much base coat or done too many powder layers. For your next manicure, use thinner base coat applications and stick to two coats of powder maximum. Tap off excess powder more aggressively.
If you’re getting bubbles or a cloudy appearance in your coating, the activator might be drying too fast before it can fully bond, or moisture got trapped under the layers. Make sure your nails are completely dry before you start, and apply activator in smooth, even strokes without rushing.
Pro Tips for Consistently Salon-Quality Results
Temperature matters more than people realize. Dip powder systems work best in a room that’s between 65 and 75 degrees Fahrenheit. If your space is too cold, the powder and activators dry more slowly and don’t harden properly. If it’s too warm, they dry too fast and can get chalky-looking. Keep this in mind if you’re working in a cold garage or during winter.
Invest in a good nail file and keep it sharp. A dull file creates friction and heat on your nail, which can cause splitting and weakening. A quality file makes shaping infinitely easier and makes your nails look way better.
Don’t shake your dip powder container—it introduces air bubbles and can create a streaky, uneven color. Instead, gently turn and roll the container to mix the powder if settled. Better yet, pour out what you need into a shallow dish and work from there.
Practice your application technique on your non-dominant hand first. Once you get the angle and motion down, your dominant hand becomes much easier. Most people need to do it three or four times before it feels natural and automatic.
Final Thoughts
Dip powder nails in a squoval shape are totally achievable at home once you understand the process and invest in quality supplies. The combination of durability, ease of application, and that gorgeous salon finish makes it worth taking the time to get it right. Your first manicure might take 45 minutes and not be absolutely perfect, but by your third or fourth time, you’ll be doing it in 30 minutes with professional-looking results every single time.
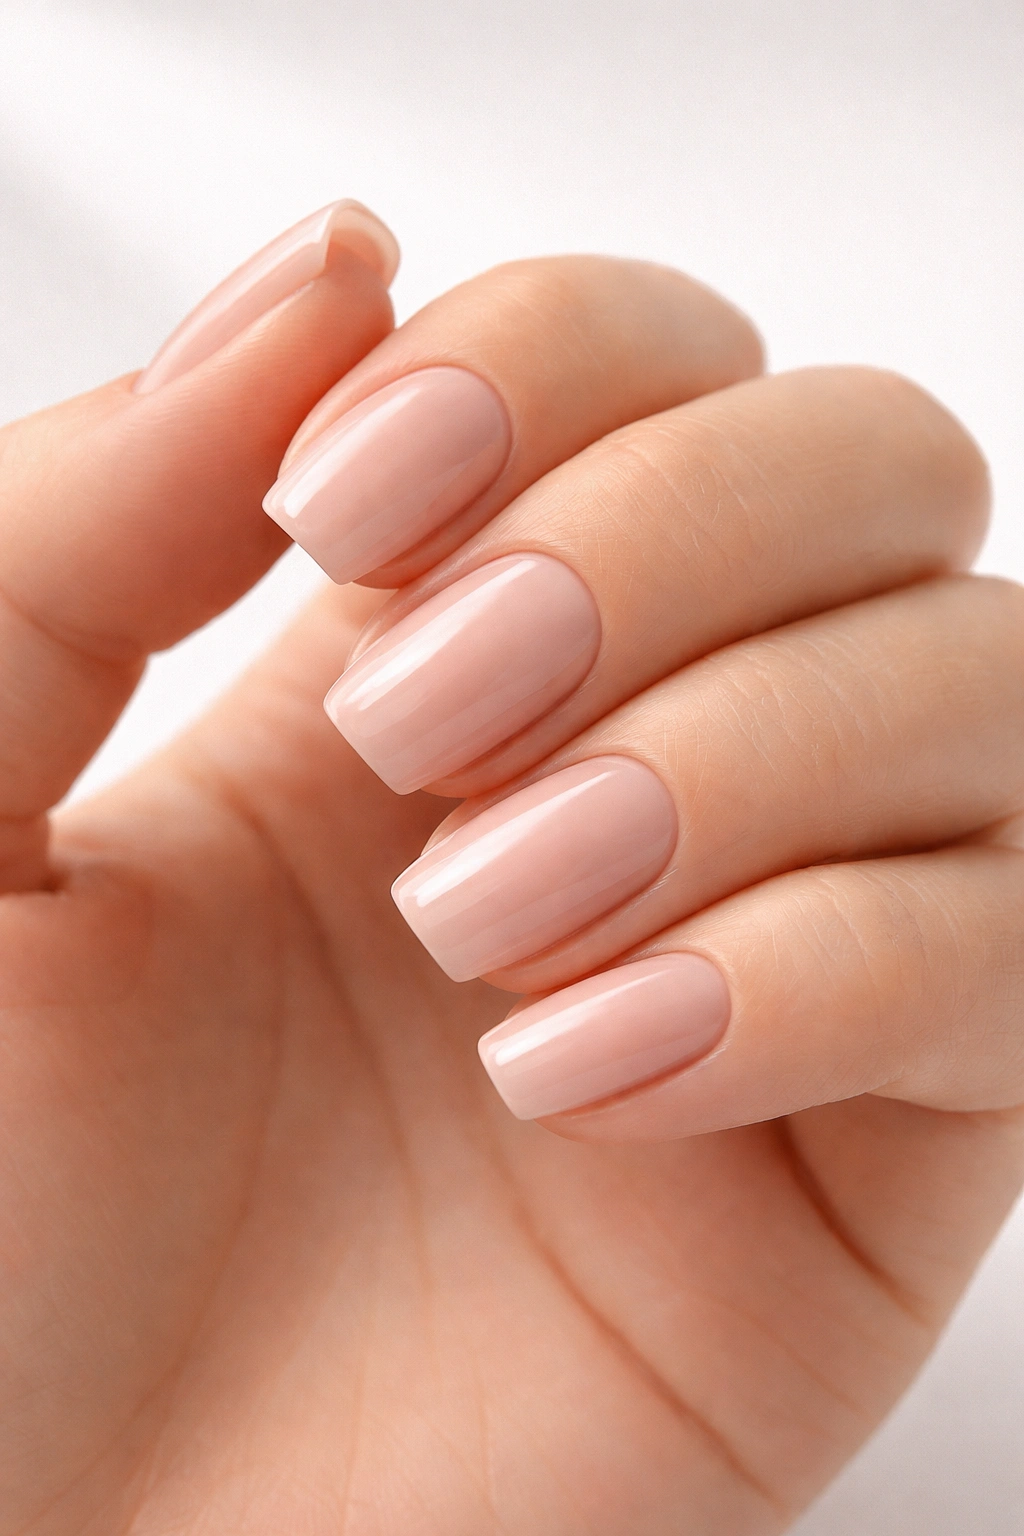
The squoval shape is forgiving, flattering, and practical—it’s honestly the best beginner shape because it doesn’t require flawless precision to look great. Start with a classic color like nude, soft pink, or a rich burgundy so you can focus entirely on technique without worrying about whether a trendy color will work. Once you’ve nailed the process, branch out into whatever colors and designs make you happy.
The real key is respecting the prep work and not cutting corners on base coat application or nail dehydration. That foundation is what makes everything else work. Get that right, and the rest of the process flows smoothly, and your manicure lasts the full three weeks looking absolutely flawless.
