

If you’ve been scrolling through nail inspiration and keep coming back to squoval shapes — that flattering middle ground between classic and trendy — you’re onto something. Short squovals offer the perfect balance: they’re practical for everyday life, less prone to breakage than stilettos or coffin nails, and they still deliver serious visual impact. The best part? You don’t need a salon chair or professional equipment to create show-stopping designs at home.
Gel polish is genuinely the game-changer for at-home manicures. Unlike traditional polish, gel adheres directly to the nail, giving you that salon-quality finish with a durability that makes intricate designs actually last two to three weeks without chipping. A short squoval shape maximizes the canvas you’re working with — wider than a round, more elegant than a square — so your art has room to shine without creating an uncomfortable length that gets in your way.
The designs in this guide range from minimalist geometric patterns to soft gradient finishes and embellished styles that prove short nails don’t mean boring nails. Each one is built around techniques and products you can master at home with a basic gel kit, a UV or LED lamp, and some patience. Whether you’re drawn to warm neutrals, jewel tones, or playful pastels, there’s a squoval design here that matches your vibe and skill level.
Let’s walk through fifteen stunning short squoval gel nail ideas you can absolutely execute in your home setup right now.
1. Soft Nude with Delicate Chrome Accent
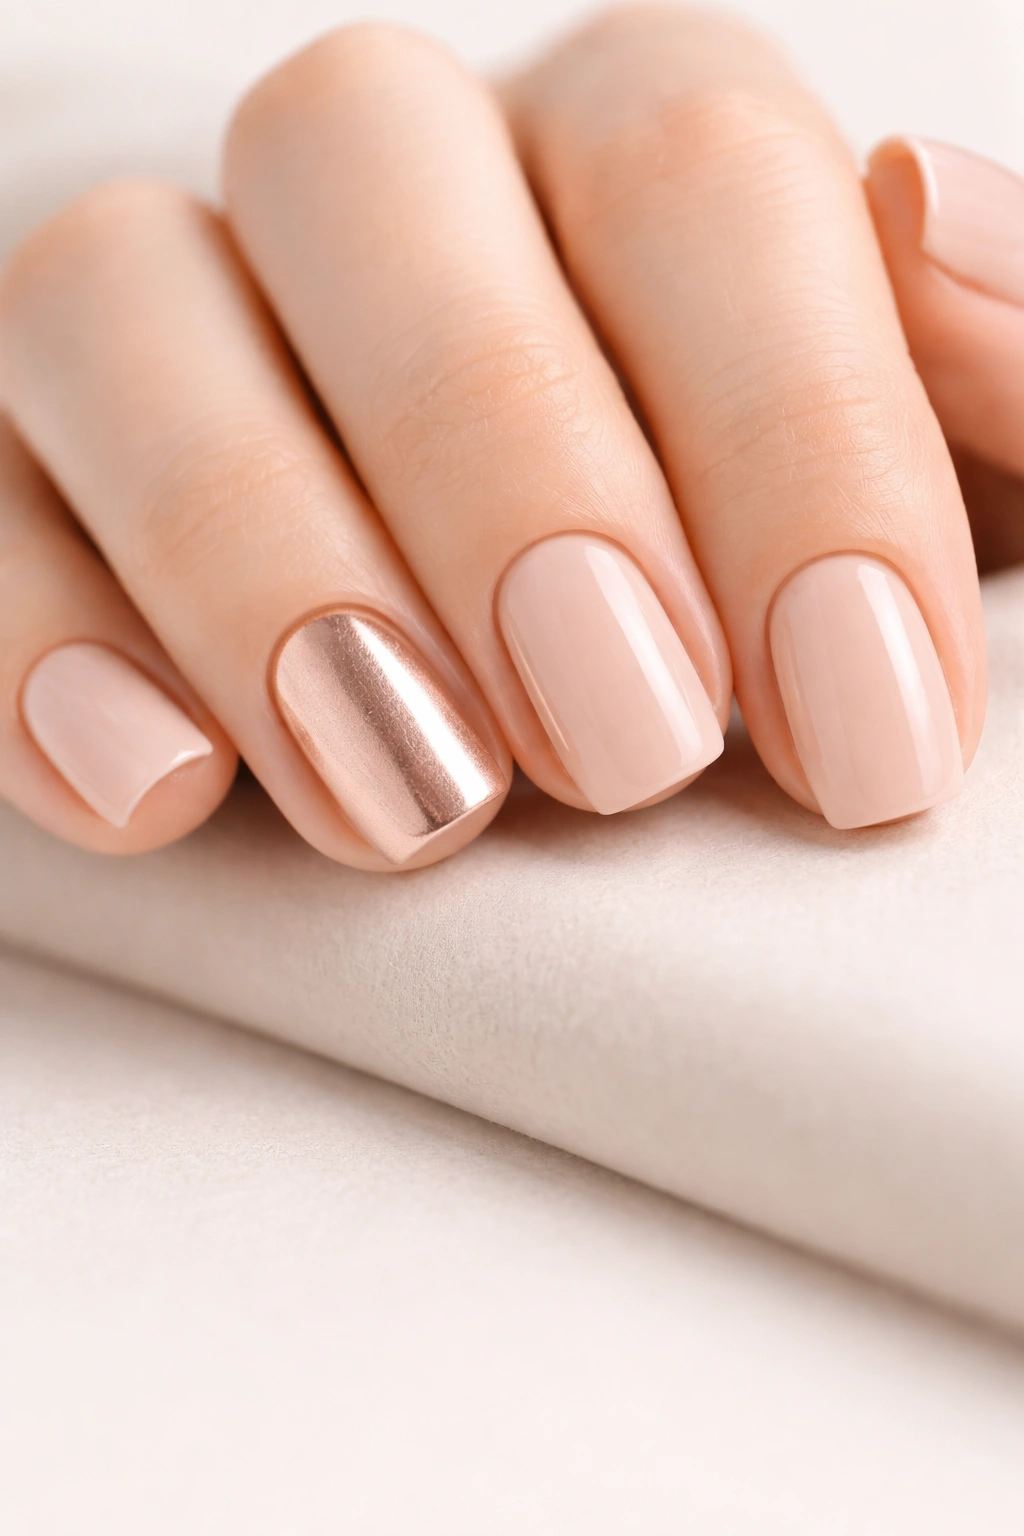
This is the design that whispers rather than shouts — sophisticated enough for any occasion, yet modern and intentional. Start with a creamy nude base that sits just slightly darker than your skin tone, then reserve the accent nail for a brushed rose gold or champagne chrome finish. The contrast between the matte nude and the reflective chrome creates dimension without requiring complicated techniques.
Why This Works on Short Squovals
The neutral base elongates shorter nails visually, while the metallic accent on a single nail (typically the ring finger) draws just enough attention without overwhelming. Chrome gel powders are forgiving — you apply them to a sticky gel base, pat gently with a velvet pad, and they adhere smoothly.
What You’ll Need and How to Apply It
- One nude gel shade (aim for something with warm undertones if you have warm skin, cool undertones if you’re cool-toned)
- Chrome gel powder in rose gold, champagne, or gold
- Clear builder gel or tacky base gel
- Velvet or microfiber application pad
- Nail file and buffer for prep
Paint two coats of your nude shade on all five nails, curing between coats. On your accent nail (or do two for balance), apply a thin layer of clear builder gel, then gently press the velvet pad loaded with chrome powder into that wet gel layer. Pat and rotate until the color is even and pigmented. Cure and seal with a clear top coat.
Pro tip: If the chrome looks patchy, you can paint a second layer of clear gel, tap the chrome powder again, and cure once more. Sometimes a double application sits more flush and shiny.
2. Peachy Blush with Encapsulated Gold Foil
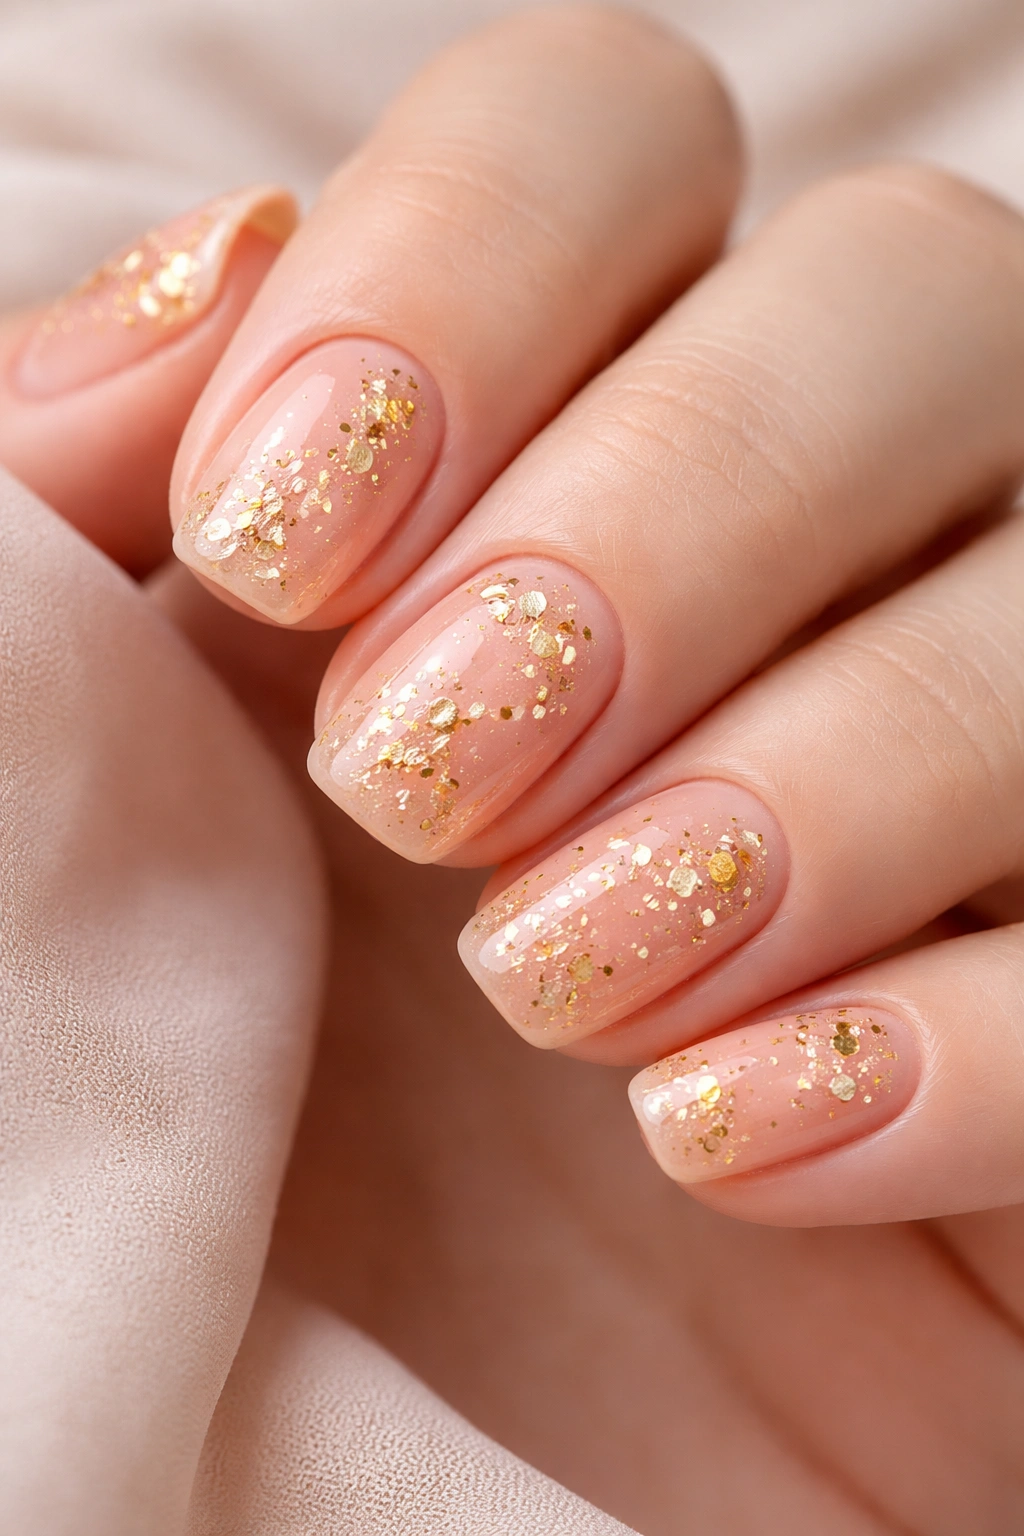
Encapsulated foil feels delicate but is incredibly durable since it’s sealed inside the gel rather than sitting on top. A warm peachy-pink provides the perfect backdrop for swirls or scattered flakes of genuine gold leaf. This design reads as luxe without being overwhelming — the softness of the peachy tone balances the boldness of gold.
The Encapsulation Technique Explained
Encapsulation means painting a base color, then layering foil pieces or powder into wet gel before sealing with a top coat. This technique locks the embellishment in place, protecting it from daily wear while keeping its full shine intact. It’s one of the most forgiving decorative methods for home application.
Step-by-Step Application
- Base: Paint two coats of a warm peachy-pink gel, curing between coats
- Foil layer: Apply a tacky base gel or clear gel to all five nails
- Encapsulate: While the gel is still wet and sticky, use tweezers to place small pieces of gold leaf across the nail, or sprinkle edible gold flakes if you prefer a more scattered look
- Seal: Brush a generous top coat over the foil to seal it completely, curing until hard
- Final cure: One more quick seal coat if the foil pieces feel uneven
The result should look like the gold is floating inside a layer of glass — shiny, protected, and permanent-looking.
3. Classic Red with Geometric Gold Details
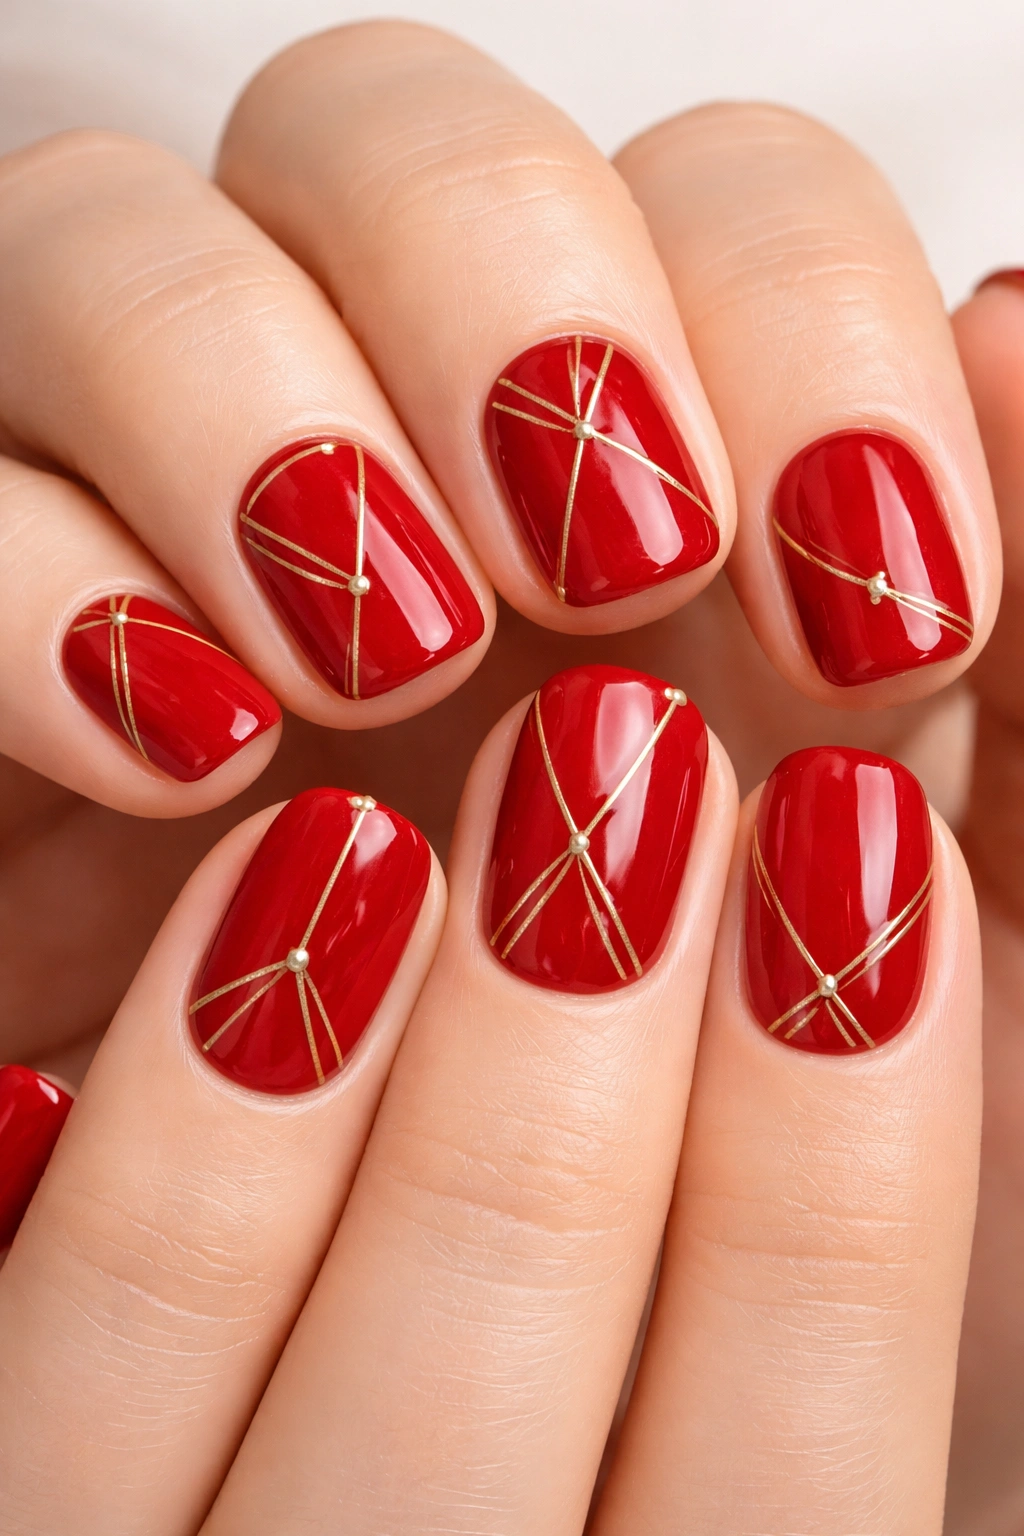
Red short squovals are timeless, but geometric gold accents elevate them into statement territory. Create thin gold lines forming triangles, sunburst patterns, or angular shapes across the nail or concentrated on the tip. A satin or velvet finish on the red base pairs beautifully with the metallic geometry.
Choosing the Right Red and Finish
Not all reds sit the same on every skin tone. Cool reds (with blue undertones) suit cool complexions, while warm reds (with orange undertones) look richer on warmer skin. If you’re unsure, a true tomato red usually flatters everyone. For finish, matte or satin (slightly textured matte) gives a modern feel that balances geometric art, while glossy reads as more traditional.
How to Execute Clean Gold Lines
- Base: Apply two coats of your chosen red, curing between coats
- Matte top (optional): If you want matte red, apply a matte top coat and cure
- Gold design: Use a thin detail brush and gold gel or a gold paint pen to draw your geometric pattern
- Pattern ideas: thin vertical lines across the nail, a triangle pointing downward from the tip, radiating lines from the cuticle, or small gold triangles scattered across the nail
- Seal: Apply glossy top coat to finish and cure
Keep your lines as thin as possible — they’ll appear bolder than you think and create cleaner geometry.
4. Milky White with Delicate Line Work
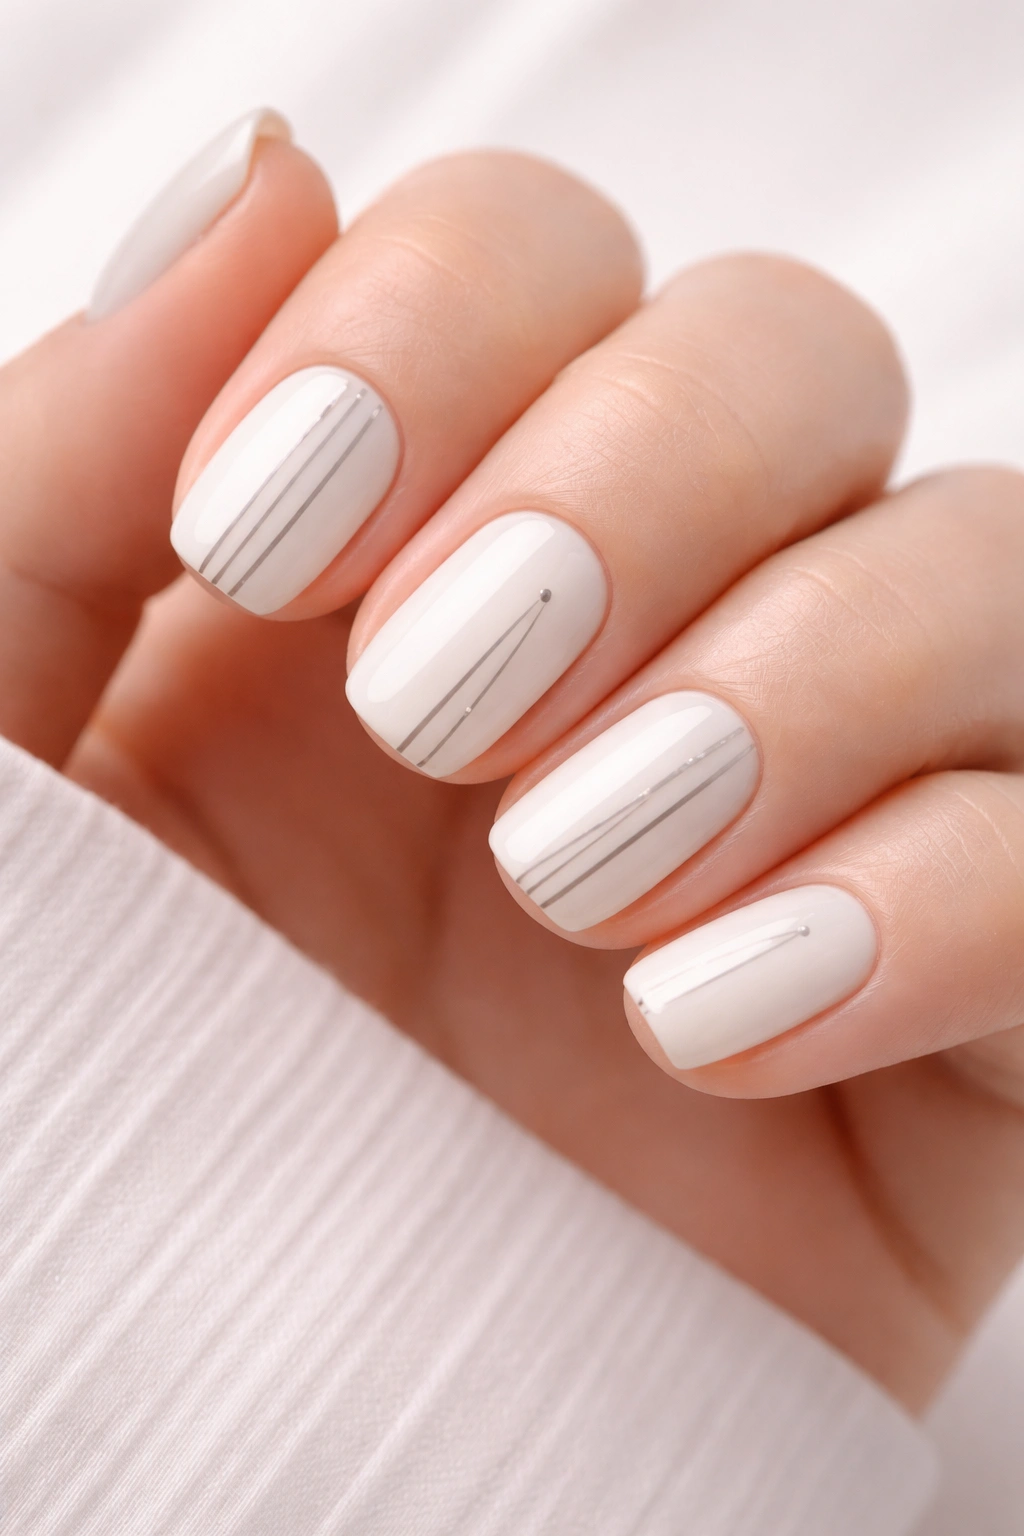
Creamy white nails are the perfect canvas for any decorative art. Think delicate line work: fine parallel lines, minimalist infinity symbols, tiny dots, or sparse line art designs in black, gray, or soft nude. The pale background makes even simple line work feel intentional and sophisticated.
Why Milky White Reads as Elevated on Short Nails
Milky or opaque white shades contain pigment that creates depth — they’re not stark white but rather a creamy, soft white that feels gentle on the eye. This shade elongates shorter nails visually and reads as intentionally minimal rather than blank. Line work on milky white also prevents the design from feeling too bare because the negative space between lines becomes part of the design itself.
Line Work Technique
- Prep: Apply two coats of your milky white gel, curing between coats
- Design selection: Choose a pattern before you start — sketch it on paper if it helps
- Tools: Use a thin gel brush (0 or 00 size) or a specialized line art brush loaded with contrasting gel color
- Execution: Move slowly and deliberately. Thin lines are created by using light pressure and moving smoothly, not by using a super-thin brush with heavy pressure
- Pattern options: five thin vertical lines, a horizontal line across the middle, a delicate infinity symbol on each nail, or scattered tiny dots
Let the white space breathe — negative space is part of this design’s beauty.
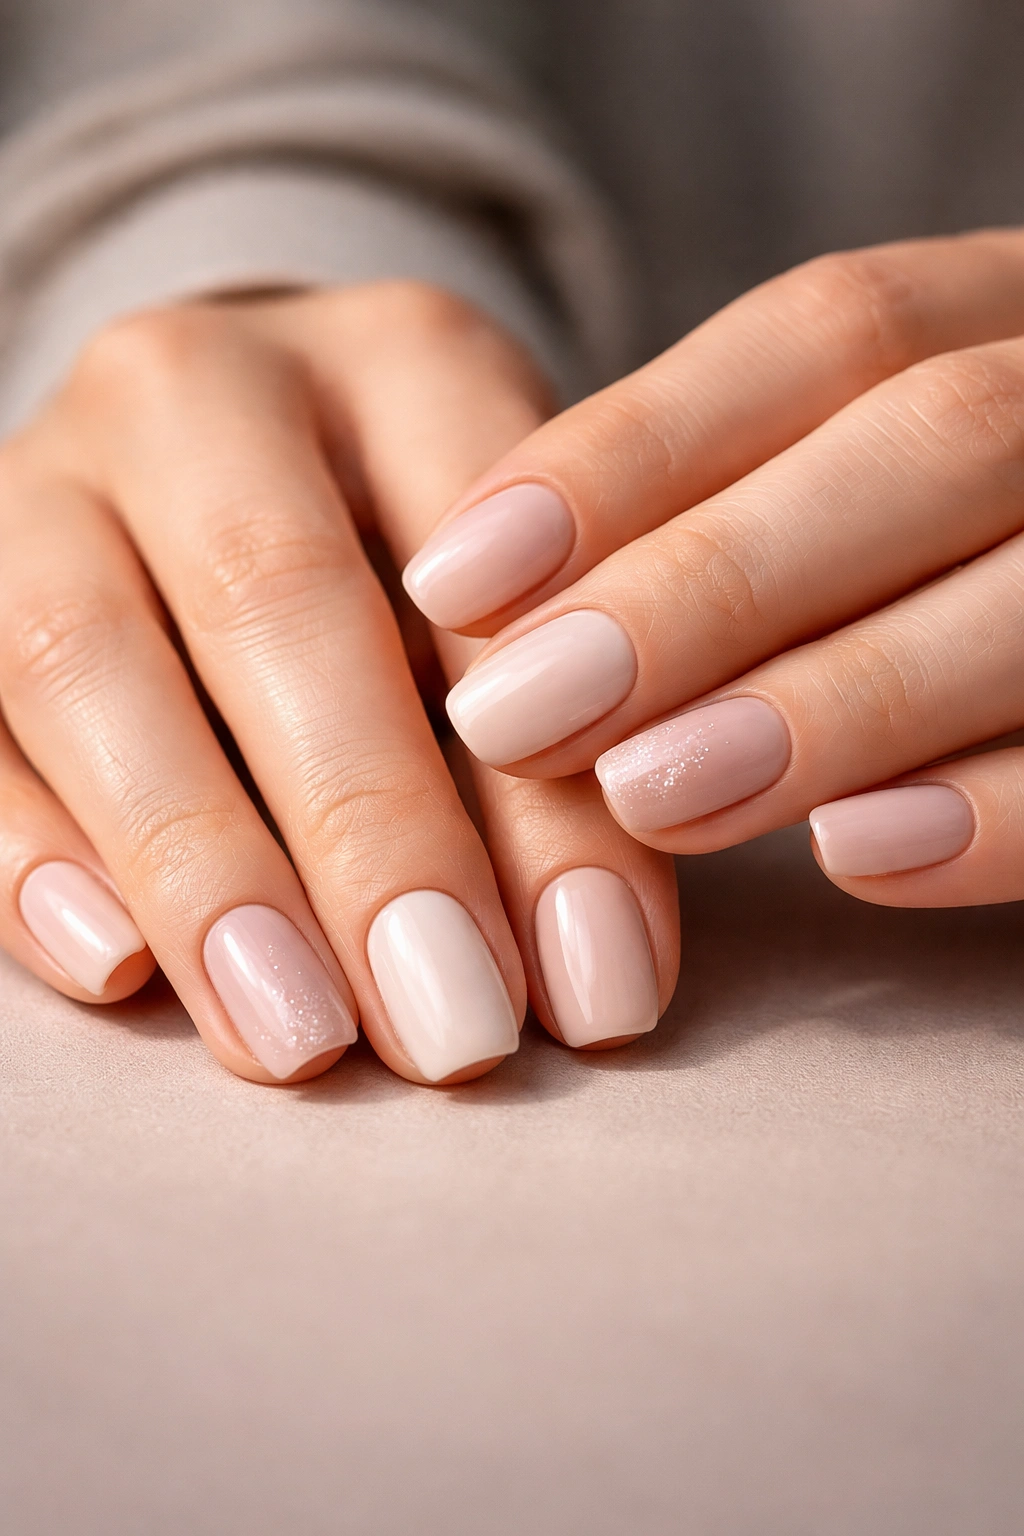
5. Dusty Rose with Gradient Fade to White
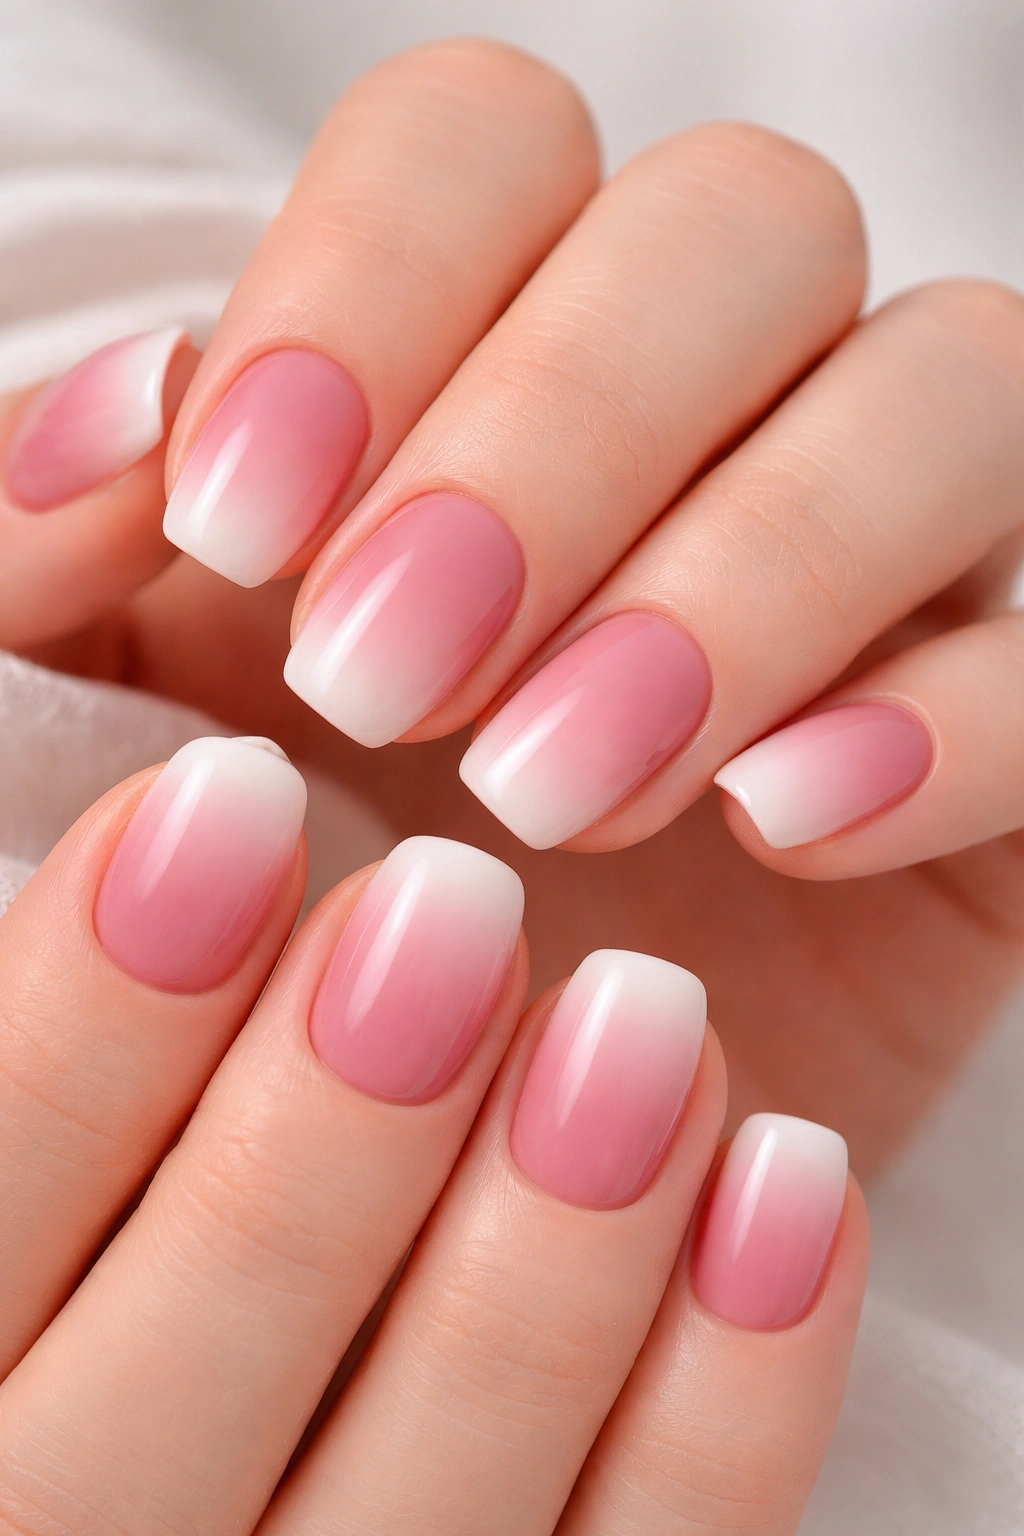
A gradient fade from dusty rose to white (or pale blush) creates an ethereal, romantic vibe that doesn’t require artistic talent to execute beautifully. The gradient technique creates a natural-looking transition that softens the whole hand.
How to Create a Smooth Gradient
Gradients intimidate many home manicurists, but they’re actually forgiving when you understand the layering. You’re essentially creating an ombre effect by building opacity gradually from one nail area to another.
Gradient Application Method
- Base coat: Apply clear base gel to all five nails and cure
- Darkest shade: Paint full coverage of dusty rose on all five nails and cure
- Transition layer: Apply a thin, uneven layer of the dusty rose to only four nails (leaving the thumb lighter), blending the edge with a makeup sponge if you have one, or letting it fade naturally when you cure
- Lighten: Apply white or pale blush gel only to the areas you want lightest (thumb, perhaps half of the pinky), cure
- Repeat: Apply another thin layer of rose to four nails, another layer of white to the lightest areas, cure again
- Refine: Keep layering until you see a smooth transition from deeper rose to pale blush to white
- Finish: Apply glossy top coat and final cure
The key is building gradually — multiple thin layers blend better than one thick layer of each color.
6. Burgundy Matte with Subtle Sparkle
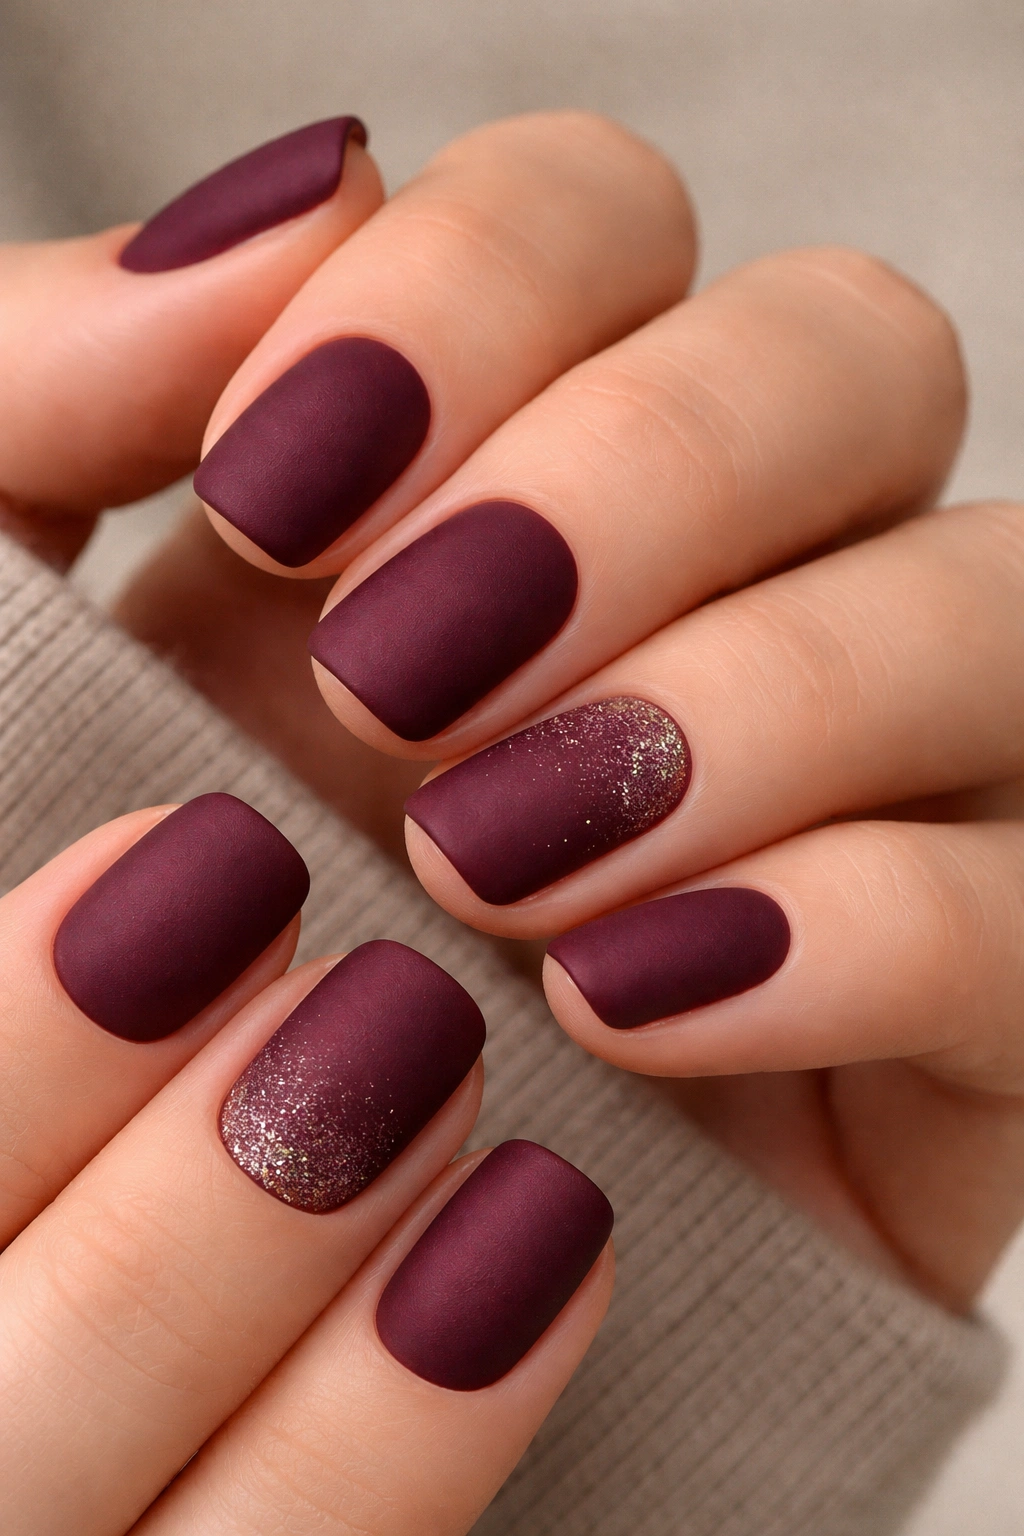
Matte burgundy is moody and sophisticated, and a light scatter of sparkle adds just enough dimension to keep it interesting without breaking the matte vibe. Use fine metallic flakes, microglitter, or a soft champagne sparkle scattered lightly across the nail.
Applying Sparkle to Matte Finish
Sparkle over matte requires strategic sealing so the matte texture remains visible while the sparkle stays protected. The order matters.
Step-by-Step Application
- Two coats of burgundy gel, curing between coats
- Apply matte top coat and cure (this creates your matte finish)
- While the matte top is still slightly sticky (or apply a fresh tacky base layer), sprinkle fine sparkle or microglitter onto two or three nails
- Light tap to settle the sparkle
- Apply a thin, clear gloss top coat just over the sparkled areas to seal them, curing until hard
- The result: matte burgundy with glossy sparkled accents
This two-finish approach keeps the matte base visible while protecting the sparkle underneath a glossy seal.
7. Warm Honey with Thin Black Striping
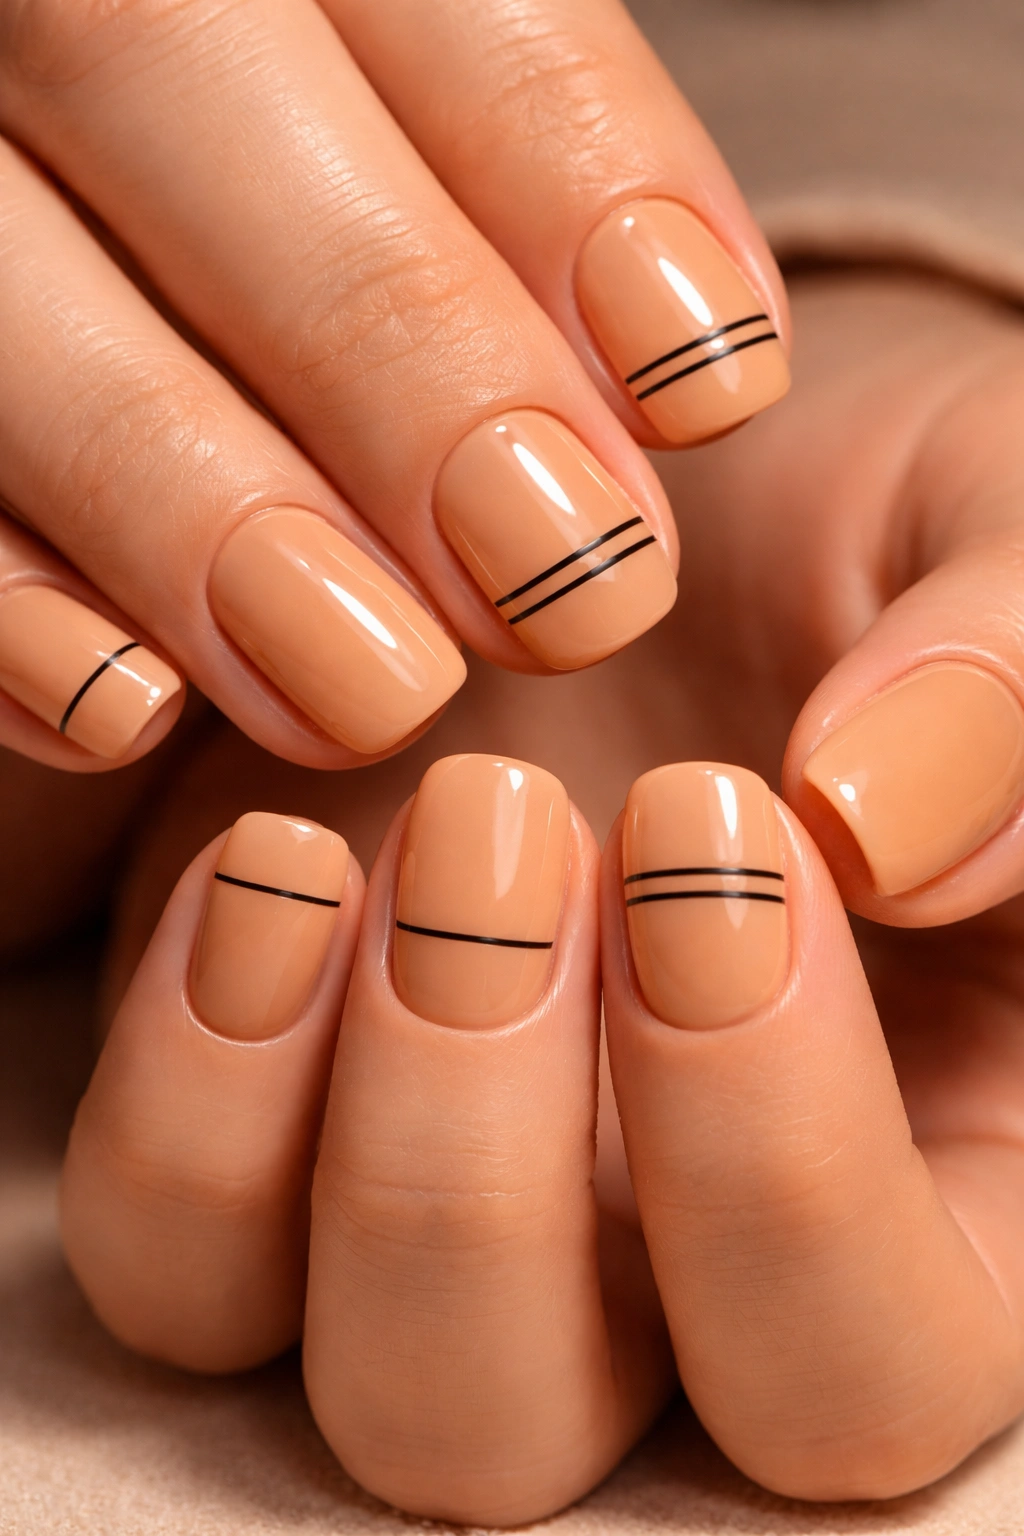
Warm honey or golden yellow gel is cheerful on short squovals, and thin black stripes create geometric interest without requiring freehand art skills. Use striping tape or paint thin lines to create patterns: horizontal stripes, diagonal stripes, or a striped accent nail while others remain solid honey yellow.
Using Striping Tape Correctly
Striping tape (also called nail tape or geometry tape) is adhesive tape that creates perfectly straight lines. It’s a game-changer for geometric designs at home because it removes the pressure of painting perfectly straight.
Striping Tape Application
- Base: Two coats of honey gel, fully cured
- Tape placement: Cut strips of striping tape and place them across the nail in your desired pattern (horizontally, diagonally, or vertically)
- Press firmly: The tape must be pressed firmly against the nail with no edges lifting, or the black gel will seep underneath
- Black gel: Apply black gel over the entire nail, covering both the exposed honey areas and the tape itself
- Remove tape: Cure the black gel, then immediately remove the tape by peeling gently from one end — the tape should lift cleanly, revealing crisp black stripes and honey spaces underneath
- Top coat: Apply clear top coat to finish and cure
The tape does the precision work; your job is just coverage.
8. Sage Green with Minimalist Botanical Line Art
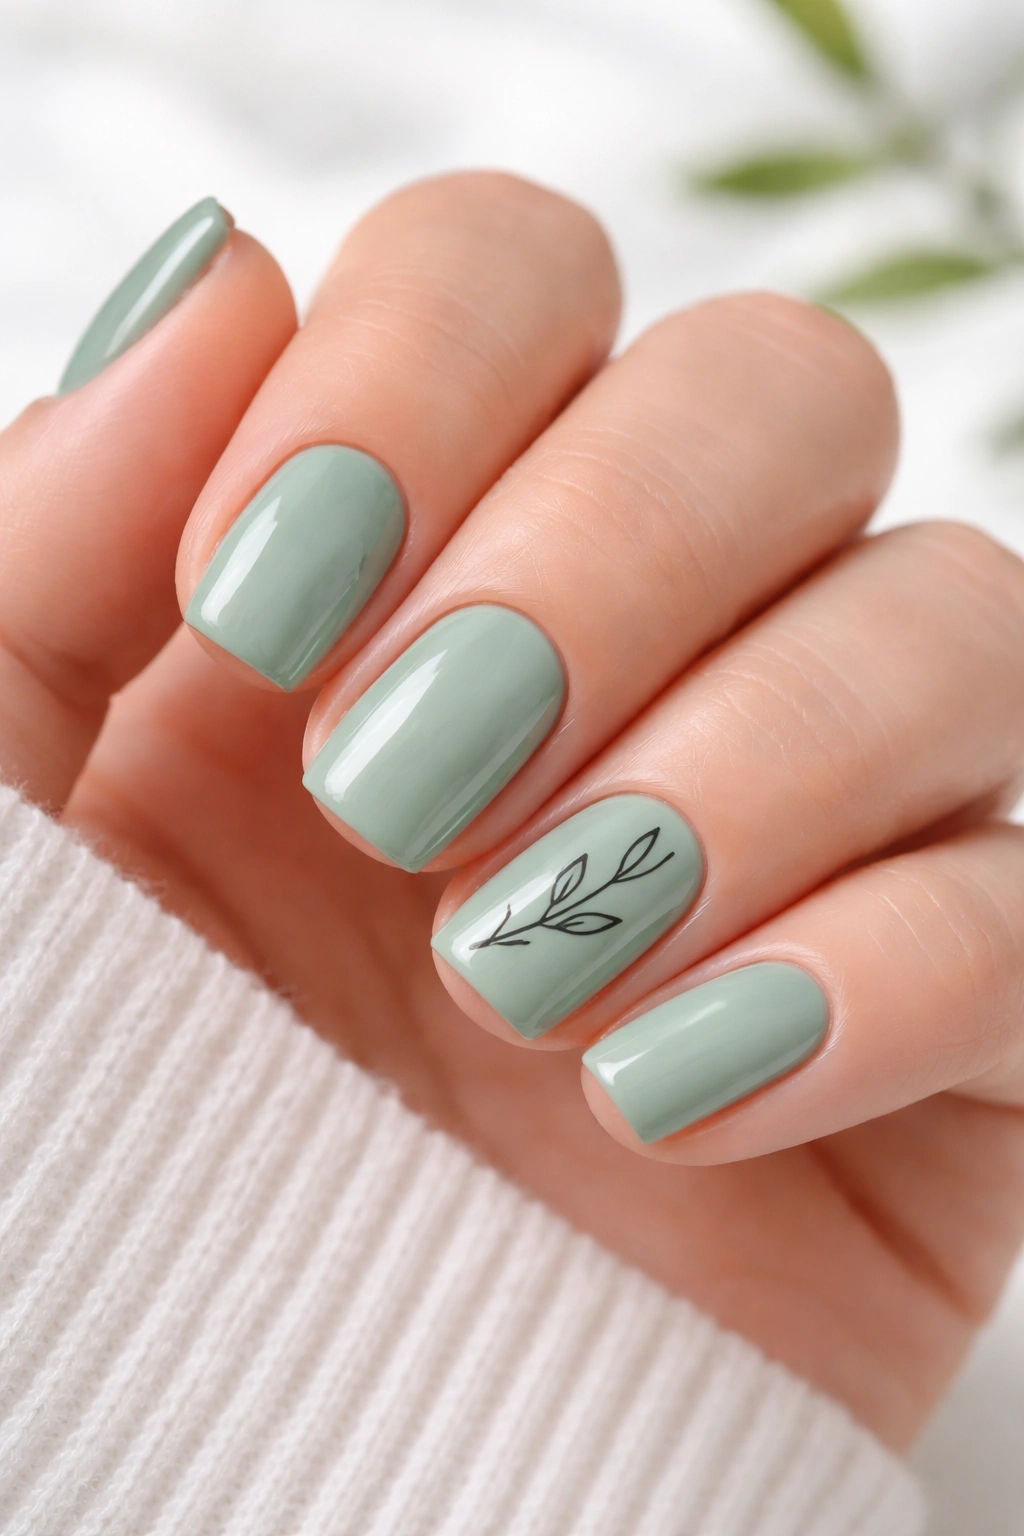
Soft sage green — a muted, blue-green shade — is calming and versatile, and minimalist botanical line art fits perfectly with the organic nature of this color. Think a single thin-stemmed plant on one nail, scattered leaves, or delicate flower outlines in black or darker sage.
Botanical Line Art Design Ideas
- Single stem with 3-4 leaves across the side of the nail
- Tiny flower outline (just the petal shape) on the tip
- Scattered small leaves across all five nails (so each nail has one or two)
- Thin branch extending from cuticle toward the tip with minimal leaves
Execution
- Two coats of sage green, curing between each coat
- Thin black or dark green gel in a 0 or 00 brush
- Light, confident strokes — shaky lines can actually look intentionally sketchy and charming, so don’t stress perfection
- Each botanical element should take no more than 10-15 seconds to draw
- Cure between colors if switching from black to green or vice versa
- Top coat and final cure
Botanicals read as intentionally artistic even when they’re simple, so resist the urge to complicate them.
9. Creamy Beige with Encapsulated Marble Effect
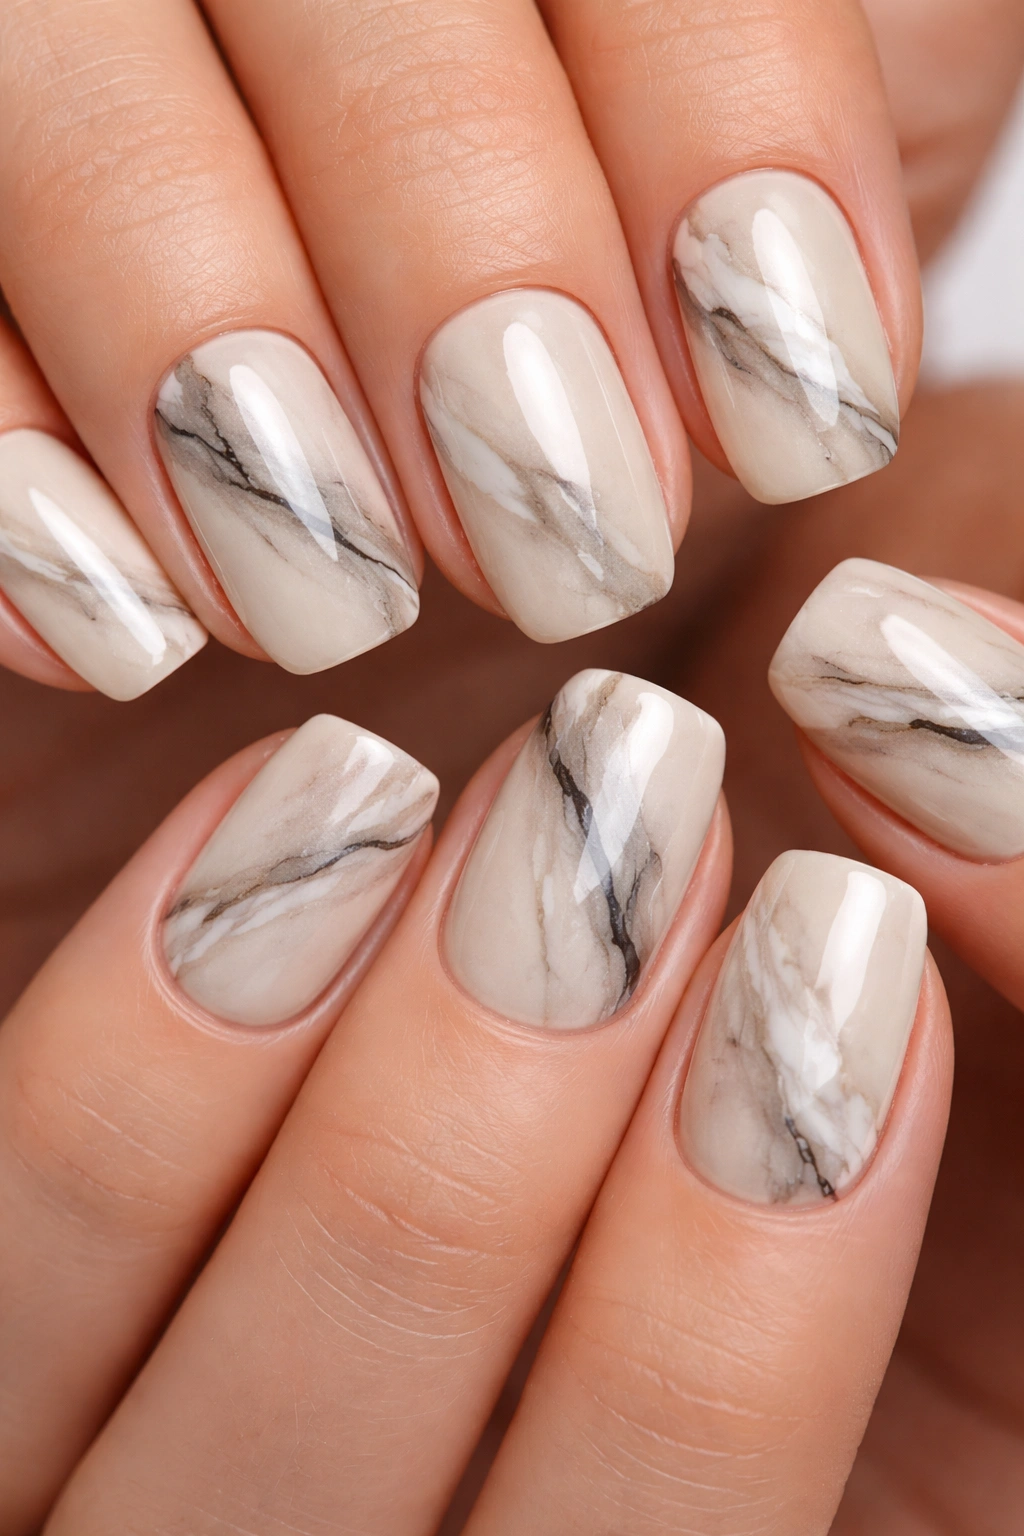
Creamy beige (a warm nude-beige) is a blank canvas for marble effects. Swirled encapsulated marble using white, gray, and thin black lines creates a sophisticated, almost stone-like appearance that feels luxury without being precious.
Creating Marble Effect with Encapsulation
Marble looks complex but comes together quickly with the encapsulation method. You’re essentially layering colors in a wet gel base, then sealing them.
Marble Encapsulation Steps
- Base: Two coats of creamy beige, cured
- Wet layer: Apply a layer of clear or builder gel that remains sticky
- Marble layers: Using a thin brush or dotting tool, create veins and swirls with white gel, then gray, then thin black lines, all while the base gel is still wet — don’t overthink the placement; natural-looking marble has irregular veins
- Swirl (optional): Use a thin brush handle or toothpick to gently swirl the colors together, creating the marble effect
- Seal: Apply glossy top coat while everything is still wet (or apply fresh builder gel first to keep it sticky) and cure
- Finish: Another coat of clear top coat to even out and seal completely, final cure
Marble is forgiving because perfect symmetry would actually look artificial — randomness makes it believable.
10. Warm Taupe with Rose Gold Chrome Tips
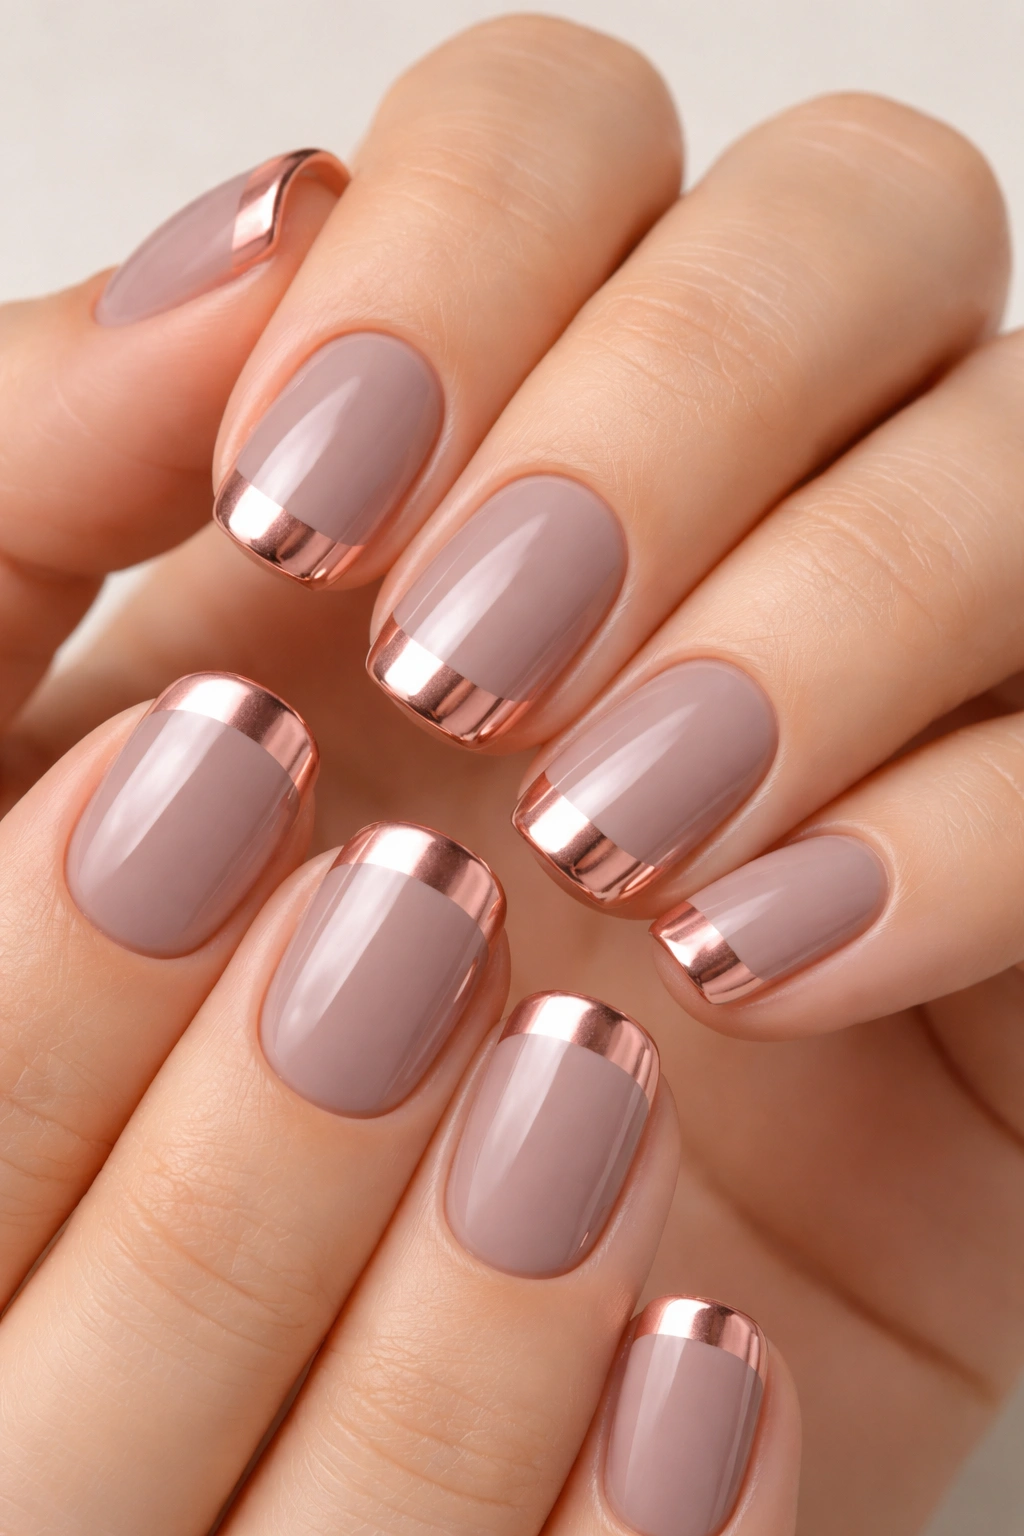
This is a subtle ombré effect where squoval tips transition to chrome. The taupe base provides warmth, and rose gold chrome on the tips adds just enough sparkle to feel special. It reads as both modern and minimalist.
Chrome Tip Application
- Two coats of warm taupe gel, fully cured on all nails
- Accent prep: On all five nails, apply a sticky builder gel or clear base gel only to the tip area (roughly the outer third of the nail)
- Chrome powder: Using a velvet applicator pad, press rose gold chrome powder into the wet gel on the tips only
- Cure the chrome layer
- Blending (optional): If you want a softer transition between taupe and chrome, apply a clear or taupe gel over the entire nail before final curing to slightly blur the line
- Top coat: Glossy seal coat and final cure
The two-tone effect is instant and glamorous without requiring freehand precision.
11. Blush Pink with Negative Space Geometric Shape
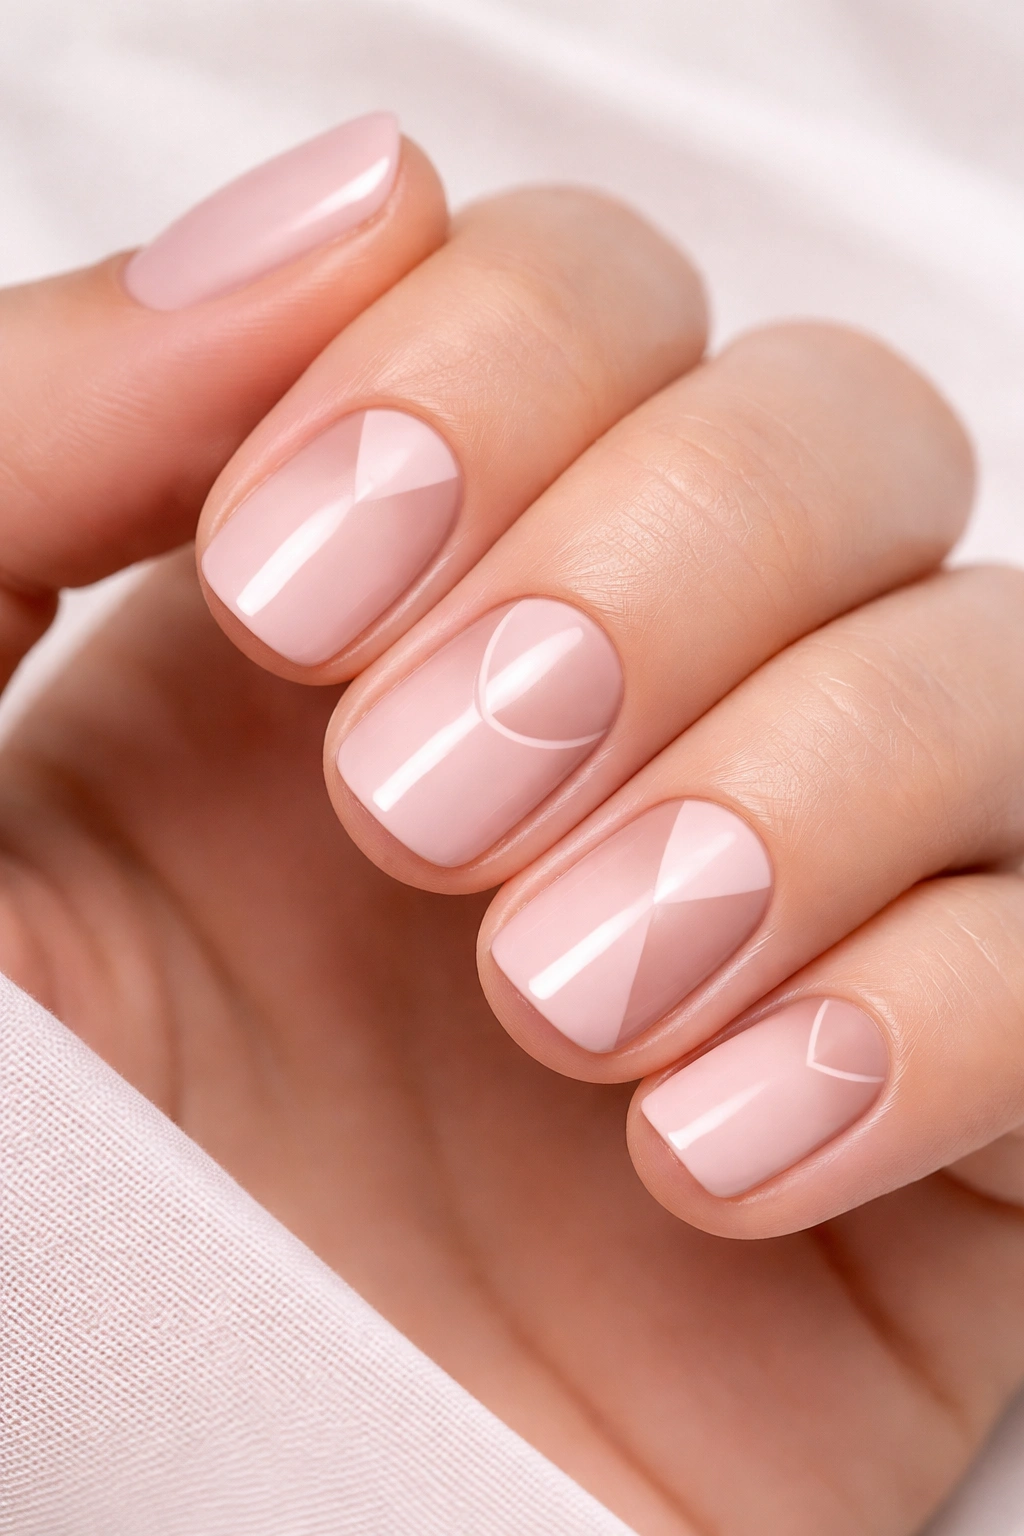
Negative space designs use the natural nail color showing through strategic design elements — think cutout patterns where you leave portions of the nail unpainted to reveal the natural nail underneath. On short squovals, a negative space triangle at the cuticle or a geometric shape at the center creates modern, artistic impact.
Planning Your Negative Space Design
Negative space works best when the unpainted area is a clean, defined shape: a triangle, a circle, a simple polygon, or a small rectangle. Curved negative spaces are harder to execute cleanly at home.
Negative Space Application
- Choose your shape and sketch it lightly on the nail with pencil before applying gel
- Prep the nail: Don’t apply base coat to the area where negative space will be
- Gel application: Apply base color gel carefully around the shape you want to leave unpainted, using a thin brush to maintain clean edges
- Multiple thin coats: Build the color with 2-3 thin coats rather than one thick coat — thin coats around edges don’t pool and create cleaner lines
- Seal: Top coat covering the entire nail, including the negative space area, and cure
The unpainted area is the art here, so those clean edges matter.
12. Soft Lavender with Shimmery Finish
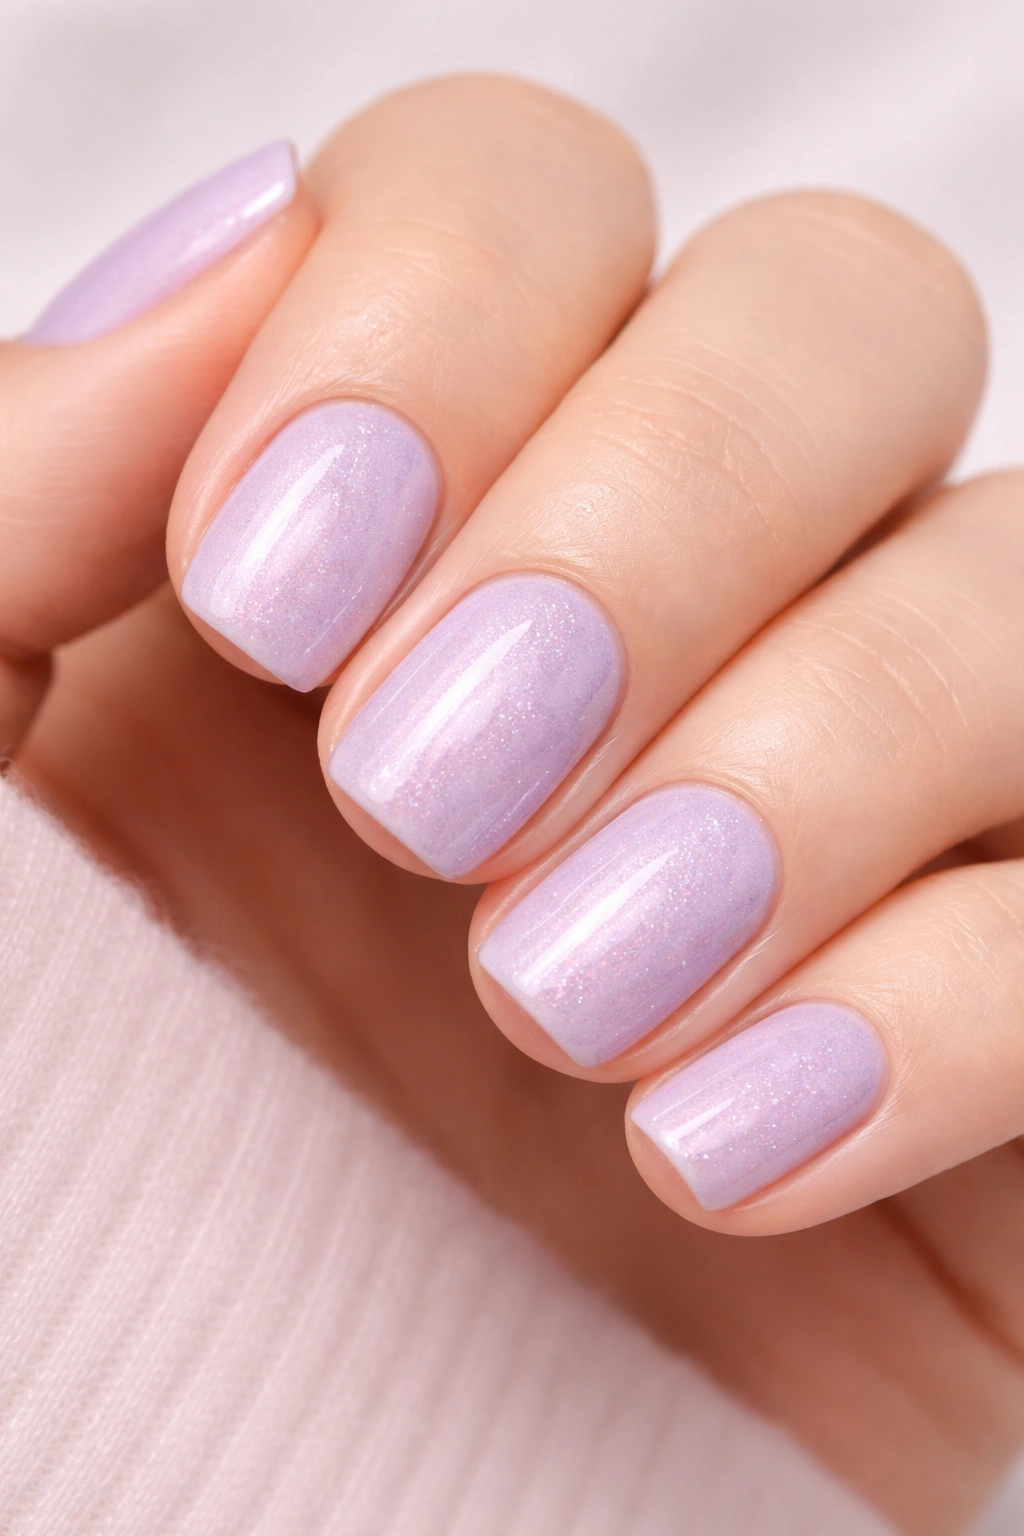
Soft lavender gel with a shimmery finish is romantic and wearable — the shimmer catches light without being glittery. This is a single-shade design that relies on finish and color choice for impact, perfect when you want beautiful nails without complicated art.
Shimmer Finishes vs. Glitter vs. Flake
Shimmers are fine, smooth particles suspended in clear gel that reflect light evenly. Glitter is chunkier and more visible. Flakes are even larger. For a refined look on short nails, shimmer wins because it reads as sophisticated rather than party.
Application
- Two coats of soft lavender gel, fully cured
- One coat of shimmer top coat (most brands make shimmer-finish top coats, or you can buy shimmer gel specifically) and final cure
The simplicity is the point — stunning color and reflective finish carry the entire design.
13. Cream with Delicate Floral Art on Accent Nail
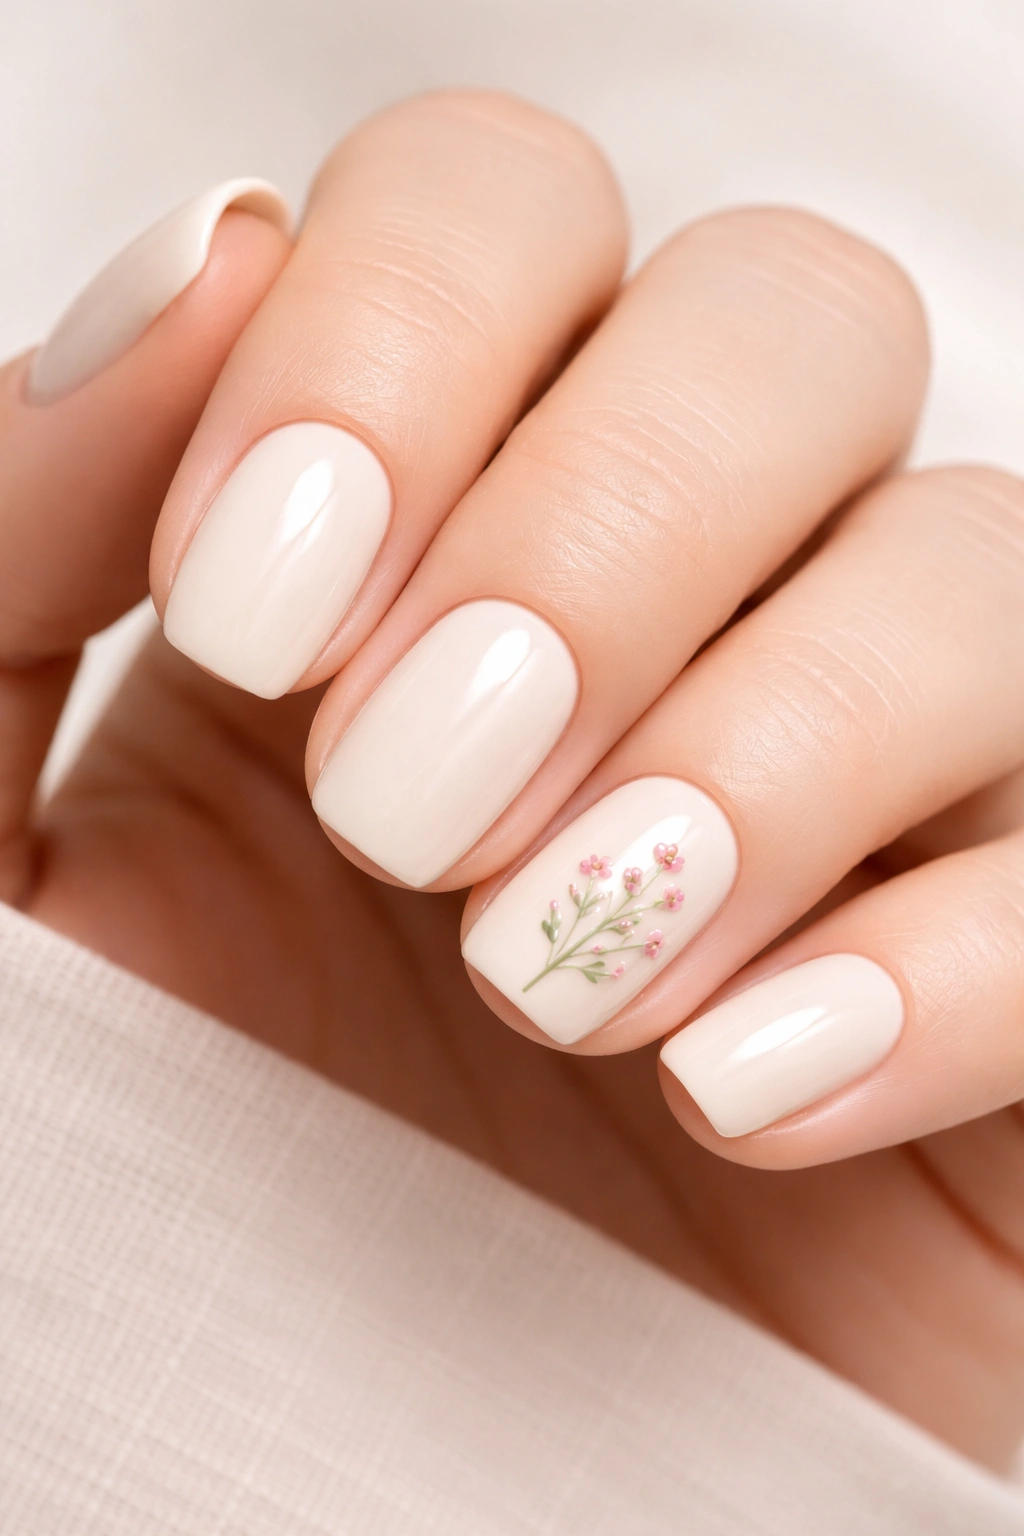
Keep four nails as a simple cream base, then create tiny floral art on one accent nail (usually the ring finger). A small cluster of flowers with thin stems, delicate petals, and minimal color (perhaps soft pink and green) reads as both artistic and wearable.
Small-Scale Floral Design
Tiny florals are easier than they sound. You’re not painting botanical accuracy; you’re creating the impression of flowers.
Floral Painting Steps
- Prep: Cream base on all nails (two coats, cured)
- Stem: On your accent nail, use a thin brush with soft green gel to paint a delicate curved stem
- Flowers: Using a small dotting tool or the end of a thin brush, dab soft pink gel to create small flower heads — even imperfect circular shapes read as flower clusters
- Details (optional): Add a tiny yellow dot in the center of each flower for a stamens effect, or a single green leaf
- Cure and seal: Top coat over everything, final cure
Imperfection adds charm here — perfect symmetry would look stiff.
14. Nude with Thin Gold French Manicure
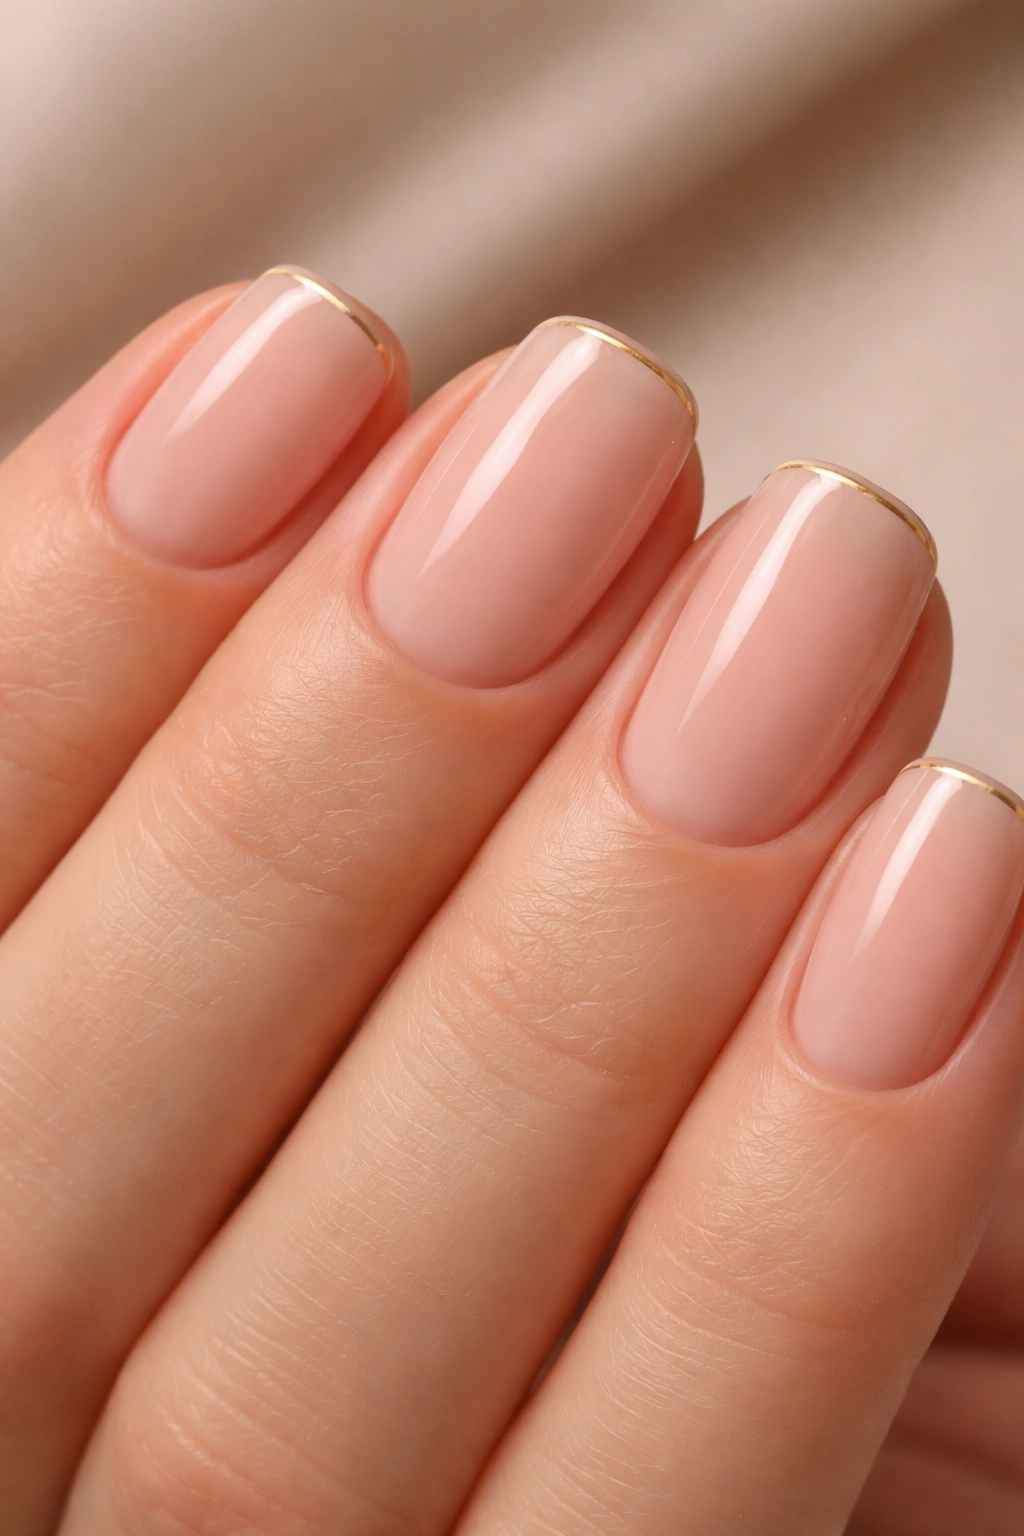
A refined twist on the French manicure: instead of a stark white tip, use a very thin gold line at the edge where the nail meets the free edge. This is subtle but instantly elegant, especially on short squovals where traditional thick French tips would overwhelm the nail.
Ultra-Thin French Line Execution
- Two coats of nude gel, fully cured on all five nails
- Gold line: Using your thinnest brush or a specialized detailing brush, paint a single thin line of gold gel just along the very edge of the free edge (where the nail extends beyond your finger)
- The line should be as thin as possible — use light pressure and a fine brush, and don’t expect it to be perfectly even. Slight irregularities add charm
- Cure and seal: Top coat and final cure
This amount of gold catches light without dominating the design.
15. Neutral Tan with Geometric Encapsulated Confetti
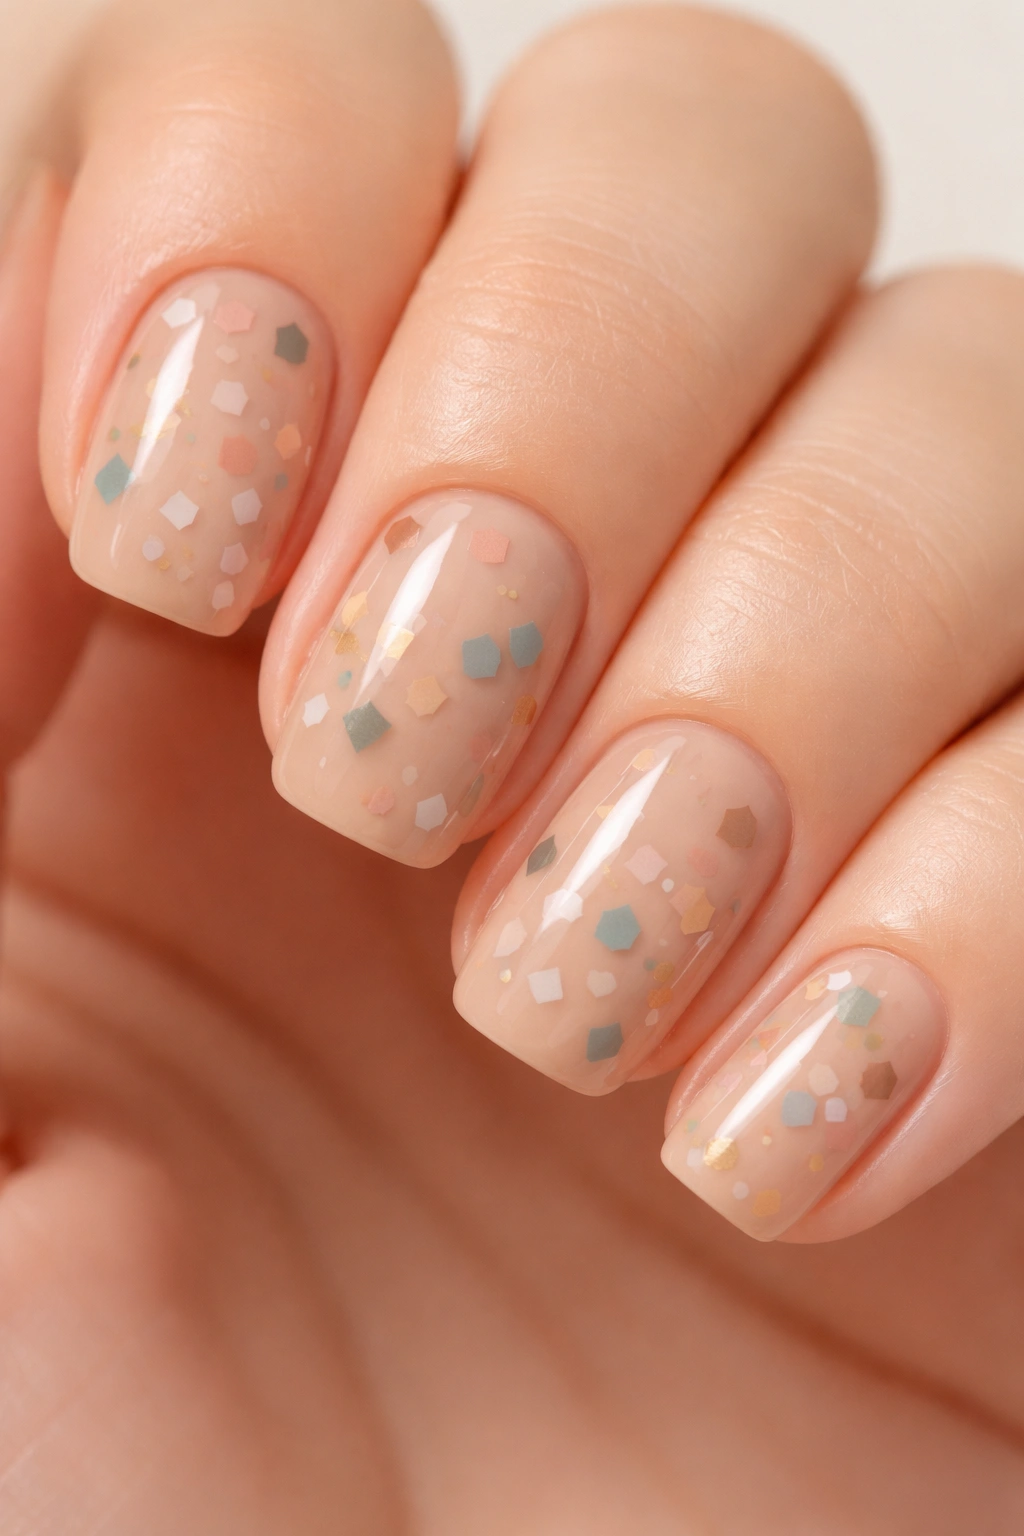
Tan is the ultimate neutral, and encapsulated geometric confetti (small triangles, squares, or stars in various gel colors sealed inside the nail) adds texture and playfulness without being childish. The geometric shapes keep it sophisticated.
Encapsulated Geometric Confetti
- Base: Two coats of warm tan gel, cured
- Confetti layer: Apply a clear or builder gel layer that remains sticky
- Shapes: Use a small dotting tool or thin brush to create tiny geometric shapes in contrasting colors — soft rose, sage green, dusty blue, navy, blush — scattered across the nail in no particular pattern
- Seal: Apply glossy top coat while the confetti layer is still wet and cure
- Finish: Second top coat for a smooth, sealed finish, final cure
The geometric shapes (not random dots or splatter) keep this design polished rather than casual. Aim for 10-15 small shapes per nail, scattered naturally.
Final Thoughts
Short squoval nails are the secret to nails that are both beautiful and practical. These fifteen designs prove that length isn’t what makes a statement — thoughtful color, intentional finish, and intentional details do. Whether you’re drawn to minimalism or texture, neutrals or color, there’s a squoval design here that you can execute at home with gel polish, patience, and a basic application kit.
The common thread in all of these designs is that they prioritize quality over complexity. Most of them use just one or two color applications, rely on finish (matte, shimmer, chrome) for visual interest, or depend on a single decorative technique like encapsulation or striping tape rather than freehand art skills. Start with one that resonates with you, assemble your supplies, and give yourself grace on your first attempt — gel application is a learned skill, and your second and third manicures will be noticeably cleaner than your first.
Your short squovals are ready to look salon-quality from your own home setup. You’ve got this.
