

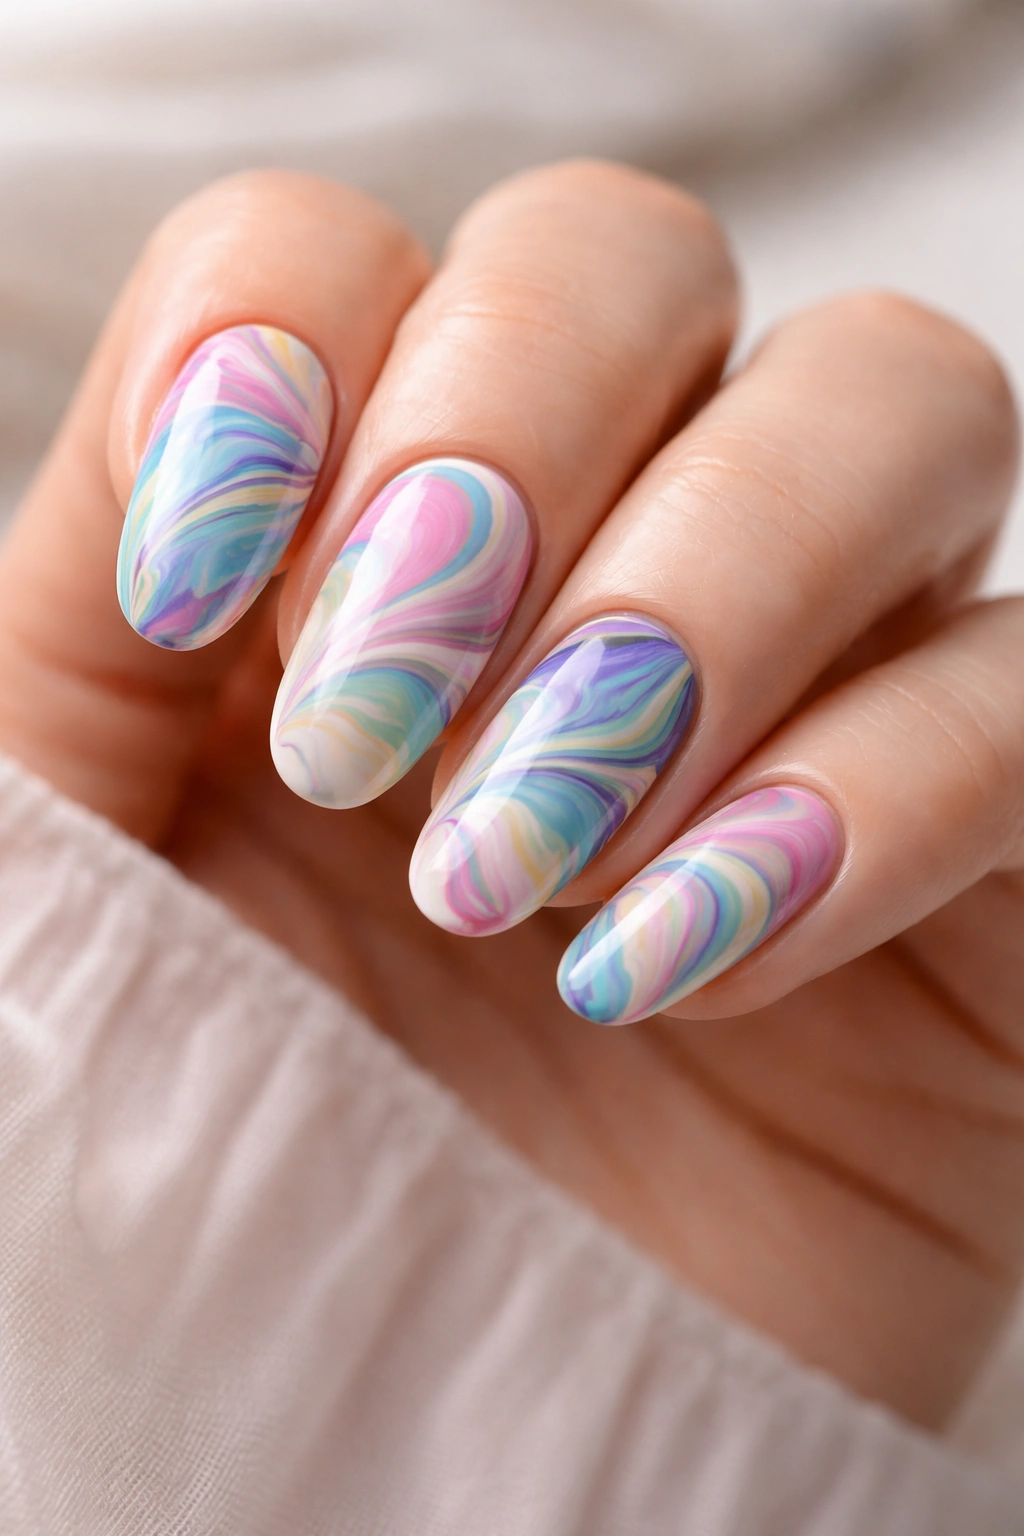
Water marble nails are one of the most enchanting nail art techniques you can try at home, and honestly, they’re far more achievable than you might think. If you’ve scrolled through social media and seen those dreamy, swirled manicures that look like they cost a fortune at a high-end salon, you’re looking at water marbling—a technique where nail polish floats on water’s surface and creates one-of-a-kind patterns that transfer directly onto your nails. The best part? You can master this artistic effect using supplies you probably already have at home, and it’s genuinely fun to do.
What makes water marble nails so special is that they’re completely unpredictable in the best way possible. Every single manicure turns out unique because the polish behaves differently each time based on water temperature, polish consistency, and how you swirl the colors. This unpredictability is what makes the technique so addictive—you’re essentially creating a tiny wearable artwork that no one else will ever replicate exactly.
Understanding Water Marble Nails: What Makes Them Special
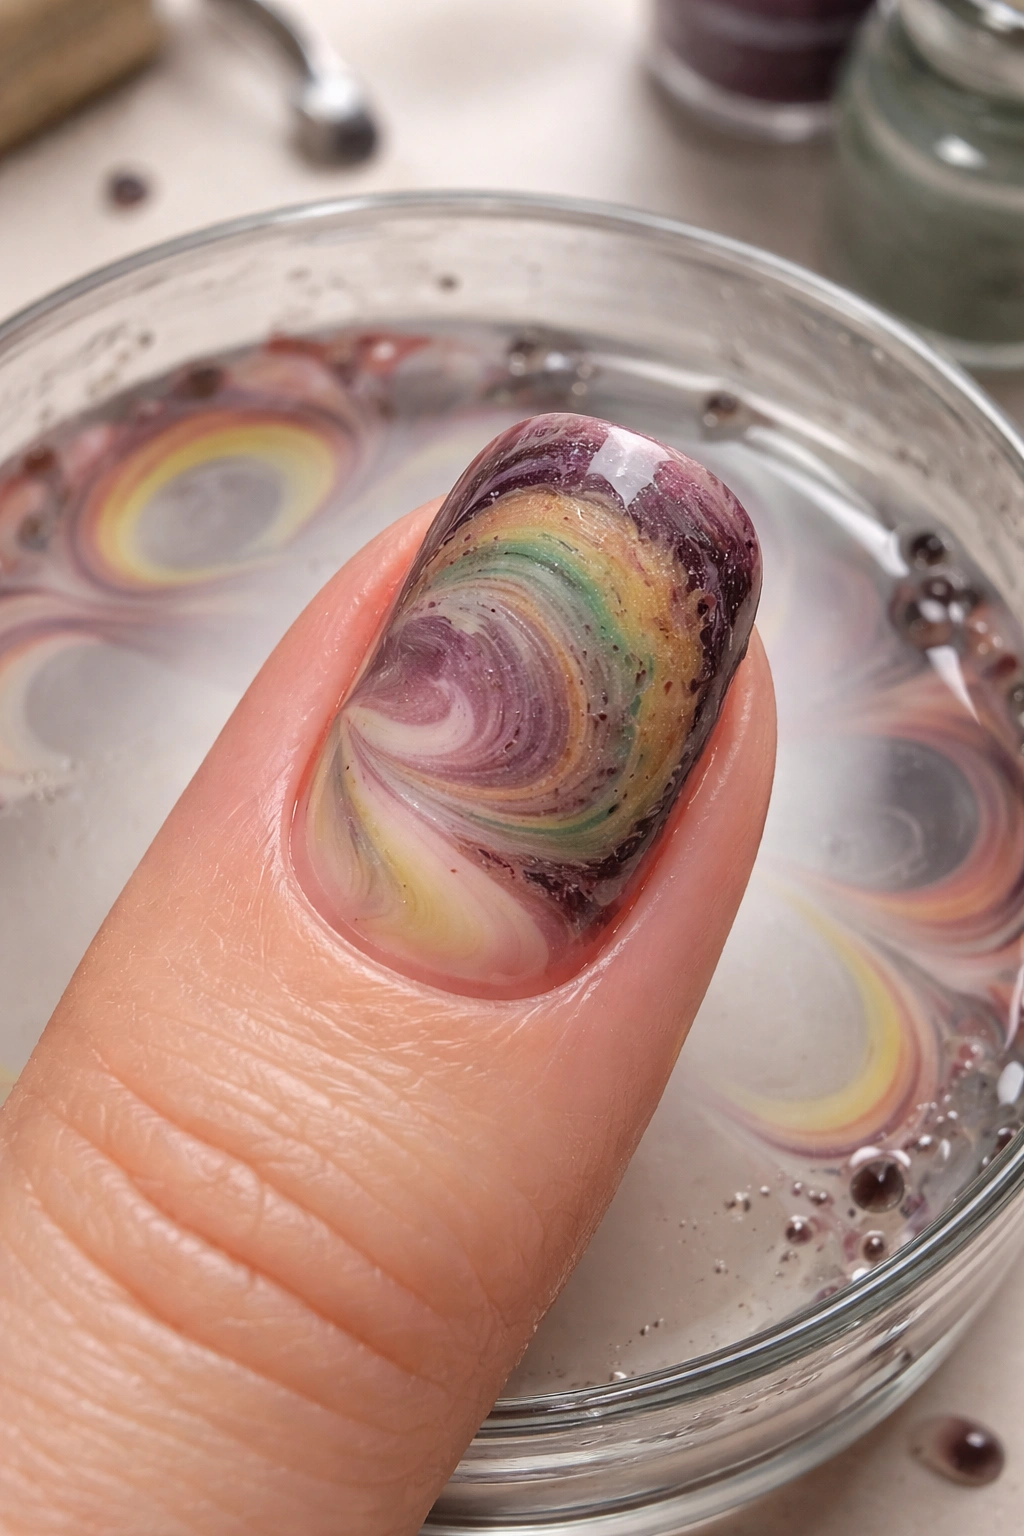
Water marble nail art is based on a centuries-old artistic technique where pigments float on water to create intricate, flowing designs. When nail polish meets room-temperature water, something magical happens: the liquid polish spreads outward into a thin, colorful ring that stays on the water’s surface instead of sinking or drying instantly.
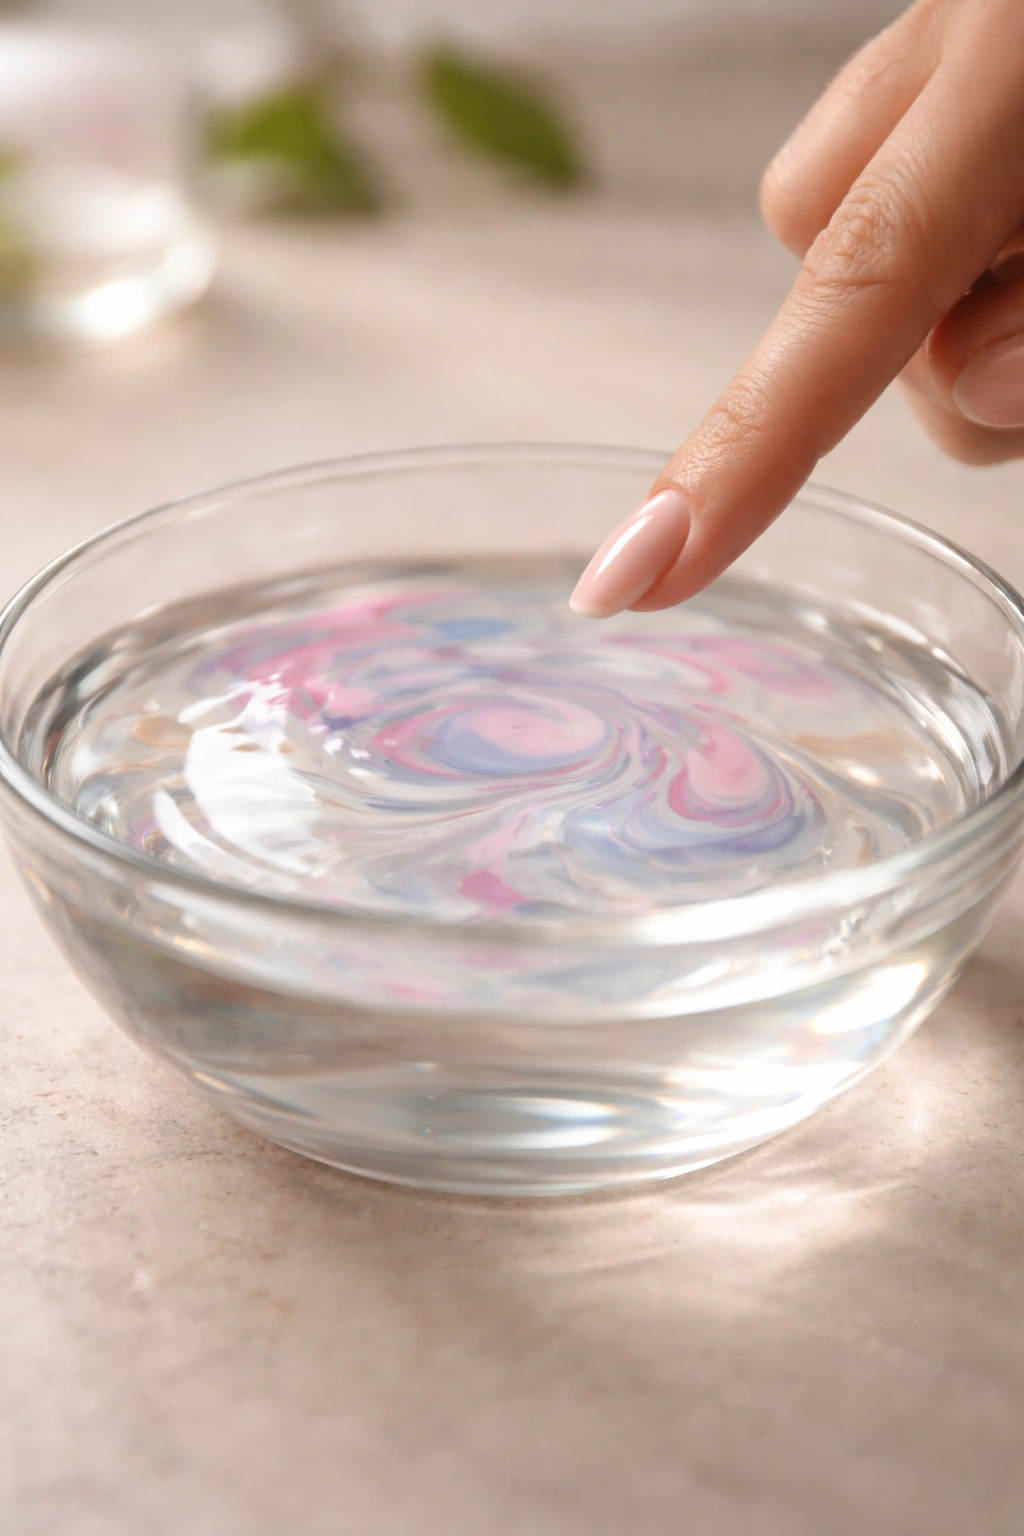
The technique involves dropping multiple colors of polish into water one at a time, creating concentric rings of color. Then, using a simple toothpick, you gently swirl these rings together to form patterns—everything from delicate spirals to dramatic starburst designs. Once you’re happy with your pattern, you dip your finger directly into the water, and the floating polish transfers onto your nail in one smooth motion.
Unlike hand-painting, water marbling doesn’t require steady hands or artistic experience. The water does much of the work for you, creating organic, fluid patterns that would be nearly impossible to paint manually. This democratizes nail art in a wonderful way—beginners can create salon-quality results on their very first attempt.
Gathering Your Complete Supplies for Success
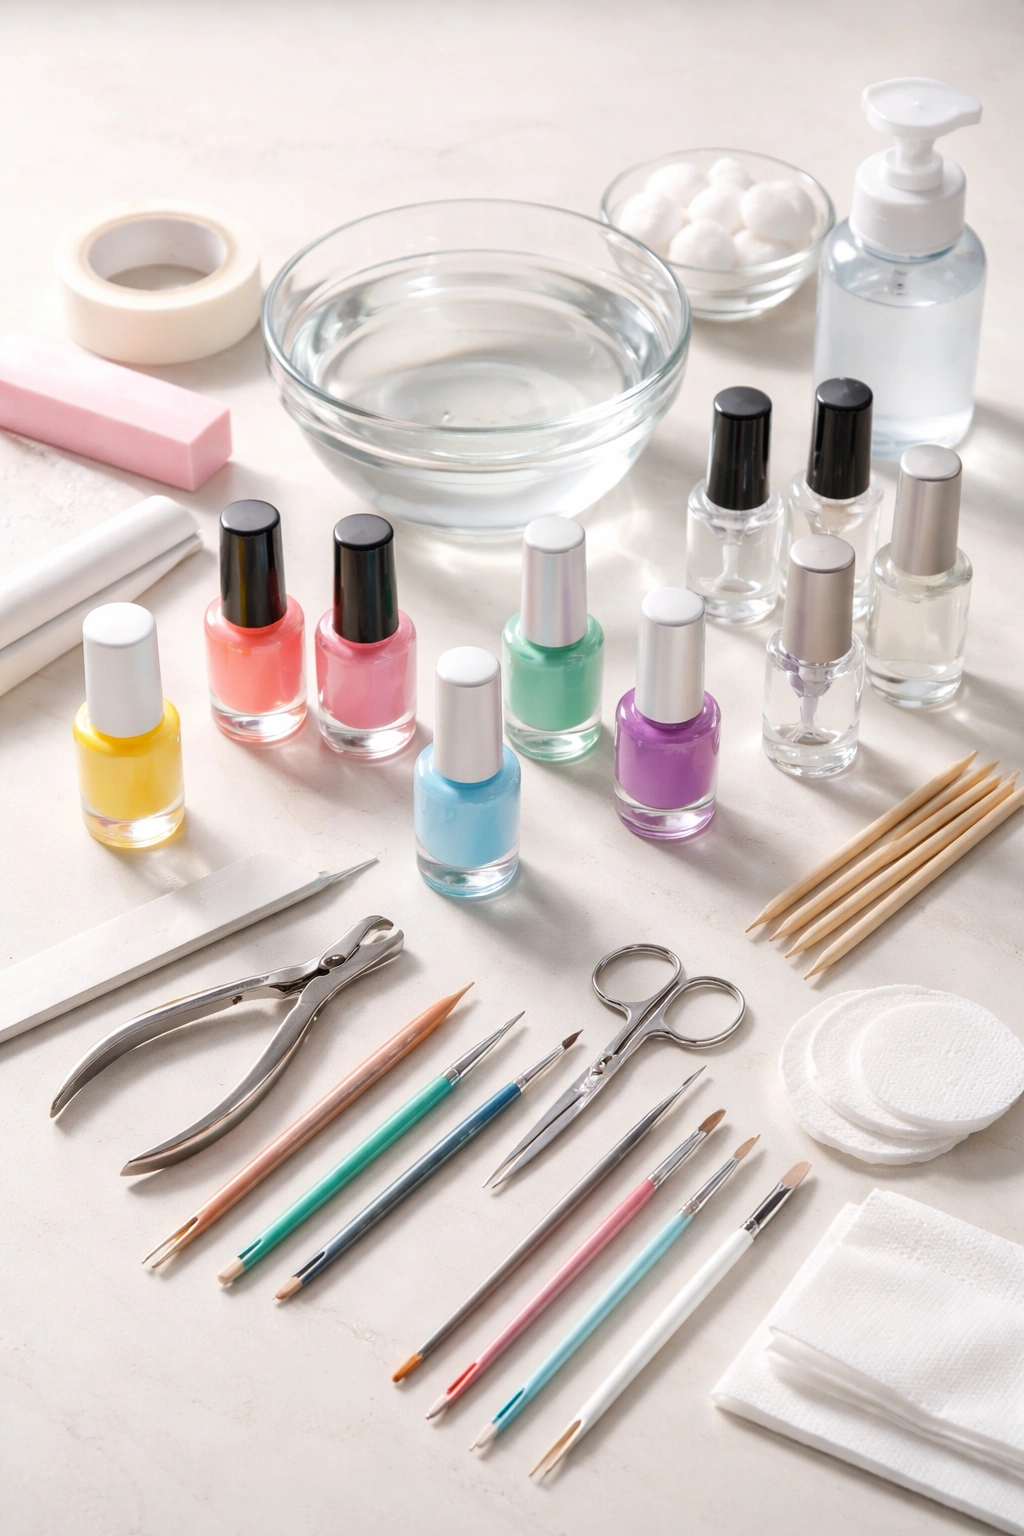
Before you start, gather everything you’ll need so you’re not scrambling mid-process. Water marbling moves quickly once you begin, so having all supplies within arm’s reach is essential.
The absolute essentials are water, nail polish, and a small cup or bowl. Beyond that, you’ll want a base coat, white or light-colored polish for your base layer, at least two or three colors for the marbling effect, and a top coat for sealing. A toothpick or cuticle stick becomes your design tool, and nail polish remover with cotton swabs handles cleanup.
The protective items that make a huge difference are liquid latex, school glue, petroleum jelly, or tape to protect the skin around your nails. This step saves you from spending 20 minutes cleaning dried polish off your fingers. Many people skip this and regret it immediately.
Optional but genuinely helpful supplies include a wide nail art brush (useful if the dip-and-scoop method isn’t working for you), paper towels for protecting your work surface, and a clean-up brush designed for manicures. If you’re serious about this, grab a disposable cup—ceramic ones from dollar stores work perfectly, or save old takeout containers. This cup will get permanently stained, so don’t use your favorite mug.
Preparing Your Nails for the Perfect Canvas
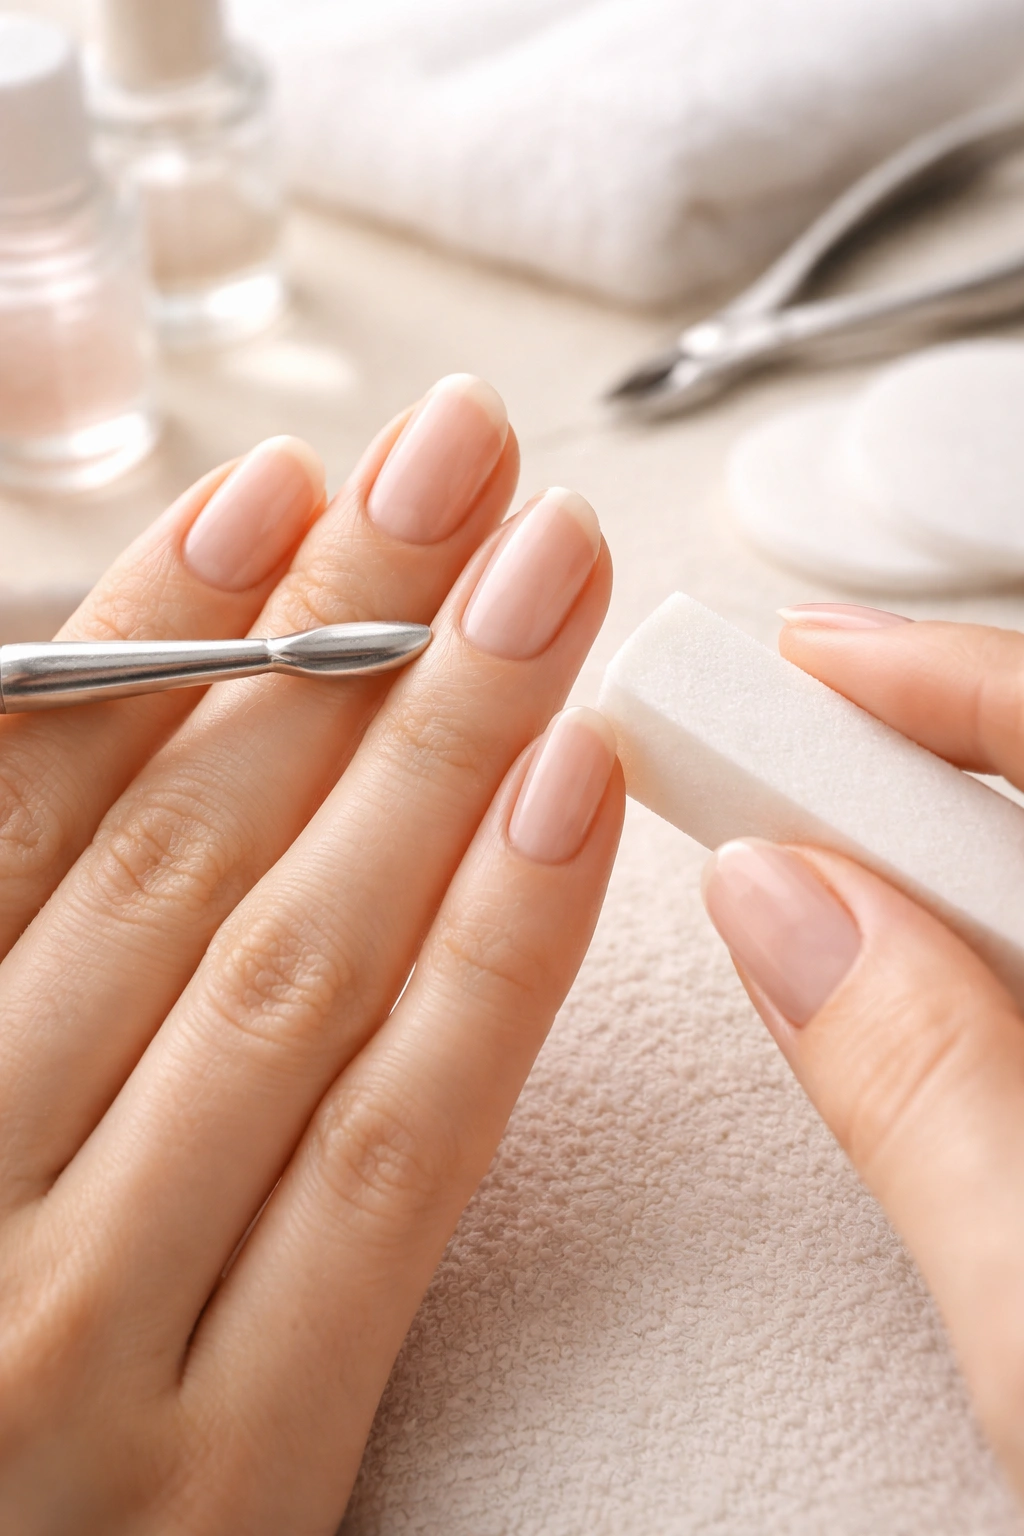
Nail preparation determines whether your water marble design will look stunning or mediocre. Start with a proper manicure foundation by removing any old polish, trimming your nails to your desired length, and shaping them with a file. Push back your cuticles gently—don’t be aggressive, as damaged cuticles look unprofessional and can interfere with polish application.
Once your nails are shaped, buff the surface lightly to remove the natural shine. This creates a slightly rougher surface that helps polish adhere better. Wipe your nails thoroughly with rubbing alcohol or nail polish remover to eliminate any oils or residue left from buffing—this step prevents the polish from bubbling or peeling prematurely.
Let your nails dry completely before moving forward. Some people use a quick-dry fan or simply wait a few minutes. You’ll know they’re ready when they look completely matte and feel slightly dry to the touch.
Protecting Your Skin: The Critical Cleanup Trick
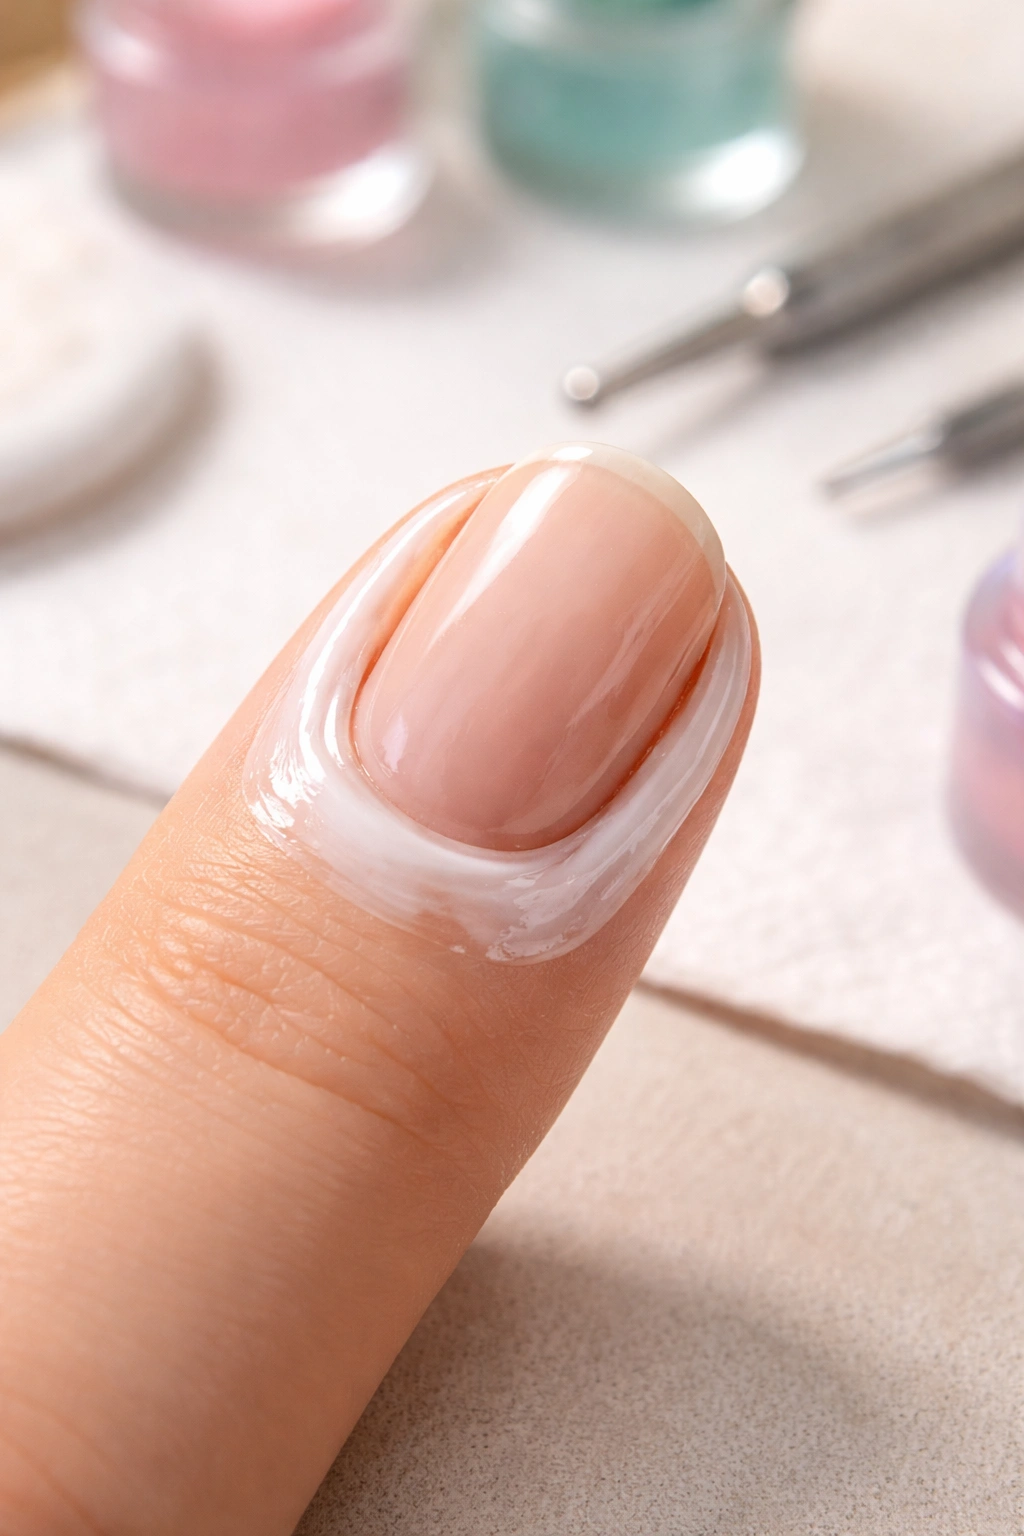
This step genuinely changes your entire experience. Protecting the skin around your nails before dipping reduces cleanup time from 20 minutes to about 3 minutes, and it prevents accidental staining that’s surprisingly difficult to remove.
Your three best options are liquid latex (the most professional choice), school glue like Elmer’s (surprisingly effective and cheaper), or petroleum jelly (the most accessible option). Apply whichever you choose generously around your cuticle area, on the sides of your nail, and underneath your fingertip. Don’t be stingy—cover at least up to your first knuckle, because polish splatter travels farther than you’d expect.
If using liquid latex or glue, let it dry completely before proceeding. This creates a barrier that polish won’t stick to. When you’re finished marbling and ready to clean up, you simply peel off the latex or glue, and most polish comes right off with it. If you use petroleum jelly, it doesn’t dry, but it still prevents polish from sticking directly to your skin, though cleanup still requires some rubbing with remover.
Tape is another option—painter’s tape works well and prevents polish from touching your skin entirely. Just apply it carefully around your nail perimeter.
Filling Your Water Bowl: Getting Temperature Right
Water temperature is genuinely the most critical factor in successful water marbling, and this is where many first-time attempts fail. Room-temperature water is your target, which typically means water that’s been sitting out for an hour or so after running from the tap.
Why does temperature matter so much? Cold water causes nail polish to set too quickly, preventing it from spreading into those beautiful, thin rings you need. The polish essentially hardens before it can form the floating pattern. Hot water, on the other hand, causes polish to break apart and become too thin, making it difficult to create distinct color rings.
Filtered or bottled water works better than tap water because filtered water slightly slows the drying process, giving you more working time. If you notice your polish drying too fast, try slightly cooler (not cold) water. If it’s spreading too thin and not forming rings, try slightly warmer (not hot) water.
Fill your cup or bowl about three-quarters full to prevent water from sloshing over the edges when you dip your finger. Too shallow and your nail won’t fit properly into the design; too full and you risk spilling everywhere.
Applying Your Base Color for Maximum Impact
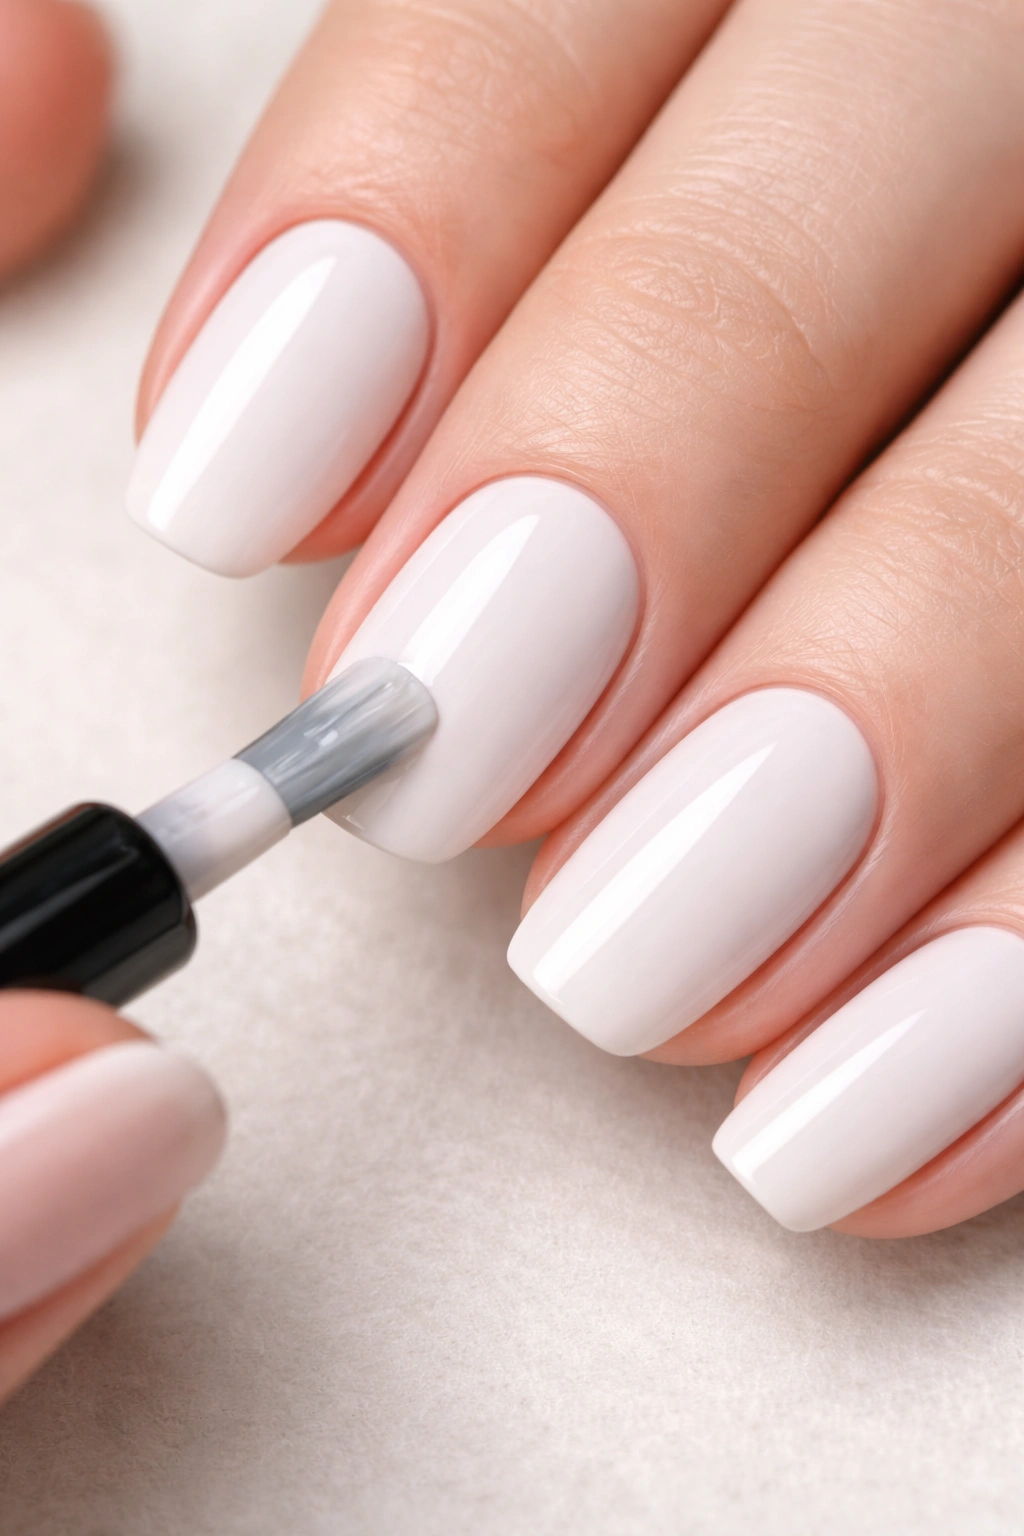
Your base color serves as the canvas for your water marble design, and choosing the right one dramatically affects your final result. White or very light colors create the most striking marbled effect because they make every swirl of color pop visually and vibrant.
If white feels too stark for your style, try soft pastels like pale pink, light cream, or barely-there blush. These neutral bases let your marble colors shine without competing with them. Darker base colors can work, but they mute the marble effect—the colors blend into the base rather than standing out crisply.
Apply your base color in thin, even coats. Use two coats rather than one thick coat, allowing each layer to dry completely between applications. This prevents bubbling and ensures smooth, long-lasting coverage. If you’re using a quality base coat underneath, it helps the polish stick better and protects your natural nails from staining.
Pro tip: Don’t apply base coat and skip to marble polish immediately. Let everything dry fully—ideally for several minutes. Rushing this step means wet polish on your nails, which will interfere with the marble design transferring properly.
Choosing the Right Polish Colors and Testing First
Not all nail polishes work equally well for water marbling, and this is crucial information that saves frustration. You need polish that floats on water’s surface, not polish that sinks to the bottom. Some polishes are formulated differently and simply won’t cooperate with this technique.
Before committing to your full manicure, test each polish color you plan to use. Drop a single drop into your prepared water and watch what happens. If it spreads into a ring and floats, you’re good. If it immediately sinks or clumps into a ball, skip that polish—it won’t work for marbling.
Thinner, newer polishes work significantly better than thick or older formulas. Old polish tends to thicken over time and sets too quickly on water. If you have polish that’s been sitting in your collection for years, it might not cooperate. Glitter polish works surprisingly well for water marbling, creating beautiful sparkly effects within your designs.
For color selection, choose colors with good contrast for your first attempt. A light color paired with a dark color creates a bold, dramatic effect that’s easy to see. As you get more comfortable, experiment with analogous colors (those next to each other on the color wheel, like blues and purples) or monochromatic variations (different shades of the same color family) for more subtle effects.
Dropping Polish Into Water: When the Art Begins
This is where water marbling transitions from preparation to actual creation. Once your supplies are ready and your nails are prepared, things move quickly—the polish dries within seconds, so you need focus and readiness.
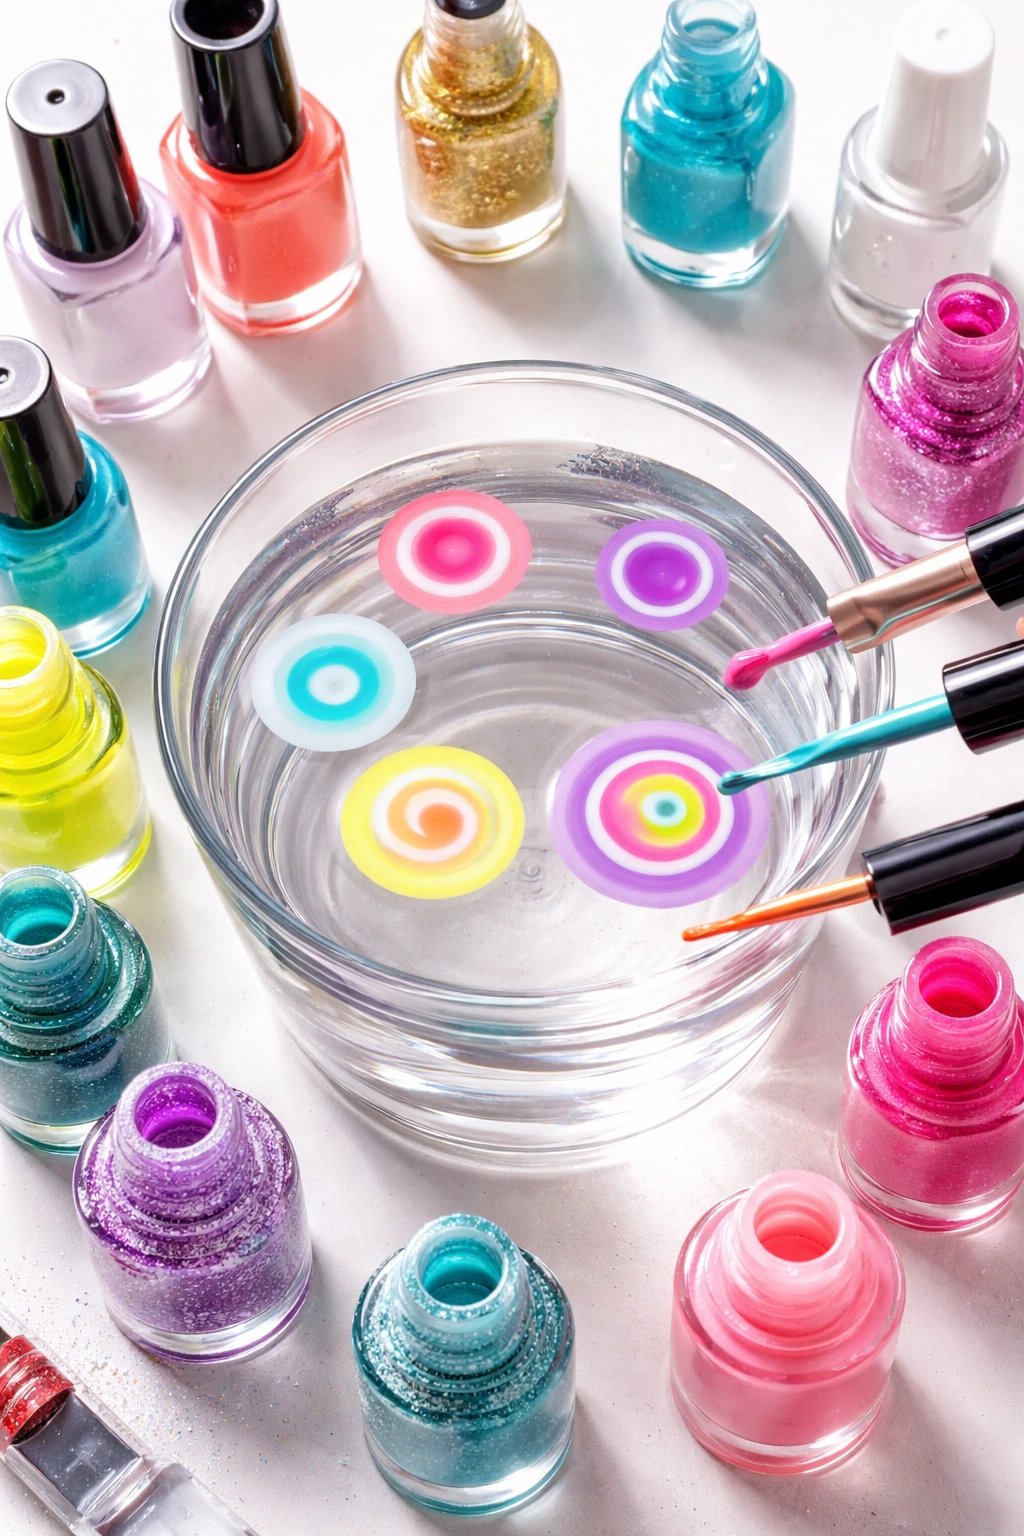
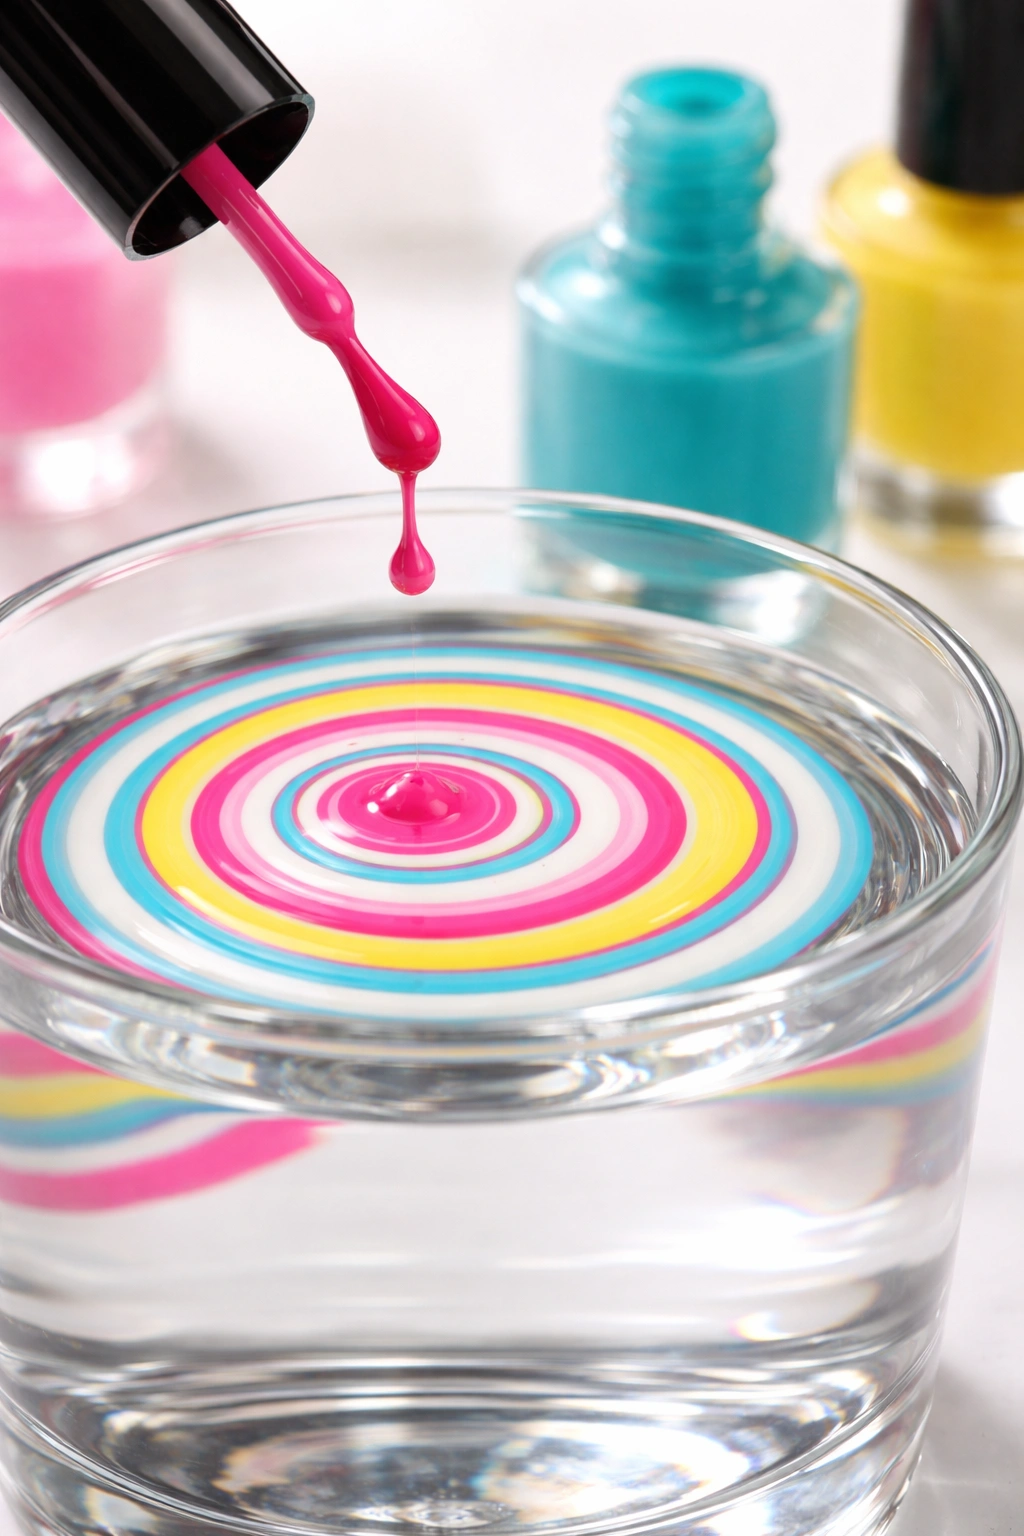
Unscrew all your polish bottle caps and leave them loose so you can work fast. Choose your first color and hold the brush wand over the water’s surface. Wait for a single drop to fall—don’t squeeze or shake the brush, just hold it steady and let gravity work. The drop will hit the water and immediately spread outward into a circle.
Once the first color has spread into a ring, drop your second color directly into the center of that ring. Again, wait for a single drop to fall and let it spread. Add your third color the same way, either in the center or overlapping slightly with the existing rings. You’re creating a bullseye pattern with concentric rings of color.
Some people add a fourth or fifth color, but three or four colors typically creates the most balanced design. Too many colors risk muddying the effect—the pattern becomes less distinct and more chaotic.
The timing between drops matters slightly. If you drop all your colors simultaneously, they spread at different rates and might not create the sharp ring definition you want. Dropping them in sequence, waiting a few seconds between each drop, gives each ring time to fully form before the next color arrives.
Swirling Patterns With Your Toothpick: Creating Your Design
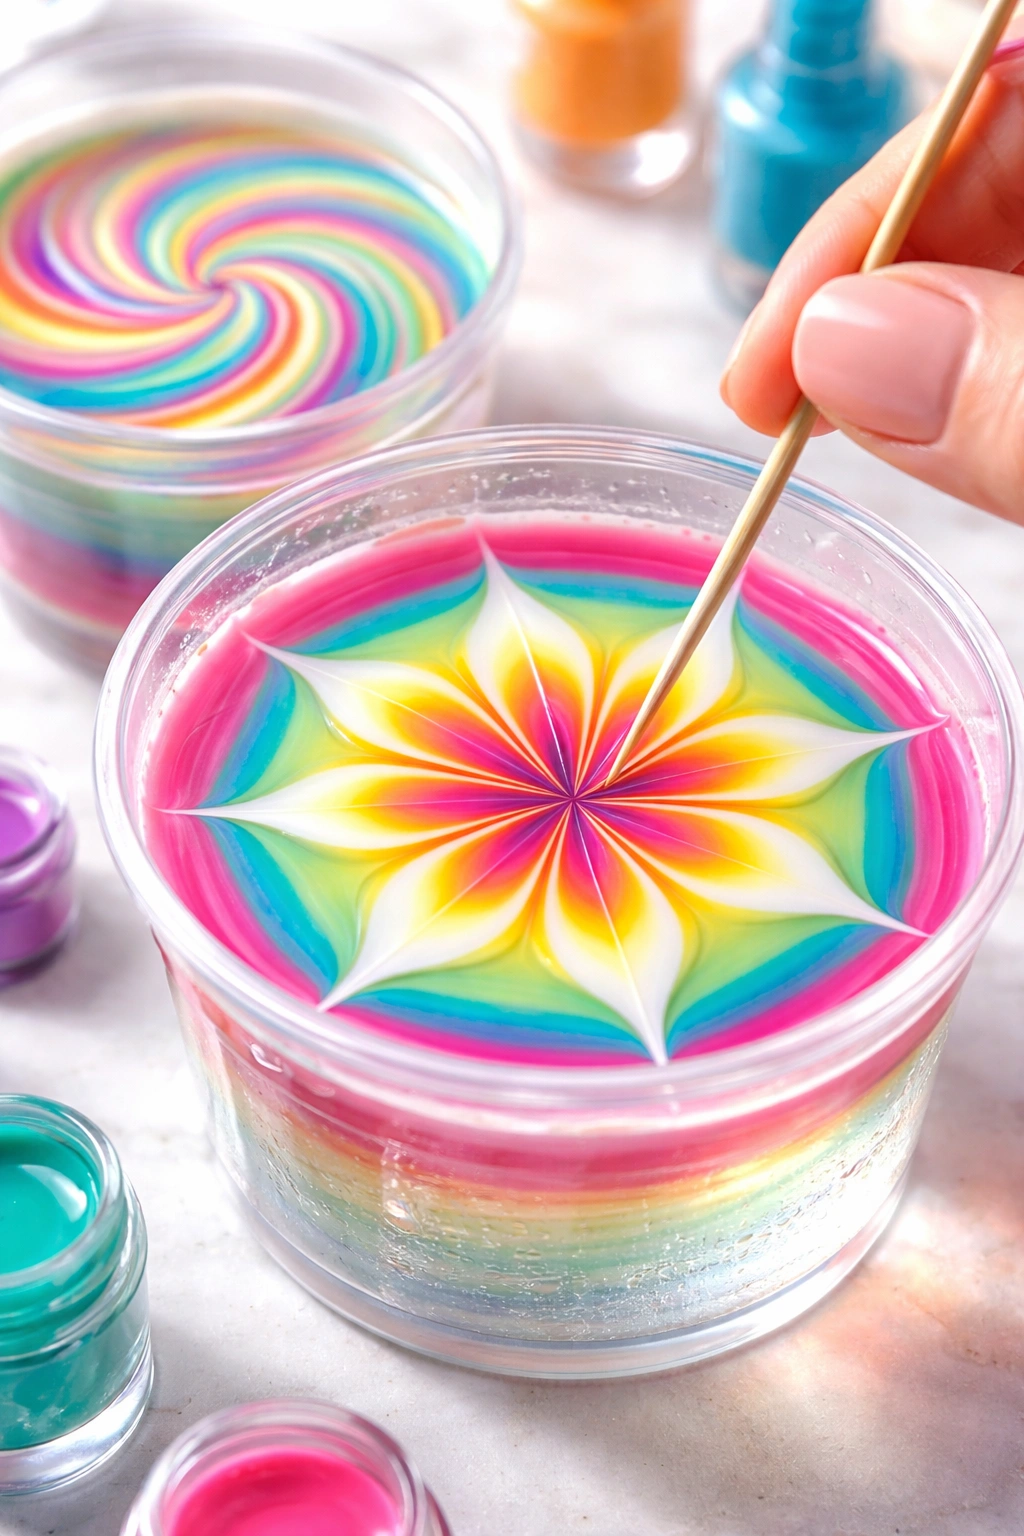
Now comes the creative part where you transform those concentric rings into an actual design. This is where your toothpick becomes magic.
The starburst pattern is the most reliable for beginners. Place your toothpick tip in the very center of your rings and drag it outward toward the edge of the cup. Lift it out and repeat, starting from the center again but dragging in a different direction. Continue this pattern, creating lines like sun rays radiating outward from the center. This creates a naturally beautiful starburst that’s nearly impossible to mess up.
The spiral pattern is slightly trickier but creates a dramatic tie-dye effect. Instead of dragging from center to edge, move your toothpick in a slow, gentle spiral, starting from the center and moving outward in a circular motion. This pulls the colors around in an organic, flowing pattern.
Feather or petal patterns involve dragging from the outer edge toward the center, creating shapes that resemble flower petals or feathers radiating inward.
The key to all patterns: move slowly and deliberately. Rushing the toothpick creates chaotic, jumbled results. Gentle, controlled movements produce clean, distinct patterns. Also, don’t overwork the pattern—a few swirls are usually enough. The polish starts drying quickly, and too much manipulation creates a muddy, blended mess rather than distinct color separation.
Dipping Your Nails Into the Marble Pattern
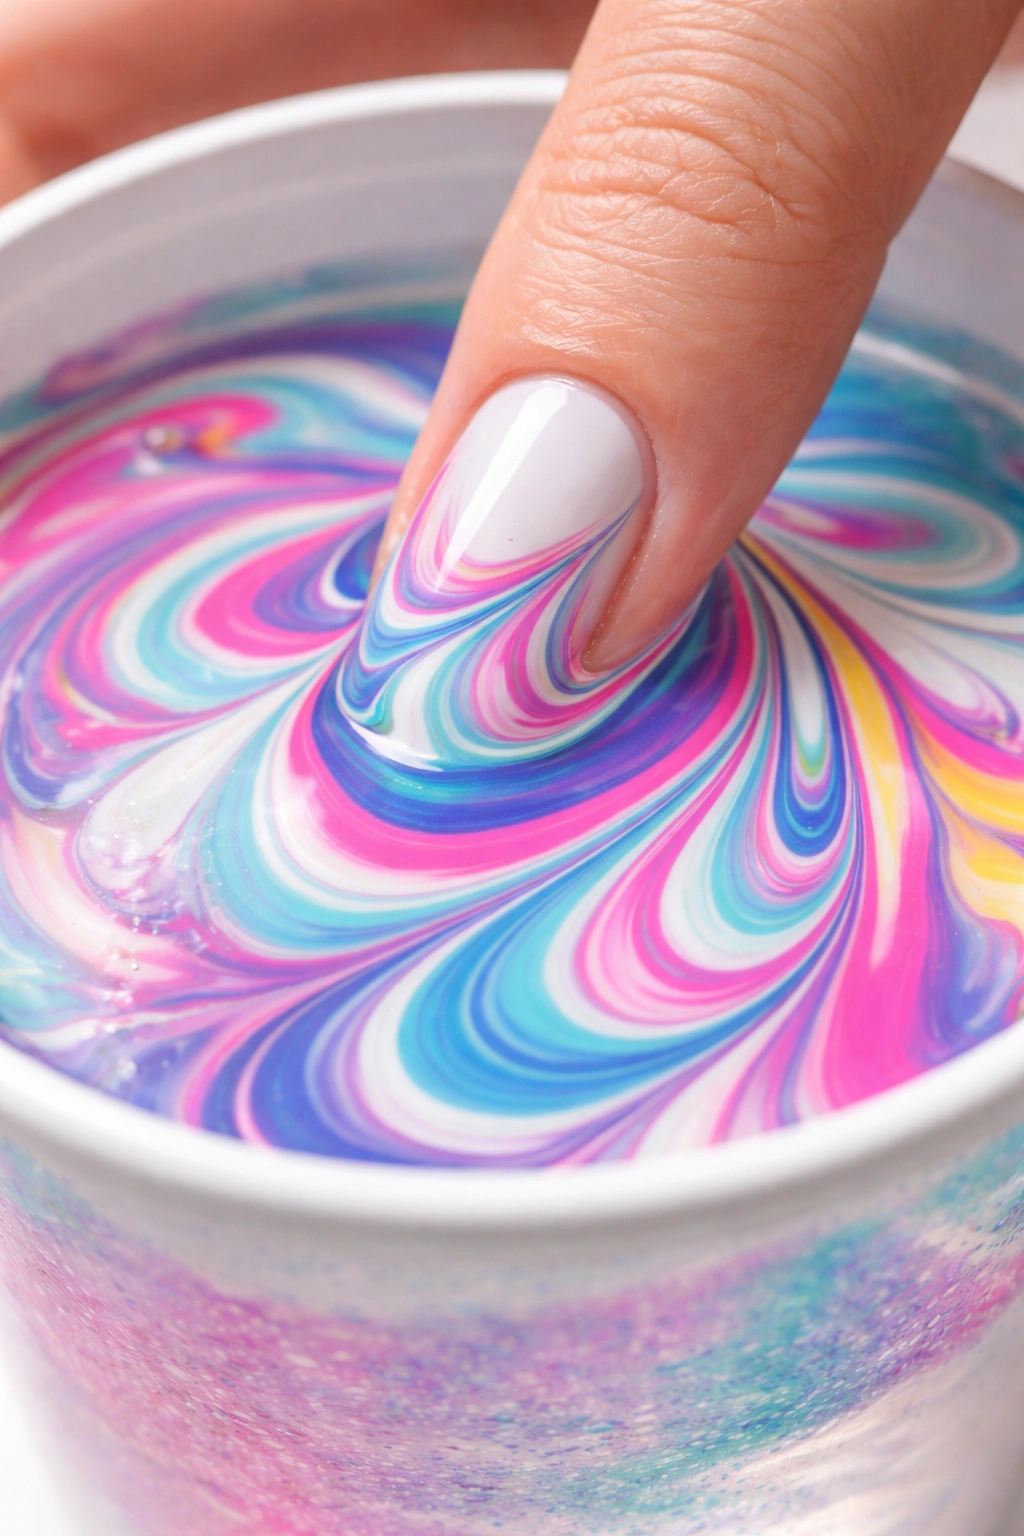
This is the moment where floating design becomes a wearable manicure. Once you’re satisfied with your pattern, it’s time to transfer it to your nail.
Hold your finger straight and parallel to the water’s surface, entering the clear water (not the polish) first. Then, tilt your finger slightly and guide your nail into the floating polish pattern. The goal is for the design to coat your entire nail surface. Depending on your nail size, you might approach from different angles or scoop slightly upward to ensure full coverage.
Hold your finger in the polish for a few seconds—somewhere between 2 to 5 seconds. This allows the polish to adhere to your nail plate. You’ll feel the polish stick as the contact time increases.
Once you feel the design has attached, gently lift your finger upward and out of the water. Don’t drag your finger back through the polish—lift straight up to avoid smudging or double-coating one side. Tilt your finger as you lift so excess water and excess polish drip back into the cup.
If the design didn’t transfer cleanly, don’t panic. You can try again. Use a toothpick to break up the remaining polish on the water’s surface, drop fresh polish, create a new pattern, and dip your next nail. The water can handle multiple designs in sequence.
Cleaning Up Excess Polish and Imperfections
Excess polish will definitely end up on your skin, your nail edges, and your fingertip. This is completely normal and expected—water marbling is inherently messier than regular nail painting.
If you applied liquid latex or glue before starting, this cleanup is remarkably easy. Simply peel off the latex or glue barrier, and most of the stray polish comes off with it. Any remaining polish residue wipes away easily with a damp cotton swab.
If you used petroleum jelly, wipe the jelly away gently with a tissue, and most polish comes with it. Any stubborn spots require a cotton swab soaked in acetone to dissolve the remaining polish.
For the nail edges specifically, use a small, clean-up brush dipped in acetone. Carefully trace along the edge where the nail meets the skin, removing any polish that extended beyond your nail boundary. Cotton swabs work here too, but a brush gives you more precision.
Don’t attempt cleanup while polish is still wet if you didn’t use a protective barrier. Wait for it to dry first—wet polish smears across your skin and becomes harder to control. Once dry, acetone easily removes it.
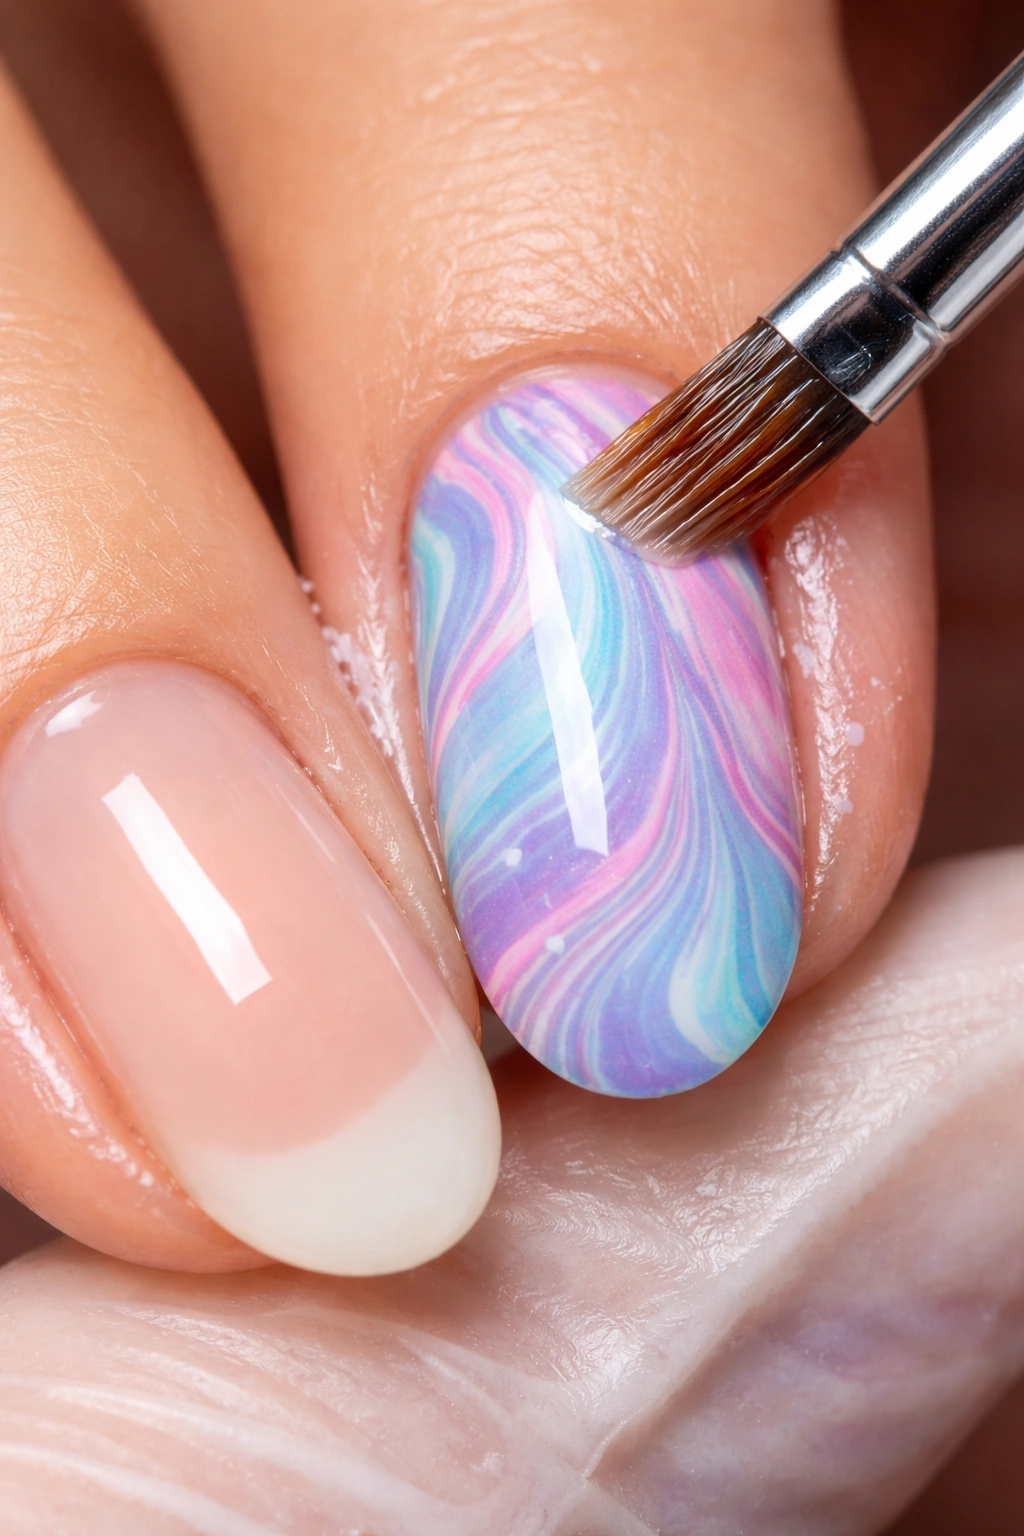
Sealing Your Design With Top Coat
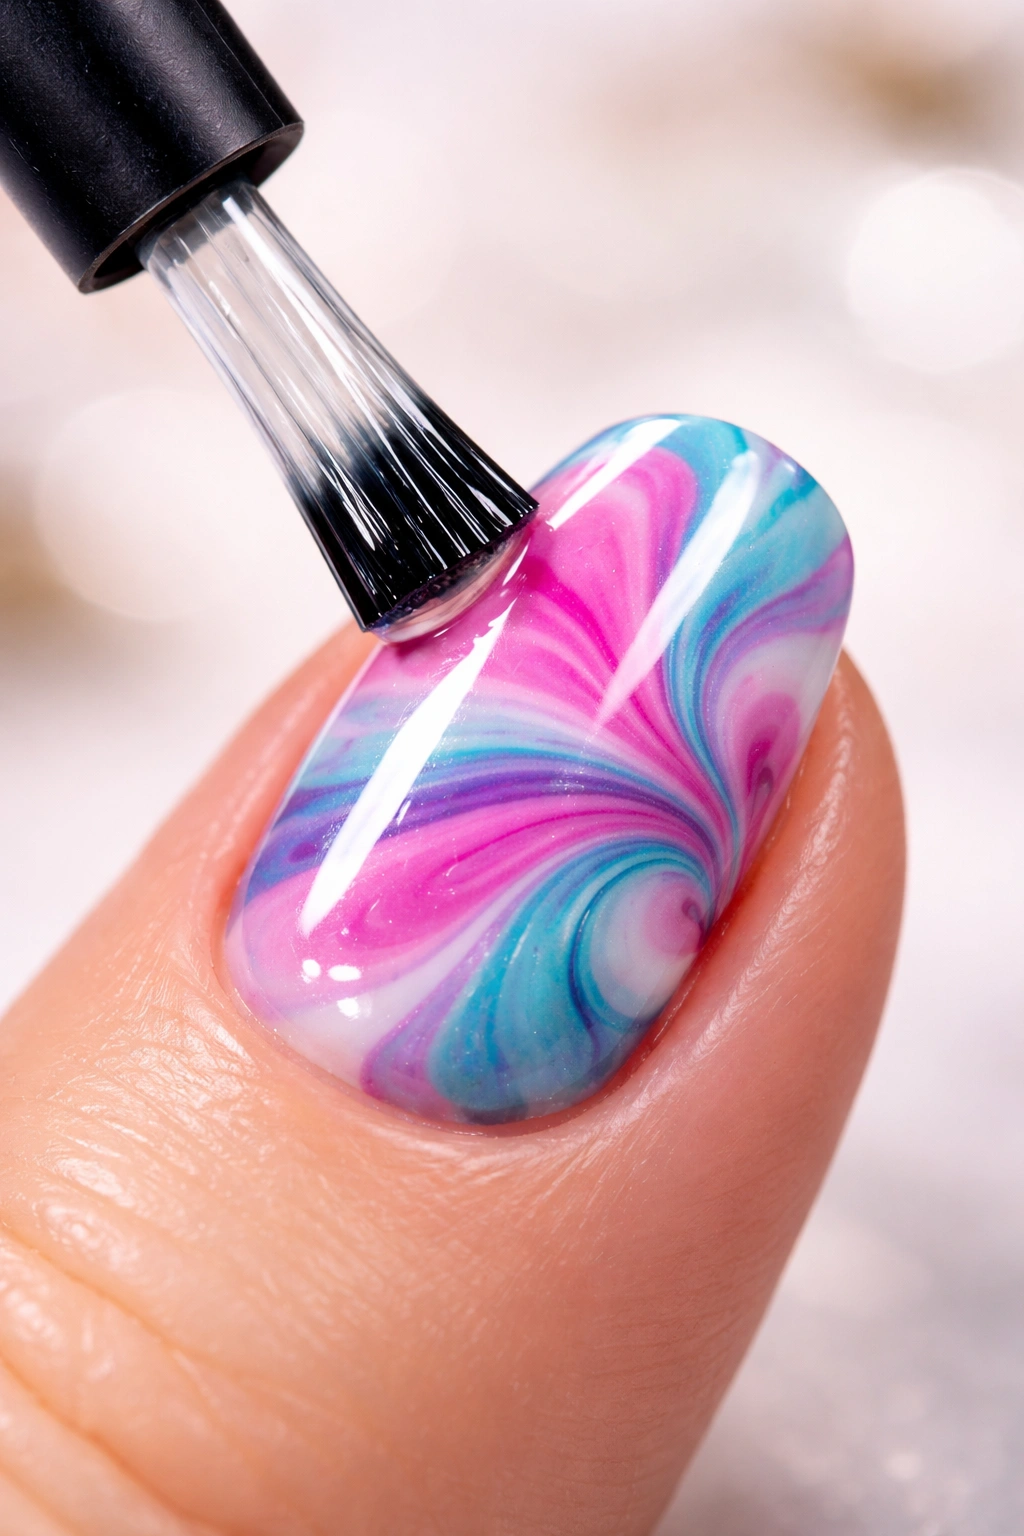
Once your nails are clean and the marble polish is fully dry, it’s time to protect your artwork with a top coat.
A glossy top coat is the most popular choice because it makes the marble colors appear more vibrant and creates a beautiful shine. Apply a thin, even layer across the entire nail surface, including the edges. Quality top coats also seal in the design and prevent chipping, extending your manicure’s lifespan significantly.
Matte top coats create a surprisingly beautiful effect on water marble nails, giving them an artistic, soft appearance rather than a glossy shine. If you prefer a more subtle, sophisticated look, experiment with matte finishes.
Let your top coat dry completely before doing anything with your hands. Some top coats dry quickly (within a minute), while others take several minutes. Check the bottle for specific drying time. Use quick-dry top coats if you’re impatient—they typically set within 60 to 90 seconds.
Once everything is dry, apply cuticle oil or hand cream to the skin around your nails. This adds shine and helps your hands look polished and professional. It also nourishes the skin, which gets slightly dried out by nail polish remover during cleanup.
Troubleshooting Common Water Marble Mistakes
Even with perfect technique, water marbling sometimes goes sideways. Here’s how to handle the most common issues.
Polish sinks to the bottom instead of floating: This happens when your polish formula simply isn’t suited for water marbling. The polish is either too thick, too old, or formulated differently. Switch to a different brand or color. Test it first before committing to your whole manicure.
Polish doesn’t spread into rings: Again, usually a polish formula issue. Try slightly cooler water, or switch polish. Some colors are inherently thinner and spread more readily than others.
Design looks muddy and colors blend together: You either swirled too much or added too many colors. With your next nail, use just two or three colors and do fewer, more deliberate swirls.
Polish dries before you can dip: Your water might be too cold or your room might be very warm. Use slightly warmer water (but not hot). Work faster—keep your hand ready and dip immediately after creating your swirl rather than hesitating.
Design doesn’t transfer cleanly to nail: You might have removed your finger too quickly, or your nail didn’t stay in contact with the polish long enough. For your next attempt, hold your finger in the polish for a full 5 seconds before lifting. Move deliberately and confidently.
Entire design came off when you dipped: This typically means your base coat was too shiny or slick. Next time, lightly buff your base color before marbling, or use a matte base coat instead of glossy.
Advanced Techniques and Color Combinations
Once you’ve mastered basic water marbling, these advanced approaches expand your possibilities.
Accent nail marbling involves marbling just one or two fingers while keeping the rest of your nails a solid color. This creates a polished look that’s perfect when you want the marble effect without full commitment.
Gradient marbling uses colors that transition from light to dark, creating an ombré effect within the marble pattern. Choose colors in the same family (various shades of blue, for example) for a harmonious result.
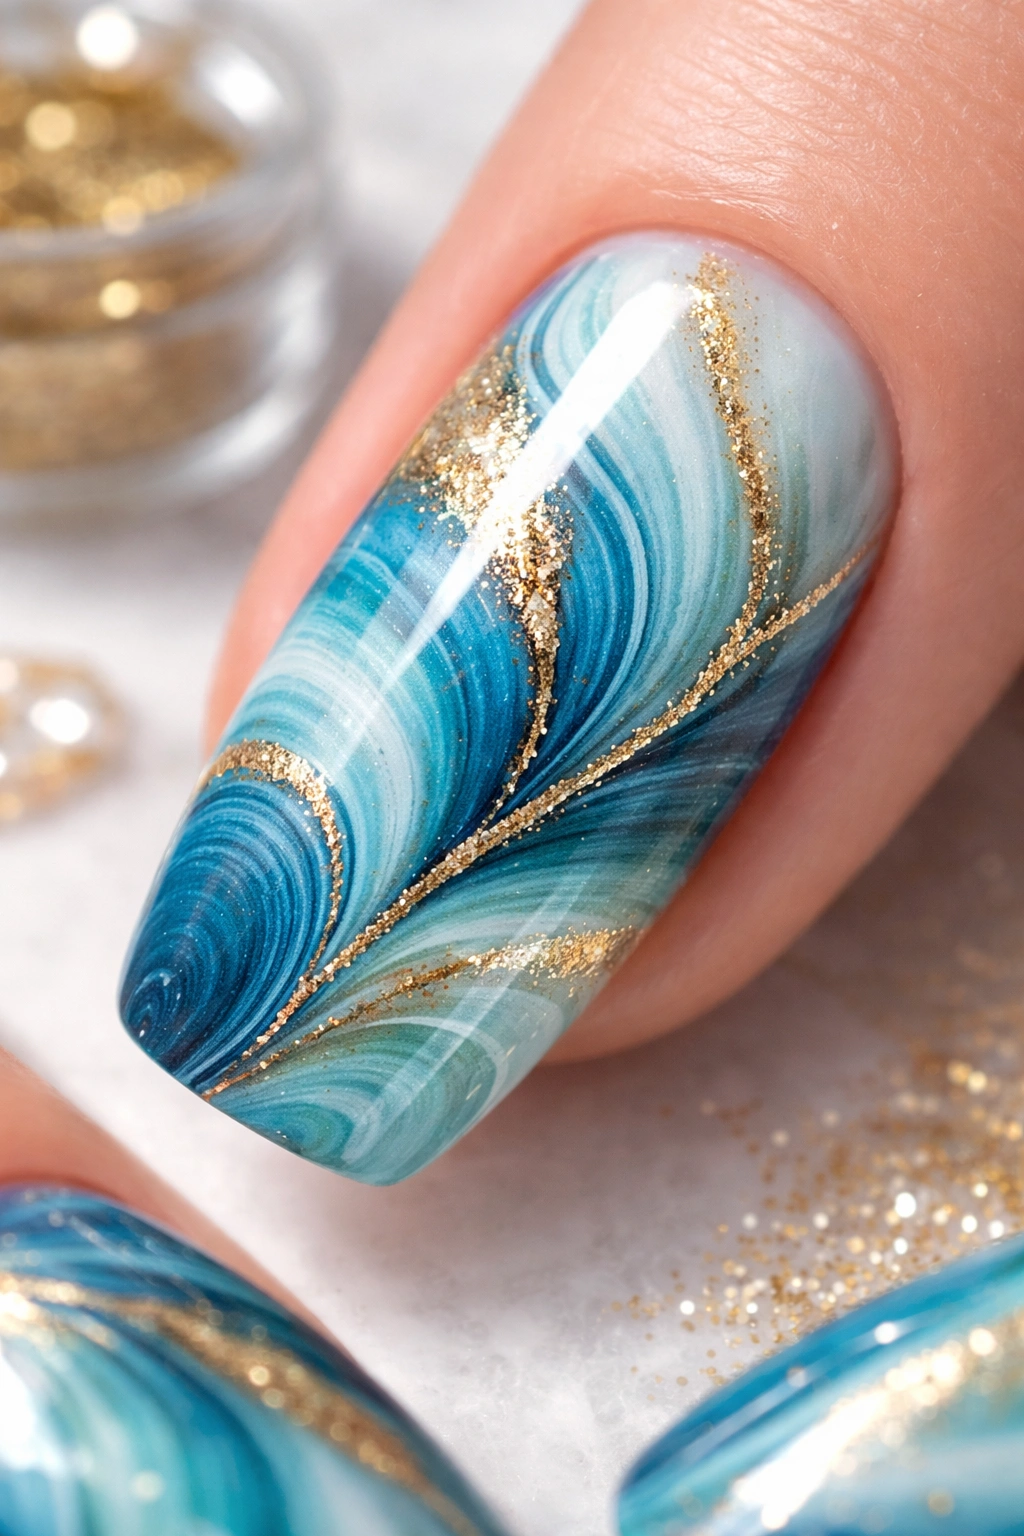
Metallic marble effects incorporate gold, silver, or copper polish into your design, creating luxe, eye-catching results. Metallic polish works surprisingly well for water marbling.
Complementary color marbling uses colors opposite each other on the color wheel—purple and yellow, blue and orange, red and green—for dramatic, high-contrast designs. These create bold statements that demand attention.
Monochromatic elegance uses multiple shades of the same color—light pink, dusty rose, and deep burgundy, for example. This creates a sophisticated, subtle effect that’s perfect for professional settings.
Black and white marble is a timeless, versatile combination that works for any occasion and pairs with any outfit. The high contrast creates striking patterns that photograph beautifully.
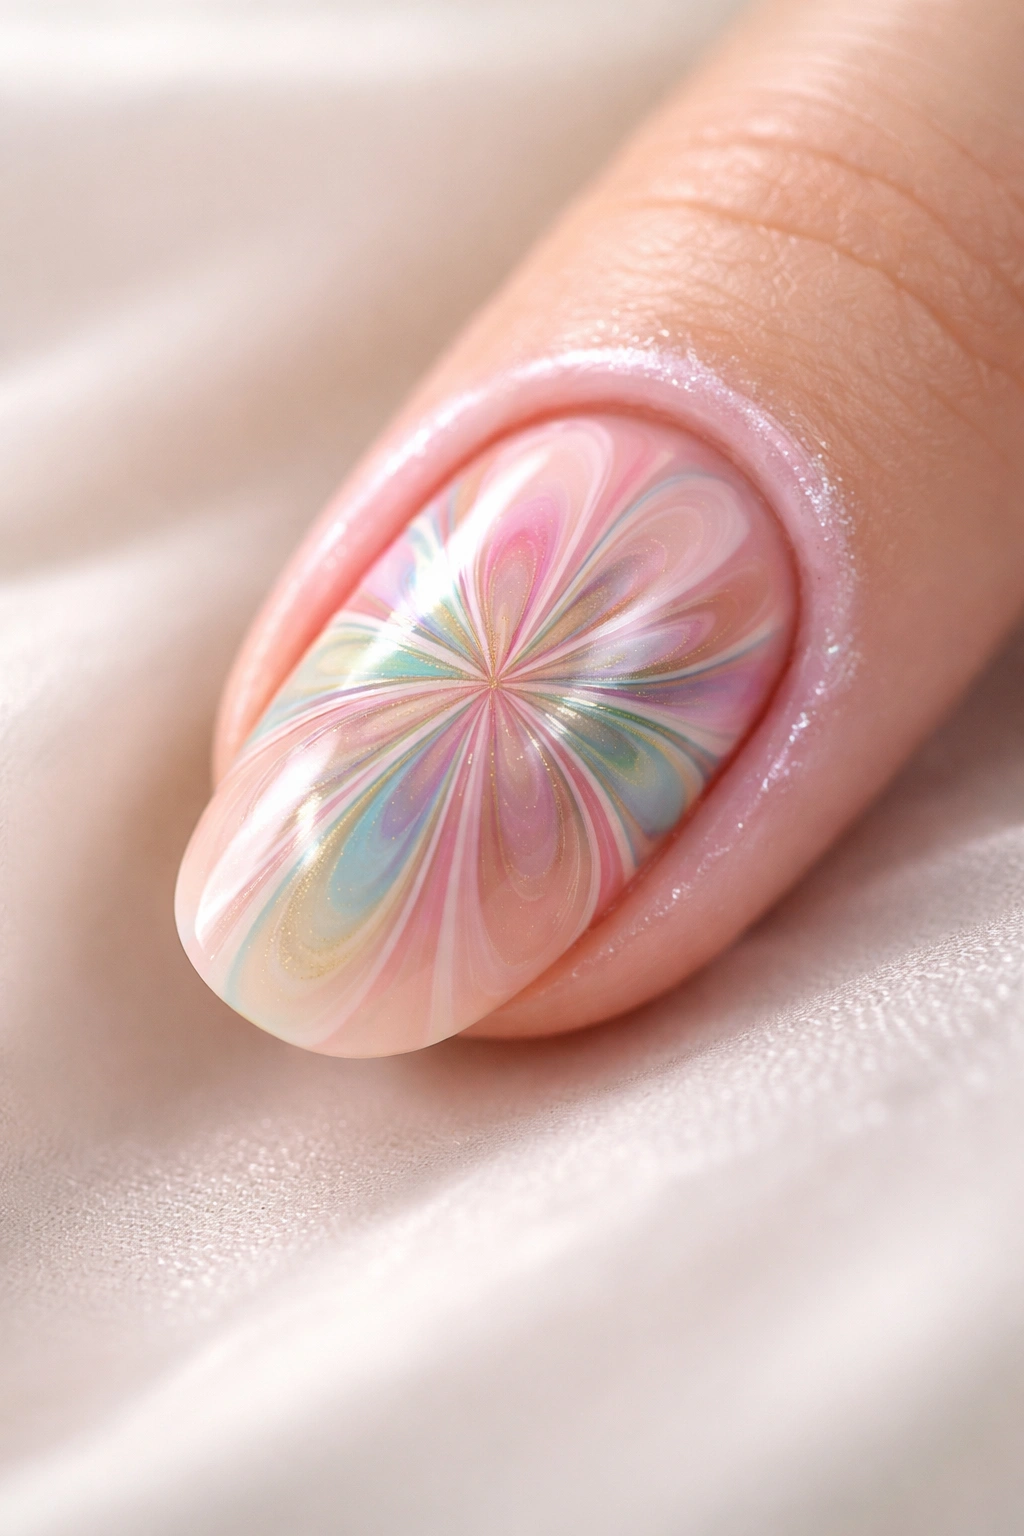
Pastel watercolor effect uses very light, barely-pigmented colors with minimal swirling, creating a soft, dreamy, watercolor-painting aesthetic.
Final Thoughts
Water marble nails represent an intersection of art, chemistry, and pure fun. There’s something genuinely satisfying about watching floating polish transform into wearable artwork on your fingertips. Your first attempt might not be perfect, but it’ll probably be better than you expected, and each subsequent manicure gets easier as you develop intuition for water temperature, polish behavior, and timing.
The true magic of water marbling is that every single manicure is completely unique. You’ll never accidentally recreate the exact same design, which means your nails are always expressing something genuinely personal and unrepeatable. No two people will ever have identical water marble patterns, even if they use the same colors and techniques.
Start with simple starbursts, master the basic technique, and then branch into more complex patterns and color combinations as your confidence grows. Keep nail polish remover nearby because yes, it’s going to get messy, but that’s part of the adventure. The cleanup is honestly easier than it sounds, especially with a protective barrier like liquid latex.
The supplies cost almost nothing—you probably already have most of them at home. The time investment is minimal, the results are gallery-worthy, and the satisfaction of showing off salon-quality nails that you created yourself is genuinely incomparable. Water marble nails aren’t some exclusive technique reserved for professional artists. They’re accessible, achievable, and waiting for you to try them.
