

Oval nails are having a moment—and for good reason. The shape is flattering on nearly every hand, elongates your fingers beautifully, and strikes the perfect balance between practical and elegant. Unlike dramatic stilettos that break easily or short, blunt edges that can feel heavy, oval nails offer a graceful curve that photographs well, works for any lifestyle, and honestly just looks intentional.
The best part? You don’t need to pay someone to achieve them. Shaping oval nails at home is far easier than most people think, and once you understand the technique, you’ll nail it consistently. The real secret isn’t expensive tools or magic—it’s understanding the geometry of the shape and using the right filing method in the right direction. Most people mess up their ovals because they file randomly, work from the wrong angle, or stop shaping too early.
I’m going to walk you through exactly how to create the shape from scratch, what tools actually matter (and which ones don’t), and how to troubleshoot when something doesn’t look quite right. By the end of this, you’ll have the confidence to maintain beautiful oval nails indefinitely without a salon trip.
Understanding Oval Nail Shape and Why It Works
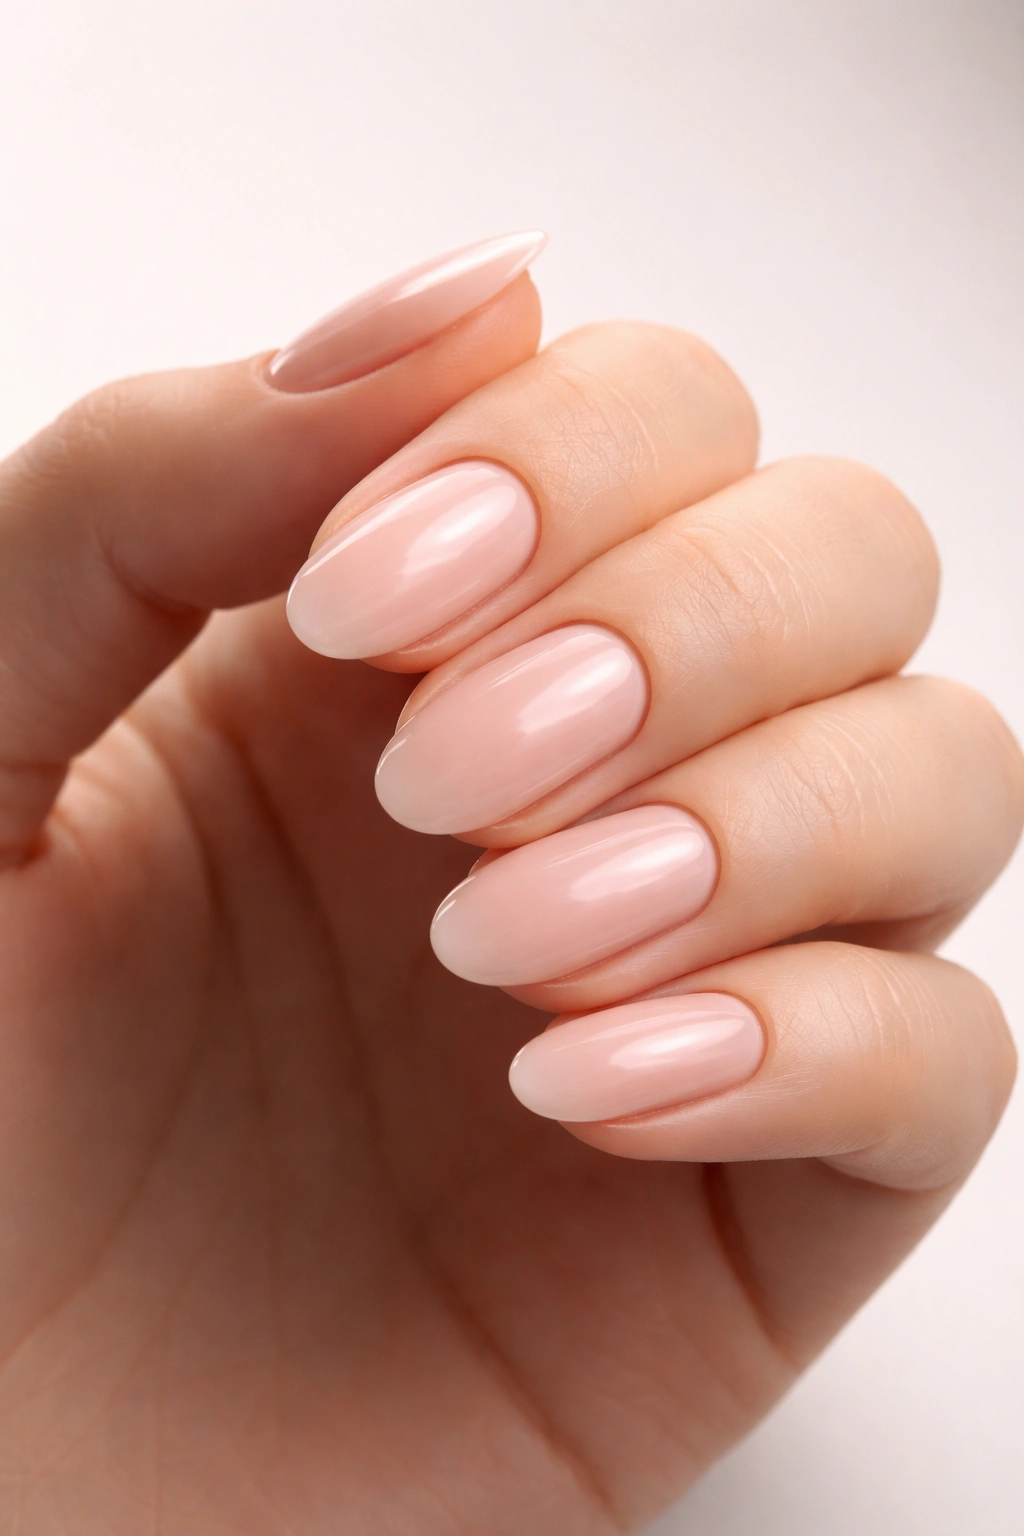
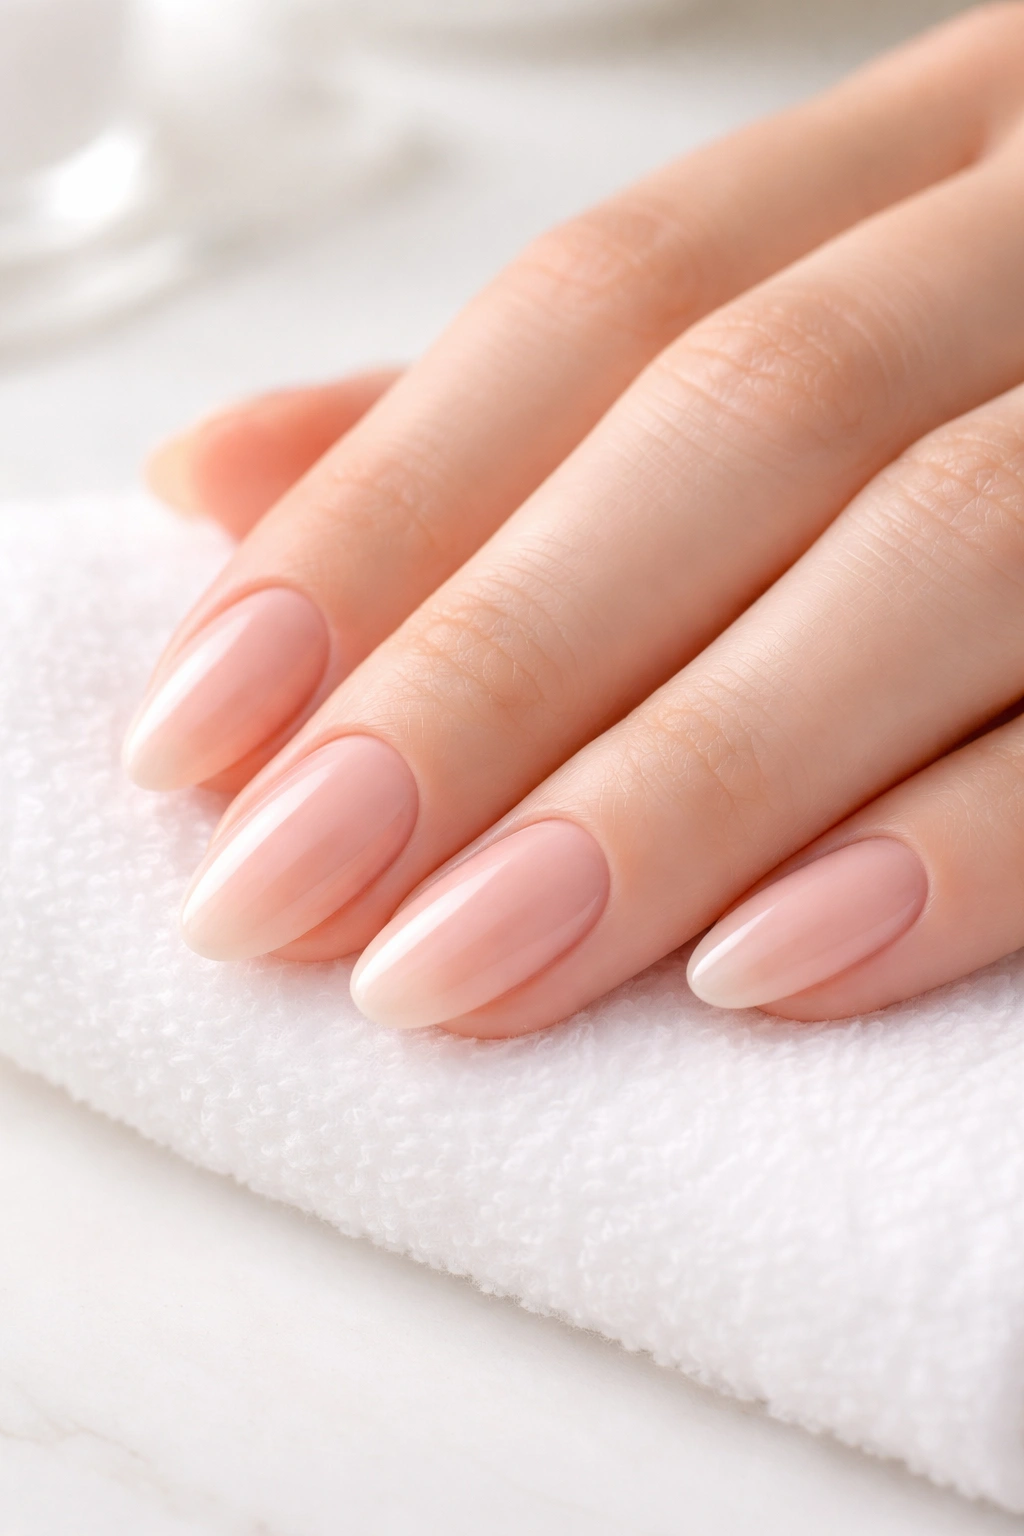
An oval nail isn’t random—it’s a specific geometric shape with clear structural characteristics. The idea is to create a nail that’s slightly wider in the middle than at the cuticle, with gradually rounded sides that taper smoothly to a curved tip rather than a sharp point.
This shape works beautifully because it distributes pressure evenly across the entire edge of the nail, making it much less prone to breakage than pointed shapes. The curve also helps the nail plate maintain its natural strength without requiring you to keep them excessively long. Many people find that oval nails at even moderate length look sophisticated and polished, whereas the same length in a different shape might look stubby.
The oval is also the most forgiving shape to maintain at home. Unlike sharp almond tips that need precise angle work or stilettos that snap if you look at them wrong, oval nails are sturdy and relatively simple to keep looking intentional. The margin for error is wider, which means you can file regularly without fear of ruining the shape.
Why Oval Suits Almost Everyone
The gentle curve of an oval flatters wider nail beds, narrower nail beds, shorter fingers, and longer fingers alike. Short nails in an oval shape look neat and intentional rather than stubby. Longer ovals look elegant without the drama of a pointed shape. The psychological effect of the oval is that it appears to lengthen your fingers because the curved tip draws the eye downward, creating the illusion of added length even when the nail isn’t actually that long.
Essential Tools You Need to Shape Nails Perfectly
You don’t need an elaborate collection to shape oval nails beautifully. In fact, the wrong tools can make the job harder and lead to chipping or uneven edges. Let’s talk about what actually matters.
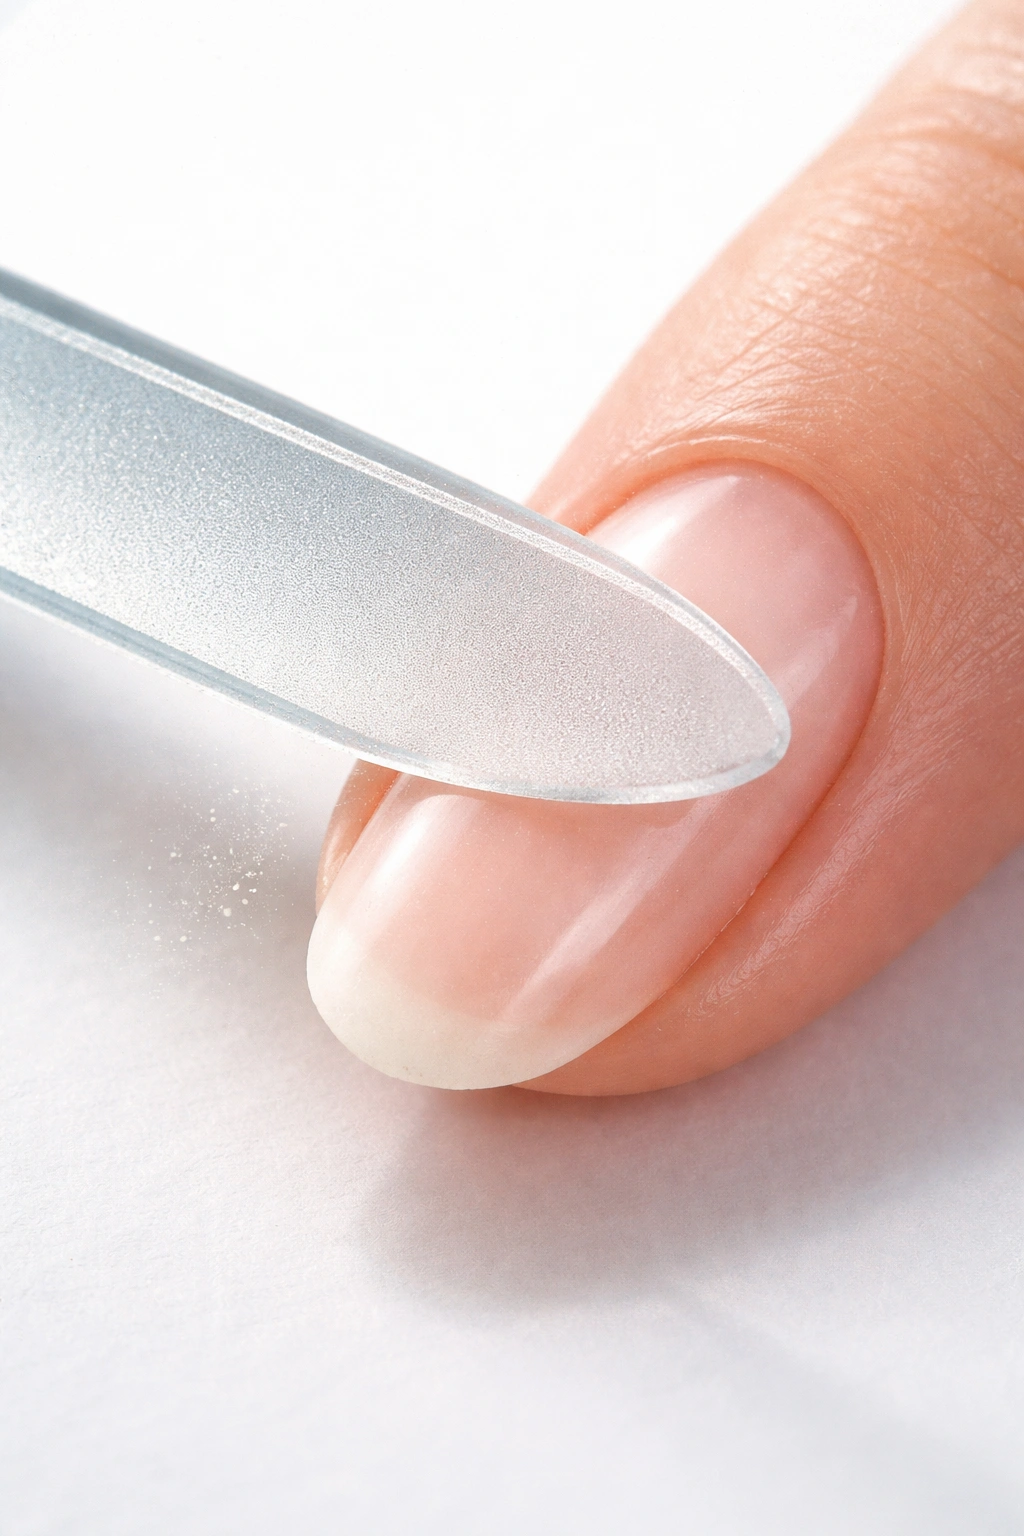
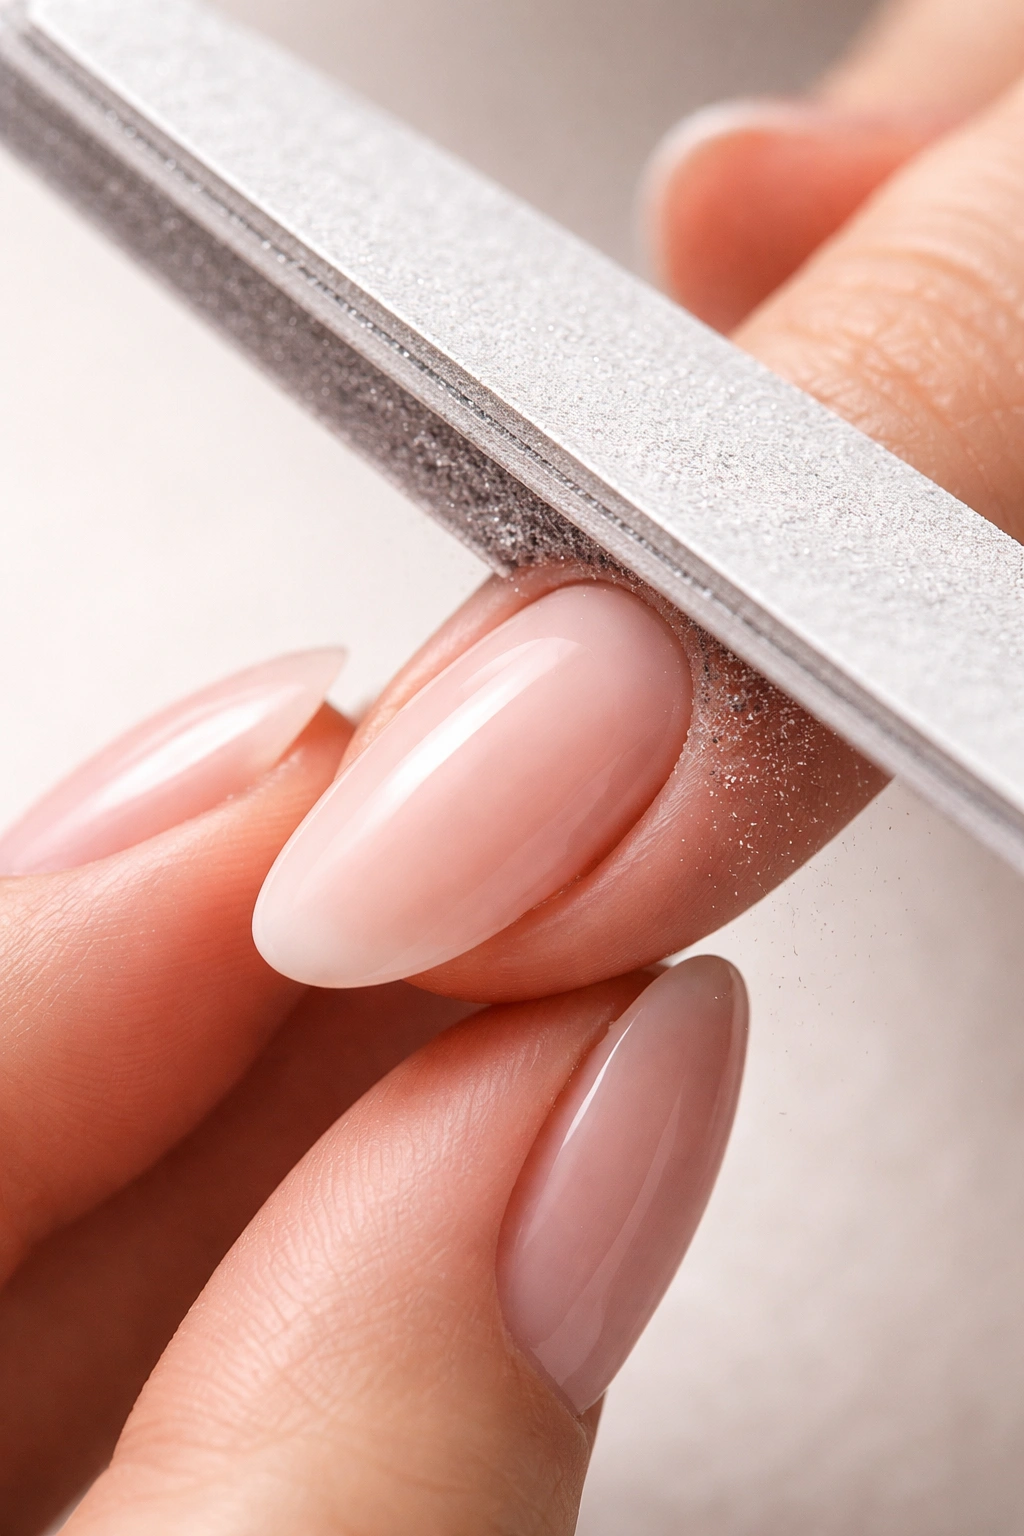
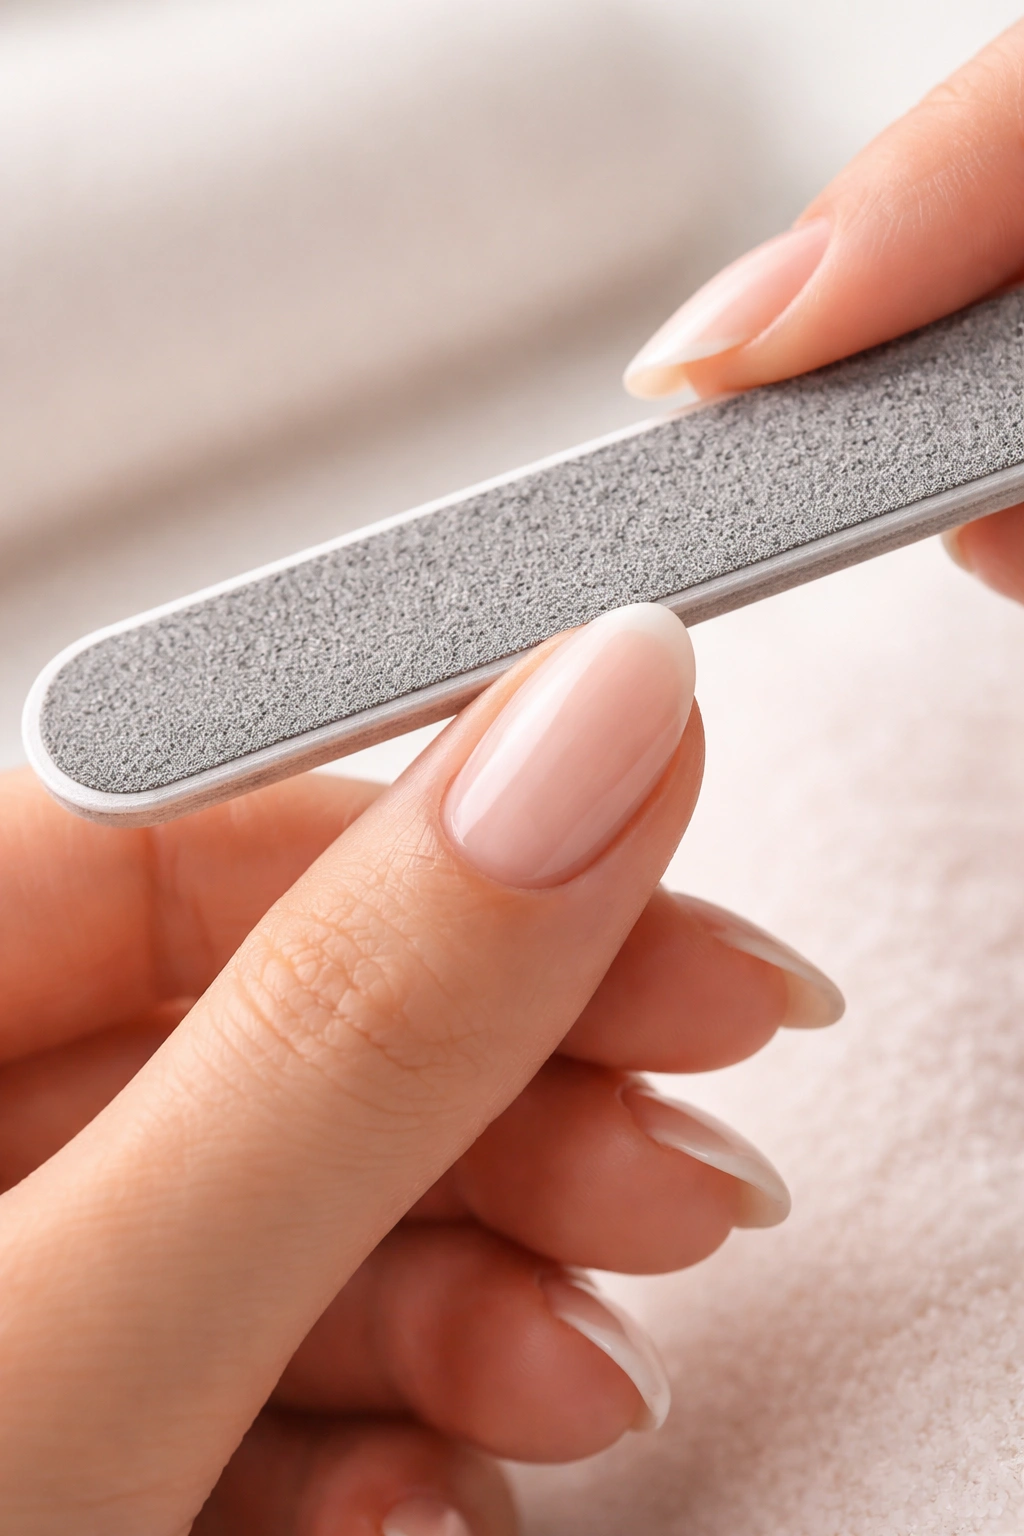
A high-quality nail file is non-negotiable. This is where most people go wrong—they use cheap files or metal files that crush the keratin rather than cutting it cleanly. You want a file with a grit between 240 and 320. Glass files are ideal because they seal the keratin edge as they file, preventing peeling and chipping. Ceramic files work well too. Metal files and cheap emery boards create rough edges that splinter and break. The slight extra cost of a quality glass file pays for itself immediately in how much longer your nails stay intact.
The shape of your file matters too. A slightly tapered file with a rounded edge works better than a perfectly flat file. This gentle curve helps you follow the natural contour of your nail and create smooth, even curves rather than harsh angles. Look for a file that’s medium-length—around 6 to 7 inches is ideal for maneuverability.
Tools That Are Nice But Not Essential
A nail buffer is genuinely helpful but not absolutely required. A three-way buffer (with different grit surfaces) lets you refine and smooth the edges after you’ve filed the basic shape, creating a more polished appearance. You’ll use the roughest side first to even out any irregularities, then the middle grit to smooth, then the finest grit to create shine. If you can’t get one, skip it—your nails will still look great with a good file alone.
Cuticle pushers and hangnail trimmers are helpful for general nail maintenance and preventing raggedy edges, but they’re not part of the shaping process itself. A good nail file handles the actual shape work.
One Thing to Skip Entirely
Don’t bother with those motorized electric nail files for home use. They’re loud, harder to control than manual files, and they generate heat that can irritate your nail bed. They also make it dangerously easy to over-file because you can’t feel the resistance like you can with a manual file. The slight time savings isn’t worth the learning curve and increased risk of damage.
Assessing Your Current Nail Length and Natural Shape
Before you start filing, spend a moment looking at what you’re working with. Your nails probably aren’t symmetrical right now—many aren’t. Oval shaping will improve them, but you need a baseline.
Look at your nails straight on from above and also from the side. Notice if they’re naturally wider or narrower. Check if your nail beds are square-ish or already somewhat curved. See where the free edge (the part that extends beyond your fingertip) is strongest and where it might be thin or prone to peeling.
The ideal starting length for shaping oval nails is usually about 1/4 inch of white free edge visible. If your nails are shorter than that, let them grow for 2 to 3 weeks before you start shaping—you need enough length to create the curved tip without filing into the living part of the nail. If they’re much longer than 1/2 inch, you might want to trim them down to a more manageable length using nail clippers (not a file) before you start the shaping process.
Working With What You Have
If one nail is damaged or shorter, don’t try to force it into the oval shape yet. File it into a simple rounded shape and let it catch up in length. You’ll be able to incorporate it into the full oval shape once all your nails are roughly the same length. Trying to force a short nail into an oval shape won’t look right and will actually damage it faster because you’ll thin the edge too much.
Filing Your Nails Straight Across First
This is the crucial first step that most people skip, and it’s why their ovals end up lopsided. You’re going to establish a solid, even baseline before you curve anything.
Hold your file at a 45-degree angle to your nail, with the file slightly angled downward toward the tip of your finger. Start at one corner of your nail (the side closest to your pinky finger) and file straight across toward the other side, using long, smooth strokes. Move the file in one direction only—never saw back and forth in a scrubbing motion. That creates tiny fractures in the keratin.
File across the entire top surface of the nail in these one-directional strokes, working from one side to the other. You’re aiming to create a perfectly straight edge across the width of the nail, with roughly equal amounts of white on both sides. This should take about 10 to 15 passes with your file.
Why Straight Across First Matters
Filing straight first establishes the correct starting point for your oval. It ensures both sides of your nail are even, preventing that asymmetrical look where one side curves more than the other. It also removes any jagged bits or old breaks, so you’re working with a clean edge. This is the foundation everything else is built on.
Check your work by looking straight at your fingertip. The white edge should be perfectly level, like a tiny shelf running across your nail. If one corner is higher than the other, go back and file that side down until they’re truly even.
Creating the Curved Sides of Your Oval Shape
Now that you have a straight edge, you’re going to create the signature oval shape by rounding the corners gradually. This is where the magic happens, and it’s actually really simple once you understand the technique.
Hold your file at about a 45-degree angle again, but this time position it against the outer corner of your nail (the side toward your pinky). You’re going to file in one direction only—from the outside corner angling inward toward the center of the nail. Make smooth, deliberate strokes, moving the file gradually from the outer corner toward the center. Don’t file in the middle—you’re only working on that outer quarter of the nail.
Make about 8 to 10 passes, then move to the opposite corner and repeat the same motion on that side. You’re creating a gentle slope from the hard corner toward the center, which forms the curved side of your oval.
Shaping Both Sides Evenly
This is where you need to pay attention to symmetry. Compare both sides as you work. File a few strokes on the left corner, then a few on the right, then check them against each other. They should curve identically—the same amount of corner removed, the same angle of slope. This back-and-forth checking prevents you from over-filing one side and ending up with a lopsided shape.
The corners should be completely rounded at this point—no hard edges or points on the sides of the nail. Run your finger across the side of the nail; it should feel smooth and curved, not sharp.
Rounding the Nail Tip With Precision
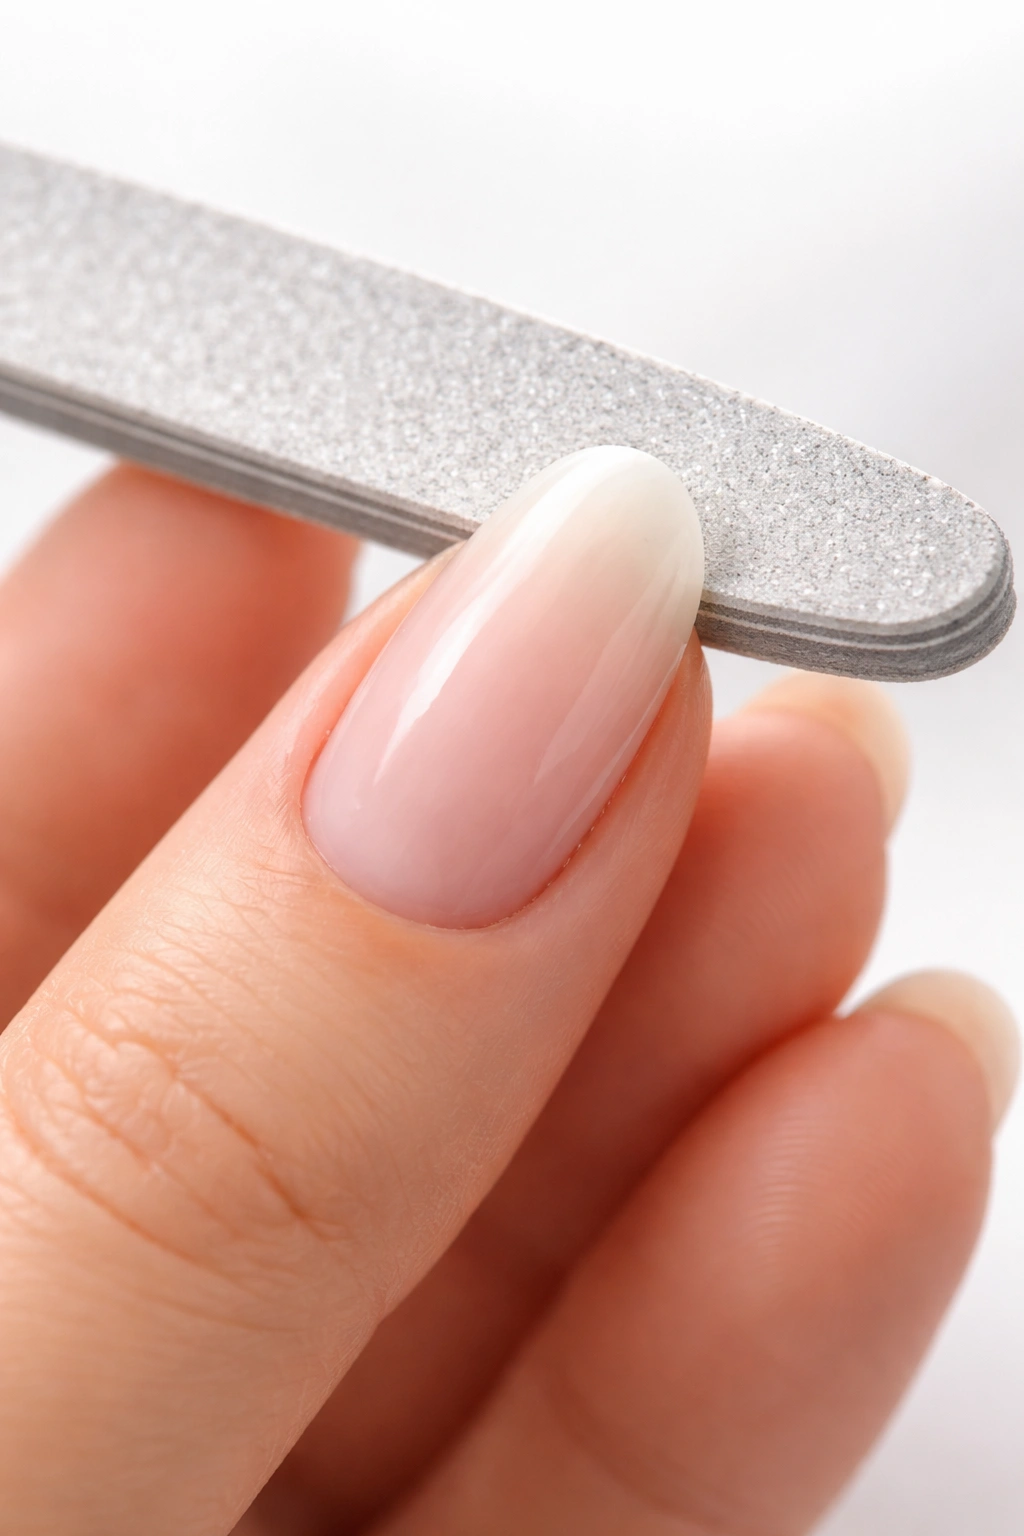
Your corners are now curved, but the tip itself is still flat. This is the final piece that transforms it into a true oval. You’re going to round that flat tip into a smooth curve that connects gracefully to your rounded sides.
Position your file at the center of the flat tip edge, angled downward toward the nail. File from the center outward toward one corner in one smooth motion. Lift your file, reposition it at the center, and file toward the other corner. This creates a gentle point at the very center, with the sides sloping smoothly down toward the corners.
You’re not trying to create a sharp point—you want the tip to be rounded and soft. Make these strokes deliberately and lightly; you don’t need pressure here. The file does the work. You’re doing maybe 5 to 8 passes total, angling from center toward each side.
Checking Your Curve
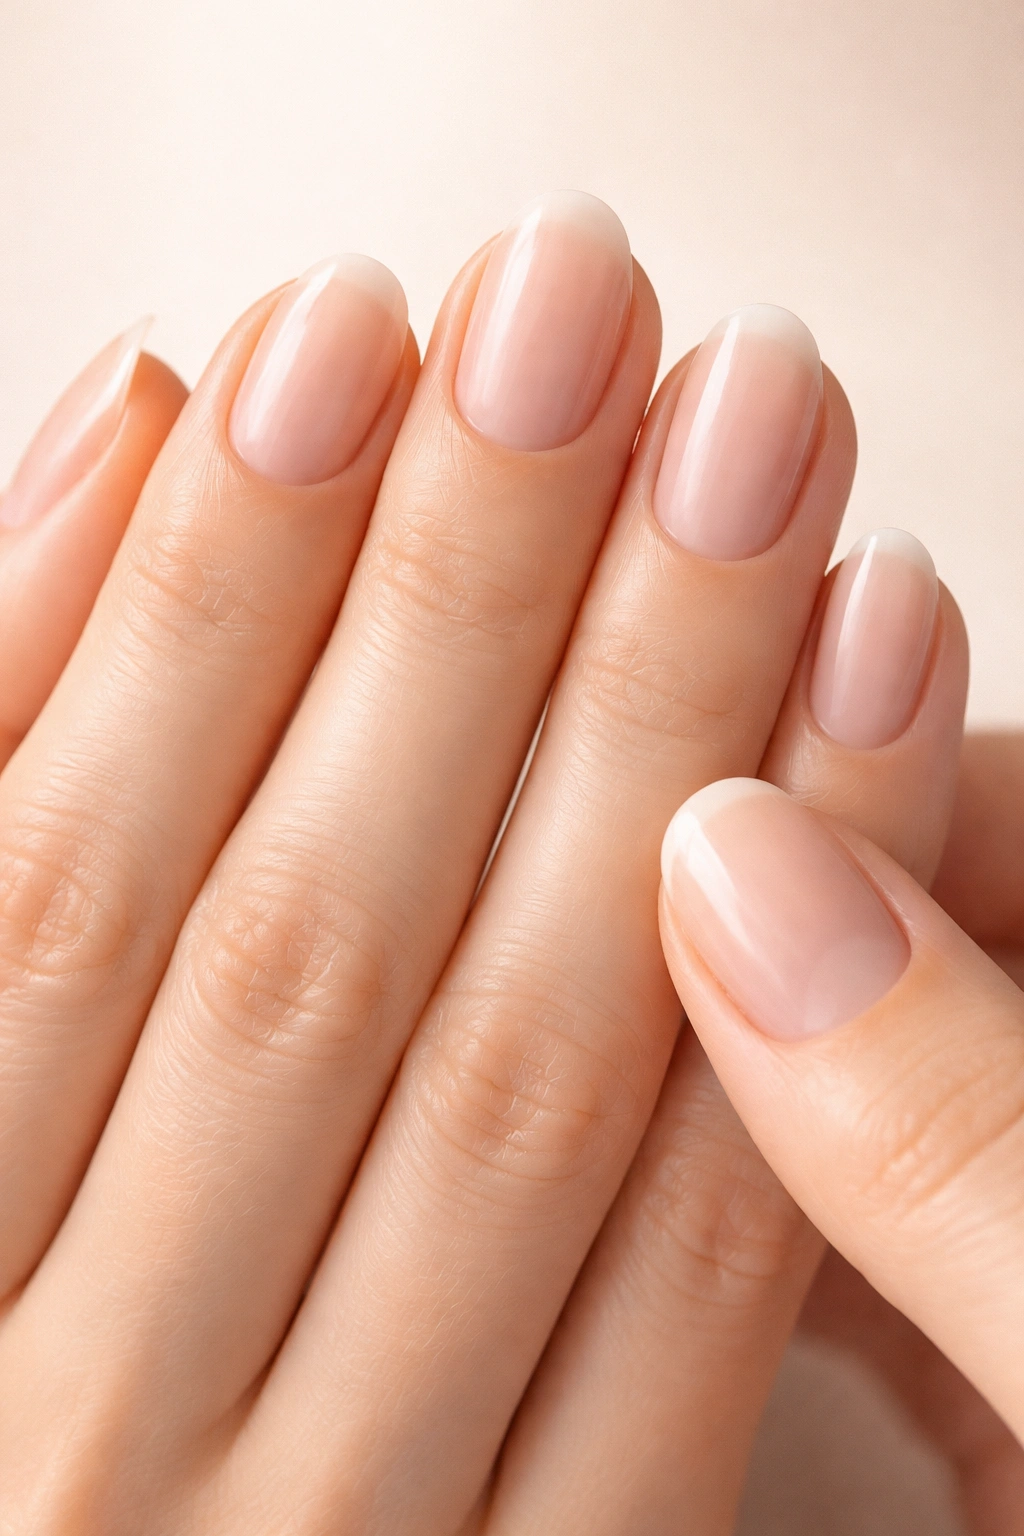
Look at your nail from the front and from the side. The tip should curve smoothly, like a tiny arch. From above, the outline should be oval—wider in the middle of the nail bed, narrower toward the tip, with no flat spots or harsh angles anywhere. If you see a flat spot where the curved sides meet the rounded tip, you need a few more passes to blend them together smoothly.
The most common mistake here is filing the tip too sharply or unevenly. Remember, you’re aiming for soft and rounded, not pointed. If one side of the tip curves more than the other, make a few passes on the flatter side to even them out.
Smoothing and Refining the Edges
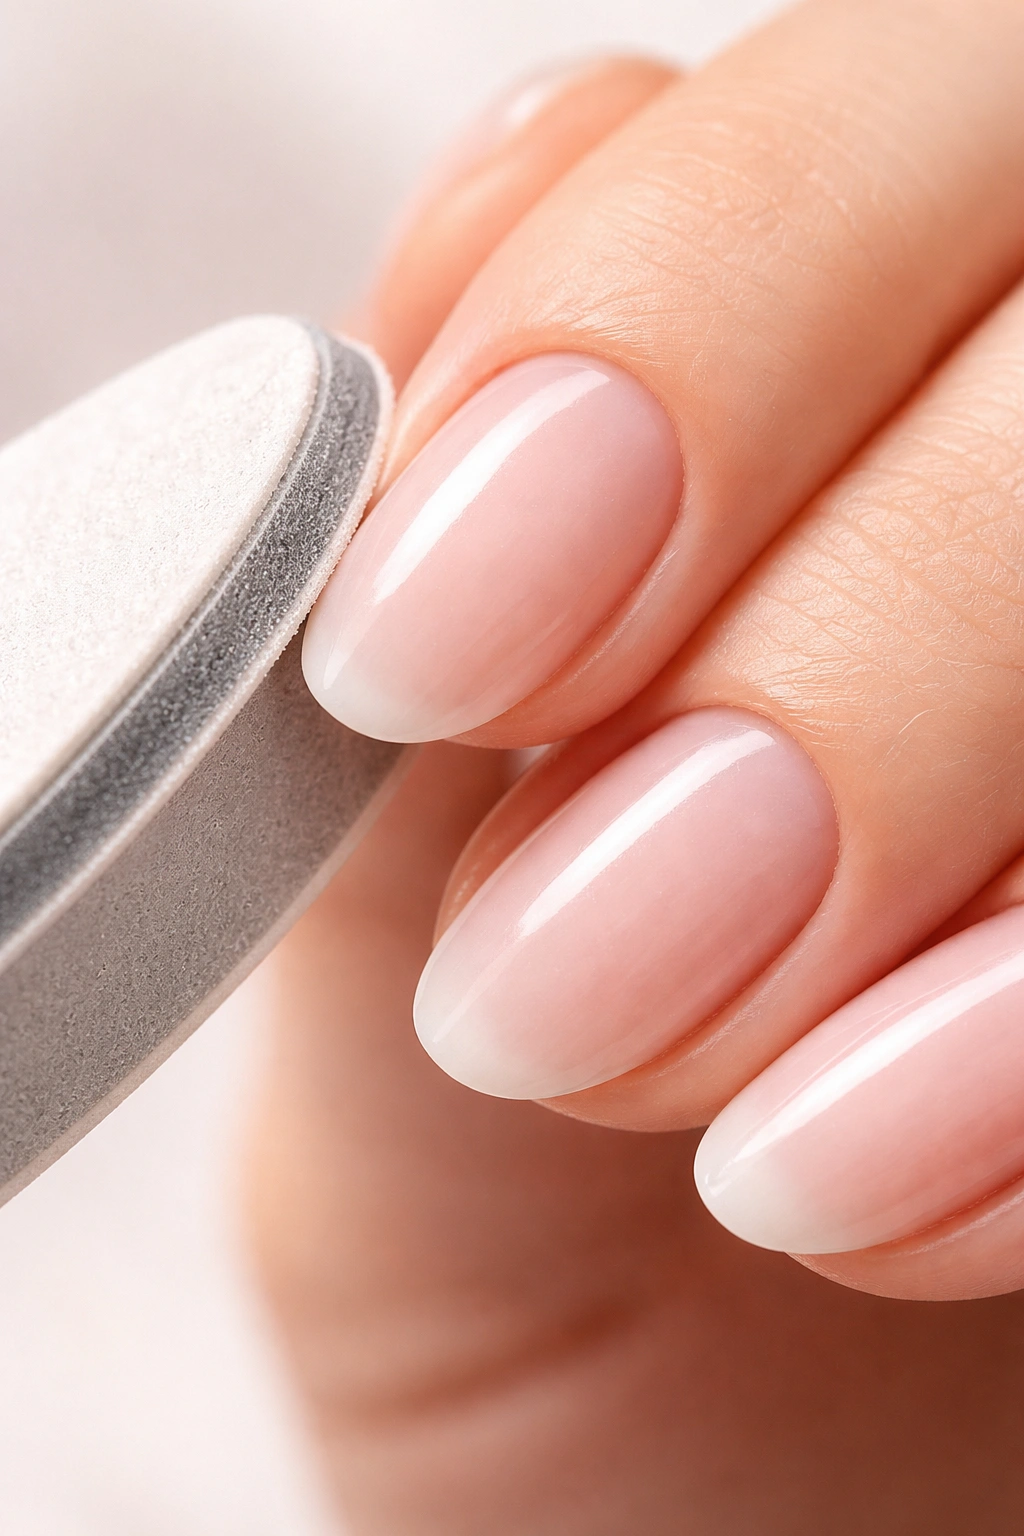
At this point, you have the basic oval shape. Now you’re going to refine it and smooth away any rough spots where the file created micro-scratches on the keratin.
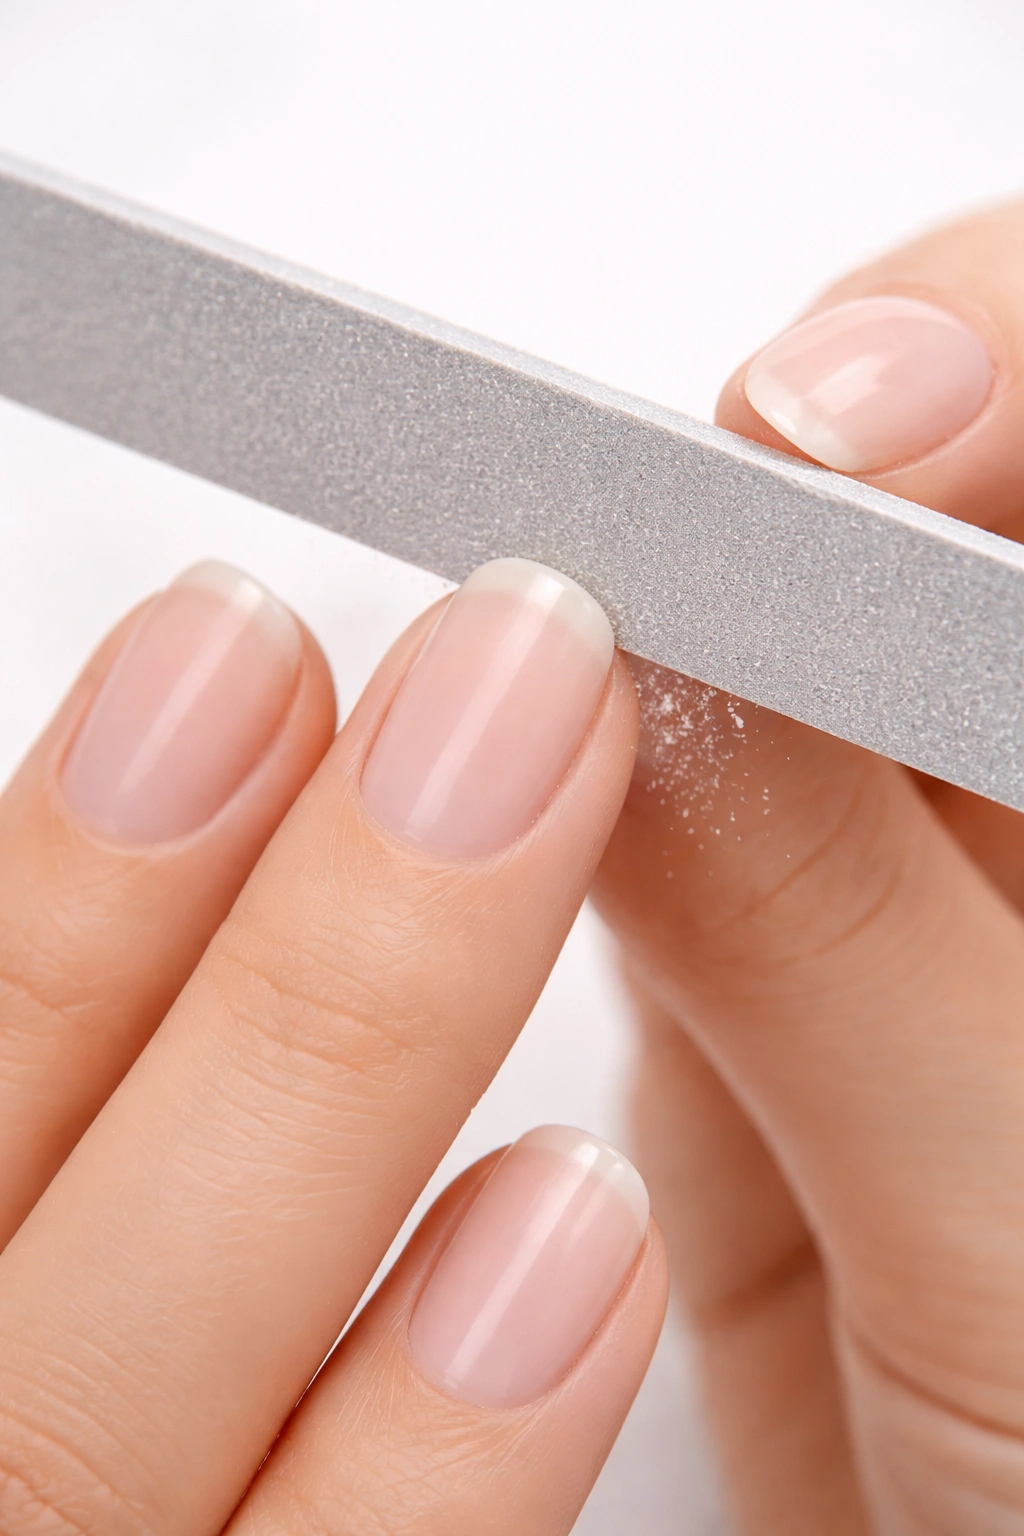
If you have a nail buffer, use the roughest grit side first to very lightly pass over the shaped edges. This evens out any irregularities in the filing and smooths minor imperfections. One or two very light passes is all you need—you’re not removing material, just smoothing the surface.
Then use the medium-grit side of your buffer with light pressure all around the edge, creating an even, polished appearance. Finally, use the finest-grit side to create shine and seal the edge.
If You Don’t Have a Buffer
You can accomplish the same thing with your nail file by using extremely light pressure and very gentle strokes around the entire edge of the nail. Go in one direction only, and feather your strokes so they’re barely touching. This polishes the edge without removing your carefully shaped work.
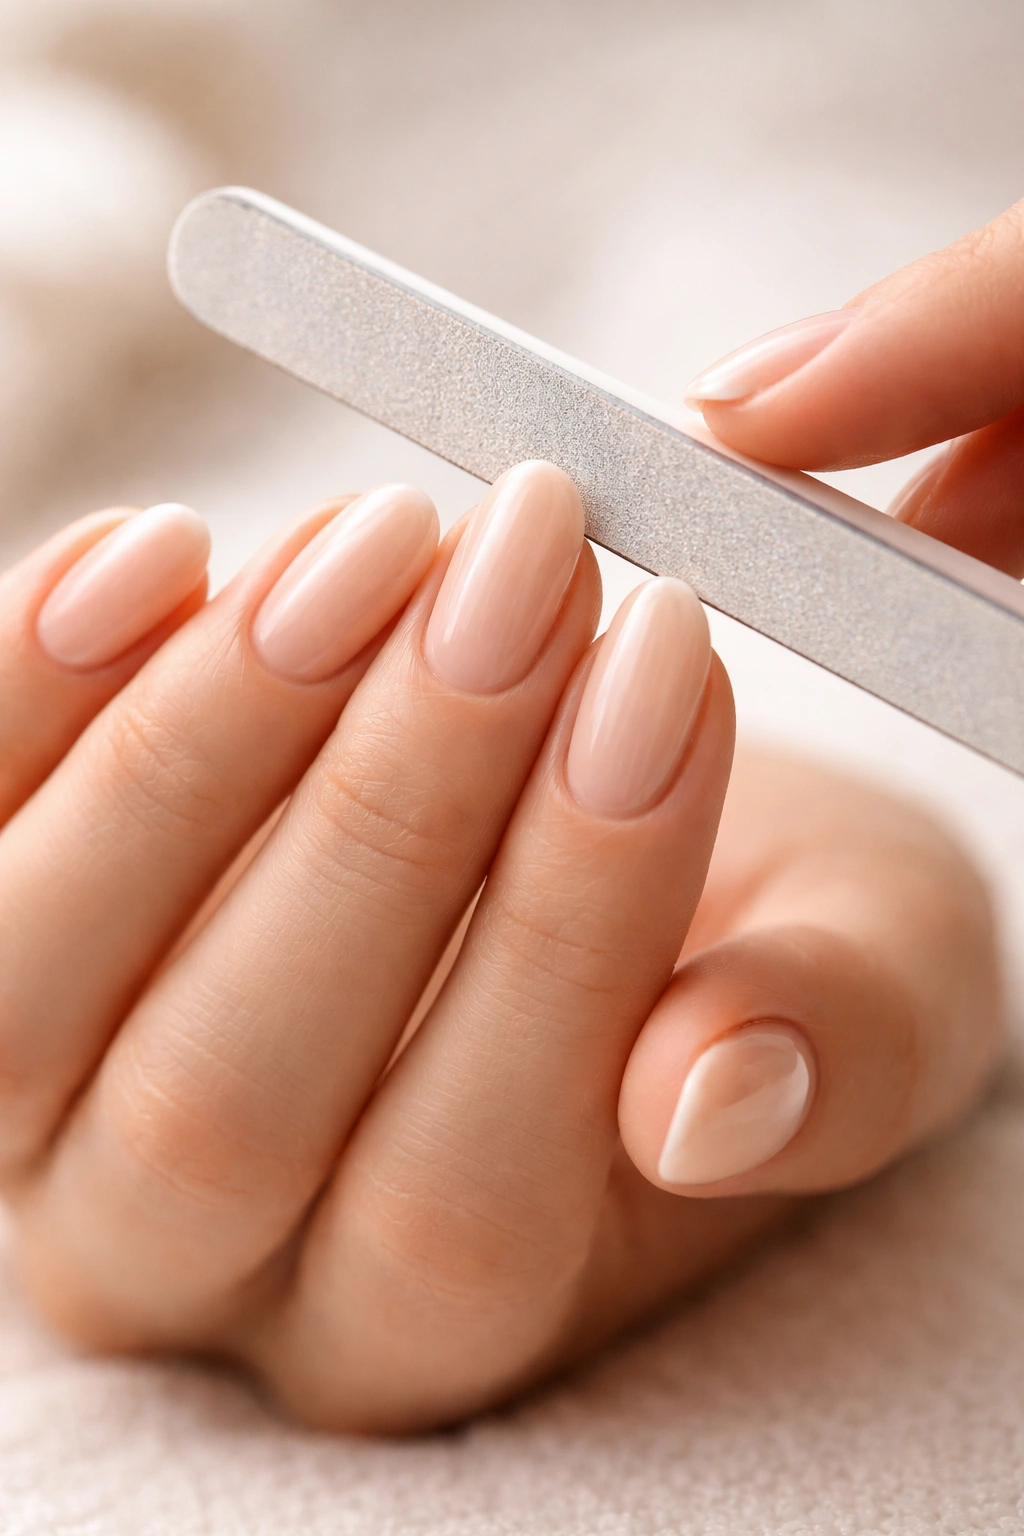
Take a moment to look at all ten nails together now. Do they look symmetrical? Do they all have the same overall shape, or do one or two look slightly different? Oval nails look best when all ten match fairly closely, so if you notice any outliers, spend a moment filing them to match the others.
Maintaining Shape Between Manicures
Oval nails hold their shape beautifully if you maintain them regularly. The key is filing early and often, before breakage happens. This is the opposite of how most people approach it—they let their nails break, then file down and start over. It’s much easier to keep a shape than to recreate it.
File your nails once a week or whenever you notice the edge starting to chip or the shape beginning to look ragged. Spend just 2 to 3 minutes reshaping as needed. This frequent maintenance means you’re only making tiny adjustments, not starting from scratch. It keeps your nails looking intentional and polished consistently.
The Weekly Touch-Up Process
Each week, look at your nails straight on. Do the tips look uneven? Make a few passes to even them. Are the sides looking sharp again? Round them slightly. Is the overall outline becoming less oval and more oblong? Do a couple of passes to reinstate the curve. These micro-adjustments take mere minutes and keep your nails looking salon-fresh indefinitely.
During daily life, your nail edges will naturally encounter things that roughen them slightly. This is normal and expected. A quick smooth over with your buffer or file once a week keeps them pristine without requiring any real shaping work.
Common Mistakes to Avoid When Shaping Ovals
Even with the best intentions, certain filing mistakes happen repeatedly. Knowing what to avoid saves you from creating problems for yourself.
Filing back and forth in a scrubbing motion is the most common mistake. This creates tiny fractures in the keratin that lead to peeling and splitting. Always file in one direction only, lifting your file at the end of each stroke and repositioning for the next one. It takes slightly longer, but the edges will be infinitely stronger and more polished.
Over-filing one side more than the other creates an asymmetrical shape. Prevent this by checking both sides frequently as you work, making sure they match. If you notice one side is more rounded than the other, focus on the flatter side to catch it up.
Filing when nails are wet makes them softer and more prone to tearing during the shaping process. File only when nails are completely dry. The keratin is more brittle when wet, and the edge won’t seal smoothly. Let freshly washed hands dry for at least an hour before filing.
More Pitfalls to Sidestep
Using the wrong file grit creates rough edges. A file that’s too coarse (lower grit number) will leave visible scratches and micro-fractures. A file that’s too fine won’t remove material efficiently. The 240-to-320 grit range is the sweet spot.
Filing past the point where both sides meet evenly creates a shape that looks unbalanced even if you can’t articulate why. The moment you see the corners looking rounded and the tip looking curved, stop. More filing at that point is just damage.
Trying to force a shape on nails that are too short damages them unnecessarily. If your nails don’t have enough free edge to create a curved tip, let them grow first. Trying to shape them too soon just thins the edge until it breaks.
Using cheap metal files or using old emery boards produces inferior results and damages your nails. Invest in a quality glass file. It lasts for years and makes an enormous difference in how your nails look and feel.
Adapting Your Technique for Different Nail Types

All nails respond to the same basic shaping technique, but some need slightly different approaches based on their structure and strength.
If you have naturally thin or brittle nails, use an even lighter touch with your file. Thin nails require fewer passes to achieve the shape—maybe 6 to 8 strokes total per side instead of 10 to 12. Stop as soon as the shape looks right rather than continuing to refine. Your nails will thank you by staying intact longer. File even more frequently (every 3 to 5 days) to catch breaks early before they’re serious.
If you have thick, strong nails, you can be a bit bolder with your filing. You have room to make adjustments and refinements without damaging the nail. You can also let more time pass between filings—every 10 to 14 days is fine for strong nails.
Shaping Nails With Different Widths
Wide nail beds benefit from a more pronounced curve. Make your oval a bit more elongated and narrow toward the tip. This creates the visual effect of length and elegance on a wider base.
Narrow nail beds work beautifully with a gentler oval—don’t make it too tapered or it will look skeletal. A relatively gentle curve that maintains some width at the tip looks more balanced on a naturally narrow nail bed.
If you have one hand with wider nails than the other, it’s worth shaping them slightly differently even though it’s the same person. Your left hand might have slightly wider nails than your right—shape each hand’s nails to flatter their natural proportions rather than forcing identical shapes.
Keeping Your Shaped Nails Healthy and Strong
The shape only looks as good as the nail health underneath it. Healthy, strong nails will hold their oval shape beautifully and grow consistently. Damaged nails will break and chip no matter how nicely you shape them.
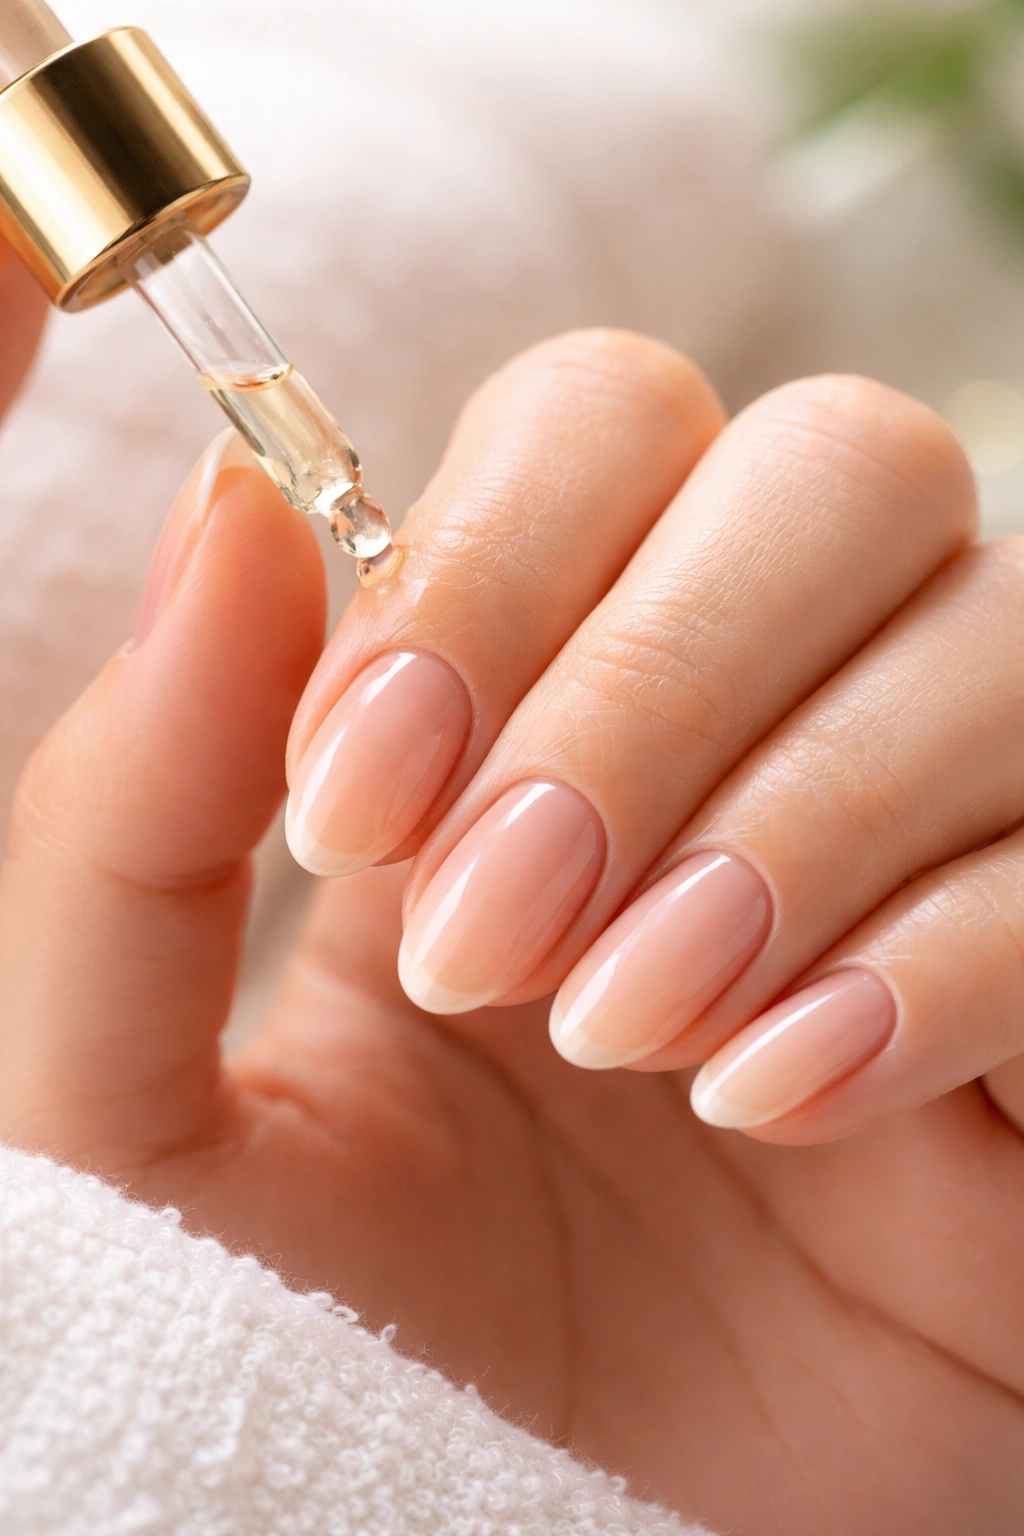
Moisturize your cuticles and nail beds daily. This keeps the nail plate and cuticle healthy and prevents peeling. Use a cuticle oil or hand cream and massage it around the base of your nails. Hydrated nails are stronger nails.
Protect your nails during wet work. Wear gloves when washing dishes, cleaning, or doing anything that involves prolonged water exposure. Nails absorb water and become softer and more prone to breakage when wet. Wearing gloves prevents this softening and keeps the shape intact.
Avoid using your nails as tools. Opening cans, scratching off labels, or using them to pry things open will break your oval shape instantly and damage the nail. Use actual tools for those jobs. This is the single most common way people break off their carefully shaped nails.
Supporting Nail Growth From Within
Your nails’ strength is partly determined by what you eat. Nails are made of a protein called keratin, plus minerals like iron and zinc. Make sure you’re eating adequate protein, and consider that if your nails are persistently weak or brittle, it might reflect a nutritional gap. Iron deficiency, low protein, and biotin insufficiency all affect nail strength. A simple blood test can rule out deficiencies if weak nails are a chronic issue for you.
Stay hydrated, too. Dehydration affects skin elasticity and nail hydration. Drinking enough water supports your nails’ flexibility and strength.
Avoid harsh chemicals on your nails. Acetone, bleach, and strong cleaners can damage the keratin. Wear gloves when using these products, or switch to gentler alternatives where possible.
Final Thoughts
Shaping oval nails at home is genuinely something anyone can master with a quality file, a little bit of understanding about the geometry of the shape, and a willingness to file in one direction with light, consistent pressure. The technique is simple—file straight across first, round the corners gradually, curve the tip, and refine the edges. That’s it.
The real magic happens in the maintenance. File your nails frequently and lightly rather than infrequently and heavily. Catch little chips and breakage early, before they become serious damage. Keep your nails moisturized and protected. Once you establish this habit, maintaining beautiful oval nails requires almost no effort and costs you almost nothing.
You’ll probably be surprised at how quickly you go from ragged, broken nails to consistently polished, intentional-looking ovals. People will ask if you’re getting them done professionally. The best part is knowing you did it yourself, with tools that cost less than a single salon visit, and you can touch them up anytime you want without scheduling an appointment or taking time out of your day.
Start with your current nails, whatever condition they’re in. File them into a basic oval shape using the steps above. Then commit to one week of daily cuticle moisturizing and protective handling. By the next week, you’ll see how much stronger they’ve become and how much better they look. The transformation from neglected nails to intentionally shaped ovals usually takes about two weeks of consistent care. Stick with it, and you’ll never go back to the salon for shaping again.
