

Your hands are one of the first things people notice about you, yet many of us neglect our nails until they’re brittle, peeling, or so weak they break the moment they grow past our fingertips. The irony is that healthy, strong nails don’t require expensive salon visits or complicated multi-step rituals—they just require consistency and the right approach. A basic nail care routine, done correctly and maintained regularly, can transform even the most damaged nails into ones you’re actually proud to show off.
The truth is, your nails are living tissue that reflects both your daily habits and your overall health. Whether your goal is to wear bold colors, sport a natural look, or simply have nails strong enough to function properly, the foundation is always the same: cleanliness, proper trimming, hydration, and protection. This guide walks you through a nail care routine that’s simple enough to stick with, backed by dermatologist recommendations, and genuinely effective at building nails that are strong, smooth, and beautiful.
Why Your Nails Deserve a Real Routine
You probably have a skincare routine. You likely have a workout regimen or a morning routine that sets up your whole day. But how many of us actually have a dedicated nail care routine? It’s easy to skip because nails don’t hurt when they’re neglected—at least not at first. But over time, ignored nails become weak, brittle, and prone to peeling and breaking, turning into a frustrating cycle that’s harder to break than simply maintaining them from the start.
Nails are made of layers of a protein called keratin, the same protein that makes up your hair. This means they’re both resilient and vulnerable in similar ways—they respond to hydration, they can be damaged by harsh chemicals, and they need consistent care to stay strong. When you neglect your nails, you’re not just affecting their appearance; you’re potentially setting yourself up for infections, breakage, and long-term damage that takes months to grow out and repair.
The best part about a proper nail care routine is that it takes remarkably little time. Most people can complete a full nail maintenance session—cleaning, trimming, filing, and moisturizing—in about 10 to 15 minutes, once or twice a week. That’s less time than many people spend scrolling through their phones. When you factor in the daily maintenance (which is often just applying cuticle oil and hand lotion), you’re looking at a few minutes of effort that pays dividends in how your nails look and function.
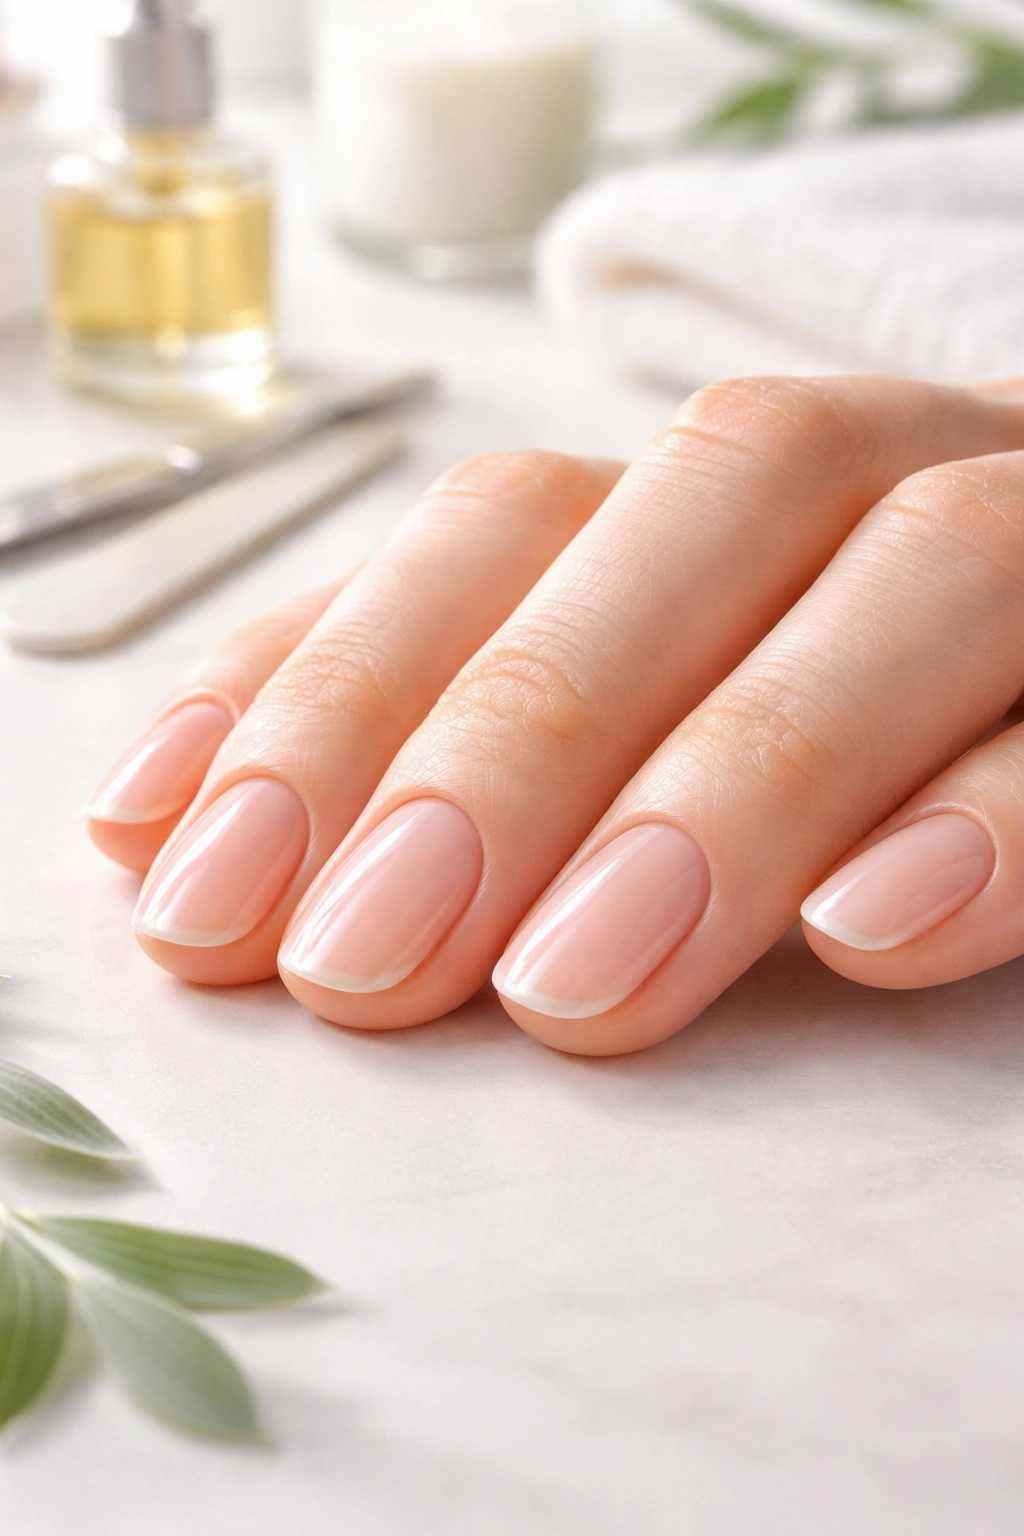
Understanding What Healthy Nails Actually Look Like
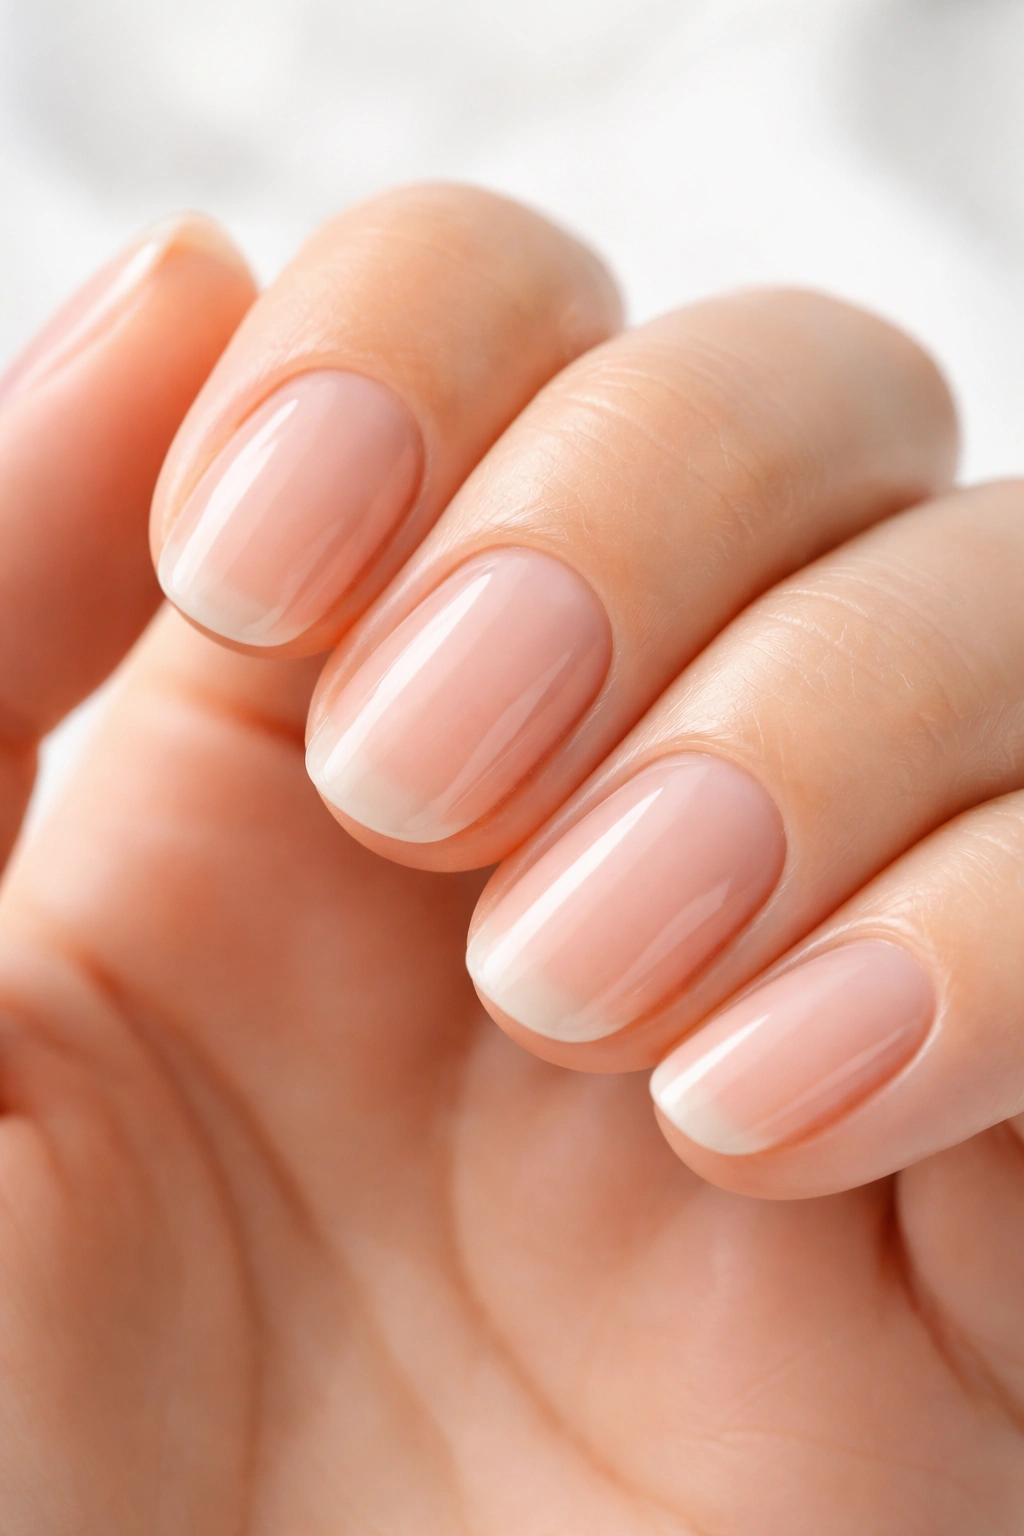
Before you start a routine, it helps to know what you’re working toward. Healthy nails have specific characteristics that are worth recognizing. Smooth, uniform color from base to tip is the ideal—no ridges, no discoloration, no dents or pits. The nail bed should be firmly attached all the way to the tip, not separating or lifting away from the skin underneath.
Some people develop vertical ridges that run from the cuticle to the tip, and these are completely normal and harmless, especially as you get older. What’s not normal—and what warrants a conversation with a dermatologist—are horizontal grooves, dark streaks under the nail, unusual thickening or thinning, nails that are pulling away from the skin, persistent pain or swelling, or any significant color change. These can signal infections, nutritional deficiencies, or other health issues that need professional attention.
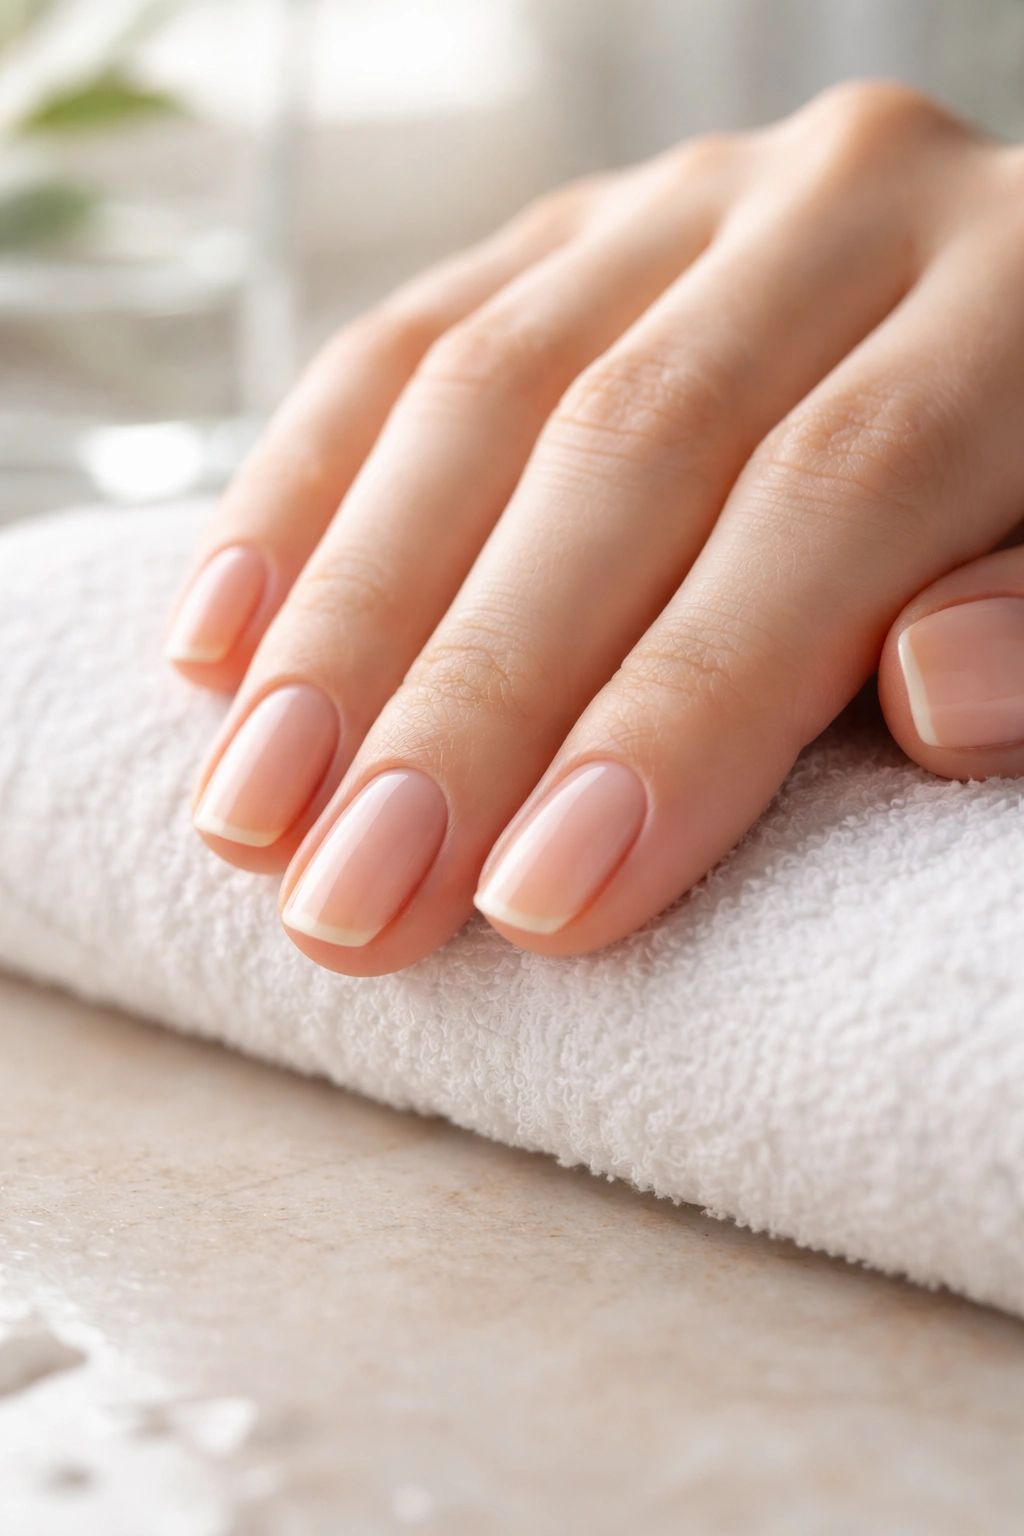
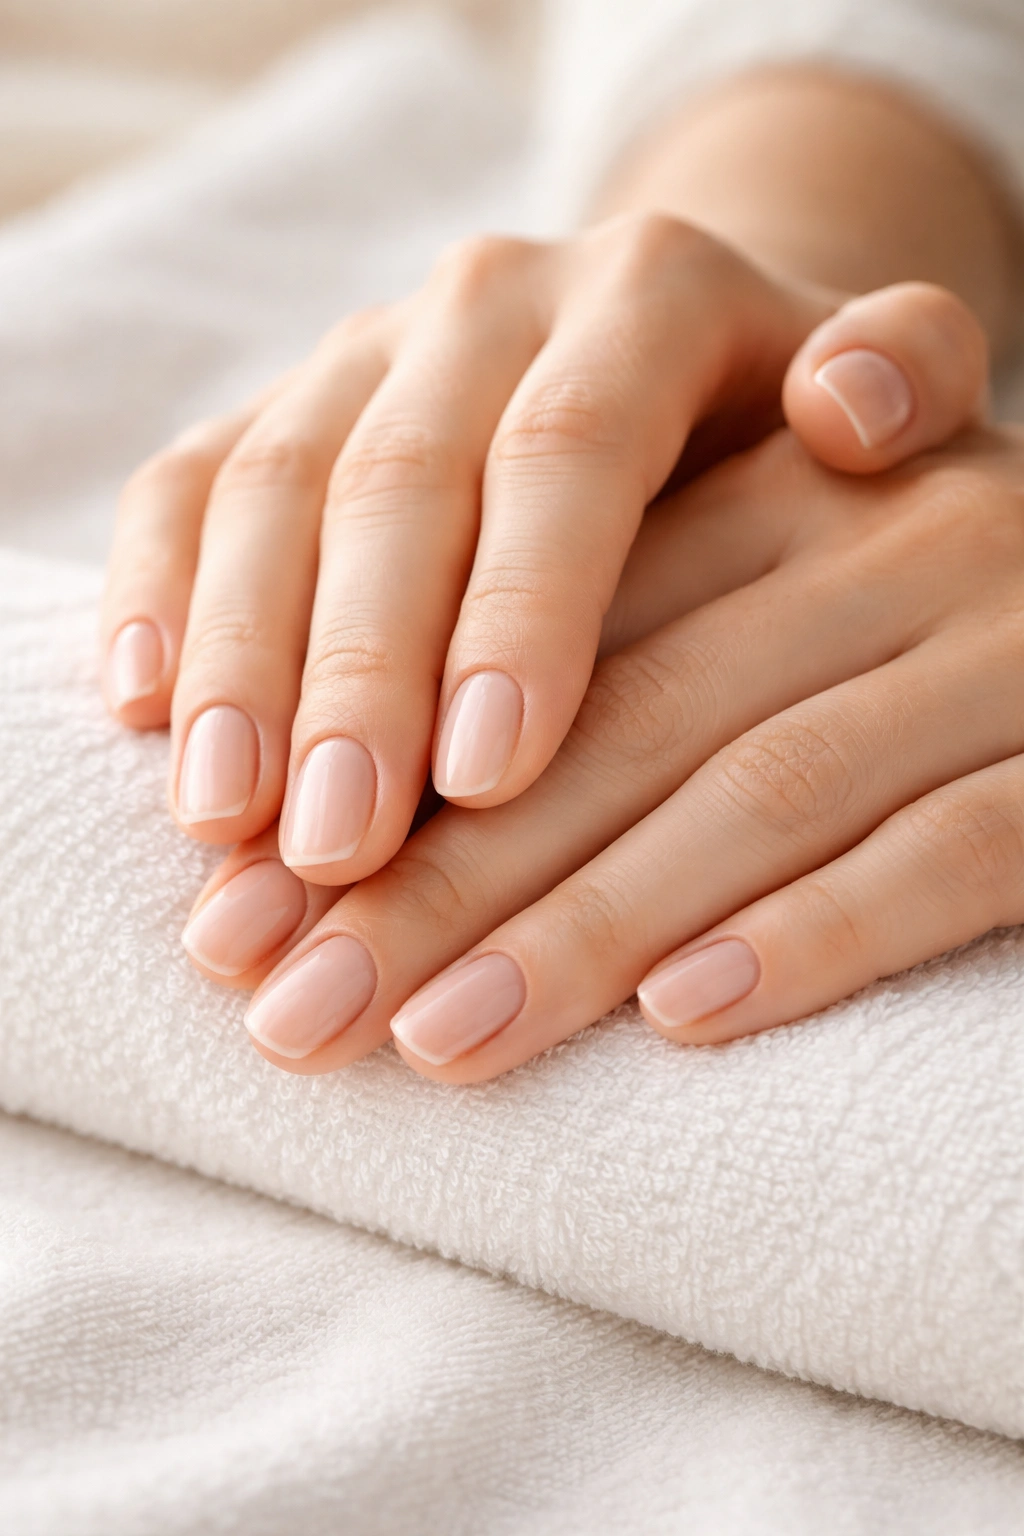
Healthy nails also have a natural slight curve and aren’t overly flexible or brittle. When you press on a healthy nail, it springs back quickly. Your nails might not be perfect right now, but if you commit to the routine in this guide, you’ll likely see noticeable improvement in texture, strength, and appearance within 4 to 8 weeks—which is roughly one full nail growth cycle.
The Foundation: Keeping Nails Clean and Dry
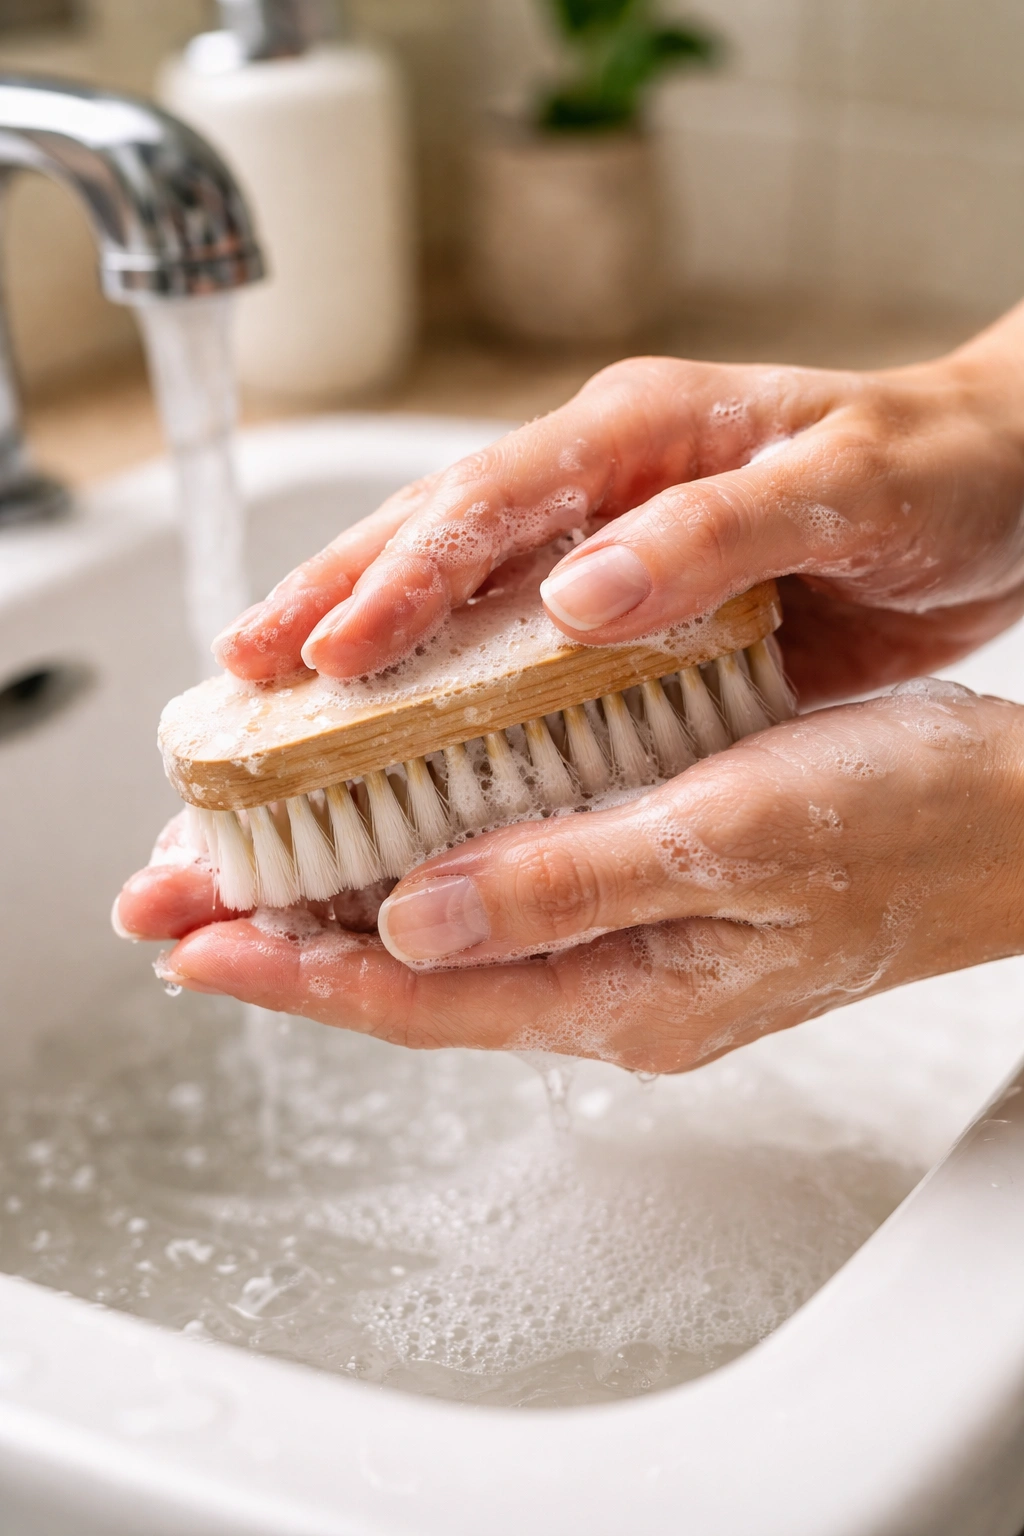
This is where every good nail care routine begins, and it’s almost embarrassingly simple. Your nails need to be clean, and they need to be dry. Bacteria and fungi thrive in moist environments, so any moisture trapped under your nails or around the cuticles is basically an open invitation to infection.
Start by washing your hands regularly with mild soap and warm water. Use a soft nail brush—or even an old toothbrush—to gently clean under and around your nails. This removes dirt, debris, and product residue that can accumulate throughout the day. The key word here is gently; you’re not trying to scrub your nail bed raw. Just a light brushing is enough. Avoid using sharp tools like the pointed end of a nail file to dig underneath your nails, because you can separate the nail plate from the bed underneath and create an opening for infection.
After washing, dry your nails thoroughly. Excessive moisture is one of the biggest culprits behind weak, peeling nails. Water actually absorbs into the nail plate incredibly easily—about 1,000 times more easily than it does into skin—which means nails swell and soften when wet. When they dry, they contract, and this repeated swelling and contracting weakens the nail structure over time. This is also why soaking your nails before a manicure, while it might feel nice, is actually counterproductive. A nail bath softens your nails, making them more vulnerable to breakage and less able to hold onto polish.
Trimming Your Nails the Right Way
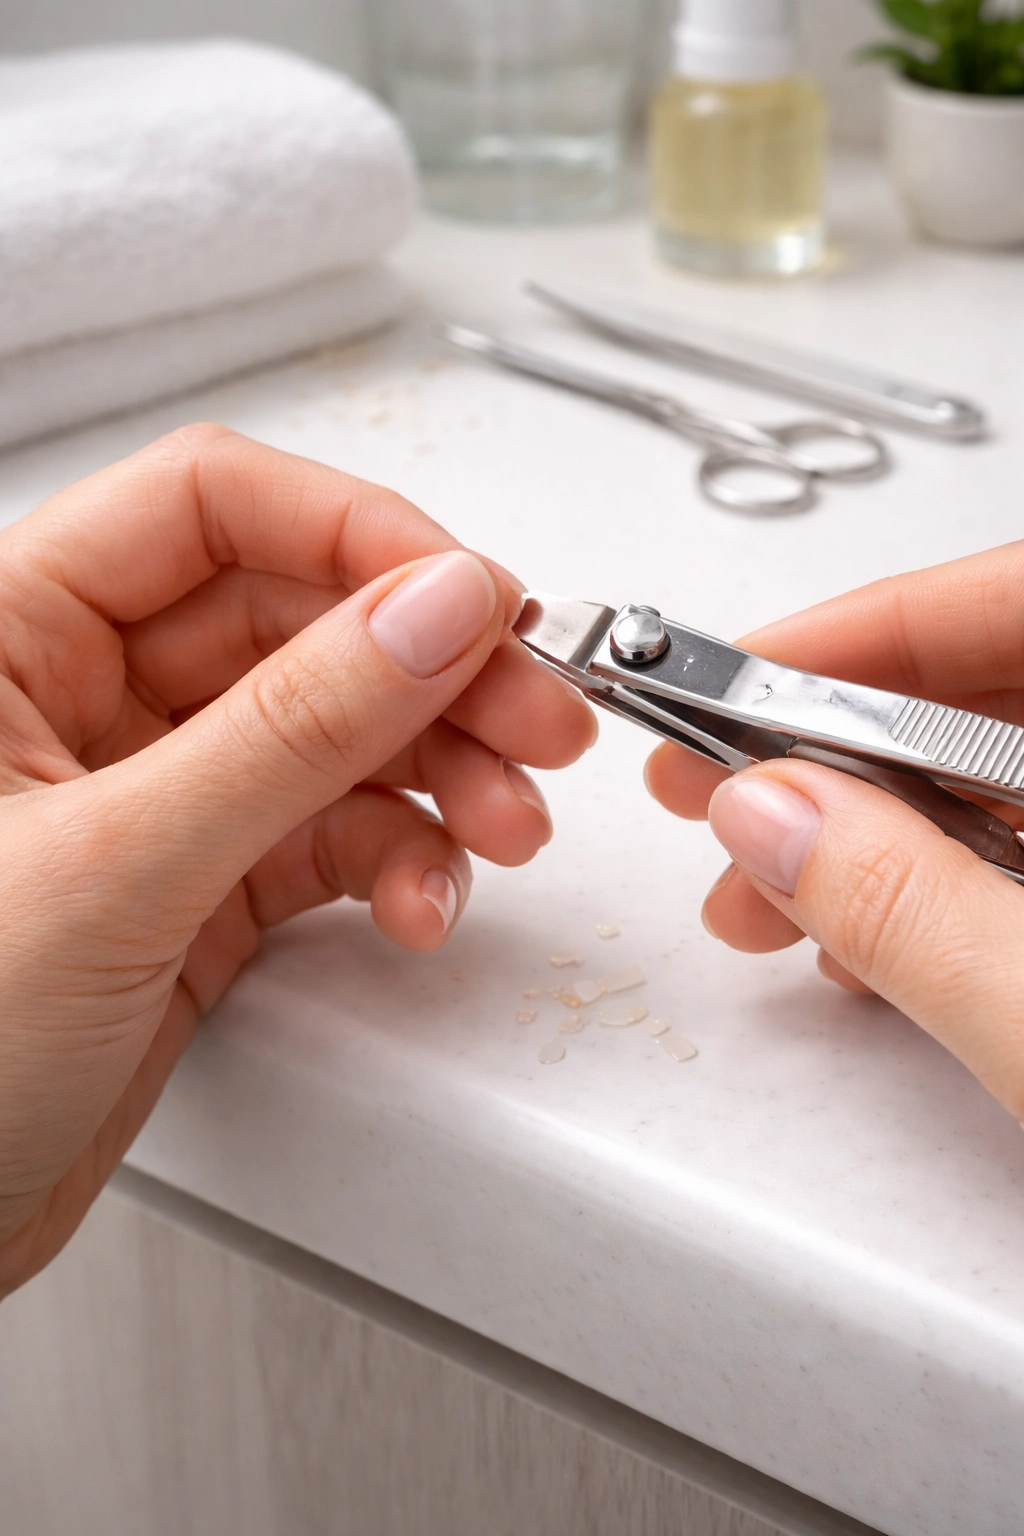
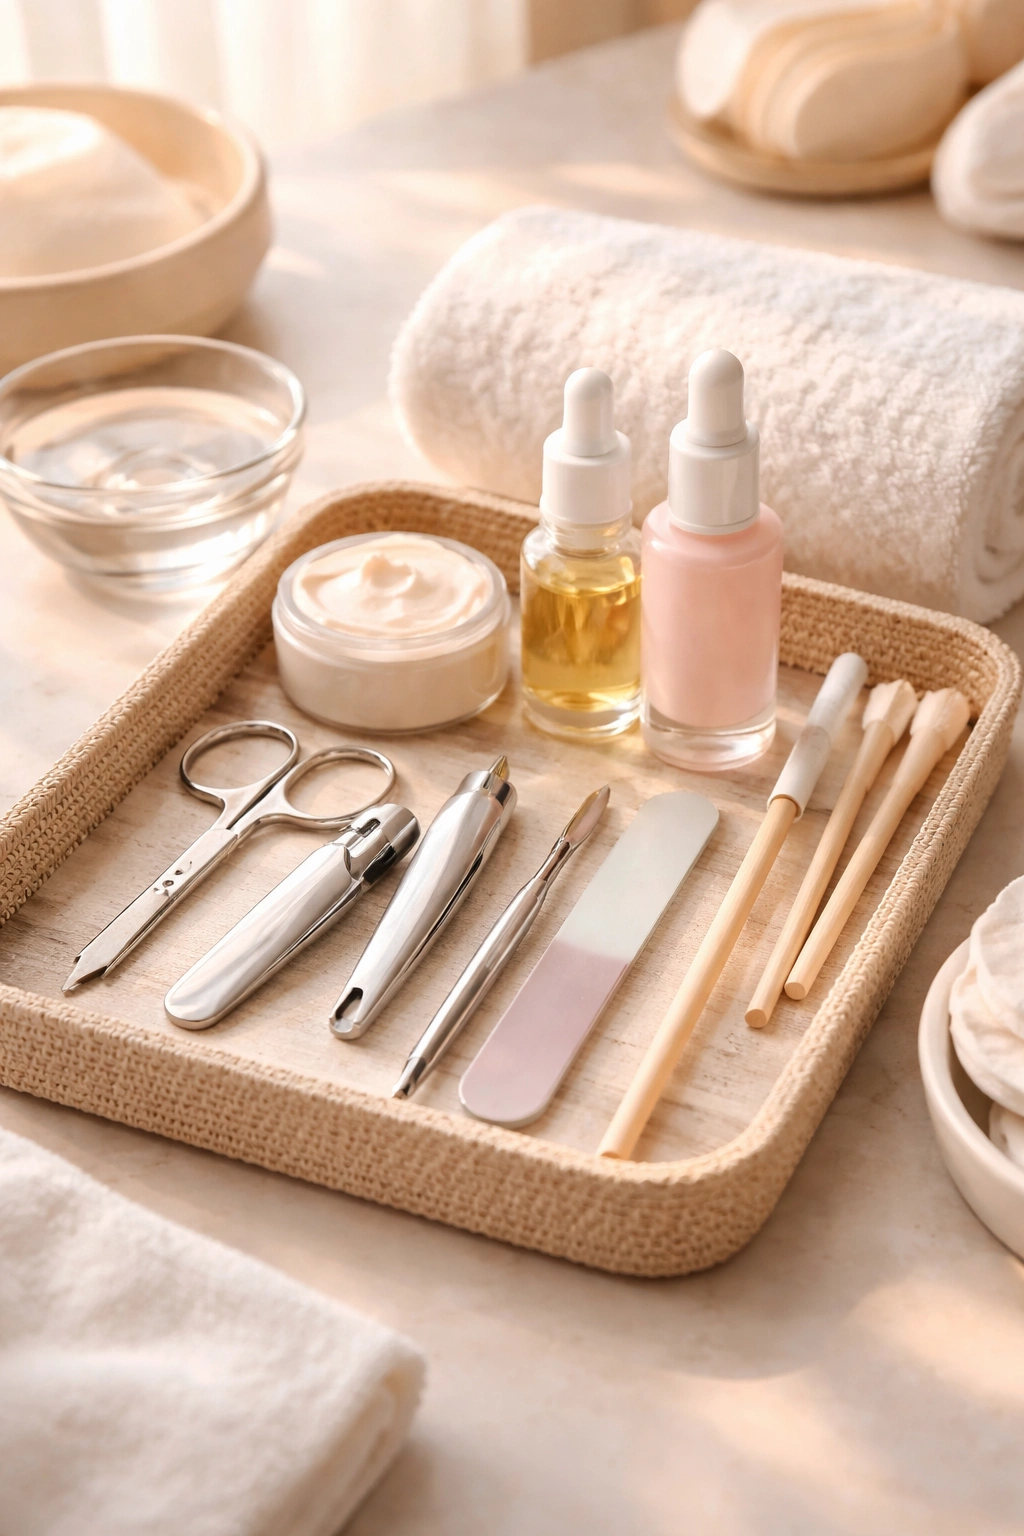
Most people trim their nails wrong, and that’s usually because they’re using the wrong tools or the wrong technique. Using sharp, high-quality nail clippers makes an enormous difference—cheap clippers from the drugstore often have dull blades that crush rather than cut cleanly, leading to uneven edges and splits that travel up the nail.
For fingernails, the American Academy of Dermatology recommends trimming almost straight across, then rounding the corners very slightly. This straight-across approach prevents the corners from becoming ingrown or catching on things and tearing. For toenails, trim straight across without rounding the corners, because rounding the corners of toenails can actually encourage ingrown nails. Never trim your nails too short—leave a little white at the tip so there’s something to grip. Trimming them all the way down to the quick weakens the remaining nail structure.
How often should you trim? That depends on how fast your nails grow and how long you like them, but generally trimming every 1 to 2 weeks helps prevent breakage and keeps them looking neat. If you notice a hangnail—that painful piece of skin pulling away next to your nail—don’t pull it or bite it off. Instead, soak your finger in warm water for a minute or two to soften the skin, then gently trim it with clean, sanitized nail scissors. Pulling at a hangnail can rip live tissue and lead to infection.
Filing for Strength, Not Damage
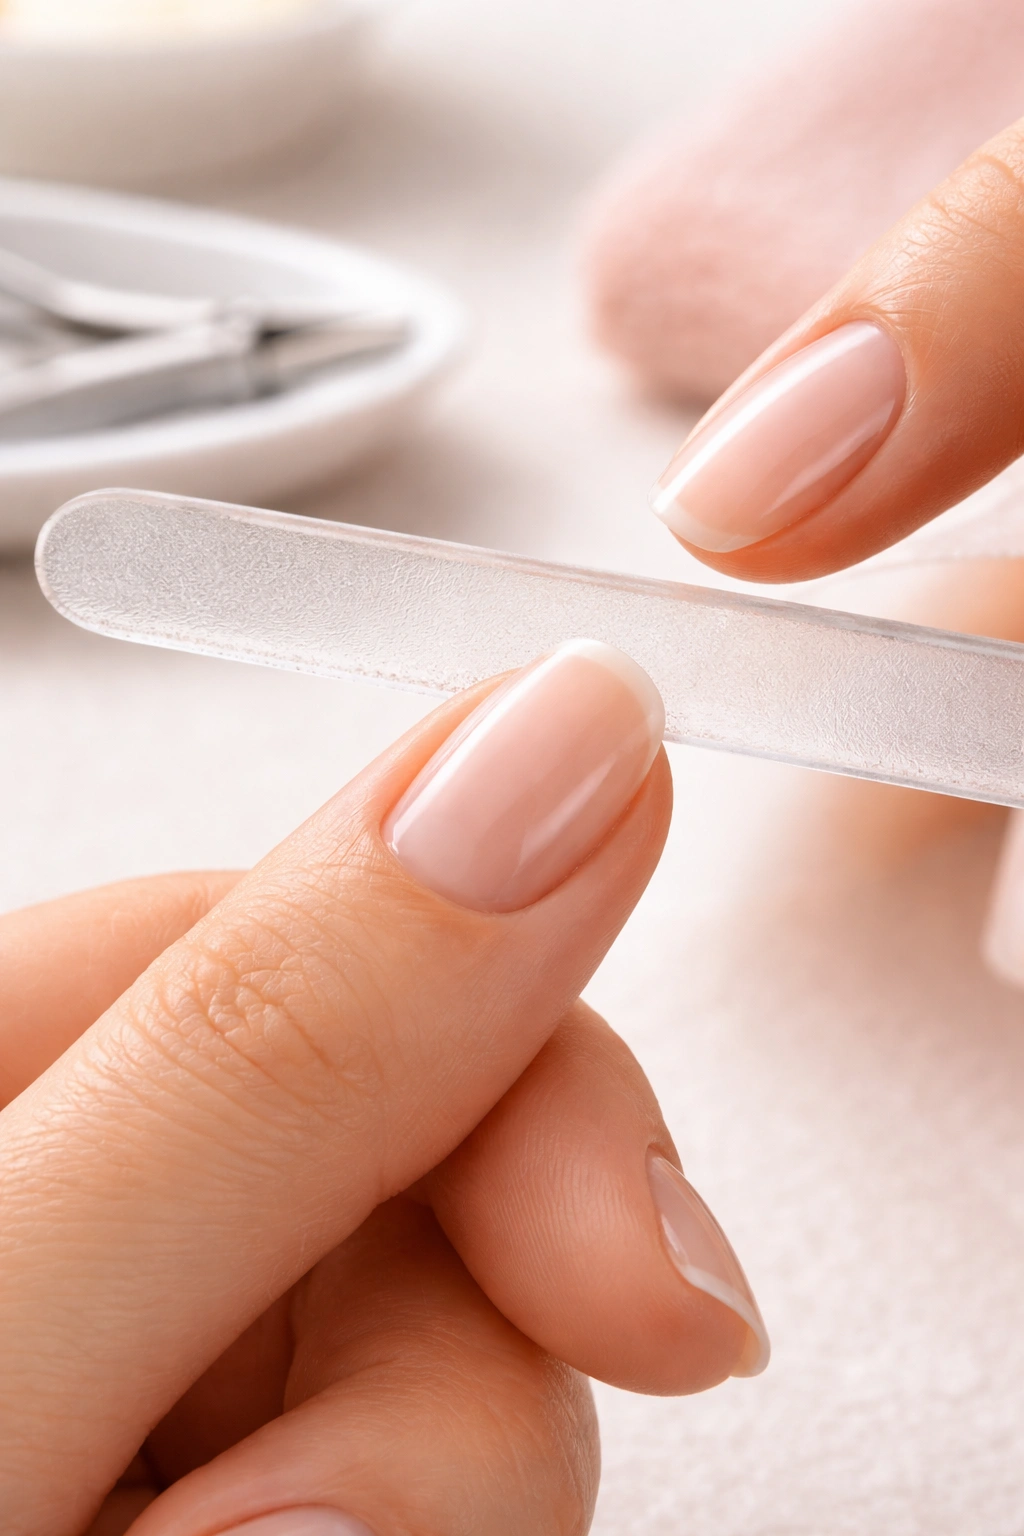
After trimming, filing shapes your nails and smooths out any rough edges that could catch and tear. This step matters more than many people realize, because the wrong file can actually cause more damage than it prevents. Traditional emery boards—those rough, sandpaper-like files—create microscopic tears in the nail edges that lead to peeling and splitting.
Switch to a glass or crystal nail file instead. These files are gentler on the nail edge and leave a smoother, cleaner edge that’s less prone to splitting. The difference is remarkable—you’ll notice immediately that glass files create a much smoother surface. They also last forever, so the slightly higher initial cost pays for itself within a few uses.
When you file, always move the file in one direction only, from the outer edge toward the center of the nail. Sawing back and forth weakens the edge and causes fraying. File gently and with patience—you’re not trying to reshape your entire nail in one session. Light, consistent strokes work better than heavy pressure. If you’re filing to create a specific shape (round, square, almond, or coffin), aim for symmetry on both sides, but remember that your natural nail shape usually looks best and requires the least maintenance.
Buffing for Smoothness and Shine
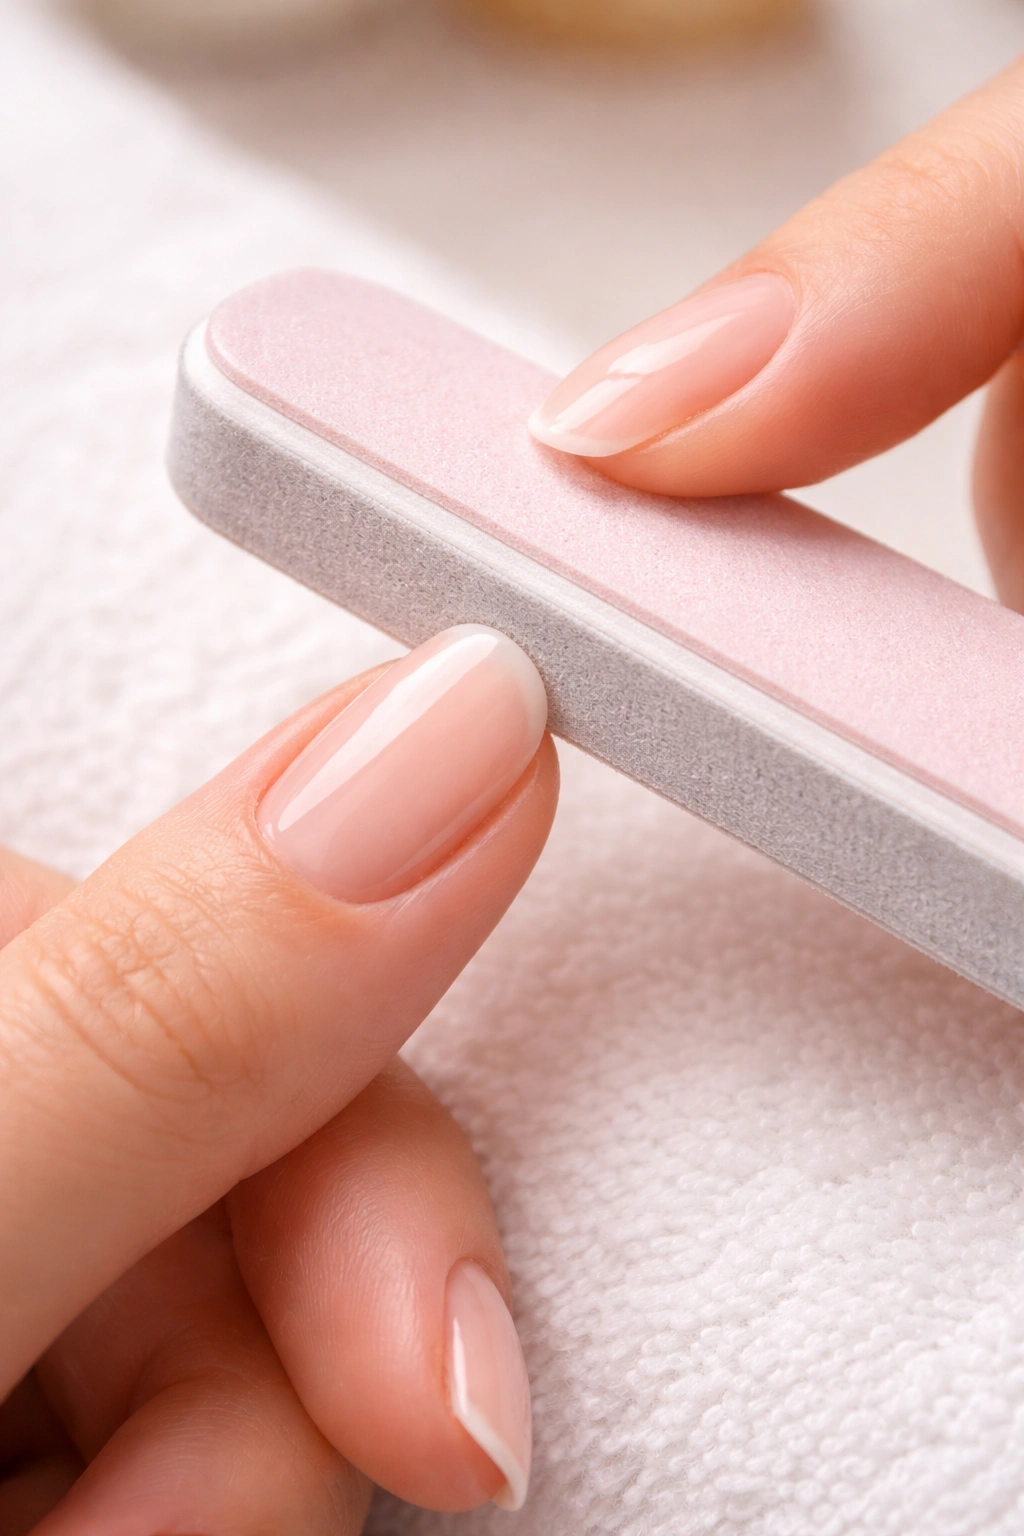
Buffing is optional, but it’s a surprisingly effective step that takes less than a minute. A soft nail buffer smooths out ridges and creates a slightly glossy surface that makes nails look healthier and helps polish adhere better. If you skip everything else, you can still buff weekly or every other week as a gentle way to maintain shine without using any products.
Use a soft, multi-sided buffer—not a rough one—and work gently. You’re just smoothing the surface, not trying to sand your nails down. Buff in one direction across the nail, moving from the cuticle toward the tip. The goal is to even out the surface and bring out a natural shine. Don’t overdo it though. Buffing too frequently can thin the nail plate over time, so stick to once every week or two, not daily. If your nails are already thin or brittle, skip buffing entirely and focus on hydration instead.
Cuticle Care Without the Cutting
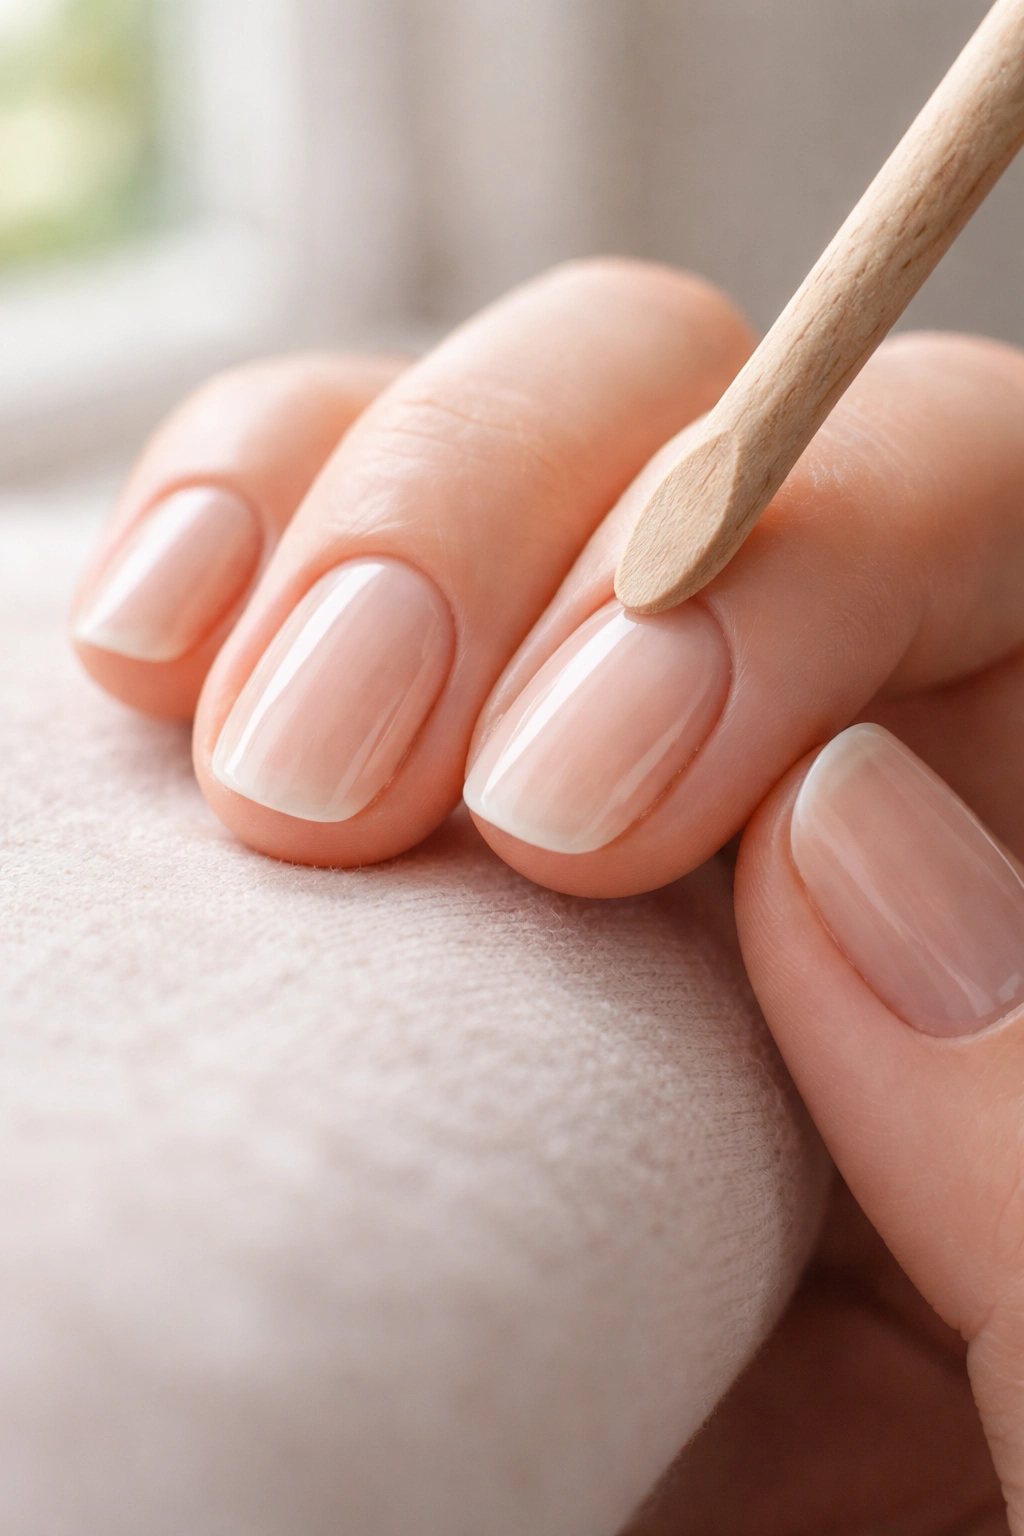
This is where many people go wrong, often because they’ve been taught—or shown by a nail technician—to cut or trim their cuticles aggressively. Here’s the reality: your cuticles are there to protect your nails from bacteria and infection, and cutting them is basically removing your nail’s natural defense system. The American Academy of Dermatology is very clear on this: don’t cut your cuticles.
What you can and should do is push them back gently. The cuticle remover or softener makes this easier—apply a small amount to each cuticle, wait a minute or two for it to soften the skin, then use a wooden cuticle pusher or even your own nail to gently nudge the cuticle back. You’re not trying to force it; just a gentle, light pressure is enough. Some people have more aggressive cuticle growth than others, and that’s fine. Your routine should honor how your nails naturally grow.
If you have loose skin around the sides of the nail (called hangnails, though technically they’re not part of your actual cuticle), you can trim those very carefully with clean scissors, but only the loose part. The actual cuticle that sits at the base of your nail should stay exactly where it is. After pushing back your cuticles, apply cuticle oil or a nourishing cream to keep that area moisturized and healthy. This prevents the cuticles from drying out, which is what causes them to peel back and form those painful hangnails in the first place.
Moisturizing Your Nails Daily
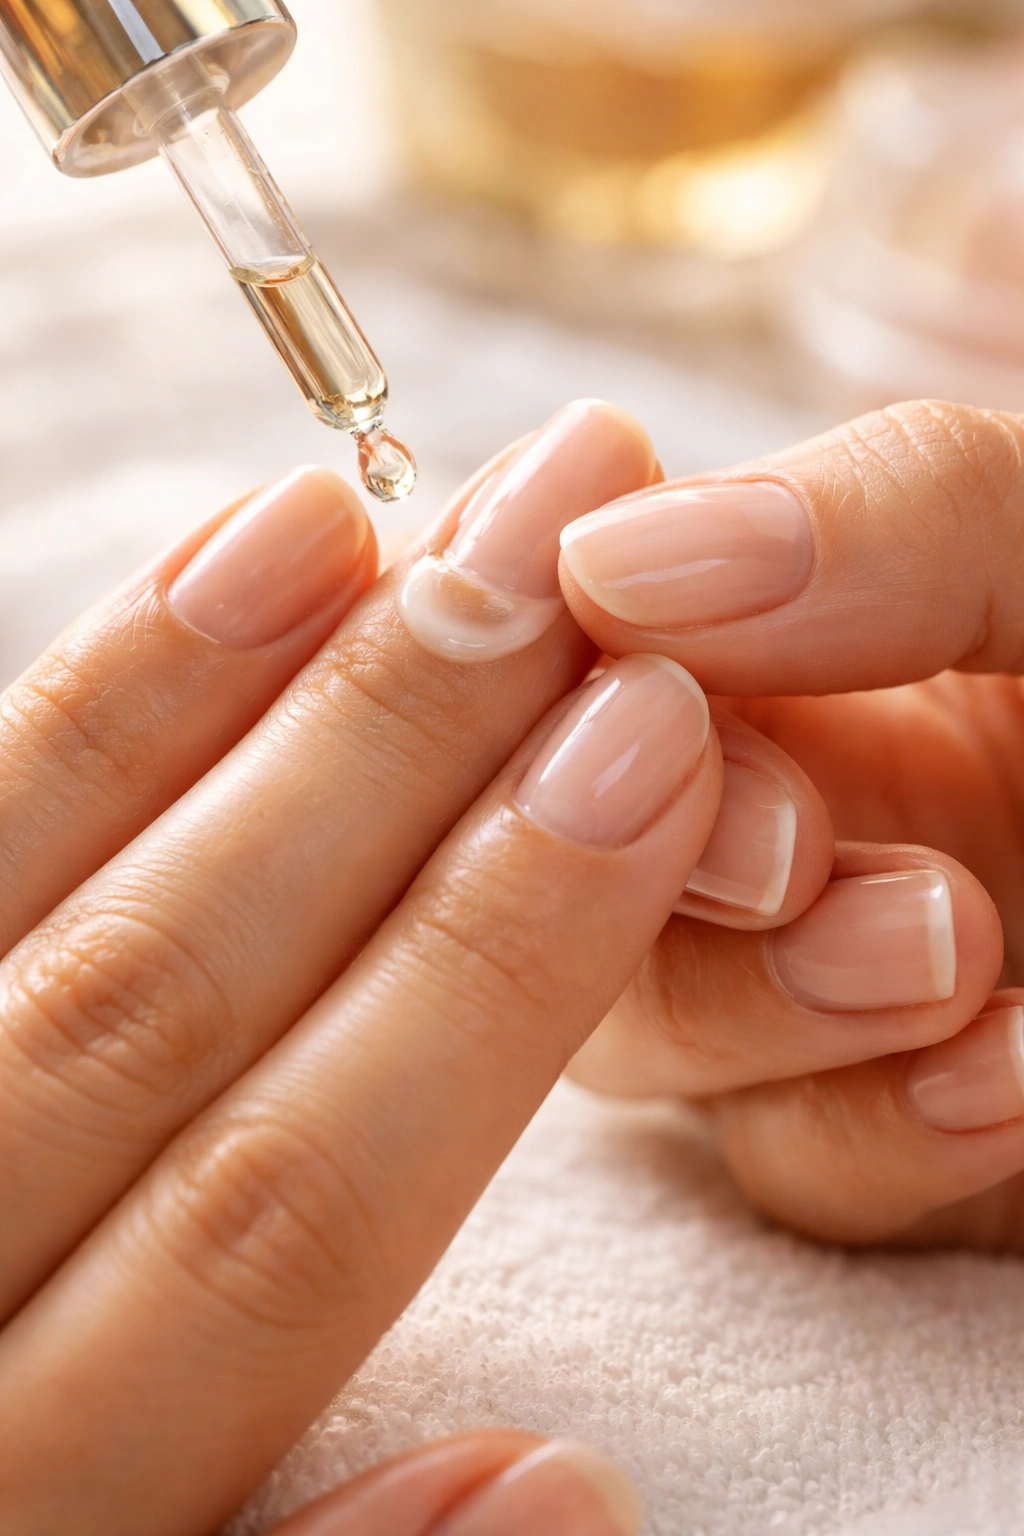
If there’s one step that makes the biggest difference in nail health and appearance, it’s moisturizing. Dry nails split, peel, break, and look dull and lifeless. Moisturized nails are strong, flexible, and glossy. This should be a daily habit, ideally morning and night, but even once a day makes a real difference.
You have options for what to use. A cuticle oil specifically formulated for nails (look for ingredients like jojoba, vitamin E, sweet almond oil, or argan oil) is ideal because it’s designed to penetrate and nourish. But a good hand lotion also works, especially one that’s thick and rich rather than lightweight and quick-absorbing. The key is consistency—it doesn’t matter if you use an expensive product or a drugstore option, as long as you use something regularly.
Apply your moisturizer to the nail plate itself, the cuticles, and the skin around the nail (called the nail fold). Take 30 seconds to massage it in gently; that massage increases blood flow to the area and helps deliver nutrients to your nails. Many people get the best results by moisturizing twice daily—once in the morning as part of their skincare routine, and once at night before bed. If you’re going to do dishes or be in water, apply a thin layer of oil beforehand as an extra protective barrier. It’s one of the simplest preventative measures you can take.
The Base Coat Secret Most People Skip
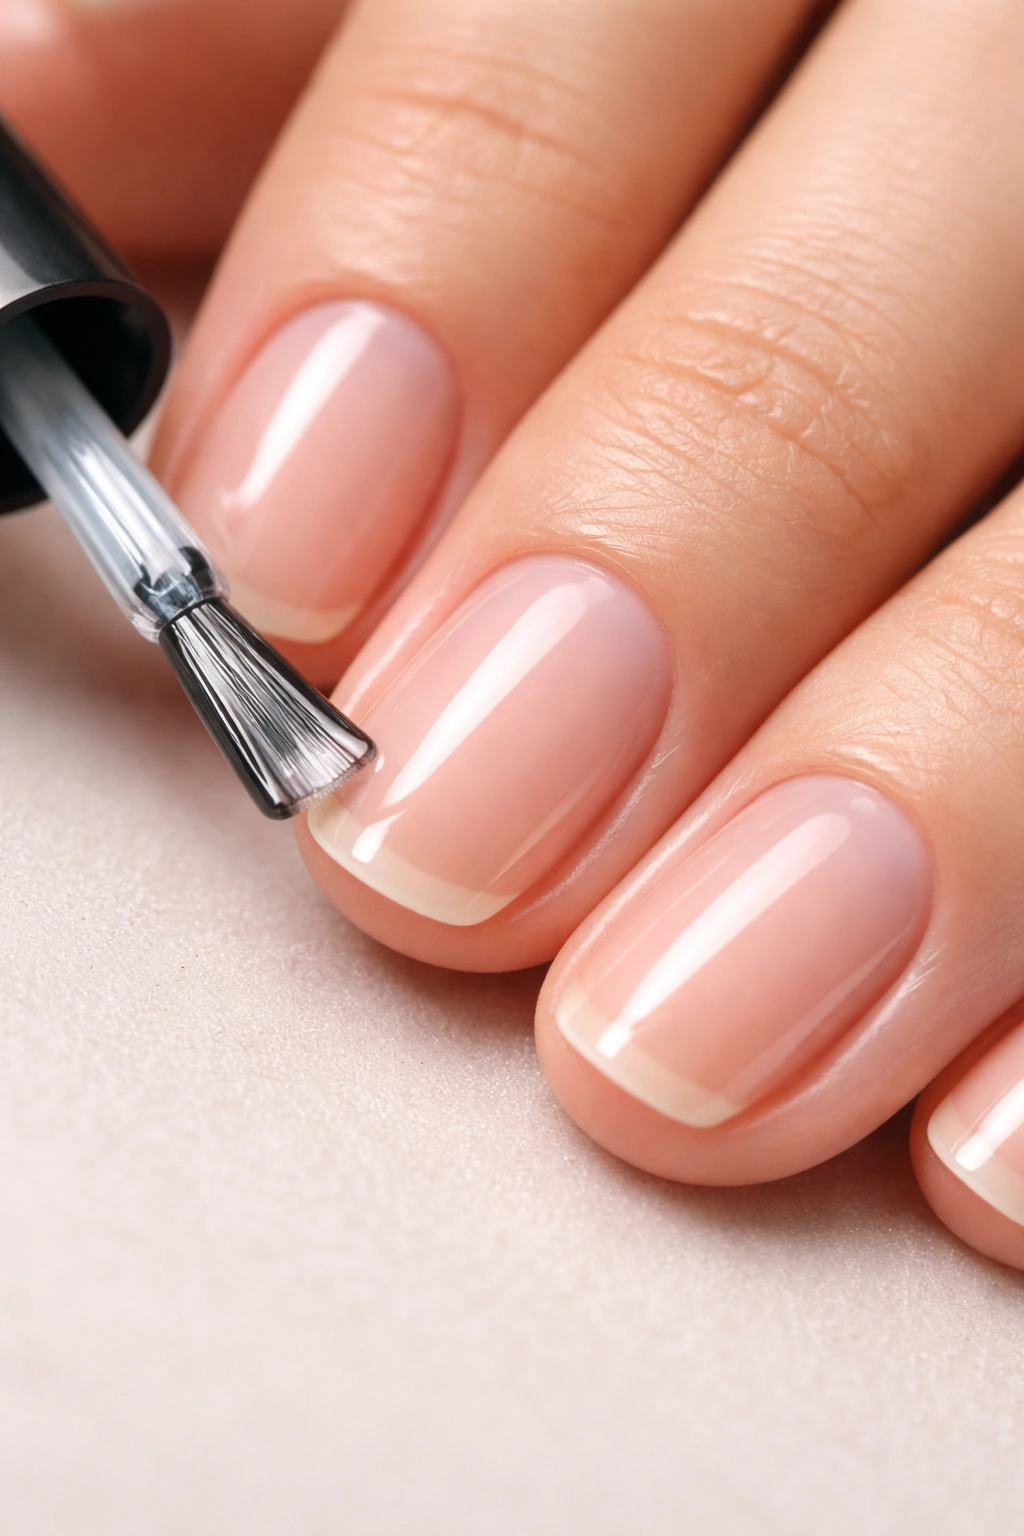
If you wear nail polish, base coat is non-negotiable, yet many people skip it thinking it’s an extra step. A base coat protects your nails from staining, helps polish adhere better, and—if you choose a strengthening formula—actively helps your nails stay strong. This is how you get manicures that last longer and nails that don’t look yellowed or damaged underneath.
Apply a thin coat of base coat directly to clean, dry nails before applying any color. Let it dry for a minute or two. Then apply your color coats, letting each one dry slightly before applying the next (though you don’t need them to be completely dry between coats—about 1-2 minutes is fine). A thin approach always works better than thick, gloppy coats. Thin coats dry faster, look smoother, and peel less. Two thin coats of color usually look better and last longer than one thick coat.
Finish with a top coat for shine and protection. This seals everything in and adds a layer of defense against chipping and wear. Quality top coats aren’t just about shine; they’re also what makes your manicure last. If you’re really committed to nail health, look for a strengthening base coat that contains proteins or nourishing ingredients. Some people use a clear strengthening polish on bare nails as their base layer, which gives them all the benefits of a base coat even when they’re not wearing color.
Choosing Polish and Removal Methods Wisely
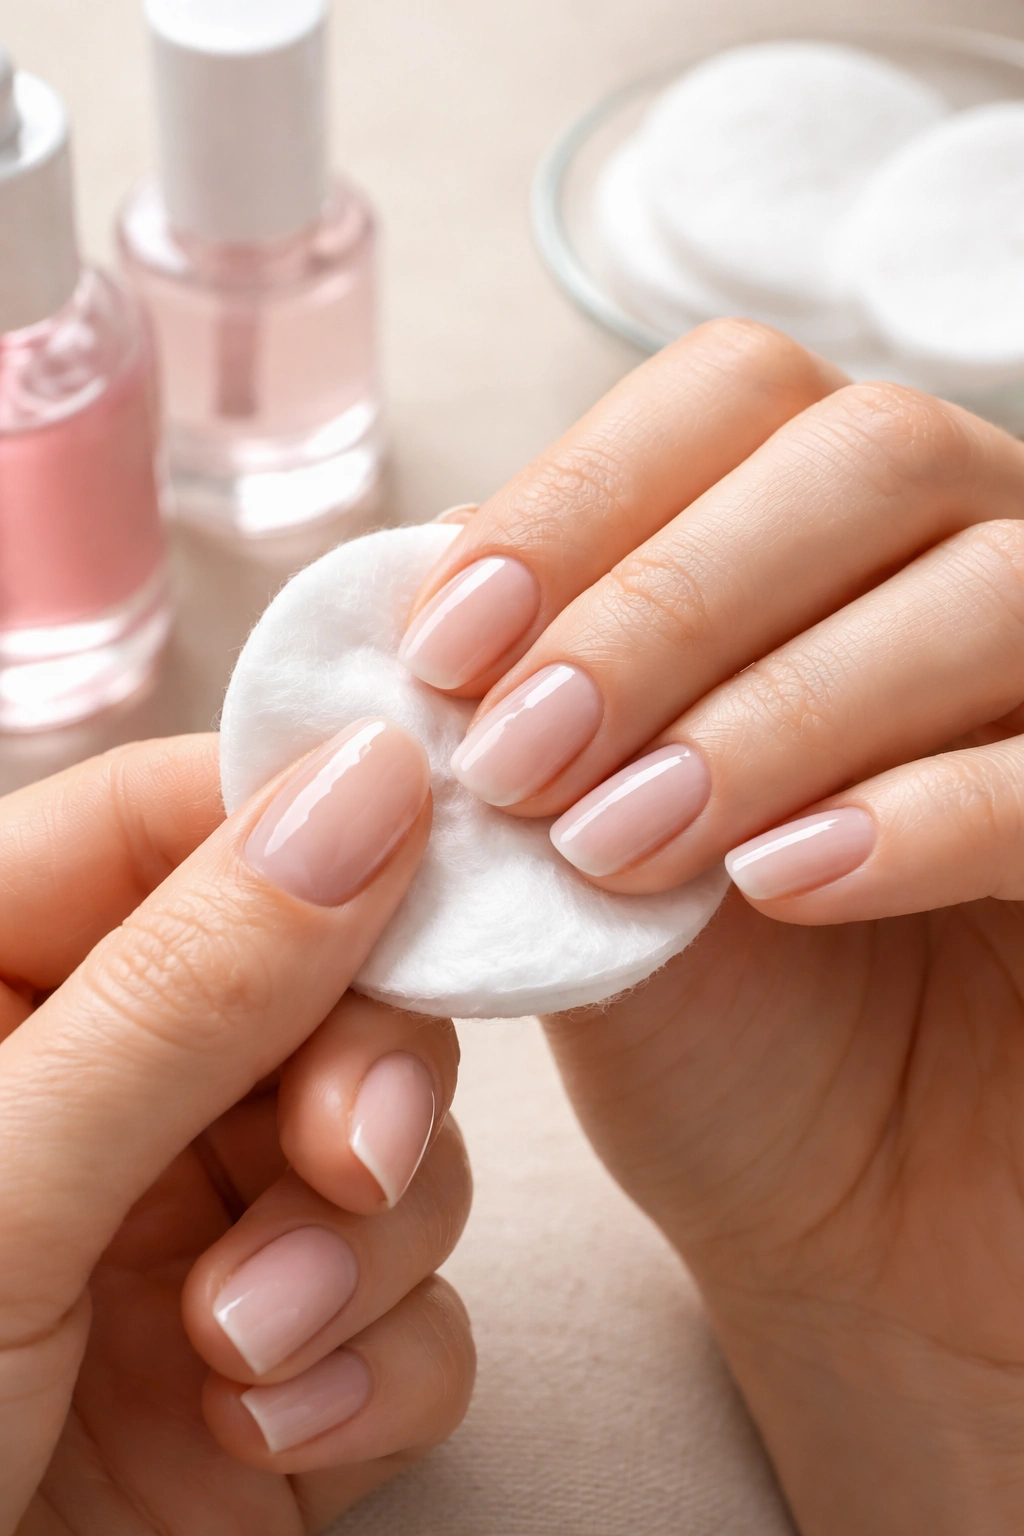
Not all nail polish is created equal, and how you remove it matters as much as what you wear. When shopping for polish, look for formulas that are “free” of harmful chemicals—specifically formaldehyde, toluene, and DBP (dibutyl phthalate). These chemicals are drying and harsh on nails. Labels that say “3-Free,” “5-Free,” or “21-Free” indicate how many of these toxic ingredients have been removed. Higher numbers are better, but even “3-Free” is a solid choice.
When it’s time to remove your polish, do not use acetone-based removers if you can help it. Acetone is incredibly drying and strips oils from your nails and surrounding skin. Non-acetone removers, while slightly slower-working, are gentler and often contain hydrating ingredients. If you must use acetone, follow it up immediately with a generous application of cuticle oil or moisturizer to replenish lost hydration.
The removal process matters too. Don’t scrub aggressively or dig at the polish. Soak a cotton pad in remover, press it onto your nail for a few seconds to let it penetrate, then gently swipe it off. If polish is stubborn, repeat rather than scrub. Some people find that wrapping the pad around their finger or using a small glass bowl to soak their fingertips (rather than scrubbing) is gentler and more effective. The key is patience—your nails will thank you.
Protecting Your Nails From Damage
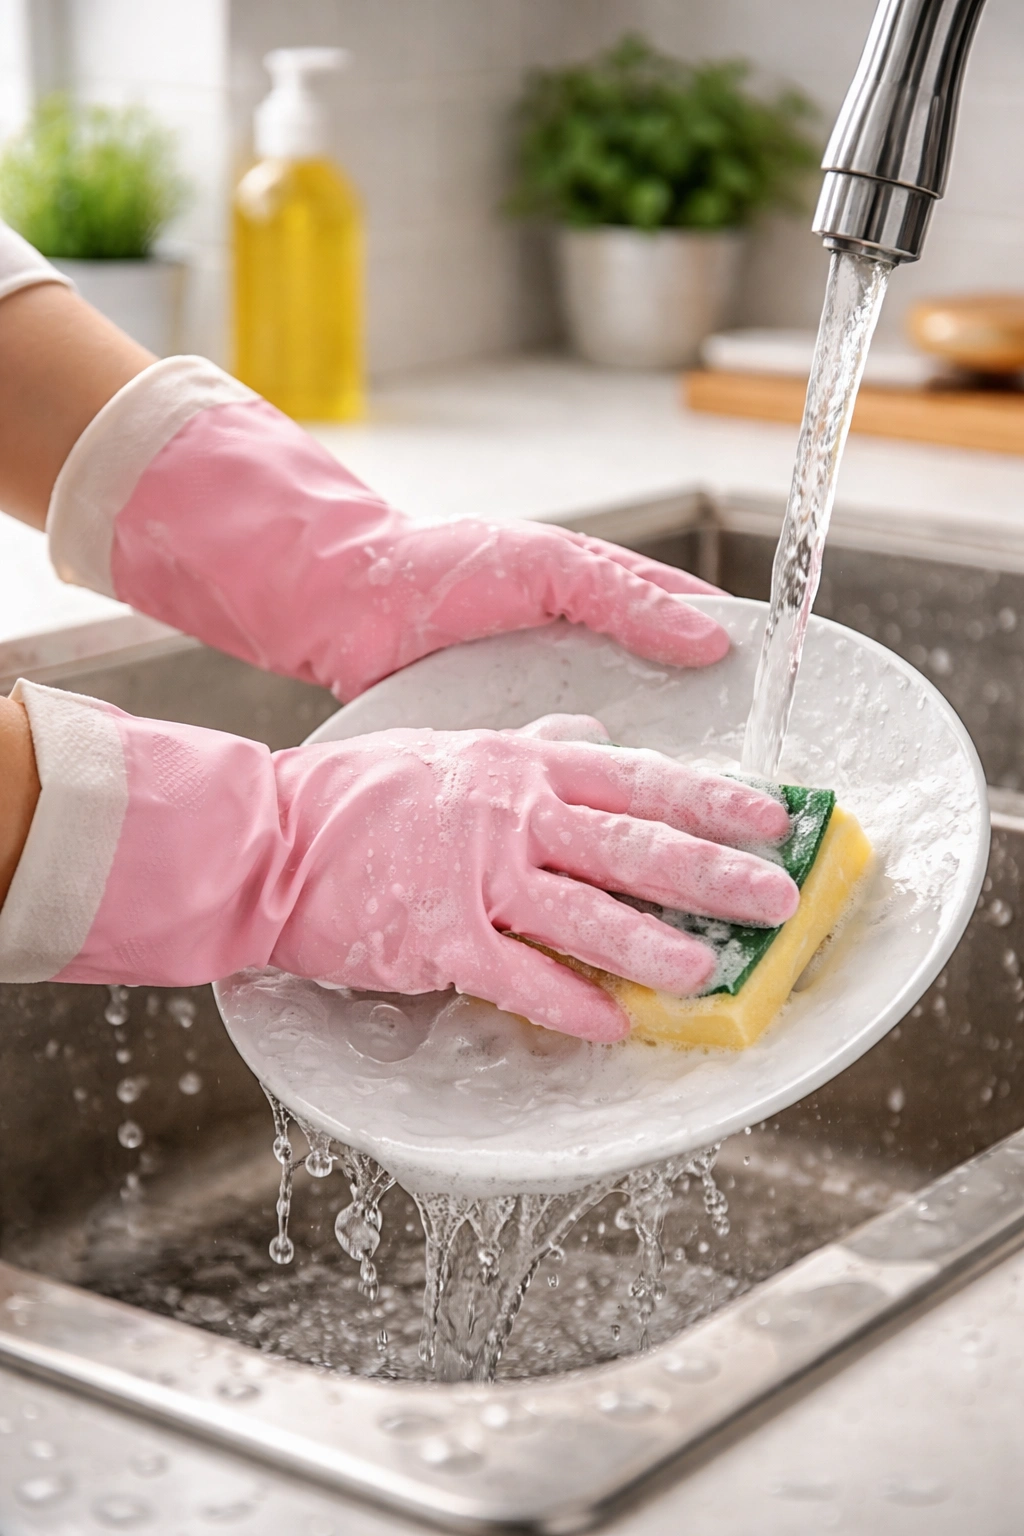
Your nail care routine isn’t just about what you do to your nails; it’s also about protecting them from harm. Wear gloves when you’re doing dishes, cleaning, gardening, or handling harsh chemicals. These activities expose your nails to detergents and prolonged water contact, both of which weaken nails. Cotton-lined rubber gloves work best because they protect from water while still allowing your hands to breathe.
Never use your nails as tools. No opening cans with your nail, no scratching off stickers or dried paint, no using them as little screwdrivers. This is one of the fastest ways to damage or break nails. It takes an extra 30 seconds to find an actual tool or bottle opener, and your nails are worth that small effort. Similarly, if you wear acrylic or gel extensions, have them applied and removed by a professional. Peeling them off yourself removes layers of your actual nail plate and causes serious damage.
Temperature changes can also stress your nails. In winter, the shift from heated indoor spaces to cold outdoor air causes repeated expansion and contraction that weakens nail cells. Wear gloves in winter to minimize this stress and, yes, moisturize even more than usual. And if you’re a swimmer or someone who spends a lot of time in water, consider wearing nail polish or a clear protective coat as a barrier, or apply oil before swimming.
Your Diet and What It Means for Nail Health
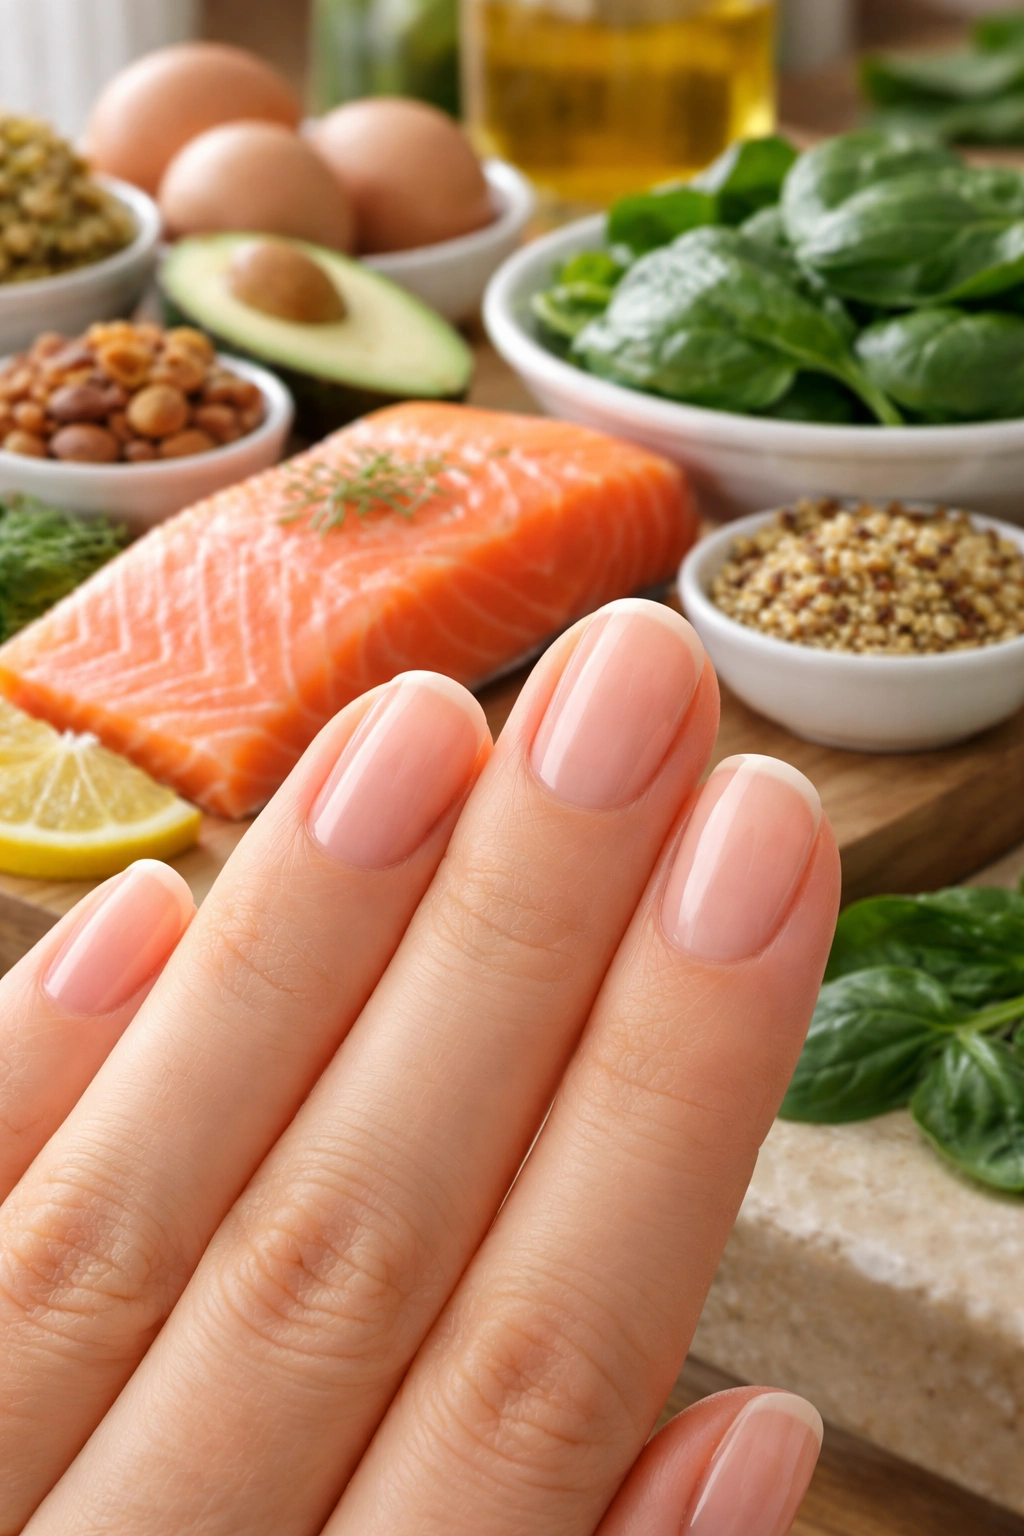
Your nails reflect what’s happening inside your body, which means diet genuinely matters for nail health. Nails need protein, biotin, iron, and omega-3 fatty acids to grow strong and healthy. You don’t need to overhaul your entire diet, but being intentional about including these nutrients makes a measurable difference.
Biotin is especially important for nail strength. You’ll find it in eggs, almonds, salmon, sweet potatoes, and spinach. Iron prevents brittleness and is abundant in red meat, beans, lentils, and leafy greens. Omega-3 fatty acids (from salmon, walnuts, chia seeds, and flaxseeds) promote hydration and shine. Protein is the building block of keratin, so any lean protein—chicken, fish, legumes, dairy—supports nail growth. Most people eating a reasonably balanced diet get enough of these nutrients naturally, but if your nails are persistently weak or damaged, a conversation with your doctor about supplementation might be worthwhile.
Water intake matters too. Staying hydrated supports every system in your body, including nail health. You don’t need to obsess over it, but drinking adequate water throughout the day helps keep your nails (and your skin) from becoming dehydrated. It’s one of those simple shifts that doesn’t cost anything but pays consistent dividends.
When to Take Breaks From Polish
Your nails don’t actually need a break from polish to be healthy—that’s somewhat of a myth—but they do benefit from periods without polish, especially if you’re dealing with damage or dryness. Every few weeks or every couple of months, consider going polish-free for a week or two. This gives your nails a chance to fully hydrate without anything covering the surface.
During these polish-free periods, you can actually see what’s happening with your nails. Are they improving? Are there new ridges or discoloration? This is your diagnostic window. And without polish, you can moisturize more freely and frequently without worrying about ruining your manicure. Some people find that just a few days of going bare nails, combined with intensive moisturizing and buffing, makes a dramatic difference in how their nails look and feel.
If you wear gel or acrylics regularly, taking breaks is even more important. These enhancements, while beautiful, can weaken your natural nails over time. The removal process—even when done professionally—can damage your nail plate. Many dermatologists recommend giving your natural nails at least a week or two between gel applications to recover and rehydrate. If you’re someone who loves having enhanced nails, try alternating: wear them for a few weeks, then go natural for a couple weeks. Your nails will stay stronger long-term.
Common Nail Problems and Quick Fixes
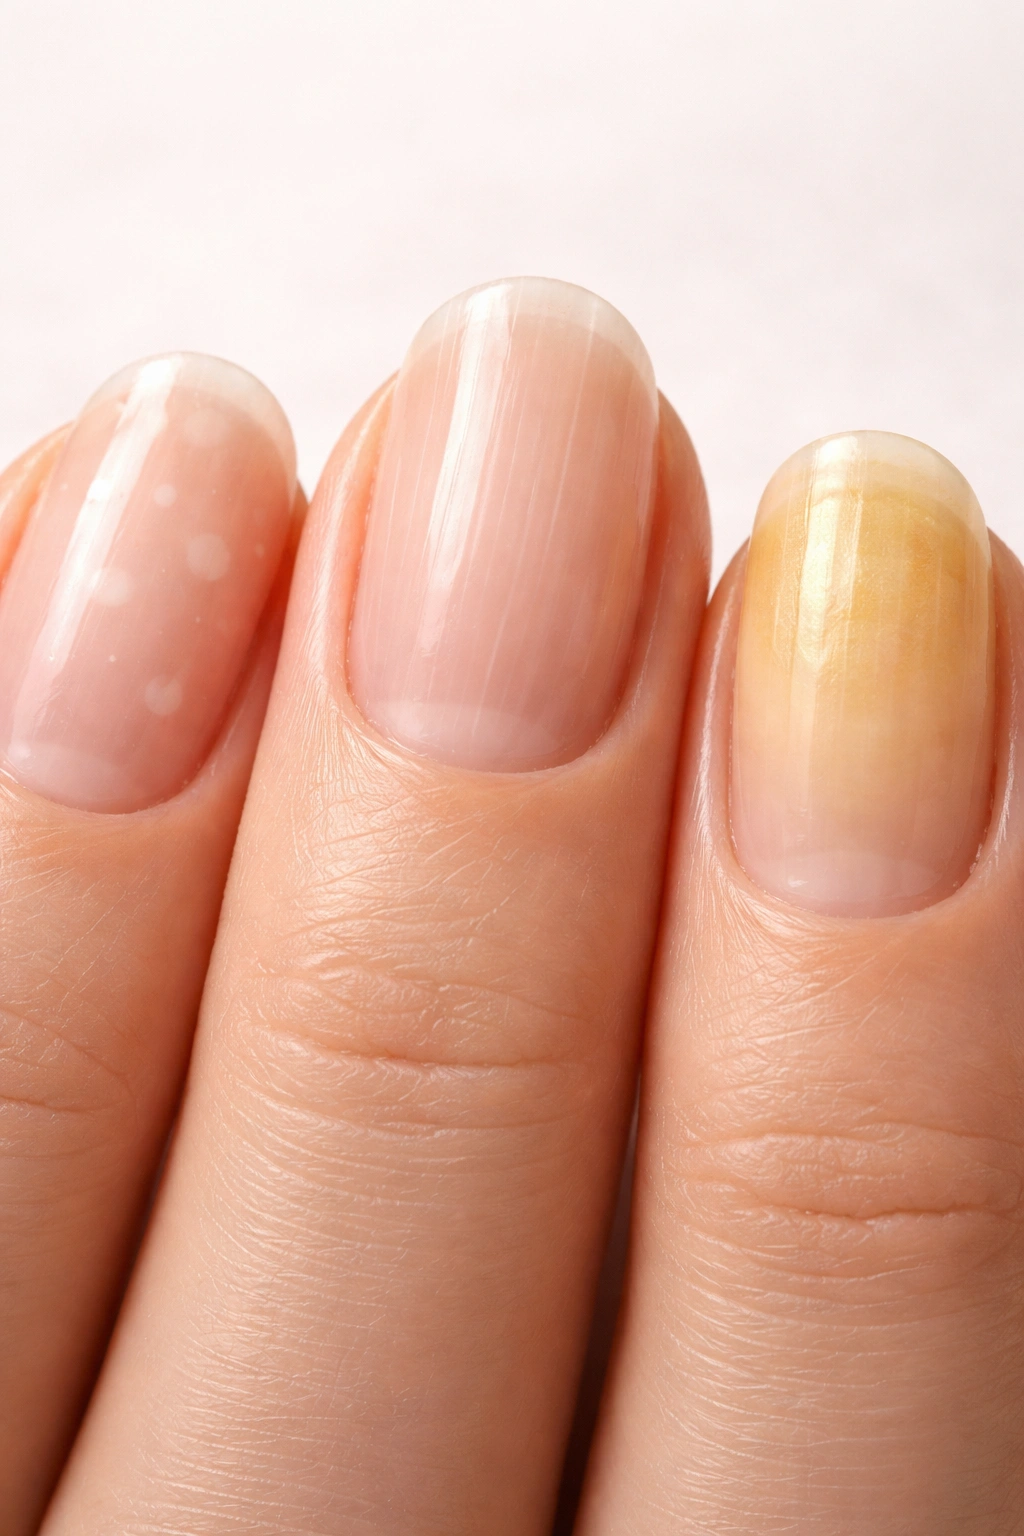
White spots on your nails are usually just minor injuries to the nail bed from impacts or pressure. They’re harmless and will grow out with your nail—there’s no treatment needed, just patience.
Vertical ridges are normal, especially as you age. If they’re really pronounced or accompanied by other changes, mention them to your doctor, but on their own they’re nothing to worry about. Buffing them smooth can help them look less obvious.
Yellow nails can result from polish staining, fungal infections, or smoking. If it’s staining from dark polish, use a base coat and alternate with lighter shades. If you suspect a fungal infection (especially if accompanied by thickening or crumbling), see a dermatologist. If it’s yellowing from nicotine, the solution is obvious, though the discoloration takes months to grow out.
Brittle, peeling nails are almost always a hydration issue. Increase your moisturizing frequency, take breaks from polish, avoid acetone removers, wear gloves when doing wet work, and wait. It takes weeks to months to see improvement, but it does come. If brittleness is severe and accompanied by other symptoms, it could indicate a thyroid issue or other health condition worth discussing with your doctor.
Hangnails that keep coming back are a sign that your cuticles are too dry. Apply cuticle oil twice daily and trim loose skin gently rather than pulling it. The habit of picking at hangnails actually makes them worse and can lead to infection.
Building a Routine That Actually Sticks
The best nail care routine is the one you’ll actually follow consistently. Complexity is the enemy of habit, so keep your routine simple enough that you can do it without thinking. If you’re gathering supplies from three different places, you won’t stick with it. If the routine takes 45 minutes, you won’t do it weekly.
Consider keeping all your nail care products together in one place—a drawer, a small organizer, a cosmetics bag. Keep it wherever you typically have a few quiet minutes: your bedroom, your bathroom, your living room. Make it convenient. Many people find that doing their nails becomes a relaxing ritual if they pair it with something they enjoy—a favorite show, a podcast, a youtube video, soft music, or just sitting somewhere peaceful.
Set a regular time. Maybe it’s Sunday night before the week starts, or Thursday evening to freshen up your manicure before the weekend. Some people do it while watching a specific show, which creates an automatic reminder. Whatever works for your life—just pick something and commit to it for a month. After about four weeks of consistency, it becomes automatic and requires far less willpower.
Don’t make it perfectionistic. If you miss a week, you don’t need to catch up or give up. Just pick it back up. If you forget to apply oil one morning, it’s not a failure. Consistency beats perfection every single time. You’re aiming for a routine that supports your nails, not a regime that adds stress to your life.
Final Thoughts
Healthy, beautiful nails are genuinely within reach for almost everyone, and the path to getting there is simpler than most people think. You don’t need expensive products, you don’t need salon visits, and you don’t need complicated multi-step regimens. You need consistency, clean and dry nails, gentle tools, regular moisturizing, and patience.
Start where you are. If your nails are currently damaged or weak, they might not look perfect for a few weeks or even a couple of months, but if you follow this routine—keeping your nails clean, trimming and filing them gently, moisturizing them daily, and protecting them from damage—you will see improvement. Your next set of nails growing in will be stronger, smoother, and healthier than the ones that are already there.
The routine in this guide isn’t demanding or time-consuming. It’s just consistent attention to the basics: cleanliness, proper maintenance, hydration, and protection. That’s it. And if you commit to it, the nails you develop—whether you wear them polished, natural, short, or long—will be nails you’re genuinely proud to show off.
