

Remember when fake nails used to be something you’d only admit to wearing in hushed tones? Those days are long gone. Press-on nails have become a total flex, and honestly, they’re one of the smartest beauty investments you can make right now.
You’re not sacrificing quality when you skip the salon—you’re gaining control, saving time, and keeping hundreds of dollars in your wallet. Plus, you can switch up your look whenever the mood strikes. Whether you’re after a natural nude for work or full-on stiletto glamour for Saturday night, fake nails deliver salon-worthy results in under 20 minutes.
Here’s the thing though: there’s a right way and a wrong way to apply press-on nails. Get it right, and they’ll stay put for up to two weeks without lifting or popping off. Get it wrong, and you’ll be fishing a fake nail out of your soup by day two. Let’s make sure you’re in the first camp.
What You’ll Need Before You Start
Don’t skip this part. Having everything within arm’s reach makes the process so much smoother, and you won’t end up with half-glued nails while you’re frantically searching for a nail file.
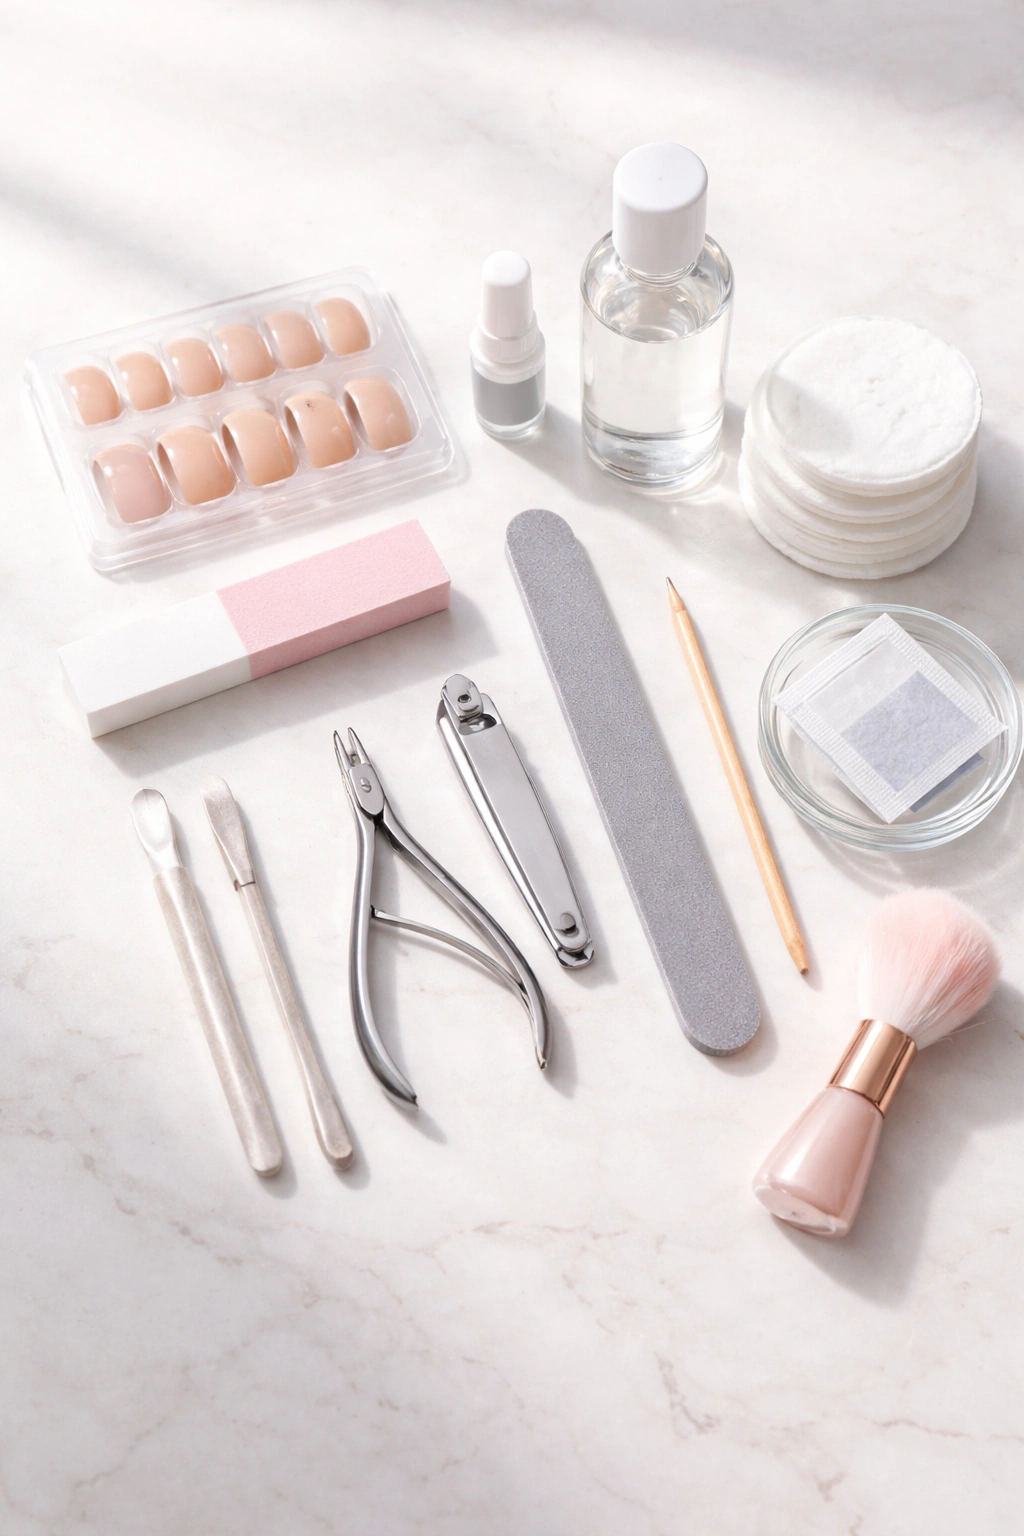
The essentials include: a set of press-on nails (obviously), nail glue or adhesive tabs, a nail file, a buffer, a cuticle pusher or orange stick, nail clippers, and rubbing alcohol or an acetone-based nail polish remover. You’ll also want some cotton pads and possibly a clean fluffy brush for dusting.
Most press-on nail kits come with glue and a mini file, but not all of them include everything you need. Having your own supplies on hand means you’re never caught short. A quality nail glue with a brush applicator is worth the investment—it gives you way more control than those tiny tubes that squeeze out globs.
One more thing: make sure you’ve got good lighting and a clean workspace. You’ll be working with small pieces and precision matters here.
Prep Work Makes All the Difference
This is where most people mess up. They’re excited to get those gorgeous nails on, so they rush through the prep. But here’s the truth: proper preparation is what separates a manicure that lasts three days from one that lasts three weeks.
Start by removing any old nail polish. Even if your nails are bare, you’ll still want to swipe each nail with acetone or rubbing alcohol. Your nails produce natural oils, and those oils are basically kryptonite for nail adhesive. Getting rid of them creates the clean, dry surface that glue loves to bond with.
Next up, wash your hands thoroughly with soap and warm water. Pay special attention to your nails and fingertips, making sure you get under the nail edges too. Dry them completely—and I mean completely—with a clean towel or lint-free cloth. Any moisture left behind will interfere with adhesion.
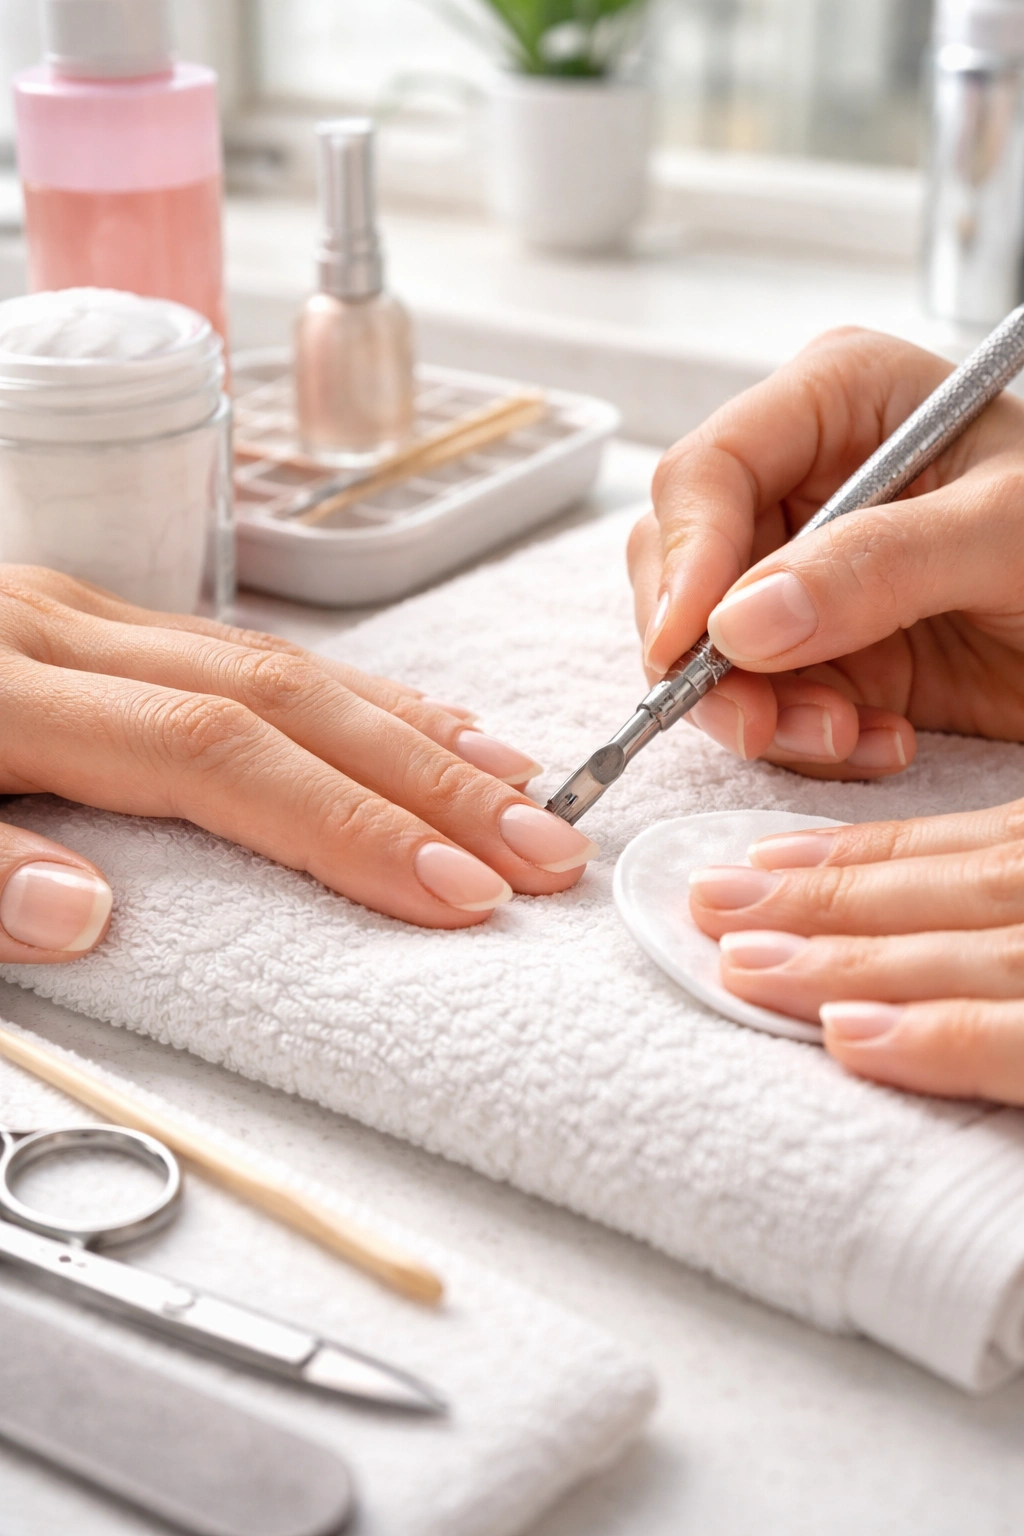
Push Back Those Cuticles
Grab your cuticle pusher or orange stick and gently push back your cuticles. You want to expose as much of your nail plate as possible, which gives the press-on nail more surface area to stick to. This step also prevents you from accidentally gluing the fake nail to your skin instead of your nail (yes, it happens).
Be gentle here. Your cuticles protect your nail bed from infection, so you’re not trying to remove them—just nudge them back a bit. If your cuticles are particularly stubborn, you can soften them first by soaking your hands in warm water for five minutes.
Trim and Shape Your Natural Nails
Use nail clippers to trim your natural nails fairly short. You don’t need to cut them down to nubs, but keeping them short prevents them from growing underneath the press-on and causing weird bumps or lifting. File them into a smooth, rounded shape that matches the curve of the fake nails you’re about to apply.
Here’s a step that makes a huge difference: lightly buff the surface of your natural nails with a nail buffer. You’re creating a slightly rough texture that gives the glue something to grip onto. Don’t go crazy with this—you’re not trying to thin out your nails. Just a few gentle passes across each nail does the trick.
The Final Wipe-Down
After buffing, use a cotton pad soaked in rubbing alcohol to wipe down each nail one more time. This removes any dust from filing and any oils that might have accumulated during prep. Let your nails air dry for about 30 seconds before moving on to application.
Some nail artists swear by using a nail dehydrator or primer at this stage. While it’s not mandatory, it does help remove every last trace of moisture and oil from your nail plate, which can add days to your manicure’s lifespan.
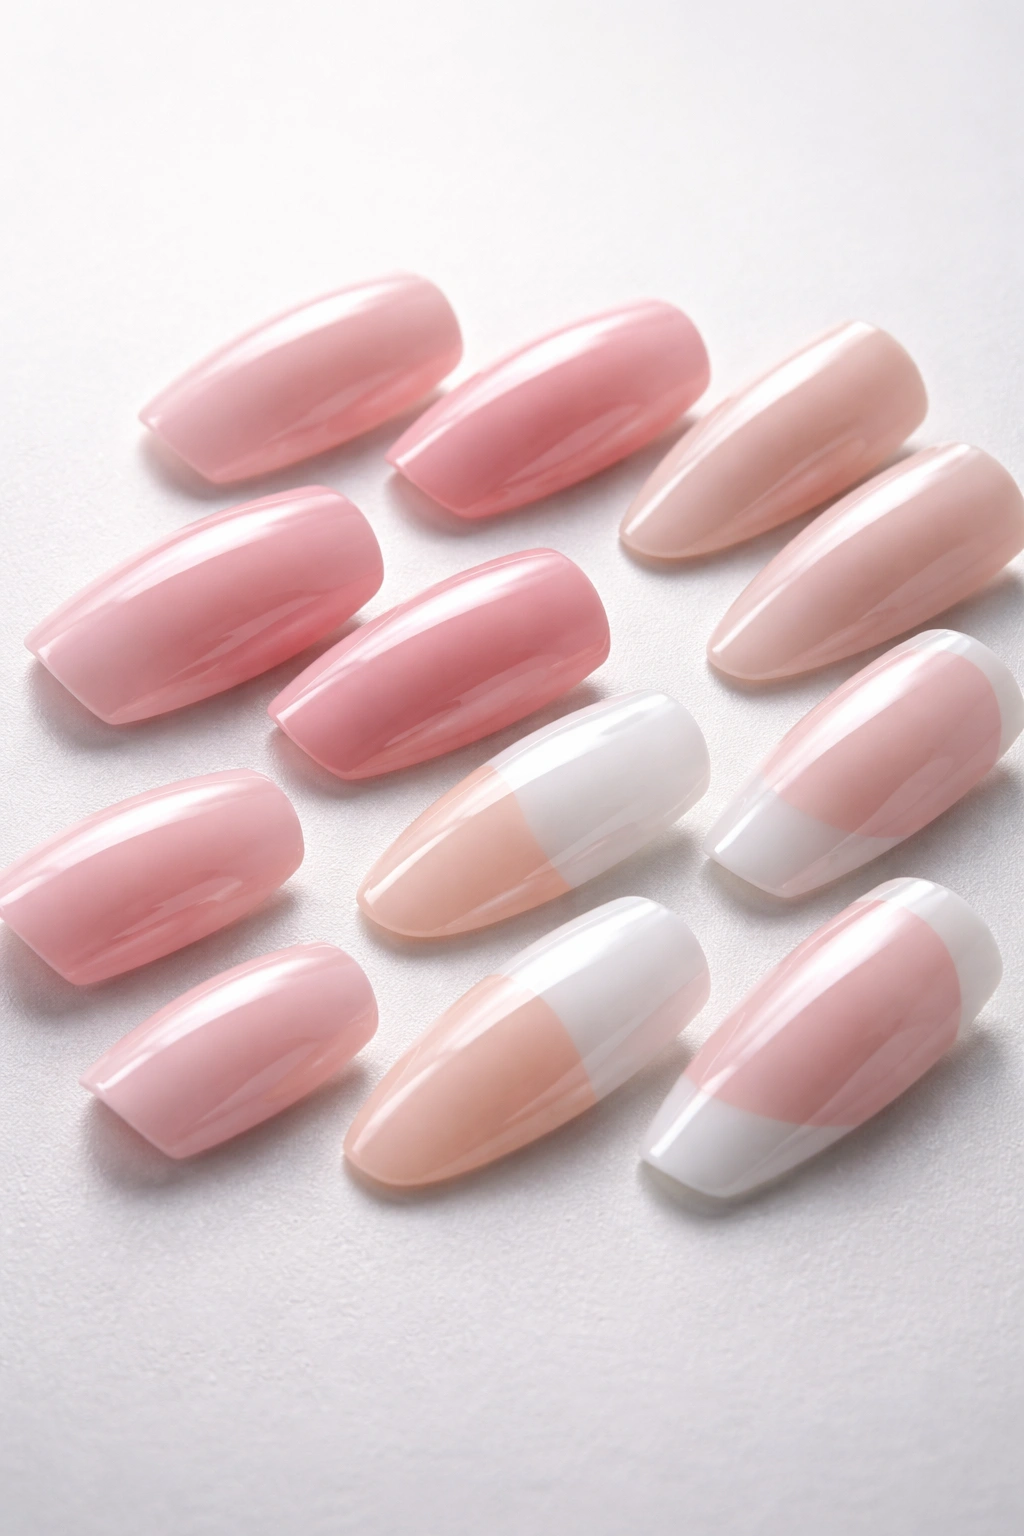
Sizing Your Press-On Nails
Before you start gluing anything, you need to figure out which nail goes where. This might seem straightforward, but it’s actually one of the most important steps in getting a natural-looking result.
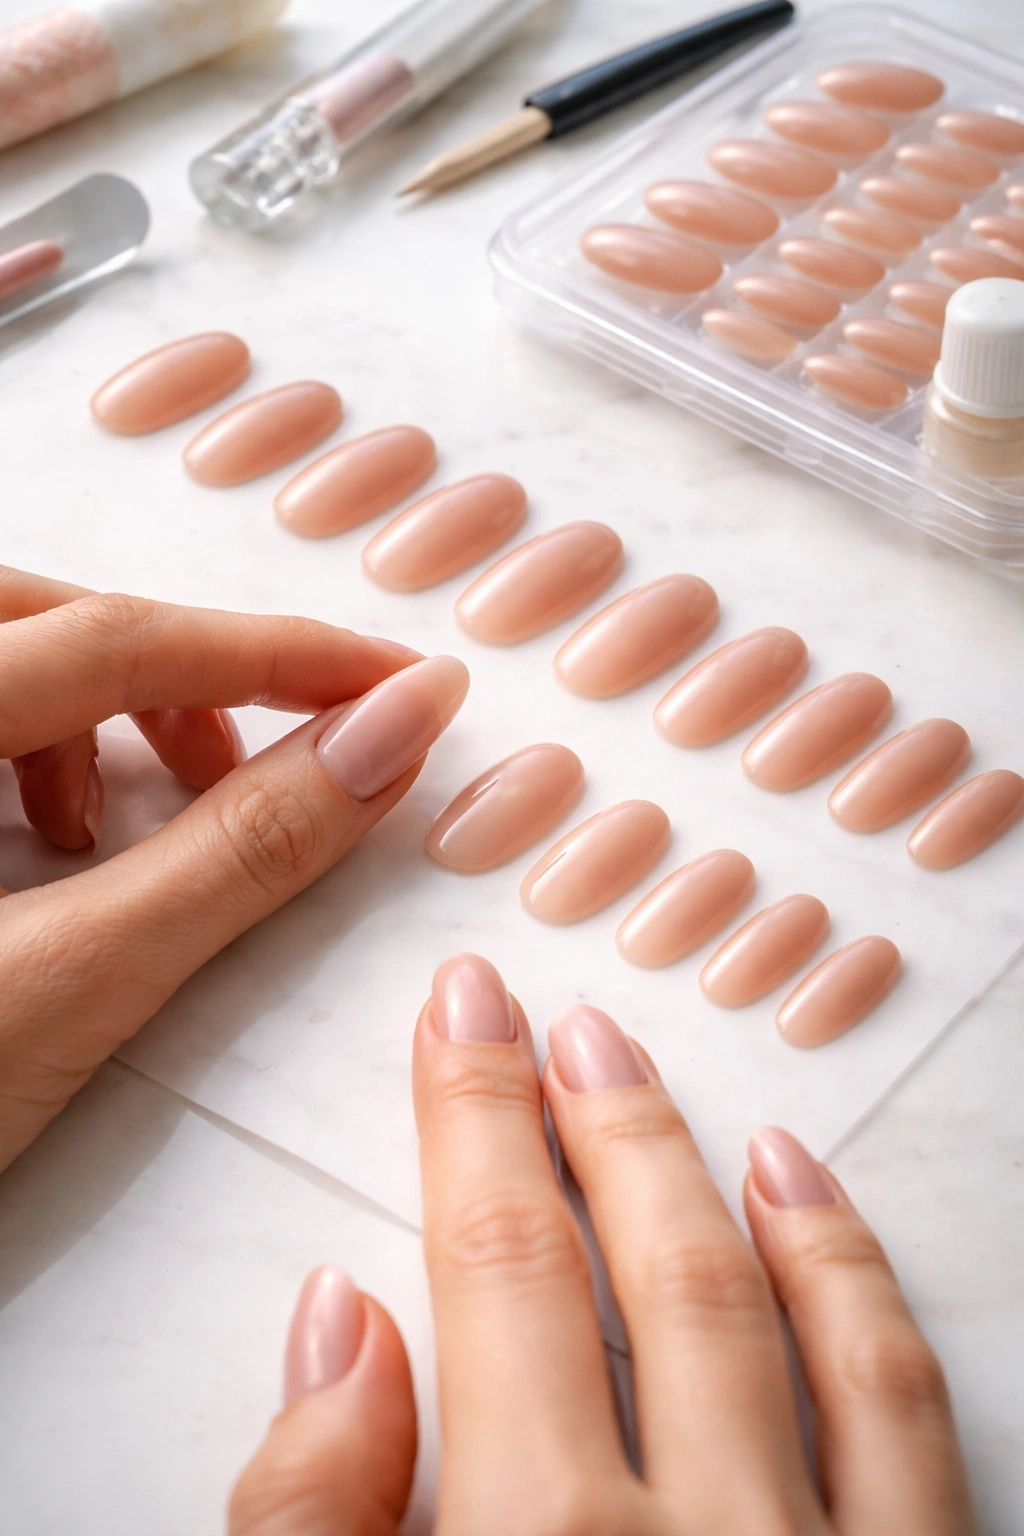
Most press-on nails are numbered on the underside, with 0 being the largest and 9 being the smallest. These numbers are your friends. The right fit means the press-on nail covers your entire natural nail from side to side without overlapping onto your skin.
Hold each fake nail over your natural nail to check the fit. The width should match perfectly—not too narrow (which leaves your natural nail exposed on the sides) and not too wide (which means it’s sitting on your skin). If a nail is slightly too wide, you can file down the sides to create a custom fit.
When you’re between sizes, go with the larger option. You can always file it down to fit perfectly, but you can’t make a too-small nail bigger. Lay out your selected nails in order—thumb to pinky for each hand—so you can grab them quickly during application.
Your nail beds might be different sizes on each hand, so don’t assume the same numbers will work for both sides. Take the time to size each finger individually.
How to Apply Press-On Nails with Adhesive Tabs
Adhesive tabs are perfect when you want a temporary look or if you love switching up your nail style frequently. They’re gentler on your natural nails and super easy to remove, but they typically only last between one to three days (sometimes up to a week if you’re careful).
Peel the adhesive tab off its backing and apply it directly to your natural nail. Press it down firmly and smooth out any air bubbles. Some people prefer to apply the tab to the back of the press-on nail instead—either method works, so try both and see which you prefer.
Line up the press-on nail with your cuticle, leaving just a tiny gap (about 1-2 millimeters) between the nail and your cuticle. This prevents the nail from catching on your cuticle and causing irritation or lifting. Press the nail down firmly, starting from the cuticle area and rolling forward toward the tip.
Hold each nail in place for about 10-15 seconds, applying steady pressure. You’re creating a seal here, so make sure you press down on the entire surface of the nail, not just the middle. Pay special attention to the edges and tip.
Repeat this process for all ten fingers, starting with your dominant hand first. That way, you’ll have full dexterity when you tackle your more challenging hand.
Applying Press-On Nails with Glue for Maximum Longevity
If you want your press-on nails to last 7-14 days (or even longer), nail glue is your best bet. The process is similar to using adhesive tabs, but with a few key differences that’ll help you get the strongest bond possible.
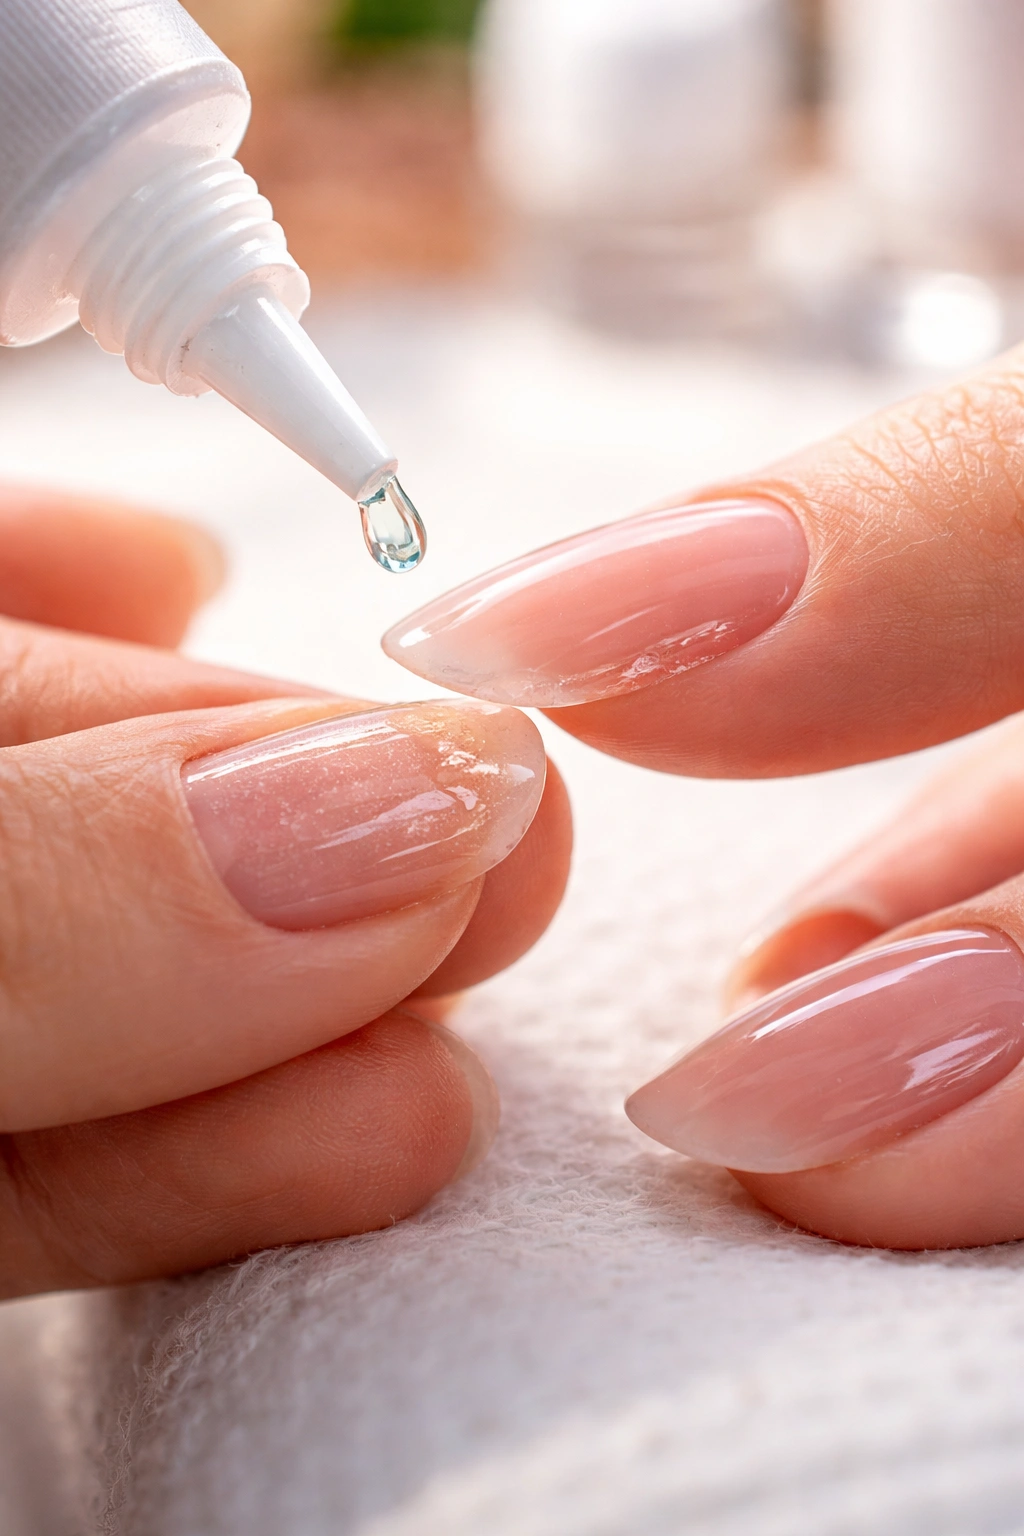
Apply a thin layer of glue to both your natural nail and the underside of the press-on nail. A small drop is all you need—seriously. Too much glue will squirt out the sides when you press down, creating a mess and potentially gluing your skin to your nail (not fun).
If you’re using a brush-on nail glue, paint a thin, even layer across the press-on nail, leaving a small margin around the edges. This prevents glue from spreading onto your skin. Let the glue sit for just a few seconds until it gets slightly tacky—this is the sweet spot for the strongest bond.
The Press-and-Hold Technique
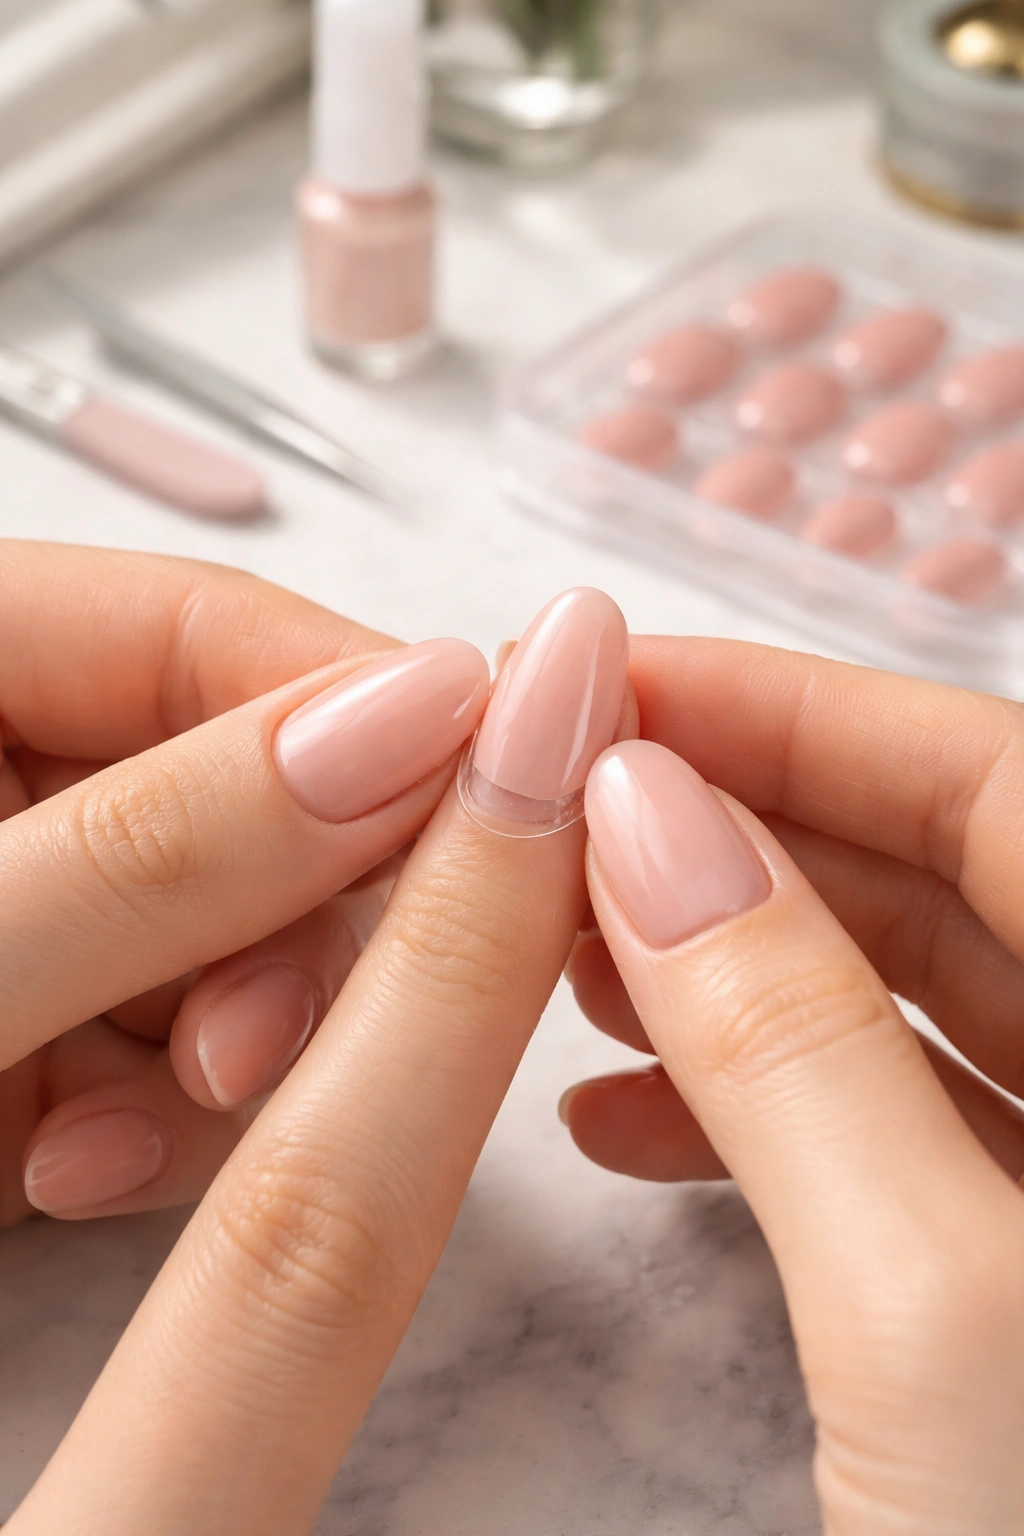
Position the press-on nail at a 45-degree angle, starting just above your cuticle. Roll it down onto your natural nail, pressing firmly from cuticle to tip. This rolling motion helps push out any air bubbles that could cause lifting later.
Once the nail is in position, press down firmly and hold for a full 20-30 seconds. Some glues set faster than others, but giving it extra time never hurts. You can use your other hand or even an orange stick to apply pressure (which prevents you from accidentally gluing your fingers together).
Work on one nail at a time, completing the entire glue-and-press process before moving to the next finger. Trying to glue multiple nails at once is a recipe for disaster—trust me on this one.
Dealing with Excess Glue
If glue does squeeze out from under the nail, don’t panic. Wait for it to dry completely (trying to wipe it away when wet will just spread it around). Once dry, you can gently buff it away with a nail file or carefully remove it with an orange stick.
You can also prevent this by applying glue in a thin line down the center of the press-on nail, staying away from the edges. When you press it down, the glue will spread naturally without overflow.
Shaping and Finishing Your Fake Nails

Once all your press-on nails are securely attached, it’s time to customize them to your preferred length and shape. This is where you get to play nail artist and create your perfect look.
Start by checking the length. If your press-ons are longer than you want, use nail clippers to trim them down. Cut straight across, removing small amounts at a time—you can always take off more, but you can’t put it back. Leave them slightly longer than your target length since you’ll file them next.
Grab your nail file and shape each nail to your desired style. Popular shapes include square, rounded, oval, almond, coffin, and stiletto. File in one direction rather than sawing back and forth, which can cause the fake nail to peel or splinter.
Press-on nails are more rigid than natural nails, so you’ll want to use a coarser nail file (around 180 grit works well). Take your time here—this is what makes your fake nails look professionally done rather than obviously artificial.
Smoothing the Edges
Run your finger along the edges where the press-on nail meets your skin. Feel any rough spots? File them smooth. The goal is a seamless transition from nail to skin, with no sharp edges that might catch on things or snag.
If you notice a visible line where the press-on nail meets your natural nail, you can very gently buff this area to blend the two surfaces. Be careful not to buff too aggressively, which could weaken the bond.
For an extra-polished finish, you can apply a clear top coat over the entire nail. This adds shine, smooths out any imperfections, and can even help seal the edges for longer wear.
Pro Tips for Making Press-On Nails Last Longer
You’ve put in the work to apply your fake nails perfectly. Now let’s talk about how to keep them looking fresh for as long as possible.
Avoid water for the first few hours after application. This is crucial. Give the adhesive time to fully cure and create its strongest bond. That means no washing dishes, no long showers, and no hand-washing clothes for at least 2-3 hours (ideally 6 hours).
After that initial curing period, water is still your enemy. Wear gloves when you’re washing dishes, cleaning, or doing anything that involves prolonged water exposure. Water seeps under the nails and weakens the adhesive, which leads to lifting and ultimately, pop-offs.
Apply cuticle oil daily—but keep it away from the edges of your press-on nails. The oil is fantastic for moisturizing your cuticles and keeping the skin around your nails healthy, but if it gets under the press-on, it’ll break down the adhesive. Apply it carefully to just the cuticle area and wipe away any excess.
What Not to Do
Don’t use your nails as tools. Opening cans, peeling off stickers, scratching lottery tickets—all of these put stress on the press-on nails and can cause them to pop off or break. Use your fingertips or an actual tool instead.
Be mindful of heat. Hot water from showers, hot tubs, and saunas can soften the adhesive. If you’re planning a spa day, maybe schedule it before your nail application rather than after.
If you notice a nail starting to lift at the edges, don’t ignore it. You can carefully apply a tiny drop of nail glue under the lifted area, press it down, and hold for 30 seconds. This quick fix can add several days to your manicure.
How to Remove Press-On Nails the Right Way
When it’s time to say goodbye to your press-on nails (or when you’re ready for a new set), proper removal is just as important as proper application. Ripping them off will damage your natural nails—possibly severely—so please don’t do it, no matter how tempting it is.
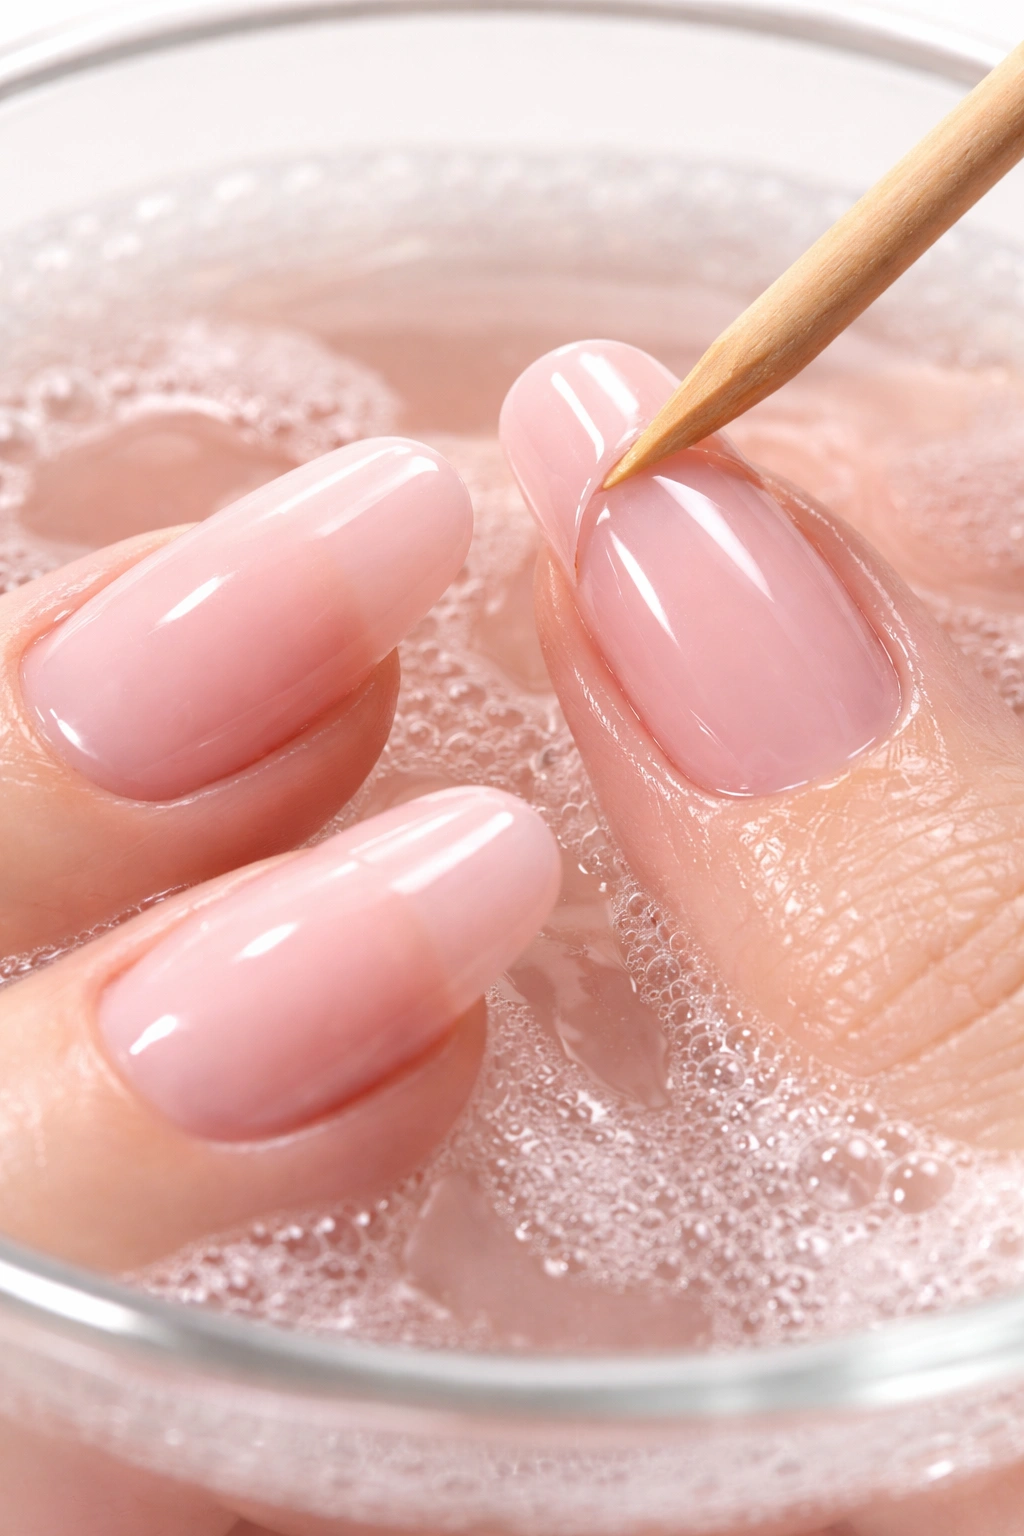
The soak method is your safest bet. Fill a bowl with warm (not hot) soapy water and soak your nails for 15-20 minutes. Add a little dish soap or body wash to the water. This softens the adhesive and loosens the bond between the press-on and your natural nail.
After soaking, the press-ons should feel loose. Gently slide an orange stick or cuticle pusher under the edge of the nail, starting at the cuticle area. Work slowly and carefully, wiggling the stick back and forth to gradually lift the nail. If it’s not coming off easily, soak for another 5-10 minutes.
For glued-on nails that are really stuck, you might need to use acetone. Soak cotton pads in acetone, place them on your nails, and wrap each fingertip in aluminum foil. Wait 10-15 minutes, then try removing the nails again with an orange stick.
Post-Removal Nail Care
Once the press-ons are off, you’ll probably notice some residual glue on your natural nails. Don’t pick at it. Either let it wear off naturally over the next day or two, or gently buff it away with a fine-grit buffer.
Give your natural nails a break before applying another set. A day or two is usually sufficient. During this time, moisturize your nails and cuticles with oil or hand cream to restore any moisture that was lost.
If your natural nails feel weak or brittle after removal, consider using a nail strengthener for a week before applying your next set of press-ons.
Troubleshooting Common Press-On Nail Issues

Even with perfect application, sometimes things don’t go quite as planned. Here’s how to handle the most common press-on nail problems.
My nails keep popping off: This is usually a prep issue. Your nails were probably too oily or wet when you applied the press-ons. Next time, be more aggressive with the alcohol wipe-down and make sure your nails are completely dry. Also check that you’re using enough adhesive and holding the nails down long enough.
There’s a gap at my cuticle: This happens when the press-on nail doesn’t fit properly or wasn’t pressed down close enough to the cuticle during application. You can fill the gap with nail glue (carefully) or just embrace it and hope no one notices. For next time, make sure you’re positioning the nail as close to your cuticle as possible without actually touching it.
The edges keep lifting: Edge lifting happens when water or oil gets under the nail. Apply a tiny drop of glue under the lifted area and press down firmly. Going forward, be more careful about water exposure and keep cuticle oil away from the nail edges.
Dealing with Nail Pain
If your press-on nails hurt, they’re either too tight (you sized down too much) or you applied them directly on your cuticle. The nail should never be pressing on your cuticle or skin—leave that tiny gap. If the pain persists, remove the nail immediately to prevent damage to your nail bed.
Some people experience a brief pinching sensation when they first apply press-on nails with strong glue. This usually fades within an hour as the glue fully cures. If it doesn’t, or if the pain gets worse, remove the nail.
Decorating and Customizing Your Press-On Nails
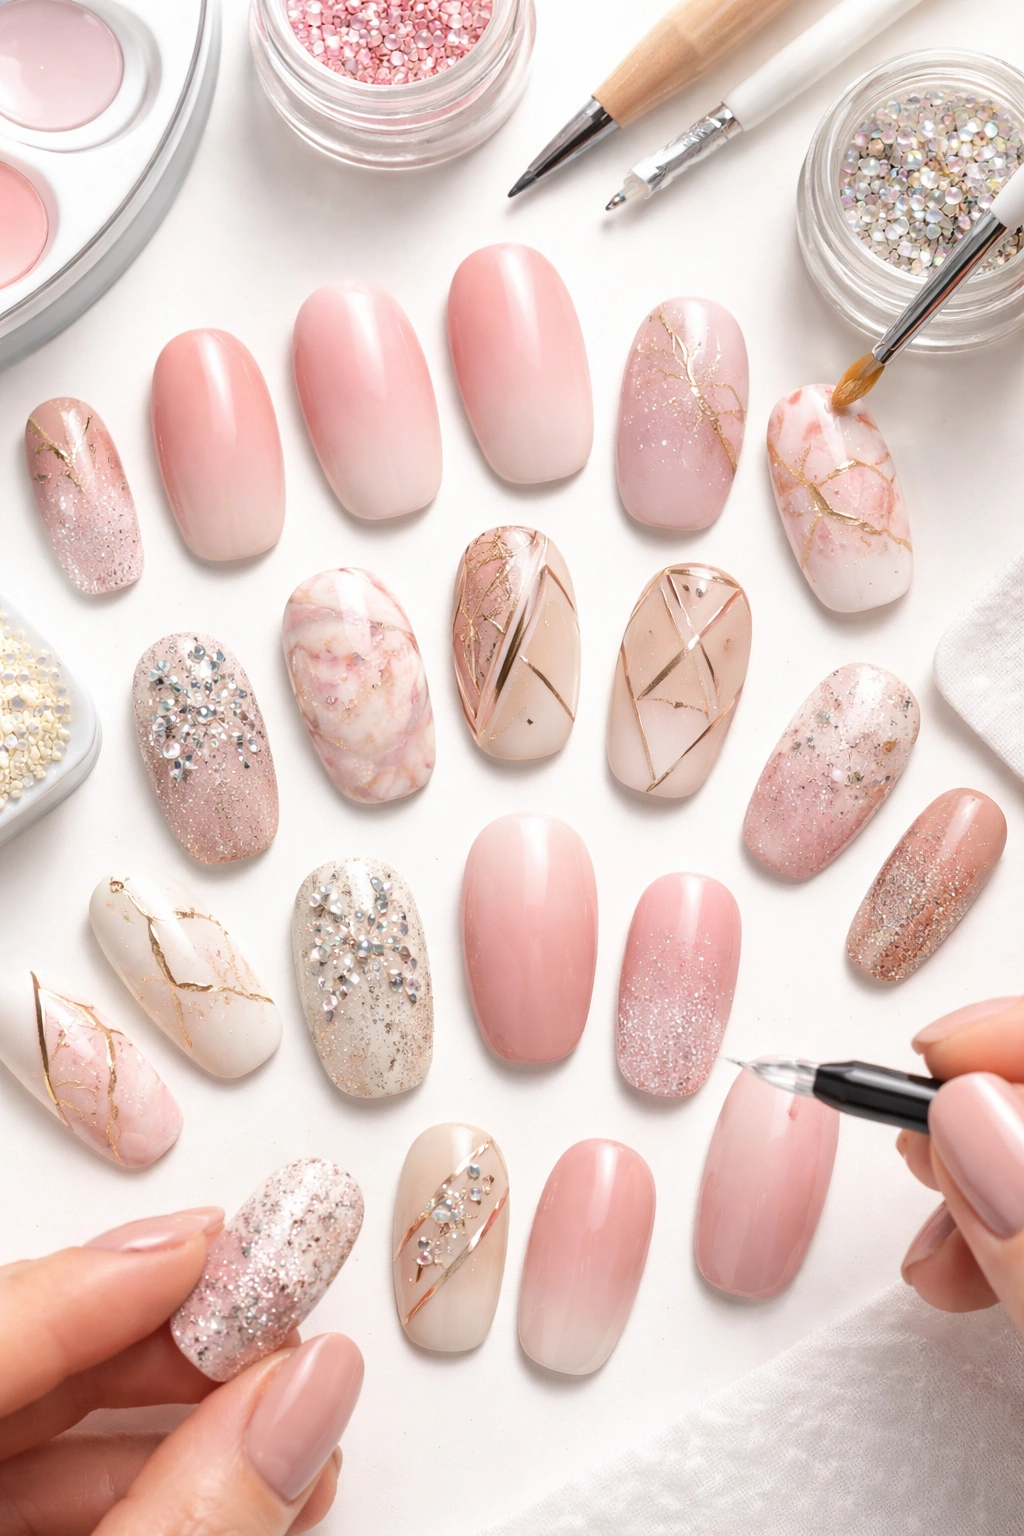
One of the best things about fake nails is the blank canvas they provide. You can paint them, embellish them, or leave them as-is if they came pre-decorated.
If you’re painting bare press-on nails, you can actually do it before you apply them. This makes the process so much easier since you’re working with a loose nail rather than trying to paint your non-dominant hand. Let them dry completely (give it at least an hour, or overnight to be safe) before applying.
You can create any nail art you like: ombre effects, French tips, marble designs, geometric patterns, or intricate hand-painted details. Rhinestones, glitter, foils, and nail stickers all work beautifully on press-on nails too.
Seal everything with a good top coat to protect your design and add shine. The top coat also helps smooth out any texture from embellishments or layered polish.
Why Press-On Nails Are Worth Your Time
Let’s be real: press-on nails have come a long way from those plasticky, obviously-fake sets from decades past. Modern press-ons are thin, flexible, and available in countless styles that rival anything you’d see in a salon.
They’re also significantly cheaper. A salon set of acrylics or gels can cost $50-$100 or more, and you need to go back every 2-3 weeks for fills. A pack of quality press-ons costs $10-$25 and can be reused multiple times if you remove them carefully.
The convenience factor can’t be overstated either. No appointment needed, no two-hour time commitment, no inhaling strong chemical fumes in a crowded salon. You can apply press-on nails while binge-watching your favorite show, and if you decide you hate them, you can take them off the same day.
For people who are tough on their nails—mechanics, nurses, anyone who works with their hands—press-ons offer a way to have beautiful nails for special occasions without the commitment of permanent extensions.
Wrapping Up

Applying press-on nails at home isn’t difficult, but it does require patience and attention to detail. The key takeaways: prep thoroughly, size carefully, apply with steady pressure, and avoid water for the first few hours. Do these things, and you’ll have gorgeous nails that last.
Start with a more affordable brand while you’re learning the process. Once you’ve got the technique down, you can experiment with higher-end press-ons or get creative with custom designs. You’ll probably mess up your first application—most people do. But by your second or third try, you’ll be applying fake nails like you’ve been doing it for years.
The best part? Once you’ve mastered the technique, you’ll never look at your nail budget the same way again. Those salon visits start to seem less necessary when you can achieve the same look at home in 20 minutes for a fraction of the price.
