

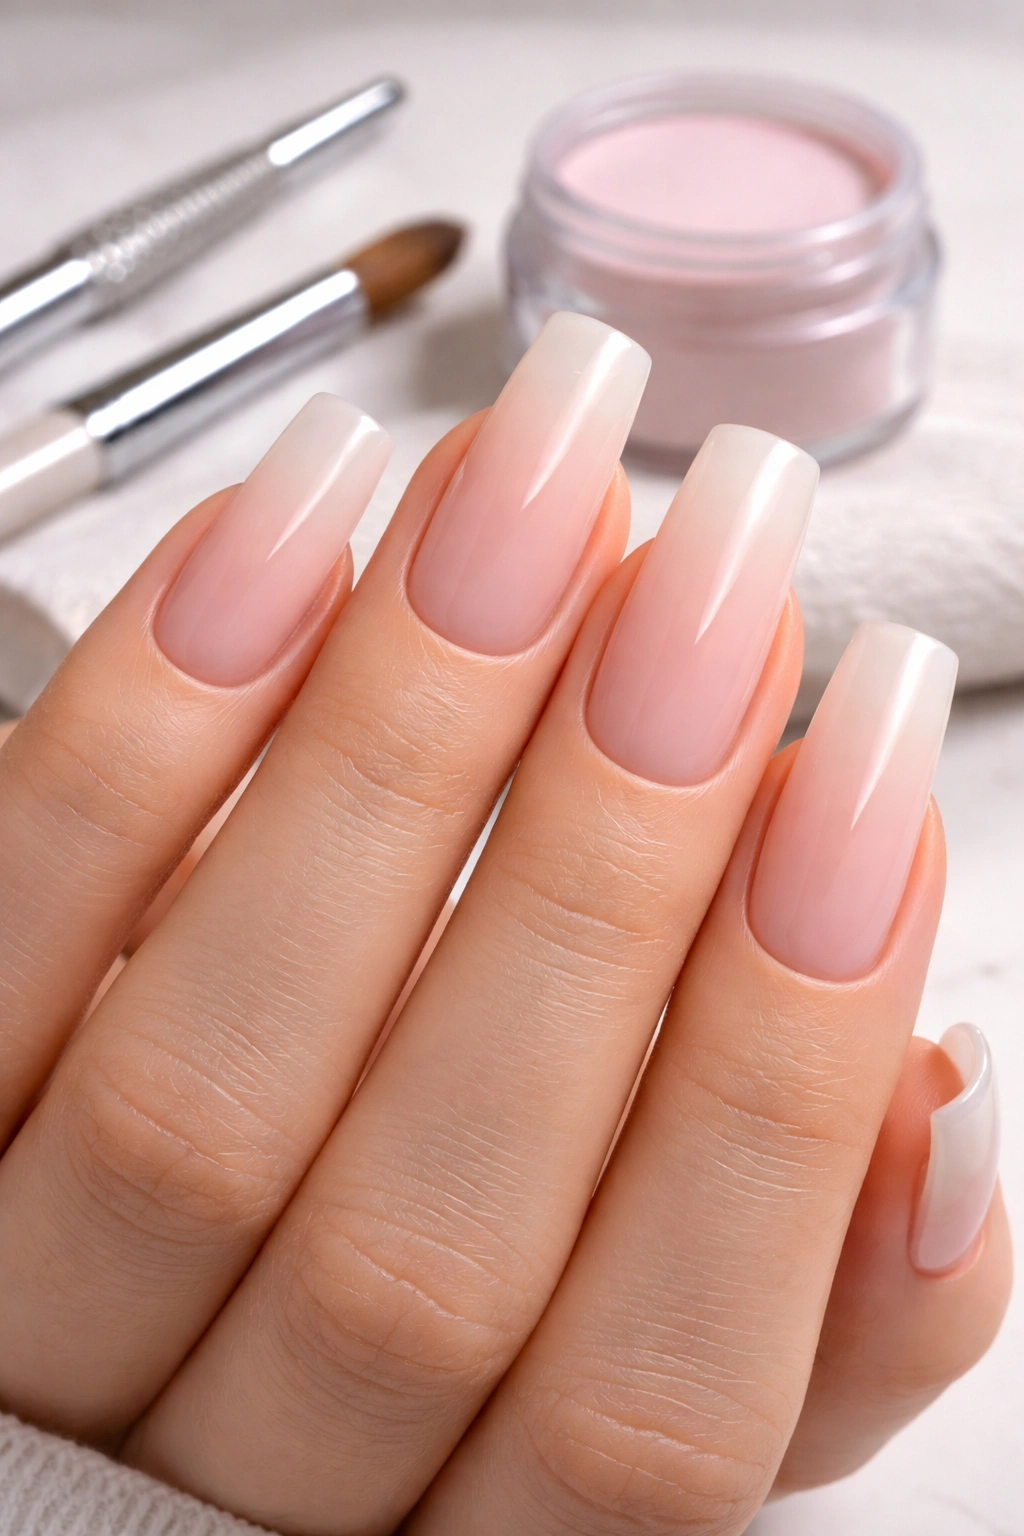
Squoval nails have become the go-to shape for anyone wanting a modern, versatile look that balances the elegance of an oval with the edginess of a square. If you’re thinking about getting long squoval nails using acrylics, you’re choosing a shape that’s flattering across different hand shapes, surprisingly durable, and endlessly customizable with color and design. The appeal is real — this hybrid shape works for everyday wear, professional settings, and special occasions without feeling overdone or impractical.
The challenge, though, is that achieving the perfect squoval shape with acrylics requires understanding not just the final look you want, but the application techniques, material choices, and maintenance habits that make long squoval nails actually work. Get the angle wrong, and you end up with something that looks more like a coffin nail or a standard oval. Skip the proper maintenance, and your beautiful set starts lifting, breaking, or looking uneven after just a few weeks. This guide walks you through every step of creating, applying, and maintaining long squoval acrylic nails that look professionally done and last for weeks without complaint.
Understanding Squoval Nail Shape and Its Appeal
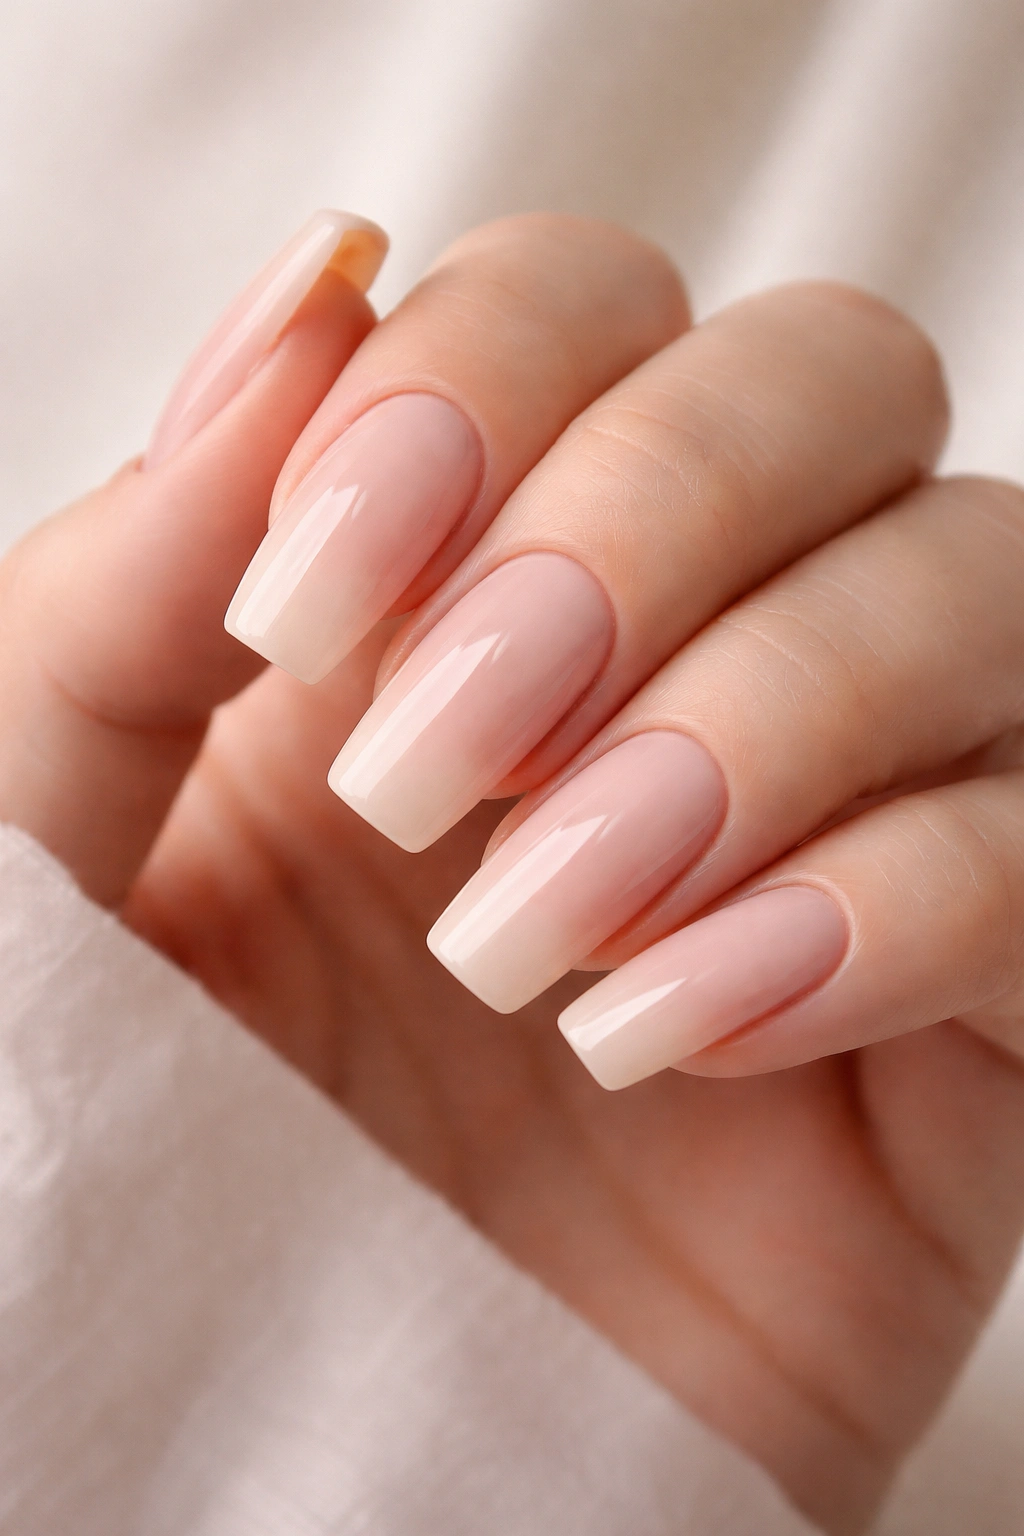
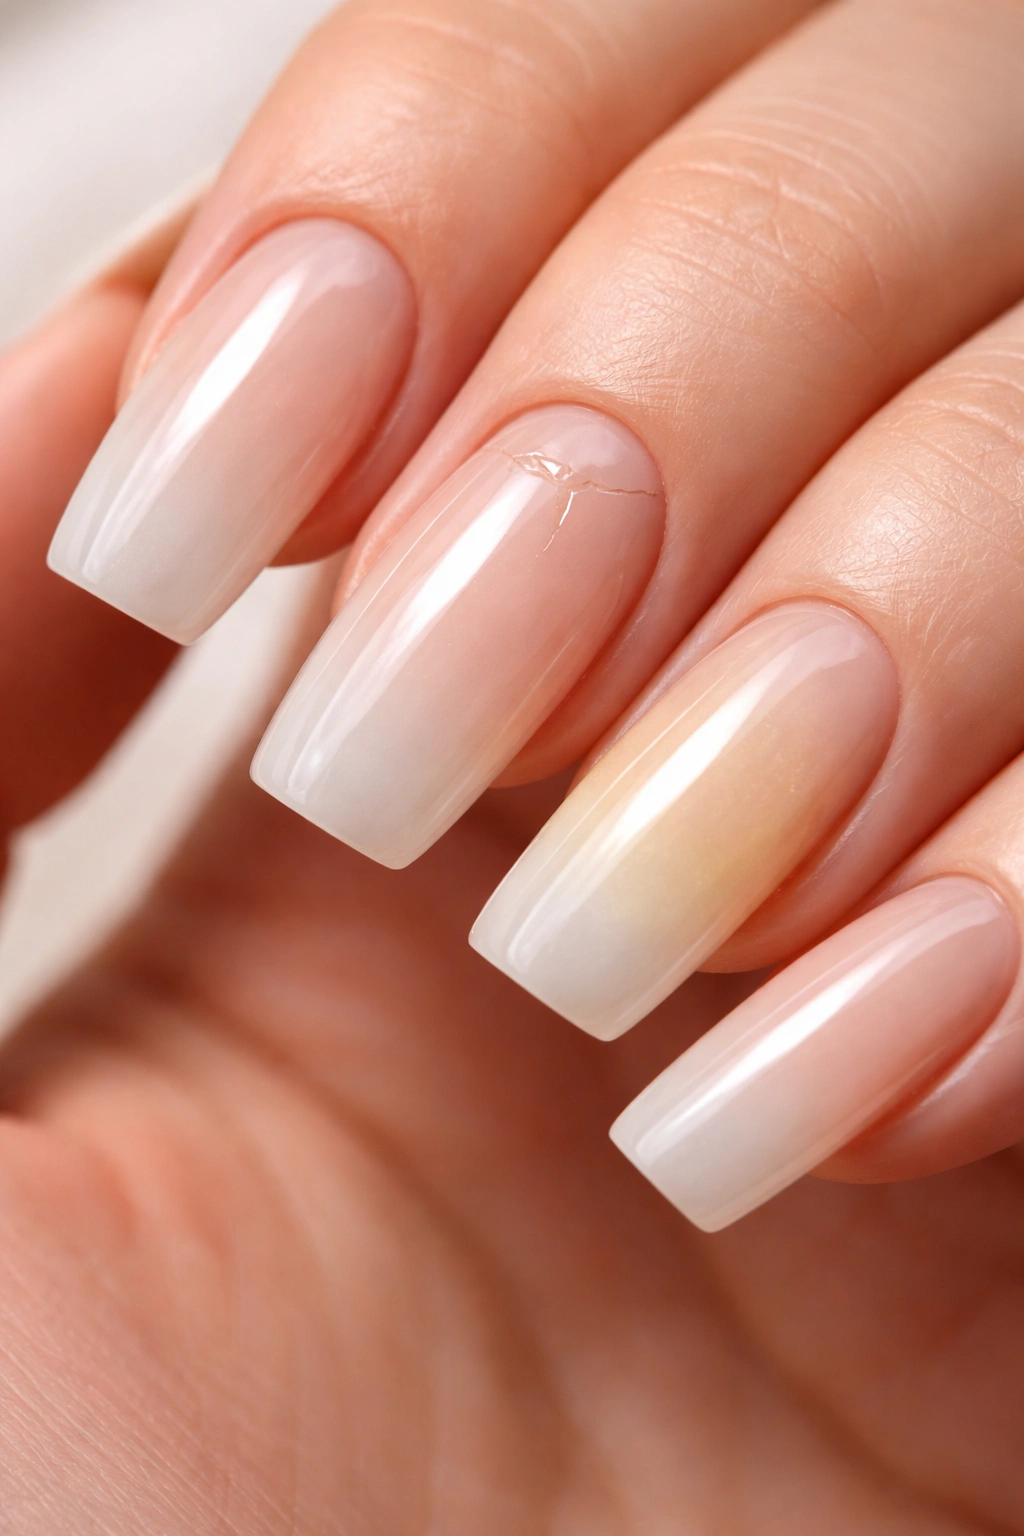
The squoval shape sits perfectly between a square nail and an oval nail—it has the straight, defined edges of a square along the sides but rounded corners rather than sharp, blunt edges. This hybrid shape works beautifully for long nails because the rounded corners prevent the brittleness that can come with long, sharply-cornered square nails, while the defined sides give you more structure and presence than a purely oval shape.
What makes squoval so popular right now is its versatility. It works equally well on short, medium, and long nail beds, which means you can get the look whether you’re growing out your natural nails or going full-length with tips. The shape photographs beautifully, making your nails look intentional and polished in photos and in person. The rounded corners also feel more comfortable when you’re using your hands for daily tasks—you won’t catch those sharp corners on fabric or accidentally stab your palm when making a fist.
Squoval nails also offer real practical advantages over other long nail shapes. The defined sides give you a larger canvas for nail art and designs without the visual heaviness of a really wide, oval nail. The rounded corners are far less likely to break or chip than sharp square corners, which means your long nails stay intact longer. And because the shape isn’t as dramatic as a stiletto or coffin nail, it reads as more wearable and approachable, which is why you see it so often on manicurists, estheticians, and other professionals who need their nails to look great but stay functional.
Gathering the Right Tools and Materials
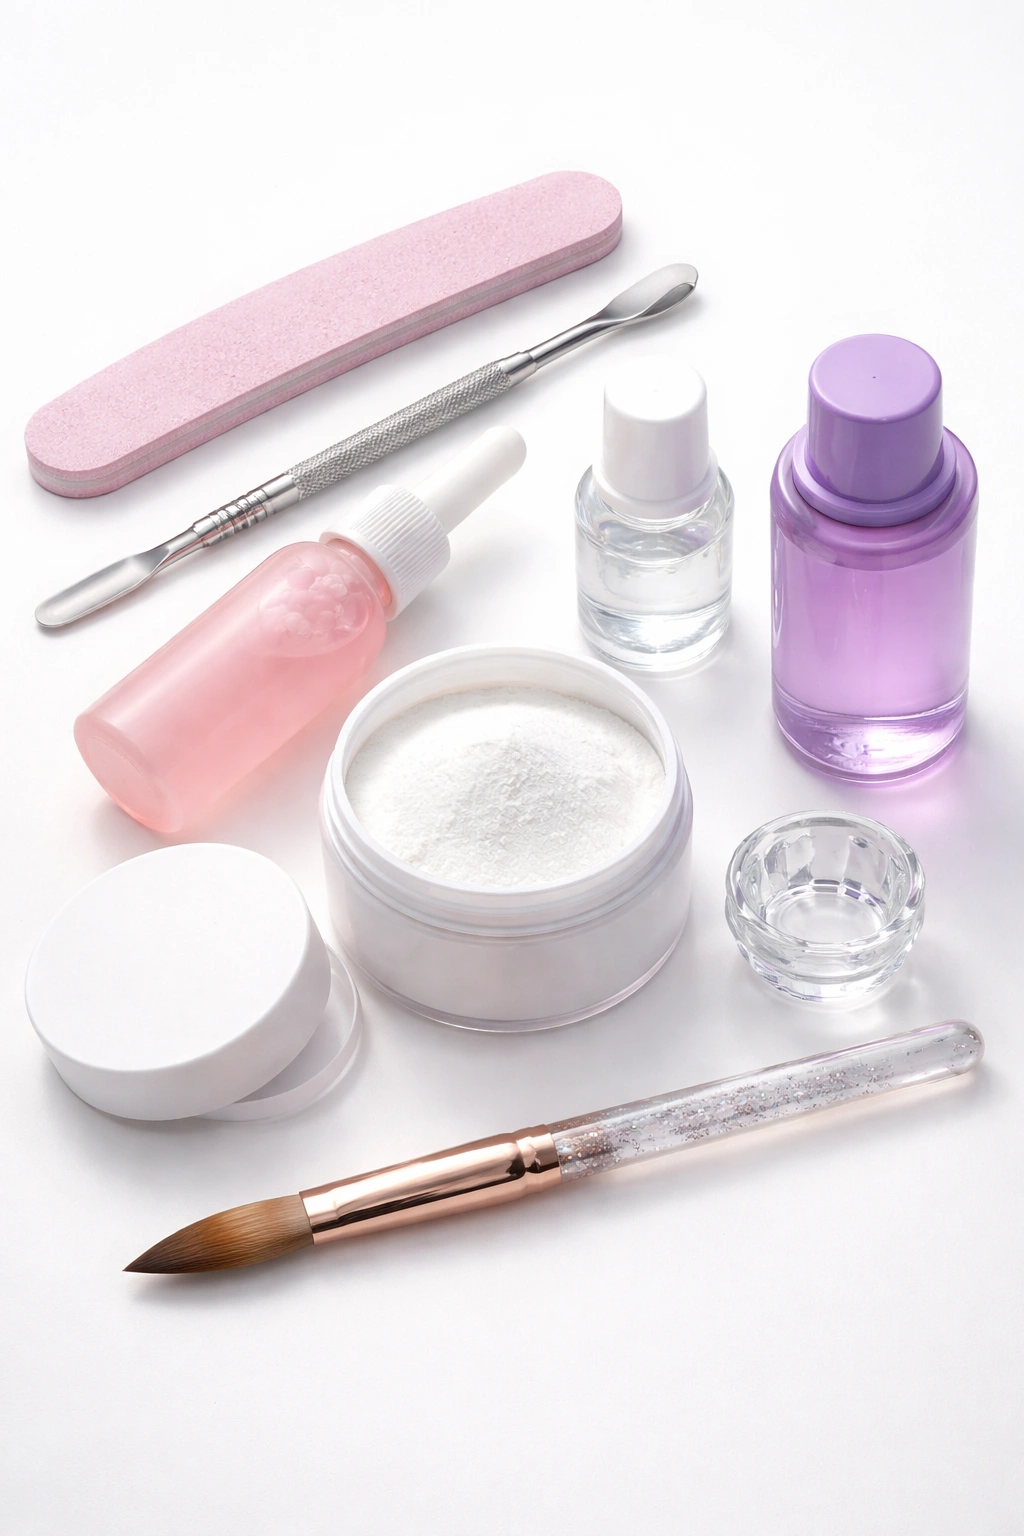
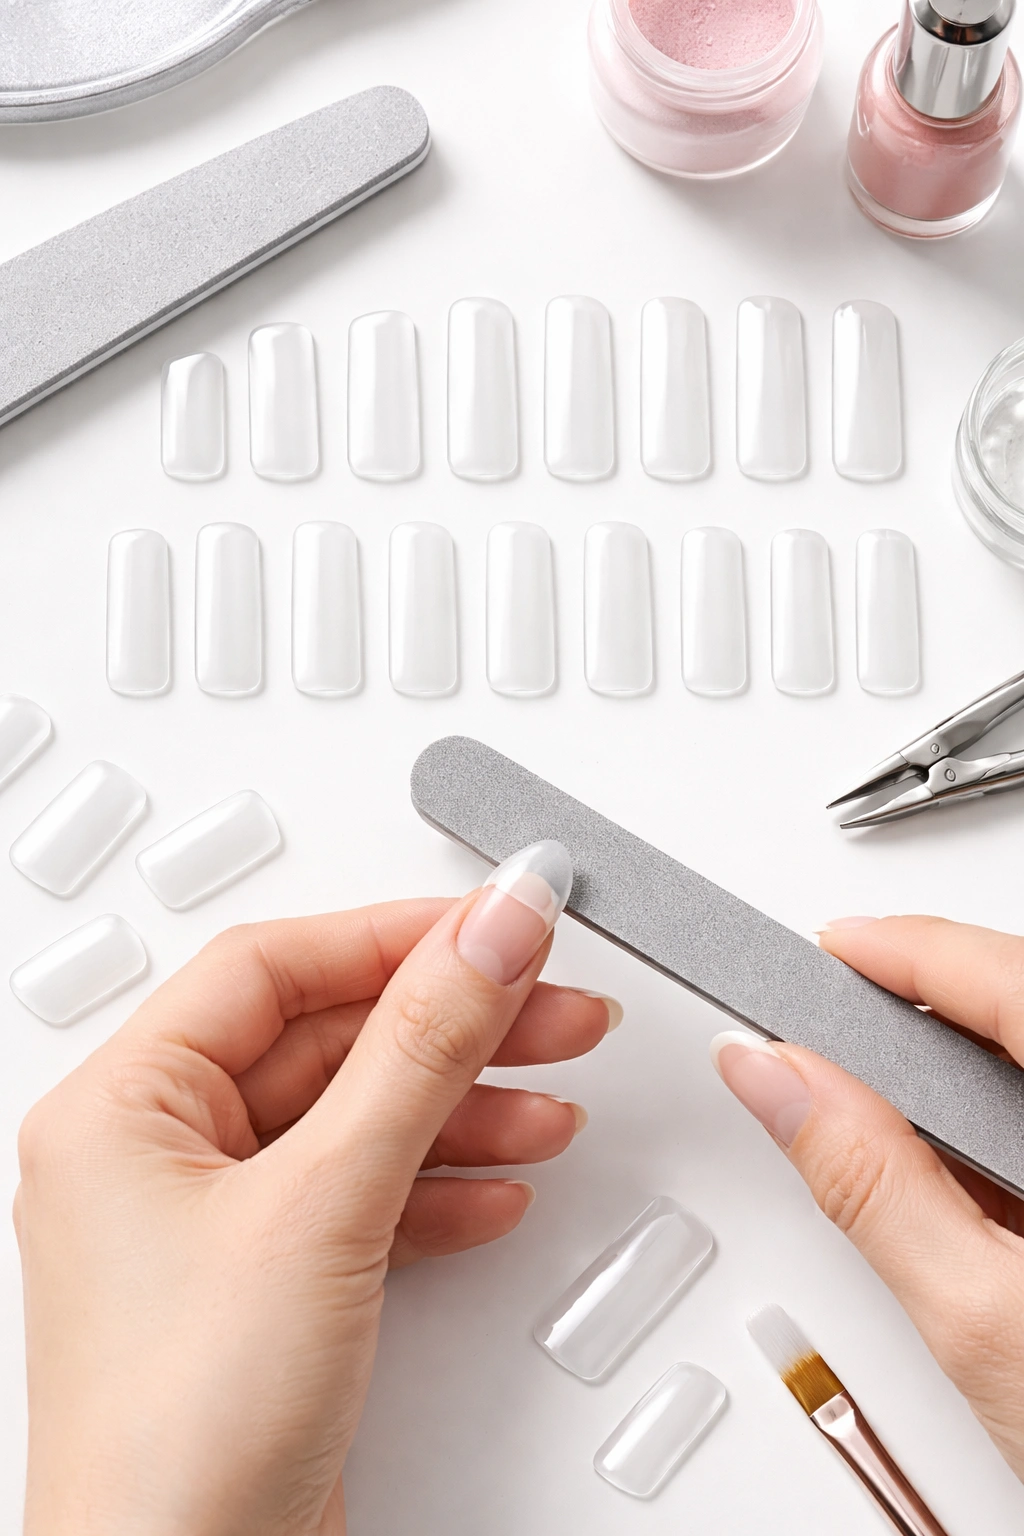
Building long squoval acrylic nails properly requires having the right supplies on hand before you start—trying to improvise or work with old, dried-out products will sabotage even the best technique. Your toolkit needs to cover prep, application, shaping, and finishing, with each tool serving a specific purpose in the process.
For prep work, you’ll need a nail file (preferably a 180-grit file for your natural nails), a metal pusher to gently lift the cuticle, and cuticle remover to soften and dissolve the cuticle layer. Have nail dehydrator or rubbing alcohol on hand to remove moisture and oils from the nail plate—this step is non-negotiable for making sure acrylics bond properly.
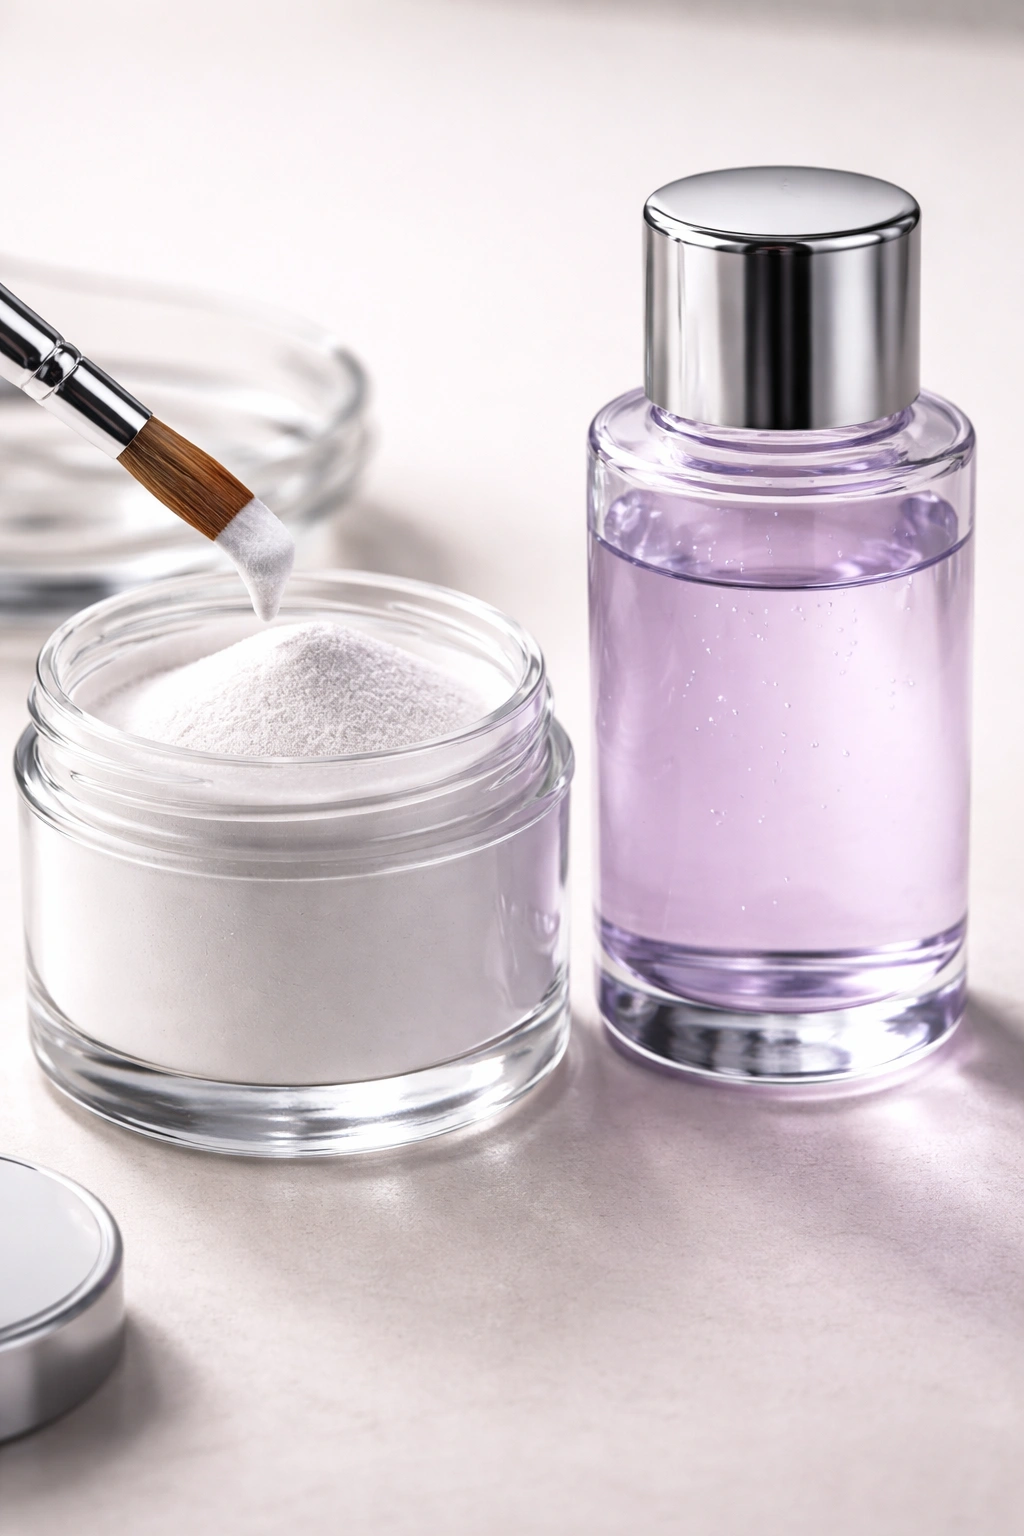
For the actual acrylic application, you need acrylic powder and acrylic liquid (monomer) that are both high-quality and fresh. These liquids can evaporate or separate over time, so older bottles become less effective and more prone to causing lifting. You’ll also need a professional acrylic brush—typically a #8, #10, or #12 depending on your hand size—that holds the bead of acrylic well without flattening too much. A dappen dish (the small glass or ceramic container) holds your monomer during application.
For shaping and contouring, gather several files with different grits: a coarse 80-grit file for initial shaping and removing excess product, a medium 150-grit file for refining the shape, and a fine 220-grit or 280-grit file for smoothing and preparing the nail for polish. A nail buffer helps create that smooth, gleaming surface that makes nails look professionally done. A three-way buffer (with coarse, medium, and fine sides) is a single tool that handles all three grits efficiently.
You’ll also want a nail drill (either electric or hand-held) with appropriate bits for shaping, smoothing, and pre-buffing work. A drill drastically speeds up the shaping process and gives you more control than filing alone. Finally, have a dust collector or shop vacuum nearby—acrylic dust is fine and easily inhaled, so proper ventilation or collection is essential for your health.
Preparing Your Natural Nails Properly
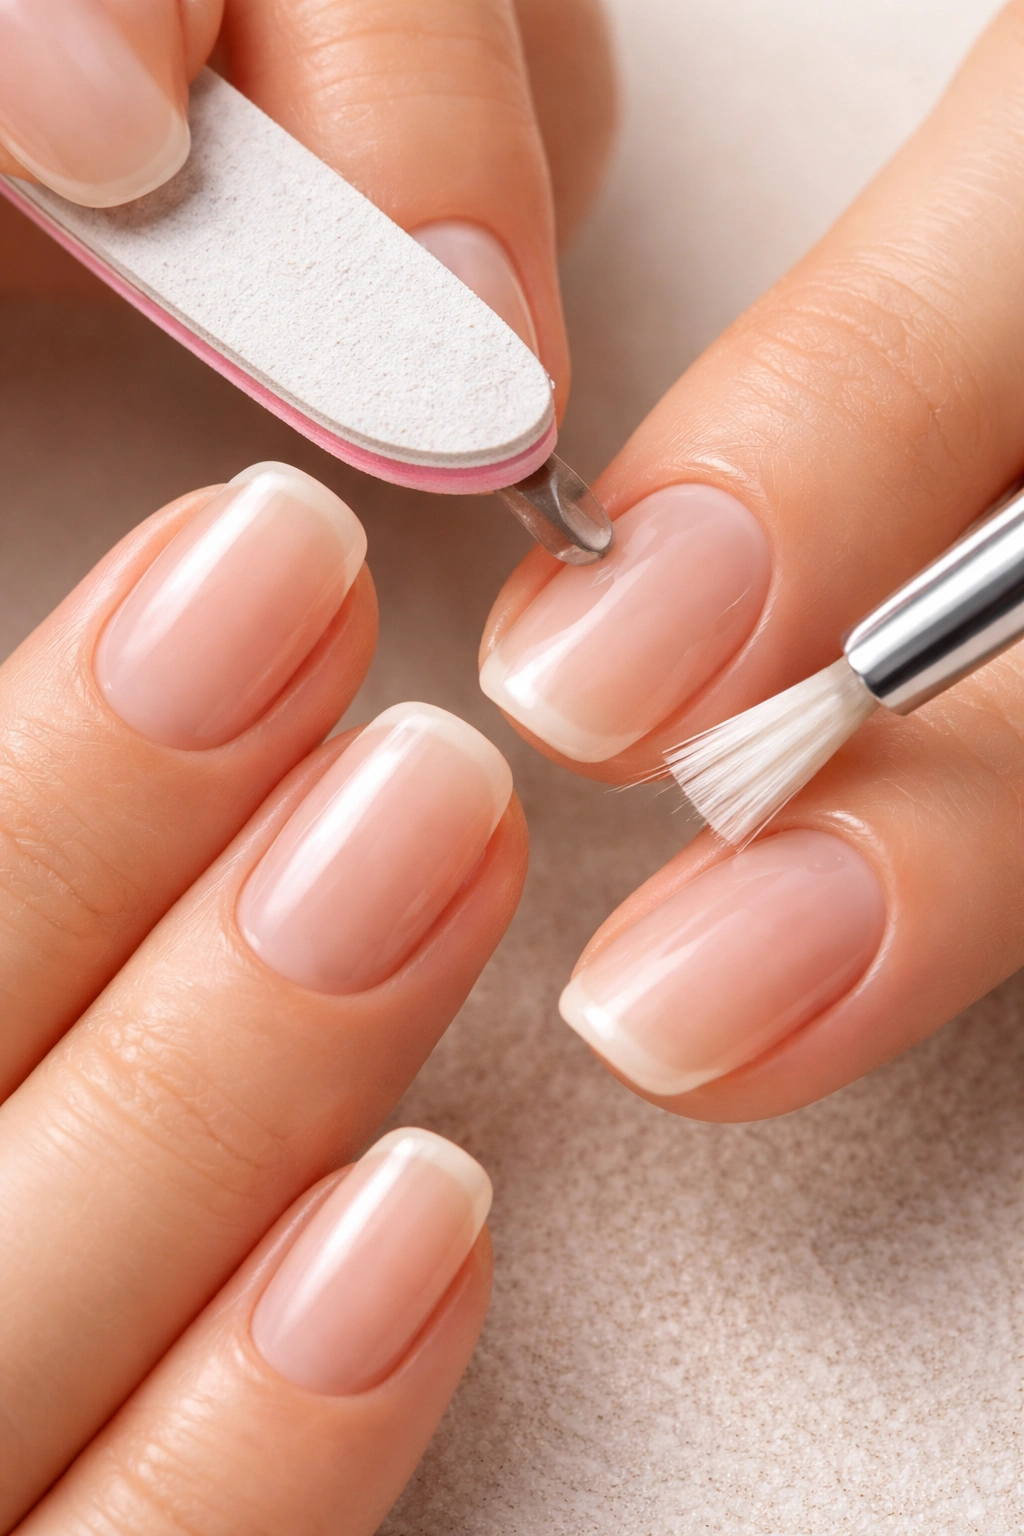
The foundation of any successful acrylic set is properly prepped natural nails. Skipping or rushing this step is the #1 reason acrylics lift early or separate from the nail plate. Proper prep doesn’t take much extra time, but it makes an enormous difference in how long your nails stay attached and how good they look.
Start by trimming your natural nails short—about 1-2mm past the fingertip is ideal. Even if you’re planning long nails, the acrylic will add the length, so your natural nails should be short enough that they’re not doing any load-bearing work. File them smooth with a gentle shape (slightly rounded or straight), and then push back your cuticles using a metal pusher and a cuticle remover. The cuticle isn’t just cosmetic—it’s a physical barrier between your nail plate and the acrylic, and it needs to be pushed back so the acrylic can bond directly to exposed nail plate.
Here’s the critical step most people rush: dehydrating the nail plate completely. Apply nail dehydrator or rubbing alcohol to each nail and let it sit for a moment, then wipe it away. This removes all the oils, moisture, and residue from your skin that would create a barrier between the acrylic and the nail plate. Moisture is the enemy of acrylic adhesion—acrylics need a dry surface to bond properly.
Finally, if you have very smooth, slippery nails (some people naturally do), gently buff the surface of each nail with a fine buffer. You’re not trying to rough it up dramatically—just creating enough micro-texture that the acrylic has something to grip. You should barely feel a difference when you touch it. Wipe away all the dust with a lint-free wipe and you’re ready to size your tips.
Selecting the Perfect Acrylic Powder and Liquid
The quality of your acrylic powder and liquid directly affects how your nails look, how long they last, and how easy they are to work with. Professional-grade acrylics are worth the investment—drugstore or heavily discounted acrylics often contain fillers and lower-quality polymers that don’t hold up as well, yellowing more easily and breaking down faster.
Look for acrylic powder that’s specifically formulated for sculpting with tips (as opposed to powder meant for dipping, which has a different consistency). The powder should be finely milled and consistent in color. High-quality powders mix evenly with the liquid and don’t clump or separate. Brands that are well-regarded among nail professionals tend to be more consistent and reliable than generic brands—you’re paying for quality, but you’re also paying for the fact that these products have been tested and refined.
The acrylic liquid (monomer) matters just as much as the powder. Fresh, professional-grade liquid has a smooth, even viscosity and mixes well with the powder to form a bead that’s easy to work with—not too thick, not too runny. Old or evaporated liquid becomes too thick and hard to work with. Low-quality liquid often has a much stronger smell and can cause irritation or allergic reactions in both you and your clients.
Pro tip: Store both your powder and liquid in a cool, dark place with the caps sealed tightly. Heat, light, and air exposure all degrade the products faster. Keep a small work bottle of liquid that you use daily and a larger storage bottle, so you’re not constantly opening and closing your main container.
The ratio of powder to liquid matters too. This is called the bead consistency—you’re looking for a bead that’s cohesive and holds its shape without being too wet or too dry. Too much powder creates a dry, crumbly bead that’s hard to work with. Too much liquid creates a runny bead that takes forever to set and tends to create too-thin nails that break easily. The perfect ratio is something you’ll develop a feel for with practice, but generally, you want a bead that holds together but flows slightly onto the nail.
Filing and Shaping Your Nail Tips to Squoval
Getting the right size tip is the foundation of achieving a perfect squoval shape. Tips that are too big will feel bulky and won’t adhere properly across the entire tip. Tips that are too small leave gaps at the sides and won’t give you enough nail to work with. The tip should cover your entire nail width and sit flush against the nail plate with no gaps.
Once you’ve selected the right size tip for each finger, it’s time to begin shaping it toward that perfect squoval form. This is where patience and precision matter—rushing the shaping phase will result in a shape that just doesn’t look right.
The Initial Filing Approach
Start with your coarse 80-grit file and establish the basic squoval outline. File the sides of the tip straight down from the cuticle area all the way to near the free edge, creating those defined straight sides. Then, instead of coming to a sharp corner, angle your file and round off the corners in one smooth motion—not too rounded (that would make it look oval), but rounded enough that the edges are soft, not pointed.
The squoval shape should feel like one continuous, elegant line from the side view. When you look at the nail from the front, you should see straight lines on both sides with only subtle rounding at the tip. This is harder to explain than it is to do once you see it, but the key is thinking about that balance: straight sides with only a hint of roundness at the corners.
Refining the Length and Taper
As you file, you’re also establishing the length and the taper. Taper refers to how the nail gets narrower toward the free edge—a good taper makes the nail look more elegant and prevents that blocky look. File so that the nail is slightly narrower at the tip than it is at the base, but not dramatically so. You want the narrowing to be subtle and gradual.
The length should be proportional to your hand size and finger length. As a general guideline, the free edge (the part extending past the fingertip) should be about one-third the length of the nail bed itself. Longer is always an option if that’s the look you’re going for, but the classic long squoval is usually somewhere in the 2-3mm to 4-5mm range in terms of free edge length.
Using a Nail Drill for Efficiency
Once you’ve established the general shape with files, a nail drill with a medium-grit bit makes the refinement process much faster and more precise. Use a barrel bit or tapered bit to smooth out file lines and perfect the angle of the sides. Work slowly and deliberately—it’s very easy to remove too much material with a drill. The drill is your finishing tool after filing, not your primary shaping tool.
Applying the Base Layer of Acrylic
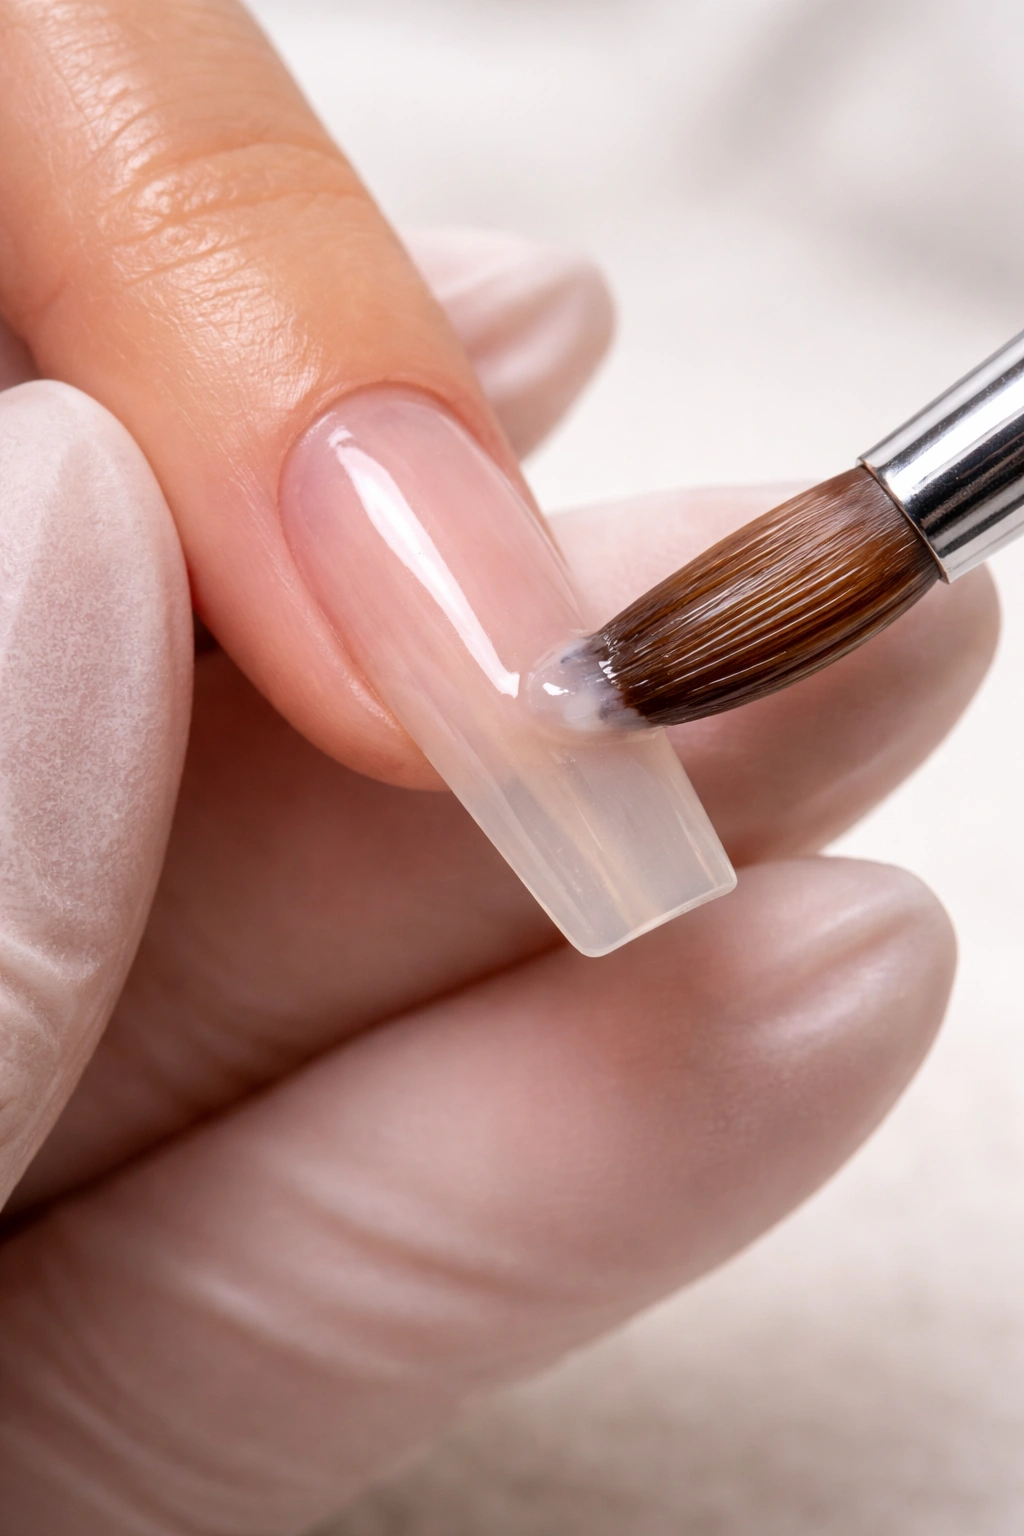
The base layer—also called the foundation or first coat—is critical because it’s what holds everything together. This layer bonds directly to your prepared natural nail and to the tip, creating a secure base for all the acrylic that comes after.
Mix your acrylic bead at the proper ratio and apply it first to the seam where the tip meets your natural nail. This connection point is where acrylics most commonly separate, so reinforcing it from the start is smart strategy. Apply a small bead along the entire seam and feather it upward onto your natural nail using gentle brush strokes. You’re trying to create a smooth transition where the acrylic gradually thins out as it moves up the nail bed.
Then apply a bead to the tip itself, spreading it across the tip area and smoothing it down. As this first layer begins to set (but before it hardens completely), use your brush to blend and feather the acrylic so there are no ridges or thick spots. The goal is an even, smooth base layer that’s thick enough to be strong but thin enough that it looks natural.
The base layer should be quite thin—you’re not trying to build all your thickness here. That comes in subsequent layers. A thin, well-adhered base is stronger than a thick, uneven one because it bonds more completely to the nail plate. Allow this layer to cure fully before moving to the next step.
Building and Sculpting the Acrylic Nail Structure
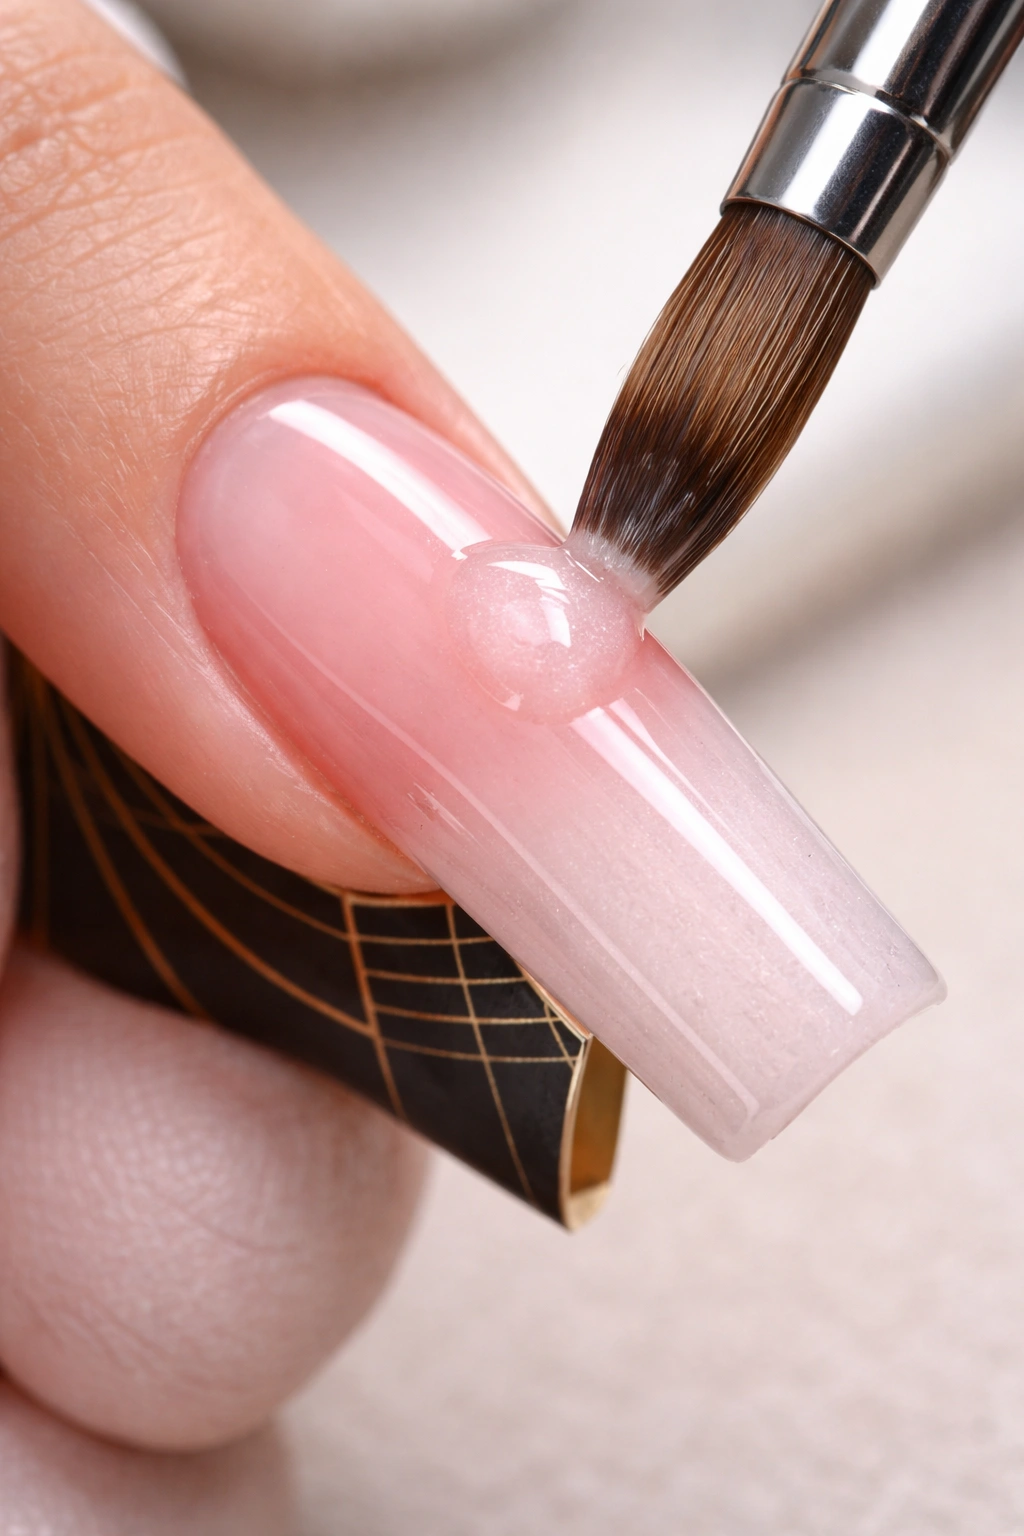
Once your base layer is set, you’re ready to build up the bulk of the acrylic that will create the strength and thickness of long nails. Long nails need enough material to be durable, but they also need to be sculpted carefully so they don’t look thick or clunky.
Apply your second bead to the center of the nail, from cuticle to tip. This is where you can add more product than in the base layer because you’re building thickness. Smooth and feather this layer just as you did the first one, blending the sides and evening out any ridges. Focus on creating a slightly higher arch down the center of the nail—this is called the apex, and it’s what gives long nails their structural strength.
The apex is the thickest part of the acrylic, positioned roughly one-third of the way from the tip toward the cuticle. This thick point acts like a beam, supporting the long free edge and preventing it from breaking. If you don’t build an apex, long nails will be weak and prone to cracking. If your apex is too far forward (too close to the tip), it creates an awkward, uncomfortable nail that feels unstable. If it’s too far back, the tip end won’t have enough support.
Creating the Right Curve and Contour
As you apply layers, you’re also sculpting the three-dimensional shape. From the side, a well-sculpted acrylic nail should have a gentle C-curve—that’s the downward arch of the nail from cuticle to tip. This curve is functional (it adds strength) and aesthetic (it looks elegant). From above, the nail should be flat to slightly rounded, with no sharp ridges down the center.
Apply 2-3 layers total, allowing each to cure fully before adding the next. Each layer should be progressively thinner than the last, with the final layers more for refinement than for bulk. By the third layer, you’re mostly evening things out and preparing for the shaping phase.
Creating the Signature Squoval Shape and Length
Now that you have your bulk acrylic built up, it’s time to shape it precisely into that perfect squoval form. This is where acrylics truly shine compared to gel nails—acrylic is much easier to file and reshape, so you can fine-tune every angle.
Using your medium 150-grit file, start shaping the sides of the nail into those straight lines that define squoval. File from the cuticle area downward, maintaining an even width and a straight line all the way down. The sides shouldn’t taper inward; they should stay roughly parallel. This is what distinguishes squoval from oval—the straight sides.
At the tip, angle your file to round off the corners smoothly. This is where it’s easy to mess up the shape—if you round too much, it becomes oval; if you don’t round enough, it looks square or even pointed. The rounding should be subtle, covering maybe the last 2-3mm of the nail. Ideally, when you look at the nail from directly above, the tip should have a gentle curve that flows naturally from the straight sides.
File the top surface of the nail to remove ridges and create an even plane. The top surface should be slightly arched (remember that C-curve we talked about), but not dramatically peaked. If you have a nail drill, this is where it becomes incredibly useful. Switch to a medium-grit barrel bit and use it to smooth the entire nail surface, refining the shape and removing file lines.
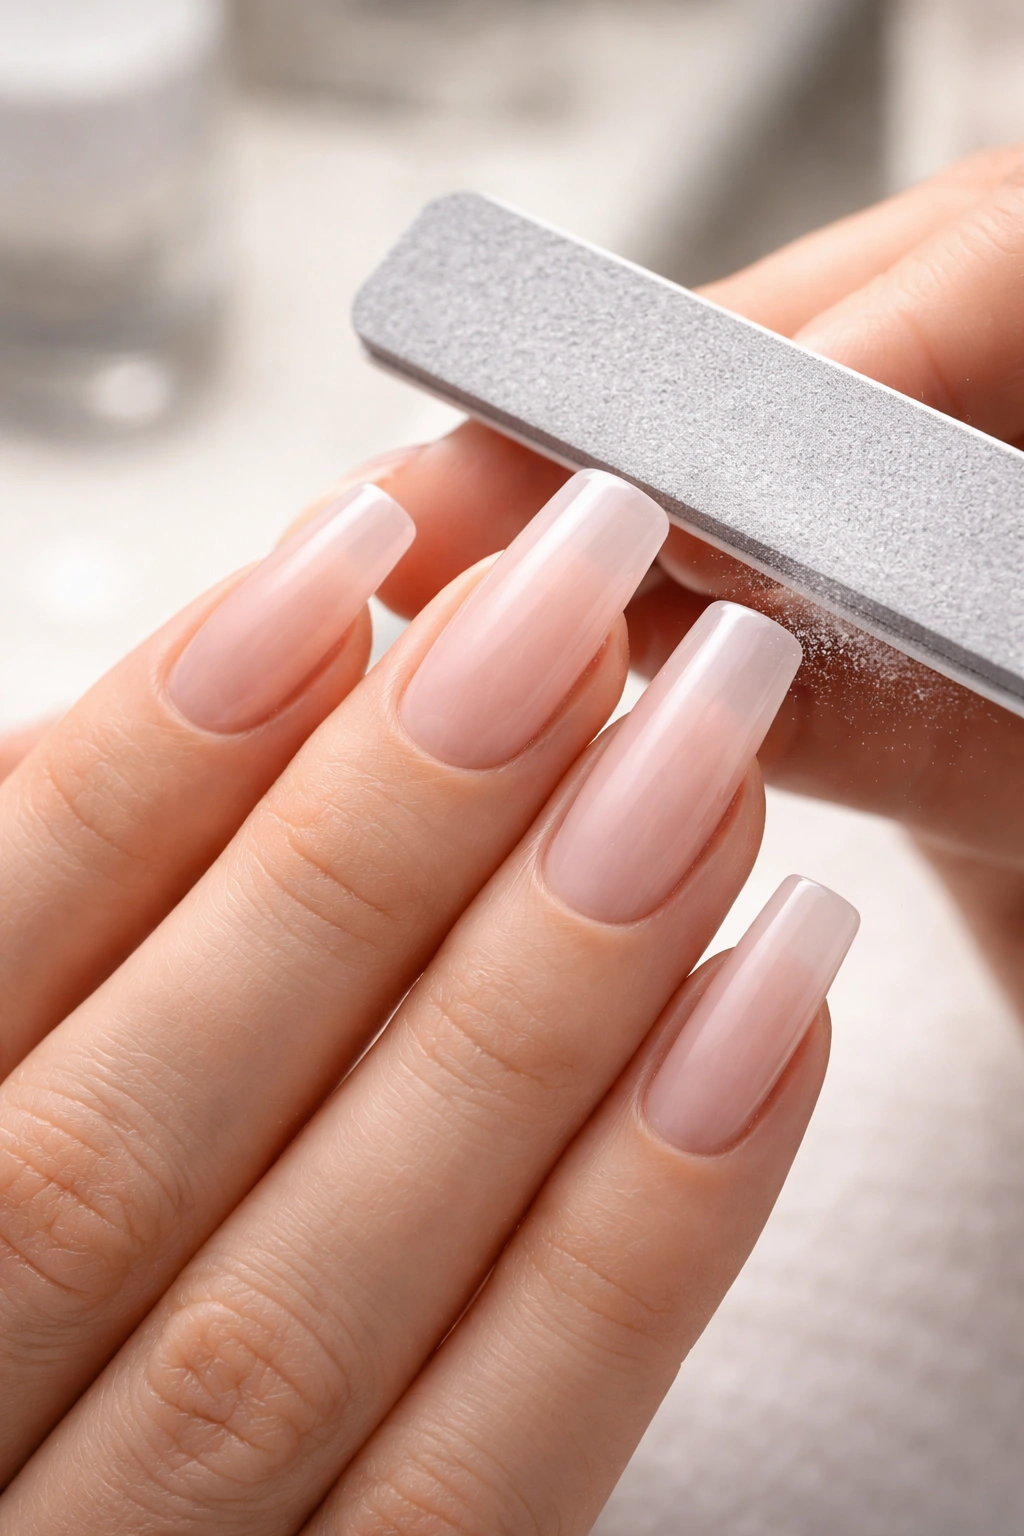
Perfecting the Nail Surface and Contours
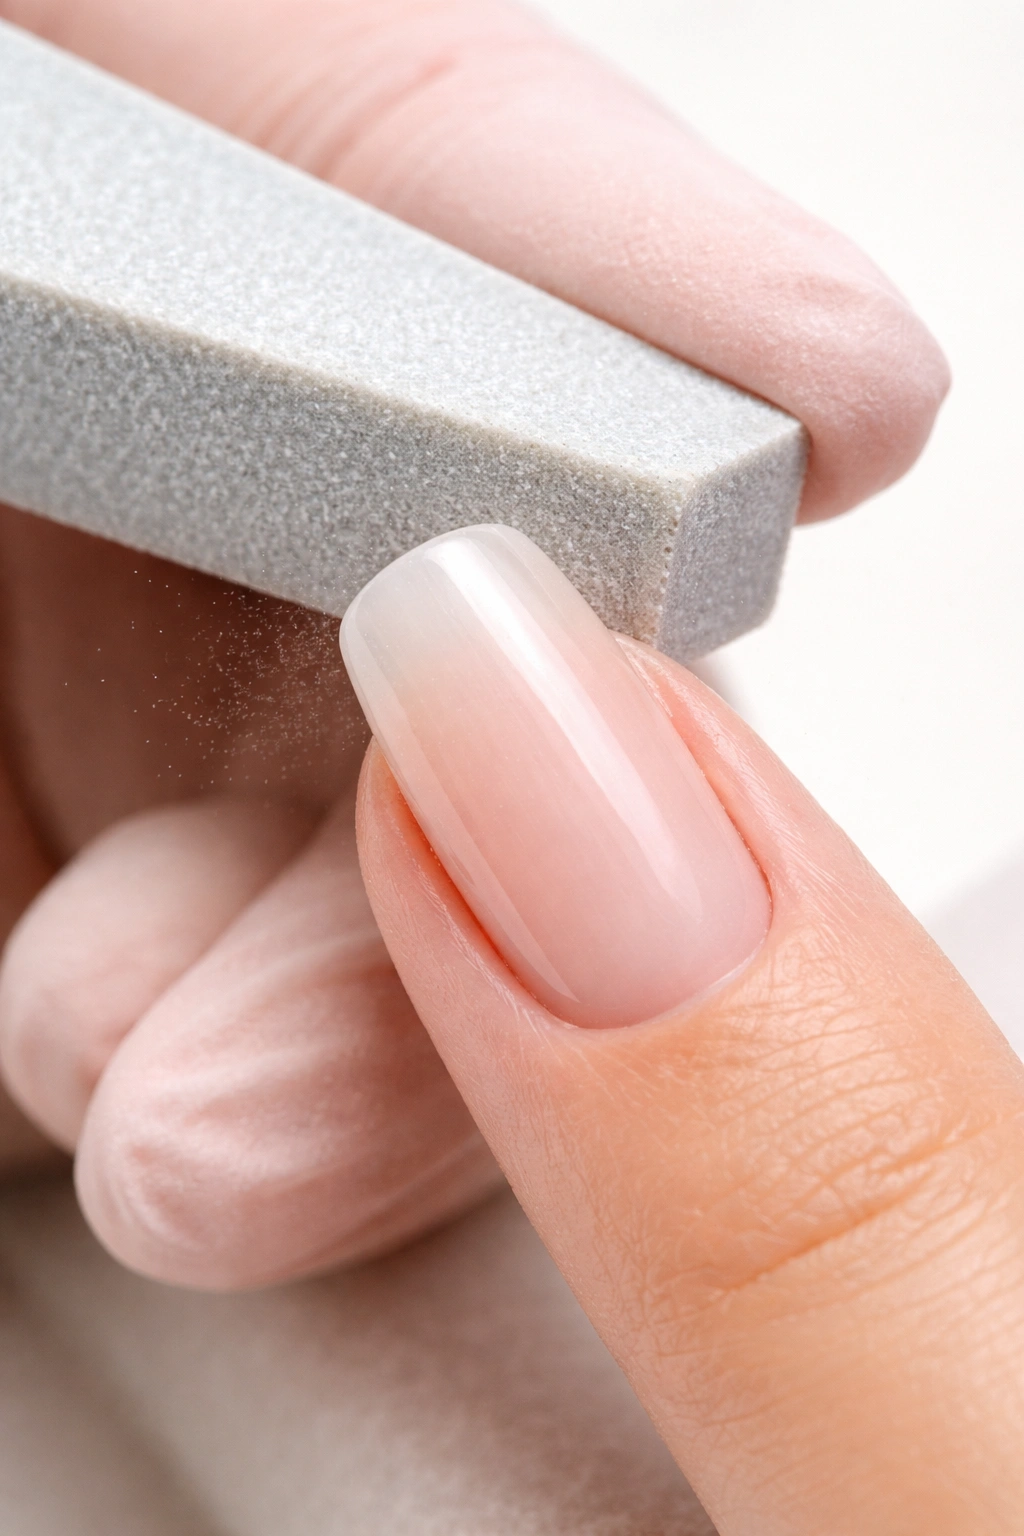
Once the shape is right, it’s time to perfect the surface. Switch to your fine 220-grit or 280-grit file and refine every surface—the top, the sides, and the edges. You’re not removing material anymore; you’re smoothing and perfecting. This is a painstaking step, but it’s what separates a nail that looks good from one that looks professionally done.
Pay special attention to the edges. The edge of the nail (where the top meets the sides) should be clean and smooth, not rough or thick. Run your fine file along the edge carefully, creating a smooth, beveled edge that feels good to the touch. This is both aesthetic and functional—rough edges catch on things more easily and feel uncomfortable.
The top surface should be completely smooth with no ridges or bumps. If you’re using a file, work in one direction rather than sawing back and forth—this gives you more control and creates a smoother finish. If you’re using a drill, use a very light touch and let the tool do the work.
Finally, use a buffer (the fine side of a three-way buffer works perfectly) to polish the entire nail. Buffing removes the micro-scratches left by filing and creates that smooth, slightly gleaming surface that makes nails look finished. This step takes only a minute but makes a huge visual difference.
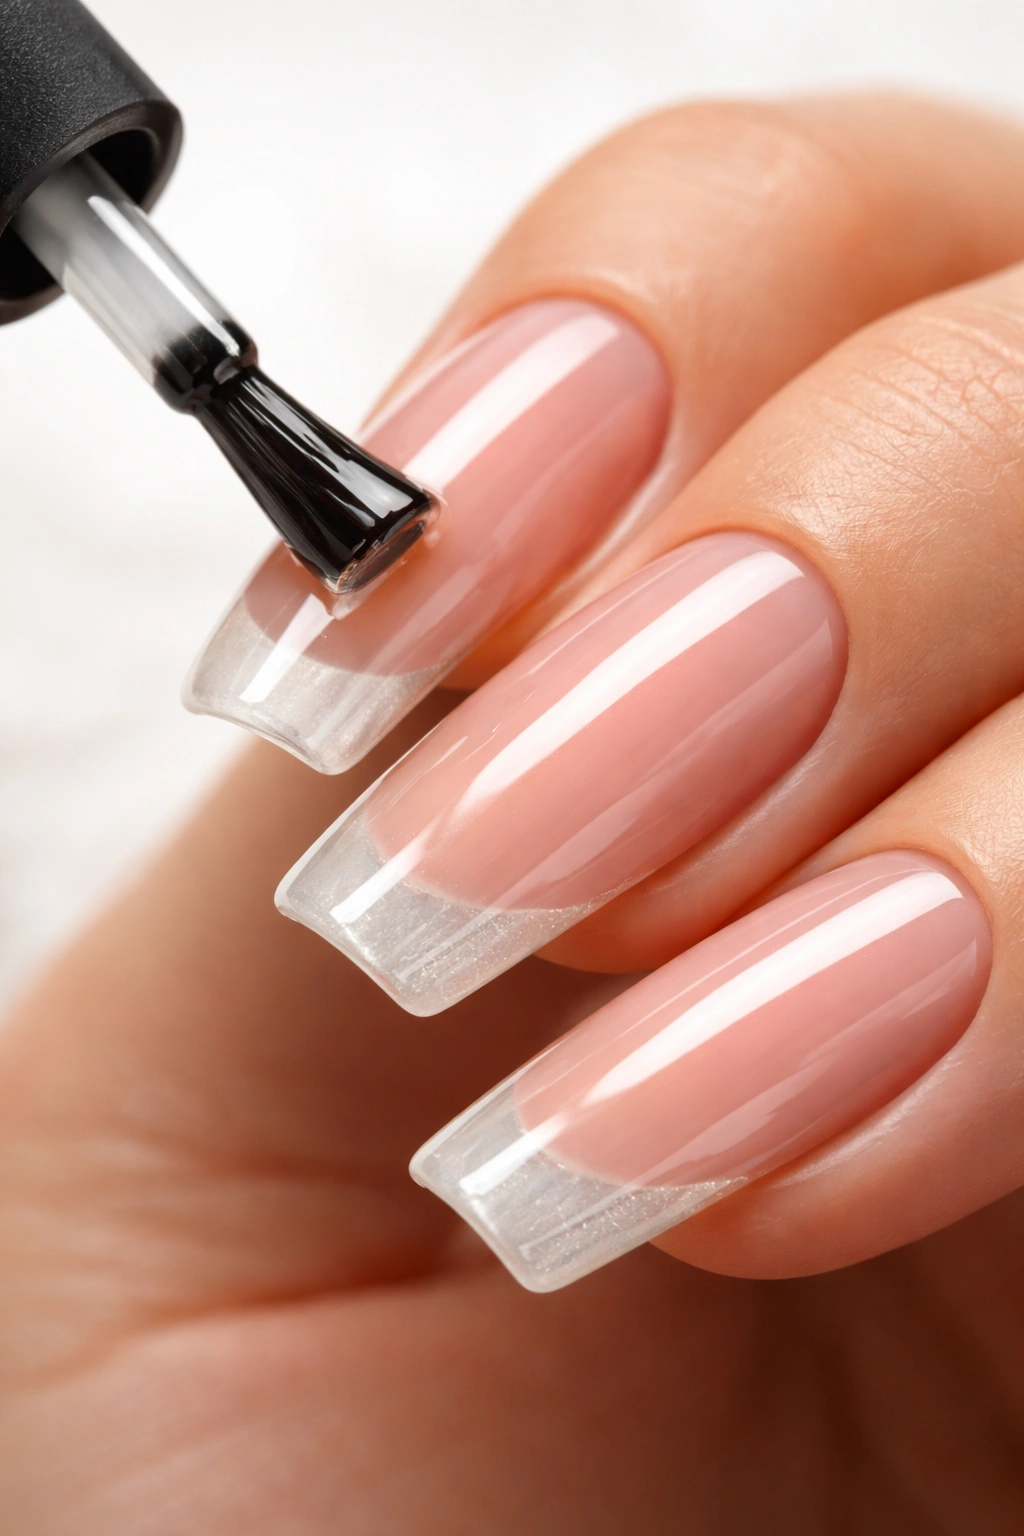
Painting and Designing Your Squoval Nails
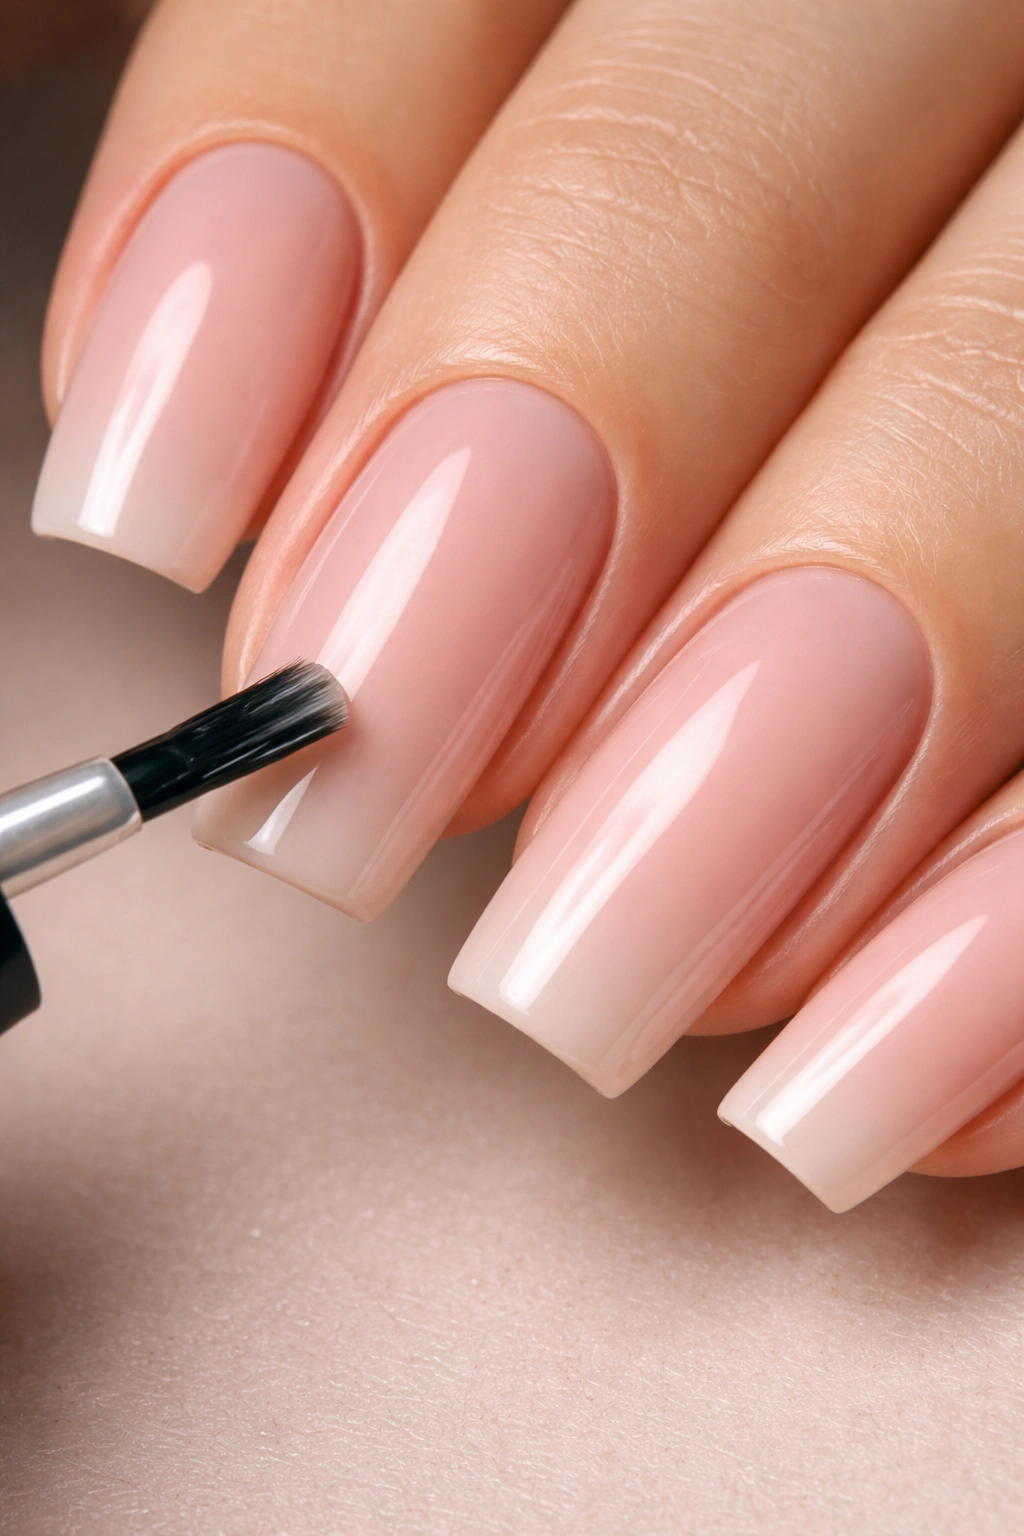
Long squoval nails are an incredible canvas for color and design. The shape is defined enough to look intentional with just a solid color, but it’s also roomy enough for complex nail art if that’s what you want.
For a solid color, apply a good base coat first—this protects the acrylic from staining and helps the polish adhere better. Then apply two coats of your color, allowing each coat to dry fully before applying the next. With long nails, the weight of thick polish can be noticeable, so thinner coats are actually better than one thick coat. Finish with a good top coat to seal everything and add shine.
If you’re doing nail art, the squoval shape works beautifully with geometric designs, ombre effects, minimalist line art, or detailed illustrations. The straight sides give you clean lines to work with, and the rounded tips provide nice focal points for designs. Whether you’re using regular polish, gel polish, stamping plates, or hand-painting, squoval nails give you plenty of surface area to be creative without the designs looking cramped.
Pro tip: If you’re planning to wear a specific design or color, test it on the acrylic before it’s fully attached if possible. Acrylic can be slightly porous when freshly cured, and some polishes (especially dark colors) can stain if they sit for a long time. Quality gel polish and regular polish both work beautifully on acrylic once it’s sealed properly.
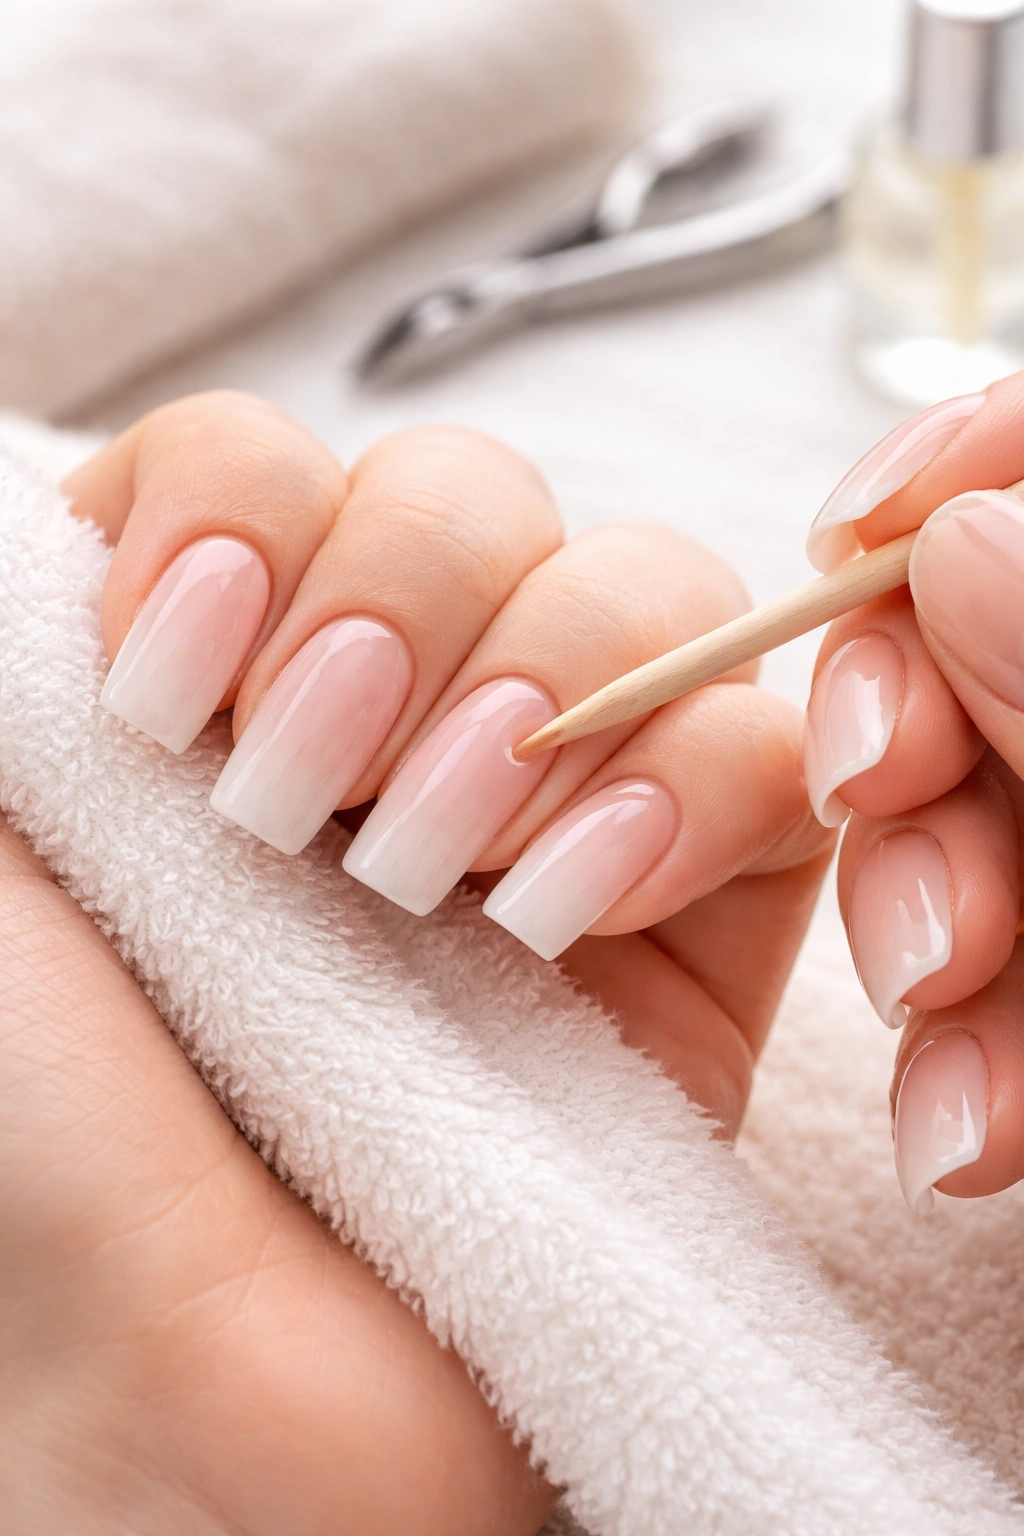
Sealing and Finishing for Longevity
The final step in creating your squoval nails is sealing everything so the polish lasts and the nails themselves stay protected. This is what separates a mani that looks great for a week from one that looks great for three weeks.
A good top coat is essential. High-quality gel or regular polish top coats aren’t just for shine—they’re also protective barriers. They prevent chipping, seal the polish edges, and protect the acrylic from moisture and oils that cause the polish to lift. Apply your top coat carefully, making sure you cap the free edge (apply polish to the underside of the nail tip). This is what makes polish last longer—you’re creating a sealed edge that resists peeling.
If you’re using regular polish, consider investing in a long-wearing or gel-polish formula. These stay shiny and chip-resistant for longer than standard polish. If you’re using gel polish, cure it according to the polish manufacturer’s instructions, usually 30-60 seconds under a UV or LED lamp.
After your mani is complete, consider applying a cuticle oil to your cuticles and the base of your nails. This keeps the skin hydrated and healthy, and it also creates a visual separation between the acrylic and your natural nail that looks polished and intentional.
Maintaining and Caring for Long Squoval Acrylics
Long squoval acrylic nails require consistent maintenance to stay looking perfect and to prevent lifting, breaking, or chipping. The good news is that maintenance is straightforward if you’re consistent about it.
First, keep your nails dry and protected when you’re doing wet work. Prolonged water exposure—especially in hot water—can cause acrylics to lift or separate because water seeps under the acrylic and breaks the bond. Wear gloves when washing dishes, cleaning, or doing anything that involves prolonged water contact. This single habit will dramatically extend the life of your nails.
Keep the undersides of your nails clean. Dirt, debris, and dried polish buildup under the free edge can look grimy and can also accumulate moisture under the nail, leading to separation. Use a soft brush or the blunt end of a nail file to gently clean underneath regularly.
Every 2-3 weeks, schedule a fill appointment if you’re maintaining the acrylic, or refresh your polish more frequently if the polish is starting to chip or lose shine. Acrylic nails grow out as your natural nail grows, creating a visible gap between the acrylic and your cuticle area. This gap becomes increasingly visible over time, so many people get fill appointments to add fresh acrylic in that gap area and keep the smooth, polished look.
Between visits, treat your nails gently. Use the pads of your fingers to press things rather than the tips. If you notice a nail starting to lift or crack, don’t ignore it—schedule an appointment to get it repaired before the damage spreads. A small lift caught early is a 10-minute fix; a full crack or separation becomes a removal-and-replacement situation.
Apply cuticle oil daily, especially before bed. This keeps the skin and nail cuticles healthy and hydrated, which actually helps prevent lifting and breakage. Healthy skin around the nail plate means better adhesion for the acrylic.
Troubleshooting Common Squoval Acrylic Problems
Even with perfect application and careful maintenance, sometimes issues come up. Knowing how to identify and fix the most common problems will help you keep your nails looking great and prevent small problems from becoming big ones.
Lifting at the seam: If the acrylic is separating where the tip meets the natural nail, the most common cause is moisture getting trapped under the acrylic. This happens from water exposure, humidity, or sometimes from a thin application at the seam during the initial application. Prevention is the best solution—keep nails dry and ensure your base layer is thick enough at the seam. If lifting occurs, have it repaired or removed quickly, as moisture under the acrylic can cause fungus or infection.
Cracking or breaking at the apex: If your nails keep breaking at that thick point you built for strength, it might mean the apex is positioned wrong (too far forward or creating an exaggerated peak) or that you’re using your nails roughly. Adjust the apex position toward the cuticle slightly and be more intentional about using the pads of your fingers rather than the tips for pressing and pushing.
Yellowing acrylic: Some acrylic powders are more prone to yellowing than others, especially when exposed to sunlight for long periods or when wearing dark polish without a base coat. Using a white or clear base coat under dark polish helps prevent staining. If yellowing occurs, the discoloration is permanent in that acrylic, so you’ll need a fill or full replacement to remove it.
Acrylic feels too thick or heavy: If your nails feel uncomfortable or too thick, you might have applied too much product. Long nails do feel different than natural nails, but they shouldn’t feel heavy or clunky. Try applying slightly less product at each layer and focusing on a more refined shape that doesn’t feel as bulky.
Cloudy or dull finish: If your nails look cloudy instead of shiny, buffing them more thoroughly and applying a good glossy top coat usually solves it. Sometimes humidity or water spotting can create a temporary dull look, but proper sealing with a quality top coat prevents this.
Nails breaking away from natural nail: This is different from lifting and usually happens when there’s too much weight or stress on the long free edge. If this keeps happening, consider whether your nails are longer than is sustainable, or whether you need to reinforce the underside of the free edge with a gel overlay or additional acrylic during fills.
Key Takeaways
Long squoval acrylic nails are absolutely achievable with proper technique, quality materials, and consistent maintenance. The shape itself is one of the most versatile and flattering options available—it works for virtually every hand shape, nail bed length, and lifestyle, which is why it’s become so popular.
The foundation of beautiful squoval nails is proper prep of your natural nails and meticulous shaping of the tips before you apply any acrylic. Take time getting the shape exactly right during the dry file stage, and your acrylic application will be infinitely easier and the results will be far superior.
Remember that long nails need structural support—that apex isn’t just for show, it’s functional engineering. Build it correctly, position it properly, and your nails will resist breaking even with daily use. And don’t underestimate the power of finishing steps: a perfectly buffed surface, proper edge beveling, and a quality top coat transform good nails into nails that look professionally done every single time.
Maintenance is the final piece of the puzzle. Keep your nails dry, schedule regular fills or polish refreshes, and be gentle with your long nails. They’re beautiful and they’re an investment, so protecting them pays off in nails that look gorgeous for weeks at a time. With these practices in place, you’ll have the long, elegant squoval nails you’re after.
