

Creating stunning nail art doesn’t require a trip to the salon or professional-level skills. With just a few bottles of polish and some basic household items, you can transform plain nails into eye-catching designs that rival anything you’d see on social media. The beauty of DIY nail art lies in its accessibility—whether you’re brand new to painting your nails or you’ve been doing it for years, there’s always a new technique to master.
The secret to achieving salon-worthy results at home isn’t about having the steadiest hand or the most expensive tools. It’s about choosing designs that work with your skill level and giving yourself permission to experiment. Some of the most impressive nail art uses surprisingly simple techniques like dotting, taping, or sponging. Once you understand these basic methods, you’ll find yourself mixing and matching techniques to create your own unique looks.
What makes polish-based nail art so appealing is its flexibility. You can keep things minimal with a single accent nail or go bold with intricate patterns across all ten fingers. The designs below range from beginner-friendly to slightly more advanced, but all of them are totally achievable at home. Grab your favorite polishes and let’s dive into ten nail ideas that’ll have everyone asking where you got your nails done.
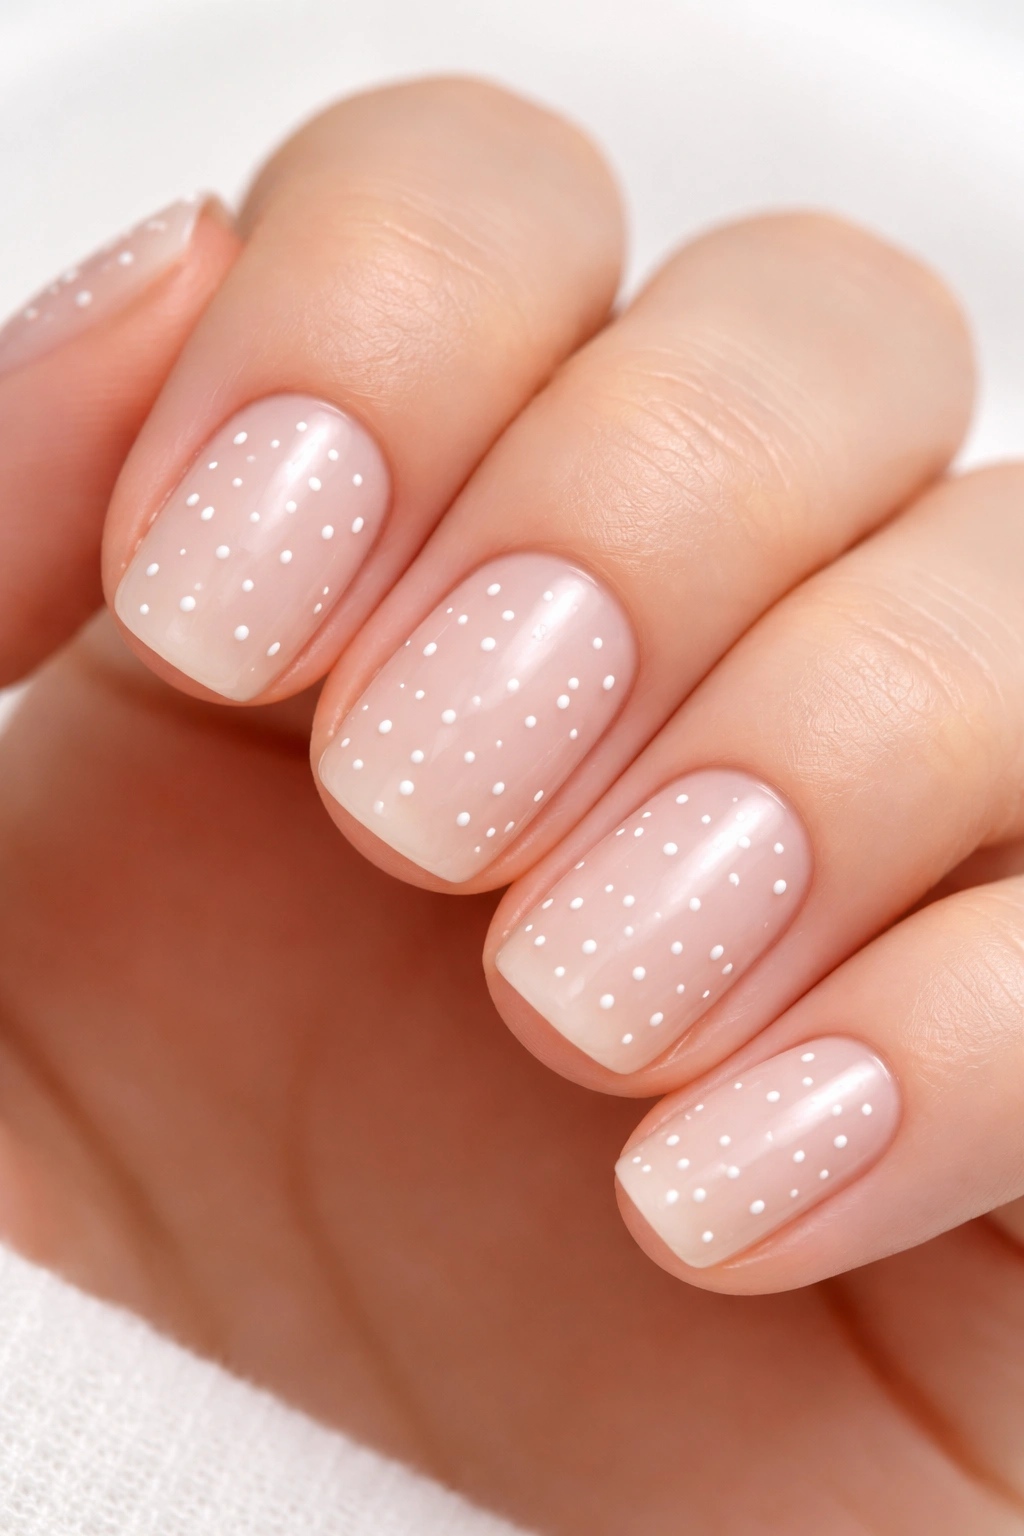
1. Classic Polka Dots
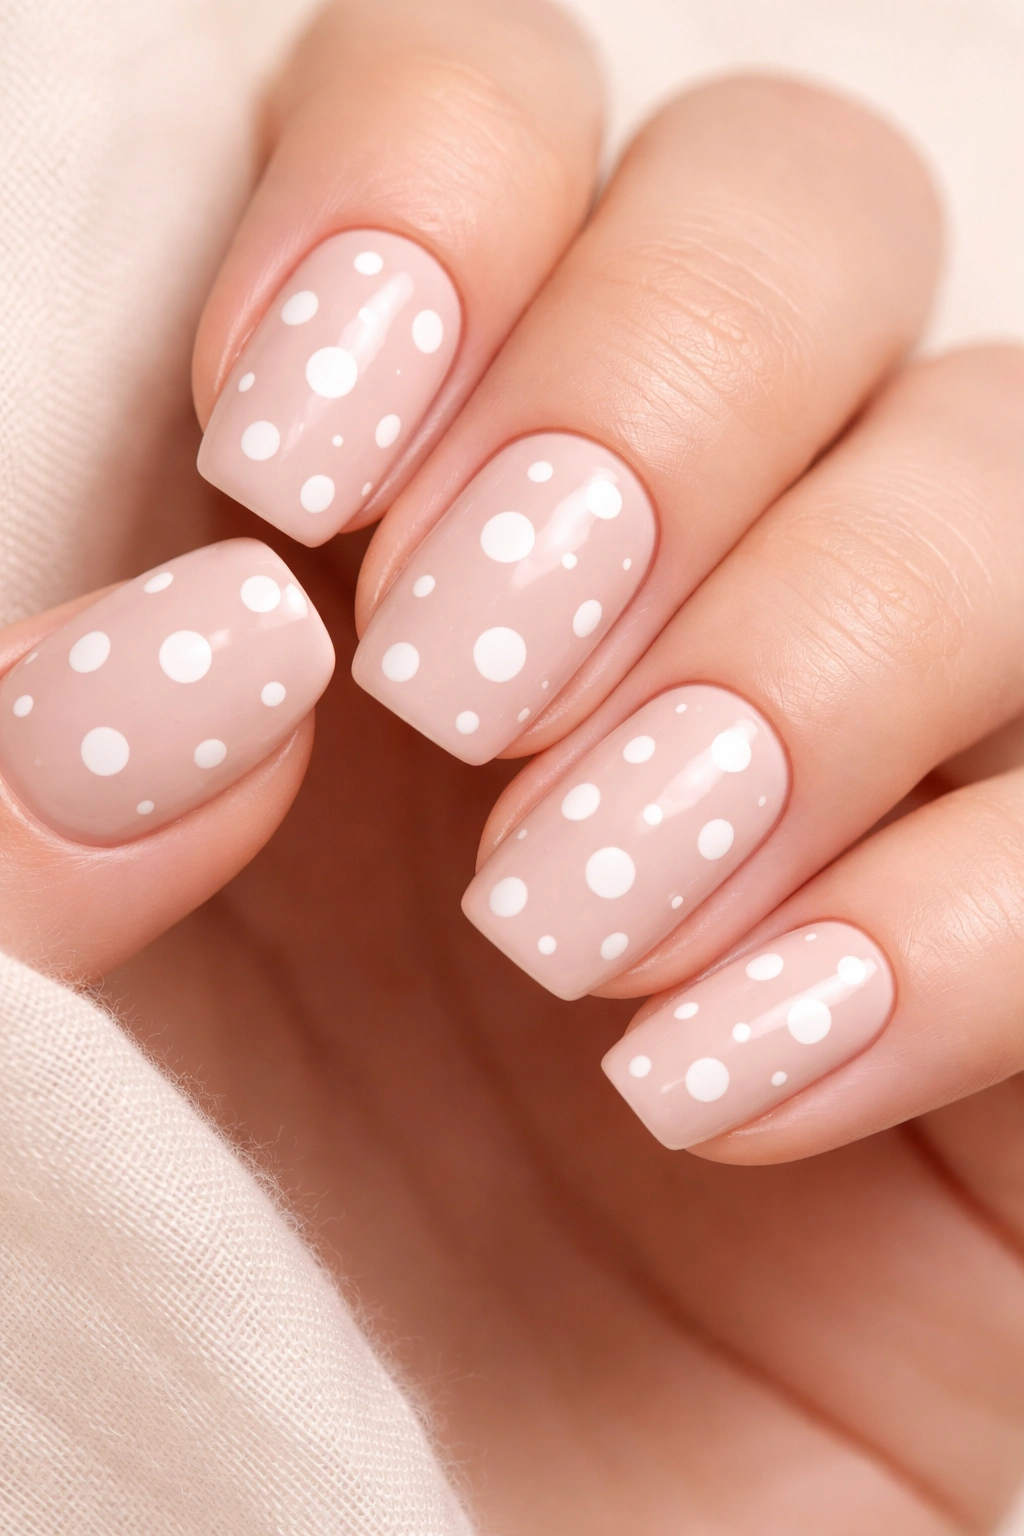
Polka dots are hands down one of the easiest nail art designs for beginners. They look playful and deliberate, even when they’re not perfectly uniform. The charm of this design is that imperfection actually adds to its appeal—scattered dots in varying sizes create visual interest without demanding precision.
Why Polka Dots Work for Everyone
Dots require minimal skill and even less equipment. You can create them with a toothpick, a bobby pin, or a proper dotting tool if you have one. The technique is forgiving because dots don’t need to be identical or evenly spaced to look intentional. Try mixing different sizes by using various tools, or keep them uniform for a more structured appearance.
How to Create the Look
Start with a base color and let it dry completely. Pour a small amount of your contrasting polish onto a piece of foil or wax paper. Dip your dotting tool or toothpick into the polish and gently press it onto your nail. The key is not to drag the tool—just press and lift straight up. Create as many dots as you like, spacing them randomly or in a pattern.
Pro tip: If your dots start looking wonky, dip a thin brush in nail polish remover and carefully erase the mistake before it fully dries.
2. Two-Tone Color Block
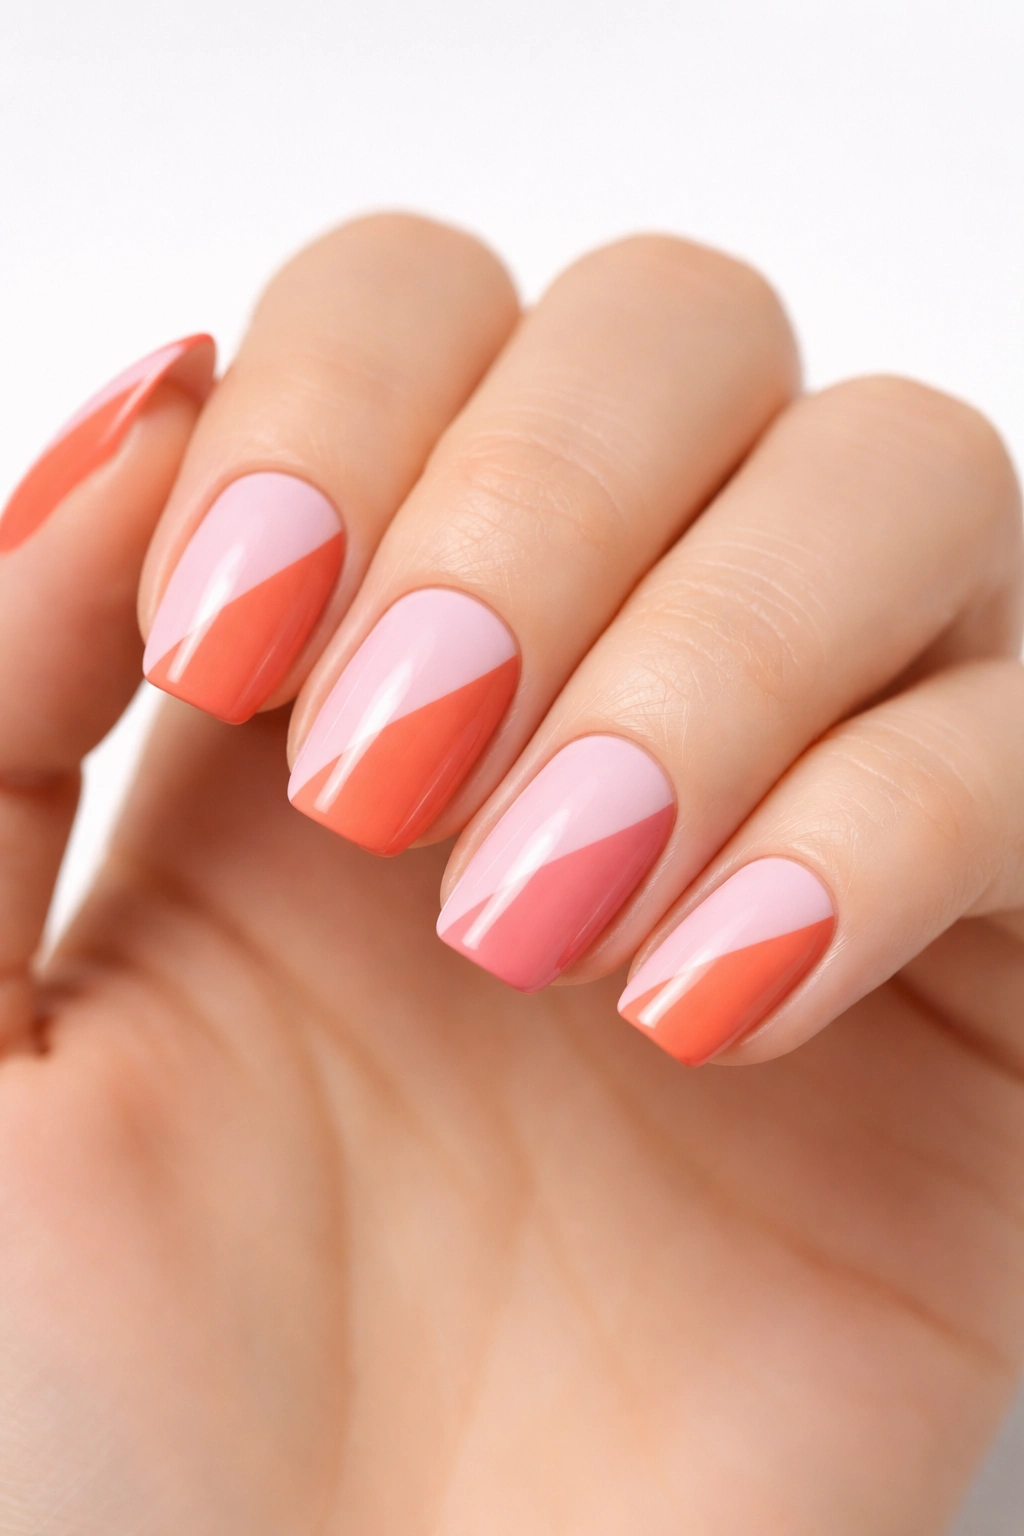
Color blocking brings a modern, geometric vibe to your nails without requiring any artistic ability. This design uses tape or nail guides to create clean, sharp lines between two contrasting colors. The result looks polished and intentional, perfect for anyone who loves minimalist aesthetics.
Choosing Your Color Combination
The magic of color blocking lies in pairing unexpected shades together. Think beyond traditional combinations—try pairing a soft nude with a bold emerald green, or combine two pastels in different color families. High contrast makes the biggest impact, but tonal variations in the same color family create a sophisticated, subtle effect.
Application Technique
Paint your entire nail with your first color and wait for it to dry completely—this is crucial. Place a piece of striping tape diagonally across your nail, or position it to block off half the nail vertically or horizontally. Press down the edges firmly to prevent bleeding. Apply your second color to the exposed section, wait about 60 seconds, then carefully peel away the tape while the polish is still slightly tacky. Seal everything with a top coat.
Quick note: Regular scotch tape works fine, but nail striping tape is thinner and creates sharper lines.
3. Glitter Gradient
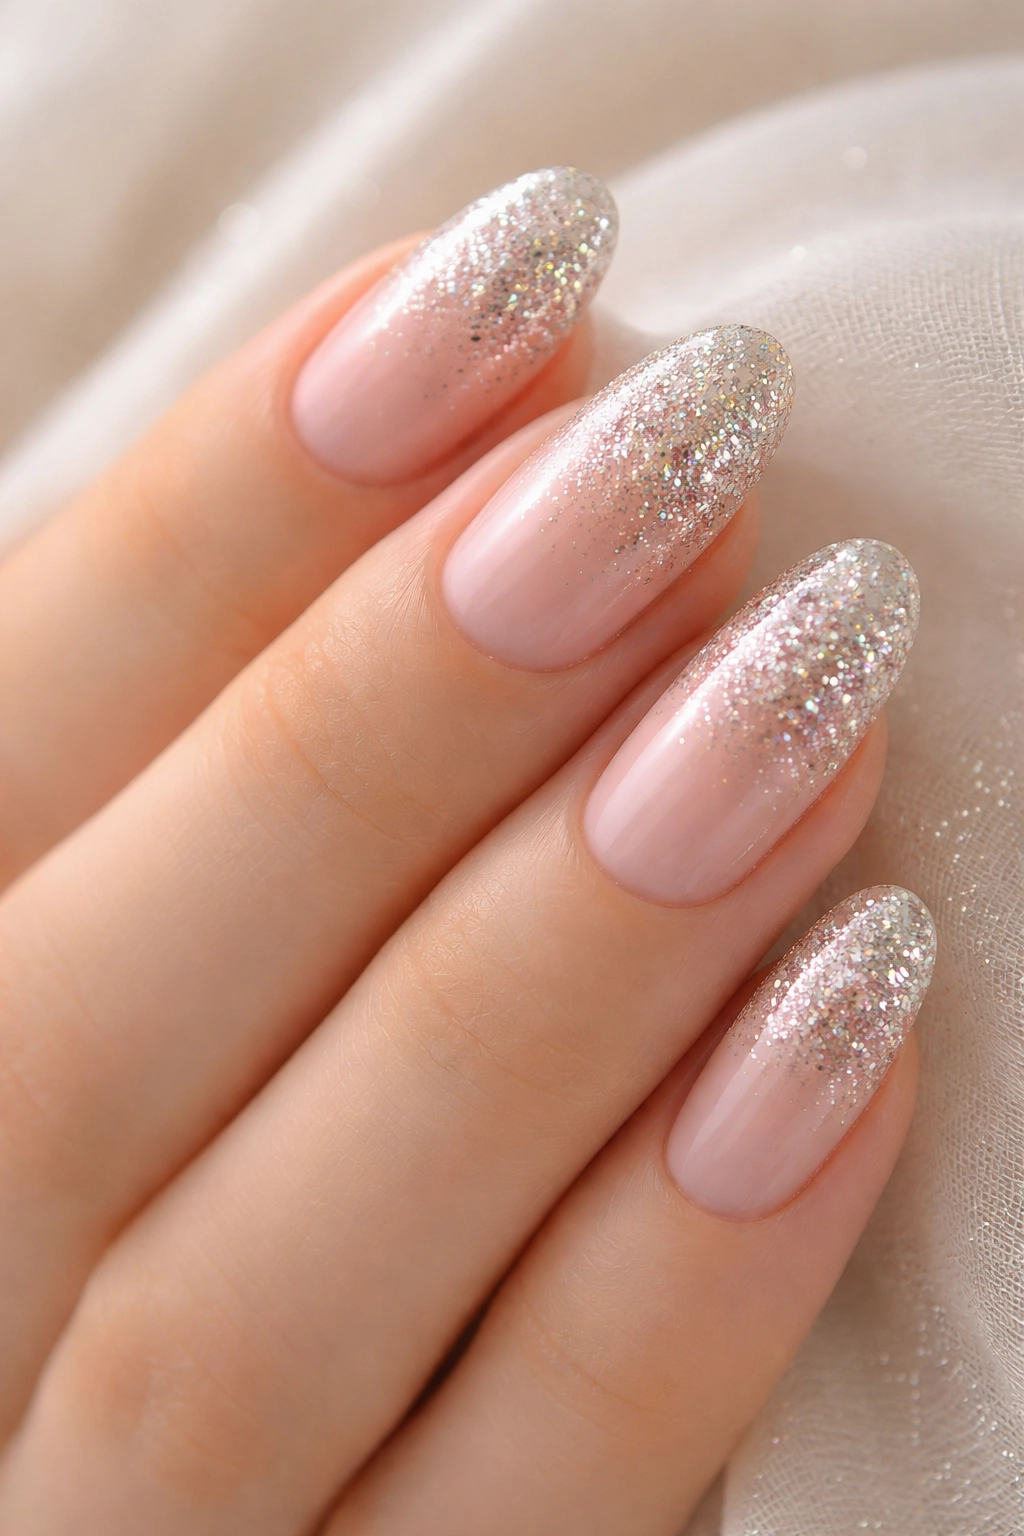
A glitter gradient gives you that expensive salon look with surprisingly minimal effort. The technique involves concentrating sparkle at the tips of your nails and fading it toward the base. It’s glamorous enough for special occasions but easy enough for a weeknight DIY session.
What Makes Glitter Gradients Special
This design hides nail growth beautifully, making your manicure last longer between touch-ups. The concentrated sparkle at the tips draws the eye and can even make shorter nails appear longer. You can create this effect with any base color, though it shows up particularly well on nude or light-colored bases.
Creating the Fade
Apply your base color and let it dry. Take a makeup sponge and paint a thick stripe of glitter polish onto it. Gently dab the sponge onto the tip of your nail, pressing and lifting without dragging. Work your way down the nail with lighter pressure, creating a natural fade. The sponge deposits glitter in a softer, more diffused way than the brush alone can achieve. You’ll need to clean up around your nails with a small brush dipped in remover, but the effect is worth it.
Glitter Removal Hack
Glitter polish can be notoriously difficult to remove. Soak cotton balls in acetone, place them on your nails, wrap with aluminum foil, and let sit for five minutes. The glitter will slide right off.
4. Simple Striping

Nail stripes offer endless possibilities while requiring just one additional tool—a thin striping brush or even a steady hand with the polish brush itself. Whether you opt for vertical lines, horizontal bands, or diagonal stripes, this design adds visual interest without overwhelming your nails.
Stripe Variations to Try
Vertical stripes running from cuticle to tip can make nails appear longer and more elegant. A single stripe down the center of each nail creates a minimalist, modern look. Horizontal stripes near the tips give you a fresh take on the classic French manicure. You can even create multiple thin lines in different colors for a rainbow effect.
Getting Those Lines Straight
Start with your base color and allow it to fully dry. Load your striping brush with polish—not too much or it’ll blob—and draw your line in one smooth, continuous motion. If you’re nervous, rest your painting hand on a stable surface and move your nail-bearing hand instead. This gives you more control. For perfectly straight horizontal lines, nail striping tape becomes your best friend as a guide.
Important: Thin out thickened polish with a few drops of nail polish thinner (not remover) for smoother line work.
5. Watercolor Marble
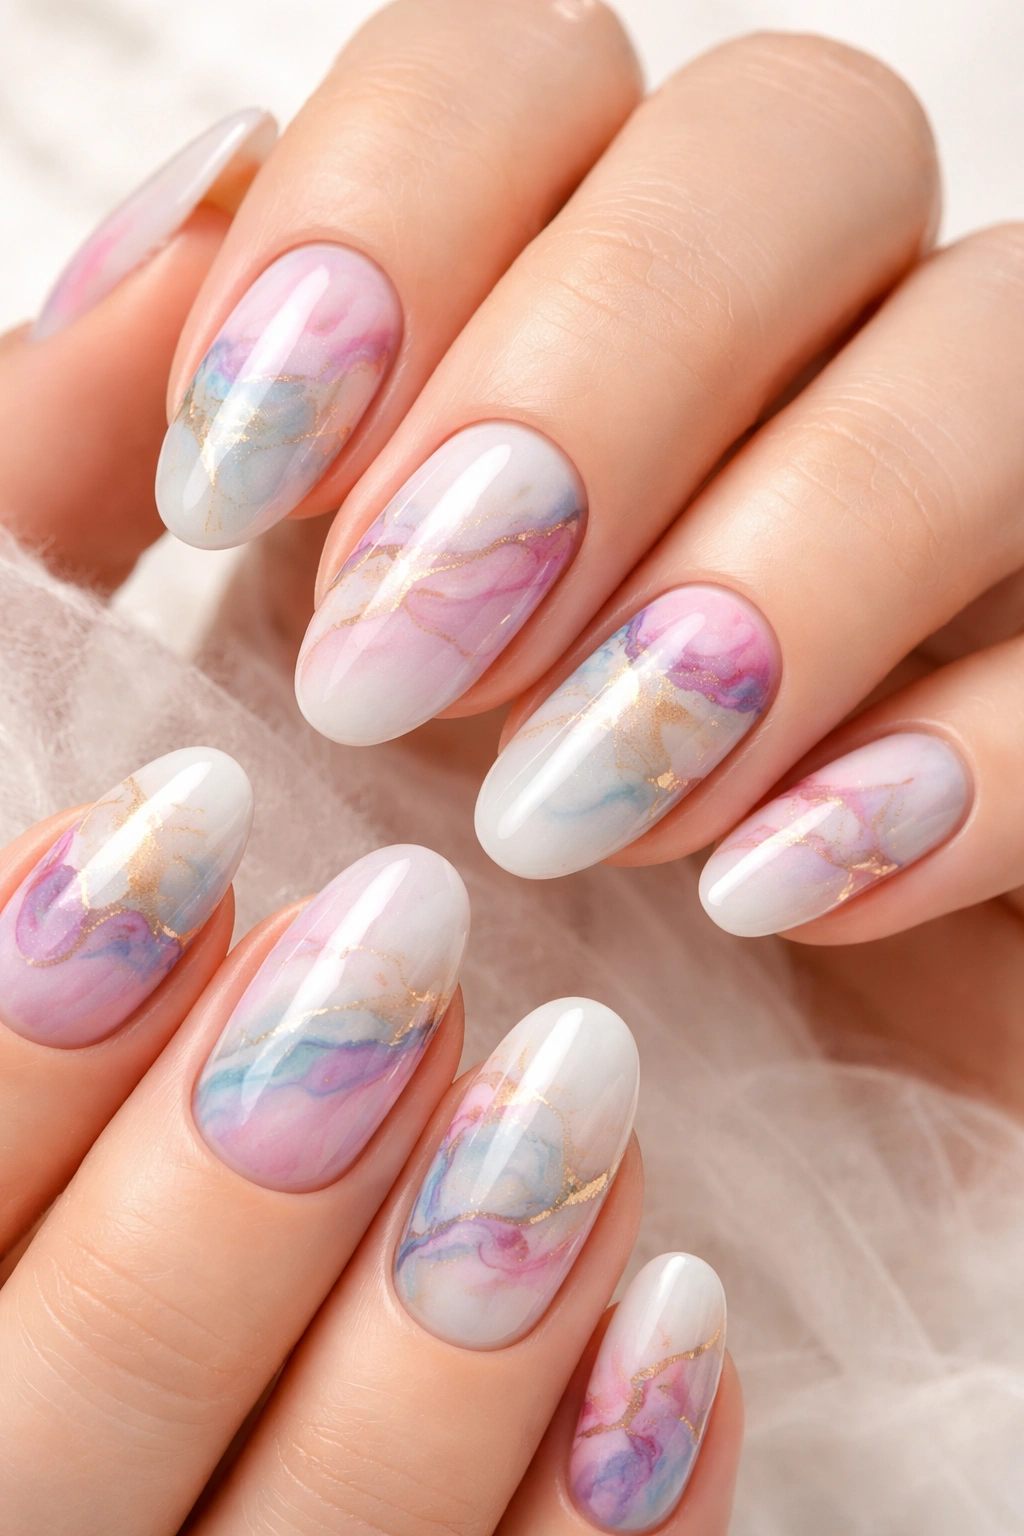
Marble nails look incredibly complex but use a surprisingly straightforward technique. The swirled, organic patterns mimic the appearance of actual marble stone, creating an elegant, high-end effect that works for any occasion. The randomness of the pattern means there’s no “wrong” way to do it.
Understanding the Marble Method
True water marbling involves dropping polish into water and dipping your nail through the design, but that technique can get messy and requires practice. An easier approach uses a dry marble method where you apply multiple colors directly to the nail and blend them with a thin brush or toothpick. This gives you more control while still achieving that signature marble look.
Step-by-Step Process
Apply a white or light neutral base and let it dry. Working with one nail at a time, apply random blobs of two or three colors (gray, black, and white work beautifully together). While these colors are still wet, use a thin brush or toothpick to swirl them together lightly. Don’t overwork it—you want distinct color sections with soft transitions between them. The veining that occurs naturally as colors mix creates that authentic marble appearance.
Artist’s tip: Less is more when creating marble patterns. Over-mixing turns your design muddy instead of marbled.
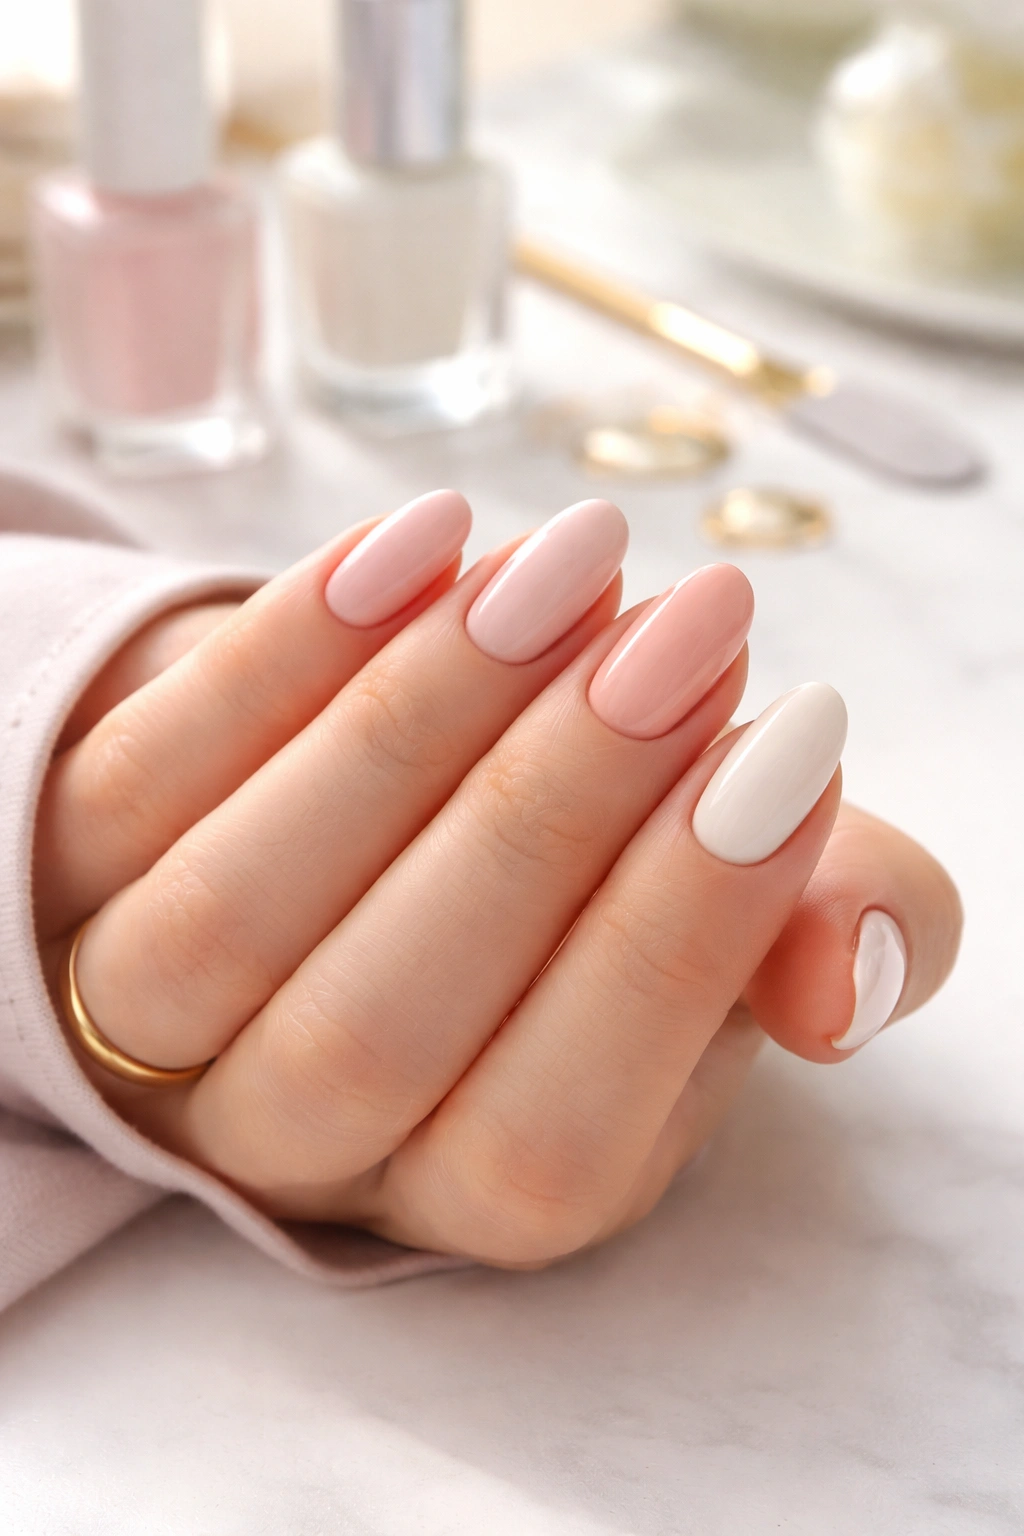
6. Negative Space Design
Negative space nail art strategically leaves parts of your natural nail bare, incorporating that bare nail into the design itself. This approach feels modern and sophisticated while being surprisingly beginner-friendly. The minimalist aesthetic works particularly well for those who want something interesting without going over-the-top.
Why Negative Space Works
These designs require less polish and often less precision than fully painted nails. The bare nail sections provide a built-in contrast that makes your chosen colors pop. Negative space designs also tend to look intentional even when they’re not perfectly executed—a slightly wobbly line reads as artistic rather than messy.
Easy Patterns to Try
The half-moon manicure leaves a crescent shape at the base of your nail unpainted—use reinforcement stickers meant for paper as guides. Geometric cutouts work beautifully with striping tape to section off triangles or other shapes. Even a simple diagonal line painted across your nail, leaving one corner bare, creates an interesting negative space effect.
Application Strategy
The key is working with fully dried base sections. If you’re painting over your natural nail and leaving sections bare, let each painted section dry before adding tape to work on adjacent areas. This prevents smudging and creates those crisp lines that make negative space designs so striking.
7. Accent Nail with Details
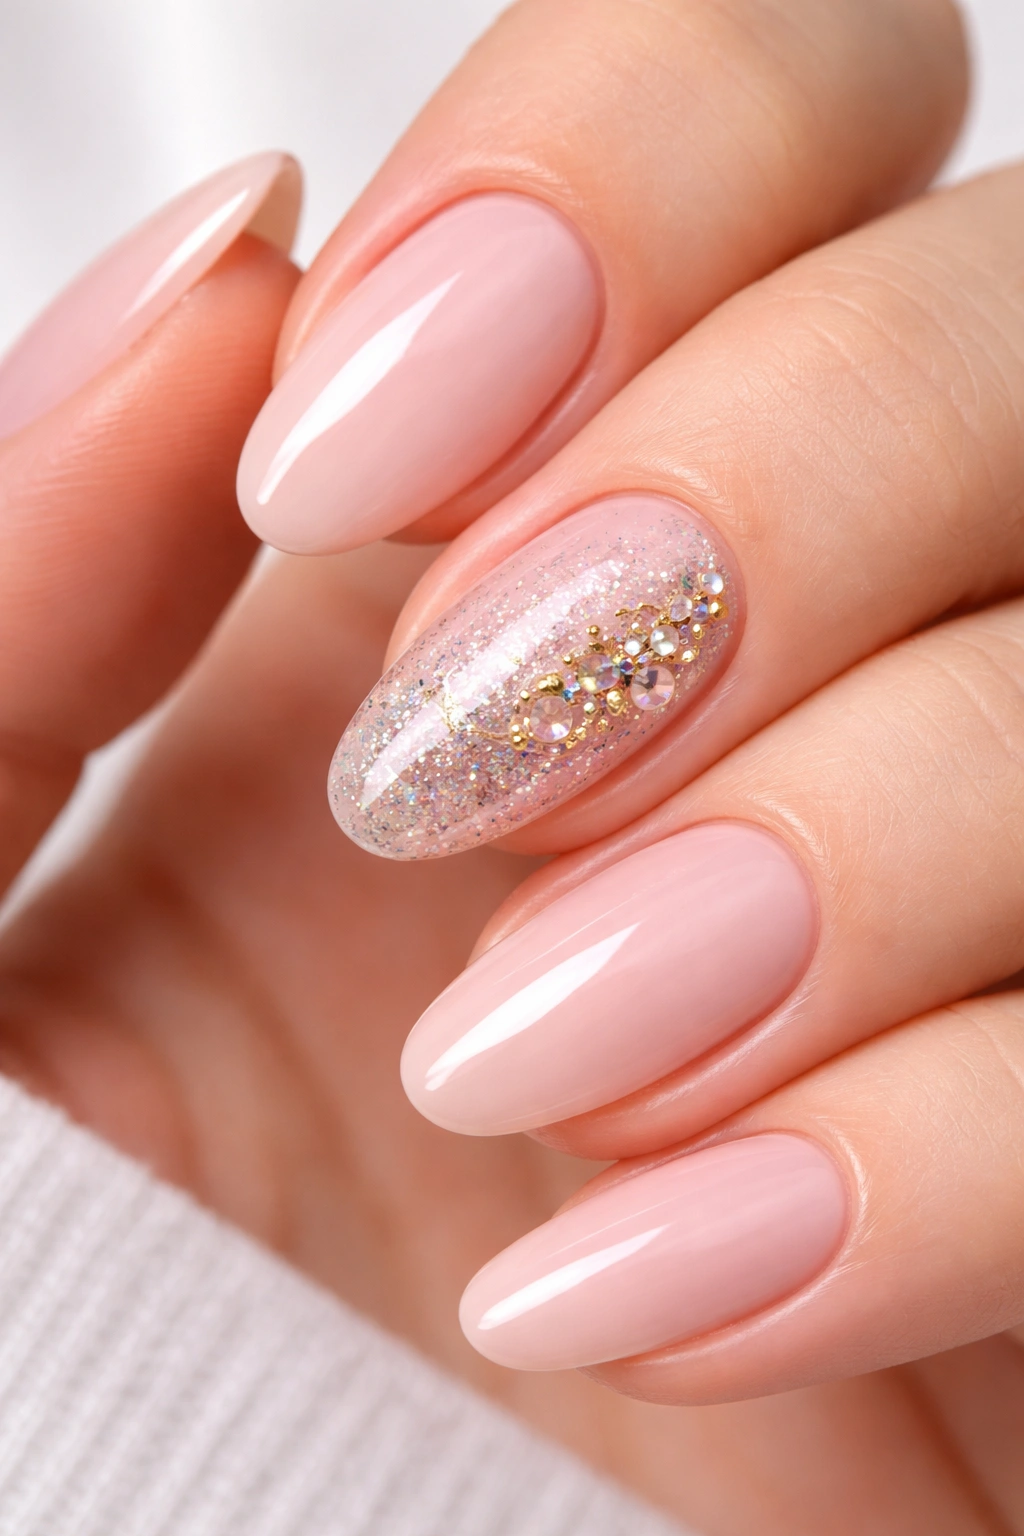
Sometimes you don’t want elaborate designs on every single nail. An accent nail gives you a place to showcase a more intricate design while keeping the rest of your manicure simple. This approach lets you experiment with techniques that might be too time-consuming for all ten nails.
Choosing Your Accent Nail
Traditionally, the ring finger gets the accent treatment, though there’s no rule saying you can’t choose differently. Some people prefer accenting their middle or index finger. You could even do two accent nails—one on each hand—if you’re feeling adventurous. The point is creating a focal point without overwhelming your hands.
Design Ideas for Your Accent
Your accent nail can feature anything from a simple glitter polish to hand-painted flowers to rhinestones. Try painting it a complementary color to your base shade, adding a metallic sheen, or creating a mini design like a single star or heart. The accent nail is also perfect for testing out new techniques before committing them to your entire hand.
Balance tip: Keep your base nails in a neutral or understated color so your accent nail truly stands out without competing for attention.
8. Sponged Ombré
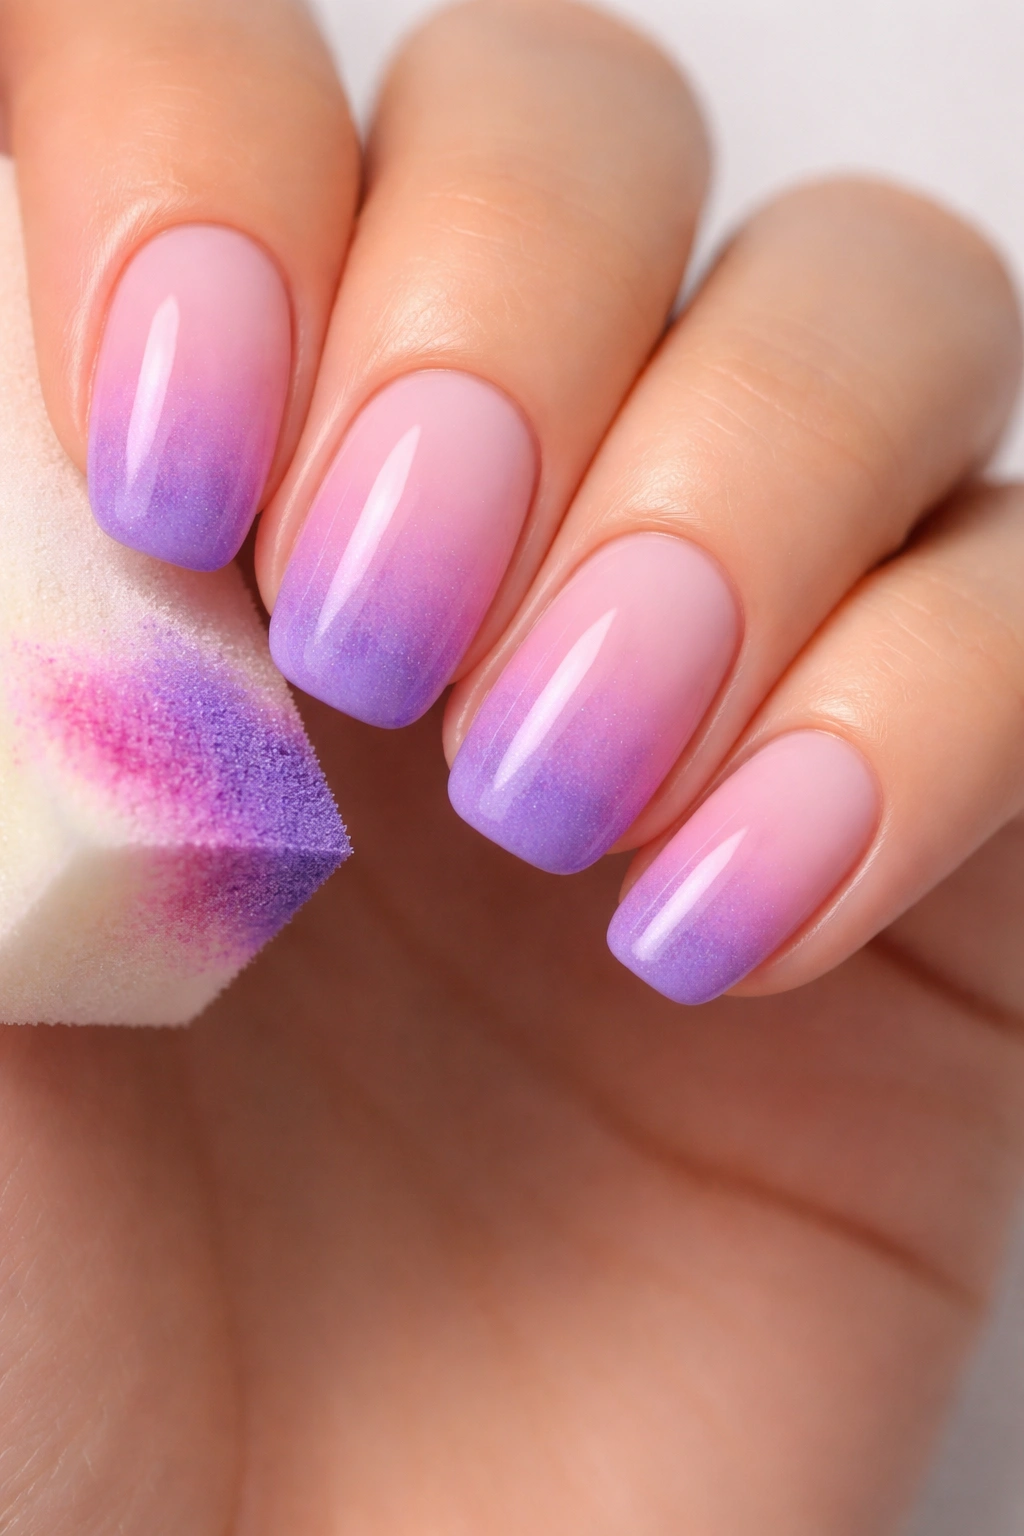
Ombré nails feature a gradual color transition from one shade to another, creating a sunset-like fade across your nail. While this technique sounds advanced, a makeup sponge does most of the work for you. The key is choosing colors that blend well together—think pink to purple, or nude to white.
Selecting Your Colors
Pick two or three colors that are in the same color family for the smoothest gradient. Colors that are too different (like red and green) will create a muddy middle section instead of a pretty transition. Lighter to darker progressions typically look most natural, though going from one pastel to another creates a dreamy effect.
Sponging Technique
Paint thick horizontal stripes of your chosen colors directly onto a makeup sponge, slightly overlapping where they meet. Press the sponge onto your nail with a gentle dabbing motion, reloading and dabbing multiple times to build up the color. The sponge blends the colors where they meet, creating that signature gradient. You’ll get polish all over your skin, so either use liquid latex around your nails beforehand or clean up with a brush dipped in acetone afterward.
Finishing Touches
Ombré nails can look a bit textured from the sponging technique. A thick layer of glossy top coat smooths everything out and intensifies the colors, giving you that professional gradient finish.
9. Tiny Dots and Dashes
Taking basic dot nail art to the next level, this design combines dots with small dashes or lines to create patterns that look more complex than they actually are. Think tiny flowers made from five dots with a dash for the stem, or abstract patterns that mix dots and short lines throughout the nail.
Creating Mini Motifs
Five dots arranged in a flower pattern with a thin line for a stem creates an instant daisy. Random dots with small dashes connecting some of them gives an abstract, artistic vibe. Alternating rows of dots and horizontal dashes creates a tribal-inspired pattern. The possibilities multiply when you start combining these simple elements.
Tools You’ll Need
A dotting tool or toothpick handles the dots, while a striping brush or the edge of a toothpick creates thin dashes and lines. Having both sizes of dotting tools (or different sized toothpick ends) lets you vary dot sizes within the same design for added interest.
Pattern Planning
Start with your larger elements first—if you’re doing flowers, place those before filling in with extra dots or details. This helps with spacing and ensures your focal points land where you want them. Remember that you can always add more, but removing elements requires starting over, so build gradually.
Design philosophy: Sometimes the prettiest patterns come from happy accidents, so don’t stress if things don’t go exactly as planned.
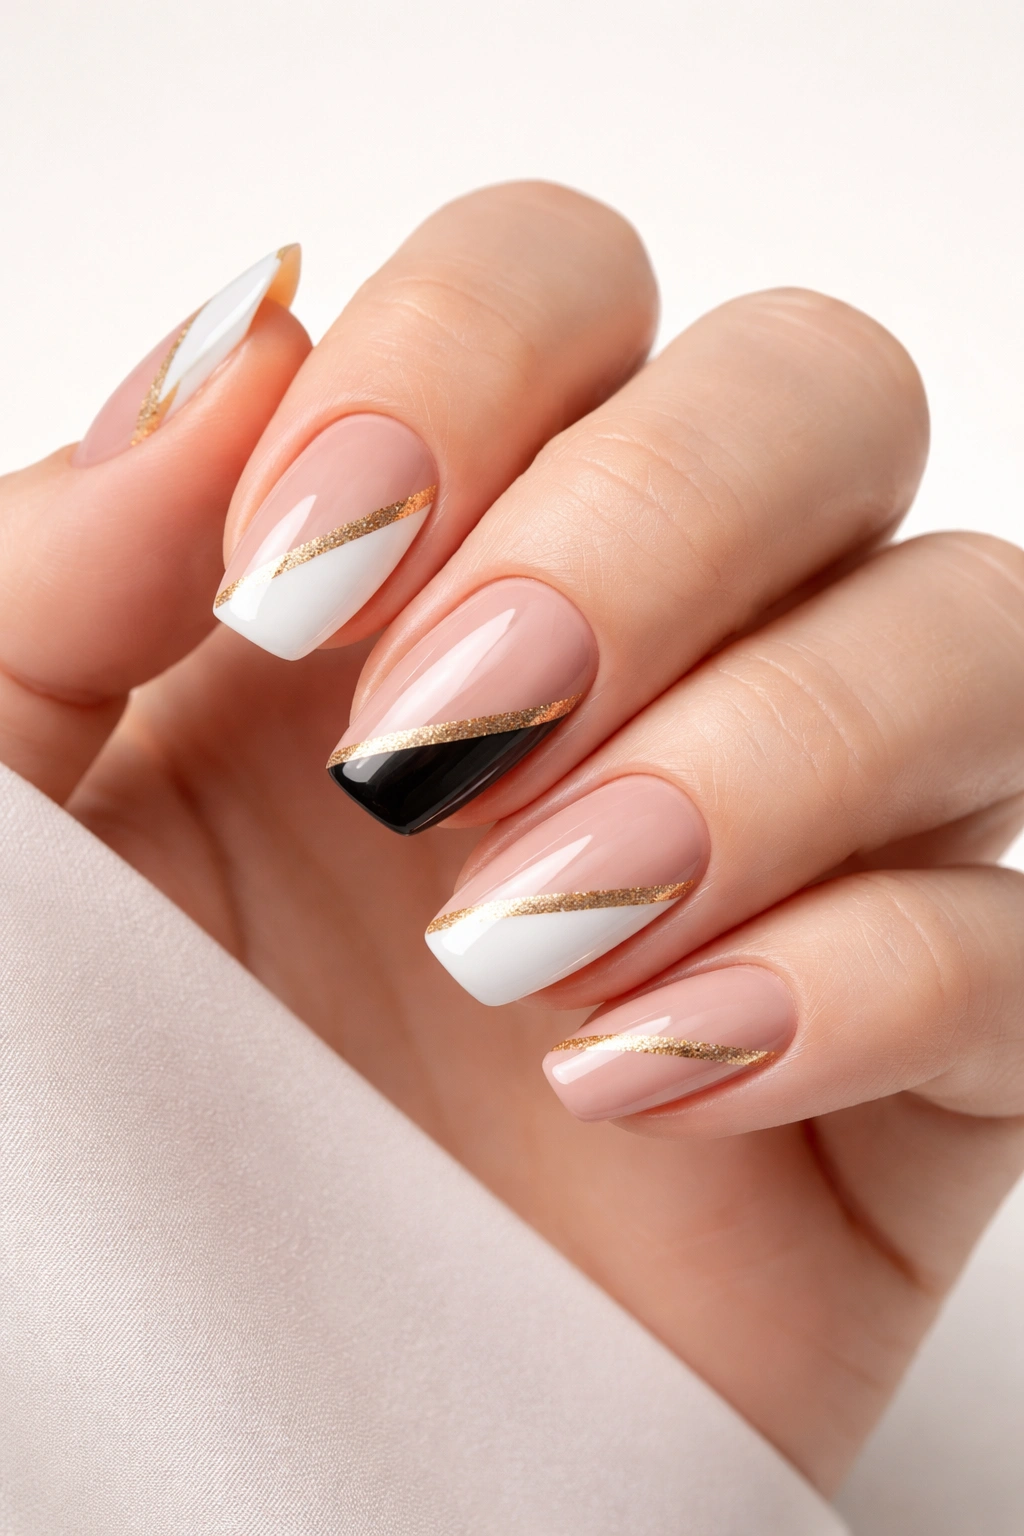
10. Metallic French Tips
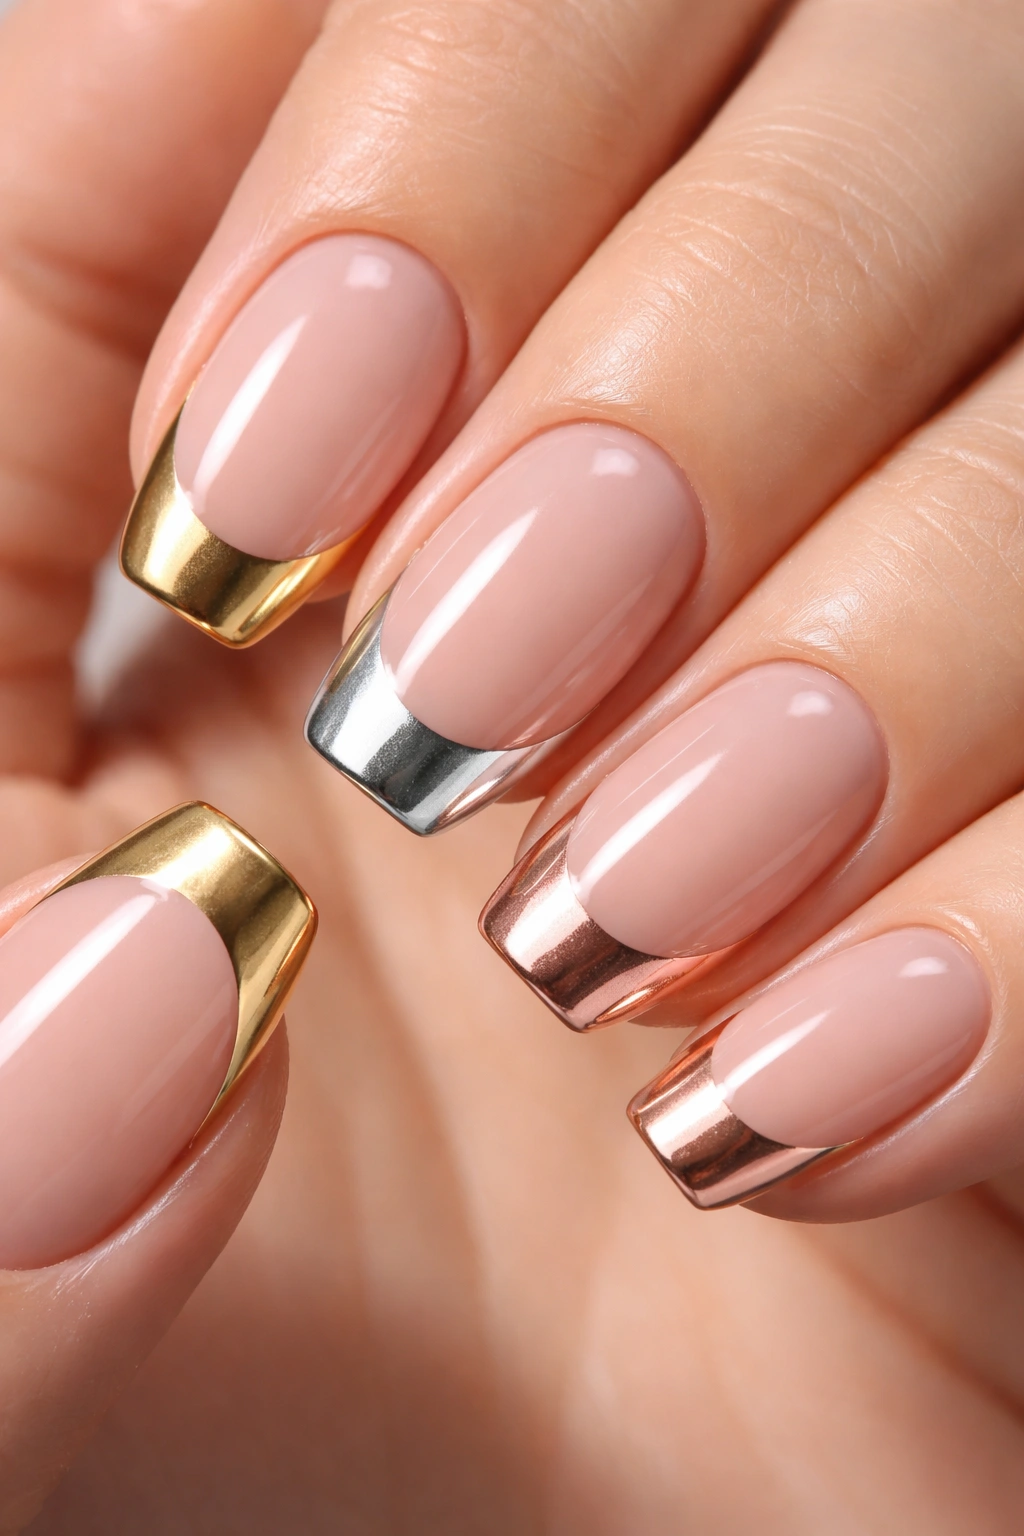
The French manicure has been around forever, but adding metallic polish to the tips brings this classic into the present. Gold, silver, or rose gold tips against a nude or sheer base create an elegant look that’s somehow both timeless and modern. The metallic shine catches light beautifully and elevates the whole design.
Why Metallics Make a Difference
Standard French tips use white, which can sometimes look stark or dated. Metallic shades add warmth and dimension while maintaining that clean, polished appearance French manicures are known for. The metallic also provides more room for error—if your line isn’t perfectly smooth, the shimmer in metallic polish disguises slight wobbles better than flat white would.
Application Method
Apply a nude or sheer pink base coat that closely matches your natural nail color. Once dry, you have options for creating the tip. The freehand method involves carefully painting a curved line with your metallic polish, but this takes practice. Nail guides or reinforcement stickers placed across your nail create a perfect guide—paint below the sticker, wait 60 seconds, then carefully remove it. For the easiest application, use the corner of a makeup sponge with metallic polish to press color onto just the tips.
Thickness Considerations
French tips look most elegant when they’re relatively thin—about 2-3 millimeters thick. Thicker tips can overwhelm shorter nails, while ultra-thin tips sometimes appear unfinished. Find a thickness that balances with your nail length.
Wrapping Up
Mastering these ten polish-based nail designs opens up endless possibilities for mixing, matching, and creating your own signature styles. The techniques you’ve learned—dotting, taping, sponging, and striping—form the foundation for countless other nail art ideas. Don’t get discouraged if your first attempts don’t look exactly like the inspiration photos you’ve seen. Even professional nail artists needed practice to develop their skills.
The real beauty of DIY nail art is the creative freedom it provides. You’re not limited by salon hours or someone else’s interpretation of a design. You can experiment with color combinations that speak to you, adjust techniques to fit your skill level, and create looks that genuinely reflect your personality. Keep your old polishes organized and accessible—that bottle you thought you’d never use might be perfect for your next nail art project.
Give yourself permission to play, make mistakes, and learn as you go. Your nails are a small canvas, but they’re one of the few places where you can showcase tiny works of art every single day. So grab those polish bottles and start creating something beautiful.
