

If you’re torn between short nails and longer ones, squoval shapes might just be the answer you’ve been searching for. This hybrid nail shape combines the practical, low-maintenance edge of square nails with the softer, more elegant curves of oval nails—and it’s absolutely the move right now for anyone wanting something polished without the commitment or fragility that comes with length.
The beauty of short squoval nails is that they’re genuinely wearable for real life. You can type without your nails getting in the way, you won’t accidentally break them off doing everyday tasks, and they still photograph beautifully and feel feminine and put-together. They’re also incredibly forgiving for at-home nail art—the short length means less surface area to worry about, making DIY designs feel totally achievable even if you’ve never painted your nails before.
The designs in this list focus on styles that work specifically well on squoval shapes and don’t require professional-grade equipment or steady hands that rival a surgeon’s. Most use basic nail polish and tools you probably already have, or can grab affordably. These are all designs you can actually pull off in your bathroom with some patience and a bit of practice.
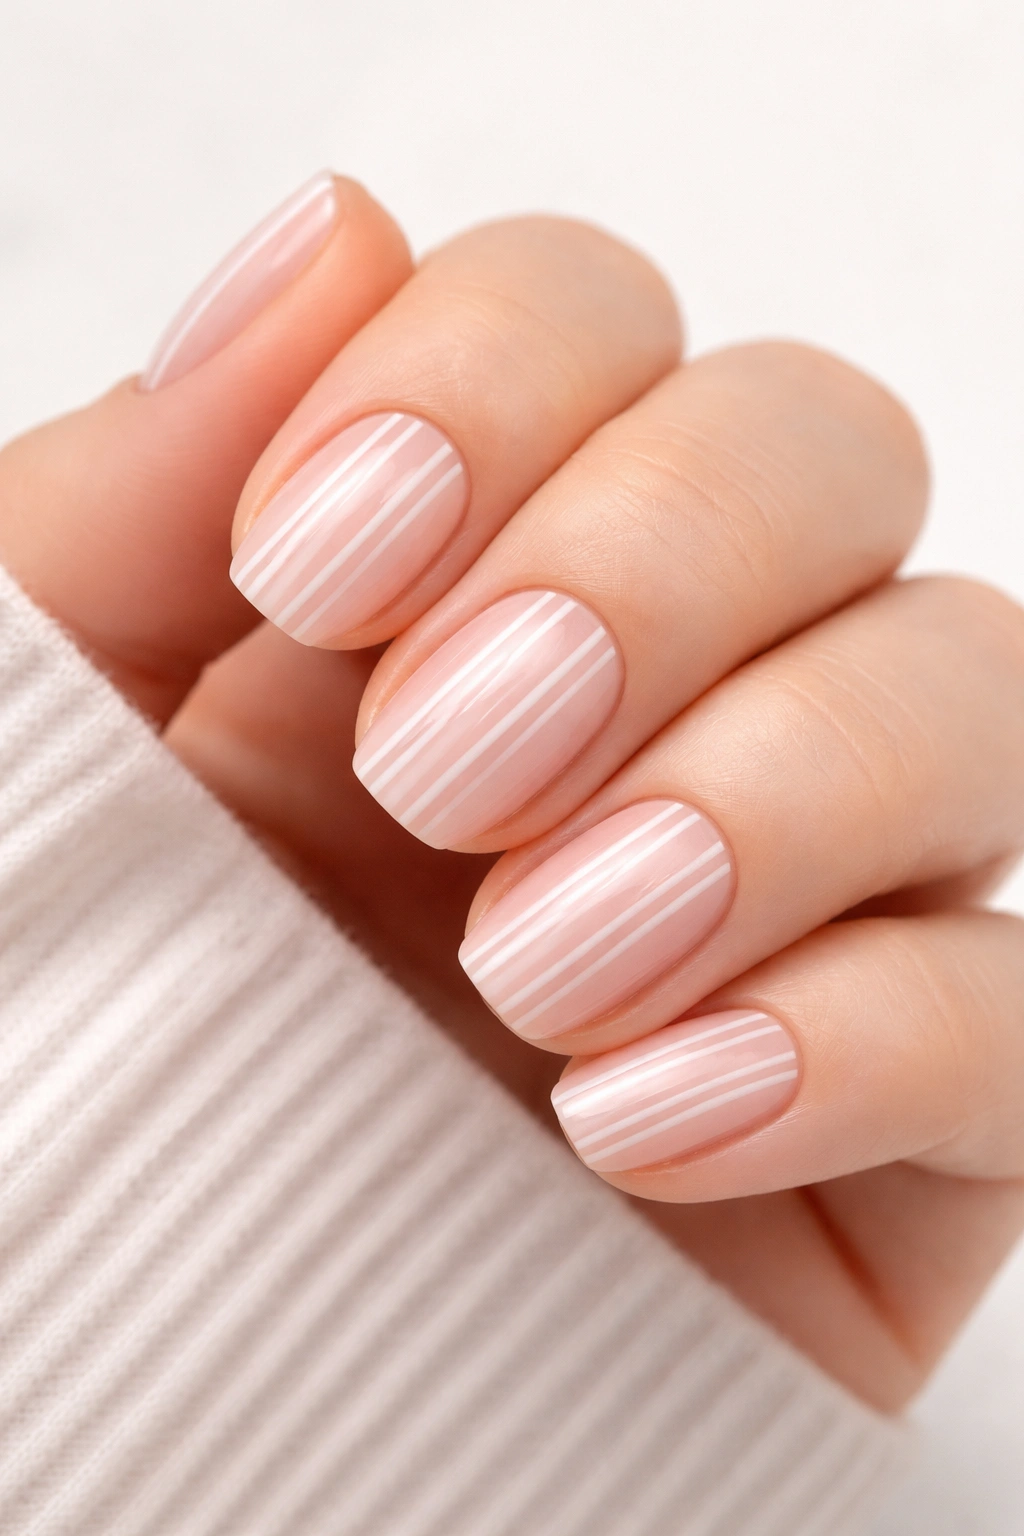
1. Minimalist Nude with Thin White Lines

This design is the definition of elegance without effort. A soft, neutral nude base paired with a few delicate white lines creates a look that reads as intentional and sophisticated while remaining completely approachable to execute. The beauty is in its simplicity—there’s nowhere to hide, so the clean lines and quality of your base color are what matter.
Why This Works for Squovals
Minimalist designs look incredible on squoval nails because the shape itself has visual interest. You don’t need busy patterns or heavy artwork to make the nail look complete. The slight angles at the sides and the rounded tips create natural negative space that makes simple lines feel architectural and modern rather than sparse.
How to Create This at Home
Start with a base coat, then apply two smooth coats of a nude shade that matches your skin tone—cream nudes work better than beiges for this look because they feel more luxurious. Once dry, use a thin detail brush (or a toothpick if you don’t have one) dipped in white polish to paint one or two delicate lines down the center of each nail, or create small geometric lines in the corners. The key is keeping them intentionally imperfect—perfectly straight lines can look stiff, so embrace a little organic movement.
Pro Tip
Use a white gel pen or nail art pen instead of a brush. These give you finer control and won’t dry out mid-application like liquid polish can on a brush.
2. Classic French Squoval
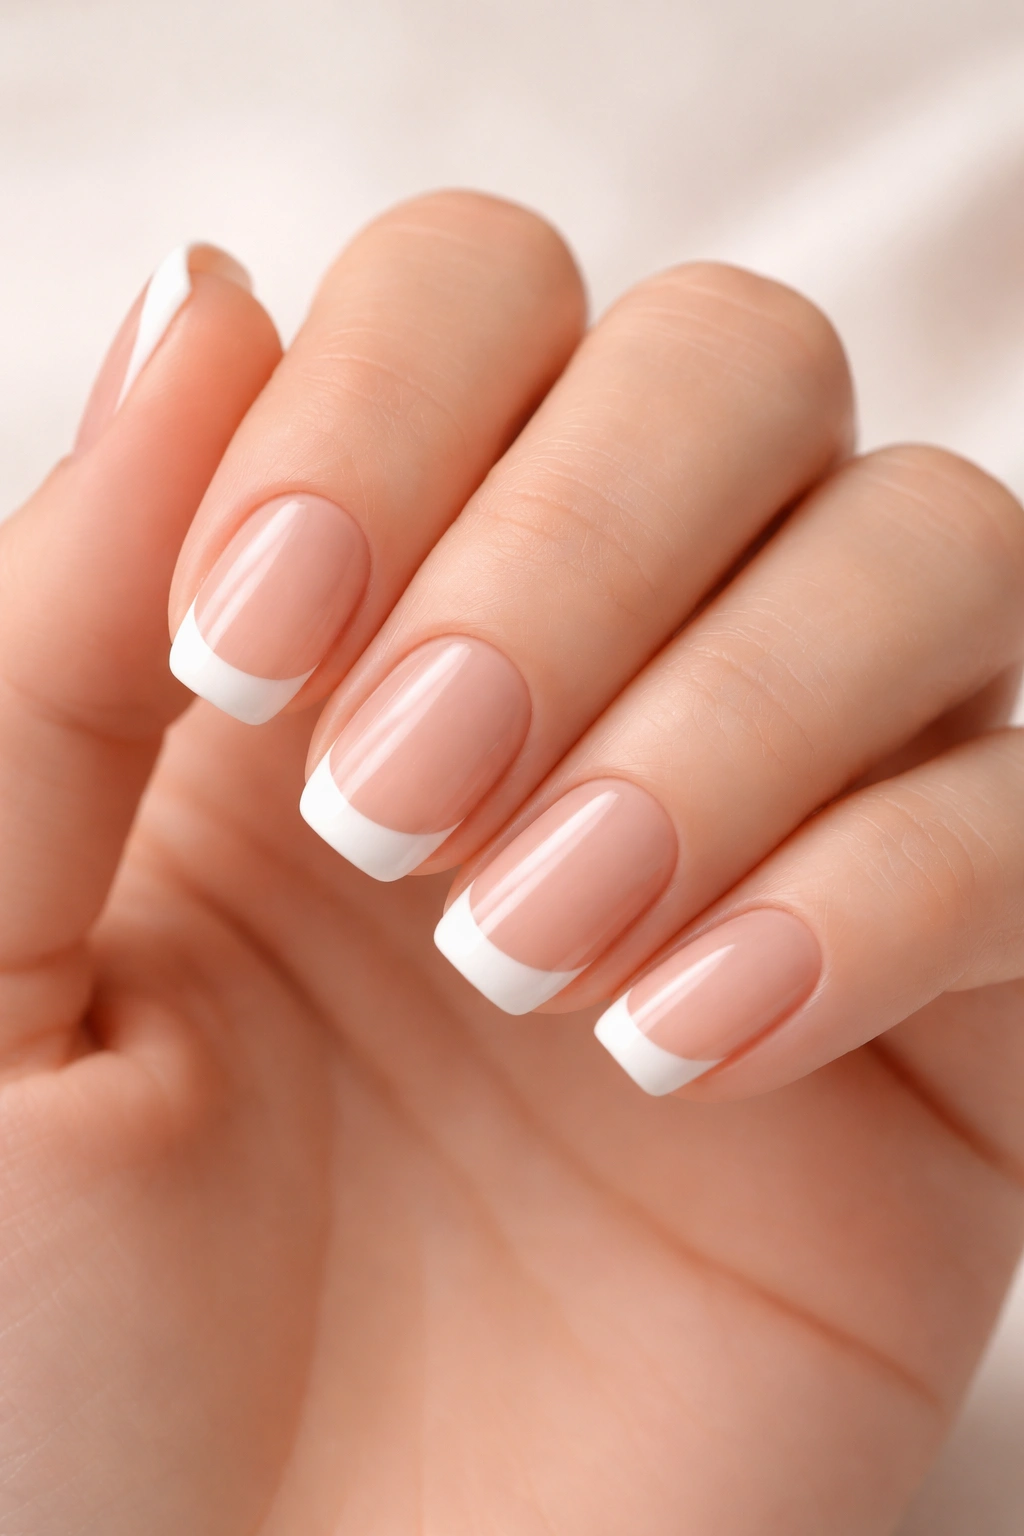
The French mani is timeless for a reason, and when applied to squovals, it gains a modern edge. The straight tips of a traditional French don’t quite suit the curved ends of a squoval, so the real trick is adapting the French style to follow your nail’s natural shape—creating a curved white tip that hugs the rounded contour.
Why This Works for Squovals
A true French manicure on a squoval actually looks softer and more current than a traditional straight-tipped French. The curved white line at the end creates a frame that emphasizes the shape rather than fighting against it. This is why squovals are sometimes called the “modern French nail”—they’re the perfect canvas for it.
How to Create This at Home
Paint a nude or pale pink base coat (two coats for opacity). For the tips, you have two options: freehand with a thin brush and white polish (which takes practice but gives you total control), or use French manicure guide stickers. Position the sticker to follow the curve of your nail tip—this usually means angling it slightly more than you’d expect. Paint the white polish tip, let it dry, then remove the sticker carefully. Seal everything with a clear top coat for shine and protection.
Pro Tip
If freehand feels intimidating, use a white gel pen to outline where you want the white tip to be, then fill it in with a tiny brush. This gives you a guide without the commitment of a sticker.
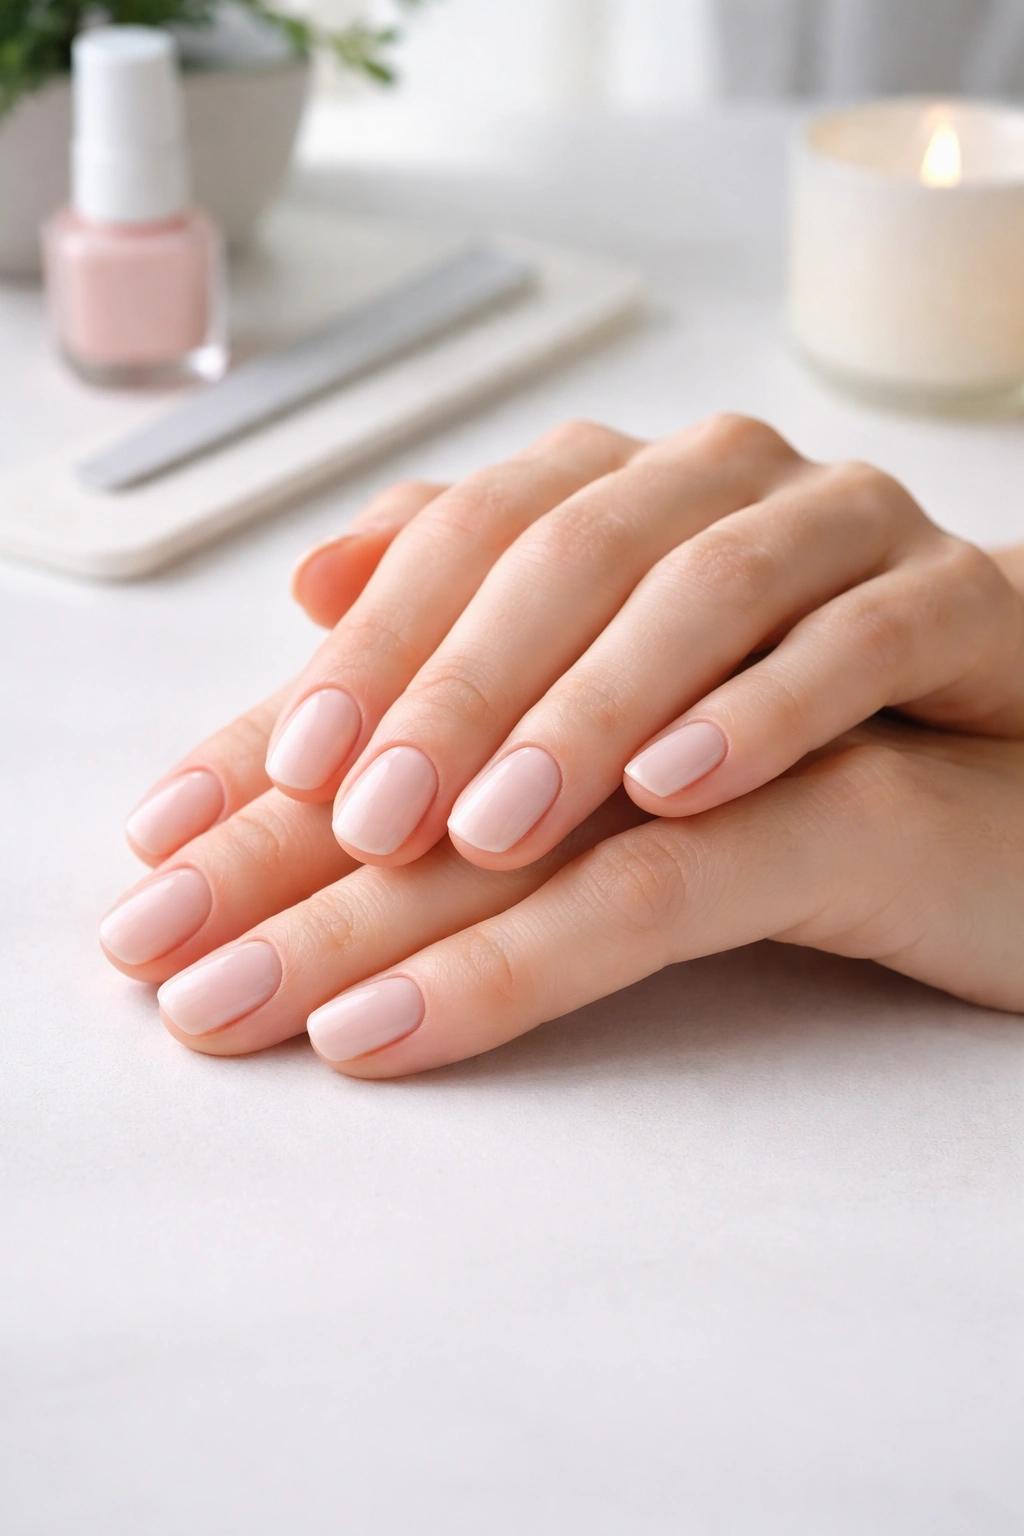
3. Soft Pink Ombre Gradient
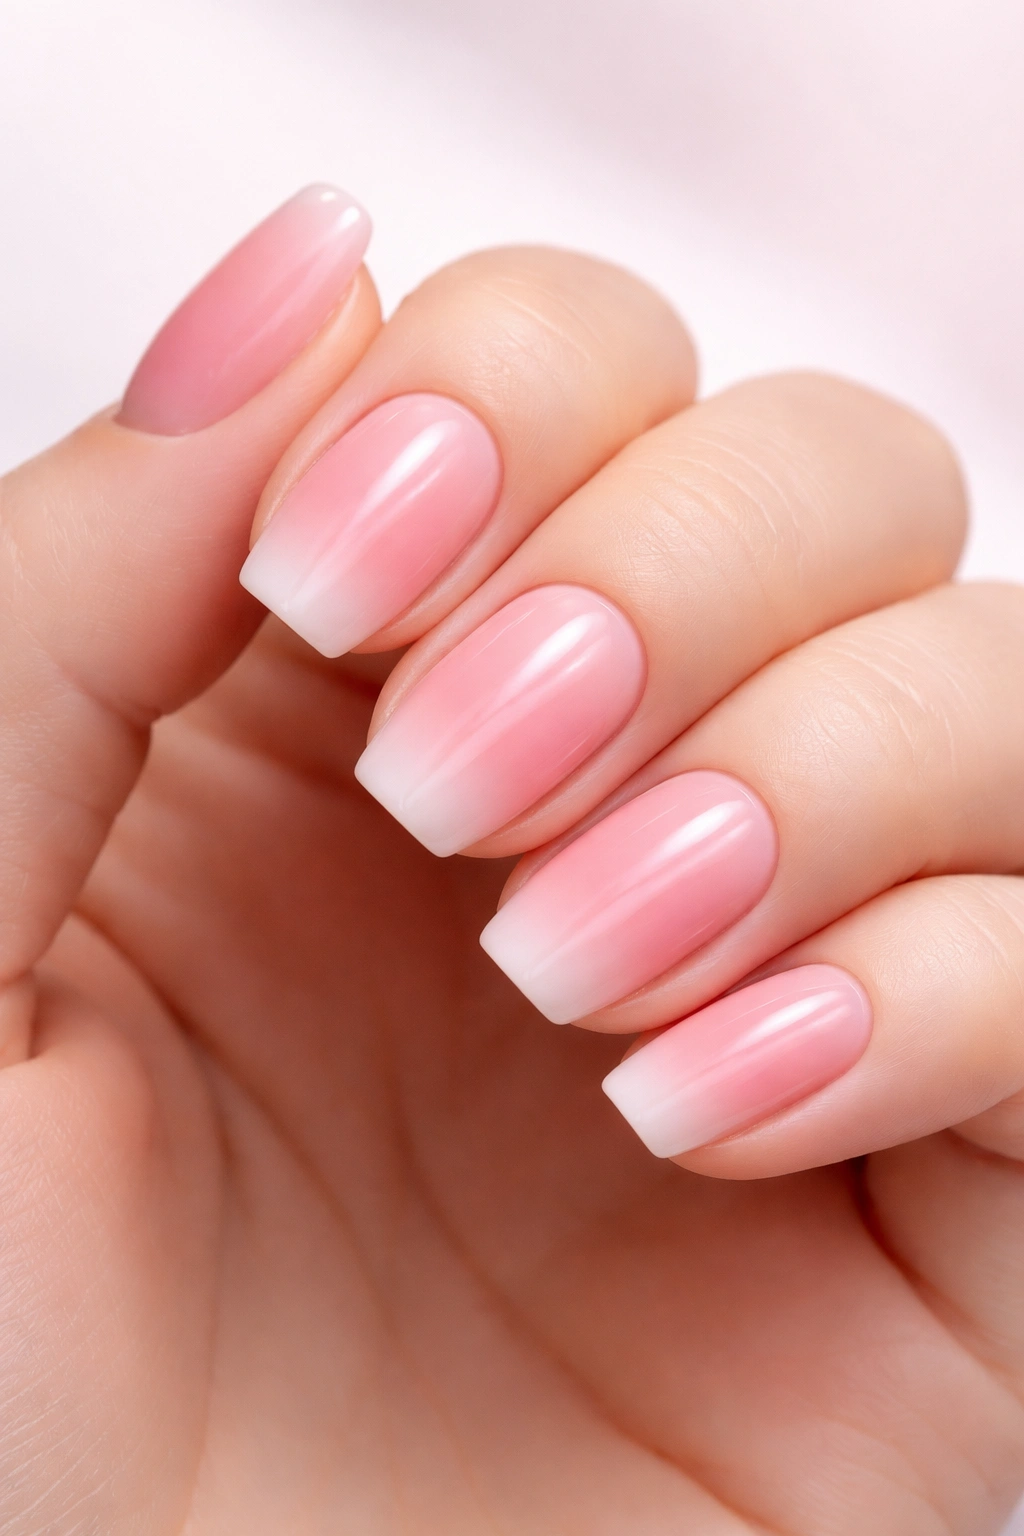
An ombre effect where color transitions from darker to lighter (or vice versa) looks incredibly polished and hides imperfections beautifully. A soft pink gradient from pale blush to deeper rose feels romantic and works for any occasion from casual to formal.
Why This Works for Squovals
The ombre technique naturally follows the contours of your nail, so the shape enhances the gradient effect. On squovals, the transition from root to tip feels smooth and intentional because there’s enough real estate to show gradual color shift without looking cramped.
How to Create This at Home
You need at least two shades of pink—a pale version and a slightly deeper version. Paint your entire nail with the lighter shade first (two coats). While a tiny amount of the darker shade is still wet on a makeup sponge, dab and bounce it gently onto the tips and sides of your nails, feathering it upward. The sponge texture naturally creates that soft gradient effect. Seal with a clear top coat. If your first pass looks too harsh, repeat with the light shade on the sponge to blend further.
Quick Facts
- Sponging creates a softer gradient than brushing
- The technique works best with colors that are close in tone (light to medium, not light to dark)
- Cleanup around the cuticle is easier if you apply a thin layer of cuticle oil first
- Practice on a makeup sponge scrap before applying to nails
4. Matte Finish Base with Glossy Tips
Combining textures in one design—matte base, glossy tips—creates visual depth and modern sophistication. This design is nearly foolproof because the contrast between the two finishes does the heavy lifting for you.
Why This Works for Squovals
The shape naturally creates a visual endpoint at the tip, making it the perfect place for a glossy accent. The matte body of the nail provides a subtle backdrop that lets the shiny tips shine without the design feeling over the top.
How to Create This at Home
Apply your chosen base color (two coats). Once fully dry, apply a matte top coat to the entire nail and let it cure if you’re using gel, or dry if using regular polish. Once the matte coat is completely dry, use a thin brush or a qtip to carefully paint a high-shine glossy top coat just on the tips (roughly the top third of each nail). The contrast between textures does all the work—you don’t need a different color for this to look striking.
Pro Tip
If you’re using regular polish, a matte top coat still takes time to fully set. Wait at least 10 minutes before applying the glossy topcoat, or the matte will soften and blur.
5. Geometric Pastel Blocks

Clean geometric shapes in soft pastel colors create a design that looks intentional and artistic without requiring freehand drawing skills. Think soft pink, pale yellow, and cream arranged in simple rectangular or triangular blocks.
Why This Works for Squovals
The straight edges of geometric shapes play beautifully against the soft curves of a squoval nail. There’s a nice visual tension—the shape is modern and structured, but the nail’s organic curves keep it from feeling rigid.
How to Create This at Home
Use a nude or cream base (two coats). Once dry, use painter’s tape cut into rectangles or triangles to create your block shapes, adhering the tape carefully to the nail. Paint your chosen pastel color inside the taped area, remove the tape, and repeat with another color on a different area of the nail. The tape edges will give you clean lines. If any polish seeps under the tape, let it dry completely before removing the tape—it peels away more cleanly that way.
Quick Facts
- Painter’s tape is gentler on nails than regular tape and peels away more cleanly
- Use a thin craft knife or cuticle pusher to press the tape edges down firmly before painting
- One thin coat of color usually shows through under painter’s tape; plan for two coats
- Let each color dry before applying painter’s tape for the next section
6. Floral Watercolor Design
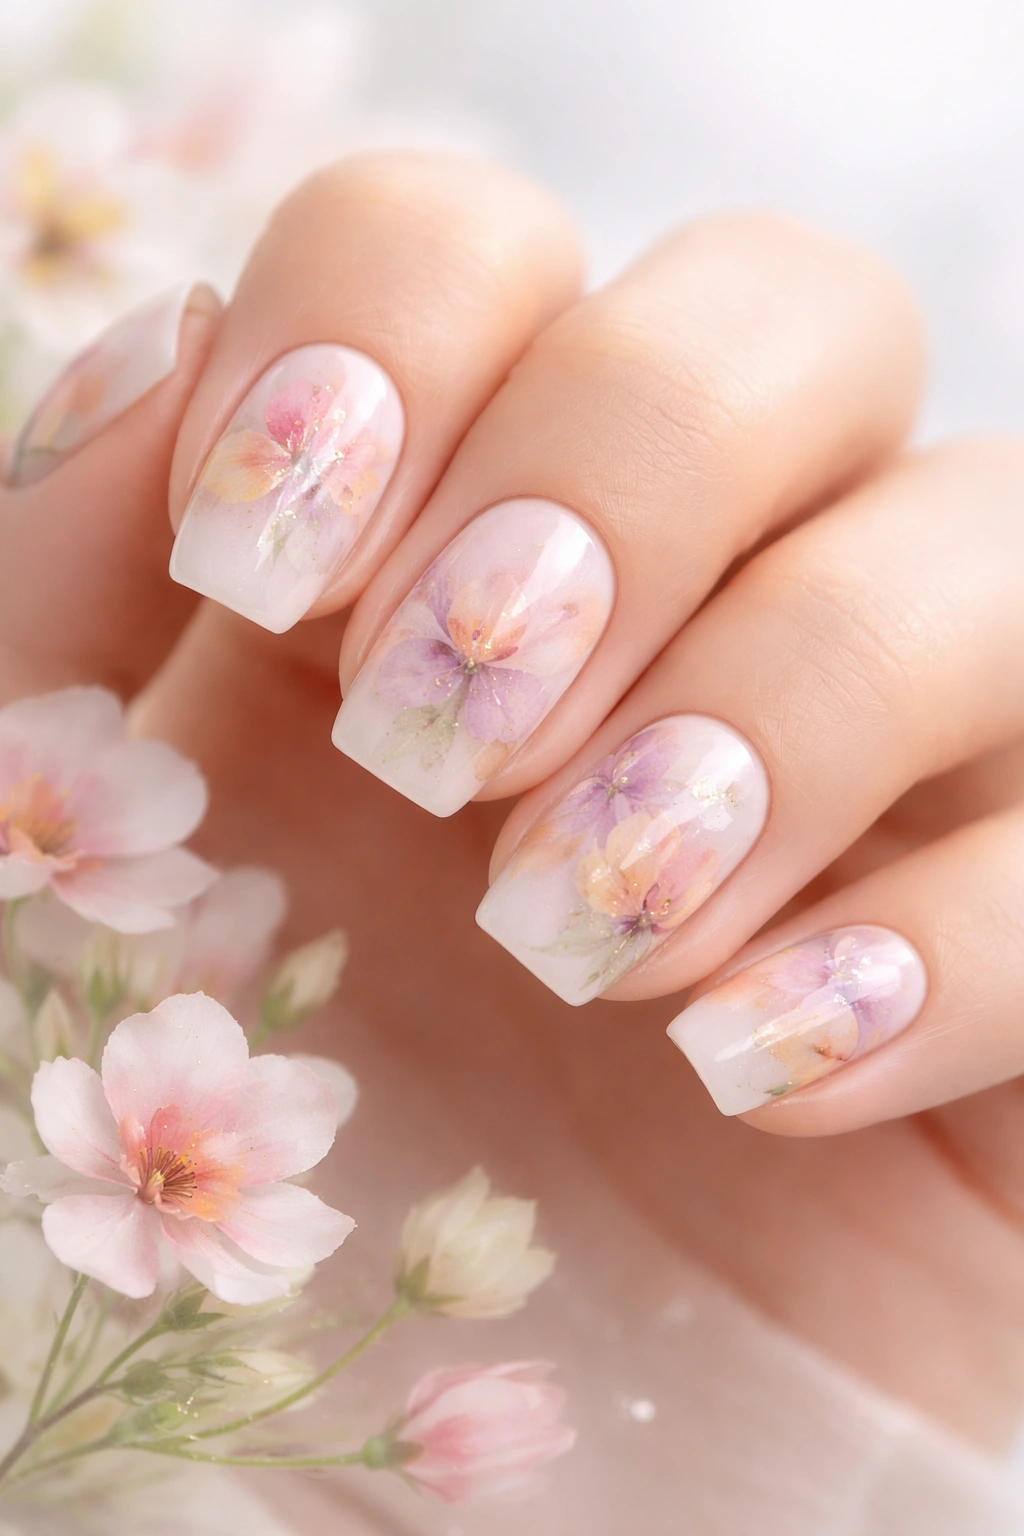
A loose, artistic floral design creates movement and visual interest. Watercolor floral looks effortlessly beautiful, and the key is embracing imperfection—flowing watercolor petals don’t need to be realistic or precise.
Why This Works for Squovals
The rounded tips of squovals provide the perfect canvas for a delicate floral accent. You can place a small flower at the tip, or scatter tiny blooms across a few nails. The shape’s curves echo the organic nature of flowers, creating visual harmony.
How to Create This at Home
Apply a light, neutral base (pale pink, cream, or soft white) as your canvas. Using a thin detail brush, paint simple flower shapes with a blurred, watercolor effect. The trick is loading your brush with a bit of water or a watercolor medium mixed with your nail polish, which makes the color translucent and allows for soft edges. Paint loose petals, add a center dot, and let colors blend slightly into each other. It doesn’t need to be perfect—slight bleeding and transparency are exactly what you want.
Pro Tip
If regular nail polish feels stiff for watercolor effects, mix a tiny drop of rubbing alcohol or a watercolor medium into your polish. This thins it enough to create that translucent, flowing quality without compromising wear.
7. Chrome Mirror Effect
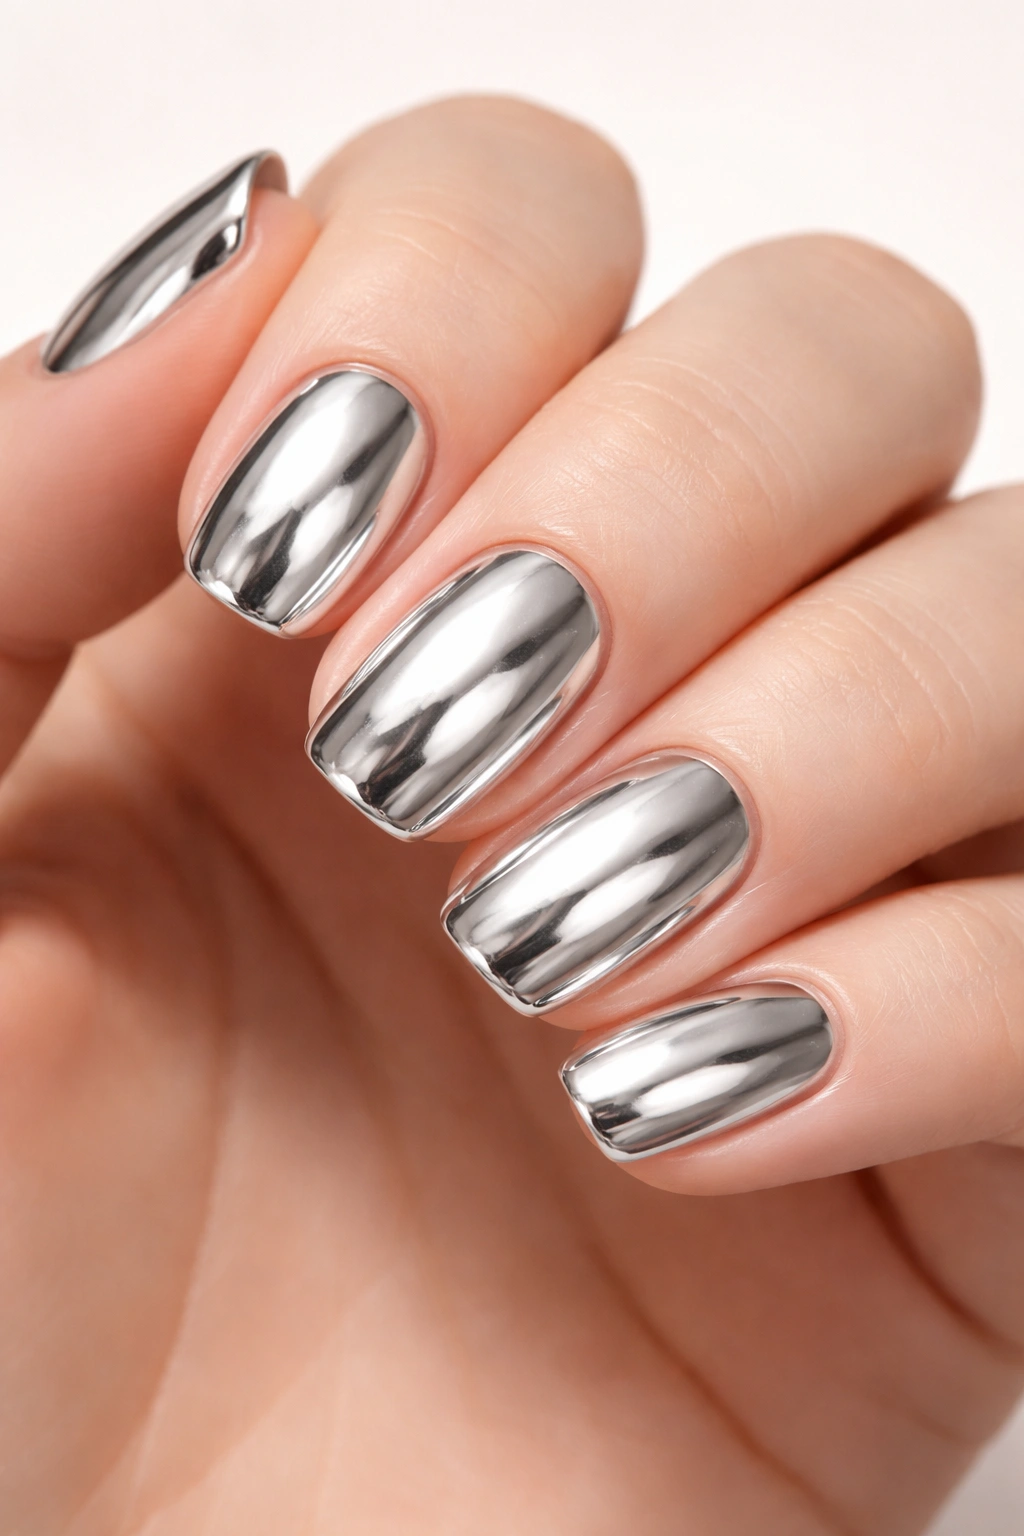
Chrome and mirror finishes create an almost metallic, reflective look that photographs beautifully and looks undeniably high-fashion. The finish catches light in a way that makes nails feel futuristic and luxe.
Why This Works for Squovals
On short squovals, chrome creates visual interest and makes nails look slightly longer than they are—the reflective surface draws the eye vertically. The effect works on any color base, though silver, rose gold, and gold chrome are most popular.
How to Create This at Home
You’ll need a chrome powder (these are affordable on Amazon or in beauty supply stores) and either a gel base or sticky residue from a gel top coat. Apply your chosen base color in gel or regular polish. Once cured or dry, apply a thin layer of sticky gel top coat (the kind that has a visible shiny layer before curing). While still sticky, use a small brush or sponge to apply chrome powder, buffing gently. The powder adheres to the sticky layer. Cure under a UV or LED lamp, then seal with a clear top coat. For regular polish bases, you’ll need a special chrome adhesive layer—these exist and work similarly, though gel is easier for beginners.
Quick Facts
- Chrome powder comes in various colors: silver, rose gold, gold, blue, green
- A little goes a long way—use a light hand to avoid a heavy, flaking finish
- Buffing the powder gently creates a smoother, more mirror-like finish
- Chrome tends to wear at the tips faster than regular polish; reapply every 2-3 weeks
8. Marble Swirl Pattern
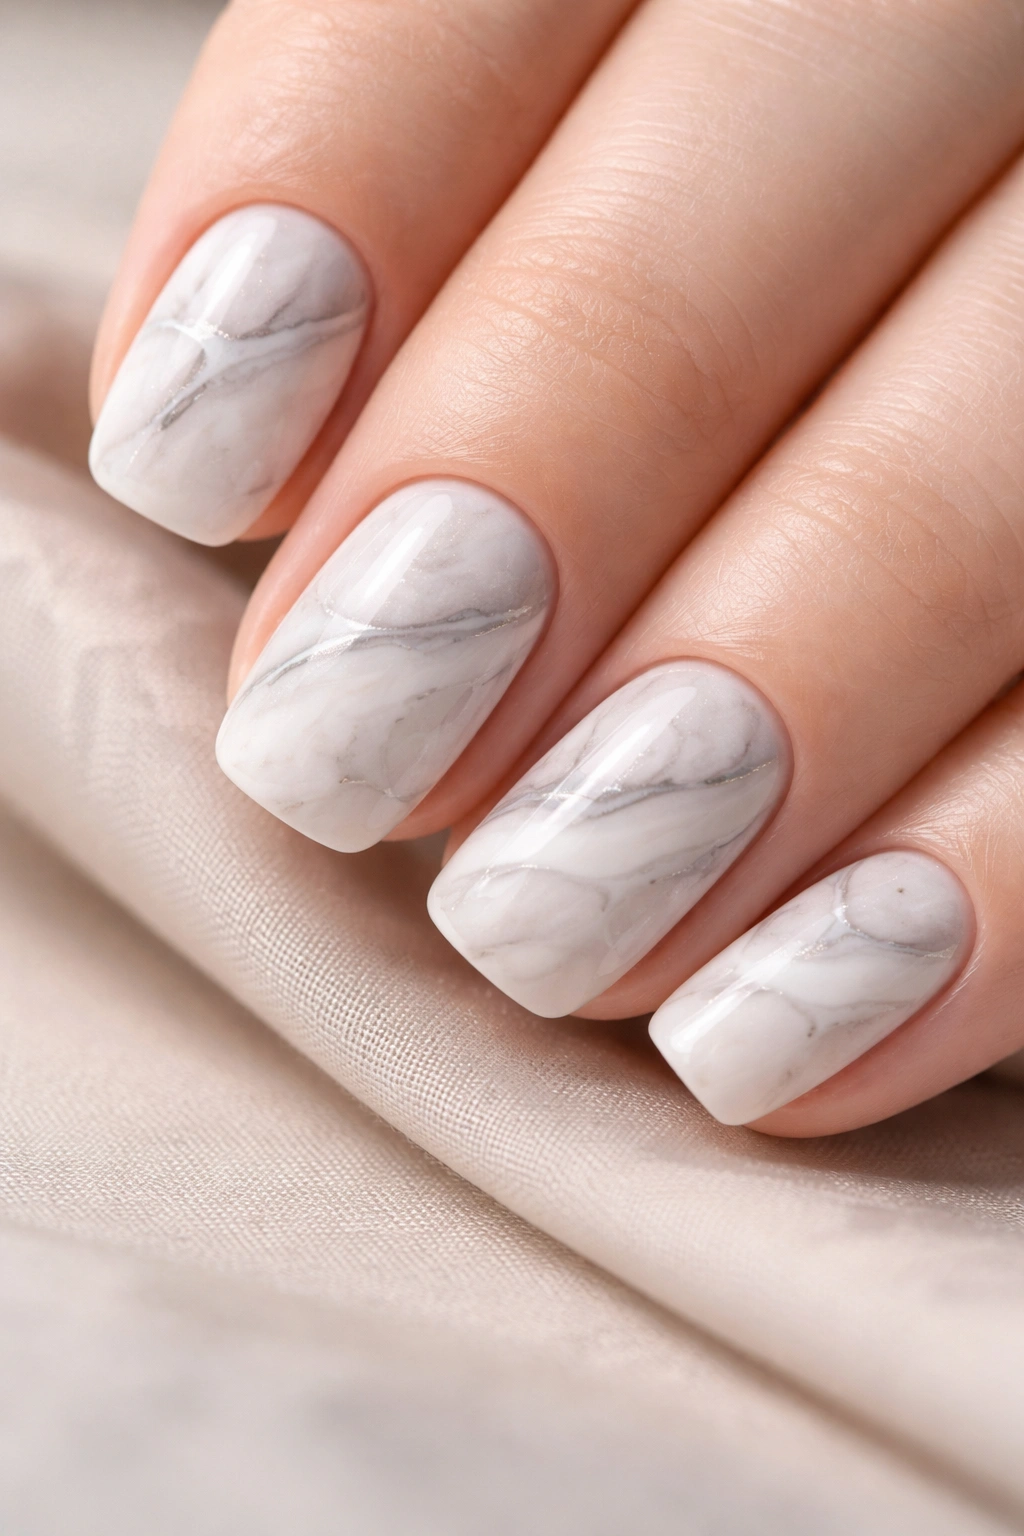
Marble designs evoke luxury and elegance, and the good news is that creating them at home is surprisingly achievable. The key is using a water-marbling technique or a dry marbling method with a thin brush—both create that signature veined stone effect.
Why This Works for Squovals
Marble’s organic veining naturally complements the organic curves of a squoval. The design looks sophisticated without being fussy, and it works beautifully in monochromatic schemes (grey and white, black and white) or soft pastels (blush and cream).
How to Create This at Home
Apply a pale base (white, cream, or soft pink). For water marbling: drop a few colors into room-temperature water, use a toothpick to create swirls, then dip your nail into the water at an angle to pick up the pattern. For dry marbling: use a thin detail brush to paint irregular veining lines in a contrasting shade (grey on white, for example), then soften the lines by dragging a nearly-dry brush through them. The softness creates the illusion of stone depth.
Pro Tip
Water marbling has a learning curve—your first attempt might look chaotic rather than marbled. Practice on a few nails before committing to all ten. Dry marbling is more forgiving for beginners.
9. Soft Glitter Gradient
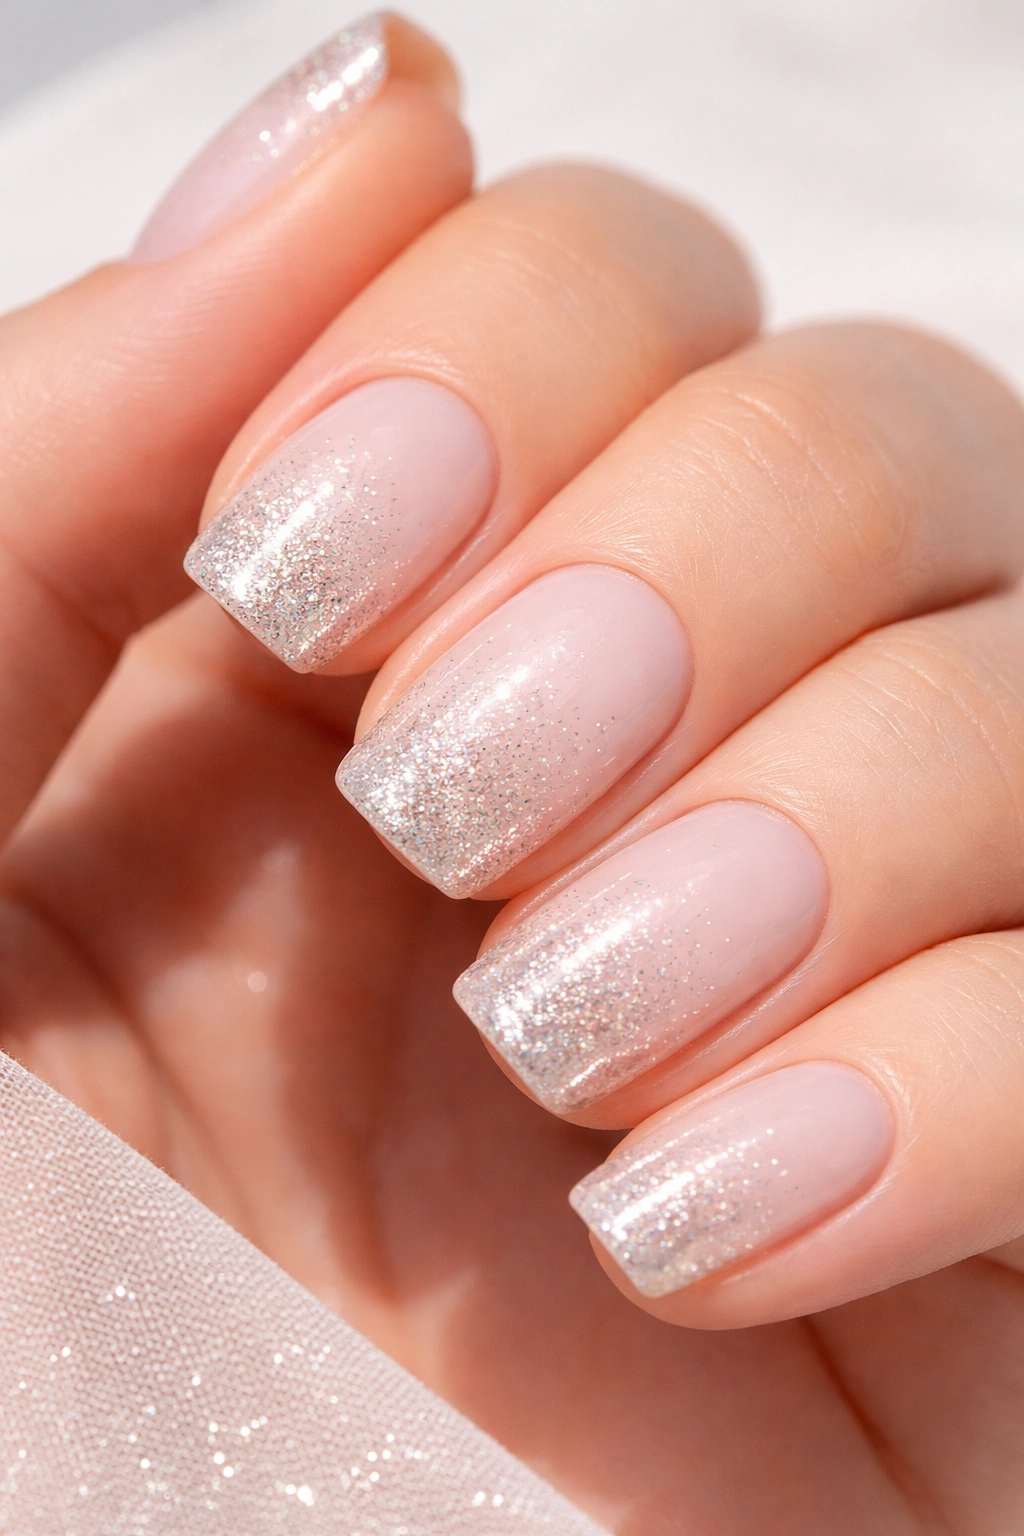
Glitter transitions gradually from concentrated at the tips to sparse or absent at the base, creating depth and sparkle without feeling costume-y. This design reads as elegant rather than playful, especially in fine glitter or when using one or two strategic colors.
Why This Works for Squovals
The glitter concentrates at the tips—the exact focal point of a squoval—making the design feel intentional and proportional. Short nails with a glitter gradient look festive but not over the top, perfect for anyone wanting subtle sparkle.
How to Create This at Home
Apply your base color (two coats). Once dry, mix a small amount of glitter polish with clear polish to create a thin, gritty mixture. Apply this mixed polish to the tips, feathering it upward about a third of the way up the nail. Let it dry. Apply another layer of the base color to the area where glitter meets the solid color, blending the transition. Seal with a clear top coat. The result is a gradient where glitter is concentrated but not overwhelming.
Quick Facts
- Fine glitter reads as more elegant than chunky glitter on short nails
- Mix glitter polish 1:1 with clear to reduce glitter density
- Multiple thin coats of the gradient mixture look better than one thick coat
- Cleanup is easier if you apply cuticle oil to the skin around your nails first
10. Two-Tone Color Block
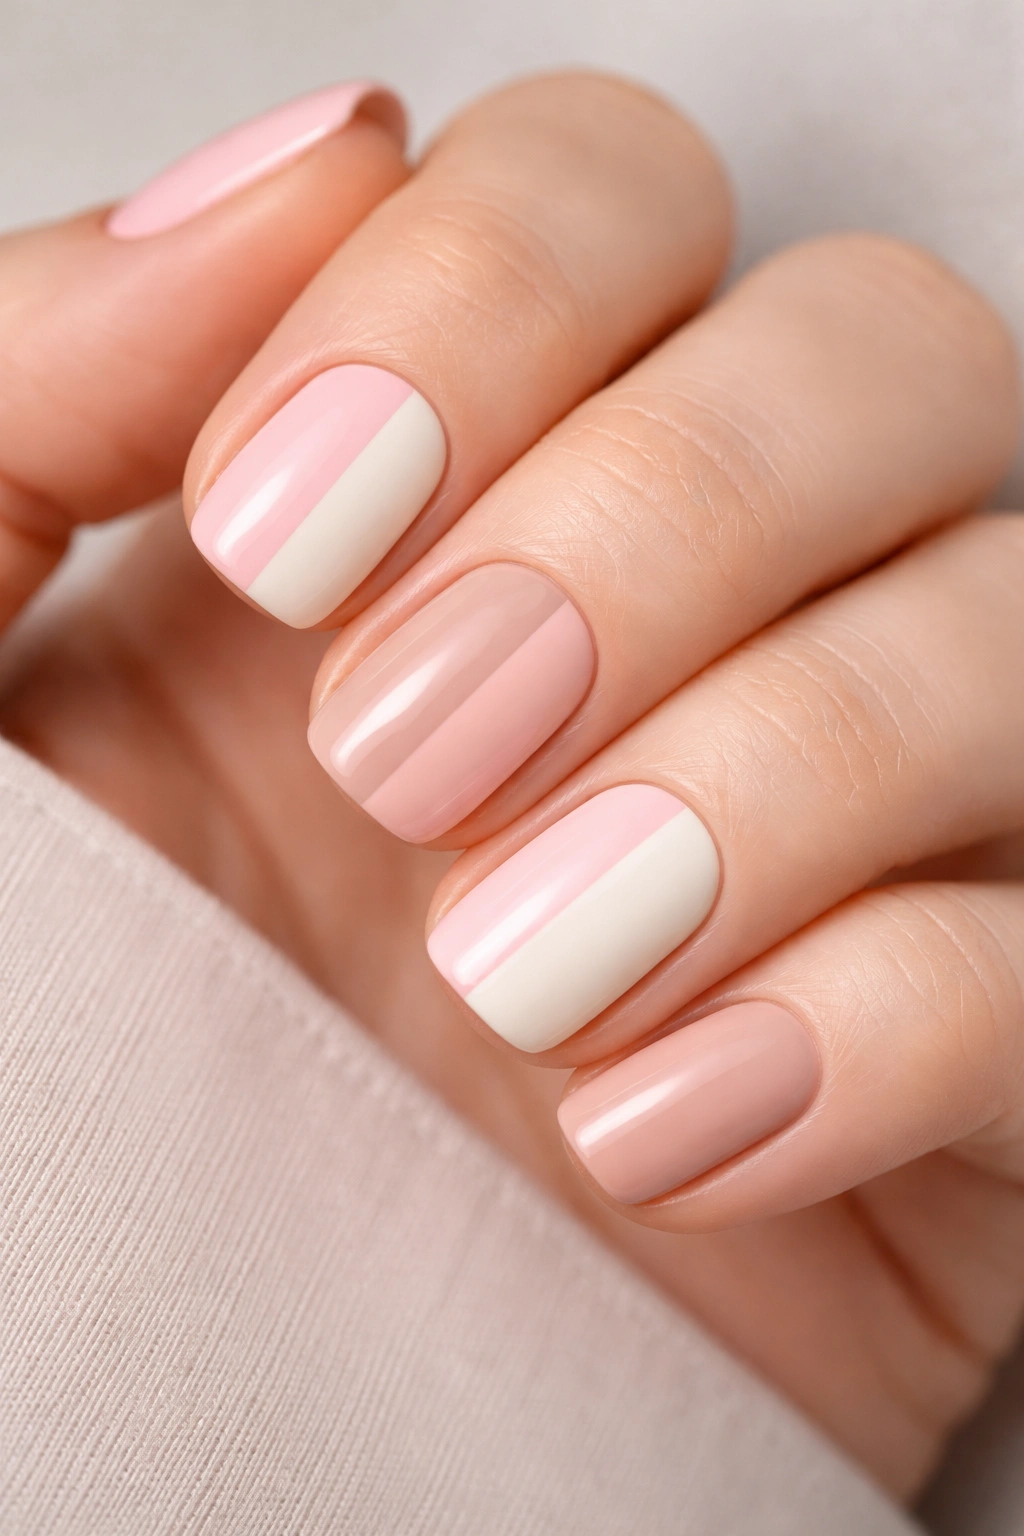
Divide each nail into two distinct color sections—usually vertical halves or a diagonal split—creating a bold, graphic design. Choose complementary pastels, contrasting brights, or a classic combination like white and nude.
Why This Works for Squovals
The shape’s straight sides and curved tips create natural visual sections. A vertical split follows the line of the nail’s length, while a diagonal split plays with the shape in an unexpected way. Both feel modern and intentional on squovals.
How to Create This at Home
Apply a base coat. Use painter’s tape to create your dividing line—vertical down the center, or diagonal from one corner to the opposite corner. Paint one color on one side (two coats), remove the tape carefully, let dry, then reapply tape to protect the first color while you paint the second color on the other side. For cleaner edges, let each color dry completely before removing tape. Seal with a clear top coat.
Pro Tip
If you want a softer, less graphic look, skip the tape and paint freehand down the center, embracing slight imperfections. The softer division feels more artistic and forgiving.
11. Delicate Nail Art with Thin Stripes
Fine, evenly spaced stripes create visual movement and interest without overwhelming short nails. Use a thin striping brush (1-2mm wide) to paint uniform lines in a contrasting shade over your base color.
Why This Works for Squovals
Thin stripes elongate and emphasize the nail’s length without needing actual length. On squovals, stripes feel elegant and structured. Horizontal stripes emphasize width; vertical stripes emphasize length—choose based on whether you want to emphasize the nail’s proportions or create the illusion of more length.
How to Create This at Home
Paint your base color (two coats). Using a thin striping brush dipped in a contrasting shade, paint thin parallel lines across the nail—either horizontally, vertically, or diagonally. Space them evenly (roughly the same distance apart). This is easier than it sounds; your nail’s natural ridges and curves give you visual guides for spacing. Let dry, then seal with a clear top coat.
Quick Facts
- Nail art pens create thinner, more controlled lines than brushes
- Vertical stripes require a steadier hand but feel more intentional
- Diagonal stripes create dynamic movement and are more forgiving
- Practice on a paper nail wheel first to get spacing and pressure consistent
12. Nude Base with Metallic Accent
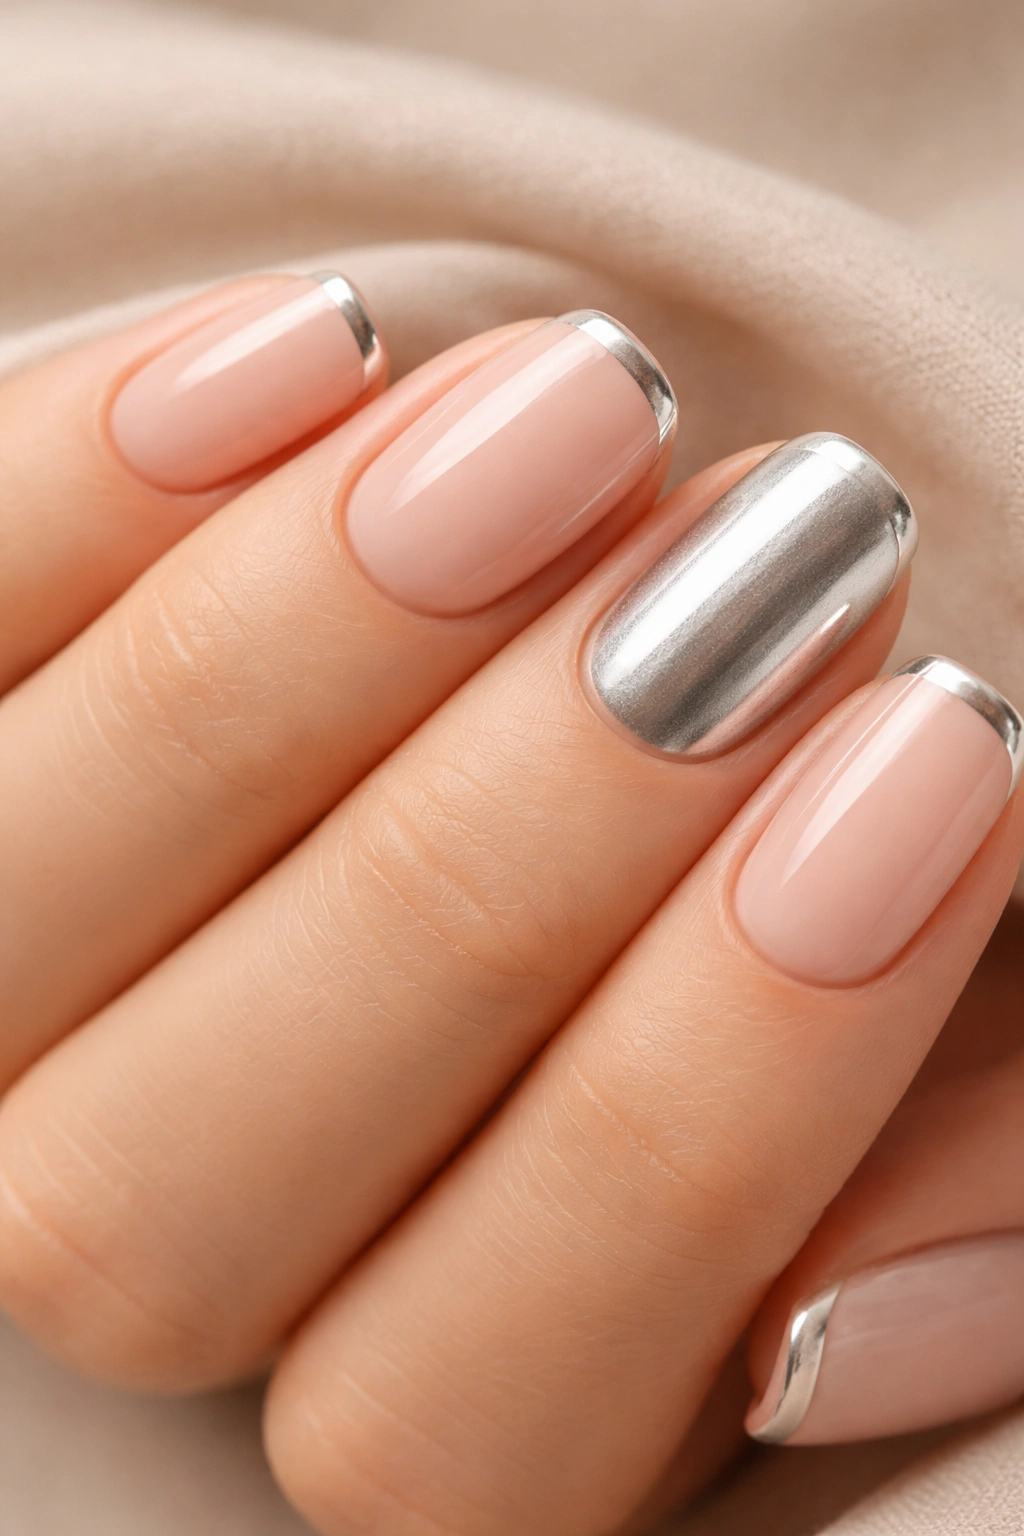
A neutral nude base paired with one metallic accent nail (or an accent on the tips or sides) creates polish and intentionality with minimal effort. The metallic catches light and draws the eye without requiring complex artwork.
Why This Works for Squovals
Metallic accents on short nails feel chic rather than overdone. On squovals, you can apply metallic to just the tips, create a metallic frame around the edge, or go full metallic on a single accent nail. The shape accommodates all these approaches beautifully.
How to Create This at Home
Apply two coats of your chosen nude shade to all nails. For metallic tips: apply a metallic shade to just the top third of your nails (about 1-2mm). For a full metallic accent nail: paint one nail (usually your ring finger or pinky) entirely in metallic. For an edge frame: use a thin brush to paint a thin metallic line around the edge of the nail, just inside the border. Seal everything with a clear top coat—metallics especially benefit from that extra protection.
Pro Tip
Rose gold metallic is universally flattering and works with nearly any skin tone. Gold and silver metallics are also beautiful but require more intentional color coordination with your base shade.
13. Speckled or Confetti Design
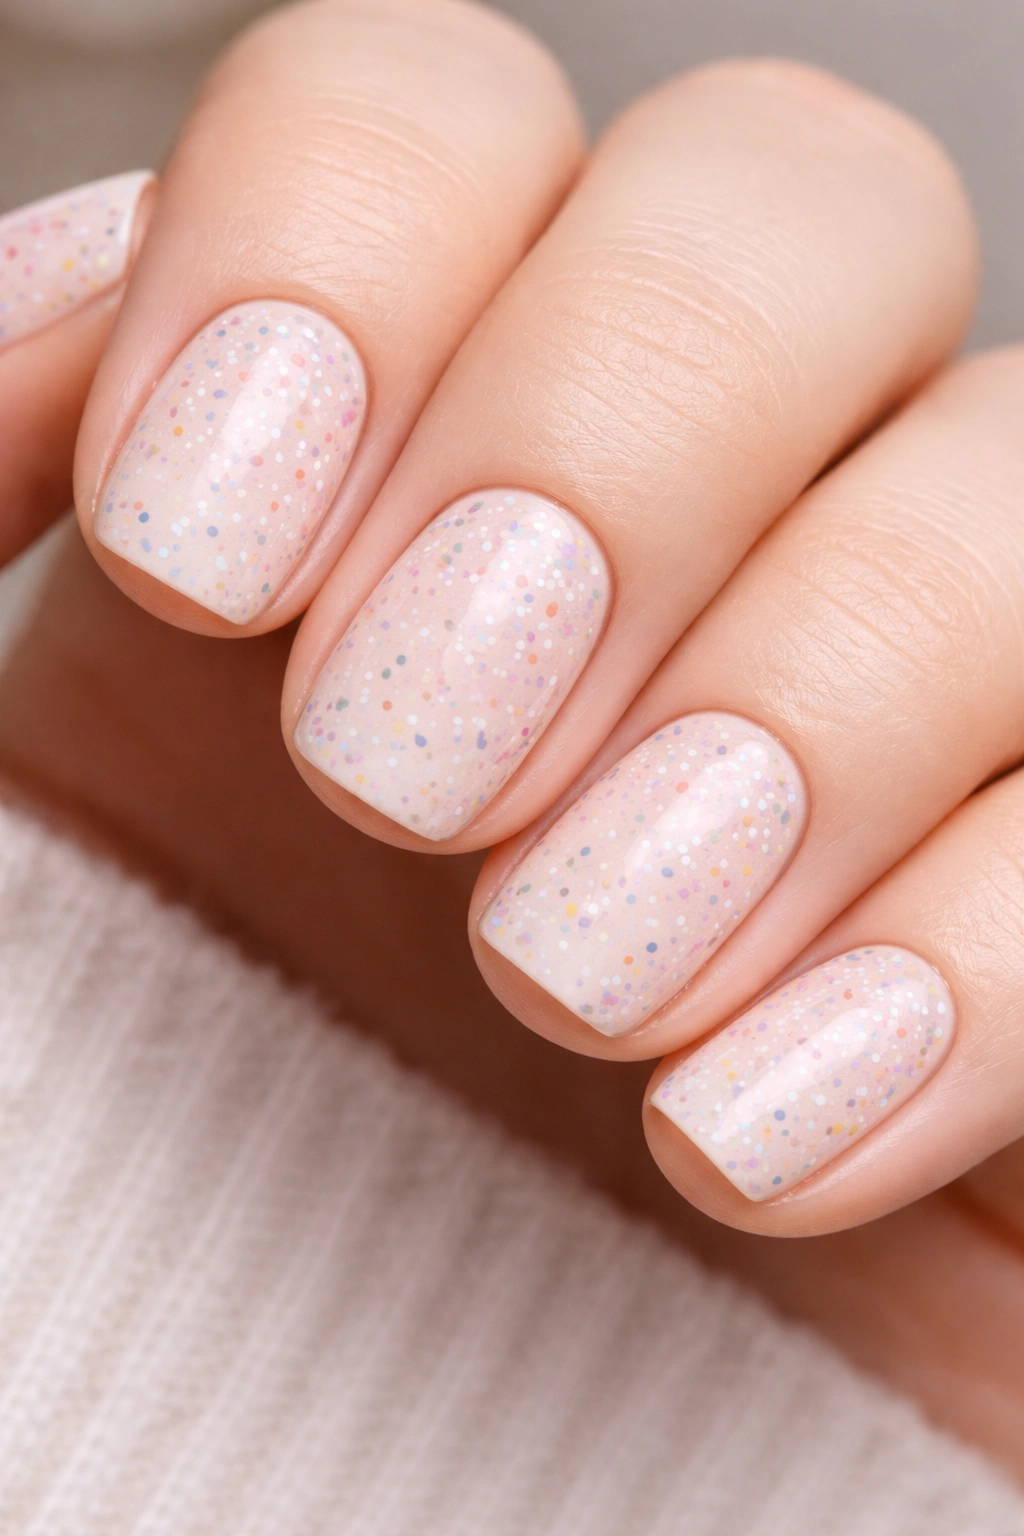
Tiny speckles or confetti-like dots scattered across the nail create visual texture and playful interest. This design is virtually impossible to mess up—speckles are meant to look random—making it perfect for nail art beginners.
Why This Works for Squovals
Speckles work on any nail shape, but on squovals they feel modern and less juvenile than they might on longer nails. The concentrated surface area means the confetti pattern reads as intentional without being overwhelming.
How to Create This at Home
Apply your base color (two coats). Using a thin brush, the tip of a toothpick, or a nail art pen, dab tiny dots of a contrasting shade all over the nail. Space them randomly—some clustered, some spread out. Let dry between colors if you’re using multiple accent shades. Seal with a clear top coat. That’s it. Imperfection is actually the point with this design.
Quick Facts
- A toothpick dipped in polish creates perfectly round dots
- Multiple accent colors (gold and silver speckles, for example) look more interesting than a single color
- Let the base color show through so the speckles read as “on top” rather than filling the nail
- This design works beautifully over shimmer or glitter bases
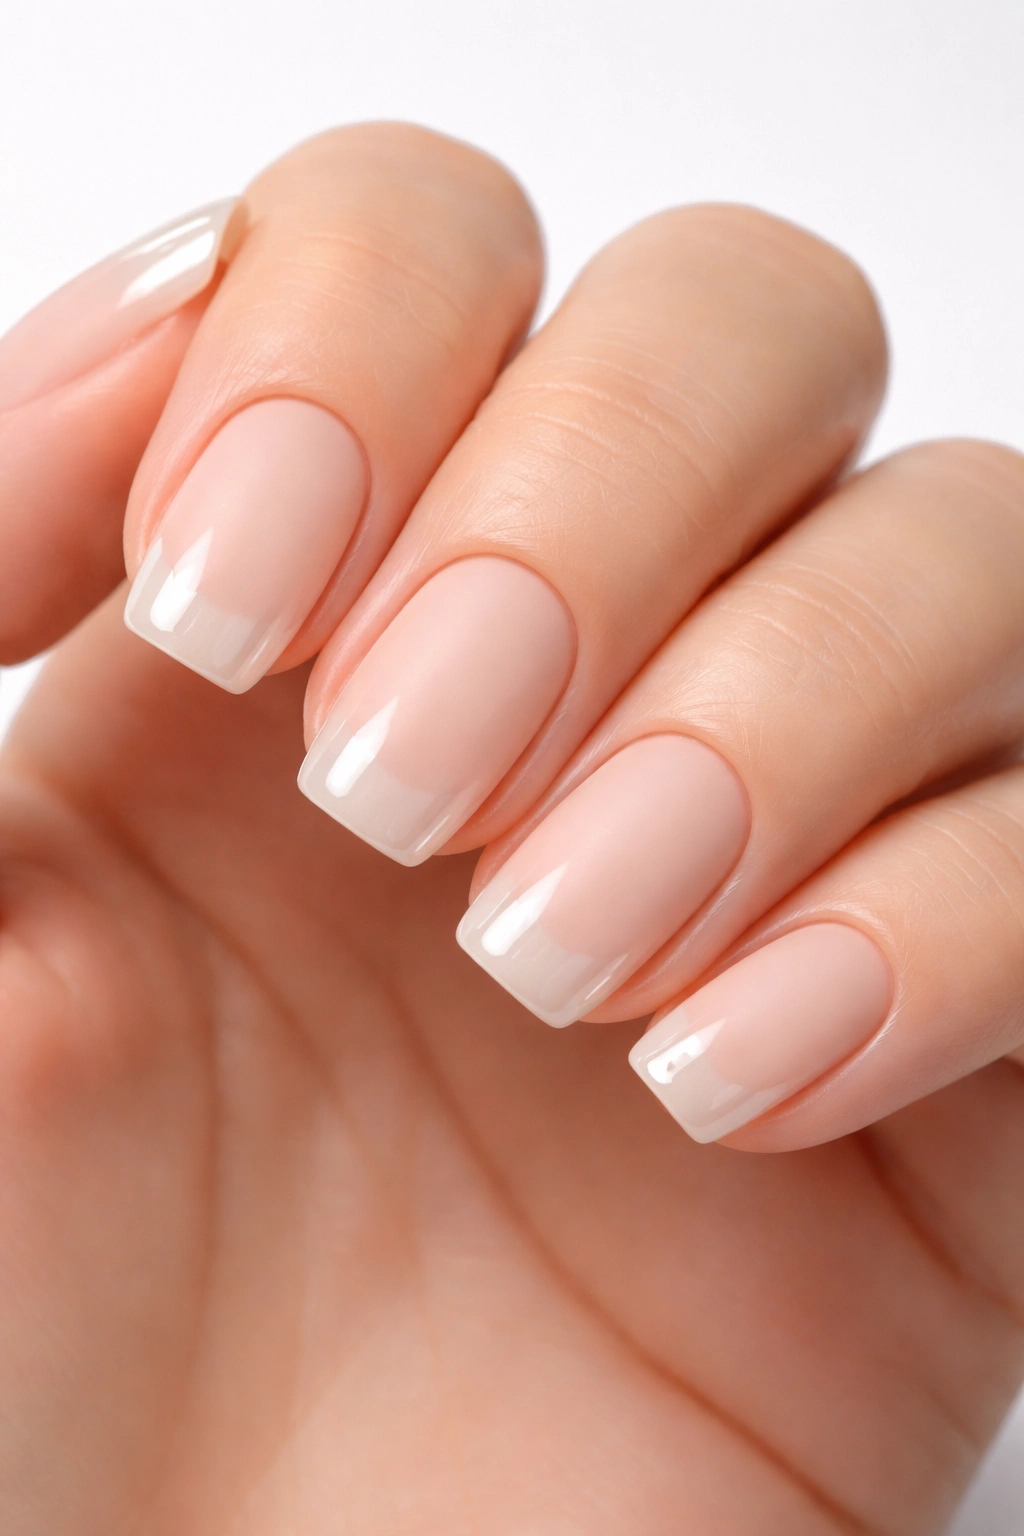
14. Pastel French with Colored Tips
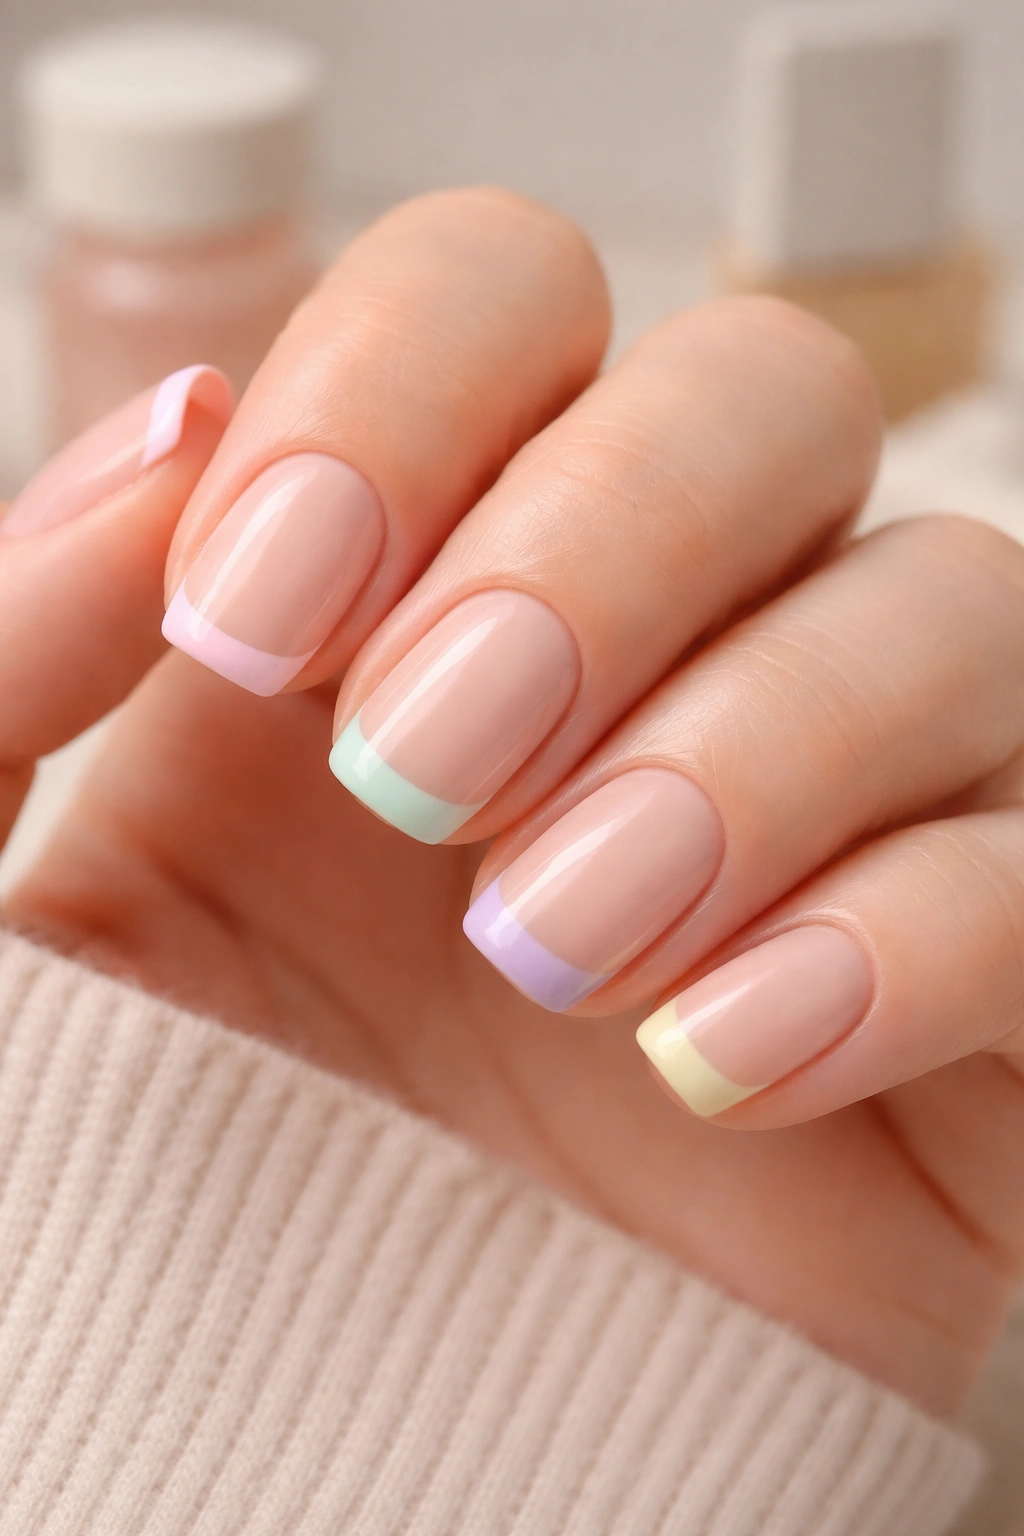
A modern twist on the classic French mani, this version uses pastel tips instead of white. Think pale pink tips, soft yellow, lavender, or mint—any soft shade against a contrasting lighter or nude base.
Why This Works for Squovals
Colored French tips on squovals feel contemporary and playful while remaining sophisticated. The color concentrated at the tips emphasizes the nail’s shape naturally. This design works for any occasion, from professional to party.
How to Create This at Home
Apply a nude or pale base color (two coats). Using French manicure guide stickers or freehand, paint the tips in your chosen pastel shade. If freehand, use a thin brush and lean into slight imperfections—a slightly organic, less-than-perfect French line actually reads as more current and intentional. Seal with a clear top coat.
Pro Tip
Try contrasting pastels: a pale pink base with soft yellow tips, or a cream base with lavender tips. The color combination feels more interesting and artistic than traditional pink-and-white French.
15. Solid Color with Subtle Shimmer
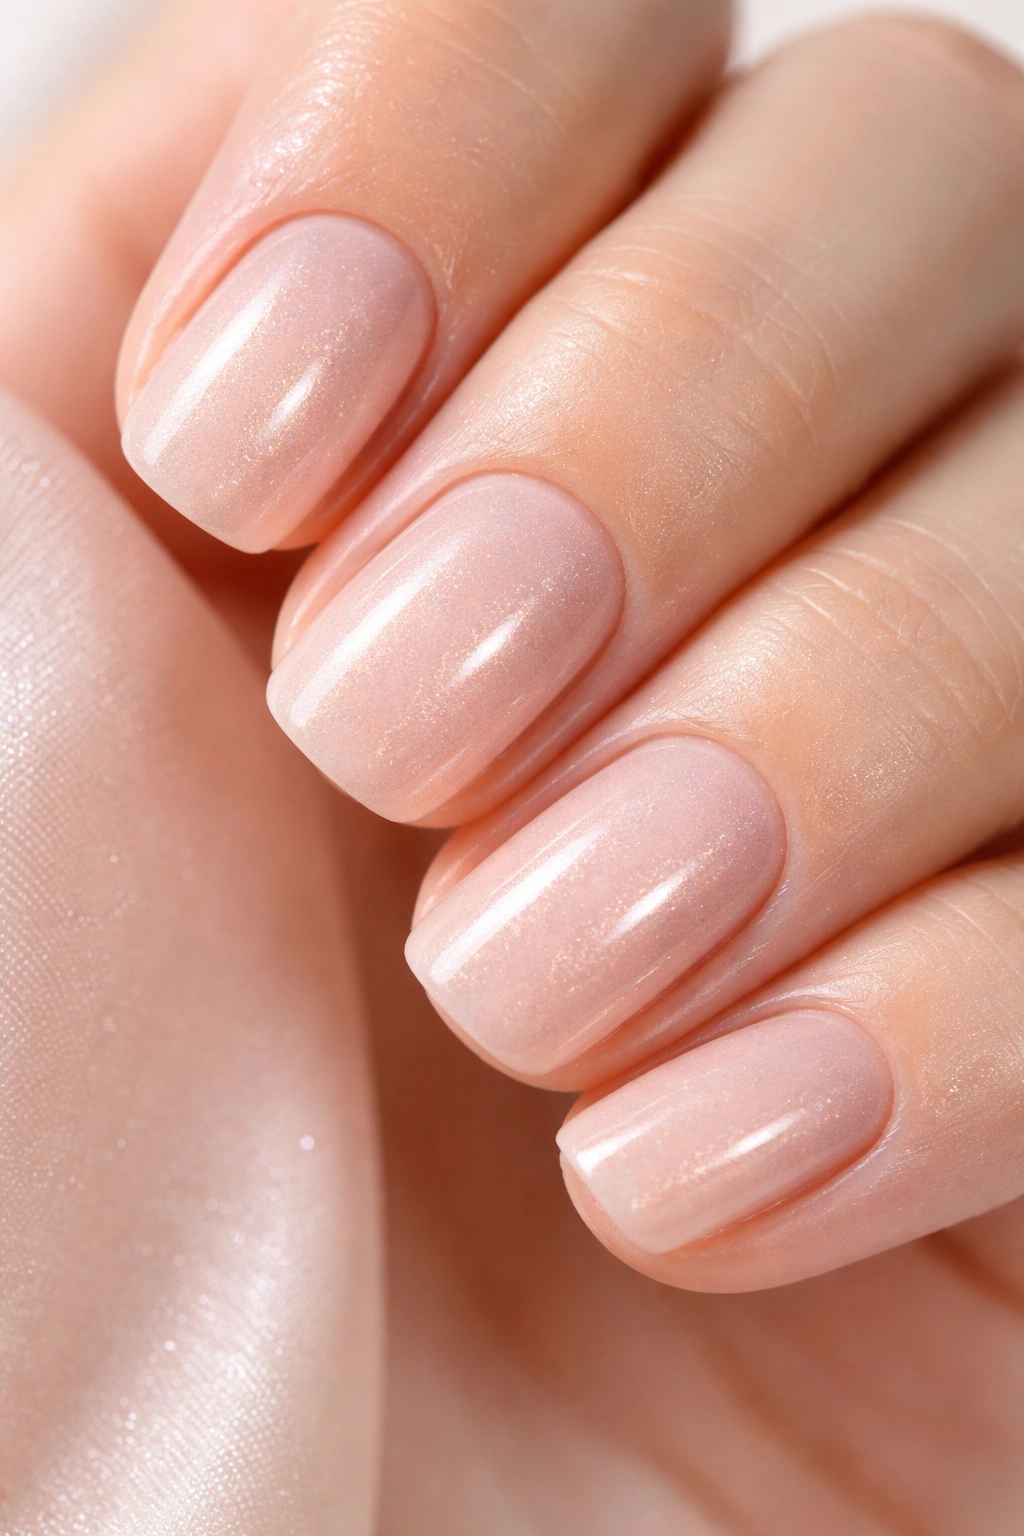
Sometimes the most elegant design is the simplest: a single, solid shade with a subtle shimmer or pearl finish. This approach is timeless, works for any occasion, and lets your nails themselves be the statement.
Why This Works for Squovals
Short squoval nails in a quality shimmer shade read as intentional and polished. The shape, though short, has enough surface area that shimmer creates dimension and interest without looking busy. This is essentially the “no-makeup makeup” approach to nail design.
How to Create This at Home
Choose a shimmer or pearl nail polish in a shade you love—soft pink, cool beige, pale gold, or even a soft neutral with tiny flecks of shimmer. Apply two coats, ensuring each coat is even and covers the entire nail. Seal with a clear top coat for shine and protection. That’s genuinely it. The quality and finish of the polish does all the work.
Quick Facts
- Shimmer shades photograph beautifully and look different depending on the light
- Pearl finishes (slightly more opaque than shimmer) are incredibly flattering and universally wearable
- One quality shimmer shade beats three coats of regular polish for achieving that “salon look”
- These designs last longer than regular polish because you’re sealing shimmer under a protective layer
Final Thoughts
Short squoval nails are genuinely the sweet spot between practicality and polish. They’re short enough that you don’t have to worry about them getting in the way or breaking unexpectedly, but they’re shaped in a way that makes even the simplest designs look intentional and complete. Every design in this list is created with tools and products that are either already in your bathroom or cost less than a single professional manicure.
The real secret to nailing any of these designs at home isn’t artistic talent—it’s patience and the willingness to let small imperfections actually add character. A slightly uneven glitter gradient or a French tip that’s not perfectly geometric reads as more human and real than robotic perfection. Start with whichever design speaks to you most, give yourself grace on the first attempt, and remember that nail polish is removable. A slightly messy first try is just practice toward a flawless second attempt.
