

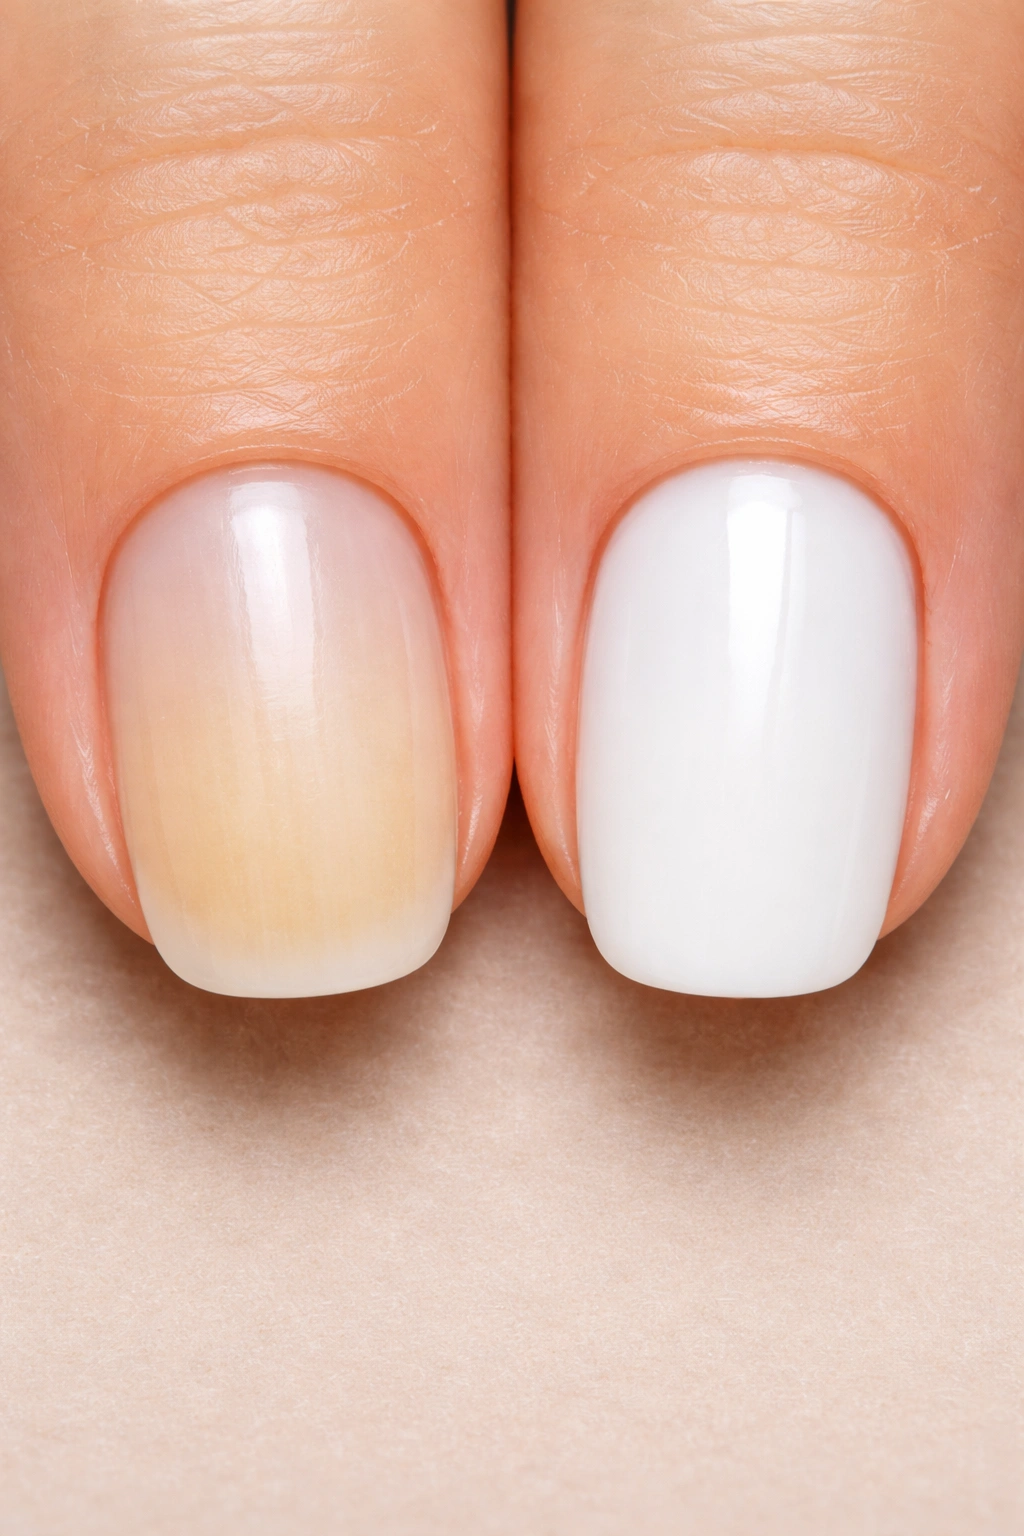
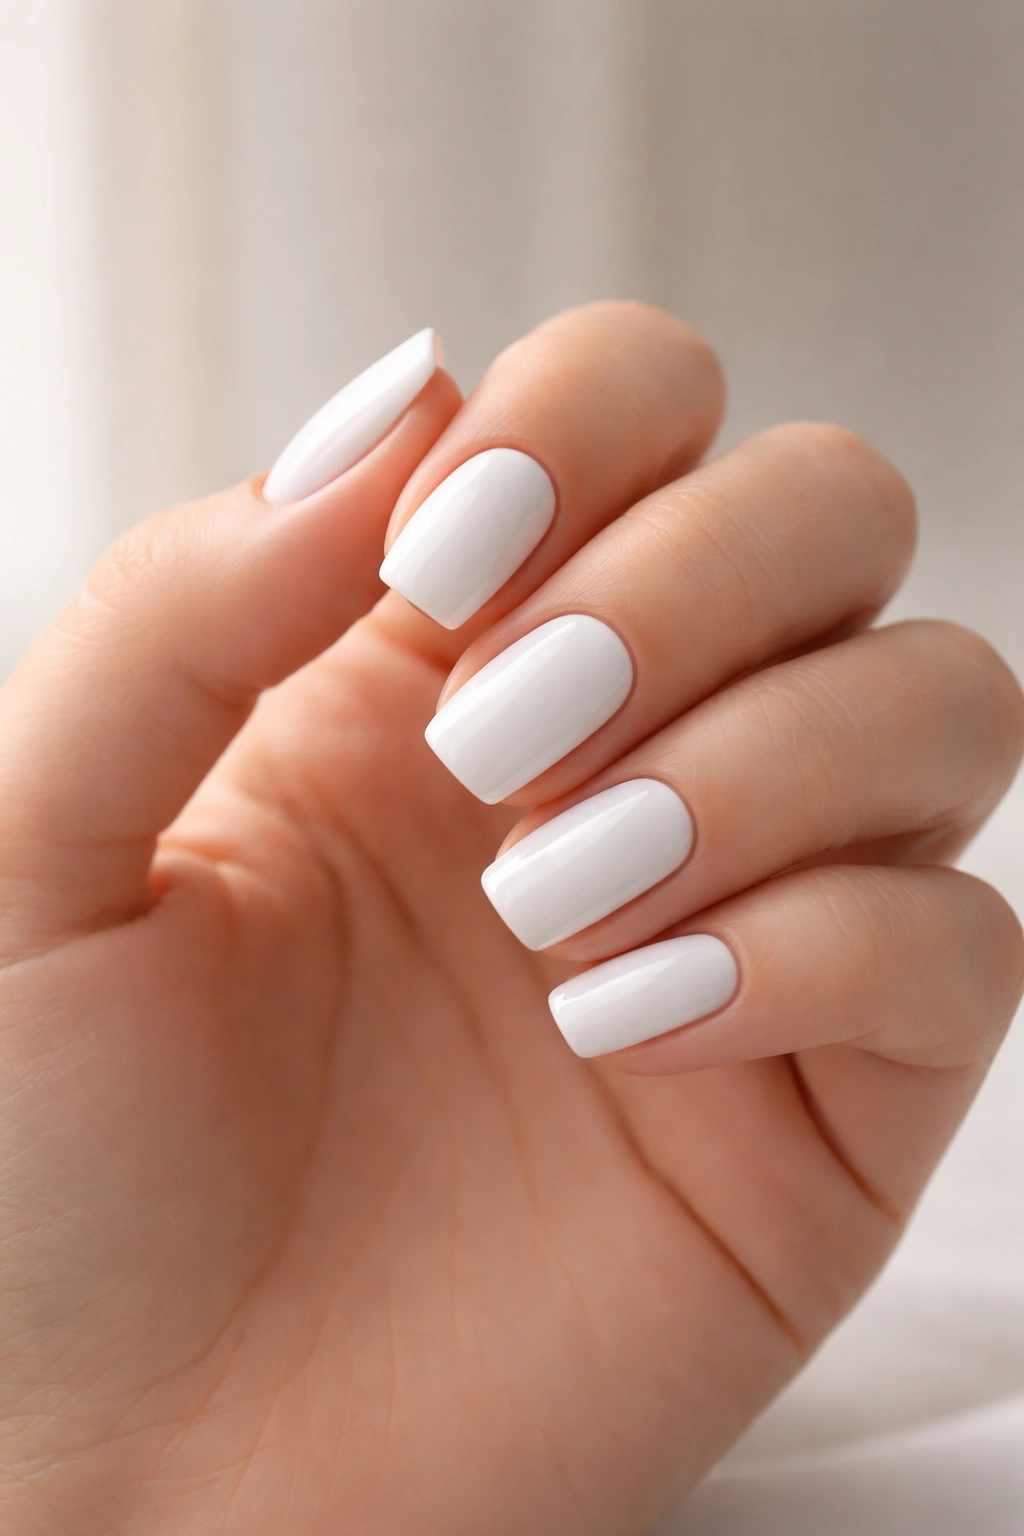
White nails represent a clean, polished aesthetic that many people desire—whether it’s fresh white polish, gel manicures, or naturally bright nails. The frustration comes when that pristine white starts shifting toward an unattractive yellow or beige tint. If you’ve painted your nails white and watched them gradually discolor, or if your natural nails have taken on a yellowish hue despite your best efforts, you’re dealing with a problem that affects countless people. The good news? Understanding what causes this yellowing—and knowing exactly how to prevent it—puts you firmly in control of maintaining those beautiful white nails long-term.
The reality is that yellowing happens through a combination of factors working together: the products you’re using, how frequently you’re applying polish, the removal methods you choose, and even lifestyle habits you might not have connected to your nails. Unlike some beauty challenges that require expensive treatments or professional interventions, preventing nail yellowing is something you can tackle with strategic, practical changes to your routine. Let’s walk through everything you need to know to keep your white nails looking fresh, bright, and unblemished.
Understanding Why White Nails Turn Yellow
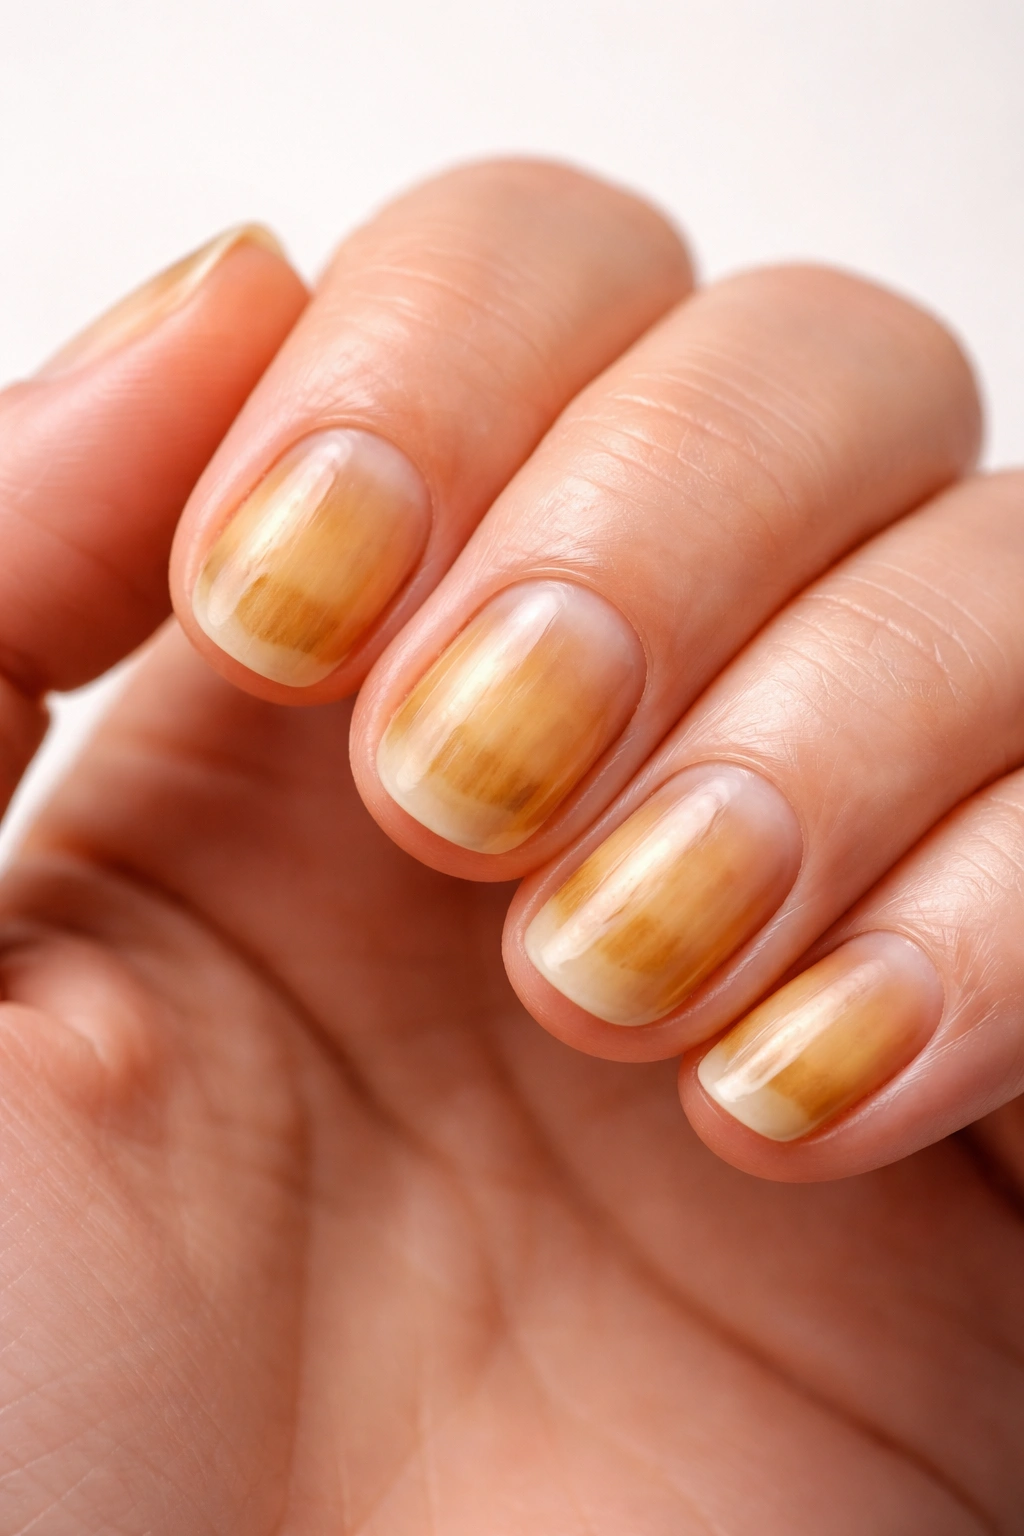
Before you can prevent yellowing, you need to understand what’s actually happening to your nails. Yellowing isn’t a single problem with one solution—it’s usually caused by multiple factors working in tandem. The nail plate, which is the visible part of your nail, is porous and can absorb pigments, chemicals, and stains from polish, environmental exposure, and even internal health issues.
According to dermatologists at Ohio State Wexner Medical Center, discoloration can stem from several distinct sources. When you wear nail polish frequently—especially darker shades—the pigments in that polish can migrate into the nail plate itself. The removal process actually makes this worse. Polish remover dissolves the polish and causes those pigments to leach directly into your nails, particularly if you’re using acetone-based removers, which are extremely harsh.
But it’s not just about polish. Your nails can also yellow from exposure to UV light during gel manicures, from handling chemicals without protection, from smoking, from staining foods and dyes, or even from underlying fungal infections. Some yellowing is purely cosmetic and temporary; other cases signal that something deeper needs attention. The key is knowing which category your situation falls into, because that determines whether you need prevention alone or if treatment is also necessary.
The Role of Nail Polish in Discoloration
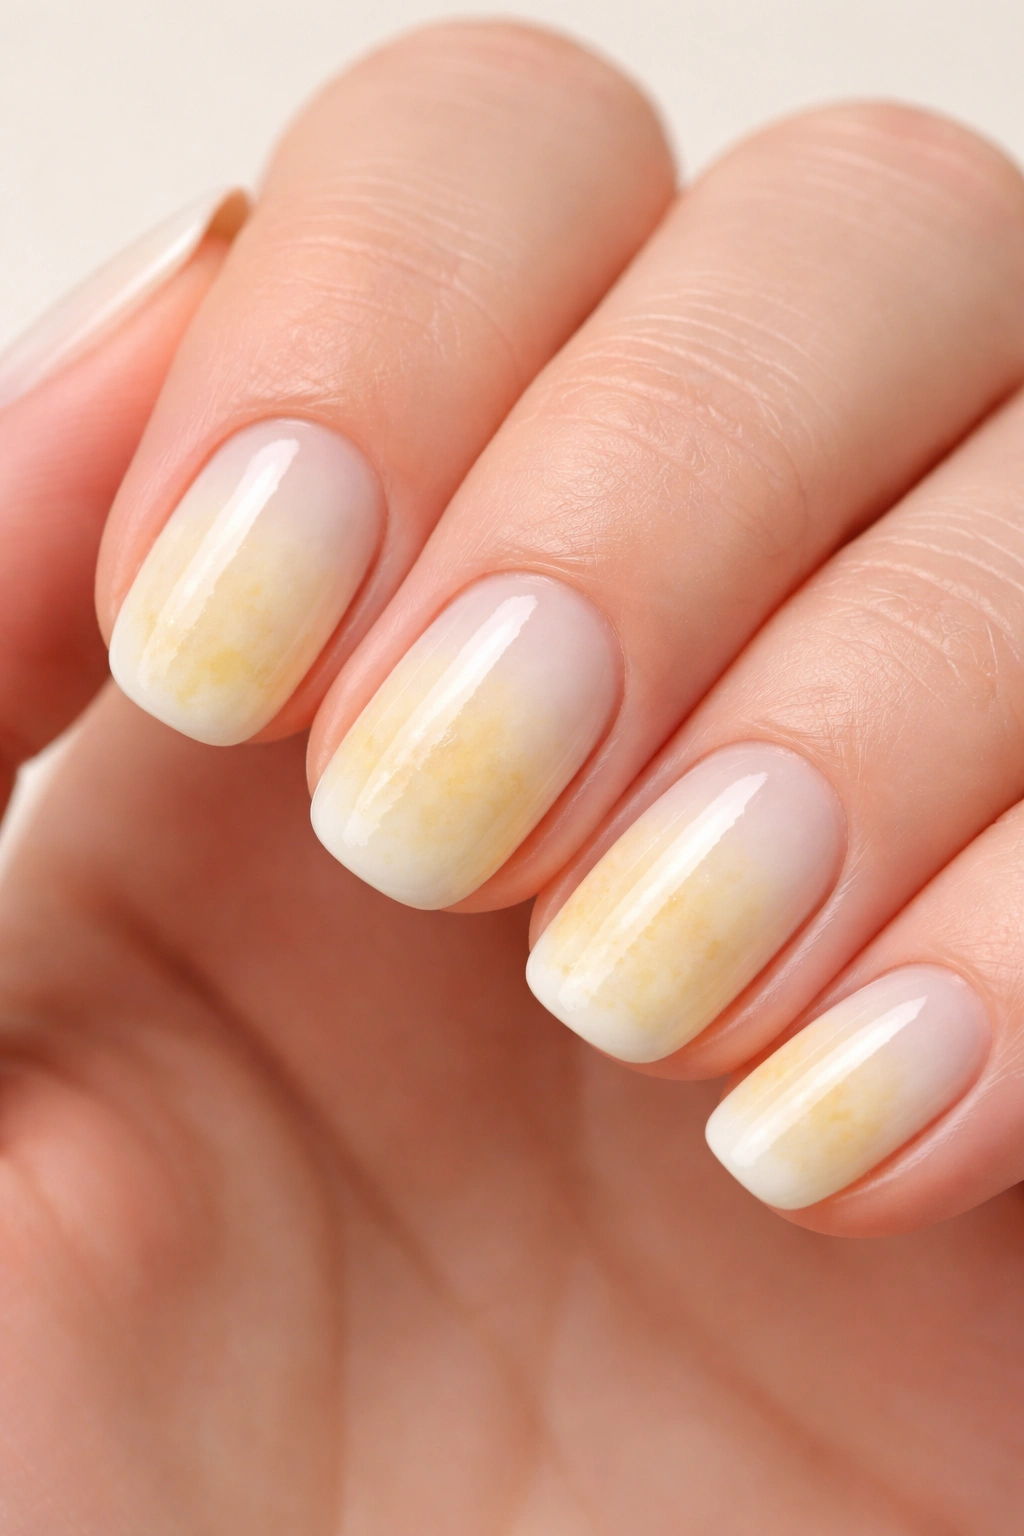
If you love wearing polish—and particularly if you favor white shades—understanding how polish contributes to yellowing is essential. Dark nail polish is significantly more likely to stain your nails than light shades. Colors like black, deep red, navy blue, and purple contain heavy pigments that are more aggressive about seeping into the nail plate. White polish, while lighter in color, can still cause yellowing if it’s a lower-quality formula or if you skip crucial preparation steps.
The culprit isn’t just the polish sitting on your nails. The real damage happens during removal. When you soak your nails in acetone remover for the typical 10 minutes required to dissolve gel polish or acrylics, that acetone is dissolving far more than just the polish. It’s also opening up the nail plate’s pores and allowing pigment molecules to penetrate deeper. This is why people who frequently wear gel or acrylic manicures often notice more stubborn yellowing—the removal process is inherently more drying and damaging than simply wiping off regular polish.
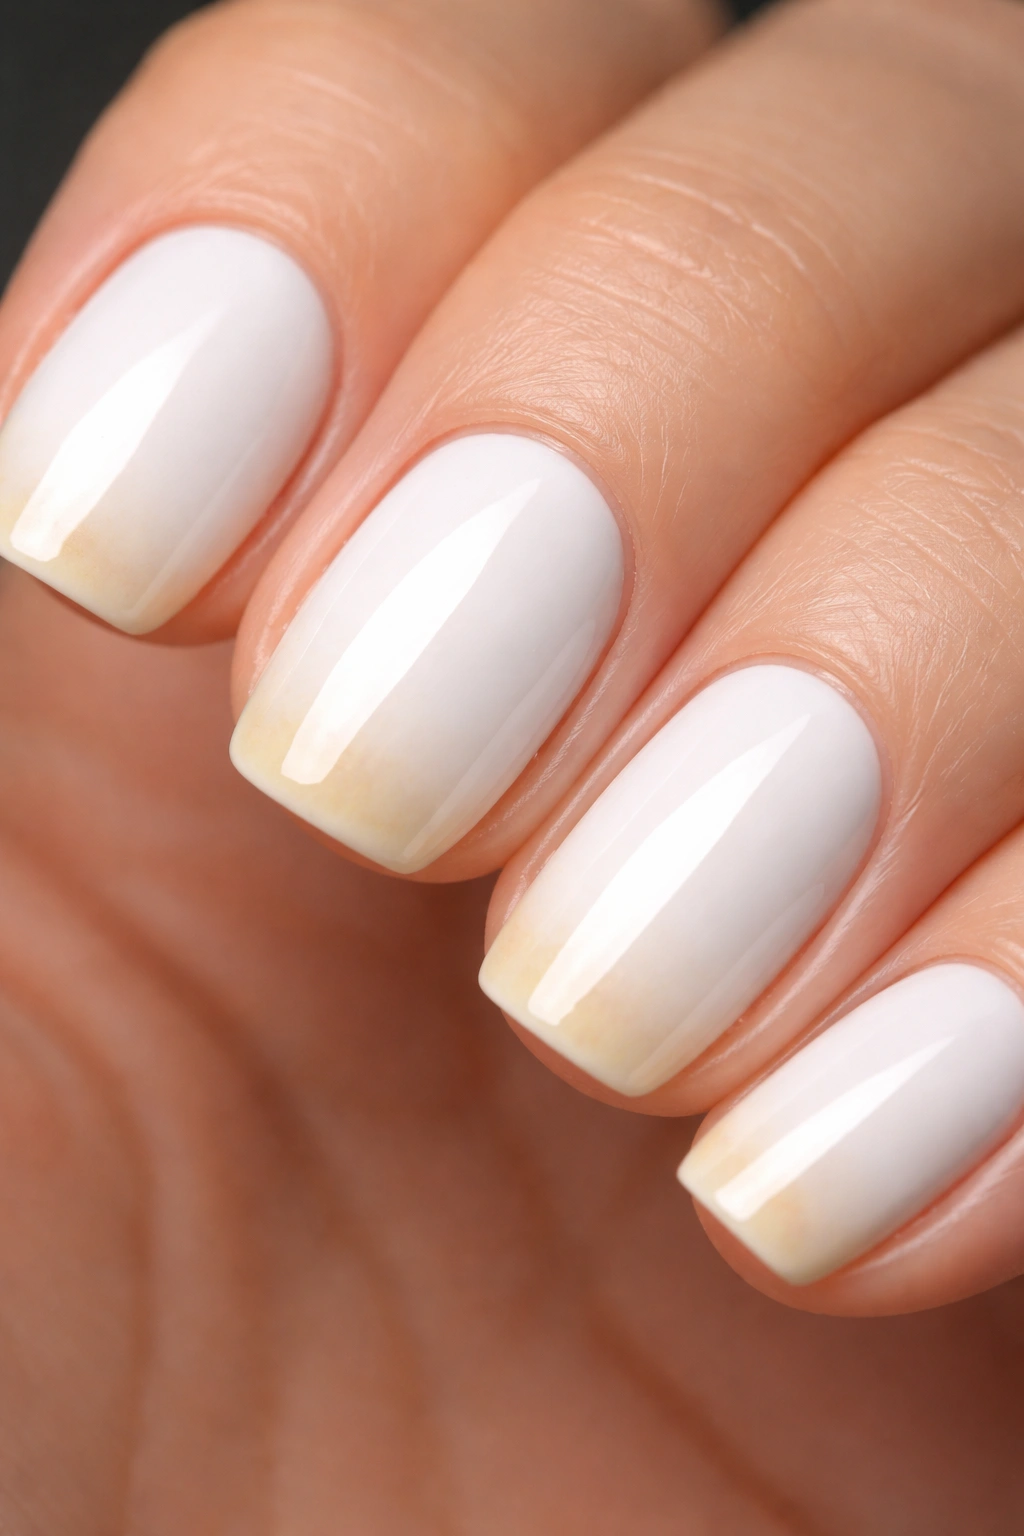
Additionally, leaving polish on your nails for extended periods—even white polish—strips moisture from the nail plate. Dry nails are more porous and more susceptible to staining. If you paint your nails white and leave that polish on for three weeks straight without giving your nails a break, you’re essentially creating conditions that make yellowing far more likely.
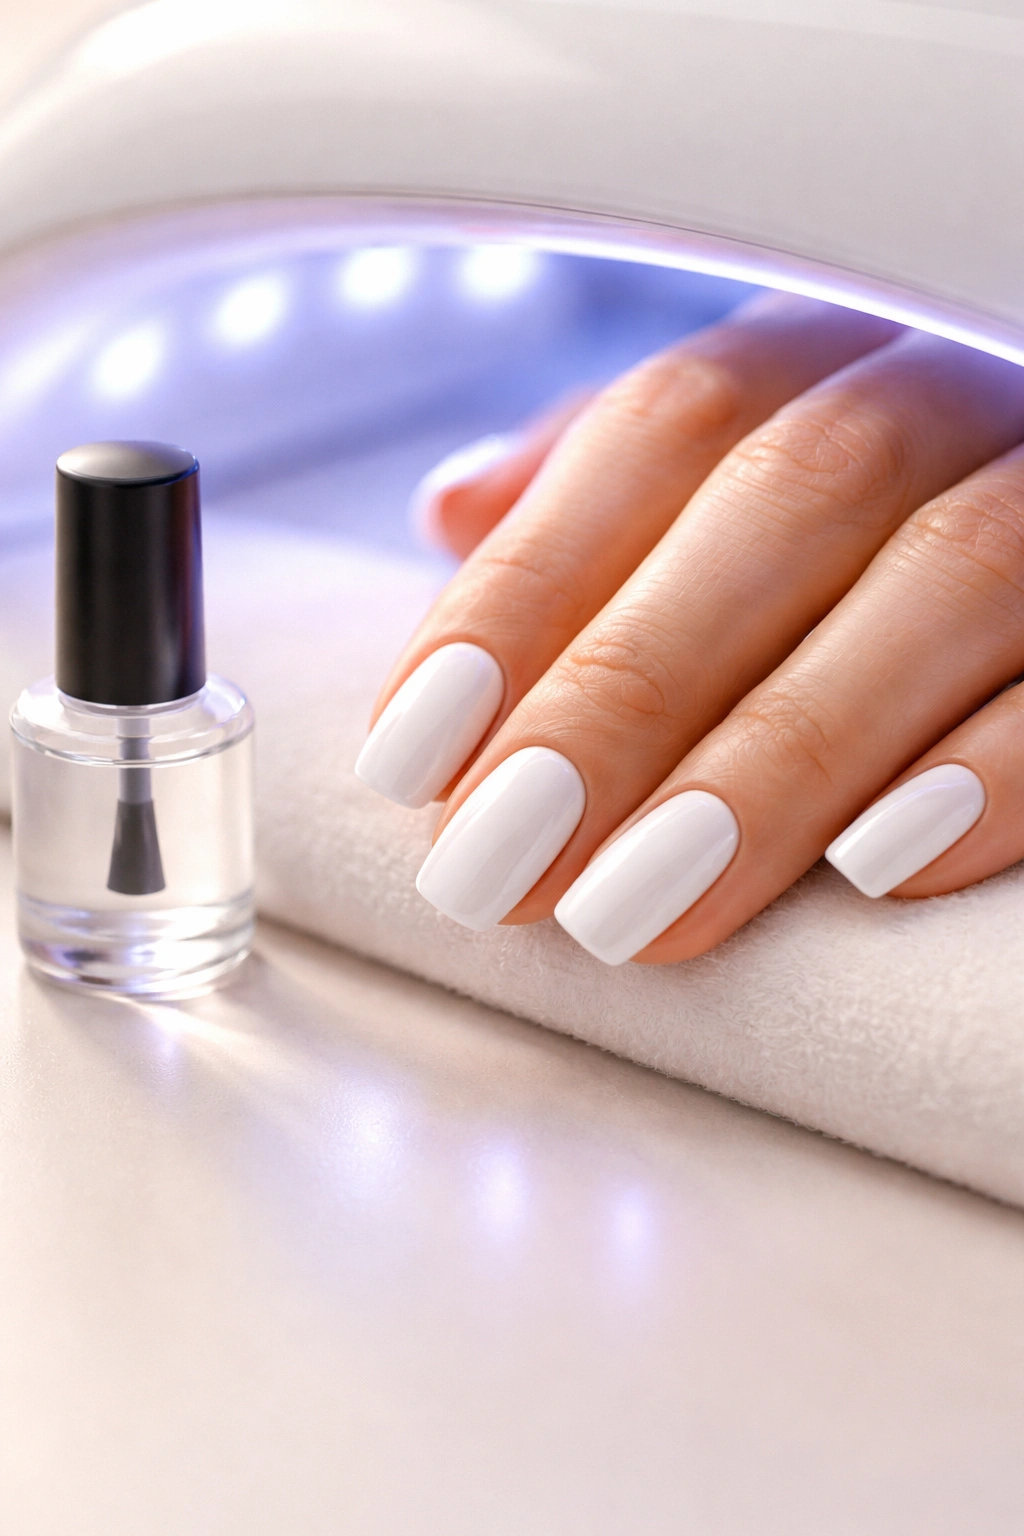
Using a Protective Base Coat as Your First Defense
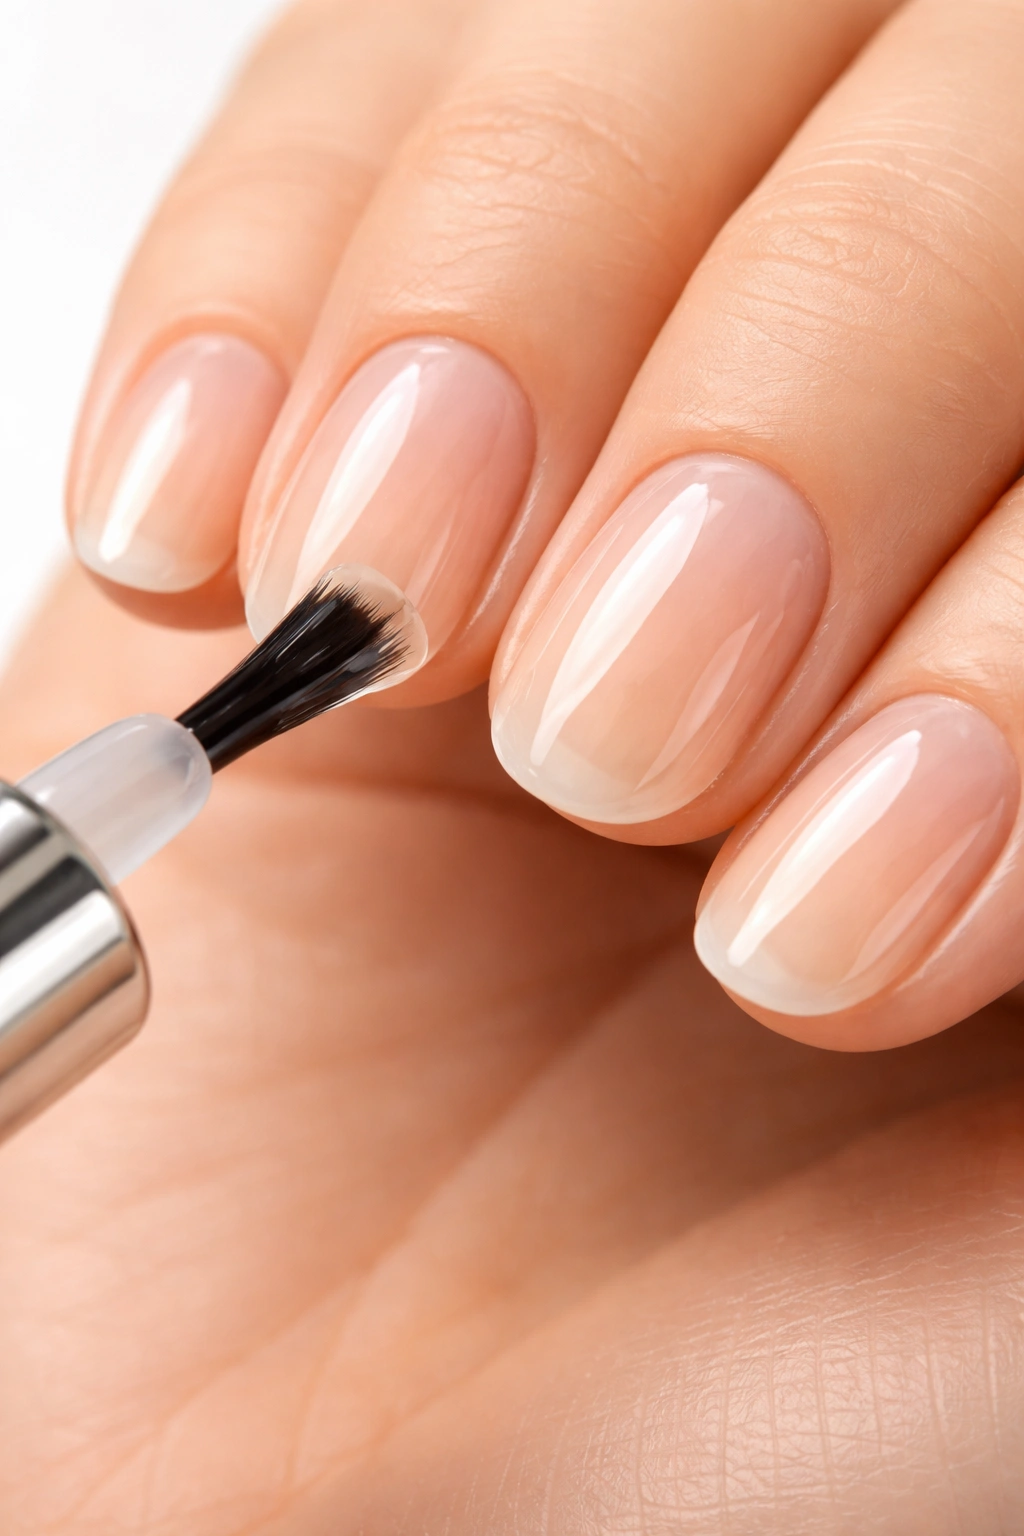
This is the single most important step you can take, and it’s honestly non-negotiable if you want to keep white nails looking pristine. A quality base coat creates a physical barrier between your nail and the polish, preventing pigments from making direct contact with your nail plate. Think of it like sunscreen for your nails—it’s not optional if you’re serious about protection.
The base coat needs to be applied to completely clean, dry nails. Any oils, dust, or residue on your nail surface will prevent the base coat from adhering properly, which means it won’t actually protect you. Use a nail file or buffer to gently prep your nail surface first, then apply a thin, even layer of base coat. Let it dry completely—this usually takes 1-2 minutes with regular polish, or 30-60 seconds under a UV lamp if you’re using gel.
If you have severe yellowing already, look for a base coat with a slight purple or blue tint. These color-correcting base coats work by neutralizing the yellow tones before you even apply your white polish. Brands like CND and OPI specifically formulate base coats designed to prevent staining. Some base coats also contain nourishing ingredients like calcium or biotin that actively strengthen your nails while protecting them. Don’t cheap out on this step—a good base coat is genuinely worth the investment.
Choosing the Right Nail Polish Formulas

Not all white nail polishes are created equal, and quality genuinely matters when it comes to preventing yellowing. Higher-quality nail polishes use better-formulated pigments and additives that are less likely to stain your nails. They also tend to include conditioning ingredients that help maintain nail moisture and health even when polish is on.
Look for polishes that are labeled “9-free,” “10-free,” or “non-toxic.” This means the formula excludes harmful chemicals like formaldehyde, toluene, dibutyl phthalate (DBP), xylene, and acetone. These chemicals aren’t just better for your overall health—they’re also less likely to cause discoloration and damage to your nail plates. Brands like OPI Gel, Essie, CND Shellac, and Olive & June have earned reputations for formulating polishes that strengthen rather than damage nails.
When choosing white polish specifically, understand that some formulas are sheerer and some are more opaque. A sheer white requires more coats to achieve full coverage, which means more layers of pigment on your nails. An opaque white in one or two coats is actually gentler on your nails long-term. Test the coverage before you commit to a bottle—swatching on a nail wheel at the beauty supply store can show you exactly how many coats you’ll need.
The Importance of Giving Your Nails a Break

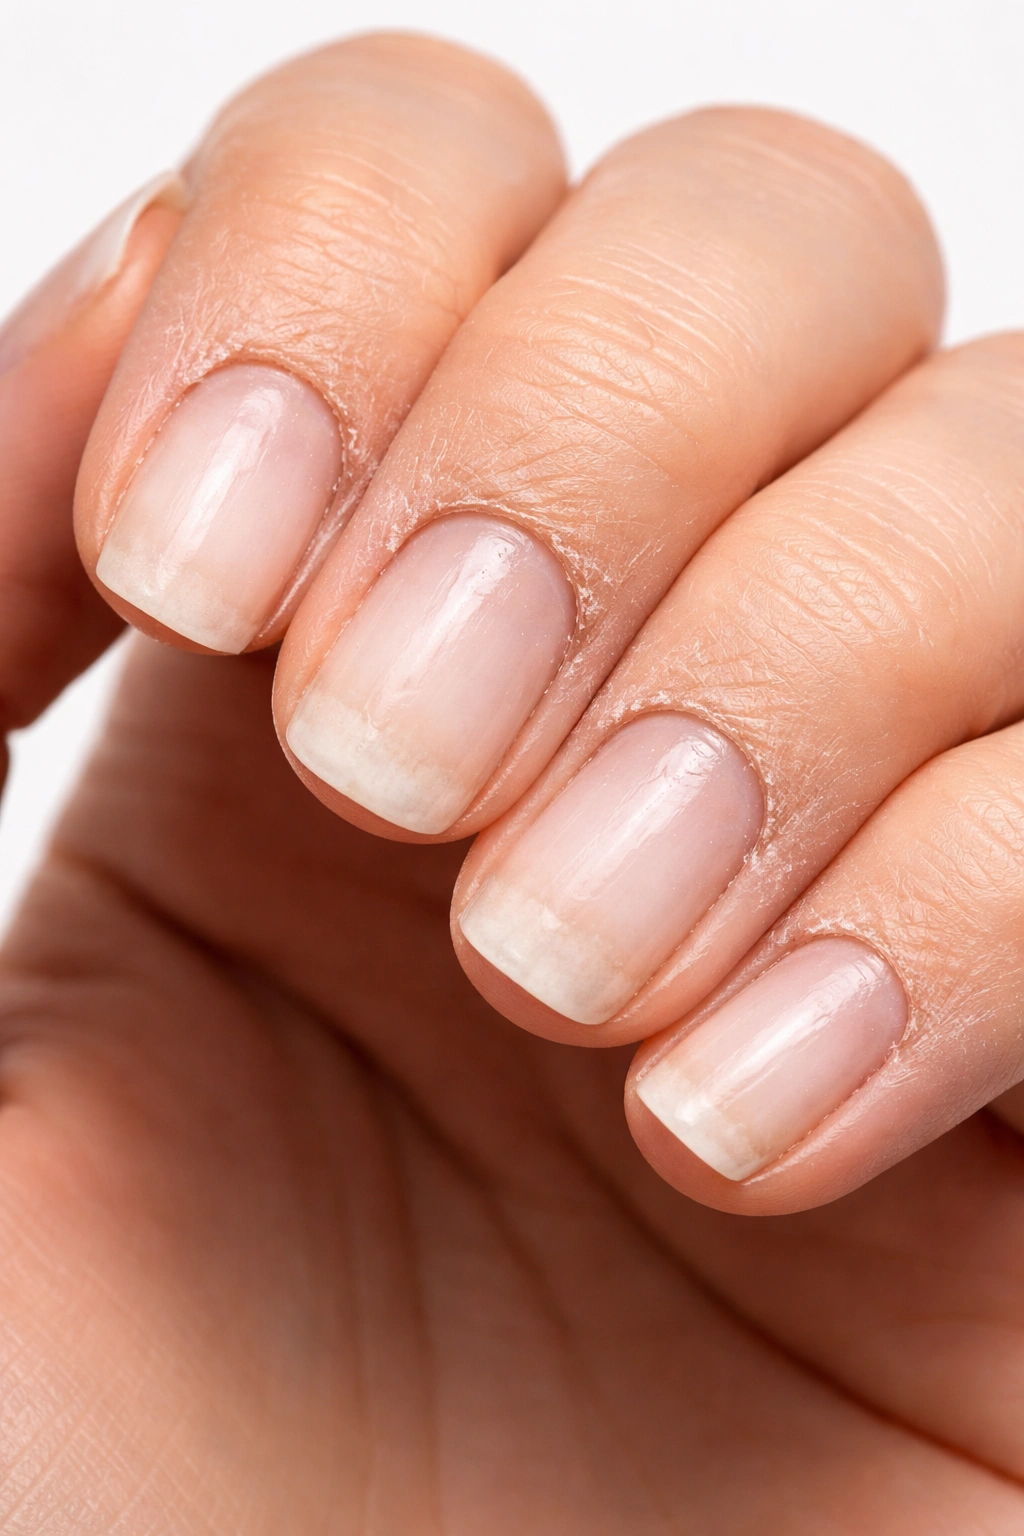
This might be the hardest part of nail maintenance for people who love having their nails done, but your nails genuinely need periods without any polish to recover and breathe. When polish sits on your nails continuously, it’s absorbing moisture from the nail plate. Your nails become increasingly dry, brittle, and weak—and dry, brittle nails are far more susceptible to staining.
The recommendation from dermatologists is to remove polish every one to two weeks and leave your nails bare for at least a few days before applying new polish. Yes, this means occasionally having unpainted nails. But this recovery time is when your nails rehydrate, when damage can repair itself, and when you have the opportunity to address any early yellowing before it becomes entrenched in your nail plate.
During these break periods, skip the polish entirely and focus on hydration and nourishment. Apply a rich cuticle oil (coconut oil, olive oil, or a dedicated nail oil) daily. Moisturize your hands and nails with hand cream after washing. Avoid soaking your hands in water for extended periods, and wear gloves when doing dishes or household chores. These few days of focused care can completely reset your nails’ condition and prevent the buildup of staining and damage that happens with continuous polish wear.
How Acetone Removers Damage Your Nails
Let’s be direct: acetone is harsh, and if your goal is to keep your white nails from yellowing, you should avoid acetone nail polish removers entirely. Acetone doesn’t just dissolve polish—it’s a powerful solvent that strips oils from your nails and opens up the nail plate in ways that actually make yellowing worse over time.
When you soak your nails in acetone to remove gel or regular polish, the acetone is simultaneously softening and dehydrating your nail plate. This dehydration makes the nail more porous and more receptive to absorbing stains. If there are any pigment particles left on your nails (which there almost always are), acetone helps them penetrate deeper into the nail structure. This is why people who use acetone frequently often develop more stubborn yellowing that’s harder to remove.
Switch to acetone-free removers instead. These are typically formulated with gentler solvents like ethyl acetate or isopropyl alcohol combined with nourishing oils. Yes, acetone-free removers often take slightly longer to dissolve polish—you might need to soak for 12-15 minutes instead of 10. But the tradeoff is absolutely worth it for nail health. Some nail technicians recommend wrapping your fingers in foil-wrapped cotton pads with remover, which allows the remover to work more effectively while minimizing the amount of time your nails are exposed. The result is less drying, less damage, and significantly less yellowing over time.
Protecting Nails from UV Light Exposure
Here’s a factor many people overlook: UV light from the sun and from gel manicure lamps can cause white nails to yellow, especially gel polish. This happens through a different mechanism than polish staining—UV exposure can actually change the chemical structure of the gel polish on your nails, causing it to shift from bright white toward yellow or cream tones.
If you wear white gel nails regularly, apply a UV-blocking top coat specifically designed for this purpose. These top coats contain UV-filtering compounds that block the light from penetrating through to the white color beneath. Some top coats also include antioxidants that help prevent the yellowing process at a chemical level. This is particularly important if you spend significant time in direct sunlight or if you work outdoors.
During gel manicure appointments, ask your nail technician to use minimal time under the UV lamp—only the amount necessary for the gel to cure properly. Some modern gel systems have reduced curing times, which means less UV exposure overall. If you’re sensitive to UV light or concerned about cumulative exposure, ask about LED lamps instead. LED lamps cure gel polish faster and with less total light exposure compared to traditional UV lamps.
Additionally, wear sunscreen on your hands and nails when you’ll be spending extended time in the sun, just as you would for your face and body. This protects both your skin and your nails from UV damage. If you’re already noticing yellowing from UV exposure, limiting sun exposure on your hands and keeping your nails protected with long sleeves when possible can help prevent further discoloration.
Keeping Your Nails Hydrated and Healthy
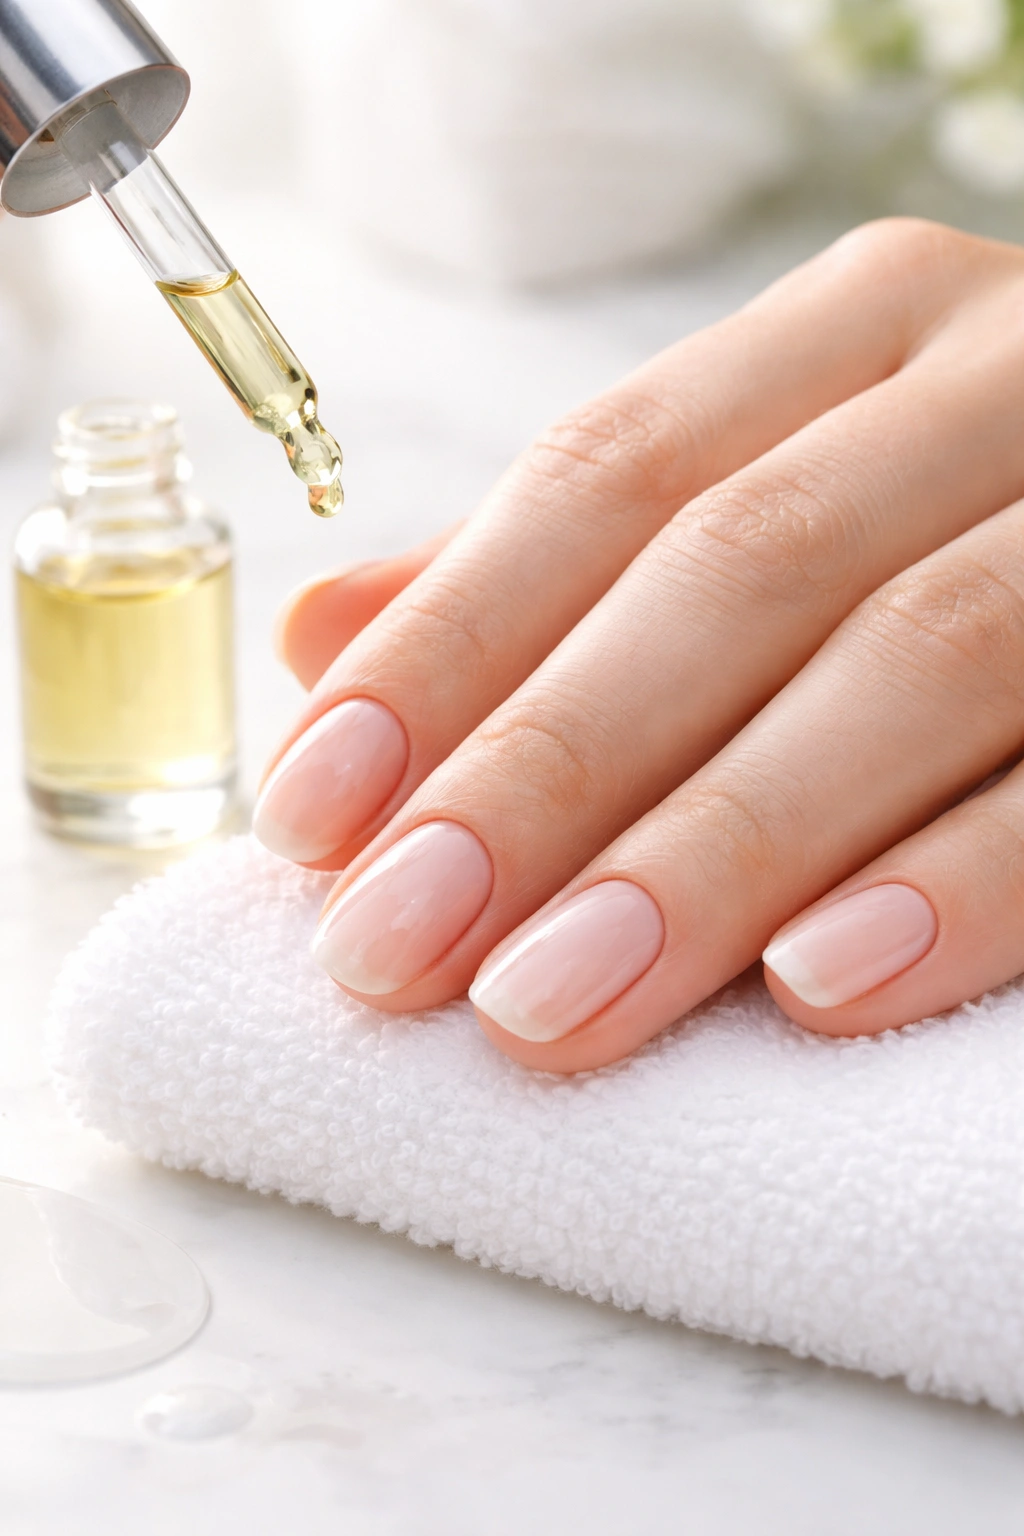
The foundation of nail health—and prevention of yellowing—is consistent hydration and nourishment. Hydrated nails are less porous, less likely to absorb stains, and more resilient overall. Dry, brittle nails, by contrast, are like sponges waiting to soak up every pigment they encounter.
This requires a two-pronged approach: internal hydration and topical hydration. Internally, drink plenty of water throughout the day. This isn’t about chugging water specifically for your nails, but rather maintaining overall hydration, which shows up in healthier skin, hair, and nails. Externally, apply cuticle oil or nail oil to your nails and cuticles at least once daily, ideally twice. The best time is right after you shower, when your nails are slightly soft and can better absorb the oil.
Specific oils that work well include coconut oil, olive oil, jojoba oil, and dedicated nail oils. Look for oils that contain vitamin E, which is a powerful antioxidant and natural moisturizer that helps prevent dry, brittle nails. Apply the oil by rubbing it into your nail plate, under the free edge, and into your cuticles. Let it absorb for 10-15 minutes, or you can apply it before bed and let it work overnight.
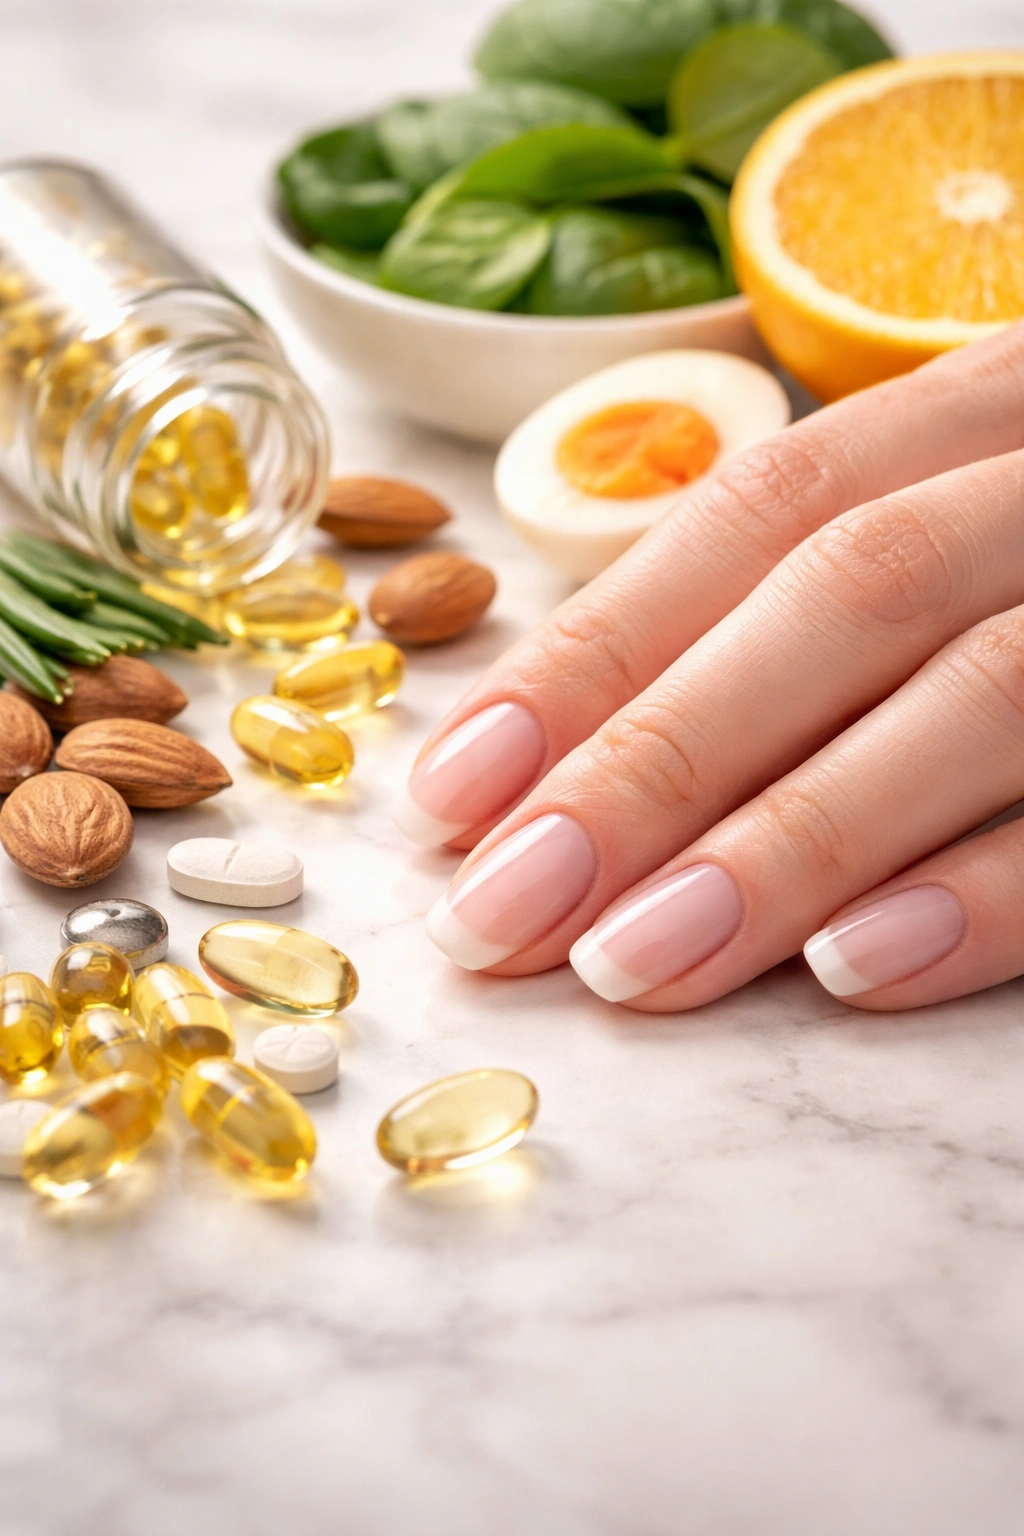
Beyond oils, consider your overall nutrition. Nails require specific nutrients to grow strong and resist staining. Biotin, zinc, iron, and vitamin E all play roles in nail health. If your diet is deficient in these nutrients, your nails will be weaker and more susceptible to damage and discoloration. Eat foods rich in these nutrients: eggs, spinach, nuts, salmon, and legumes. If you suspect a nutritional deficiency, consider talking to your doctor about targeted supplements or prenatal vitamins, which are often recommended for improving nail health because they contain comprehensive micronutrients.
Avoiding Harsh Chemicals and Environmental Stains
Your hands encounter staining substances daily, from household cleaners to food dyes to gardening materials. Protecting your nails from unnecessary chemical exposure is one of the most effective prevention strategies. This doesn’t require you to wrap your hands in plastic—just thoughtful use of protection when needed.
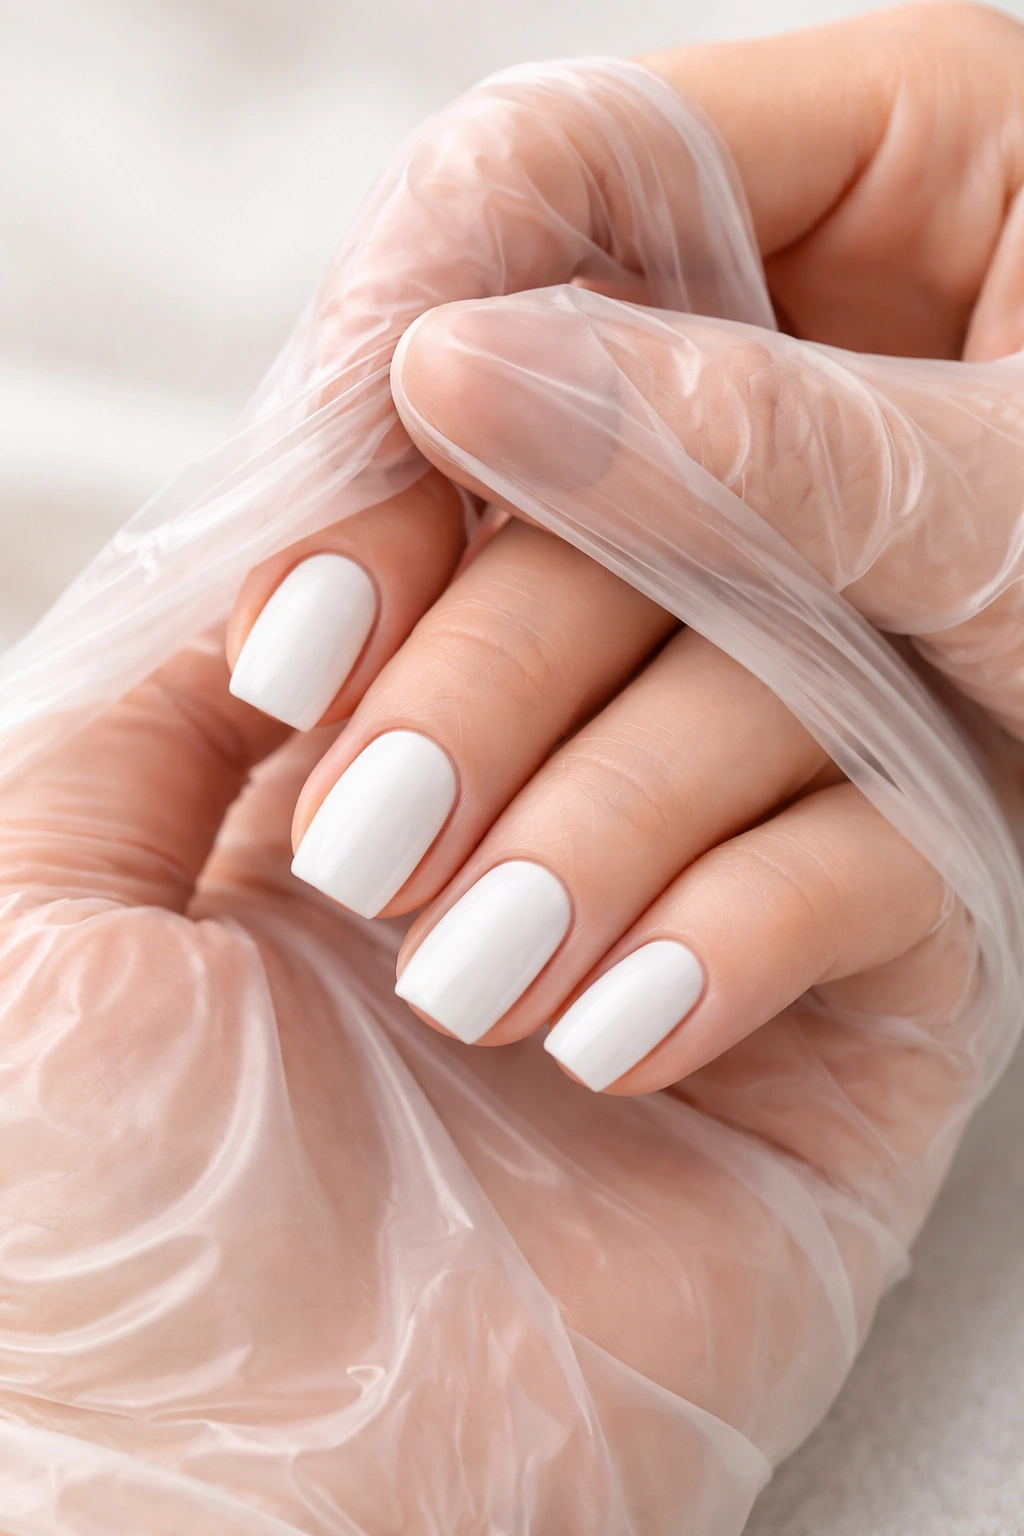
Wear rubber gloves when doing dishes, cleaning bathrooms, or using any household cleaning products. These chemicals are harsh and can penetrate your nail plate, causing discoloration over time. Similarly, if you dye your hair, wear gloves or apply a protective layer like petroleum jelly on your nails before application. Hair dye is notorious for staining nails, and this simple precaution eliminates that risk entirely.
Be cautious with foods that stain, particularly if you’re not wearing polish. Berries (especially blackberries and blueberries), beets, turmeric, and strongly colored foods can stain your nails if you’re handling them without gloves. If you’re preparing these foods frequently, keep a pair of thin latex gloves in your kitchen specifically for food prep.
Chlorine from swimming pools can also affect nail color and health. If you swim frequently, consider applying a waterproof top coat to your nails before swimming, or wear gloves designed for water sports. After swimming, rinse your nails thoroughly with fresh water and dry completely, then apply cuticle oil to replace moisture lost to chlorine exposure.
The Impact of Smoking on Nail Discoloration
This is a direct correlation that dermatologists consistently point out: smoking causes yellowing of both nails and fingers. Nicotine is a powerful stain that accumulates on your nails over time, turning them yellow or brown. If you’re a smoker and you’re frustrated about yellow nails, this is the primary culprit.
The yellowing from smoking is often more stubborn than other types of staining because nicotine bonds to the nail structure rather than just sitting on the surface. While the home remedies discussed in this article can help reduce the appearance of nicotine stains, the most effective solution is to quit smoking or significantly reduce cigarette consumption.
If you do smoke and want to minimize staining, wear gloves while smoking (yes, really), keep your nails trimmed short, and use the whitening remedies discussed later in this article regularly. But understand that these are band-aid solutions. The permanent solution to smoking-related nail yellowing is quitting smoking itself. Beyond nail health, this will improve your overall health dramatically.
Nutrition and Vitamin Deficiencies Affecting Nail Health
Yellowing nails can sometimes indicate that something deeper is going on with your health. While most white nail discoloration is purely cosmetic and caused by external factors, persistent yellowing despite prevention efforts can occasionally signal nutritional deficiencies or underlying health conditions.
Vitamin E deficiency is specifically linked to weak, discolored nails. This vitamin is a potent antioxidant and natural moisturizer that keeps nails hydrated and resilient. If you’re not getting enough vitamin E through your diet (nuts, seeds, olive oil, spinach), consider a supplement. Biotin, a B-vitamin, is also crucial for nail strength and growth. Studies have shown that biotin supplementation can significantly improve nail thickness and reduce peeling and brittleness.
Iron deficiency can manifest as pale or yellowish nails, along with other symptoms like fatigue and shortness of breath. Zinc deficiency shows up as white spots on nails and slow growth. If you’re noticing persistent nail changes that don’t respond to the prevention strategies discussed here, and if you’re also experiencing other symptoms like fatigue, hair loss, or digestive issues, talk to your doctor about checking your nutrient levels. Sometimes what looks like a cosmetic nail problem is actually your body signaling that it needs nutritional support.
Beyond vitamins and minerals, maintaining overall nutrition supports nail health. Protein is essential for nail growth—your nails are primarily made of a protein called keratin. Make sure you’re eating adequate protein daily. Stay hydrated, eat a balanced diet rich in whole foods, and minimize processed foods and excess sugar. These basics support not just your nails, but your entire body’s ability to maintain healthy skin, hair, and nails.
Quick Remedies for Existing Yellow Stains
If your white nails are already yellowed despite your best efforts at prevention, don’t panic. There are several effective at-home remedies that can help restore brightness and remove mild to moderate staining. These work best when the yellowing is primarily from polish staining or surface discoloration, rather than from fungal infection or systemic issues.
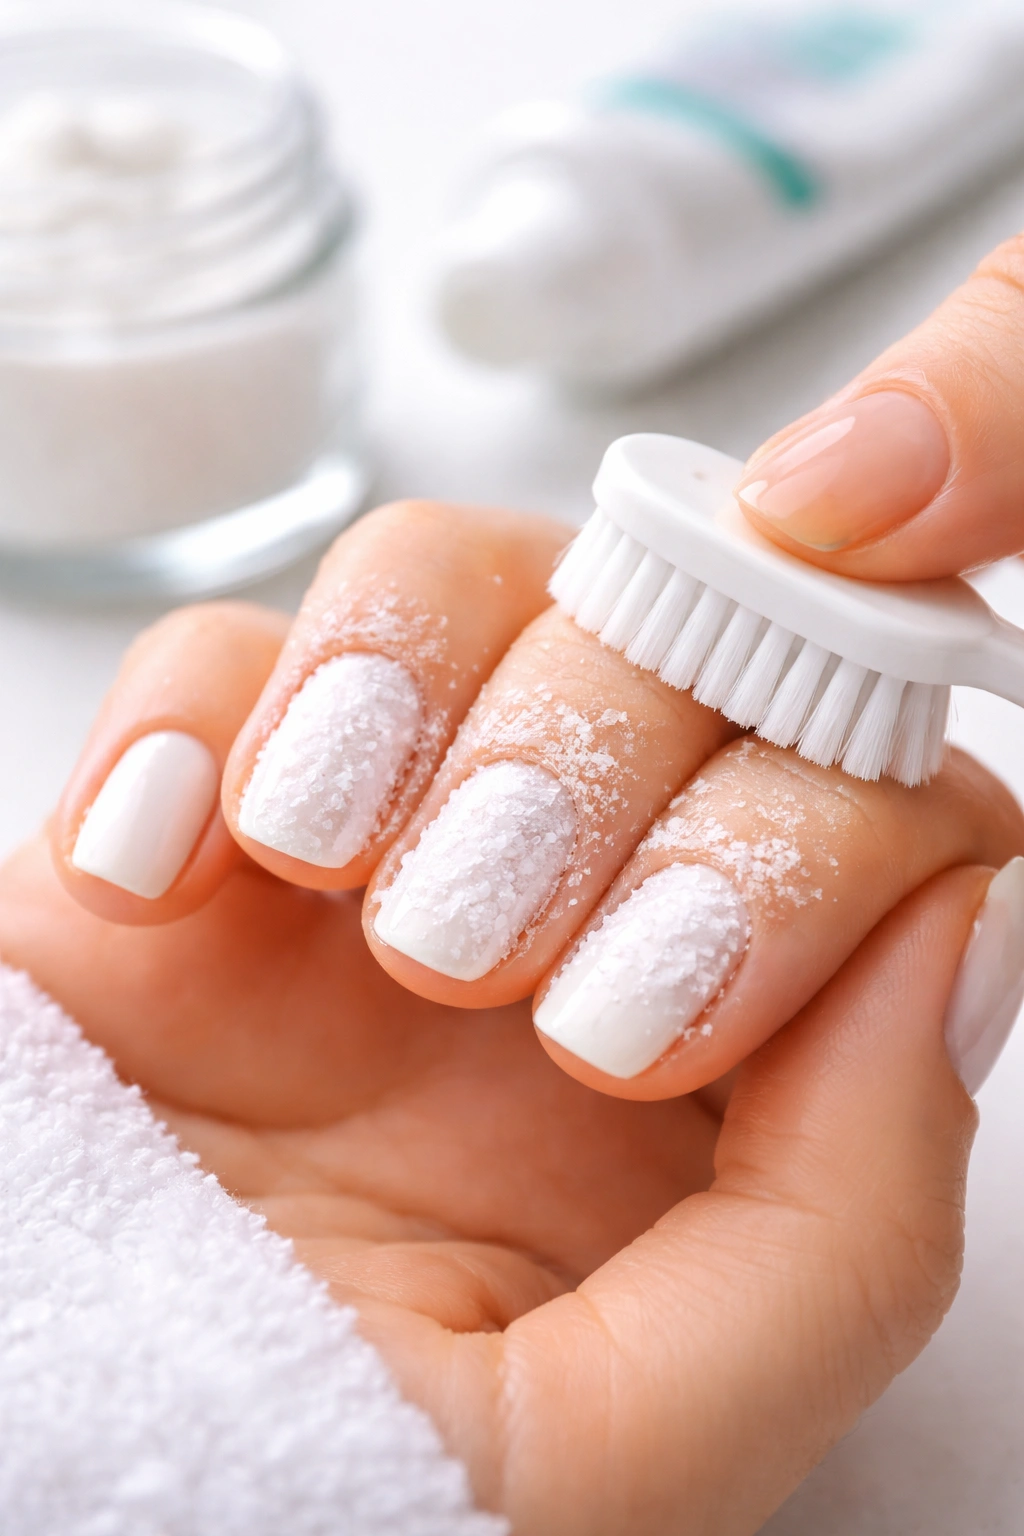
Whitening toothpaste is one of the most accessible and effective options. Choose a whitening formula that contains hydrogen peroxide and baking soda. Apply the toothpaste generously to your nails and let it sit for 10-15 minutes. Use a soft nail brush or an old toothbrush to gently scrub the toothpaste into your nails, working it under the free edge as well. The slight abrasive action of the toothpaste combined with the whitening ingredients helps lift stains from the nail surface. Rinse thoroughly with warm water. You can repeat this treatment once or twice a week until your nails return to their desired brightness.
Baking soda paste is another excellent option. Mix two parts baking soda with one part water to create a thick paste. Apply this paste to your nails with a cotton swab, covering the entire visible nail surface, and let it sit for 10 minutes. Use a nail brush to gently scrub the paste into your nails, then rinse thoroughly. Baking soda is mildly abrasive and also has natural whitening properties.
Lemon juice and baking soda combined create a powerful whitening treatment. Mix one tablespoon of lemon juice with two tablespoons of baking soda to form a paste. Apply to your nails and cuticles with a cotton swab, let it sit for 10 minutes, then gently scrub with a toothbrush. The citric acid in the lemon juice acts as a natural bleach while the baking soda provides gentle mechanical exfoliation. Rinse well and apply cuticle oil afterward, as lemon can be drying to your nails and skin.
Hydrogen peroxide soaks are effective for stubborn staining. Mix three to four tablespoons of hydrogen peroxide with half a cup of water in a glass bowl. Soak your nails in this solution for up to two minutes, then gently scrub the surface with a soft toothbrush. Rinse thoroughly and apply hand cream. You can repeat this up to two or three times per week. The hydrogen peroxide works as a mild bleach that lifts stains from your nails without being as harsh as other chemical treatments.
Denture tablets are a clever hack that actually works. Drop one denture cleaning tablet into a cup of warm water and soak your nails for 10 minutes. The same enzymes that clean dentures help remove stains from nails. This is gentler than some other methods, making it safe to use even if your nails are already somewhat damaged or sensitive.
After any of these treatments, always apply a nourishing cuticle oil or hand cream to rehydrate your nails, as most of these remedies are somewhat drying. The key is consistency—these remedies work best when used regularly over time, not as a one-time treatment.
Distinguishing Between Cosmetic Yellowing and Medical Issues
Most yellow nail discoloration is cosmetic and caused by external factors like polish staining or surface discoloration. However, in some cases, yellowing can indicate an underlying medical condition that requires professional treatment. Knowing the difference is important so you don’t waste time with home remedies when you actually need medical intervention.
If your yellowing is accompanied by thickened, brittle, or crumbly nails, you might have a fungal nail infection. Fungal infections typically affect toenails more than fingernails, but they can occur on either. These infections are persistent and don’t respond to the whitening remedies discussed above. If you suspect a fungal infection—particularly if the discoloration doesn’t improve after several weeks of home treatment—see a dermatologist or podiatrist for diagnosis and treatment.
Yellowing can also be a symptom of more serious systemic conditions. Yellow nail syndrome, a rare condition, features thick, slow-growing yellow or greenish nails along with respiratory symptoms and leg swelling. Liver disease, thyroid problems, and diabetes can all manifest as yellowing nails. If your nail yellowing is sudden, severe, affects all your nails (rather than just a few), or is accompanied by other health symptoms, see your doctor.
The straightforward test: if your nails respond to home whitening remedies and stay white when you follow the prevention strategies outlined in this article, the yellowing was cosmetic and you’ve solved the problem. If your nails resist treatment and the yellowing returns quickly despite your efforts, or if the discoloration is thick and difficult rather than surface-level, consult a dermatologist to rule out fungal infection or other medical causes.
Creating Your Long-Term Nail Maintenance Routine
Preventing white nail yellowing isn’t about doing one thing perfectly—it’s about integrating multiple protective strategies into your regular routine. The goal is to make these habits automatic so they don’t feel burdensome. This is what separates people who successfully maintain beautiful white nails from those who struggle with recurring yellowing.
Start with the non-negotiables: always use a base coat before applying polish, always use acetone-free remover, and always give your nails at least a few days off polish every two weeks. These three changes alone will dramatically reduce your yellowing problems. From there, add layers: use cuticle oil daily, choose higher-quality polish, remove polish every 1-2 weeks rather than letting it sit for 3+ weeks, and protect your nails from chemicals and harsh treatments.
Create a simple nail care schedule. For example: paint nails on Monday, remove polish and let nails breathe from Saturday to Monday, apply cuticle oil every evening, and do a whitening treatment if needed every Thursday. When these steps are scheduled, they become part of your routine rather than an extra effort you have to remember to do.
Keep your supplies organized so you have easy access to base coat, acetone-free remover, quality white polish, cuticle oil, and any whitening products you want on hand. When your tools are readily available, you’re far more likely to actually use them consistently.
Final Thoughts
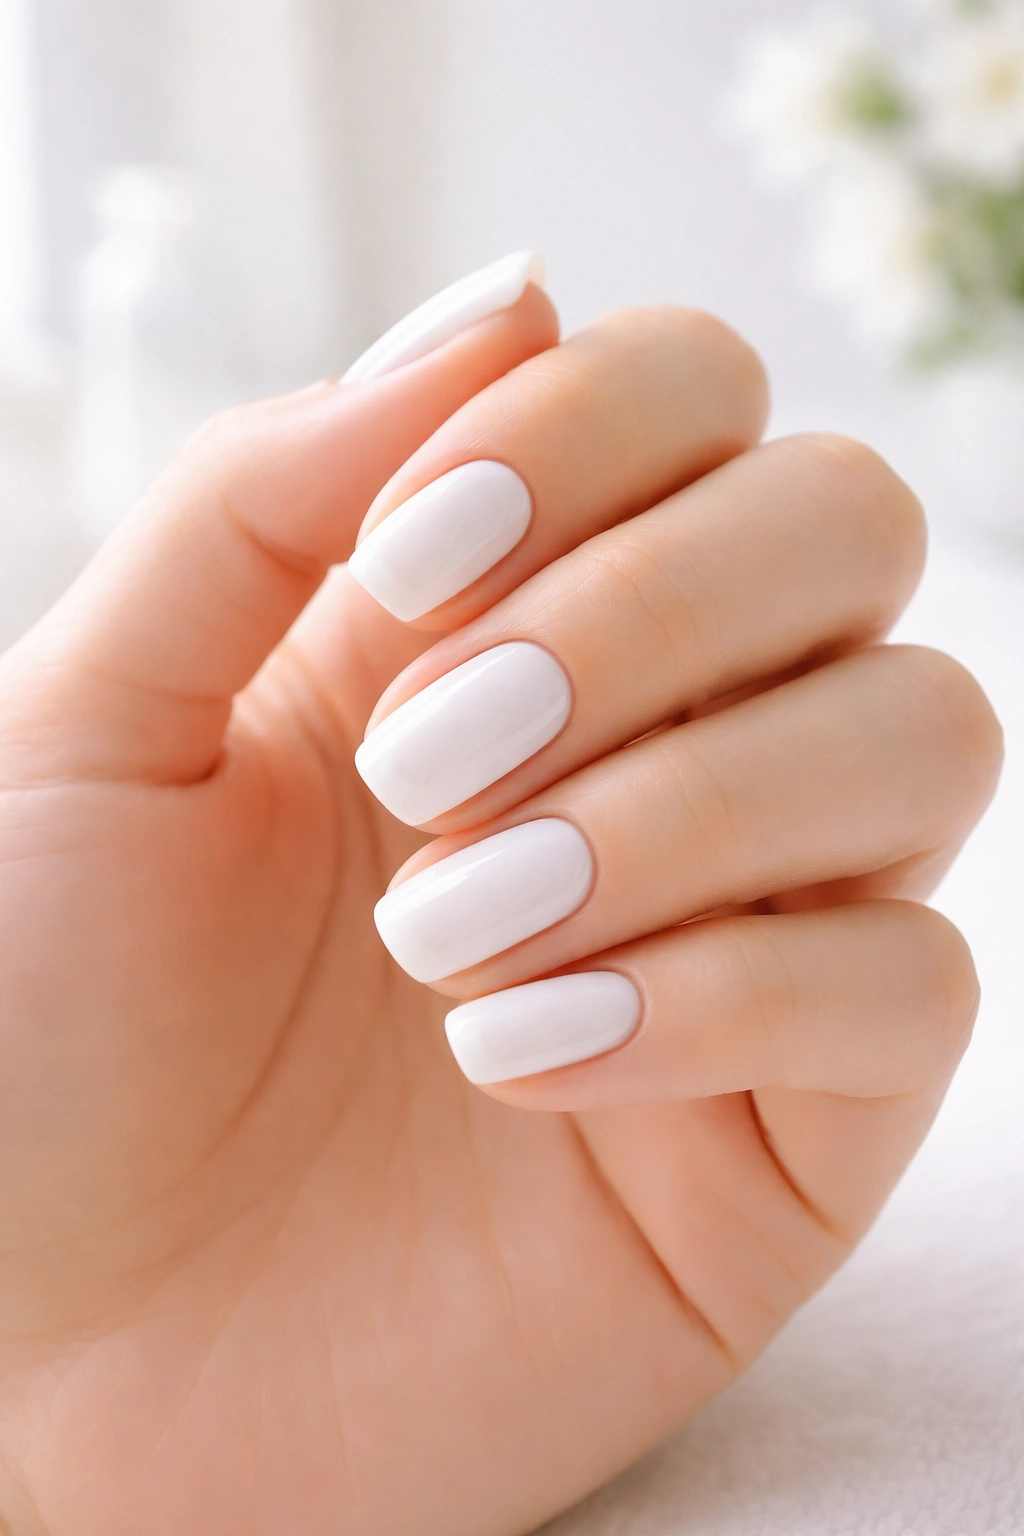
Keeping white nails from yellowing is absolutely achievable, and you have far more control over this than many people realize. The yellowing that happens on most white nails isn’t inevitable—it’s the result of specific factors that you can address and minimize. Whether you’re dealing with polish staining, UV exposure, chemical damage, or dry, brittle nails that stain easily, there’s a concrete strategy to prevent it.
Start implementing the changes that feel most doable for your lifestyle. If you wear polish constantly, begin by switching to acetone-free remover and using a quality base coat—these two changes alone will make an enormous difference. If you’re mainly concerned about maintaining natural white nails, focus on hydration, protection from chemicals, and avoiding smoking. Layer in additional strategies as these first steps become habits.
The consistency matters far more than perfection. You don’t need to follow every single recommendation in this article to see real results. Pick the top three or four changes that align with your habits and commit to those. Once they’re automatic, you can add more. Within a few weeks of implementing your prevention routine, you’ll notice your white nails staying whiter, brighter, and more resilient. That’s when you’ll realize that the effort was genuinely worth it.
