

Flower nail designs have become the go-to choice for anyone looking to add a touch of elegance, femininity, or artistic flair to their manicure without overthinking the whole process. Whether you’re heading to a spring wedding, planning a casual weekend brunch, or simply want your fingertips to reflect your love of nature, floral nails deliver exactly what you need—beauty that feels effortless and timeless. The best part? Flower nail art works for every skill level, from complete beginners willing to try their first dotting tool to experienced nail artists pushing the boundaries of what’s possible with gel and acrylics.
What makes floral designs so versatile is their ability to adapt to literally any mood, season, or aesthetic. Prefer minimalist elegance? There’s a delicate single-stem design waiting for you. Craving bold, statement-making drama? Layered 3D florals with rhinestones will absolutely deliver. Love retro vibes? Cherry blossoms and vintage rose patterns echo the romance of decades past. Love modern geometry? Abstract blooms in unexpected color combinations prove flowers can feel contemporary too.
The designs in this collection span multiple nail shapes, lengths, and difficulty levels because everyone deserves flower nails that make them feel like themselves. Whether you’re planning to DIY at home with basic tools or heading to your nail artist with a screenshot, you’ll find something here that speaks to your style. Most importantly, each design comes with practical insight into what makes it work, how to achieve the look, and why it’s worth trying.
Let’s dive into twenty flower nail ideas that prove florals never go out of style.
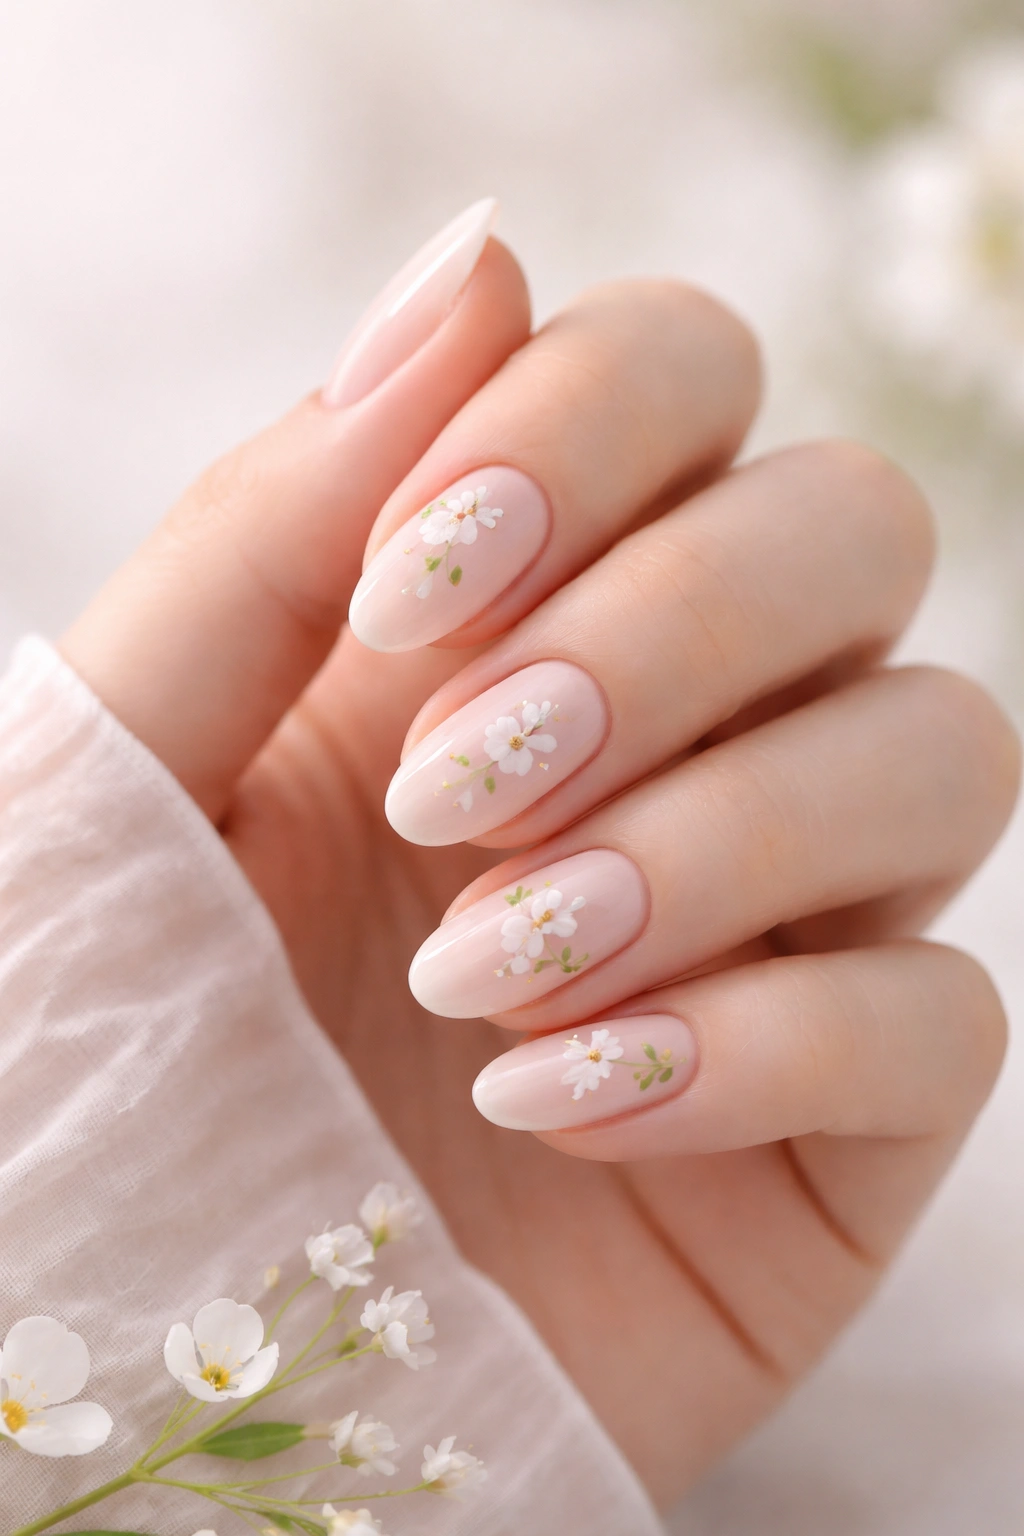
1. Delicate Daisy Clusters on Nude Base
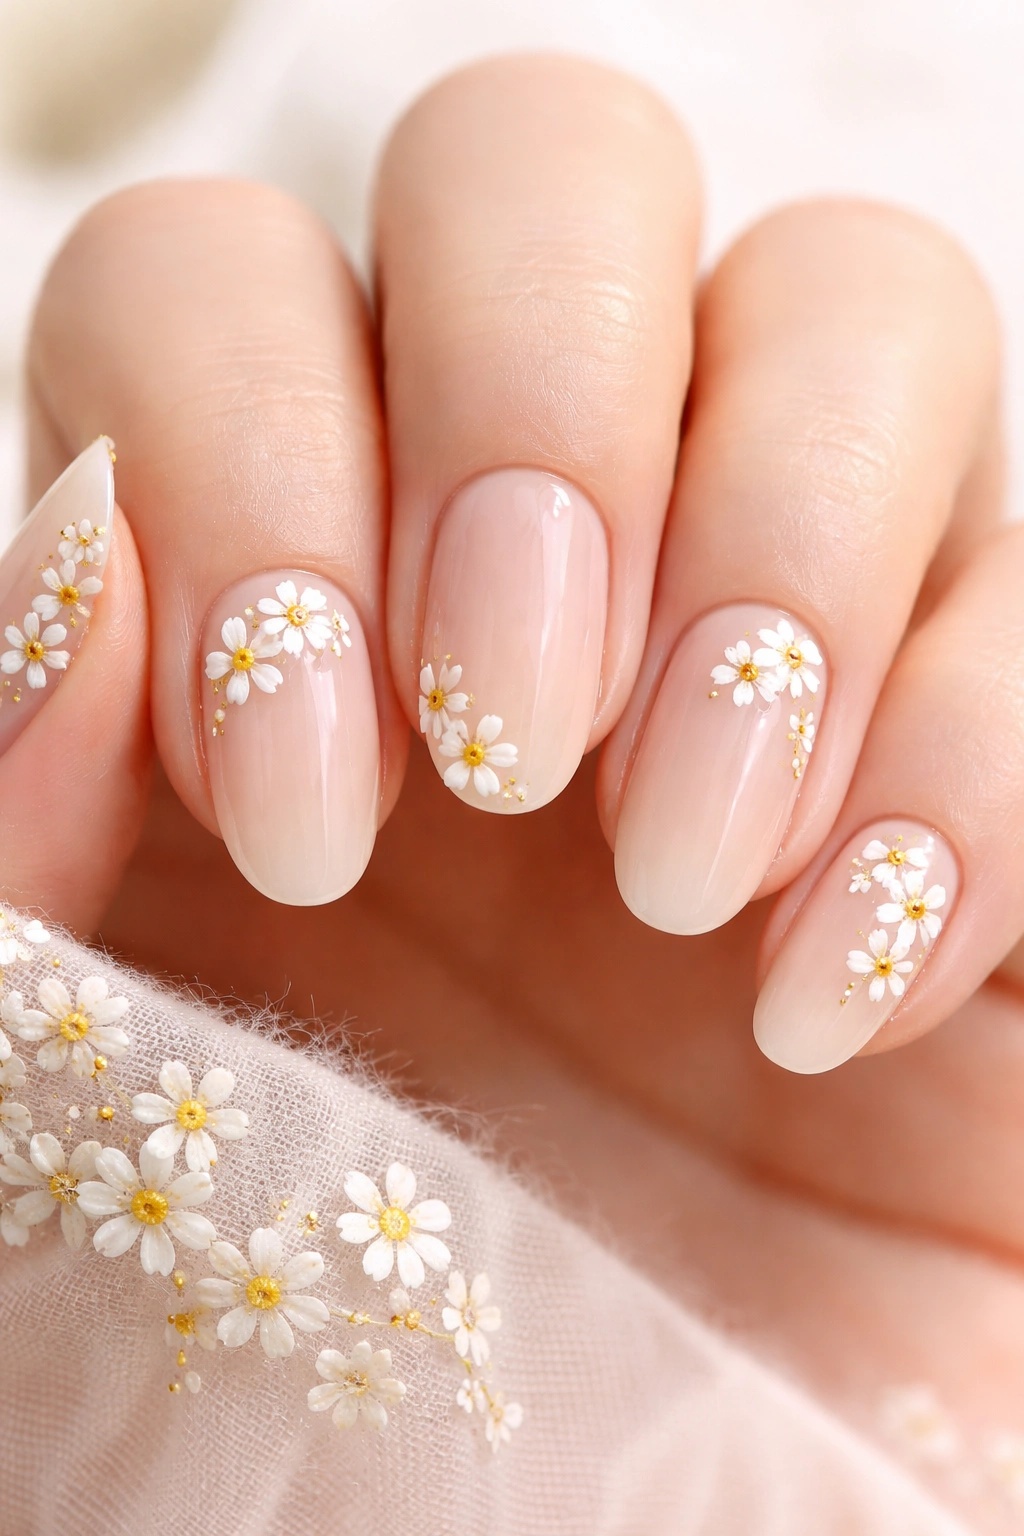
Daisies are the workhorse flower of nail art—they’re forgiving, instantly recognizable, and somehow look more impressive than they actually are to create. This design pairs tiny white daisies with yellow centers scattered across a soft, creamy nude base, concentrating heavier clusters near the cuticle and tip while leaving the middle of the nail breathable.
Why This Design Works So Well
The reason daisy clusters feel sophisticated rather than childish comes down to restraint and color choice. A warm nude base keeps everything grown-up, while the white-on-white florals create subtle dimension that catches the light differently depending on how you angle your hand. The scattered placement mimics how flowers naturally grow—random and organic rather than rigid and geometric.
How to Recreate This at Home
You’ll need a nude base polish, white polish, yellow polish, and either a dotting tool or the pointed end of a bobby pin. Paint each nail with two coats of your nude base and let it dry completely. Using your dotting tool dipped in white, create five dots arranged in a loose circle for each flower petal. While the white is still slightly tacky, use an even tinier dotting tool or a toothpick dipped in yellow to add the center. Seal with a quality topcoat. The entire manicure takes about 15-20 minutes, and imperfect petals actually add to the charm.
Pro tip: Practice your daisy placement on a piece of paper first to find a rhythm that feels natural to you—this simple step eliminates hesitation when you’re actually working on your nails.
2. Watercolor Cherry Blossoms with Soft Gradient
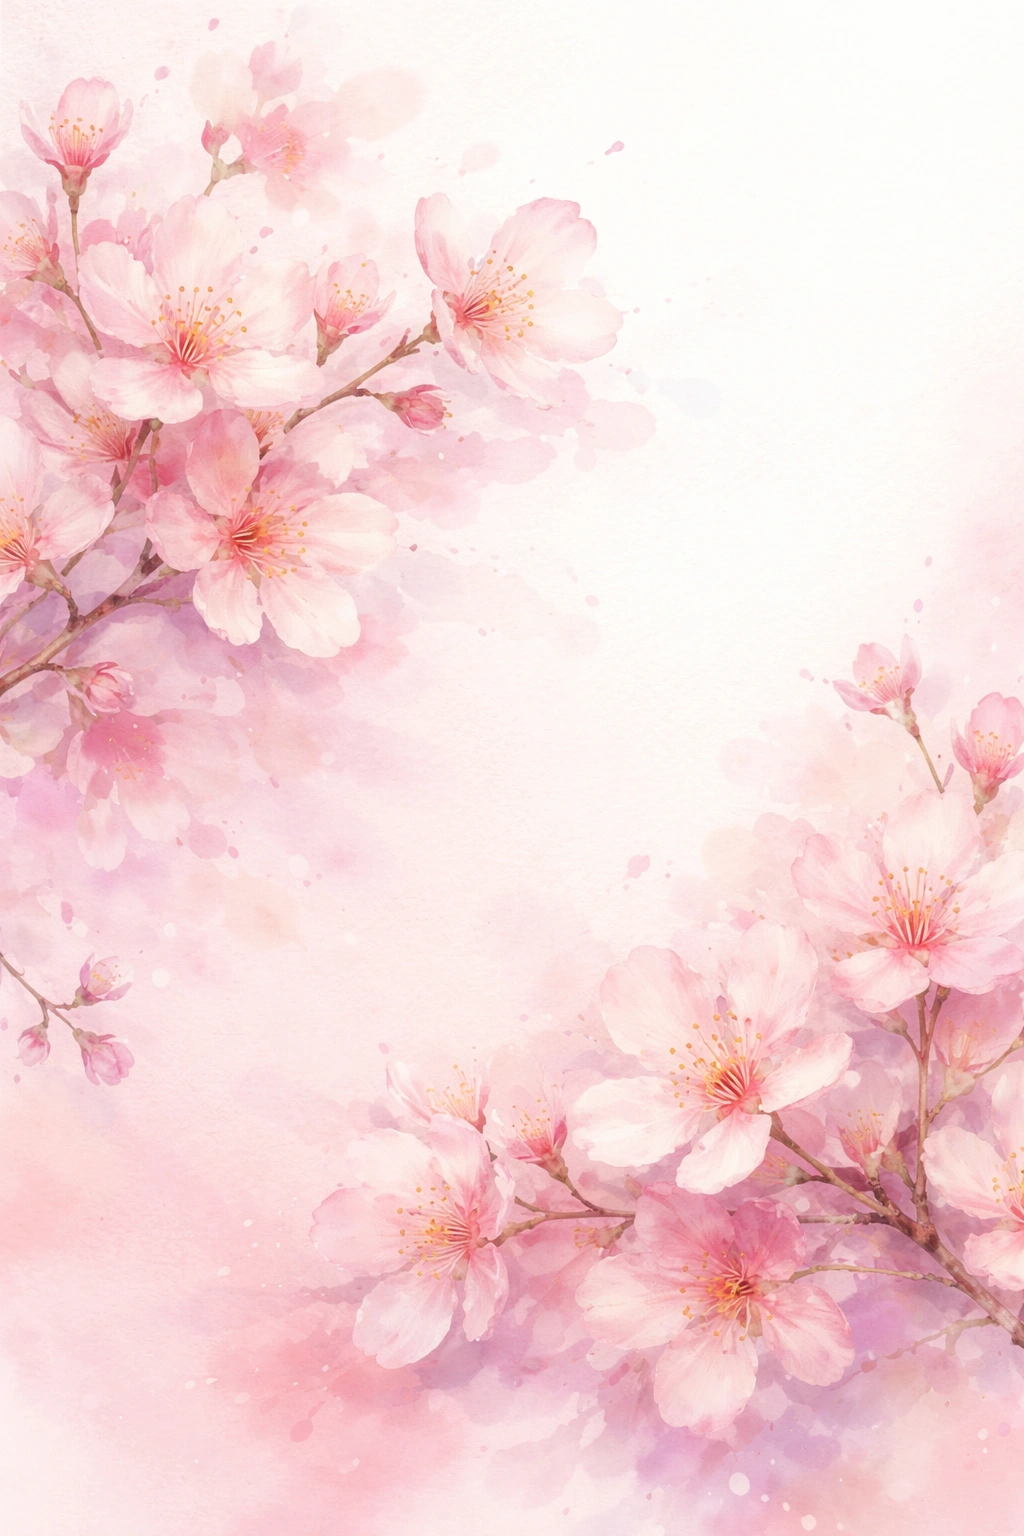
Cherry blossom designs evoke springtime romance and poetry, especially when rendered in soft, watercolor style. This design uses a pale pink gradient base that transitions from almost-white at the tips to deeper blush tones at the cuticle, with hand-painted cherry blossoms in soft pink, peach, and white floating throughout.
The Artistic Appeal of Watercolor Technique
What makes watercolor florals feel elevated is the intentional imprecision—petals blur into each other, colors blend where they meet, and the overall effect feels painterly rather than graphic. This softness suits cherry blossoms especially well because it mirrors how the real flowers look in nature: delicate, fleeting, and slightly ethereal. The gradient underneath adds depth without competing with the blooms.
Creating This Look (Professional Recommendation)
While you can attempt this at home with patience and a fine detail brush, the watercolor effect genuinely benefits from professional execution. A skilled nail artist can blend colors directly on the nail while gel or polish is still tacky, creating those signature soft edges that make the design feel authentic. If you’re DIYing, use a makeup sponge to create your gradient, then let it cure completely before adding flowers with diluted polish (mix regular polish with a bit of acetone to sheer it out).
Styling note: This design pairs beautifully with gold or rose gold jewelry and feels especially appropriate for spring events, engagement celebrations, or any time you want to feel polished but not over-the-top.
3. Black French Tips with Colorful Floral Details
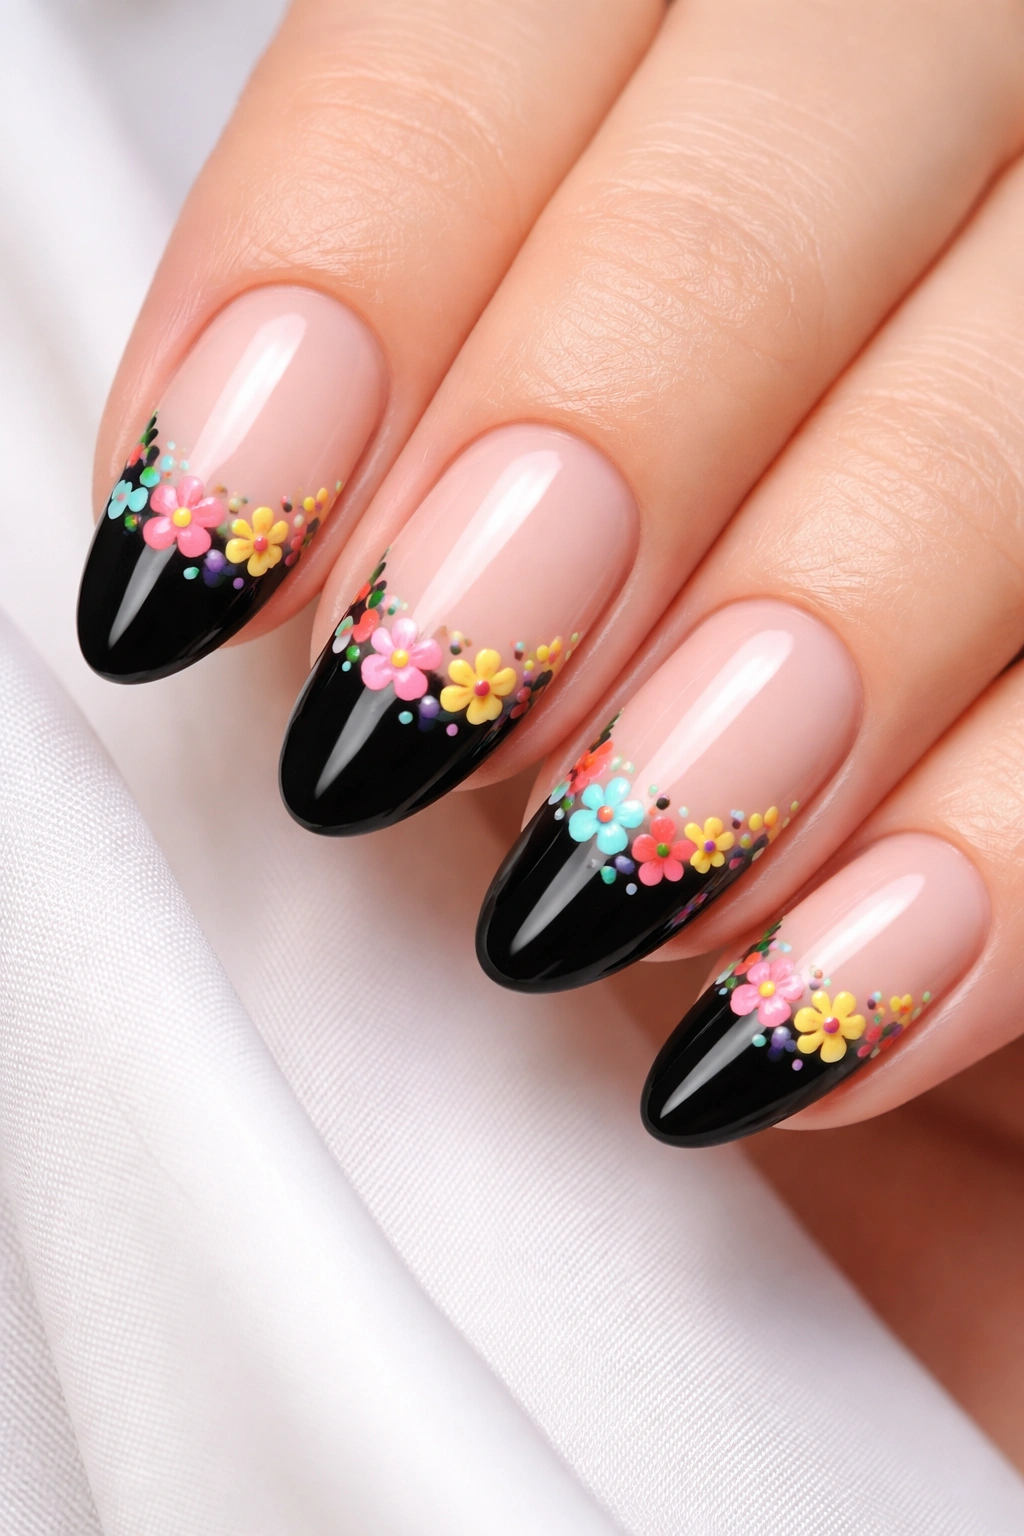
The drama of black French tips takes on a completely different energy when paired with vibrant floral accents. This design keeps the tips crisp and clean in glossy black, then adds small bursts of multicolor flowers—coral, yellow, pink, and turquoise—on the nail bed just above the black line, creating a striking contrast.
Why This Design Feels Modern
Black floral French tips work because they break every expectation about what a French manicure “should” be. Instead of demure and understated, you’ve got confident and bold. The florals prevent the design from feeling harsh or purely graphic. The white or nude base between the flowers and the black tip creates breathing room that keeps everything from feeling cluttered.
Execution and Versatility
Start with a clean, neutral base coat on all nails. Paint the tips in glossy black, creating a slightly angled line rather than a perfectly straight one if you want a more modern vibe. Once dry, use a fine detail brush to paint small floral clusters in your chosen bright shades just above where the black begins. The flowers don’t need to be precious or perfect—slightly abstract blooms actually enhance the design’s contemporary feel. Seal everything with a chip-resistant topcoat.
Real-world advantage: This design works on any nail length and shape, and because the flowers are concentrated in one area, they’re less likely to chip from daily activities than designs that extend all the way to the tips.
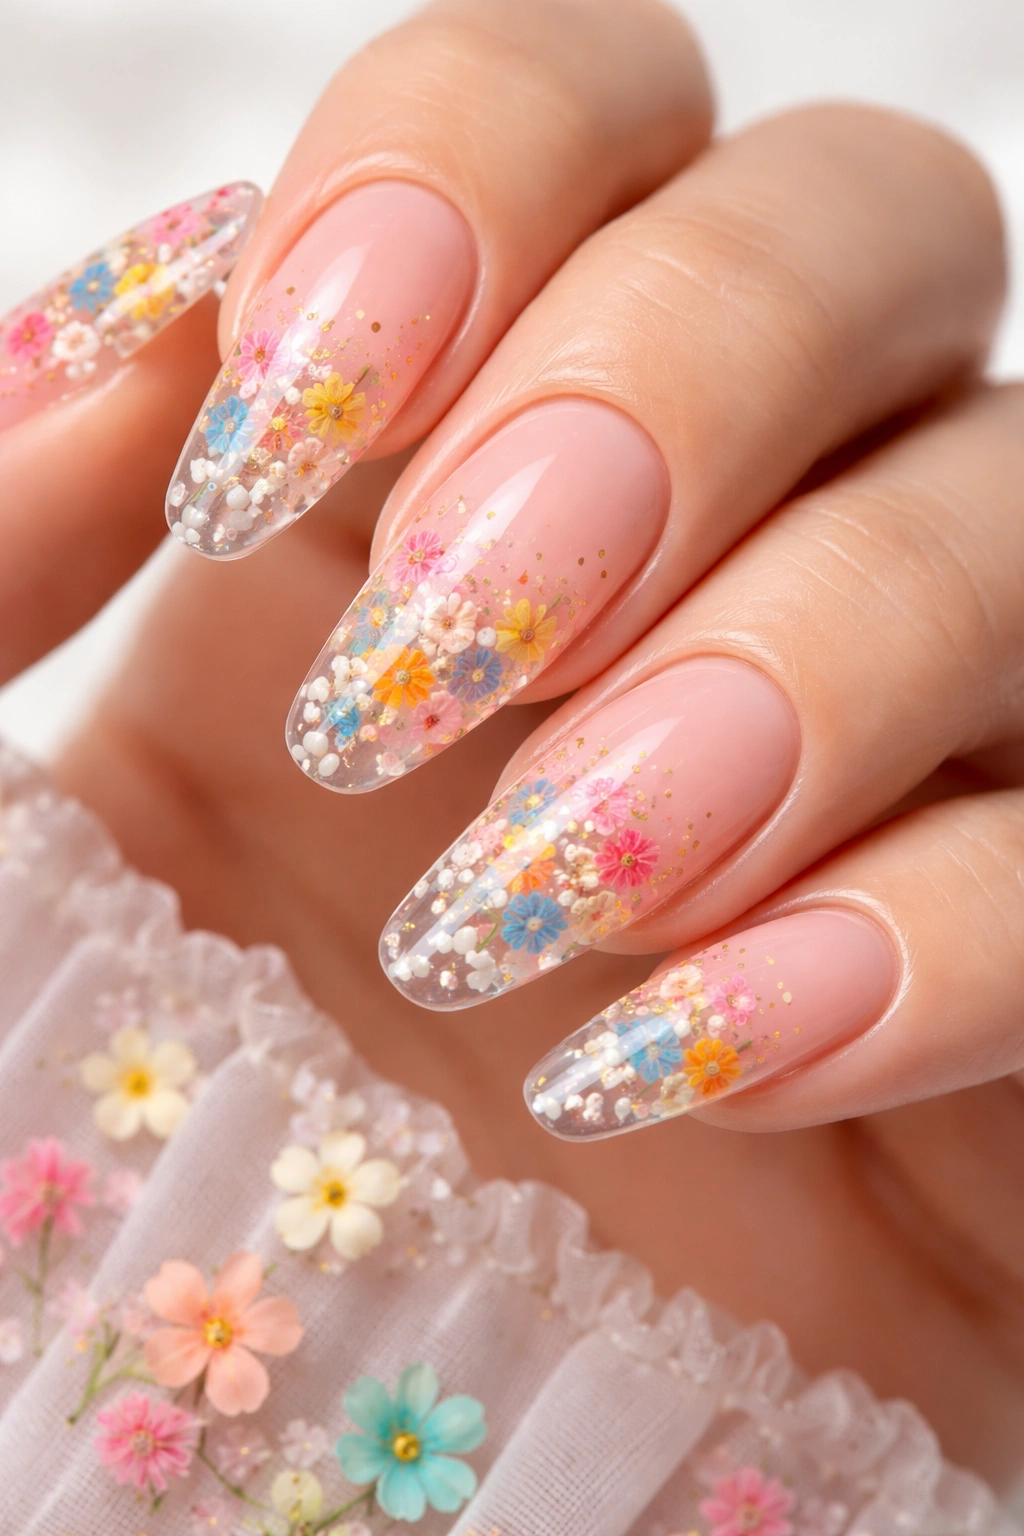
4. Pressed Dried Flowers Encapsulated in Clear Gel
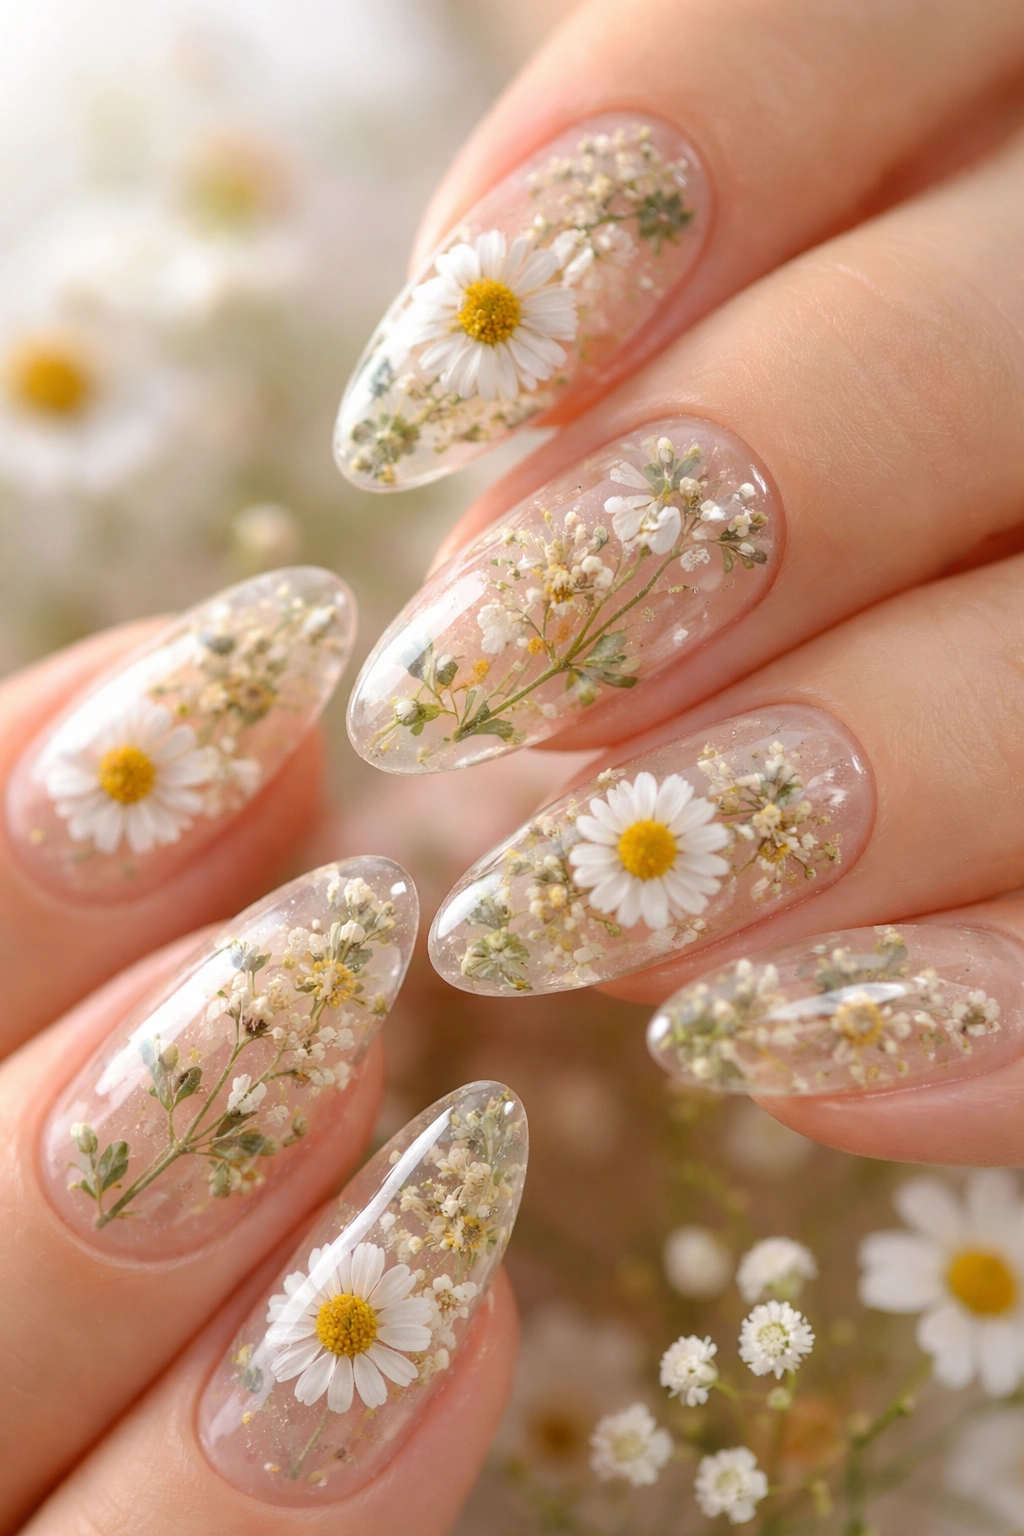
One of the most sophisticated-looking designs involves actual dried flowers pressed into clear gel and sealed with layers of topcoat. This creates a dimensional, botanical effect that looks like you’re carrying a miniature herbarium on your fingertips. Tiny dried daisies, baby’s breath, and delicate greenery work beautifully for this technique.
The Luxury of Real Botanicals
Using real flowers elevates nail art from digital image to three-dimensional art object. You can see and feel the actual texture, and the dried flowers cast real shadows under different lighting conditions. This design photographs incredibly well and genuinely feels special in person—there’s something luxurious about knowing someone took the time to source and carefully apply real plant material to create your manicure.
Professional Territory (For Good Reason)
This is best left to nail professionals because it requires specific gel adhesives, proper encapsulation technique to prevent the flowers from shifting, and knowledge of which dried flowers will hold up to daily wear and moisture. Your nail artist will source high-quality dried flowers, place them precisely while gel is in the ideal tacky state, and seal them with enough topcoat to protect them while maintaining clarity. The result lasts 3-4 weeks without the flowers browning or shifting.
Worth knowing: Ask your nail artist about “non-wipe” gel adhesive bonds specifically designed for delicate floral elements—this makes a significant difference in longevity.
5. Peachy-Orange Ombre with Tiny White Blossoms
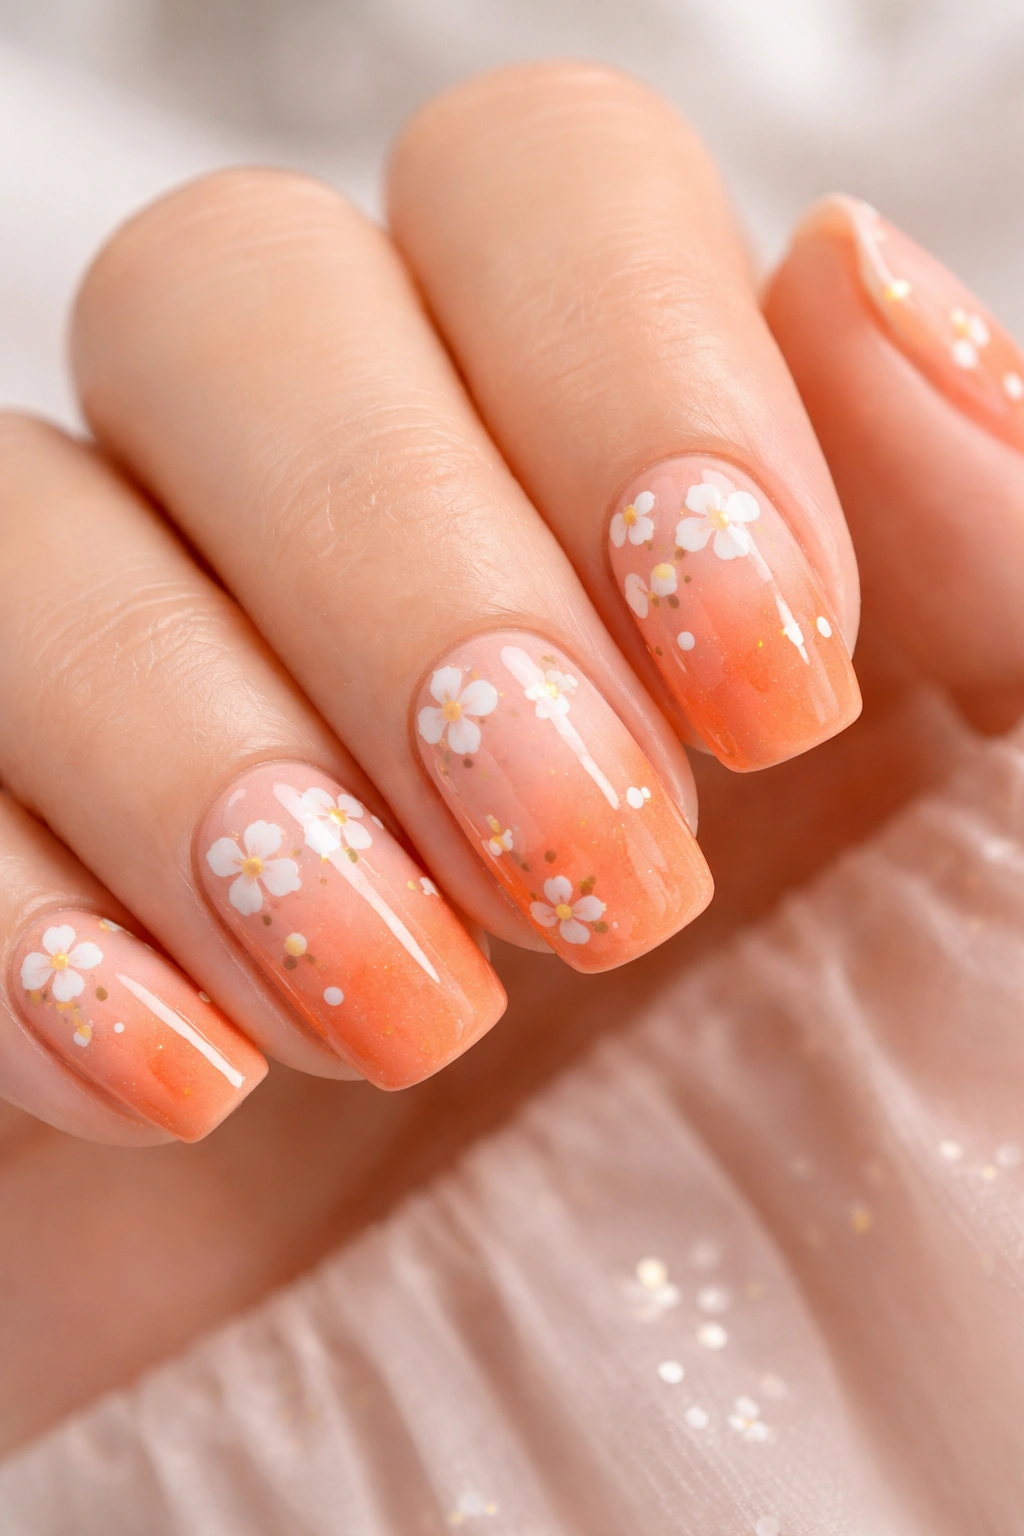
This design combines a warm peachy-orange ombre gradient with minimalist white flowers sprinkled throughout, creating a look that feels both summery and sophisticated. The ombre transitions from pale peach at the tips to deeper sunset orange at the cuticle, anchored by delicate white blooms that almost disappear into the gradient until you look closely.
The Psychology of Warm Florals
Warm color florals feel approachable and happy compared to cool-toned designs. Orange is a color most people avoid in general fashion, but on nails it reads as optimistic, creative, and seasonally appropriate without being limited to fall. The white flowers prevent the warm base from feeling overwhelming—they give your eye a place to rest and add sophistication to what could otherwise feel juvenile.
At-Home Recreation Strategy
Create an ombre using a makeup sponge and two shades of peachy-orange polish, blending from light to dark as you move toward the cuticle. Once completely dry, use the tiniest dotting tool or the end of a toothpick to add five-petal white flowers scattered across the gradient. You want enough flowers to be noticeable but not so many that they overtake the gradient—aim for 2-4 flowers per nail depending on nail size.
Pro tip: Let the white flowers dry slightly before applying your final topcoat, or they’ll smudge into the gradient base and lose their definition.
6. Navy Blue with Hand-Painted Gold-Accented Florals
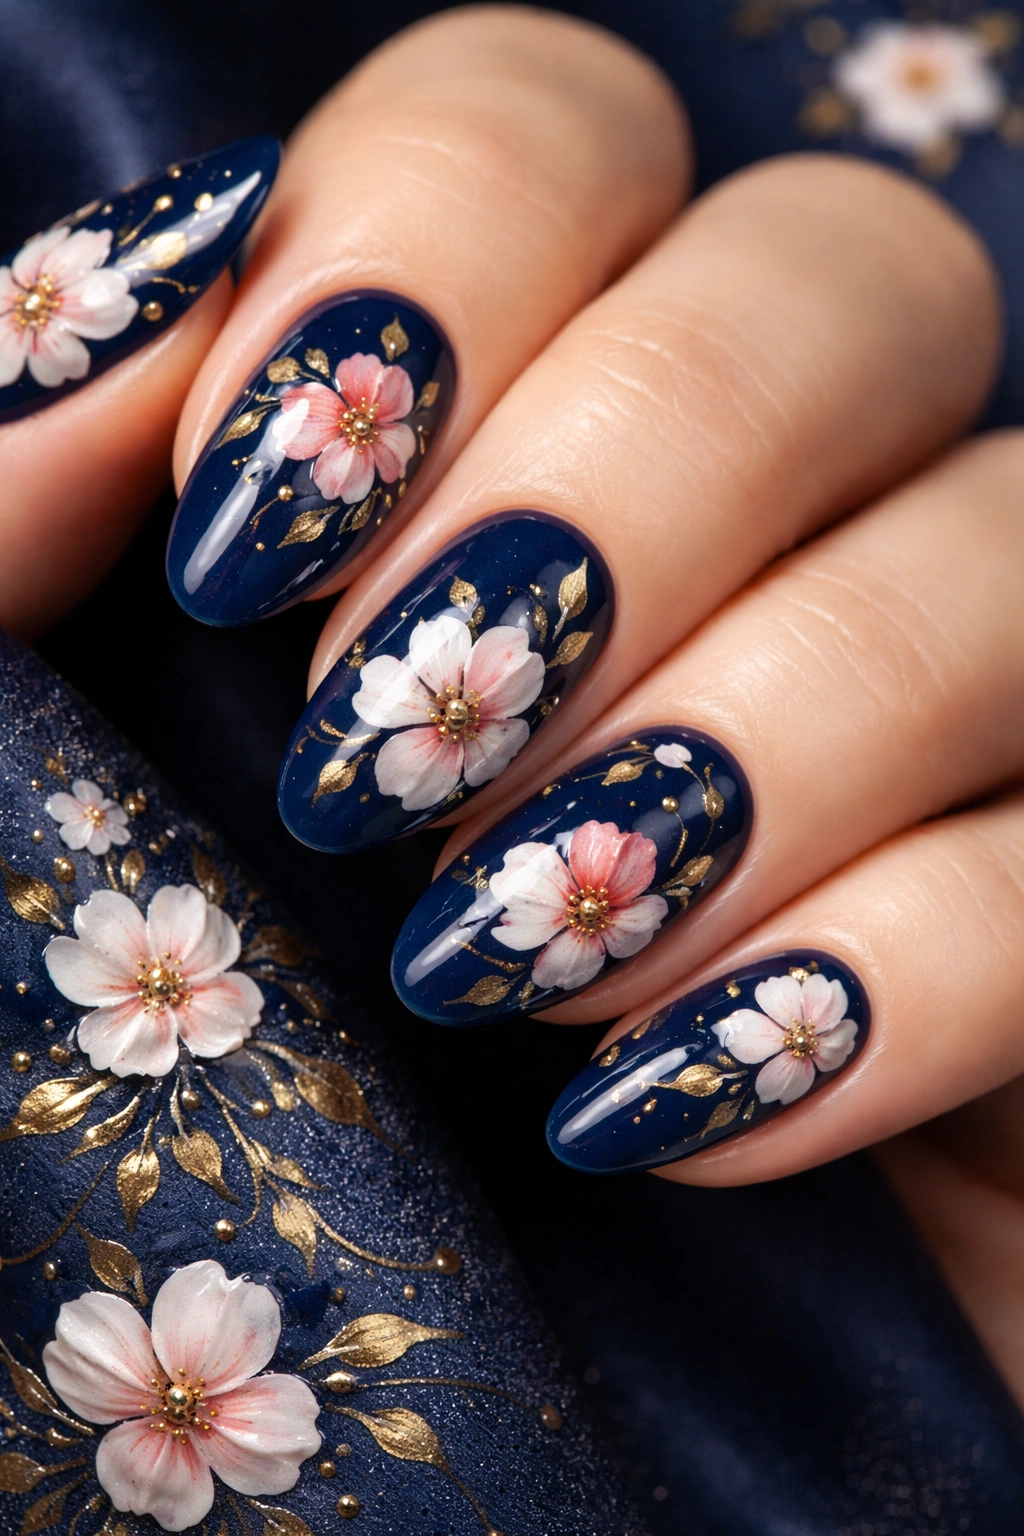
Deep navy creates the perfect moody backdrop for hand-painted flowers with metallic details. This design features stylized blooms in soft pink, white, and coral, each with tiny gold beads or gold-painted centers, against a rich navy base that makes every color pop.
Creating Contrast Through Color Theory
Navy is one of the most flattering base colors for nail art because it’s dark enough to make pastels sing while sophisticated enough to keep everything feeling elegant rather than playful. The gold accents add luxury and warmth to what could otherwise feel cold. The combination is deeply flattering on almost every skin tone.
What You’ll Need
Beyond your navy base and various flower colors, you’ll want ultra-fine brushes for detail work and either a gold gel pen or hand-painted gold dots using a very thin brush. The precision required here makes this design ideal for either professional application or as a DIY project if you’re comfortable with detail work. Each flower can be slightly different—varying sizes and styles actually create visual interest that makes the design feel more artistic.
Insider note: Navy blue nail polish sometimes has a slightly purple undertone while others lean greener—test a few options because the undertone dramatically affects how your floral colors read against the base.
7. Soft Pink with Delicate Rose Details and Gold Leaf
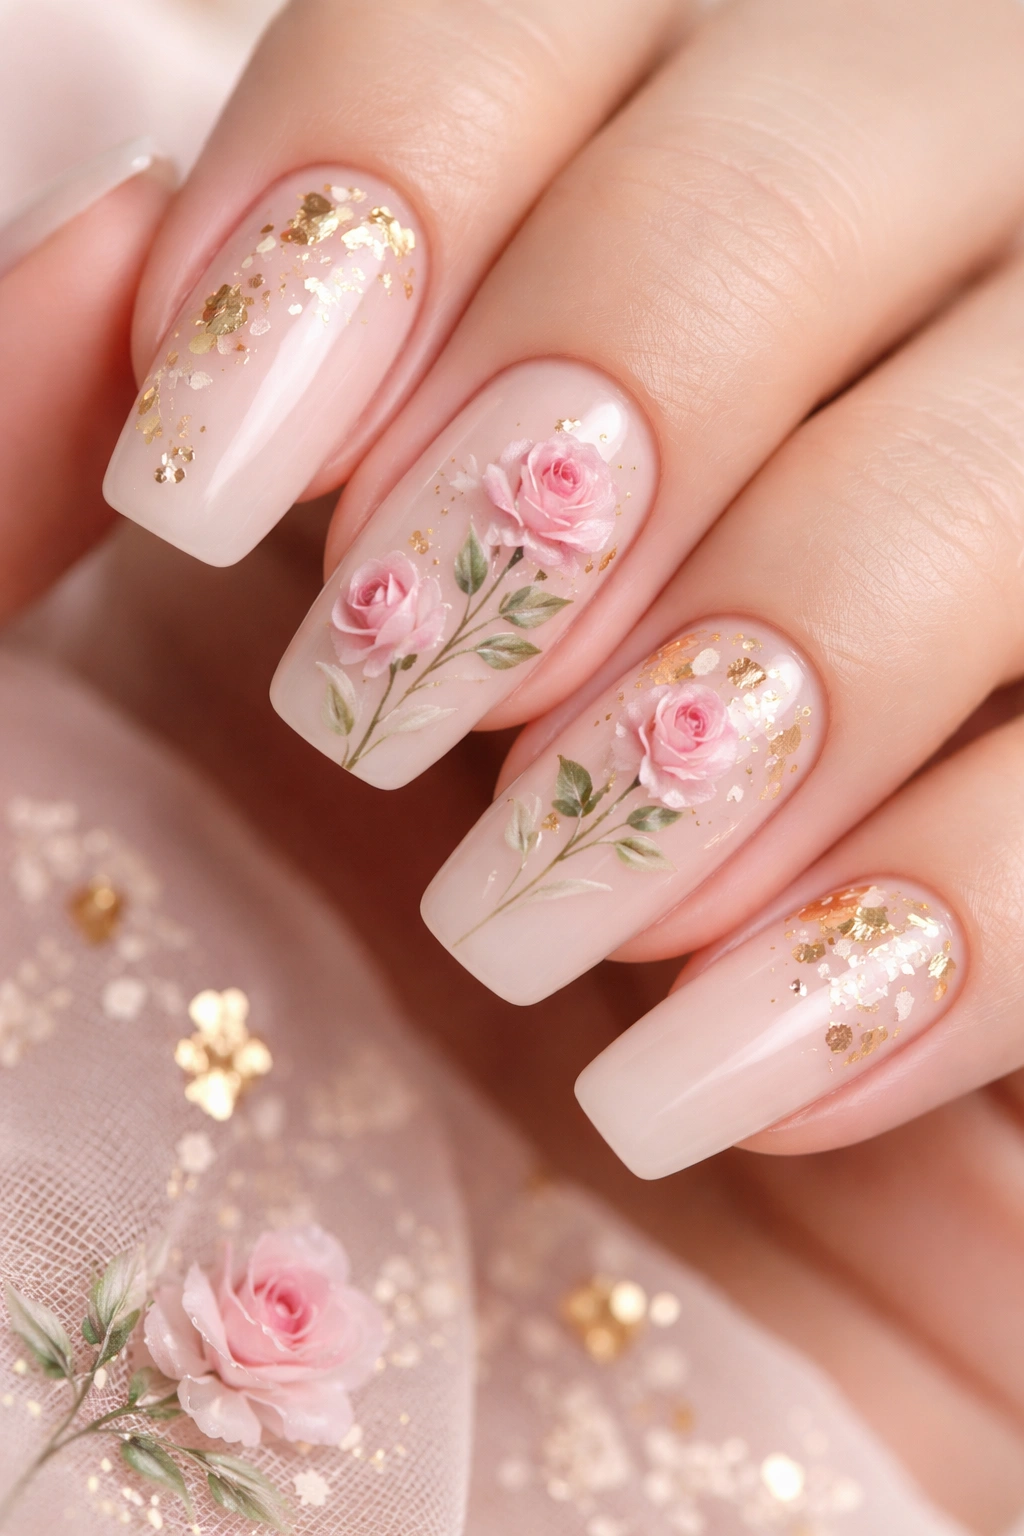
This romantic design starts with a soft, creamy pink base and features hand-painted pink roses with green stems, accented by real gold leaf scattered throughout the design. The roses are slightly translucent, creating a watercolor effect, while the gold adds just enough shimmer to catch the light.
Romance Without Overdoing It
The difference between girly and romantic comes down to restraint and execution. This design is romantic because the roses are rendered beautifully and the color palette is intentional rather than “all the pretty colors.” Gold leaf acts as sophisticated punctuation—it enhances without overwhelming. The slightly translucent quality of the roses keeps them from feeling stiff or artificial.
The Role of Gold Leaf
Gold leaf adds dimension and texture that regular polish can’t replicate. It catches light and movement, making your nails shimmer subtly as you move your hands. Applied over a slightly tacky topcoat and sealed carefully, it stays put and looks luxurious. This is another technique that genuinely benefits from professional application, but experienced DIYers can master it with practice.
Perfect for: Engagement celebrations, bridal showers, anniversary dinners, or any time you want to feel special without being over-the-top dramatic.
8. Matte Nude with Tiny Pastel Floral Dots

Minimalism meets femininity in this ultra-subtle design that features a matte nude base covered in tiny, barely-there pastel flowers—soft yellows, pale blues, dusty pinks, and lavender—scattered randomly across all ten nails like a secret garden only close viewers will notice.
The Power of Understatement
There’s genuine sophistication in a design so subtle that people have to look twice to fully see it. This manicure works in professional environments where flashy nails might feel out of place, but it keeps your hands from being boring. The pastel colors are barely distinguishable from skin tone from a distance, which adds to the elegance.
DIY-Friendly Execution
This design doesn’t require advanced skills—you just need patience and a steady hand with a tiny dotting tool. Paint your base in a quality matte topcoat over any nude polish. Once dry, dip the smallest end of your dotting tool into pastel shades and add single dots or five-petal flowers across each nail. Seal with either matte or glossy topcoat depending on the final effect you prefer.
Styling note: This design pairs perfectly with minimalist jewelry and works year-round because the colors are so neutral they don’t read as seasonal.
9. Burgundy Base with Cream-Colored Floral Accents
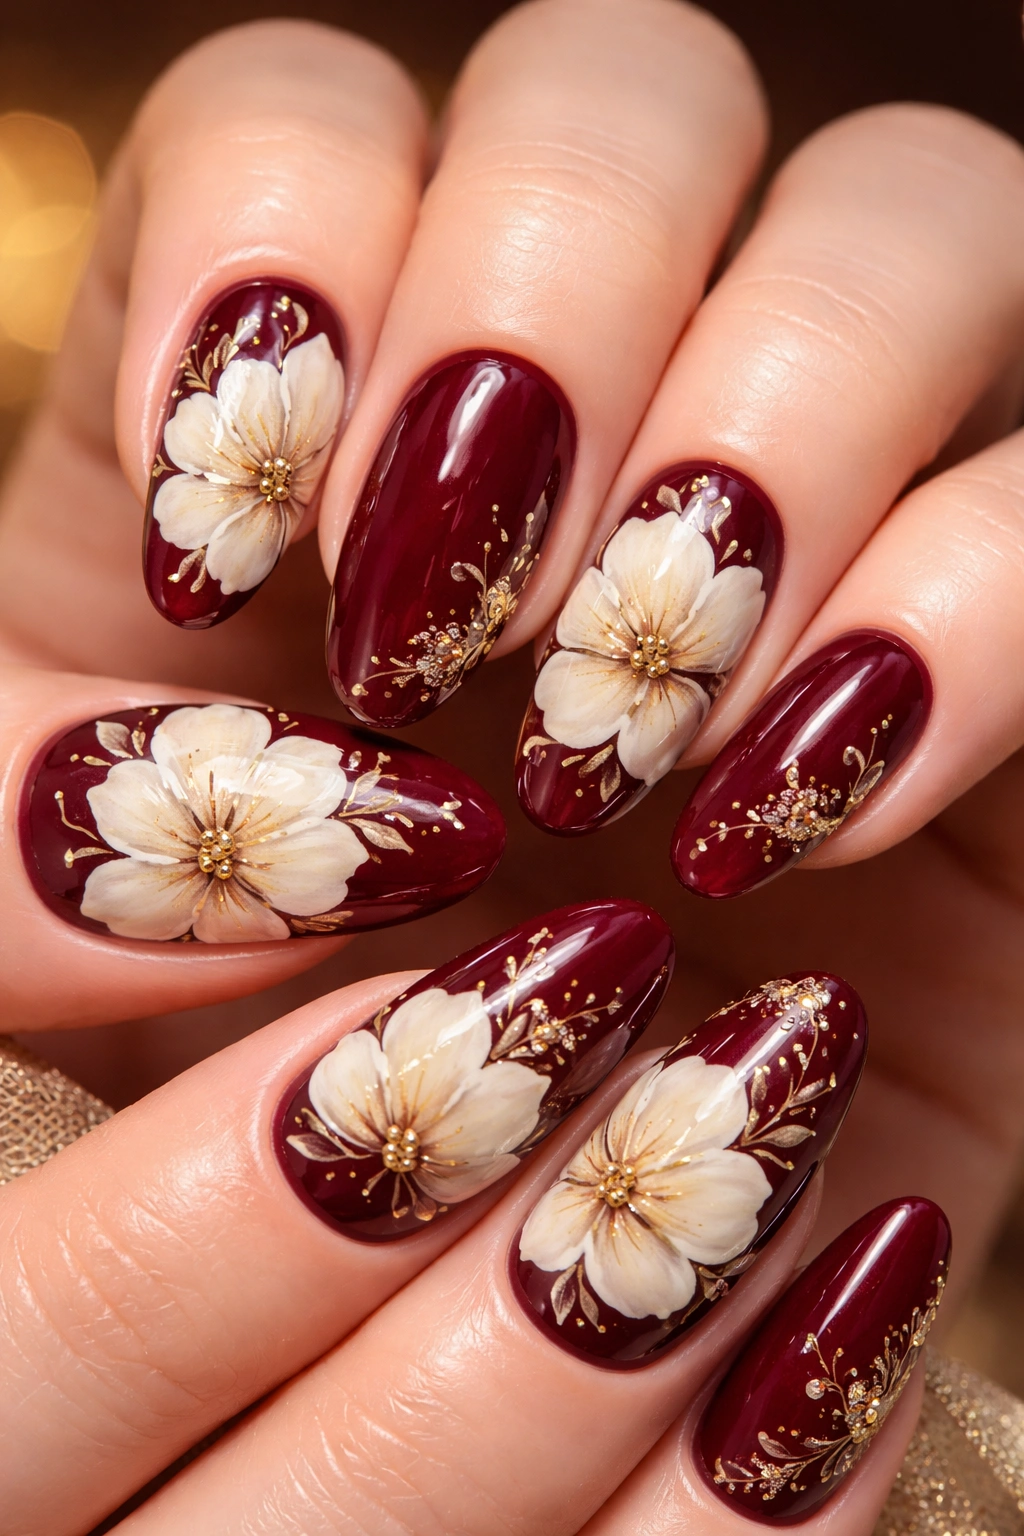
Burgundy is the ultimate fall and winter color, and when paired with cream or off-white florals, it creates a warm, luxurious aesthetic. This design features large, bold cream flowers with gold-painted details scattered across deep burgundy nails, making each bloom feel like a statement rather than a whisper.
Why Burgundy Feels Special
Burgundy is inherently elegant—it’s the color of wine, of velvet, of things that feel important. When you add cream flowers to burgundy, you’re creating contrast that makes both colors look better. The flowers don’t disappear into the background; they stand out as intentional artistic choices. This combination works beautifully for everything from holiday parties to winter weddings to professional settings where you want to feel polished and powerful.
Creating the Contrast
Start with 2-3 coats of burgundy polish for full opacity. Once completely dry, paint your flowers in cream or off-white using a detail brush. You can make them as stylized or realistic as you want—the burgundy background is forgiving and makes imperfections feel intentional. Add gold details with a very fine brush for dimension, then seal everything with a glossy topcoat that makes the flowers pop.
Real talk: This design genuinely elevates your appearance—people notice when your nails look expensive and intentional, and this definitely reads that way.
10. Clear Nails with Multicolor Floral Gel Extensions
This design capitalizes on the popularity of clear gel tips by embedding colorful florals directly into translucent gel extensions. The flowers seem to float within the nail itself, creating a three-dimensional effect that’s absolutely eye-catching. Tiny blooms in coral, yellow, pink, and turquoise are suspended in clear gel with subtle iridescent accents.
The Appeal of Clear Gel Canvas
Clear gel tips create a unique canvas that regular nail polish can’t replicate. You’re working with transparency and depth, which allows you to layer florals and create genuine three-dimensionality. The nails catch light differently throughout the day, making them genuinely interesting to look at from multiple angles.
Professional Application Required
Creating clean, clear gel extensions with embedded florals requires specialized skills and equipment. Your nail artist will build the clear gel extension, embed dried flowers or hand-painted details while the gel is in the tacky stage, then seal everything with topcoat. The result is incredibly durable and looks stunning in photos. Because the flowers are encased in gel rather than sitting on top, they won’t chip or wear away from daily activity.
Bonus feature: These nails look incredible on camera and in person—they work for everything from social media content to special events.
11. Olive Green with Hand-Painted White Wildflowers
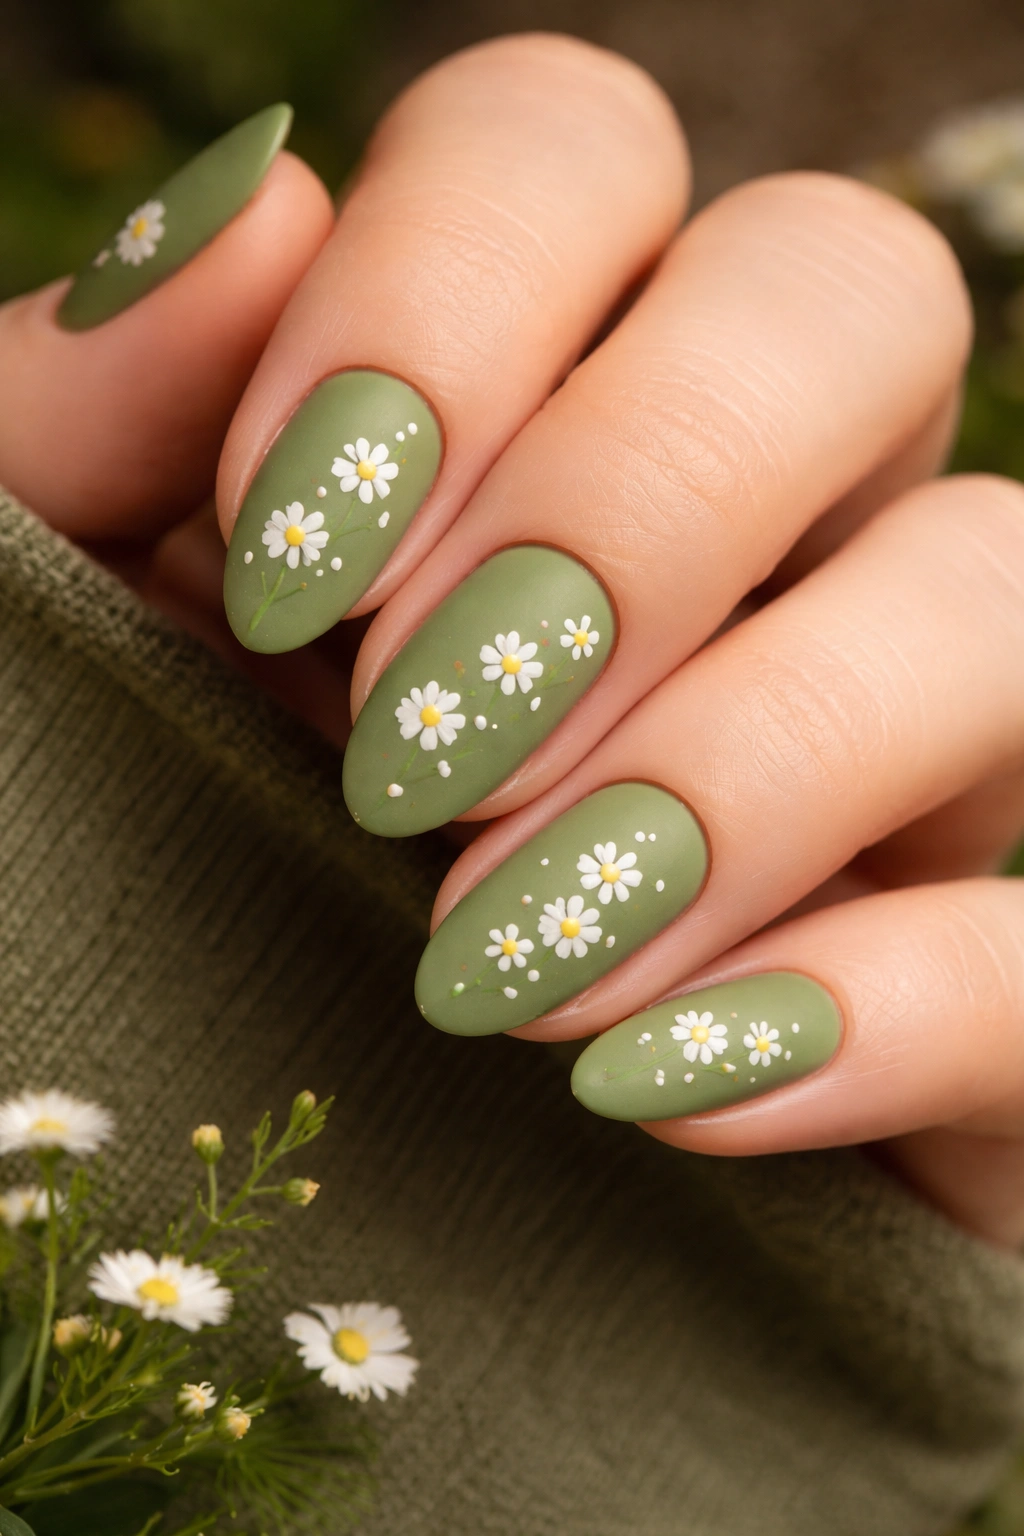
Earthy, botanical, and effortlessly chic, this design pairs matte olive green with delicate white wildflowers scattered across the nail like a garden growing on your fingertips. The green is warm enough to feel inviting rather than austere, and the white flowers create beautiful contrast without feeling stark.
Connecting with Nature Through Nails
Olive green has become increasingly popular because it reads as nature-inspired and sophisticated simultaneously. Unlike brighter greens that can feel novelty, olive feels timeless and mature. The white wildflowers add movement and personality to what could otherwise be a solid color manicure. This design appeals to people who love outdoors, gardening, plant-based aesthetics, or anyone seeking a manicure that feels less traditionally “pretty” and more authentically them.
Achieving Natural-Looking Florals
The key to wildflower designs is imperfection. Real wildflowers don’t grow in perfectly symmetrical patterns—they bloom at different stages, some flowers face different directions, some are fuller than others. Translate this to your nails by varying the size and fullness of each flower, changing the direction some stems point, and letting some flowers be more suggested than fully detailed.
Insider knowledge: Use a slightly thinned white polish (mix with a tiny bit of acetone) for the smallest flowers—this creates delicate details that feel more realistic than opaque white dots.
12. White Base with Scattered Rainbow Micro-Florals
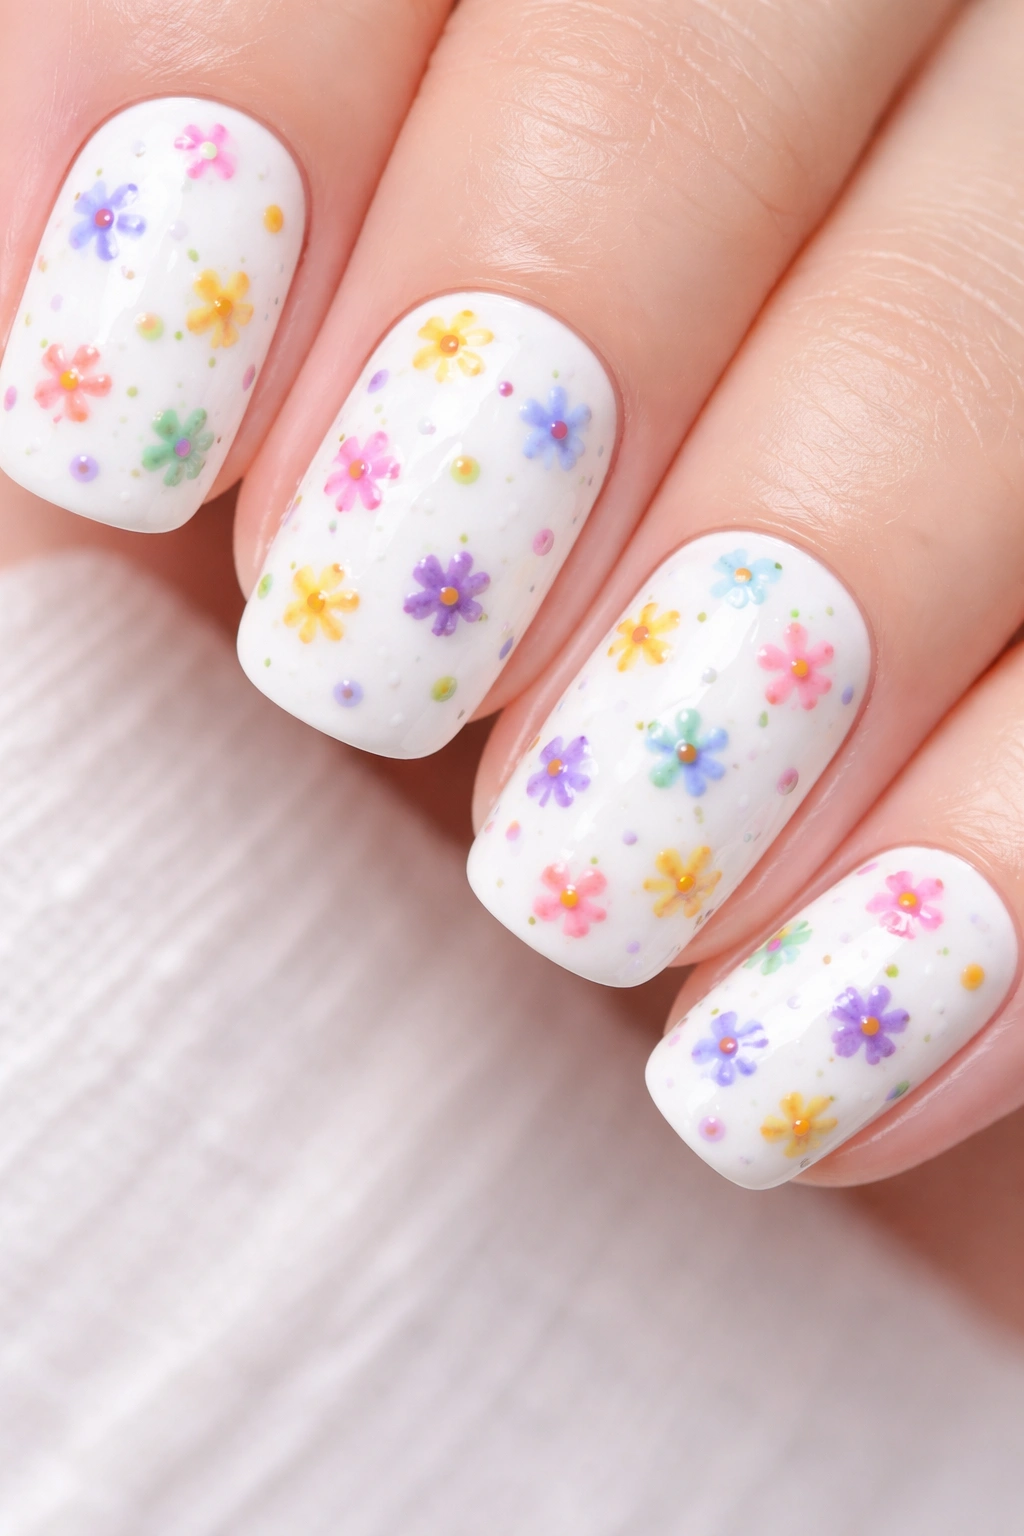
This playful design uses a clean white base as a canvas for dozens of tiny flowers in every color of the rainbow, scattered randomly across each nail. The flowers are so small they’re almost abstract, creating a colorful, joyful overall effect that reads more sophisticated than “rainbow nails” typically sounds.
Balancing Playfulness with Elegance
Rainbow designs can feel juvenile, but scaling the elements down and concentrating on floral shapes keeps this design feeling artistic and intentional. The white background gives breathing room and prevents the design from feeling visually overwhelming. Each tiny flower is distinct enough to be interesting but small enough that the overall effect is cohesive rather than chaotic.
Technique for Micro-Florals
You need very steady hands, a magnifying lamp, and the finest detail brush you can find—or a toothpick dipped in polish works surprisingly well. Paint each tiny flower as a group of 3-5 dots arranged in a loose circle, using different colors for each flower. The flowers don’t need centers—the implied shape is enough. Work on one nail at a time and step back frequently to assess the overall distribution and color balance.
Pro tip: If you’re new to detailed work, practice on a piece of white paper first to get comfortable with the hand movements and pressure needed.
13. Nude Ombre with 3D Pink Flower Accents
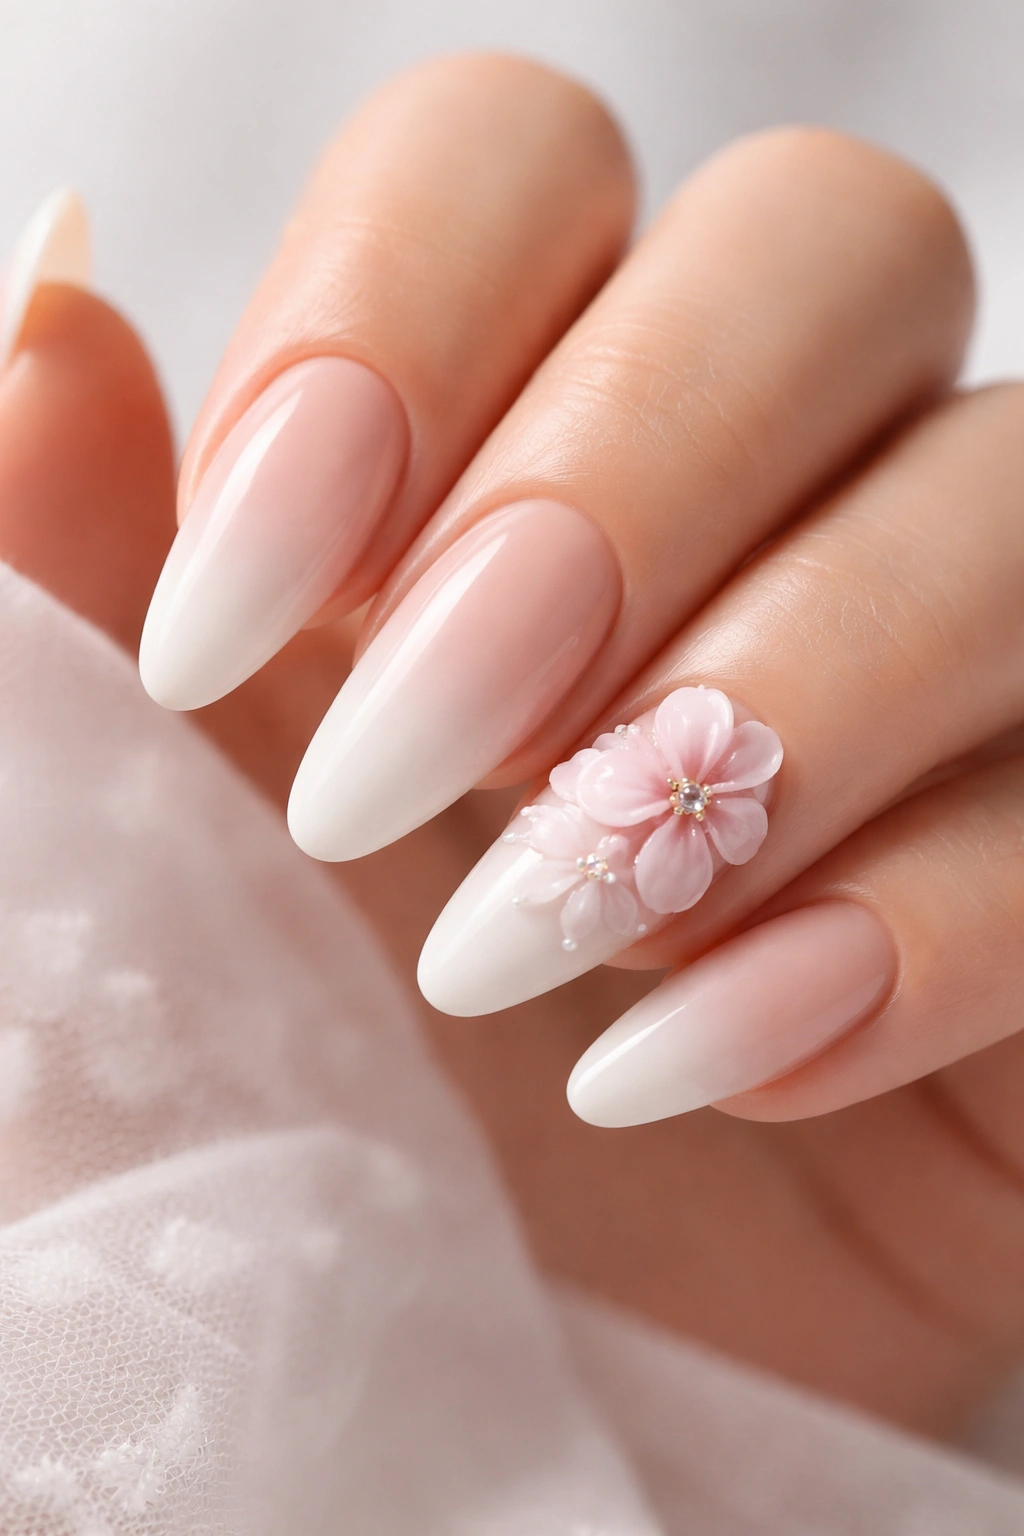
This elegant design combines a subtle nude-to-white ombre gradient with sculpted, three-dimensional pink flowers on accent nails. The flowers actually protrude slightly from the nail surface, creating genuine depth and texture that makes the design feel expensive and custom.
The Luxury of Textured Nail Art
3D flowers elevate manicures from simple decoration to wearable art. They catch light and shadow, create visual movement, and genuinely feel special in person. This level of artistry signals that you’ve invested in your nails, which translates to an overall polished appearance. The ombre base keeps everything elegant while the 3D flowers provide the “wow” factor.
Creating 3D Elements
Building 3D flowers requires layering gel, careful placement of embellishments, and professional equipment. Your nail artist will sculpt the flower shapes using thick gel applications, adding dimension with each layer. Some artists hand-paint details, others add tiny rhinestones or pearls to flower centers. The result is incredibly durable when done properly—3D elements won’t pop off if you’ve chosen an experienced technician.
Worth the investment: While 3D nail art costs more than regular manicures, the durability and visual impact often make it worthwhile for special occasions or when you want something genuinely one-of-a-kind.
14. Black Nails with White Hand-Painted Daisy Pattern
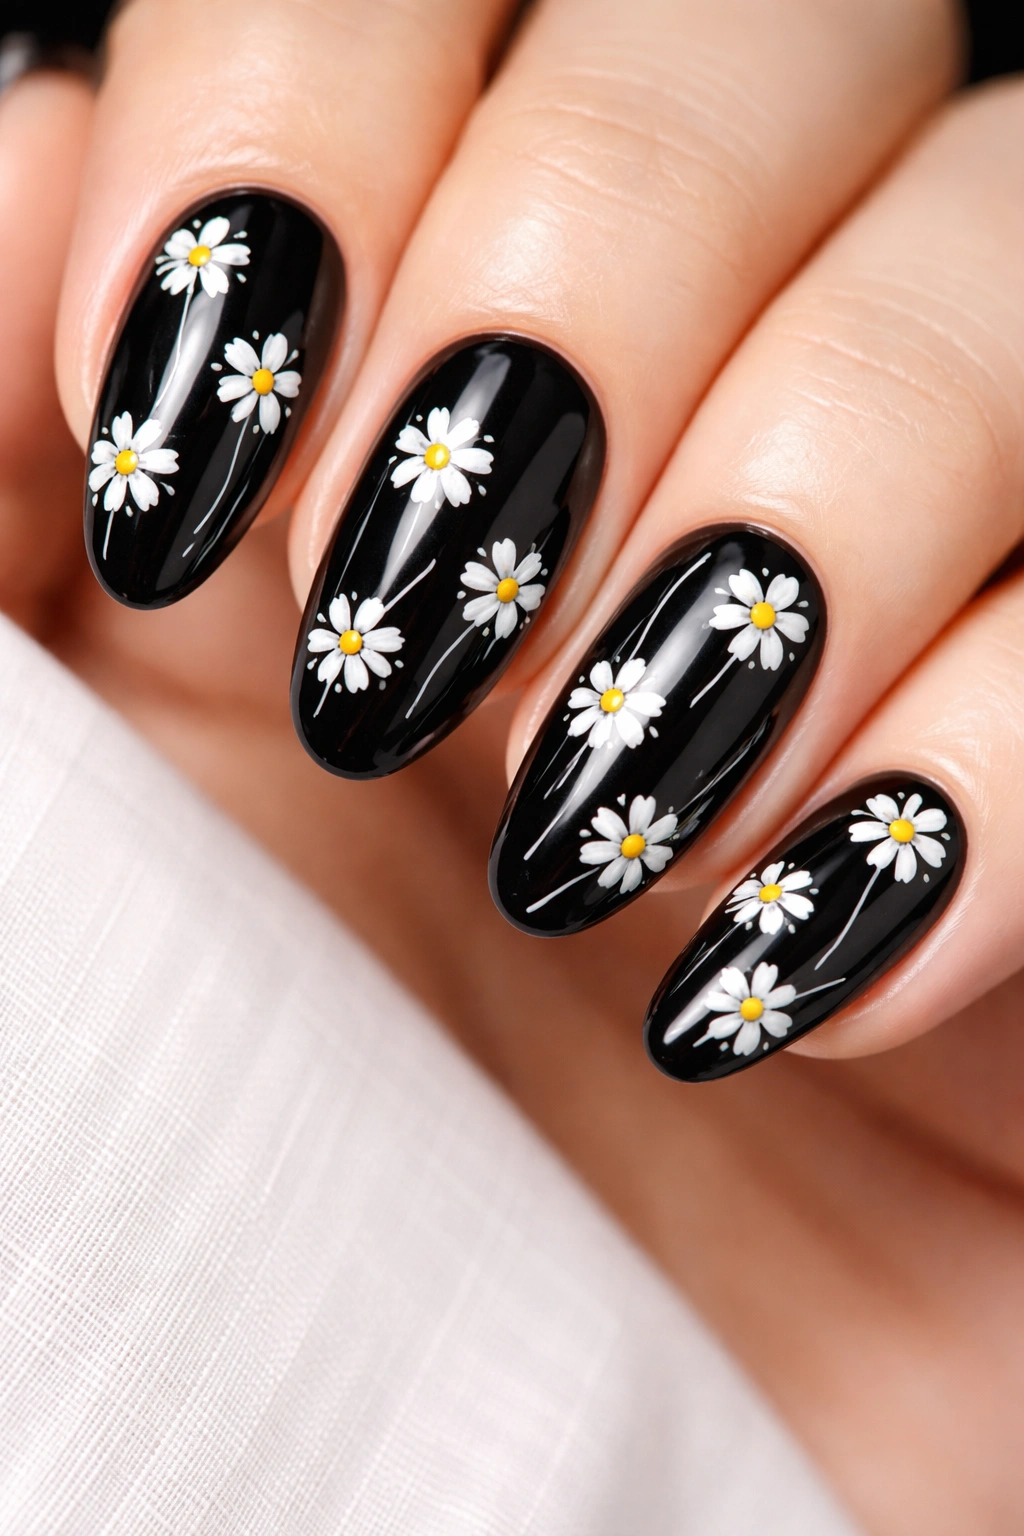
Sometimes the most striking designs are the simplest ones. Black nails with white hand-painted daisies create graphic, high-contrast impact that works for any occasion from casual to formal. The design features simple white daisy outlines (no filled petals, just the circular shapes) scattered across all ten nails with yellow dots for centers.
The Timelessness of Black and White
Black and white is perhaps the most foolproof color combination in nail art. It’s inherently elegant, works on every skin tone, and the high contrast means even slightly imperfect brushwork looks intentional and artistic. This design has been popular for years and will continue to be popular because the combination is simply foolproof.
Quick Execution Process
Paint all nails glossy black and let dry completely. Using white polish and a very thin brush, paint simple circle outlines for daisy petals—you’re not filling them in, just suggesting the shape with circular lines. Add yellow dots for the flower centers. The white outlines over black are forgiving because any slight wobbles in your lines read as hand-painted character rather than mistakes.
Best for: Professional settings, everyday wear, minimalist aesthetic, or when you want high impact without feeling cutesy.
15. Blush Pink with Tiny Gold-Leaf Rose Details

This romantic but understated design features a warm blush pink base with delicate gold-leaf accents shaped into tiny roses. The roses are so small they’re almost abstract, but the gold leaf catches the light beautifully, creating shimmer and sparkle without obvious glitter.
The Versatility of Blush Pink
Blush pink is one of the most universally flattering colors—it works with warm and cool undertones, reads as both professional and feminine depending on context, and pairs beautifully with virtually any jewelry or outfit. Adding gold leaf elevates blush from simple to luxurious without the weight of larger floral designs. This is a “just got a professional manicure” feeling without the time or cost if you’re DIYing.
Applying Gold Leaf
Gold leaf application requires a slightly tacky surface and a light touch. Paint your blush base, seal with a thin layer of topcoat (or use a sticky gel base), then carefully apply small pieces of gold leaf using a tweezers. Shape them into rose-like forms by gently pressing and folding. Seal the entire design with another topcoat to protect the delicate gold leaf. It sounds complicated but becomes intuitive with practice.
Styling suggestion: This design pairs beautifully with rose gold jewelry and works especially well for dates, special dinners, or any time you want to feel subtly luxurious.
16. Terracotta with Cream and Rust Floral Design
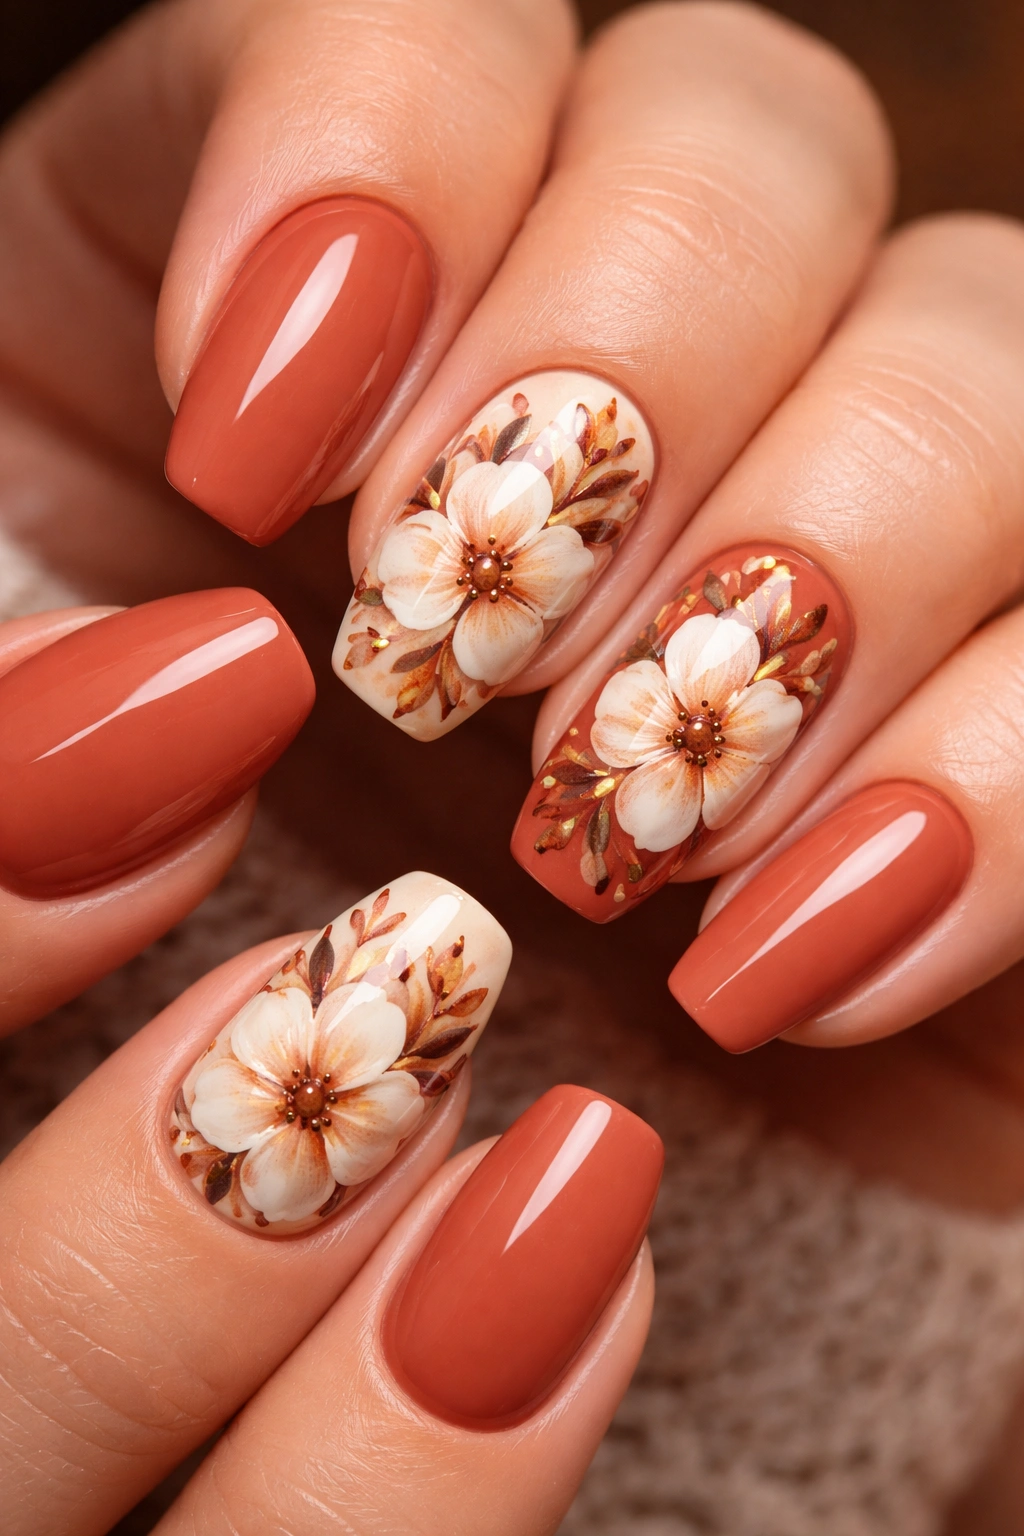
Warm, earthy, and sophisticated, this design uses a terracotta base with cream-colored flowers accented by rust-colored details. The combination creates a completely cohesive palette that feels harmonious rather than scattered. Larger flowers are the focal point, with smaller blooms providing visual balance.
The Warmth of Earth Tones
Terracotta and rust combinations feel grounded and mature in a way that brighter colors can’t quite achieve. This palette works beautifully in fall and winter but feels appropriate year-round because the colors are naturally muted. The design appeals to people with warm undertones who struggle finding nail colors that feel right—earth tones typically look stunning on warm skin.
Compositional Approach
Start with a terracotta base. Using cream polish and a detail brush, paint larger flower shapes on 2-3 accent nails. Using rust polish (or the same rust shade diluted slightly for lighter application), add details, shading, or smaller flowers around the cream blooms. The interplay between the warm shades creates depth while staying within a cohesive color family. This design works beautifully with matte or glossy finishes.
Real-world advantage: These colors hide daily dirt and wear better than pastels or bright shades, making them practical for people who want elegant nails that don’t need constant touch-ups.
17. Sheer Nude with Delicate Pink and Peach Ombré Florals
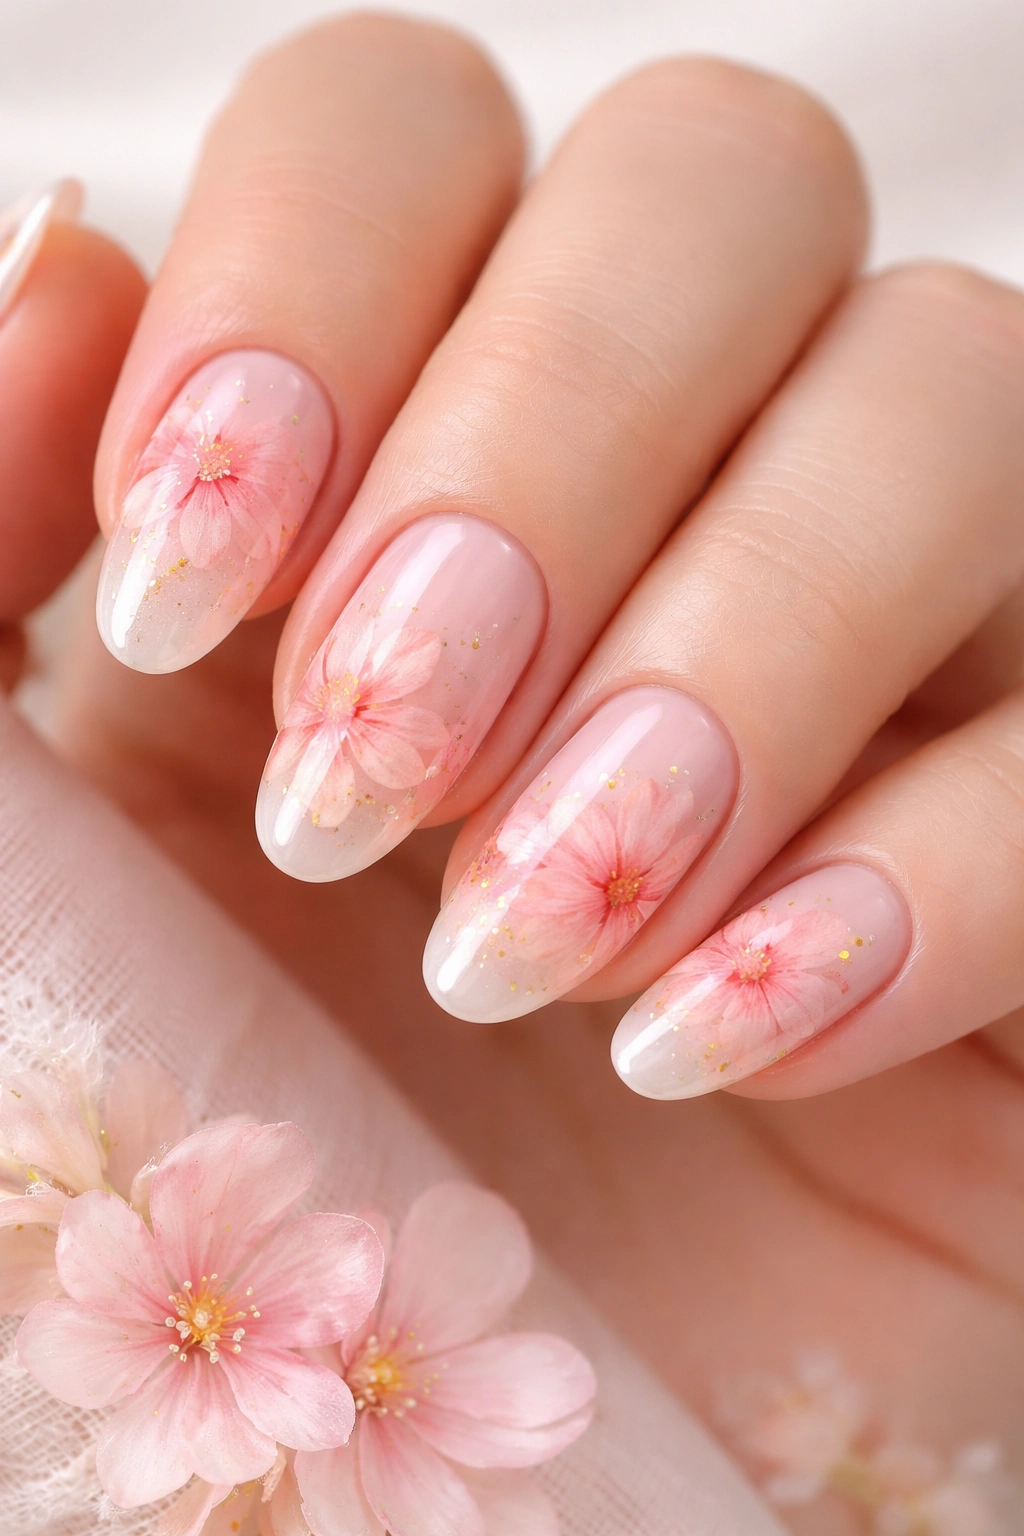
This design uses a sheer nude base that lets your natural nails show through, with soft pink and peach flowers that blend into the translucent base using watercolor technique. The overall effect is so delicate it almost feels like a suggestion rather than a bold design choice.
The Power of Sheer Bases
Sheer polishes create a completely different aesthetic than opaque ones. They enhance your natural nails rather than covering them, which appeals to people seeking elegant understatement. Adding watercolor florals to a sheer base creates an impressionistic, artistic effect that reads as intentionally artistic rather than accidental.
Watercolor Florals on Sheer Base
The technique involves thinning your pink and peach polishes with a tiny bit of acetone and applying them while the sheer base is still slightly tacky. The colors blend and diffuse into the base, creating soft edges and gradual color transitions. This technique requires patience and gentle touches—aggressive brushwork breaks the delicate effect.
Perfect for: Professional environments, understated elegance, anyone who loves the feel of natural nails with subtle embellishment, or people seeking a design that works with any outfit.
18. Deep Plum with Gold-Accented Purple Wildflowers

This luxurious design pairs deep plum base color with hand-painted wildflowers in various shades of purple, pink, and white, each accented with tiny gold dots or gold-painted details. The result feels sophisticated, artistic, and slightly moody—perfect for people who love drama with elegance.
Monochromatic Florals with Metallic Accents
Using flowers in shades related to your base color (rather than contrasting colors) creates sophisticated cohesion. The flowers are visible because of subtle tone shifts rather than high contrast, which keeps everything feeling harmonious. The gold accents provide just enough visual pop to prevent the design from feeling flat or monochromatic-to-the-point-of-boring.
Building the Design
Start with deep plum as your base. Once dry, use various purple and pink shades to hand-paint flowers, varying sizes and flower types (some roses, some abstract blooms). Use the finest brush you have to add tiny gold details—flower centers, accent dots, tiny lines suggesting stamens. The more varied your purple and pink shades, the more interesting the overall design becomes.
Personality note: This design appeals to people who love color and art but prefer sophistication over brightness—it’s colorful without being loud.
19. Cream Base with Scattered Wildflower Clusters
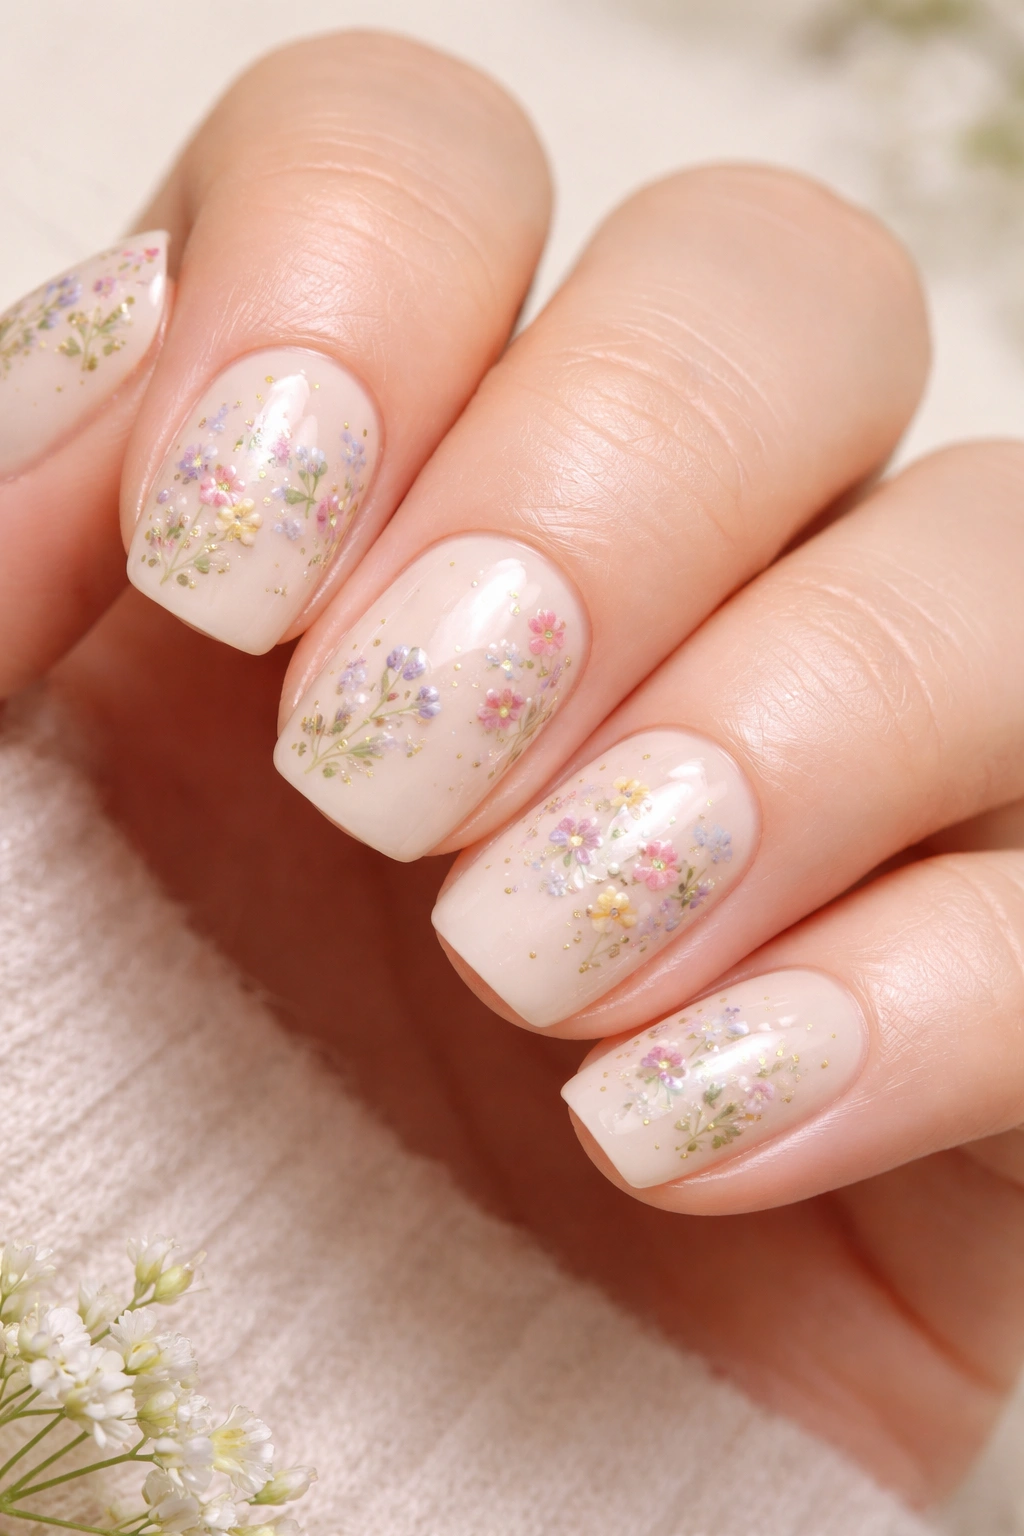
This charming design features a creamy ivory base with scattered clusters of wildflowers in pastels—soft yellows, blues, pinks, and purples—distributed randomly across each nail to create a natural, botanical feeling. The flowers are small but noticeable, creating visual interest without overwhelming the space.
The Beauty of Botanical Randomness
Wildflowers don’t grow in patterns—they bloom where conditions allow, creating random distributions that actually look more natural than carefully planned arrangements. Translate this to nail art by deliberately scattering flower clusters rather than creating symmetrical designs. Some clusters are denser than others, some flowers overlap slightly, and some areas are left bare—this variation is what makes the design feel authentic.
Creating Realistic Wildflower Look
You need multiple soft colors and a willingness to not overthink placement. Use a dotting tool or toothpick to create clusters of small dots in different colors, sometimes grouping them tightly and sometimes spreading them out. Let some flowers be fuller (five petals) while others are simpler (three dots suggesting a partial bloom). The imperfection is the entire point.
Best for: Spring events, garden parties, anyone who loves botanical aesthetics, or people wanting nail art that feels personal and artistic rather than perfectly executed.
20. Nude with Black Outlined Botanical Line Drawings
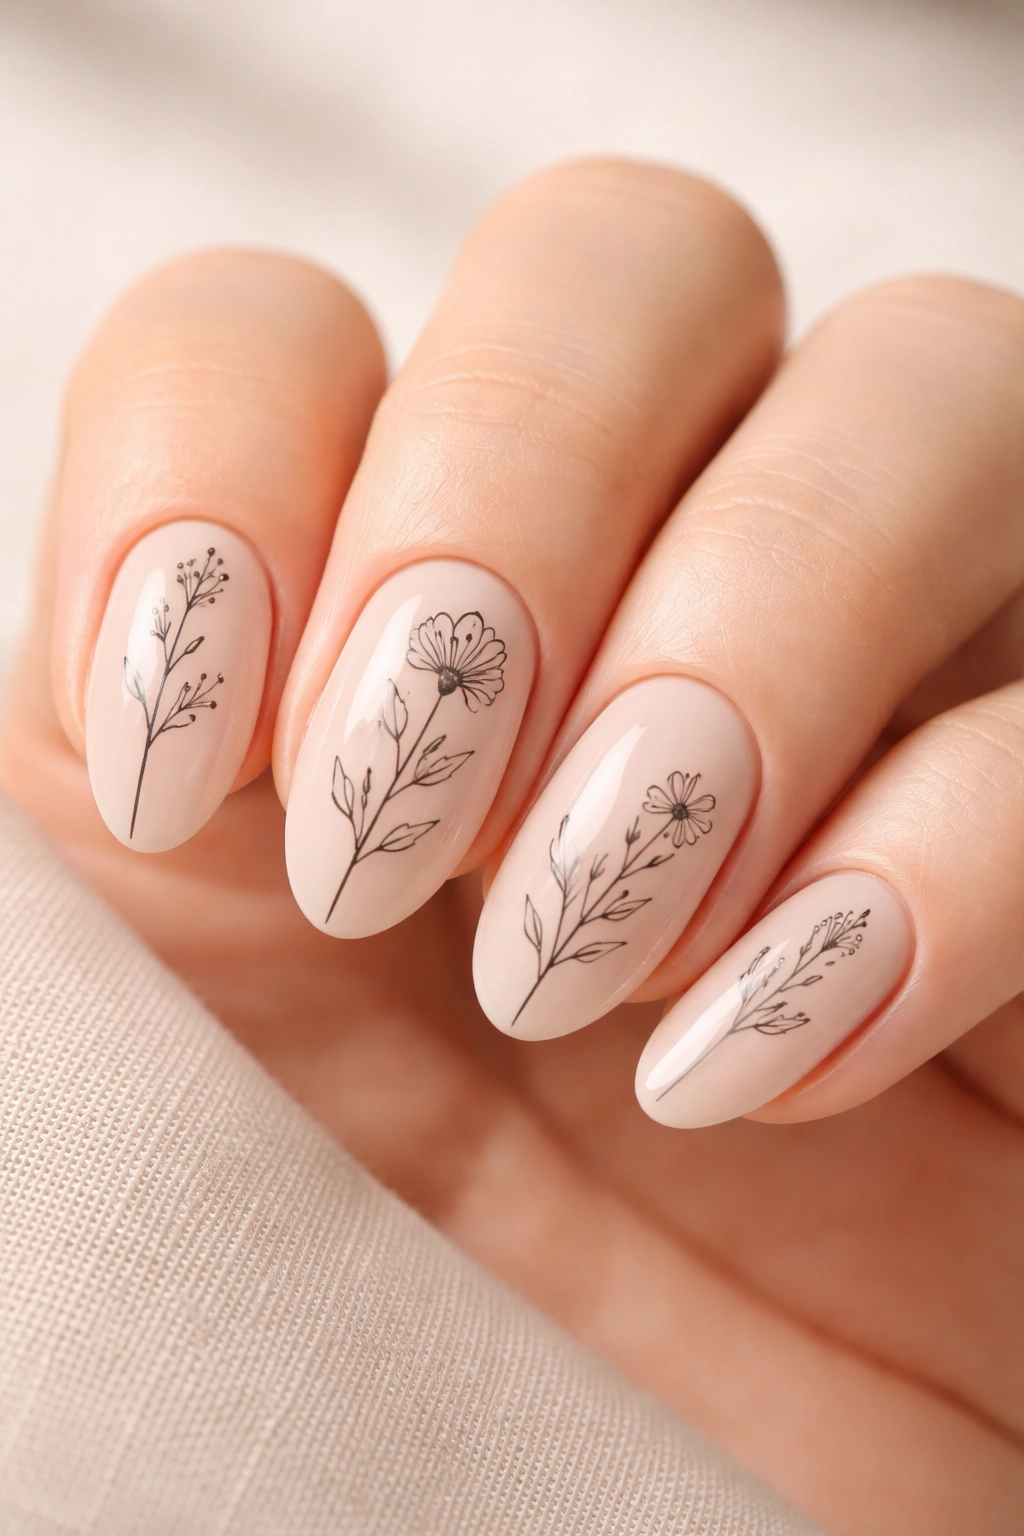
This artistic design features a clean nude base with black line drawings of flowers—not filled-in florals but simple line sketches of various botanical elements. Delicate stems, leaf outlines, and minimalist flower shapes create an artistic, gallery-like effect.
Line Art as Sophistication
Outline drawings are having a major moment in aesthetic design because they’re artistic without being decorative. They suggest the form rather than spelling it out, which appeals to people with more sophisticated taste. This design works beautifully on professional settings because it reads as artistic and intentional rather than “decorated.”
Execution Requirements
You need a very fine striping brush or a nail art pen and steady hands. Sketch your designs lightly first if you’re nervous (you can do this on the actual nail with a pencil if needed). Draw simple botanical line drawings—a single continuous line suggesting a flower shape, a stem with leaves indicated by simple lines, minimalist botanical illustrations. The wonkier and more hand-drawn your lines, the more authentic and artistic the design becomes.
Why this works: This design appeals to people who love art, fashion illustrations, and editorial nail design. It’s distinctive, memorable, and genuinely stands out from typical floral designs.
Final Thoughts
Flower nail designs prove that there’s no single way to be beautiful or stylish. Whether you’re drawn to delicate minimalism or dramatic 3D florals, whether you prefer pastels or bold jewel tones, whether you want something subtle or impossible to miss—floral nail art has space for your vision. The designs in this collection span skill levels, price points, and aesthetics, which means you can absolutely find something that feels like you.
The most important thing when choosing a floral design isn’t following what’s trendy or copying what someone else wore perfectly. It’s selecting something that makes you feel good when you look down at your hands. Because ultimately, the best manicure is the one that makes you smile and feel confident every single time you notice your nails throughout your day. Whether that’s a simple daisy or an elaborate botanical masterpiece, you’ve got the tools to make it happen.
