

There’s something undeniably captivating about hibiscus flowers—those bold, trumpet-shaped blooms that instantly transport you to a sun-soaked beach with swaying palms and gentle ocean breezes. When it comes to nail art, hibiscus designs pack that same tropical punch, transforming your fingertips into miniature canvases of island paradise. Whether you’re planning a beach vacation, channeling those nostalgic Y2K surfer-girl vibes, or simply craving a dose of sunshine during ordinary days, hibiscus nail art delivers that perfect blend of playful charm and exotic elegance.
What makes hibiscus nails so special goes beyond their aesthetic appeal. These designs are incredibly versatile, working beautifully across different nail shapes, lengths, and color palettes. You can keep things subtle with minimalist outlines on neutral bases or go full maximalist with vibrant three-dimensional blooms adorned with rhinestones and metallic accents. The hibiscus motif adapts to your personal style, making it just as appropriate for a professional office setting (when done tastefully) as it is for a poolside party.
The beauty of hibiscus nail art lies in its accessibility too. While intricate hand-painted versions showcase serious artistic skill, the availability of quality nail stickers and simple dotting techniques means anyone can achieve gorgeous tropical tips at home. From classic red and pink petals to unexpected color combinations featuring blues, purples, and neons, hibiscus designs offer endless creative possibilities that keep your manicure fresh and exciting all season long.
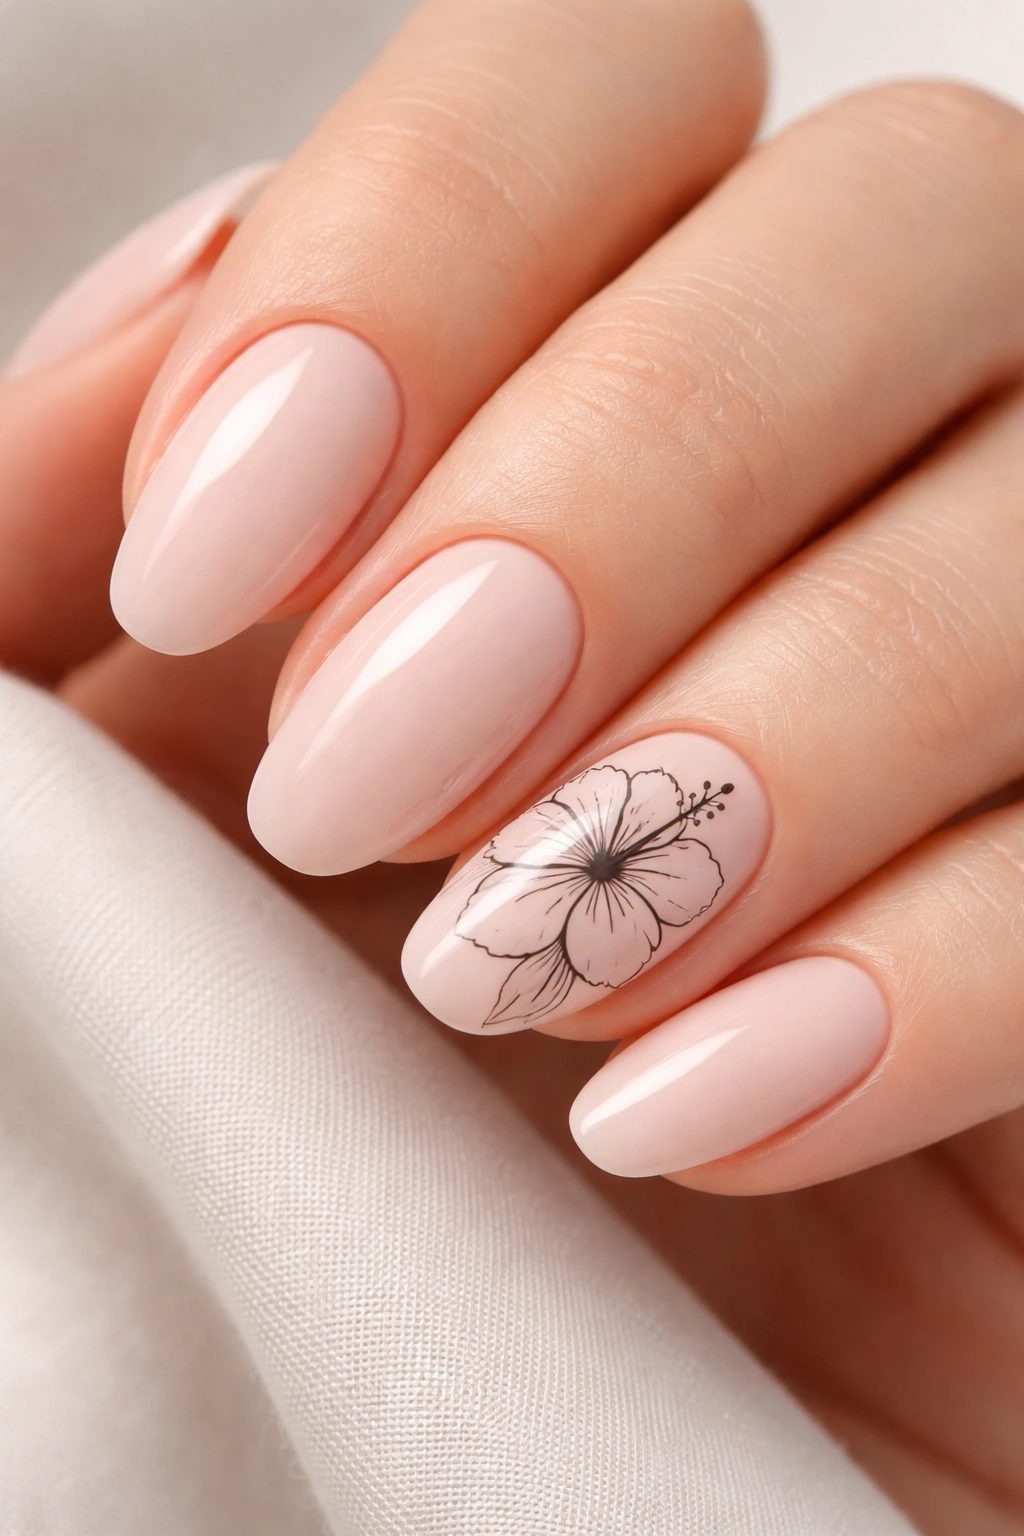
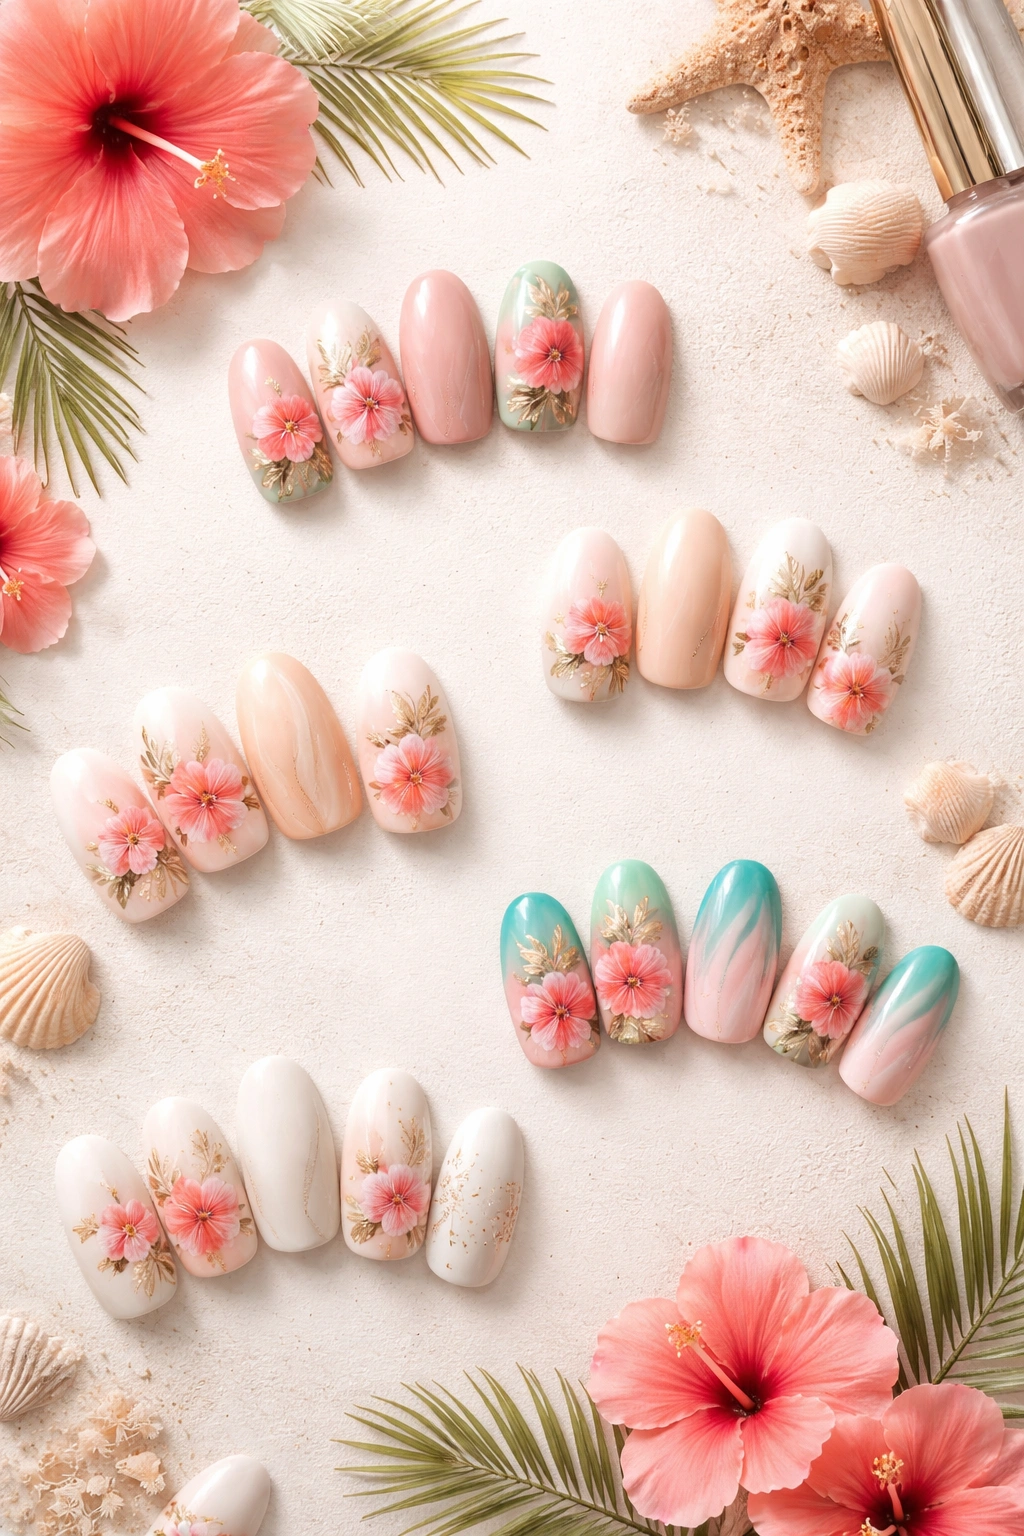
1. Classic Pink Hibiscus on Nude Base
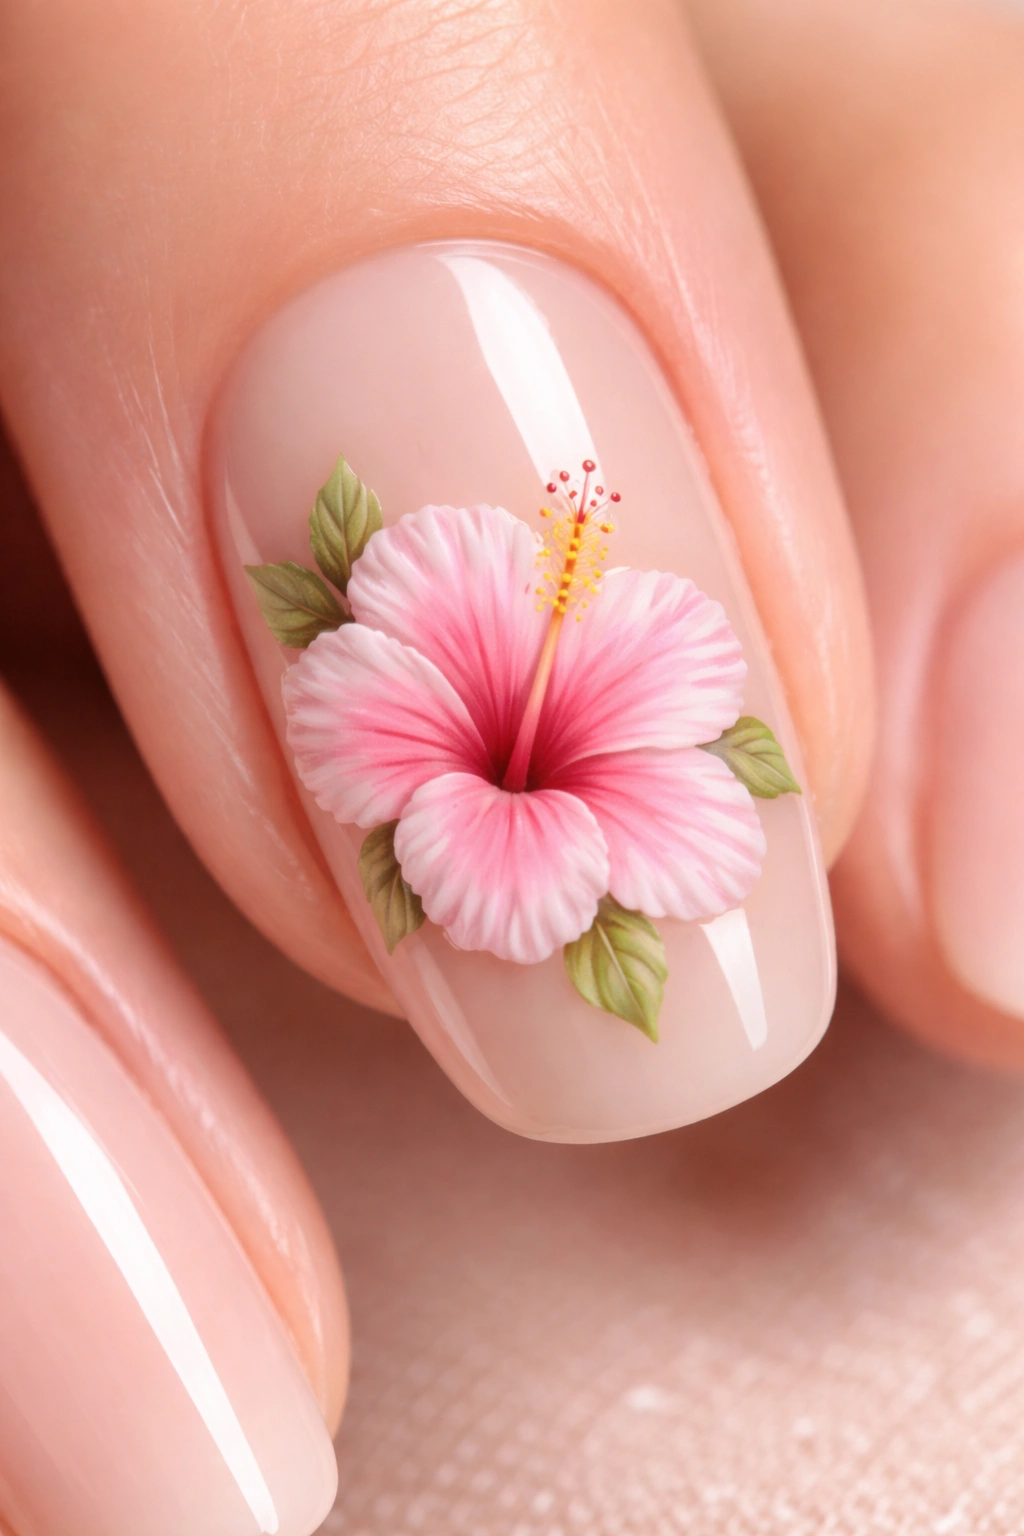
The timeless elegance of soft pink hibiscus flowers painted against a nude or sheer base creates a sophisticated tropical look that works for absolutely any occasion. This design strikes that perfect balance between statement-making and understated, giving you the best of both worlds.
Why This Design Never Goes Out of Style
Pink hibiscus on nude nails offers incredible versatility that few other nail art styles can match. The neutral base keeps the overall look grounded and professional, while the floral elements add personality and visual interest without overwhelming your hands. This combination flatters every skin tone, making it a universally appealing choice. The soft pink petals can range from barely-there blush tones to vibrant fuchsia, allowing you to adjust the intensity based on your mood or the occasion. What’s more, this design transitions seamlessly from day to night—appropriate enough for business meetings yet beautiful enough for weddings and special events.
Application Tips for Best Results
- Start with a quality nude base coat that complements your natural skin tone
- Use a fine detail brush or dotting tool to create five-petal formations
- Add darker pink or coral shading to petal edges for dimension
- Include a yellow or golden center with tiny dots to mimic the hibiscus stamen
- Seal everything with a glossy top coat to make colors pop
Pro tip: If you’re not confident in your freehand painting skills, opt for high-quality hibiscus nail stickers. Apply them over your cured base color, then seal with top coat for a flawless finish that looks hand-painted.
2. Vibrant French Tips with Hibiscus Accents
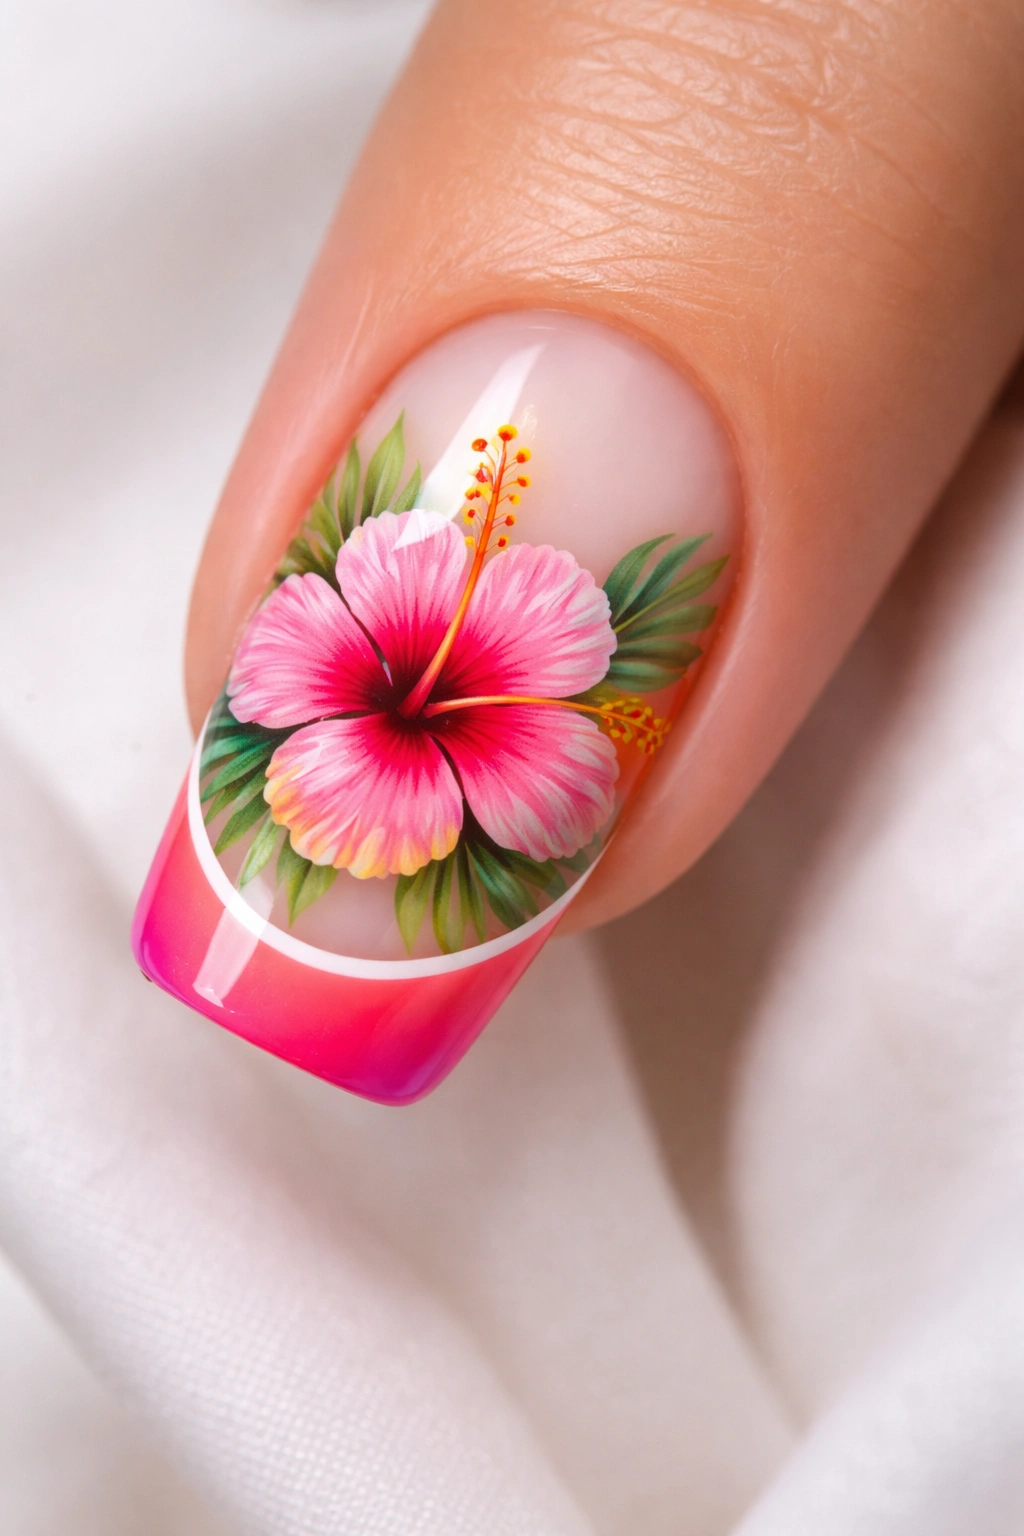
Forget traditional white tips—tropical hibiscus French manicures bring a refreshing twist to this classic nail style. By replacing or enhancing standard French tips with colorful hibiscus designs, you create a look that’s both familiar and excitingly new.
What Makes This Style Stand Out
French manicures have dominated nail salons for decades because the style naturally elongates fingers and looks polished without being overly fussy. Adding hibiscus flowers to this beloved format injects personality and summer energy while maintaining that inherent sophistication. The contrast between the clean French tip line and the organic, flowing petals creates visual interest that draws the eye. You can paint hibiscus blooms directly onto colored French tips, allowing petals to slightly overlap onto the nail bed, or keep flowers confined to the tip area for a more structured appearance. This design works beautifully on both short and long nails, making it accessible regardless of your preferred nail length.
Creative Color Combinations
- Hot pink tips with white hibiscus outlines for a bold statement
- Sunny yellow tips featuring coral-orange hibiscus blooms
- Classic white tips with delicate pink hibiscus accents
- Neon green tips paired with vibrant magenta flowers
- Pastel rainbow tips, each with a different colored hibiscus
Fun variation: Try a “reverse French” where the hibiscus design sits at the base of your nail near the cuticle, with the French tip remaining simple and clean. This unexpected placement creates a modern, fashion-forward aesthetic.
3. 3D Sculptured Hibiscus Blooms
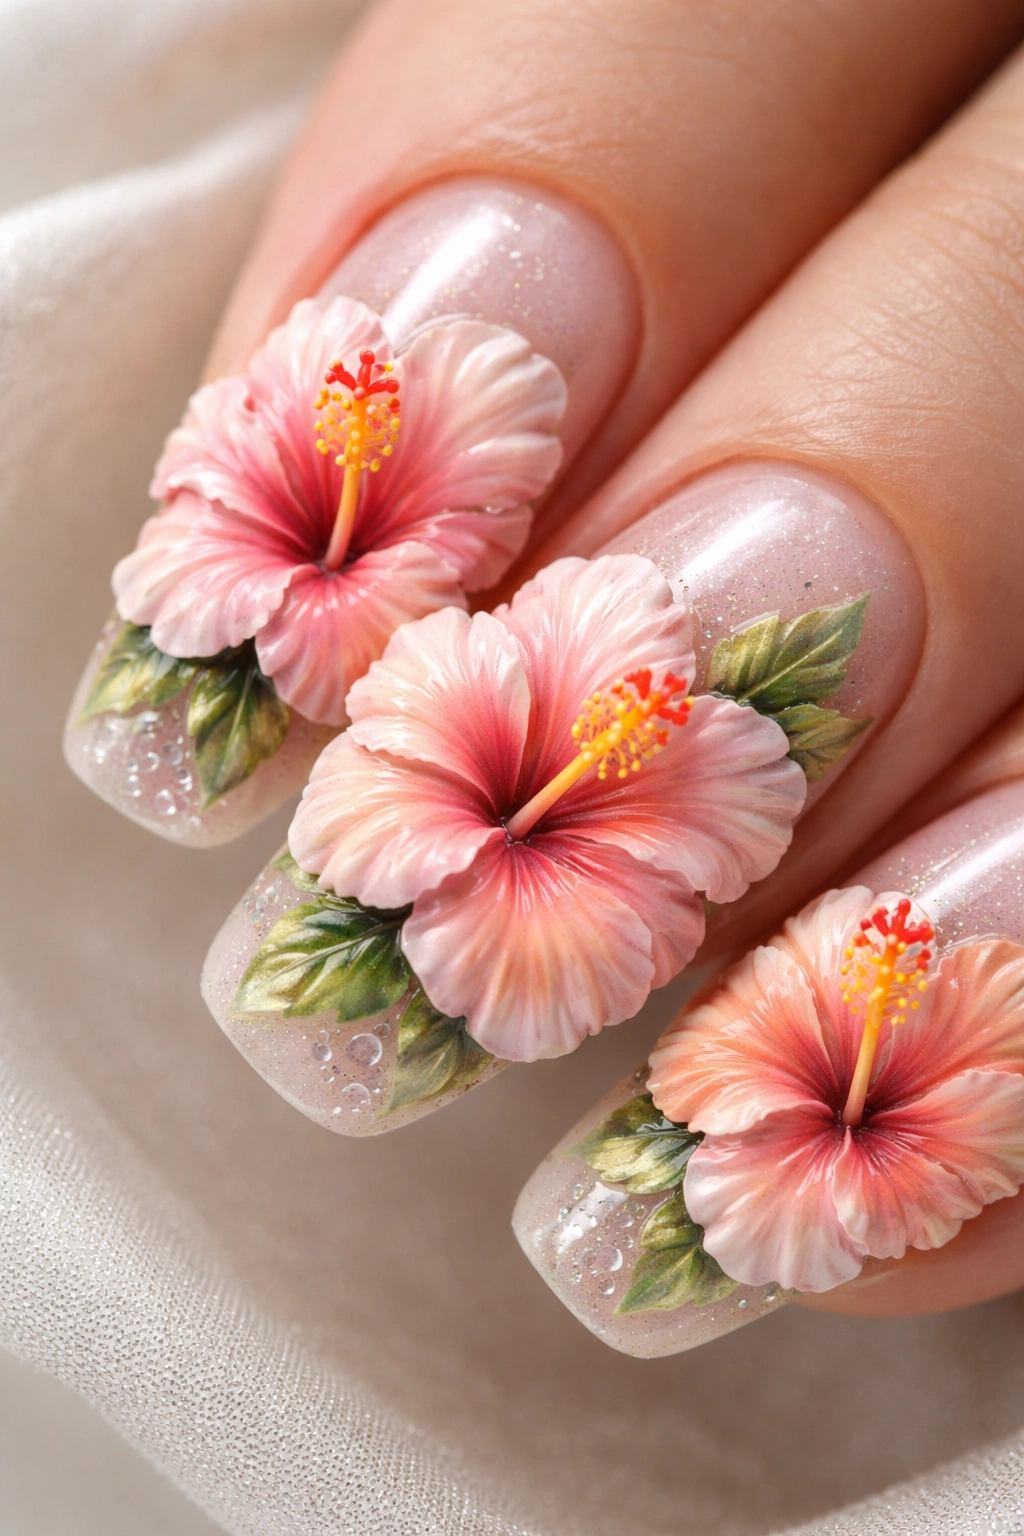
When you want your nails to make an entrance before you do, three-dimensional sculptured hibiscus flowers deliver maximum impact. These raised, textured blooms literally pop off your nails, creating a tactile, artistic statement that photographs beautifully and feels absolutely luxurious.
The Art Behind Dimensional Flowers
Creating 3D hibiscus involves using acrylic or gel to sculpt individual petals that extend slightly above the nail surface. Skilled nail technicians build these flowers layer by layer, carefully shaping each petal to create realistic curves and dimension. The result looks almost like real miniature hibiscus blooms growing from your fingertips. While this technique requires more time and expertise than flat nail art, the stunning outcome justifies the effort. The dimensional aspect catches light from different angles, creating beautiful shadows and highlights that flat designs simply can’t achieve. These nails become genuine conversation starters, with people constantly asking about your gorgeous manicure.
Styling and Maintenance Considerations
What to expect:
- Application takes longer than traditional nail art (plan for 2-3 hours)
- Slightly more delicate than flat designs—be mindful when typing or handling objects
- Works best on medium to long nails for proper flower placement
- Usually features 1-2 accent nails with 3D elements rather than all ten fingers
The sculptured flowers can be enhanced with glitter, chrome powder, rhinestones in the centers, or even tiny pearl accents. Just remember that while these nails are durable when properly applied, the raised elements mean you’ll want to be a bit more careful with your hands than usual.
4. Neon Tropical Hibiscus Paradise
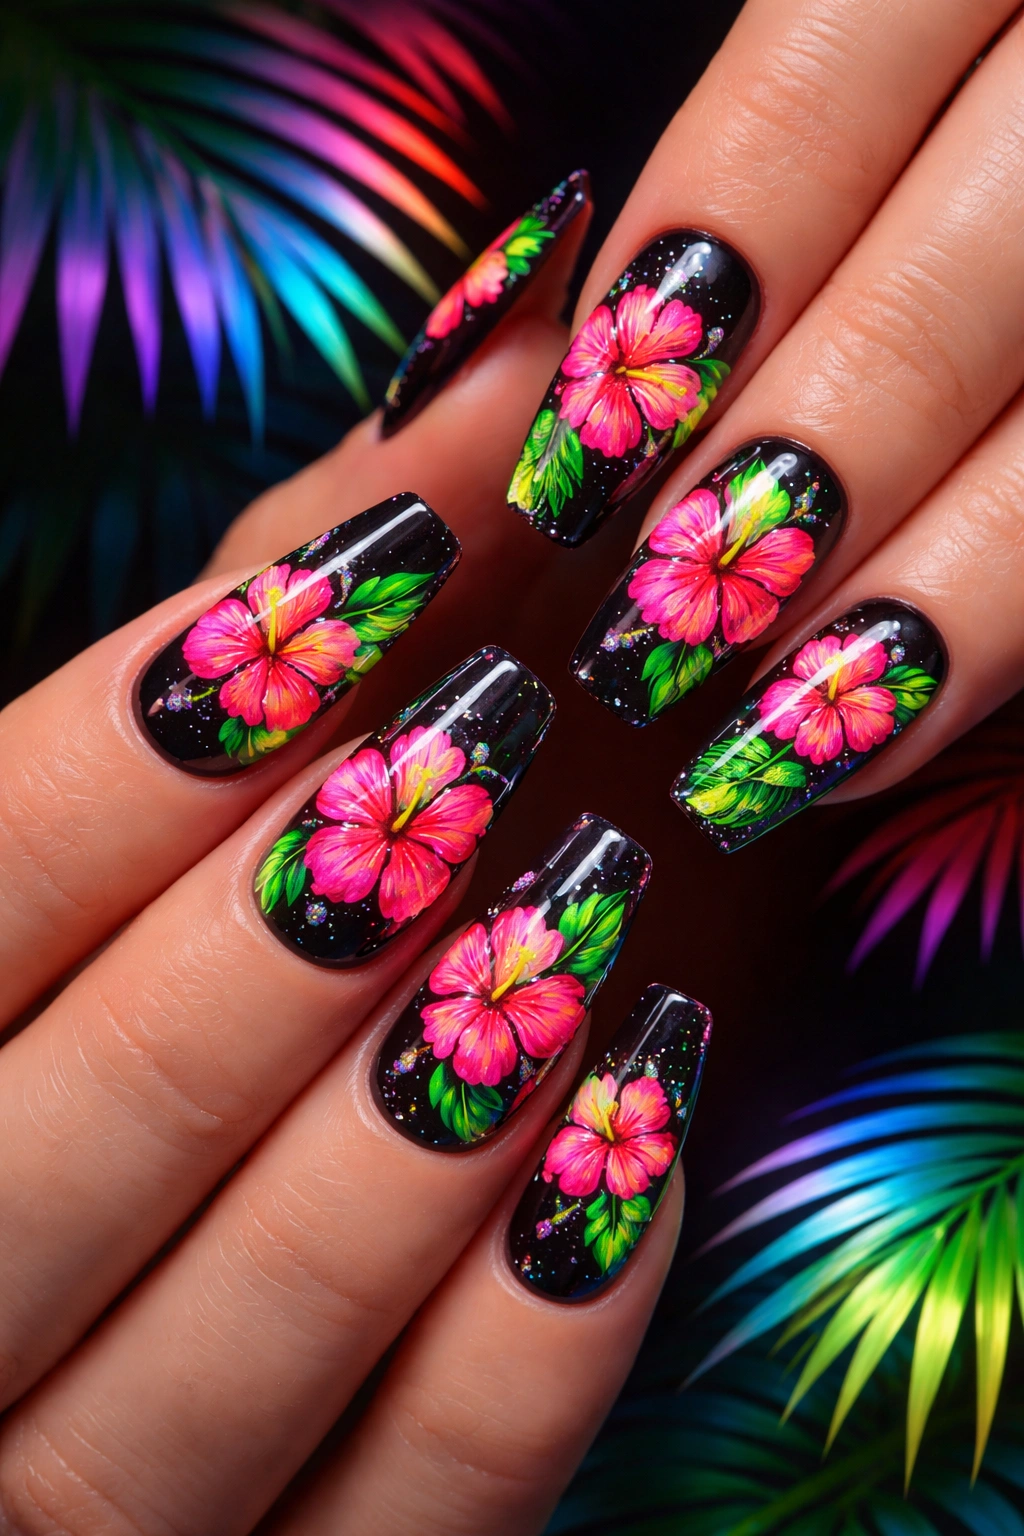
Throw subtle out the window and embrace the bold, electric energy of neon hibiscus nail art. This eye-catching style combines the organic beauty of tropical flowers with the high-impact punch of neon colors, creating a look that screams summer fun and fearless confidence.
Why Neon Works for Hibiscus Designs
Neon colors possess an almost otherworldly vibrancy that makes them perfect for capturing the intense beauty of tropical environments. When you paint hibiscus flowers in neon pink, electric orange, lime green, or brilliant yellow, you’re not just creating nail art—you’re making a statement about living life in full color. These shades photograph incredibly well, making your nails absolutely pop in photos and videos. The high contrast between neon hibiscus and darker backgrounds (like black, navy, or deep purple) creates visual drama that’s impossible to ignore. This design appeals to the bold and adventurous, perfect for music festivals, beach parties, tropical vacations, or anytime you want your hands to radiate pure joy and energy.
Best Color Pairings and Techniques
- Neon pink hibiscus on black backgrounds for maximum contrast
- Multi-neon flowers (each nail a different neon shade) on white bases
- Electric blue hibiscus against neon yellow backgrounds
- Lime green and hot pink combination for that classic ’90s beach vibe
- Neon orange blooms with highlighter yellow centers
Styling note: Neon polishes often appear more vibrant when applied over a white base coat first. This extra step makes the neon pigments truly sing and prevents any transparency issues that sometimes plague neon formulas.
5. Minimalist Line Art Hibiscus
Sometimes less really is more. Minimalist line art hibiscus designs prove that you don’t need elaborate colors or complex techniques to create stunning tropical nail art. These delicate, refined outlines capture the essence of hibiscus with elegant simplicity.
The Beauty of Simplicity
Minimalist hibiscus nail art uses thin, precise lines to sketch the flower’s distinctive shape—usually just the petal outlines and center stamen—without filling in solid color. This approach creates an airy, sophisticated aesthetic that feels modern and artistic. The design works particularly well for professional environments where bold nail art might feel out of place, yet you still want to express your creativity. Black line art on nude or white nails creates a chic, gallery-worthy look, while white outlines on colored bases offer a softer, more romantic vibe. The minimalist approach also tends to be more forgiving for DIY nail artists since you’re not worrying about staying perfectly within color boundaries or creating smooth gradients.
Techniques for Perfect Line Work
Essential tips for clean lines:
- Invest in a quality striping brush or fine liner brush (the thinner, the better)
- Use slightly thicker polish consistency for better control
- Practice the hibiscus outline on paper first to get comfortable with the shape
- Work slowly—rushing leads to wobbly lines and smudges
- Clean up any mistakes with a thin brush dipped in acetone
You can keep every nail the same or vary the placement, creating accent nails with the line art hibiscus while keeping other nails solid colors. The minimalist approach also pairs beautifully with other simple elements like single dots, thin geometric lines, or small leaf outlines.
6. Sunset Ombre with Floating Hibiscus
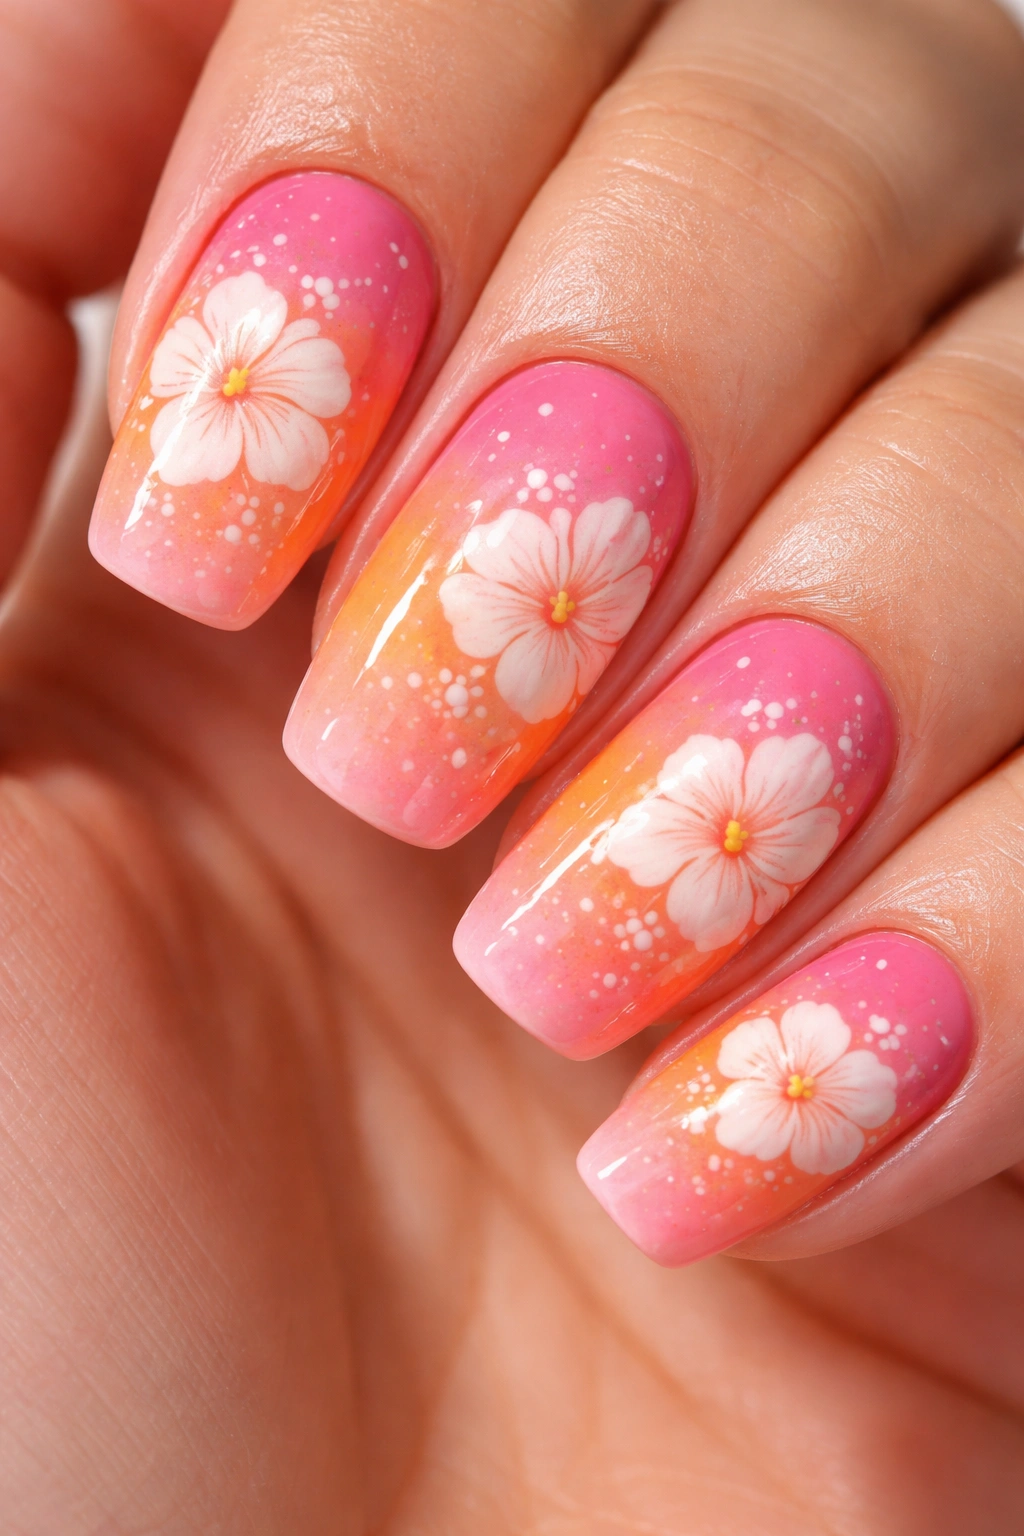
Capture the breathtaking beauty of a tropical sunset on your nails by combining gradient ombre backgrounds with delicate hibiscus flowers. This romantic design merges two popular nail trends into one cohesive, dreamy aesthetic that feels both artistic and wearable.
Creating Depth Through Color Transition
Ombre backgrounds provide the perfect canvas for hibiscus designs because they add visual depth and interest without competing with the floral elements. The gradual color transition—from warm coral melting into soft peach, or vibrant fuchsia fading to pale pink—mimics the natural color variations found in actual hibiscus petals and tropical sunsets. When you place white or contrasting hibiscus flowers over these gradient bases, they appear to float ethereally across the color spectrum. This technique works magic on longer nails where you have more space to showcase the full ombre effect, though it can be adapted beautifully to shorter nails too by using just two colors instead of three or four.
Color Schemes That Capture Paradise
- Sunset gradient: Deep orange → coral → peach → pale yellow with white hibiscus
- Ocean-inspired: Navy blue → turquoise → aqua with pink hibiscus blooms
- Pink paradise: Hot pink → rose → blush → cream with golden hibiscus
- Purple twilight: Deep plum → lavender → lilac with white flowers
- Tropical green: Forest green → mint → sage with coral hibiscus
Application technique: Use a makeup sponge to dab on your ombre colors, blending where they meet. Let this dry completely before adding your hibiscus designs on top. Seal everything with top coat to smooth out any texture from the sponge application.
7. White Hibiscus on Bold Jewel Tones
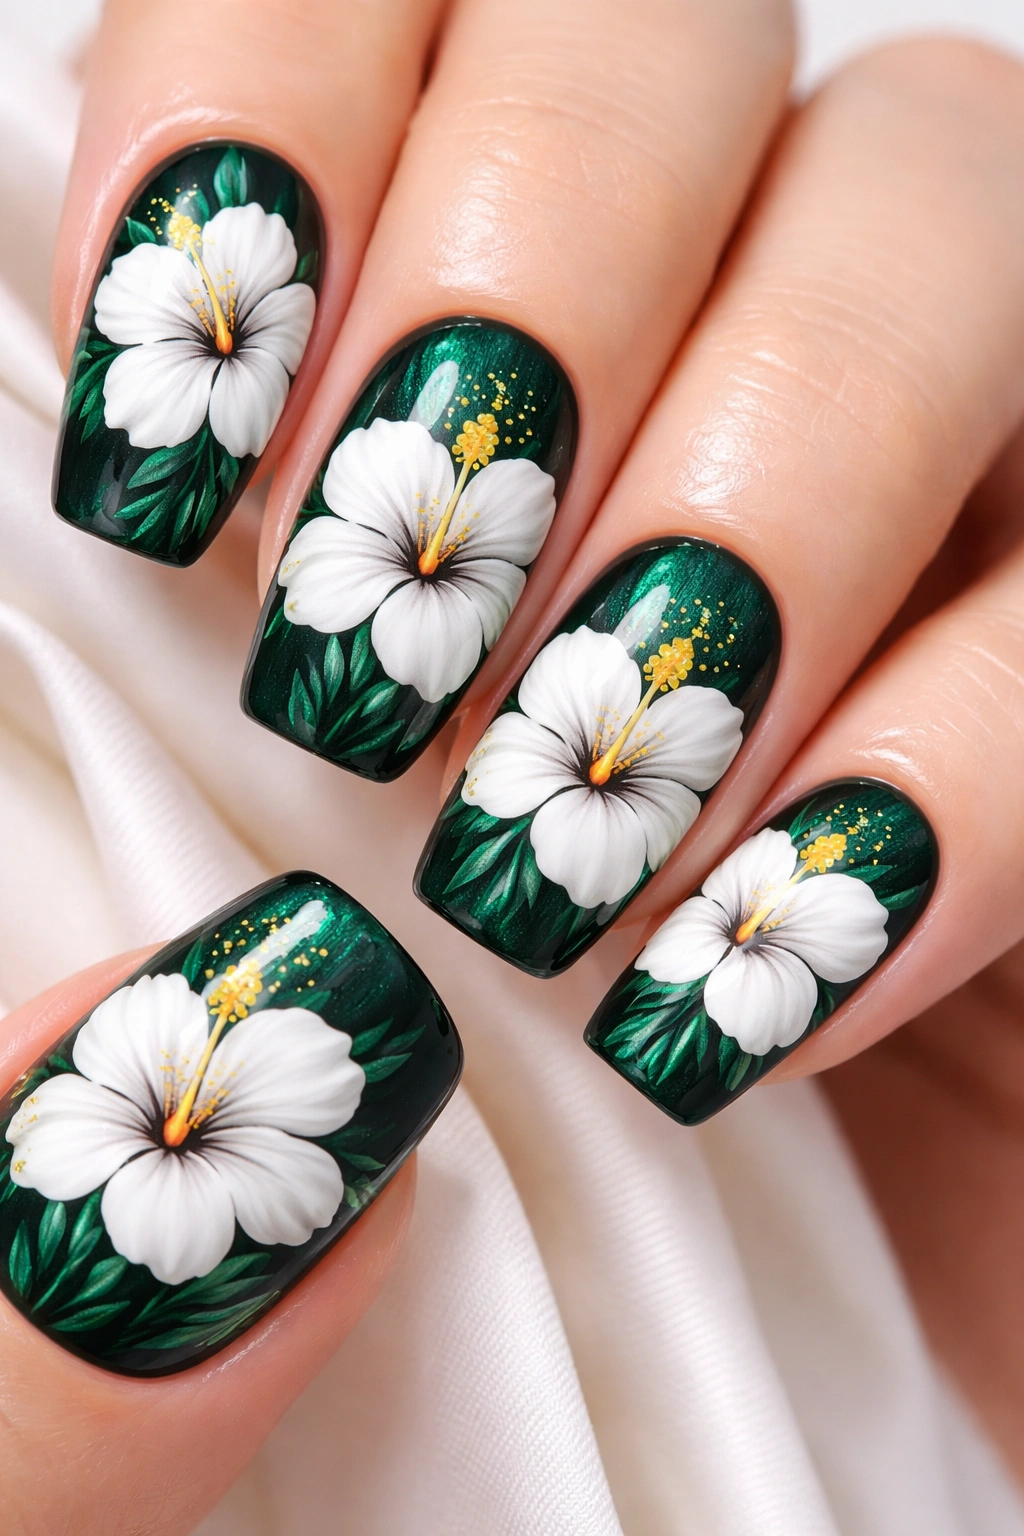
Sometimes the most striking combinations come from unexpected contrasts. White or cream hibiscus flowers painted on rich, saturated jewel tones create a luxurious, elegant aesthetic that feels both tropical and sophisticated—perfect for those who want hibiscus nails with a more refined edge.
Why This Color Reversal Works So Well
We typically think of hibiscus flowers in warm, vibrant shades, but flipping the script with white blooms creates instant visual intrigue. The crisp contrast between pure white petals and deep, saturated backgrounds makes every detail of the flower stand out with crystal clarity. This combination feels fresh and modern while still maintaining that tropical essence. Jewel tones like emerald green, sapphire blue, amethyst purple, or ruby red provide richness and depth that elevates the entire design beyond casual beach vibes into something you could comfortably wear to elegant events. The white hibiscus appears almost luminous against these dark, intense colors, creating a glowing effect that’s absolutely mesmerizing.
Best Base Colors and Styling Options
Top jewel tone choices:
- Deep teal or peacock blue for an oceanic tropical feel
- Rich eggplant purple for unexpected sophistication
- Bottle green for a lush, garden-inspired aesthetic
- Burgundy or wine for a romantic, evening-appropriate vibe
- Navy with subtle shimmer for understated elegance
You can enhance these designs further by adding gold or silver details to the hibiscus centers, incorporating tiny rhinestones, or painting delicate white leaves and vines connecting the flowers. The white-on-dark combination also works beautifully with negative space techniques, where you leave portions of the nail unpainted to create interesting shapes and patterns.
8. Rainbow Tropical Hibiscus Mix

Why settle for one color when you can have them all? Rainbow hibiscus nail art celebrates the full spectrum of tropical beauty by featuring different colored flowers across your nails. This playful, vibrant design radiates pure happiness and creative freedom.
Embracing Maximum Color Energy
Rainbow hibiscus designs let you explore the incredible variety of colors that actual hibiscus flowers display in nature—from fiery reds and sunset oranges to sunny yellows, hot pinks, coral shades, and even rare purple varieties. By painting each nail (or each flower) in a different hue, you create a cohesive yet diverse look that never feels boring. This approach works particularly well if you struggle to choose just one color or want your nails to match multiple outfits in your wardrobe. The key to making rainbow designs work is ensuring some element ties everything together—whether that’s keeping the background color consistent, using similar flower sizes and placements, or incorporating a repeating accent color in all the flower centers.
Balancing Multiple Colors Successfully
- Use a neutral base (white, cream, or nude) to prevent color overload
- Keep flower shapes and sizes consistent even when colors vary
- Include green leaf accents to ground the rainbow with nature
- Alternate warm and cool tones across your nails for visual balance
- Add small gold or white details to unify different colored blooms
Color distribution idea: Try painting thumb and pinky in matching colors, ring and index fingers in another matching pair, with the middle finger featuring a complementary contrasting shade. This creates symmetry and balance while still showcasing multiple colors.
9. Hibiscus with Tropical Leaves and Elements
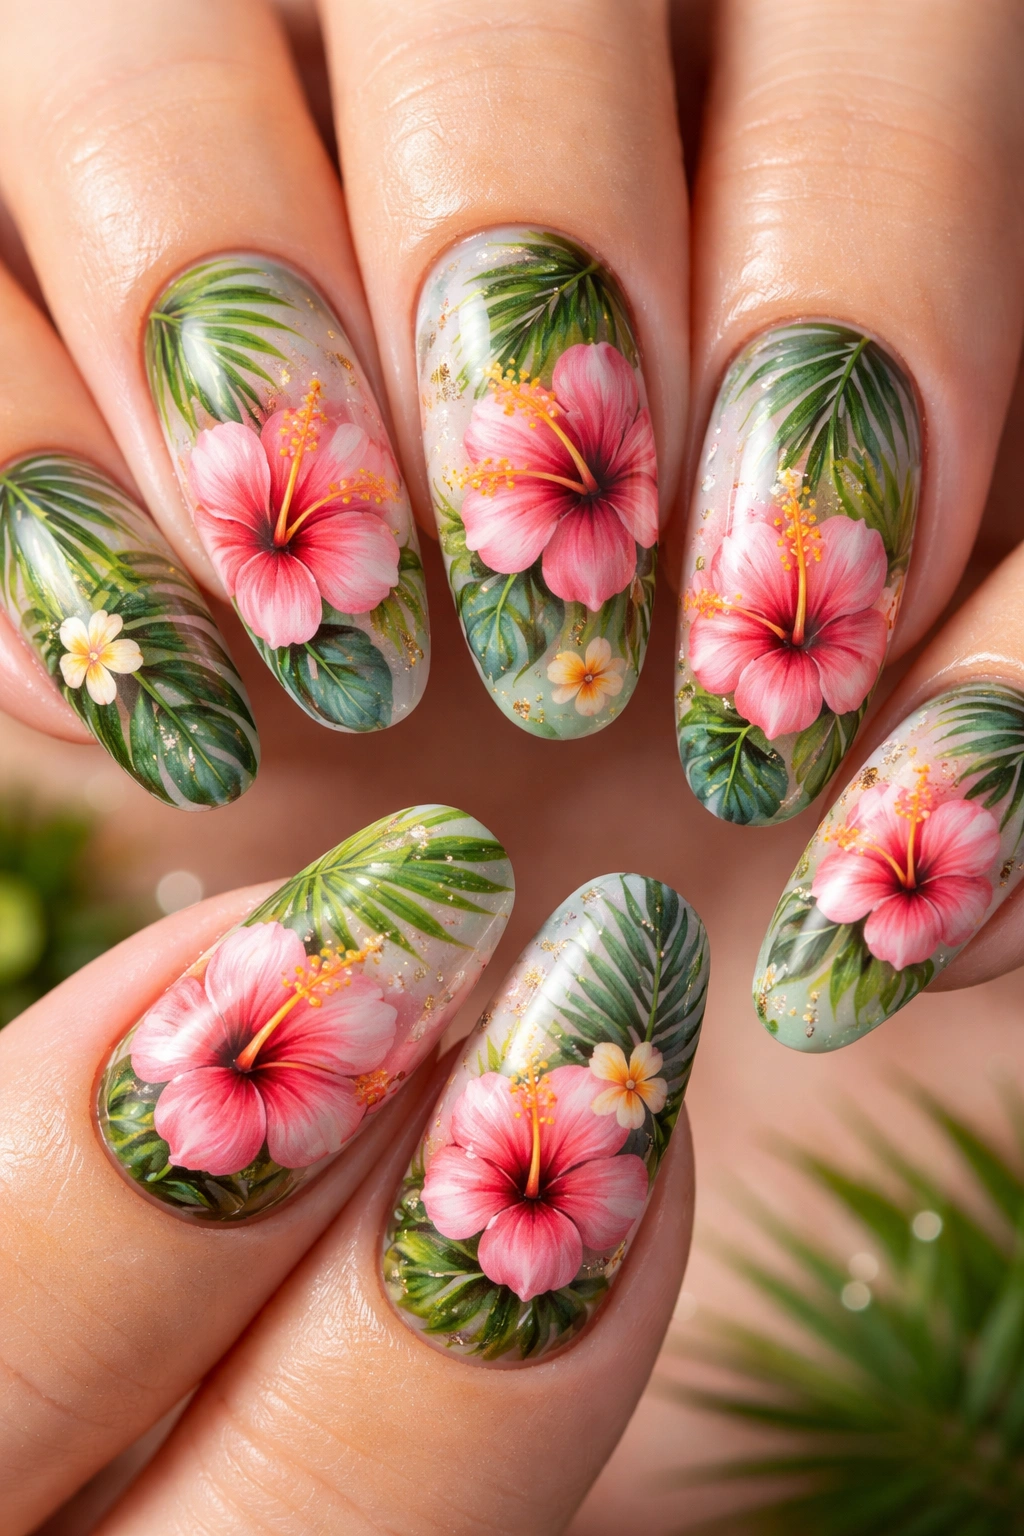
Take your hibiscus nail art to the next level by incorporating complementary tropical elements like palm fronds, monstera leaves, tiny pineapples, or coconut motifs. This comprehensive approach creates a full tropical landscape on your nails rather than isolated flowers.
Building a Complete Tropical Scene
Hibiscus flowers rarely grow in isolation—they’re typically surrounded by lush tropical foliage and other island elements. Recreating this natural context on your nails adds storytelling dimension to your manicure. Palm leaves with their distinctive fan shape make perfect frame elements around hibiscus blooms, while monstera leaves with their unique splits add architectural interest. You might include small details like tiny butterflies hovering near flowers, dewdrops on petals, or even subtle wave patterns on accent nails to suggest the nearby ocean. This maximalist approach works best when you have a bit more nail real estate to work with—think medium to long lengths—though clever placement can make it work on shorter nails too.
Elements That Complement Hibiscus
Popular tropical additions:
- Palm fronds: Delicate green leaves with thin striping for individual fronds
- Plumeria flowers: Smaller white or yellow blooms to fill negative space
- Monstera leaves: Bold, graphic leaf shapes in deep green
- Banana leaves: Large, flowing leaf shapes in lime or forest green
- Tiny pineapples or coconuts: Playful miniature fruit accents
The trick is not overcrowding your nails—select 2-3 complementary elements maximum and distribute them thoughtfully. Perhaps your thumb and middle finger feature full hibiscus blooms, your index and ring fingers showcase tropical leaves, and your pinky has a small accent element. This creates visual rhythm without chaos.
10. Watercolor Dreamy Hibiscus

For a softer, more artistic interpretation of hibiscus nail art, watercolor techniques create an ethereal, painterly effect that looks like your nails were kissed by a talented artist’s brush. This romantic style emphasizes blended colors and gentle transitions rather than crisp, defined edges.
The Romantic Appeal of Watercolor Florals
Watercolor hibiscus nail art mimics the delicate, translucent quality of actual watercolor paintings, with colors that seem to bleed gently into one another and edges that fade rather than stop abruptly. This technique creates a dreamy, whimsical aesthetic that feels softer and more feminine than bold, graphic hibiscus designs. The beauty lies in the imperfection—slightly irregular petal shapes, color variations within individual petals, and the organic way pigments blend together. This forgiving nature makes watercolor techniques surprisingly accessible for DIY nail artists, since you’re not aiming for perfectly uniform results. The style works gorgeously on light bases where the translucent color layers can build dimension, and it pairs beautifully with other delicate elements like gold foil accents or tiny pearl embellishments.
Achieving the Watercolor Effect
Step-by-step technique:
- Apply a white or very pale base color and let it dry completely
- Dilute your chosen nail polish colors slightly with clear polish or polish thinner
- Use a thin brush to paint loose petal shapes, working quickly before polish sets
- While still wet, add a second color to petal edges and let it naturally blend
- Create variation by layering different translucent color washes
- Add delicate line work for stamens and leaf veins once base layers dry
The key is working with slightly thinned polish that flows and blends more easily than full-strength formula. You can also use actual nail art watercolor paints designed specifically for this technique, which offer even more control and blending capability.
Final Thoughts
Hibiscus nail art offers something truly special—the ability to carry a piece of paradise with you wherever you go. These tropical blooms transform your nails into tiny canvases that celebrate color, creativity, and the carefree spirit of island life. Whether you gravitate toward the bold statement of neon hibiscus, the refined elegance of minimalist line art, or the romantic softness of watercolor blooms, there’s a hibiscus design that perfectly matches your personal aesthetic.
What makes hibiscus nails particularly wonderful is their adaptability. They transition beautifully from casual beach days to elegant evening events simply by adjusting color palettes and complexity levels. The design works across all nail shapes and lengths, making it accessible whether you prefer short, practical nails or dramatic stiletto tips. And with options ranging from simple DIY sticker applications to intricate hand-painted masterpieces, hibiscus nail art welcomes everyone regardless of skill level.
Beyond their aesthetic appeal, hibiscus designs carry symbolic meaning too—representing delicate beauty, seizing the moment, and living life with tropical warmth and openness. Every time you glance at your hibiscus-adorned fingertips, you’re reminded to embrace joy, color, and the small pleasures that make life beautiful. So go ahead and let your nails bloom with the vibrant energy of hibiscus flowers. Your fingertips deserve to feel like a permanent vacation.
