

Short squoval nails are having a major moment in nail art, and there’s a surprisingly good reason: this nail shape actually looks flattering on almost every hand shape and fits seamlessly into everyday life. Unlike long stiletto nails that require careful navigation around daily tasks, short squovals give you that polished, intentional look while remaining completely practical. But here’s where it gets fun—a single glitter accent nail can completely transform a simple manicure from “nice” to “absolutely stunning,” and it takes maybe five extra minutes to create.
The beauty of glitter accent nails is that they work whether you’re going for a bold, eye-catching statement or something subtle and sophisticated. A glitter accent is the nail art equivalent of the perfect piece of jewelry: it catches the light, adds dimension, and feels like you put real thought into your appearance without ever looking overdone. Paired with the contemporary clean lines of a squoval shape, glitter accents feel modern and intentional rather than dated or costume-like.
If you’ve been hesitant about diving into glitter nail art because you’re worried it’ll look too young or too chaotic, this collection should ease those concerns. We’re not talking about nails covered head-to-toe in glitter chaos. Instead, you’ll discover how strategic placement, color coordination, and thoughtful design choices can make glitter feel elevated and wearable for any occasion. Whether you prefer minimalist elegance or eye-catching sparkle, there’s a squoval glitter accent idea here that’ll make you want to book your next appointment—or grab your tools and DIY.
1. Classic Gold Glitter French Tips with Nude Base
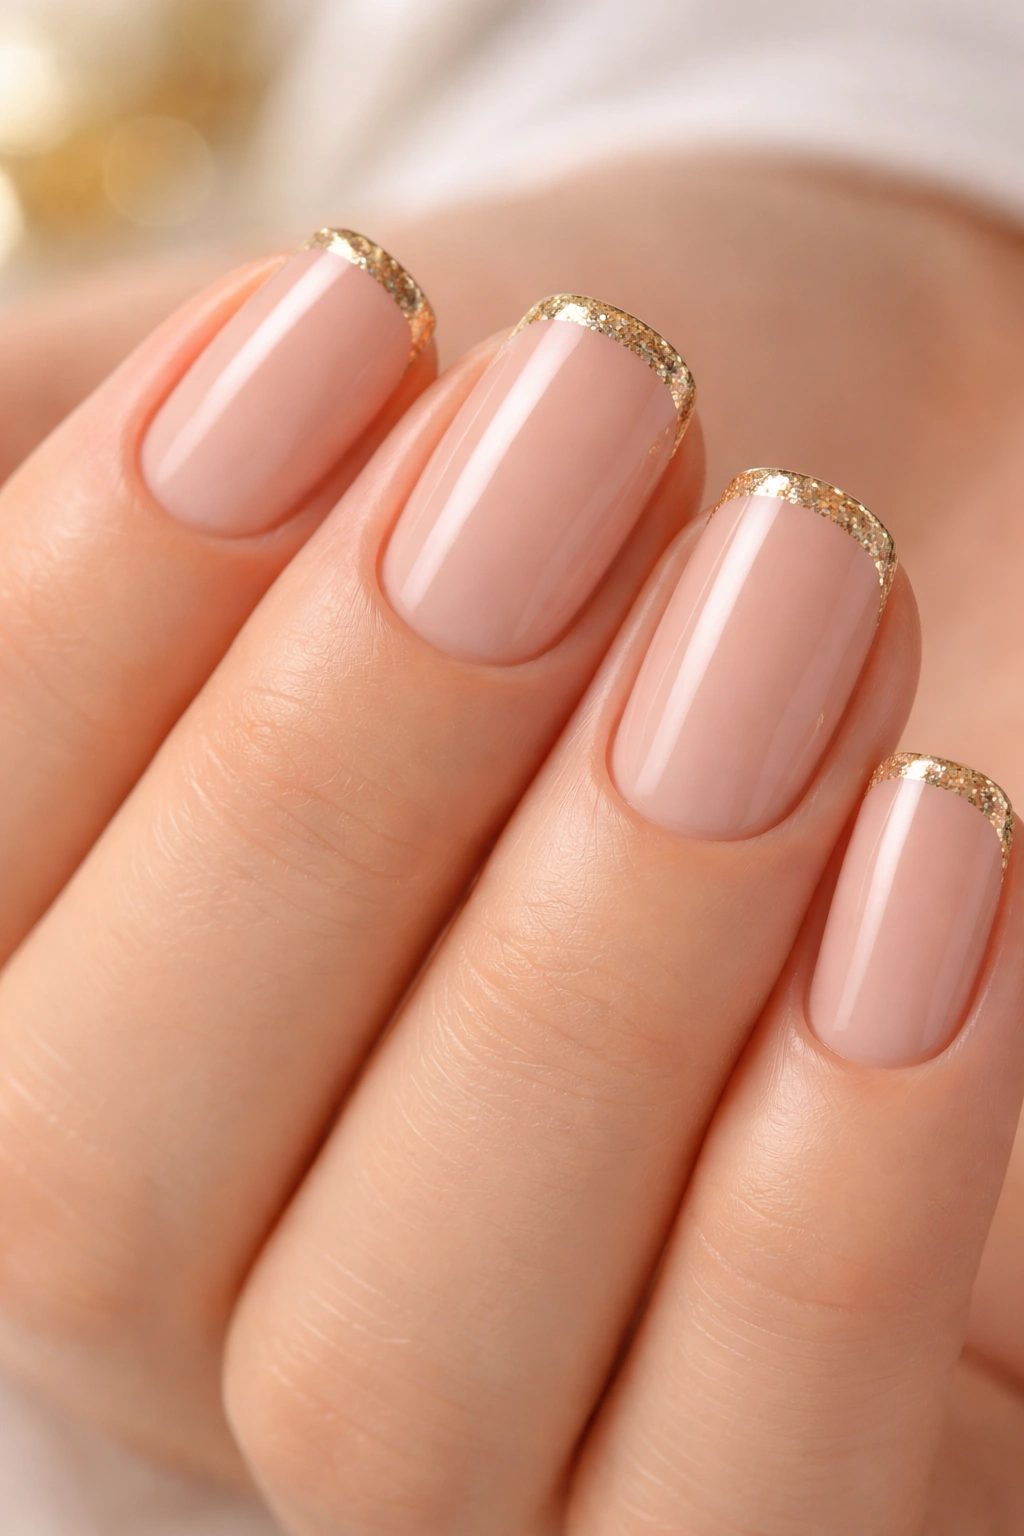
A gold glitter French tip on short squovals is the nail art version of a timeless blazer—it works, it always looks polished, and you’ll never regret choosing it. This design keeps the main nail in a clean, neutral nude or soft pink that elongates the finger, while a thin line of gold glitter outlines just the tip of the nail. The glitter acts as sophisticated jewelry for your fingertips without overwhelming the overall aesthetic.
Why This Design Stands Out
Gold has an inherent warmth and luxury feel that instantly elevates any manicure, and when confined to just the French tip area, it doesn’t read as costume-y at all. The nude base creates a seamless visual line from skin to nail, making your fingers appear longer despite the short length. This combination works across all skin tones and matches virtually any outfit or occasion.
How to Apply It
- Use a soft, creamy nude polish as your base color—think ballet pink, soft beige, or warm ivory depending on your undertones
- Apply two coats of the nude base, allowing each coat to dry completely
- Once dry, use a thin striping brush or toothpick dipped in gold glitter polish to paint a clean line across the tip of the nail, or use a pre-made glitter tip sticker for precision
- Seal everything with a high-shine topcoat to make the glitter pop and lock it all in place
Pro tip: If you’re nervous about hand-painting the glitter line perfectly straight, use a thin piece of painter’s tape as a guide along where your French line should sit—it creates a clean edge and removes the guesswork entirely.
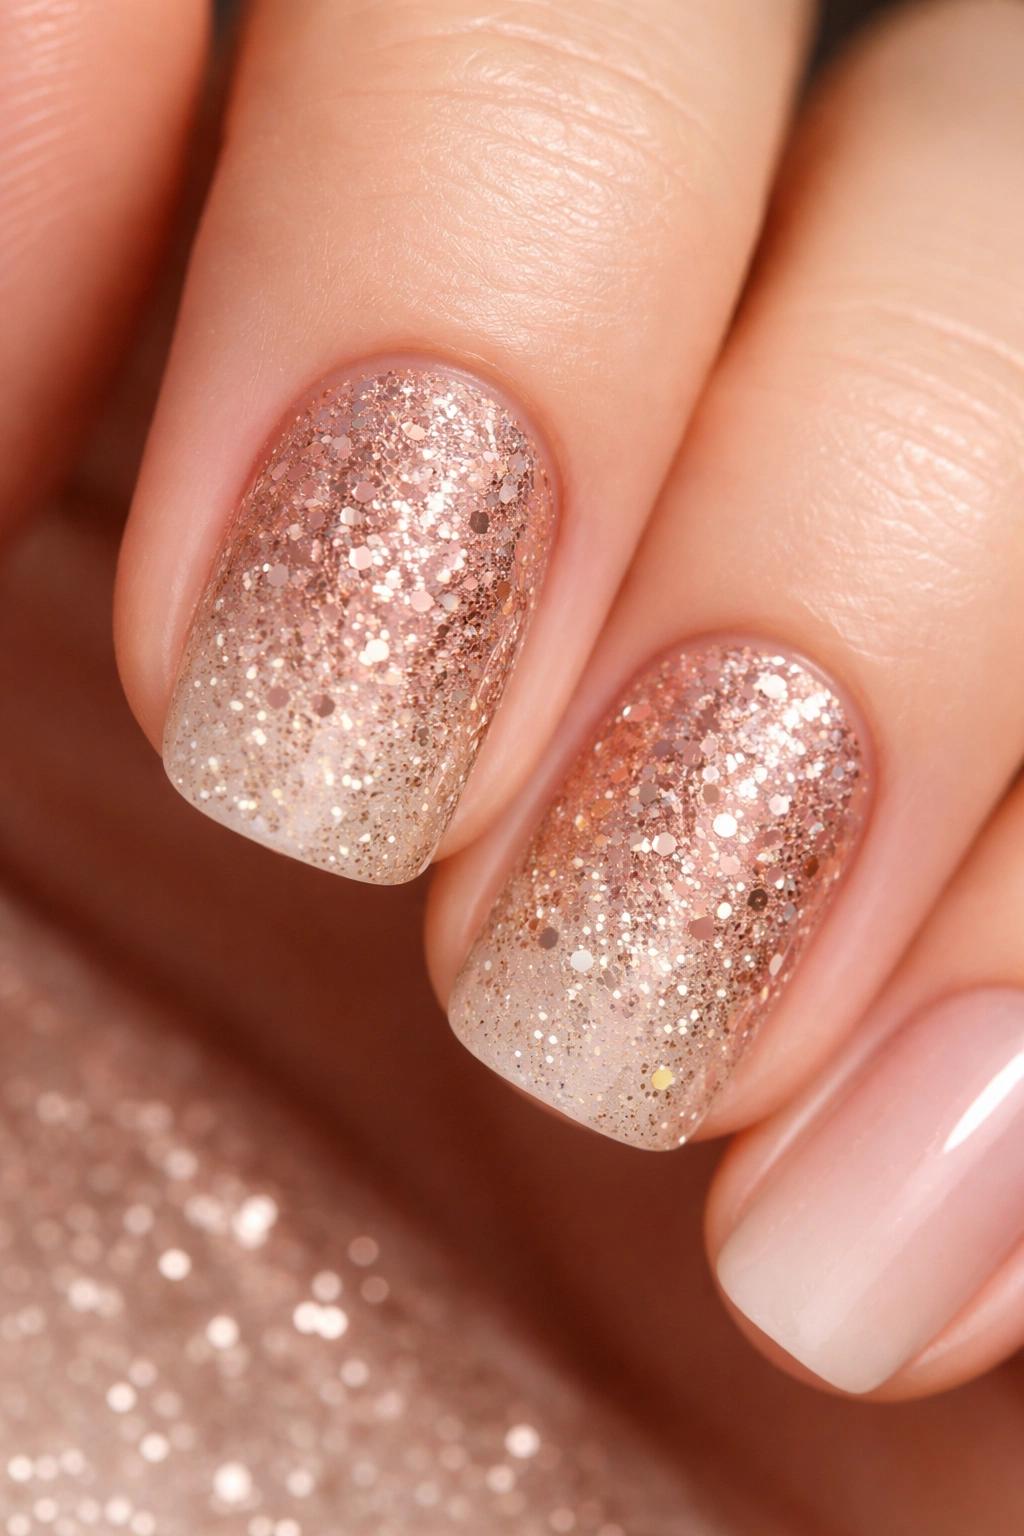
2. Ombré Pink-to-Glitter Gradient on Accent Nail Only
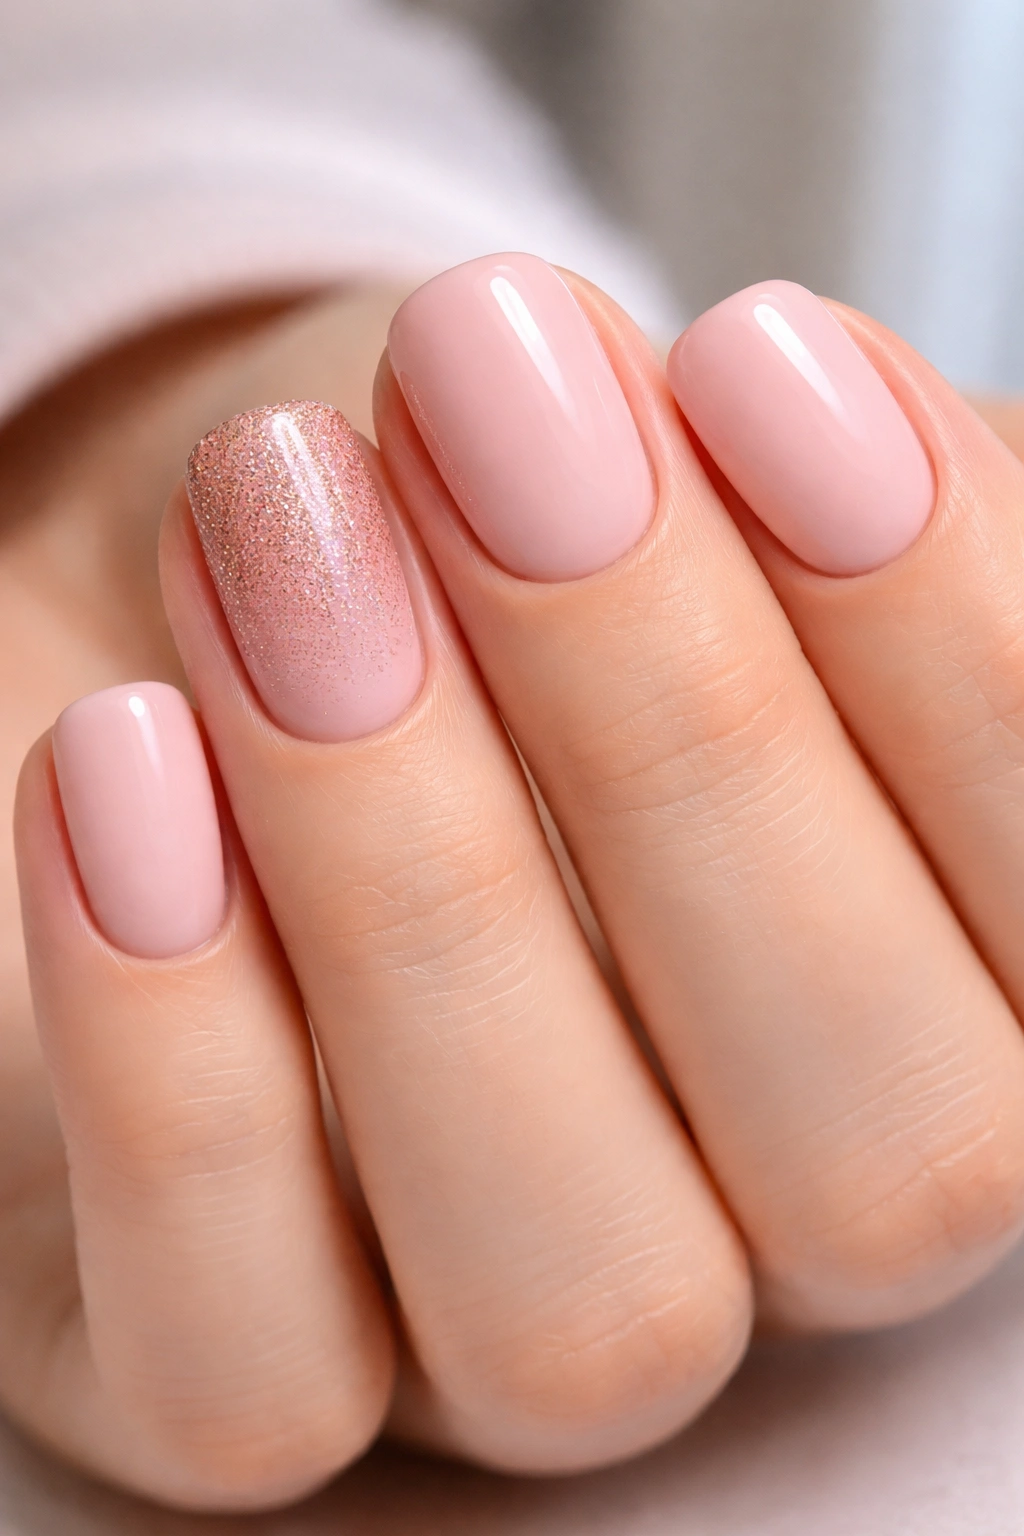
This design is pure romance: one accent nail features a gradient that flows from soft blush pink into sparkly rose gold glitter, while the other four nails stay solid blush pink. The gradient creates movement and depth on that single accent nail, making it feel like a deliberate focal point rather than a random sparkly interruption. This works beautifully on your ring finger or middle finger for maximum visibility.
The Chemistry Behind the Gradient
An ombré requires layering: the pink base gets progressively lighter and more glittery as you move down the nail, eventually becoming almost pure glitter at the tip. This technique creates visual interest and feels more sophisticated than a solid glitter nail. The gradient reads as intentional artistry rather than just “glitter nail,” which elevates the whole manicure into something special.
Materials and Method
- Start with a nude or very pale pink base coat on all five nails
- Apply two coats of soft blush pink to all nails and let dry
- On your accent nail only, use a makeup sponge to dab a glitter polish mixture from the middle toward the tip, then layer rose gold glitter on the bottom third
- Build opacity gradually with thin layers, allowing drying time between each
- Finish with a glossy topcoat that makes the gradient look luminous
Worth knowing: Ombré works best when you use glitter in the same color family as your base—pink to rose gold, not pink to silver. This keeps the design cohesive rather than chaotic.
3. Geometric Glitter Half-Moon on Neutral Base
A half-moon glitter accent is pure geometric precision: imagine the curved negative space at the base of your nail filled with geometric shapes in glitter rather than leaving it empty. This design works with the natural architecture of your nail and feels intentionally modern. Use one accent nail or apply the half-moon design to all five nails for a coordinated, editorial look.
Why Geometry Works Here
Geometric patterns with glitter read as very current and very intentional. Instead of trying to make a “pretty” design, you’re creating a confident, architectural statement. The half-moon placement is flattering because it sits at the widest part of your nail and doesn’t clash with the squoval shape—in fact, it complements it.
Execution Tips
- Paint your entire nail in a cool-toned neutral like greige or soft gray
- Using a thin brush or striping tool, carefully outline a half-moon shape at the base of the nail with glitter polish
- Fill the half-moon with geometric elements: thin glitter stripes, tiny dots in glitter, or a solid glitter fill depending on your skill level
- Alternatively, use thin metallic tape to create the geometric shapes and fill with glitter for cleaner lines
- Seal with a matte topcoat for an ultra-modern finish, or glossy if you want the glitter to shine
Insider note: Matte topcoats make glitter look more sophisticated and less “sparkly-costume” because they reduce the shine overall while the glitter still catches light.
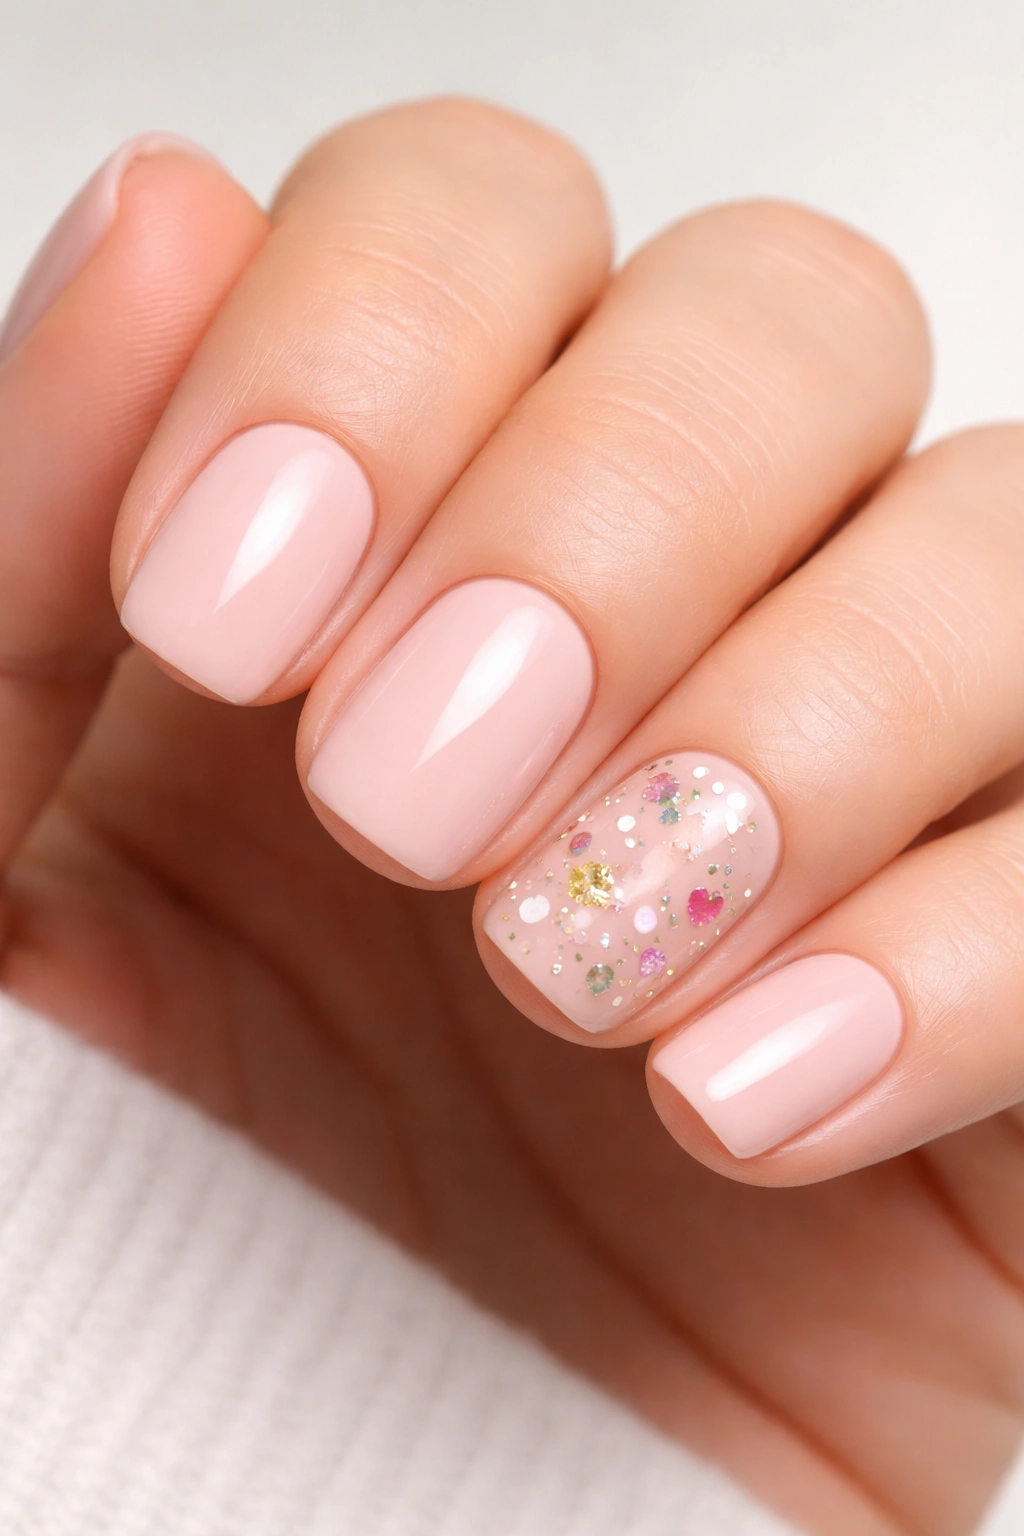
4. Candied Pearl Glitter with Soft Pink Nail
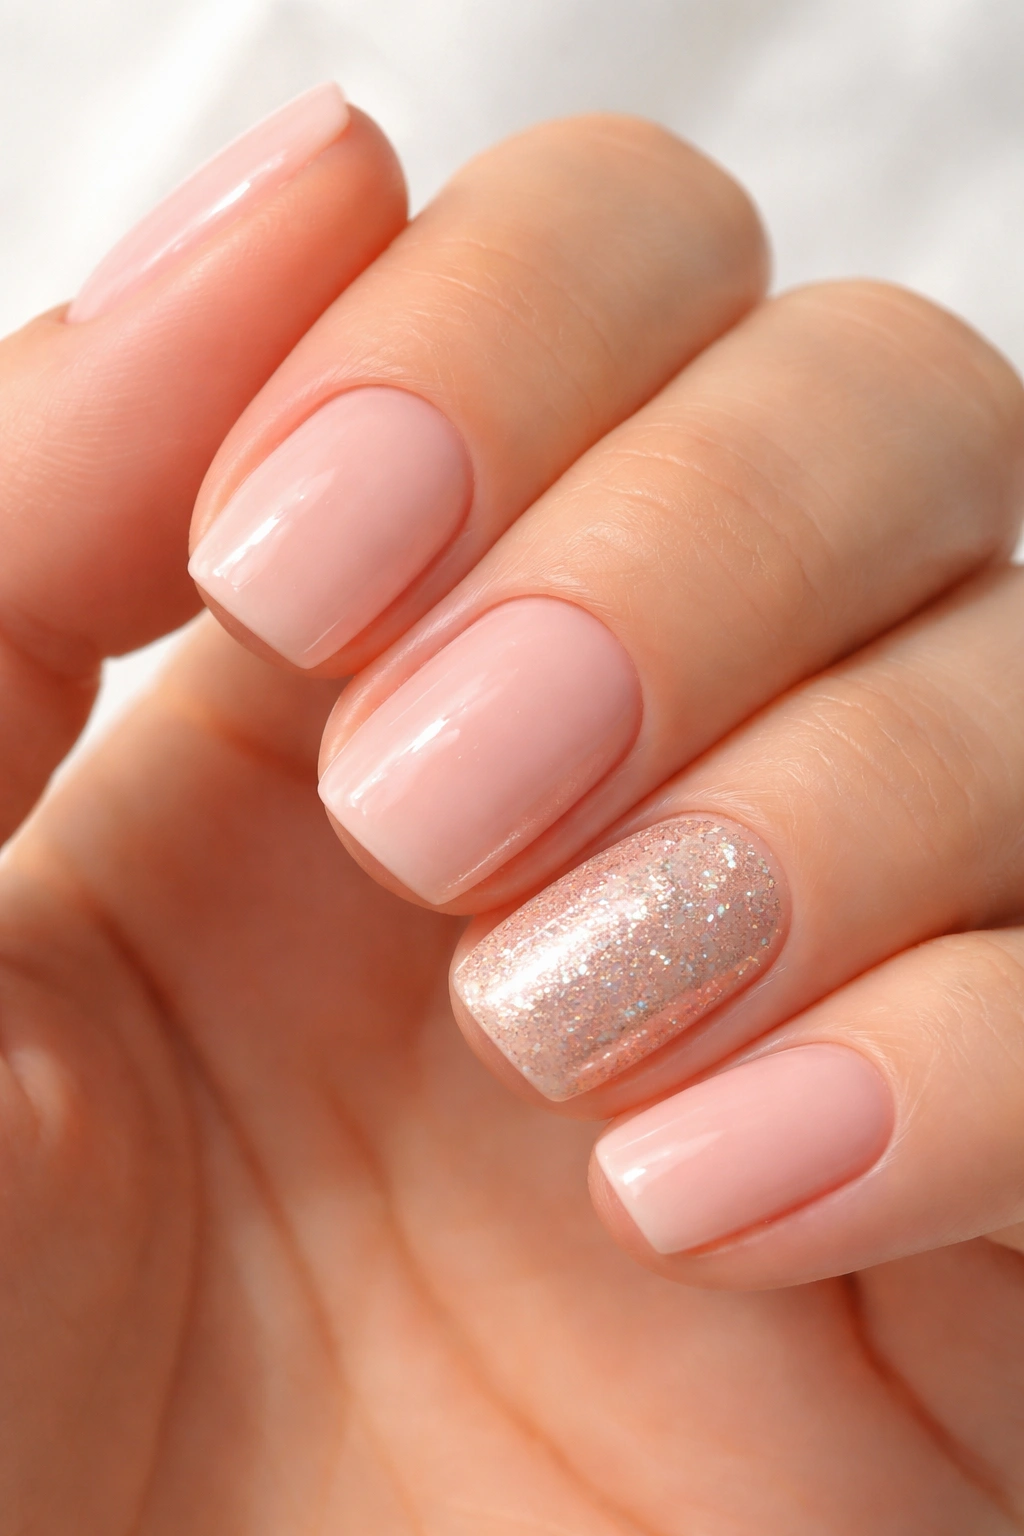
This design mimics the look of a pearl dusted with edible glitter—soft, iridescent, and utterly refined. One accent nail gets a pearl or champagne-pink base topped with iridescent or pearl-finish glitter, while your other four nails stay a coordinating soft pink. The result is delicate without being invisible, and it catches light in a magical way from every angle.
The Iridescent Advantage
Pearl and iridescent glitters are the secret weapons of elegant nail design. Unlike traditional glitter that’s one solid color, iridescent glitter shifts and changes depending on the light and angle, making your nails feel expensive and thoughtfully curated. On short squovals, this subtle sparkle feels grown-up and intentional.
Application Strategy
- Paint all nails with a soft, warm pink base—two coats for opacity
- On your accent nail, apply a pearl or champagne polish as your topcoat color instead of the pink
- While that’s still wet or slightly tacky, sprinkle iridescent glitter over just the top third of the nail
- Allow to dry completely, then seal with a clear topcoat
- For the most refined look, use fine-grain glitter rather than chunky glitter—it creates a candied effect rather than a sparkle-bomb
Pro tip: Iridescent glitter shows up best in natural daylight and under certain indoor lighting. If you want maximum sparkle visibility indoors, add a second thin coat of glitter before sealing.
5. Negative Space Glitter Stripes on Clean Base
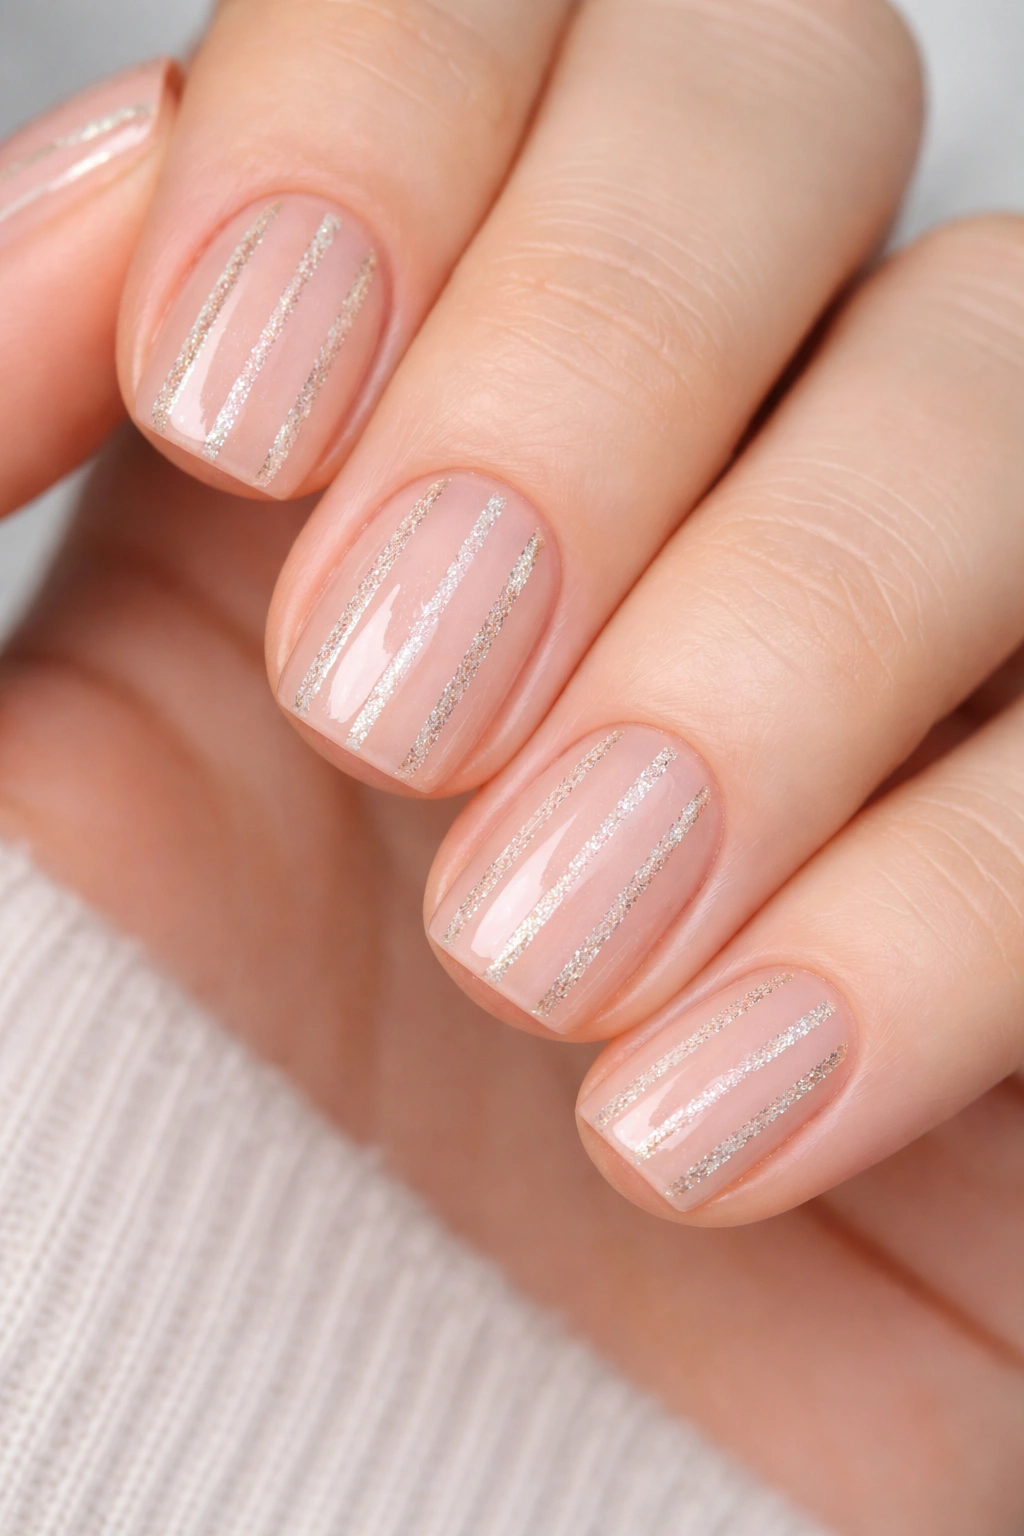
Negative space design—where you deliberately leave parts of the nail unpolished to show the skin underneath—pairs beautifully with glitter. Imagine thin, parallel stripes of glitter running down a mostly bare nail on a neutral-colored base. This feels artistic and modern while keeping the overall look minimal and intentional. It’s the opposite of “covered in glitter” but uses glitter strategically to create drama.
The Minimalist Appeal
Negative space glitter works because it makes a statement without visual noise. Your eye is drawn to the graphic pattern rather than to “ooh, sparkles everywhere.” On short squovals, this restraint actually makes the design feel more sophisticated and more wearable for professional settings. You get the glitter impact with the sophistication of negative space design.
How to Create Clean Negative Space
- Paint your base in a soft, neutral color like taupe or warm beige
- Use thin striping tape or a very fine striping brush to create thin vertical stripes down the nail, leaving gaps of bare nail between each stripe
- Fill only the stripes with a glitter polish—you can use the same color as your base with glitter added, or a contrasting metallic glitter
- Remove tape carefully, seal with topcoat, and the result is impossibly chic
- Alternatively, use a thin striping brush to hand-paint glitter stripes freehand if you trust your steadiness
Worth knowing: Negative space designs photograph incredibly well and look intentional even with slight imperfections, because the graphic nature of the design is the whole point—not perfect smoothness.
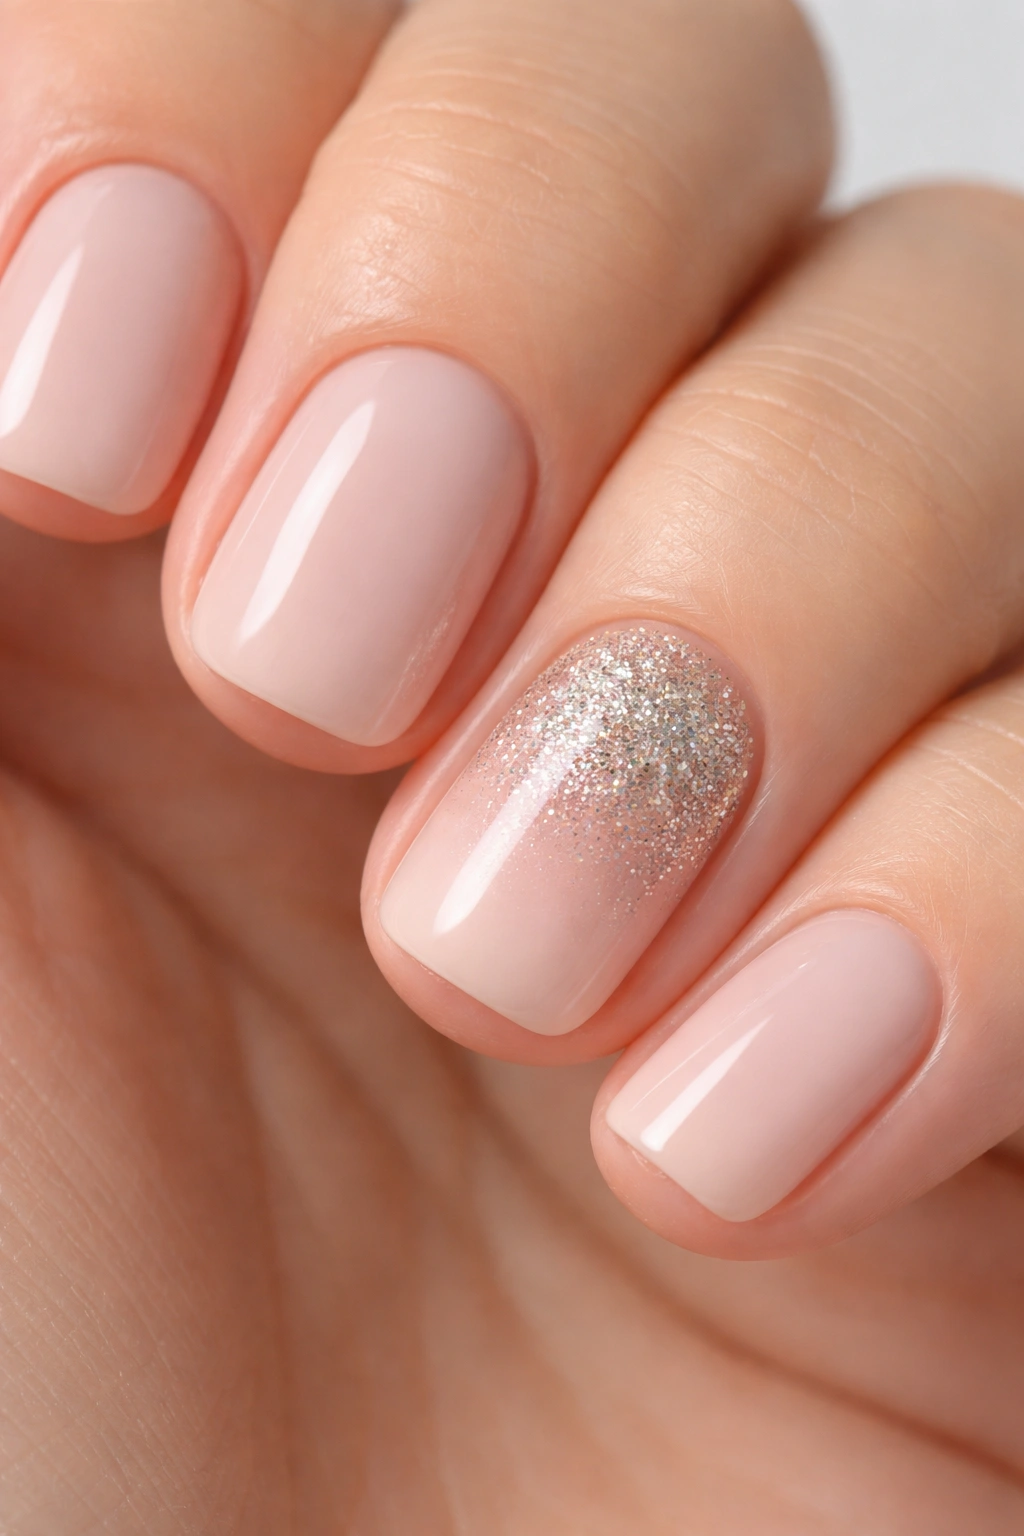
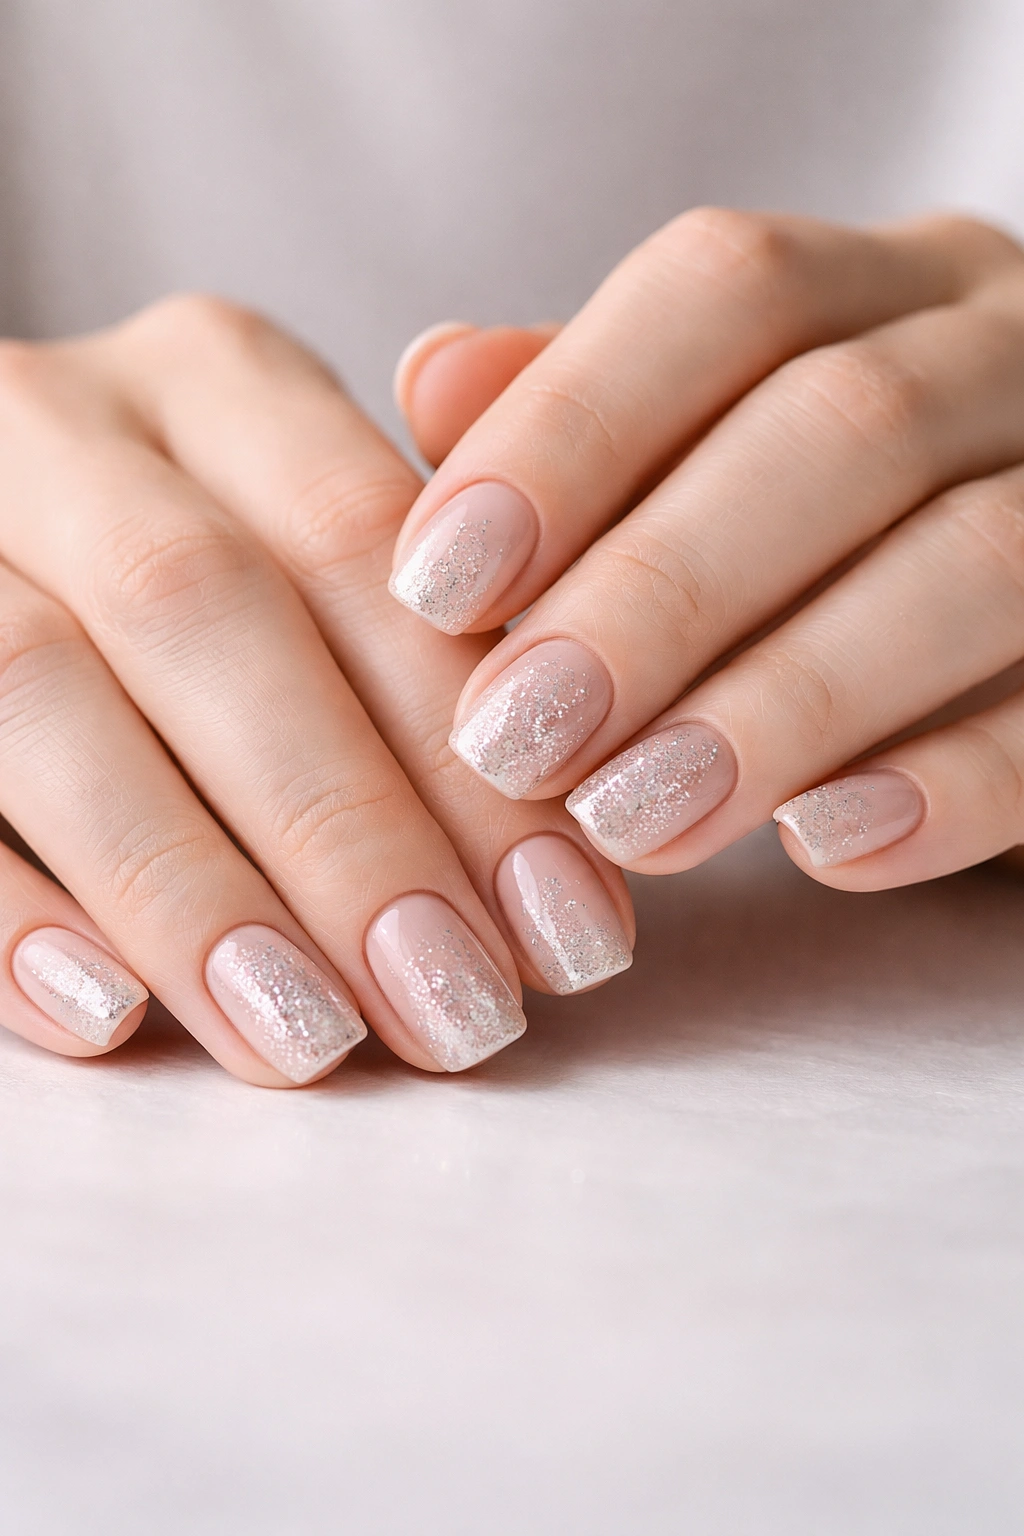
6. Glitter Gradient Fade to Bare Nail
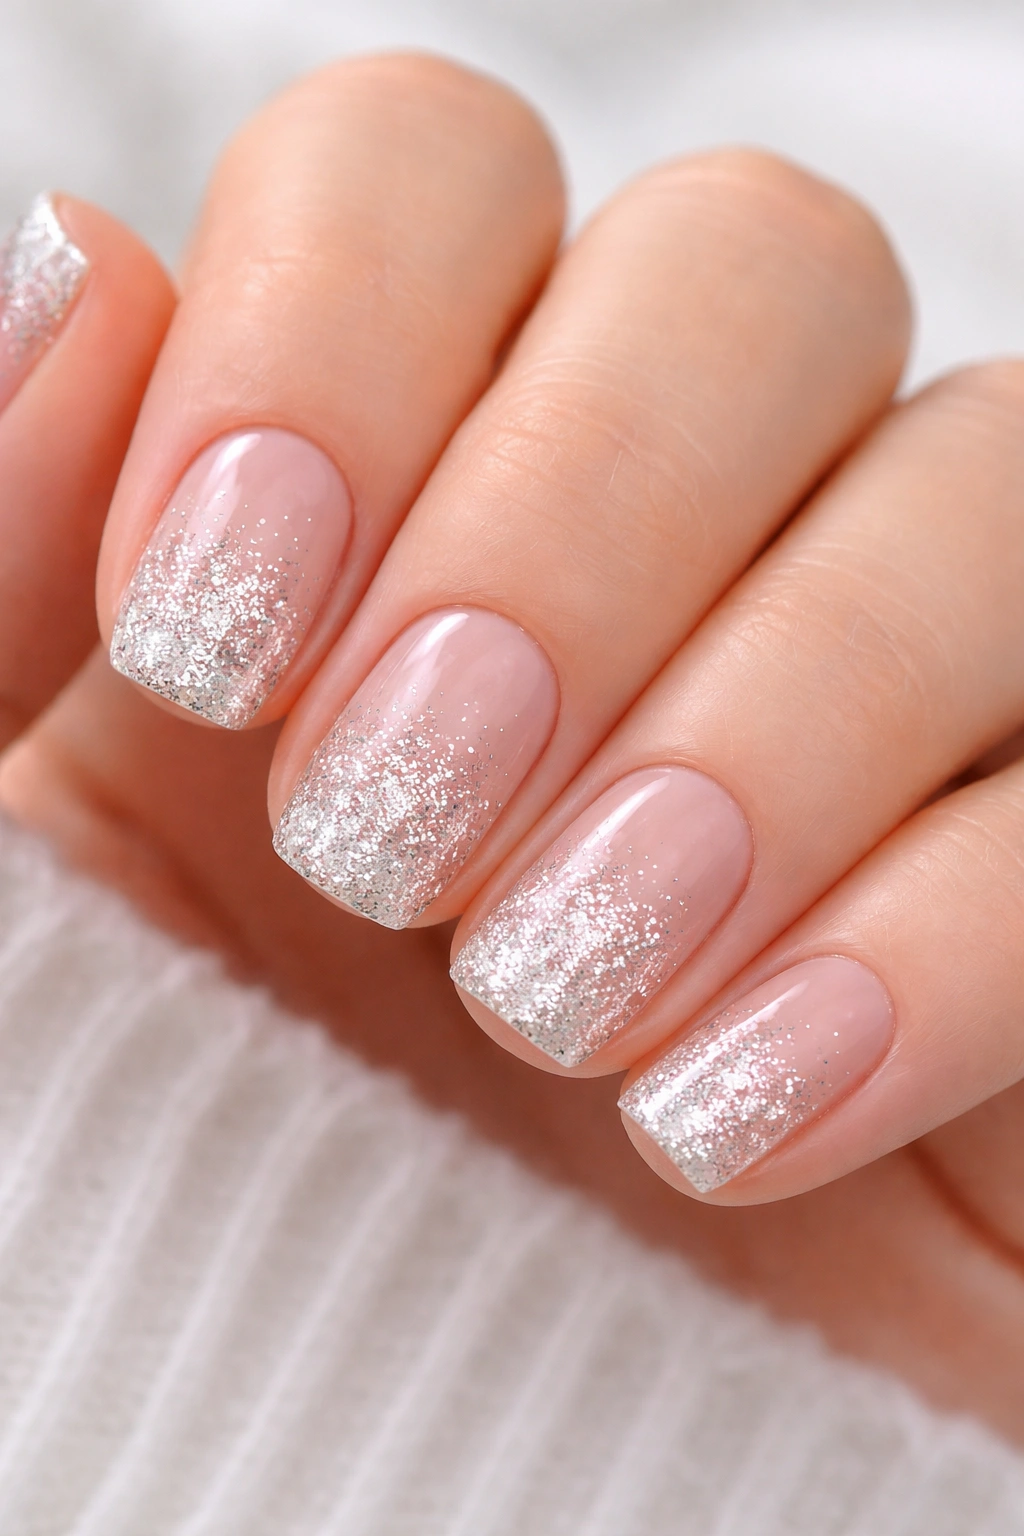
Imagine glitter that starts dense and opaque at the tip of your nail and gradually fades to almost invisible as it approaches your cuticle, eventually blending into your natural nail or a sheer base color. This gradient fade feels soft, modern, and surprisingly wearable because most of the nail is still your natural color or a sheer shade. It’s the “I have my nails done but not in an obvious way” approach to glitter.
Building the Gradient
A glitter fade requires patience and thin layers. You’re not painting one thick glitter coat—you’re applying glitter in progressively lighter concentrations to create a gradient effect. Start with dense glitter at the tip and dilute it or apply it more sparingly as you move up the nail toward your cuticle. This takes practice, but the result feels impossibly elegant.
Step-by-Step Method
- Apply a base coat and allow to dry
- Paint your entire nail with a sheer nude or clear base color
- At the very tip, apply a thick layer of glitter polish
- Moving up toward the cuticle, apply progressively thinner layers of the same glitter, allowing each to dry slightly before applying the next
- The glitter should barely be visible near your cuticle and dense at the tip
- Seal with a soft-focus or matte topcoat to enhance the subtle gradient
- Use a fine-tip brush to clean up any glitter that gets outside your nail line
Pro tip: This design works beautifully in rose gold, champagne, or nude glitter because those shades blend more naturally into skin than bright silver would.
7. Confetti Glitter Burst on One Accent Nail
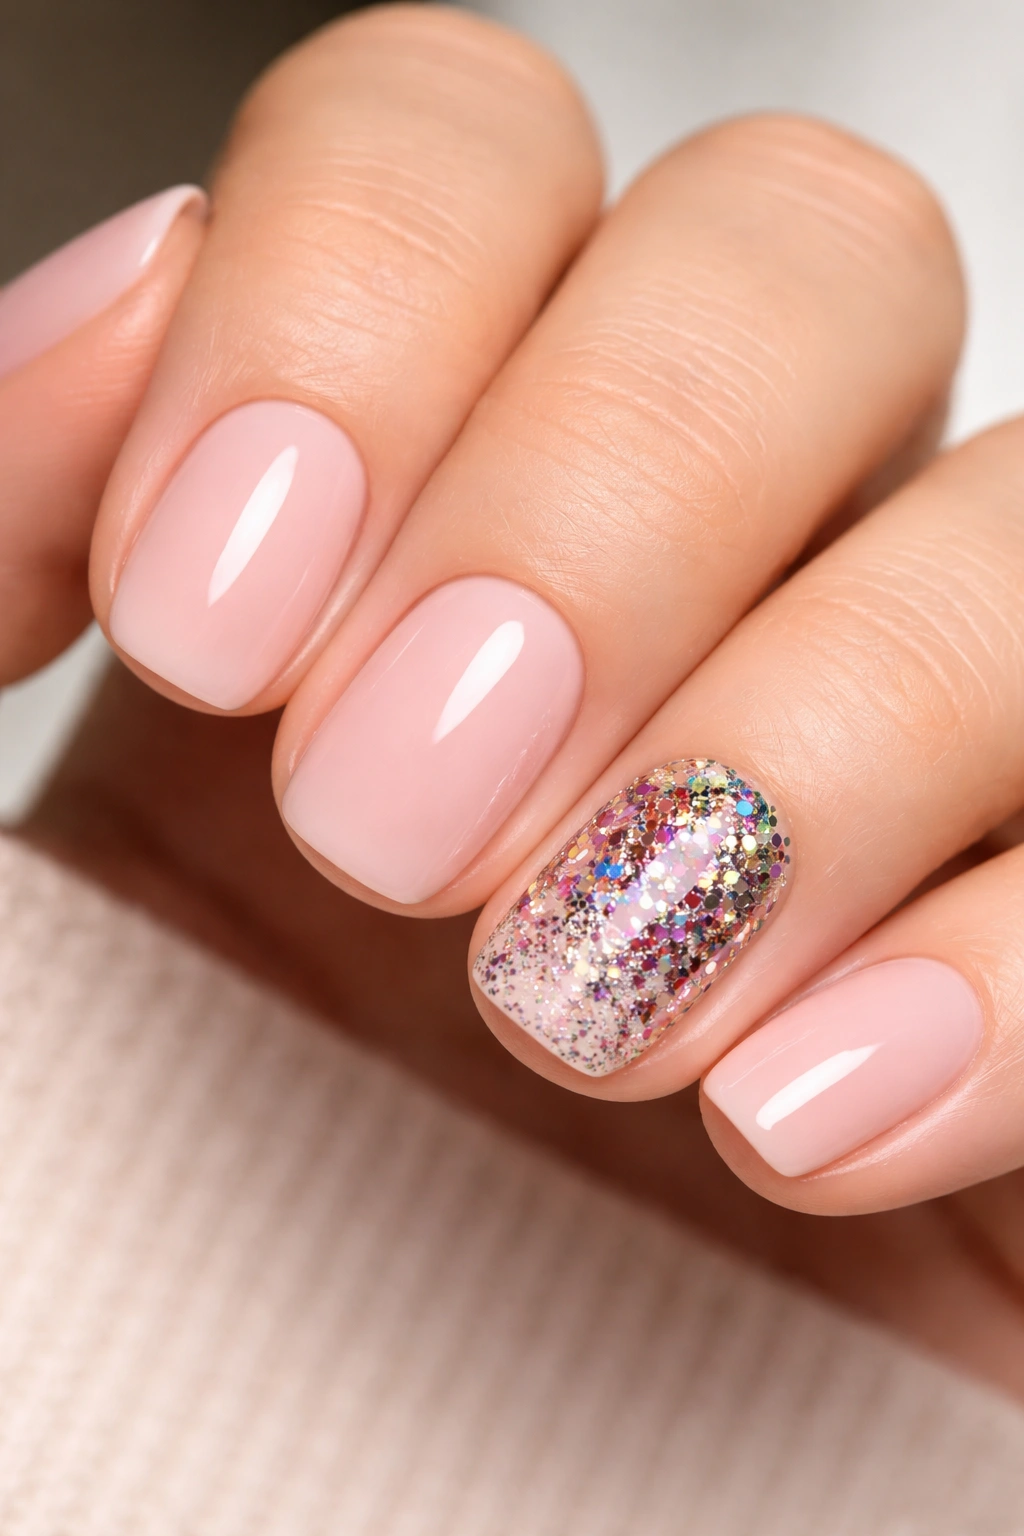
A confetti burst is exactly what it sounds like: concentrated glitter in multiple colors and finishes clustered on one accent nail, creating the visual effect of celebration and movement. While the other four nails stay solid in a neutral shade, that one accent nail becomes a mini fireworks display. This works especially well on your ring finger or middle finger for maximum impact.
Making Confetti Feel Intentional
The key to a confetti glitter design that doesn’t look chaotic is using glitters that share a color family or that coordinate with your base color. If your base is nude, layer rose gold glitter with champagne and bronze glitters. If your base is blush pink, use pink, rose gold, and coral glitters. The coordination makes it feel intentional rather than random.
Building the Burst
- Paint your four main nails in your chosen neutral base color
- On your accent nail, paint the entire nail in a base color slightly darker than your main nails (this helps the glitter show up better)
- Using a concentrated dab method, layer 3-4 complementary glitters in the center-to-lower portion of the accent nail
- Use a toothpick or thin brush to distribute the glitter slightly and create that “burst” effect
- Allow plenty of drying time between layers to prevent mud-colored blending
- Seal with a top coat that locks all that glitter in place
Insider note: Confetti bursts photograph beautifully and feel extra special for date nights, celebrations, or whenever you want your nails to feel more intentional than everyday.
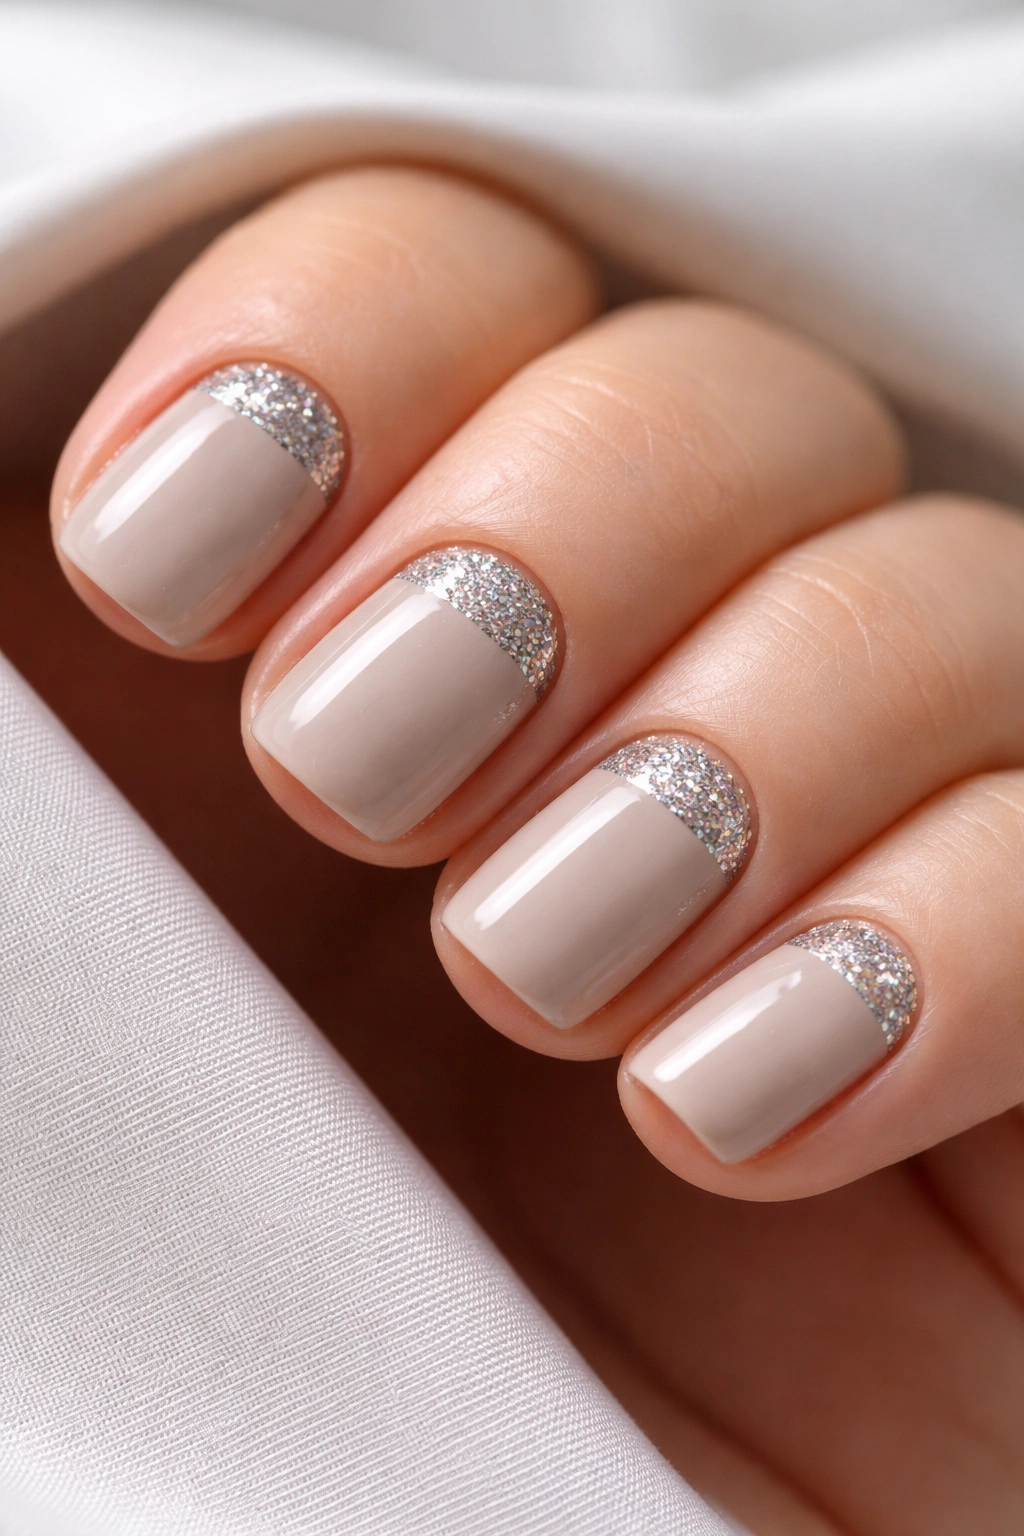
8. Metallic Glitter Outline with Minimalist Aesthetic
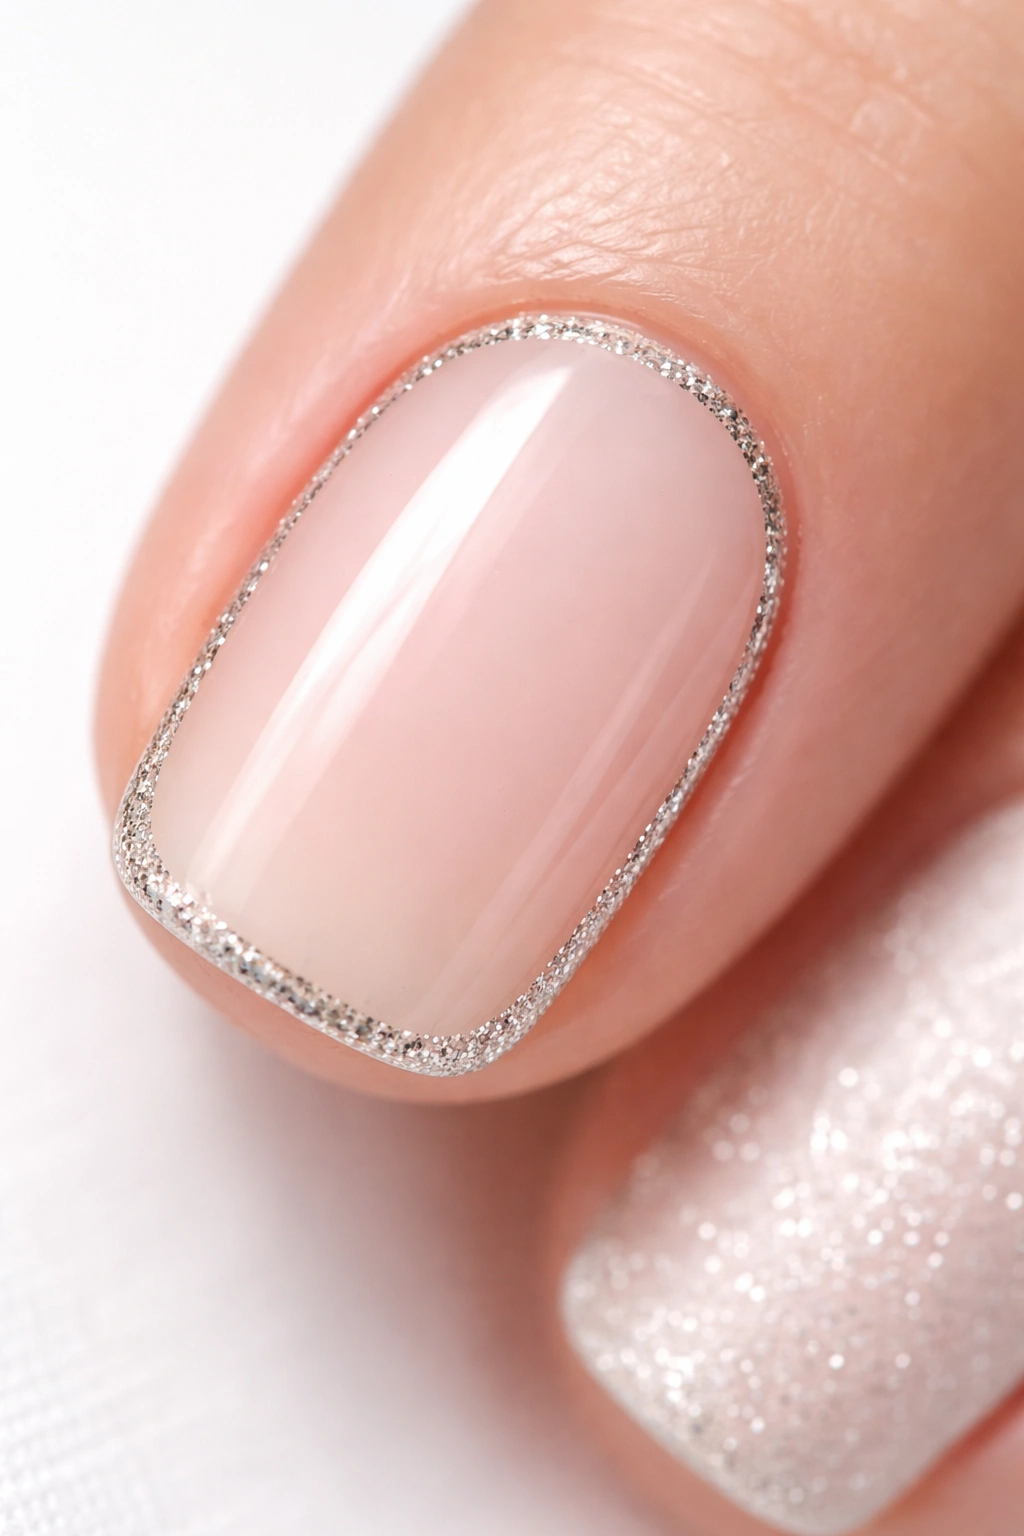
Take a short squoval nail and outline just the edge—the perimeter of the nail shape—with thin metallic glitter, leaving the entire middle of the nail bare or filled with a sheer color. This creates a frame effect that’s graphic and modern without being busy. It’s the art gallery approach to glitter: the frame draws attention to the shape itself rather than obscuring it.
Why Outlines Work
An outline design celebrates the squoval shape itself because it highlights the nail’s edges and corners. It’s a clever way to use glitter as accent rather than coverage. On short nails, this outline approach actually makes your nails look deliberately shaped and cared-for, because you’re essentially drawing attention to the nail’s form.
Outline Application
- Paint your base color—either a sheer nude or leave the nail mostly bare
- Using a very thin striping brush, carefully outline the entire perimeter of the nail with metallic glitter polish (gold, silver, or rose gold all work)
- Keep the line as thin and clean as possible—thickness is optional but thin lines read as more sophisticated
- A second thin coat of the metallic outline adds definition and visibility
- Seal everything with a topcoat that won’t dull the glitter line’s shine
Worth knowing: If your outline gets wobbly, don’t stress—thin lines are forgiving because the graphic nature of the design makes small imperfections look intentional.
9. Dual-Tone Glitter Mix on Half Nail Design
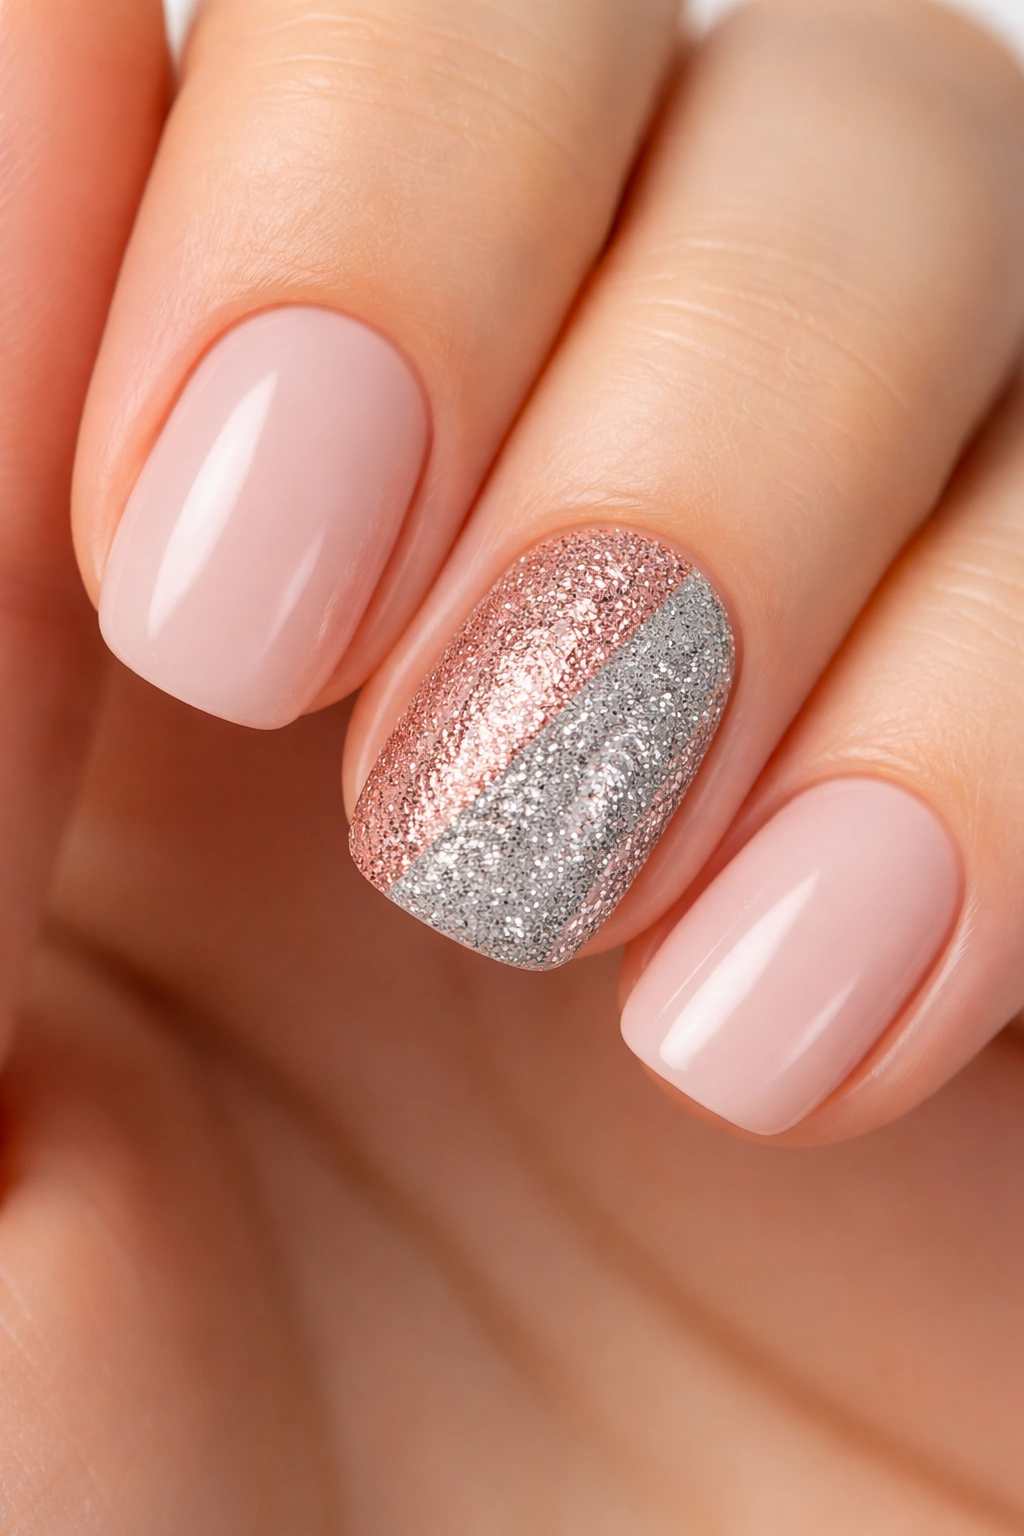
Split your accent nail vertically or diagonally down the middle, with one half featuring rose gold glitter and the other half featuring silver or champagne glitter. The contrast between the two metallic glitters creates visual interest and feels very contemporary. Your other four nails stay solid in your chosen base color, letting that one dual-tone nail be the statement piece.
Balancing Two Glitters
The key to making dual-tone glitter work is ensuring both glitter shades are visible and equally weighted. If one shade is darker or applies more thickly than the other, the design will feel unbalanced. Use glitters that are similar in opacity and grain size so they read as equals rather than one dominating the other.
Creating the Division
- Paint all nails in your neutral base color
- On your accent nail, decide whether you want a vertical or diagonal split
- Use painter’s tape to mark the dividing line, creating a clean edge between the two halves
- Apply the first glitter shade to one half, allow to dry, then apply the second glitter shade to the other half
- Remove tape carefully, seal with topcoat, and you’ve got a split-screen glitter nail
- Alternatively, free-hand the division with a thin brush if you’re comfortable—the artistic feel of a slightly imperfect division can actually look intentional and modern
Pro tip: Diagonal divisions feel more dynamic and movement-forward than vertical divisions, which feel more structured and geometric.
10. Glitter Tips with Detailed Base Design
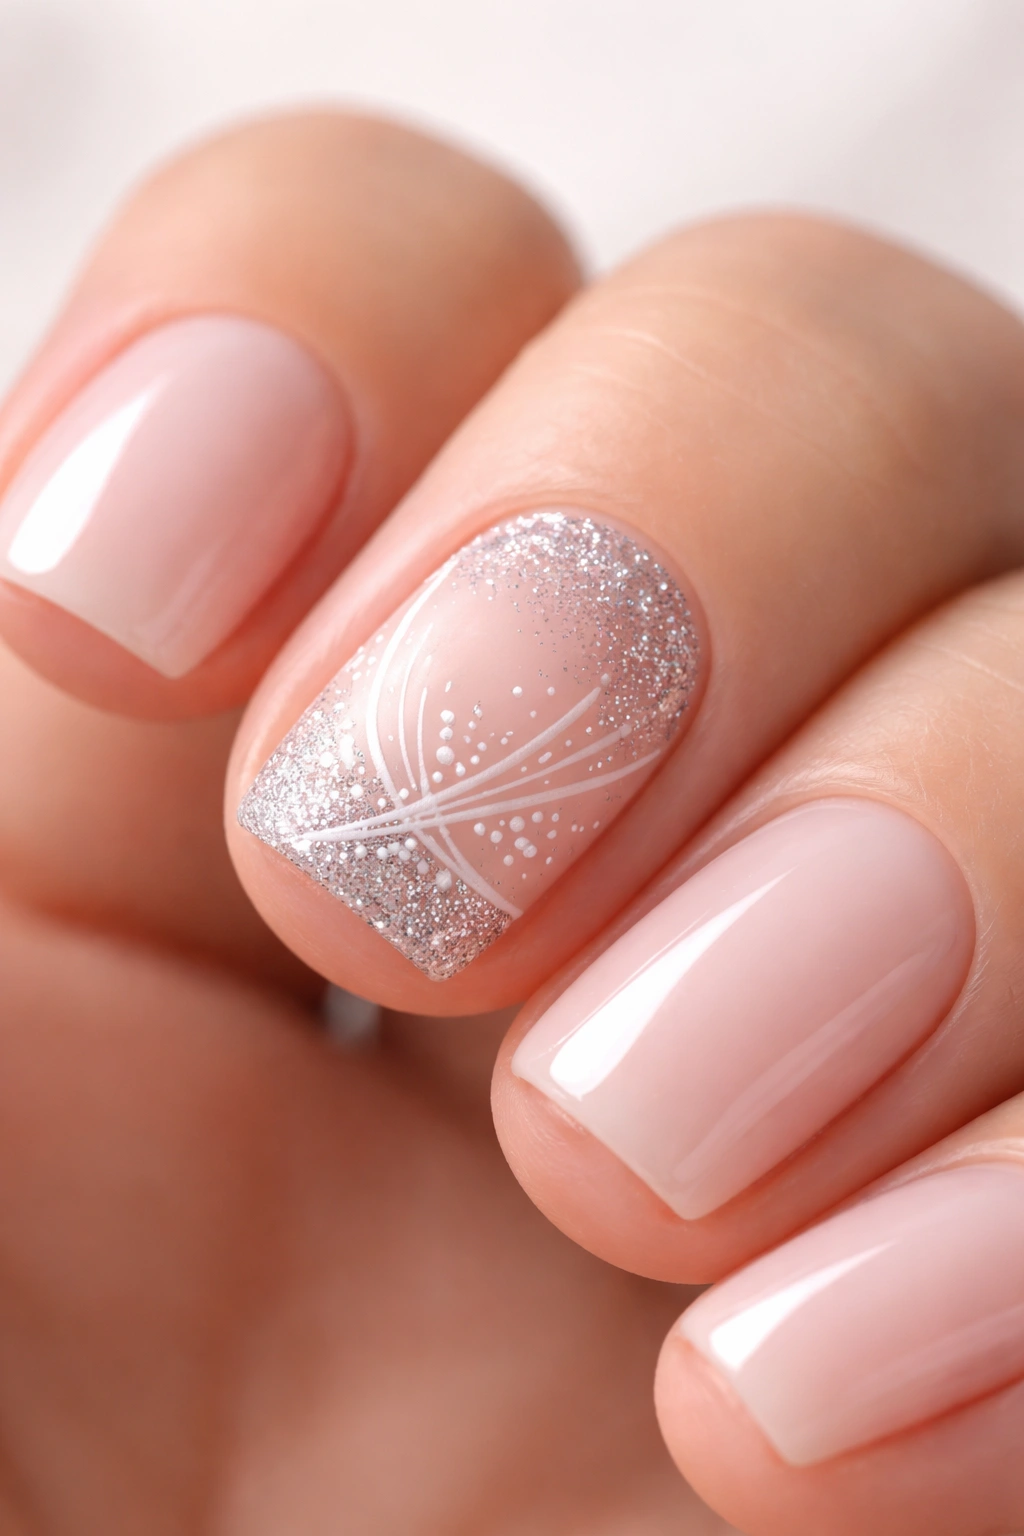
Layer your glitter strategically by adding it only to the tip of the nail while the base features a simple line drawing, dot pattern, or minimalist design in a contrasting color. For example, imagine a nude base with tiny minimalist line drawings (geometric shapes, abstract lines, or micro dots) in black, topped with clear glitter tips. The glitter amplifies the intentionality of the base design while keeping both elements visible.
Combining Design Elements
When you’re layering multiple design elements on one nail, the goal is to make sure each element is visible and contributes to the overall aesthetic rather than competing for attention. Glitter tips work beautifully over minimal base designs because the base elements are small enough not to be obscured by the glitter.
Layering Order and Method
- Paint your base color on all nails
- Add your base design element (lines, dots, or small pattern) in a contrasting color—use a thin brush or dotting tools for precision
- Allow the base design to dry completely before proceeding
- Apply glitter polish only to the tip area of your accent nail(s), creating a clear demarcation between the designed base and the glittery tip
- The glitter becomes an amplified, sparkly crown to your base design
- Seal everything with a clear topcoat
Worth knowing: This approach works especially well when your base design is monochromatic (black on nude, for instance) because the glitter adds all the color and sparkle while the line design adds sophistication.
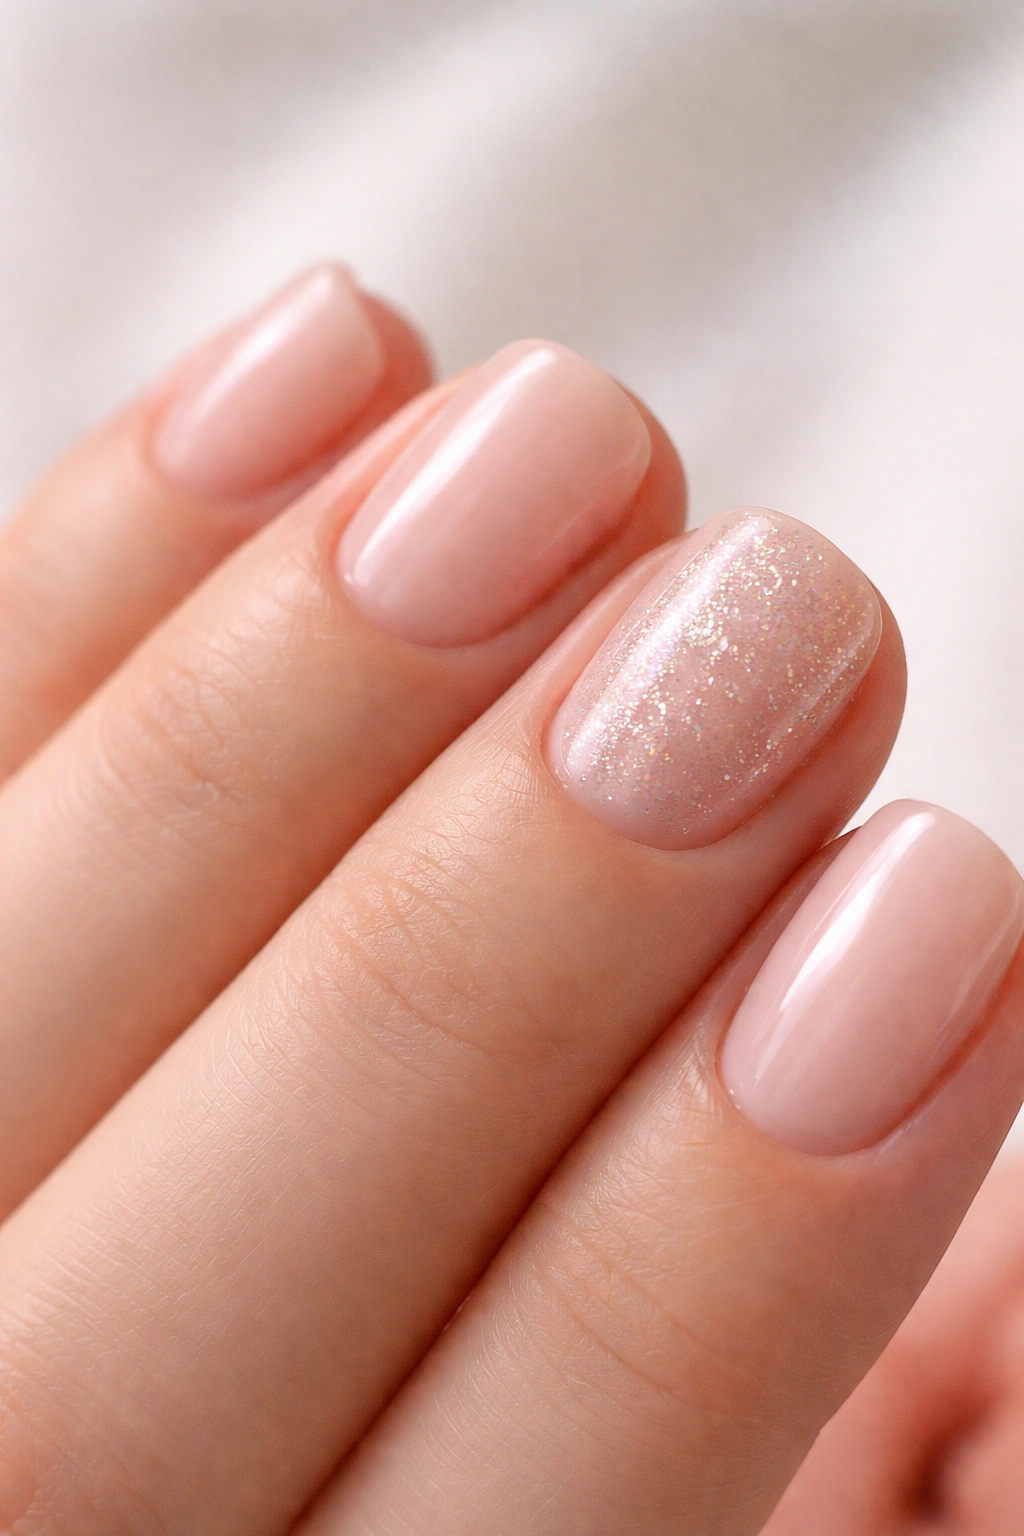
11. Milky Glitter for Soft Ethereal Look
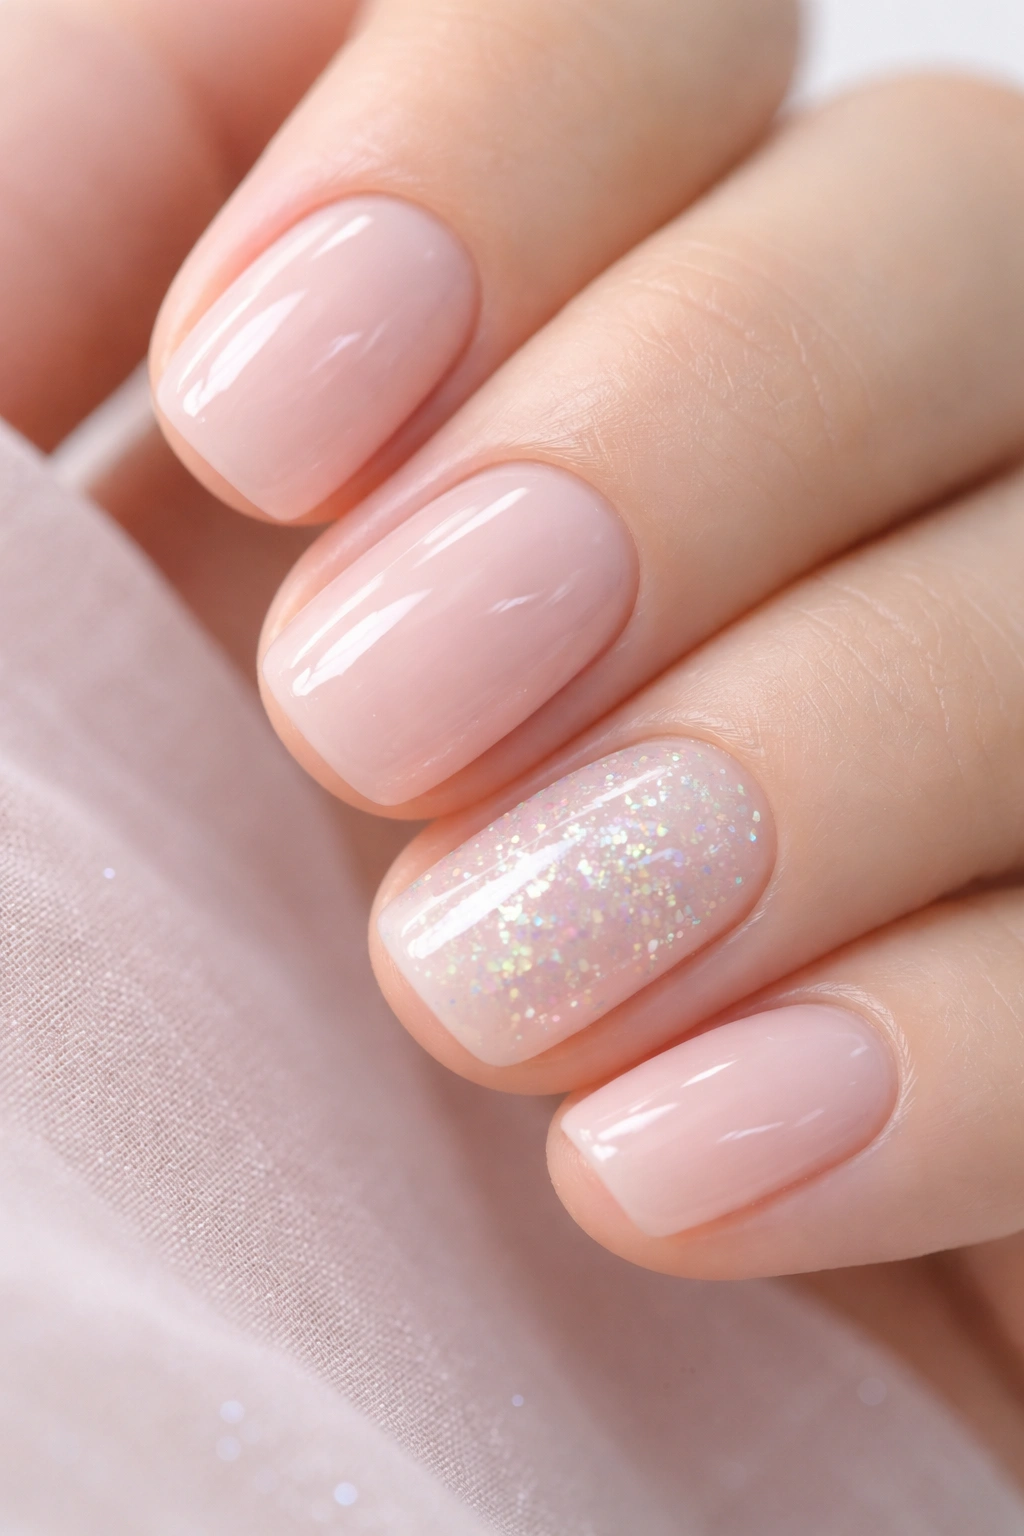
Milky or opalescent glitter suspended in a cloudy, translucent base creates an ethereal, almost frosted effect that’s completely different from traditional sparkly glitter. One accent nail in milky glitter while the others stay solid creates a soft focal point that catches light subtly rather than dramatically. This style feels particularly refined and works beautifully for professional settings or minimal aesthetic lovers.
The Opalescent Advantage
Milky glitters have a softer, more sophisticated sparkle than dense traditional glitters. They let light through rather than reflecting it boldly, creating an almost moonlit quality. On short squovals, this soft quality makes the nail feel refined rather than party-ready, without sacrificing the glitter element you love.
Creating Milky Glitter Effect
- Paint your base color on all nails—a soft nude, blush, or even a light gray works beautifully
- On your accent nail, choose a milky or opalescent glitter polish (these often come pre-mixed but you can also create this by mixing clear polish with very fine iridescent glitter)
- Apply two coats of the milky glitter, allowing each coat to dry
- The cloudiness builds with each layer, creating that frosted, ethereal effect
- Seal with a topcoat that won’t add too much shine—a soft matte or semi-gloss works better than high-shine, which can overpower the delicate effect
Insider note: Milky glitter nails photograph beautifully in natural daylight because the light comes through the cloudy base and creates a dimensional, almost gemstone quality.
12. Reverse Glitter Ombre (Glitter to Nude Gradient)
Instead of starting with glitter at the tip and fading to bare, reverse the process: begin with a heavy glitter concentration at the cuticle line and fade to a solid nude or sheer color at the tip. This inverted approach feels contemporary and unexpected, creating movement that draws your eye toward your hand rather than toward your fingertips. It’s a conversation-starting alternative to traditional glitter placement.
Why Reverse Ombre Works
Most glitter designs concentrate sparkle at the tip because that’s the most visible area. By reversing this, you’re creating visual interest that’s both unexpected and modern. The glitter at the base catches light as your hands move, making them feel more dynamic. On short nails, this placement draws attention to your hand’s movement rather than to one static focal point.
Execution Steps
- Apply your base color to all nails
- On your accent nail, start at the cuticle line with a dense glitter application
- Using a makeup sponge or stippling method, gradually apply less glitter as you move down toward the tip
- The tip should be almost entirely glitter-free, showing just your base color
- This creates a gradient that’s the opposite of the traditional tip-focused approach
- Seal with topcoat once you’ve achieved your desired gradient intensity
Pro tip: Reverse ombré works especially well in metallic glitters (gold, silver, rose gold) because the concentration at the cuticle reads as intentional framing rather than accidental placement.
13. Scattered Glitter Stars or Shapes on Solid Base
Instead of concentrated glitter placement, scatter individual glitter stars, hearts, or tiny geometric shapes across one accent nail in a seemingly random (but actually thoughtfully spaced) pattern. Your other four nails stay completely solid, making that scattered-glitter nail feel like a deliberate artistic statement rather than a glitter accident. This playful approach works for any personality.
Making Random Feel Intentional
The secret to scattered glitter designs is that they’re not actually random—they’re carefully spaced to feel balanced and intentional. You’re creating negative space between the shapes so each glitter element reads as its own object rather than part of a blob. This intentionality makes even a playful design feel sophisticated.
Applying Individual Shapes
- Paint your base color on all nails
- On your accent nail, use a thin brush or dotting tool to hand-paint individual glitter shapes (stars have five points, hearts have a distinctive form, tiny circles create dots)
- Space them deliberately across the nail, leaving breathing room between each shape
- You’ll want roughly 5-8 individual shapes on a short nail to create visual interest without overwhelming it
- Allow drying time between shapes so they don’t blur together
- Seal with topcoat once complete
Worth knowing: If hand-painting tiny shapes feels intimidating, use nail art stickers with individual glitter shapes and apply them strategically across your nail for a similar effect with less stress.
14. Glitter Underneath Sheer Polish for Diffused Sparkle
Apply glitter polish to your nail, then immediately layer a sheer or semi-opaque nude polish over top while the glitter is still wet or very fresh. The sheer polish diffuses the glitter, creating a softer, more muted sparkle that feels elegant and wearable. It’s like putting frosted glass over your glitter—the sparkle is still there, just softened and refined. This approach is perfect for minimalist lovers who want subtle shimmer.
The Diffusion Effect
Layering sheer over glitter creates depth and dimension that solid glitter alone can’t achieve. The translucency of the sheer polish allows light to pass through while the glitter underneath catches and reflects it, creating a multidimensional sparkle. This technique feels especially refined on short nails because it reads as “subtle luxury” rather than “obvious sparkle.”
Layering Method
- Paint your base color and allow to dry
- Apply glitter polish to your accent nail—one or two coats depending on desired glitter intensity
- While still slightly wet or tacky, immediately apply a sheer or very light nude polish over the glitter
- Don’t wait for the glitter to fully dry, as the sheer polish needs to blend slightly with the glitter layer for that diffused effect
- The result is glitter that’s visible but softer, like light filtering through fabric
- Allow to dry completely, then seal with topcoat
Pro tip: This technique works beautifully with iridescent or pearl glitters because the diffusion enhances their multidimensional quality rather than muting it completely.
15. Mixed Metallic Glitter on Gradient Base
Create a gradient background that transitions from rose gold to champagne to pale gold, then top that gradient with a mixture of all three metallic glitters scattered across the nail. This creates a luxurious, blended effect where everything works together in the same metallic family but with dimension and depth. It’s sophisticated, celebratory, and surprisingly wearable despite the intensity of layers.
Building Dimensional Glitter
This design works because everything is coordinated within the same metallic color story—rose gold, champagne, and pale gold are all warm metallics that enhance rather than clash with each other. The gradient base pulls them together while the mixed glitters scattered on top create sparkle and movement. On short squovals, this concentrated shimmer looks intentional and editorial rather than chaotic.
Creating the Mixed Metallic Accent
- Paint all nails in a light, neutral base color
- On your accent nail, create a subtle gradient using rose gold and champagne polishes—blend them together with a sponge for a seamless transition
- Once dry, mix equal parts of your three metallic glitters in a small dish or palette
- Apply the mixed glitter blend across the gradient nail using a stippling or dabbing motion with a brush
- The glitter mixture will catch all three metallic tones, creating depth and luxury
- Allow to dry, then seal with a glossy topcoat that makes everything shimmer together
Insider note: Mixing your own glitter blend allows you to control the exact ratio of each shade, ensuring that no single metallic dominates and the effect feels balanced and intentional.
Final Thoughts
Short squovals with glitter accents offer the best of both worlds: the practical elegance of short nails with the eye-catching sparkle that makes you feel special every time you look at your hands. Whether you choose understated elegance like a gold glitter French tip or something more expressive like a confetti burst, the key is choosing a design that feels authentically you rather than forcing yourself into a trend that doesn’t match your style.
The glitter accent approach is also wonderfully forgiving from a maintenance perspective. Because the glitter lives on just one or two accent nails, chips and wear are less noticeable than they would be on a full glitter manicure. You’ll still get the impact and joy of sparkly nails while enjoying the practicality of short, squoval-shaped tips that don’t catch on everything and don’t require constant fussing.
Start by trying whichever design speaks to you most—don’t feel pressured to attempt something technically complicated if you’re new to nail art. The beauty of these ideas is that even the simpler ones (like the gold French tip or scattered shapes) look incredibly intentional and polished once they’re finished. Grab your tools, trust the process, and remember that your nails are the perfect canvas for expressing exactly how you want to feel.
