

There’s something about taking the time to get your nails done before a date that shifts your entire energy. When you glance down and see perfectly manicured nails that reflect thought, care, and intention, it actually boosts your confidence in a way that’s hard to explain but impossible to ignore. Long, rounded nails with a romantic theme? That’s the sweet spot between elegant, playful, and undeniably date-night ready—feminine without trying too hard, polished without being stuffy.
The combination of length and shape matters more than you might think. Round nails are inherently softer and more approachable than sharp stiletto shapes, yet they still read as sophisticated and intentional. They’re also dramatically easier to wear on a daily basis, which means your manicure won’t sabotage you mid-date when you’re trying to text, eat, or hold a drink. The heart motif—whether subtle or bold—brings an unmistakable romantic energy that tells your date you’re ready to have fun and lean into the vibe of the evening.
What makes these designs work is that they walk the line between statement and wearable. You’re not looking for something so outrageous it distracts from actual conversation. Instead, these are designs that spark genuine compliments when someone really notices them, feel special to wear, and photograph beautifully if the moment calls for it. The nail designs below represent different moods, color palettes, and intensity levels—so whether you’re going for classic elegance, bold glamour, or romantic playfulness, you’ll find something here that feels authentically you.
1. Classic Red with Gold Heart Accents

You cannot go wrong with the timeless combination of deep red polish and shimmering gold details. Red reads as confident, put-together, and undeniably date-night ready, while gold adds a touch of luxury without pushing into costume territory. The beauty of this design lies in its restraint—the gold hearts don’t overwhelm the nail, they enhance it.
Why This Design Works for Date Night
Red nails have been a symbol of elegance and romance for decades, and that’s not changing anytime soon. When you choose a quality red formula—something with depth and richness rather than a flat, bright red—it instantly elevates your entire appearance. Adding gold hearts keeps the design feminine and romantic while maintaining an air of timeless sophistication that works for upscale dinners, casual coffee dates, or anything in between.
How to Achieve the Look
- Use a classic red polish as your base (think burgundy or true red rather than orange-red tones)
- Apply two coats for full, opaque coverage and allow each to dry completely
- Use a thin nail art brush or toothpick dipped in gold leaf polish or gold gel to create small heart shapes on select nails
- Seal everything with a glossy top coat for that luxe, polished finish
- Consider placing the gold hearts on your ring and pinky fingers while keeping the other nails solid red for balance
Pro tip: If free-hand hearts feel intimidating, use gold adhesive heart stickers designed for nails—they look identical to hand-painted versions and take zero artistic skill.
2. Soft Pink with Ombré Heart Gradient
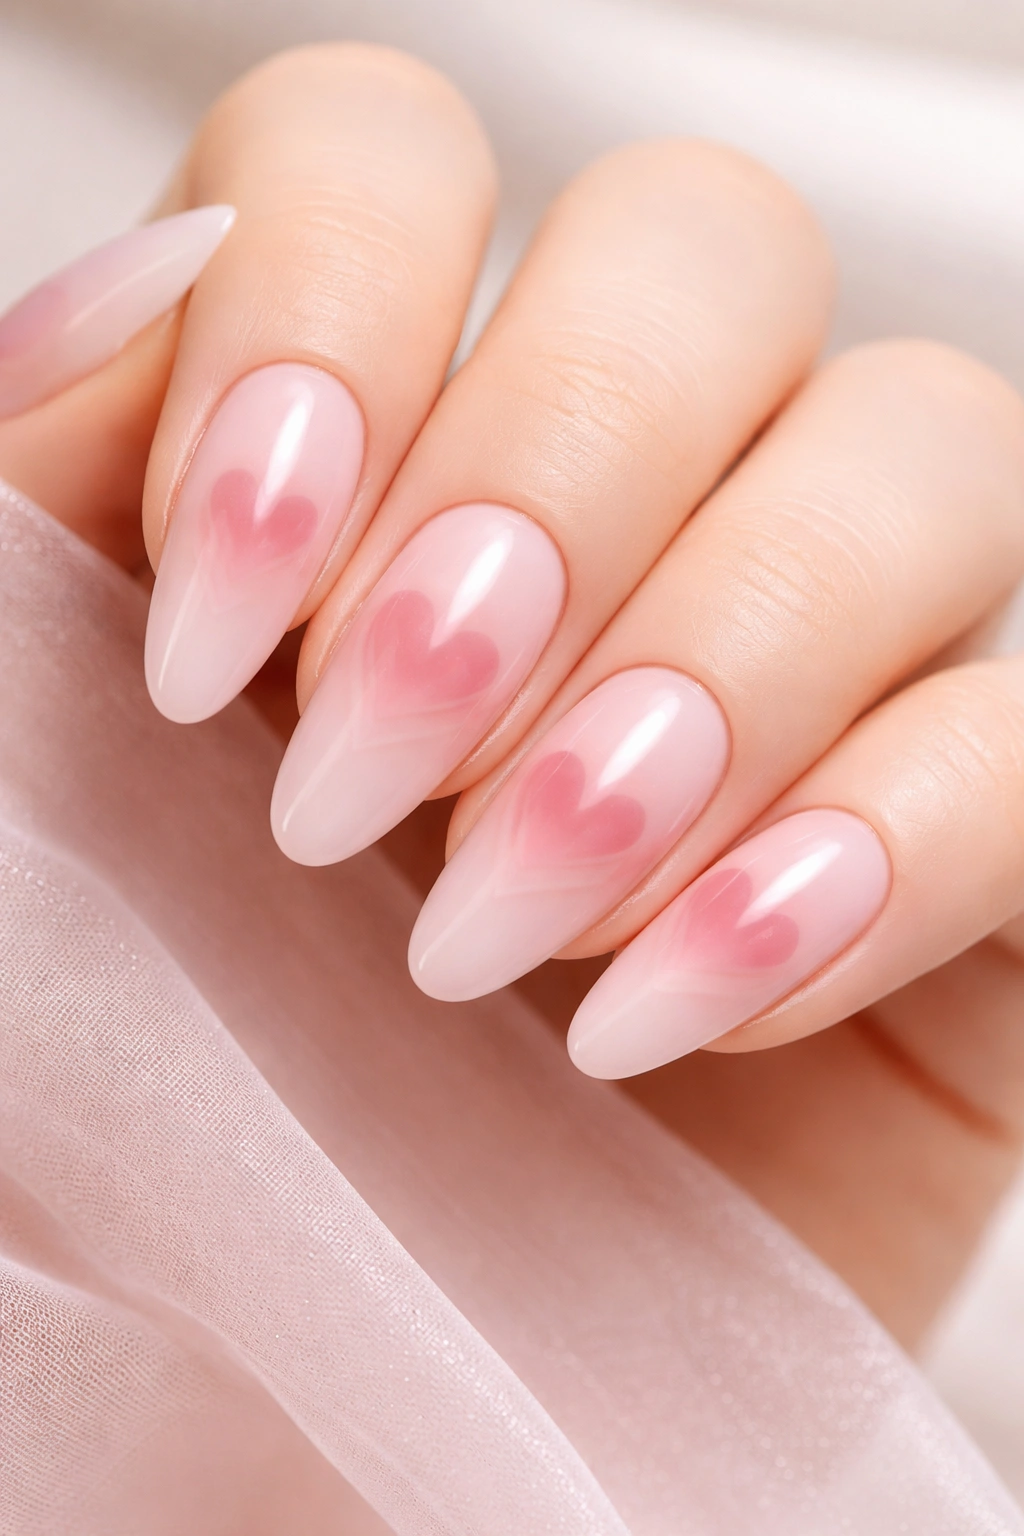
This design combines the universally flattering soft pink base with an ombré gradient that transitions from blush to deeper rose within each heart. It’s romantic without being saccharine, elegant without feeling overdone, and the gradient effect makes it feel hand-crafted and intentional.
Why This Design Reads as Effortlessly Romantic
Soft pink is arguably the most universally flattering color for date night nails because it’s soft enough to feel approachable yet refined enough to read as intentional. The ombré gradient within the heart shape adds dimension and visual interest without making the design feel chaotic or busy. This is the kind of nail design that makes people say, “That’s so pretty—did you do that yourself?” It looks intricate and artistic without requiring advanced nail art skills to execute.
Building the Ombré Heart Effect
- Start with a base of soft pink or blush nail polish
- Apply two full coats and let dry
- Create heart shapes using a sponge technique: dab deeper rose or mauve polish onto a makeup sponge, then gently tap it onto the nails to create a gradient effect
- Use a thin brush to define the heart outline with the deeper shade
- Top with a glossy sealer for a professional finish
- This works beautifully on 2-3 accent nails while keeping the other nails solid blush pink
Pro tip: Keep a small makeup sponge dedicated to your nail kit—it’s the easiest way to achieve gradient effects without special nail equipment.
3. Nude with Holographic Heart Details
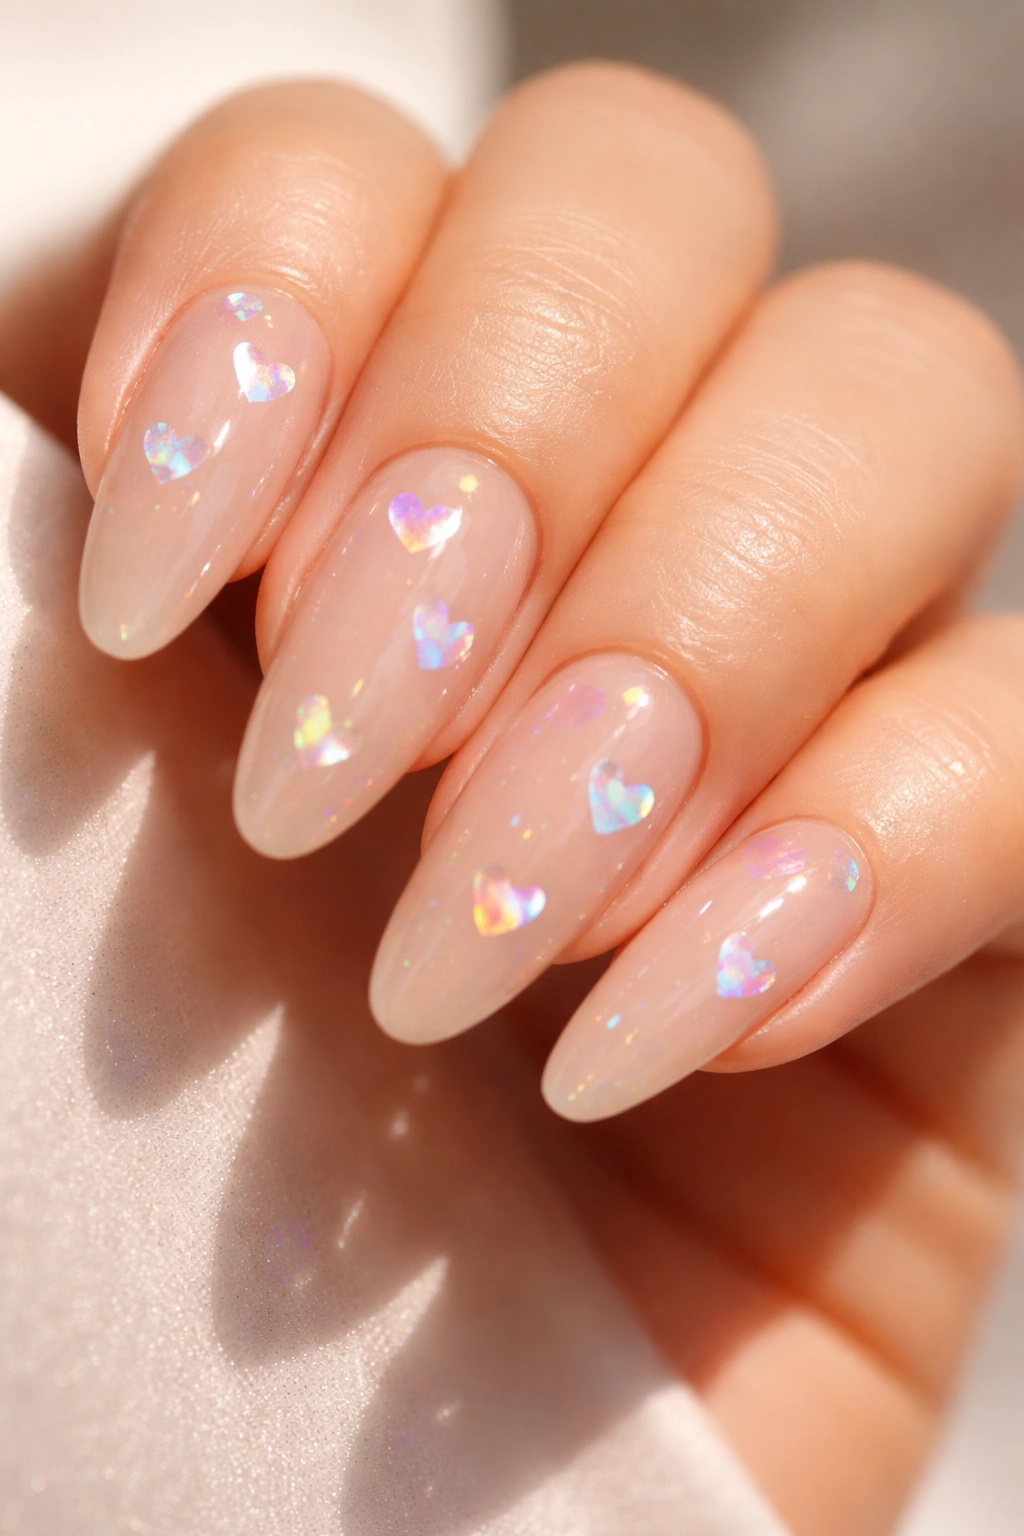
Holographic accents are the secret weapon for nails that look extraordinary under any lighting. A warm nude base keeps everything grounded and universally flattering, while holographic heart details catch light and create rainbow reflections that feel playful and modern without looking costume-y.
The Magic of Holographic Elements
Holographic finishes have evolved beyond cheesy and into genuinely sophisticated territory when applied thoughtfully. Under soft lighting at a restaurant, these hearts will shimmer subtly. Under natural light or the flash of a phone camera, they come alive with prismatic color shifts. This makes the design feel special and date-specific—like you put real thought into what to wear for this occasion.
Application Method for Best Results
- Apply two coats of warm nude or beige base polish and allow to fully cure
- Use holographic heart stickers or hand-paint small hearts using holographic gel or nail polish
- Holographic products work best over a slightly sticky base, so avoid wiping the sticky residue if using gel products
- Alternatively, use holographic glitter suspended in clear polish for a more subtle effect
- Seal with a glossy top coat to protect the holographic finish and keep it shining
- Apply to accent nails (index and middle finger, plus thumbs) for maximum impact
Pro tip: Holographic products look most impressive in photos when there’s a light source nearby—something to consider if you want nails that photograph beautifully.
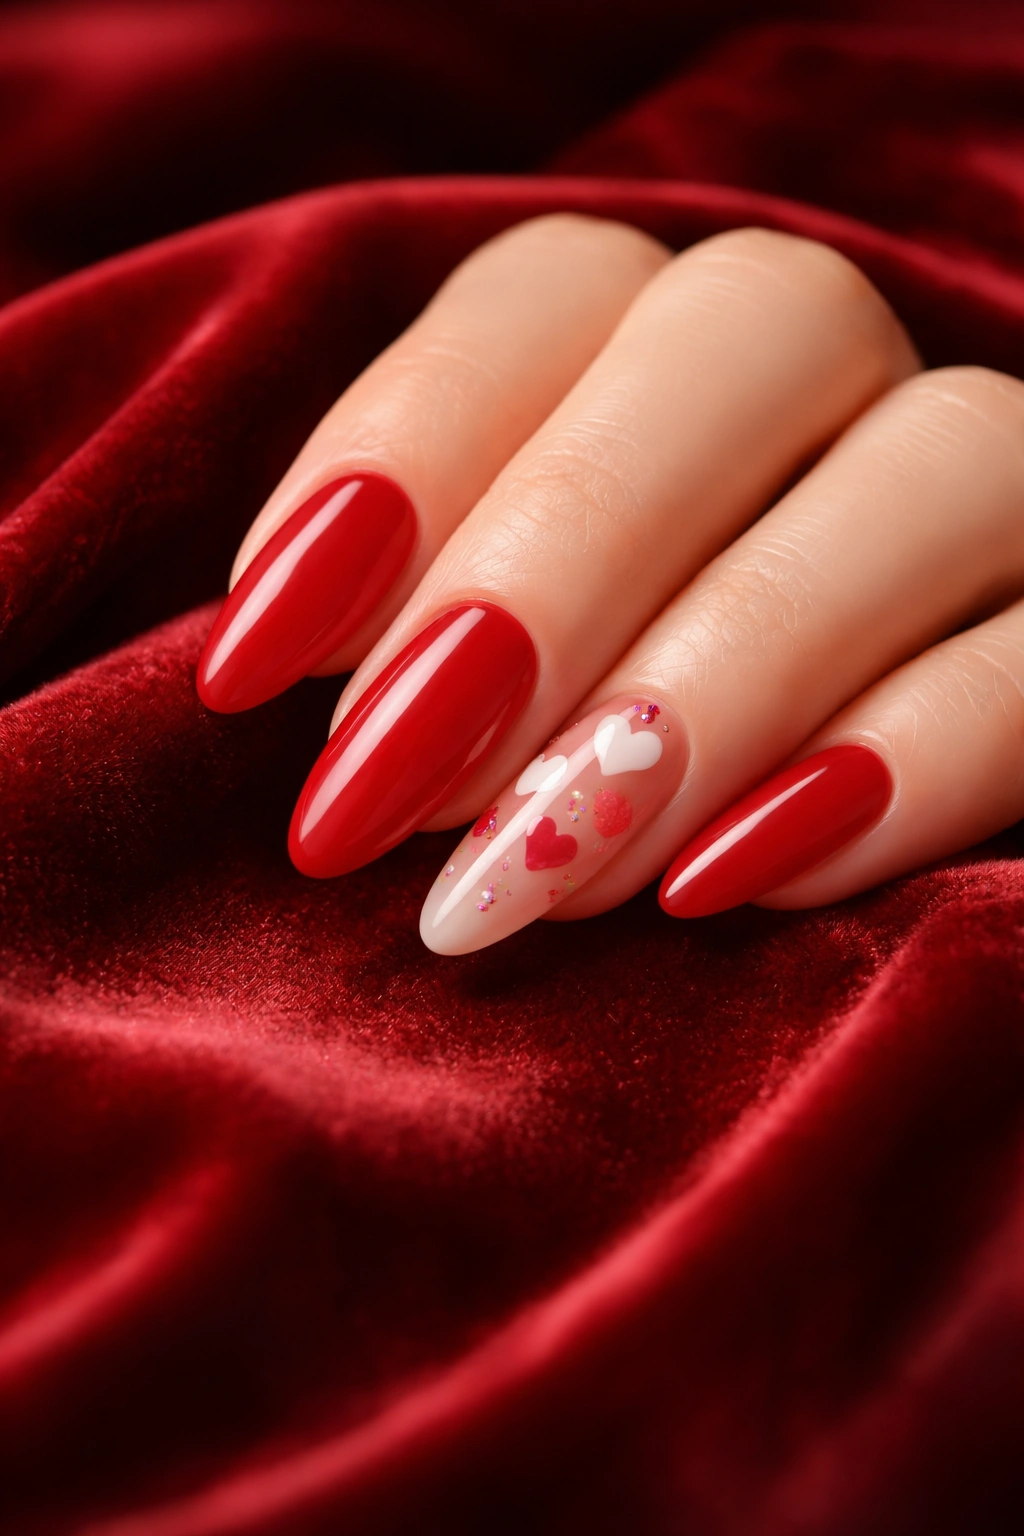
4. Burgundy with Delicate White Heart Outline
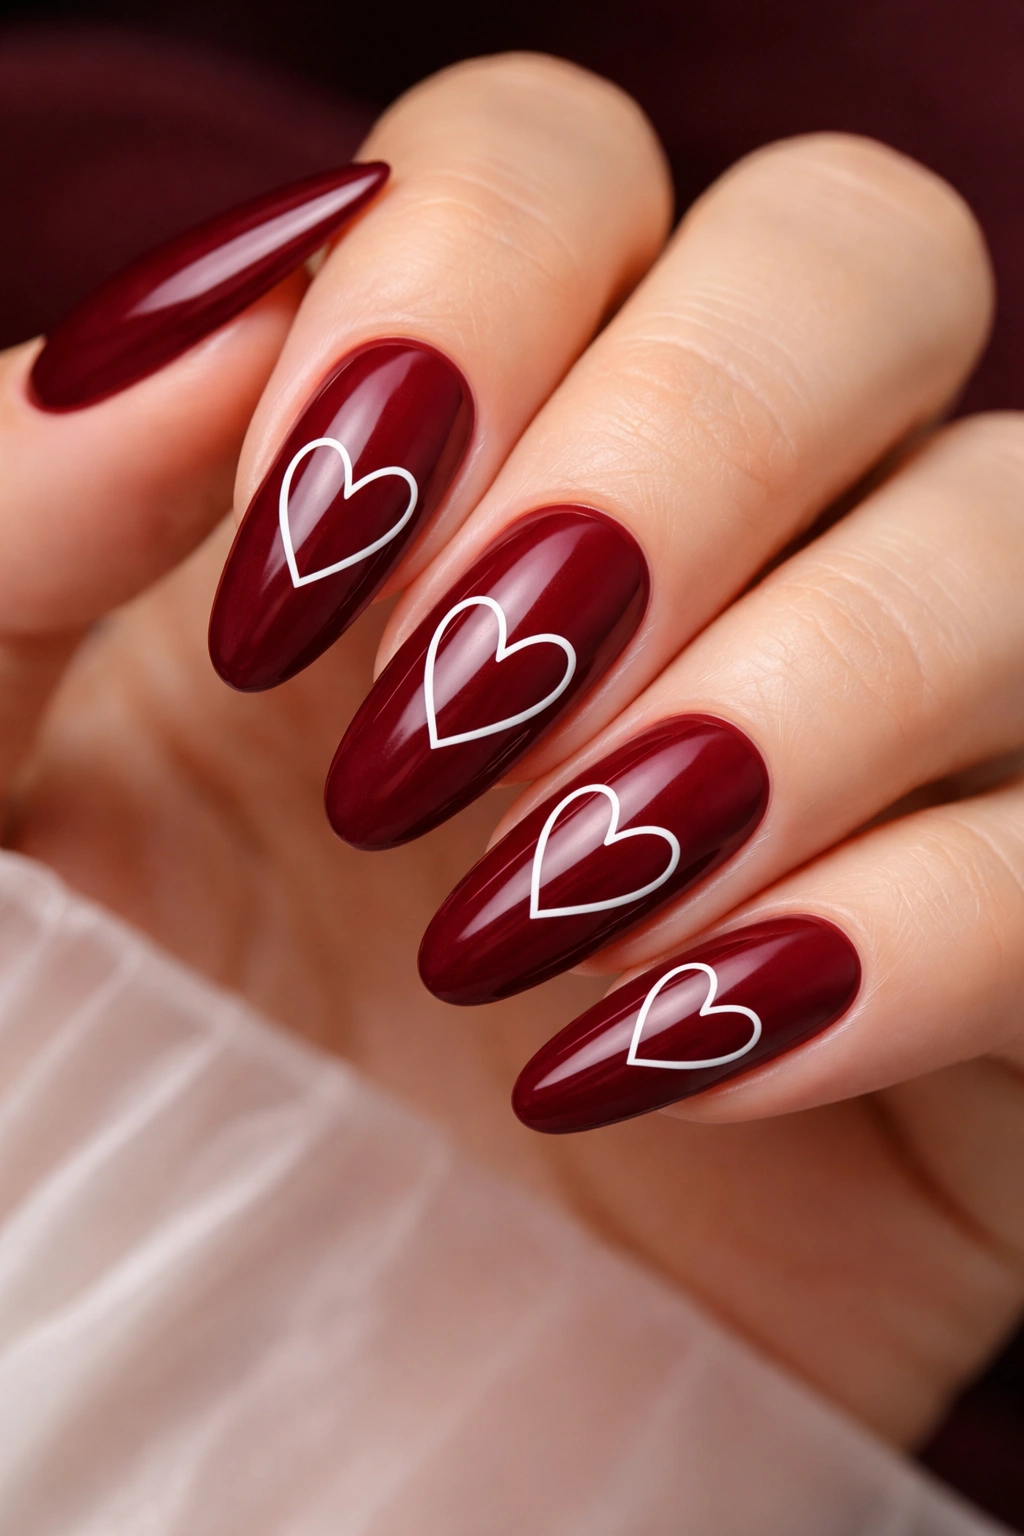
This design flips the script by using a rich burgundy base with white heart outlines instead of filled shapes. It’s sophisticated, slightly edgy, and works beautifully for date nights where you want to feel both romantic and confident rather than specifically cutesy.
Why White on Burgundy Reads as Upscale
The contrast between deep burgundy and crisp white creates a striking visual that feels intentional and designer-level. This isn’t a saccharine pink-and-white combination—it’s a more mature, confident approach to romantic nail art. The outlined hearts rather than filled shapes add a modern, minimalist touch that prevents the design from feeling too valentines-card-y.
Creating Crisp White Heart Outlines
- Start with 2-3 coats of deep burgundy or wine polish depending on pigmentation
- Use a thin white gel or polish pen to create heart outlines, or use a very fine nail art brush
- White polish can be tricky to apply neatly, so go slowly with steady strokes
- If you make mistakes, use a small brush dipped in acetone or a nail art corrector pen to clean up edges
- Apply hearts to 3-4 accent nails for visual impact without overdoing it
- Seal with a glossy top coat
- Add a second outline if needed for extra definition after the first layer dries
Pro tip: Practice the heart outline on a strip of paper first if hand-painting feels daunting—most people can execute the outline after a quick practice run.
5. Blush Pink with Rose Gold Foil Hearts
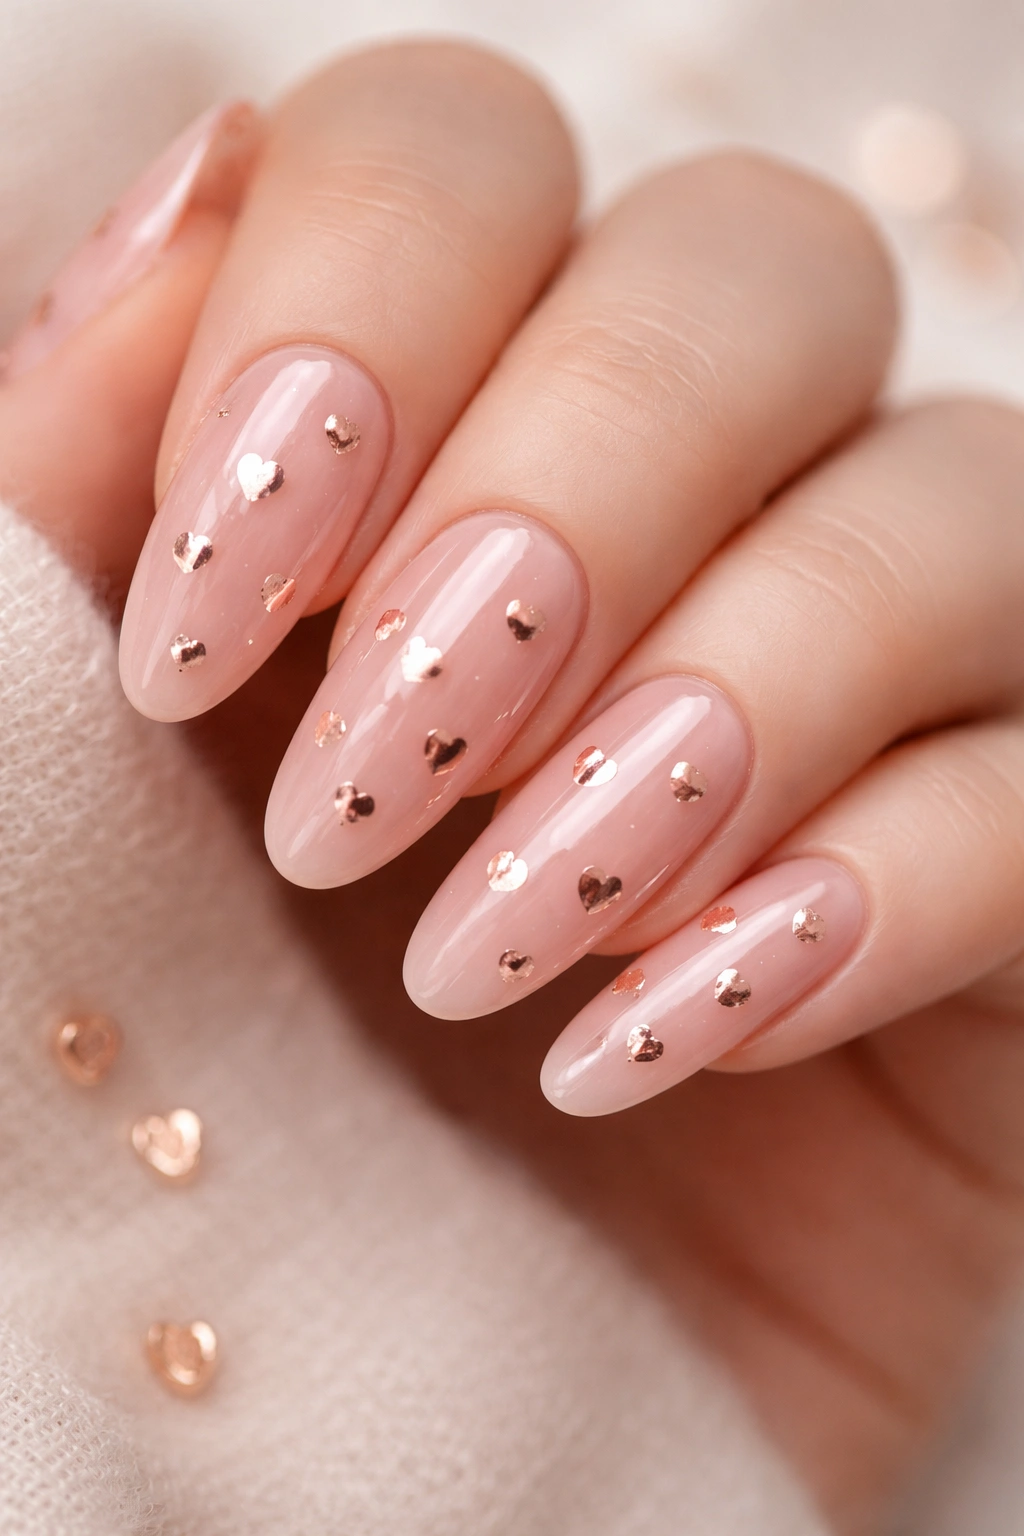
Rose gold is having a moment for excellent reasons—it’s flattering, warm, and feels both romantic and modern. Combined with a soft blush base and metallic foil hearts, this creates a design that feels like actual jewelry for your nails rather than something playful or costume-y.
Why Rose Gold Elevates Any Base Color
Rose gold occupies a fascinating middle ground between warm and cool tones, which makes it compatible with an enormous range of skin tones. On blush pink, rose gold foil creates a monochromatic, tonal effect that reads as refined and intentional. The metallic foil catches light differently than holographic finishes—it creates a concentrated, luxe shimmer rather than a rainbow spread, which feels more sophisticated and date-appropriate.
Applying Foil Hearts for Maximum Impact
- Use a blush or light pink base and apply 2-3 coats for full coverage
- Rose gold foil hearts are applied using special foil adhesive—apply a thin layer of the adhesive to your nail
- Cut rose gold foil into small heart shapes and press firmly onto the adhesive side
- Work one nail at a time so the adhesive doesn’t dry before you apply the foil
- Seal with a top coat to protect the foil and keep it from peeling
- Place foil hearts on accent nails—index finger, middle finger, and thumbs work best
- The foil will last 1-2 weeks with careful handling and a strong top coat
Pro tip: Rose gold foil can be delicate, so avoid submerging your nails in water immediately after application—wait at least 30 minutes for the sealer to fully harden.
6. Nude with Glitter Gradient Hearts
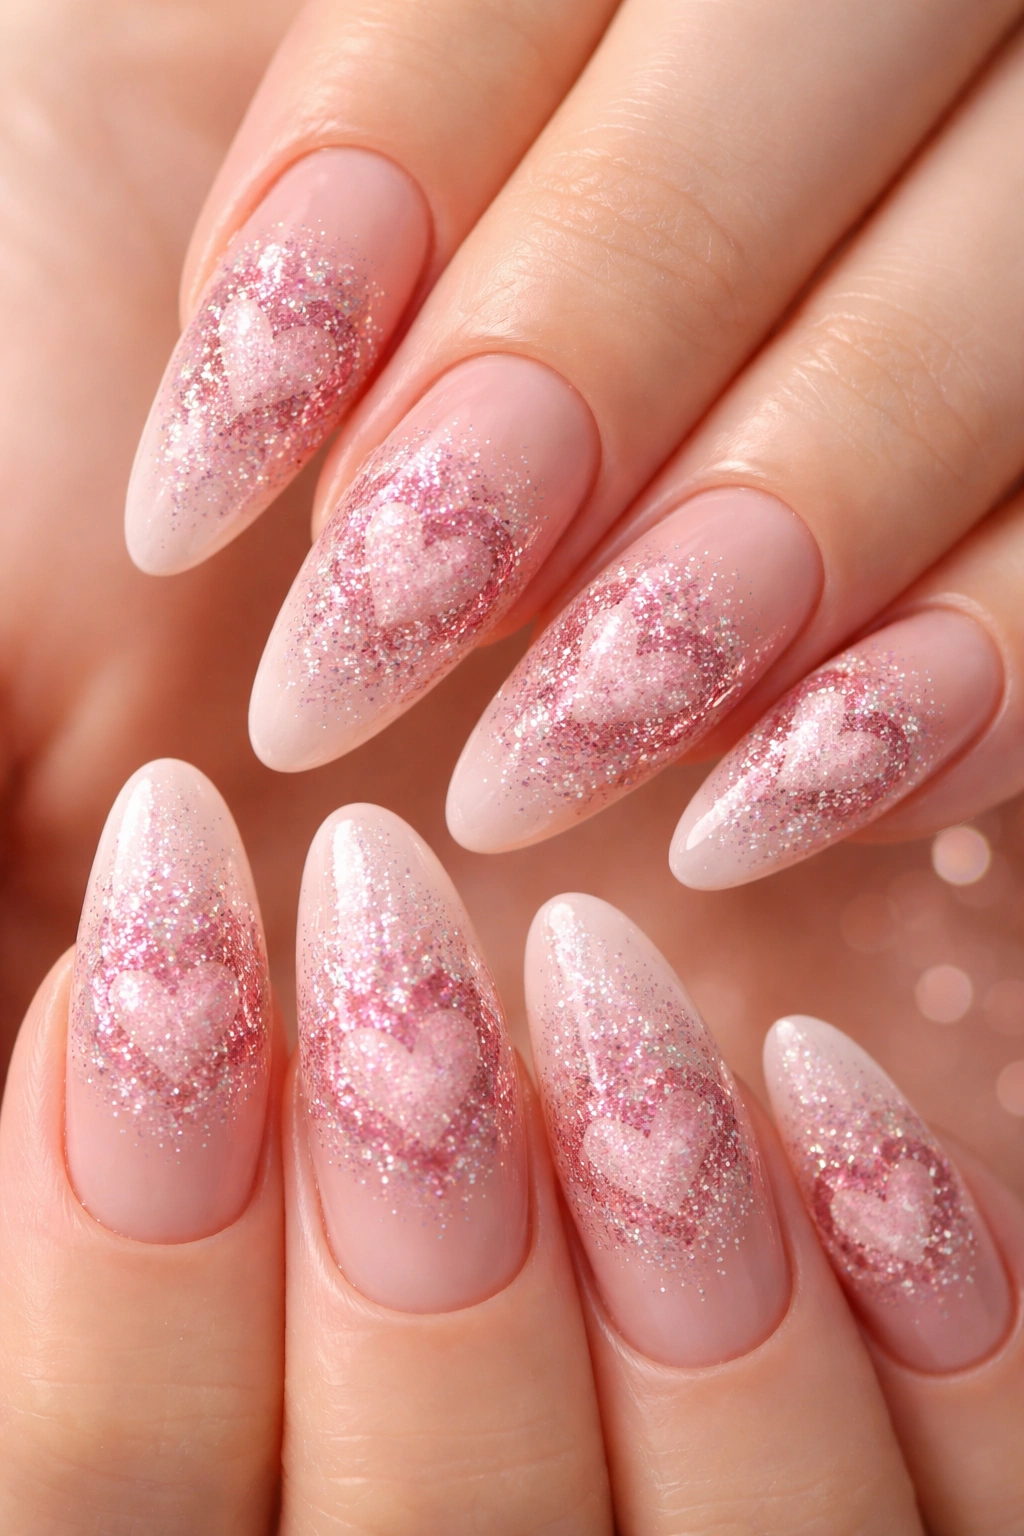
This design layers a glitter gradient that forms the shape of hearts over a classic nude base. It’s playful, sparkly, and romantic without being over-the-top or costume-y—the kind of design that catches light when you move your hands but reads as sophisticated in photos.
The Glitter Gradient Effect
Glitter gradients work by layering glitter particles from dense to sparse, creating a soft fade effect. When applied in the shape of hearts, this technique creates dimension and depth that makes the hearts appear three-dimensional. The gradient effect is also forgiving—slight imperfections in the shape actually add to the hand-crafted, artisanal feel.
Building Your Glitter Gradient Heart
- Apply 2-3 coats of nude base polish and let dry completely
- Mix glitter polish or loose cosmetic glitter with clear nail polish to create your own glitter mixture
- Using a sponge, apply a concentrated layer of glitter to the center of where your heart will be
- Gradually sponge lighter glitter mixtures outward to create the fade effect
- Define the heart shape by carefully painting the outline with clear polish or a nude shade
- Apply glitter to multiple nails (3-4 accent nails) for a cohesive look
- Seal with a glossy, thick top coat to smooth the glitter and prevent particles from catching on clothing
Pro tip: Loose cosmetic glitter gives you more control over density than pre-mixed glitter polish, and it’s cheaper too—find it in the craft supply section of most stores.
7. Deep Plum with Metallic Silver Hearts
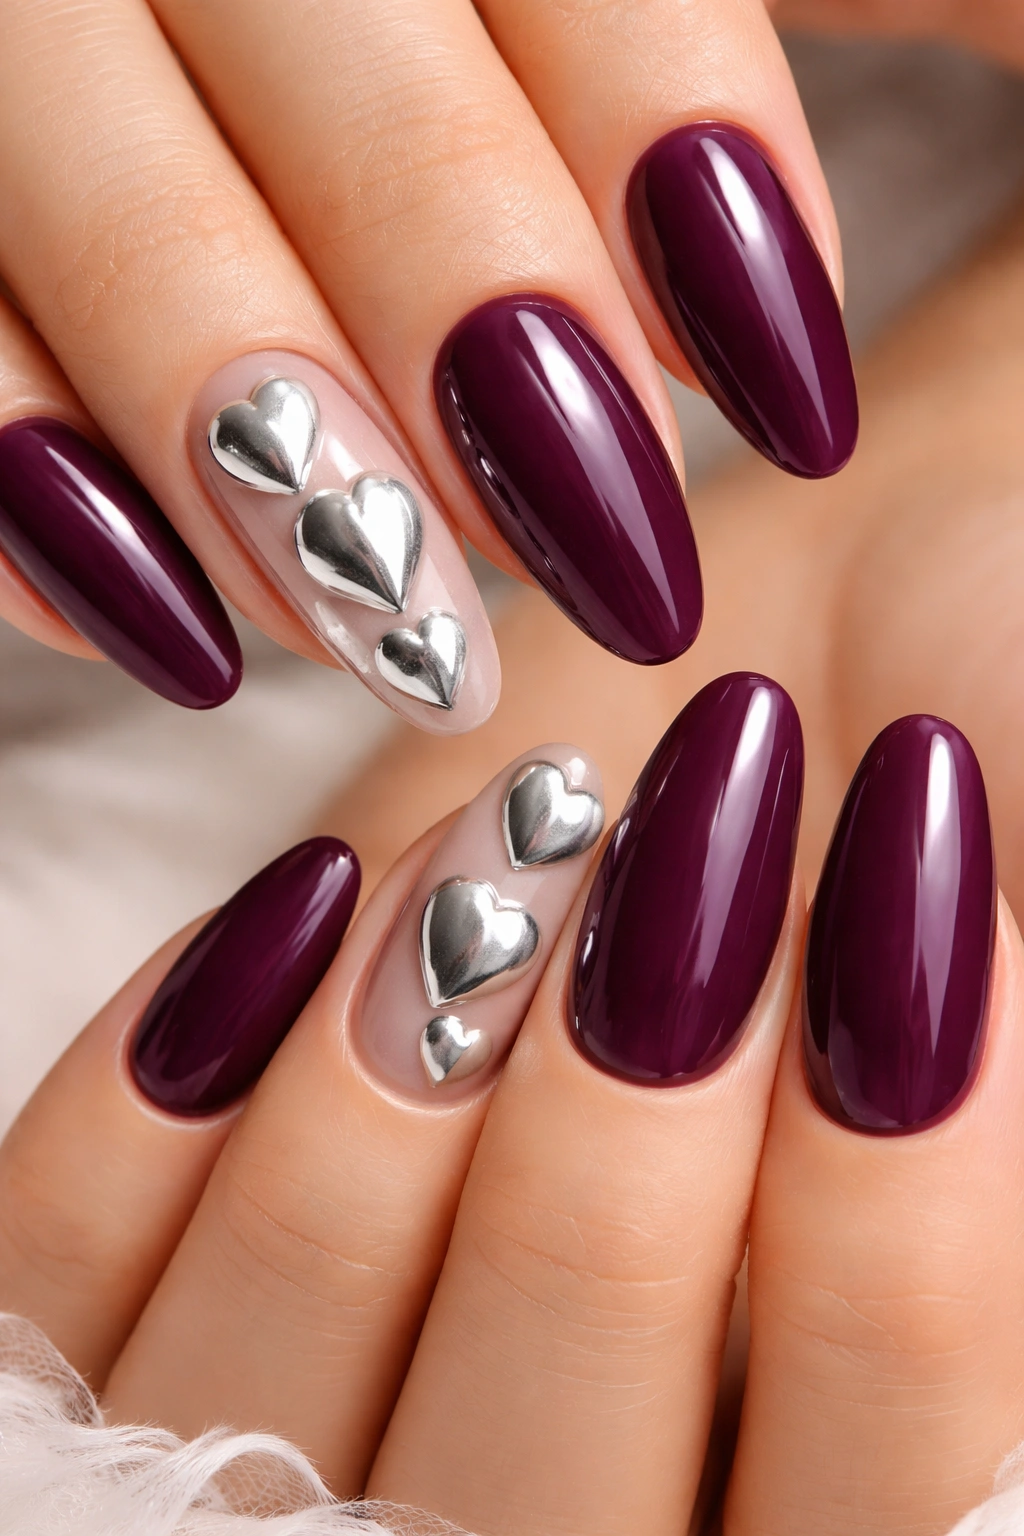
Plum is an underrated choice for date night because it reads as romantic and sophisticated without the obviousness of red or pink. Silver metallic hearts add a cool-toned elegance that makes this design feel upscale and modern rather than traditionally romantic in a predictable way.
Why Plum Works for Romantic Occasions
Plum occupies the intersection between playful and serious—it’s rich enough to feel intentional and mature, yet it has a creative, slightly daring energy compared to classic date-night colors. The purple family is inherently romantic in a more interesting way than expected shades, which makes you stand out while still completely nailing the date-night aesthetic.
Applying Silver Hearts to Plum
- Choose a true plum or eggplant shade rather than something that reads as murky or muddy
- Apply 2-3 coats for full opacity and allow to dry completely
- Use a silver metallic gel or polish to create small, evenly-spaced hearts on select nails
- Silver can be tricky to apply neatly because it’s often a thinner consistency than regular polish—use a brush with good bristle control
- Apply hearts to 2-3 accent nails (typically ring finger, pinky, or index) while keeping other nails solid
- Seal with a glossy top coat to protect the metallic finish
- If freehand painting feels challenging, use pre-made metallic silver stickers in heart shapes
Pro tip: Silver metallic looks most striking when applied over a very clean, smooth base—take extra time making sure your plum polish is perfectly even before adding hearts.
8. Cream with Hand-Painted Rose Details
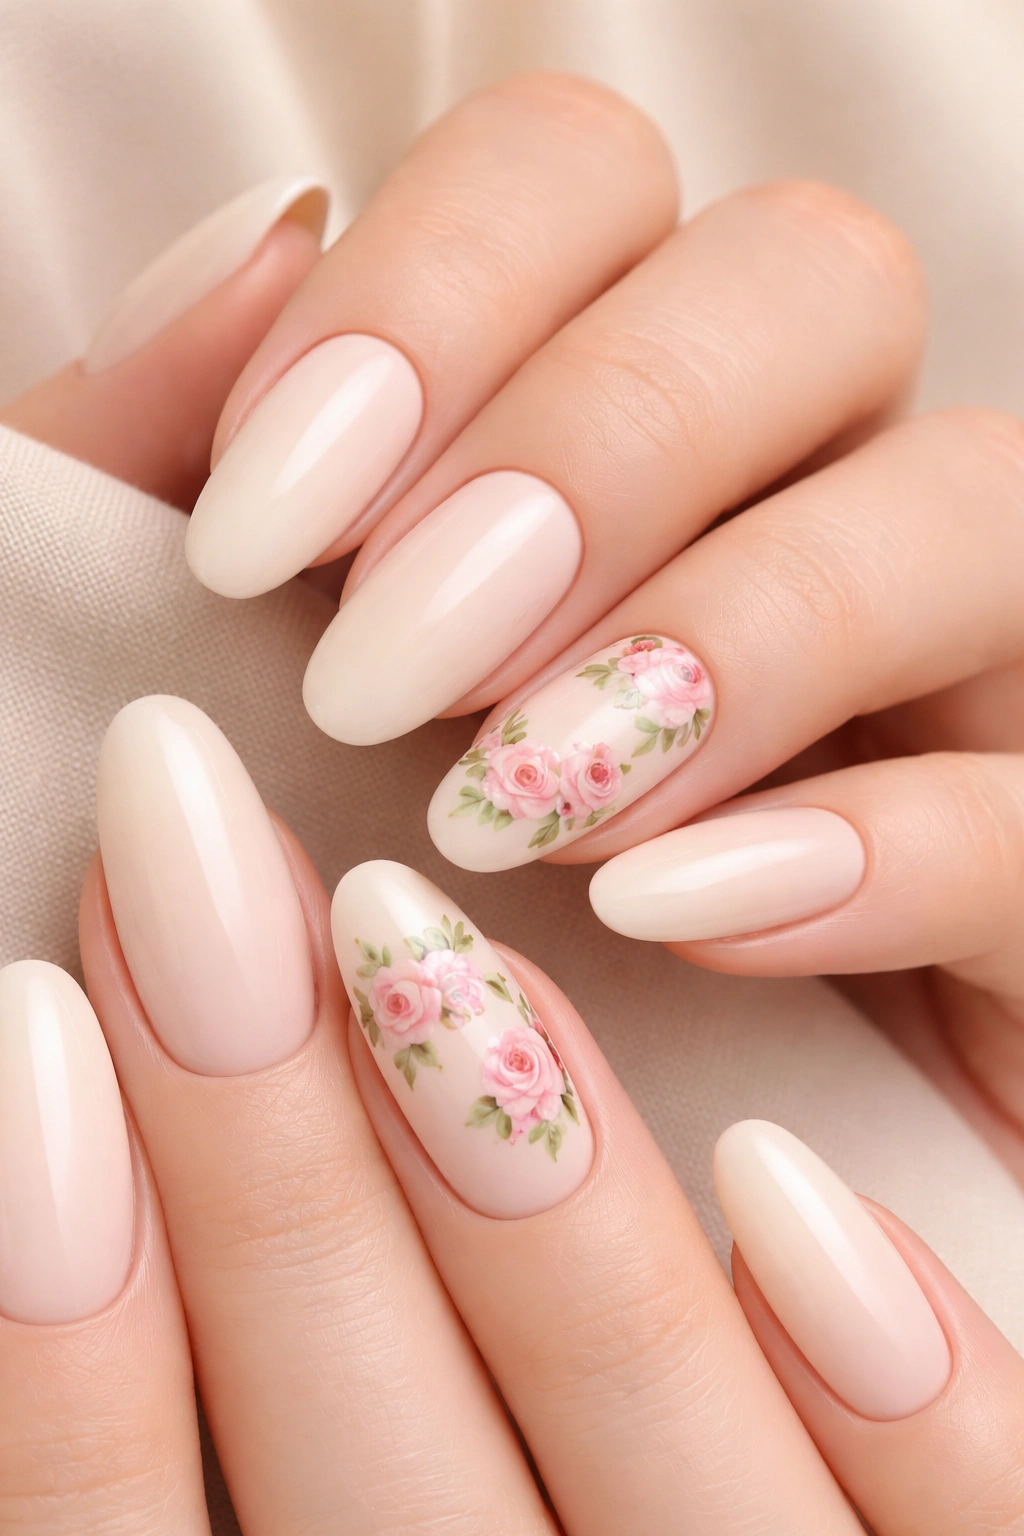
This design elevates beyond simple hearts by painting small, detailed roses instead. Cream provides a clean canvas that makes the roses pop, and the design reads as deeply romantic and artistic without feeling costume-y. It’s the choice for someone who wants something truly special and is willing to invest in quality nail art.
Why Hand-Painted Roses Feel Elevated
While hearts are romantic and cute, hand-painted roses communicate sophisticated romance and intentionality at a different level. This design says you’re not just looking for date-night nails—you’re looking for wearable art. The complexity of a rose compared to a simple heart also makes this design memorable and conversation-starting in the best possible way.
Executing Hand-Painted Rose Design
- Use a pale cream or ivory base and apply 2-3 coats for a perfect foundation
- Use a very fine detail brush (size 0 or smaller) with gel or quality acrylic paint-style nail polish
- Paint tiny, delicate roses using traditional rose painting techniques: start with a spiral center, then add petals gradually
- You only need 2-3 roses per nail for maximum impact without overwhelming the design
- Paint roses on accent nails only—typically 2-3 nails maximum
- Allow paint to dry completely before sealing with a glossy top coat
- This is a design where professional application is honestly worth the investment if painting isn’t your strength
Pro tip: Cream base with hand-painted details is easier to execute than white, which can look stark and chalky—cream photographs beautifully and provides a softer canvas.
9. Soft Lavender with Ombre Pearl Hearts
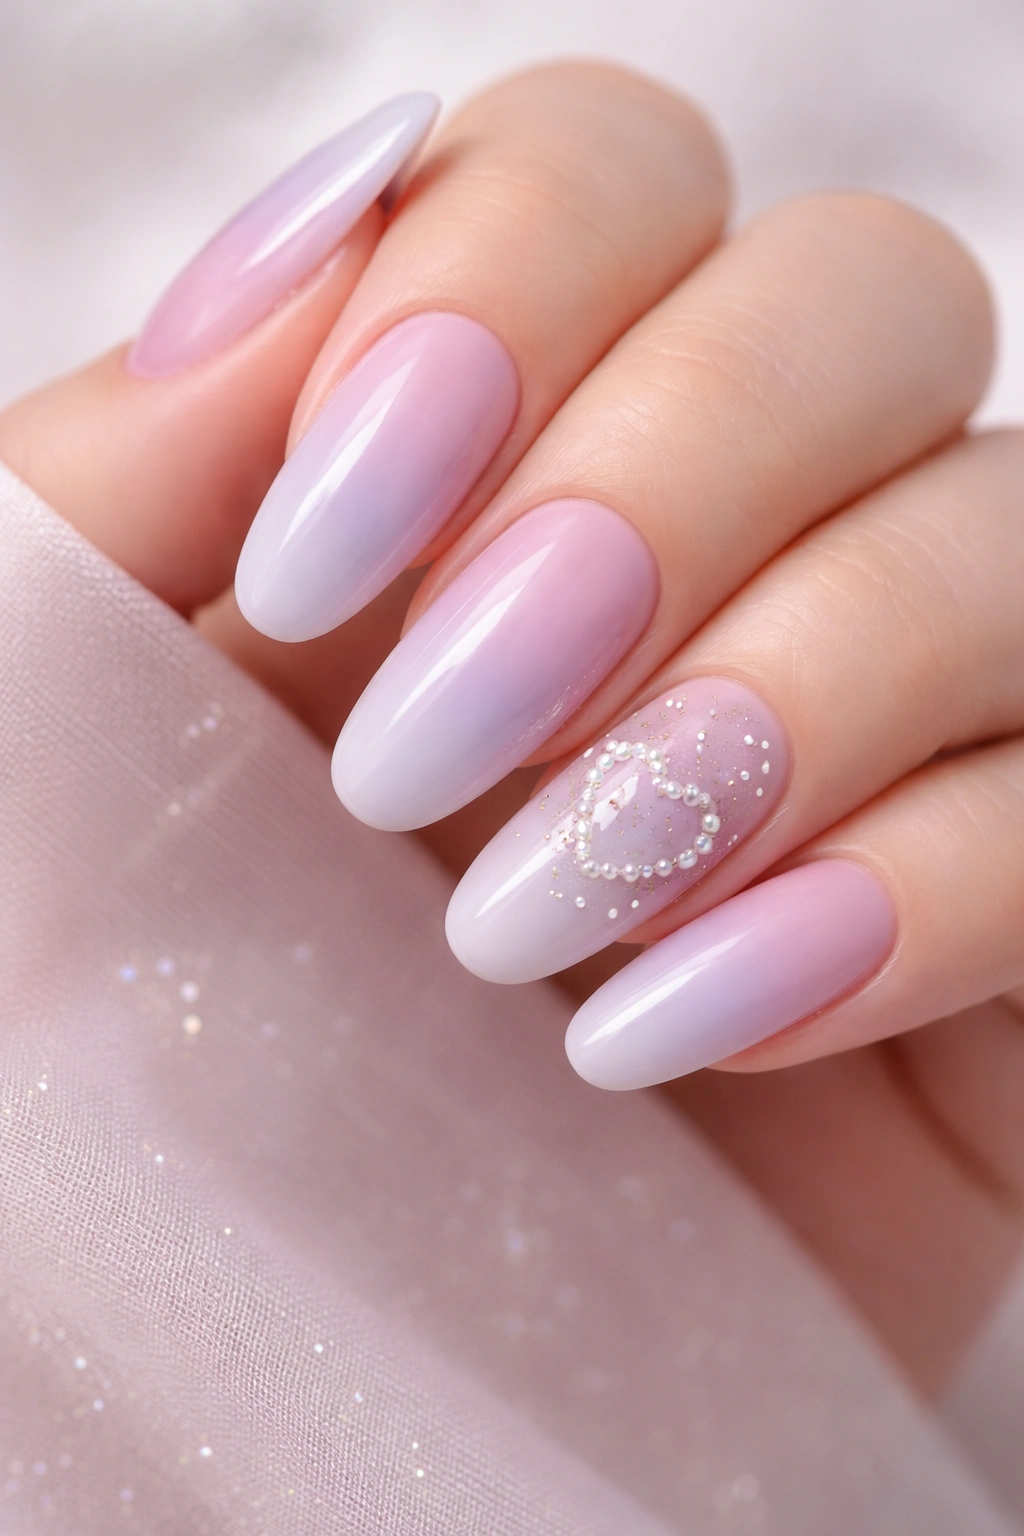
Lavender is inherently romantic without being pink, making it perfect for someone who wants to feel feminine and date-ready but prefers cooler tones. Pearl hearts create an iridescent effect that feels subtle and luxurious, catching light beautifully without the intensity of holographic or glitter finishes.
The Appeal of Lavender for Date Nails
Lavender hits a sweetspot: it’s distinctly romantic and elegant, but it also feels slightly unexpected and creative compared to the standard pink or red date-night color. It works across all skin tones (warm or cool) and pairs beautifully with both warm and cool-toned clothing, giving you maximum flexibility for your outfit choice.
Creating Pearl Heart Details
- Apply 2-3 coats of soft lavender or pale purple base polish
- Pearl finishes work best when applied in thin layers over a base—they’re meant to shimmer subtly, not cover completely
- Use a pearl or iridescent gel/polish to create heart shapes on 2-3 accent nails
- Pearl looks particularly beautiful when layered: apply a thin coat, let it dry, then add a second thin coat for more dimension
- The pearl effect works well with hearts because pearls have that luminous quality that makes hearts appear to glow
- Seal with a glossy top coat to enhance the iridescent effect
- Pearl finishes can be delicate, so avoid picking or scratching at the nails
Pro tip: Pearl polish looks most impressive in natural daylight and under warm lighting—it’s the best choice if you’re going somewhere with beautiful ambient lighting.
10. Coral with Gold Leaf Heart Accents
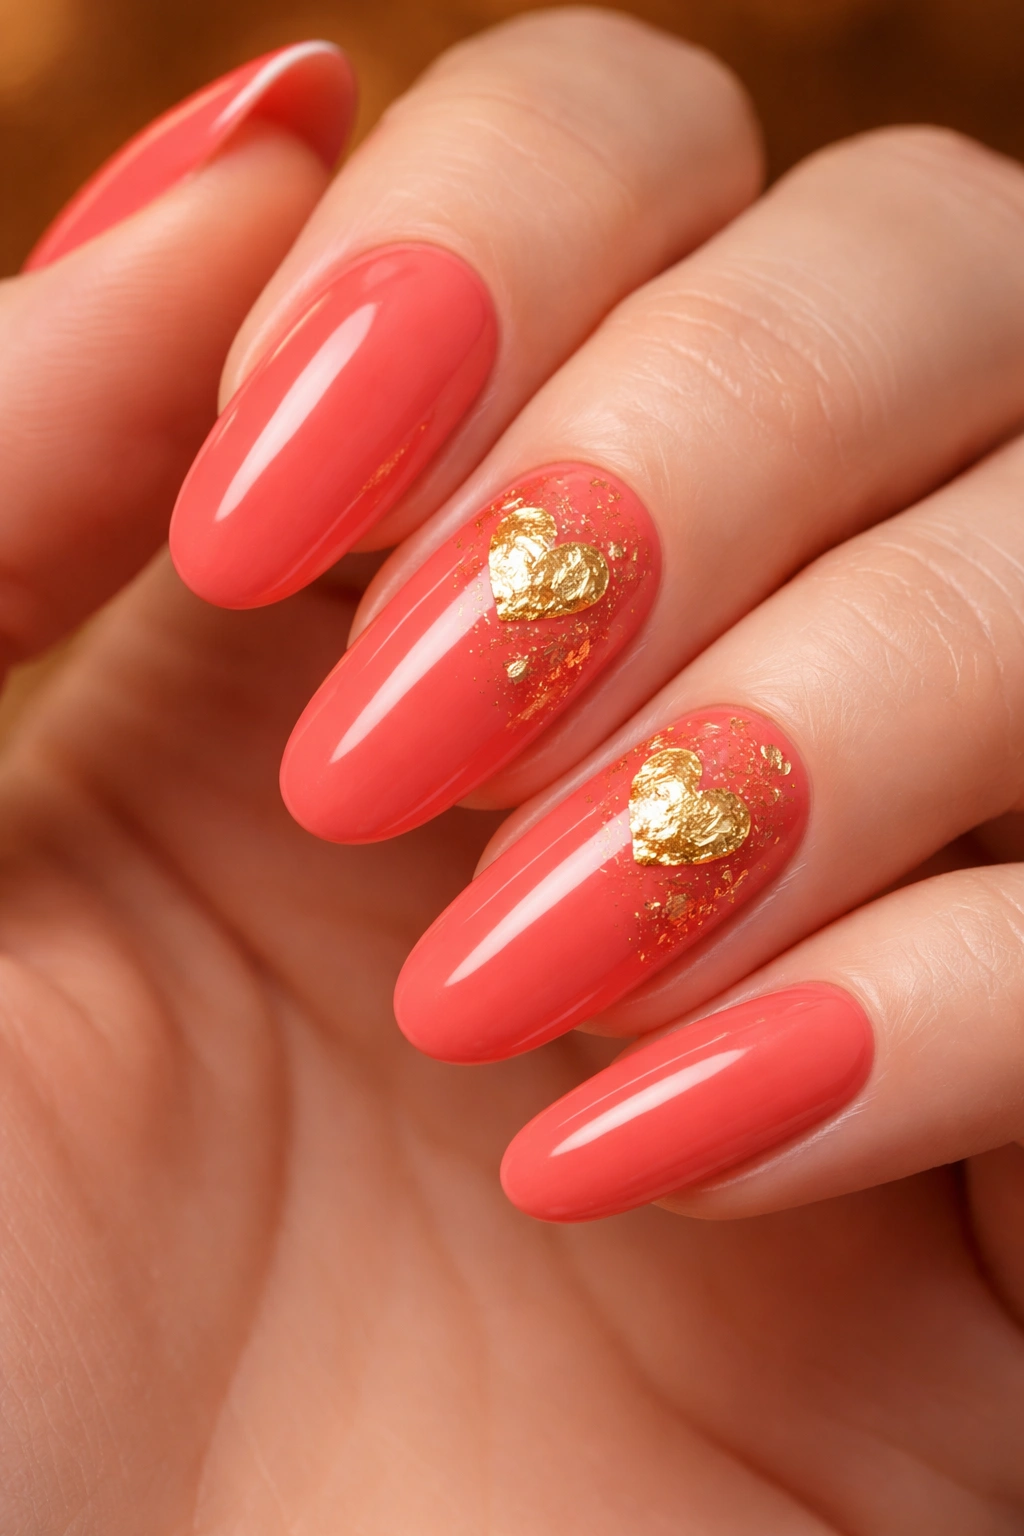
Coral brings warm, happy energy while still reading as romantic and intentional. Gold leaf adds an element of luxury and texture that elevates what could otherwise feel overly playful into genuinely sophisticated territory. This combination works particularly well for someone who wants their nails to feel fun and romantic simultaneously.
Why Coral Feels Date-Night Ready
Coral is often overlooked in favor of pink or red, which is a mistake—it’s warm, flattering, and has an inherent sense of optimism that translates into confidence. Gold leaf on coral creates a sophisticated warmth that feels both romantic and luxe. This is the nail design that makes people say “wow, you look really happy and put-together,” which is exactly the vibe you want on a date.
Applying Gold Leaf Hearts
- Use a true coral shade (not orange-red, not salmon—true warm coral)
- Apply 2-3 coats for an opaque, even finish
- Gold leaf is applied similarly to foil—use a gold leaf adhesive layer on your nail
- Cut gold leaf into small heart shapes and press firmly onto the adhesive
- Work quickly because adhesive dries fast, and you’ll only get one chance per nail
- Seal with a strong top coat to prevent the gold leaf from peeling
- Place gold leaf hearts on 2-3 accent nails for visual impact
- This design lasts 1-2 weeks with careful handling
Pro tip: Practice on a single nail first if you’ve never worked with gold leaf—once you understand how delicate and quick the application needs to be, the rest becomes much easier.
11. Blush with Negative Space Heart Outline
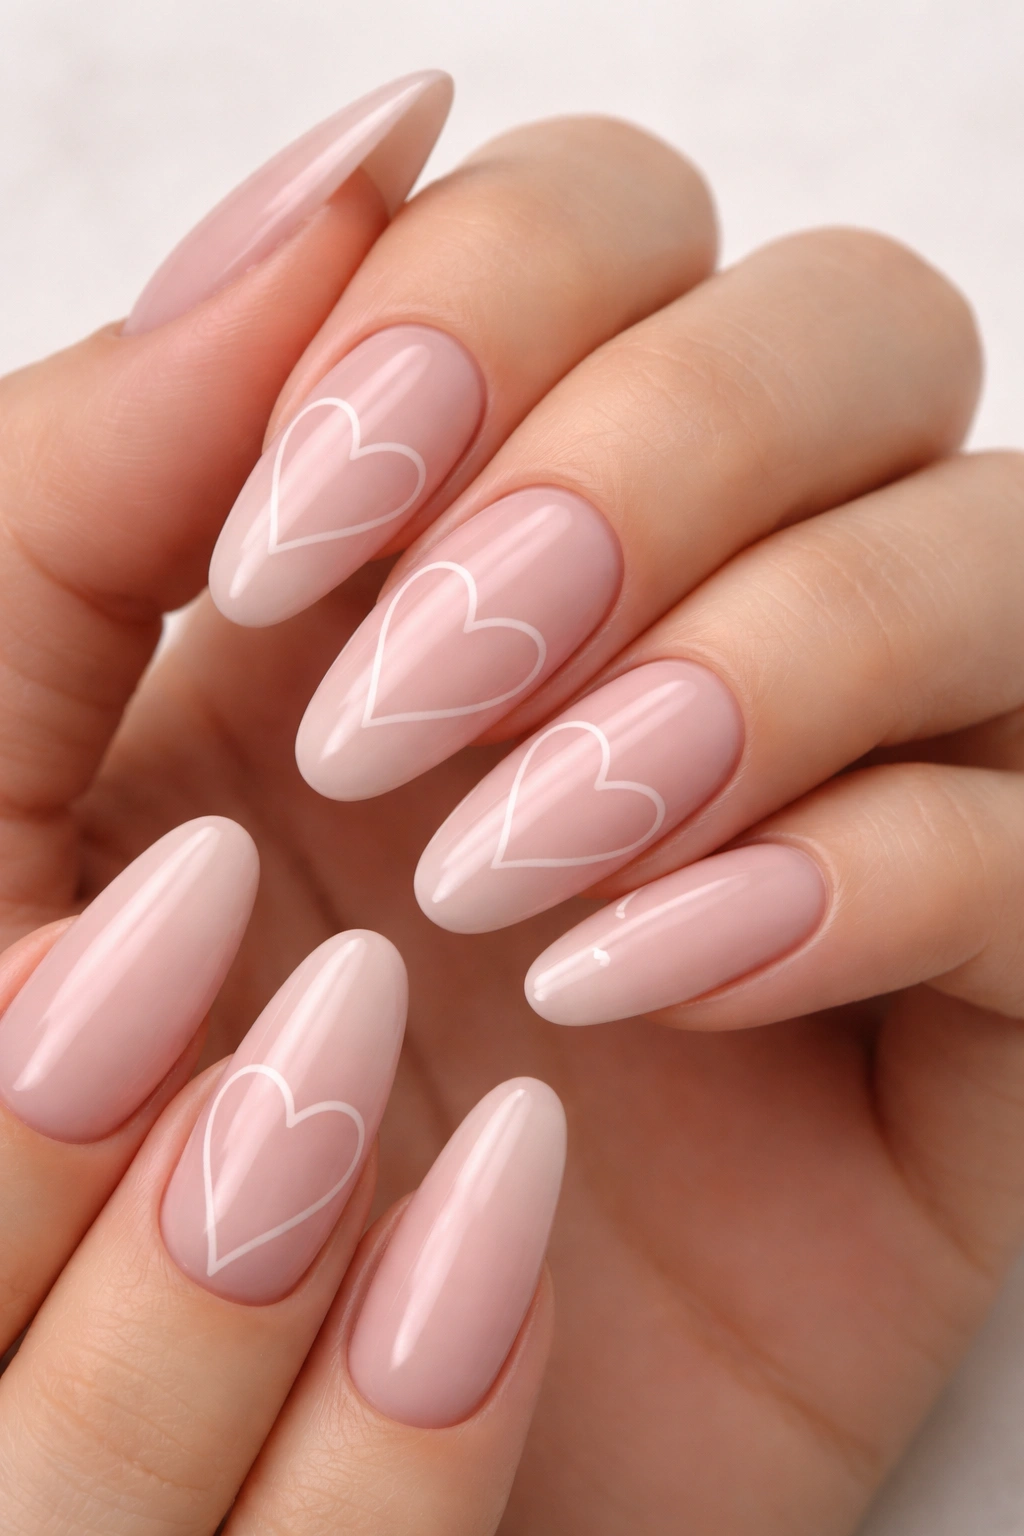
This minimalist design uses the nail itself as the negative space to create heart outlines. The effect is clean, modern, and profoundly romantic in a sophisticated way. Negative space designs are inherently harder to execute than filled or decorated nails, which makes this choice communicate high design sensibility.
The Minimalist Romance of Negative Space
Negative space nail designs are having a major moment because they’re striking, unexpected, and work with any outfit or occasion. A negative space heart is particularly beautiful because the actual nail color becomes the design element—you’re not adding to the nail, you’re working with it. This design appeals to people who prefer understated elegance and want something that reads as artistic without being visually busy.
Creating Perfect Negative Space Hearts
- Start with a blush or neutral base color and apply 2-3 coats
- Use a thin nail art brush and carefully paint clear polish or a nude shade in the shape of a heart outline
- This essentially “removes” the blush color and reveals clear nail or a nude base underneath
- The heart outline should be clean and even—take your time with this step
- Apply to multiple nails for a cohesive look (all 10 nails with hearts works beautifully for this style)
- You can also achieve this effect by using nude base with light colors painted in the negative space, then adding a blush overlay—it’s easier than it sounds
- Seal with a glossy top coat
Pro tip: If your hand-painting isn’t precise enough for clean outline work, use thin striping tape to create the heart outlines—tape off the shape and paint over it, then remove the tape for perfect lines.
12. Classic White with Red Heart Accents
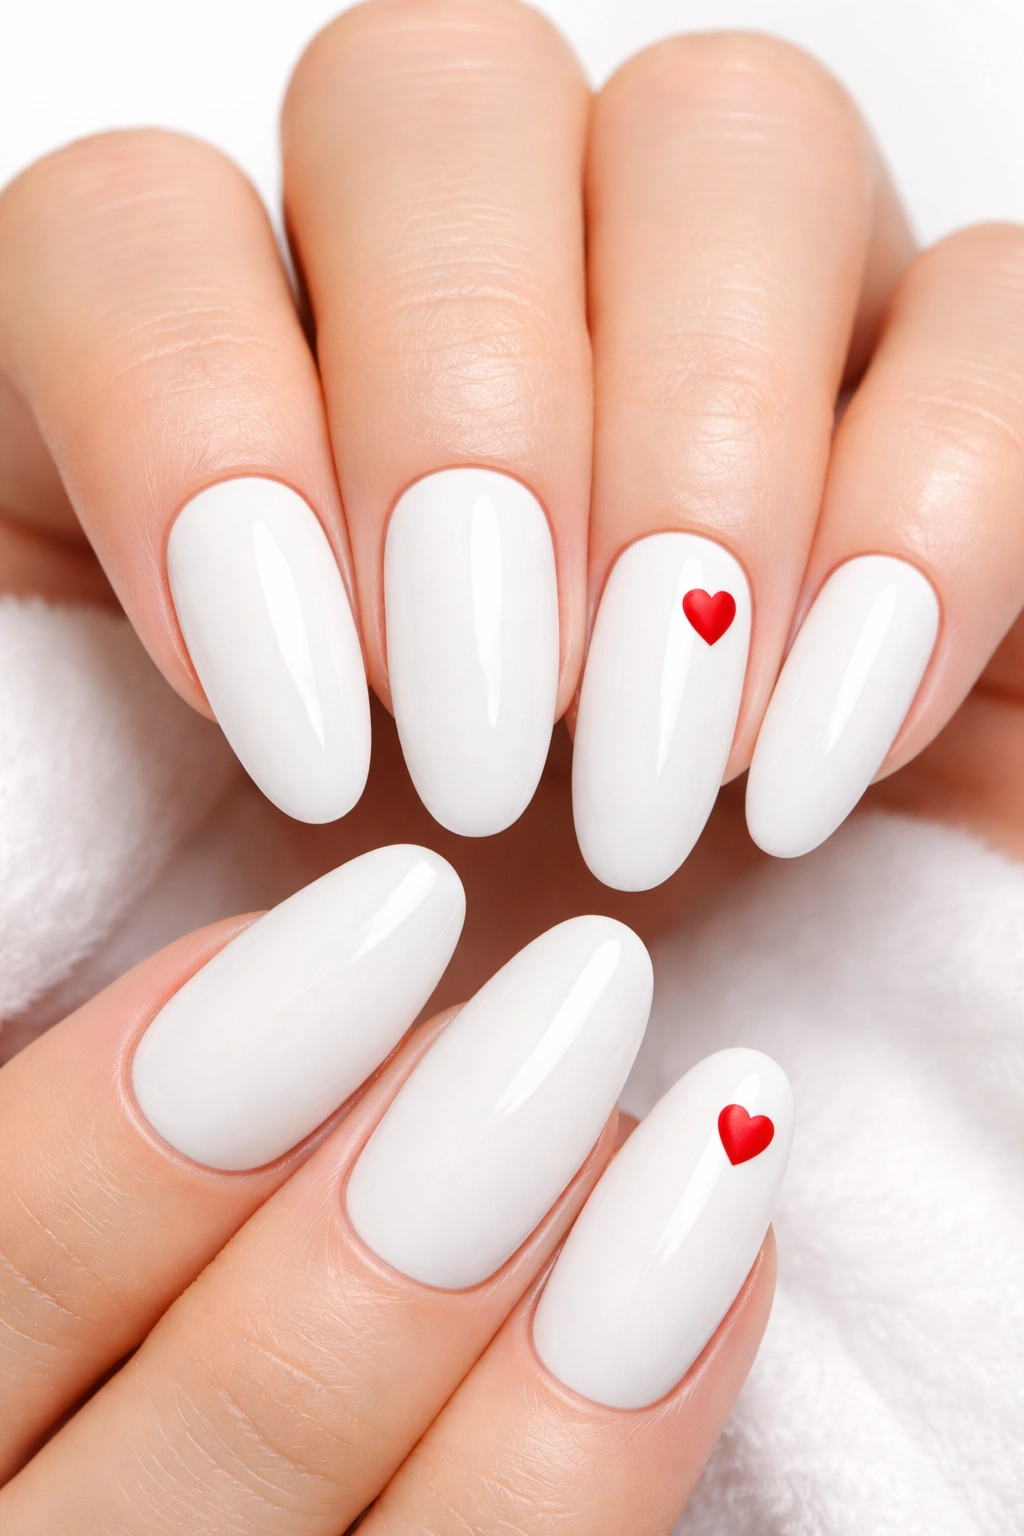
You can’t improve on classic, and white nails with red hearts are the definition of timeless romance. This design is clean, elegant, and unquestionably date-appropriate. It works for any type of date and any setting because it reads as intentional without being trendy or risky.
Why Classic Works
Sometimes the most striking designs are the simplest ones. White nails signal clean elegance and intentionality—you’re not trying to hide anything. The addition of a few red heart accents immediately communicates romance and fun without any ambiguity about where you stand on the date. This design works across all age ranges, professional settings, and casual scenarios because it’s fundamentally balanced.
Executing the White and Red Look
- Use a true white or creamy white (not ivory or off-white for maximum contrast with red hearts)
- Apply 2-3 coats of white and allow to dry completely—white polish often needs extra coats for opacity
- Paint small red hearts using a bright, true red polish or gel
- Place hearts on 2-3 accent nails while keeping other nails solid white for balance
- Red polish can be tricky to apply neatly, so consider using red heart stickers for a perfectly clean design
- Use a glossy top coat to seal everything and create that polished, finished appearance
- The contrast between pure white and true red is what makes this design pop—avoid muddy or muted shades
Pro tip: If white polish is hard to get opaque, start with a white base coat (the sticky kind designed specifically as a base), then apply white polish—this gets you full opacity with just two coats of color.
Final Thoughts
A date night manicure is one of those details that seems small until you realize how much it shifts your entire energy and confidence. The moment you sit across from someone and catch sight of your own polished, intentional nails, something just clicks. You feel put-together. You feel like you made an effort for this moment. That’s not superficial—that’s actual confidence, and it shows.
The designs above work because they all hit the same beautiful note: romantic without being obvious, intentional without being over-the-top, and flattering without requiring you to abandon your own style. Long, rounded nails with heart accents are the perfect vehicle for this balance because they’re inherently wearable and sophisticated while still clearly communicating romantic energy.
The length and shape you choose matter too. Long nails in a rounded shape feel feminine and elegant while remaining practical enough for an actual date where you’ll be eating, holding drinks, or maybe even holding hands. They photograph beautifully. They catch light. They make a statement without screaming for attention.
Pick the design that feels most authentically you. Whether that’s classic red and gold, creative rose details, or minimalist negative space—the best date night nail design is the one that makes you feel genuinely confident and happy when you look down at your hands. That confidence radiates outward and makes the actual date infinitely better.
