

Daisy nails are having a major moment, and honestly, it’s easy to see why. These cheerful, whimsical floral designs bring an instant boost of happiness to your fingertips, and the best part? They’re surprisingly easy to recreate whether you’re a nail art pro or an absolute beginner. White petals with a sunny yellow center just feel right—they capture that fresh, springtime energy that works beautifully all year long.
What makes daisy nails so special is their versatility. You can dress them up for a wedding, keep them casual for everyday wear, pair them with bold colors for a statement look, or go soft and subtle with pastels. The five-dot flower technique used to create them requires nothing more than a dotting tool (or even a bobby pin or toothpick in a pinch), a couple of polishes, and a steady hand. These designs work on any nail length, any nail shape, and they complement virtually every skin tone.
We’ve scoured the best nail inspiration sources and rounded up ten adorable daisy nail ideas that’ll make you want to book a manicure appointment immediately—or grab your own polish and start experimenting at home. Whether you’re drawn to delicate minimalist florals, bold color combinations, or something with extra sparkle and dimension, there’s a daisy nail look here that’s going to become your new obsession. Let’s dive into the prettiest designs that prove daisies truly are the perfect nail motif.
1. Classic White Daisies on Soft Pink
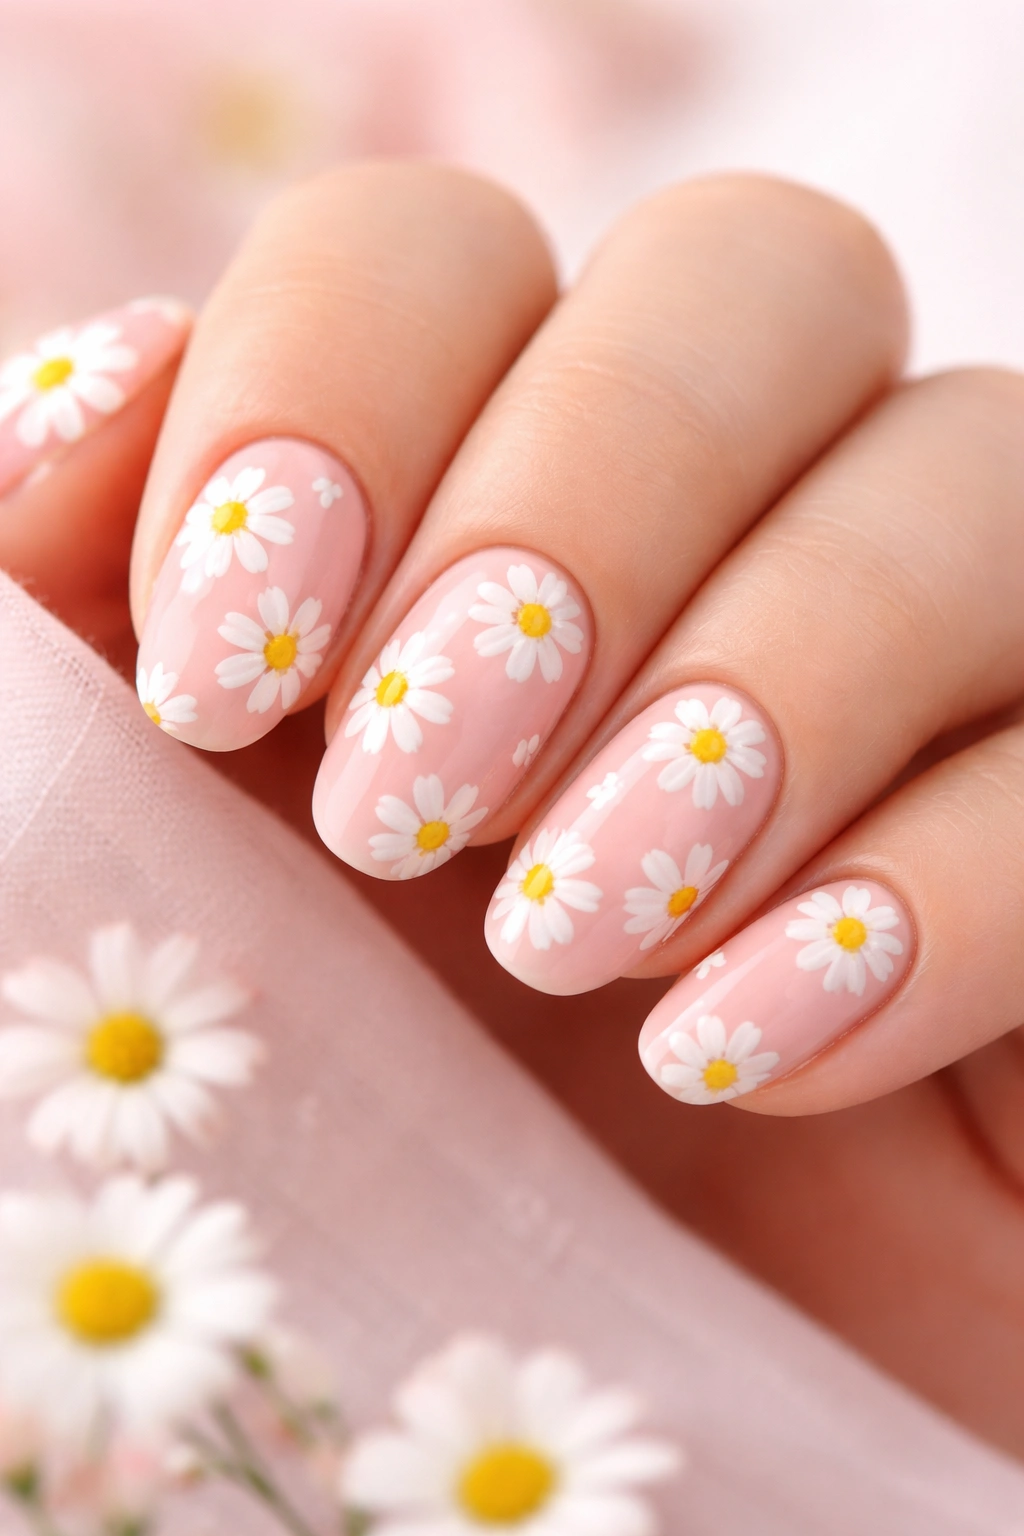
This is the daisy nail design that started it all, and it remains absolutely timeless for a reason. A pale pink or soft mauve base provides the perfect canvas, allowing simple white petals with yellow centers to pop without overwhelming the nail. The combination feels inherently romantic and fresh, making it suitable for everything from a casual Tuesday to a special occasion.
Why This Look Works So Well
The beauty of this design lies in its simplicity and sophistication. Pale pink serves as a universally flattering neutral that coordinates with nearly every outfit in your wardrobe. The soft base tone creates gentle contrast with the white petals, so your daisies stand out without needing multiple colors or complicated techniques. This is the perfect design if you want to look put-together without spending hours on nail art.
How to Create It at Home
Start by painting your nails with two coats of a pale pink polish—something like a dusty rose or ballet pink works beautifully. Once fully dry, grab a dotting tool and white polish. Create five dots in a circle pattern, spacing them evenly around each nail. After the white dries, add a small yellow dot in the center using a fresh dotting tool. For extra polish, try using a slightly larger dot for the center—this adds dimension and helps cover any imperfections in your petal placement.
Pro tip: Don’t stress about making your flowers perfectly symmetrical. Slightly imperfect, organic-looking daisies actually look more charming and natural than perfectly geometric ones.
2. Pastel Rainbow Daisies with Multiple Colors
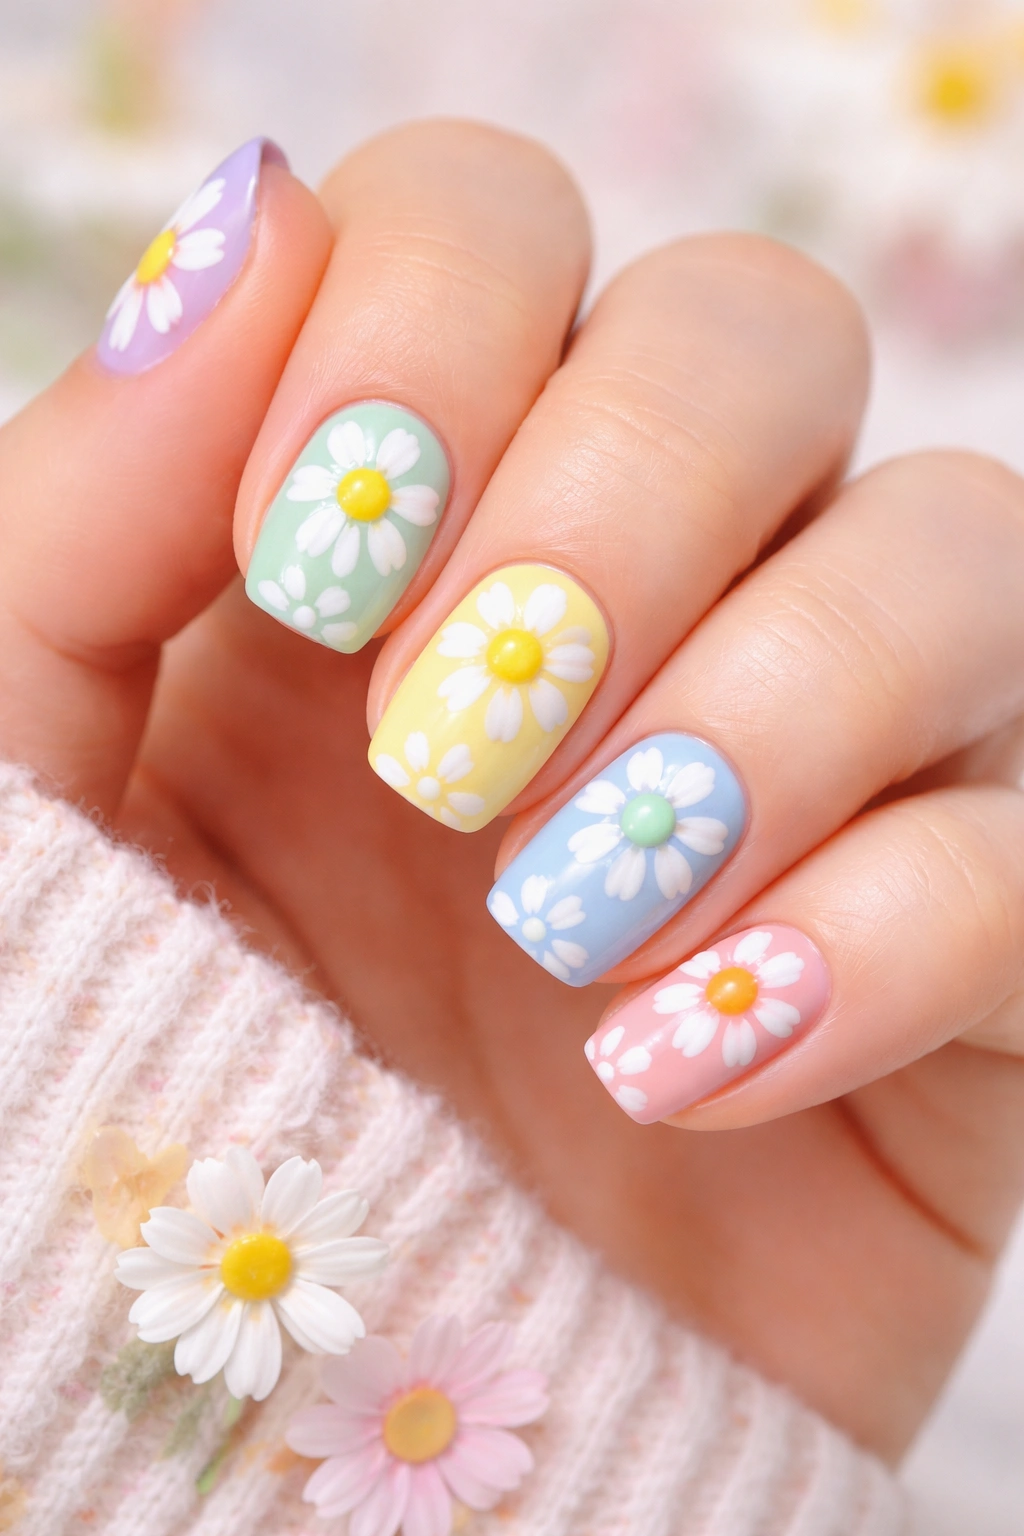
Ready to get playful? Try painting each nail a different pastel shade—soft lavender, mint green, pale yellow, baby blue, and blush pink—then add white daisies with colorful centers to match each base. This vibrant yet soft approach feels youthful and joyful without being overwhelming. It’s the kind of design that makes people smile when they see it.
Why This Design Stands Out
Mismatched manicures have become increasingly popular, and this version takes the trend and makes it definitively spring-coded. Instead of random, clashing colors, the pastels coordinate beautifully together while the unified daisy motif ties the whole look together. You get the fun of a playful mix-and-match mani without sacrificing cohesion or sophistication.
Setting Up Your Rainbow Design
Begin by choosing five soft pastel shades that complement each other—think spring garden colors. Paint each nail with a different color, starting with your pinky. Once all the base colors are completely dry, grab white polish and your dotting tool. Paint white petals on every nail, then use a coordinating color for each nail’s flower center. For instance, the lavender nail might get a pale yellow center, while the mint nail gets a soft pink center.
Insider note: If you’re worried about mixing up your dotting tool between colors, grab a few cheap ones and dedicate each to a specific shade. This prevents accidental color mixing and makes the whole process smoother.
3. Navy Blue Base with Bright White Daisies
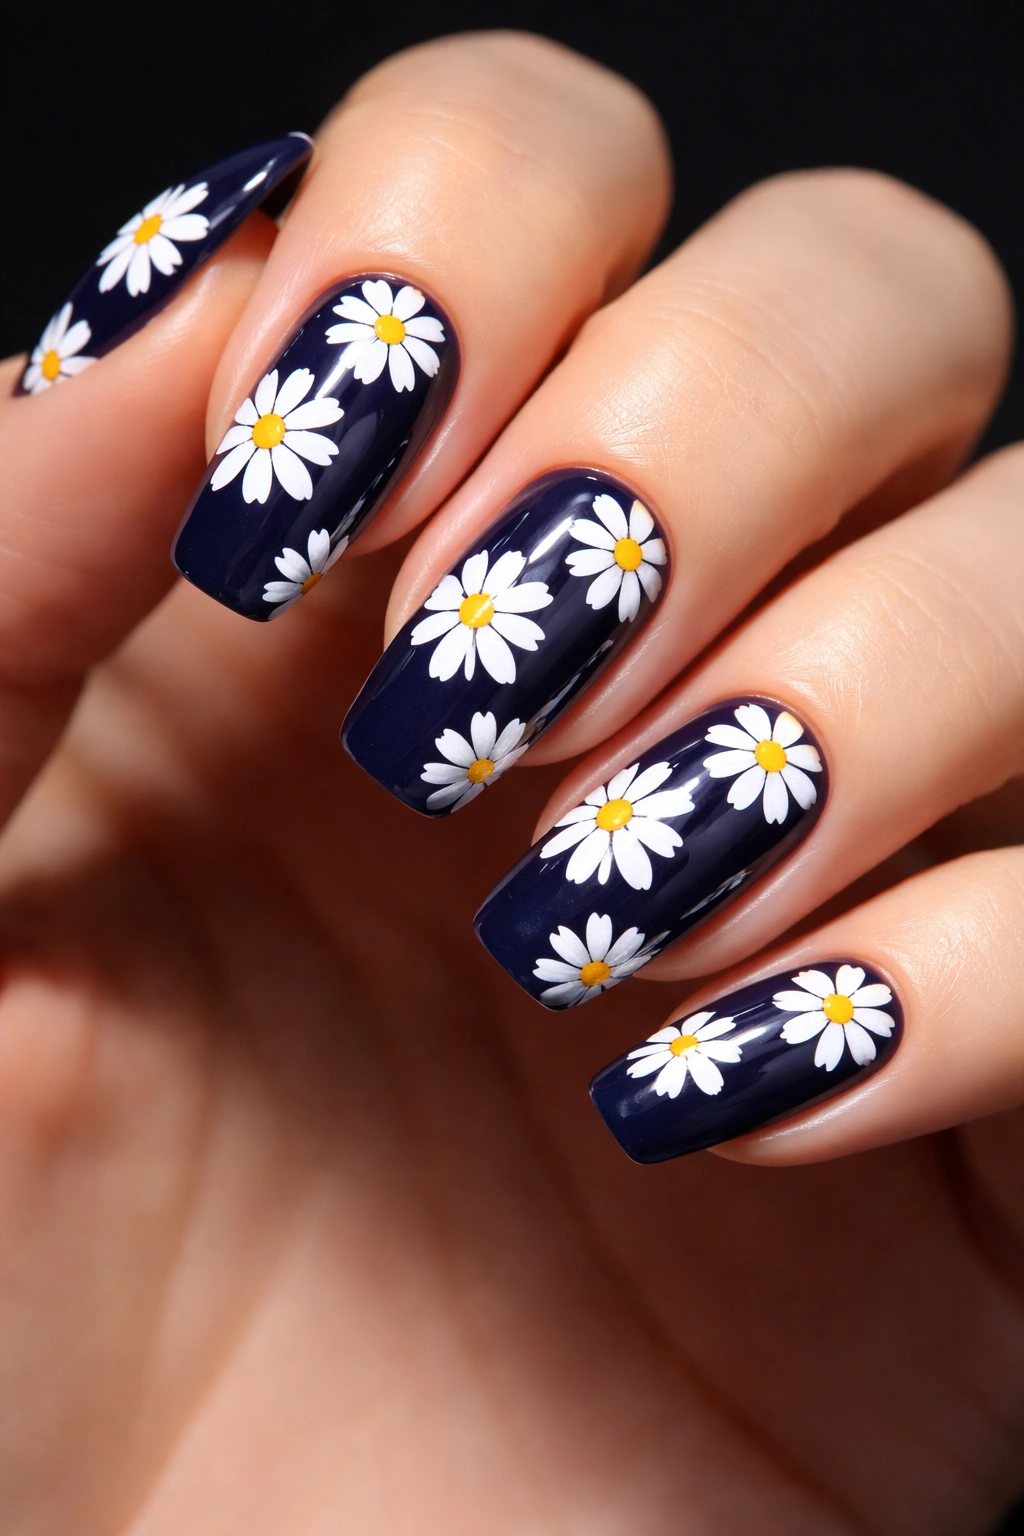
For something with more edge and drama, try pairing a deep navy or dark teal base with crisp white daisies and bright yellow centers. This high-contrast combination creates serious visual impact. The dark background makes the white petals absolutely pop, giving you a bold statement manicure that still feels elegant and wearable.
What Makes This Look Bold Yet Wearable
Navy is a neutral color that works with virtually any wardrobe, yet it feels more modern and interesting than basic black or nude. The bright white daisies create such clean contrast that they practically glow against the dark base. This design walks the perfect line between statement-making and office-appropriate—it’s bold enough to feel confident and interesting, but grounded enough to wear to work.
Creating the High-Contrast Effect
Paint your nails with two coats of navy or dark teal, ensuring full opacity so the color looks rich and deep. Let this dry completely—this matters more than usual since you’re working with a dark base. Using a metal dotting tool and opaque white polish, create your daisy petals. The white will appear almost luminous against the dark background, so you don’t need to use as much product. Finish with a bright yellow center using a fresh dotting tool or toothpick.
Worth knowing: Navy-based daisy nails photograph beautifully. If you love sharing your manicures on social media or capturing them for your own reference, this color combo creates stunning contrast in photos.
4. Lavender French Tips with Tiny Daisies
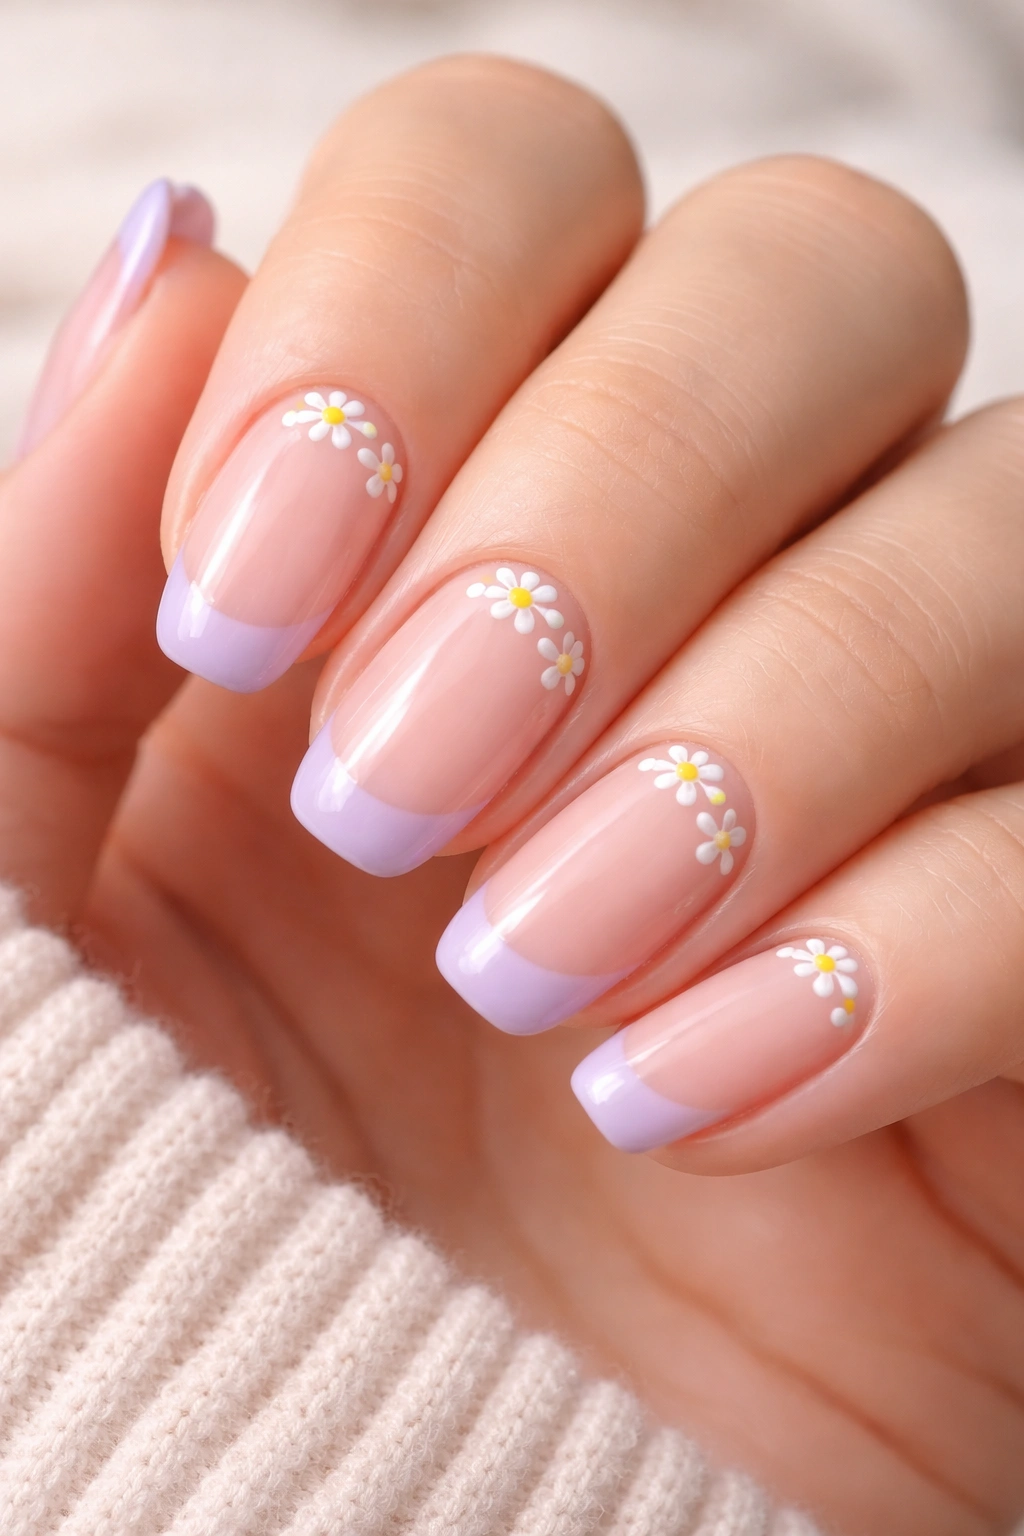
Combine the timeless elegance of a French manicure with delicate daisy flowers for a look that’s both classic and fresh. Paint your nails nude or natural, create soft lavender French tips, then scatter tiny daisies around each nail—particularly near the cuticle and along the edges. This hybrid design offers the grown-up appeal of a French mani with the playfulness of floral art.
Why French Daisy Nails Are Genius
French manicures are the ultimate timeless look—they grow out beautifully, work with everything, and feel sophisticated. By adding daisies, you inject personality and whimsy without compromising that classic elegance. The dainty size of the flowers means they enhance rather than dominate, making this design perfect for anyone who wants nail art but prefers a subtle approach.
Executing the French Daisy Look
Start with a neutral base like pale pink, nude, or milky white. Once dry, create your French tips using a soft lavender shade. You can use French tip guides if you need them, or freehand if you’re confident with your brush control. The tips should be about one-third of the nail. Once the tips are completely dry, use white polish and a dotting tool to paint tiny daisies in the remaining space. Vary their placement—some near the cuticle, some scattered across the body of the nail—so it doesn’t look too structured.
Pro tip: Keep your daisies small on this design. The smaller flowers maintain the elegance of the French mani while adding that cute floral element.
5. Clear Nails with Hand-Painted Daisy Details
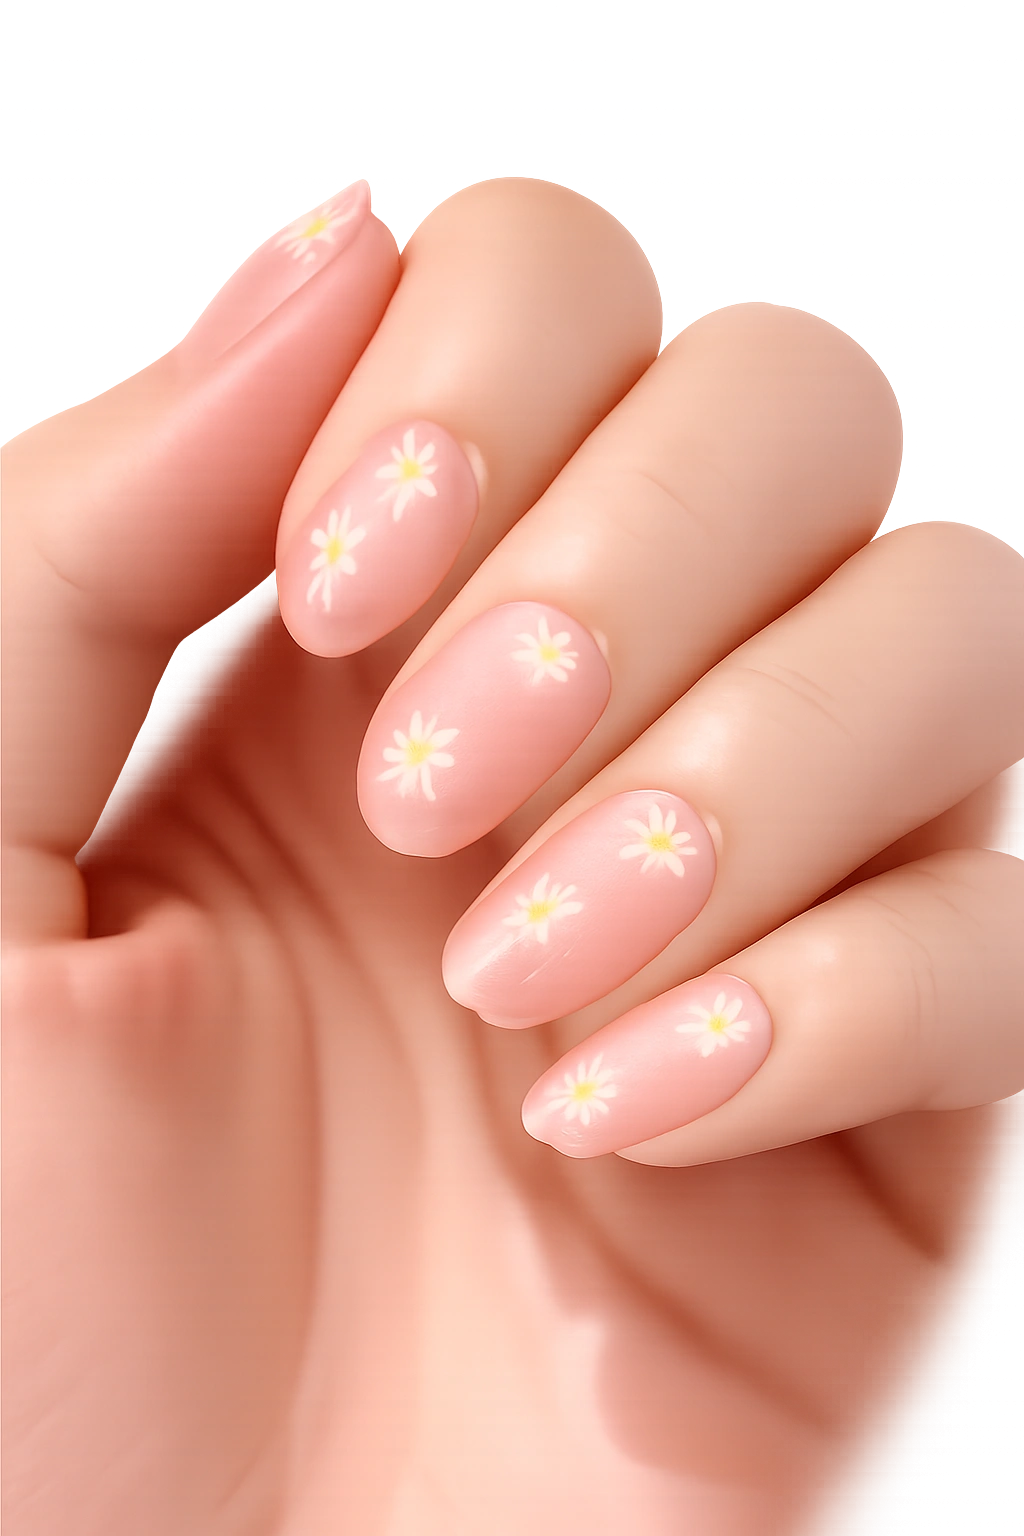
Sometimes less truly is more. A completely natural, almost bare nail with just hand-painted white daisies and yellow centers creates subtle sophistication that feels fresh and modern. This design works beautifully if you prefer a natural nail aesthetic but still want a hint of nail art and personality.
The Minimalist Appeal
This design became wildly popular among people who prefer the clean-girl aesthetic or minimal style. There’s something genuinely beautiful about letting your natural nail show through while adding just one element—the daisies. It’s not plain, but it’s not busy either. It’s the nail art equivalent of a linen shirt and jeans—effortless and always appropriate.
Painting on Natural Nails
Prep your natural nails with a clear base coat and glossy top coat to protect them and create shine. Once fully dry, use white polish and a thin brush (or dotting tool) to paint your daisy petals directly on the clear surface. Keep the flowers small and delicate, scattered across each nail rather than concentrated in one spot. Add small yellow dots for centers, then seal everything with a clear glossy top coat.
Worth knowing: This design requires a steady hand, but practice makes perfect. You might want to do a few test flowers on a nail wheel before committing to your actual nails.
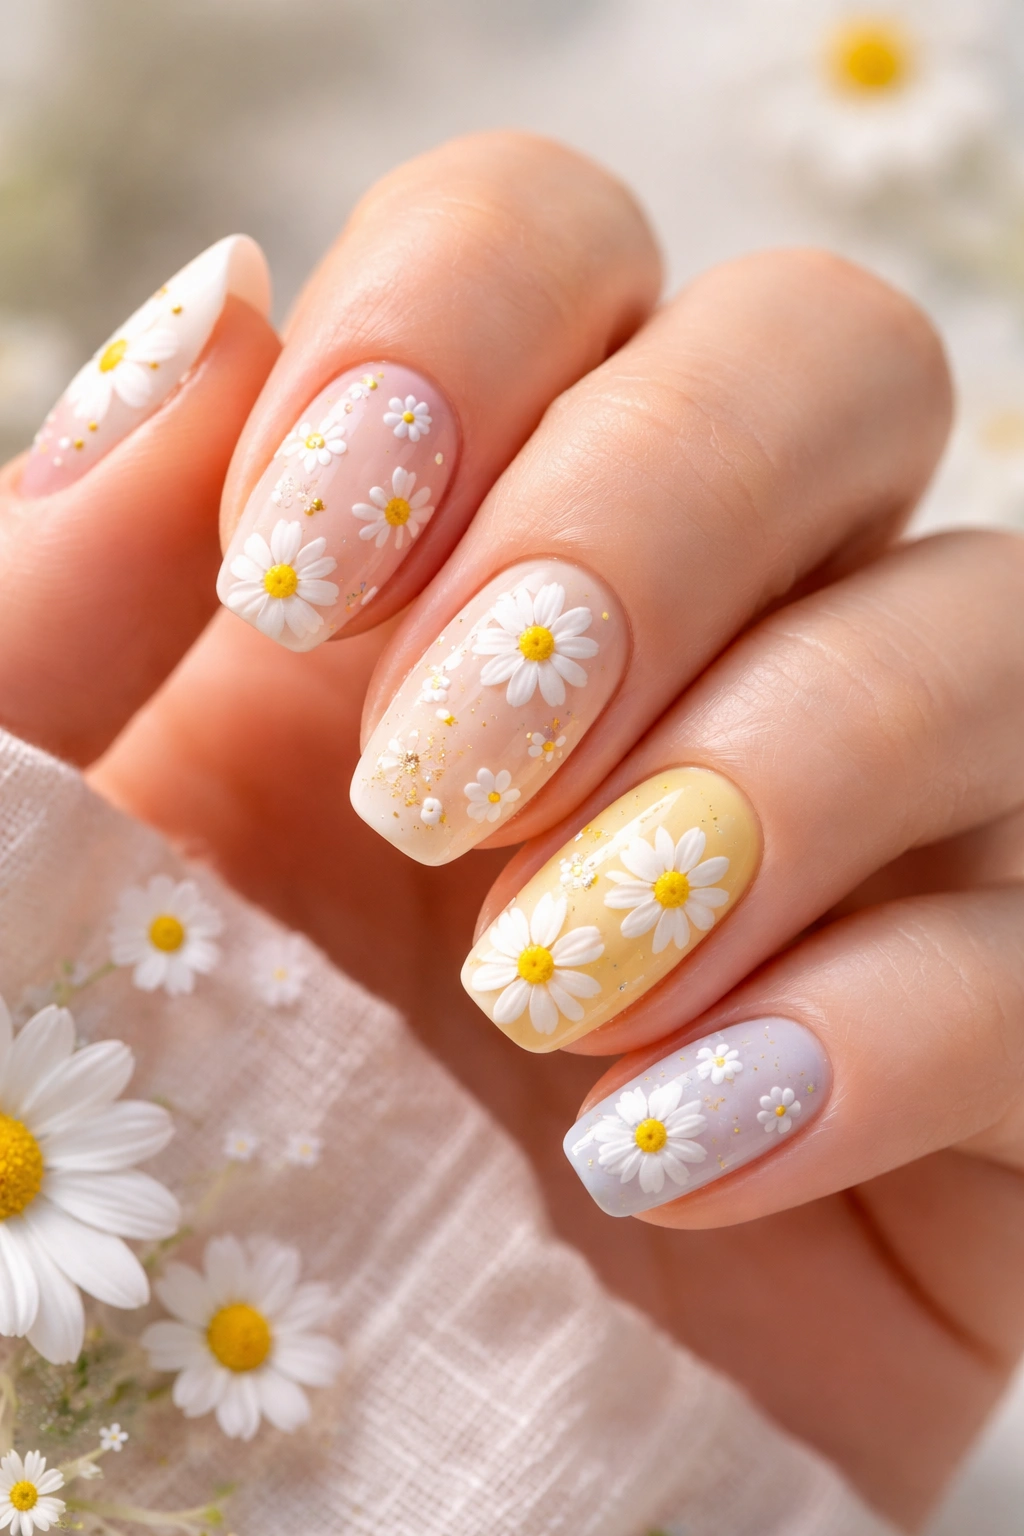
6. Butter Yellow Nails with Oversized White Daisies
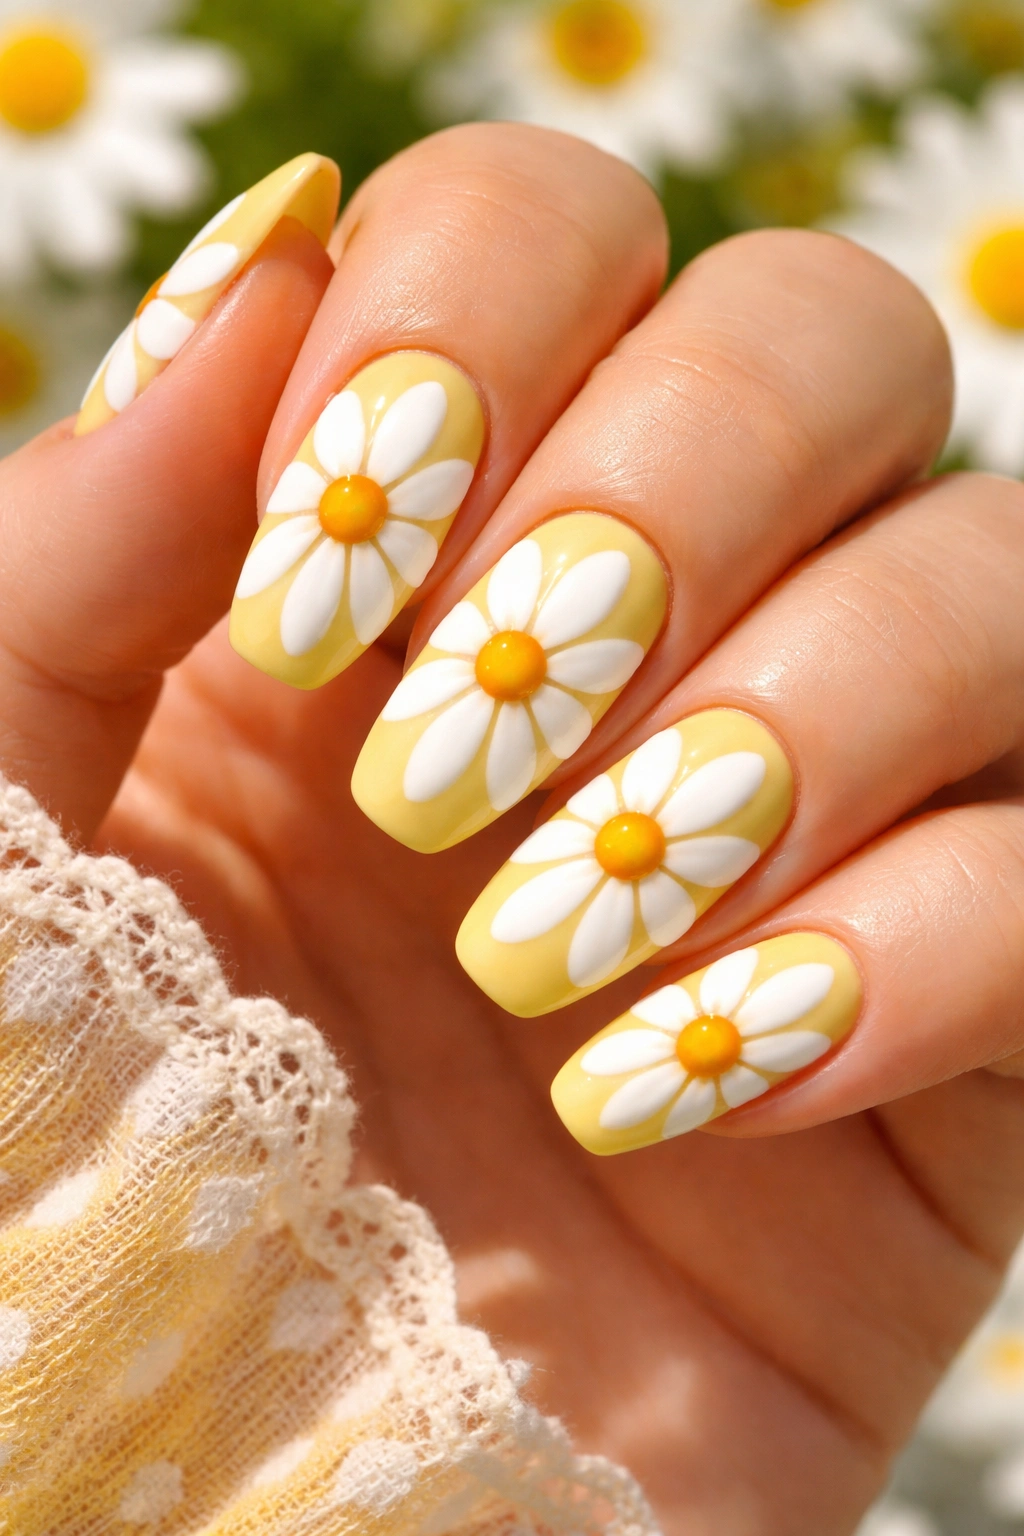
Go bold with a warm, creamy butter yellow base covered in large, statement-making white daisies. The oversized flowers feel fresh and modern rather than delicate and dainty, giving traditional daisy nails a contemporary twist. This design absolutely radiates summer energy and optimism.
The Statement-Making Approach
Oversized florals are having a major moment in fashion and home décor, so naturally they translate beautifully to nails too. Larger daisies make the design feel more intentional and artistic rather than simply cute. The yellow base amplifies the cheerful, optimistic vibe—this is the nail design equivalent of wearing your best mood on your fingertips.
Creating Oversized Daisies
Paint your nails with two generous coats of a warm butter or honey yellow. Let this dry completely. Using white polish and a slightly larger dotting tool (or the back of a bobby pin), create bigger petals than you might normally. Instead of the traditional five petals, try creating six or seven arranged in a loose circle. Make each petal about one-quarter inch across. Add a yellow or light orange center dot using a fresh tool.
Insider note: Don’t make your oversized daisies perfectly round or geometric. Let some petals be slightly different sizes and shapes—this makes them feel more artistic and less like a stencil.
7. Nude Base with Gold and White Daisies

For an elevated, luxe take on daisy nails, try a warm nude base with white petals, then add tiny gold accents or gold-foil centers instead of yellow. This sophisticated color palette feels expensive and refined, perfect for someone who wants nail art that leans elegant rather than whimsical.
Why Gold Elevates Everything
Gold instantly makes any design feel more upscale and special. Combined with a neutral nude base, it creates a look that’s both trendy and timeless. This design works beautifully for weddings, formal events, or any time you want your nails to feel extra special without screaming “nail art.”
Incorporating Gold Elements
Start with a warm nude or peachy nude base—something that complements your skin tone and feels like a slightly elevated version of your natural nail. Once completely dry, paint white petals using your dotting tool. Instead of adding a yellow center, use a thin brush to paint gold foil polish or gold gel in the flower center. Alternatively, you can use gold leaf or adhesive foil, pressing a tiny piece into the wet center dot before it dries.
Pro tip: Gold foil polish can be pricey, but a little goes a long way. One bottle will last through multiple manicures. If you don’t have access to foil polish, regular metallic gold polish works beautifully too.
8. Black Nails with Delicate White Daisies and Rhinestone Centers
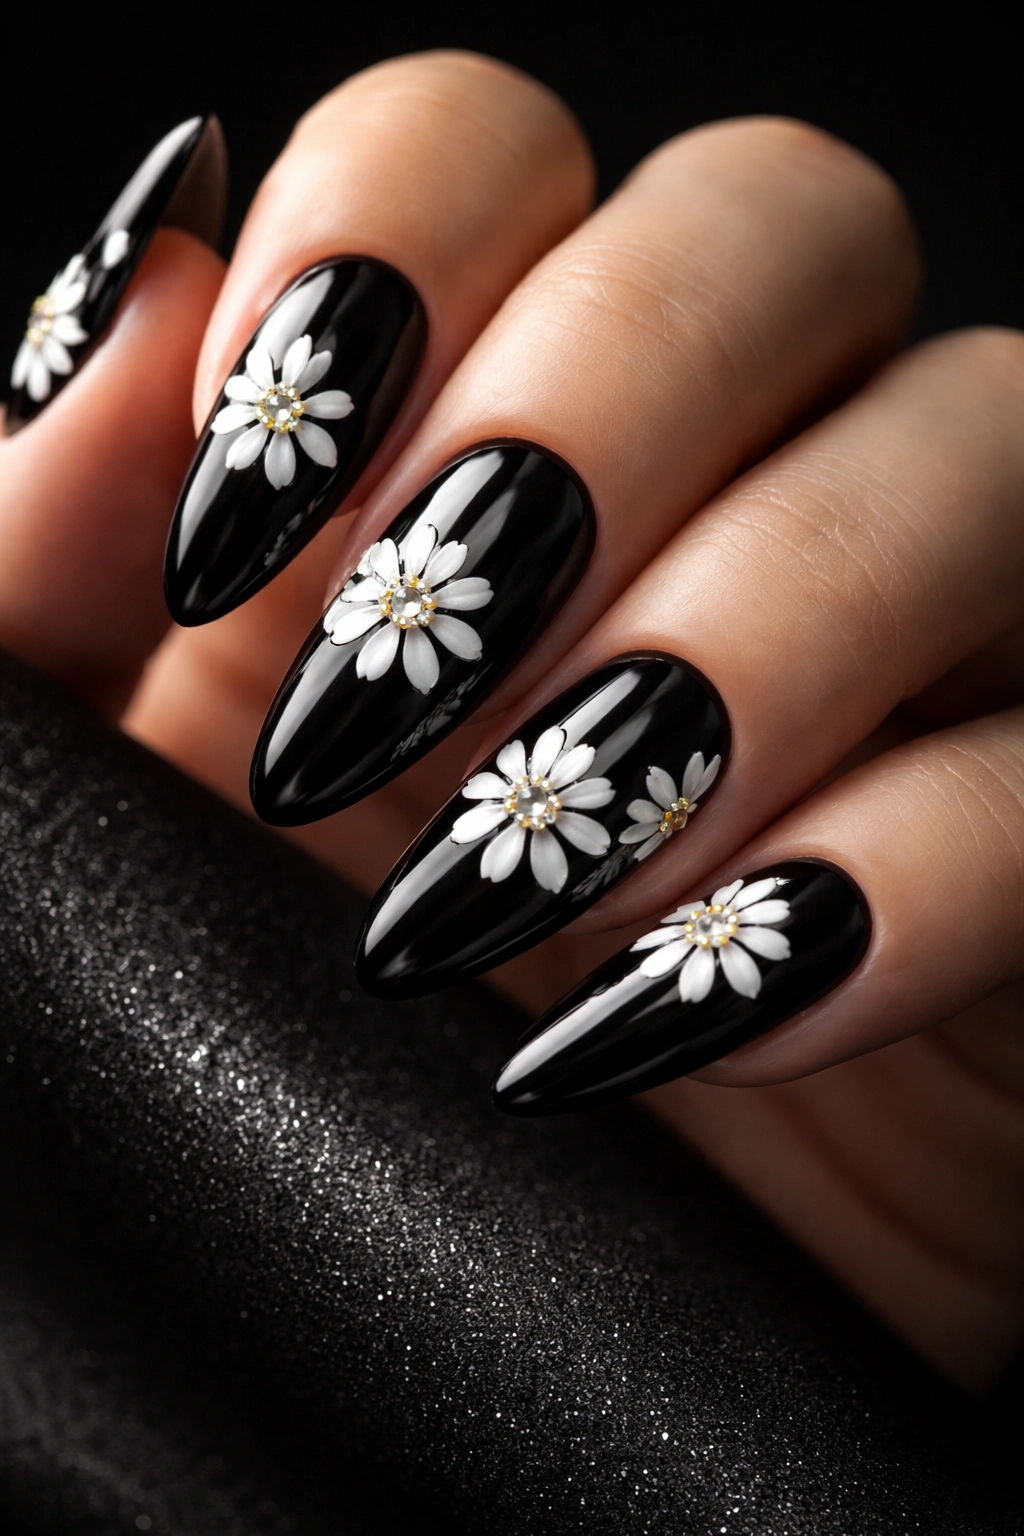
Ready to embrace your moody side? Black nails with delicate white daisies and sparkly rhinestone centers create a look that’s goth-girl meets garden fairy. It’s bold, unexpected, and absolutely stunning. The contrast between the dark base and bright white flowers is striking, and the rhinestones add glamour and dimension.
The Unexpected Elegance of Dark Daisies
Black is typically associated with edgy, dramatic styles, so pairing it with innocent, cheerful daisies creates an intriguing juxtaposition. It’s moody but playful, sophisticated but fun. This design appeals to anyone who loves maximalism or enjoys subverting expectations about what nail designs “should” be.
Creating the Dark Daisy Look
Paint your nails with two or three coats of jet black, ensuring full opacity. The white will show up brilliantly against this base, so you don’t need to worry about visibility. Using white polish and a dotting tool, create your daisy petals. Once they’re dry, add the rhinestone centers using a slightly damp dotting tool to pick up each tiny rhinestone and place it in the flower center. A small dab of nail glue on the dotting tool helps secure the stone.
Worth knowing: Rhinestones are reusable if they fall off, so keep them in a small container. Some people prefer to use larger rhinestones on the ring finger or thumb and smaller ones on the other nails for visual interest.
9. Ombré Nails from Pink to White with Daisies
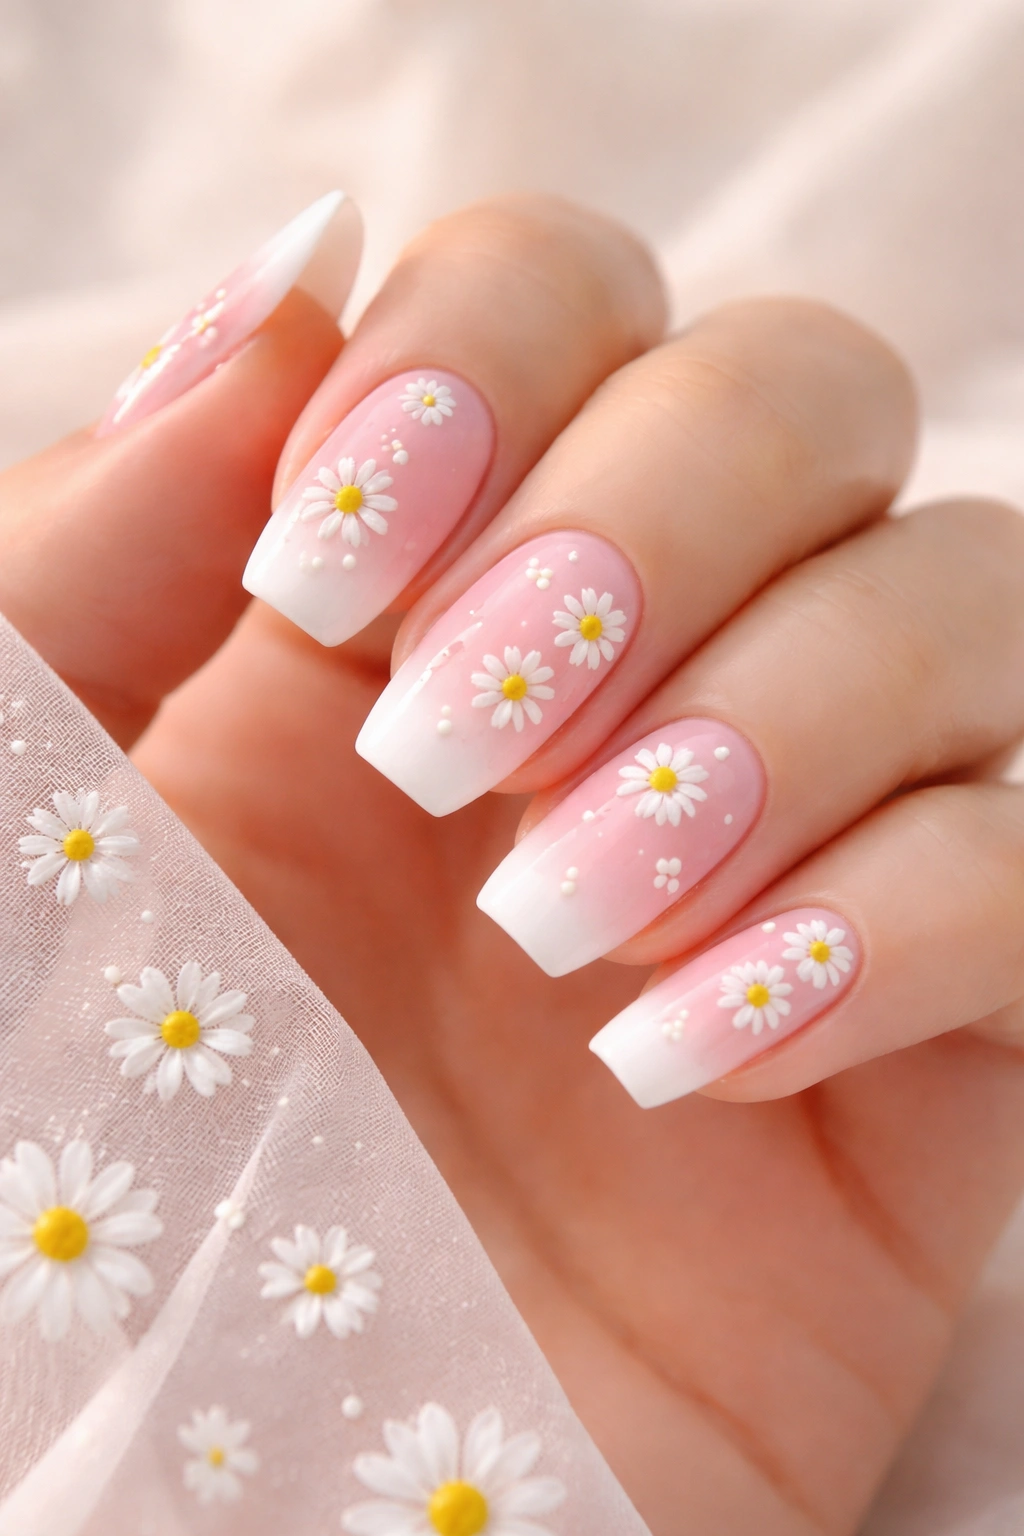
Create a stunning gradient that transitions from soft pink near the cuticle to white at the tip, then add tiny daisies throughout the ombré. This blended, artistic approach feels modern and takes daisy nails to a more sophisticated place. It’s the perfect design for someone who loves the look of ombré nails but wants to add a floral element.
The Art of Gradient Daisies
Ombré nails have remained popular for years because they’re visually interesting and relatively easy to create. Adding daisies transforms the ombré into something more purposeful and designed rather than simply color-blocked. The flowers seem to emerge from the gradient itself, creating a cohesive, artistic look.
Executing the Ombré-Daisy Hybrid
Paint your nails with a nude or clear base. Create your ombré using a makeup sponge and two shades of polish—soft pink and white. Dab the sponge on a piece of foil with one color on each side, then press onto your nail starting at the cuticle with pink and transitioning to white at the tip. Repeat this 2-3 times per nail for blended color. Let dry completely, then add white daisy petals using a dotting tool. The petals will blend slightly into the ombré, creating a soft, artistic effect. Add yellow or light pink centers.
Pro tip: Apply a glossy top coat after creating your ombré but before adding the daisies. This prevents the sponging technique from looking too speckled and gives you a smoother surface to work on.
10. Pastel Blue with Daisy French Tips
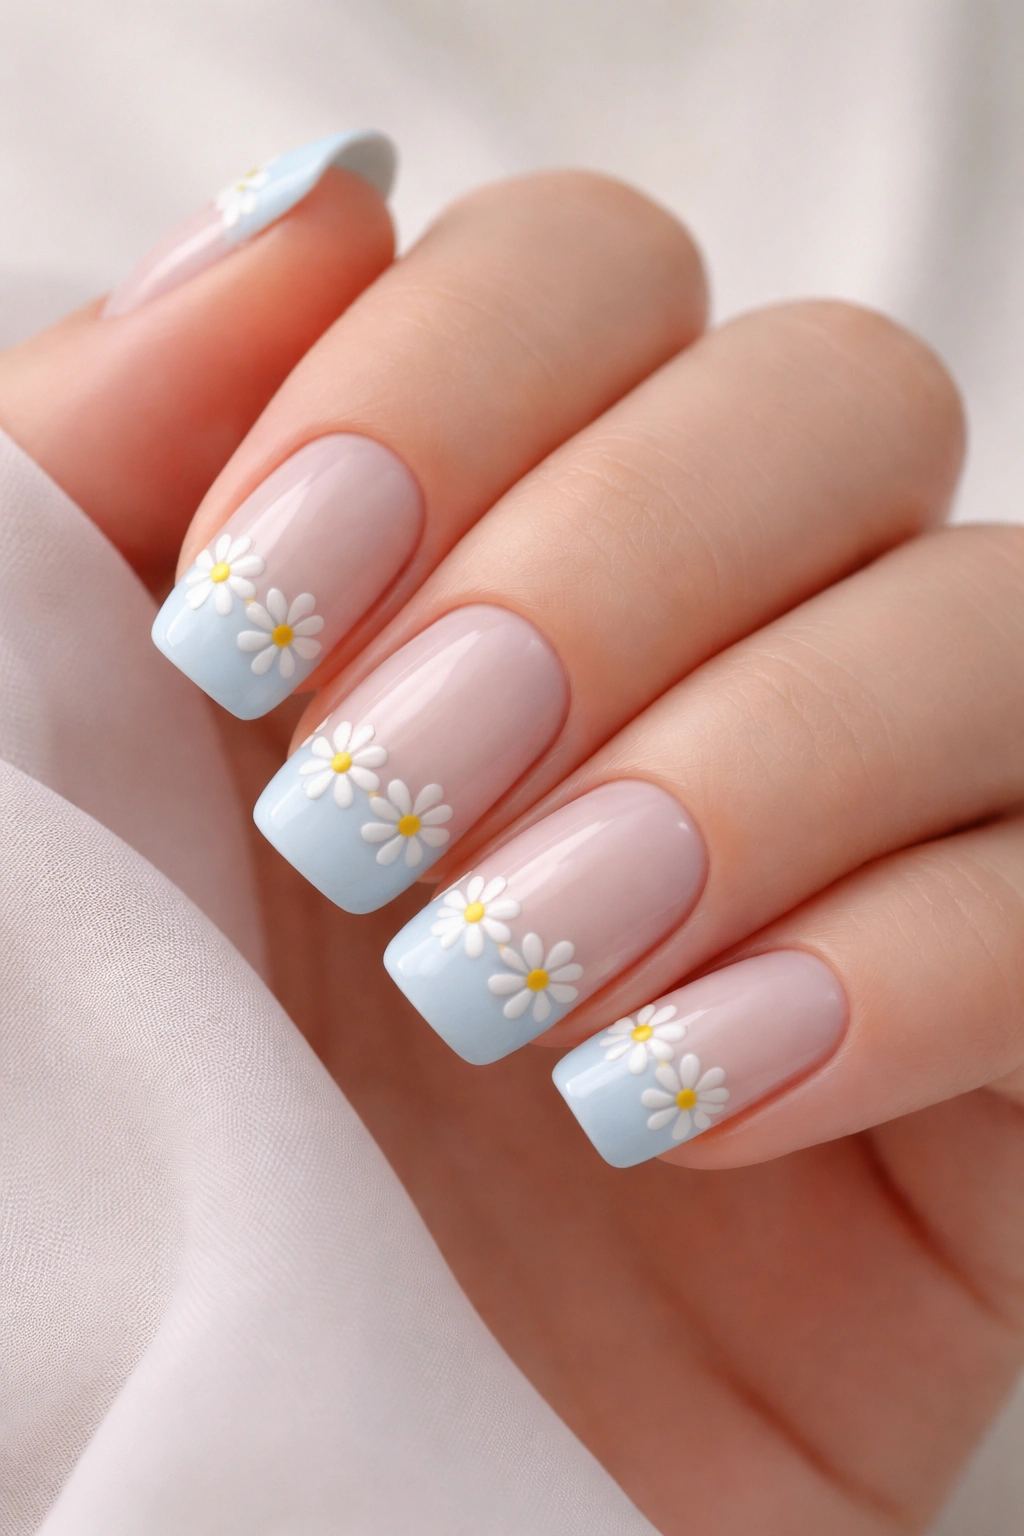
Here’s a fresh take on the traditional French manicure: instead of a white or nude base with colored tips, try a soft pastel blue base with daisy-shaped French tips. Paint the upper third of each nail white, then add yellow dots to create tiny daisies along the smile line. This design combines the elegance of a French with the playfulness of a full daisy design.
Why This Variation Feels So Fresh
Standard French manicures can feel a bit overdone, so reimagining the tips as daisies breathes new life into the classic. The pastel blue base feels soft and dreamy while remaining neutral enough for everyday wear. This design is fun without being too trendy or juvenile—it’s the kind of mani that photographs beautifully and makes you smile every time you look at your hands.
Creating Daisy French Tips
Paint your nails with two coats of a soft, pastel blue—think baby blue, powder blue, or a muted periwinkle. Once this dries, paint the upper third of each nail white to create your French tip base. Using a dotting tool and white polish, create tiny petals along the smile line where the white tip meets the blue base, creating a mini daisy at the center of each nail. Add a small yellow center dot to complete each flower.
Insider note: Keep your daisy French tips small and delicate. Oversized flowers on the tips can make the design feel clunky. The charm of this style comes from its daintiness and precision.
Final Thoughts
Daisy nails have rightfully earned their place as one of the most beloved nail design trends. Whether you’re gravitating toward classic soft pastels, dramatic high-contrast combinations, or elevated luxe versions with gold and rhinestones, there’s genuinely a daisy nail design for every mood, season, and aesthetic. The beauty of this trend is its accessibility—you don’t need professional equipment, expensive products, or advanced artistic skills to create a beautiful daisy manicure.
The wonderful thing about floral nail art is that it brings genuine joy and personality to your everyday look. Every time you catch a glimpse of your hands, you get a little mood boost from those cheerful blooms. Whether you choose to recreate one of these designs at home or bring your inspiration to a trusted nail technician, you’re choosing to add a touch of whimsy, femininity, and flower-power to your style.
Start with whichever design speaks to your heart first. If you love minimalism, begin with the clear nails option. If bold color appeals to you, try the navy or butter yellow versions. Once you master one daisy design, experiment with the others and create variations of your own. Mix colors, play with sizes, add rhinestones or glitter, combine daisies with other tiny florals—make the trend entirely your own. The daisies are simply the canvas; your creativity is what makes your manicure truly special.
