

Short squoval nails have become the go-to shape for anyone wanting a modern, sophisticated look that’s practical without sacrificing style. The combination of square edges and rounded corners strikes that perfect balance — they’re durable enough for daily life but elegant enough to feel intentional and polished. Add fine line art to the equation, and you’ve got a manicure that speaks volumes about your aesthetic sensibility without screaming for attention.
What makes line art so compelling on squoval nails is how the shape naturally becomes part of the design. Those clean lines and subtle curves create the perfect canvas for delicate geometric patterns, minimalist illustrations, and architectural details that would look fussy or confused on longer nails. The shorter length keeps the designs crisp and readable, while the squoval’s gentle width gives you just enough room to play with negative space and layered line work.
The beauty of line art nails isn’t that they require expert-level freehand skills — though if you have them, fantastic. Many of these designs can be created with steady hands, thin nail art brushes, and a little patience. Some people swear by using thin striping tape for perfectly straight lines or dotting tools for precise placement. Others grab a fine-tip pen or a nail art pen designed specifically for detailed work. The tools matter less than understanding what creates visual impact at a glance.
Whether you’re drawn to minimalist geometry, organic flowing patterns, or abstract compositions, there’s a line art design on squoval nails that’ll feel authentic to how you actually want to look and feel. Let’s explore ten designs that genuinely deliver that chic, intentional aesthetic.
1. Minimalist Black Lines with Accent Nail
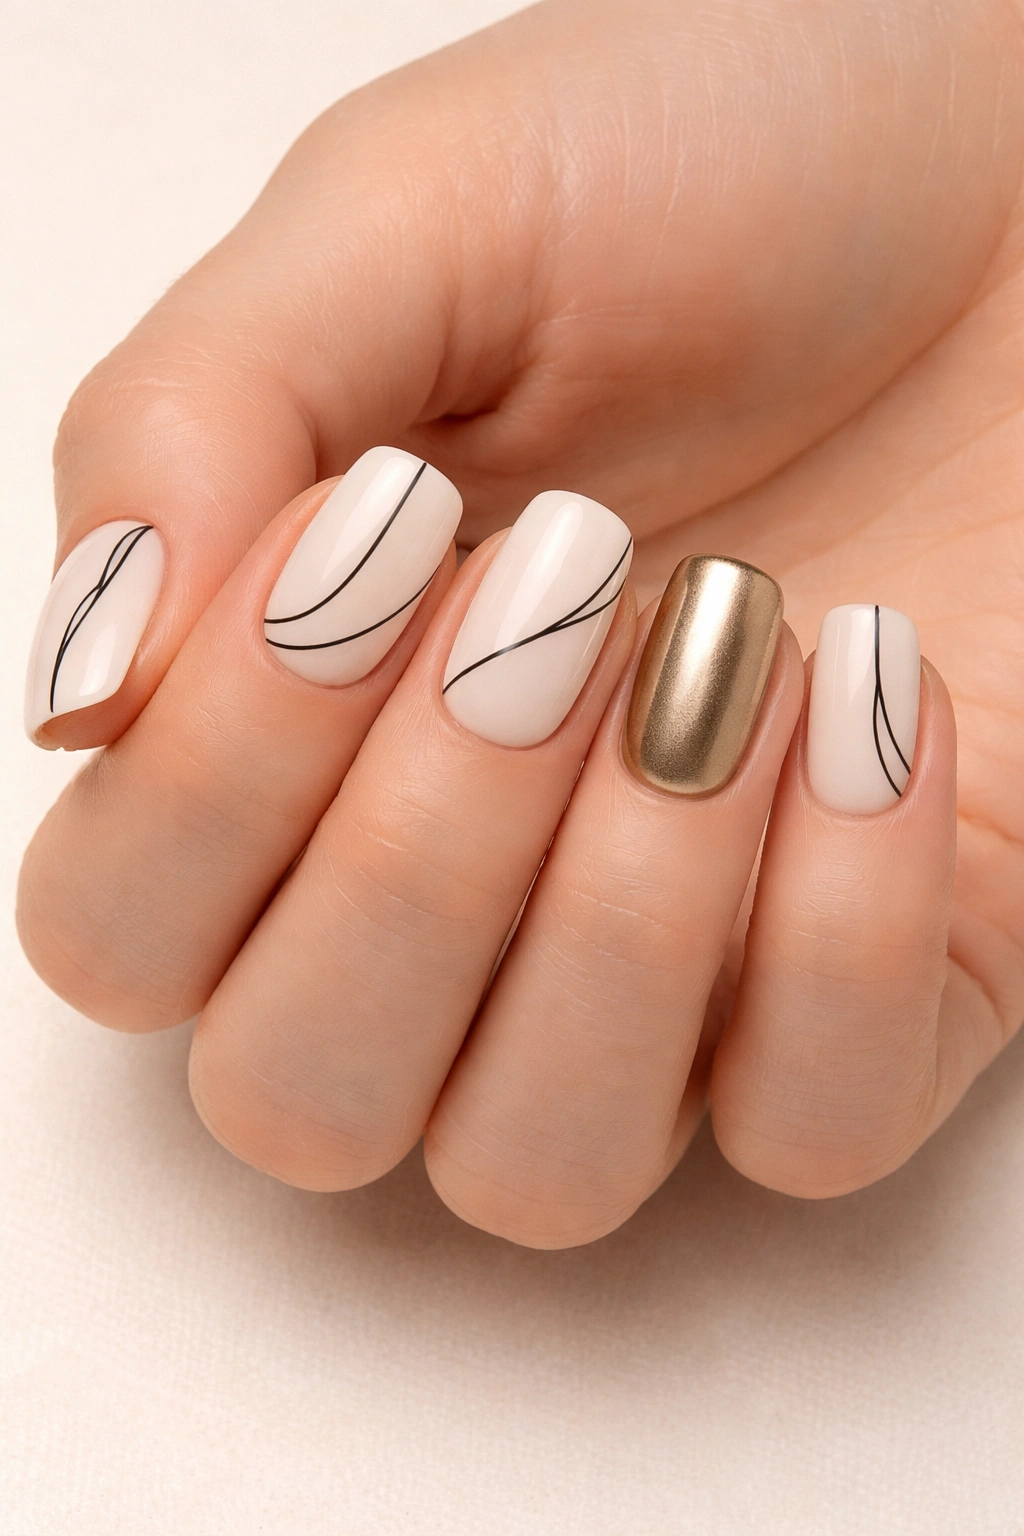
A single nail in a rich color or metallic finish paired with nine nails featuring thin black lines is the epitome of understated luxury. The lines don’t need to be complicated — a few clean strokes, maybe a simple geometric shape like a triangle or square, or just thin parallel lines running diagonally across the nail create enough visual interest to feel intentional without overwhelming the nail bed.
Why This Design Works on Short Squovals
The shorter length means those thin black lines stay sharp and readable instead of looking delicate to the point of disappearing. Black ink photographs beautifully against light, neutral base colors like cream, soft pink, or pale gray, and the contrast gives the nail definition even from a distance. The simplicity means you can actually maintain this look without it chipping within days.
How to Create It
- Start with a smooth base coat and two coats of your chosen pale or neutral color
- Allow it to dry completely (this step matters — wet polish makes lines go fuzzy)
- Using a thin striping brush or nail art pen, draw your lines while holding your hand steady against a table or armrest
- Start with thinner lines than you think you want; you can always layer another thin line on top if needed
- Seal everything with a glossy or matte topcoat depending on your preference
- For the accent nail, a solid metallic gold, copper, or deep jewel tone creates contrast without competing
Pro tip: If your hand shakes even slightly, apply a small drop of topcoat to the brush before dipping it in the black polish — the topcoat makes the polish flow more smoothly and forgives minor wobbles.
2. Geometric Chevron Pattern
Chevron patterns — those classic V-shaped lines that repeat across the nail — have a graphic, modern energy that feels more sophisticated than it looks to create. On short squoval nails, you can fit roughly three to four chevron peaks from cuticle to tip, which gives you a clear, defined pattern without looking cramped or busy.
Why This Design Stands Out
Chevrons inherently draw the eye upward, which makes short nails appear slightly longer visually. The pattern is directional and purposeful, so it automatically reads as intentional rather than random. It works equally well on monochromatic color schemes or with contrasting colors where each chevron alternates between two hues.
Key Design Elements
- Use a thin striping brush or nail art pen for precise angled lines
- Keep your angles consistent (roughly 45 degrees on both sides of the chevron for balance)
- Space your chevrons evenly — rough guides are easier to follow than trying to eyeball perfect distance
- A single-color chevron on a contrasting base is minimalist and clean
- Two-color chevrons (where each peak is a different color) add visual complexity and playfulness
- You can create chevrons using tape by placing thin striping tape at your desired angle, then painting over it and removing the tape while polish is still slightly wet
Worth knowing: Chevron patterns look best when they’re perfectly symmetrical, so your non-dominant hand might feel less steady. Do those nails first when your confidence is highest, or recruit someone to help with one hand.
3. Abstract Wavy Stripes
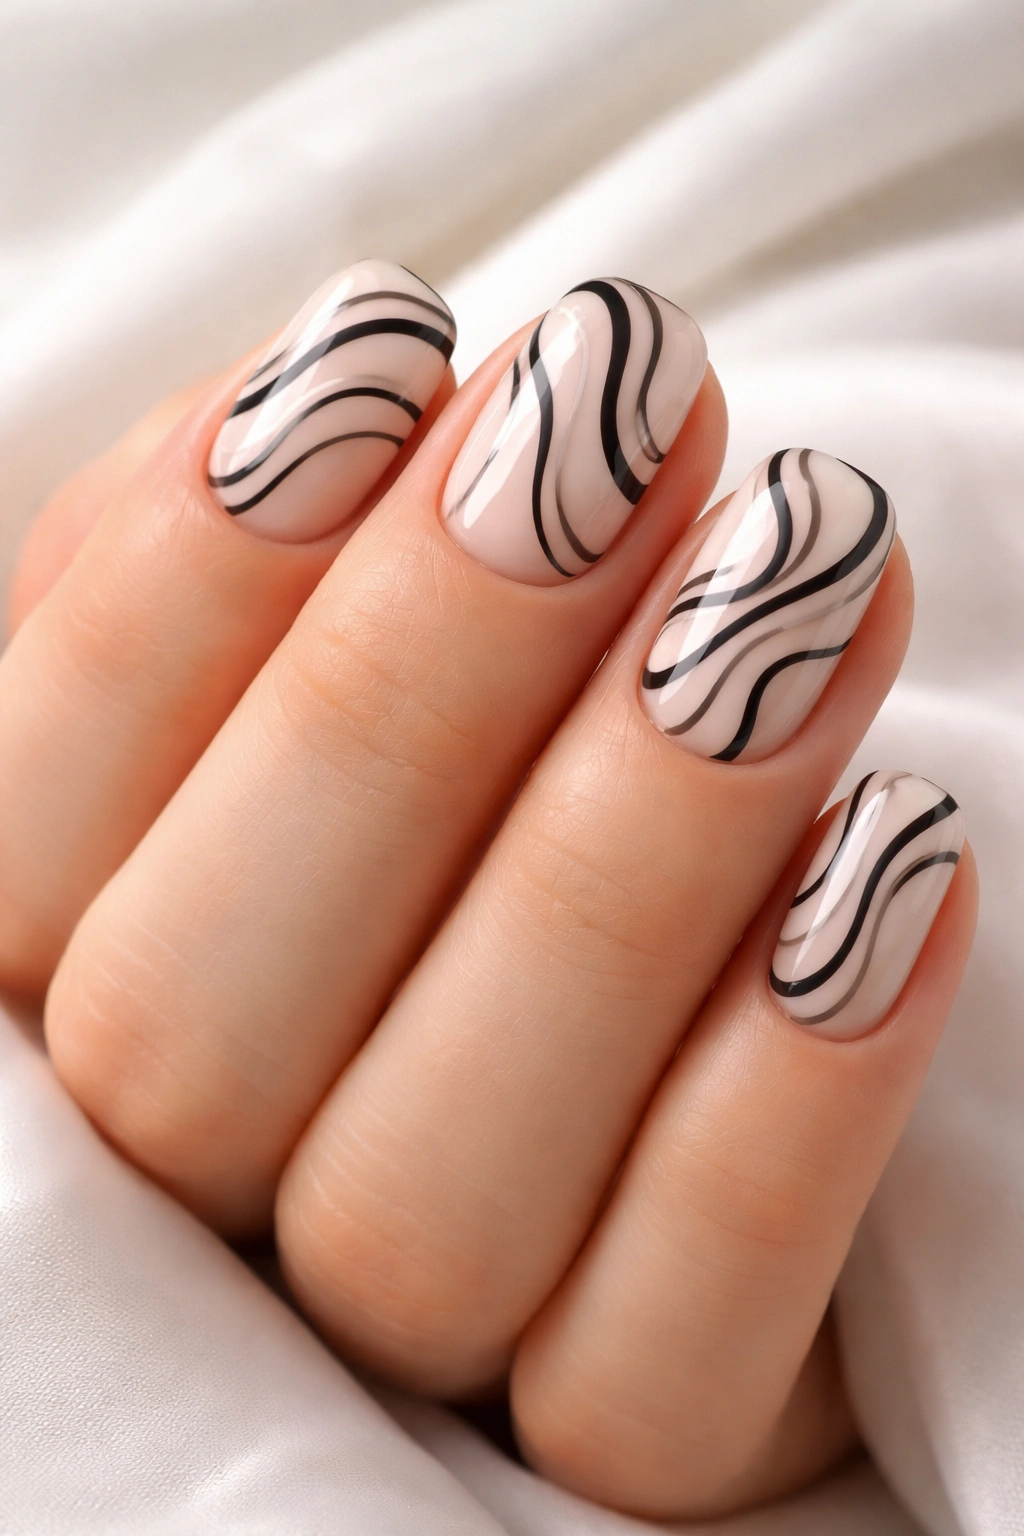
Flowing, organic wavy lines create a completely different energy than geometric patterns — they feel artistic and relaxed rather than structured. These aren’t meant to be perfectly uniform; slight variations in the wave height and spacing actually enhance the handmade, intentional aesthetic rather than detracting from it.
How This Design Feels Different
Wavy stripes work beautifully on squoval nails because the shape’s subtle curves complement the flowing lines. Unlike sharp geometric patterns, waves are forgiving — a line that’s not perfectly straight actually looks more natural and intentional. You can layer multiple wave directions (horizontal, diagonal, vertical) for visual depth without the design feeling chaotic.
Creating Wavy Stripes That Look Intentional
- Apply a base color and let it dry completely
- Using a thin brush, draw your first wavy line freehand, starting at one side of the nail and moving toward the other
- The wave should be gentle — not tiny wiggles, but actual curves that take up some space
- Repeat the wave pattern, leaving consistent (or intentionally varying) space between each line
- You can create a more polished look by using the same wavy line pattern but offsetting each line slightly so they don’t align perfectly
- Seal with topcoat for a finished appearance
Insider note: These stripes photograph beautifully, especially with diagonal lighting that catches the lines. The imperfect, organic quality is actually the whole point — perfect uniformity would make it look less intentional.
4. Negative Space with Fine Lines
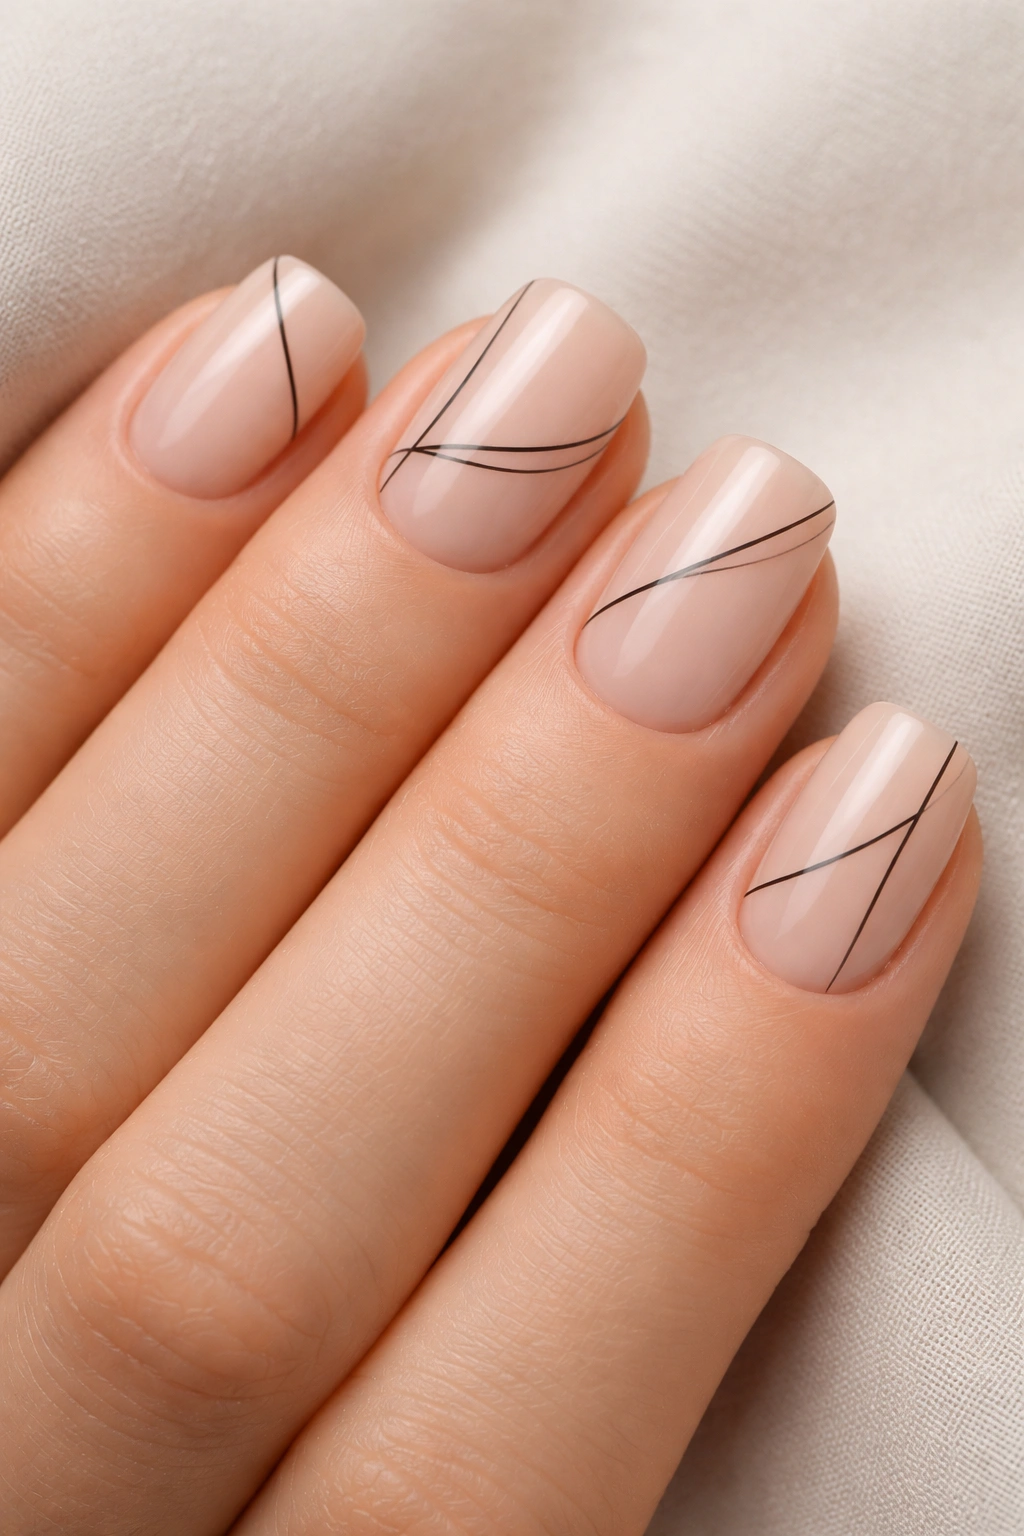
Negative space design means intentionally leaving areas of your nail bare or showing the skin beneath, creating visual contrast and a sophisticated, gallery-like quality. Thin lines become the framework that defines what’s visible and what’s hidden, making the empty space feel like part of the design rather than a mistake.
Why Negative Space Feels Chic
This approach is inherently modern because it respects the nail’s natural color and doesn’t try to completely cover it. Negative space designs have an editorial, high-fashion quality — they look like they came from a designer nail salon even when you create them at home. The white or nude showing through reads as intentional minimalism rather than chipped polish or incomplete coverage.
Design Ideas Using Negative Space
- Frame just the tips of your nails with thin black lines, leaving the nail beds completely bare
- Create geometric shapes (triangles, rectangles, hexagons) with lines, filling only portions of each shape with color
- Draw thin lines from the cuticle that don’t quite reach the tip, letting the design trail off naturally
- Create a small accent area (like a corner or one third of the nail) with dense line work, leaving the rest completely bare
- Use thin lines to create an outline of an object (a leaf, a mountain, a wave) and leave the interior empty
Pro tip: Apply a very light color or no polish at all to the areas you want to show negative space, then draw your lines in black or a dark color that contrasts with your skin tone.
5. Sunset Gradient with Line Details
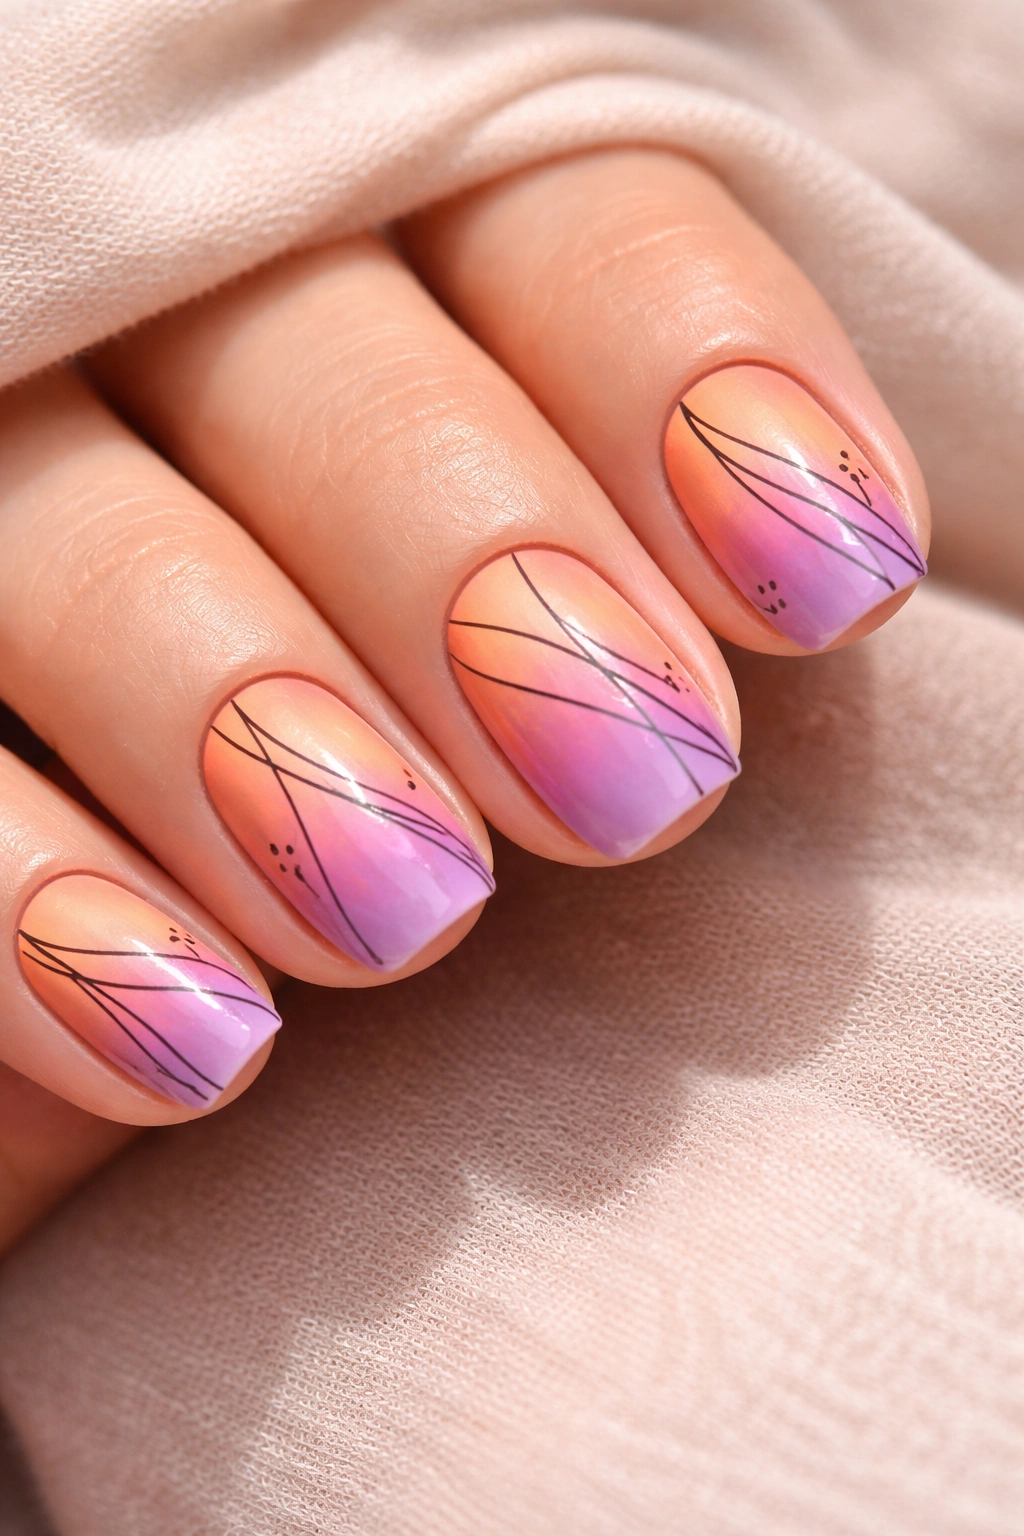
Layering line art over a gradient background creates depth and prevents the design from feeling flat. A warm sunset gradient in oranges, pinks, and purples becomes a completely different piece when you add thin geometric lines, stripes, or abstract patterns on top, turning it from simple ombré into a curated artistic statement.
How Line Art Elevates a Gradient
Gradients alone can feel a bit dated or generic, but adding intentional line work transforms them into something current and sophisticated. The lines don’t need to reference the sunset specifically — abstract geometric lines, stripes, or minimalist shapes read as deliberate artistic choices rather than just decoration. This combination gives you color and interest without overwhelming short nails.
Layering Gradient and Lines Correctly
- Create your gradient using a makeup sponge (dab rather than swipe for softer transitions) or a gradient tool
- Make sure the gradient is completely dry before adding any line work — wet polish will smudge and drag
- Use black, white, or a contrasting color for your lines so they stand out against the gradient
- Consider geometric shapes that reference the sunset theme (triangles pointing downward, horizontal lines suggesting layers of sky, or small circles representing the sun)
- You can create lines that follow the gradient’s natural transitions rather than fighting against them
Worth knowing: If your gradient is very colorful or contains multiple colors, keep your line work simple — one or two thin lines per nail rather than elaborate patterns. The gradient is already providing plenty of visual interest.
6. Monochrome Grid Design
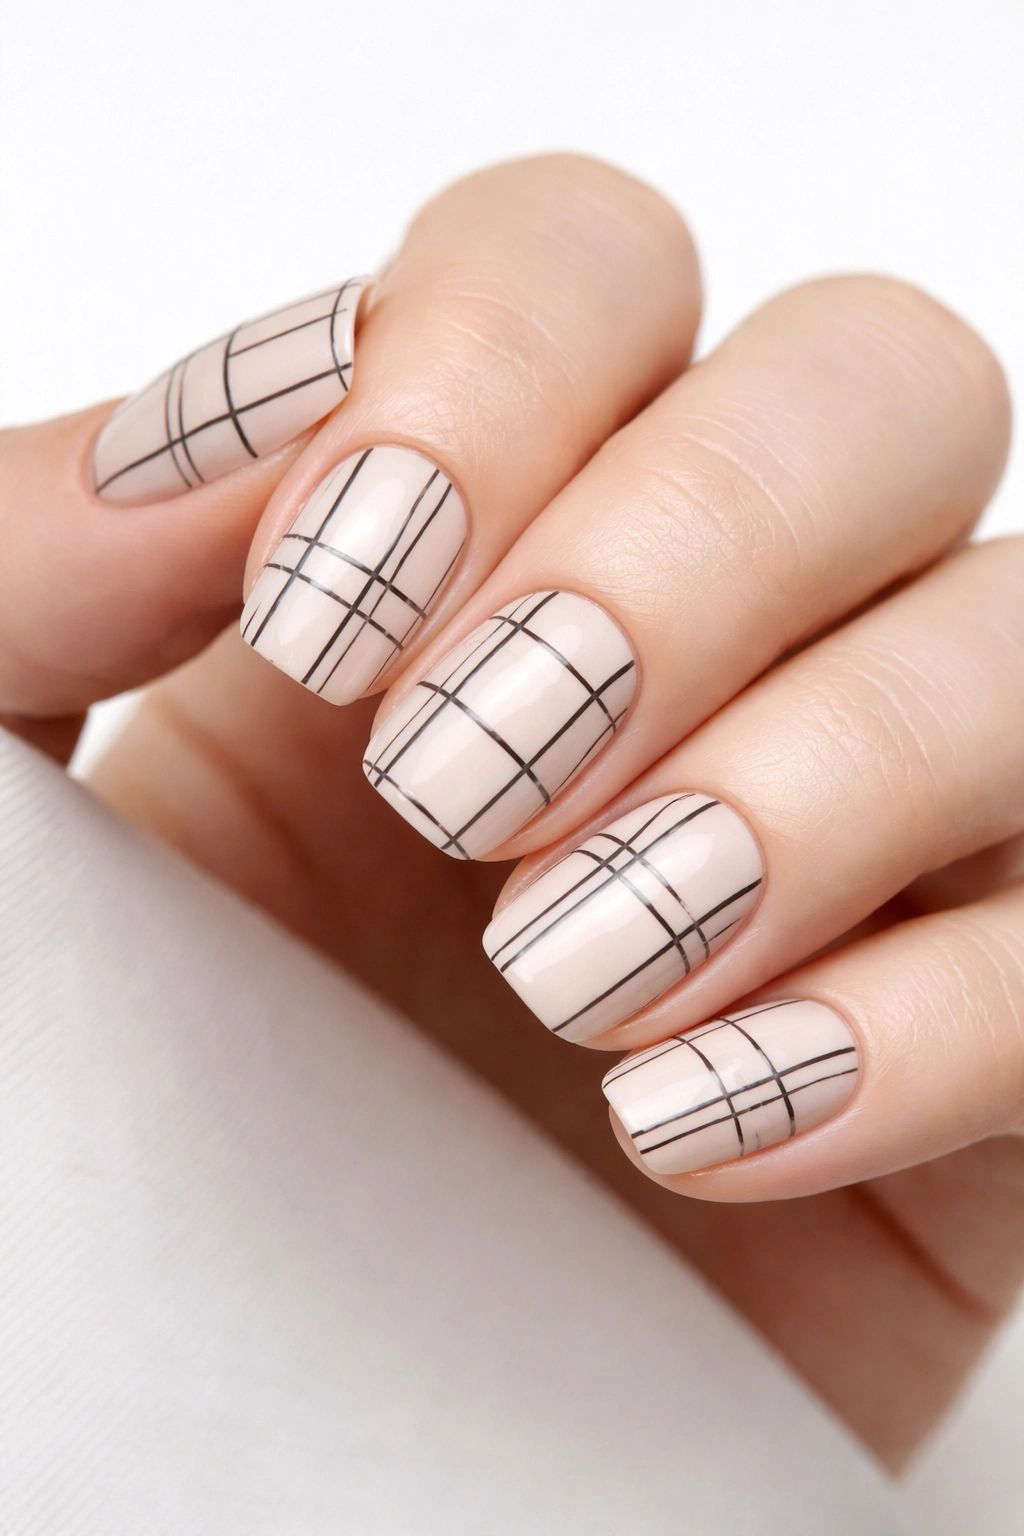
A grid pattern created entirely in one color family — think black lines on a white nail, or dark navy lines on light gray — is the definition of sophisticated minimalism. The grid doesn’t need to be perfectly uniform squares; loose, organic grid patterns with varying line weights and spacing feel more artistic and intentional.
Why Grids Read as Modern
Grids have an architectural, almost design-sketch quality that feels intentional and curated. Unlike patterns that are purely decorative, grids reference design principles and structure, which automatically reads as thoughtful. Monochrome grids eliminate color distraction and let the pattern and composition speak for themselves.
Creating a Grid That Feels Intentional
- Decide whether you want a rigid, precise grid (perfect squares, consistent spacing) or a loose, organic grid (varying line weights and spacing)
- For rigid grids, you can lightly mark your guidelines with a pencil or use thin striping tape to ensure straight lines
- Draw vertical lines first, then horizontal lines, working slowly and allowing each line to dry slightly before adding the next
- Varying the line thickness slightly (some lines thinner, some slightly bolder) adds visual interest without sacrificing the grid’s clean aesthetic
- Leave some areas of the grid unfilled with color for additional negative space impact
Pro tip: A loose grid where some lines are broken or incomplete feels less rigid and more like intentional art than a perfectly uniform grid.
7. Scattered Constellation Lines
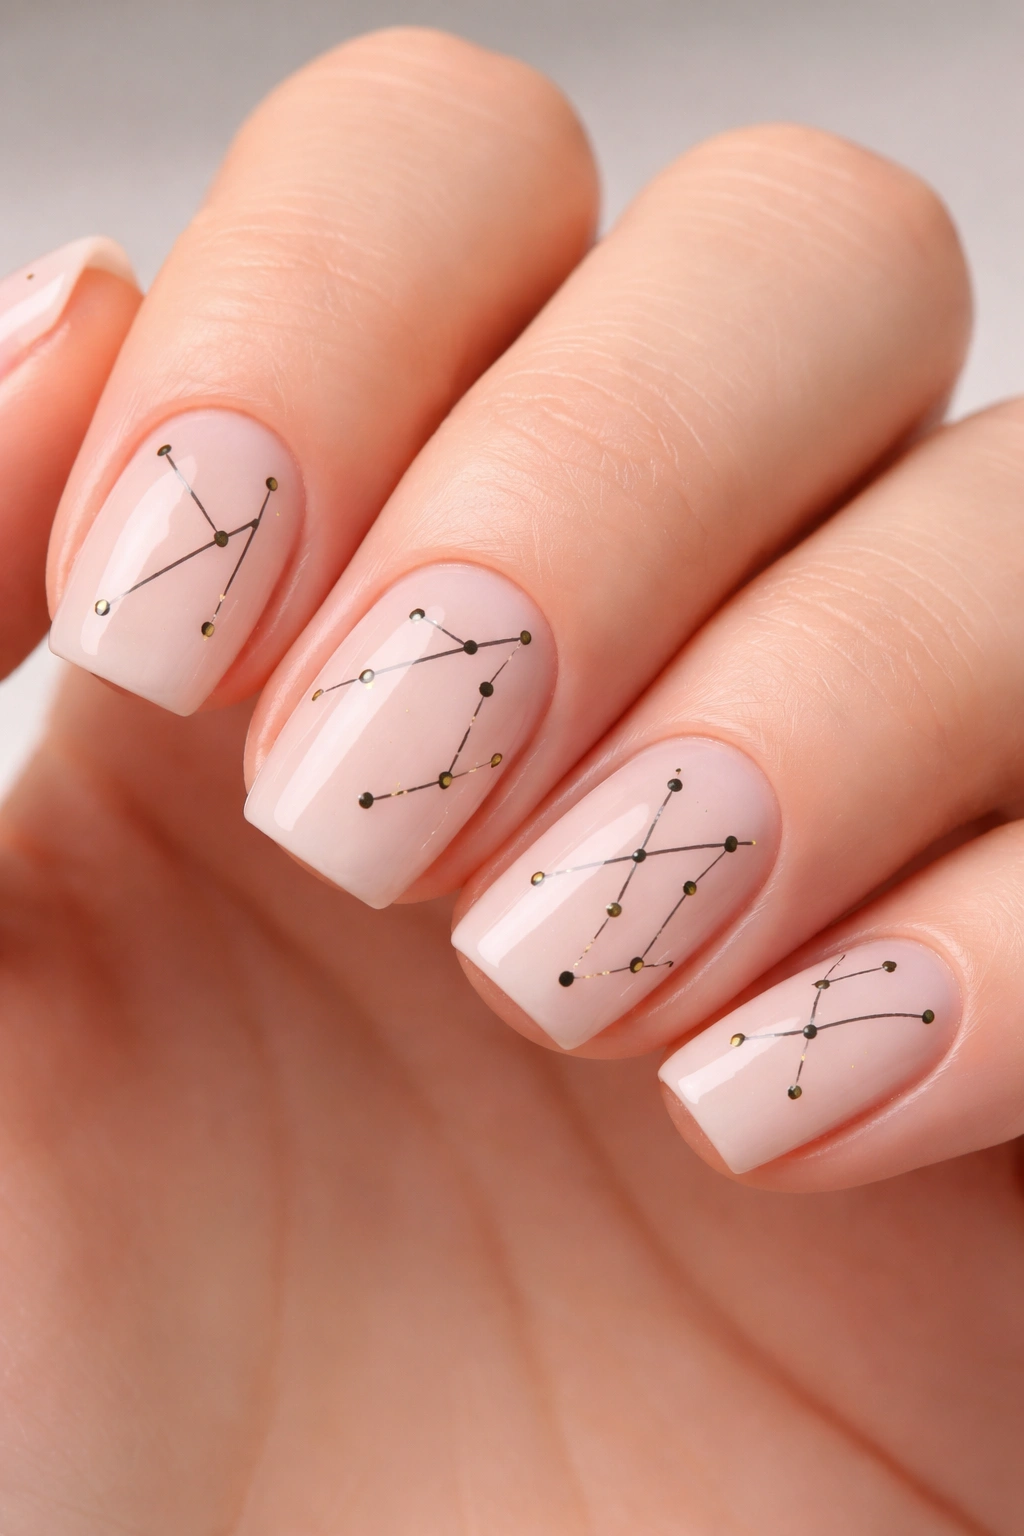
A playful, whimsical approach to line art, constellation designs use fine lines connecting imaginary dots across the nail surface. These designs feel personal and artistic without requiring you to draw recognizable objects — abstract dot-and-line compositions have just as much impact as actual constellation patterns.
What Makes Constellation Designs Work
There’s something naturally appealing about connecting dots — it feels purposeful and artistic without needing to be realistic or recognizable. On short squoval nails, you can create two or three small constellation clusters, or one larger composition that stretches across several nails if you’re coordinating a full set. The scattered approach means imperfect placement actually enhances the design’s organic, intentional quality.
Building Your Constellation Design
- Start with small dots placed randomly across the nail using a dotting tool or the end of a thin brush
- Don’t make your dots perfectly aligned — randomness is part of the charm
- Using a thin brush or striping tool, draw lines connecting some (not all) of the dots to create a constellation shape
- Some lines can be thin and delicate; others can be slightly bolder for visual variation
- You can add small additional decorative marks — like tiny triangles, small circles, or additional line flourishes — between dots
- The pattern should feel like someone thoughtfully placed these marks rather than following a strict template
Worth knowing: These designs look equally beautiful in single-color (black lines on white nail) or color (gold or silver lines on a darker base). The metallic versions feel extra special for events or occasions.
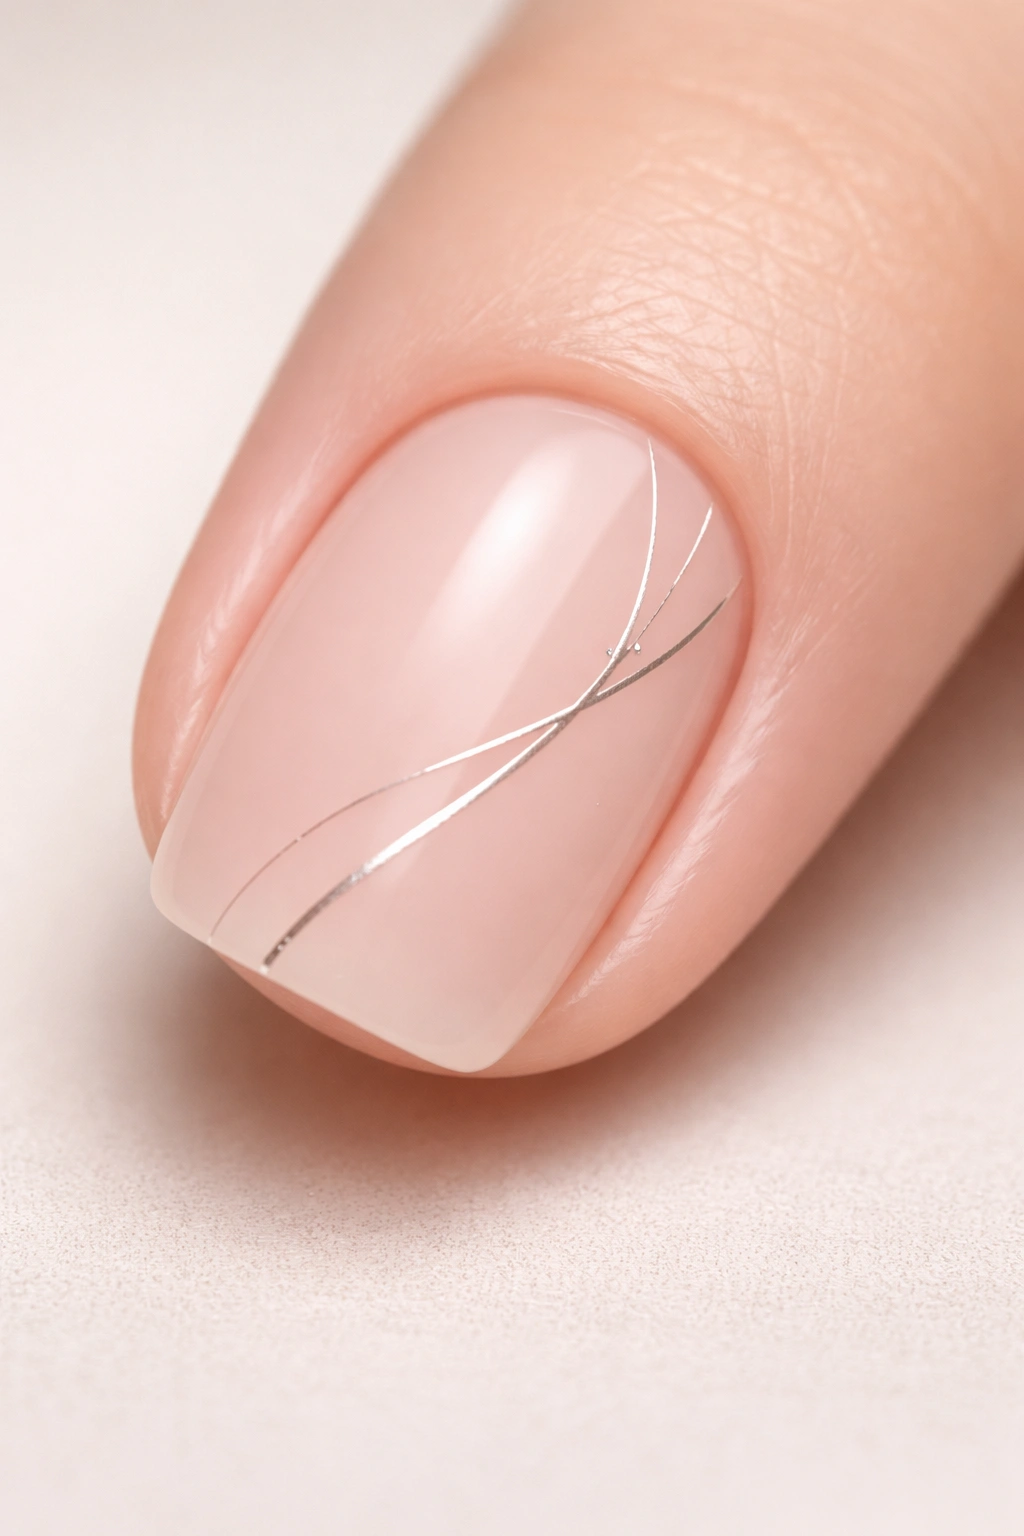
8. Double Line French Manicure
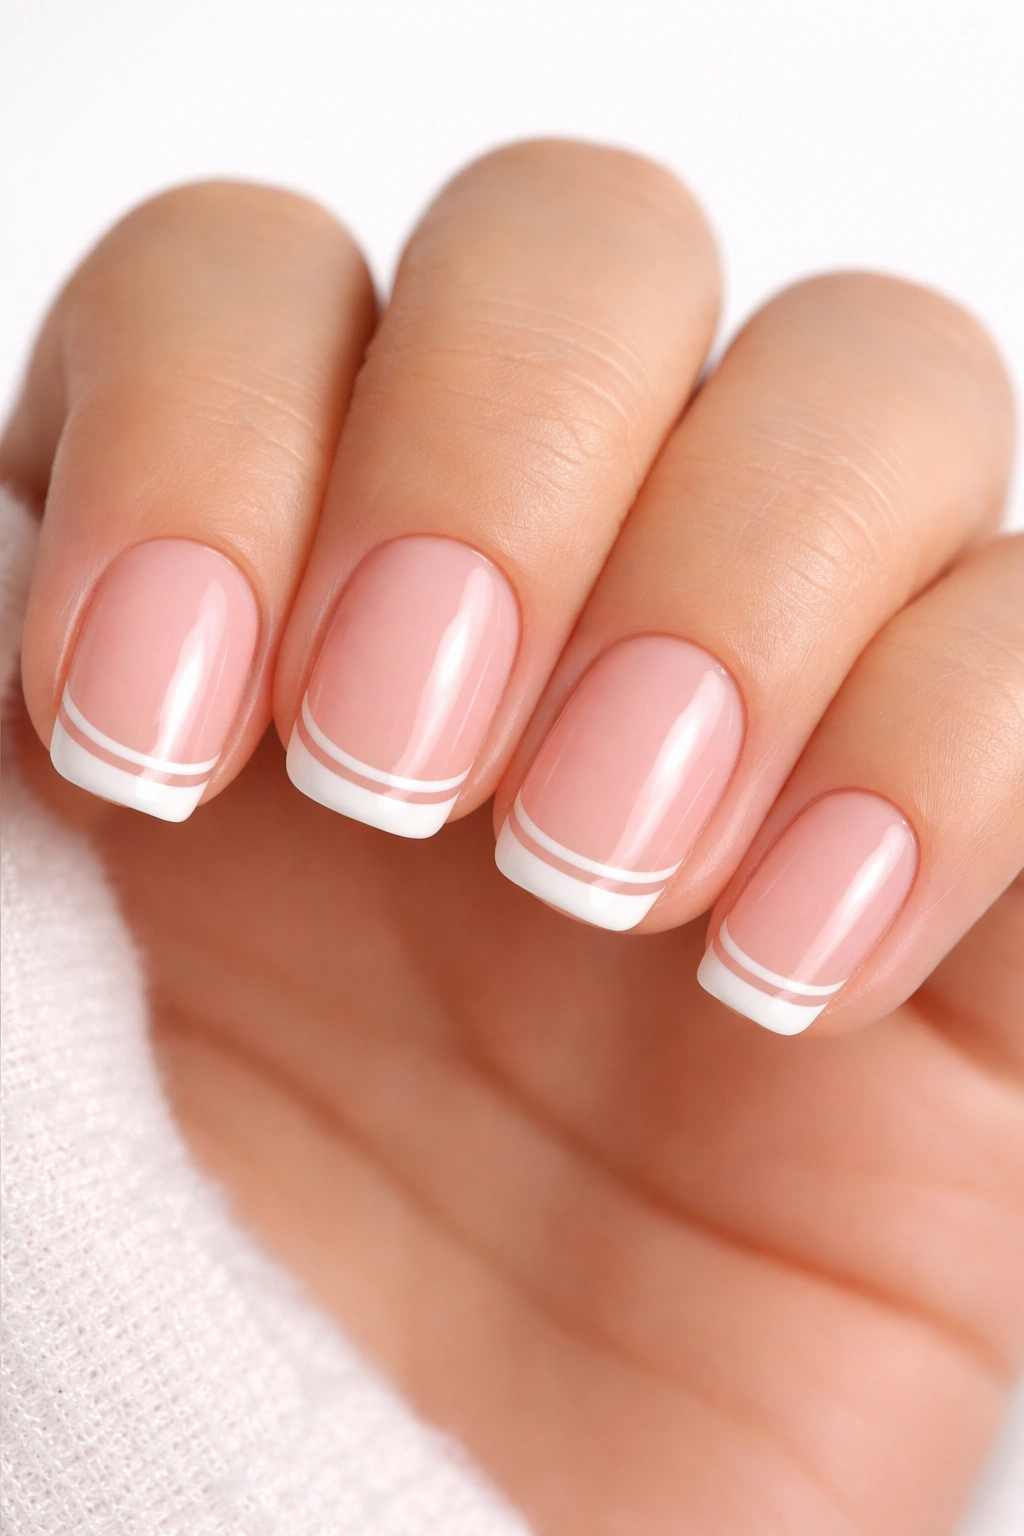
The French manicure gets a modern update when you replace the traditional thick line with two thin, parallel lines creating an elegant graphic edge. This approach maintains the classic elegance of a French manicure while feeling contemporary and refined, perfect for short squoval nails where clean, defined edges matter.
Why Double Lines Modernize the French Manicure
A single thick traditional French line reads as classic or dated depending on context, but two thin parallel lines automatically feel current and intentional. The double line creates subtle depth and visual interest while maintaining the sophisticated simplicity that makes French manicures timeless. The parallel lines also emphasize the nail’s clean edge and the squoval shape’s natural grace.
Creating Perfectly Parallel Double Lines
- Apply your base color (typically pale pink, cream, or nude) and let it dry completely
- Lightly mark where your lines will go with a pencil if you need guides (the marks will disappear under polish)
- Use thin striping tape to create perfectly parallel guides, or draw both lines freehand if you’re confident
- The lines should be roughly 2-3mm apart, creating a thin frame rather than a thick graphic element
- Keep your first line steady, then mirror its exact distance from the edge with the second line
- You can create additional visual interest by making the lines slightly angled rather than perfectly horizontal
Pro tip: If creating perfectly parallel freehand lines feels impossible, this is the one time using tape is not cheating — it’s practical and the results are flawless.
9. Marble Swirl with Gold Lines
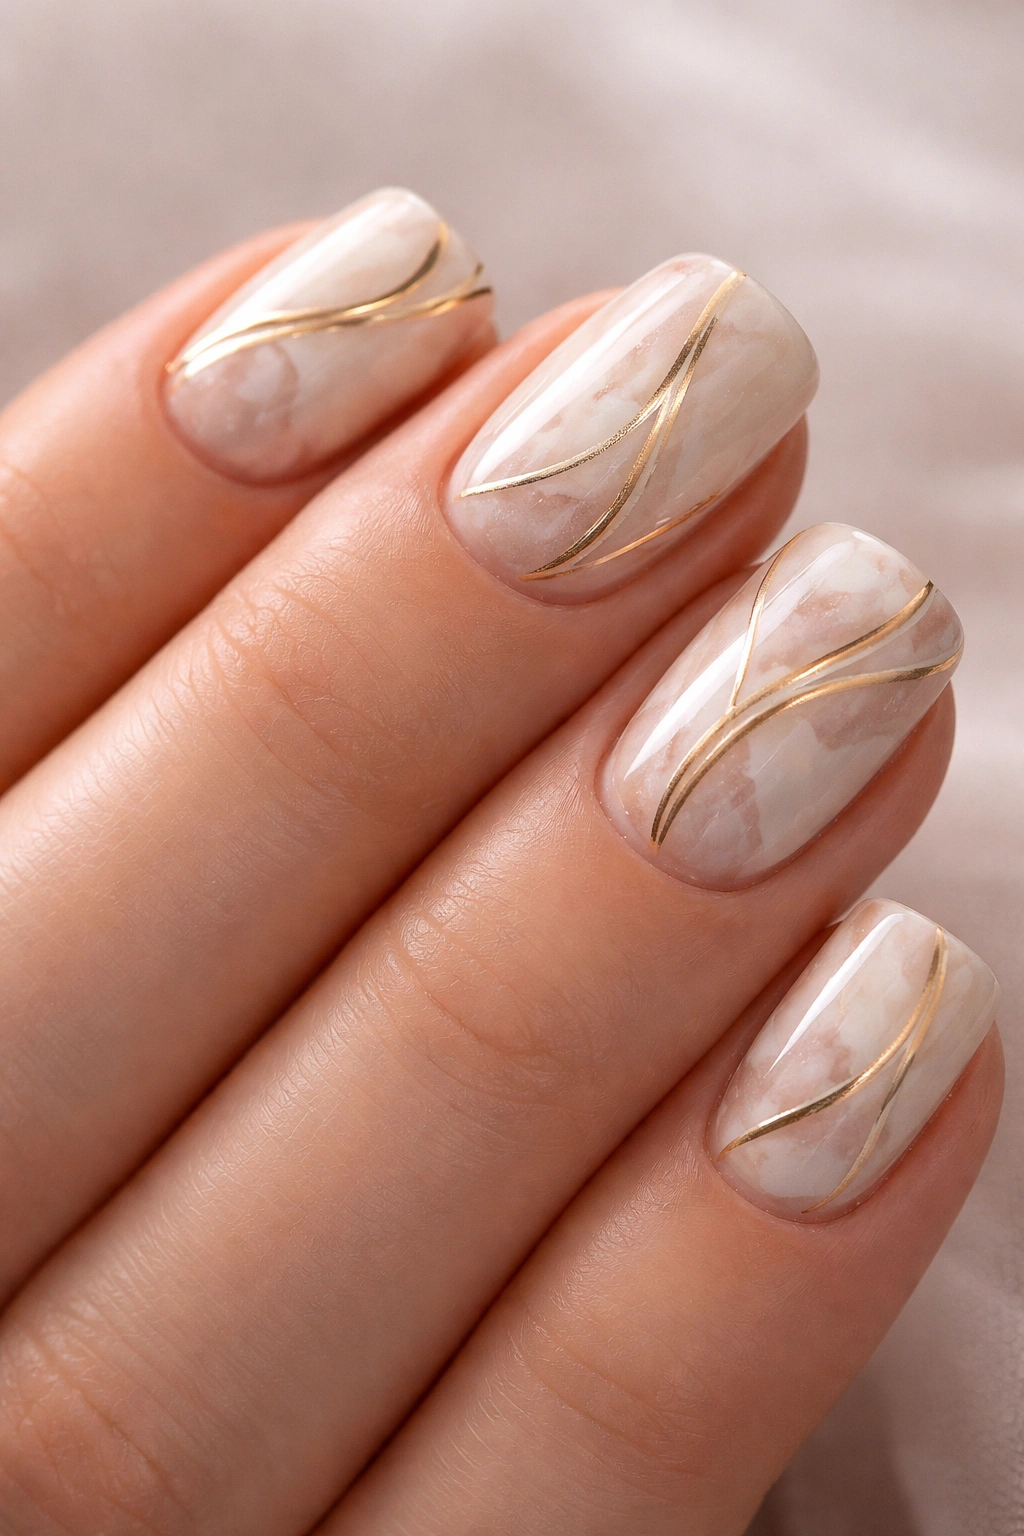
Combining the organic beauty of marble patterns with thin gold or metallic lines creates a design that feels both luxurious and wearable. The marble pattern provides visual interest and complexity, while the gold lines add structural definition and elegance, transforming a potentially busy design into something refined and intentional.
How Metallic Lines Elevate Marble
Marble patterns can sometimes read as chaotic or overly complicated, especially on short nails, but adding strategic metallic lines creates visual anchors and structure. These lines might follow the marble’s natural swirls, create geometric divisions across the marble, or establish a separate design layer entirely. The metallic catches light and draws attention, keeping the marble from feeling muddy or overwhelming.
Creating Marble with Strategic Line Work
- Create your marble pattern using a water marbling technique or by swirling colors with a thin brush
- Allow the marble to dry completely
- Plan where your gold lines will go — typically along the edges, creating geometric sections, or following the swirls naturally
- Using a thin brush and gold or silver metallic polish, add your lines with intention
- Consider doubling some lines or creating patterns (parallel lines, small geometric shapes) rather than just random accent lines
- The metallic lines should feel like they’re organizing or highlighting the marble rather than randomly placed
Worth knowing: Metallic polishes apply most smoothly over a slightly sticky topcoat base — allow your topcoat to be just barely tacky before applying metallic lines, and the polish will glide smoothly without dragging.
10. Minimalist Botanical Stems
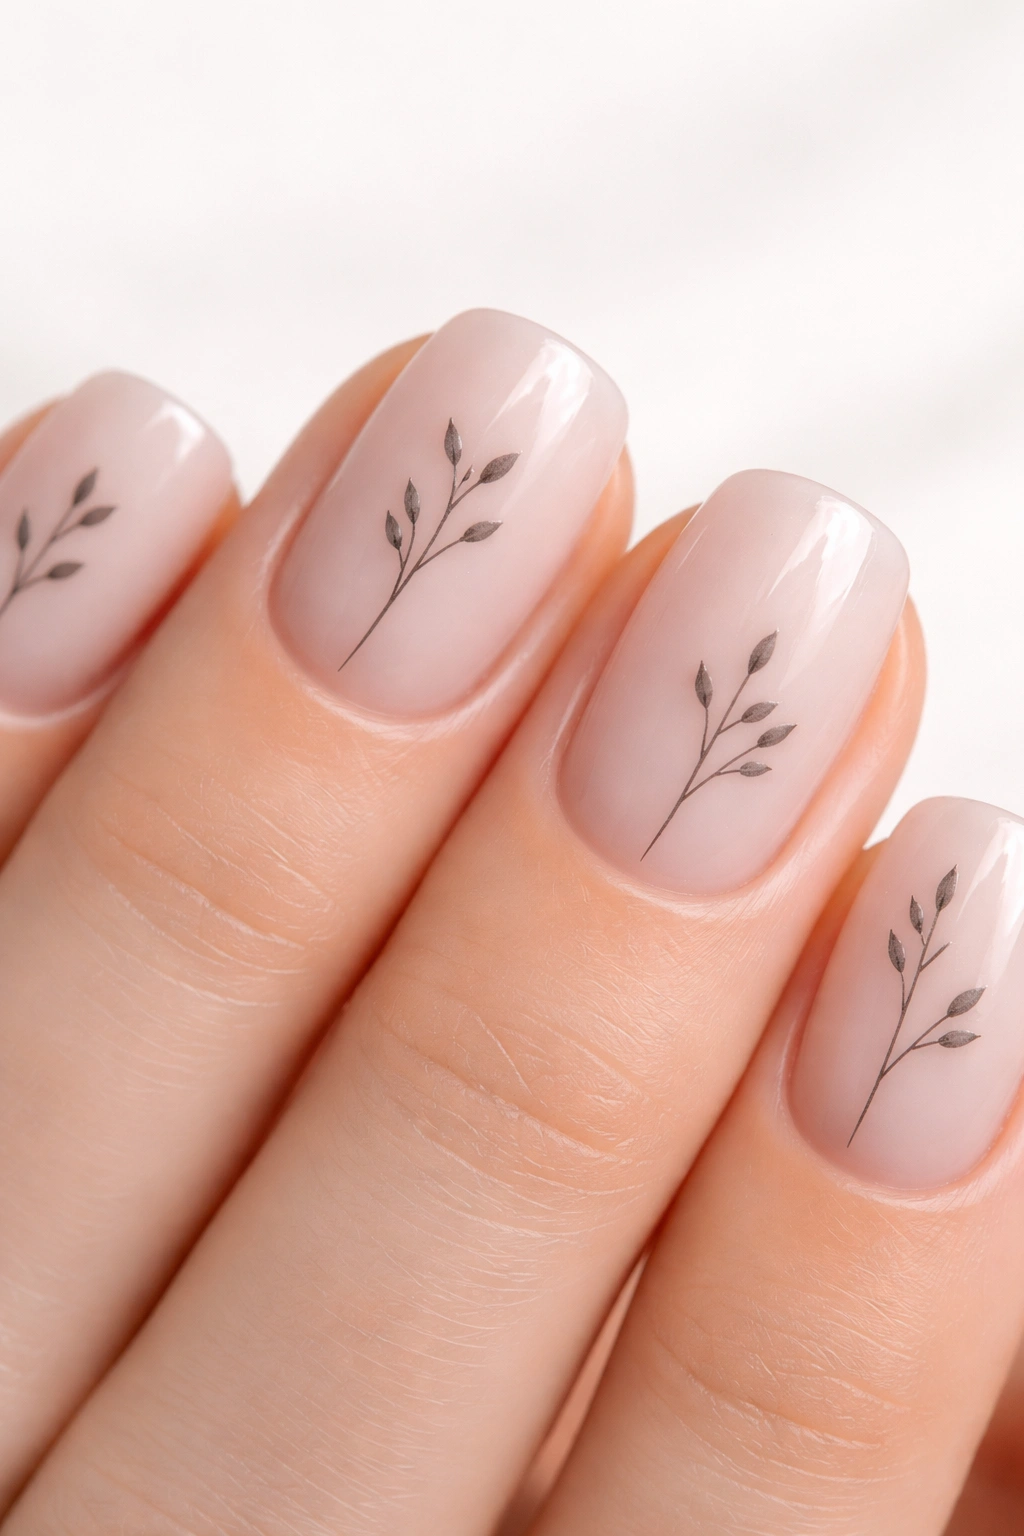
Fine-line botanical designs — delicate stems with tiny leaves or buds — bring organic elegance to short squoval nails. These designs feel artistic and thoughtful without being complicated; they work beautifully in single color or with subtle color accents on specific leaves or stems.
Why Botanical Lines Feel Chic
Botanical designs are inherently sophisticated because they reference nature and hand-drawn artistry. Unlike abstract geometric patterns, botanical elements feel personal and gentle — they suggest someone who appreciates natural beauty and takes time to create something intentional. The organic quality of plant stems and leaves actually complements squoval nails’ natural shape.
Designing Botanical Stems
- Start with thin, slightly curved main stems using your thinnest brush or striping tool
- Stems don’t need to be perfectly straight; gentle curves feel more organic and natural
- Add smaller branch lines coming off the main stem at irregular intervals
- Tiny leaves can be created with just two or three small brush strokes — a pointed leaf shape, or simple oval leaves
- Consider adding small buds (tiny dots or small marks) at the ends of branches or along the stems
- You can create a different botanical pattern on each nail, or repeat a similar stem pattern across all ten for cohesion
Pro tip: These designs look particularly beautiful in muted colors like sage green, dusty rose, or warm gray rather than pure black — the softer color feels more refined and less harsh against skin tone.
Final Thoughts
Short squoval line art nails represent a specific aesthetic choice — one that values intention, clarity, and understated sophistication over maximalism or loudness. The beauty of line art is that it doesn’t require advanced artistic skill or expensive tools; what matters most is patience, decent lighting, and the confidence to embrace imperfection as part of the design’s charm.
The designs that feel most chic aren’t necessarily the most complicated ones. Instead, the manicures that genuinely catch people’s attention are the ones where every element serves a purpose — whether that’s creating visual structure, adding elegance, or establishing an artistic point of view. Line art achieves that because the lines themselves become meaningful; they’re not just decoration but actual design elements that organize the nail and create composition.
Start with whichever design speaks most strongly to your aesthetic. If clean geometry appeals to you, go for a chevron or grid. If you prefer organic beauty, botanical stems or wavy stripes might feel more authentically you. The wonderful thing about short squoval nails is that line art looks crisp and polished on this shape regardless of which design you choose. Give yourself permission to make mistakes, embrace slight imperfections as character rather than flaws, and enjoy the process of creating something intentionally beautiful on your own nails.
