

Polka dots are having a major moment in nail art, and here’s the best part: you don’t need expensive salon tools or professional training to recreate these playful, timeless designs at home. Whether you’re drawn to classic black-and-white combinations, soft pastels, or bold, colorful statements, polka dot nails offer something for every mood and occasion. The trend has resurged in popularity because it combines retro nostalgia with modern versatility — you can keep it minimal and chic or go wild with creative color combinations. What makes polka dots so appealing is their pure simplicity: just dots scattered across your nails. Yet within that simplicity lies endless possibility. The beauty of this nail art style is that it’s genuinely beginner-friendly. You don’t need stencils, stamps, or advanced techniques. A dotting tool (or even a bobby pin or toothpick from your kitchen drawer) combined with nail polish and a bit of patience is all you need to transform your nails into something gallery-worthy. This guide walks you through 10 distinct polka dot nail designs you can absolutely execute yourself, complete with the exact techniques, color combinations, and pro tips that separate stunning results from mediocre ones. By the end, you’ll have multiple design ideas in your back pocket and the confidence to experiment with variations that match your personal style.
1. Classic Black and White Polka Dots
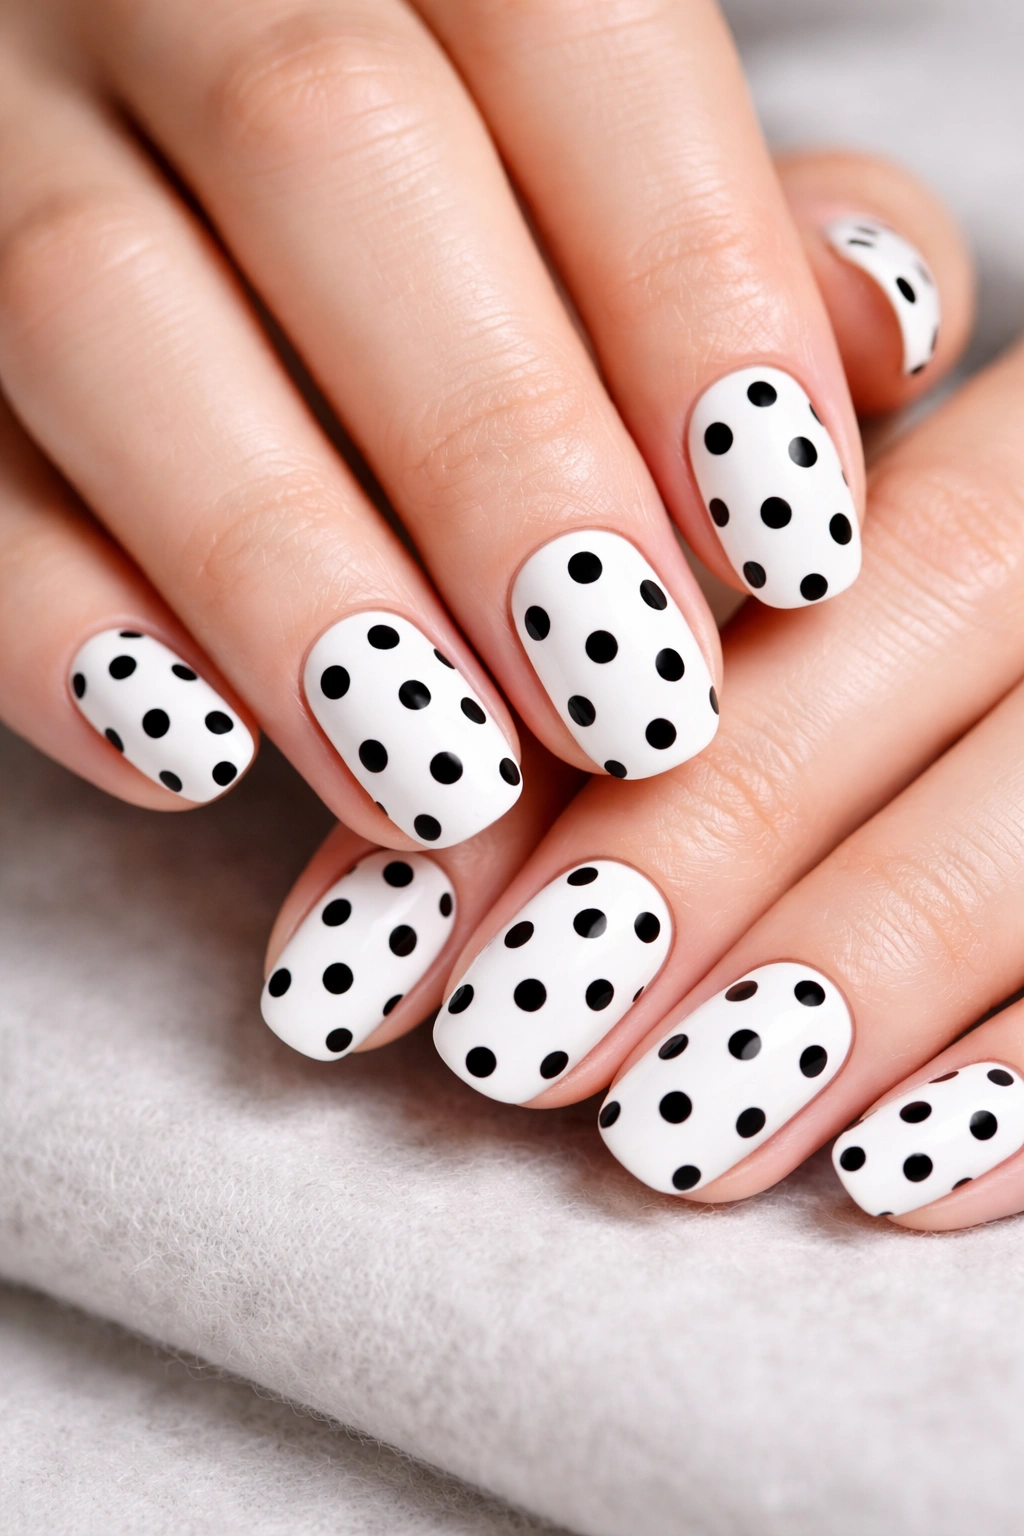
This is the design that started it all — and for good reason. A crisp white base with bold black polka dots (or the reverse) delivers maximum visual impact with zero complexity. The high contrast makes the dots pop from across the room, and the monochrome palette means this manicure goes with literally everything in your wardrobe.
Why This Design Works So Well
The beauty of black and white lies in its graphic simplicity and timeless appeal. Black and white combinations never look dated because they exist outside of trend cycles. The contrast is inherently satisfying to the eye, making even imperfectly spaced dots look intentional rather than sloppy. This design also works on any nail length and shape — short, rounded nails look just as polished as longer almond-shaped ones.
How to Achieve the Look
Start with a clean base coat to protect your nails, then apply two coats of your white polish, waiting for complete dryness between coats. Pour a small amount of black polish onto a nail art palette or even a ceramic dish. Dip your dotting tool (or the rounded end of a bobby pin) into the black polish and gently press it onto your nail, holding for a second before lifting away. The key is consistent pressure — too light and the dot won’t show; too hard and it’ll spread into a blob. Space your dots randomly across the nail surface for organic appeal, then seal everything with a glossy top coat once fully dry.
Expert Tips for Perfect Results
Don’t aim for perfect symmetry. Beginners often overthink dot placement, but irregular spacing actually looks more natural and forgiving of any imperfect dots. Vary your dot sizes slightly by using slightly more or less pressure with your tool — this creates visual interest and camouflages any dots that didn’t turn out perfectly round. If a dot runs together or looks off, let it dry completely, then use a thin brush dipped in your base coat color to carefully paint over it and start fresh in that spot.
2. Soft Pink and White Polka Dots

Swap the drama of black and white for something softer and more romantic. A pale pink or rosy mauve base with delicate white polka dots creates a feminine, approachable look that feels both current and timeless. This combination works beautifully for everyday wear, special occasions, or anyone who gravitates toward warm, gentle color palettes.
The Psychology of Soft Pink Polka Dots
Pink and white combinations trigger feelings of softness, femininity, and approachability. The white dots against a pink base feel less graphic than black and white, making the overall look feel more understated and wearable. This design particularly suits people who want nail art that looks intentional but not aggressive. It pairs perfectly with both casual and formal outfits without dominating your overall appearance.
Application Technique for Best Results
Select a soft pink shade — think dusty rose, pale mauve, or ballet pink rather than hot pink. Apply your base coat, then two full coats of pink, curing under an LED or UV lamp between coats if using gel polish, or simply waiting for complete air-dry time with regular polish. Once dry, place white gel or regular polish on your palette. Using your dotting tool, create small to medium dots across the nail. The beauty of this combination is that white shows up so clearly against pink that even slightly imperfect dots read as intentional. Smaller dots tend to feel more sophisticated than oversized ones with this color pairing.
Seasonal Variations
During cooler months, shift toward deeper mauve or wine-tinted pinks with white dots for a more autumnal feel. In warmer seasons, go brighter with coral-pink bases and white dots for a summery vibe. You can also try reversing the concept: white or cream nails with tiny pink dots scattered across, which creates a subtle, almost barely-there effect that’s incredibly chic.
3. Ombre Polka Dots with Gradient Colors
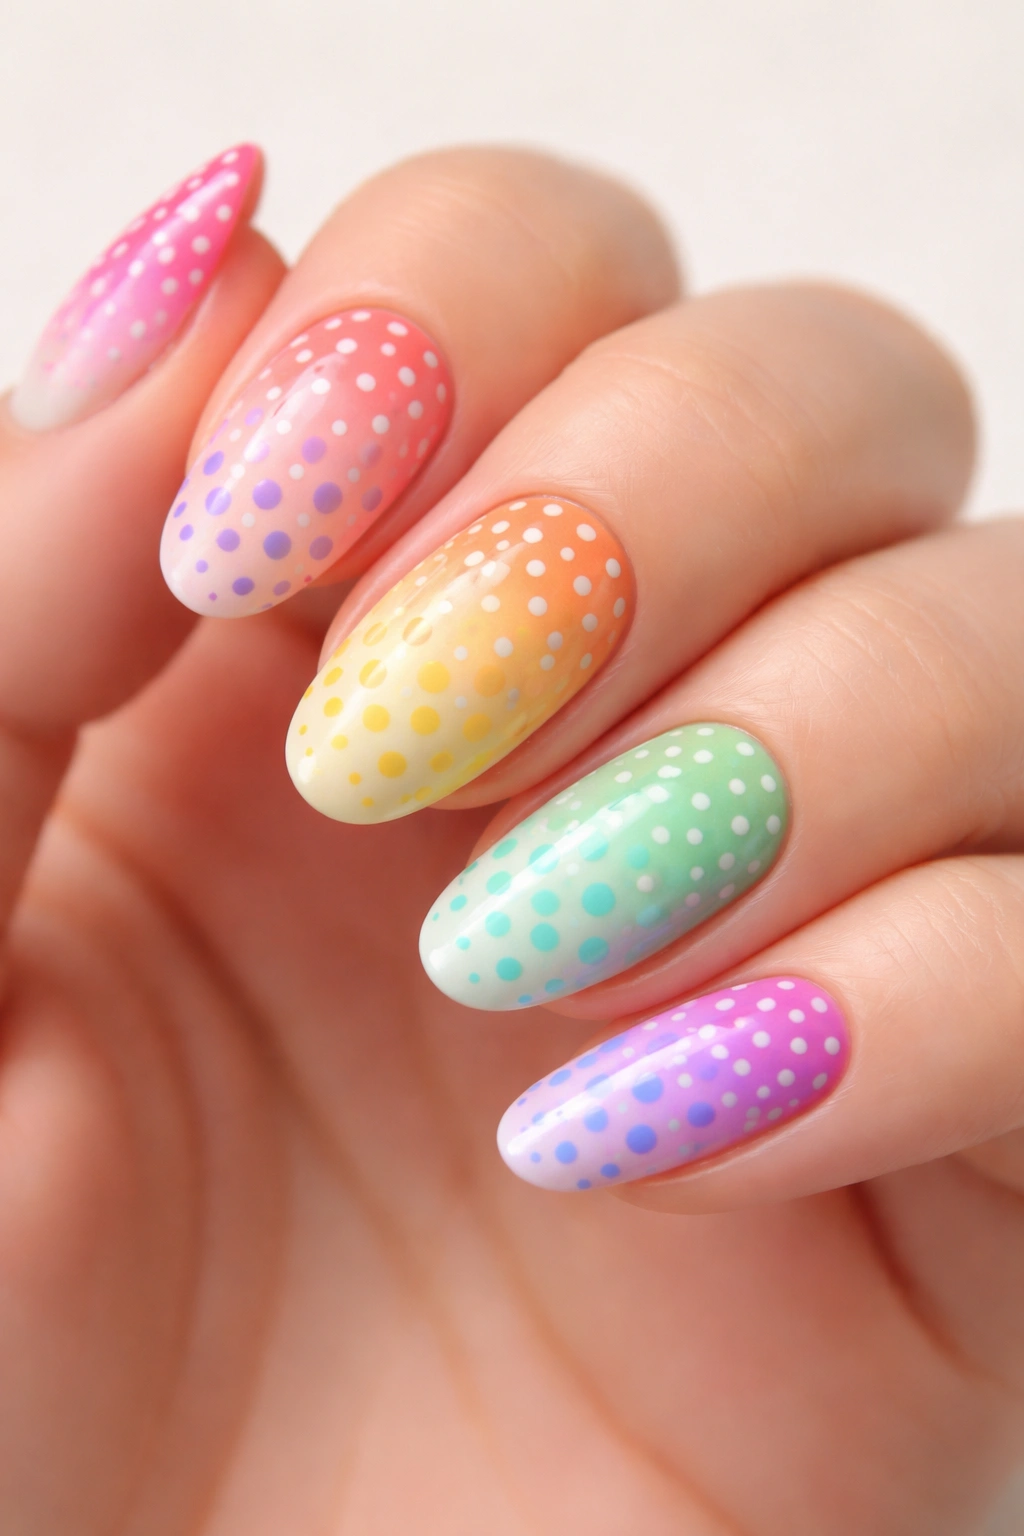
Take the polka dot concept and elevate it with an ombre effect. Instead of using a single dot color, gradually transition your dots from light to dark (or vice versa) across your nails, creating a sophisticated gradient while maintaining the playful dot pattern. This approach feels more advanced than basic polka dots but is actually just as simple to execute.
Understanding the Ombre Gradient Effect
An ombre polka dot design works by placing dots in progressively darker or lighter shades as you move from one nail to the next, or even within a single nail. For example, you might use light blue dots on your thumb, medium blue on your index finger, and deep navy on your pinky — all on the same neutral or white base. The result is a design that feels dynamic and artistic while maintaining the recognizable polka dot pattern readers expect.
Step-by-Step Execution
Start with a neutral base — cream, white, or nude — on all nails. Select three to five shades of a single color family. You might choose pastels (baby blue, soft lavender, pale pink, dusty mauve) or jewel tones (emerald, sapphire, amethyst, teal). Apply your base coat, then your neutral base color. Once dry, dip your dotting tool into your lightest shade and create dots on your pinky and ring finger. Rinse or wipe your tool clean, then dip into your next shade and dot your middle and index fingers. Continue this process across all nails, progressing to your darkest shade on your thumbs. The gradient happens naturally as your eye moves across your hand.
Color Combinations That Work Best
Blues transitioning from sky to navy. Pinks moving from blush to deep rose. Purples flowing from lilac to eggplant. Greens shifting from sage to forest. Warm earth tones ranging from butter to chocolate. The key is choosing shades within the same color family so they feel cohesive rather than random.
4. Minimalist Nude Base with Metallic Dots
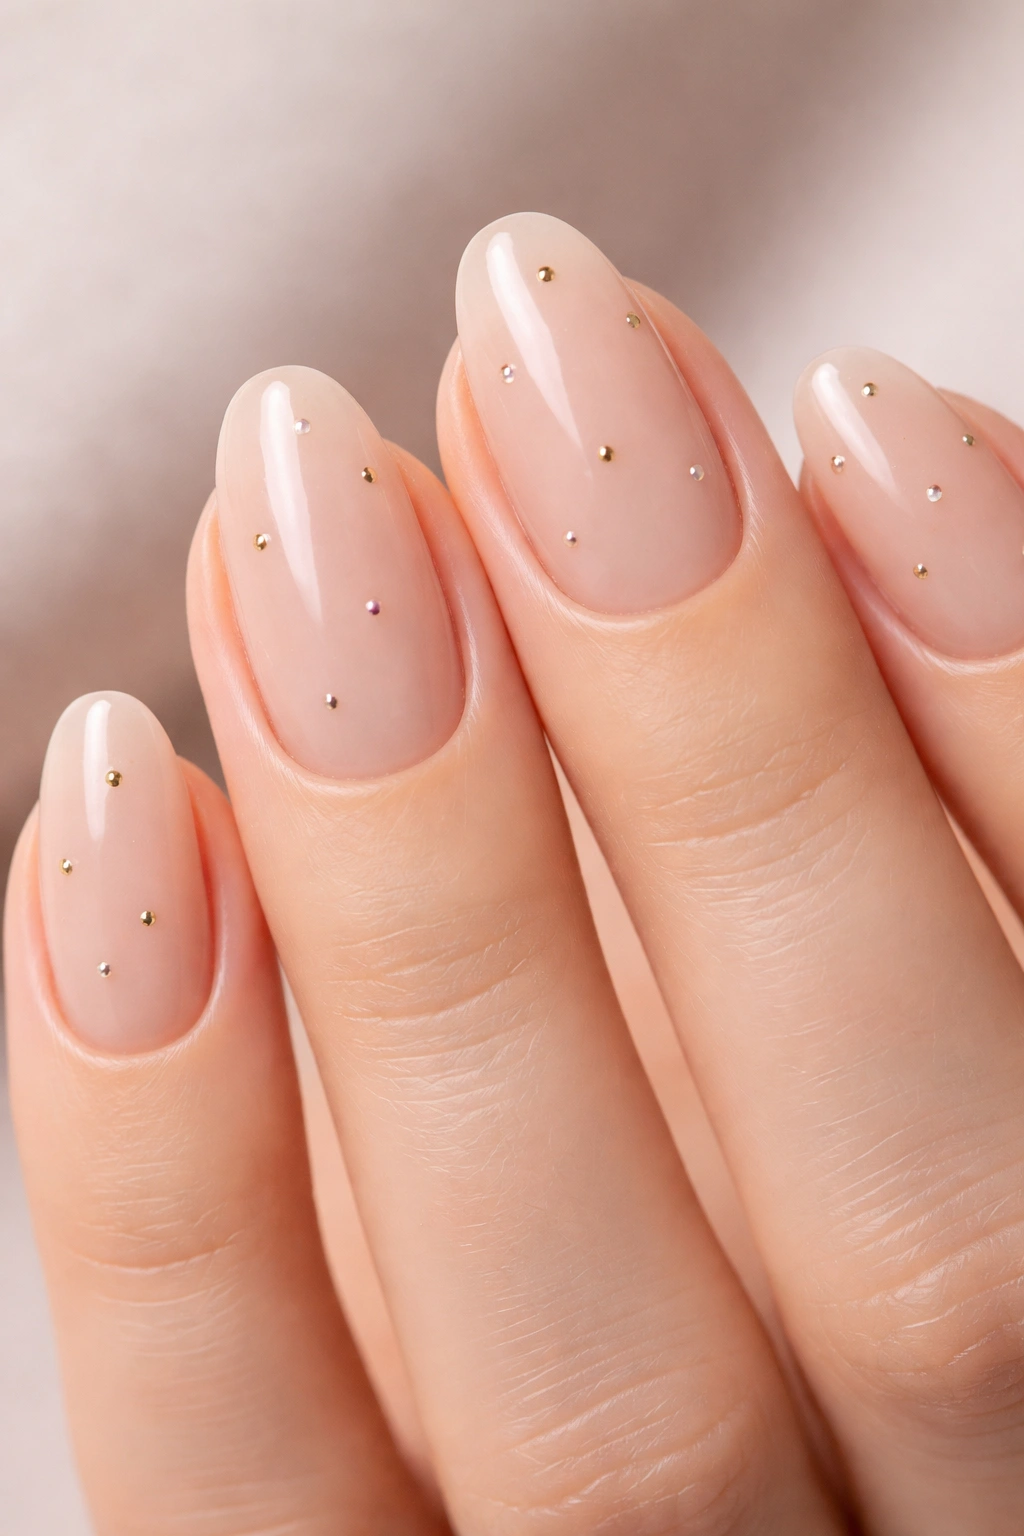
For a sophisticated, understated approach, try a barely-there nude or skin-tone base with tiny metallic dots in gold, silver, or rose gold. This design whispers instead of shouts, making it perfect for professional settings, formal events, or anyone who prefers quiet elegance over bold statements. The metallic shine catches light beautifully without overwhelming the overall look.
Why Metallic Dots Elevate the Design
Metallic polishes have an inherent glamour because they catch and reflect light. Even when applied in small quantities as polka dots, they create a sense of sparkle and luxury. Pairing metallics with a muted nude base creates an intentional contrast — the dots become jewelry for your nails rather than a loud pattern. This combination works across all seasons and occasions because it feels both approachable and polished.
Application for a Flawless Finish
Choose a nude shade that matches your skin tone closely. Apply base coat, then two coats of your nude polish. Once fully dry, select your metallic shade — gold works with warm skin tones, silver and rose gold work universally. Pour a small amount onto your palette. Using your dotting tool, create very small, delicate dots across each nail. Keep them sparse rather than dense; five to eight dots per nail is often more impactful than covering the entire surface. Metallic polishes can sometimes be a bit thick, so dip your tool frequently to maintain fresh color and avoid dragging dry polish across your nail. Seal with a top coat, which will help the metallic polish adhere properly and intensify its shine.
Pro Tip for Metallic Success
If your metallic polish is particularly thick, thin it slightly with a drop of polish thinner before application. This makes the dots more spreadable and gives you better control. Alternatively, some metallic polishes perform better when applied in thin layers rather than one thick coat, so don’t be afraid to build the metallic color gradually.
5. Rainbow Polka Dots on a Neutral Base
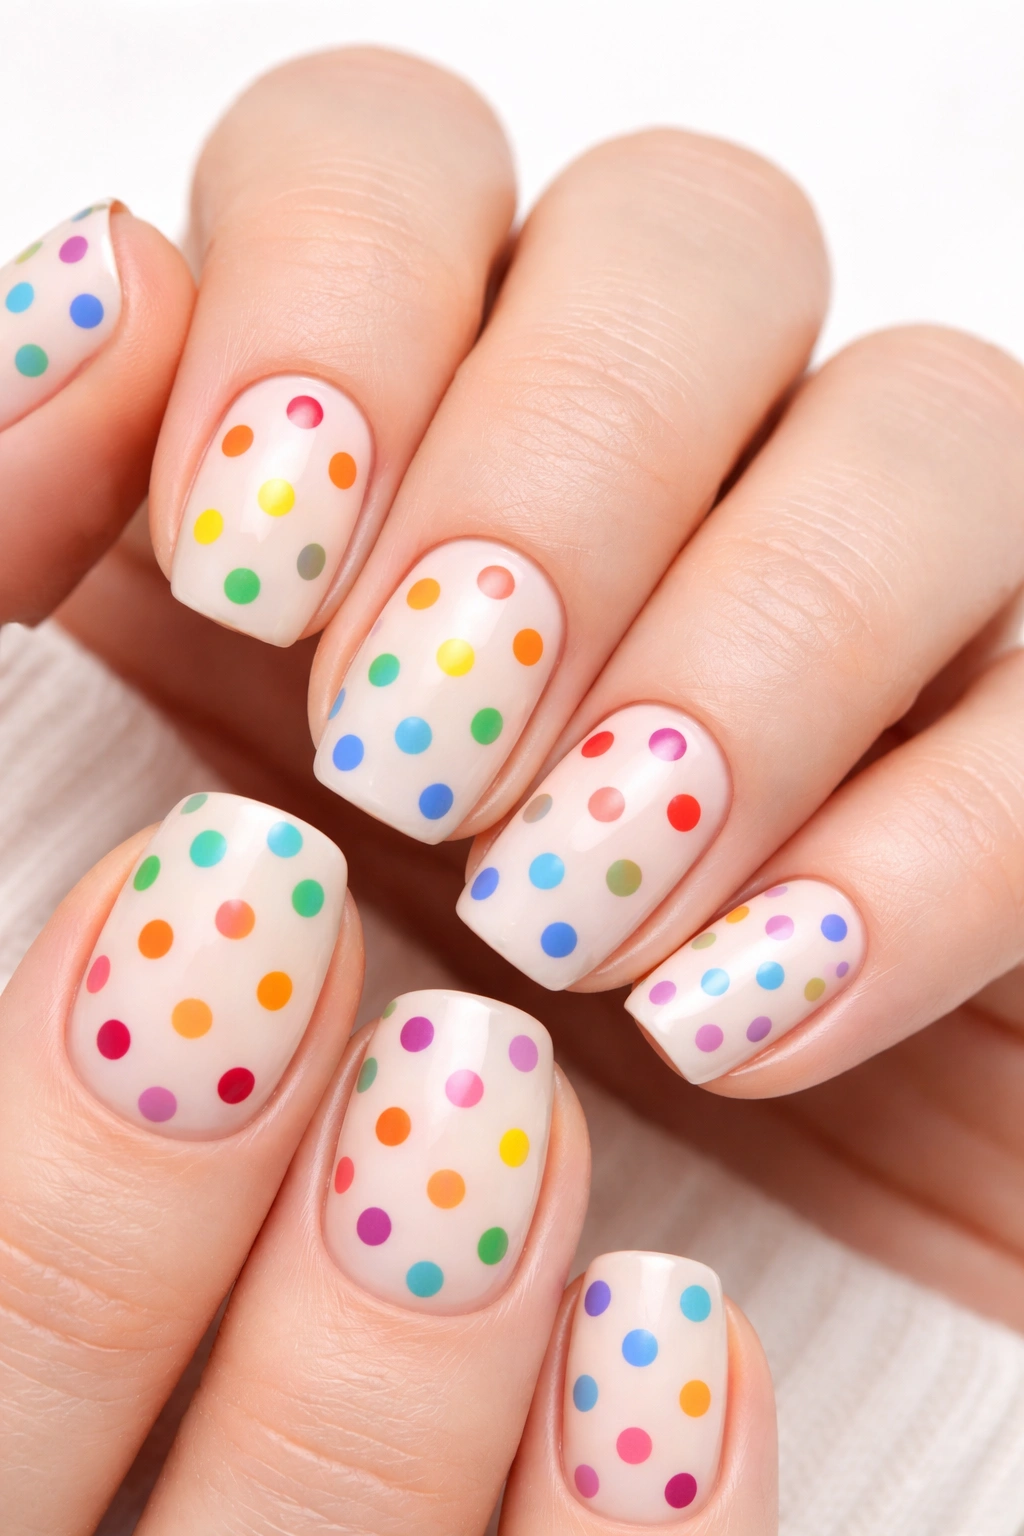
Inject maximum playfulness into your nail art with multicolored polka dots scattered across a white, cream, or nude base. This design celebrates joy and creativity without requiring any blending or complex techniques. It’s perfect for anyone who loves color but wants a pattern-based approach rather than a solid manicure.
Choosing Your Rainbow Palette
You have several approaches here. Go true rainbow with red, orange, yellow, green, blue, and purple dots. Stick to pastels for a softer, dreamier effect. Choose jewel tones for something richer and more sophisticated. Mix neon brights for a festival-inspired vibe. The key is selecting colors that feel cohesive rather than chaotic — either they’re all from the same color intensity level (all pastels, all brights, all jewel tones) or they’re intentionally varied for maximum impact.
Execution Strategy
Apply your neutral base coat and base color. Set up your palette with small amounts of each color you’re using. Work systematically across your nails, applying one color at a time. Dot all your red polka dots first across all ten nails, then move to orange, then yellow, and so on. This approach prevents you from constantly switching colors and running back and forth to your palette. It also forces you to space out dots of the same color naturally rather than clustering them. Let each color dry slightly before moving to the next to prevent colors from bleeding into one another.
Spacing and Balance
Distribute your dots evenly across all ten nails rather than loading one nail with tons of color and leaving another sparse. Step back periodically and view your whole hand to ensure the color distribution looks balanced. If you feel one color is underrepresented or one nail looks too busy, adjust accordingly. Remember that dots don’t need to be perfectly even in size — variation actually adds to the playful aesthetic.
6. Bold Red and White Polka Dot French Tips
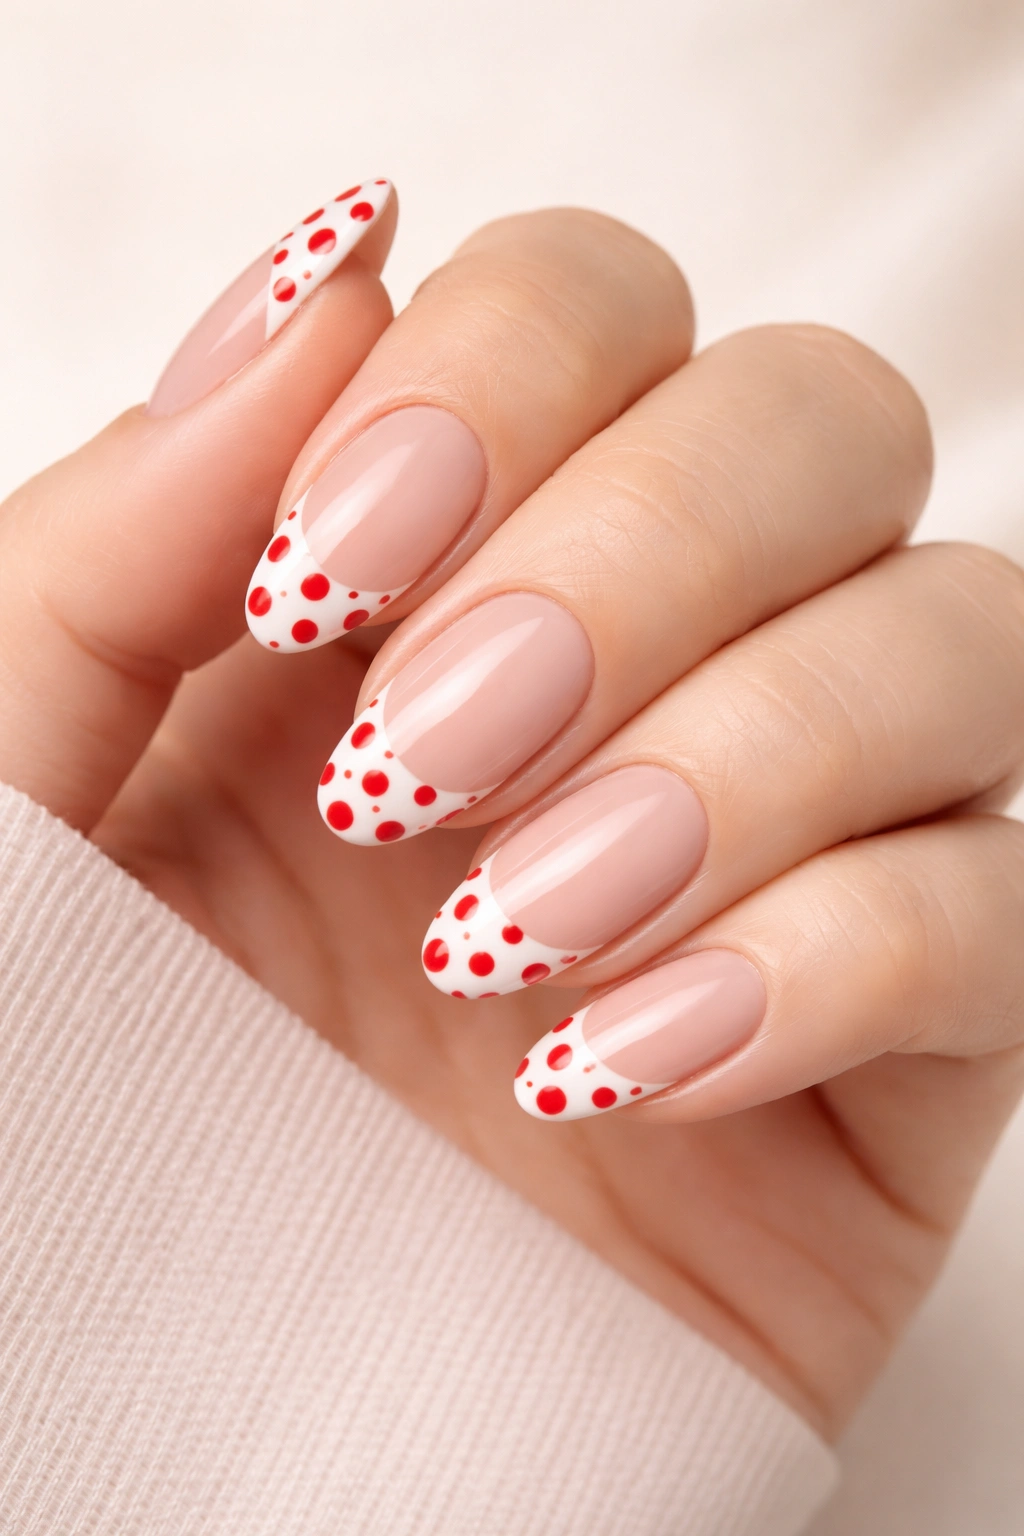
Elevate the classic French manicure by adding polka dots to the tips. A traditional white or cream tip gets a playful upgrade when you dot it with red, creating a look that’s both elegant and whimsical. The confined space of the French tip means fewer dots, making this design feel less busy than polka dots covering the entire nail.
Why French Tips with Dots Feel Sophisticated
French manicures read as universally polished and professional, while polka dots add personality and trend-awareness. Combining them creates something that works for boardrooms and brunches alike. The dots are essentially a fun detail rather than the main event, which keeps the overall effect refined. This design also works beautifully on short nails because the dotted area is so concentrated.
Creating the Perfect French Tip Base
Paint your nails with a neutral base color — nude, pale pink, or even sheer with just a hint of color. Once dry, apply your white or cream polish to just the tip of the nail, leaving about one-third of the nail in the base color. Use a steady hand or, if you’re less confident, apply painter’s tape along where you want the white to start, paint over it, let it dry, then carefully remove the tape for a clean line. Once your white tips are completely dry, dip your dotting tool into red polish and create small dots across the white tip area. Typically, three to five dots per nail works beautifully.
Color Variations on the French Tip Dot Design
Keep the white tips but swap red for black dots for a more graphic look. Use nude tips with black dots for understated elegance. Try pale pink tips with red dots for a romantic twist. Cream tips with burgundy dots for autumn. Light blue tips with navy dots for a cool-toned version. The French tip format is versatile enough to accommodate multiple color stories.
7. Two-Tone Polka Dots with Inverted Design
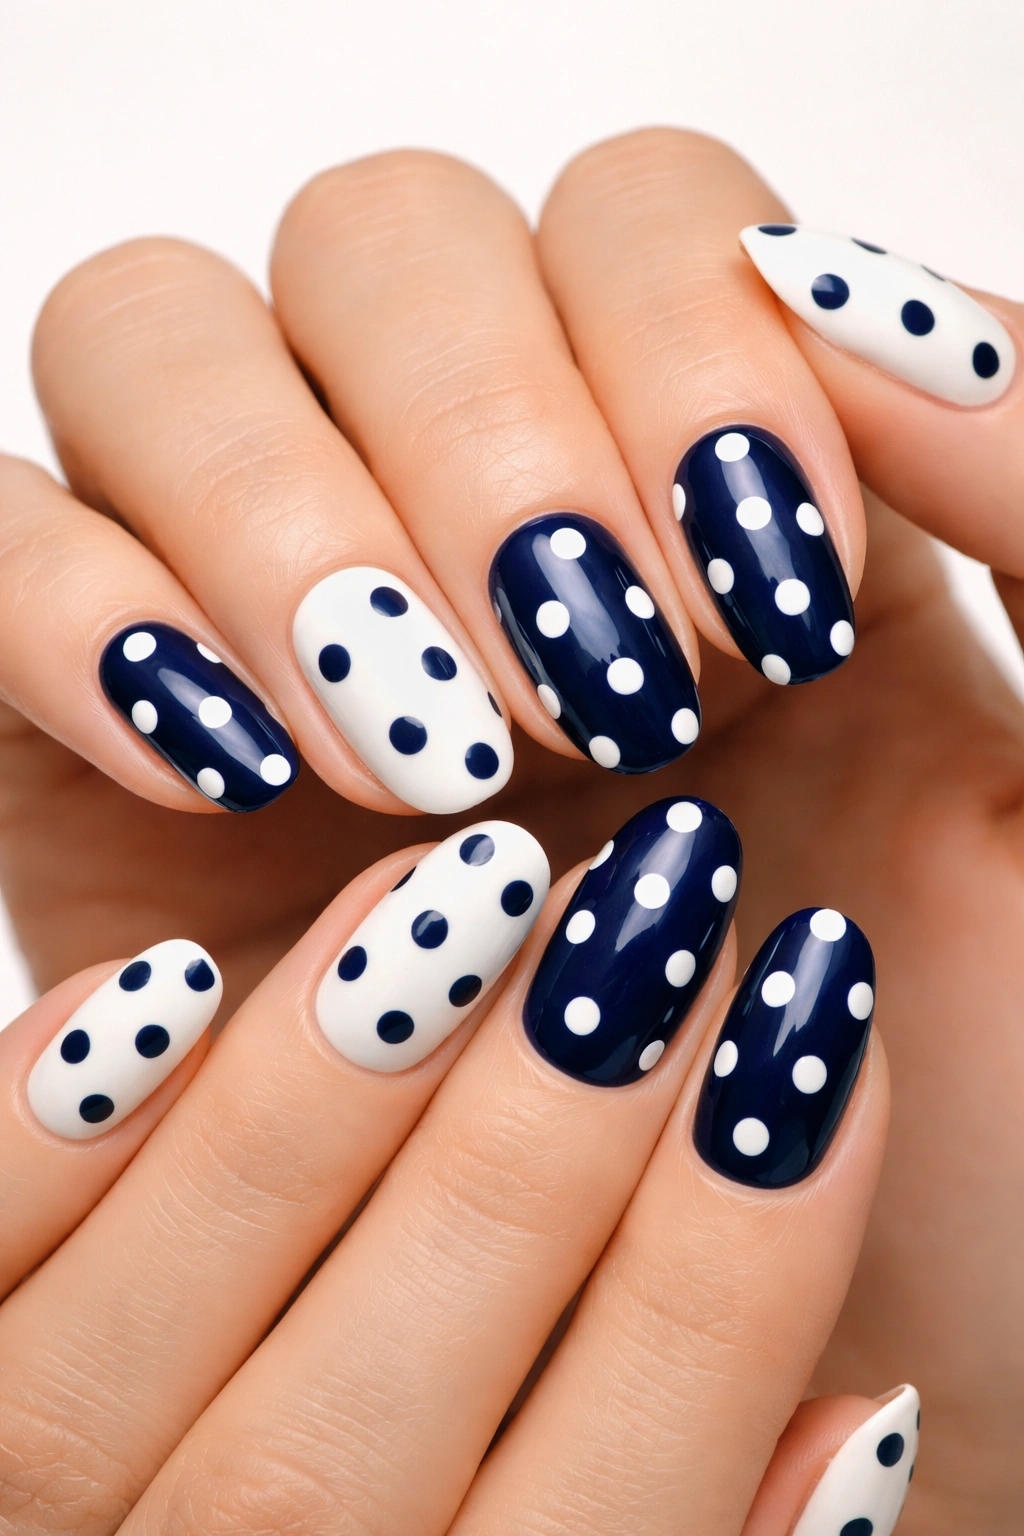
Create visual interest by using two contrasting colors and inverting the design across your hands. One hand features color A as the base with color B dots; the other hand features color B as the base with color A dots. This symmetrical-but-opposite approach feels intentional and fashion-forward while remaining totally DIY-friendly.
The Psychology of Inverse Design
Matching but inverted designs create a sense of harmony and sophistication. They suggest intentionality and design consciousness without requiring any advanced skill. This approach also solves the problem of “one nail looks more polished than the other” because the symmetry across both hands creates a cohesive whole rather than ten individual canvases.
Executing the Inverted Design
Choose two colors with strong contrast — navy and white, burgundy and cream, forest green and pale pink. Paint all ten nails on your right hand with color A (let’s say navy). Once dry, add color B (white) polka dots. For your left hand, reverse the process: paint all nails with color B (white), then add color A (navy) dots. The key is maintaining consistent dot size and spacing across both hands so the design reads as intentionally matched rather than accidentally similar. Stand back and view both hands together — the inverted pattern should feel balanced and harmonious.
Why This Design Works
It celebrates both hands equally rather than treating one as the “main” manicure. It’s interesting enough to deserve a comment without being so complex that it required hours in a salon chair. It works for any nail length and pairs well with all skin tones and outfit styles.
8. Glitter Polka Dots for Festive Sparkle
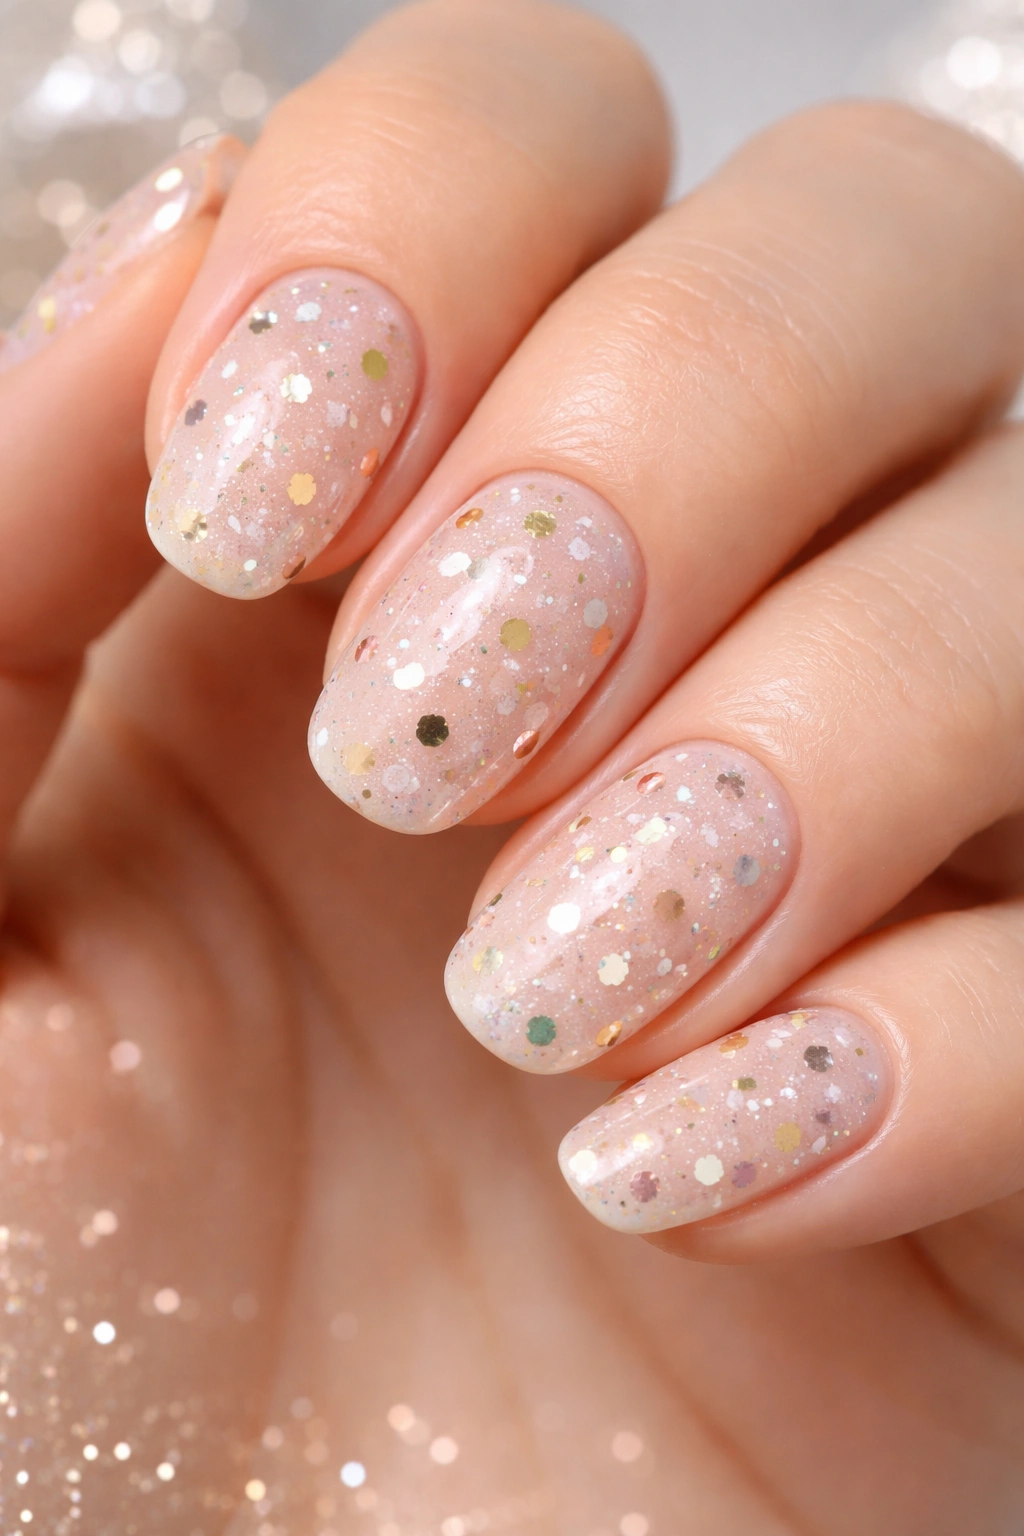
Swap solid-color polish for glitter polish when creating your dots for a design that catches light with every hand movement. Glitter dots against a solid base create a sophisticated sparkle rather than a costume-like effect, especially when you use fine glitter formulas rather than chunky craft glitter.
Selecting the Right Glitter Polish
Not all glitter polishes are created equal. Fine, microglitter formulas apply smoothly and look elegant, while larger-fleck glitters can appear costume-like. For polka dots specifically, seek out polishes with small, uniform glitter particles. Alternatively, you can use regular polish mixed with very fine loose glitter, though this requires more careful application to prevent the glitter from spreading beyond your intended dot area.
Application Technique for Glitter Dots
Paint your base color first — a solid, opaque shade in gold, silver, burgundy, navy, or any color that contrasts with your glitter choice. Once completely dry, apply your base coat. Pour a small amount of glitter polish onto your palette. Here’s the key difference from regular polish: glitter formulas are thicker and sometimes stickier. Dip your dotting tool and press gently onto the nail, holding for a second or two to allow the glitter to adhere. Don’t twist or drag — simple, steady pressure works best. The glitter particles will stay where you place them because they’re suspended in the polish. Seal with a glossy or matte top coat, depending on your preference.
Color Combinations That Sparkle Best
Navy base with silver glitter dots. Burgundy base with rose-gold glitter dots. Nude base with champagne glitter dots. Deep green base with gold glitter dots. Black base with holographic or rainbow glitter dots. The contrast between solid and sparkle is what makes this design special, so ensure your base and glitter colors are distinctly different.
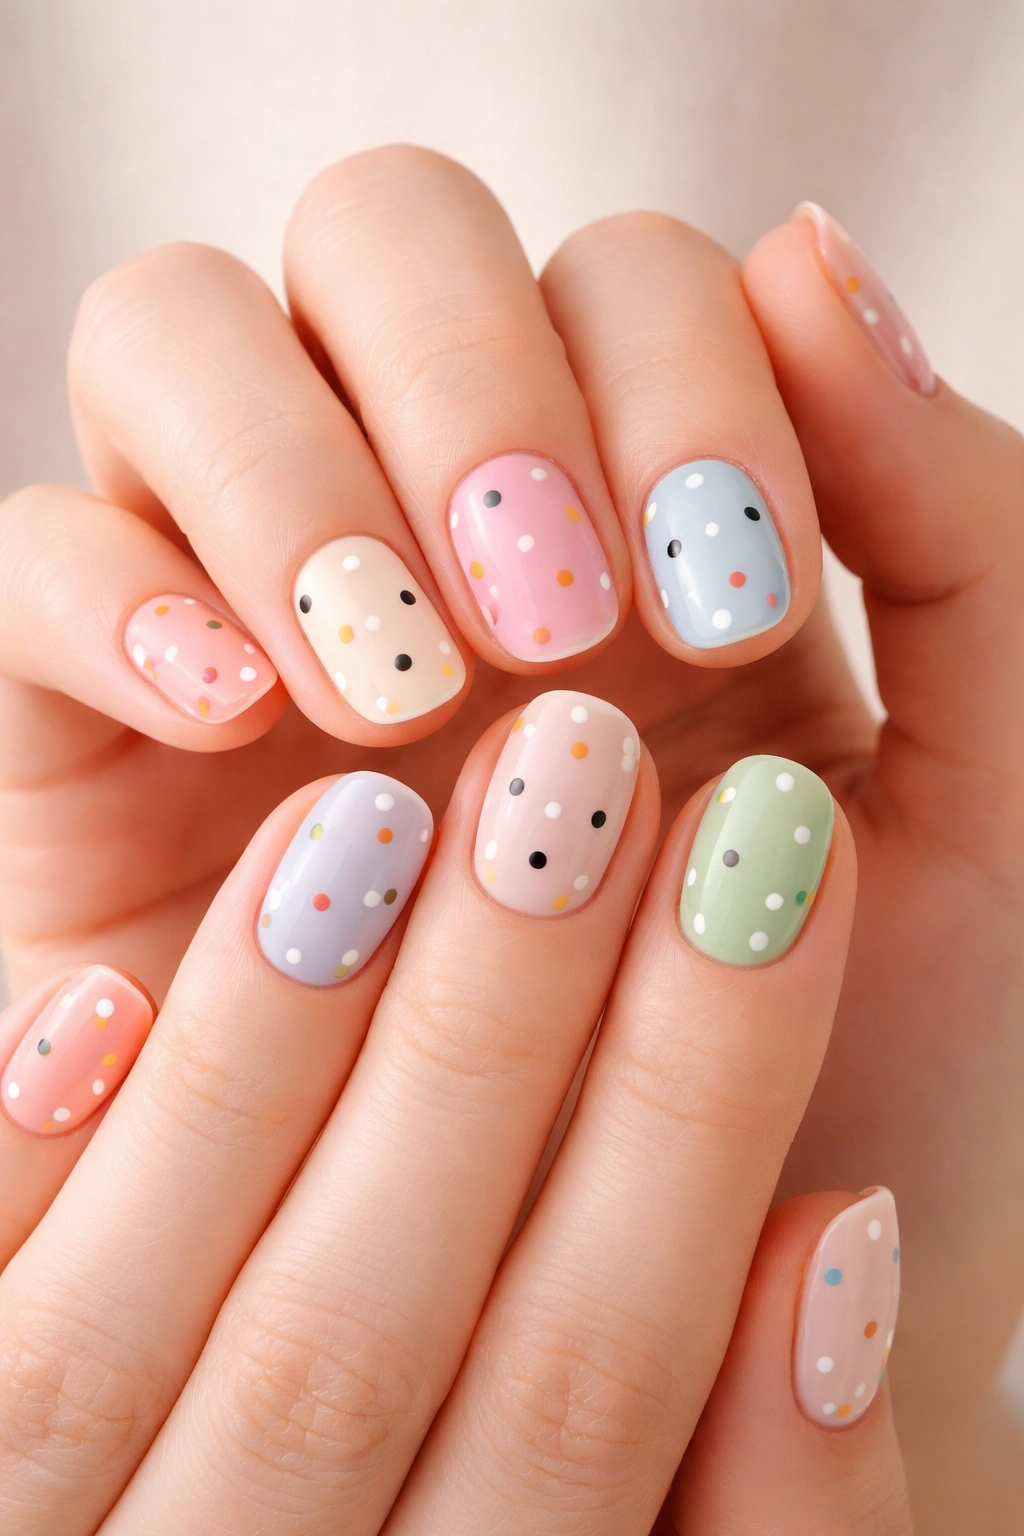
9. Pastel Polka Dots for Spring and Summer
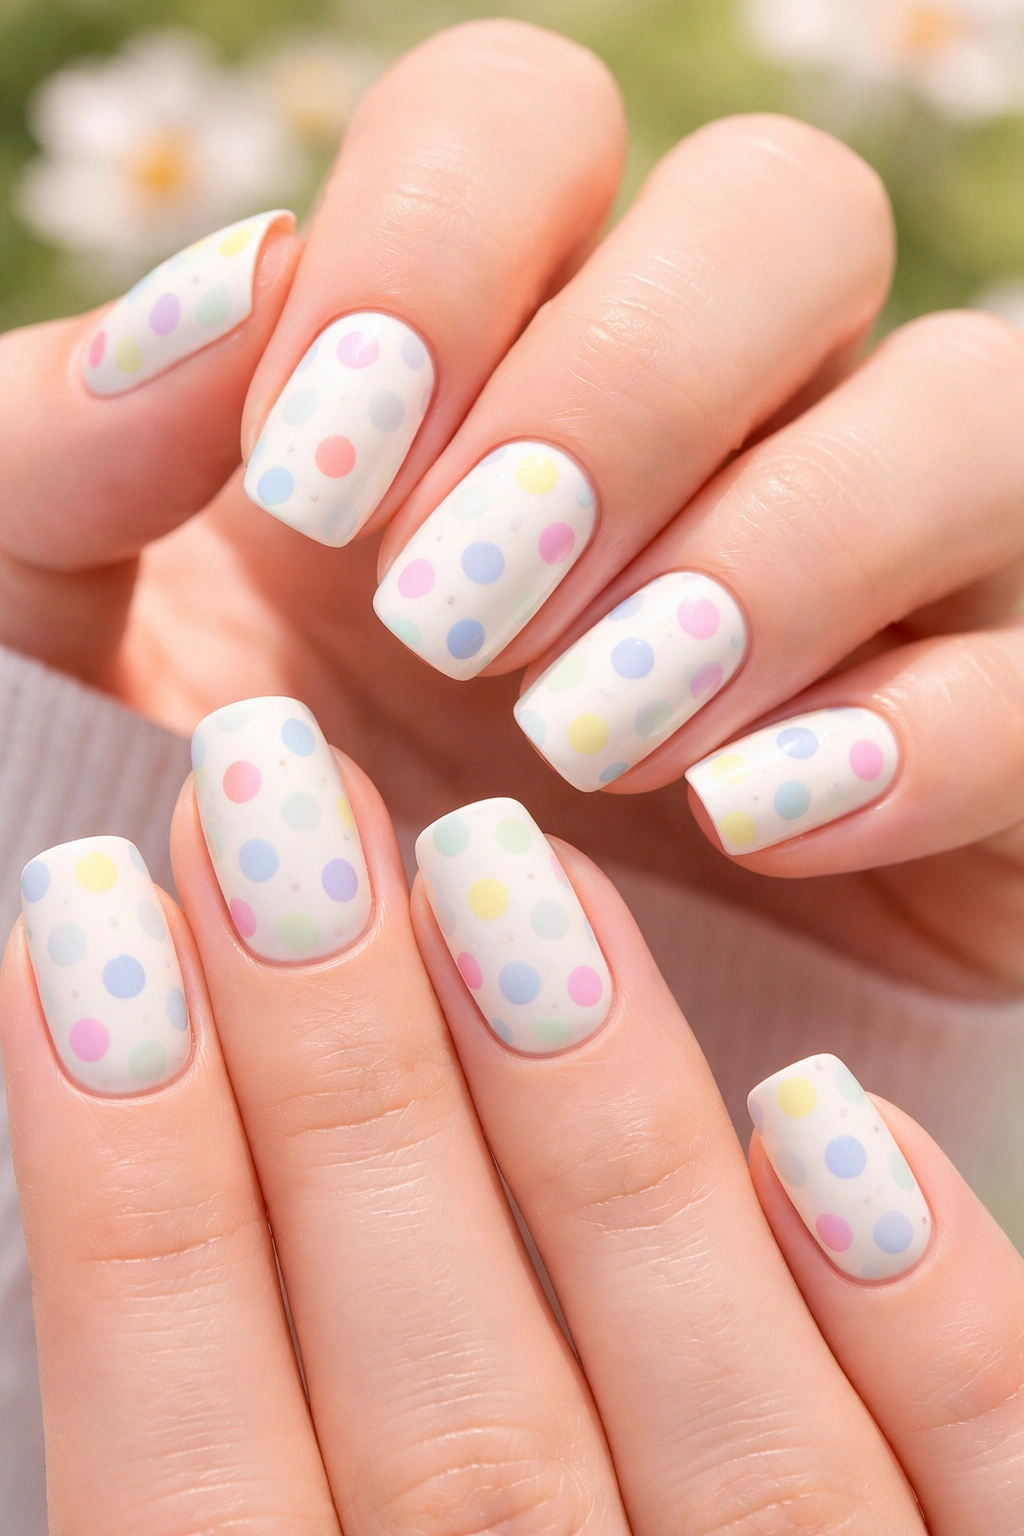
Embrace soft, dreamy aesthetics with a full palette of pastel polka dots. Use a cream, white, or pale nude base and apply dots in soft pink, lavender, mint green, pale yellow, and baby blue — all on the same nail or distributed across your hand. This design screams gentle femininity and pairs beautifully with sundresses, lightweight fabrics, and warm-weather aesthetics.
Creating Cohesion with Pastels
The challenge with multiple pastel dots is preventing them from looking chaotic or overwhelming. The trick is maintaining similar saturation levels across all your colors — all should be equally soft and muted rather than mixing bright pastels with dusty ones. Your base should be equally soft; a bright white base will make the pastels pop aggressively, while a cream or pale nude base lets them breathe and feel harmonious.
Application Approach
Paint your pale base on all nails. Once completely dry, arrange your pastel polishes on your palette. Using your dotting tool, apply one color at a time across all ten nails, rinsing your tool between color changes. This systematic approach prevents colors from running together and allows you to control density. With pastels, less is often more — five to seven dots per nail usually looks more sophisticated than a nail completely covered in dots. The soft colors work beautifully when spaced out with breathing room.
Seasonal Timing
These soft dots feel most at home during spring and summer, but there’s no reason you can’t wear them year-round if pastels make you happy. In fact, wearing soft pastels during cooler months creates a charming contrast between the dreamy nail design and the practical clothing required by the season.
10. Ombré Jelly Polka Dots with Translucent Base
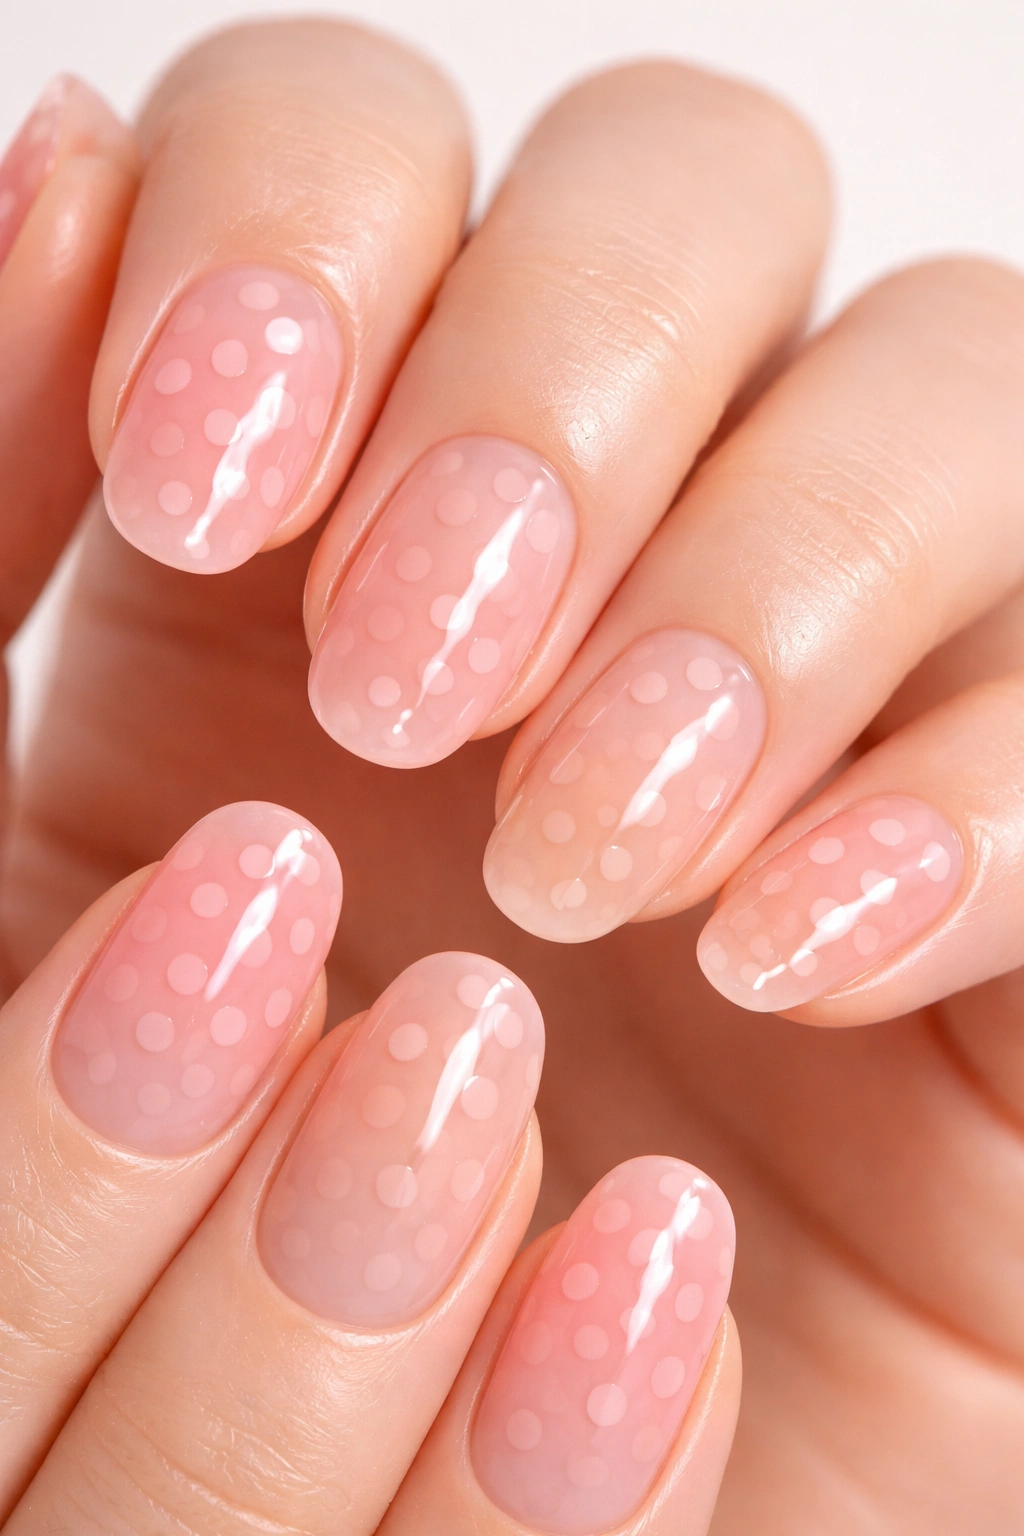
Create an ethereal, high-fashion manicure by using sheer jelly base polishes and matching jelly dot colors for a tone-on-tone effect with dimensional depth. The translucency of jelly formulas creates an almost liquid, glass-like appearance that feels luxe and contemporary. This design sits at the intersection of minimalism and sophistication.
Understanding Jelly Polish
Jelly polishes are semi-transparent, allowing your nail or skin tone to show through slightly. They’re thicker than regular polish but not as opaque as cream formulas. When you layer a jelly dot on top of a jelly base of the same or a similar color, you create dimension through depth rather than color contrast. The result feels subtle, modern, and intentional.
Choosing Your Jelly Palette
A pale pink jelly base with slightly deeper rose jelly dots. A sheer nude jelly base with warm peach jelly dots. A translucent white jelly base with milky ivory jelly dots. A pale blue jelly base with slightly deeper sky-blue jelly dots. The key is selecting shades within the same color family so the design reads as cohesive despite the tonal subtlety.
Execution for Best Results
Apply your jelly base coat and your chosen jelly base color (usually two to three coats for proper coverage with sheer formulas). Once fully cured if using gel polish, set up your dotting tool with your second jelly shade. Apply dots across each nail, using consistent pressure. The beauty of tone-on-tone jelly dots is that imperfection becomes part of the aesthetic — slight variation in dot size and placement adds to the organic, handmade feeling. Seal with a top coat, which will intensify the shine and create that signature glass-like appearance.
Why This Design Feels Luxe
Tone-on-tone designs are associated with high-fashion, minimalist aesthetics. They require more trust in subtlety than bold designs, which signals sophistication. The jelly formula’s inherent shine and translucency adds an extra dimension that reads as intentional and expensive. It’s the nail art equivalent of a capsule wardrobe — refined, purposeful, and endlessly wearable.
Final Thoughts
Polka dot nails prove that the most impactful nail art doesn’t require complex skills, expensive tools, or hours of your time. Each design in this guide delivers a distinct aesthetic — from bold and graphic to soft and romantic — yet all share the same foundation: a dotting tool, nail polish, and patience. The beauty of polka dots lies in their forgiving nature. A slightly imperfect dot reads as charming rather than sloppy. Uneven spacing feels organic rather than careless. This pattern celebrates the handmade quality that makes DIY nail art so satisfying.
Start with whichever design resonates most with your personal style, but don’t stop there. Once you’ve mastered the basic technique, experimenting becomes effortless. Swap color combinations. Play with dot sizes. Mix and match designs across different nails. Add accents like gems, stripes, or metallic outlines. The foundational skill — creating a polka dot — opens the door to endless creative possibilities. You don’t need to wait for your next salon appointment or invest in professional nail art supplies. The polka dots you create at home, on your own timeline, with complete creative control, will likely bring you more joy than any salon version could. That’s the real magic of this trend.
