

Animal print nails have become a go-to choice for anyone looking to add a bold, confident statement to their manicure. Whether you’re drawn to the timeless elegance of leopard spots or the striking geometry of zebra stripes, there’s something undeniably captivating about bringing wildlife-inspired patterns to your fingertips. The beauty of animal print nail designs is their incredible versatility—they work equally well as subtle accents on a single nail or as an all-over design that commands attention.
What makes animal print nails so appealing is that they never feel dated. Unlike fleeting trends that come and go, animal prints remain a staple in nail art because they’re deeply rooted in fashion and personal style. You can wear them to the office with a minimalist aesthetic, to a night out with maximum glamour, or anywhere in between. The pattern speaks for itself—it’s inherently fierce, playful, and endlessly customizable. Better yet, you don’t need professional-grade skills to create these designs. With the right tools, some patience, and a bit of inspiration, you can absolutely nail these looks at home.
The following fifteen designs will show you just how diverse and creative animal print nails can be. From classic patterns everyone recognizes to unexpected color twists that feel totally fresh, you’ll find designs that match your personality and style. Each one is achievable, beautifully detailed, and guaranteed to spark compliments wherever you go.
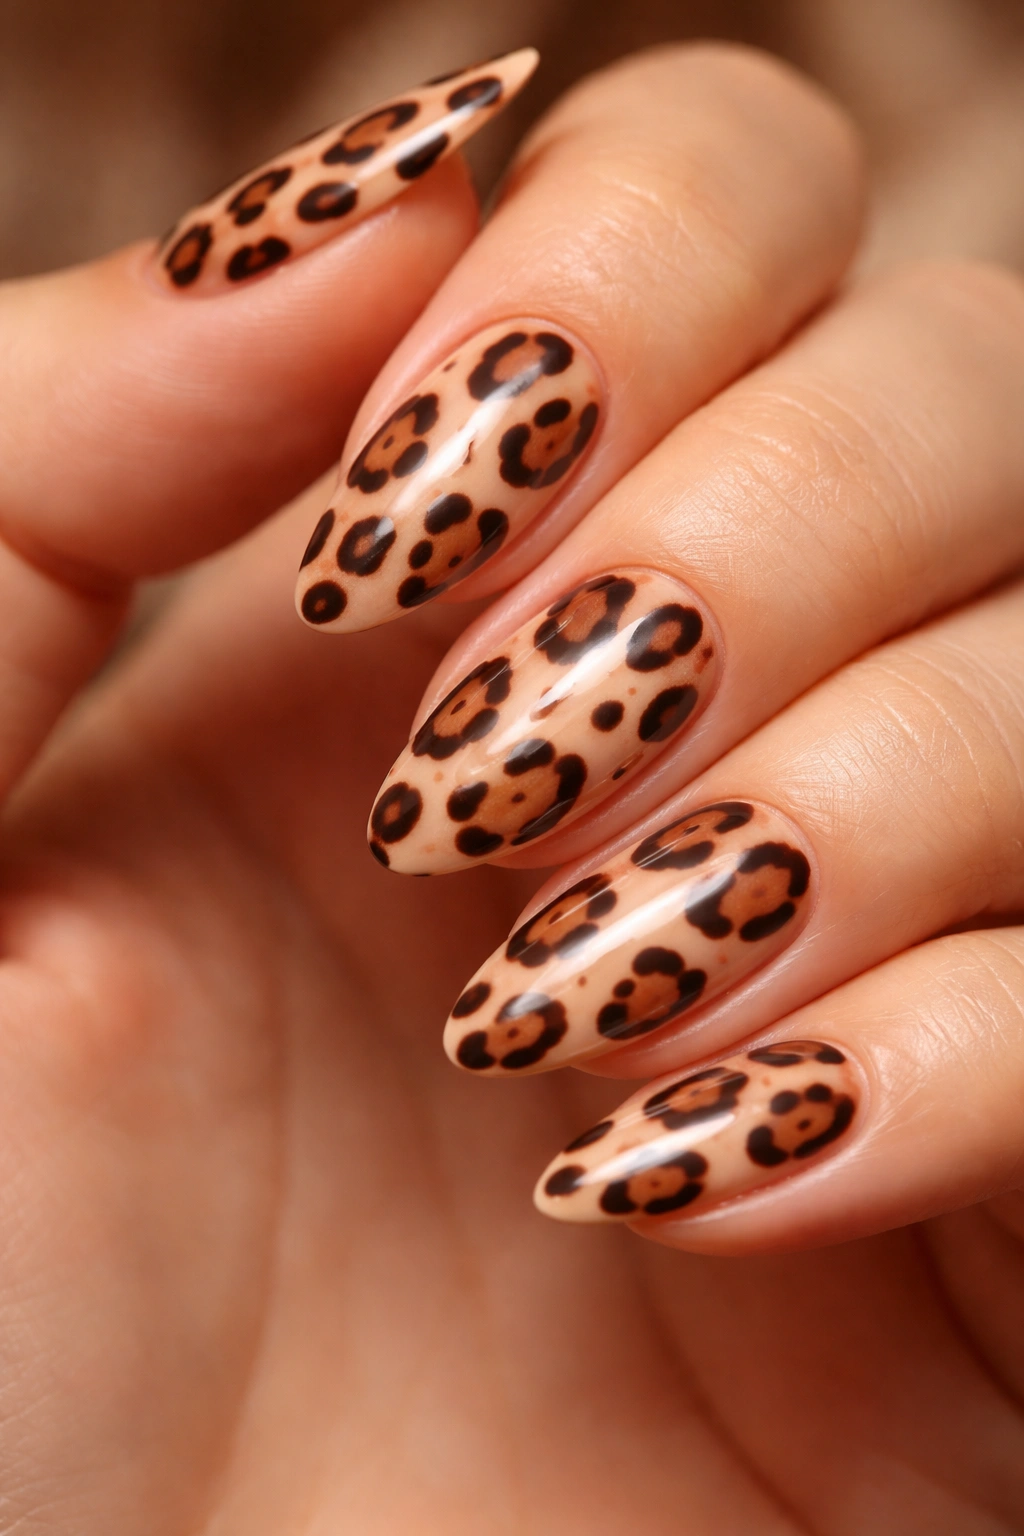
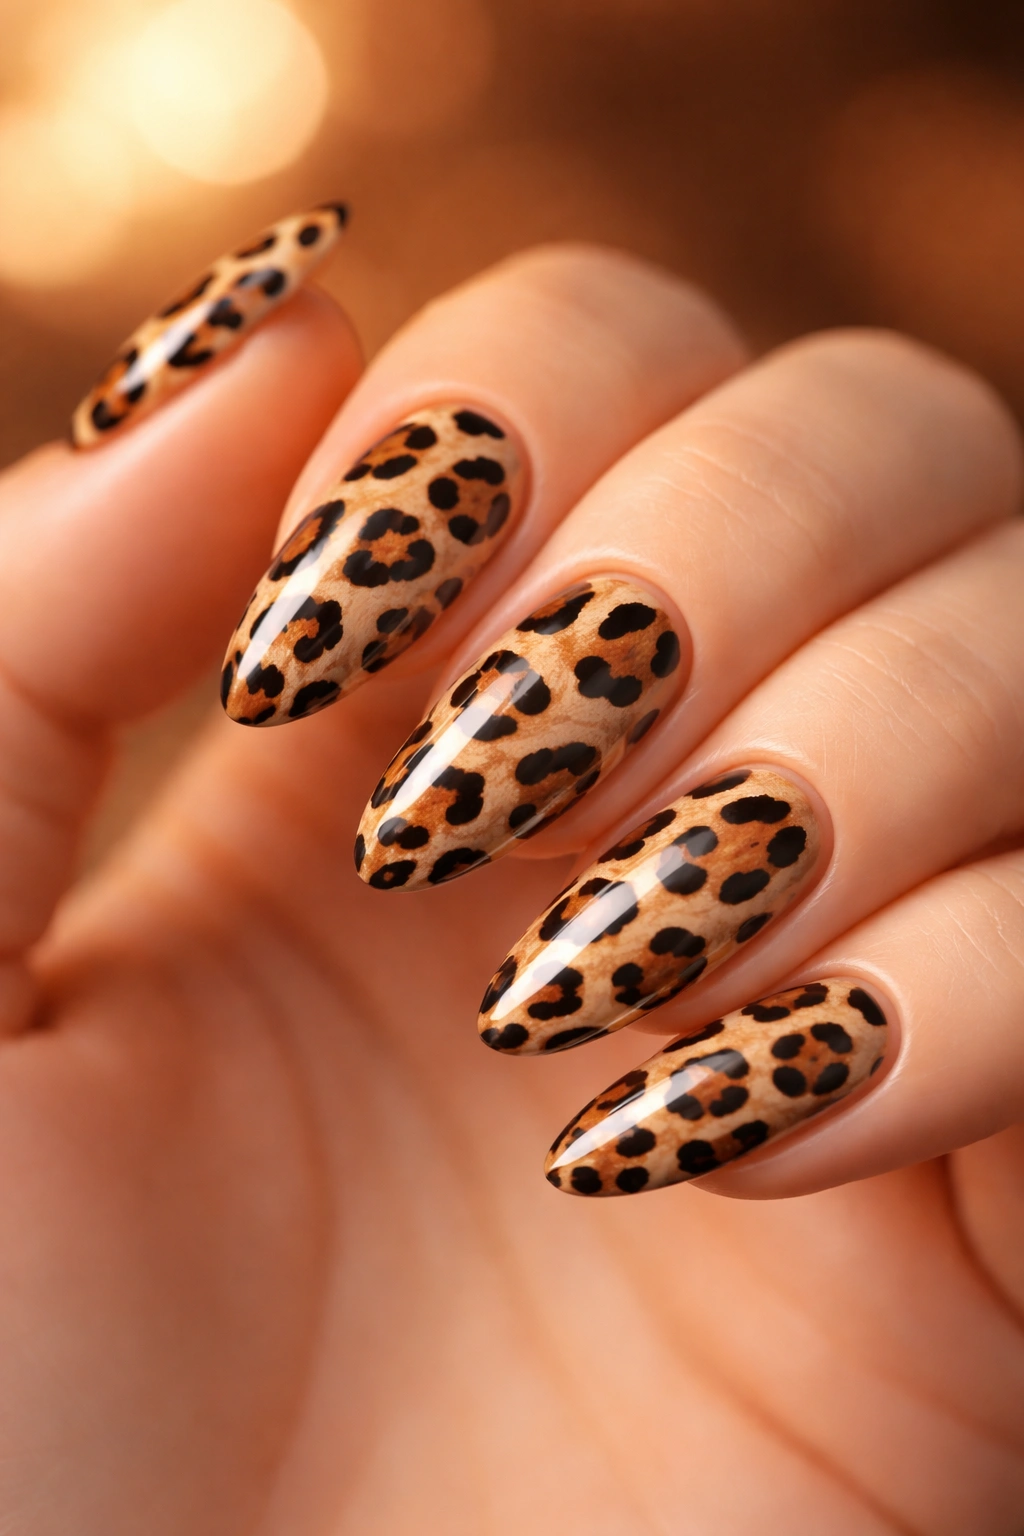
1. Leopard Print Nails
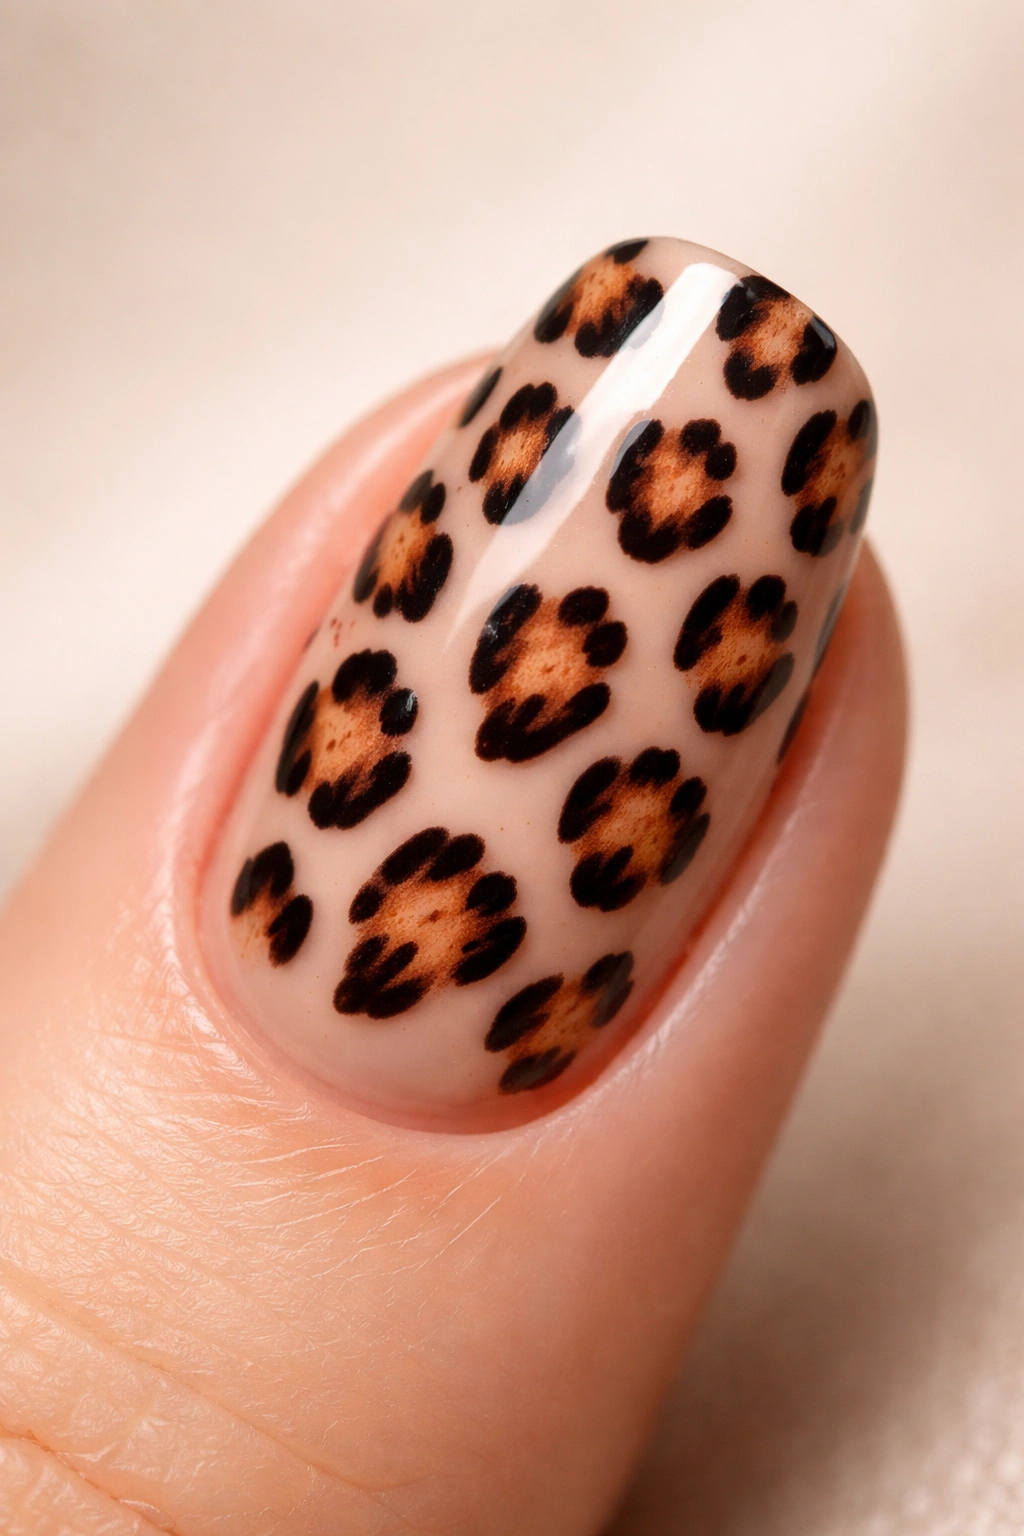
Leopard print remains the undisputed queen of animal print nails. This design features the signature spotted pattern that’s instantly recognizable and inherently luxe. The key to nailing leopard print is understanding that the spots don’t need to be perfectly uniform—in fact, the imperfections make it look more authentic and interesting.
How to Create the Look
Start with a base coat in a warm neutral shade like nude, beige, or soft pink. Once that’s completely dry, use a fine nail art brush to carefully paint small, irregular circular shapes in a rich brown or black shade. Some spots should be filled in completely, while others look better when you create just the outline. The secret to professional-looking leopard print is varying the size and spacing of your spots—no two should look identical. Add a glossy top coat to seal in your design and create that coveted shine.
Why Leopard Spots Work for Everyone
Leopard print is surprisingly wearable because you can adjust the color palette to match your skin tone and personal aesthetic. Warm undertones look beautiful with golden-brown spots on a cream base, while cooler undertones shine with charcoal spots on a pale pink background. You can go minimalist with just a few accent nails, or go bold with the full design across all ten fingers. The versatility is endless.
Pro tip: Add metallic gold or copper accents to your leopard print spots for an elevated, luxurious finish that catches the light beautifully.
2. Zebra Stripe Nails

Zebra stripes bring a high-contrast, edgy energy to your manicure that feels punk-rock chic. The bold black lines against a white or cream base create a striking visual impact that’s impossible to ignore. What’s wonderful about zebra print is that it works on any nail length and shape—the stripes automatically elongate your fingers while adding serious attitude.
Perfecting the Stripe Placement
The most important element of zebra print nails is getting the stripe direction right. Paint your base color first, usually white, cream, or even pastel shades for a modern twist. Then, using a thin nail art brush or even a striping tool, paint thin black lines across the nail at slightly diagonal angles. The stripes should be wavy rather than perfectly straight—this is what makes them look organic and natural. Vary the space between lines to keep the design from feeling too rigid or mechanical.
Making It Your Own
One of the best parts about zebra stripes is how easily you can customize them. Try painting stripes in deep burgundy instead of black for a softer look, or experiment with gold or holographic finishes for something more glamorous. You can even paint stripes on just the nail tips for a French manicure twist, or create stripes on multiple fingers with other designs on the remaining nails for a mixed look.
Worth knowing: Thinner, more closely spaced stripes feel more elegant and refined, while thicker, wider-spaced stripes feel bolder and more playful. Choose based on the vibe you’re going for.
3. Cheetah Spot Nails
Cheetah print sits somewhere between leopard and abstract—it features scattered, irregular spots that feel more organic and less structured than classic leopard spots. This design has a playful, fun energy while still looking incredibly chic. Cheetah spots work beautifully in various color combinations, making them more forgiving than some other animal prints.
Creating Organic, Natural-Looking Spots
Begin with a warm base color like peachy-nude, warm brown, or even soft orange. Using a fine-tipped brush or dotting tool, create small, somewhat elongated spots rather than perfect circles. The spots should vary significantly in size and shape—some can be thin and stretched, others more compact and rounded. Leave plenty of space between spots so the base color shines through. This creates the illusion of movement and prevents the design from feeling too busy or overwhelming.
Color Combinations That Pop
While classic brown and cream cheetah print never disappoints, don’t be afraid to explore unexpected palettes. Soft pink with deeper mauve spots feels feminine and modern. Pale yellow with burnt orange spots has a warm, summery quality. Even light purple with chocolate brown spots creates an unexpectedly sophisticated look. The variety in color options makes cheetah print nails perfect for experimenting with your style.
Quick fact: Cheetahs actually have solid black spots without the ring pattern that leopards have, but in nail art, we often blend the two patterns because they both look stunning.
4. Snake Print Nails
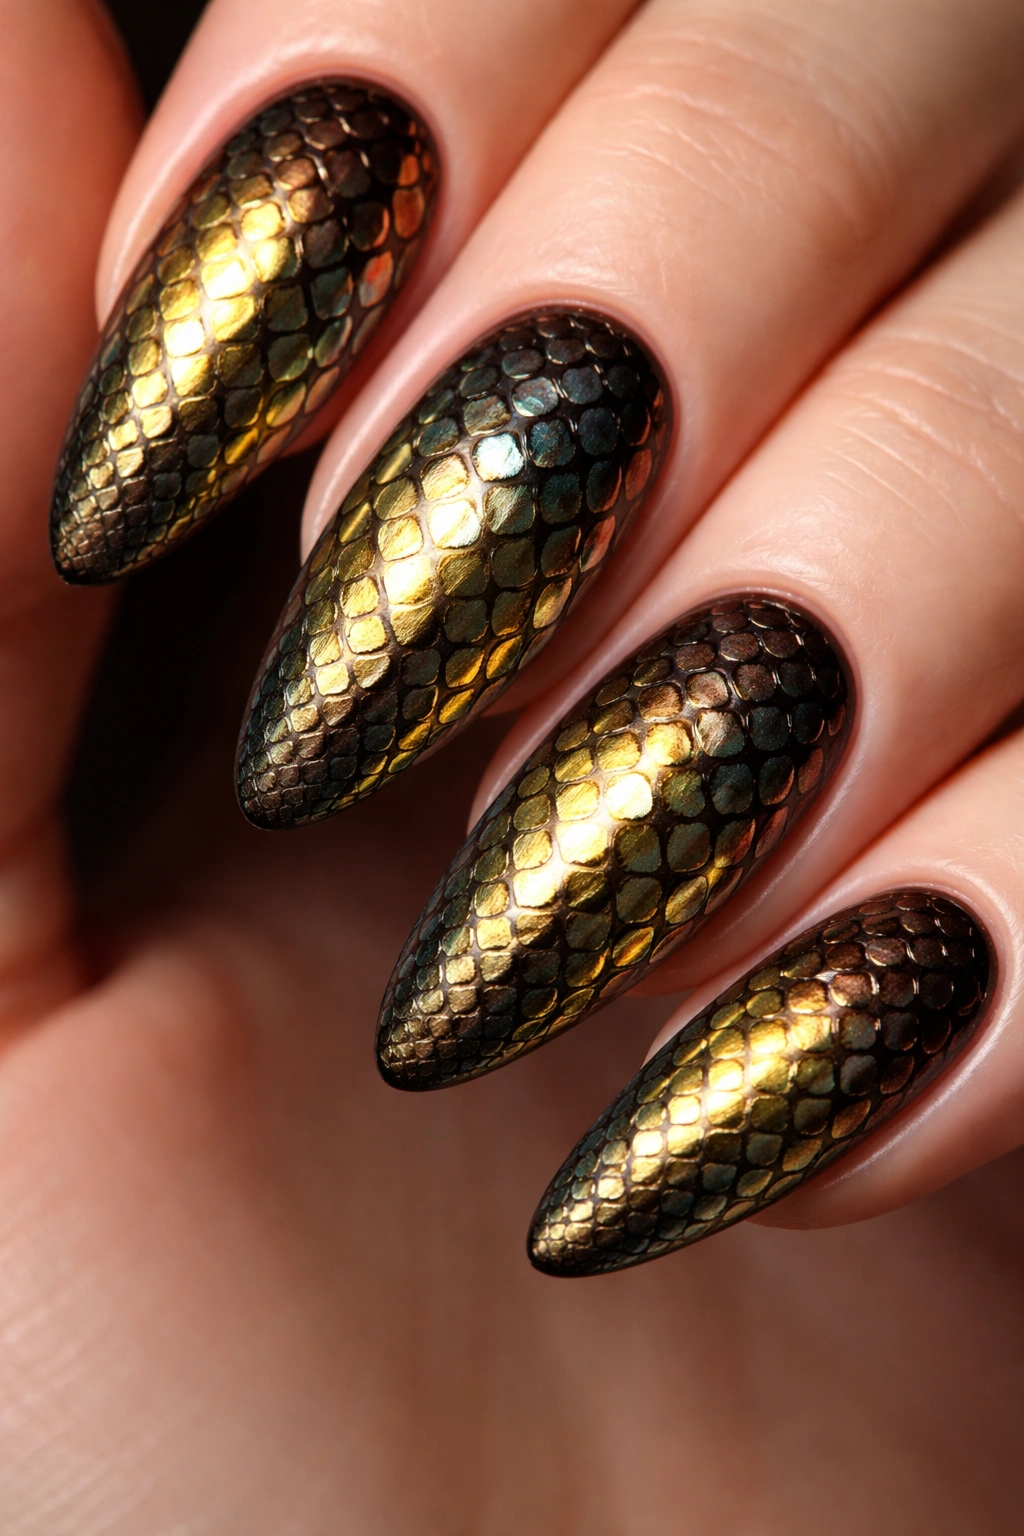
Snake print nails bring a sophisticated, slightly mysterious edge to your manicure. Whether you go for a realistic snakeskin look or a more abstract interpretation, this design always feels upscale and intentional. The pattern features a scaled or scaly appearance that can be rendered in countless color ways, from naturalistic greens and browns to unexpected pastels and metallics.
Building the Scaled Texture
The most effective way to create snake print is to paint a base color, then use a fine brush to create curved, overlapping lines that mimic scales. Start at one edge of the nail and create rows of curved lines that flow naturally down the nail. Each “scale” can be outlined or filled in—both approaches work beautifully. You can create tight, intricate scaling for a realistic look, or looser, more abstract patterns for a modern interpretation. The key is making the pattern flow in a consistent direction so it reads as intentional rather than random.
Color Palettes for Snake Skin Nails
Multichromatic snake print is incredibly trendy right now—try a gradient of metallics in gold, green, and bronze that shifts as you move your hand. Alternatively, creamy white or soft nude with shimmering champagne accents reads as elegant and understated. For those who want maximum impact, deep forest green or jewel-tone purple with contrasting scale outlines delivers serious sophistication. Even simple black scales on a white base has a modern, minimalist appeal that’s absolutely timeless.
Insider note: Matte finishes emphasize the texture and pattern of snake print, while glossy finishes make the scales shimmer and catch light beautifully. Choose based on whether you want the design to feel bold or subtle.
5. Cow Print Nails

Cow print nails bring a playful, slightly whimsical energy that feels fresh and fun. Unlike some animal prints that read as edgy or dramatic, cow print has a lighthearted quality that works for virtually any occasion. The classic black and white combination is timeless, but modern interpretations explore unexpected color variations that feel current and interesting.
Achieving Authentic Cow Print Patches
Start with a white or cream base and allow it to dry completely. Using black polish or a dark shade, apply irregular patches across each nail using a dotting tool or the end of a brush. The key to convincing cow print is avoiding symmetry and perfect shapes—real cow patches are organic and unevenly distributed. Some patches should be larger, others small and scattered. Don’t overthink the shapes; let them flow naturally across the nail. You can create patches that extend across multiple nails for visual cohesion, or keep each nail’s pattern unique for a more artistic look.
Fresh Twists on Classic Cow Print
While black and white cow print will never go out of style, experimenting with color opens up exciting possibilities. Try navy and cream for a cooler-toned look that feels preppy and polished. Brown and tan patches on a warm beige base create an earthy, nature-inspired aesthetic. For something bolder, apply neon patches on a white base, or create metallic gold and silver patches for a luxe twist. Cow print proves that animal patterns can be fun and sophisticated simultaneously.
Quick fact: You can achieve cow print using simple tools—even a makeup sponge or cotton swab can create realistic-looking patches if you tap or dab carefully.
6. Tiger Print Nails
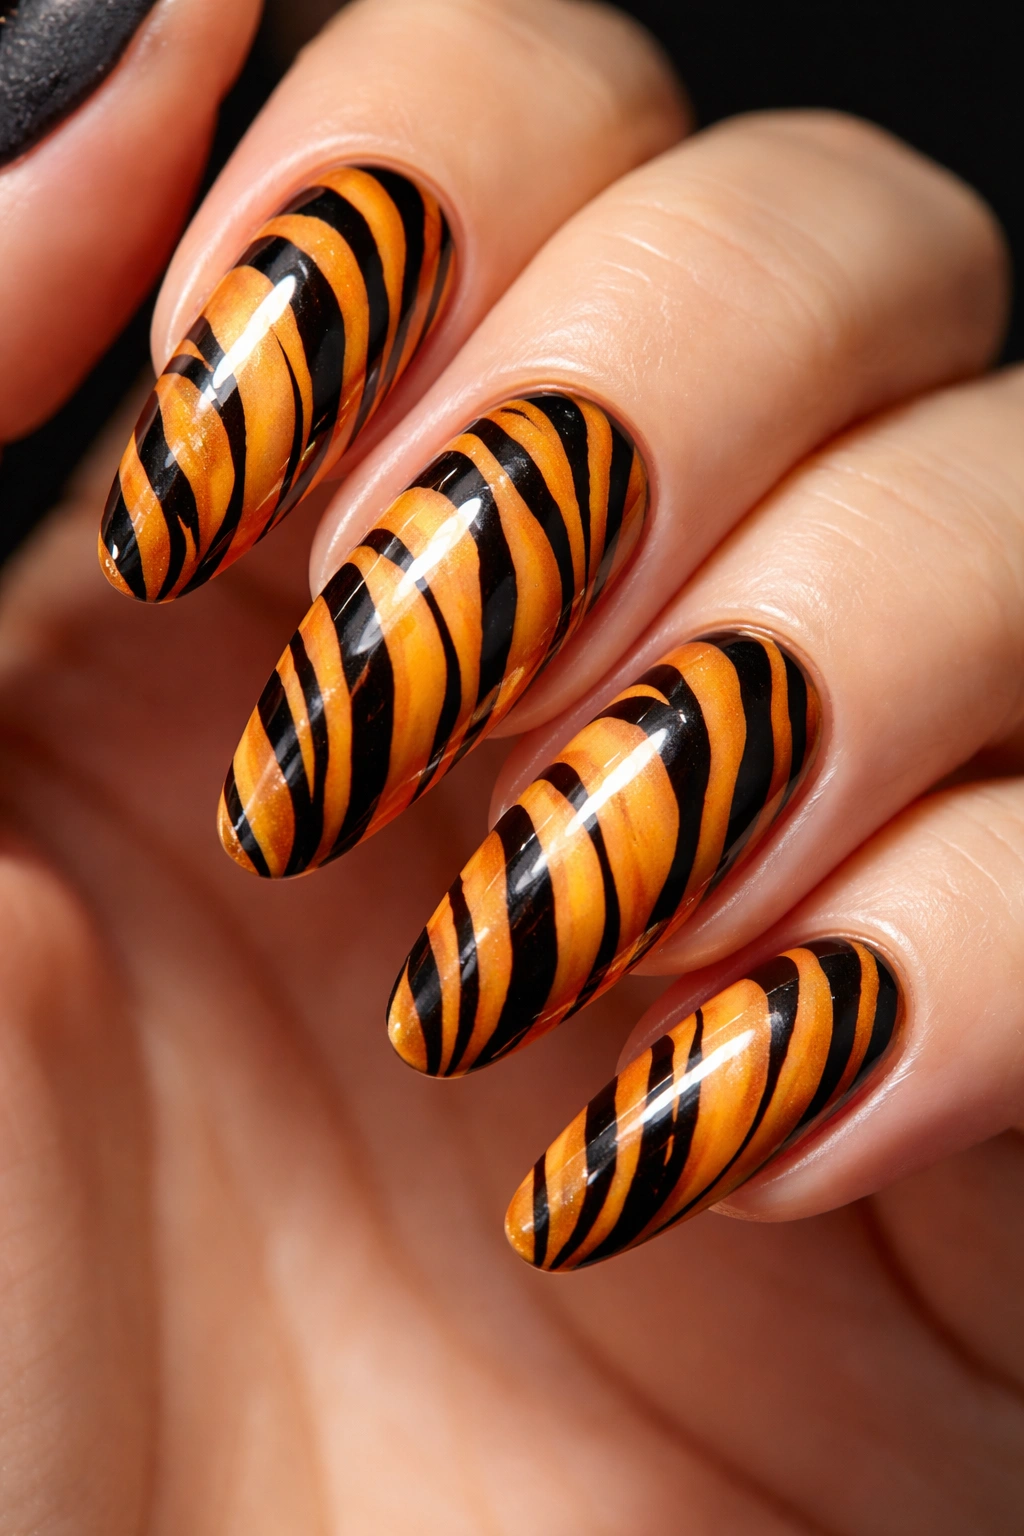
Tiger print nails deliver serious attitude and boldness. The dramatic striped pattern, often in warm oranges, blacks, and creams, makes an unmistakable statement. Tiger print works beautifully on longer nails where the stripes have room to really showcase themselves, but it’s equally striking on shorter lengths when executed with intention.
Painting Convincing Tiger Stripes
Begin with a warm base color like soft orange, peachy nude, or even a gradient of warm sunset tones. Using a thin brush and dark orange, brown, or black polish, paint curved, tapering stripes across the nail. Tiger stripes are different from zebra stripes—they’re curved, organic, and they vary significantly in width. Some stripes should be bold and thick, others thin and delicate. The stripes flow with a sense of movement rather than rigid geometry. This variation in stripe width and curve is what makes tiger print feel dynamic and alive.
Creating Visual Impact
Tiger print naturally draws the eye, so consider using it strategically—perhaps on all ten nails for maximum drama, or as an accent on two or three fingers for a more subtle statement. The pattern works beautifully with glossy top coats that emphasize the color contrasts. You can also add dimension by layering stripes in multiple shades—use orange, rust, and black together for depth and visual interest that elevates the design beyond simple two-color patterns.
Pro tip: Tiger print looks especially striking on coffin, stiletto, or almond nail shapes, which allow the stripes to elongate your fingers and create a more dramatic silhouette.
7. Giraffe Print Nails

Giraffe print offers a softer, more sophisticated alternative to some of the bolder animal patterns. The irregular patches of tan and brown create a warm, organic aesthetic that feels less aggressive than leopard or tiger print. Giraffe print also works beautifully in unexpected color combinations, allowing you to create a design that feels uniquely yours.
Capturing Authentic Giraffe Patterns
Start with a warm tan or light brown base color. Using a darker shade—rich brown, burnt sienna, or even warm black—create irregular, somewhat rectangular patches scattered across the nail. Giraffe patches are larger and more angular than leopard spots, and they often have darker outlines that make each patch distinct. You can create patches that overlap slightly, or keep them separated for a cleaner look. The beauty of giraffe print is that there’s flexibility in how structured or organic you make the pattern.
Modern Color Interpretations
While traditional tan and brown giraffe print will always be classic, consider painting giraffe patches in unexpected colors for a contemporary twist. Soft cream with subtle gray or taupe patches feels minimalist and understated. Warm yellow with rust-colored patches evokes a sunny, safari-inspired feeling. Even pale pink with deeper rose patches creates a feminine, fashionable look that feels completely current. Giraffe print proves that animal patterns can be subtle and sophisticated.
Worth knowing: Giraffe print works beautifully as an accent on just one or two nails paired with solid colors, or as a full design across all nails depending on how bold you want your manicure to feel.
8. Crocodile and Alligator Print Nails
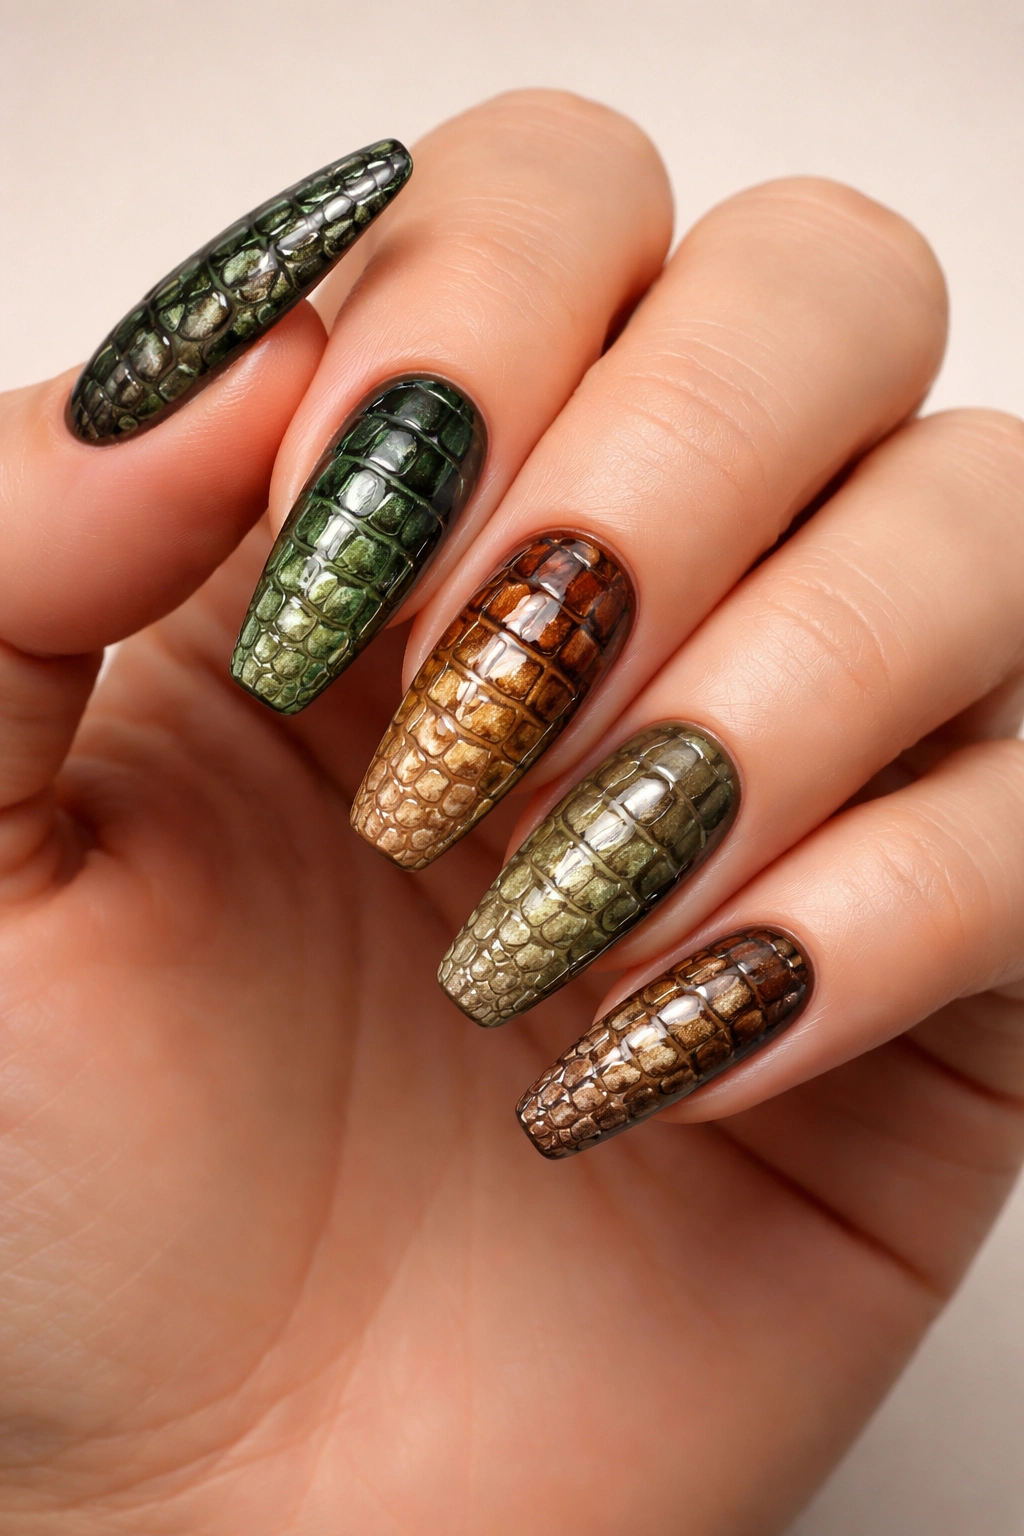
Crocodile and alligator print nails bring textured, dimensional detail to your manicure. These designs feature interconnected scales that create a realistic, almost three-dimensional effect. The pattern reads as luxurious and bold, with a slightly reptilian elegance that feels edgy yet refined.
Building Textured Reptile Patterns
Begin with a base color—green, blue, brown, or even hot pink for a playful twist. Using a thin brush, outline small, irregular polygonal shapes across the nail to represent individual scales. Each “scale” should have a darker outline with the base color visible in the center. Some nail artists fill in every scale with the darker shade, while others leave scales more open and outlined. Both approaches work beautifully—it’s about whether you want a realistic or more abstract interpretation. The overlapping nature of scales creates that signature reptilian texture.
Colors That Create Crocodile Drama
Classic green and brown crocodile print reads as natural and sophisticated. Charcoal gray with metallic silver accents creates a modern, edgy look. Hot pink with black scale outlines feels bold and playful. Even jewel tones like deep teal with gold or bronze accents deliver serious luxury vibes. The structured, grid-like nature of crocodile print means it looks beautiful in virtually any color combination you can imagine.
Pro tip: Add dimension by painting some scales slightly darker than others, creating shadows and highlights that make the pattern appear three-dimensional and deeply textured.
9. Dalmatian Print Nails
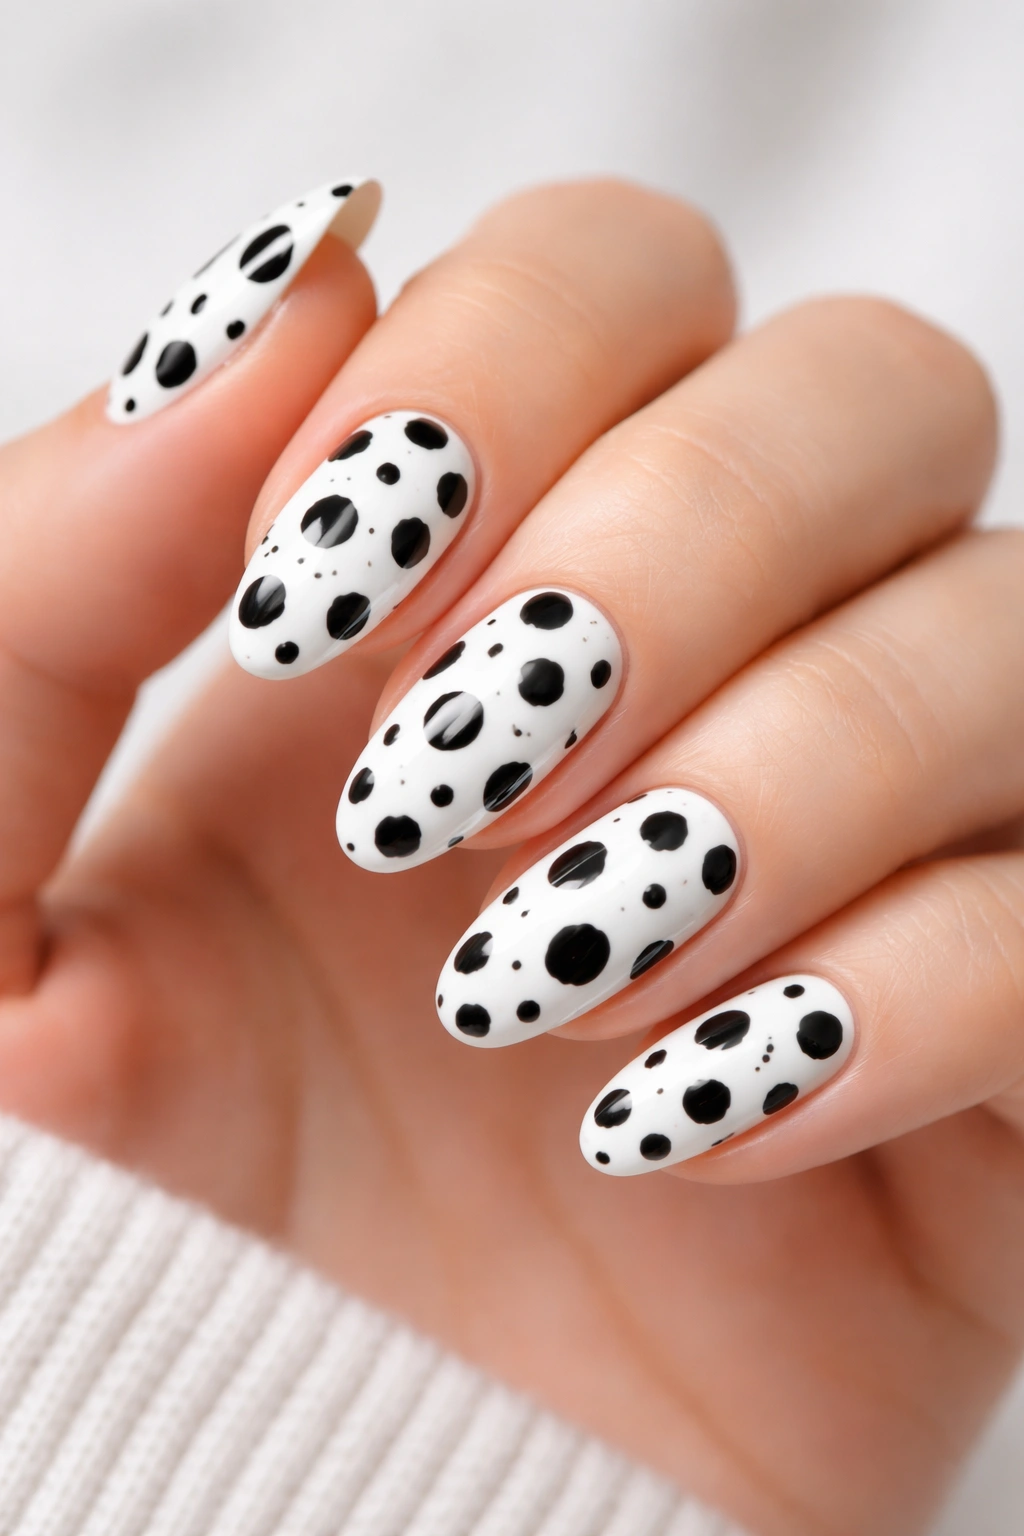
Dalmatian print nails bring spotted fun and visual interest that feels playful without being overwhelming. Unlike some spotted patterns that require varying spot sizes, Dalmatian spots are generally more uniform in size, making this design slightly more forgiving for home nail artists. The classic black and white combination is iconic, but modern variations are equally stunning.
Creating Uniform, Charming Spots
Start with a white or cream base and let it dry completely. Using a dotting tool or the rounded end of a bobby pin, create small, consistent circular spots in black polish across each nail. The spots should be relatively uniform in size, though slight variation feels more natural. Space the spots evenly but not perfectly—allow them to scatter naturally around the nail without a rigid pattern. The simplicity of Dalmatian print is actually what makes it so effective and accessible for DIY nail art.
Elevating Dalmatian with Color
While classic black and white Dalmatian print is timeless, exploring color variations keeps the design feeling fresh. Navy spots on a cream base feel preppy and sophisticated. Brown spots on warm tan create an earthy, nature-inspired look. For something bolder, try red spots on white for a bold, graphic appearance, or even holographic spots for a modern, eye-catching twist. Dalmatian print’s simplicity means it pairs beautifully with other design elements like metallic accents or glitter.
Quick fact: Dalmatian spots are actually easier to execute than many other animal prints because they don’t require the same level of precision or shading that more complex patterns demand.
10. French Manicure With Animal Print Tips
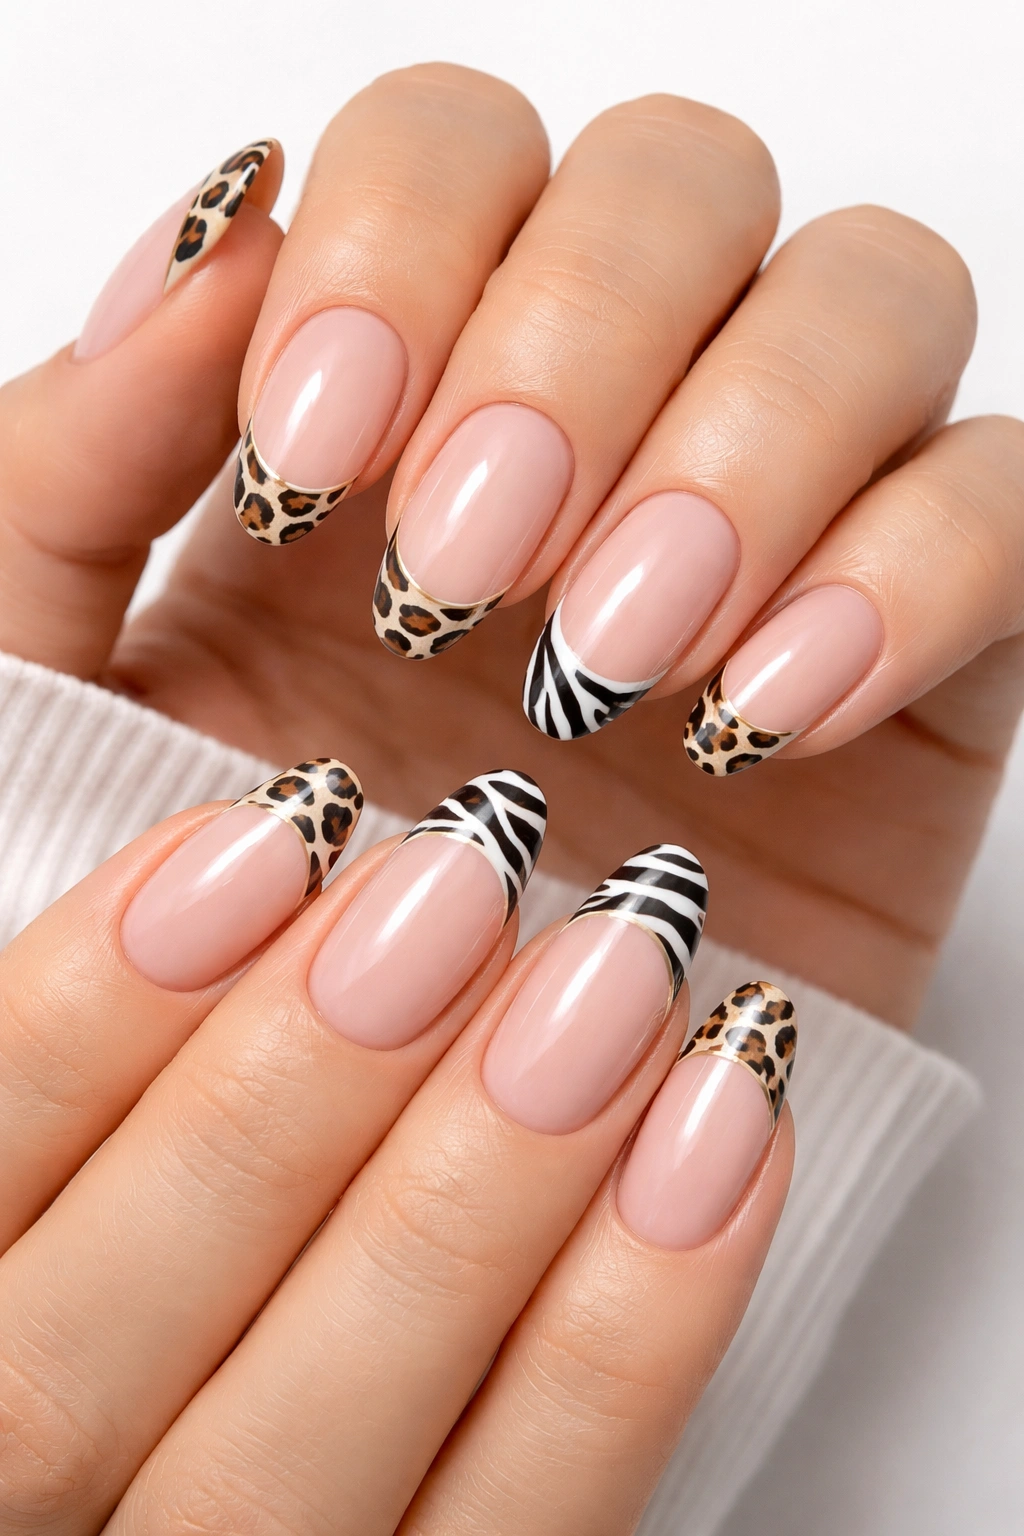
Combining the classic elegance of a French manicure with animal print creates a hybrid design that’s both timeless and contemporary. This approach takes the refined simplicity of French tips and adds an unexpected wild element, making it perfect for anyone who wants to seem daring while maintaining sophistication.
Blending Classic and Wild
Paint a nude or pale pink base color across all ten nails as you normally would for a French manicure. Instead of painting solid white tips, use a thin brush to paint animal print—leopard spots, cheetah markings, zebra stripes, or giraffe patches—across just the tip area. The contrast between the neutral base and the patterned tips creates visual interest without feeling overwhelming. You can paint the tips on all ten nails for a cohesive look, or select just a few nails for a more subtle statement.
Design Options That Work
Leopard-printed French tips feel elegant and endlessly wearable. Zebra-striped tips add edgy attitude while maintaining classic French manicure appeal. Subtle giraffe patches on French tips create a sophisticated, safari-inspired look. Even mixed prints—where each finger has a different animal pattern on the tip—feels curated and intentional. The French manicure base keeps the overall design grounded and professional while the animal print adds personality and style.
Pro tip: Use a slightly darker shade of your base color to outline the tips before adding animal print—this creates definition and makes the transition from base to tip more visually polished.
11. Minimalist Animal Print Nails

Minimalist animal print nails prove that less is often more. This approach strips animal prints down to their essence—perhaps just a few carefully placed spots on one accent nail, or simple stripes on a single finger. The restraint makes the design feel modern, intentional, and incredibly chic.
The Power of Understated Design
Choose a clean base color—white, nude, soft pink, or pale blue—and paint all ten nails. On just one or two accent nails, add minimal animal print elements: perhaps three or four carefully spaced leopard spots, a single column of delicate zebra stripes, or a small giraffe patch. The simplicity means every element must be intentional and well-executed. This is where precision matters—each line and dot should feel purposeful rather than hurried.
Why Minimalism Works
Minimalist animal print feels incredibly sophisticated and modern. It appeals to people who love animal print aesthetics but prefer subtlety over boldness. The design reads as artistic rather than costume-y, and it works beautifully in professional settings where bolder animal print might feel out of place. Minimalist designs also take significantly less time to execute, making them perfect for DIY manicures where precision is easier to achieve with fewer elements.
Worth knowing: Minimalist animal print pairs beautifully with matte top coats, which emphasize clean lines and geometric precision while glossy finishes can make minimal designs feel a bit too shiny and diminish their subtle impact.
12. Neon Animal Print Nails
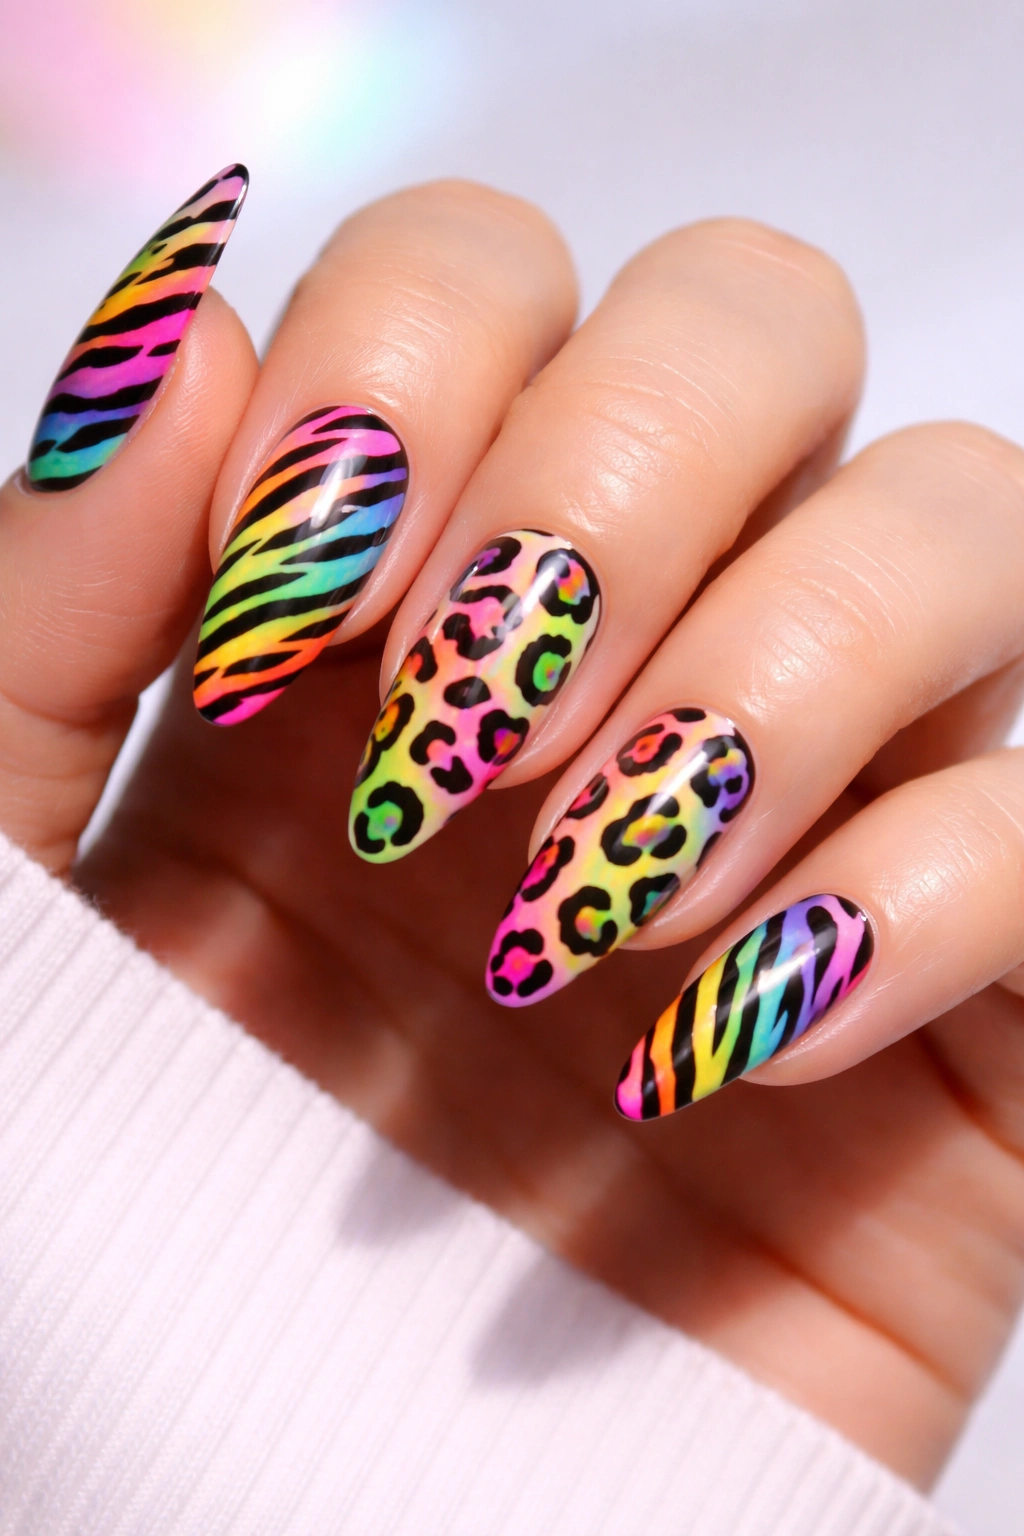
Neon animal print nails transform traditional patterns with electric, eye-catching colors that feel bold and contemporary. Neon leopard spots, zebra stripes, or tiger patterns bring an unexpected modern twist to classic designs. This approach works best for people who want to make a statement and aren’t afraid of bold color.
Creating Neon Impact
Start with a white, pale pink, or nude base—these neutral backgrounds make neon colors pop dramatically. Paint animal print patterns using neon polish in electric pink, lime green, hot orange, or electric blue. The contrast between the muted base and the vibrant pattern creates visual electricity that simply commands attention. The pattern itself remains recognizable—leopard spots, stripes, or patches—but the color choice modernizes and energizes the entire design.
Making Neon Work for You
Neon animal print feels youthful and playful, perfect for festival season, summer celebrations, or anyone who simply loves bold color. You can use a single neon shade across all ten nails for maximum impact, or mix multiple neon colors across different fingers for a maximalist approach. Layer neon animal print with metallic accents or glitter for even more visual interest and dimension.
Pro tip: Balance neon animal print with other neutral elements—perhaps solid neon nails on some fingers and neon animal print on just a few accent nails—to make the design feel cohesive rather than chaotic.
13. Holographic Animal Print Nails

Holographic animal print nails blend shimmering, iridescent finishes with traditional animal patterns, creating designs that shift color and sparkle as you move. This approach adds serious luxury and visual dimension to any animal print pattern, whether it’s leopard spots, zebra stripes, or snake scales.
Achieving Holographic Effects
Paint your base color first, then apply animal print patterns using holographic polish or by stamping with holographic designs. The magic of holographic finishes is that they shift between multiple colors—typically blues, greens, pinks, and purples—creating an almost magical appearance as the light catches the polish differently. You can use holographic polish for just the animal print elements, or go full-coverage holographic for maximum sparkle and dimension.
Layering for Maximum Drama
Combine holographic patterns with other effects for even more visual interest. Layer holographic leopard spots over a solid base color and seal with a glossy top coat for shine. Add gold or silver metallic accents to holographic animal print for a luxe, glamorous finish. The iridescent quality of holographic finishes naturally elevates any design, making even simple animal print feel special and elevated.
Worth knowing: Holographic effects work best under various lighting conditions and are less visible in dim environments, so save these designs for occasions where you’ll be in natural or bright artificial light.
14. Mismatched Animal Print Nails
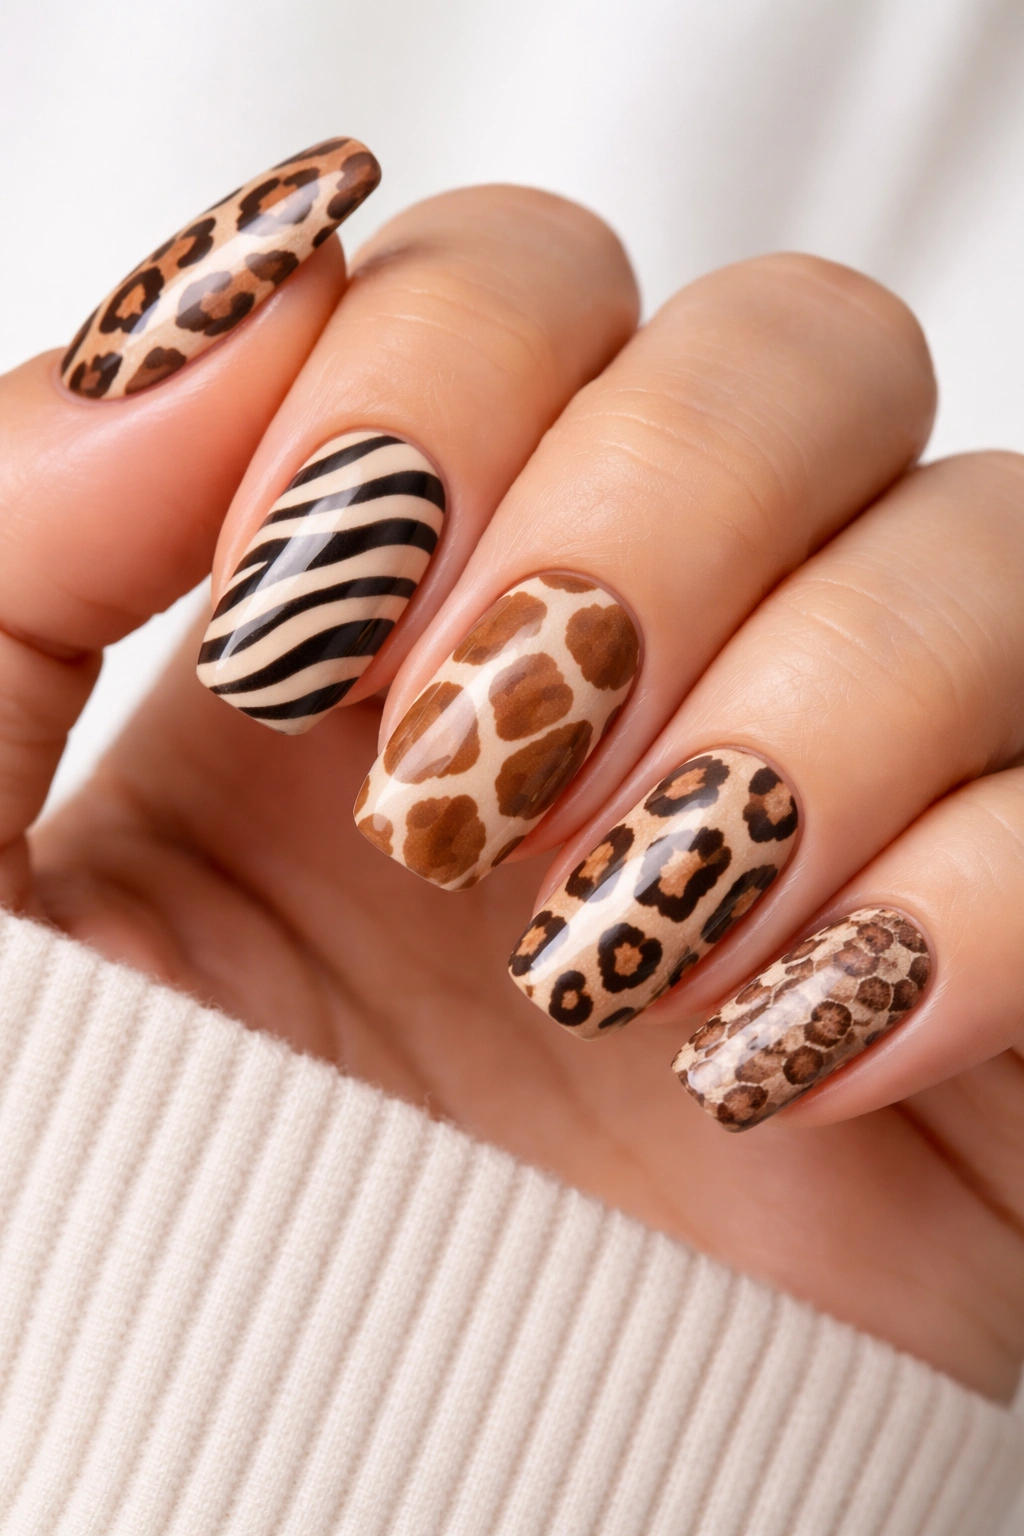
Mismatched animal print nails celebrate individuality and creative expression by pairing different animal patterns across your ten fingers. One nail might feature leopard spots, another zebra stripes, a third giraffe patches—creating a cohesive yet diverse design that feels artistic and curated.
Creating Cohesion Across Multiple Patterns
The key to successful mismatched animal print is choosing patterns and colors that complement each other visually. Use a consistent color palette—warm neutrals, jewel tones, pastels—across all patterns to tie the overall manicure together. You might use the same base color on all nails, or vary the base colors while keeping the pattern shades consistent. This creates a unified aesthetic despite the variety of patterns.
Building Your Mismatched Design
Consider pairing leopard spots with zebra stripes on adjoining fingers, then adding giraffe patches and tiger stripes further down. Some nails can feature animal print while others remain solid colors that echo the tones used in the patterns. The overall effect feels intentional and artistic rather than haphazard. Mismatched animal print allows you to combine multiple favorite patterns into a single manicure without overwhelming the design.
Pro tip: Paint the most intricate patterns first—like detailed zebra stripes or giraffe patches—when your hand is fresh and your precision is highest. Save solid colors and simpler patterns for last.
15. 3D Textured Animal Print Nails
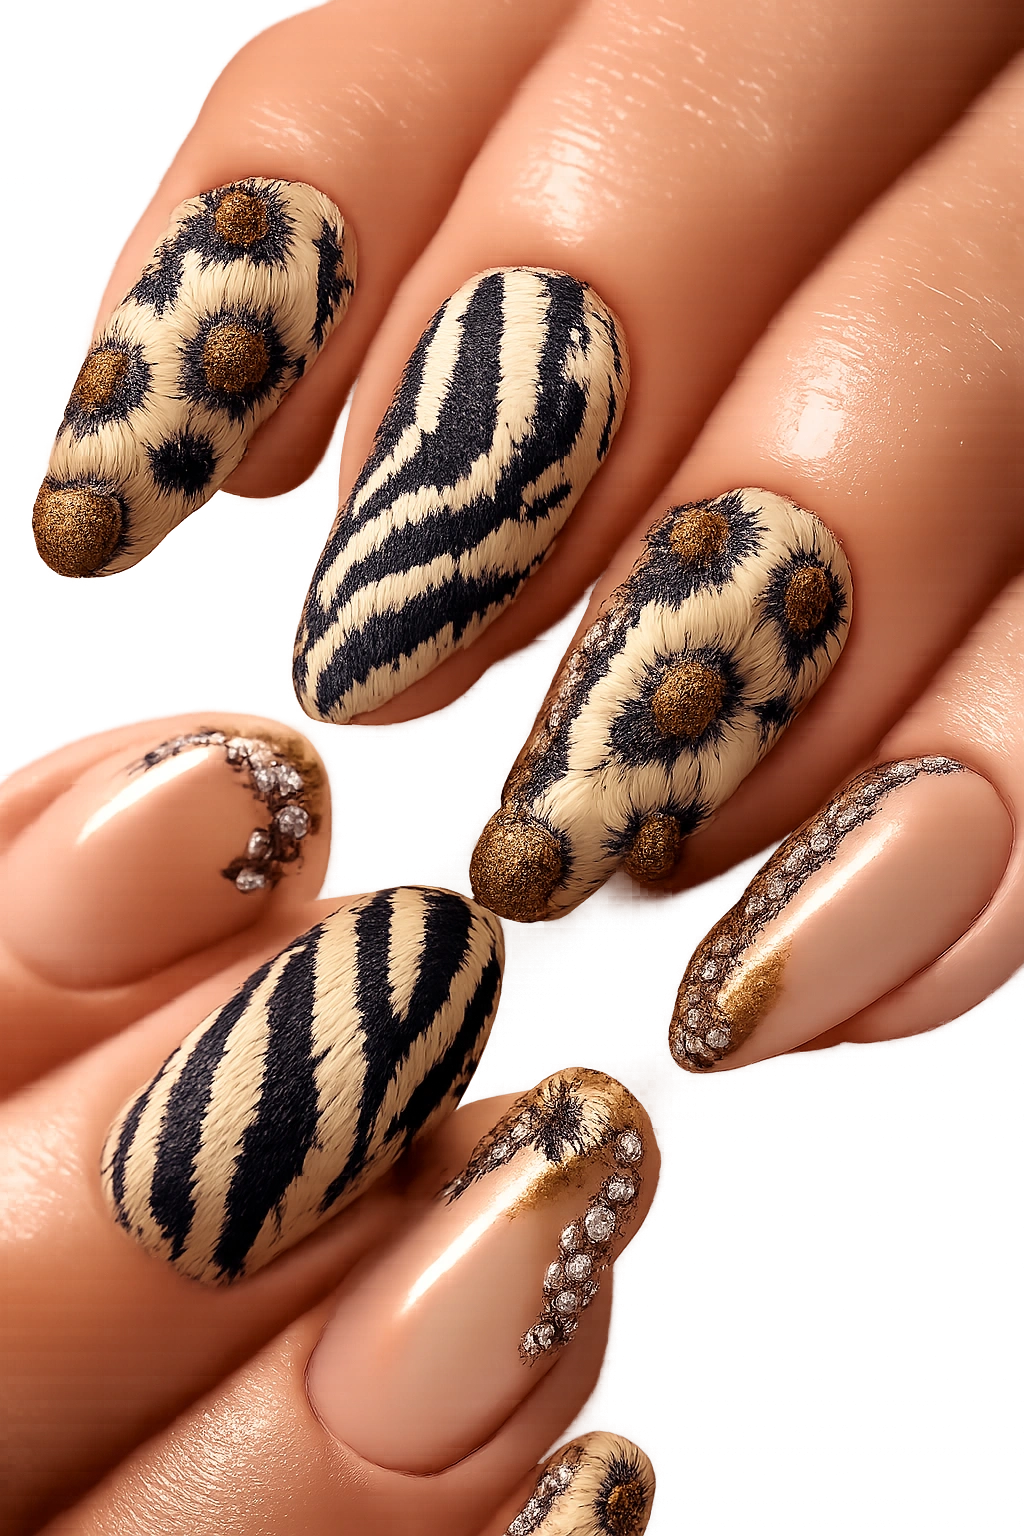
3D textured animal print nails bring dimension and tactile interest beyond what flat nail art can achieve. Using gel, acrylics, or embellishments like caviar beads or crystals, you can create animal print patterns that are literally raised off the nail surface, creating a luxury manicure that’s as interesting to touch as it is to look at.
Building Texture and Dimension
One approach is to create animal print outlines or elements using thick gel or acrylic that sits noticeably above the nail surface. Paint a base color, then use textured material to outline leopard spots, create raised zebra stripes, or form giraffe patches that pop off the nail. Alternatively, apply animal print patterns using tiny caviar beads—pressing them into tacky gel polish—to create a bumpy, textured surface that catches light and feels luxurious.
Material Choices for Texture
Clear gel with embedded glitter or metallic elements creates dimension while maintaining the animal print pattern visibility. 3D acrylic nail art allows you to sculpt raised designs and paint animal patterns directly onto textured surfaces. Crystals, rhinestones, or foils combined with traditional animal print create mixed-media designs that feel genuinely special. The texture transforms animal print from simply a visual pattern into an experience that engages multiple senses.
Worth knowing: Textured animal print requires a bit more care during daily activities, as raised elements catch on fabric more easily than flat nail art. These designs work beautifully for special occasions or people who are extra-careful with their nails.
Final Thoughts
Animal print nails represent a perfect intersection of timeless style and personal expression. Whether you gravitate toward classic leopard spots, bold zebra stripes, or unexpected color combinations, there’s an animal print design that reflects your personality and aesthetic. The fifteen designs explored here are starting points—feel free to experiment, mix patterns, adjust colors, and make these designs completely your own.
The most important thing to remember is that animal print nails should feel confident and authentic to you. Don’t feel pressured to choose a design that doesn’t resonate with your style, and don’t hesitate to take creative risks with colors or combinations. The beauty of animal print is its incredible versatility and forgiving nature. Even imperfect spots, slightly uneven stripes, or wobbly lines read as part of the design’s organic charm. Your nails are a canvas for self-expression—embrace the wildness, have fun with the process, and rock whatever animal print design makes you feel fabulous and fierce.
