

Long oval nails are having a serious moment, and when you add rhinestones into the mix? That’s where the magic happens. There’s something genuinely captivating about the way light catches crystals on elongated nails — it’s not just glamorous, it’s mesmerizing. Whether you’re prepping for a special event, celebrating an everyday win, or just feeling like your nails deserve some serious sparkle, rhinestone designs offer endless possibilities for self-expression.
The beauty of combining long oval shapes with rhinestones is that you get the best of both worlds: the sophisticated, elongating effect of the oval profile paired with the luxury and light-reflecting drama of crystals. Oval nails are surprisingly flattering on most hand shapes, and rhinestones amp up that elegance without screaming “overdone.” The right design makes your hands look polished, intentional, and genuinely memorable.
What makes these designs so wearable is that they work across virtually every aesthetic — from minimalist and understated to maximalist and unapologetically glamorous. You can go with a simple scattered approach using just a few strategic stones, or go full-coverage crystal coverage for that red-carpet ready vibe. The versatility is genuinely impressive. We’ve pulled together ten standout long oval rhinestone designs that range from subtle sophistication to bold statement-making, and each one includes exactly what you need to know to either recreate it yourself or show a nail technician exactly what you’re envisioning.
1. Classic Diamond Sparkle on Clear Base
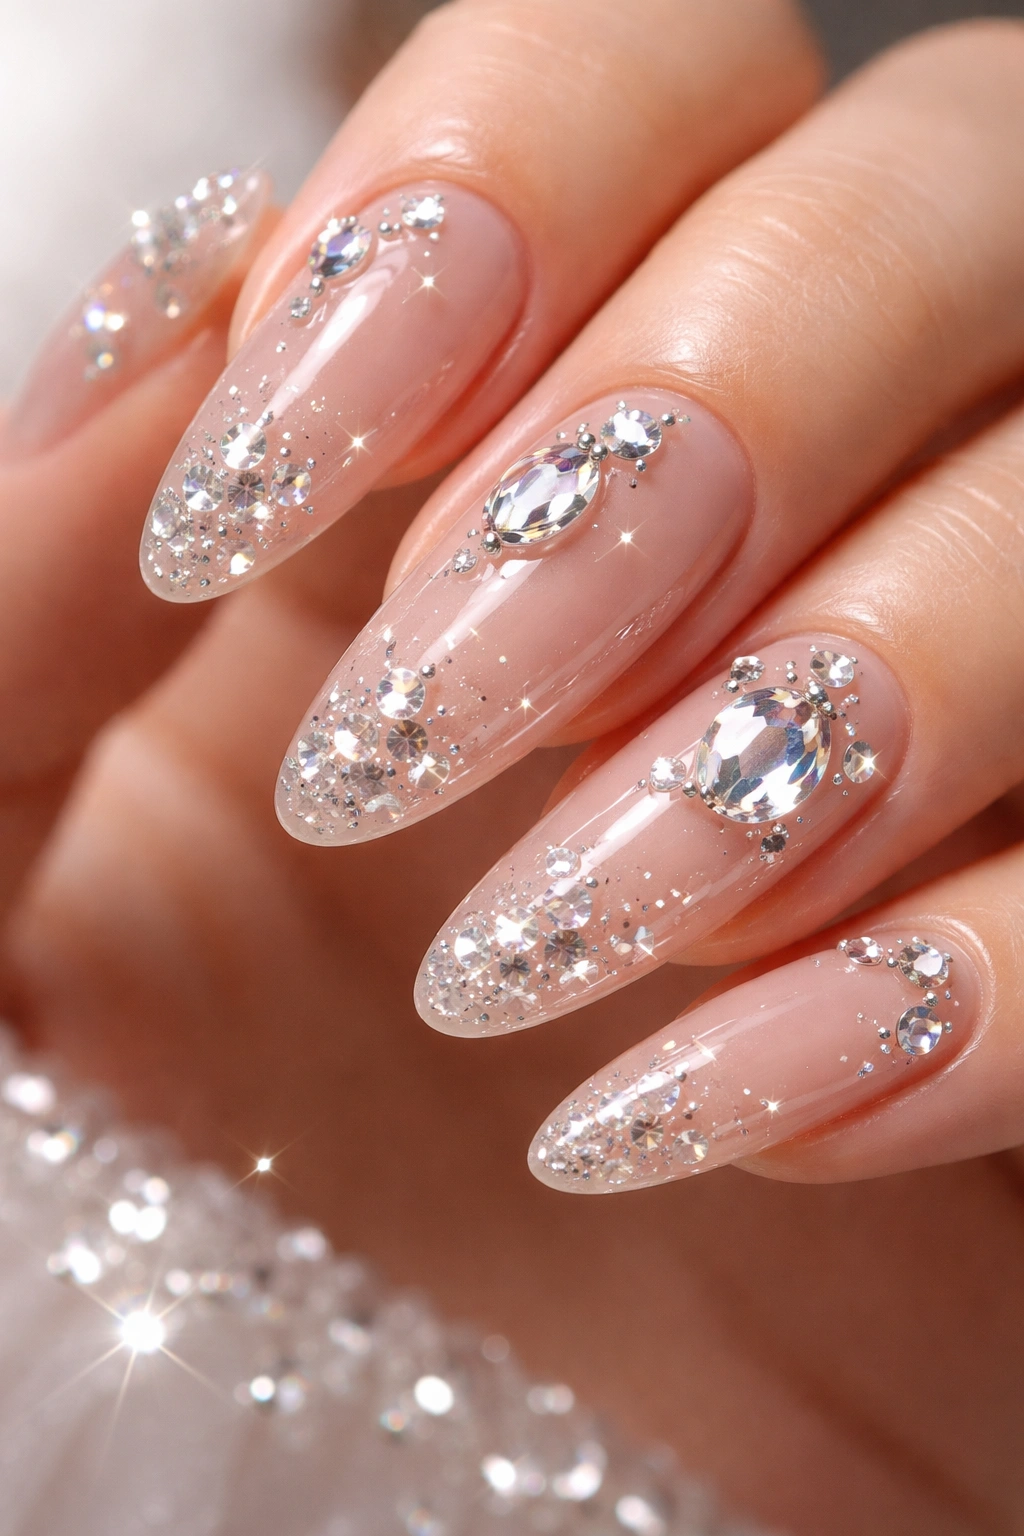
This is the design that never gets old because it’s absolutely timeless. A completely clear or translucent nude-pink base lets your actual nail shine through, and then you layer in crystal-clear rhinestones — either large diamond-shaped stones or brilliant round crystals — arranged in a scattered pattern that catches light with every movement. The magic here is restraint paired with impact.
Why This Design Is So Universally Flattering
The clear base elongates your nails even further, creating an almost glass-like illusion that makes fingers look impossibly graceful. The scattered rhinestones (typically 5-8 per nail) create visual interest without overwhelming the nail, which means this design works beautifully for professional settings, casual outings, weddings, and everyday wear. The transparency also means any slight imperfections in your actual nail underneath blend seamlessly rather than standing out.
How to Make This Work
- Base polish: Completely clear gel or polish, or a barely-there nude-pink if you want subtle warmth
- Rhinestone placement: Scatter 5-8 medium-to-large crystals (approximately 4-6mm each) randomly across the nail
- Application method: Use a rhinestone picker or a dotting tool dipped in gel to place each stone precisely
- Seal it: Top coat is absolutely essential to lock stones in place and create that seamless, glossy finish
- Wear duration: This design lasts 3-4 weeks with proper sealing
Pro tip: Vary the size of your rhinestones slightly — mixing 4mm, 5mm, and 6mm stones creates more visual depth than using uniform sizes.
2. Gradient Ombre with Scattered Rhinestones
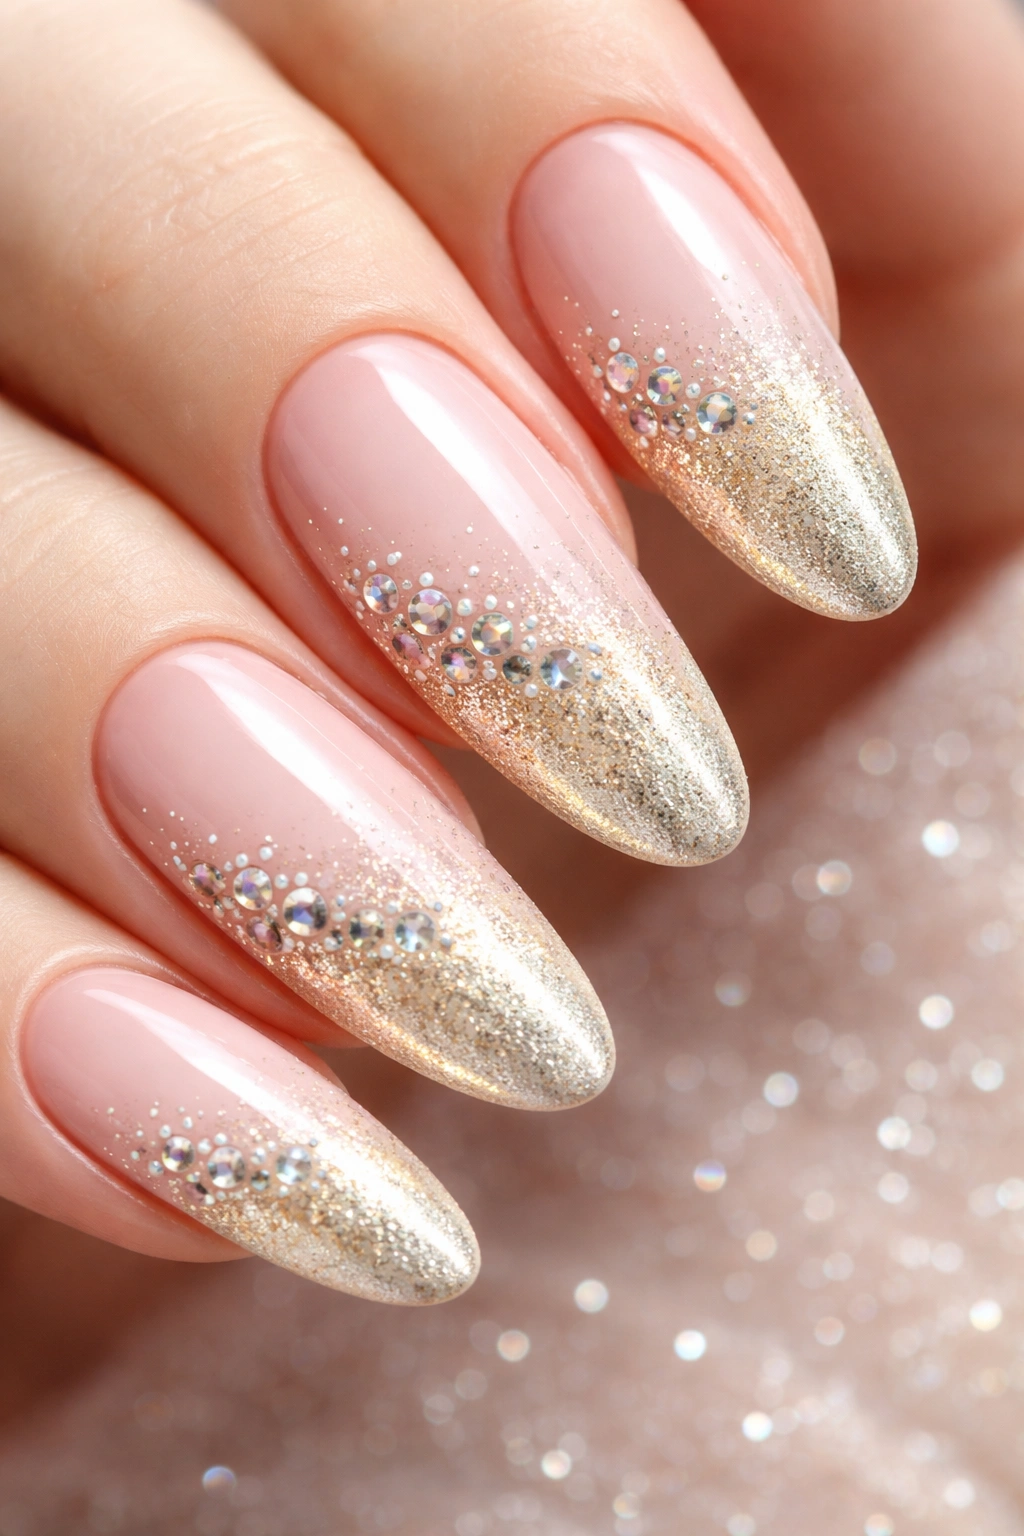
Ombre nails create a sophisticated color transition that draws the eye from your fingertips upward, and when you scatter rhinestones throughout that gradient, you get a design that’s both artistic and deeply luxurious. This works best with a two-to-three-color gradient — like soft blush fading to champagne, or nude transitioning into soft gold and then a touch of rose gold.
The Visual Impact of Color-Plus-Crystal Combinations
The gradient becomes the canvas, and the rhinestones act as intentional highlights that pull the eye across the ombre transition. This creates a 3D effect that makes nails look more voluminous and artistic than either element alone. The scattered approach (rather than lined up in rows) feels more organic and modern, like the stones naturally caught light in random places rather than being perfectly structured.
Application and Design Details
- Gradient method: Use a makeup sponge and tap-dab technique to blend three polishes into smooth transitions, or use gel polish in gradient shades and blend with a soft brush
- Stone placement: Place rhinestones in clusters along the gradient transition lines, with maybe 2-3 additional stones scattered toward the base
- Total stone count: 6-10 stones per nail creates elegant emphasis without overwhelming
- Color combinations that work brilliantly: blush-to-champagne, nude-to-rose-gold, pale pink-to-mauve, or ivory-to-pale-yellow
- Longevity: 3-4 weeks with quality gel and proper sealing
Worth knowing: The gradient itself takes time to execute perfectly, so this design is better suited for salon application unless you’re experienced with blending polishes.
3. Nude Base with All-Over Crystal Coverage
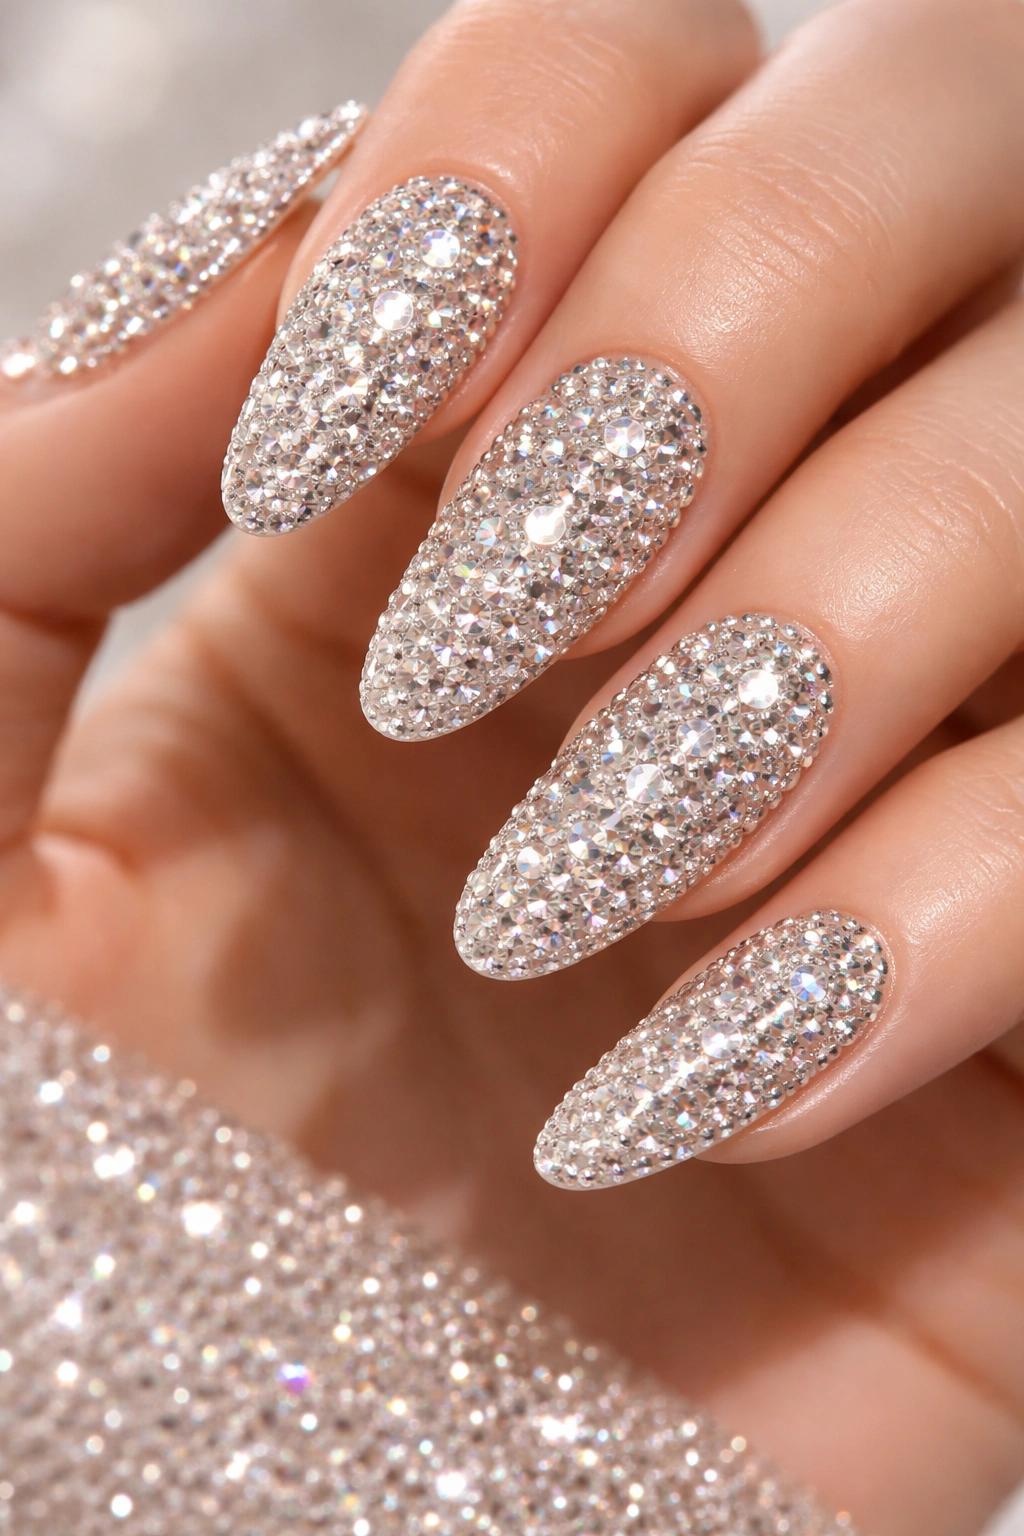
Sometimes more is genuinely more, and this design proves it. An elegant nude or beige base acts as a neutral canvas for what becomes a complete crystal covering — the entire visible nail surface becomes shimmering, light-catching stone. This creates an almost jeweled, armor-like effect that’s pure luxury and absolute show-stopper energy.
Why Full Coverage Works Better Than It Sounds
You might think an all-over rhinestone design would look tacky, but when executed with intention using quality stones and strategic sizing, it becomes incredibly glamorous. The key is using graduated stone sizes — larger crystals toward the center, medium-sized stones in the middle section, and smaller stones filling in the gaps and creating dimension. The nude base ties everything together and prevents visual chaos.
Making It Work Without Looking Overdone
- Stone size variety: Use a mix of 6mm, 5mm, 4mm, and 3mm crystals to create a balanced, high-fashion look
- Stone placement: Start with larger stones in the center nail area and work smaller toward the edges
- Density: Stones should be close enough to create that full-coverage sparkle but with just barely enough visible nude base peeking through to prevent looking costume-like
- Sealing: Multiple layers of top coat (at least 2-3) are crucial to lock everything in and create that professional, polished finish
- Maintenance: This design benefits from weekly “top-up” appointments to replace any stones that loosen over the 2-3 weeks between full maintenance
Insider note: Using crystal AB stones (aurora borealis finish) instead of plain clear stones adds rainbow iridescence that makes the full coverage look even more intentional and artistic.
4. Black Matte with Gold Rhinestone Accents
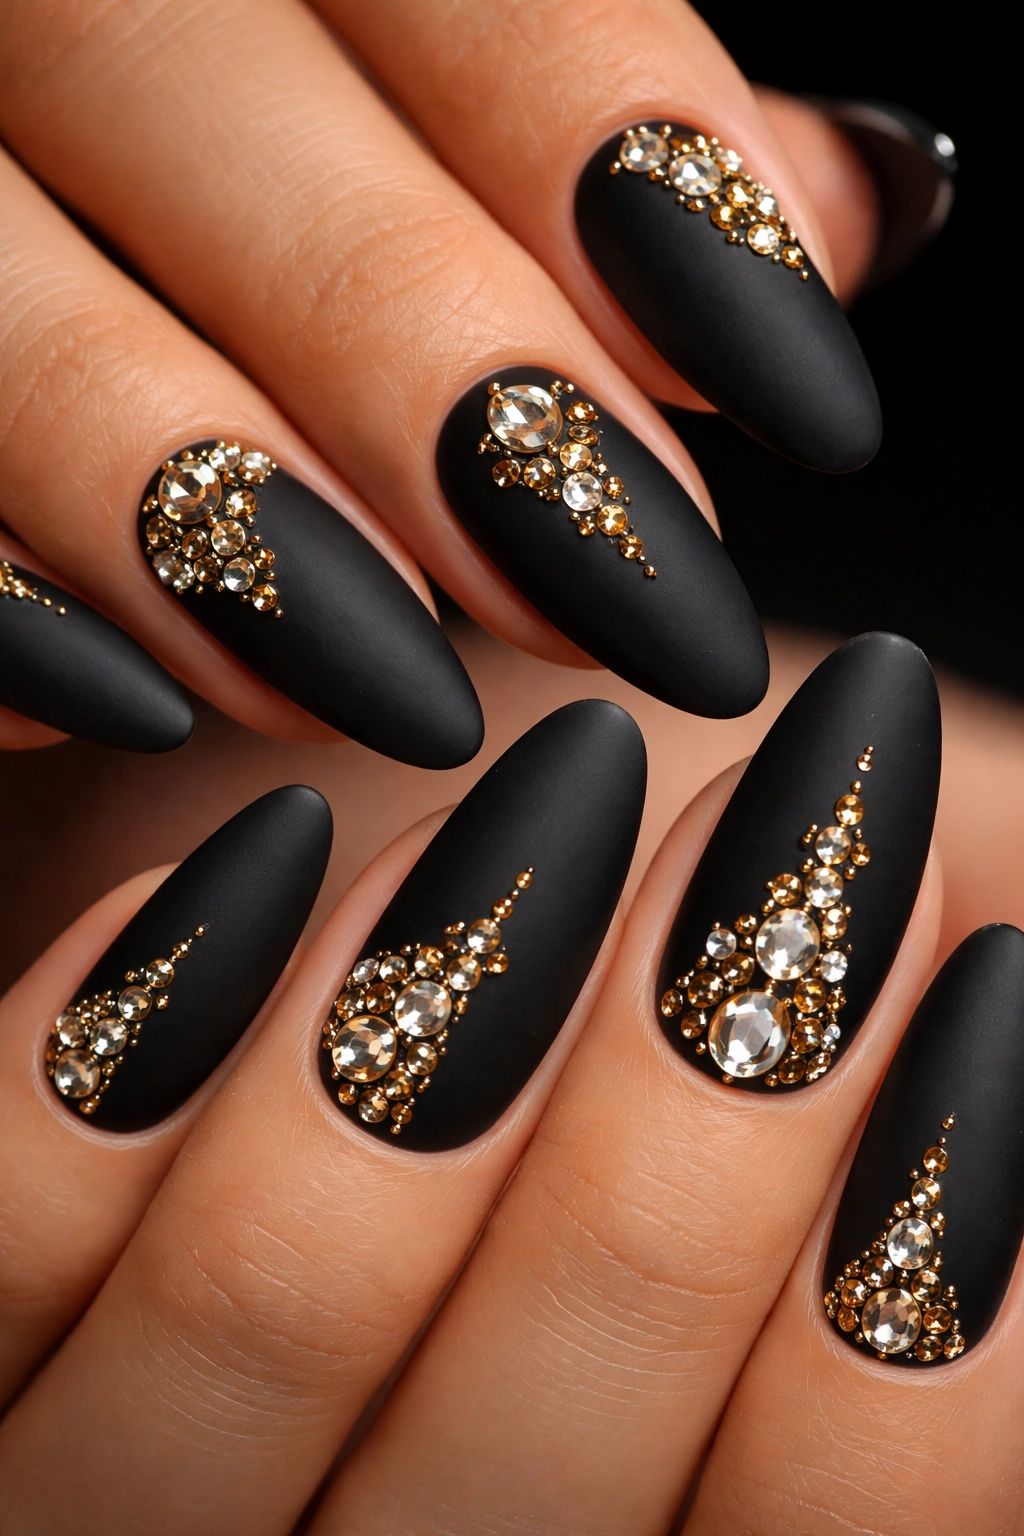
Bold, sophisticated, and genuinely striking — this design pairs a velvety matte black base with strategically placed gold or champagne-colored rhinestones to create high-contrast drama. The matte finish is the key element here; it grounds the sparkle and prevents the design from veering into costume territory.
Why the Matte-Plus-Sparkle Combination Is So Powerful
Black matte polish recedes visually, which means the gold rhinestones literally jump off the nail. They become focal points rather than surface decoration. This is a design that looks expensive, intentional, and genuinely editorial. The contrast between the light-absorbing matte and the light-reflecting crystals creates an almost 3D illusion of depth.
Design Execution and Placement Strategy
- Base polish: High-quality matte black gel or polish that doesn’t chip easily
- Rhinestone color: Gold, champagne, or rose gold are the best contrasts with black
- Pattern options: Linear accent lines along one or two edges, a geometric design on one accent nail, scattered throughout in the bottom half, or concentrated in a focal point on the ring finger
- Stone sizing: Medium-sized stones (5-6mm) work best so they’re visible against the dark background but still feel refined
- Stone count: 8-12 per nail creates impactful sparkle without dominating the design
- Finish: Keep the matte on base, but use glossy top coat over the rhinestones only to make them pop even more
Pro tip: This design is perfect for anyone who loves drama but needs something that works in professional environments — the matte base keeps it surprisingly work-appropriate.
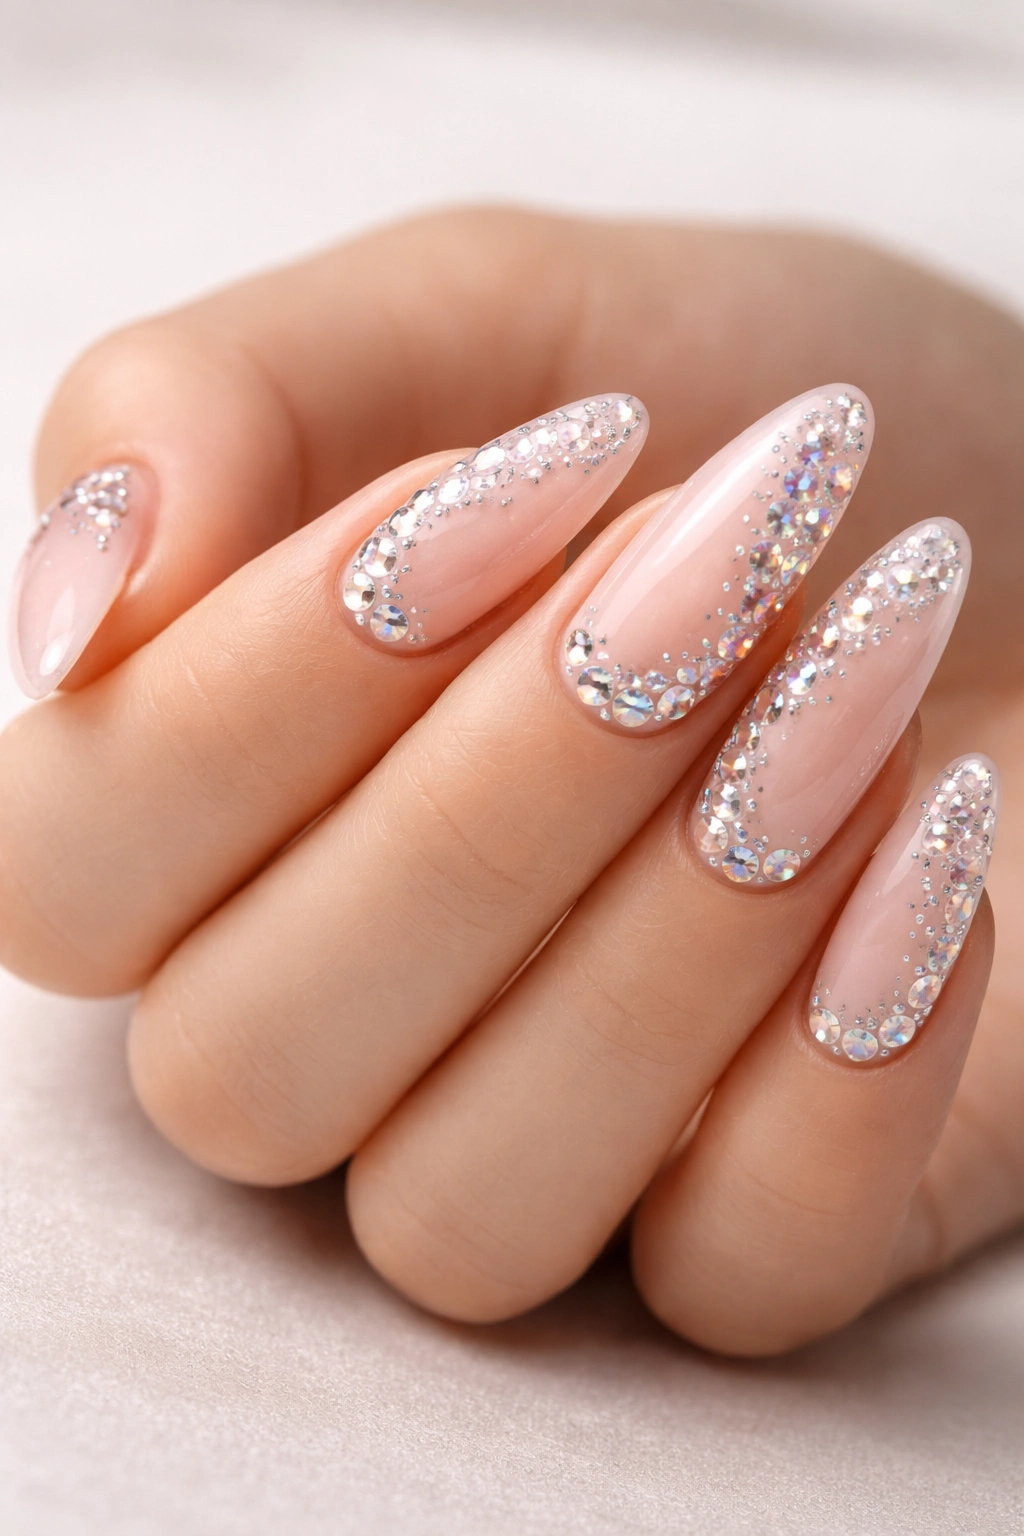
5. Soft Pink with Concentrated Tip Design

Instead of scattering rhinestones across the entire nail, this design concentrates all the sparkle on the tips where your nails naturally create visual interest. A delicate soft pink base provides the perfect backdrop for a dense rhinestone cluster that covers roughly the outer third of each nail, creating an ombré-like effect from solid pink to glittering crystal.
The Strategic Beauty of Concentrated Placement
By keeping rhinestones clustered at the tip rather than spread throughout, you create a gradient effect that actually makes nails look longer and more refined. The eye travels from the soft base color all the way to the glittering tip, which draws attention upward and emphasizes nail length. This approach also feels more modern and editorial than scattered placement, with that intentional, designed-on-purpose quality.
How to Build This Look Successfully
- Base color: Soft pink, rose quartz pink, or pale mauve — something that reads feminine and delicate
- Stone placement: Begin concentrating stones about 1/3 down from the tip, and increase density toward the very end
- Stone progression: Use slightly larger stones at the very tip (6-7mm) and gradually decrease size as you move toward the base of the crystal section (moving down to 4-5mm)
- Total stones: 15-20 per nail creates that rich, concentrated look
- Application technique: Apply stones to wet gel before curing, which helps them adhere properly and prevents shifting
- Longevity: 2-3 weeks before stones may need touching up
Worth knowing: This design actually looks longer-lasting than scattered designs because any stones that loosen are in the tip area where they’re less noticeable.
6. Silver Metallic with Geometric Rhinestone Pattern
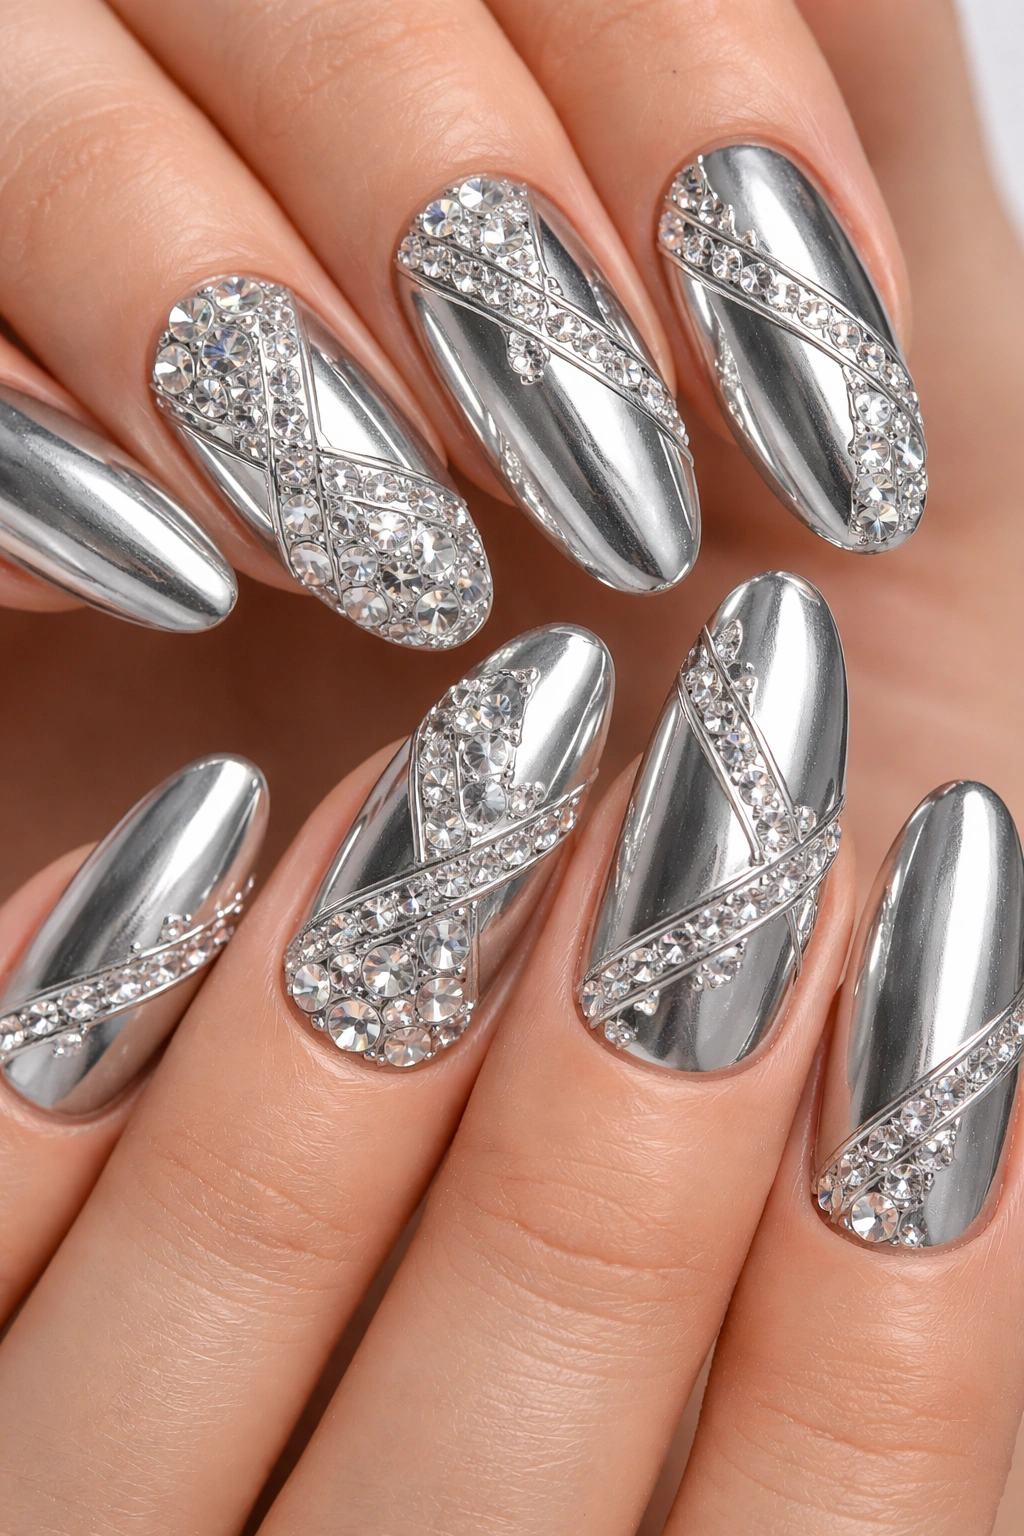
When you combine a shimmering silver metallic base with geometric rhinestone placement, you get something that feels both modern and luxurious. This design uses rhinestones in intentional patterns — stripes, triangles, hexagons, or linear arrangements — that create structure and visual rhythm rather than random sparkle.
Why Geometric Patterns Elevate the Design
Geometric patterns introduce an element of sophistication that scattered stones can’t quite achieve. They signal intentionality, artistic vision, and actual design thinking. The silver metallic base becomes the canvas for the crystal pattern, and the combination feels like something you’d see in high-fashion nail artistry rather than purely decorative work.
Pattern Ideas and Application Methods
- Stripe pattern: Vertical or diagonal lines of rhinestones running across the nail, evenly spaced
- Triangle design: A geometric triangle formed by rhinestones, either pointing up from the base or down from the tip
- Hexagon accent: One central hexagon shape created with 6-8 stones, positioned on the ring finger or accent nail
- Linear gradient: A line of rhinestones that transitions from thick at one end to tapering down to single stones at the other
- Stone sizing: Keep stones consistent within a geometric pattern (all 5mm, for example) unless the design specifically calls for graduated sizes
- Application: This works best with gel application, as you can position stones precisely before curing
Pro tip: Use a rhinestone placement guide or create small reference marks with a non-toxic marker to ensure your geometric pattern is balanced and precisely executed.
7. White Polish with Rainbow Crystal Embellishments
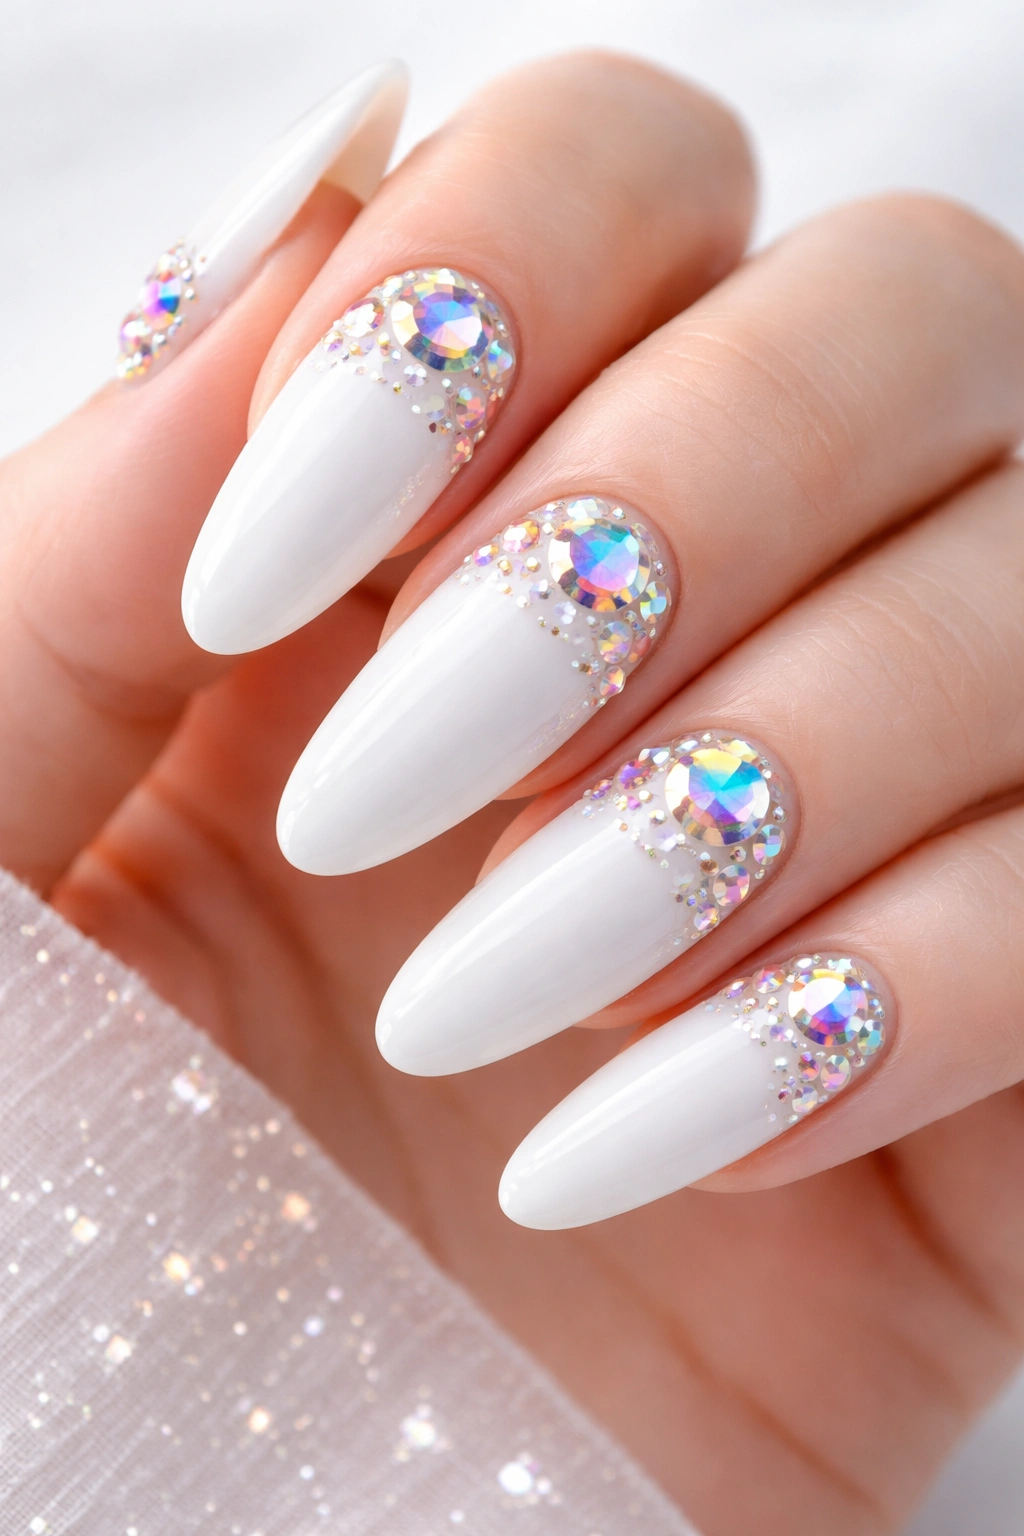
Pure white is the ultimate blank canvas, and when you layer on rainbow or aurora borealis rhinestones, you get a design that catches light in multiple colors. This is cheerful, eye-catching, and genuinely fun while still maintaining that polished, intentional quality.
The Optical Magic of Rainbow Stones on White
White amplifies the color-shifting properties of aurora borealis stones because there’s no competing color to mute the iridescence. A single white nail catches light that’s pure and bright, so rainbow stones scattered across it refract into visible red, green, blue, purple, and gold. It’s genuinely stunning and photographs beautifully — the rainbow effect shows up clearly in photos whereas it can get lost on darker or more colorful bases.
Creating Balance with Rainbow Stones
- Base polish: Crisp white gel or polish, almost like an eggshell finish so it doesn’t look neon
- Stone selection: Aurora borealis or crystal AB stones specifically — these have the rainbow iridescent coating that regular clear stones lack
- Placement: Scattered across the entire nail or concentrated toward the tip, with about 8-12 stones per nail
- Sizing: 5-6mm stones are ideal — large enough that the color-shifting effect is visible
- Complementary accents: Consider one accent nail with a slightly more concentrated design or a larger statement stone
- Durability: 3-4 weeks with proper sealing
Worth knowing: Aurora borealis stones photograph incredibly well and look especially striking in natural sunlight — this is a design that generates genuine compliments.
8. Champagne Gold with Statement Rhinestone Focal Point
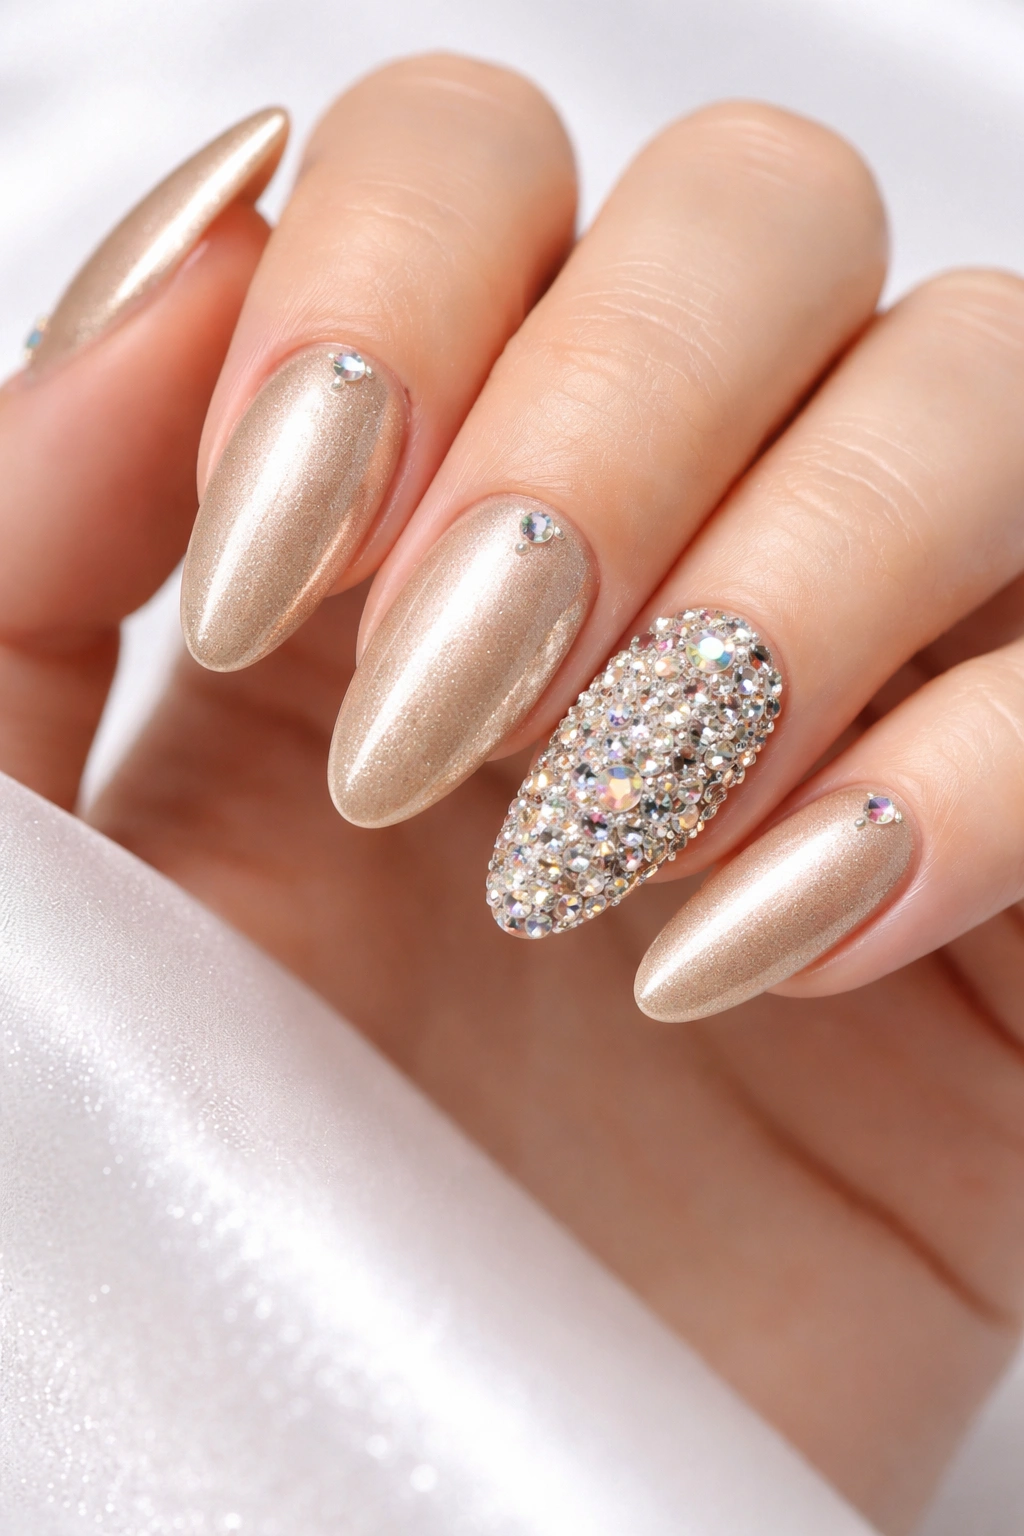
Rather than spreading sparkle evenly, this design uses a champagne gold base and concentrates the majority of rhinestones into one statement focal point — often on the ring finger or middle finger — while keeping other nails simpler with just a few accent stones. This creates a hierarchy of visual interest that feels intentional and art-gallery-quality.
Why the Focal Point Approach Feels More Sophisticated
Not every nail needs to be equally decorated. By creating one show-stopper nail with dense rhinestone coverage and keeping others more minimal, you actually create more impact than uniform coverage across all ten nails. It’s a principle used in fine jewelry and high fashion — strategic focus creates drama. The champagne gold base bridges the gap between neutral and glamorous, providing richness without competing with the stones.
Creating Your Statement Focal Point
- Base color: Champagne gold, light gold, or warm nude-gold across all nails
- Focal point nail: Ring finger or middle finger typically works best
- Focal point design: Dense rhinestone cluster covering roughly 60-70% of the focal point nail — center it or position it toward the tip depending on your preference
- Accent stones on other nails: 2-3 small rhinestones per nail positioned at the base or corner, creating visual rhythm without competing
- Stone selection: Mix sizes on the focal point (4-7mm) to create depth, keep accent stones uniform (4-5mm)
- Application: Apply focal point stones while gel is still wet and uncured; cure thoroughly before applying accent stones to other nails
Pro tip: This is an excellent design for smaller hands because the focal point doesn’t overwhelm — it draws attention to one beautiful nail rather than demanding attention everywhere.
9. Deep Burgundy with Delicate Rhinestone Detailing
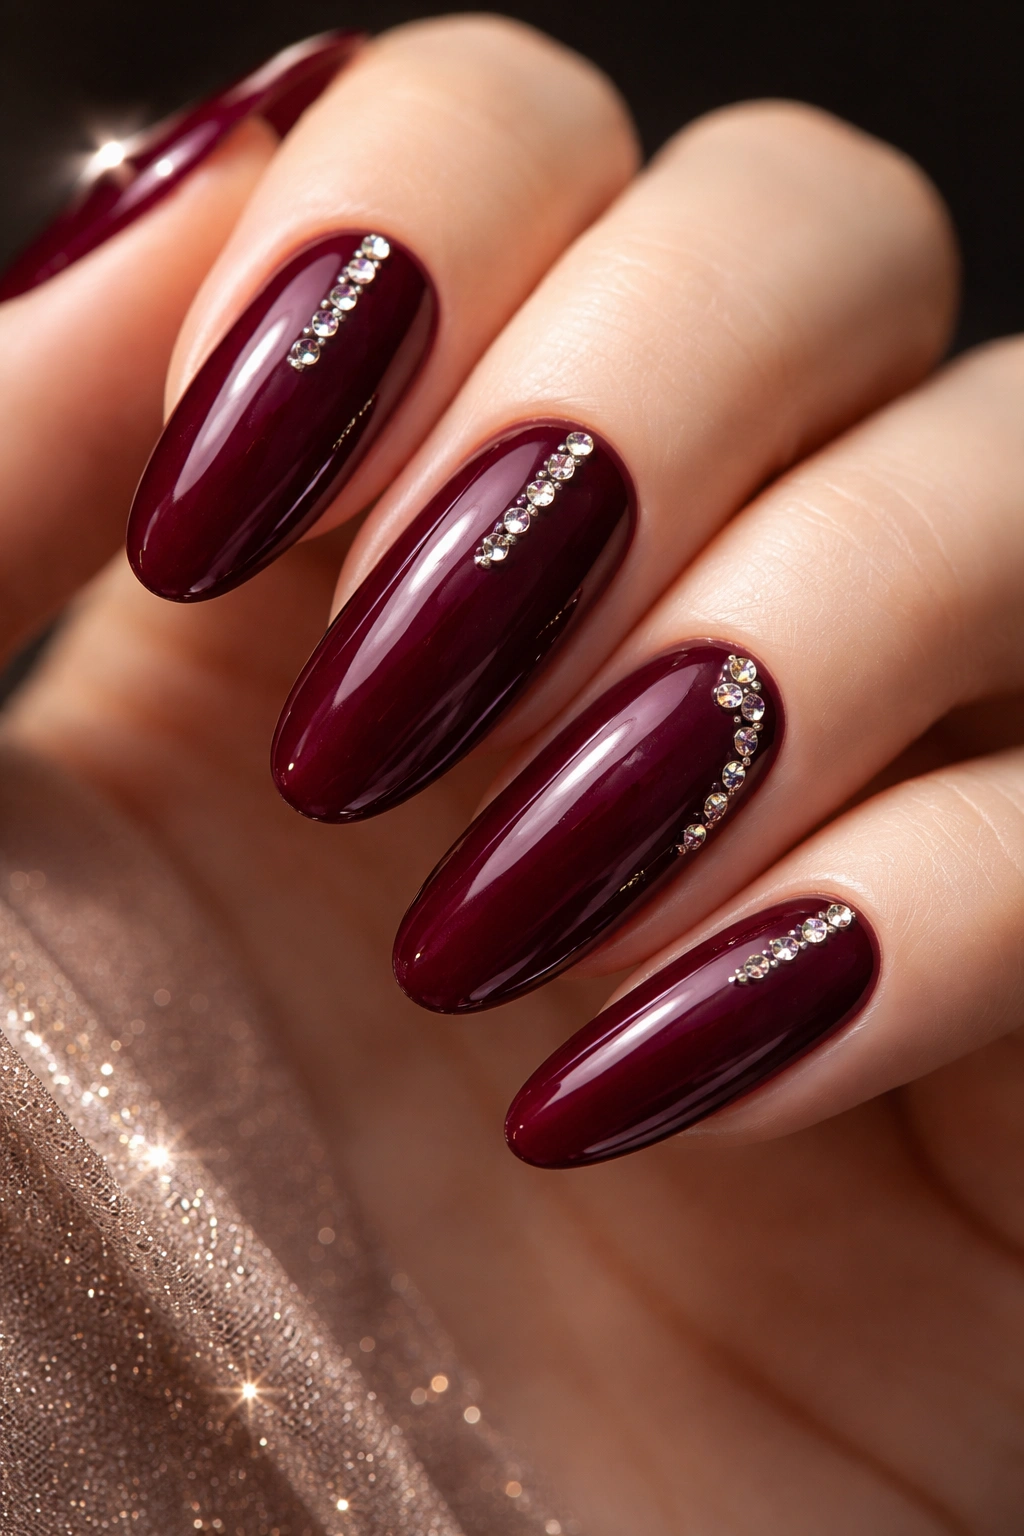
Burgundy is sophisticated and seasonless, and when paired with delicate, strategic rhinestone placement, it becomes absolutely luxurious. This design keeps the burgundy front-and-center while using rhinestones as refined accents rather than dominant features — think sophisticated jewelry that enhances rather than screams for attention.
Why Deep Colors Need Light-Handed Rhinestone Placement
Deep jewel tones like burgundy can absorb light rather than reflect it, which means too many rhinestones can get visually lost. By using fewer stones and positioning them with intention, you create highlight moments that actually pop against the rich color rather than blending in. This design reads as refined luxury rather than decorated.
Delicate Detailing Approaches
- Base color: Deep burgundy, wine red, or oxblood — rich and sophisticated
- Rhinestone placement options:
- A delicate vertical line of 5-6 small stones (3-4mm) down the center of the nail
- A subtle arc of stones across the upper half, mimicking a tiara effect
- Small clusters in two corners, creating balance without overwhelming
- A single larger stone (6mm) at the base center, like a signature mark
- Stone color: Stick with clear, champagne, or rose gold to complement the burgundy
- Total stones per nail: 4-8 maximum keeps the look refined
- Finish: Glossy top coat makes stones pop against the matte-ish appearance of the burgundy base
Worth knowing: This design is perfect for anyone who loves red nails but wants to elevate them beyond solid color — the rhinestones add luxury without sacrificing the dramatic elegance of deep burgundy.
10. Pastel Purple with Rhinestone Art Deco Design
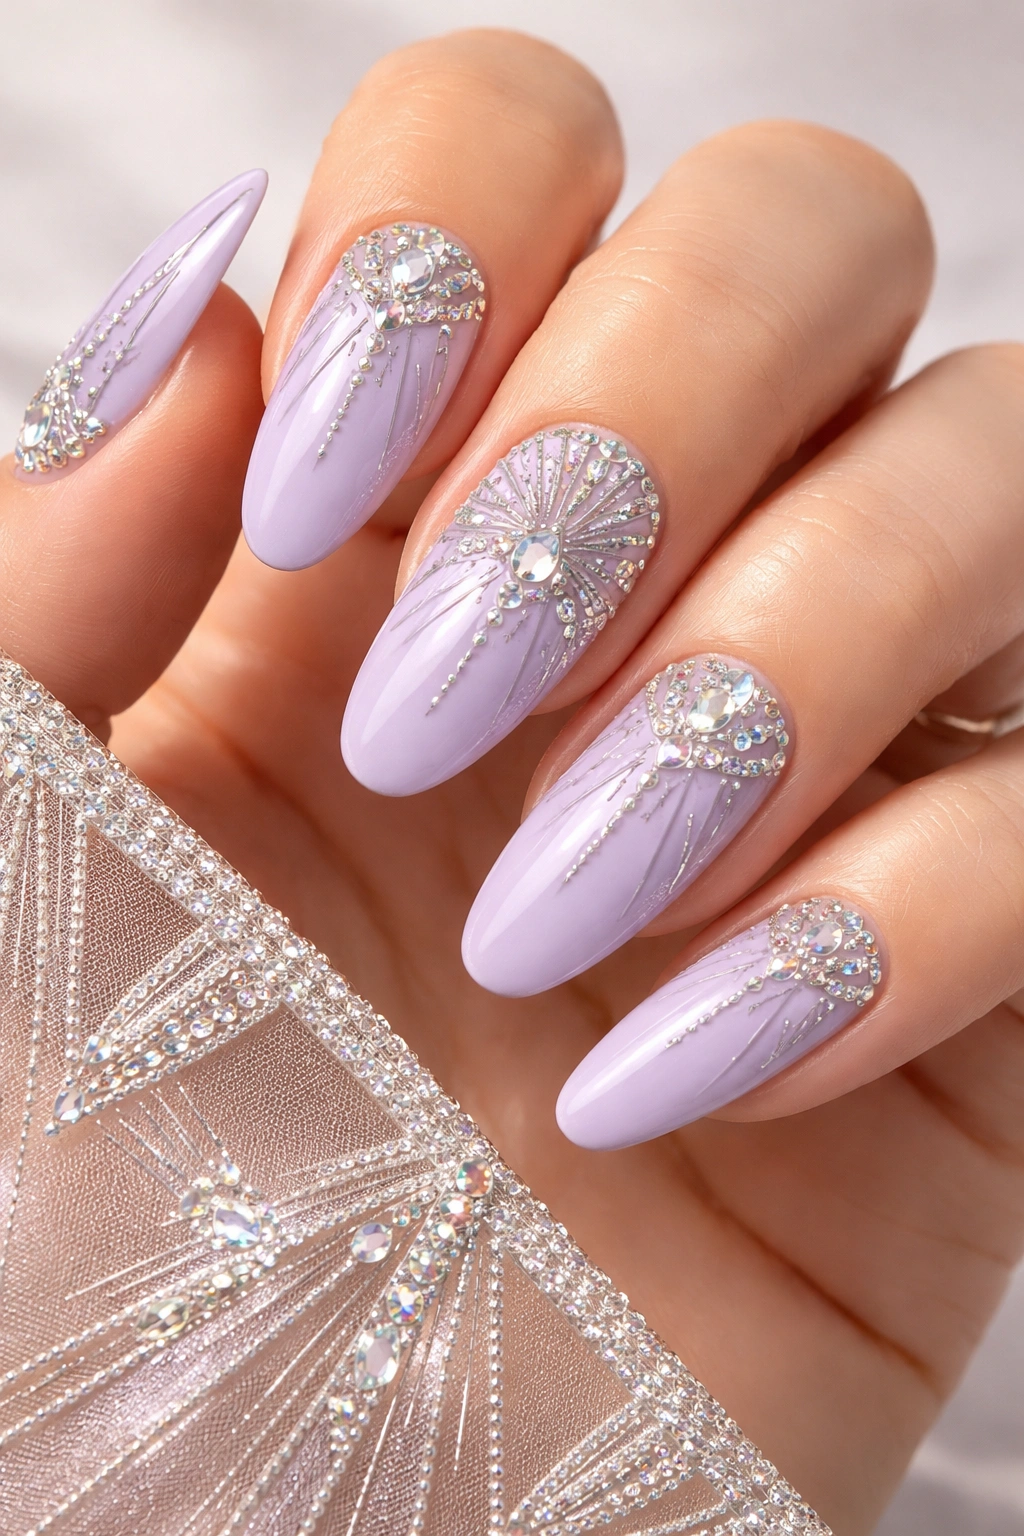
Art Deco styling creates geometric patterns with vintage glamour, and when applied to pastel purple nails with rhinestones, you get a design that feels both retro-inspired and completely current. This approach uses rhinestones to outline and create structured geometric patterns that reference the angular, geometric aesthetic of the Art Deco movement.
The Appeal of Art Deco Structure in Nail Design
Art Deco patterns are inherently sophisticated because they’re intentional, mathematical, and historically significant. When you create Art Deco patterns with rhinestones, you’re not just placing sparkly stones — you’re creating actual design with visual depth and artistic purpose. The pastel purple provides a soft, modern foundation that prevents the design from feeling dated or costume-like.
Creating Your Art Deco Rhinestone Design
- Base color: Soft lavender, lilac, or pale purple — gentle enough that patterns stand out
- Art Deco pattern options:
- Radiating lines of small stones (3-4mm) creating a sunburst pattern from the center outward
- Geometric borders: stones forming triangles, diamonds, or hexagons along the edges and center
- Symmetrical designs: lines and shapes mirrored perfectly down the center of the nail
- Fan pattern: stones arranged in a semicircular fan shape, pointing either up from the base or down from the tip
- Stone placement technique: Use a fine dotting tool and reference marks to ensure geometric precision
- Stone sizing: Keep stones consistent within each geometric element (all 4mm for outlines, for example)
- Total stones: 12-18 per nail creates that full Art Deco impact
- Application: Requires either salon application or genuine patience and a steady hand
Pro tip: This is a design where quality matters — precise stone placement is what makes it look intentional and artistic rather than random, so take time with application or seek out a nail technician experienced with geometric designs.
Final Thoughts
Long oval nails with rhinestones offer such incredible range that you can genuinely find a design that matches your personality, aesthetic, and lifestyle. Whether you’re drawn to the minimalist elegance of a few scattered crystals on a clear base or the full-coverage glamour of an all-over sparkle situation, these designs deliver that feeling of having truly polished, intentional nails.
The key to making any rhinestone design work is quality in every element — the base polish, the grade of rhinestones, the application technique, and the sealing process all matter. Cheap rhinestones come loose within days, and poor application methods mean stones shift and lift. Investing in quality materials and either going to an experienced technician or taking your time with at-home application makes the genuine difference between a design that looks professional and one that looks amateurish.
Real talk: rhinestone nails do require maintenance. You’ll want to be gentle with your hands, avoid soaking them in water for long periods, and probably plan for a touch-up visit every 2-3 weeks if you want full sparkle throughout. But if you love having nails that catch light, turn heads, and make you feel genuinely polished and special, that maintenance is absolutely worth it.
