

Geometric nail art has made a serious comeback, and honestly, there’s nothing quite like the satisfaction of creating perfectly sharp lines and bold shapes right on your own nails at home. The best part? You don’t need to be a professional nail artist to pull off these designs. With a little patience, the right tools, and a steady hand (or even some helpful tricks to steady an unsteady one), you can create stunning geometric manicures that look like they came straight from a high-end salon.
The beauty of geometric nails is their versatility. Whether you’re into minimalist designs with just a few clean lines or you prefer bold, colorful patterns that make a statement, there’s a geometric style waiting for you. These designs work on any nail shape and length, and they’re perfect for any occasion—from casual everyday wear to special events where you want your nails to do the talking.
In this guide, we’re breaking down ten geometric nail designs that are not only achievable at home but genuinely fun to create. You’ll learn the techniques that work, the tools that make the process easier, and exactly how to execute each design with confidence. Let’s dive in and get those nails looking magazine-worthy.
1. Clean Crisscross Stripes
Why This Design Works So Well
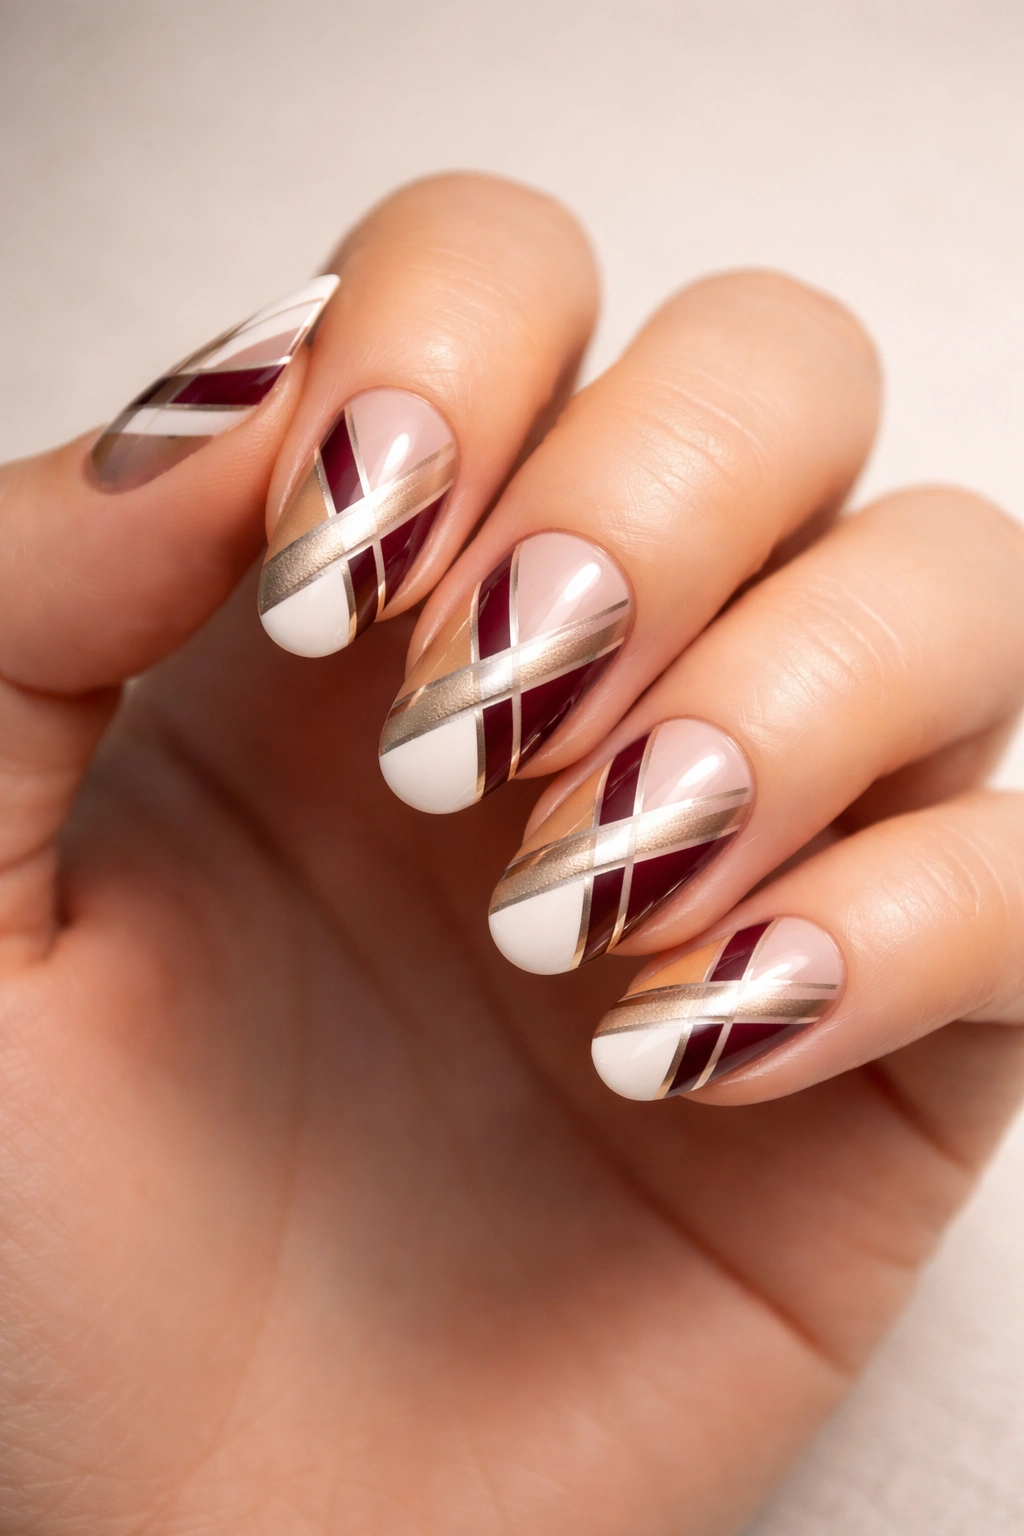
The crisscross look is where edgy glam meets casual elegance, and it’s surprisingly forgiving for beginners. This design uses three complementary shades of nail polish to create diagonal intersecting lines that catch the eye instantly. The beauty here is that even minor imperfections get hidden in the complexity of the design—those crossed lines naturally create visual interest that draws attention to the overall pattern rather than small mistakes.
What You’ll Need to Get Started
Grab a clear base coat and top coat, three contrasting nail polish colors (metallic gold, white, and burgundy work beautifully together), and a small detail brush for cleanup. You don’t need specialized tools for this one—a regular nail brush will do the job. The key is choosing colors that complement each other, whether you go warm tones like gold and copper or cool tones like navy and silver.
Step-by-Step Execution
Start by painting your nails white in three vertical stripes down the center of each nail, leaving space on either side. Once that’s completely dry, paint wine-colored diagonal stripes from the left-center edge toward the opposite tip. Fill in the space above these stripes with the wine color to create a triangular shape. Finally, paint metallic gold diagonal stripes over the wine color on the right side, creating another triangle. Clean up the edges with a detail brush dipped in rubbing alcohol, then seal everything with a glossy top coat.
Pro tip: Make sure each coat is completely dry before applying the next—patience is your best friend here. If you rush and apply polish while the layer beneath is still wet, you’ll end up with smudging and muddy colors instead of crisp, clean lines.
2. Bold Chevron Pattern Using Striping Tape
The Magic of Striping Tape
Chevron stripes represent one of the easiest ways to achieve professional-looking geometric nails at home, all thanks to striping tape. This tape is thin enough to not damage your nails, yet strong enough to create perfectly sharp lines when you paint over it. The chevron pattern—those distinctive V-shaped zigzag lines—adds dynamic movement to your manicure and works equally well as a full design or a subtle accent on just one nail.
Building Your Design Foundation
Paint all your nails (except your accent nail if you’re doing that variation) in a solid grey, lavender, or any neutral shade you love. Let this base dry completely—this is non-negotiable because wet polish will smudge when you apply the tape. Cut thin strips of striping tape and arrange them in a chevron pattern on your accent nail, creating those classic V-shapes. Make sure each piece is pressed down firmly so polish doesn’t seep underneath.
Applying Polish and Removing Tape Correctly
Paint your contrasting color directly over the striping tape in smooth, even strokes. Here’s the critical part: you need to peel off the tape before the polish dries completely. If you wait until it’s fully dry, the tape will tear the polish and create rough, ragged edges instead of clean lines. The timing typically takes about 30-60 seconds after you finish painting. Use tweezers to gently lift one corner of the tape and peel it away slowly. Finish with a clear top coat once the polish is fully dry.
Worth knowing: This technique works with any color combination imaginable. Try mixing two contrasting neon shades for summer vibes, or use metallics like rose gold and silver for a more sophisticated look.
3. Half-Matte, Half-Glossy Texture Play
Understanding the Textural Contrast
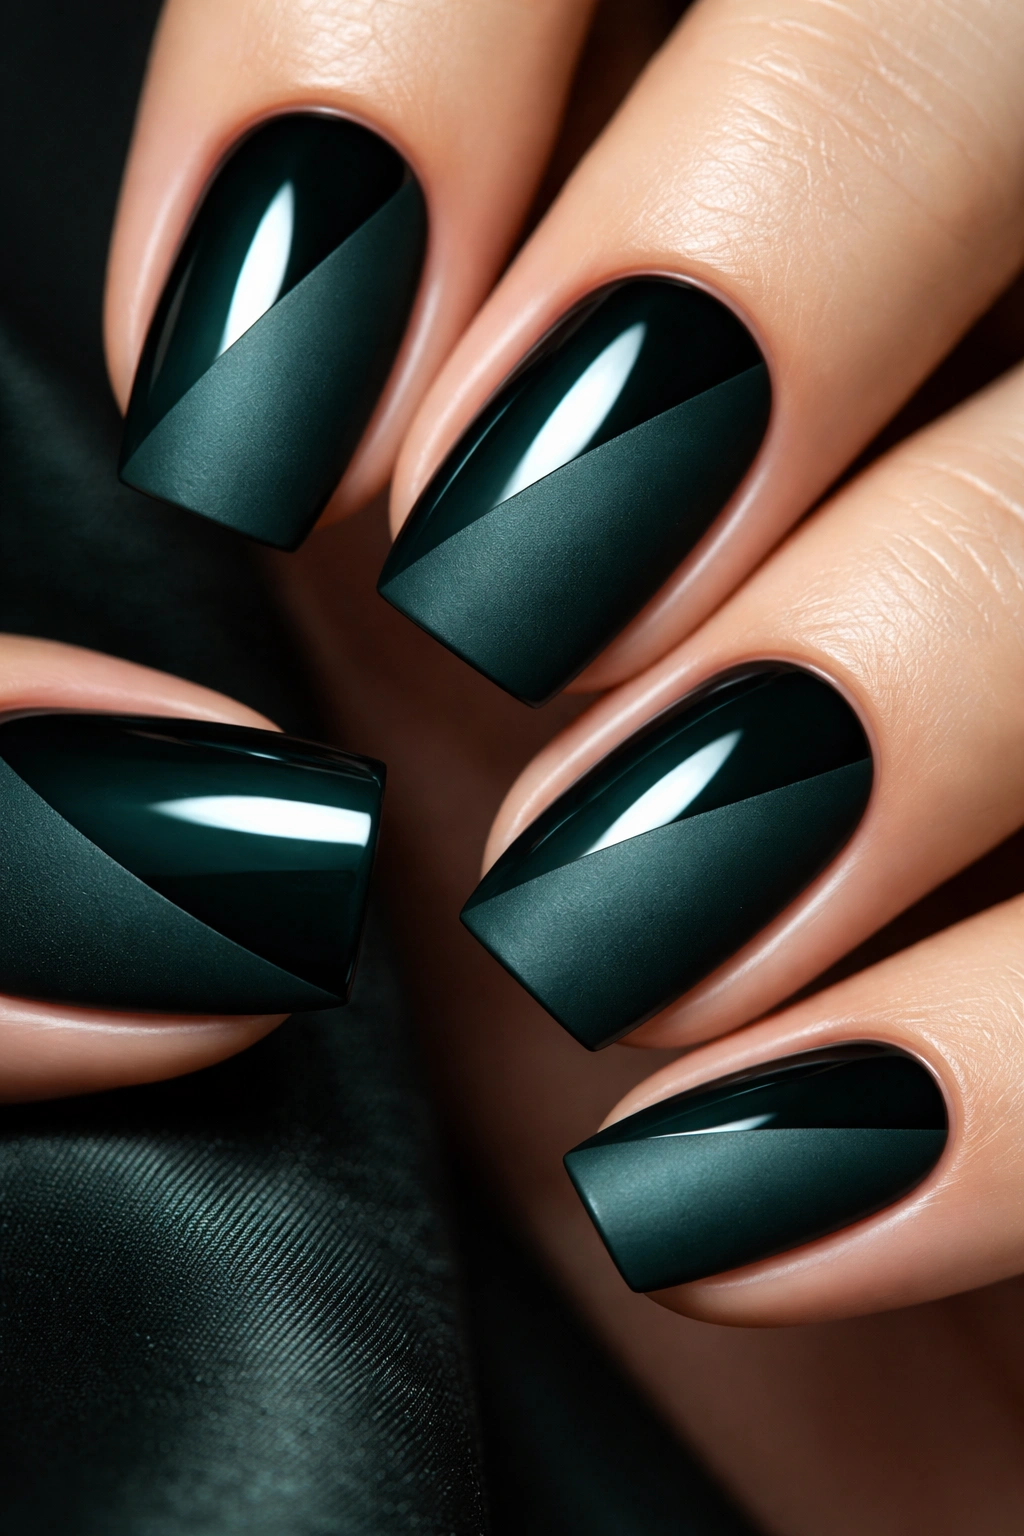
This design is all about playing with finishes to create visual depth without needing multiple colors. You’ll paint your nails in a solid color, apply a glossy top coat, then strategically apply a matte top coat to half of each nail. The contrast between shiny and flat creates an optical illusion that makes your nails look more dimensional and modern. Dark jewel tones like deep green, navy, or burgundy show this effect most dramatically.
Achieving That Perfect Half-and-Half Split
Begin with two coats of your chosen polish color, letting each layer dry thoroughly before moving on. Apply a high-shine, glossy top coat across all your nails and let that dry completely as well. Now comes the creative part: using a matte top coat, carefully apply it to the top half of your nails, creating a diagonal line from the center of one edge toward the opposing tip. You want this line to be smooth and intentional, creating that half-matte look that’s become so visually striking.
Perfecting the Application Technique
The key to nailing this design (pun intended) is using a very deliberate brushstroke with your matte top coat. Start from one side of the nail at approximately the center point and drag the brush diagonally toward the tip, creating that clean diagonal line. If you mess up and want to adjust, you can use a cotton swab slightly dampened with top coat to soften edges or clean up areas before everything fully sets. The matte finish takes longer to dry than glossy, so give yourself extra time before your next activity.
Insider note: This design photographs beautifully because the texture difference catches light in unexpected ways. It looks even more impressive in person than in photos.
4. Monochromatic Triangle Tessellation
Why Triangles Create Such Visual Impact
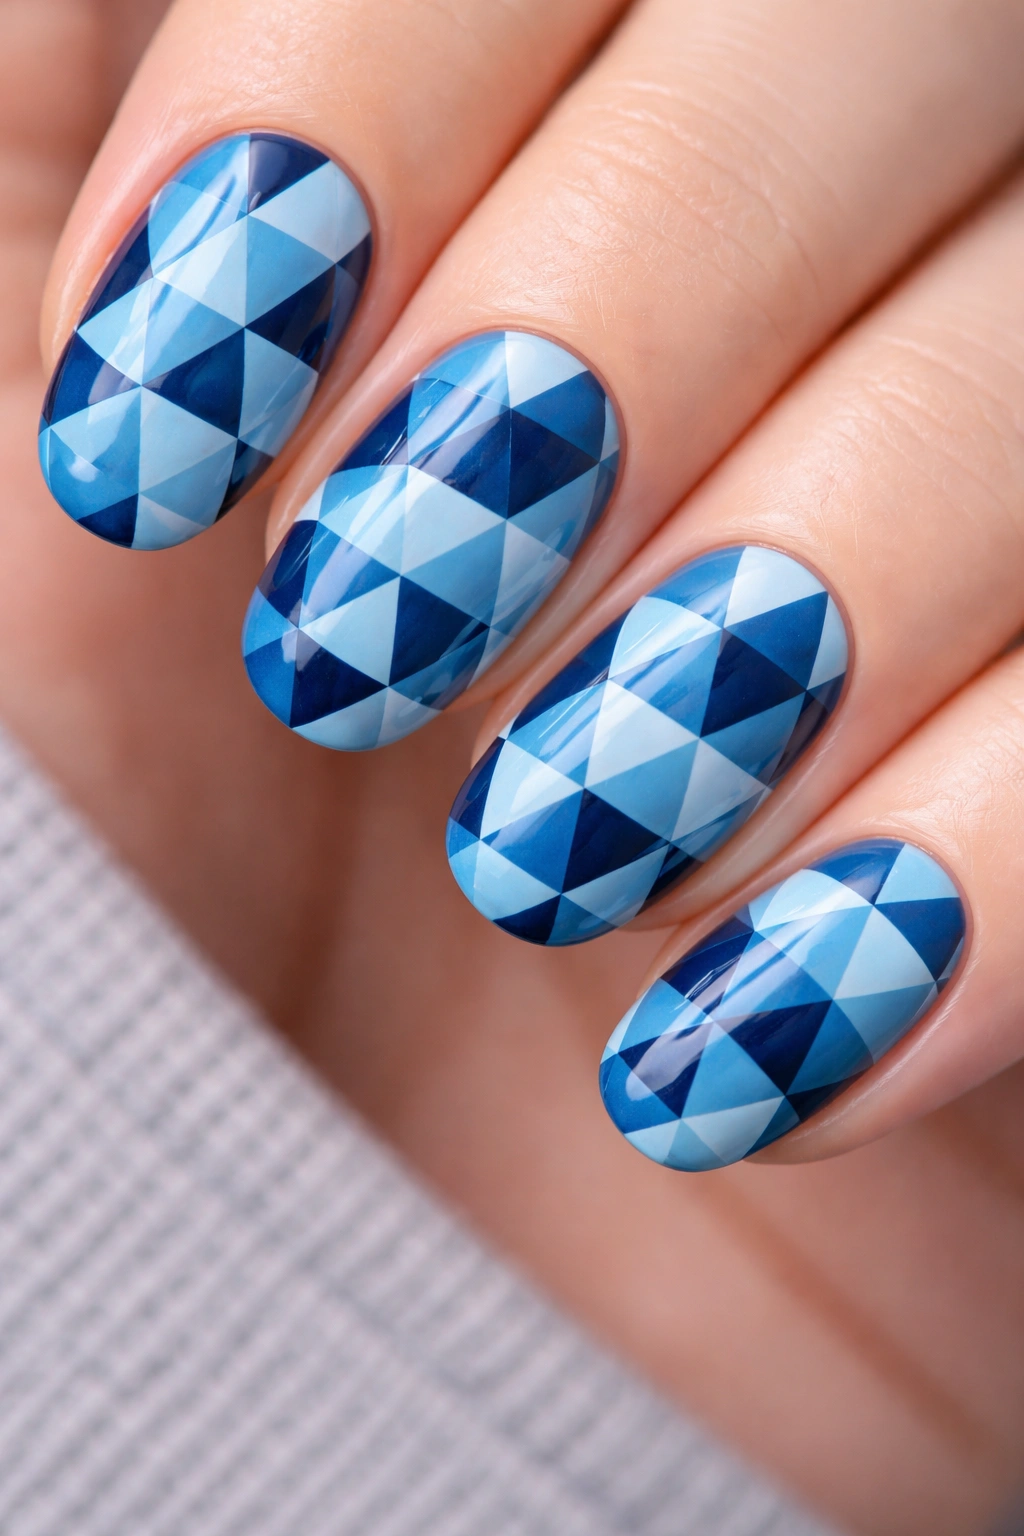
Triangles are geometric nail design royalty. They’re simple enough for beginners to execute but create surprisingly complex and sophisticated patterns when arranged together. A monochromatic approach—using different shades of the same color—makes the design even more approachable because you don’t have to worry about color coordination. The triangles create an almost hypnotic, kaleidoscopic effect that’s genuinely mesmerizing to look at.
Creating Your Color Palette
Choose a base color—let’s say a soft blue—then gather two or three additional shades of that same blue family. You might have a pale sky blue, a medium cornflower blue, and a deep navy. This range of tones creates depth without being jarring. Paint your nails in your lightest shade as the base coat, making sure you have smooth, opaque coverage with two coats if necessary.
Mapping Out Your Triangle Pattern
Using a thin detail brush or a striping brush, start painting triangles of your medium shade in a random or organized pattern—whichever speaks to you. Some people prefer a structured geometric layout, while others love the organic chaos of randomly placed triangles. Once you’ve completed the medium triangles, add darker triangles in between or overlapping, creating that layered, tessellated effect. Don’t stress about perfection here; tiny imperfections actually add to the handmade charm of this design.
Quick fact: Tessellation is the art of creating patterns that fit together perfectly without gaps. You don’t need to be mathematically perfect to create a beautiful tessellated nail design—approximate triangles that nearly touch work beautifully.
5. Black and White Grid Design
The Timeless Appeal of Grid Patterns
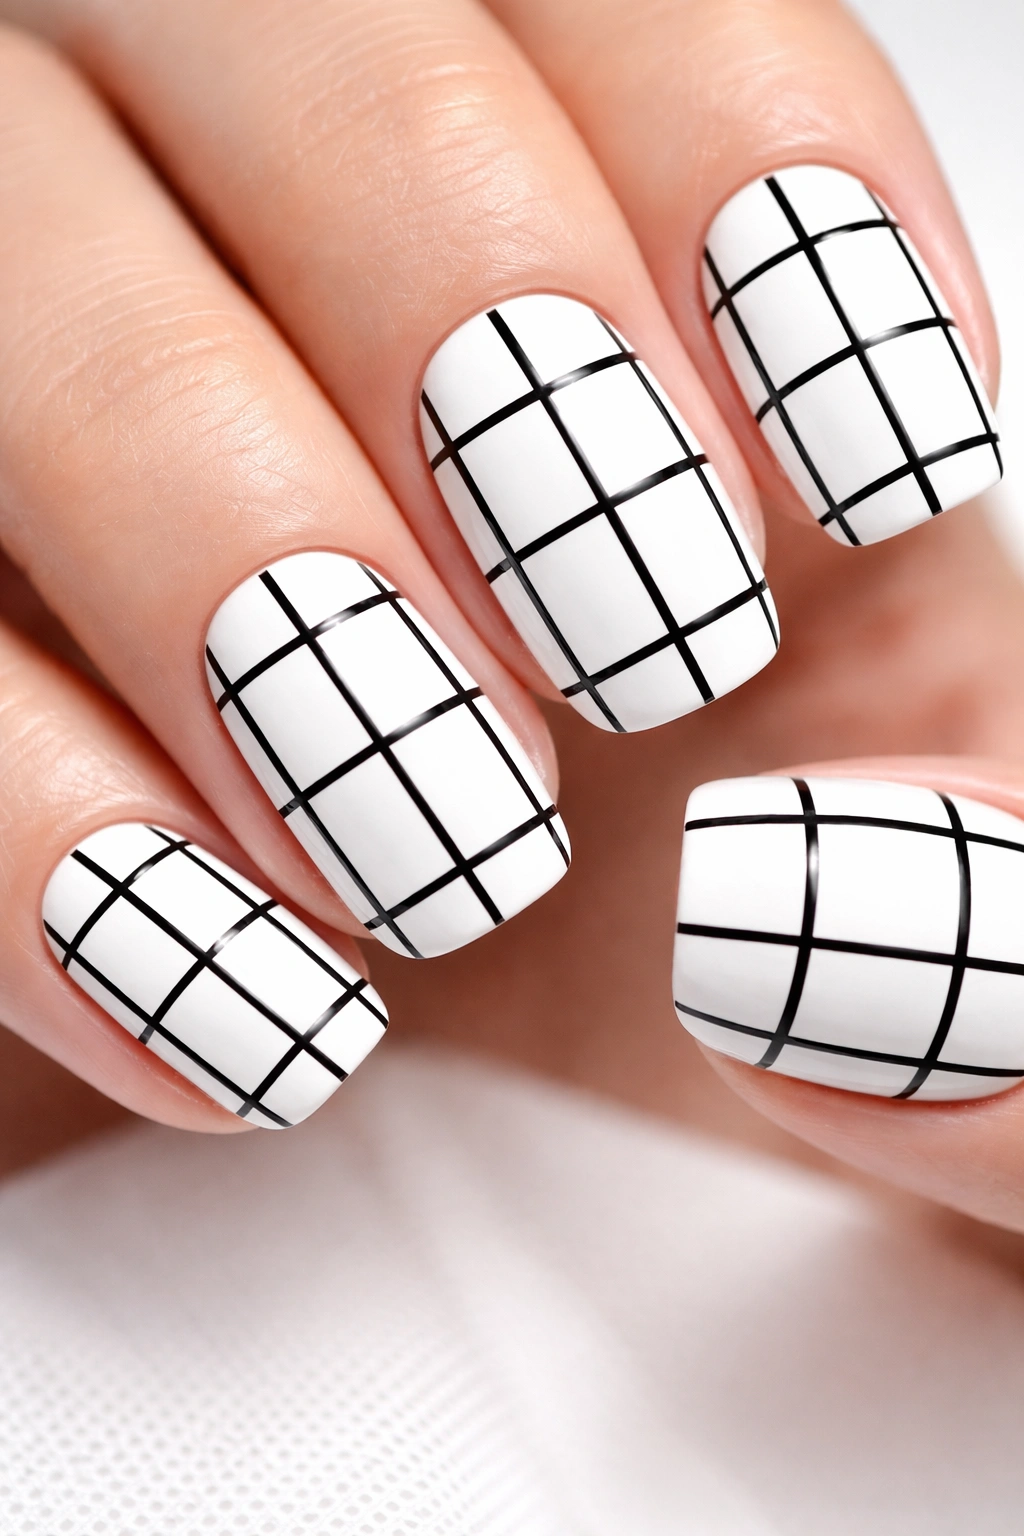
A simple black and white grid transforms your nails into tiny works of minimalist art. This design is refreshingly easy to execute, looks undeniably chic, and works with virtually any outfit or occasion. The grid pattern creates a sense of organization and order that’s visually soothing, yet the geometric precision gives it an edge that prevents it from looking boring or plain.
Building Your Grid Foundation
Start with two coats of pure white polish on all your nails—this will be your canvas. Let this dry completely before moving forward. Using a very thin striping brush and black polish, paint vertical lines evenly spaced across each nail. The spacing doesn’t need to be mathematically perfect; aim for roughly equal distance between lines, perhaps a millimeter or two apart depending on your nail size. Let these vertical lines dry completely.
Completing Your Grid with Horizontal Lines
Once the vertical lines are dry, paint horizontal lines in the same manner, spacing them to match your vertical lines as closely as possible. Step back and admire your perfectly gridded nails. If you want to elevate this design further, try filling in every other grid square with a pale shade of your chosen color—a dusty rose, sage green, or soft grey creates a checkerboard variation that’s slightly more complex but equally achievable.
Pro tip: Using a ruler or even lightly placing pieces of striping tape as guides can help you create more uniformly spaced lines if precision is important to you. Some people freehand these lines beautifully; others benefit from a little structural help.
6. Neon Geometric Accents on Neutral Base
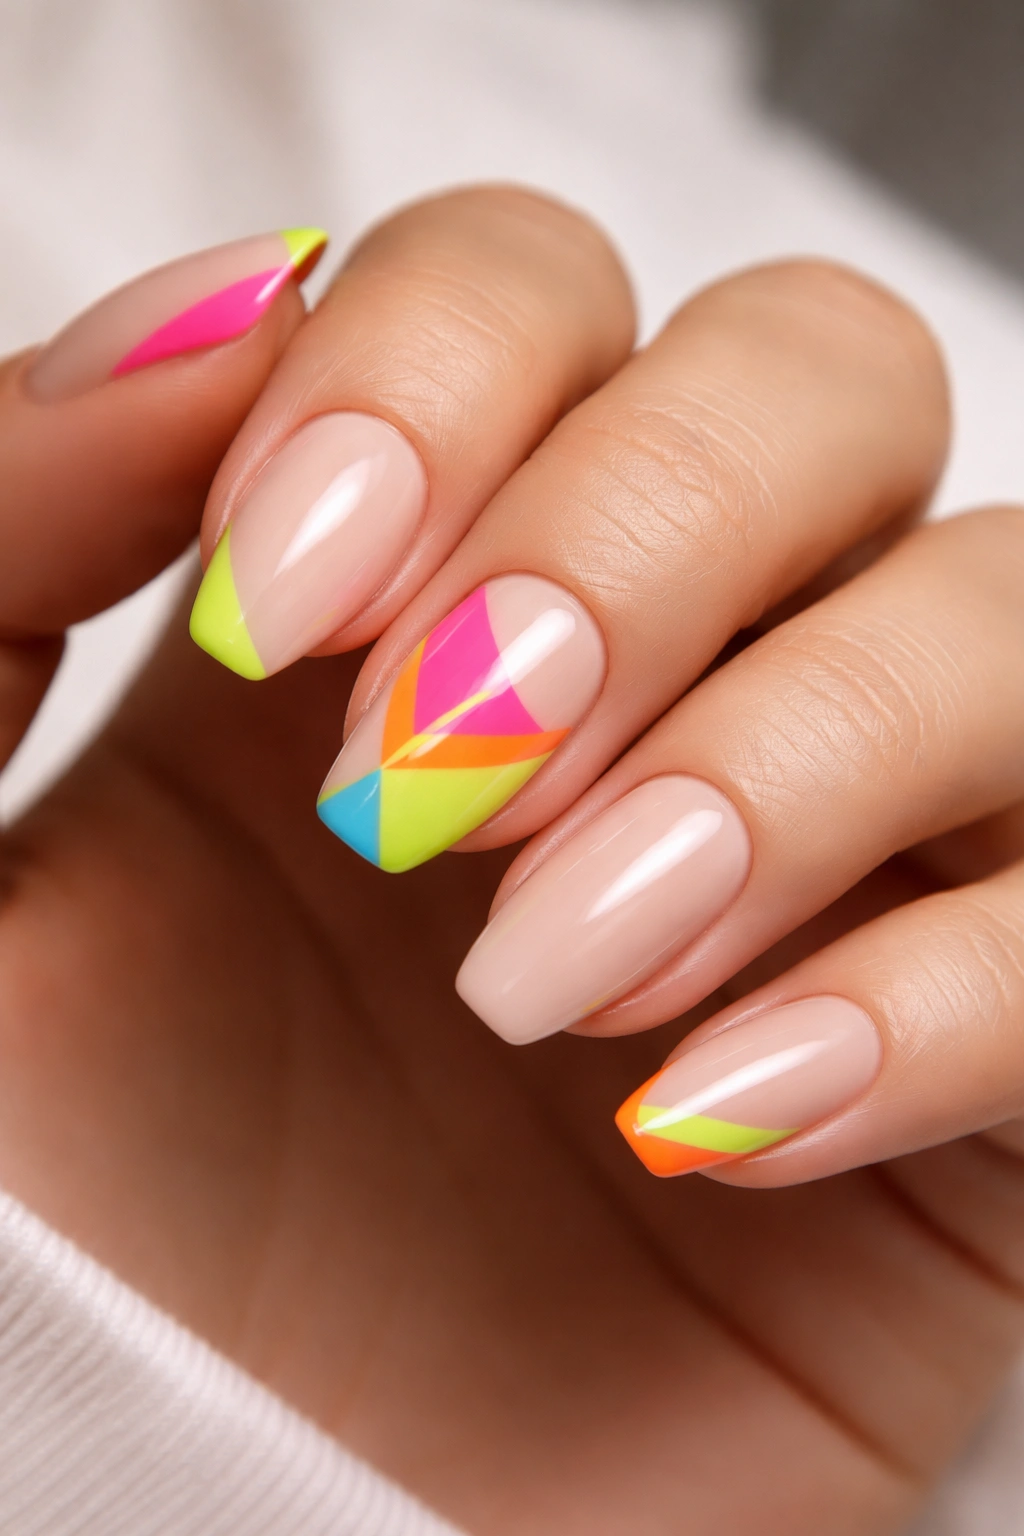
Balancing Bold and Understated
If you love the idea of geometric nails but worry they might be too much for your everyday style, neon geometric accents on a neutral base offer the perfect compromise. Your base stays subtle and professional, while strategic pops of neon—perhaps just on your accent nail or on the tips of a few nails—add personality and edge without overwhelming your look.
Choosing Your Neutral Canvas
Paint all your nails in a soft, neutral shade like nude beige, light grey, soft taupe, or cream. These pale backgrounds make neon colors absolutely pop without creating jarring contrast. The neutral base also gives you flexibility to wear these nails to professional settings or casual outings. A glossy finish on your neutral base will make any neon accents appear even more vibrant.
Strategic Neon Placement
Using a thin brush and a bright neon color—neon pink, neon green, or electric blue all work wonderfully—create your geometric accents. You might paint a single bold triangle on your ring finger, add neon lines across just your accent nails, or create a small geometric shape like a diamond at the base or tip of each nail. The key is restraint; the neon should complement your look rather than compete with it. Finish with a glossy top coat to protect your design and enhance the neon’s vibrancy.
What to watch for: Neon polish can be tricky to apply because it’s often more sheer than regular polish. You may need three coats rather than two to achieve opaque, vibrant color. Also, neon shades tend to stain your nails, so wear a good base coat underneath.
7. Chevron Stripes with Metallic Accents
Combining Two Trending Techniques
Chevron patterns are undeniably eye-catching, but when you add metallic accents—gold, silver, or rose gold—to the mix, you elevate the design from cute to absolutely stunning. This combination gives you movement through the chevron pattern plus luxury through the metallics, creating a manicure that works for both casual and dressier occasions.
Laying Down Your Base Pattern
Using striping tape, create your classic chevron V-pattern on all your nails or just on accent nails, depending on your preference. Paint your main color (perhaps a soft pink, dusty blue, or classic white) over these taped sections. Before removing the tape, decide where you want your metallic accents. Some people paint the metallic shade over the entire design, then remove the tape. Others remove the tape first, then add metallic details within or alongside the chevron pattern.
Adding the Metallic Details
Using a very fine detail brush and metallic polish, add thin lines or small shapes within your chevron pattern. You might outline each chevron with gold, add a thin metallic stripe down the center of each V, or create tiny metallic triangles at the base of each chevron. The metallic details catch light beautifully and add an instant touch of glamour. Seal everything with a high-shine top coat to let those metallics really gleam.
Insider note: Metallic polishes work best over slightly darker or more saturated base colors. Light pastels can make metallics look subdued, while jewel tones and bold colors make them absolutely sing.
8. Negative Space Geometric Shapes
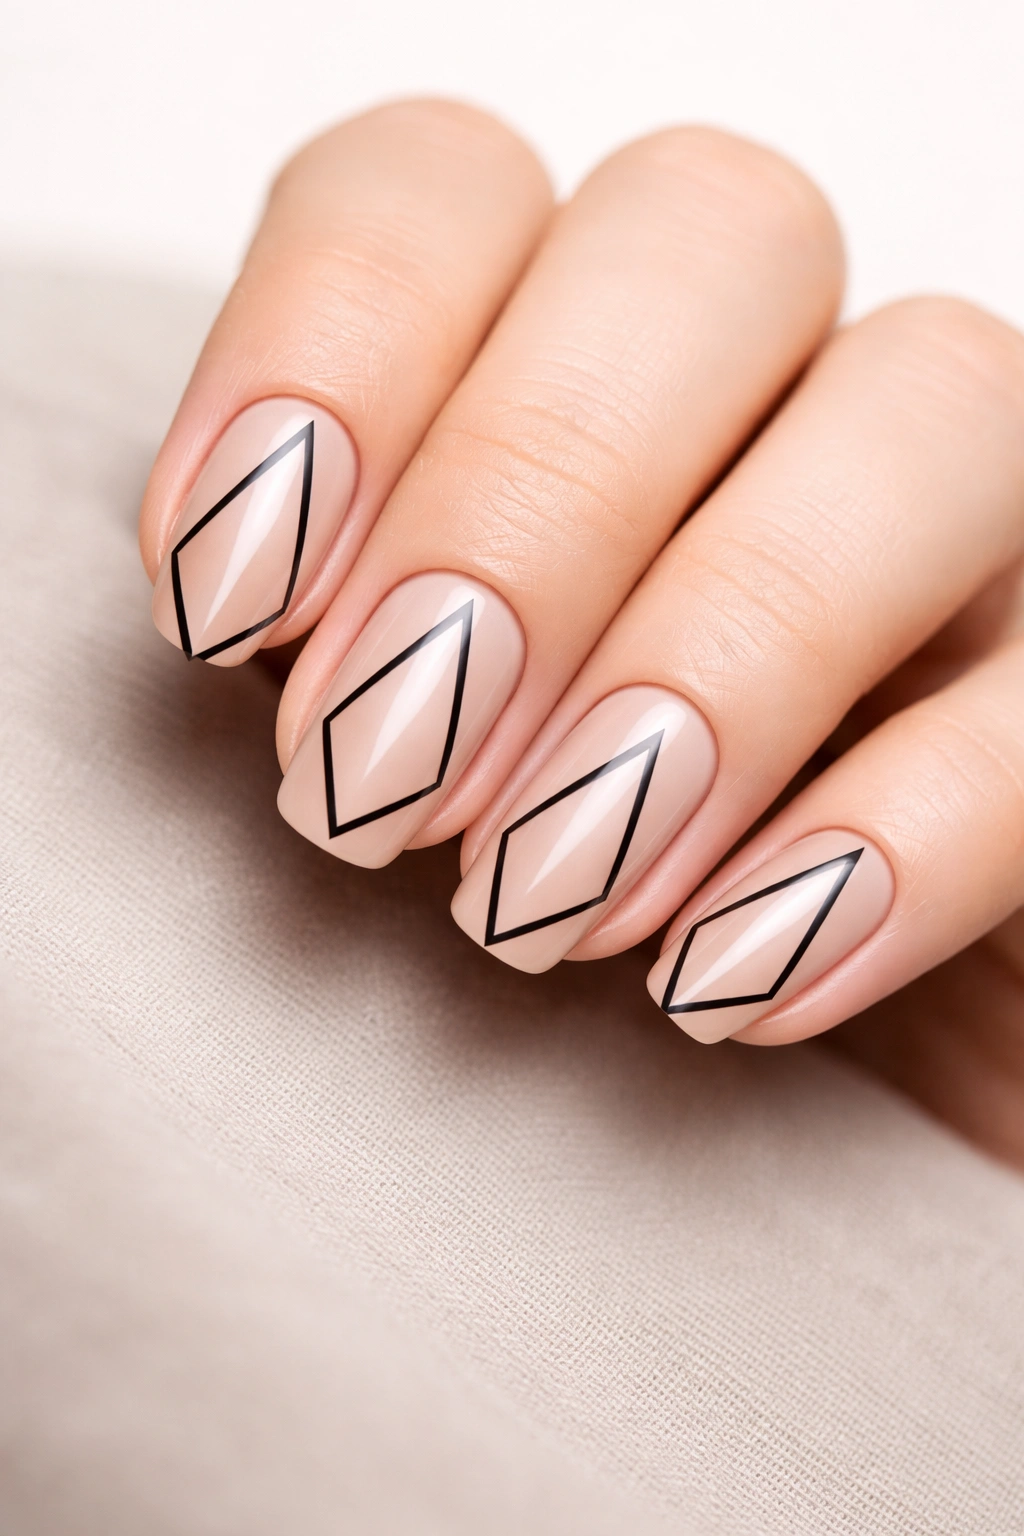
The Power of What You Don’t Paint
Negative space nail art—where you intentionally leave areas unpainted to show your natural nail or a light base color—creates a modern, minimalist look that’s deeply satisfying. With geometric designs, negative space becomes particularly striking. You might create a large triangle or diamond outline with just a thin border of color, leaving most of the nail bare, or use geometric shapes to frame areas of your nail strategically.
Planning Your Negative Space Design
Start with a pale or nude base coat, or go completely natural if your nails are in good shape. Decide on your geometric shape—perhaps a simple triangle at the base of your nail, a diamond in the center, or a hexagon outline. Using a thin brush and a contrasting color (black and white create the most dramatic negative space effects), paint just the outline or border of your chosen shape. The unpainted space creates the visual weight of the design, which might sound backward but creates a beautifully modern aesthetic.
Executing with Precision
This design actually requires steadier hands or more patience than heavily patterned options because the empty space makes any unevenness more obvious. Take your time, and don’t hesitate to use a detail brush with rubbing alcohol to clean up any wobbles before the polish dries. The payoff is worth the extra care—negative space geometric designs look incredibly sophisticated and fashion-forward.
Worth knowing: Negative space designs photograph extraordinarily well on social media because they have such a clean, graphic quality. They’re perfect for sharing if you enjoy posting your nail art online.
9. Color-Blocked Geometric Sections
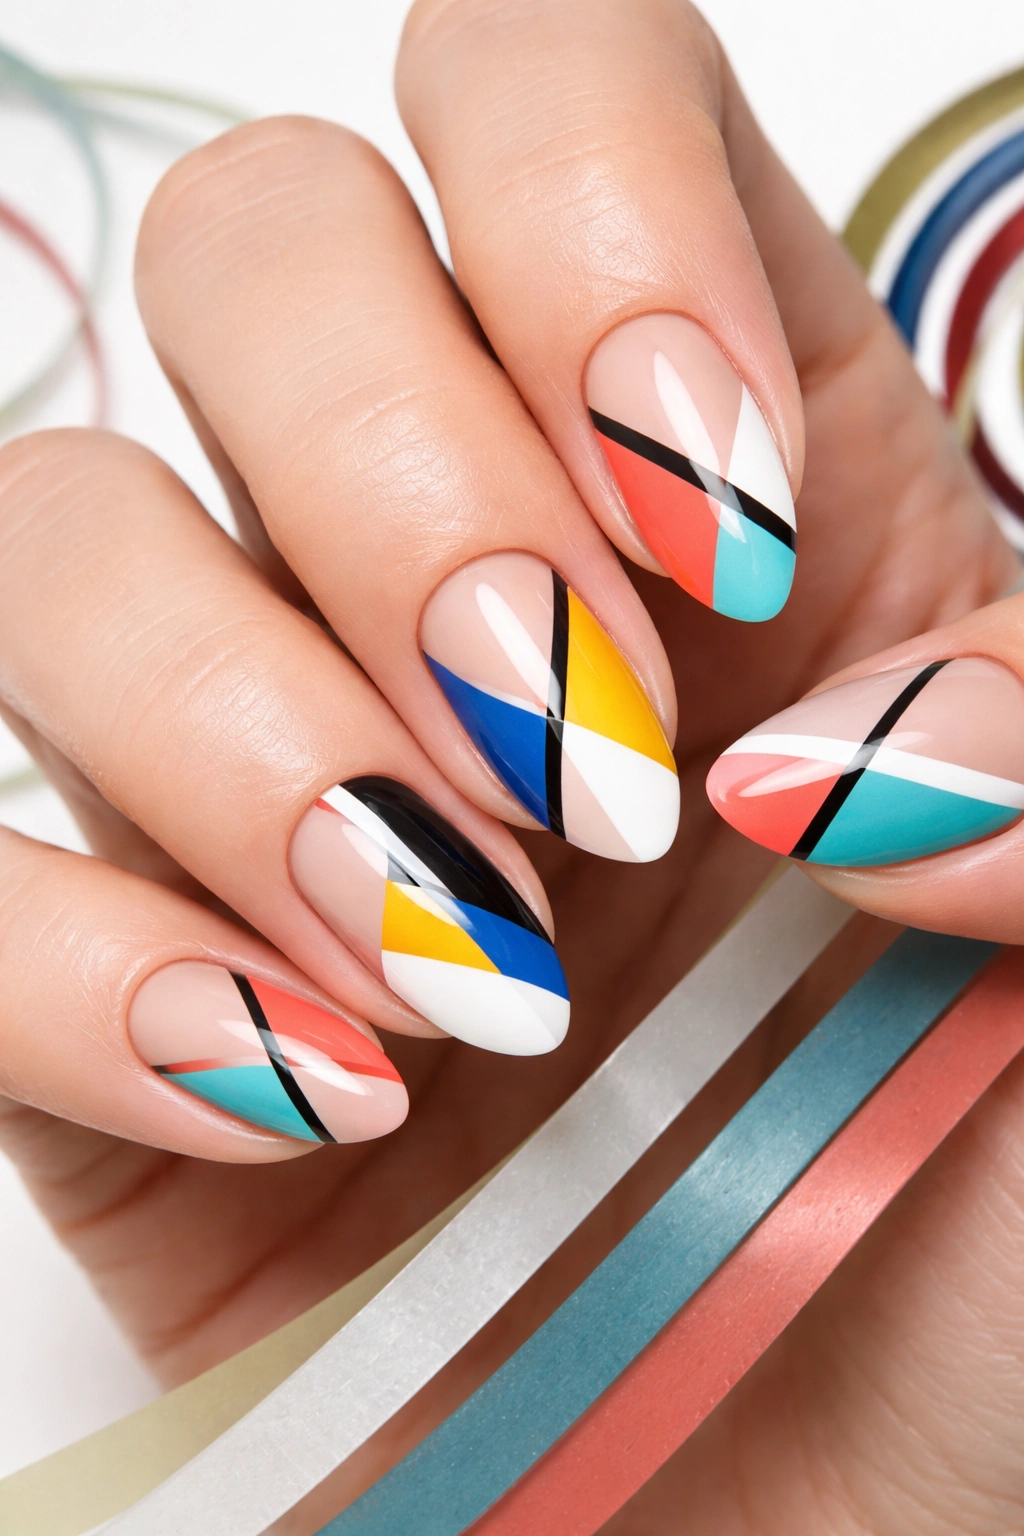
Creating Bold Visual Impact Through Color
Color blocking—painting distinct sections of your nail in different complementary colors—becomes even more striking when you arrange those blocks in geometric patterns. Instead of random sections, you’re creating structured shapes like triangles, rectangles, or diagonal halves. The result is bold, modern, and surprisingly easy to achieve with basic tools.
Choosing Colors That Work Together
The magic of color blocking lies in your color selection. Complementary colors (opposite each other on the color wheel) create vibrant, energetic designs. Analogous colors (adjacent on the color wheel) create harmonious, pleasing designs. You might try cobalt blue and bright orange, dusty rose and sage green, or classic black and white. Paint your base coat and let it dry, then use thin strips of striping tape to map out your geometric sections before painting.
Painting Your Sections
Paint each taped section with its designated color, making sure to use smooth, even strokes. Apply a second coat if needed to get opaque coverage. Remove the striping tape while the polish is still slightly wet (but not dripping wet) to reveal clean, sharp color lines. If any color seeps under the tape, don’t worry—you can clean this up with a small detail brush and rubbing alcohol once everything is dry. Finish with a glossy top coat unless you prefer a matte finish for a more modern aesthetic.
Quick fact: Matte finishes on color-blocked designs create an interesting contrast because the matte surface makes colors appear slightly different than they do when glossy. Some people prefer the softer look of matte; others love how glossy brings out color intensity.
10. Minimalist Geometric Lines and Dots
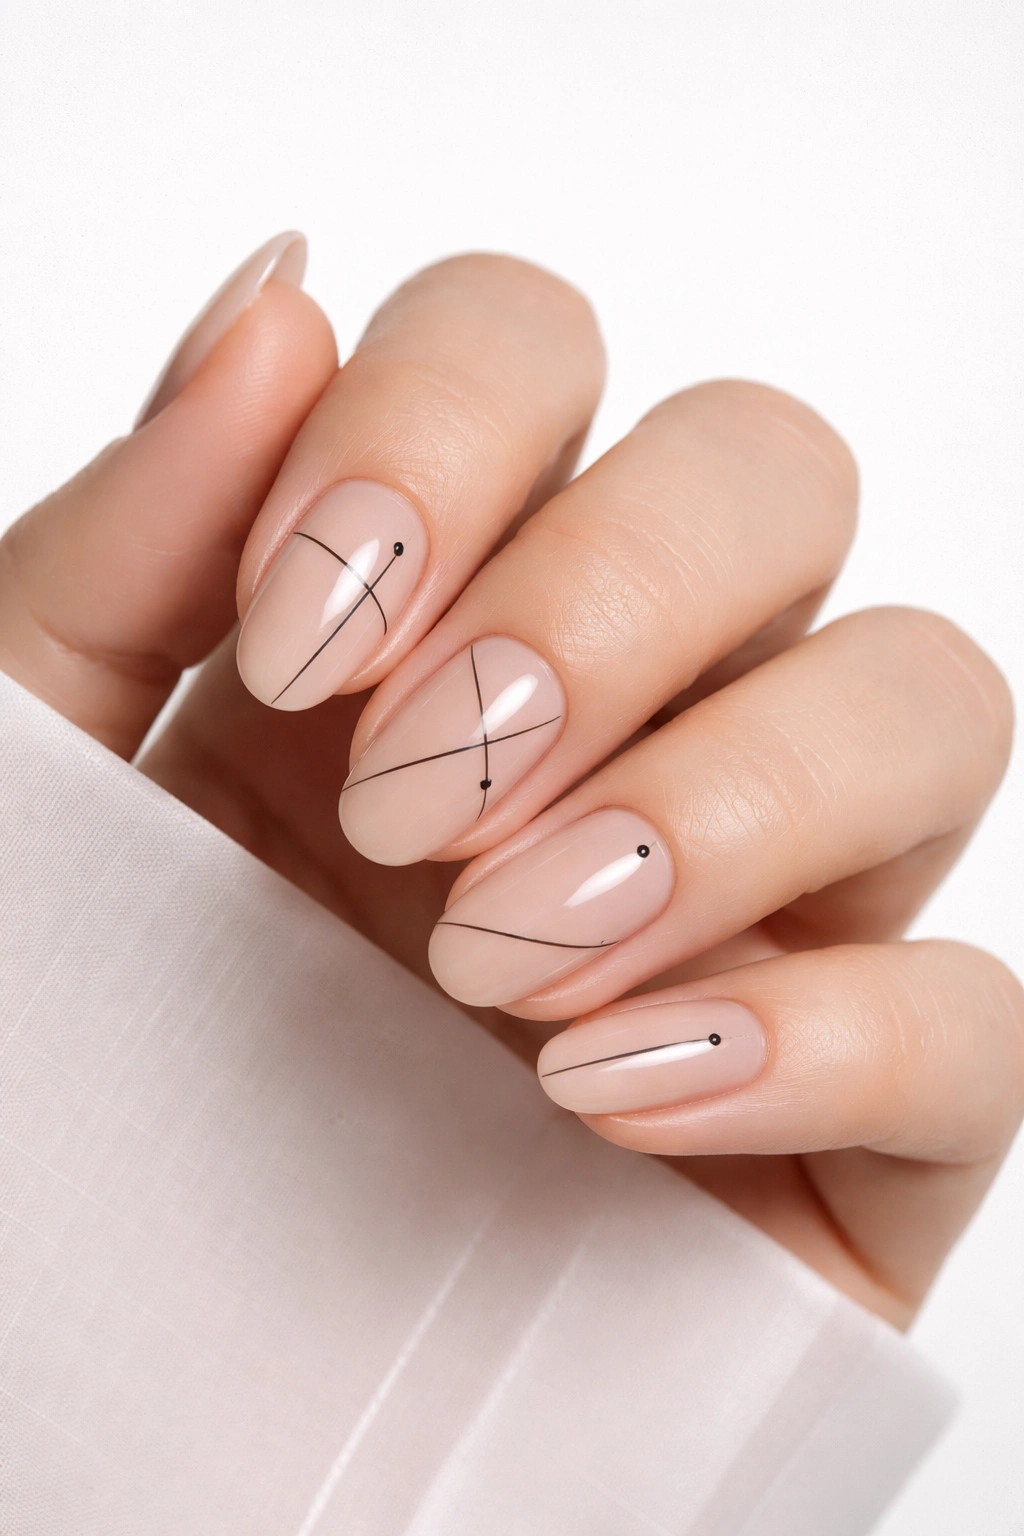
Sophisticated Simplicity
Sometimes less really is more, and minimalist geometric designs prove this beautifully. Just a few thin lines and strategically placed dots can create a sophisticated, artistic look that feels modern and intentional. This design is perfect if you love the idea of geometric nails but want something subtle enough for professional environments or people who prefer understated elegance.
Building a Minimalist Composition
Start with a clean base coat in white, nude, or your preferred neutral shade. Using a thin striping brush or detail brush, paint one or two thin geometric lines on each nail. You might create a single diagonal line from corner to corner, a vertical line down the center, or asymmetrical lines that create the suggestion of geometric shapes without fully defining them. Add just a few small dots using a dotting tool or the end of a bobby pin dipped in contrasting polish.
Creating Balance and Movement
The key to successful minimalist designs is balance. Your lines and dots should feel intentional rather than random, even if they appear spontaneous. Some people like perfect symmetry—the same pattern on every nail. Others prefer asymmetrical arrangements where designs vary slightly from nail to nail, creating visual interest while maintaining the minimalist aesthetic. Either approach works beautifully; go with what appeals to you.
Real talk: This design is surprisingly harder to execute than more complex geometric patterns because every single line is visible and scrutinized. Take your time, use quality brushes, and don’t be afraid to start over if you’re not happy with your first attempt. The simplicity means there’s nowhere to hide mistakes, but that also means the payoff when you nail it is incredibly satisfying.
Final Thoughts
Creating geometric nail art at home is genuinely achievable, and these ten designs give you a wonderful range from bold and colorful to sleek and minimalist. The most important thing to remember is that perfection isn’t the goal—your personal touch and the care you put into your manicure is what makes it special. Even tiny imperfections add character and show that these nails were made with intention and creativity.
Start with whichever design calls to you most strongly, gather your supplies, and give yourself permission to take your time. Nail art is incredibly forgiving; you can always clean up edges, fix small mistakes, or completely start over if you want to try a different approach. The tools you need are minimal and inexpensive, and once you have them on hand, you’ll find yourself creating new designs regularly.
Most importantly, have fun with this. Geometric nails are about expressing yourself, trying new color combinations, and celebrating the satisfaction of creating something beautiful with your own hands. Whether you’re getting these nails ready for a special occasion or just treating yourself on a random Tuesday, you deserve nails that make you feel confident and fabulous.
