

Long oval nails are having a major moment, and when you pair that elegant shape with delicate bow details, you get a mani that’s both sophisticated and playfully cute. The long oval silhouette is forgiving to work with—it’s not as dramatic as a sharp coffin shape, but it’s way more striking than a blunt square—making it perfect for bow nail designs that need room to shine without overwhelming your fingertips.
The beauty of bow nails lies in their versatility. Whether you’re drawn to minimalist line-art bows, chunky 3D designs, or glittery masterpieces, there’s a style that matches your aesthetic and skill level. Bows work beautifully across every season and for every occasion—they add a feminine touch to workday looks, bring playful energy to casual outfits, and elevate special-occasion manicures with instant sophistication.
What makes long oval bows so appealing is that they feel like a special occasion without requiring you to abandon your everyday nail shape. You get the length and drama of oval nails, the charm of bow details, and an endless range of color and design possibilities. The longer canvas that oval nails provide gives you space to really showcase bow designs—whether you’re going for minimal and modern or ornate and glamorous.
1. Soft Pink Ribbon Bows with Gold Accents
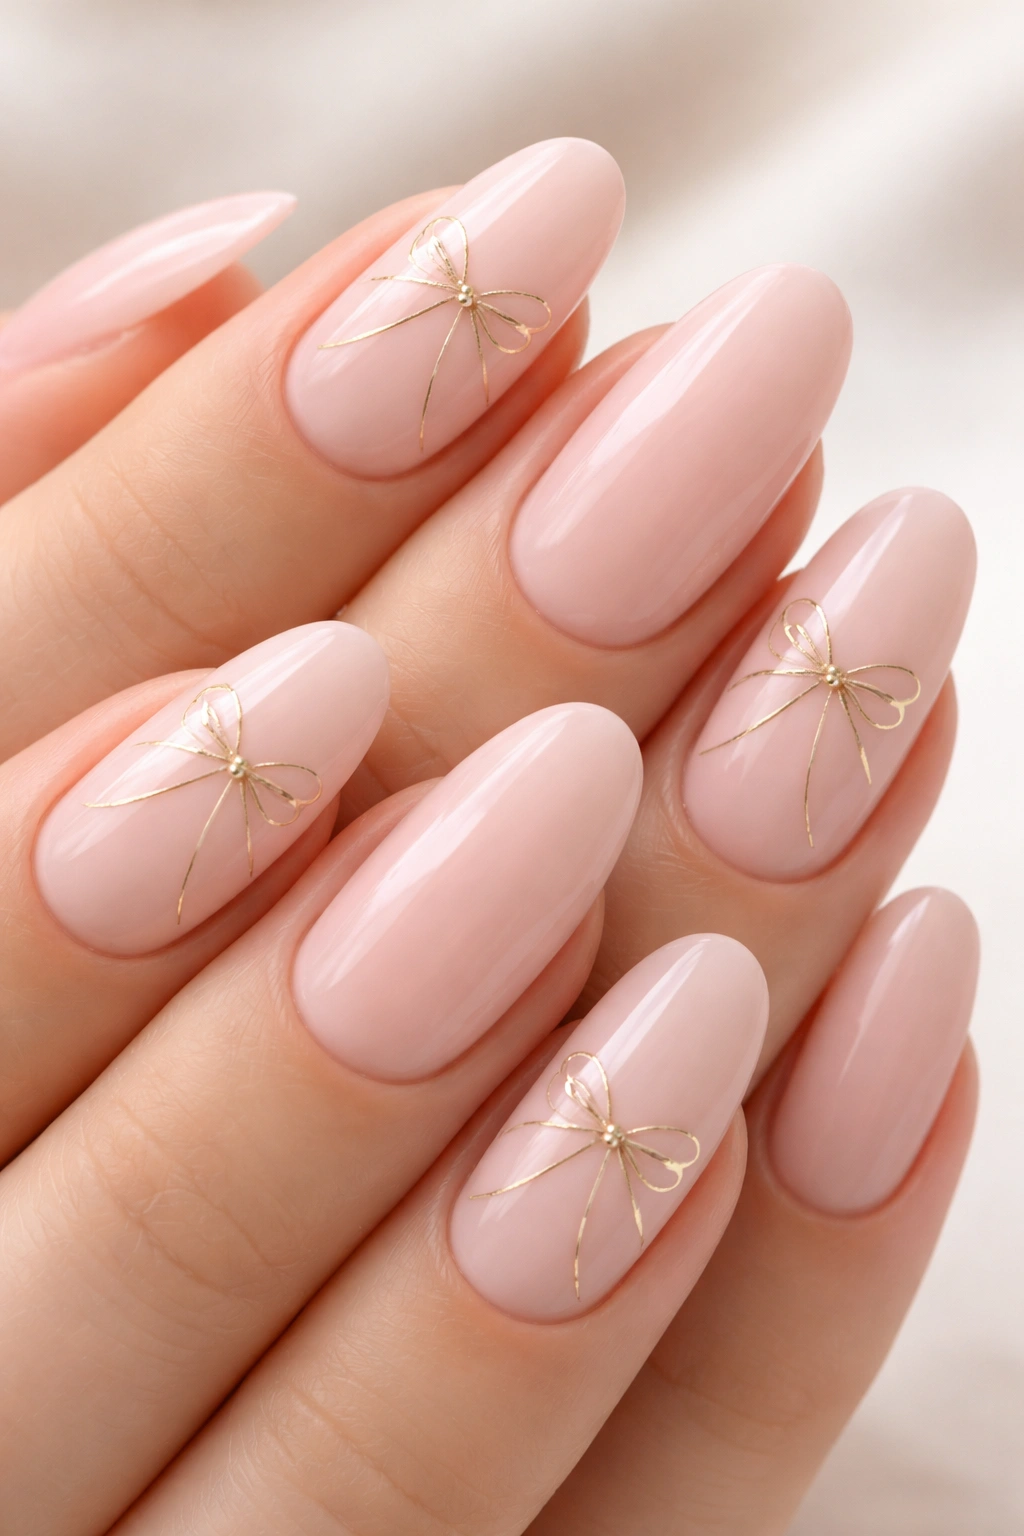
This design combines blush pink with delicate gold ribbon bows for a look that’s romantic without being over-the-top. The base is a soft, creamy pink that feels both elegant and wearable, while the bows are hand-painted or stamped in fine gold lines, creating a refined aesthetic that works for everything from brunches to business meetings.
Why This Design Works
Soft pink and gold is a timeless pairing that photographs beautifully and never looks dated. The minimalist line-art approach to the bows means this design stays understated even though it’s clearly intentional and well-executed. This combo is also forgiving if you’re working with a nail artist—the fine lines hide imperfections better than solid shapes would.
Key Details to Request or Recreate
- Base coat in a soft ballet-pink or dusty rose shade
- Gold metallic pen or thin brush to paint delicate bow outlines on two to three nails per hand
- Add tiny gold dots at the center where the bow loops meet for extra refinement
- Seal everything with a glossy top coat for a refined, professional finish
- Optional: add a single thin gold stripe down the center of each nail for visual continuity
2. Classic Red Velvet Bows with Black Outline
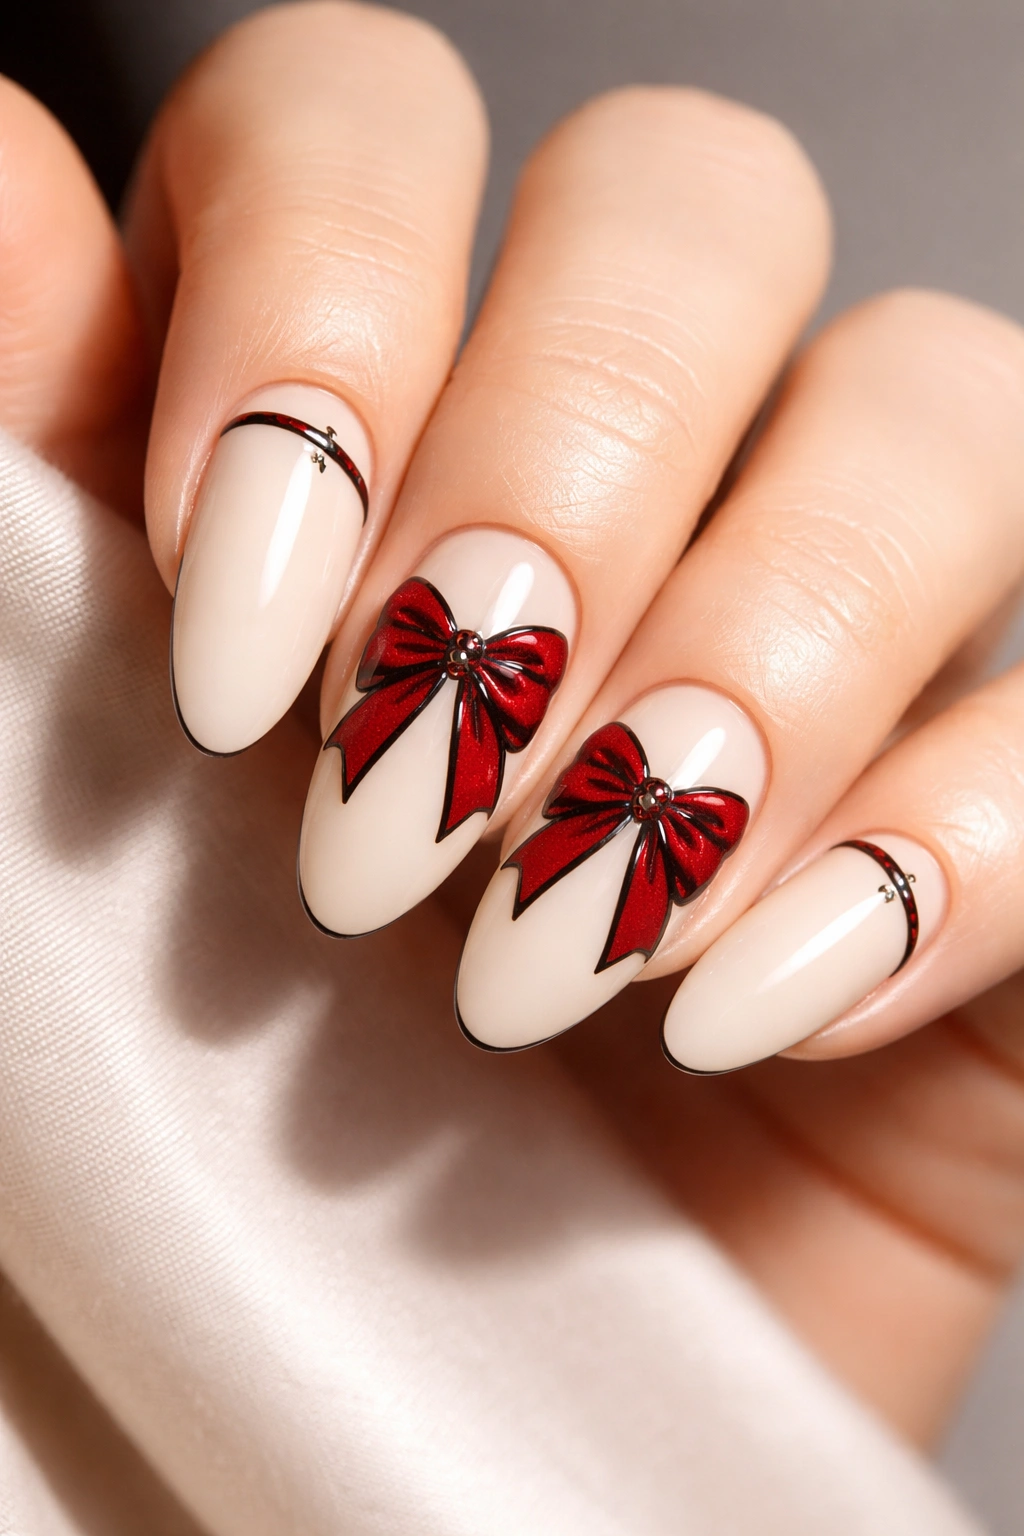
Channel vintage elegance with a deep, rich red base paired with bold black bow outlines. This design has serious old-Hollywood energy—think 1950s glamour meets modern nail art. The black outline keeps the bows crisp and defined while the red velvet base gives serious statement mani vibes.
Why This Design Works
Red and black is a color combination that’s been iconic for decades, and pairing it with bow designs taps into that timeless aesthetic. The high contrast between the deep red base and the bold black bows makes this mani impossible to miss. It’s the kind of design that looks sophisticated enough for formal events but also feels bold enough for everyday wear if you’re someone who loves making a statement.
Key Details to Request or Recreate
- Deep, cream-finish red base (not shiny—matte or satin looks more elegant here)
- Black gel or polish to outline bows on select nails (typically ring fingers and one accent nail)
- Make the bow lines thick and confident rather than delicate—this design thrives on boldness
- Add a subtle black stripe or accent line on other fingers to tie the design together
- Use a shiny topcoat to make the red appear even more luxurious and dimensional
3. Lavender Dreams with Pastel Bow Details
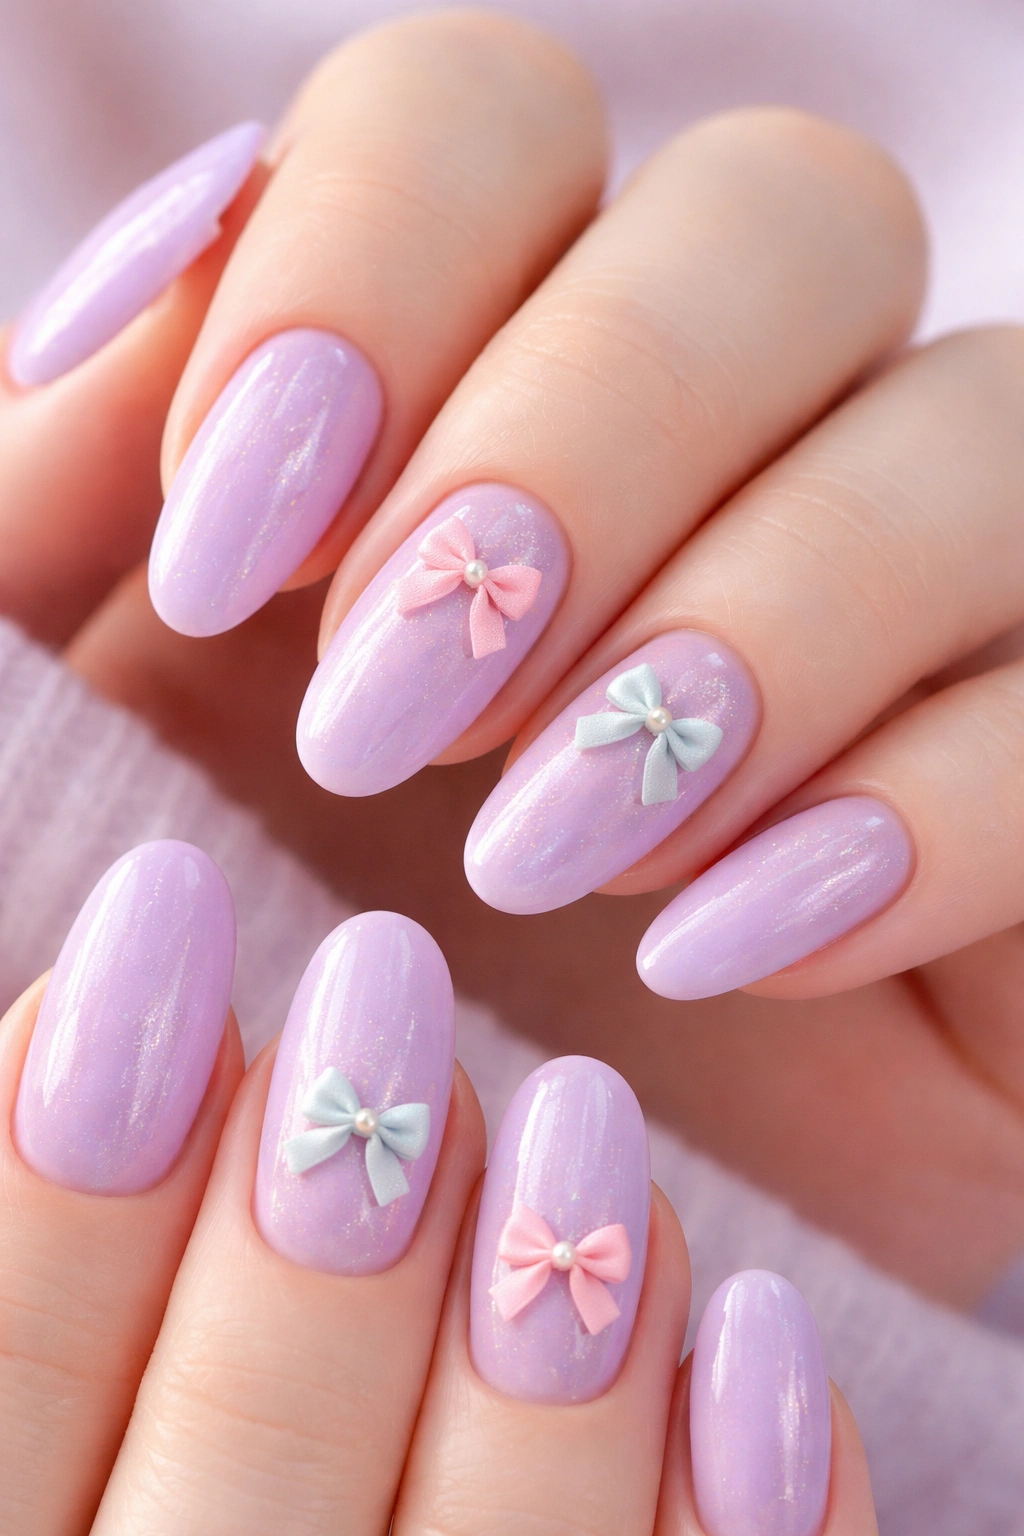
Soft lavender forms the base for this whimsical design, paired with tiny pastel bows in pale pink, mint green, and baby blue scattered across select nails. This is the mani to choose if you want something that feels dreamy, playful, and slightly Pinterest-worthy without crossing into saccharine territory.
Why This Design Works
The key to making multiple pastel bows work is keeping them small and using negative space strategically. By placing bows on just two or three nails per hand rather than covering every finger, you create visual interest without overwhelming the design. Lavender is also neutral enough that it pairs beautifully with almost any outfit, while the pastel bows add personality and charm.
Key Details to Request or Recreate
- Lavender base coat (pick a shade with slightly more gray than purple for sophistication)
- Tiny pastel bows in varying shades—use 3-4 complementary pastels rather than just one
- Keep bows small and delicate to match the soft lavender base
- Add optional tiny pearl or rhinestone accents at bow centers for subtle sparkle
- Consider placing bows on accent nails (ring fingers) to avoid too-busy visuals
- Finish with a light shimmer topcoat for an ethereal, dreamy effect
4. Nude with 3D Nail Charm Bows
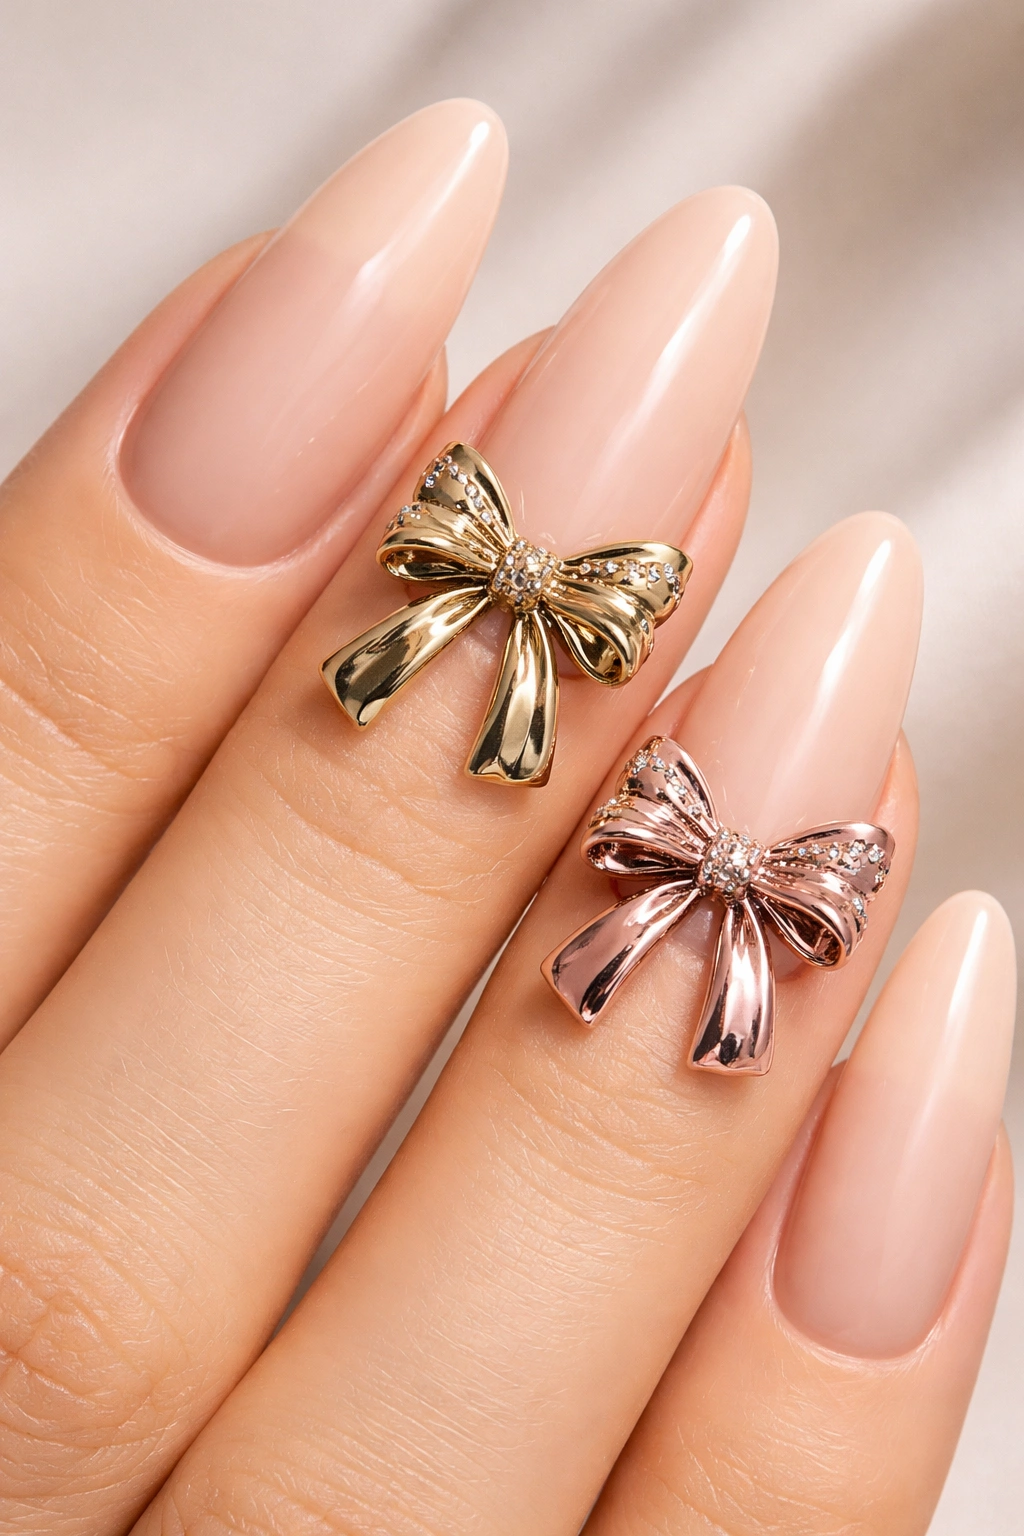
This design proves that minimalism and drama can absolutely coexist. A neutral nude or beige base serves as the canvas, while chunky 3D bow charms (either press-on bows or hand-sculpted gel bows) steal the show on select nails. The nudes keep it classy, while the dimensional bows add unexpected personality.
Why This Design Works
3D bows are easier to pull off than you might think, especially if you’re using pre-made nail charms that you can attach with nail glue or builder gel. The neutral base means these bows work with virtually any outfit, season, or occasion. This is the design to choose if you want something that looks high-fashion and slightly avant-garde while remaining wearable.
Key Details to Request or Recreate
- Nude or warm beige base in a cream or satin finish
- Purchase or create 3D bows in metallic finish (gold, rose gold, or silver work beautifully)
- Attach bows to ring fingers and one index finger using nail glue or clear builder gel
- Keep bows oversized and confident—don’t go dainty here
- Use a single nude color across all nails to let the 3D elements be the star
- The contrast between flat base and dimensional bows is what makes this design special
5. Ombre Blush to White with Delicate Bows
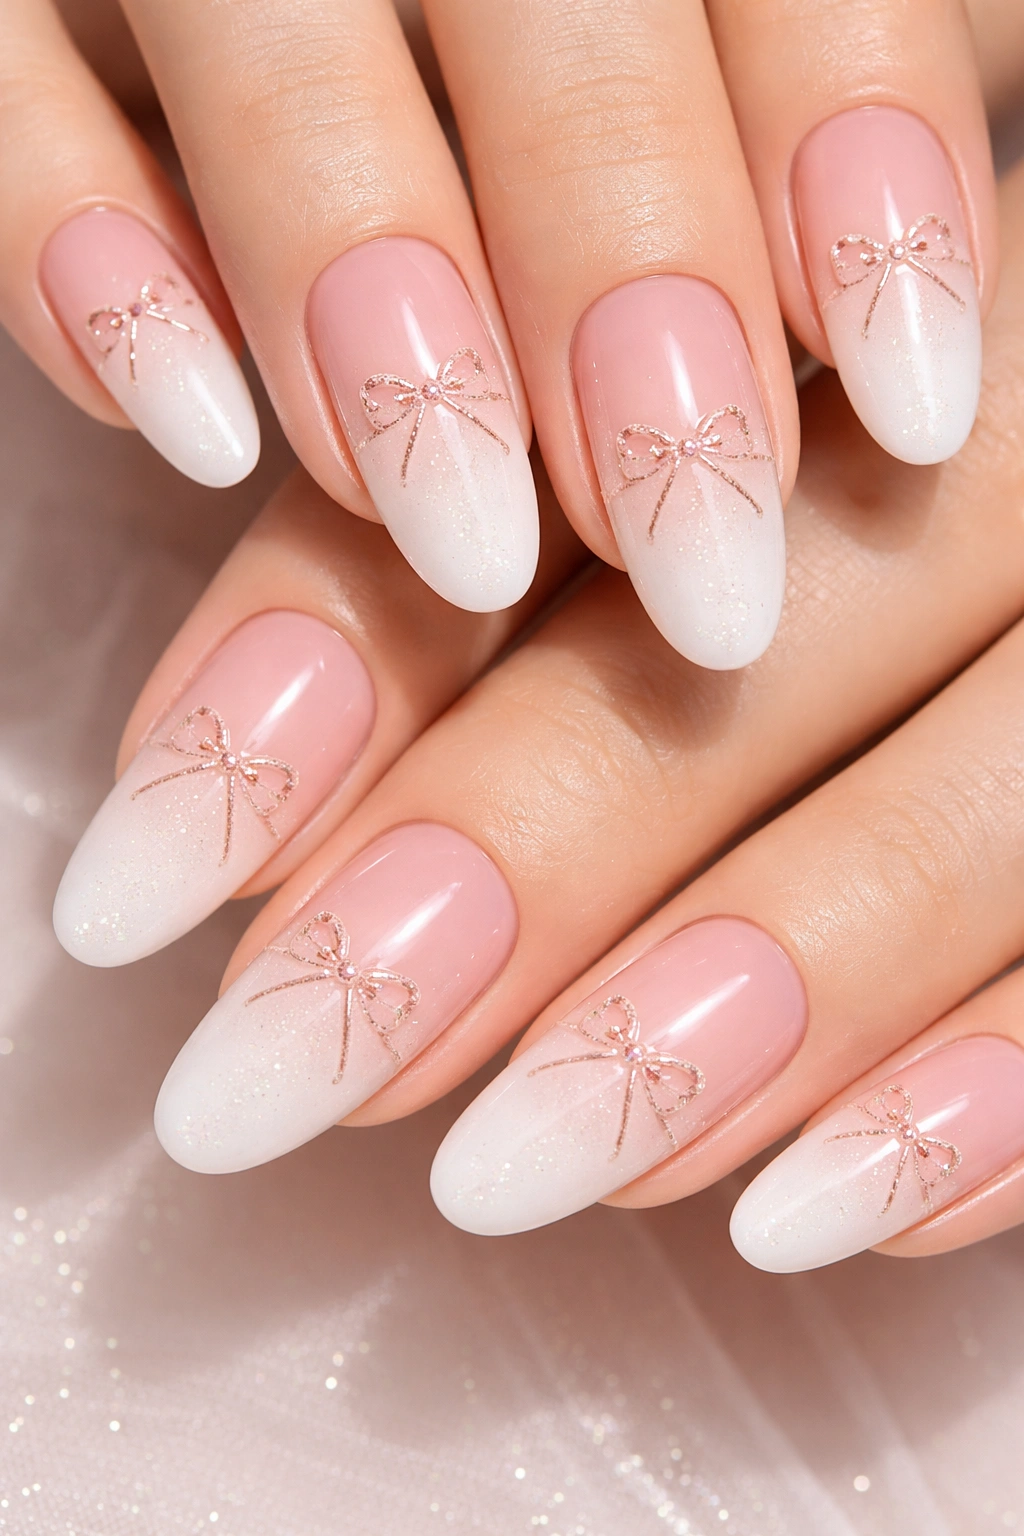
Create an ombré effect that transitions from soft blush on the nail bed to white at the tips, then layer tiny delicate bows across the gradient. This design feels sophisticated and modern while maintaining that cute factor the bow elements bring. The ombré adds depth and complexity that makes this mani feel like you spent serious time at the salon.
Why This Design Works
Ombré designs naturally draw the eye down the nail, and when you add bow details, you create multiple focal points that make the overall look feel thoughtfully designed rather than random. The blush-to-white gradient is also incredibly flattering on all skin tones and works with any color wardrobe. This is a design that feels elevated without being overly complicated to execute.
Key Details to Request or Recreate
- Start with a blush pink base on the nail bed
- Use a makeup sponge or gradient technique to blend white toward the free edge
- Add delicate bow outlines in rose gold or light pink across the gradient
- Keep bows small and scattered rather than large and obvious
- Consider adding tiny sparkle or glitter only at the white tip area for subtle shine
- Use a shiny topcoat to make the gradient appear smooth and seamless
6. Classic French Manicure with Bow Embellishments
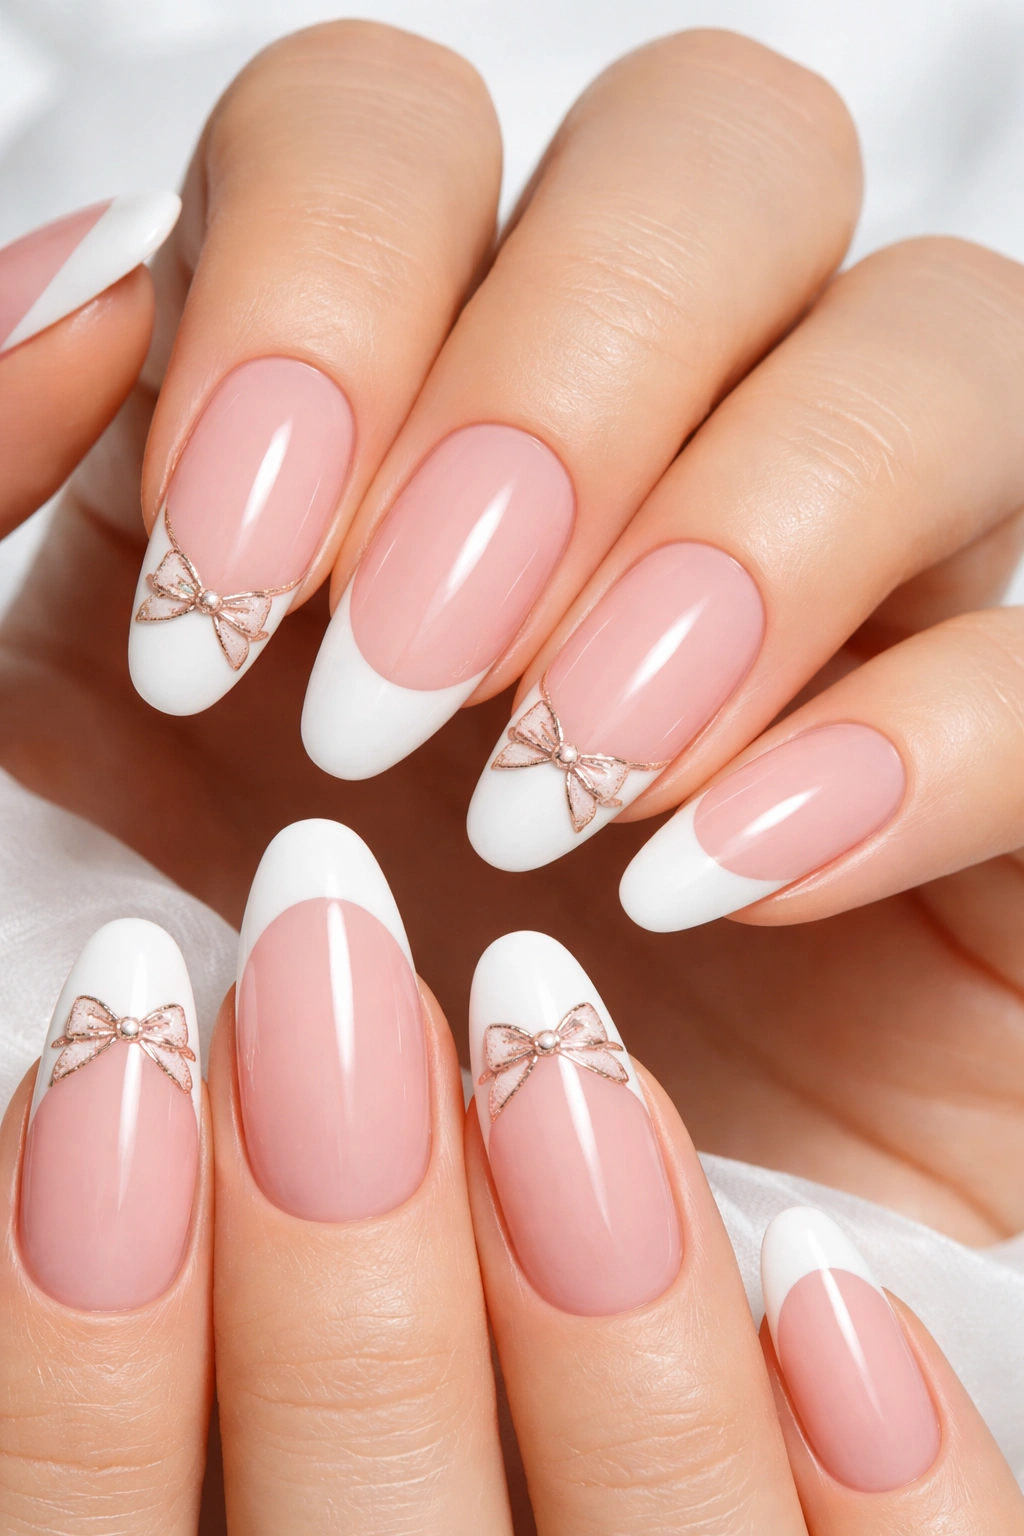
Take the timeless French manicure and give it a modern twist by adding delicate bows at the tip where the white meets the pink. This design bridges classic and contemporary, making it perfect if you want something that feels special but not dramatically different from your usual nail routine.
Why This Design Works
A French manicure is universally flattering, and adding bow details elevates it without completely changing its DNA. The bows sit right at the visual focal point of a French mani, so they feel integrated rather than tacked-on. This is an excellent choice if you want something you can wear to any event, from job interviews to weddings, while still showing your personality.
Key Details to Request or Recreate
- Soft pink base on the nail bed (traditional French mani shade)
- Clean white tip line—keep it slightly thicker than a traditional French line
- Add a thin delicate bow outline right where the white meets the pink, centered on select nails
- Use nude or rose gold for the bow color to keep everything harmonious
- Consider alternating: bow on the ring finger, no bow on the index finger for balance
- Seal with a clear, glossy topcoat for that polished, salon-perfect finish
7. Deep Emerald with Gold Bow and Rhinestone Details
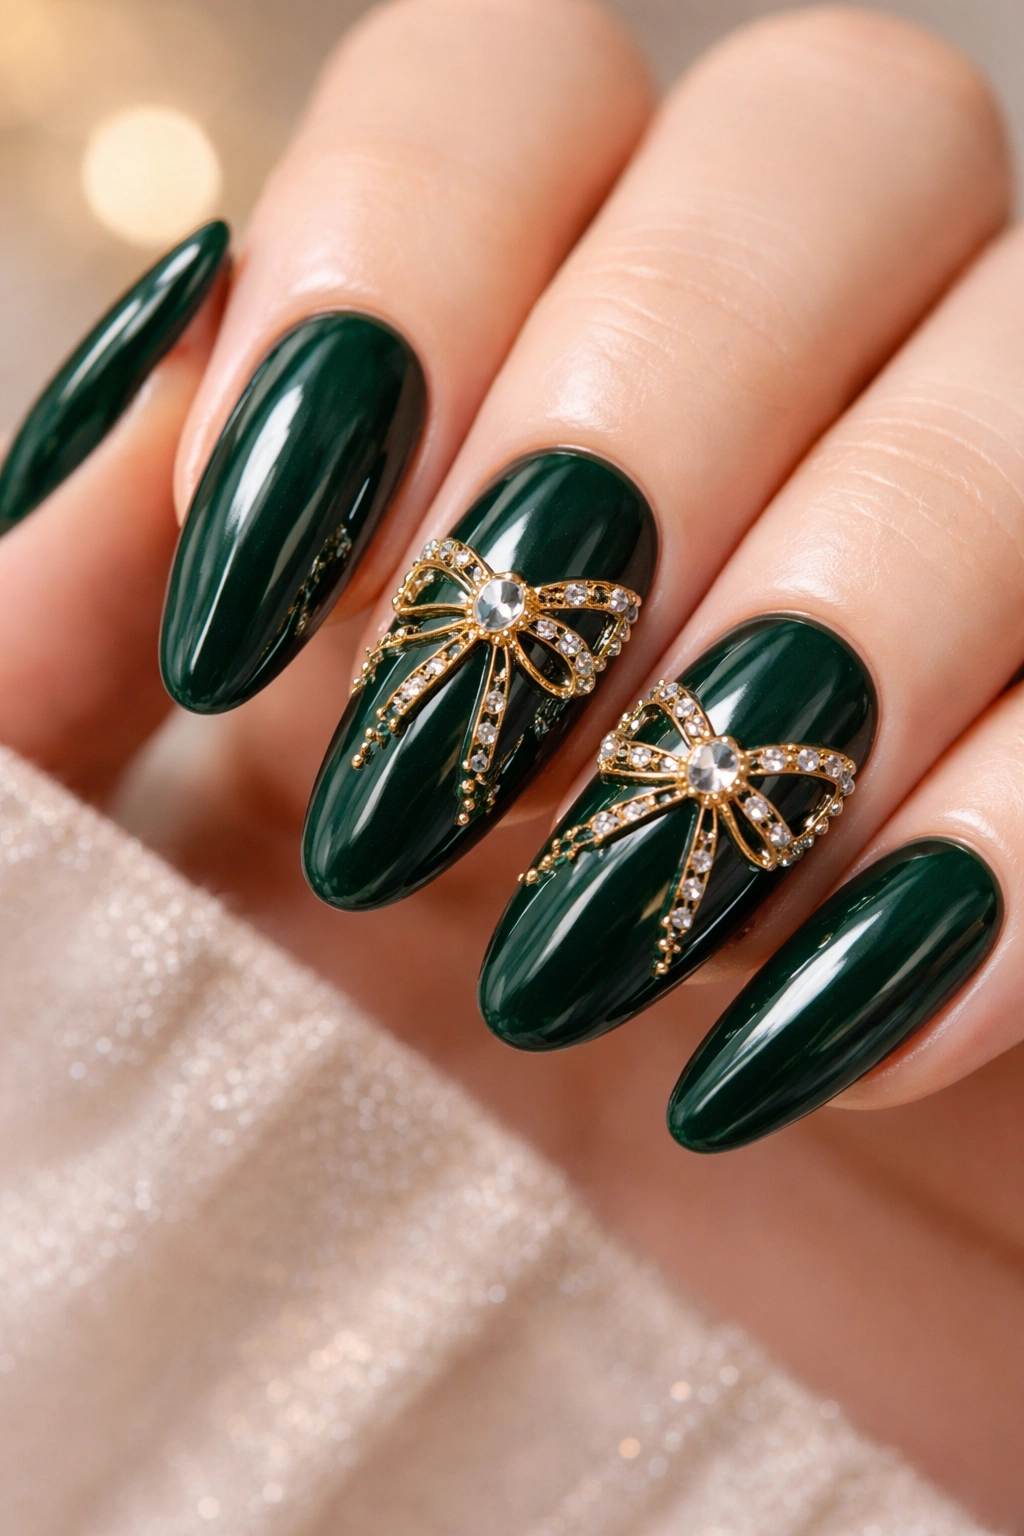
Rich emerald green is the perfect base for glamorous gold bows adorned with tiny rhinestones and sparkle accents. This design reads expensive and luxurious—the kind of mani that makes people ask where you got it done. Emerald and gold is a naturally high-impact color combination that feels both jewel-toned and playful.
Why This Design Works
Deep jewel tones like emerald are having a major moment, and they provide the perfect backdrop for ornate bow details. Gold bows on emerald create maximum contrast and impact, while rhinestone accents catch the light and add dimension. This design works beautifully for special occasions but also holds its own as an everyday mani if you love statement nails.
Key Details to Request or Recreate
- Deep, rich emerald base (choose a shade that leans warm rather than cold)
- Gold gel or metallic polish to outline bows on two to three nails
- Place tiny rhinestones or crystals at the bow center and along the loops for sparkle
- Add thin gold accent lines on other nails to tie the overall design together
- Consider adding a touch of gold flake or confetti to the emerald base for extra glam
- Use a shiny topcoat and ensure rhinestones are sealed properly so they last
8. Chocolate Brown Base with Rose Gold Bows
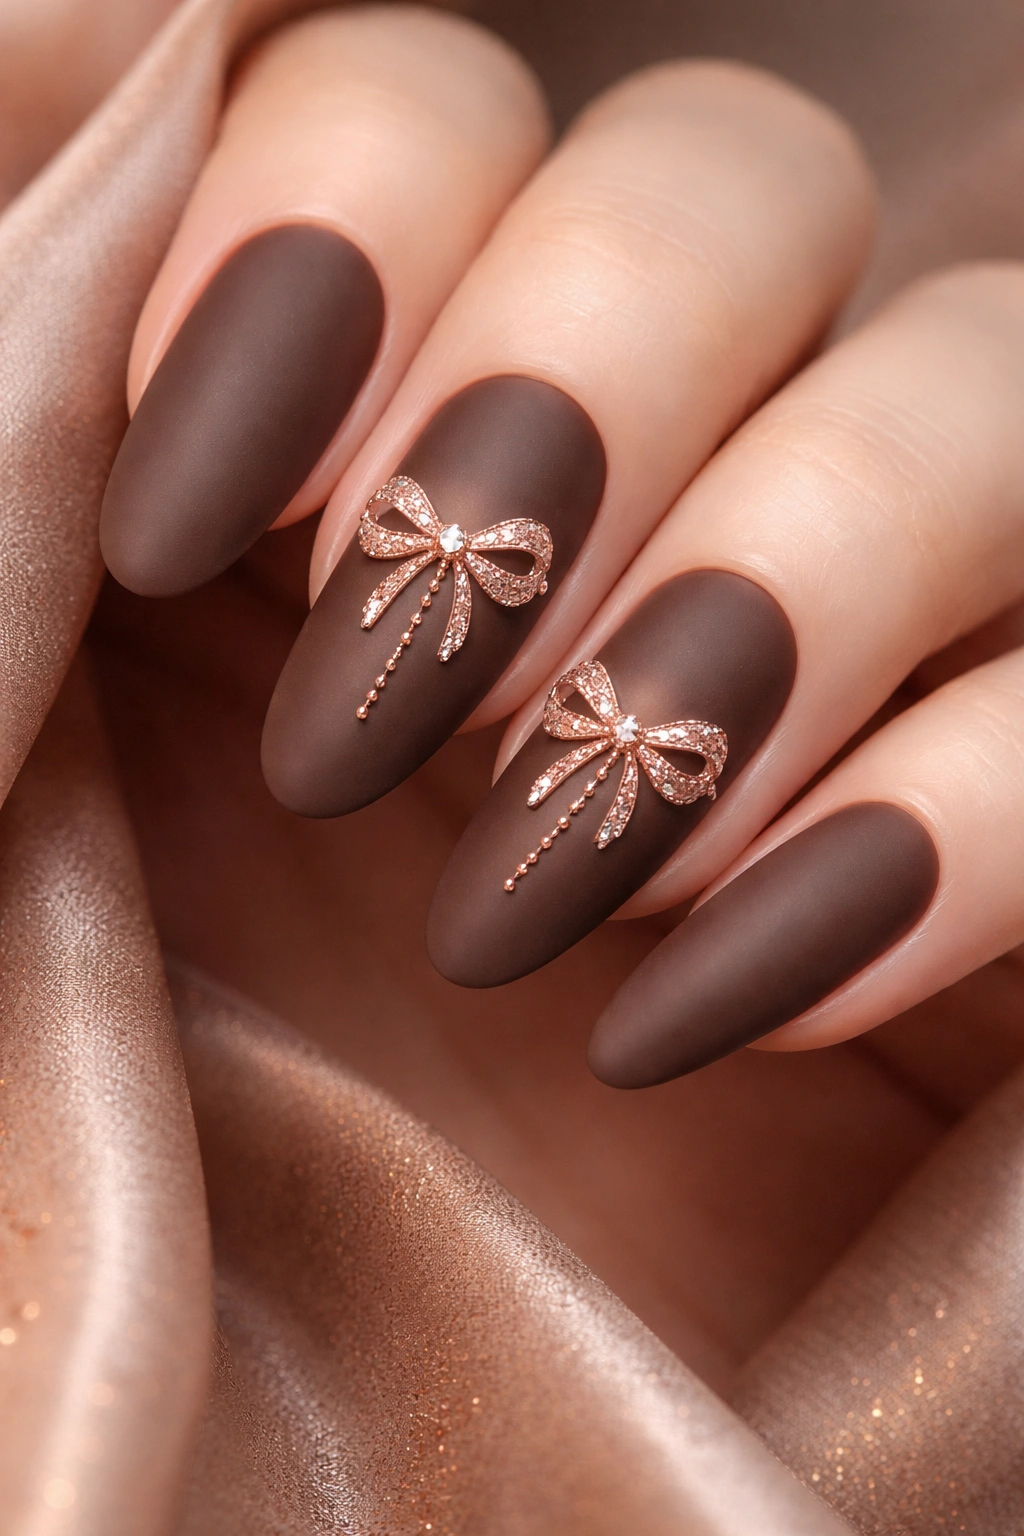
This earthy, sophisticated pairing combines a warm chocolate brown with delicate rose gold bows for a look that’s chic, understated, and surprisingly versatile. Brown-based nails are trending because they photograph beautifully and complement virtually every skin tone, and adding rose gold bows gives them a contemporary edge.
Why This Design Works
Chocolate and rose gold is a color combo that feels warm and inviting rather than heavy or dated. The muted brown base lets the rose gold bows shine without the design feeling busy. This is an excellent choice if you prefer understated elegance or if you’re looking for a nail design that works with both casual and formal outfits.
Key Details to Request or Recreate
- Warm, creamy chocolate brown base in a matte or satin finish
- Rose gold metallic paint or gel for bow details
- Keep bow lines clean and well-defined against the brown background
- Add optional rose gold speckles or shimmer to the brown base for subtle dimension
- Place bows on accent nails (typically ring fingers) rather than all over
- Finish with either a matte topcoat for a velvety look or shiny for more glamour—both work beautifully
9. Blush Pink Base with Multi-Colored Bow Variety
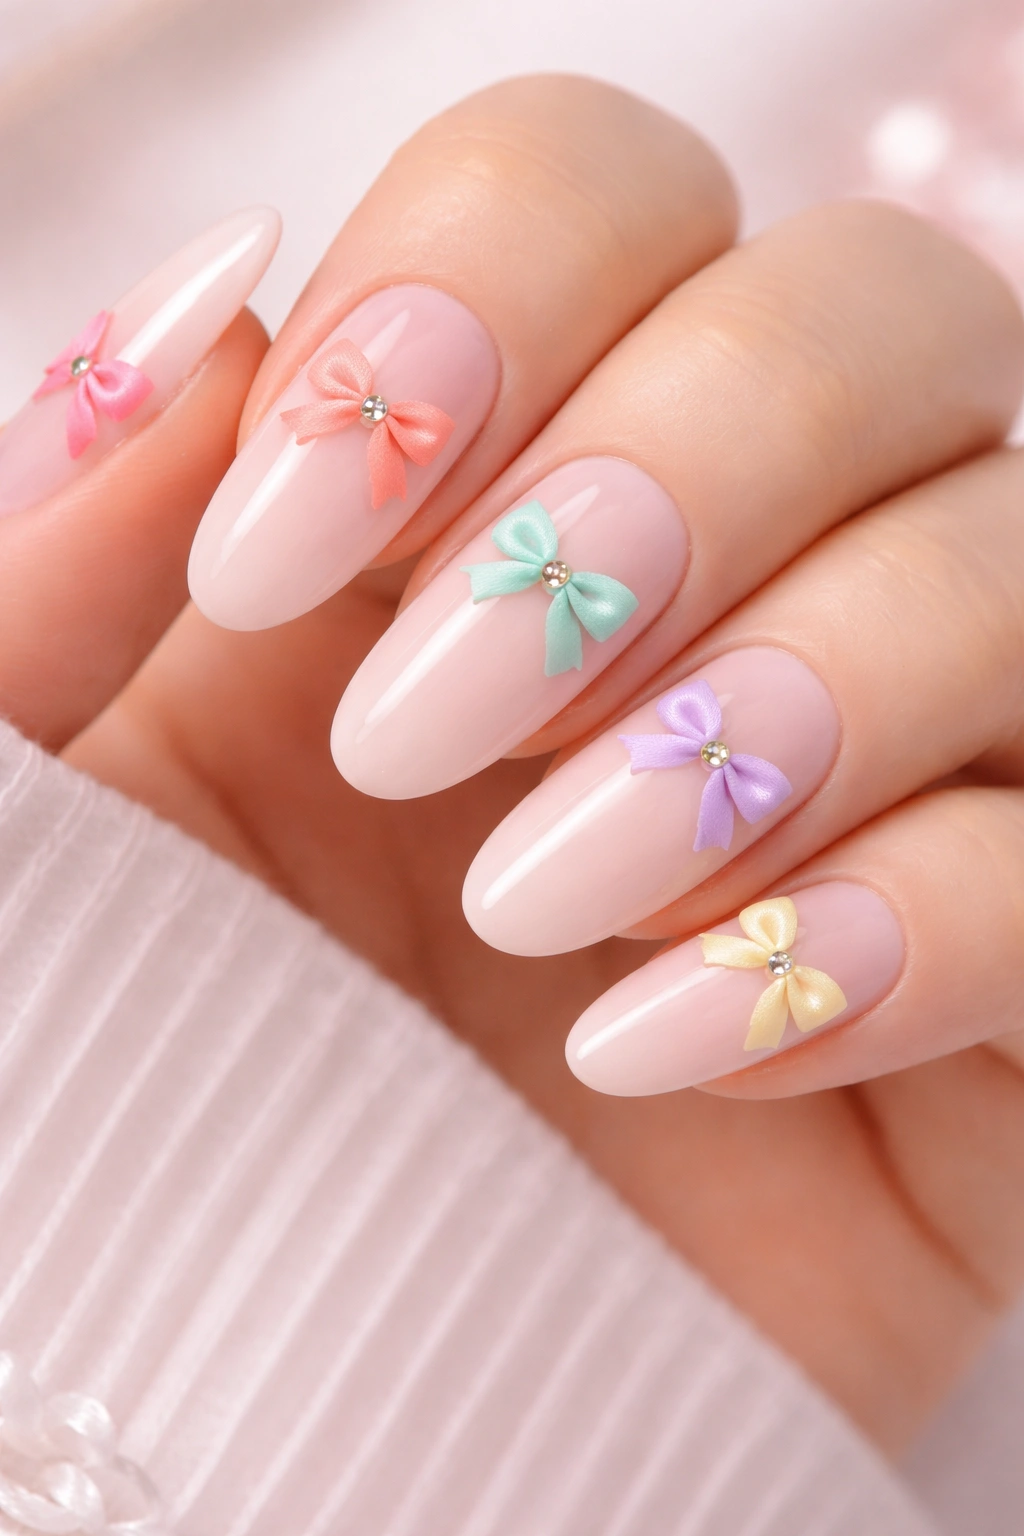
Choose a soft blush base and then create different bow designs on different nails—one might be coral, another mint, another lavender. This design celebrates playfulness and personal expression by allowing each nail to be its own tiny work of art. It’s organized enough to look intentional but varied enough to feel fun and dynamic.
Why This Design Works
This design works because the unified blush base creates cohesion even though each bow is different. It’s the kind of mani that shows you have a playful personality without sacrificing elegance. This approach is also forgiving if you’re doing DIY nails—small variations in color or shape feel intentional rather than like mistakes.
Key Details to Request or Recreate
- Soft, neutral blush pink base on all nails
- Choose 4-5 complementary colors for bows (pastels, jewel tones, metallics—mix and match)
- Paint one different colored bow on each finger (ring finger gets one shade, index another, etc.)
- Keep all bows the same delicate size and style so the design feels coordinated despite color variety
- Add tiny matching accent dots or lines in coordinating colors
- The blush base ties everything together and prevents the multi-color approach from feeling chaotic
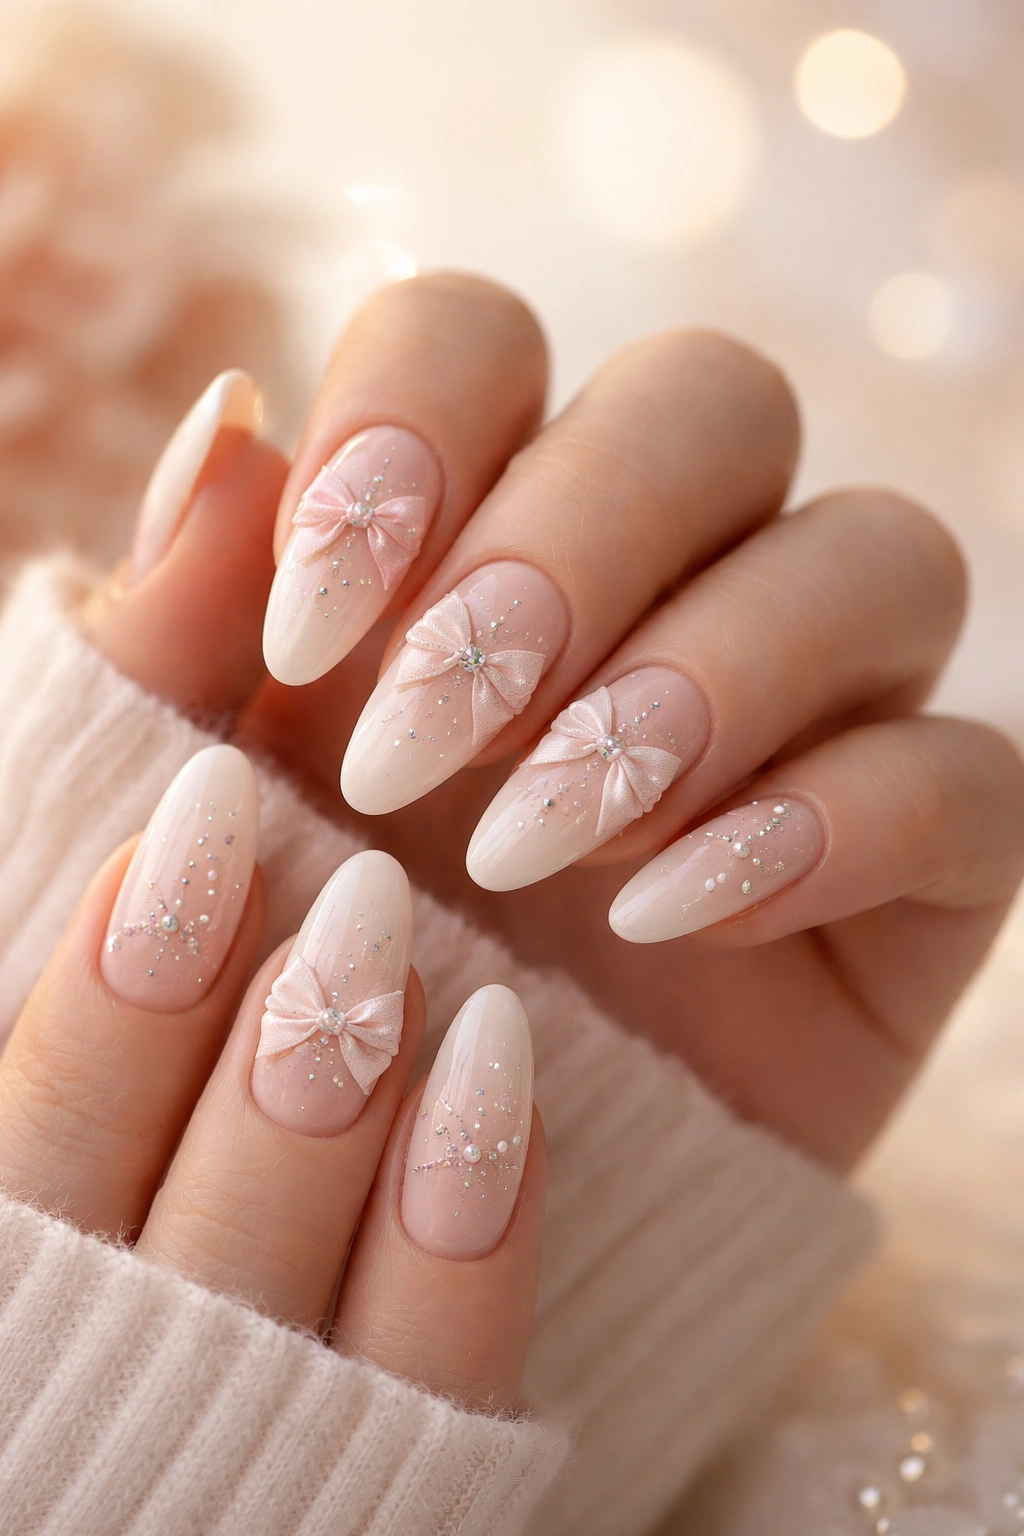
10. Ballet Pointe with Soft Pink Bows and Glitter Tips
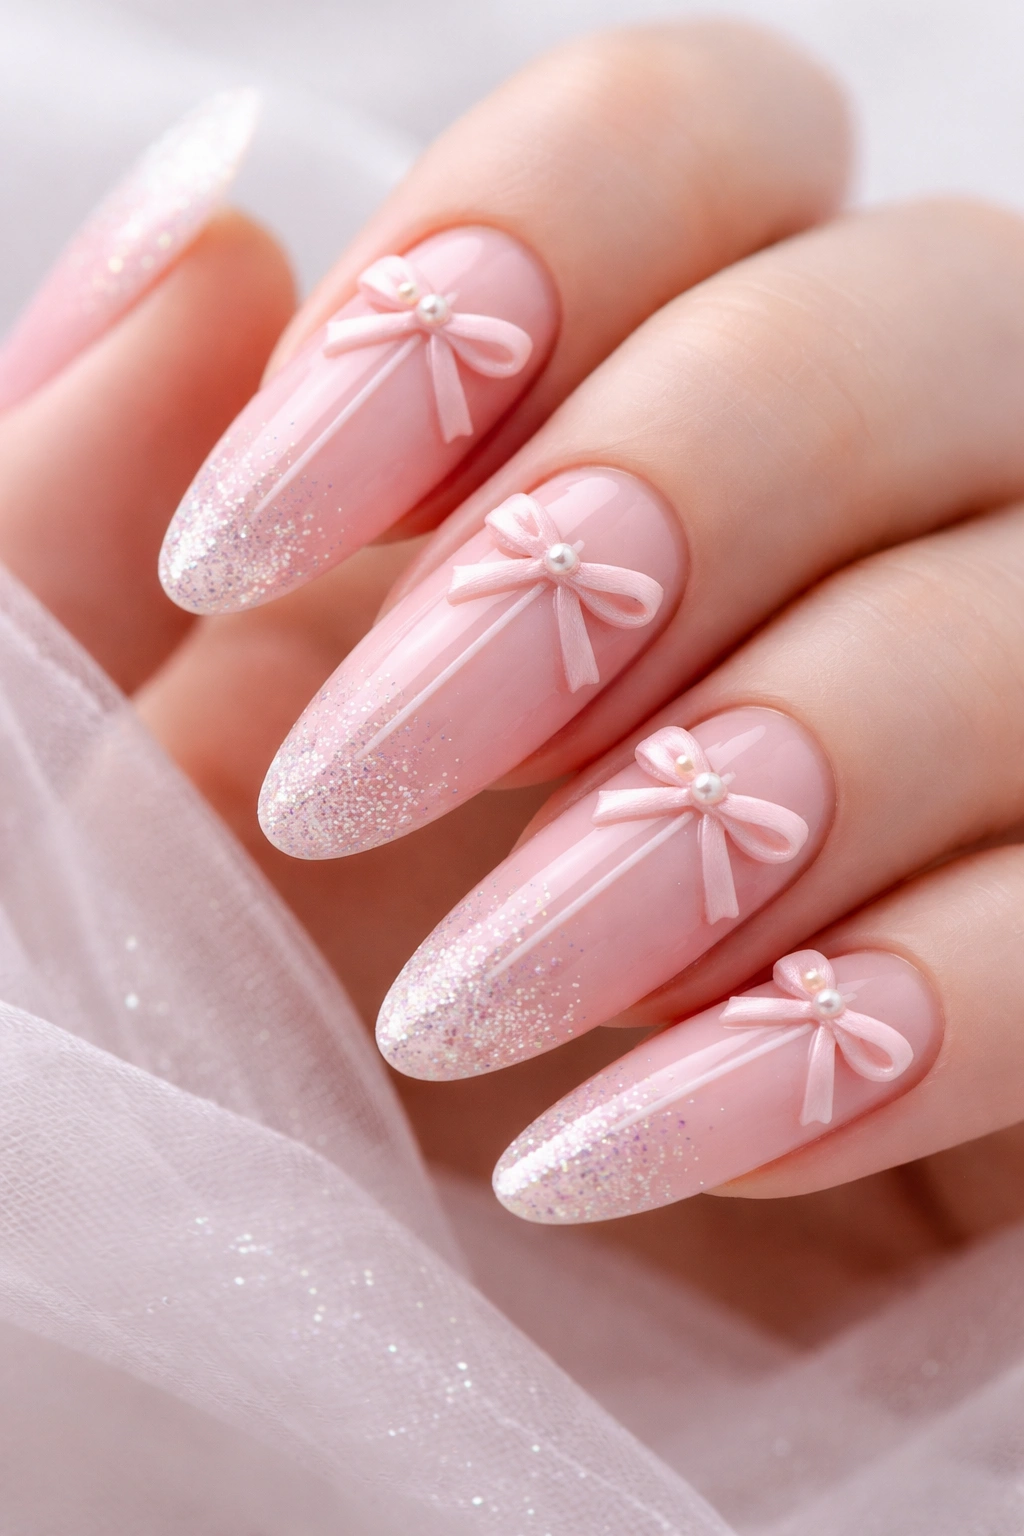
Channel your inner ballerina with a design inspired by pointe shoes—soft pink base throughout with tiny delicate bows (like the ribbons on ballet pointe shoes) and a subtle glitter gradient toward the tips. This design is inherently feminine, graceful, and speaks to anyone who’s ever admired ballet aesthetics.
Why This Design Works
The ballet inspiration gives this design a narrative and meaning beyond just being pretty, which makes it feel special. The soft pink is universally flattering, and the bow details reference actual ballet elements, so the design feels grounded in something real. Adding glitter at the tips brings just enough sparkle to feel celebratory without overwhelming the delicate ballet aesthetic.
Key Details to Request or Recreate
- Soft, warm pink base that mimics pointe shoe color
- Delicate bow outlines in nude, rose gold, or pale pink for subtle contrast
- Add a fine black line or stripe down the center of each nail (inspired by the seam of pointe shoes)
- Blend fine glitter or shimmer powder into clear gel at the tip area, creating an ombré effect
- Keep the overall design refined and understated—this should feel graceful, not overdone
- Perfect for dancers or anyone who loves the aesthetic of classical ballet
11. Nude with Marble Texture and Bow Accents
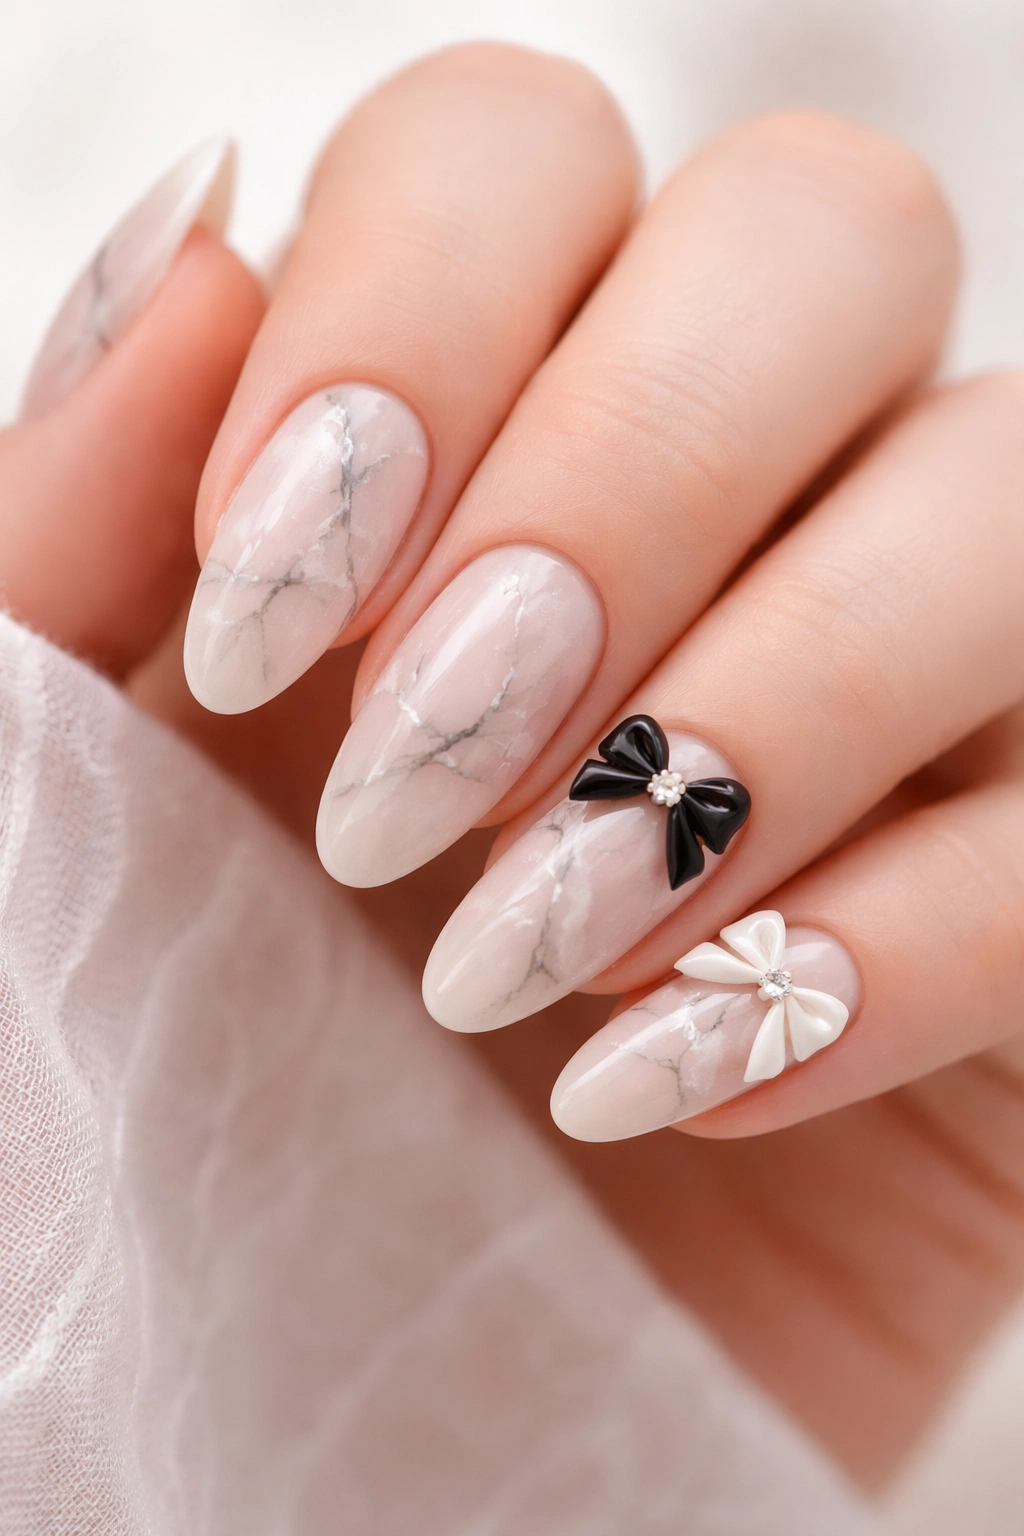
Combine a neutral nude base with a subtle marble texture (either hand-painted or using marble powder), then add delicate bows in contrasting colors on select nails. The marble adds modern sophistication while the bows keep things playful. This design proves that texture and pattern can coexist beautifully with minimalist bow details.
Why This Design Works
Marble textures are enduringly popular because they add visual interest without being loud or trendy. By keeping the bows minimal and placing them on just a couple of nails, you maintain the sophisticated feel of the marble while adding personality. This design works for virtually any occasion and pairs well with any outfit.
Key Details to Request or Recreate
- Nude or warm beige base coat in cream or satin finish
- Create marble effect using black, white, and gray colors with a wet brush or sponge technique
- Keep marble pattern subtle and delicate—this isn’t a bold statement design
- Add small, refined bows in black or dark gray to complement the marble texture
- Consider placing bows only on accent nails to avoid too-busy visuals
- Use a glossy topcoat to make the marble texture appear smooth and intentional
12. Milky White with Minimalist Line-Art Bows
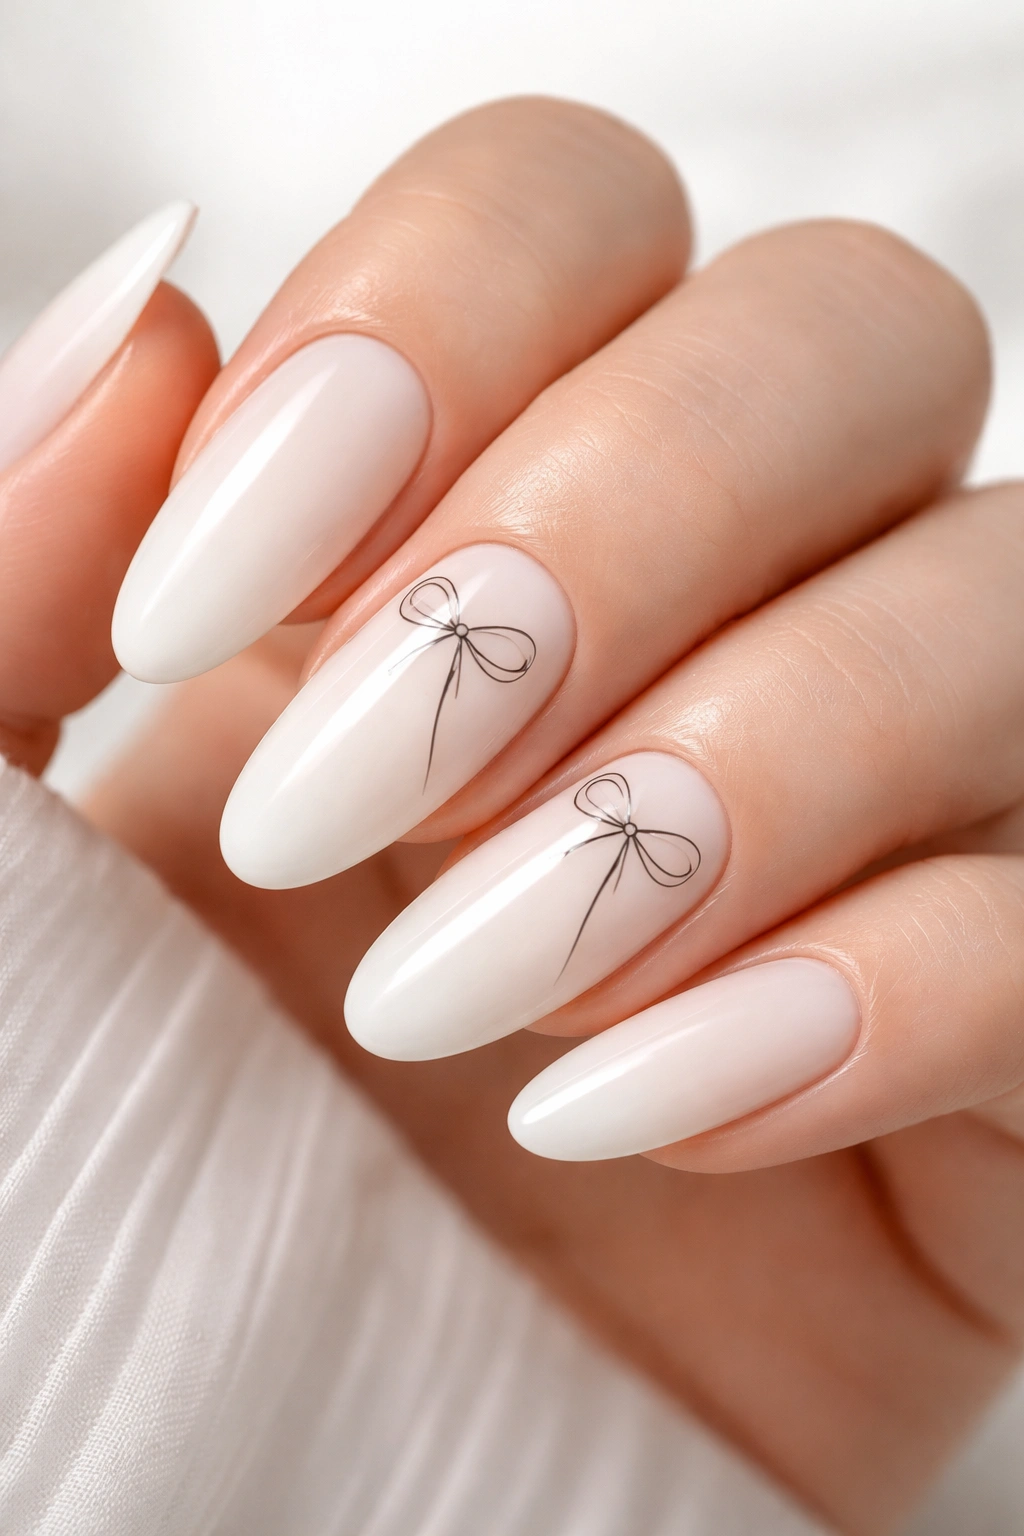
This ultra-minimalist design features a creamy, milky white base paired with the thinnest possible line-art bows in black or dark gray. The simplicity is the sophistication here—no sparkle, no embellishments, just clean lines and negative space. This design is perfect if you love modern art aesthetics or prefer understated elegance.
Why This Design Works
Minimalist designs are always elegant because they demand precision and confidence. By choosing a milky white base (rather than stark white), you add warmth and prevent the design from feeling cold or clinical. The thin bows become architectural elements rather than decorative additions, which appeals to anyone who loves contemporary design.
Key Details to Request or Recreate
- Milky or creamy white base (something with subtle warmth, not pure bright white)
- Use the thinnest possible brush or pen to create bow outlines in black or charcoal
- Keep bows small and scattered across two to three nails per hand
- Let negative space be a key element of the design—don’t fill every available area
- Consider adding a single thin horizontal or vertical line on other nails for balance
- Skip the sparkle and embellishments—this design is about purity of form
13. Burgundy with Metallic Gold Bow and Jewel Details
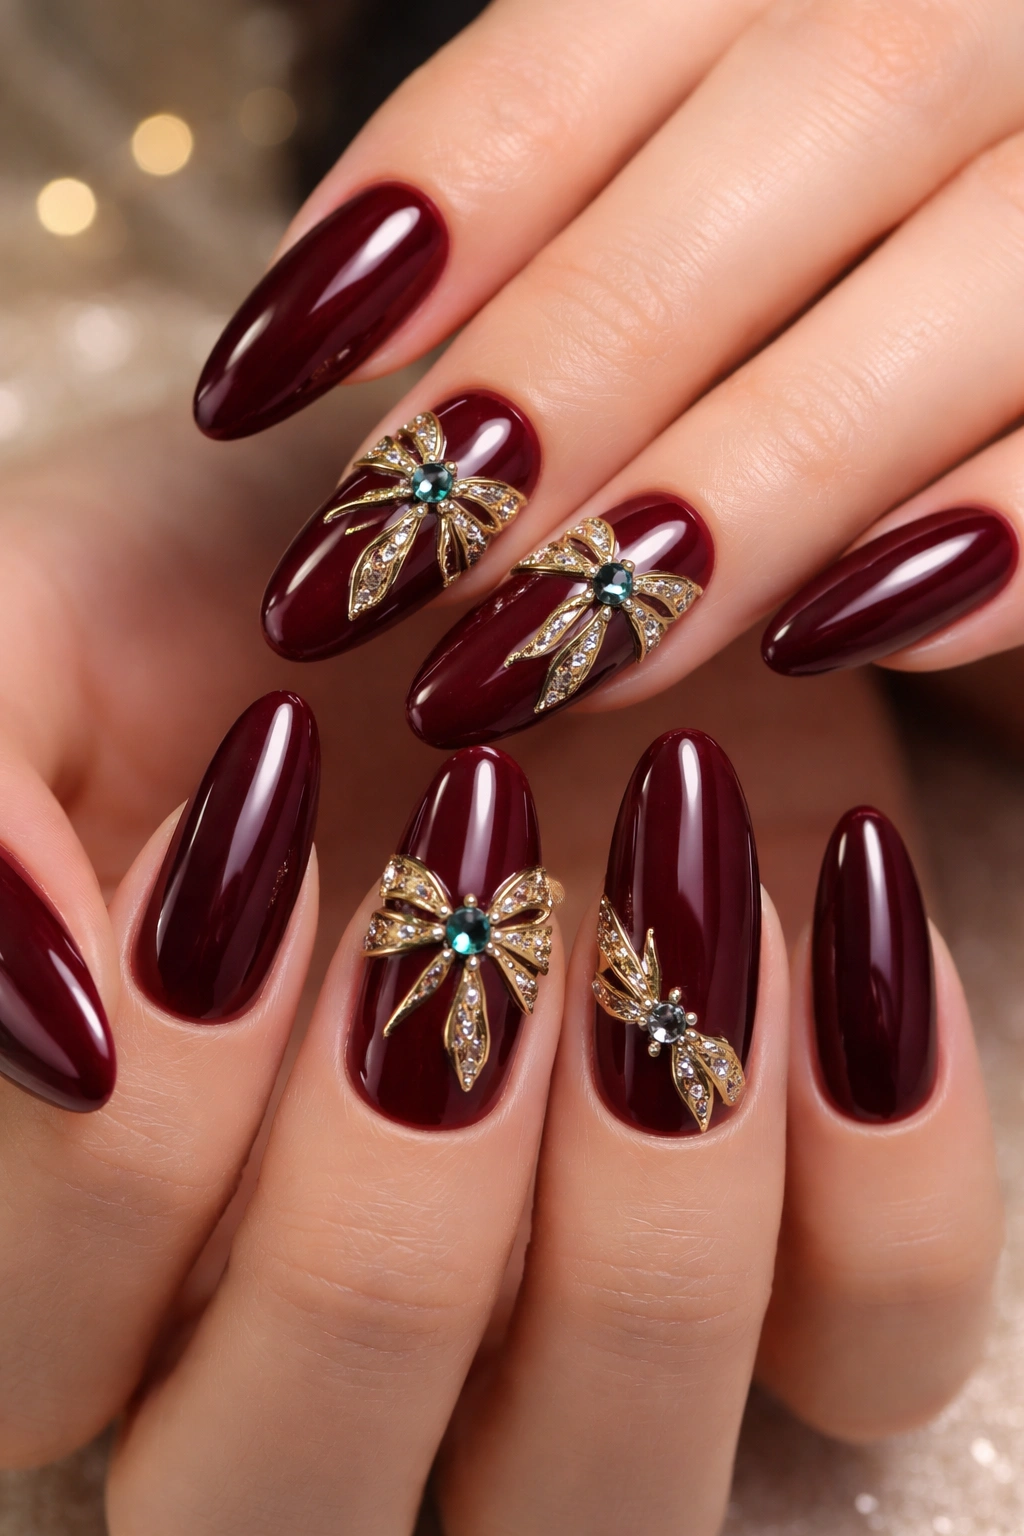
Deep burgundy forms an ultra-luxe base that’s paired with a prominent metallic gold bow on select nails, accented with tiny emerald or sapphire-colored rhinestones. This design feels like you’re wearing actual jewelry on your nails—it’s opulent, dramatic, and impossible to miss. Perfect for special occasions or if you’re someone who loves making a bold statement.
Why This Design Works
Burgundy is a color that conveys sophistication and depth, and it provides the perfect jewel-box backdrop for metallic and crystal accents. Gold against burgundy creates warmth and richness, while the rhinestones add sparkle without feeling cheap or costume-y. This design reads high-fashion and expensive regardless of whether you’ve paid professional salon prices for it.
Key Details to Request or Recreate
- Deep, rich burgundy base with a cream or satin finish
- Large, bold bow in metallic gold on ring fingers and one accent nail
- Place tiny emerald or sapphire-colored rhinestones or crystals at bow center and along loops
- Add thin gold stripes or accents on non-bow nails to unify the design
- Consider a subtle burgundy-to-black ombré for extra depth and dimension
- Ensure all rhinestones are securely sealed so they last for the full wear period
14. Soft Peach with Delicate Blush Bow and Negative Space
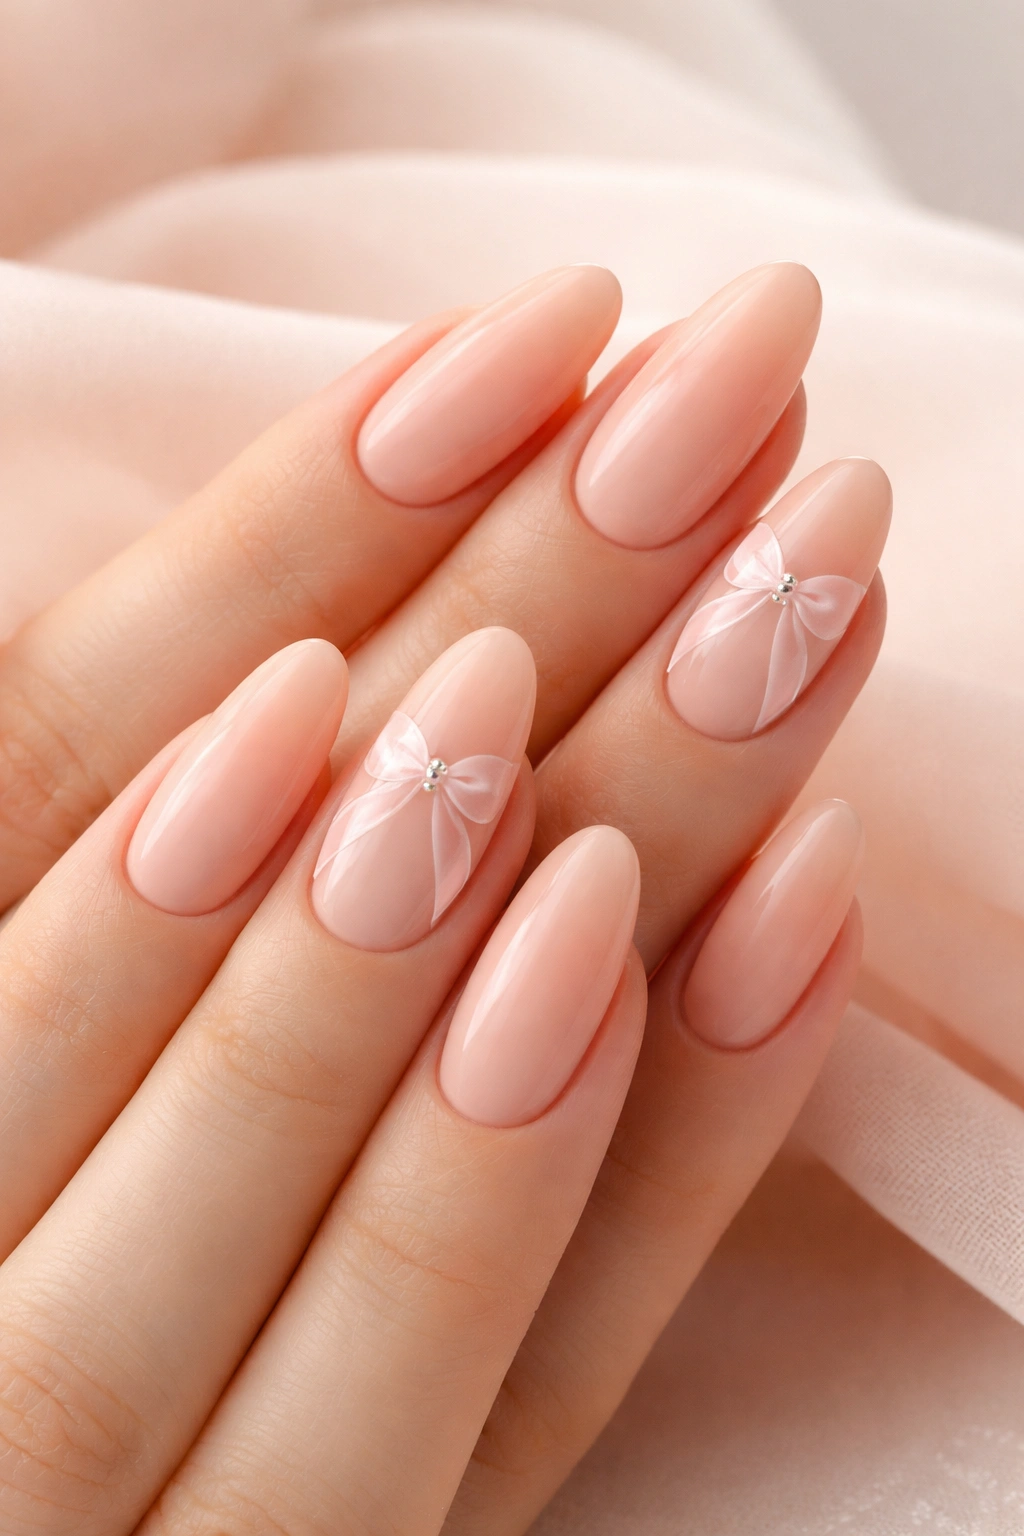
Warm peachy-beige base with an almost-matching blush pink bow creates a monochromatic, tonal look that’s sophisticated in its subtlety. Lots of negative space keeps the design feeling airy and modern rather than ornate. This is the mani for someone who loves cohesive, harmonious color palettes and minimalist aesthetics.
Why This Design Works
Tonal, monochromatic designs are having a major moment because they feel curated and intentional. By using multiple shades of the same warm peachy-pink family, you create visual interest through subtlety rather than contrast. This approach is also incredibly forgiving—slight variations in shade or bow shape feel intentional rather than like mistakes.
Key Details to Request or Recreate
- Soft, warm peach or peachy-beige base as your foundation
- Paint delicate bows in a slightly darker or slightly lighter shade of the same family
- Keep bows small and place them on just one or two accent nails
- Use negative space strategically—bare nail space is part of the design
- Consider adding a paper-thin accent line in rose gold if you want just a hint of contrast
- The overall effect should feel calm, organized, and sophisticatedly underplayed
15. Pastel Rainbow with Bow on Every Nail
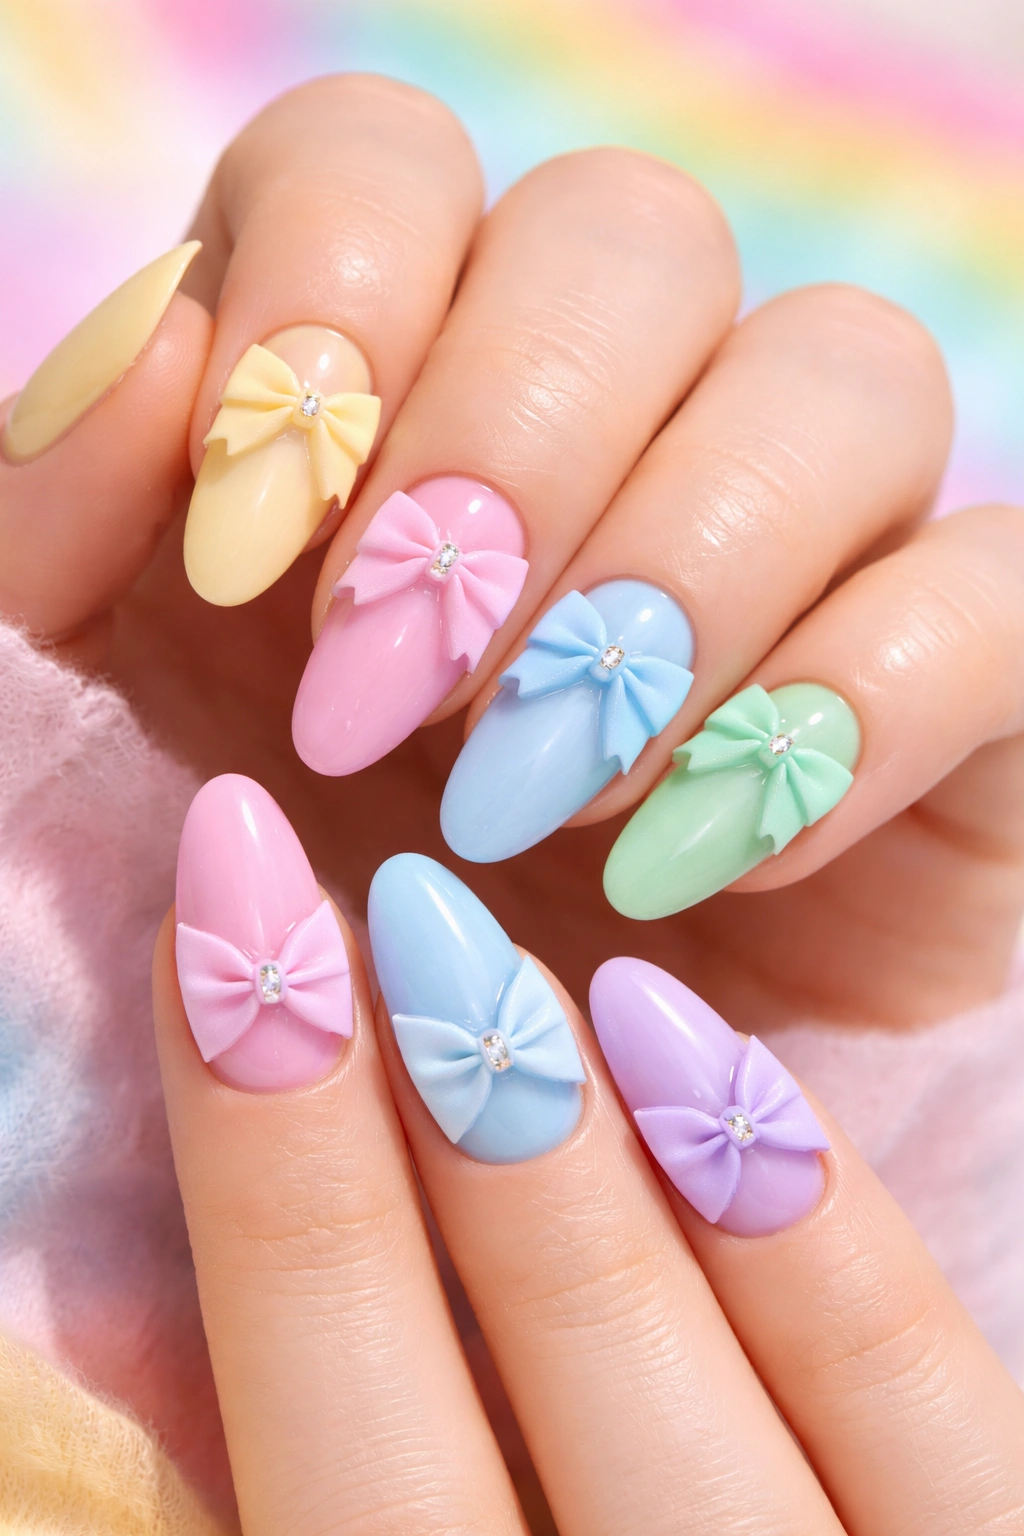
Go bold with this playful design: each nail is a different pastel color (pale yellow, light pink, soft blue, mint green, lavender), and each features a coordinating-colored bow. This design is joyful, youthful, and celebratory—perfect if you love color or want a mani that just makes you smile every time you look at your hands.
Why This Design Works
This design works because each pastel shade is equally toned and muted, so despite being multiple colors, the overall effect is cohesive rather than chaotic. The bows tie the design together visually and give each nail a clear focal point. This is the ultimate playful-but-not-juvenile design—it’s sophisticated enough for casual wear but fun enough to express personality.
Key Details to Request or Recreate
- Choose 5 distinct pastel shades (yellows, pinks, blues, greens, purples all work well)
- Assign one color to each nail, starting with your thumb and working across
- Paint a bow on each nail in a slightly coordinating shade (slightly darker or metallic version of the base)
- Alternatively, paint bows in a coordinating metal (rose gold or gold works on all pastels)
- Keep bows consistent in size and style across all nails for unified visual impact
- Use a glossy topcoat to keep everything looking fresh and bright
Final Thoughts
Long oval bows are the perfect combination of romantic, playful, and sophisticated—they work because they appeal to your desire for something special without requiring you to sacrifice wearability or practicality. Whether you lean toward minimal line-art designs, glittery glamour, or bold jewel-tone statements, there’s a bow nail design out there that matches exactly how you want to feel.
The beauty of bow nails is that they’re as adaptable as you are. The same long oval shape and bow concept can look completely different depending on your color choices, embellishments, and placement decisions. You might love the burgundy-and-gold version for evening events, the soft pink version for everyday wear, and the rainbow version whenever you want to feel playful and unapologetic about expressing your personality through your nails.
Start by choosing a design that genuinely speaks to you—not because it’s trending or because you think you “should” like it, but because when you look at it, you immediately imagine how it’ll feel on your hands and how it’ll make you feel. That’s the design worth investing time, money, and effort into recreating. Your perfect bow nail mani is waiting—it’s just a matter of picking which version of gorgeous you want to wear.
