

Short squoval nails have become the go-to shape for anyone who wants the chic, modern look of almond or coffin nails without the fragility or inconvenience. The squoval—that perfect hybrid between square and oval—offers the best of both worlds: defined edges that photograph beautifully combined with softened corners that resist breaking. When you add stars to this already-winning formula, you get nail designs that are playful, eye-catching, and surprisingly versatile enough to wear everywhere from casual hangouts to fancy occasions.
Stars have a unique power when it comes to nail art. They instantly add personality and whimsy to even the simplest color palette. A star design breaks up blank space, creates a focal point, and tells people something about your style without requiring detailed freehand painting skills. Whether you choose glossy finishes, matte textures, glitter accents, or minimalist line work, star nails transform ordinary manicures into conversation starters.
The beauty of short squoval star designs lies in their accessibility. You don’t need to commit to growing out extremely long nails or spending hours at a salon perfecting intricate artwork. These designs work brilliantly on natural nails, are manageable to recreate at home with the right tools, and look intentional rather than like you’re trying too hard. Whether you’re someone who’s intimidated by nail art or a seasoned manicure enthusiast looking for fresh inspiration, there’s a short squoval star design here that will make you genuinely excited to show off your nails.
1. Midnight Navy with White Star Accents
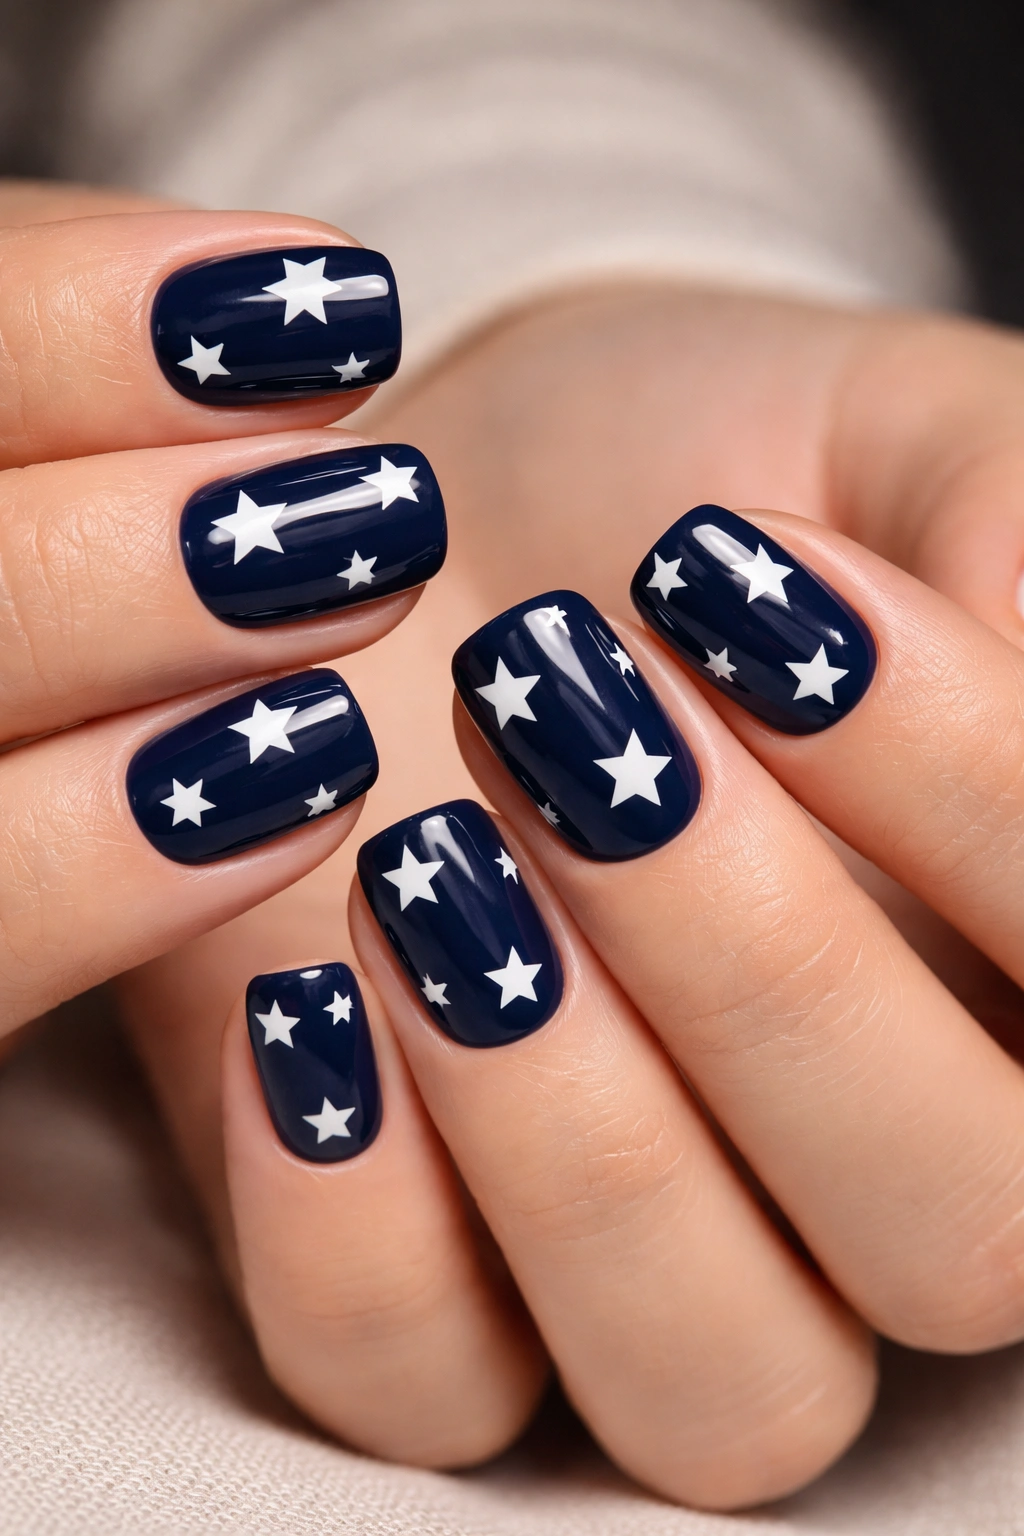
Navy blue provides the perfect canvas for crisp white stars that seem to shimmer like a night sky on your fingertips. This design pairs a deep, sophisticated base color with 3-5 white stars scattered casually across each nail—some on the nail itself, some wrapping slightly onto the side edges. The contrast between the deep blue and bright white creates natural visual drama without feeling over-the-top or childish.
Why This Design Works
The navy-and-white combination is timelessly elegant, meaning you can wear this manicure to a job interview, casual brunch, or evening event without a second thought. The stars prevent the solid navy from feeling boring, yet the limited color palette keeps everything refined and professional. This design proof that star nails aren’t just for fun personalities—they work just as well in sophisticated color combinations.
How to Achieve the Look
- Use a chip-resistant navy base coat (two coats for opacity)
- Apply white gel or acrylic for the stars using a thin brush, dotting pen, or pre-made star stamp
- Seal with a glossy top coat for shine that makes the stars pop against the navy
- Alternatively, use white nail polish or even a white gel pen for crisp precision if you prefer hand-painting
Pro Tip
If dotting stars freehand feels intimidating, buy a basic star-shaped nail stamp from any beauty supply store. Stamping takes the pressure off perfection and creates perfectly uniform stars every single time.
2. Blush Pink with Sparkly Rose Gold Stars
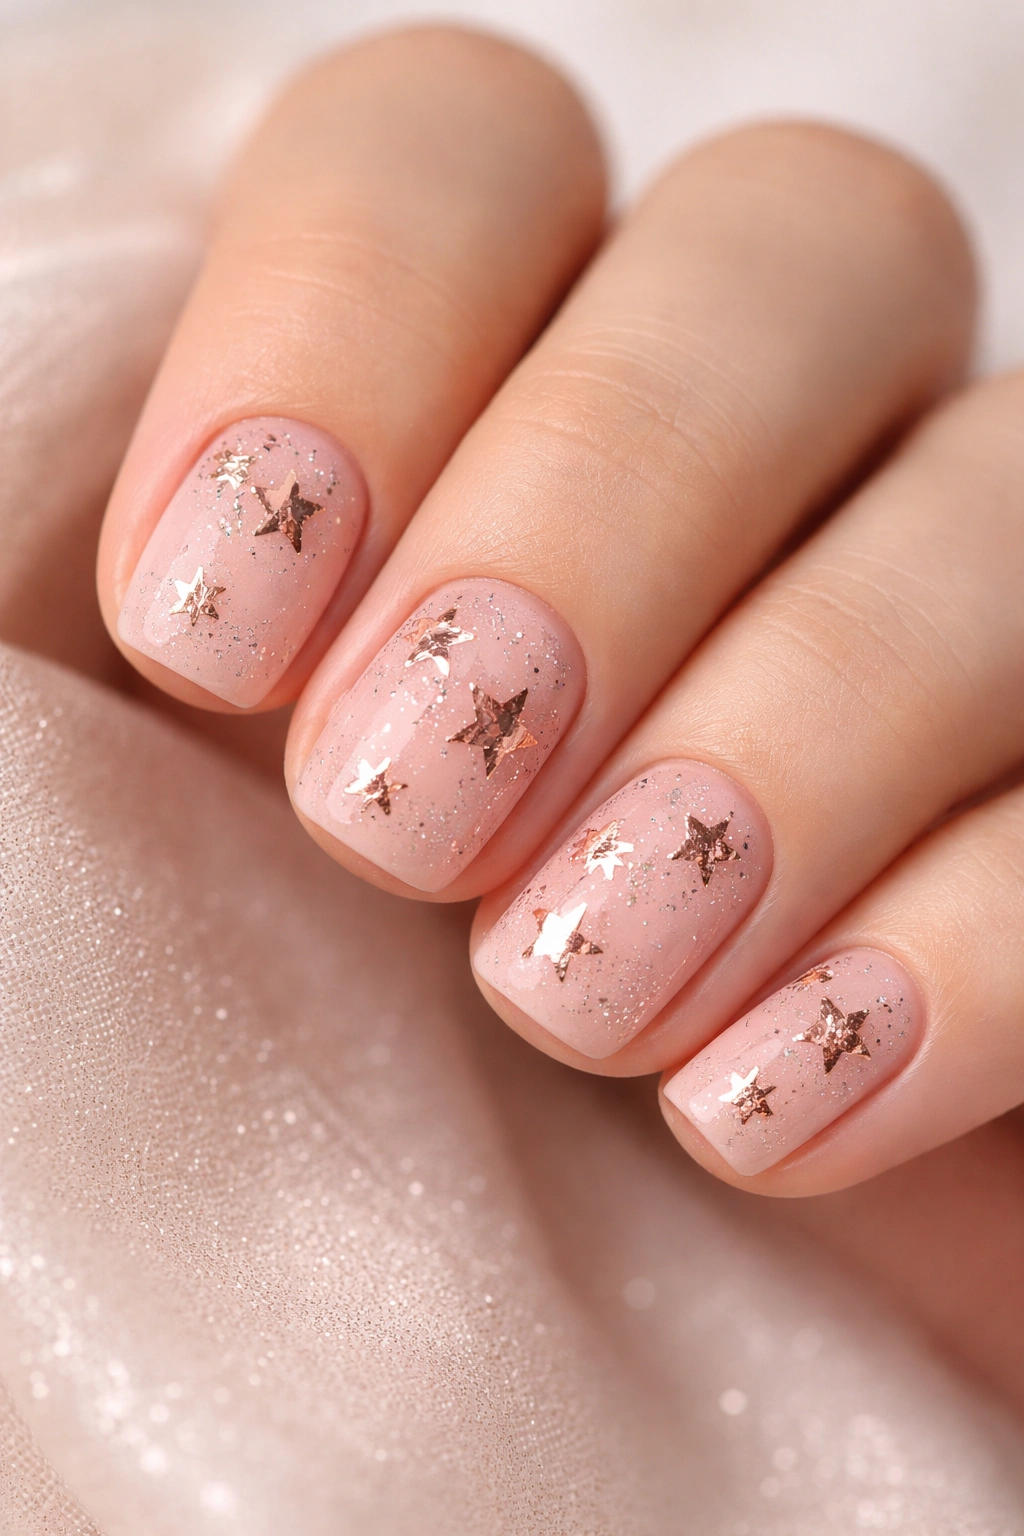
This design whispers elegance instead of shouting it. A soft blush or dusty rose base is paired with rose gold stars—either glitter-filled stars, foil accents, or metallic rose gold polish painted in star shapes. The warm metallics against the cool blush creates a sophisticated, Instagram-worthy combination that feels both modern and timeless.
Why This Design Works
Blush pink is flattering on almost every skin tone, and rose gold metallics amplify that flattery without overwhelming. This design reads as intentionally stylish rather than matchy-matchy, because the rose gold stars act as jewelry for your nails. The softness of the color combination makes it perfect for anyone who loves looking polished but not prissy.
Color and Finish Combinations
- Matte blush base with glossy rose gold stars creates texture contrast
- Shimmer blush with rose gold glitter stars for maximum light-catching appeal
- Sheer blush with rose gold foil stars for a luxe, jewelry-like effect
- Nude-blush hybrid with rose gold dust for subtle, barely-there elegance
Variation Worth Trying
Add a single small crystal or rhinestone to the center of one star on your accent nail for extra sparkle and dimension. It’s a tiny detail that completely elevates the look.
3. Forest Green with Gold Star Details
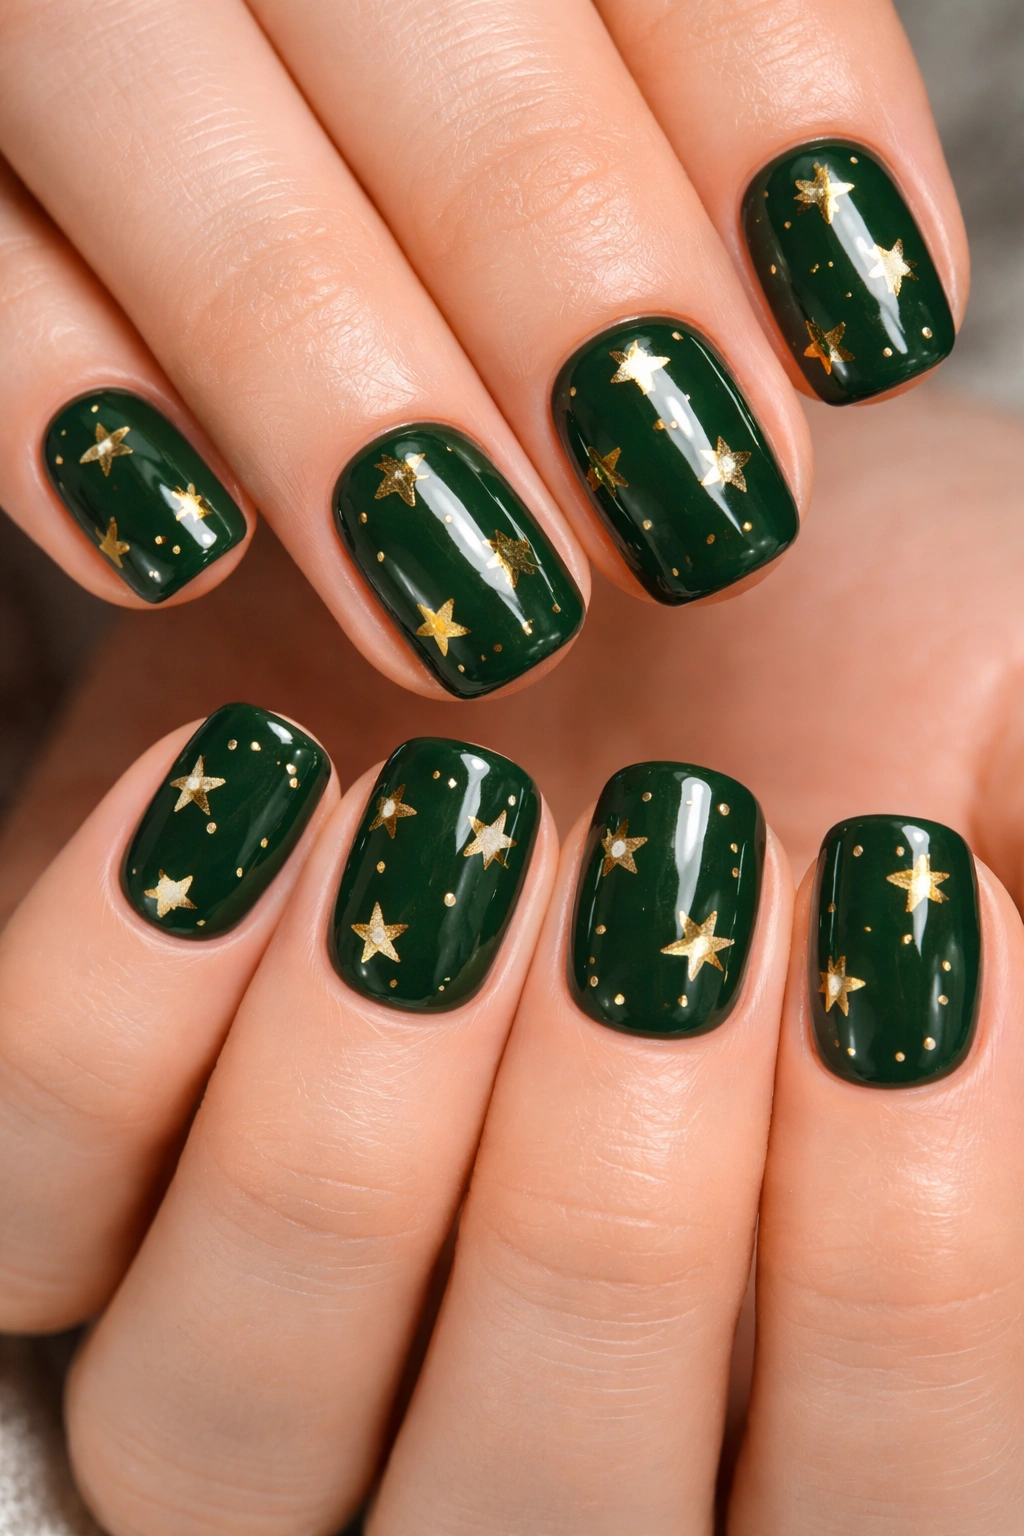
Deep forest green evokes natural beauty and sophistication, while bright gold stars create a striking, jewel-toned contrast. This design works beautifully with either scattered random stars or a more intentional placement pattern—like stars concentrated on the tips or one prominent star per nail.
Why This Design Works
This combination feels glamorous and earthy at the same time. The green-and-gold pairing has historical roots in luxury and elegance, making it feel inherently classy rather than trendy. It’s perfect if you love rich, saturated colors and want something that feels intentional and curated rather than bright and bubbly.
Application Tips
- Use a forest green cream or shimmer base (cream finishes appear more opaque and solid)
- Apply gold stars using a thin detailing brush, metallic gel pen, or gold foil
- Seal with a matte top coat to let the green take center stage, or glossy to emphasize the gold
- Let the base fully dry between layers to prevent colors muddying together
Occasion Match
This design absolutely shines at evening events, parties, holiday celebrations, or any time you want to feel extra polished. The jewel-tone combination automatically reads as fancy without being over-dressed.
4. Crisp White with Multicolor Star Constellation
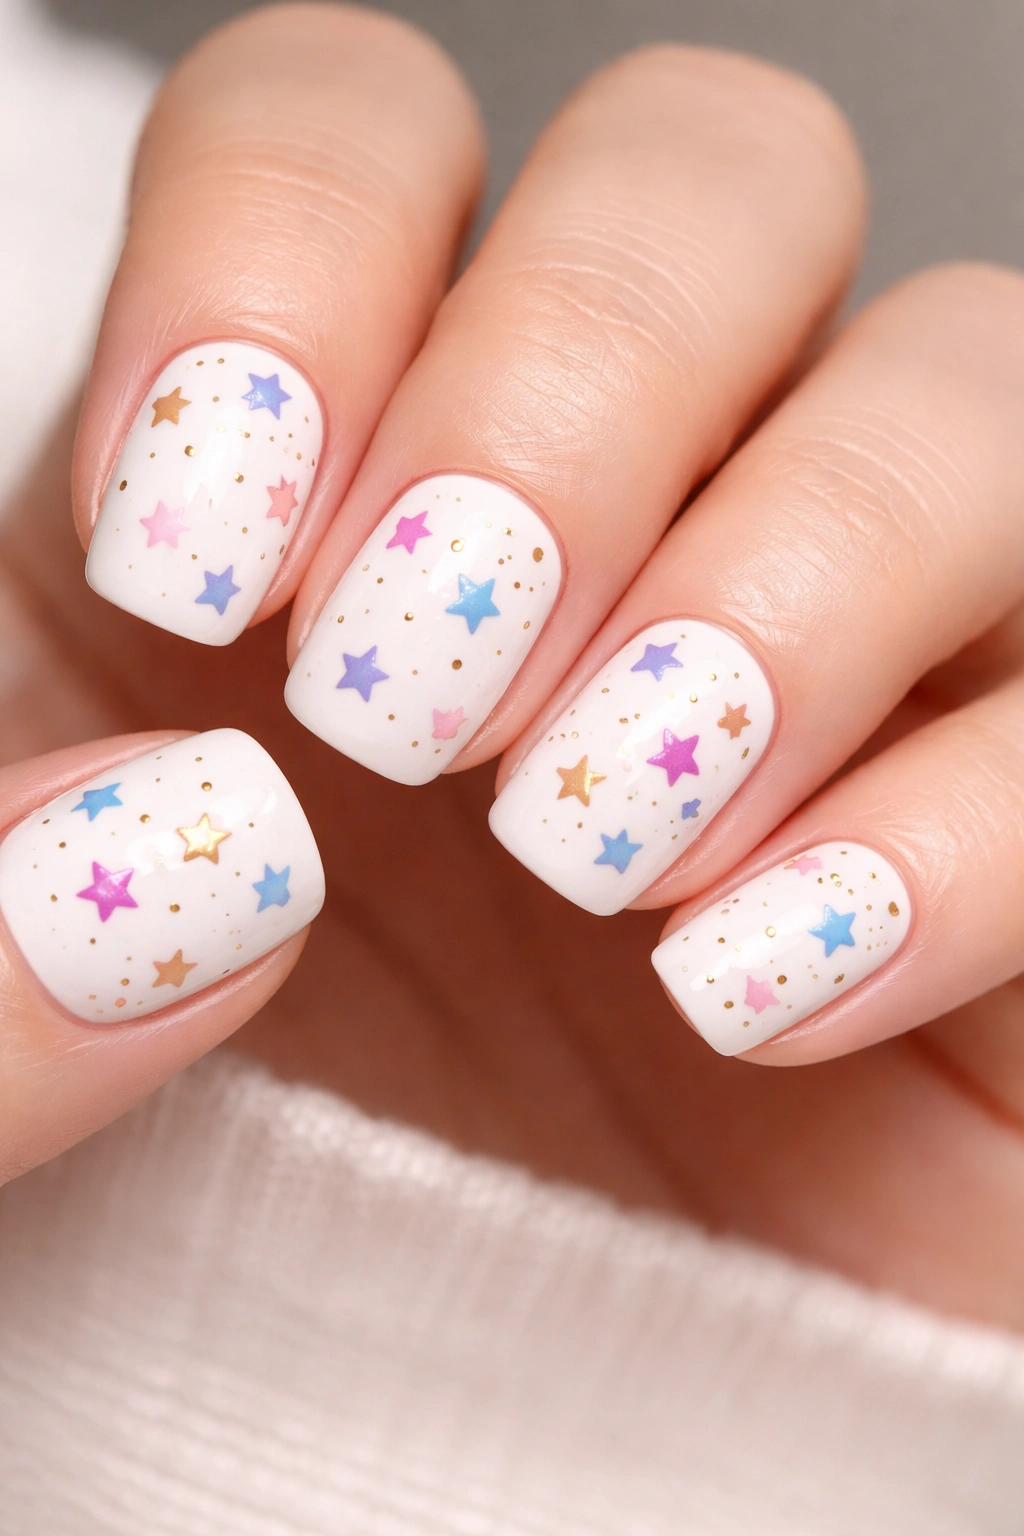
A clean white base becomes a blank canvas for a colorful constellation of tiny stars scattered across multiple nails. Each star is painted in a different color—maybe blues, purples, pinks, and golds all mixed throughout. The effect feels playful and youthful without sacrificing sophistication, because the white base keeps everything bright and organized.
Why This Design Works
Multicolor designs can feel chaotic, but when you anchor them against white and use only 3-4 colors repeated throughout, they read as intentional and creative rather than messy. The white background gives your brain a “reset” between colors, so even though multiple hues are present, the design feels clean and cohesive. This is brilliant for creative types who want their nails to reflect their personality.
Color Selection Strategy
- Choose 3-4 colors that all have similar undertones (all cool-toned, or all warm-toned) for natural harmony
- Pastels create a softer, dreamier vibe; brights create more playful energy
- Repeat each color 2-3 times across your fingers to create subtle pattern rather than pure randomness
- Add tiny complementary dots or lines between stars to tie the design together
Accessibility Note
If freehand multicolor feels daunting, create a template. Paint white base, let dry completely, then use a toothpick dipped in different polish colors to create tiny dots and simple star shapes. Simple beats perfect.
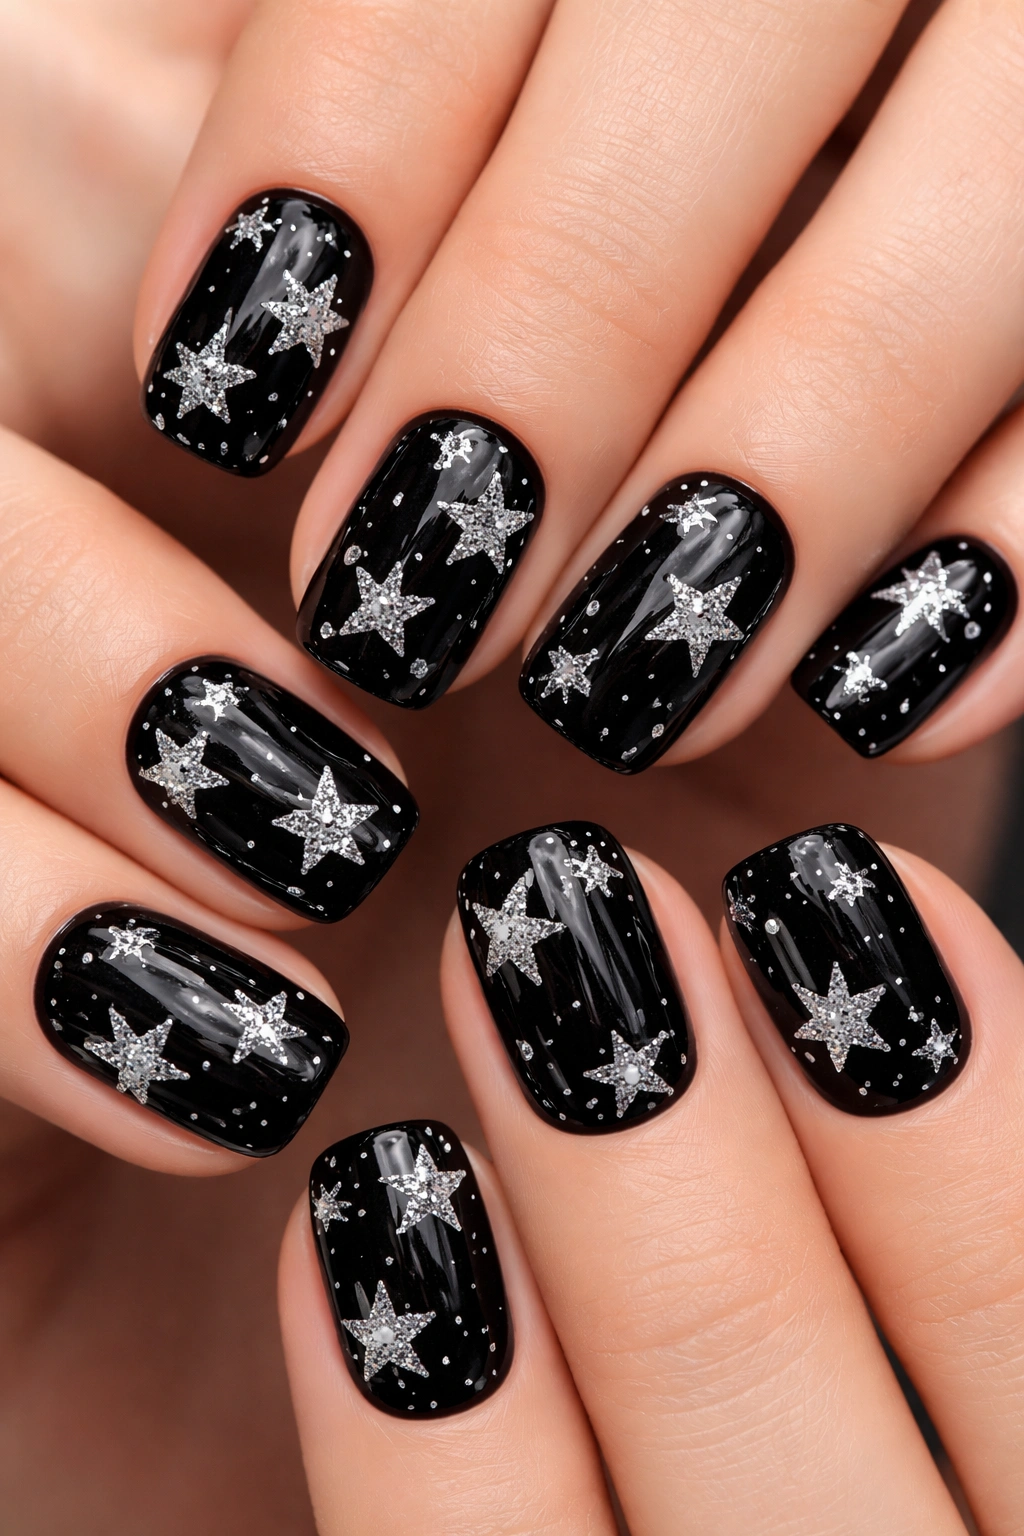
5. Black with Silver Glitter Stars
This is your “I’m confident and cool” design. A solid black base paired with silver sparkle stars creates a design that feels edgy, contemporary, and inherently stylish. The contrast between black’s depth and silver’s brightness creates visual pop that photographs beautifully.
Why This Design Works
Black-and-silver is the ultimate sophisticated contrast. Stars in silver glitter prevent the black from feeling heavy or gothic, giving the design friendly approachability despite its darker palette. This design says “I have taste” more confidently than almost any other combination on this list.
Glitter Application Options
- Pre-made glitter stars (adhesive backed or pressed into tacky base coat)
- Silver gel glitter painted into star shapes and sealed with top coat
- Loose glitter mixed into clear gel and cured under UV light
- Silver foil stars applied with gel adhesive for a precise, structured look
Care Consideration
Glitter requires commitment to upkeep—it can shed slightly as nails grow out. Budget extra time for removal, as silver glitter notoriously clings to everything. Soak nails in acetone rather than aggressive scraping to remove them safely.
6. Ombré Coral-to-Peach with Iridescent Stars
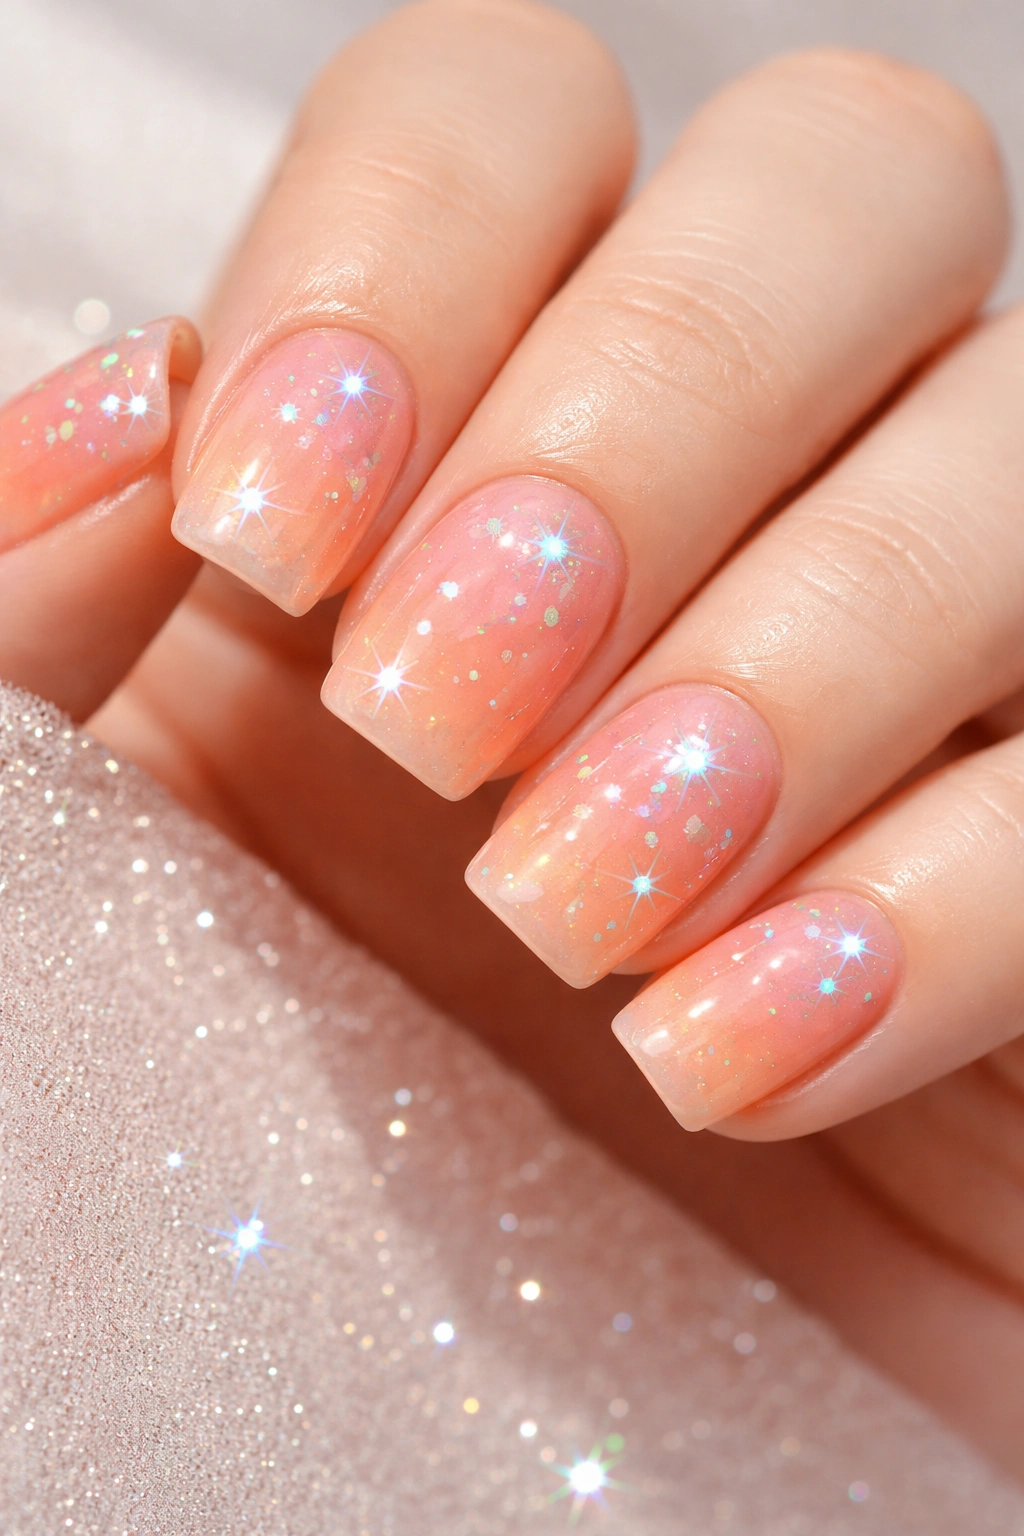
This gradient design uses warm sunset tones—starting coral-orange on the cuticle and fading to soft peach at the tips. Scattered across this warm canvas are iridescent stars that shift color depending on lighting and viewing angle, from pink to purple to green.
Why This Design Works
Ombré bases draw attention to the nail shape and create dimension without requiring detailed artwork. Iridescent stars add movement and magic, catching the light differently from every angle. This design feels fresh and creative while being forgiving to execute—ombré doesn’t require perfect blending, just a general color transition.
Creating the Ombré Base
- Paint full coral base, let dry
- Apply peach to the lower half and blend where colors meet using a sponge (stipple motion, not smearing)
- Don’t stress about perfect blending—soft, imperfect blending actually looks more organic
- Seal with top coat, then add iridescent stars once completely dry
Bonus Detail
Add a thin line of gold or silver metallic polish along the sides of each nail to frame the ombré and stars, creating extra polish and intentionality.
7. Lavender with Tiny White Stars and Micro Beads
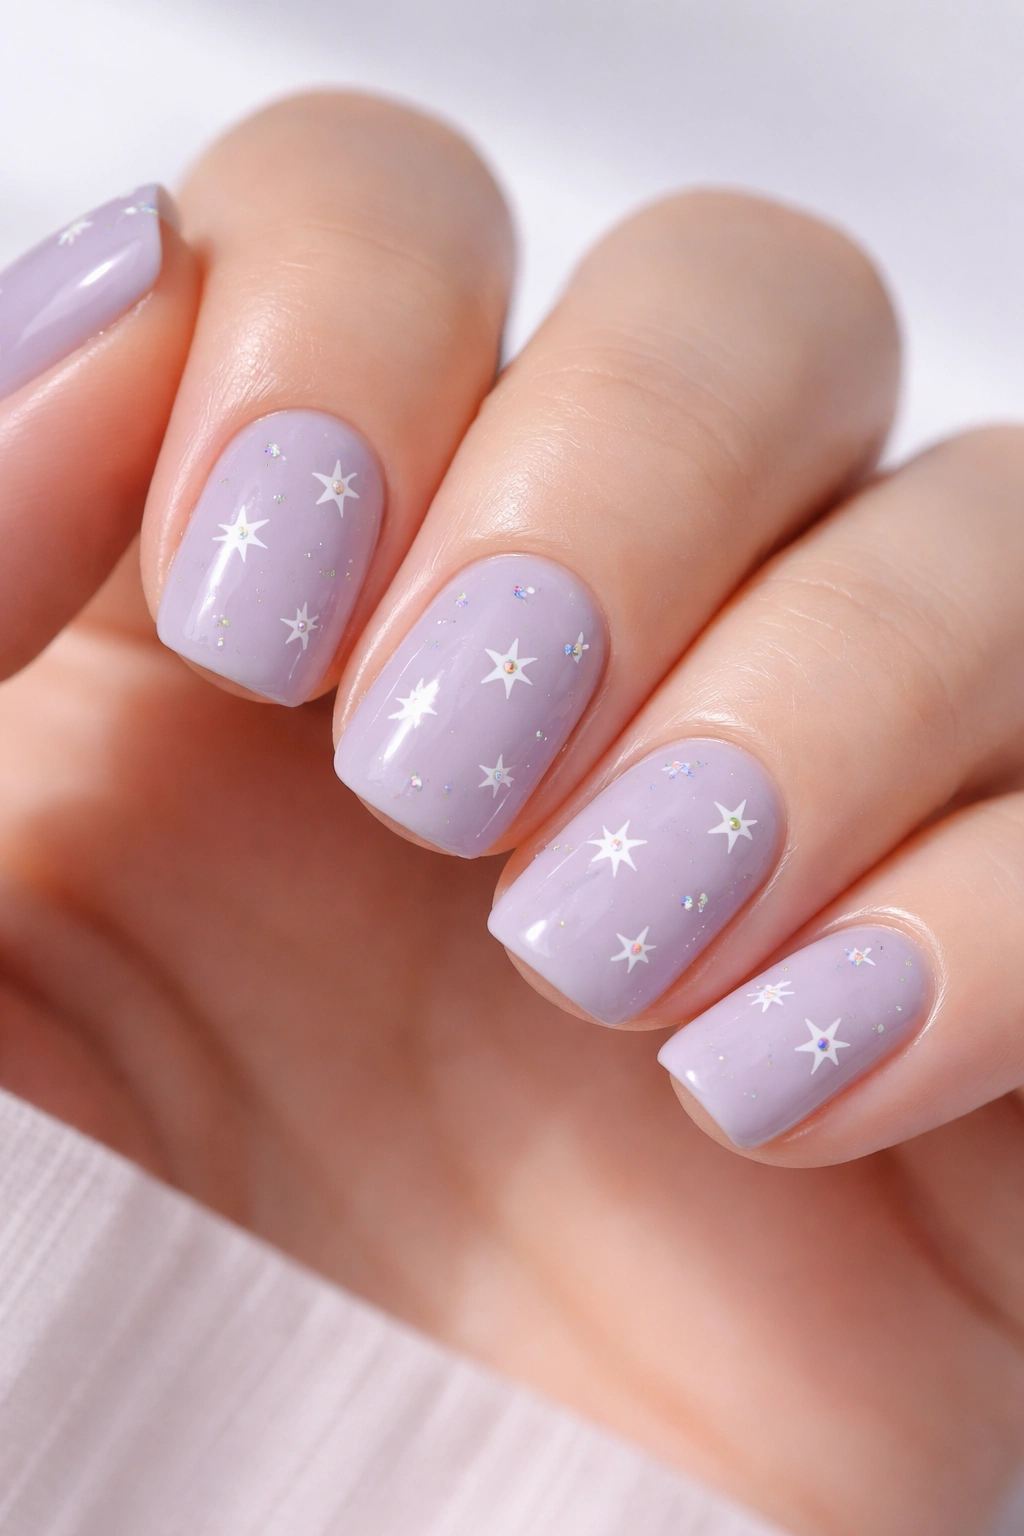
Soft lavender is already charming on its own, but combining it with small white stars and a sprinkle of iridescent micro beads transforms it into something genuinely special. The beads sit on top of the polish, catching light and creating unexpected dimension and sparkle.
Why This Design Works
Lavender is universally flattering and calming, making it perfect for anyone who wants their nails to feel soothing rather than bold. The combination of painted stars and tactile beads creates visual and textural interest, making a fundamentally simple design feel more luxe and intentional. This is the definition of “simple but special.”
Assembly Process
- Apply lavender base and let cure completely
- Paint or stamp tiny white stars across the nails
- While stars are still slightly tacky, press micro beads onto select spots (not every star)
- Seal everything with a thick, sturdy top coat that holds the beads in place
- Use a gel top coat rather than regular polish for durability—beads require extra hold
Realistic Durability
Beads add gorgeous visual interest but sacrifice some practicality. Expect slightly shorter wear time (maybe 10-14 days instead of 14-21) and be mindful of the beads catching on fabrics. For special occasions, this trade-off is absolutely worth it.
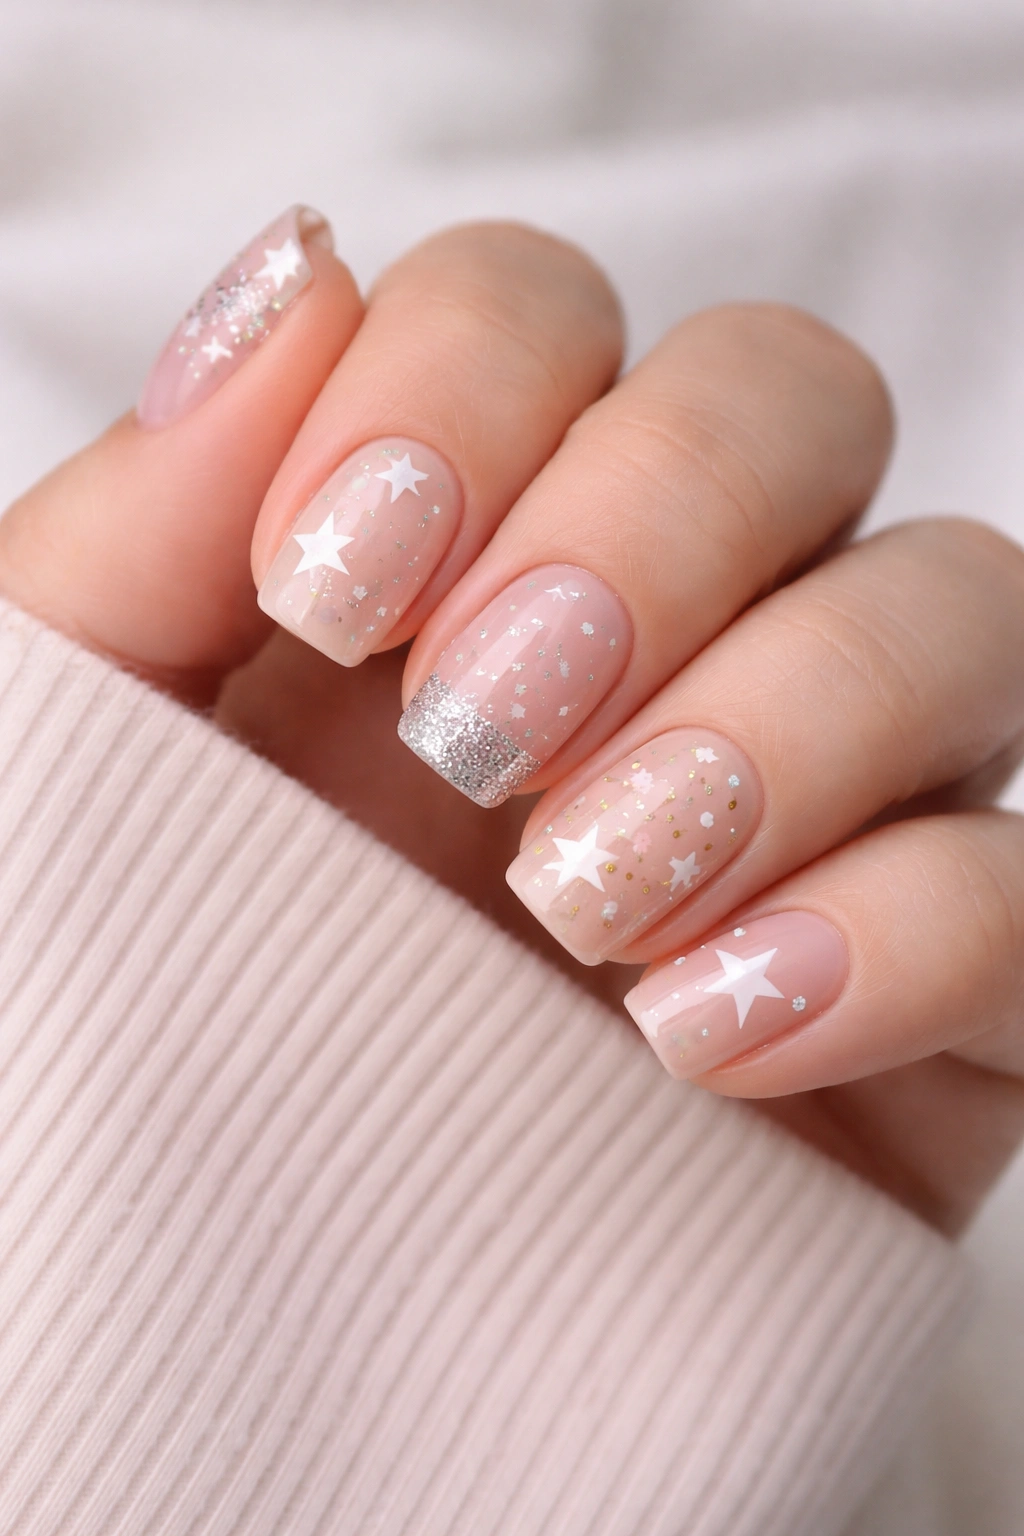
8. Nude with Scattered Star Constellation and Negative Space
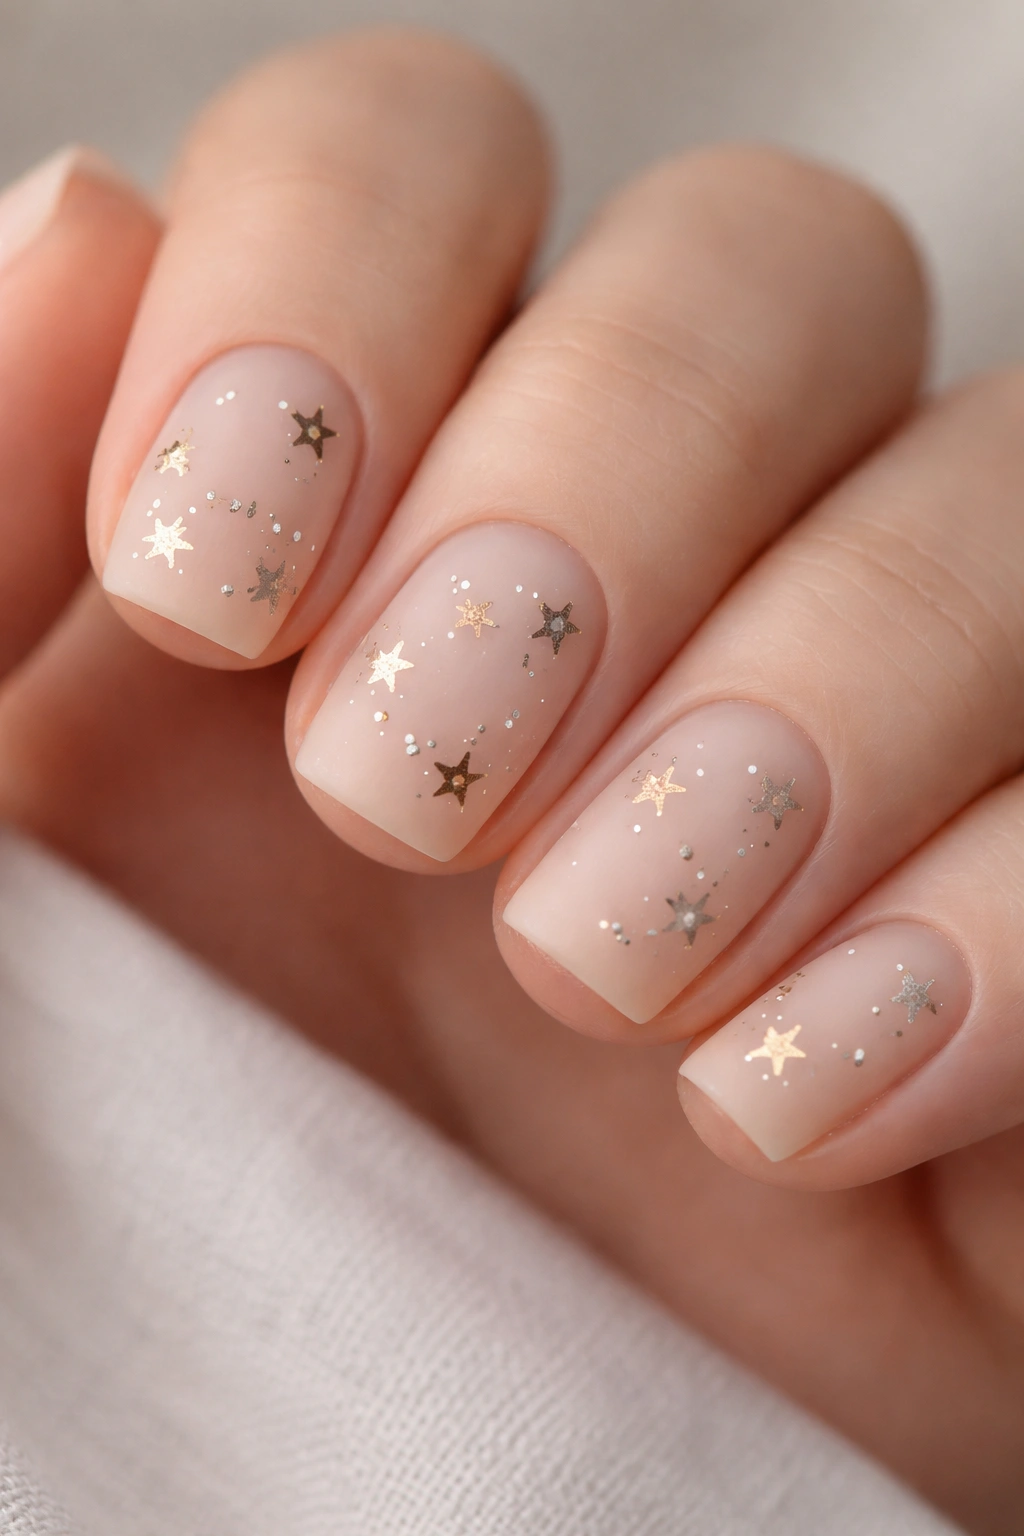
This design uses a nude or neutral tan base as the foundation, then adds stars in various metallic tones—gold, silver, rose gold—scattered across the nails. Negative space (small areas where the nail itself shows through without any color) adds intentional, sophisticated detail between the stars.
Why This Design Works
Nude nails elongate the fingers naturally, and adding stars prevents them from feeling boring or incomplete. Negative space adds a contemporary, modern edge, making what could be a basic design feel curated and intentional. This is perfect for anyone who loves understated elegance—the design is there if you’re looking for it, but doesn’t announce itself loudly.
Creating Intentional Negative Space
- Paint nude base, leaving tiny sections (small circles, curved sections, or geometric shapes) unpainted
- Add metallic stars to the colored areas, occasionally letting stars hover near the negative-space sections
- The unpainted areas should feel purposeful, not accidental—maybe 3-5 small spots per nail
- Seal with matte or satin top coat to emphasize the sophisticated, non-glitzy vibe
Best for This Design
This design suits professional environments, minimalist personalities, and anyone who appreciates understated beauty. It’s the “quiet confidence” of nail designs.
9. Teal with White Star Tips and Gradient Fade
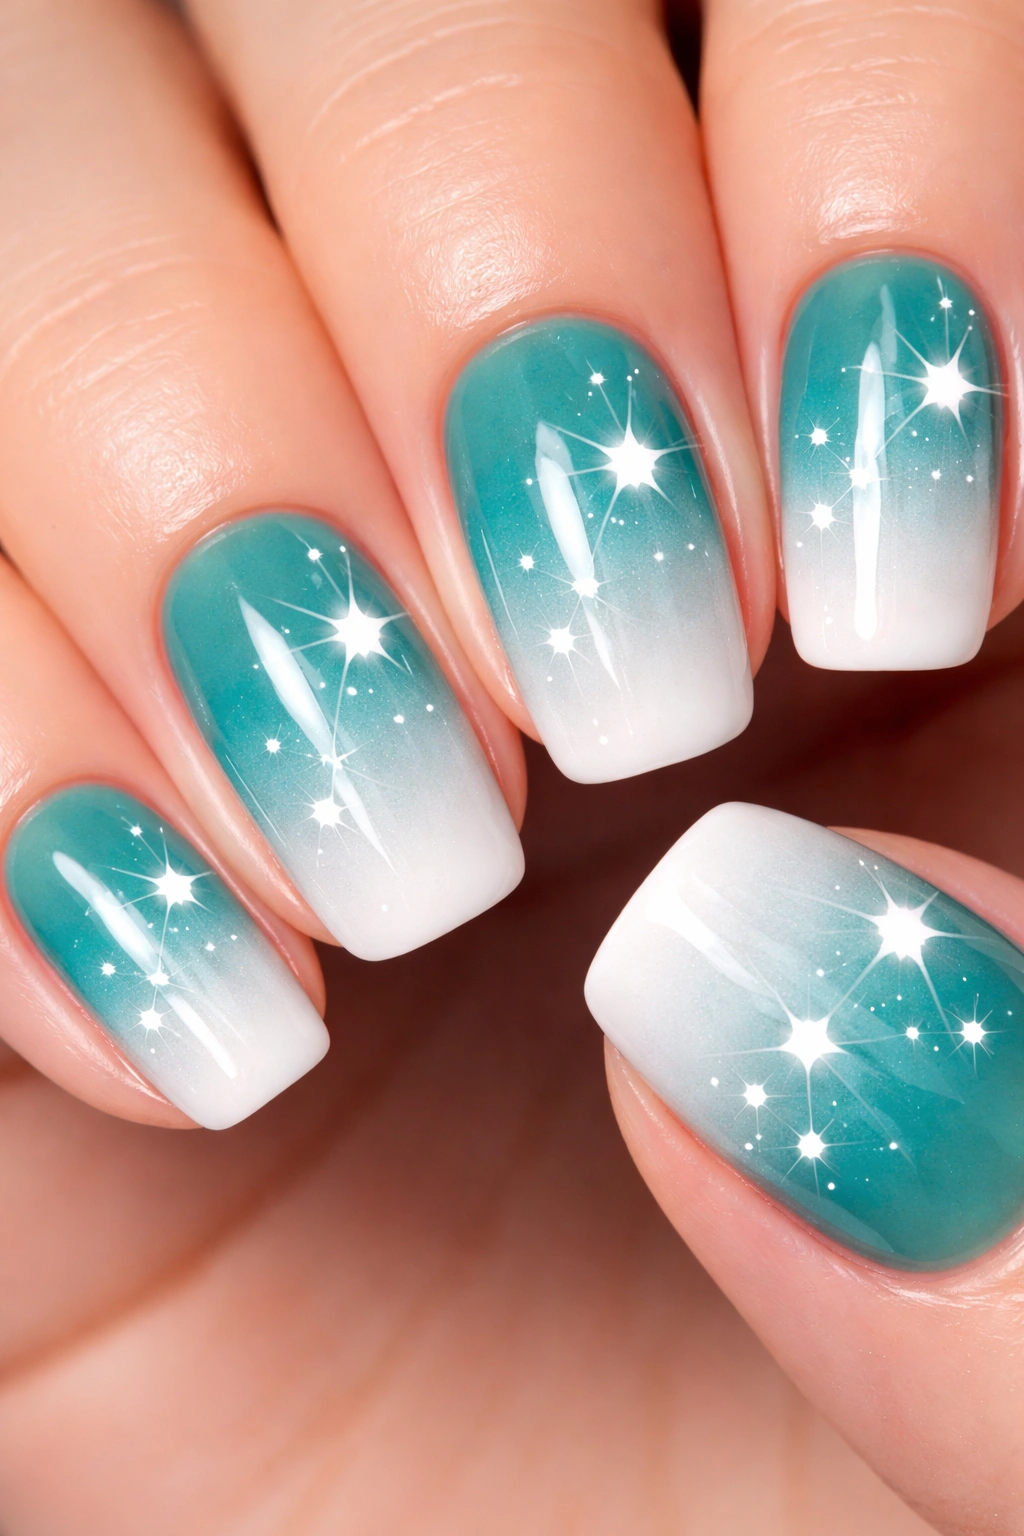
Picture bright teal transitioning to white at the tips, with white stars strategically placed in the teal section and wrapping slightly onto the gradient. The stars create a cohesive flow from base to tip, and the teal-to-white transition feels modern and intentional.
Why This Design Works
Teal sits in that perfect sweet spot between blue and green, suiting cool, warm, and neutral skin tones beautifully. The gradient to white keeps the design bright and fresh, while the stars prevent it from reading as a basic ombré. This design has movement and direction—it’s visually interesting from every angle.
Color Transition Technique
- Apply teal base to full nail
- Use a makeup sponge to blend white polish onto the tip section (stipple, don’t swipe)
- Create soft, feathered transition rather than sharp line
- Paint stars with white gel or polish, allowing some to straddle the gradient line
- Seal with glossy top coat for shine that makes the gradient smooth and the stars pop
Skill Level Assessment
This design requires basic blending skills (sponging, not perfection) and confidence with a thin brush for stars. It’s intermediate rather than beginner, but genuinely achievable with one or two practice attempts.
10. Champagne Gold with Tiny Black Stars and Minimalist Lines
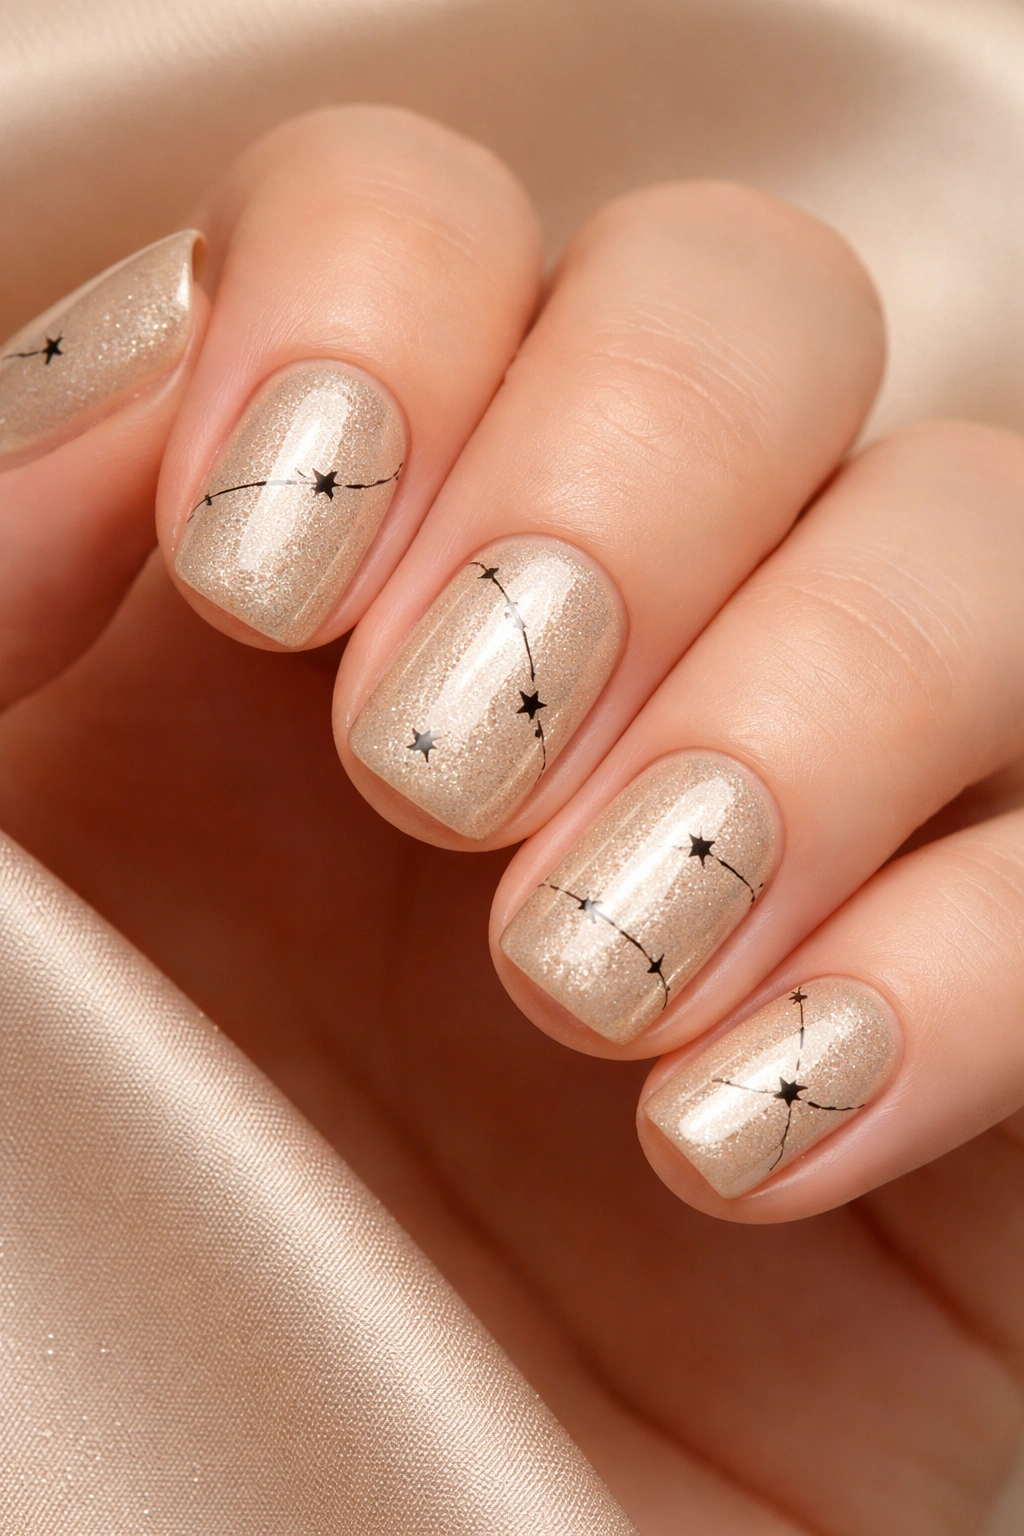
Luxe champagne gold pairs with tiny black stars scattered minimally across the nail—maybe just 1-2 stars per finger rather than a full constellation. Add hair-thin black lines (geometric, organic, or flowing) that connect or complement the stars, creating an understated but sophisticated composition.
Why This Design Works
Champagne gold is inherently glamorous, feeling sophisticated and flattering on virtually every skin tone. Black lines add artistic detail without overwhelming, and the minimal star placement prevents the design from feeling cluttered. This is the ultimate “less is more” approach—every element earns its place in the composition.
Creating Hair-Thin Details
- Use a detail brush thin enough that you can create lines the width of a strand of hair
- Practice on a practice wheel first—these details require a steady hand, but are totally learnable
- Alternatively, use a gel pen with an ultra-fine tip for more controllable precision
- Let lines guide the eye to stars rather than existing independently
Occasions That Suit This Design
Champagne gold with black minimalism feels upscale, creative, and confident. It’s perfect for formal events, professional success moments (promotions, important presentations), or any time you want to feel seriously polished. The design says “I have excellent taste” without saying a word.
Final Thoughts
Short squoval star nails brilliantly balance playfulness with polish, creativity with practicality, and style with accessibility. Whether you’re drawn to sophisticated jewel tones, soft pastels, bold contrasts, or minimalist elegance, there’s a star design on this list that will make you genuinely excited about your manicure. The beauty of stars as a design element is that they work in literally any color combination, from unexpected pairings to classic neutrals—they simply require you to choose colors that make you feel confident.
The most important part of creating any nail art at home is giving yourself grace during the learning curve. Your first attempt at detailed stars might be slightly wobbly, your gradients might be softer than you intended, or your glitter application might not be perfect. Every single detail improves dramatically with practice, and even slightly imperfect nail art displays intention and creativity that transcends technical perfection.
Start with whichever design speaks to you most strongly—the one that makes you think “I want that” rather than the one that seems easiest. Your enthusiasm for the design will carry you through any learning curve, and you’ll end up with nails you genuinely love wearing. Whether you’re creating these designs yourself or bringing reference photos to a nail technician, short squoval star nails offer the perfect combination of adorable charm and sophisticated style that makes them endlessly wearable across seasons, occasions, and moods.
