

If you’ve scrolled through social media lately, you’ve probably noticed nails that look like liquid watercolor paintings, mesmerizing marble patterns, and swirling abstract designs that seem to move right before your eyes. Welcome to the world of blooming gel nail art—a technique that transforms your manicure into a wearable work of art without requiring the precision and advanced skills of traditional nail design.
The magic behind blooming gel lies in its special formulation. Unlike regular gel polish, which sets and stays exactly where you apply it, blooming gel has a thinner consistency that allows colors to spread, drift, and blend organically across the nail surface. When you drop gel polish onto wet blooming gel, the colors expand and create patterns that are impossible to replicate exactly twice—every single manicure becomes a unique masterpiece. The best part? You don’t need to be a professional nail artist to achieve salon-quality results. With a few basic tools and some experimentation, anyone can master this technique at home.
What makes blooming gel designs so captivating is how they combine simplicity with stunning results. You’re essentially applying color to a specially formulated base and letting physics and chemistry do the creative work. The designs can range from delicate and minimalist to bold and vibrant, making blooming gel incredibly versatile for different styles and occasions. Whether you’re drawn to the elegance of marble, the playfulness of tie-dye, or the sophistication of abstract patterns, there’s a blooming gel design waiting for you.
1. Marble Effect Blooming Gel Nails
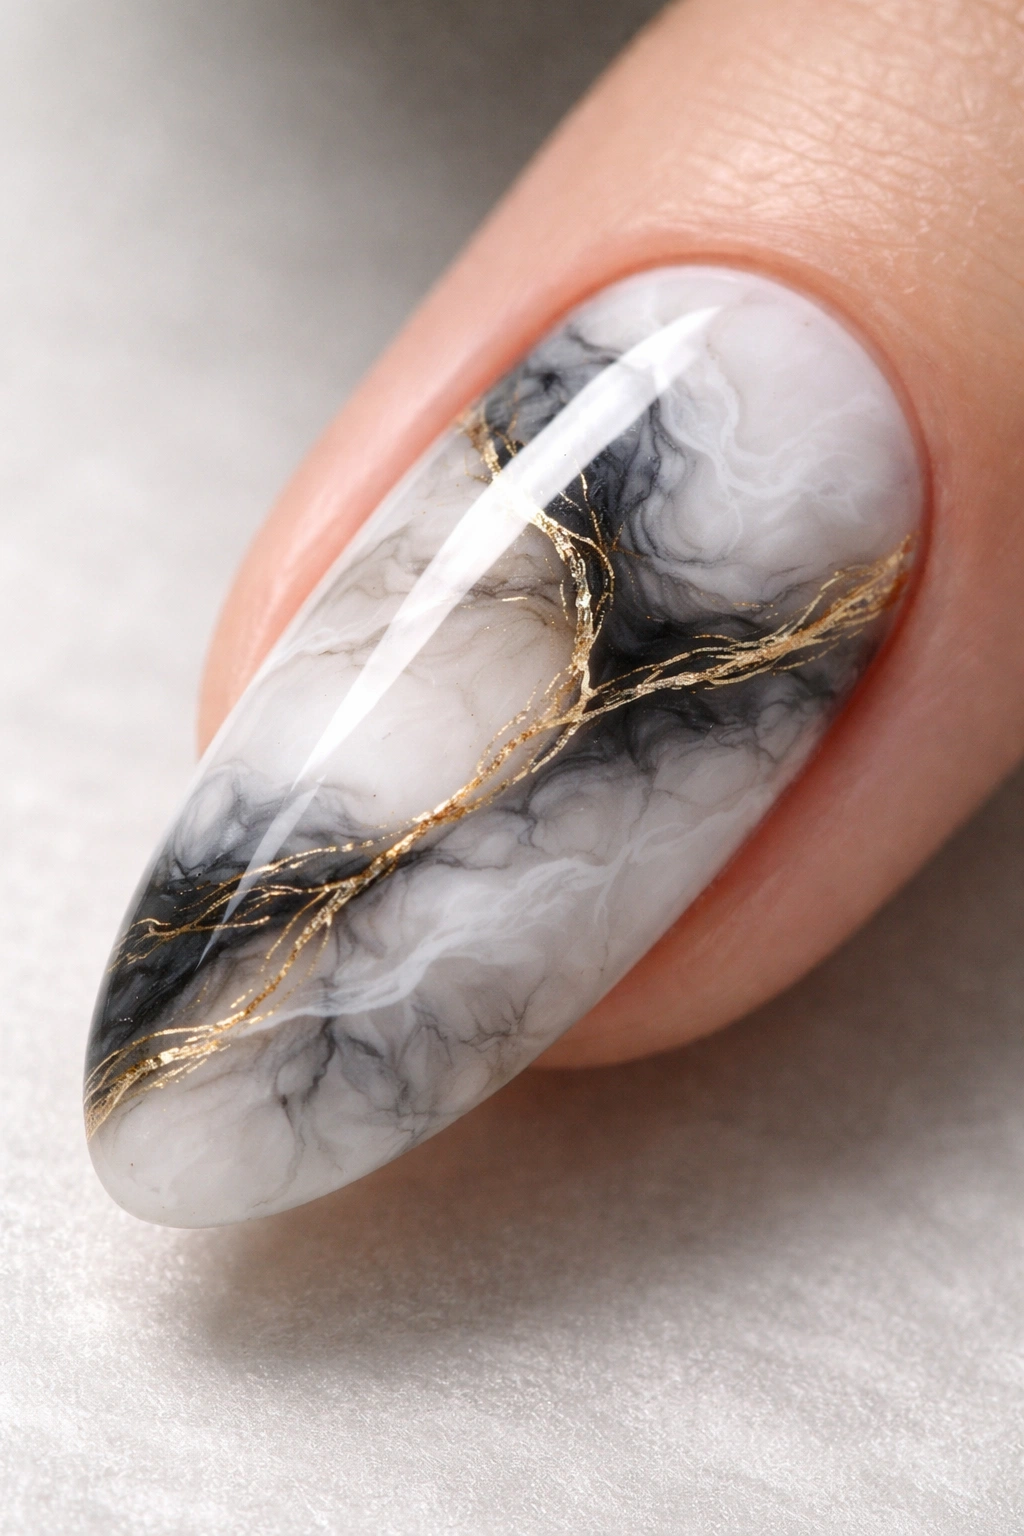
Achieve the timeless sophistication of marble stone directly on your fingertips using blooming gel. This classic design works by layering contrasting colors—typically whites, blacks, grays, and golds—that blur and blend together to mimic the natural veining found in real marble. The beauty of this technique lies in how the blooming gel softens hard lines into those characteristic swirling patterns you see in luxury stone.
Why Marble Works So Well for Blooming Gel
Marble designs benefit tremendously from blooming gel’s diffusing properties. The sharp contrasts between light and dark colors create natural definition without requiring you to draw crisp lines, making it beginner-friendly despite looking incredibly polished and expensive. The watercolor effect actually enhances the marble aesthetic, giving it that soft, high-end look that solid colors or regular gel polish can’t quite achieve.
How to Create This Design
- Apply a white or nude base color as your foundation and cure completely
- Add a thin layer of blooming gel without curing
- Using a fine detail brush, draw thin black, gray, or gold lines in various directions across the nail
- Allow the colors to spread naturally for 10-30 seconds—the blooming gel will soften the lines
- For deeper veining, drag your brush through the wet blooming gel to create feathered patterns
- Cure once you’re happy with the effect, then seal with a top coat
Pro tip: The key to believable marble is varying your line thickness and direction. Some strokes should be thin and delicate, while others are bolder and more prominent—just like real marble stone. Curing between layers also allows you to build depth and add more veining for enhanced dimensionality.
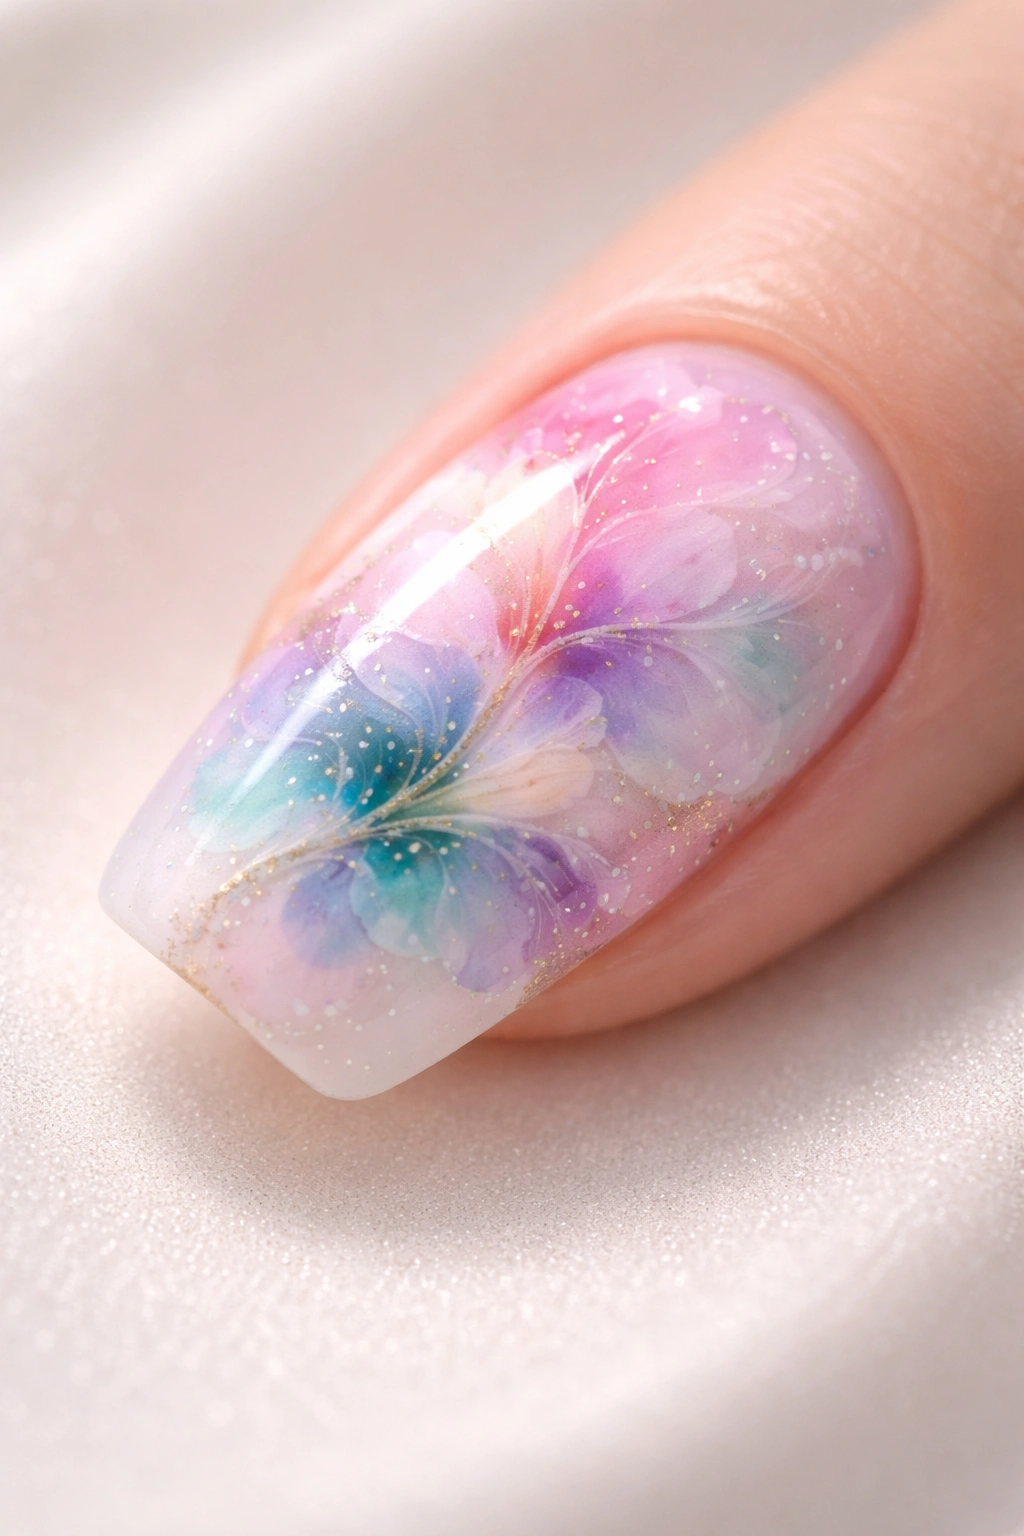
2. Watercolor Floral Blooming Gel Nails
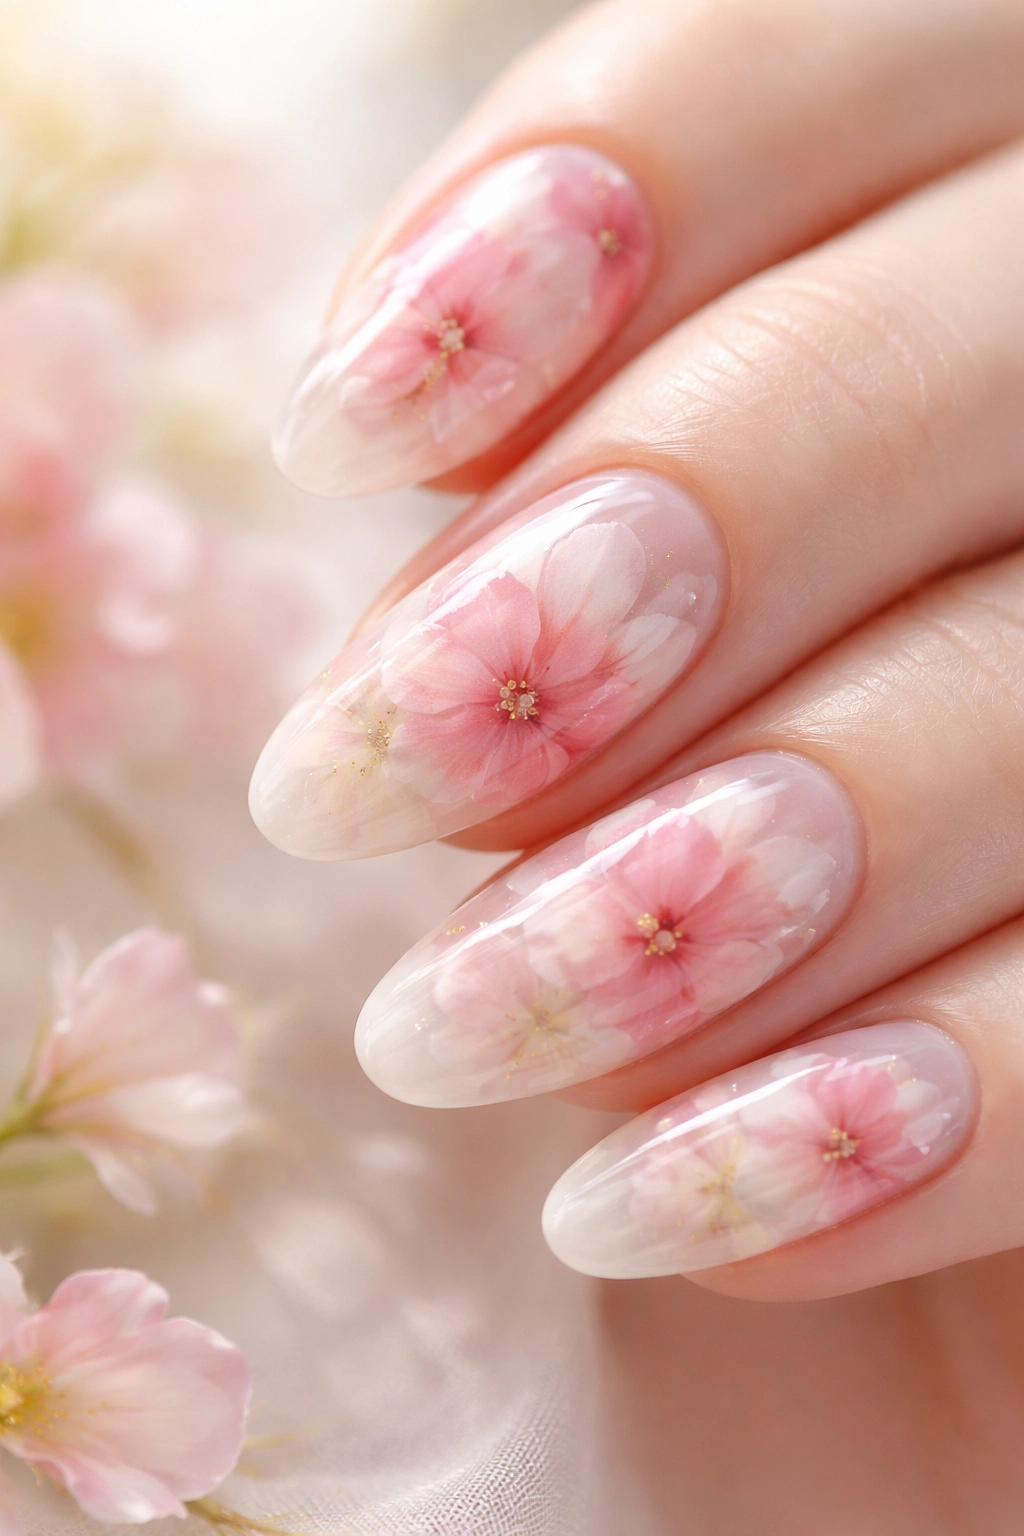
Watercolor floral designs bring painterly elegance to your manicure, creating the impression that an actual artist has hand-painted tiny flowers directly on your nails. These designs use soft, blended colors in petal shapes that seem to fade and bloom naturally across the nail surface. The organic quality of blooming gel makes watercolor florals look authentically artistic rather than stiff or artificial.
The Beauty of Watercolor Blooms
What sets watercolor florals apart from traditional floral nail art is how forgiving the technique is. You don’t need to paint perfect petals—you’re creating loose color placement and letting the blooming gel handle the blending. This makes it ideal for spring and summer events, bridal celebrations, or anyone who loves botanical aesthetics without the rigid precision typically required for floral designs.
Creating Your Own Watercolor Flowers
- Start with a light base color (soft pink, cream, or pale yellow work beautifully)
- Apply blooming gel as your working layer and leave it uncured
- Using a dotting tool or fine brush, place dots of your chosen petal colors in circular or organic patterns
- Add a contrasting center color to define the flower’s focal point
- Let the gel spread for 15-20 seconds before adding depth with a darker shade
- Cure and seal with top coat for a glossy, finished appearance
Worth knowing: Soft pastel colors create a dreamy, romantic aesthetic, while richer jewel tones (deep purples, emerald greens, burgundies) make florals feel more dramatic and luxurious. You can also combine both approaches on different nails for a multi-mood manicure that keeps things visually interesting.
3. Tortoiseshell Blooming Gel Nails

Tortoiseshell nails—often called “tortie” nails—recreate the warm, rich, multi-toned aesthetic of actual tortoiseshell. This design layers translucent shades of browns, ambers, blacks, and creams, allowing them to blend into a semi-transparent, dimensional effect that looks incredibly sophisticated and effortlessly high-end. Unlike solid-color tortoiseshell, blooming gel tortie has a softer, more organic quality.
Why Tortoiseshell Is Always in Style
Tortoiseshell works across all seasons and pairs seamlessly with virtually any outfit. The neutral yet eye-catching nature of the design bridges casual and formal wear, making it suitable for both everyday manicures and special occasions. The technique also showcases blooming gel’s ability to create depth—the layered, translucent effect gives your nails a 3D quality that single-color polish simply can’t match.
Technique for Authentic Tortoiseshell Effect
- Apply a sheer nude or soft orange base color and cure completely
- Layer blooming gel over the base without curing yet
- Drop dots of chocolate brown, black, and amber in random areas across the nail
- Allow colors to spread and overlap naturally—this overlap creates the signature dimension
- For added richness, apply a second layer of blooming gel after curing and add more colors
- The translucent nature means lighter colors will show through darker ones, creating natural blending
Insider note: Tortoiseshell looks more upscale when you use a sheer or translucent base rather than an opaque one. The semi-transparent quality makes the design feel luxurious and intentional rather than accidental or muddy. This is one design where less opacity actually creates more impact.
4. Tie-Dye Blooming Gel Nails
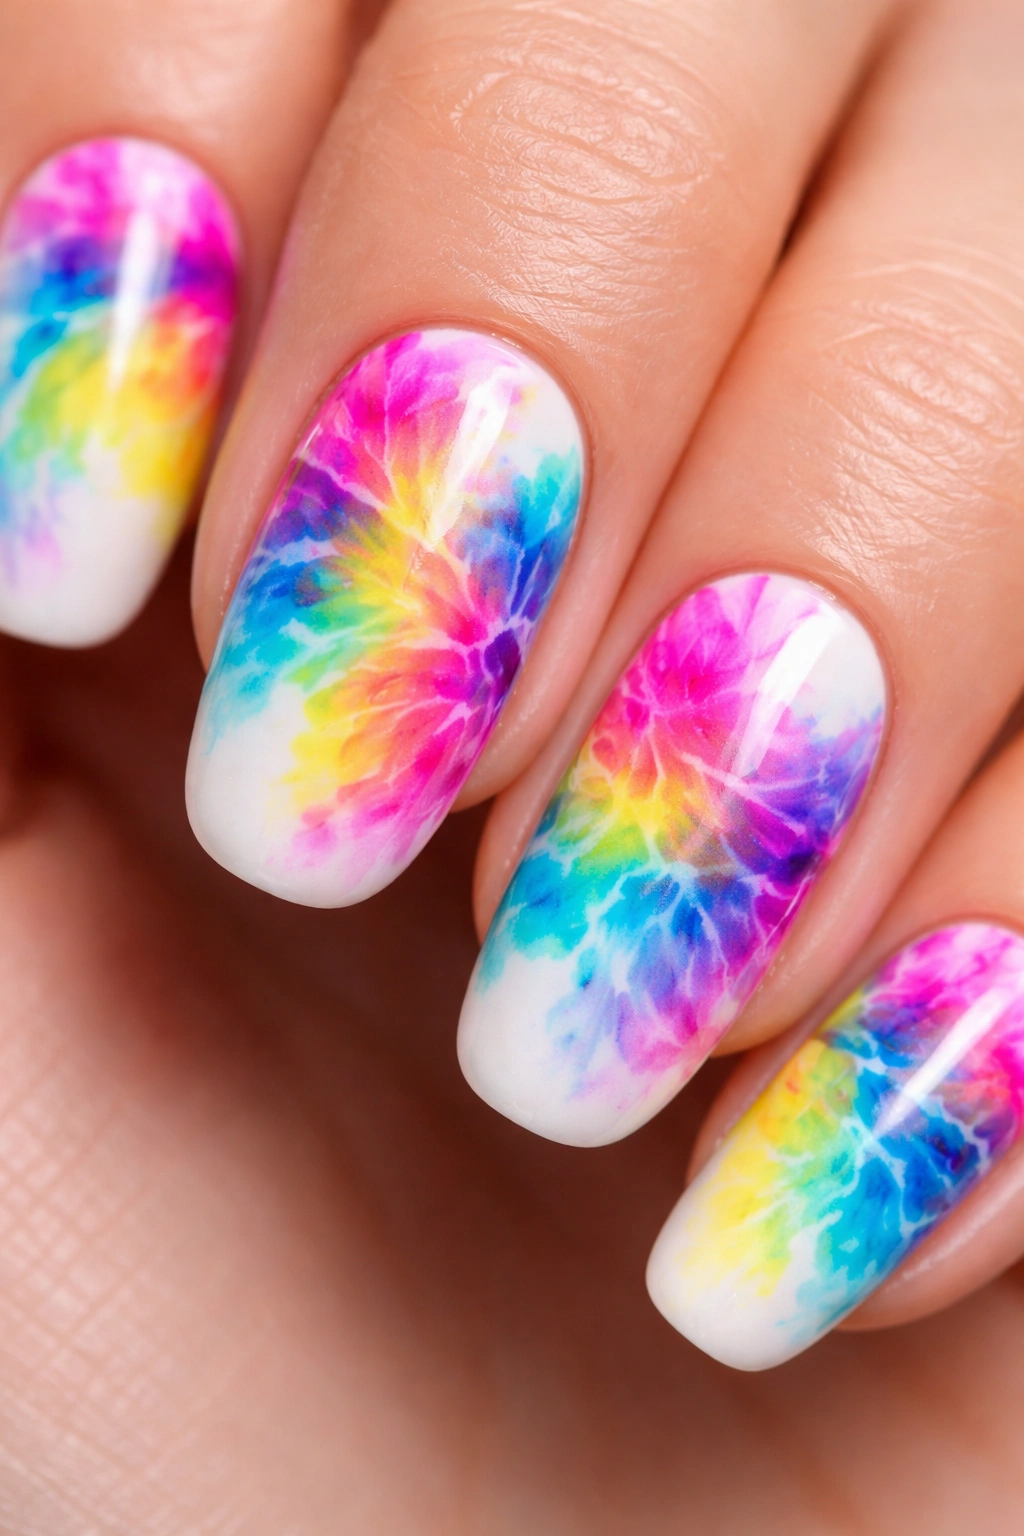
Bring the carefree energy of ’70s tie-dye directly to your fingertips with vibrant, swirling color combinations that celebrate the bohemian aesthetic. Tie-dye blooming gel nails are joyful and playful, featuring neon pinks, electric blues, sunshine yellows, and bold purples that blend into organic, unpredictable patterns. Each nail ends up completely unique, making this design perfect for anyone who loves spontaneity and self-expression.
Why Tie-Dye Embraces the Unpredictability
The beautiful thing about tie-dye blooming gel designs is that “mistakes” are actually part of the charm. Since the whole aesthetic celebrates organic, uncontrollable color blending, you can’t really go wrong. This makes it one of the most forgiving blooming gel designs for beginners, and it’s also wildly fun to create—watching colors spread into a tie-dye pattern is genuinely satisfying.
Step-by-Step Tie-Dye Application
- Apply a white or clear base to provide a clean canvas for vibrant colors
- Add a thin layer of blooming gel without curing
- Drop dots of bright colors across the nail, spacing them out to allow room for spreading
- Wait 15-25 seconds and watch the colors bloom and merge into each other
- For added visual interest, drag a detail brush through some of the color spots in a single direction
- Cure once colors have spread to your liking, seal with top coat
Fun fact: The longer you wait before curing, the more the colors will blend and spread, creating a softer, more blended tie-dye effect. If you prefer more defined color sections, cure sooner. Experiment to find your preferred level of color integration.
5. Snakeskin and Reptile Print Blooming Gel Nails
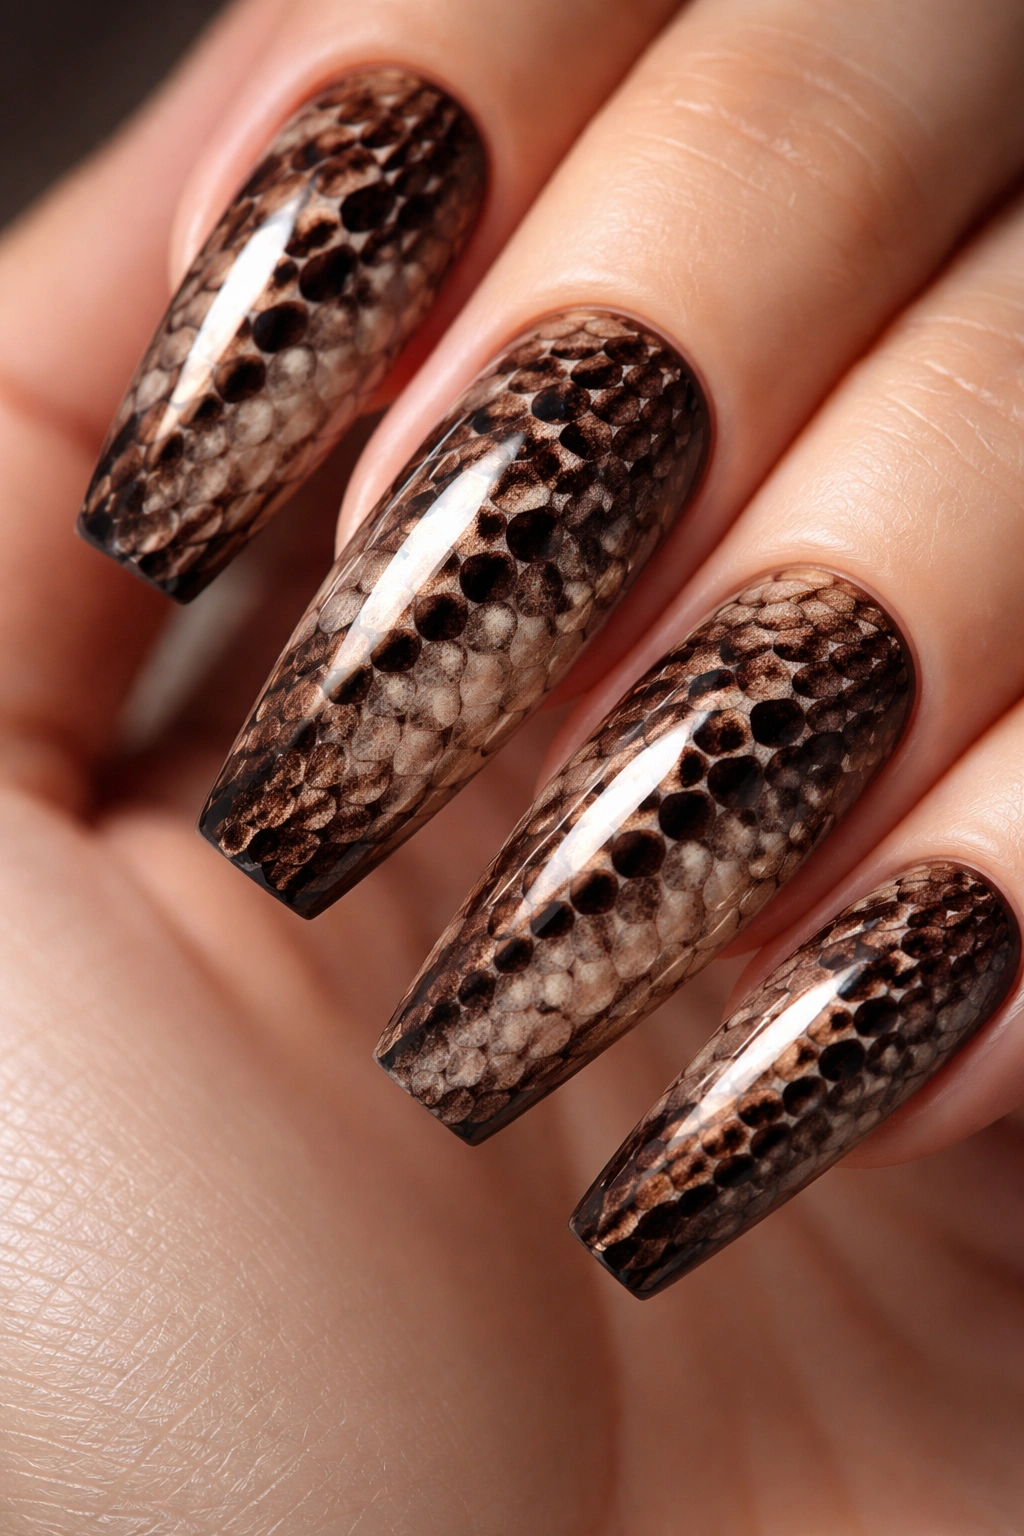
Transform your nails into an edgy fashion statement with snakeskin or crocodile-textured designs created through blooming gel. This design uses overlapping dots and dragged brush strokes to create scale-like patterns reminiscent of actual reptile skin. Chocolate browns, blacks, and nude tones create the most realistic effect, though you can also play with unexpected color combinations like iridescent greens, metallics, or high-fashion pastels.
The Fashion-Forward Appeal of Reptile Prints
Snakeskin nails make an undeniable style statement—they’re bold, textural, and sophisticated in a way that demands attention. This design works beautifully for those who want to push creative boundaries and experiment with something beyond traditional florals or pastels. The blooming gel technique adds dimension to the scale pattern, making it look almost three-dimensional and incredibly realistic.
Creating Your Own Reptile Texture
- Apply a nude, cream, or light brown base color to mimic skin tone
- Apply uncured blooming gel over the base
- Drop dots of a contrasting dark color (black or deep brown) in overlapping, irregular rows
- Drag a fine brush through each row of dots in one direction to create the scale effect
- Add another row with a different shade if desired for enhanced texture and depth
- Cure and finish with a matte or glossy top coat depending on your preference
Pro tip: The scale pattern looks most realistic when the dots and dragged lines follow a slight directional flow, just like real reptile skin. Don’t make it perfectly symmetrical—natural reptilian patterns are wonderfully irregular and asymmetrical. Varying your dot sizes and spacing also creates more authentic texture.
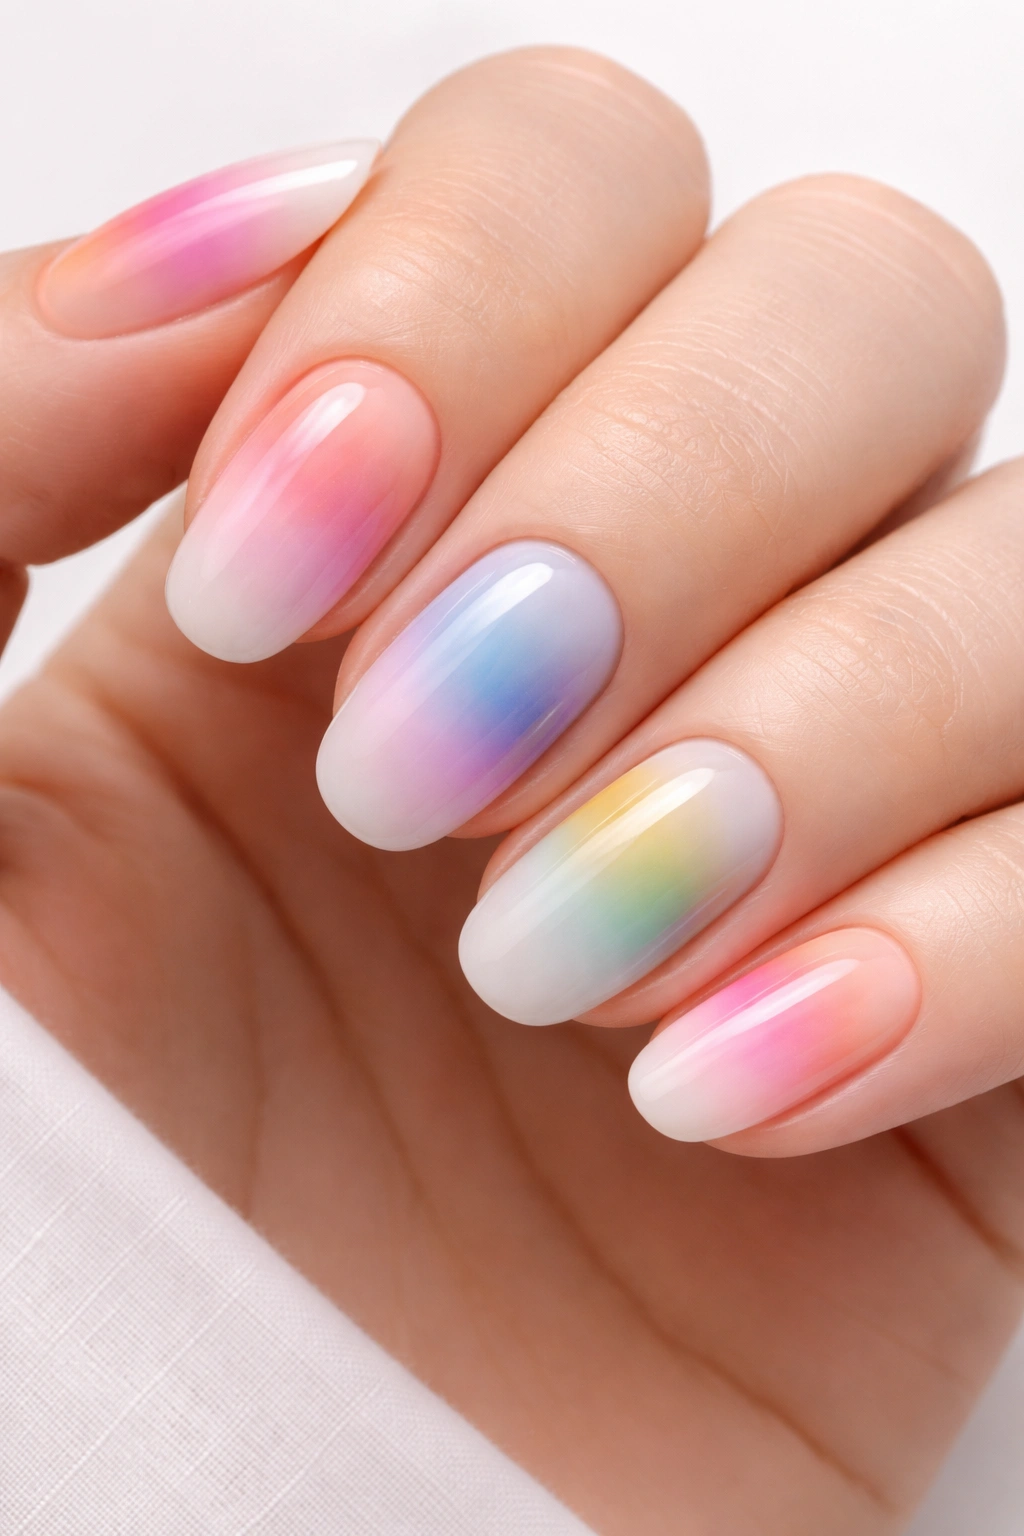
6. Aura Blooming Gel Nails

Aura nails capture the mystical vibe of a glowing energy field right on your fingertips, creating an ethereal, almost spiritual aesthetic. These designs feature a soft gradient or halo effect, typically starting with a lighter color in the center and blooming into deeper, richer tones toward the edges. The result is an airbrushed, luminous quality that feels modern, artistic, and undeniably Instagram-worthy.
The Spiritual and Aesthetic Appeal of Aura Designs
Aura nails combine current wellness aesthetics with genuine artistic beauty. They appeal to those seeking something beyond traditional manicures—something that feels intentional and visually striking. The soft gradient effect creates an almost meditative quality, and the endless color combination possibilities mean you can match your aura design to your mood, your outfit, or the season.
How to Build Your Own Aura Effect
- Start with a light pink, nude, or white base color as your foundation
- Cure the base completely before proceeding
- Apply a thin layer of blooming gel in the center of the nail
- Drop a slightly deeper color around the perimeter while the blooming gel is still wet
- The color will naturally bloom outward from the center, creating a gradient or halo effect
- For multi-color auras, add a third accent color between your primary and secondary shades
- Allow spreading for 15-25 seconds, then cure under the lamp
Worth knowing: The most striking aura designs use colors that complement each other—analogous colors on the color wheel create harmonious gradients, while contrasting colors produce more dramatic, eye-catching effects. Soft pastels feel ethereal and dreamy, while deeper jewel tones look more sophisticated and intentional.
7. Abstract Smoky Effect Blooming Gel Nails
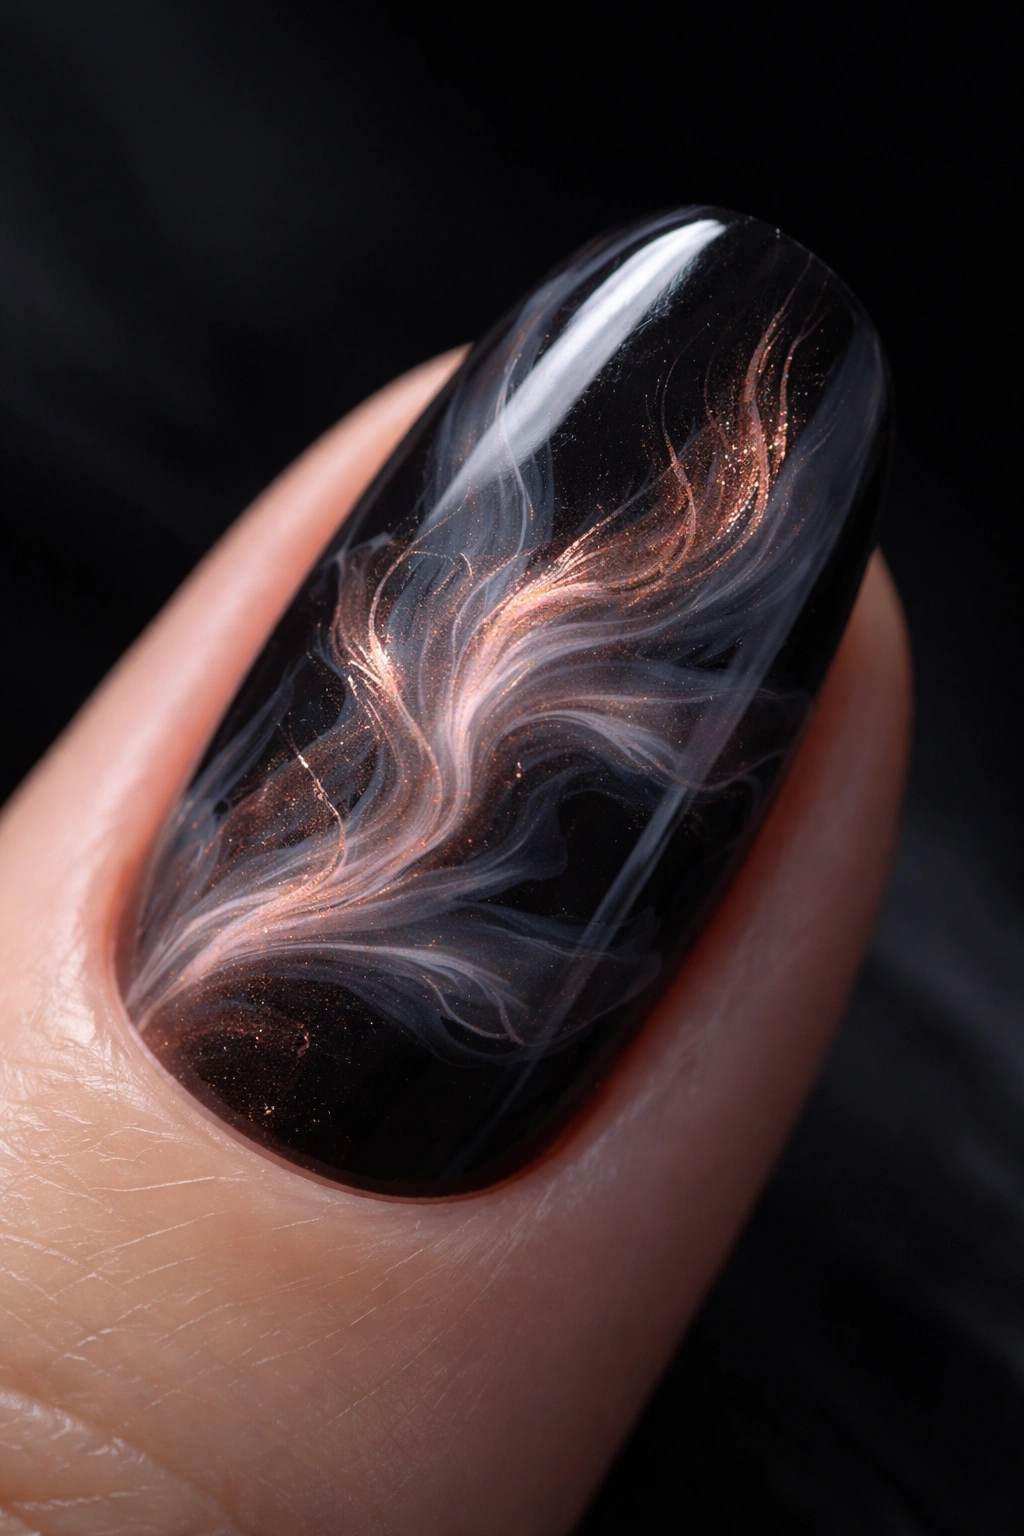
Create a moody, mysterious manicure with the smoke effect—an abstract design that mimics the wispy, flowing movement of actual smoke. This technique uses light colors dragged through darker bases to create ethereal, atmospheric patterns that feel artistic and deeply sophisticated. Smoky effects work beautifully in dark palettes (blacks, grays, deep purples) or in unexpected combinations like dusty rose bleeding into charcoal.
Why Smoke Effects Feel So Artistic
The smoke effect showcases blooming gel’s ability to create truly organic, unpredictable designs. Unlike geometric nail art, which requires precision, smoke effects celebrate movement and flow. The resulting designs feel like actual art—the kind of abstract work you’d see in a gallery. This makes smoky effects perfect for creative individuals, artists, and anyone who wants nails that feel genuinely unique.
Achieving the Perfect Smoky Look
- Apply a dark base color (black, deep gray, or dark purple) and cure fully
- Add a layer of blooming gel without curing
- Using a fine brush or toothpick, draw thin, wavy lines of light color (white, light gray, or rose gold) across the nail
- Drag the light color through the darker base with soft, flowing strokes
- Allow the blooming gel to spread and diffuse the light color into wispy patterns
- The effect should resemble smoke gradually dispersing into the darker background
- Cure once you achieve your desired level of diffusion
Insider secret: The most convincing smoke effects use curved, flowing lines rather than straight ones. Gentle waves and organic curves mimic actual smoke movement far better than rigid patterns. Working slowly and deliberately also gives you better control over where colors disperse.
8. Simple Flower Patterns with Blooming Gel
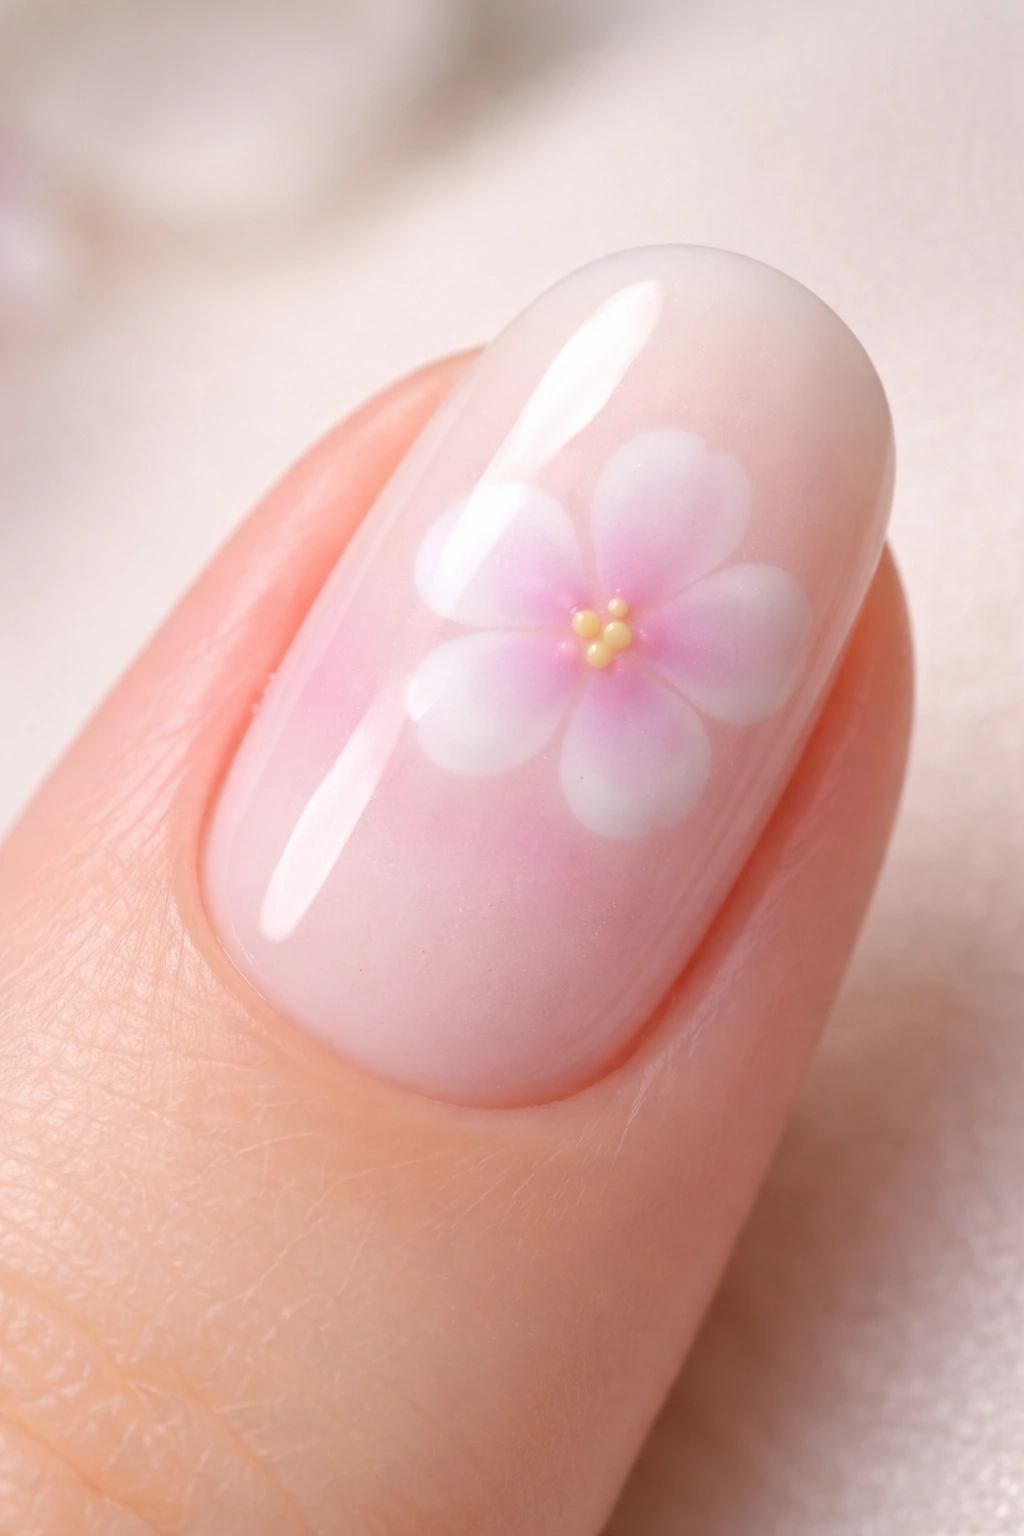
Simple flower designs prove that you don’t need advanced artistic skills to create beautiful botanical nail art. This technique involves placing five to seven small dots in a circle to form petals, then adding a contrasting center dot for dimension and definition. The blooming gel handles the rest, softening your dots into delicate, realistic-looking petals that appear professionally executed.
Why Simple Flowers Work for Every Skill Level
Simple flower patterns are arguably the most beginner-friendly blooming gel design. Five dots arranged in a circle is something anyone can accomplish, yet the blooming gel transforms those basic dots into actual flowers with soft, blended petals. This design builds confidence for new blooming gel users and proves that minimal effort can yield maximum visual impact—a deeply satisfying realization.
Creating Effortless Blooming Flowers
- Apply your chosen base color (pastels work beautifully for spring and summer) and cure completely
- Layer blooming gel over the base without curing
- Using a dotting tool or thin brush, place five dots in a loose circular pattern for petals
- Leave slightly more space between petals than you might normally—the blooming gel will fill this space
- Add a contrasting center dot (darker color, gold, or glitter) directly in the middle
- Allow the gel to spread naturally, transforming your dots into soft, organic petals
- Cure once colors have bloomed to your liking
Fun fact: You can create clustered bouquets by placing multiple small flowers across the nail, or create a single statement flower that takes up most of the nail surface. Varying flower sizes on different nails also creates visual interest while keeping the technique simple.
9. Colorblock Blooming Gel Nails
Colorblock designs divide the nail into distinct sections of contrasting colors that blend seamlessly where they meet, creating bold graphic designs with artistic flair. Unlike sharp geometric colorblocking, blooming gel colorblock nails feature soft transitions and blurred boundaries between color sections. This creates an interesting visual that bridges minimalist and artistic sensibilities—striking without being overwhelming.
The Contemporary Appeal of Colorblock Designs
Colorblock nails feel modern and intentional, the kind of design that speaks to someone with a strong sense of personal style. These designs showcase how blooming gel can create controlled effects when you want them—you have agency over where colors go, yet the blooming gel still adds that organic, artistic quality. It’s the perfect balance between precision and spontaneity.
Building Your Colorblock Effect
- Apply a neutral or light base color as the foundation
- Cure the base completely
- Add a thin layer of blooming gel without curing
- Apply your first accent color in a defined section (top half, left side, or diagonal—your choice)
- Apply a second complementary color in another section, allowing colors to kiss and blend slightly where they meet
- The blooming gel creates a soft transition zone between your blocks of color
- Optional: add a third color if desired, then cure
- Finish with a glossy or matte top coat
Pro tip: The most sophisticated colorblock designs use colors from the same family (different shades of pink, for example) or complementary colors from the color wheel. Unexpected combinations are fun, but cohesive color choices look more intentional and expensive.
10. Burgundy and Red Blossom Blooming Gel Nails
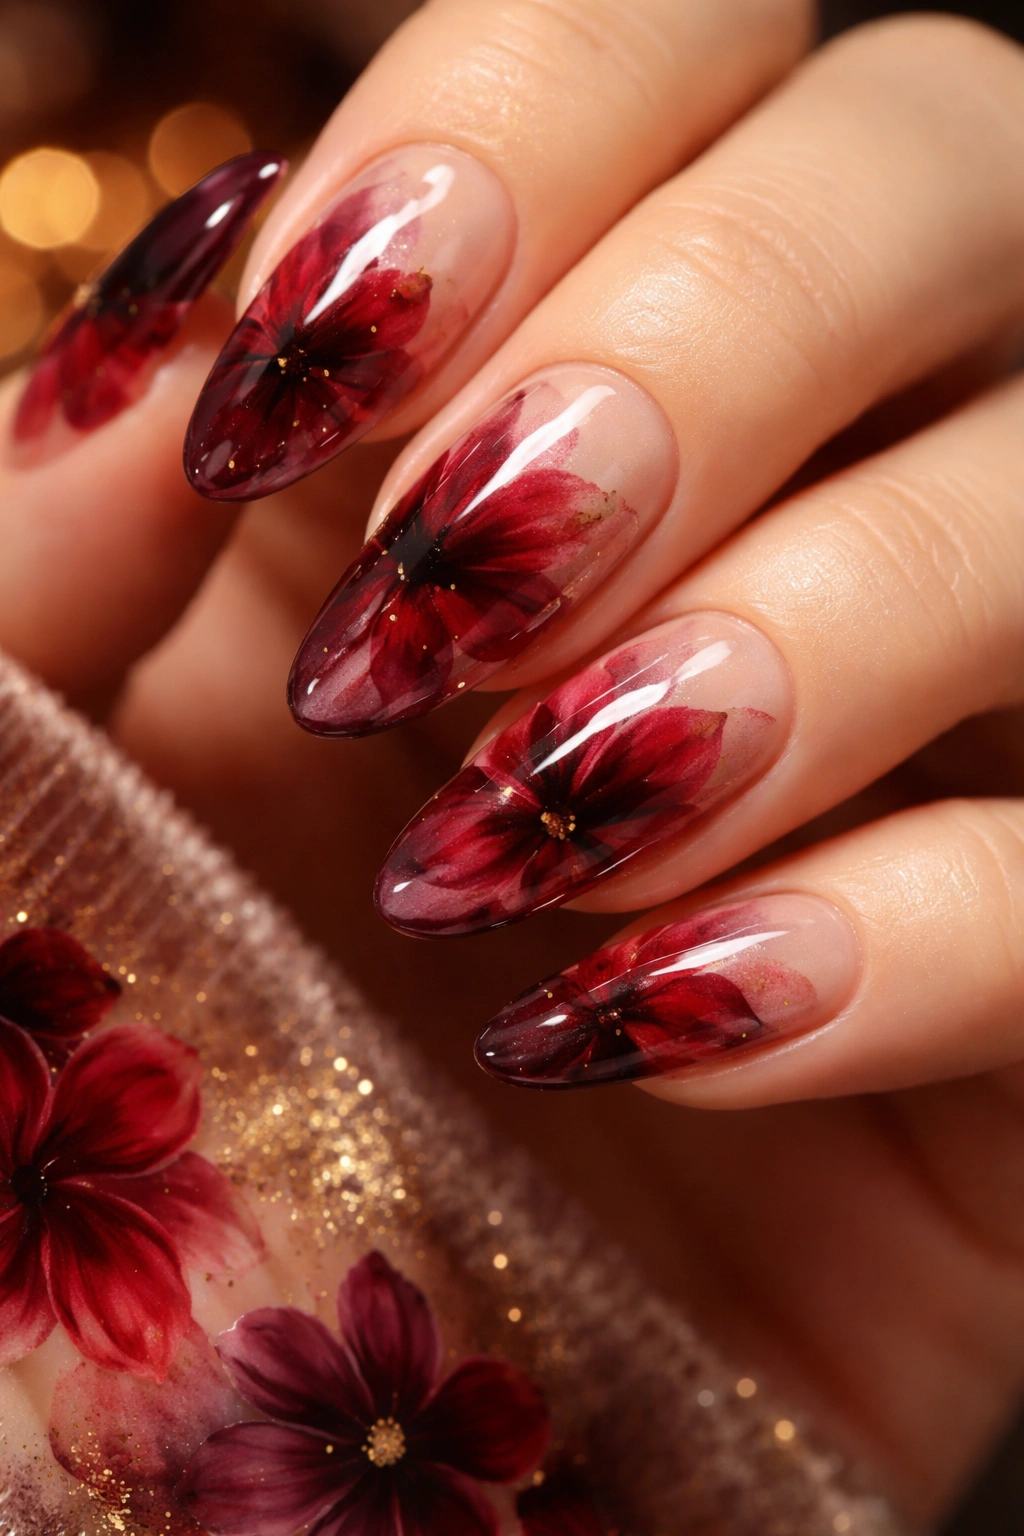
Embrace luxury and warmth with blooming gel designs in rich burgundy, wine, and deep red tones. These colors bloom with intensity and create an opulent, almost velvety appearance that feels both romantic and sophisticated. Whether shaped into floral patterns or used for moody marbled effects, burgundy and red blooming designs work beautifully for autumn, winter holidays, and any occasion calling for elegance and depth.
Why Rich Reds Command Attention
Burgundy and red blooming gel nails instantly elevate your appearance—there’s something inherently luxurious about these colors, especially when they’re executed with the soft, artistic quality that blooming gel provides. These designs work year-round but particularly shine during fall and winter months when richer tones feel seasonally appropriate. They pair beautifully with leather, metallics, and formal wear.
Techniques for Red and Burgundy Blooms
- Apply a sheer nude or ivory base to let the richer colors truly pop
- Add a layer of blooming gel without curing
- Drop burgundy and deep red dots in circular patterns for flowers, or scattered for abstract designs
- Add a gold or amber accent color to create warmth and depth within the blooms
- The translucent quality of these colors means they’ll blend beautifully with underlying shades
- For maximum luxury, top with a shimmer or metallic finish rather than plain gloss
- Cure once colors have bloomed to achieve your desired opacity level
Worth knowing: These deeper tones can sometimes appear muddy if you use too much color. Start with small dots and add more if needed—you can always build intensity, but it’s harder to lighten a design that’s already too dark. The beauty of burgundy blooming gel comes from allowing lighter base colors to show through.
Final Thoughts
Blooming gel nail designs offer something genuinely magical—the ability to create stunning, salon-quality nail art without years of practice or expensive professional equipment. Whether you’re drawn to the elegance of marble, the playfulness of tie-dye, the sophistication of snakeskin, or the ethereal beauty of aura nails, there’s a blooming gel design that speaks to your personal style.
The real power of blooming gel lies in how it democratizes nail art. These designs don’t require precision, steady hands, or advanced brushwork. They require only basic tools, a few quality gel polishes, and your willingness to experiment and have fun. Each time you create a blooming gel design, you’ll get something slightly different—and that unpredictability is part of what makes the technique so captivating.
Start with a design that calls to you, gather your supplies, and give it a try. You might surprise yourself with what you can create. And even if your first attempt doesn’t look exactly as you imagined, the beauty of blooming gel is that happy accidents often result in stunning designs you couldn’t have planned. That’s the magic of letting color spread and bloom right before your eyes.
