

Butterfly nail designs have captured the hearts of nail art enthusiasts everywhere, and honestly, it’s not hard to see why. These delicate yet striking designs bring a touch of natural elegance to your fingertips while offering endless creative possibilities. Whether you’re drawn to soft, whimsical pastels or bold, dramatic styles, there’s a butterfly nail design that speaks to your unique aesthetic.
The beauty of butterfly nail art lies in its versatility. You can rock these designs on short nails with minimalist touches, long almond shapes with intricate detail, or anything in between. They work beautifully for everyday wear, special occasions, seasonal celebrations, or whenever you want your hands to feel like wearable art. From delicate hand-painted butterflies to eye-catching 3D embellishments, the range of possibilities ensures you’ll find something that resonates with your personal style.
What makes butterfly nails particularly special is how they allow you to express personality through color, technique, and placement. A single butterfly accent can feel elegant and understated, while full-coverage butterfly garden designs feel playful and bold. The gentle curves and natural movement of butterfly wings translate beautifully to nail art, creating designs that feel both sophisticated and whimsical.
1. Classic French Tips with Delicate Butterfly Accents
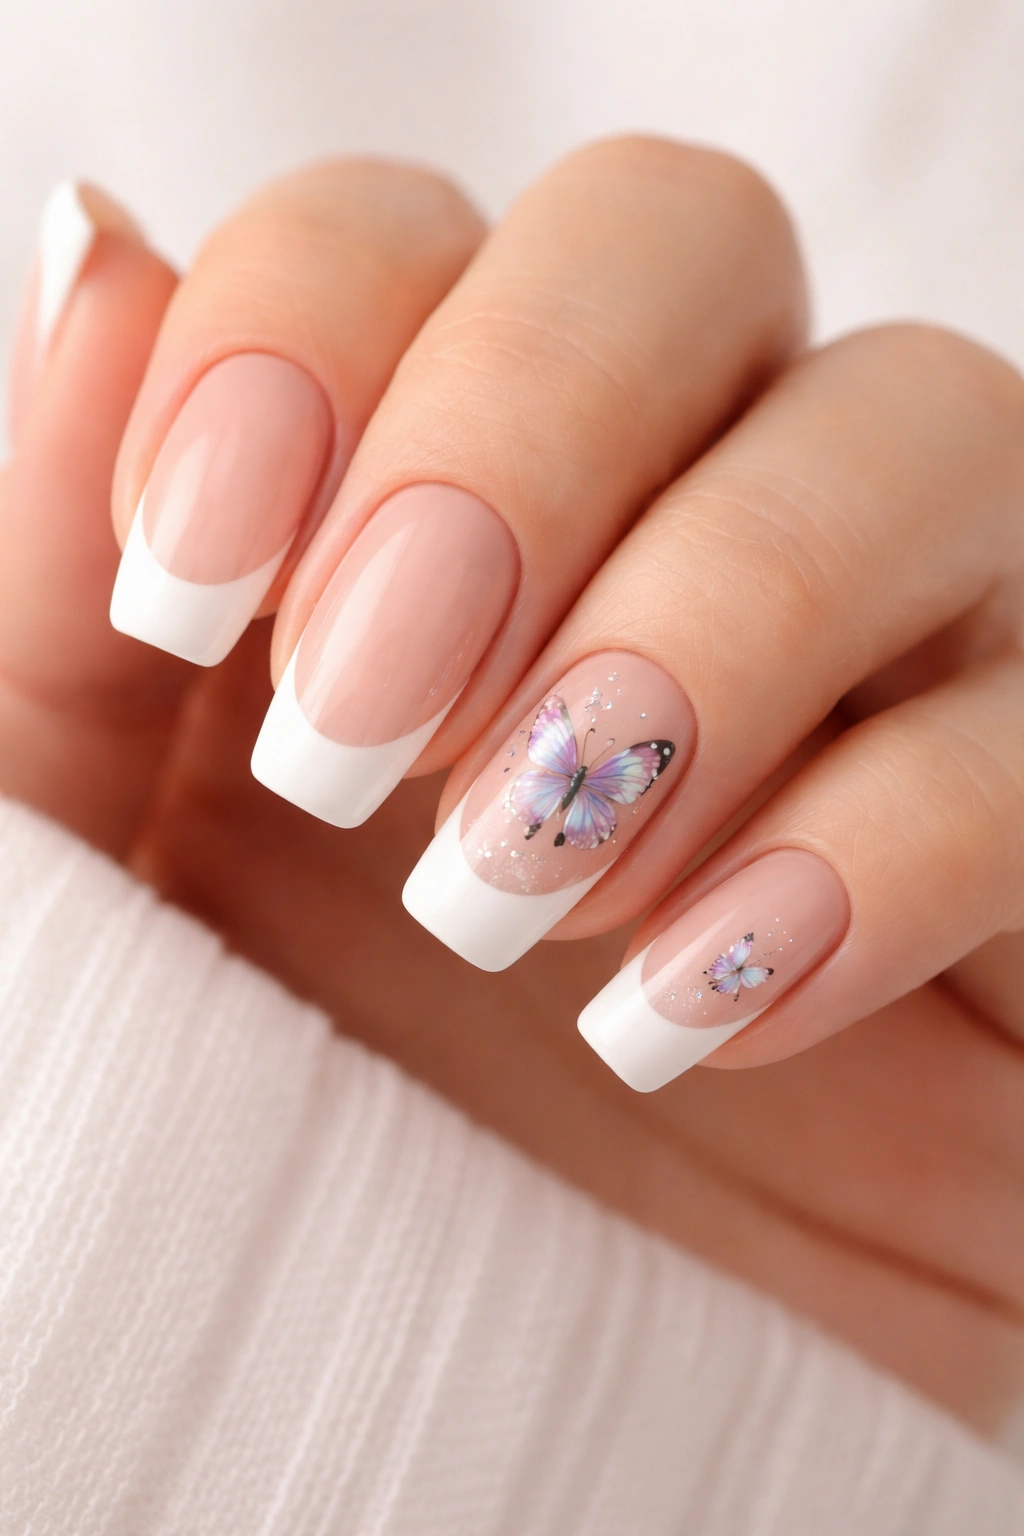
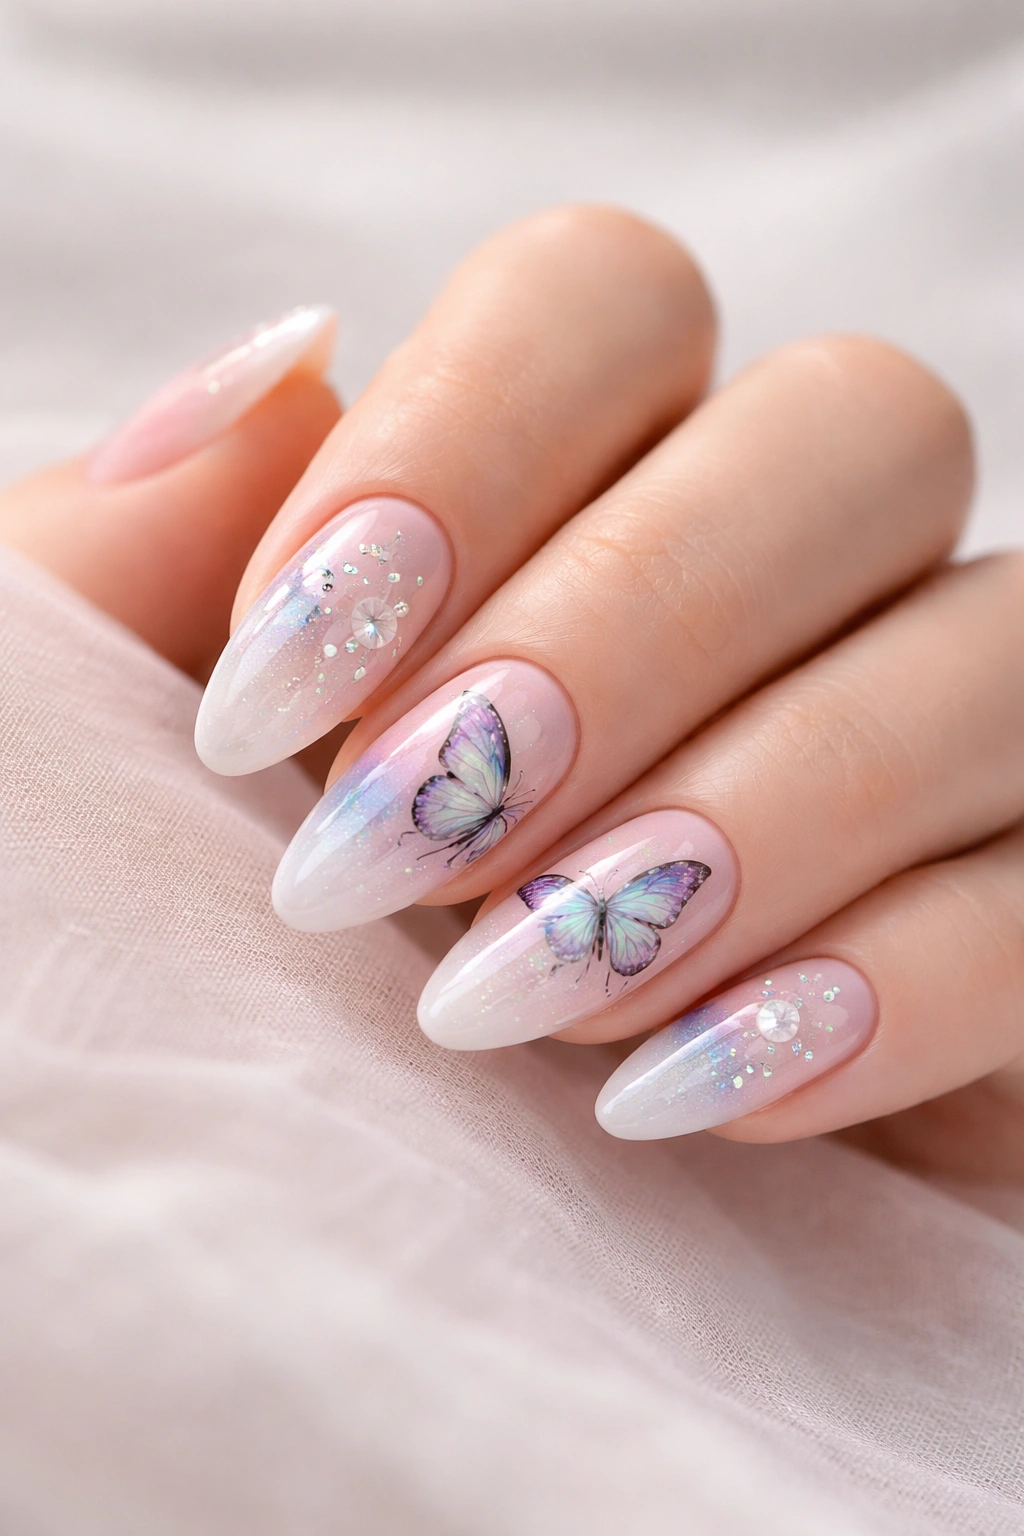
French manicures have always been a timeless choice, but adding butterfly elements transforms them into something truly special. The combination of crisp white tips with a nude or soft pink base provides the perfect neutral canvas for butterfly embellishments. Place a single delicate butterfly on your ring finger or distribute them across multiple accent nails for visual interest.
Why This Design Works So Well
The genius of adding butterflies to French nails is that it maintains the polished, professional aesthetic of the classic look while injecting personality and creativity. The contrast between the clean geometric lines of the French tip and the organic, flowing curves of butterfly wings creates visual dynamism. This design walks the line between boardroom-appropriate and genuinely artistic, making it suitable for both office settings and special events.
How to Create This Look
- Start with a perfectly filed and shaped nail (almond or coffin shapes work beautifully)
- Apply a neutral base color—think soft pink, beige, or nude
- Create crisp white tips using a thin brush or nail guide
- Use a fine nail art brush or toothpick to hand-paint delicate butterflies on one or two accent nails
- Add tiny details like antennae and wing patterns for dimension
- Seal everything with a high-quality glossy top coat
Pro tip: If hand-painting feels intimidating, butterfly nail decals make this design instantly achievable without requiring artistic skills.
2. Watercolor Butterfly Wings
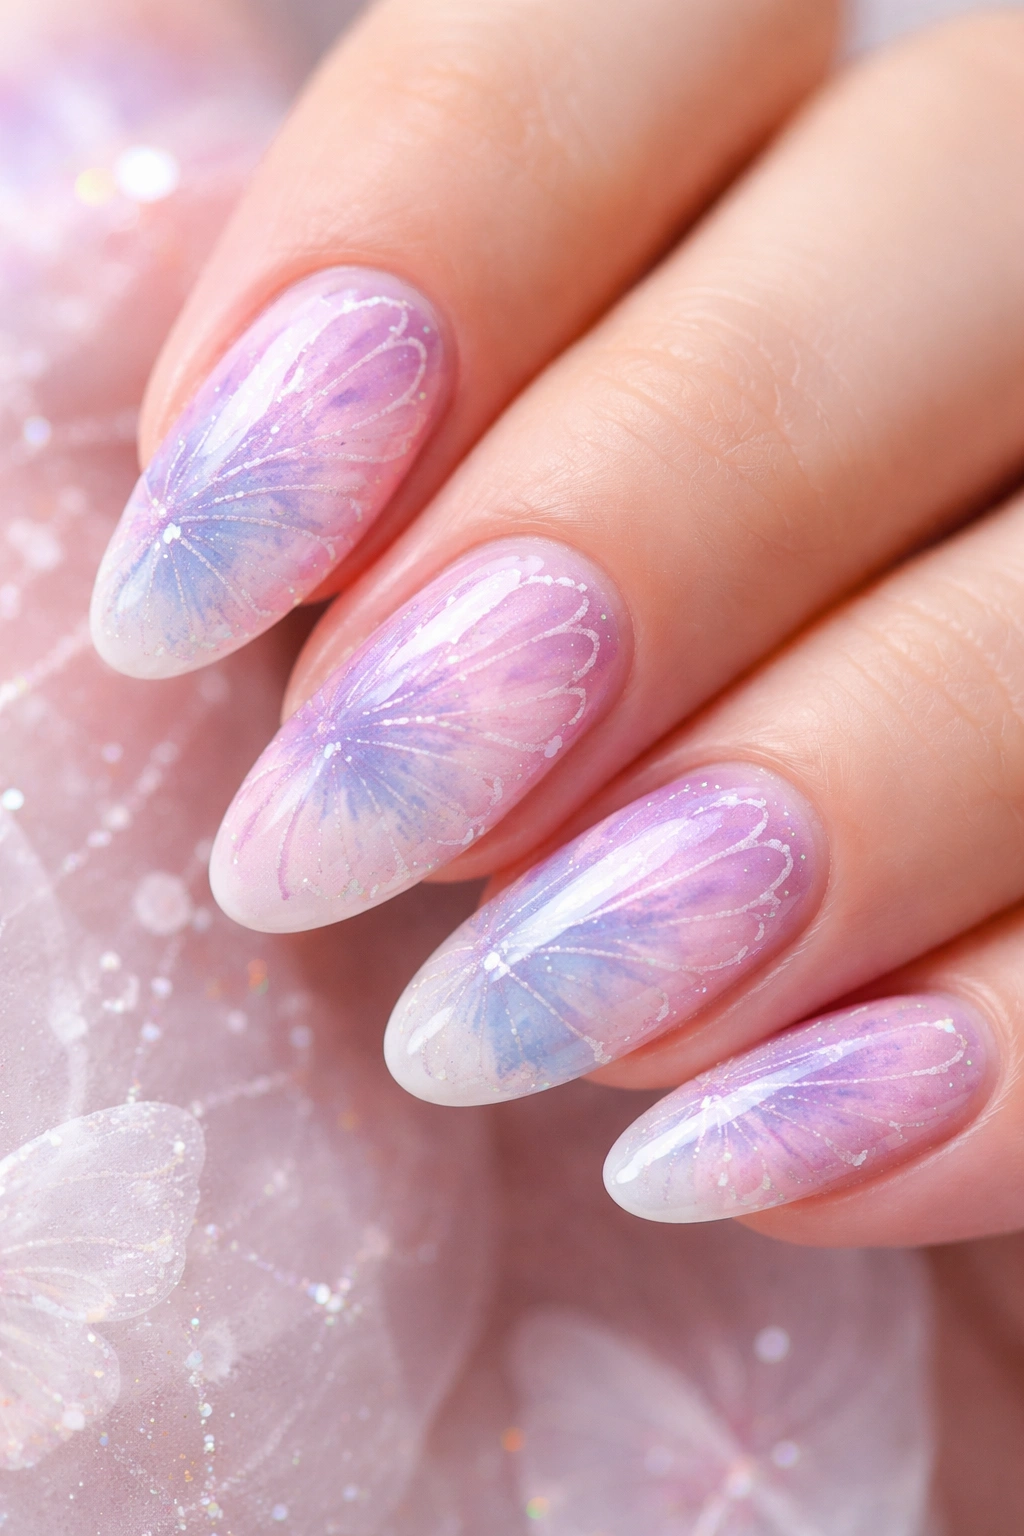
Watercolor butterfly nails capture the essence of artistic expression, creating soft, dreamy designs that look like painted masterpieces. This technique involves layering translucent polish colors and allowing them to blend organically, mimicking the natural gradient found on butterfly wings. The result is ethereal, unpredictable in the best way, and genuinely Instagram-worthy.
The Magic Behind the Watercolor Effect
Watercolor nail art works because it embraces the imperfect nature of blended colors. When you drop wet polish onto a base and swirl complementary shades together, you’re creating gradient transitions that couldn’t be replicated through traditional painting methods. The fluidity and flow of the polish create butterfly wings that appear to shimmer with depth and dimension. Light hits these designs differently depending on the angle, making them feel alive and dynamic.
Step-by-Step Watercolor Application
- Apply a white or very light base color to create a clean canvas
- Drop small amounts of complementary colored polish (purples with pinks, blues with teals) onto the nail while the base is still wet
- Use a thin brush or toothpick to gently swirl and blend the colors
- Work quickly—speed is your friend when creating watercolor effects
- Guide the colors into rough butterfly wing shapes
- Allow the design to set before sealing with top coat
Insider note: This technique is surprisingly forgiving because watercolor beauty comes from imperfection and organic blending.
3. Bold 3D Butterfly Embellishments
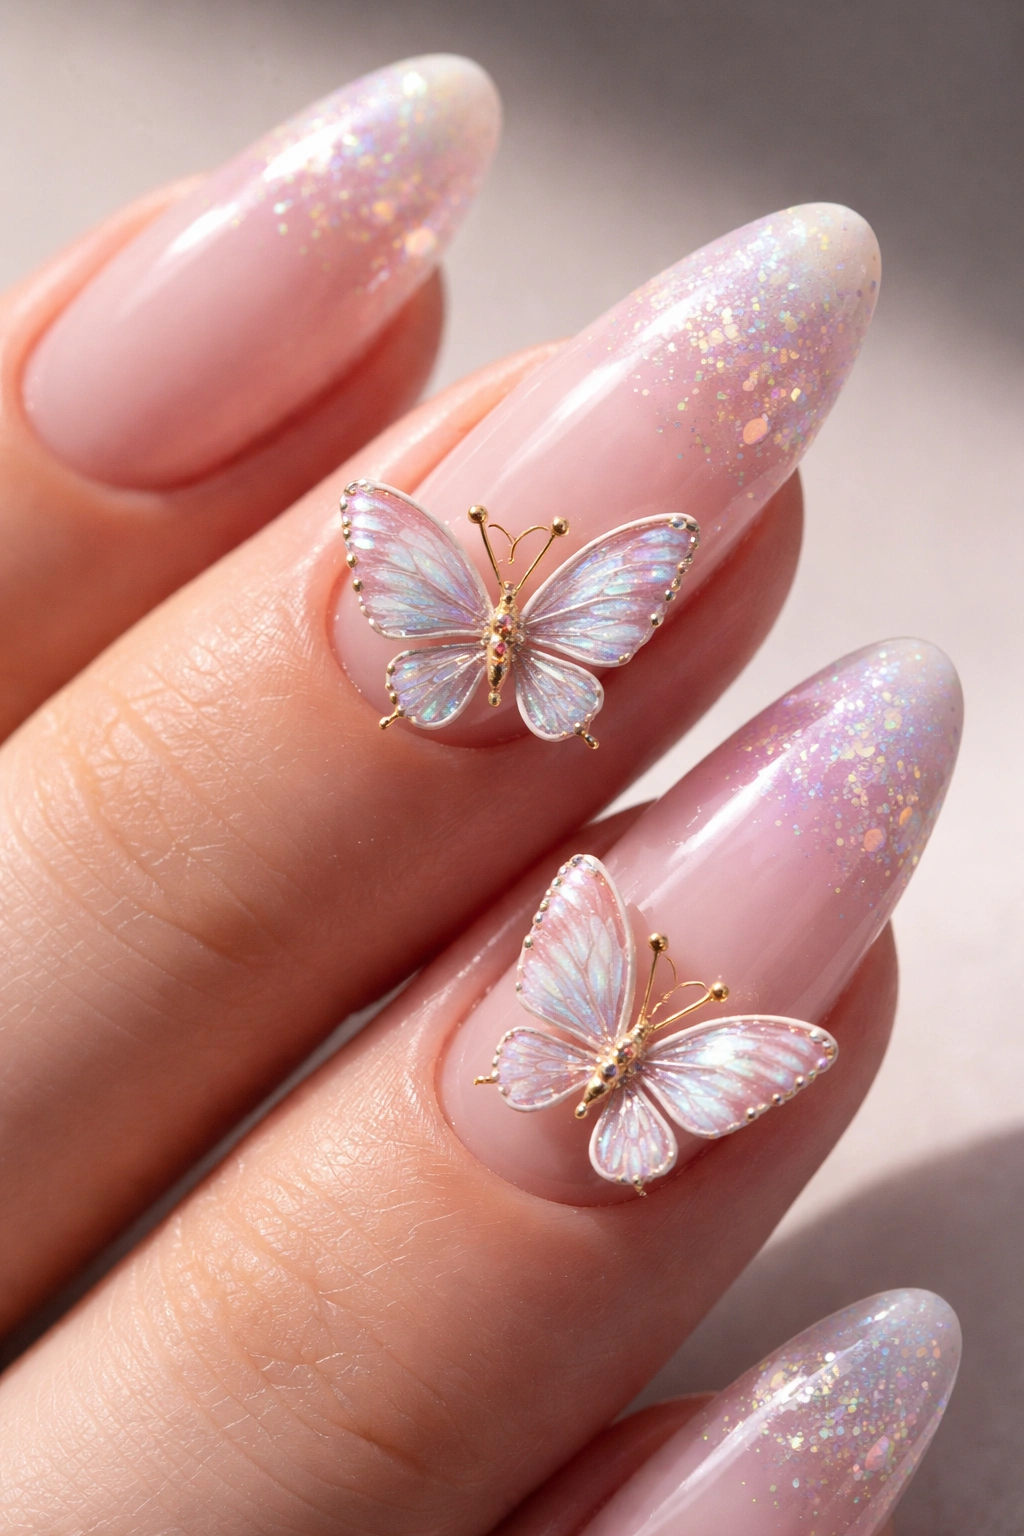
Ready to elevate your nail game? Three-dimensional butterfly embellishments transform nails from decorated to genuinely sculptural. These raised designs use materials like acrylic powder, gel extensions, or pre-made butterfly charms strategically placed to catch light and cast tiny shadows. The dimensional effect makes butterflies appear ready to flutter away from your fingertips.
Creating Dimension That Lasts
Three-dimensional nail designs require proper technique and quality materials to ensure they remain secure through daily activities. Modern 3D butterfly applications use either sculptured acrylic structures or gem-quality resin pieces sealed into place. The key is placing embellishments strategically—typically on one or two accent nails—so they don’t interfere with daily life while creating maximum visual impact. When light hits these raised elements, shadows enhance the illusion of movement and depth.
Popular 3D Butterfly Placements
- Single dramatic butterfly on ring finger
- Twin butterflies on ring and middle fingers for symmetry
- Clustered butterflies on accent nails with supporting rhinestones
- Layered butterflies at different heights for true dimension
- 3D butterflies combined with flat painted butterfly designs
Worth knowing: Professional application ensures proper adhesion, but many pre-made 3D butterfly press-on nails offer salon-quality results at home.
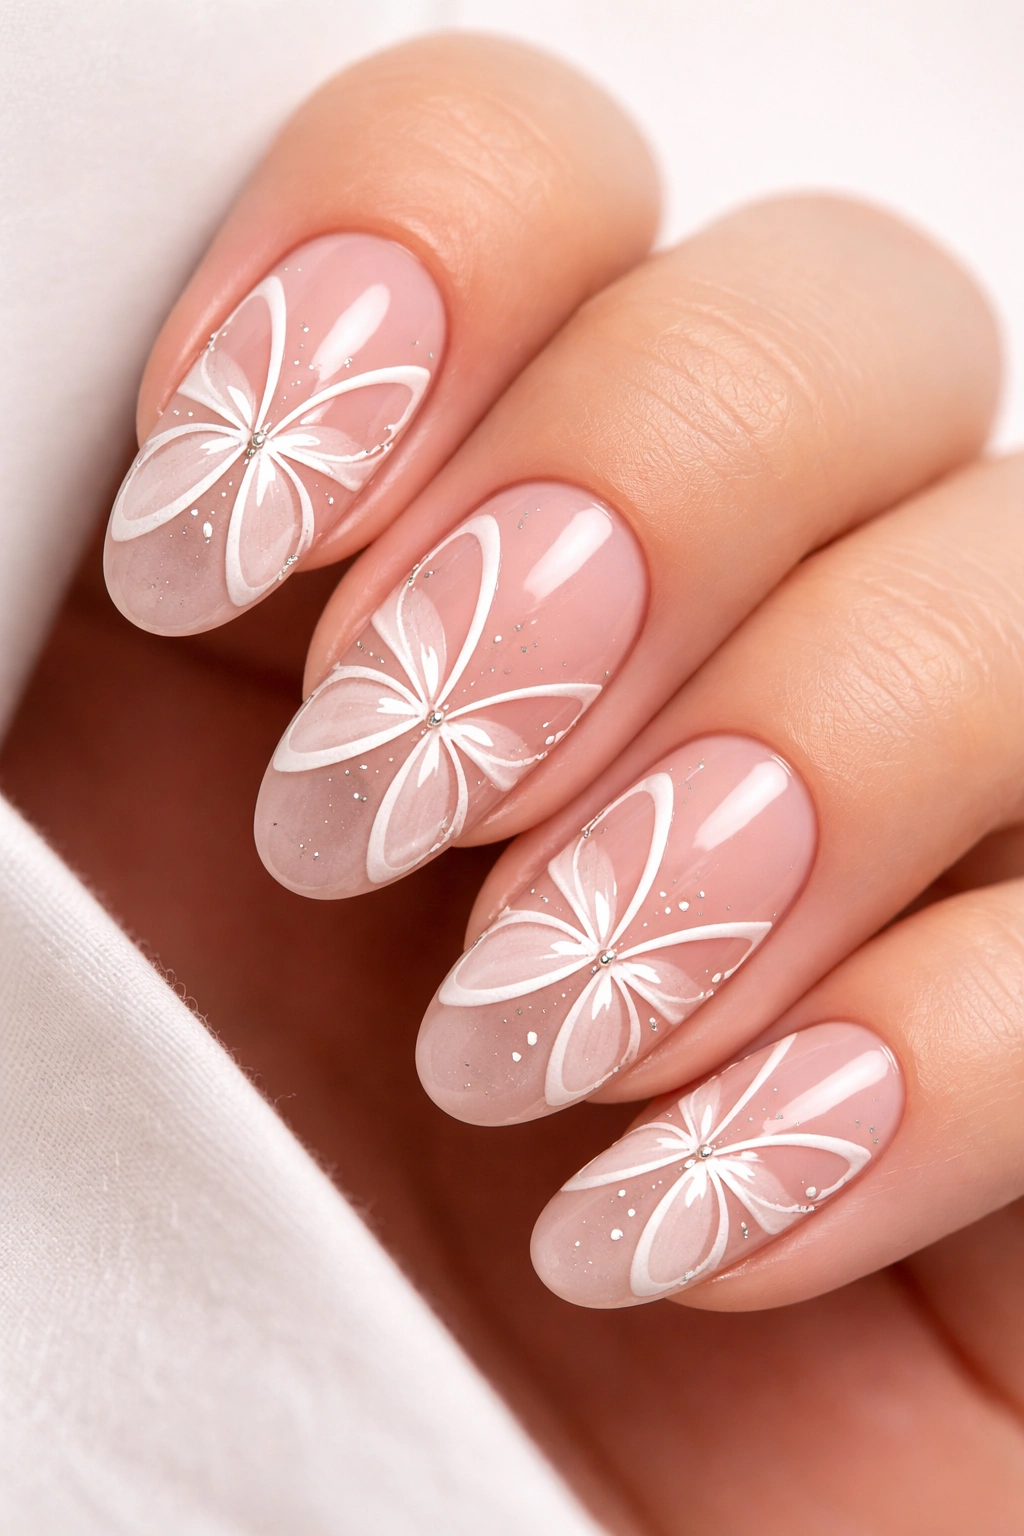
4. Minimalist Line Art Butterflies
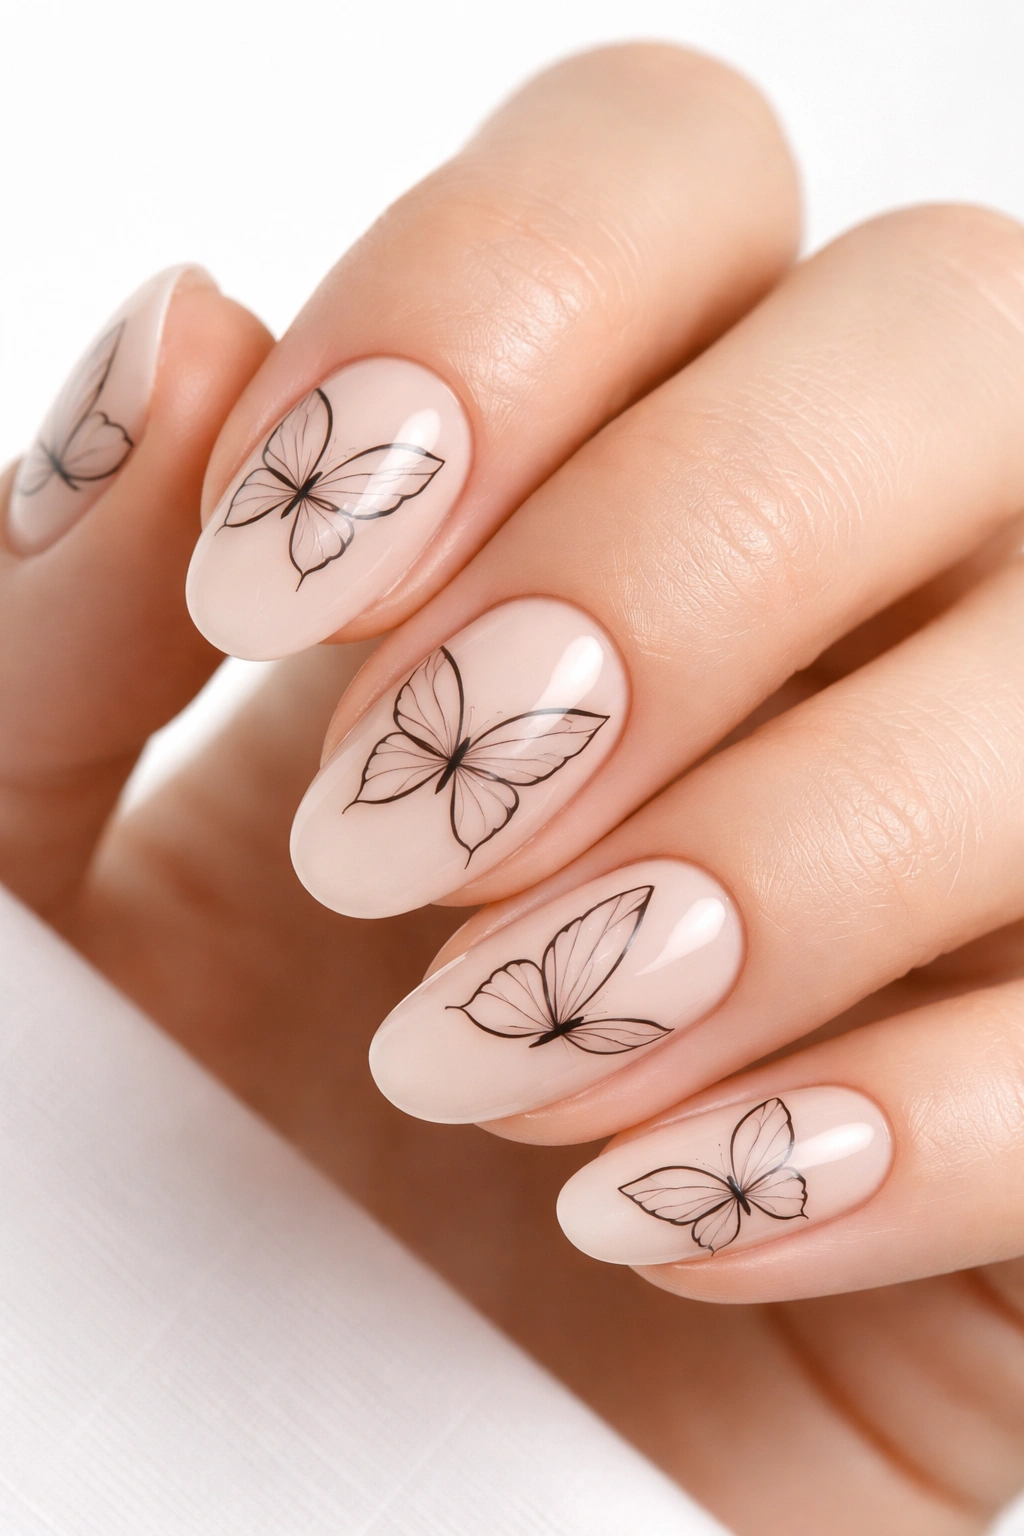
Sometimes the most impactful designs use the fewest elements. Minimalist butterfly nail art proves that sophisticated beauty doesn’t require elaborate detail work. Using strategic lines, dots, and simple curves, artists capture butterfly essence through pure line work. Think of it as elegant sketching where every stroke has purpose and meaning.
The Power of Simplicity in Nail Art
Minimalist designs have a special appeal because they feel modern, intentional, and inherently chic. A simple black line butterfly on a nude or white base communicates sophistication through restraint. This approach works beautifully on shorter nails where intricate detail might get lost. The minimalist aesthetic also allows the natural nail shape to shine while the butterfly design adds artistic interest without overwhelming the nail space. This style particularly suits professionals and minimalist lifestyle enthusiasts.
Executing Minimalist Butterfly Designs
- Choose a clean, neutral base color—nude, white, or soft pink work best
- Use an ultra-thin nail art brush or even a toothpick for precise linework
- Draw butterfly silhouettes with just a few essential lines
- Add minimal details: antennae, body line, perhaps a few tiny dots on wings
- Keep designs to one or two accent nails for maximum impact
- Seal with a matte or glossy top coat depending on desired finish
Quick fact: Minimalist butterfly designs actually photograph beautifully for social media because their clean lines translate perfectly to digital formats.
5. Holographic Butterfly Magic
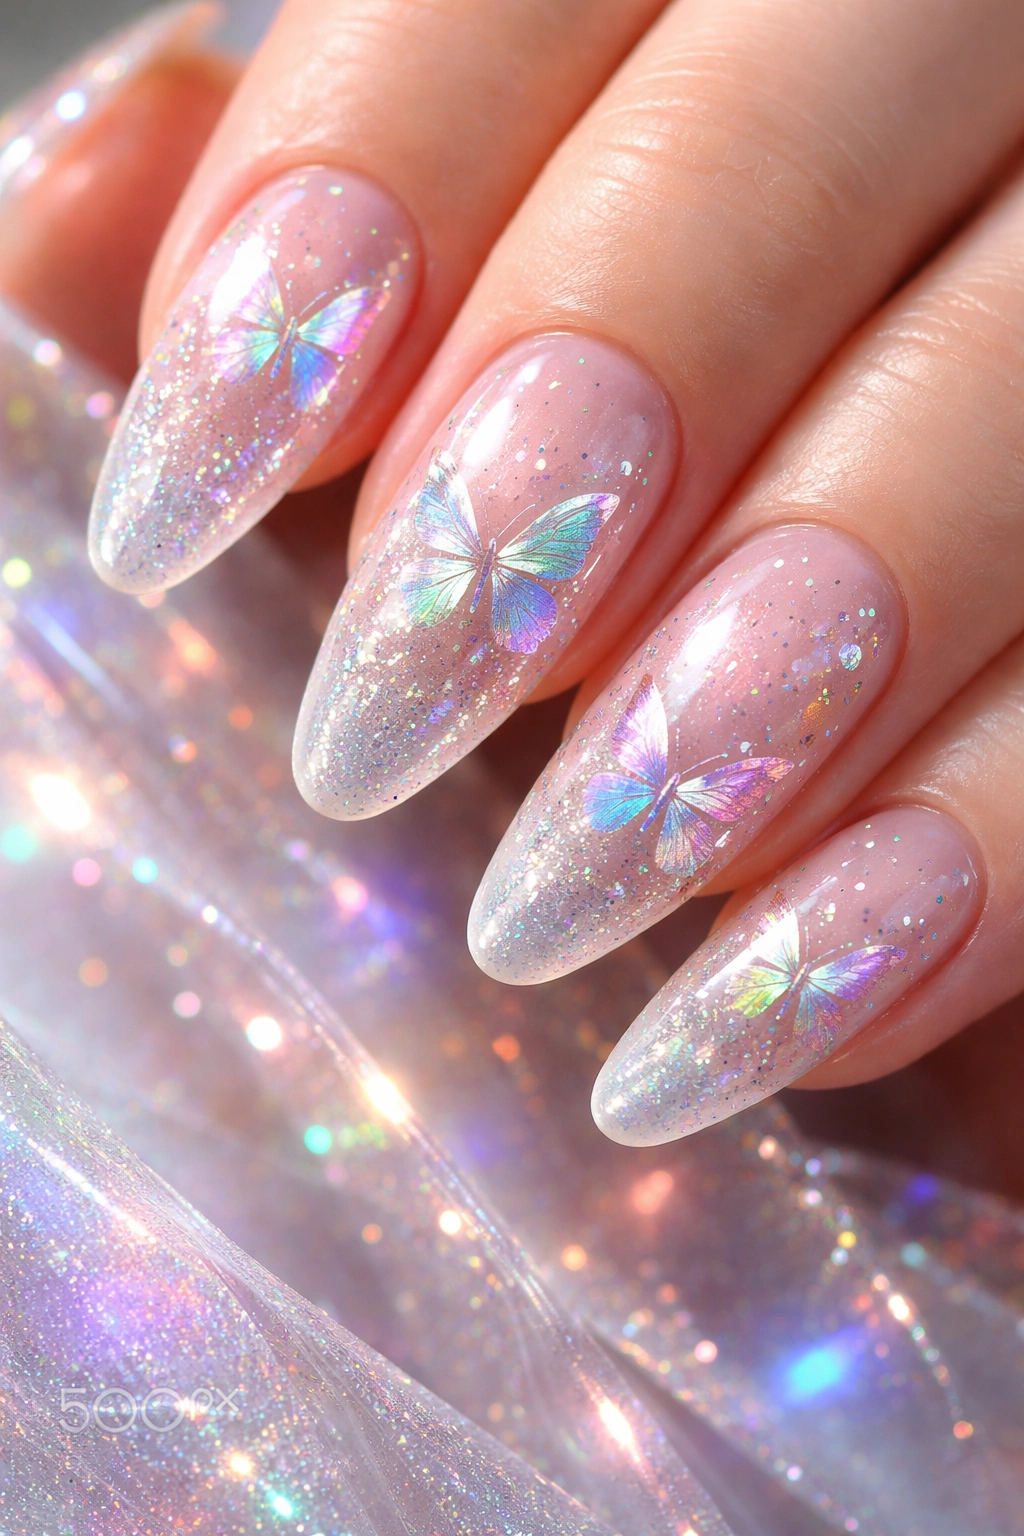
Step into a dimension of pure shimmer with holographic butterfly nails that shift and transform with every light angle. These designs use special holographic polishes or powders that reflect light in rainbow prisms, creating otherworldly effects that seem to change colors as your hands move. Holographic butterflies appear to flutter even while remaining perfectly still.
Understanding Holographic Technology
Holographic nail products contain tiny light-refracting particles suspended in polish. When light hits these particles at different angles, they reflect different colors of the spectrum. This creates the signature rainbow-shifting effect that makes holographic nails so mesmerizing. The beauty of using holographic effects for butterfly designs is that the natural movement of your hands constantly reveals new color combinations and light interactions. It’s nail art that literally changes throughout the day.
Application Techniques for Holographic Butterflies
- Apply holographic polish as a complete base for maximum shimmer
- Use holographic powders dusted over sticky gel for concentrated effects
- Create holographic butterfly shapes over neutral backgrounds for contrast
- Layer holographic elements with traditional colors for hybrid designs
- Combine holographic wings with regular polish bodies for depth
Fun fact: Holographic butterfly nails genuinely catch people’s attention in unexpected ways—they become conversation pieces wherever you go.
6. Ombre Background with Silhouette Butterflies
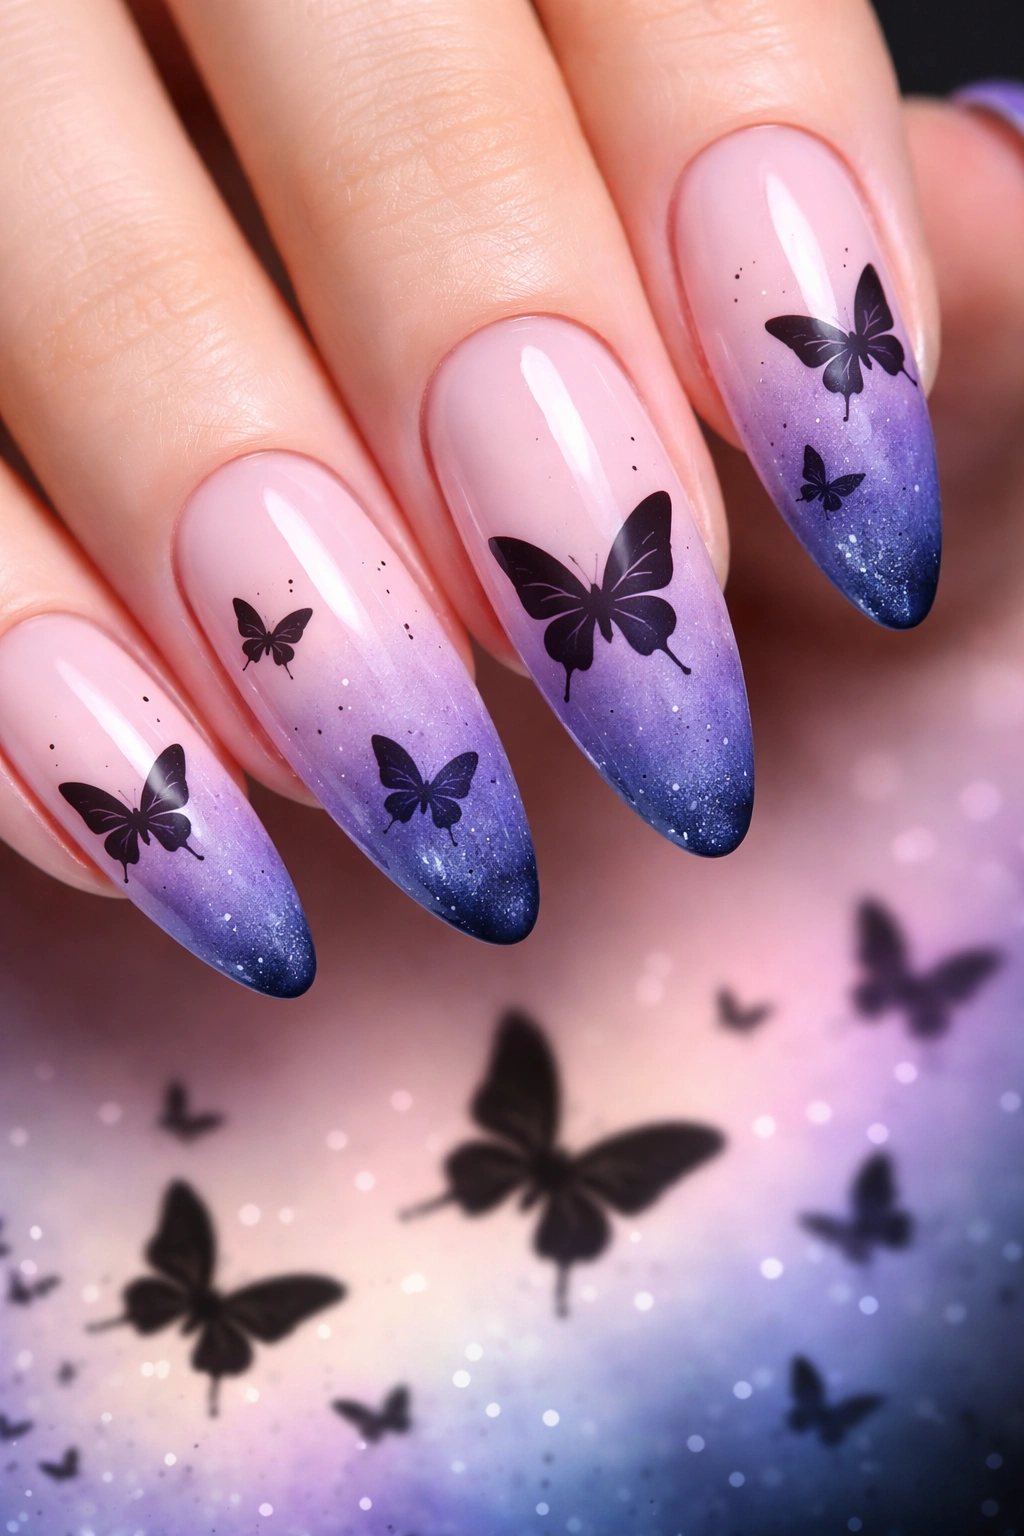
Creating sunset or twilight skies on your nails becomes enchanting when butterfly silhouettes dance across gradient backdrops. The ombre technique blends colors seamlessly from light to dark, mimicking natural phenomena like sunsets fading into evening. Against these dreamy backdrops, dark silhouettes create striking visual contrast that draws every eye.
The Psychology of Ombre Backgrounds
Ombre designs feel naturally beautiful because we see these color transitions constantly in nature—sunsets, ocean horizons, twilight skies. When you recreate these gradients on nails and overlay butterfly silhouettes, you’re creating miniature landscape paintings. The silhouettes work as anchor points, preventing the gradient from feeling too abstract or formless. This combination of soft color transitions with definitive shapes creates balanced, visually satisfying designs.
Creating Stunning Ombre Butterfly Designs
- Choose complementary ombre colors: warm oranges/pinks for sunset vibes, cool blues/purples for twilight
- Create ombre using sponging, dry brush blending, or gradient tools
- Apply darker base colors at the tip, lighter at the cuticle
- Once dry, add butterfly silhouettes in contrasting dark polish
- Keep silhouettes simple—detailed work conflicts with gradient backgrounds
- Consider placing butterflies as if in flight through the color gradient
Worth knowing: Ombre designs photograph beautifully and feel seasonal without being tied to specific months, making them genuinely evergreen options.
7. Negative Space Butterfly Designs
Have you considered that unpainted areas can be as impactful as painted ones? Negative space butterfly designs leave portions of natural nail visible, creating butterfly shapes through the interplay between colored and unpainted areas. This modern technique makes your actual nail part of the artwork rather than just a canvas.
Why Negative Space Feels So Contemporary
Negative space design represents sophistication through restraint and intentional emptiness. Rather than filling every millimeter of nail with color, negative space designs let your natural nail shine through strategically. This approach creates a modern, artistic aesthetic that feels fresh and minimalist. The technique also has practical benefits—designs grow out more gracefully than full-coverage styles, and your natural nails get exposure to air and moisture.
Techniques for Negative Space Butterflies
- Paint full background color, then carefully remove color in butterfly shapes using acetone and a thin brush
- Apply colored polish only in wing sections, leaving body and antennae unpainted
- Create border-only designs where only the outline of butterfly wings carries color
- Combine negative space with minimal accent details in other colors
- Use this technique on shorter nails where it creates elegant, office-appropriate looks
Pro tip: Negative space designs work particularly well with natural nails or very subtle nude base colors.
8. Glitter Butterfly Wings Sparkling and Shimmering
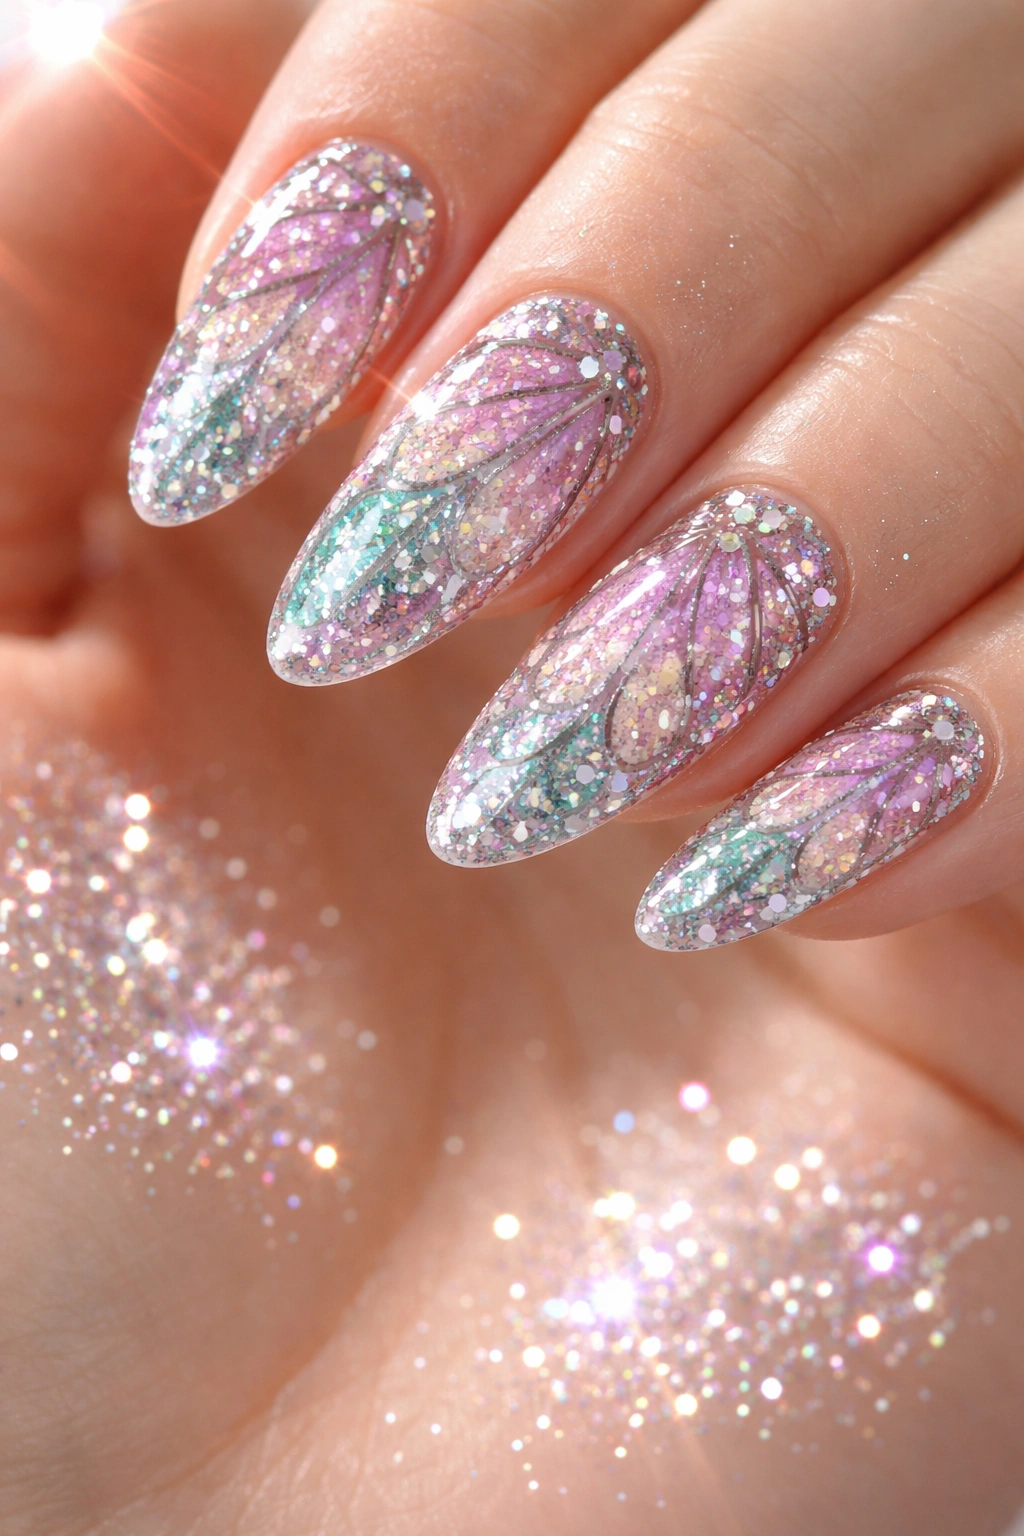
Nothing captures butterfly magic quite like glitter that sparks from every angle, transforming nails into dazzling shimmer displays. Glitter butterfly designs range from delicate accents to full-coverage glitter statements impossible to ignore. Mix fine and chunky glitter for texture, or stick with one size for streamlined elegance.
The Glitter Gradient Spectrum
Glitter butterfly designs offer surprising versatility depending on glitter size and concentration. Fine glitter creates refined, elegant effects perfect for weddings and formal occasions. Medium glitter adds playful sparkle visible from arm’s length. Chunky glitter makes bold statements that demand attention. The key is choosing glitter sizes that match your personality and the occasion. Layering different sizes creates dimension—larger glitter pieces at butterfly centers graduating to fine sparkle at wing edges.
Building Glitter Butterfly Designs
- Apply colored base coat (nude, pink, or any hue that complements your glitter)
- Mix glitter into clear top coat or use pre-made glitter polish for custom effects
- Apply glitter in butterfly shapes using a small brush or sponge
- Layer different glitter sizes for visual interest and dimension
- Seal everything thoroughly to keep glitter in place and smooth texture
- Consider adding complementary non-glitter elements for balance
Insider note: If you want glitter without the mess, glitter ombre designs (concentrated at tips) offer sparkle where you want it most.
9. Vintage Botanical Butterfly Nails
Transport yourself to Victorian naturalist journals with designs combining scientific precision and artistic beauty. Vintage botanical butterfly nails feature butterflies rendered with anatomical attention alongside flowers and botanical elements, creating cohesive garden scenes. Think of nails as tiny encyclopedia pages where each butterfly is catalogued with loving detail while maintaining artistic appeal.
The Art of Vintage Naturalism
Vintage botanical designs celebrate nature through careful observation, something nineteenth-century naturalists perfected. When applied to nails, this aesthetic combines scientific accuracy with artistic interpretation. Color palettes feature muted dusty roses, sage greens, antique golds, and cream—colors suggesting aged paper and vintage illustrations. The result feels both educational and romantic, like nature studies created with genuine affection for the subjects. These designs work beautifully for nature lovers and anyone who appreciates historical aesthetics.
Creating Vintage Botanical Effects
- Use muted, earthy color palettes: dusty rose, sage green, antique gold, cream
- Paint detailed butterfly with anatomically accurate wing patterns
- Add complementary botanical elements: wildflowers, herbs, botanical labels
- Include fine line details suggesting scientific illustration style
- Consider adding tiny handwritten-style labels or dates
- Finish with matte top coat to enhance vintage appearance
Quick fact: These designs work particularly well on longer nails where you have space for detailed botanical scenes.
10. Neon Butterfly Summer Vibes

When summer demands bold statements, neon butterfly nails answer with electric colors that glow in daylight and explode under blacklight. These designs embrace playful nail art with hot pinks, electric blues, blazing oranges, and lime greens capturing carefree festival spirits. Butterflies become celebrations of color where wings gradient between neon shades.
The Psychology of Neon Colors
Neon colors trigger excitement and joy—they’re impossible to ignore and inherently joyful. When applied to butterfly designs, neon transforms delicate creatures into bold statements. A white base coat makes colors pop dramatically, creating maximum contrast. Black bases create edgy effects making butterflies appear to glow from within. The key is pairing neon with enough white space that the design doesn’t feel overwhelming, even though the colors themselves demand attention.
Neon Butterfly Application Ideas
- White base with neon butterfly shapes gradienting between multiple neon shades
- Black base with single neon butterfly for maximum contrast
- Neon geometric butterfly patterns for modern interpretation
- Neon ombre designs concentrating brightness at tips
- Neon wing details on neutral bases for balanced neon integration
Worth knowing: Neon designs photograph especially well under various lighting conditions, from natural daylight to UV light.
11. Metallic Foil Butterfly Art
Imagine butterflies crafted from precious metals landing on fingertips, wings catching light like mirrors. Metallic foil butterfly art uses transfer foils in gold, silver, copper, and rose gold, creating lustrous designs appearing three-dimensional despite being flat. The reflective quality makes hands appear adorned with tiny metal sculptures bringing elegance and sophistication.
The Luxury of Foil Finishes
Metallic foils offer a luxurious appearance that elevates any manicure instantly. Transfer foils adhere to tacky polish or special adhesive, creating crisp, shiny designs with professional quality. Unlike glitter that sits on the surface, foil creates seamless, smooth finishes that feel polished. The reflective nature of foils means designs catch light continuously, creating movement and dimension without adding bulk to nails. Mixing metal tones (gold with copper, silver with rose gold) creates eclectic, jewelry-like effects.
Foil Application Techniques
- Apply tacky base coat in chosen color
- Press metallic foil transfer sheet onto nail with firm, even pressure
- Peel away backing to reveal shiny foil design
- Seal with matte or glossy top coat depending on desired finish
- Layer foil with other design elements for complexity
- Combine different foil colors on single nail for mixed metal effects
Pro tip: Quality foil adhesives and sealants ensure foil designs last through your entire manicure cycle without flaking.
12. Butterfly Garden Full Coverage Designs
Why settle for one butterfly when entire ecosystems can flourish across fingertips? Full coverage butterfly garden designs transform each nail into miniature paradise where multiple butterflies dance among flowers, vines, and botanical elements. This maximalist approach celebrates nature’s diversity through rich, detailed tapestries telling stories of spring awakening and nature’s abundance.
The Beauty of Maximalist Nature Art
Full coverage butterfly gardens allow for genuine creativity and personal expression through detailed composition. Unlike designs constrained to single elements, garden designs accommodate multiple butterflies in various sizes and colors interacting with florals. Success lies in thoughtful composition ensuring decorated nails maintain balance without becoming visually overwhelming. Artists combine stamping, freehand painting, and decals to achieve intricate details. The result is wearable art bringing joy with every glance.
Building Butterfly Garden Designs
- Start with neutral base color allowing multiple colors to shine
- Paint or stamp various butterfly sizes and species
- Add complementary flowers, vines, and botanical elements
- Create depth through overlapping elements and varied opacity
- Balance busier and simpler areas so design feels cohesive
- Include butterflies at different “heights” suggesting dimension
- Consider thematic elements: spring garden, wildflower meadow, tropical paradise
Worth knowing: Garden designs work best on medium to long nails where space accommodates multiple elements without feeling cramped.
13. Geometric Abstract Butterflies
Modern art meets nature in geometric abstract designs deconstructing delicate creatures into angular shapes, unexpected patterns, and stylized forms. Rather than realistic representations, butterflies become interpretations built from triangles, hexagons, and abstract elements suggesting wings without literal depiction. This contemporary approach appeals to minimalist aesthetic appreciators wanting whimsical elements with modern sensibility.
The Innovation of Abstract Interpretation
Geometric abstraction transforms butterflies into contemporary art installations. Each wing might feature different patterns—one solid color, one geometric, one patterned. The result feels both artistic and wearable, bridging traditional nail art and fine art aesthetics. Color blocking works exceptionally with each geometric section featuring different shades. The style pairs perfectly with modern fashion and architectural jewelry, making it ideal for creative professionals who appreciate boundary-challenging design.
Creating Geometric Butterfly Designs
- Choose 2-4 complementary colors for clean color blocking
- Sketch basic butterfly silhouette with geometric sections
- Fill sections with solid colors, patterns, or textures
- Add geometric details: dots, lines, shapes within butterfly shape
- Keep designs to one or two nails for impact
- Use matte finishes for modern, artistic appearance
Quick fact: Geometric butterflies actually appeal to people who normally wouldn’t wear butterfly designs—the modern interpretation feels fresh and unexpected.
14. Pastel Rainbow Butterfly Dreams
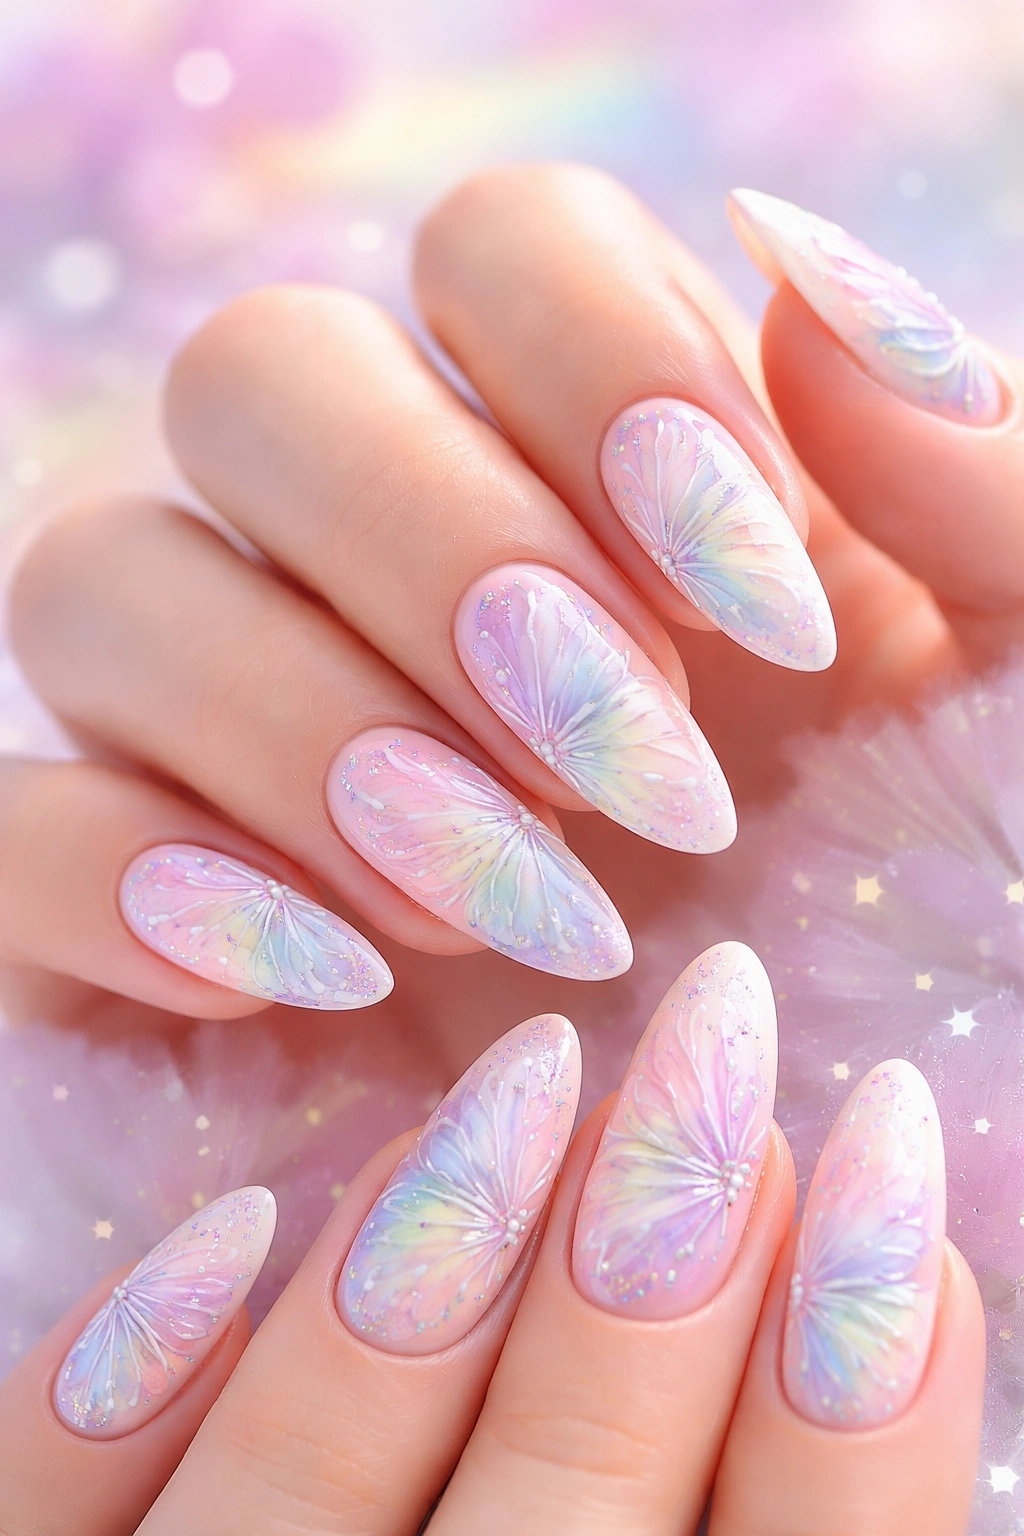
Soft as cotton candy and twice as whimsical, pastel rainbow butterfly nails create fantasy worlds where colors exist in gentlest forms. These designs layer soft pinks, baby blues, lavender purples, mint greens, and butter yellows creating fairy tale butterflies. Each butterfly features its own pastel rainbow gradient—gentle, dreamy, and genuinely magical feeling.
The Serenity of Soft Colors
Pastel colors inherently evoke calm and joy. When applied to butterfly designs, pastels create soothing visual effects bringing genuine emotional softness. Unlike neon that demands attention, pastels invite appreciation and admiration. These designs suit spring celebrations or anyone embracing inner creativity while maintaining polished appearances. Achieving this ethereal look requires highly pigmented pastel polishes maintaining soft appearances without becoming chalky or dull.
Pastel Butterfly Composition
- Choose limited pastel palette: pinks, blues, lavenders, greens, yellows
- Paint butterfly shapes using gradient application of pastels
- Create transitions between colors while maintaining soft appearance
- Layer butterflies with varying pastel combinations
- Add soft sparkle through delicate glitter accents if desired
- Finish with glossy coat to enhance dreamy quality
Pro tip: Pastel designs photograph beautifully in natural light, revealing color subtleties that flash photography might miss.
15. Black and White Monochrome Butterflies
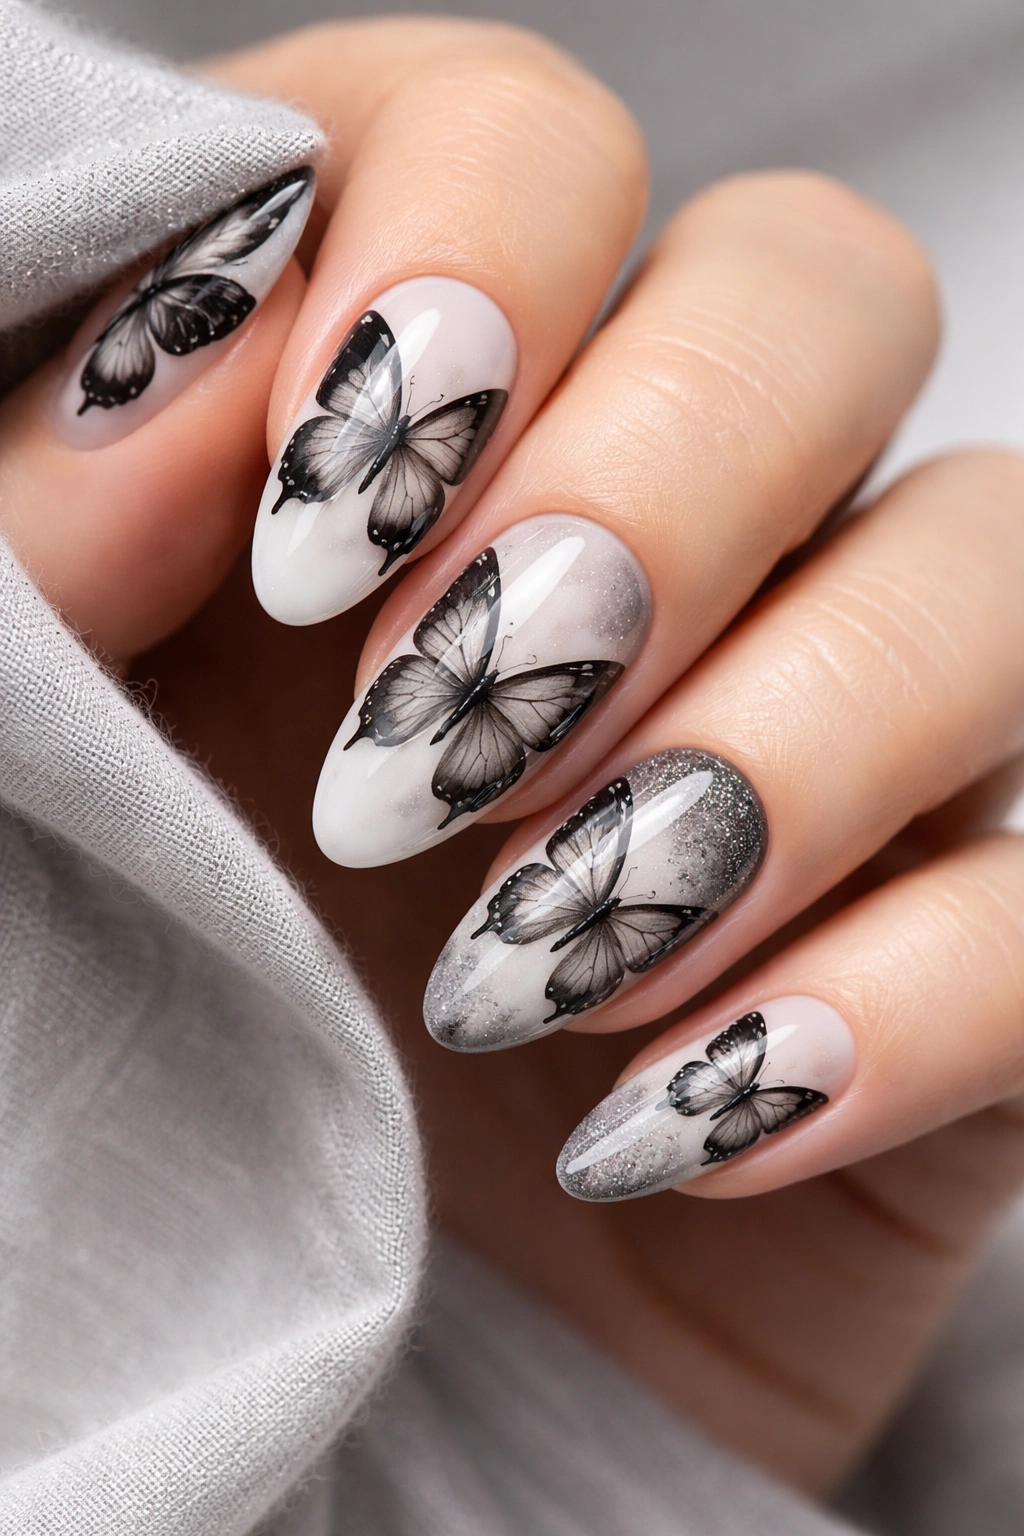
Proving color isn’t necessary for impact, black and white monochrome butterfly designs create sophisticated drama through contrast alone. Designs range from photorealistic grayscale butterflies to bold graphic interpretations playing with positive and negative space. The absence of color forces attention to detail, pattern, and composition where every line counts in creating form.
The Timeless Power of Monochrome
Black and white combinations transcend trends because they’re inherently classic and sophisticated. Monochrome designs work with any outfit, professional or casual, making them genuinely timeless choices for nail art. Adding grayscale variations creates depth and dimension without color introduction. Some designs feature photorealistic butterfly illustrations rendered in grayscale, while others use bold graphic shapes with high contrast. The versatility means monochrome works for minimalists and detail-oriented artists alike.
Monochrome Butterfly Techniques
- Create photorealistic butterflies using gray tones and fine detail work
- Use bold black outlines with white fill for graphic clarity
- Incorporate different finishes: matte black with glossy white details
- Use gray tones creating depth without color introduction
- Add subtle color pops (single red or gold) if you want to break monochrome
- Layer designs for visual interest despite limited color palette
Insider note: Monochrome designs actually showcase technical skill more clearly than color designs—detail work becomes the focus rather than color.
Final Thoughts
Butterfly nail designs offer something genuinely special—the ability to express creativity while celebrating nature’s delicate beauty. Whether you choose minimalist elegance, bold 3D embellishments, artistic watercolors, or any of the countless designs explored here, butterfly nails transform your hands into wearable art. The versatility means you can adapt these designs to match any season, outfit, mood, or occasion, making them genuinely timeless choices for nail art enthusiasts.
The most important thing to remember is that butterfly nail designs should make you feel confident and joyful. Don’t stress about achieving salon perfection if you’re working at home—even imperfect butterfly nail art has charm and character. Start with designs that resonate with your personal aesthetic, experiment with techniques that excite you, and most importantly, have fun with the process. Your hands deserve to flutter with personality and style.
