

Long round nails with dot designs are one of those rare nail art trends that manages to be both incredibly fun and surprisingly versatile. Whether you’re heading to a brunch with friends or just want to add playfulness to your everyday look, dotted nails deliver instant personality without requiring serious artistic skill. The beauty of dots lies in their simplicity — they’re forgiving, scalable, and work across nearly every color palette and aesthetic you can imagine.
The reason round nails paired with dots feels so fresh comes down to contrast. Round nails have an inherently soft, modern quality that complements the structured geometry of dots perfectly. Add length to that shape, and suddenly you’ve got a canvas that’s both elegant and whimsical. Small dots can feel delicate and refined, while larger dots make a bold, confident statement. Mix dot sizes, play with placement, and layer them over different base colors, and you’ll unlock an endless range of looks that feel uniquely yours.
What makes dot nail designs so appealing is that they’re genuinely accessible. You don’t need a nail artist’s hand-eye coordination to create them — a toothpick, a bobby pin, or even the back of a dotting tool can apply dots with precision. The playful nature of dots also means imperfection reads as intentional rather than amateur. A slightly uneven dot distribution often looks more organic and charming than a perfectly symmetrical arrangement.
Let’s explore fifteen specific dot nail designs that capture different moods, color stories, and techniques. Each one is achievable at home and pairs beautifully with the length and shape of long round nails.
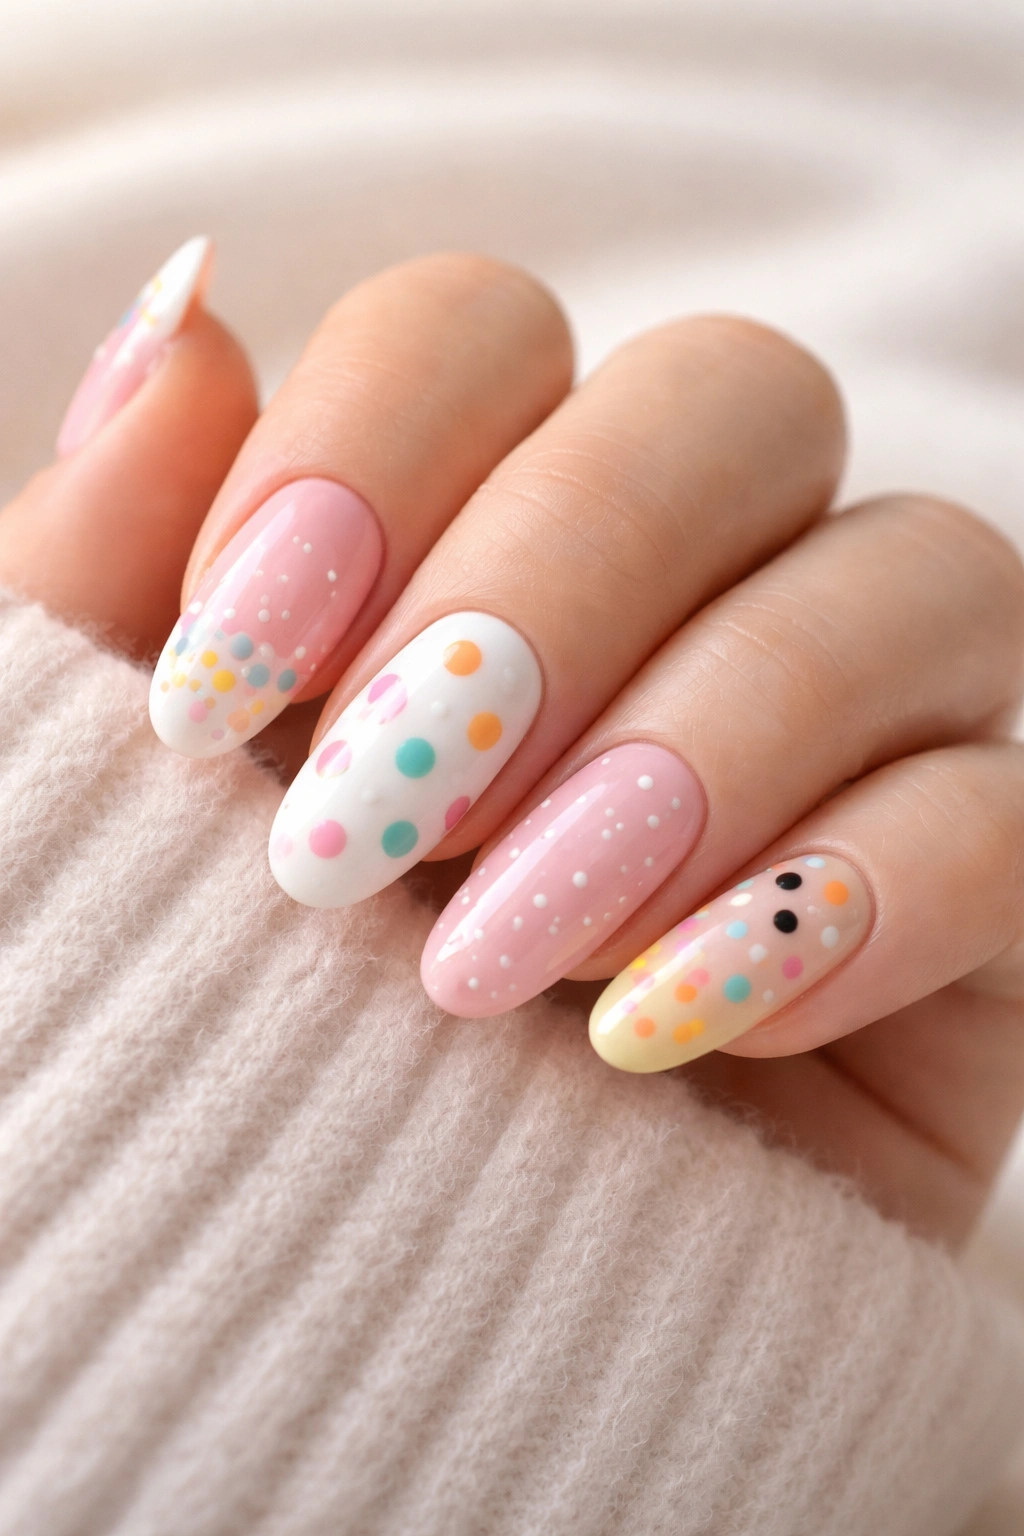
1. Rainbow Scattered Dots
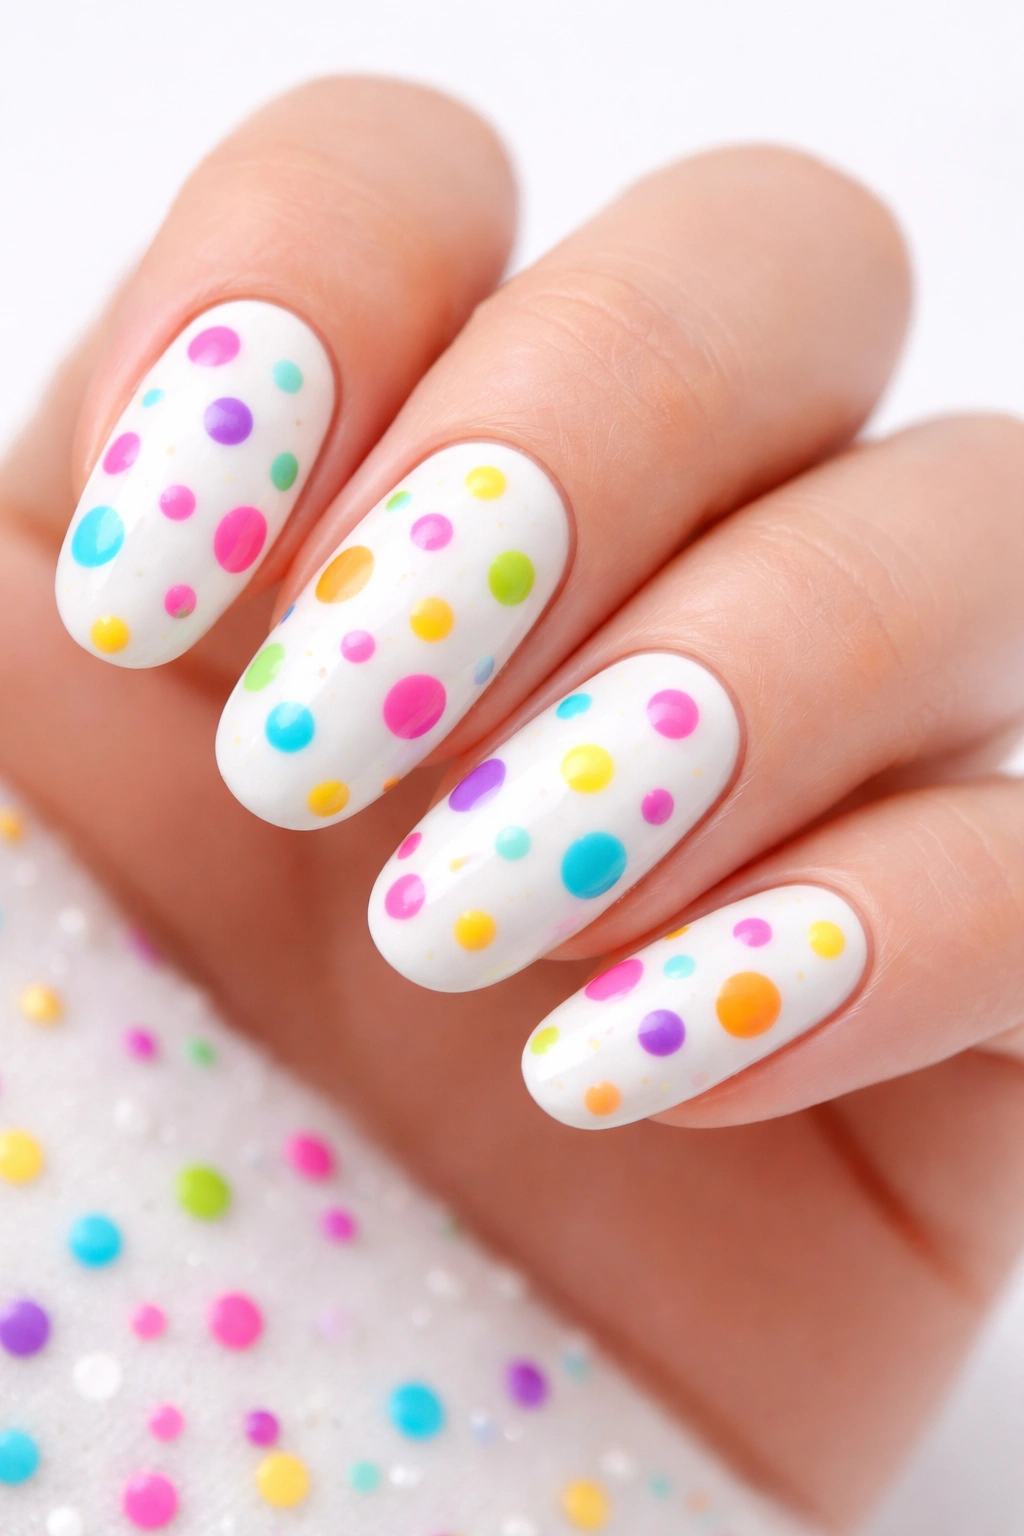
This design celebrates color chaos in the best possible way. Start with a clean white or cream base — this becomes your blank canvas for maximum color impact. Scatter small dots across the nail in every color you can think of: hot pink, sunshine yellow, electric blue, emerald green, coral, purple, and orange.
Why This Design Works So Well
The scattered dot arrangement feels organic rather than planned, which is exactly the energy this design radiates. Round nails elongate beautifully when you distribute color across the entire surface rather than confining it to stripes or sections. The white background acts as a breathing room that keeps multiple colors from feeling overwhelming.
How to Execute This Look
- Use a dotting tool or bobby pin dipped in nail polish to apply dots in varying sizes across all five nails
- Vary dot size deliberately — mix tiny dots with larger ones for visual rhythm and interest
- Leave some white space visible; not every inch of the nail needs coverage
- Seal everything with a glossy topcoat to make the colors appear more vibrant
- Let each color dry briefly before moving to the next to prevent muddying
Pro tip: This design benefits from using creme finishes rather than metallic or shimmer polishes, which can make the overall look feel chaotic instead of playful.
2. Minimalist Single Dot Accent
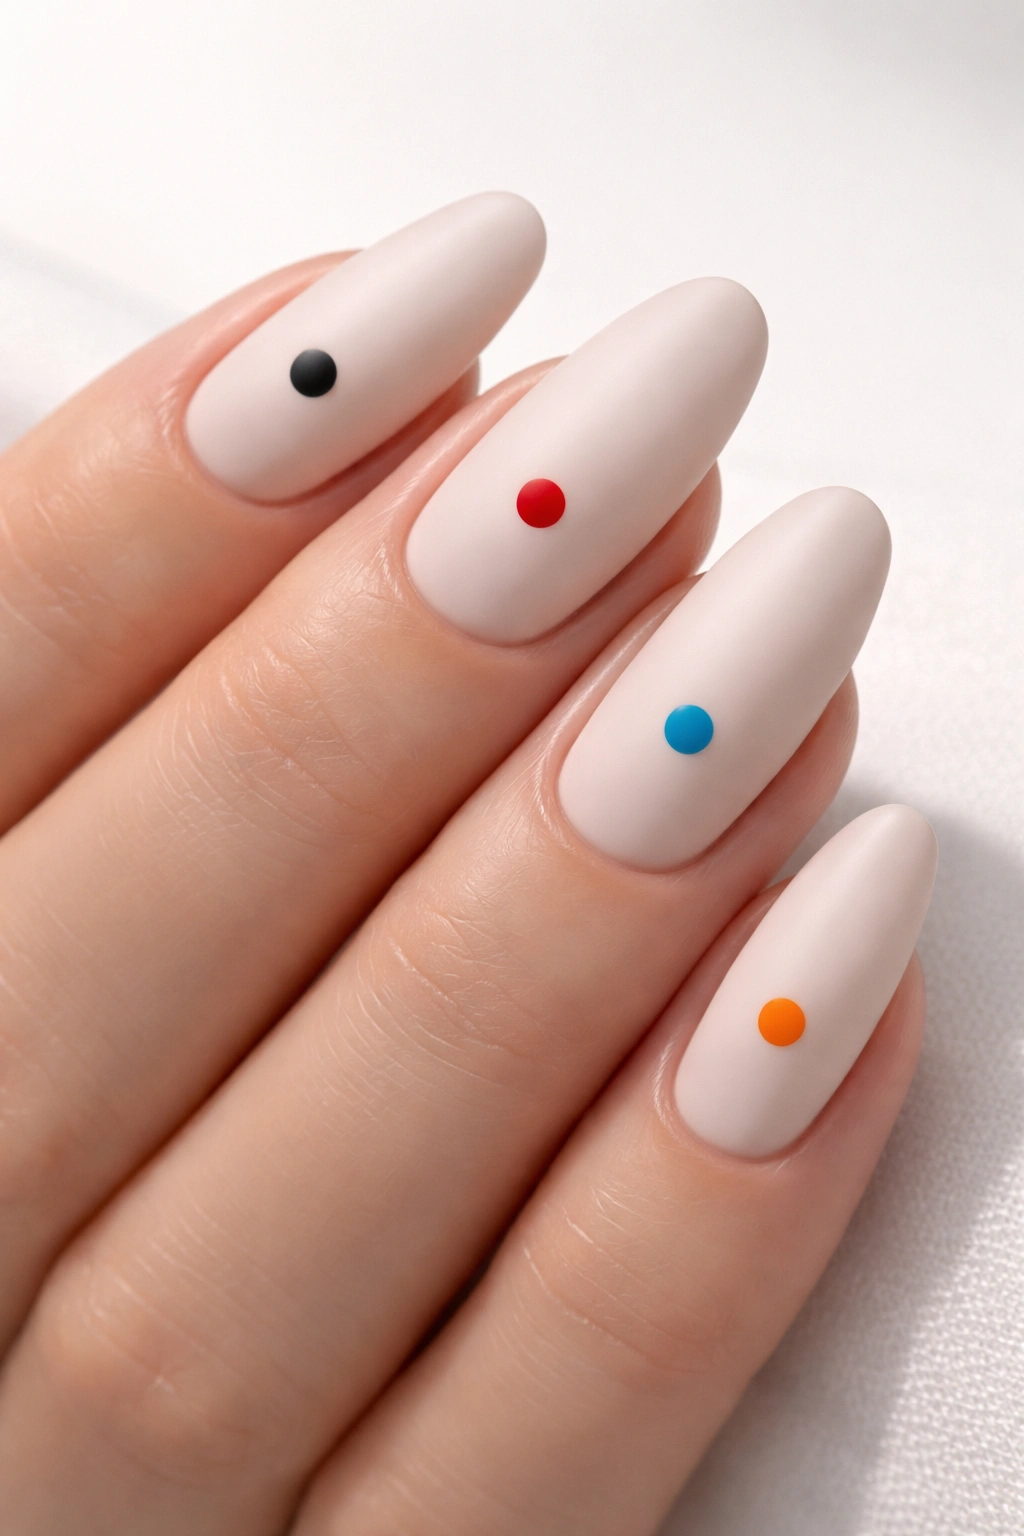
Sometimes less truly is more. This design features a single, perfectly placed dot on each nail — typically one per nail in the center, or one positioned slightly off-center for a more contemporary feel. Paint your long round nails in a sophisticated neutral like soft beige, warm gray, or barely-there pink.
The Power of Restraint
A single dot creates maximum visual impact through simplicity. The contrast between the muted base and the bold accent dot — typically in black, deep navy, or a jewel tone — feels intentional and refined. This is the design choice for someone who wants nail art that whispers rather than shouts.
Execution Tips
- Paint your base color in two coats for full opacity and smoothness
- Use a fine dotting tool for precision; a toothpick works in a pinch but can be harder to control
- Choose a dot color that creates strong contrast with your base for definition
- Consider placing dots at slightly different positions on each nail for subtle asymmetry
- Finish with a matte topcoat for a modern, understated look
Worth knowing: The impact of a single dot depends heavily on its size relative to your nail. On long nails, a smaller dot can disappear, so size up compared to what you’d use on short nails.
3. Polka Dot Classic
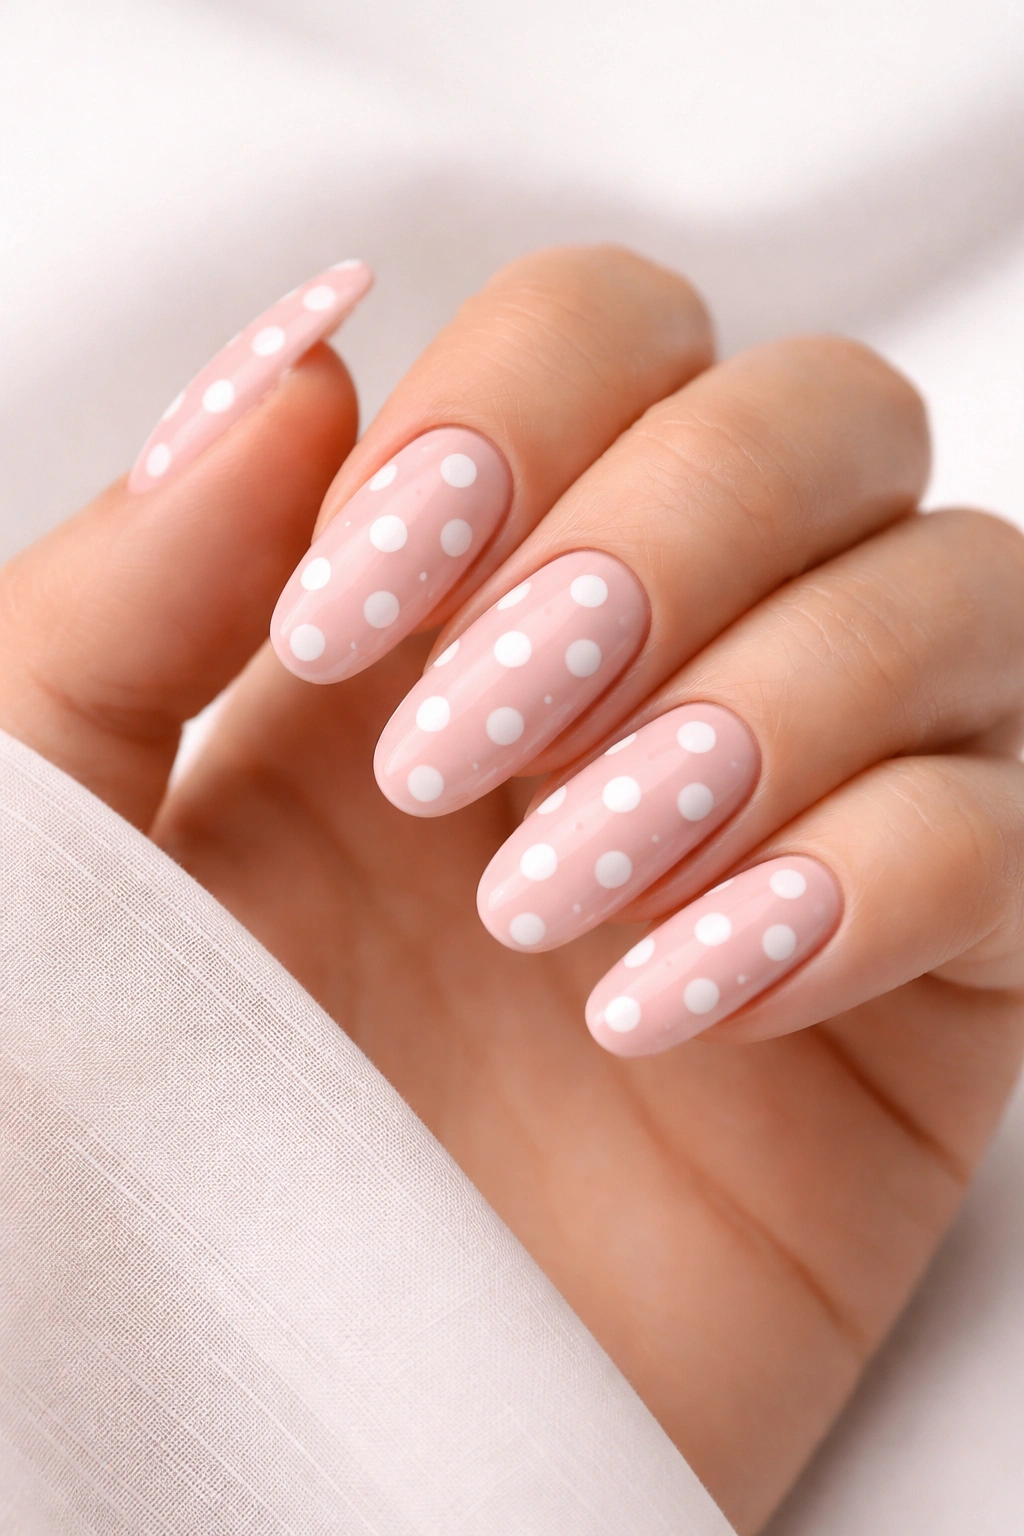
The polka dot design is timeless for a reason — it’s joyful, effortless-looking, and works across nearly every base color imaginable. Choose a base color you love, then cover it in evenly-spaced dots in a contrasting shade. This design works equally well with a soft pink base and white dots, or a deep navy base with gold dots.
Why Polka Dots Never Go Out of Style
Polka dots carry instant nostalgia and playfulness. They’re associated with vintage fashion, but feel contemporary when executed on long, modern nail shapes. The repetitive pattern creates visual harmony that feels intentional rather than random.
Best Practices for Perfect Polka Dots
- Map out your dot placement lightly with a pencil or by eye before applying polish
- Use a medium-sized dotting tool and reload it with polish for each dot to maintain consistency
- Space dots evenly by imagining invisible horizontal and vertical lines across your nail
- Aim for dots that are roughly the same size throughout, though slight variation adds charm
- Let the base coat dry completely before adding dots to prevent dragging
Insider note: The most striking polka dot designs use two colors with strong contrast — light on dark or dark on light — rather than colors with similar brightness levels.
4. Gradient Dot Ombre
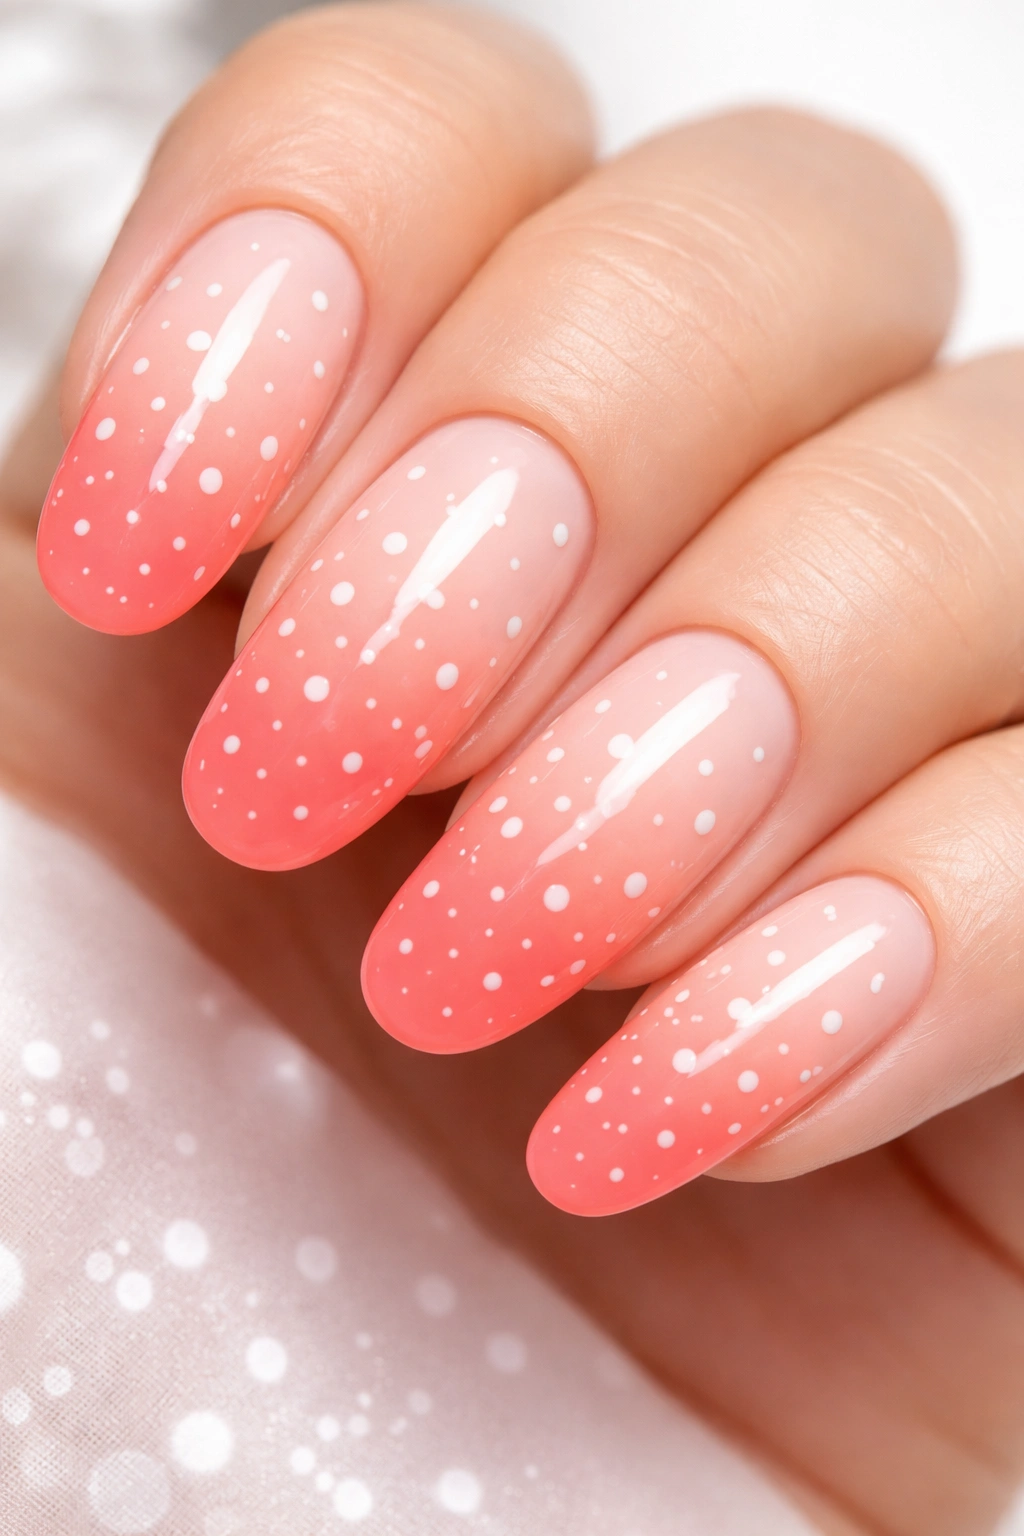
Combine the softness of an ombre gradient with the playful geometry of dots for a design that feels both sophisticated and fun. Create a gradient base that moves from one color to another across your five nails, then layer dots in a complementary shade throughout.
Creating Seamless Ombre Transitions
An ombre base requires a bit more patience than a solid color, but the effort pays off dramatically. Use a makeup sponge to tap and blend two polishes together on the nail surface, creating smooth color transitions. Once you’ve mastered the base, the dots become the playful accent that breaks up the gradient’s smoothness.
How to Layer Dots Over Ombre
- Allow your gradient base to dry completely and cure under a lamp before adding dots
- Use a shorter dotting tool or toothpick to apply dots more deliberately over the gradient
- Concentrate dots more heavily where the colors blend in the middle of the gradient
- Consider using white or a metallic shade for dots over darker gradient sections for better visibility
- A topcoat seals everything and enhances color depth
Pro tip: If blending an ombre base feels intimidating, use gradient nail polish or a pre-made ombre tool that creates the effect with one application.
5. Geometric Dot Pattern
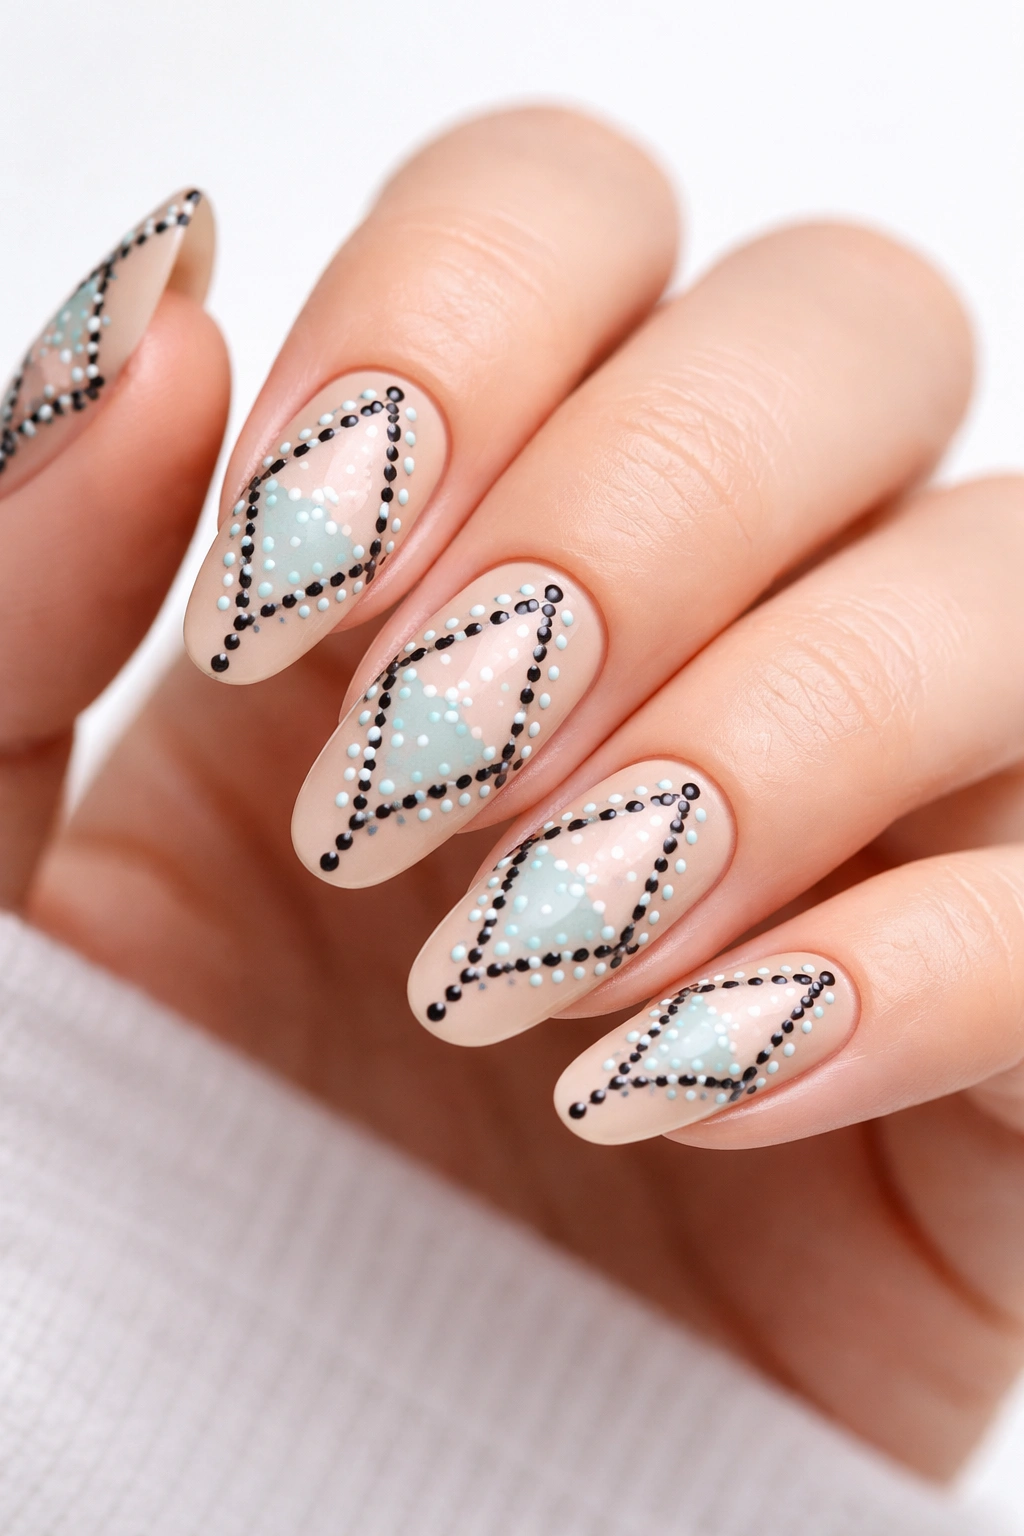
Move beyond random dots and embrace structured geometry. Create a design where dots form lines, create boundaries, or arrange themselves in intentional patterns — diamonds, triangles, or interconnected shapes outlined by dots rather than solid lines.
The Appeal of Structured Dot Placement
Geometric dot arrangements feel intentional and contemporary. They appeal to people who love nail art but want something more structured than scattered designs. Long round nails provide plenty of space for geometric shapes to read clearly and feel balanced.
Creating Geometric Precision
- Sketch your geometric pattern lightly with a pencil or nail marker before applying color
- Use a fine dotting tool and work methodically to position dots exactly where your pattern calls for them
- Consider creating a dot outline of a geometric shape rather than filling it in completely
- Negative space (leaving parts of the pattern empty) adds sophistication to geometric designs
- Use complementary colors — one shade for dots and another for the base — for maximum definition
Worth knowing: Geometric dot patterns work best when you keep your design to two colors maximum; adding a third color can make it feel too busy on long nails.
6. Neon Dot Pop
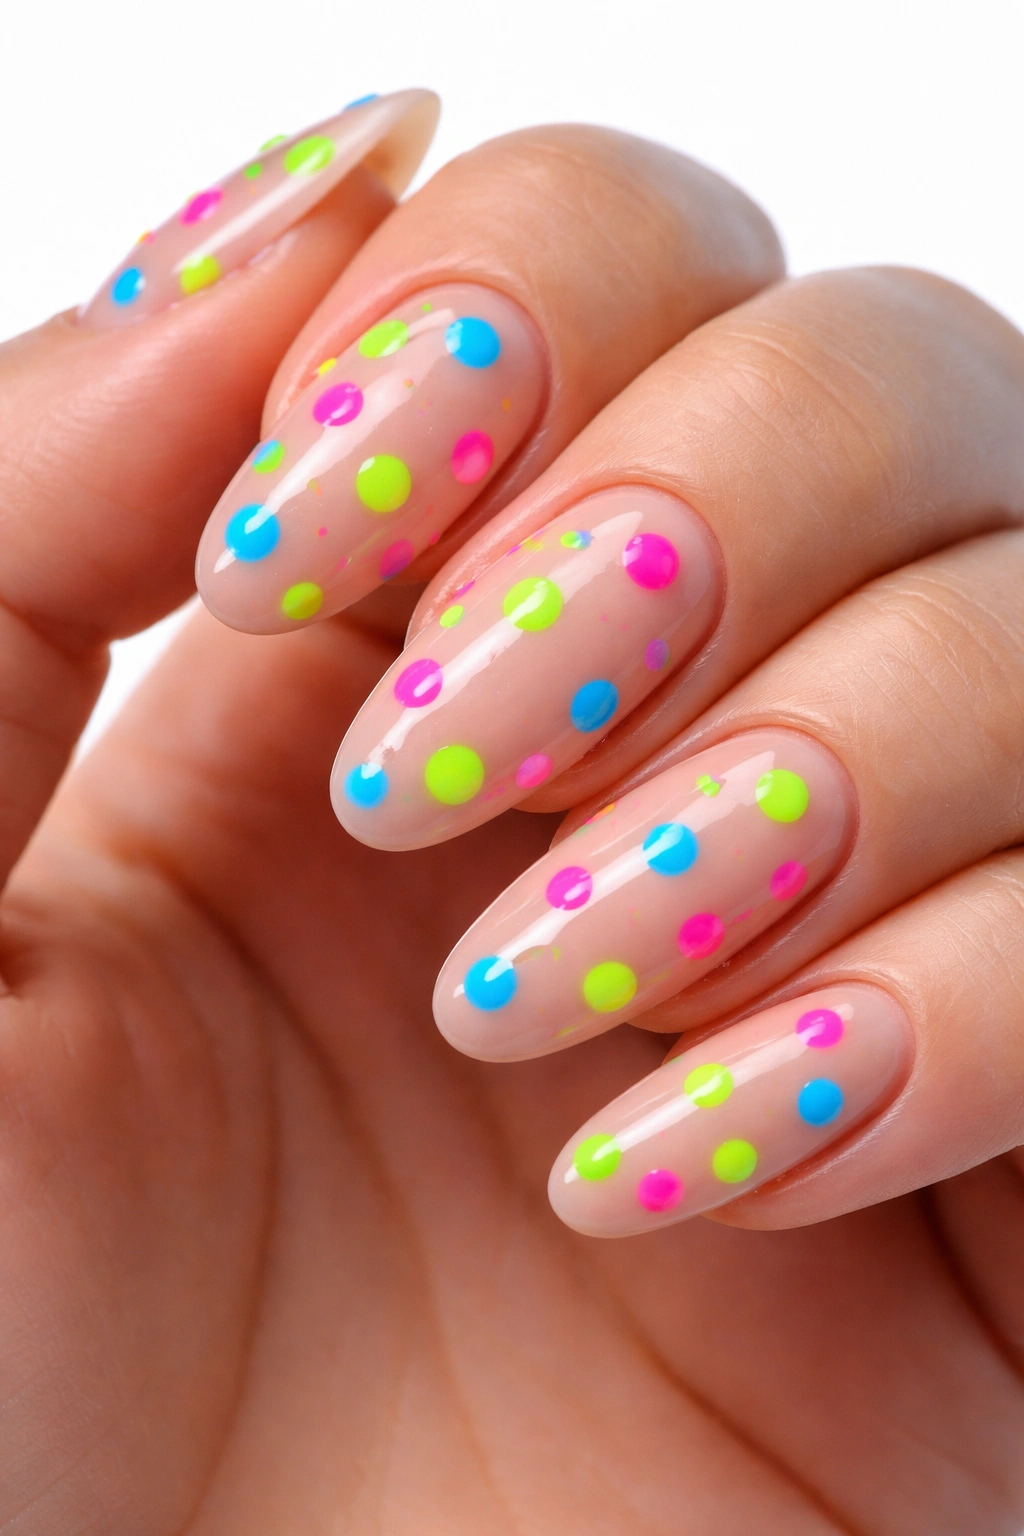
If you love bold, energetic nail art, neon dots deliver maximum impact. Paint your nails in a neutral base like white, light gray, or soft nude, then cover them with dots in electric neon pink, lime green, vibrant orange, or electric blue. The contrast is impossible to miss.
Making Neon Work Without Overwhelming
Neon colors can read as chaotic if every nail is completely covered, so practice restraint. Use neon dots more sparsely than you might with more subdued colors, or concentrate neon dots on an accent nail while keeping other nails mostly neutral.
Neon Dot Application Tips
- Neon polishes often require three thin coats for full opacity and true color saturation
- Allow each coat to dry completely; neon polishes tend to be more fluid and can smudge easily
- Use topcoat to intensify the neon’s glow — neon polishes look more vibrant under shine
- Consider mixing neon shades — neon pink dots on some nails and neon green on others — for variety
- Matte topcoat tones down neon intensity if the glossy version feels too loud
Pro tip: Neon dots paired with a nude or skin-tone base create the illusion of longer nails while feeling playful rather than over-the-top.
7. Metallic Gold Dots
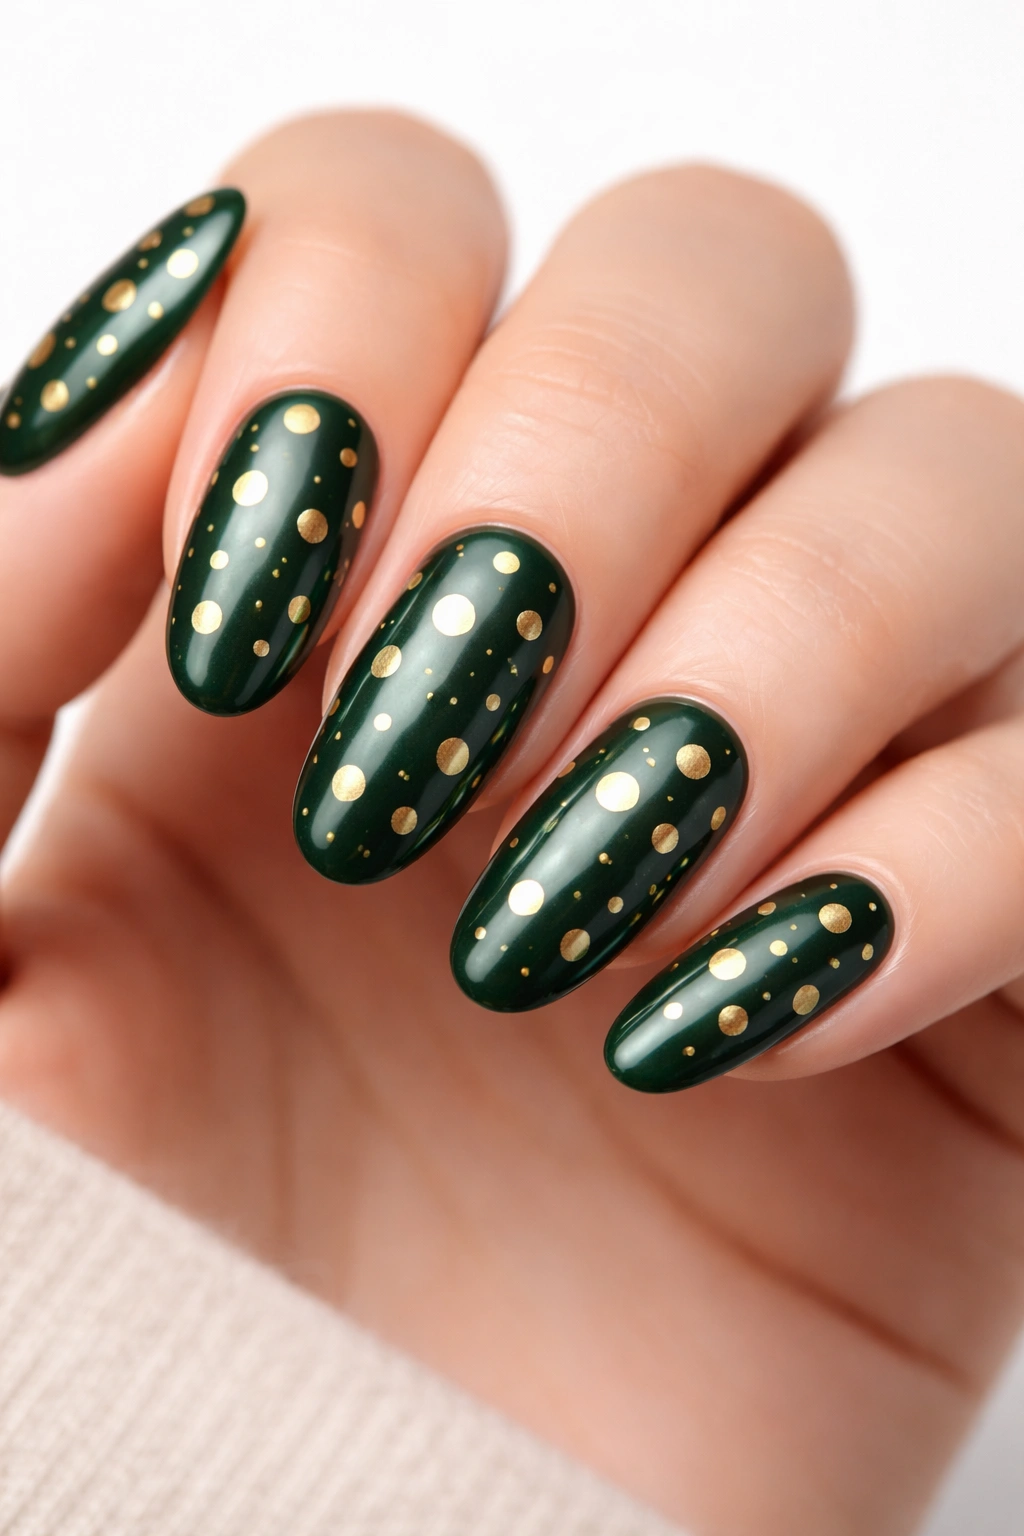
Gold dots bring instant elegance to any base color, making this design perfect for transitioning your look from casual to special occasion. Paint your nails in a jewel tone like emerald green, sapphire blue, or burgundy, then add gold dots scattered across the surface.
Why Gold Works with Nearly Everything
Gold has a universal appeal that complements warm skin tones and cool tones equally. Gold dots over deep colors feel luxurious and sophisticated, while gold dots over pastels feel whimsical and feminine. The metallic finish catches light and adds dimension that solid-color dots can’t match.
Gold Dot Technique
- Metallic polishes often require a base or primer to prevent staining your nails
- Use a dotting tool and work with slightly more pressure than you would with cream polishes — metallics are sometimes thicker
- Layer gold dots at varying sizes for visual interest and movement
- Consider mixing matte and metallic finishes: a matte base with shiny gold dots, or matte gold dots over glossy base
- Seal with a clear topcoat to amplify the metallic sheen
Worth knowing: If your metallic polish is too thick to apply cleanly with a dotting tool, thin it slightly with a drop of topcoat to improve workability.
8. Watercolor Dot Effect
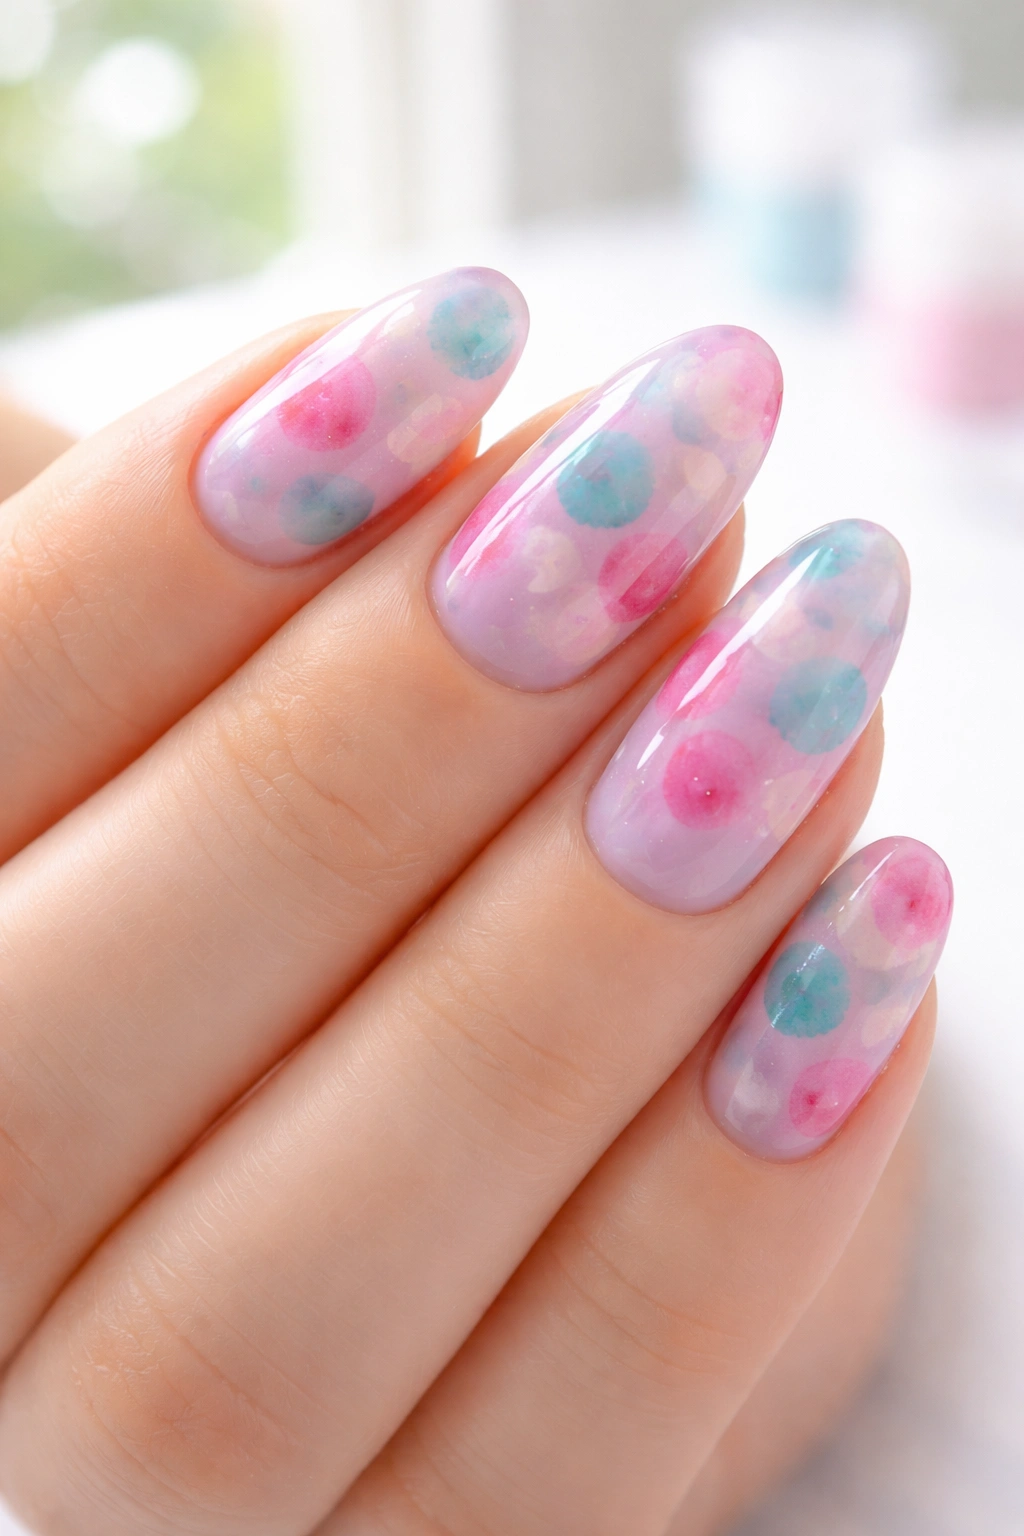
For a softer, more artistic approach, create a watercolor-inspired design with dots that appear to blend and diffuse into the surrounding polish. This requires a slightly different technique — instead of placing crisp dots on a solid base, you’ll apply one color to still-wet polish underneath.
The Artistic Magic of Watercolor Nails
Watercolor dot designs feel painterly and one-of-a-kind because no two applications look identical. This is the design for people who appreciate the beauty of happy accidents and organic imperfection. Long round nails provide plenty of space for the watercolor effect to fully develop and feel intentional rather than accidental.
Creating Watercolor Dots
- Apply your base color and allow it to reach a tacky, not-quite-dry state — not wet, but not fully cured
- Dab the watercolor color onto the tacky base using a dotting tool or small brush
- Watch as the color naturally diffuses and bleeds into the still-wet base
- The effect becomes permanent once everything fully dries, so placement matters
- Topcoat seals the effect and prevents any smudging
Pro tip: Practice this technique on a practice wheel or paper first — timing is everything, and it takes a few attempts to get the tackiness level right.
9. Glitter Dot Focal Point
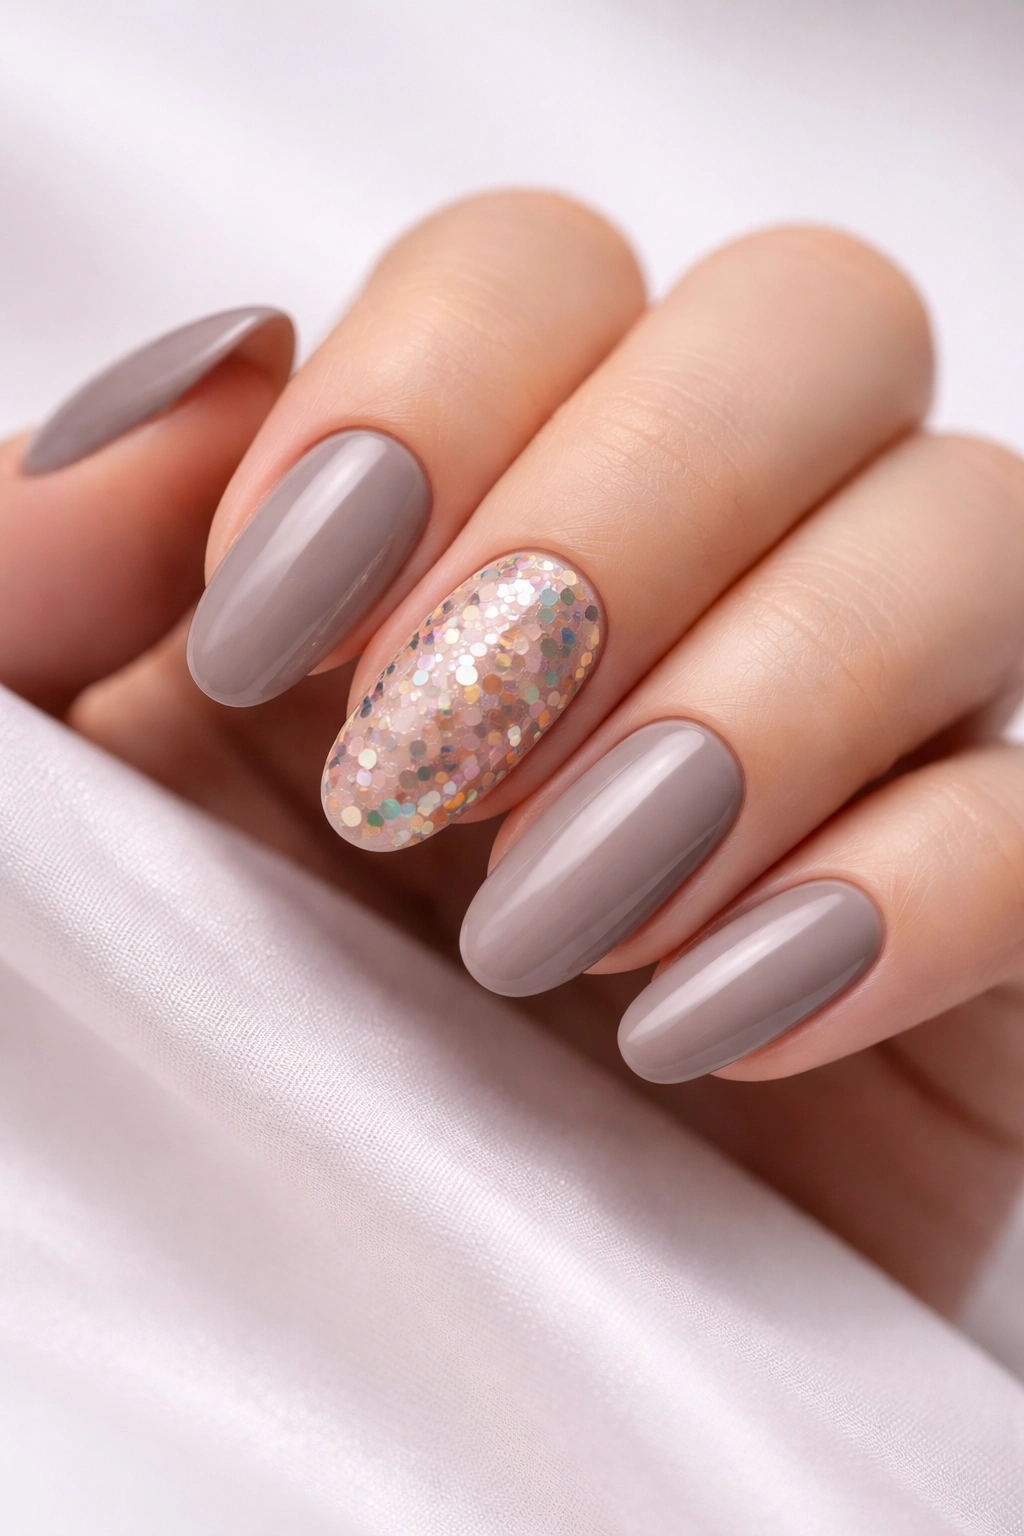
This design places your glitter emphasis on a single accent nail while keeping other nails more understated. Paint four nails in a solid color, then dedicate one nail to large, glittery dots or a glitter dot focal point design.
Creating Intentional Focal Points
A focal point accent nail draws the eye and adds visual interest without requiring every nail to be ornate. This approach works beautifully for people who love detailed nail art but want practicality — glitter can snag on things, so concentrating it on one nail reduces that risk while maximizing impact.
Glitter Dot Application
- Use a glitter topcoat or glitter-filled polish for dots that integrate seamlessly with your base
- Apply glitter dots to one nail in a concentrated area, creating a visual focal point
- Make glitter dots larger than you would with regular polish — glitter reads as smaller due to sparkle diffusion
- Layer multiple glitter dots in the same area for depth and dimension
- Use a matte topcoat on your other nails and gloss on your glitter focal nail to emphasize the contrast
Worth knowing: Regular glitter polish dots over a wet or even slightly tacky base creates a softer, more blended look than applying dots over fully cured polish.
10. Two-Tone Dot Design
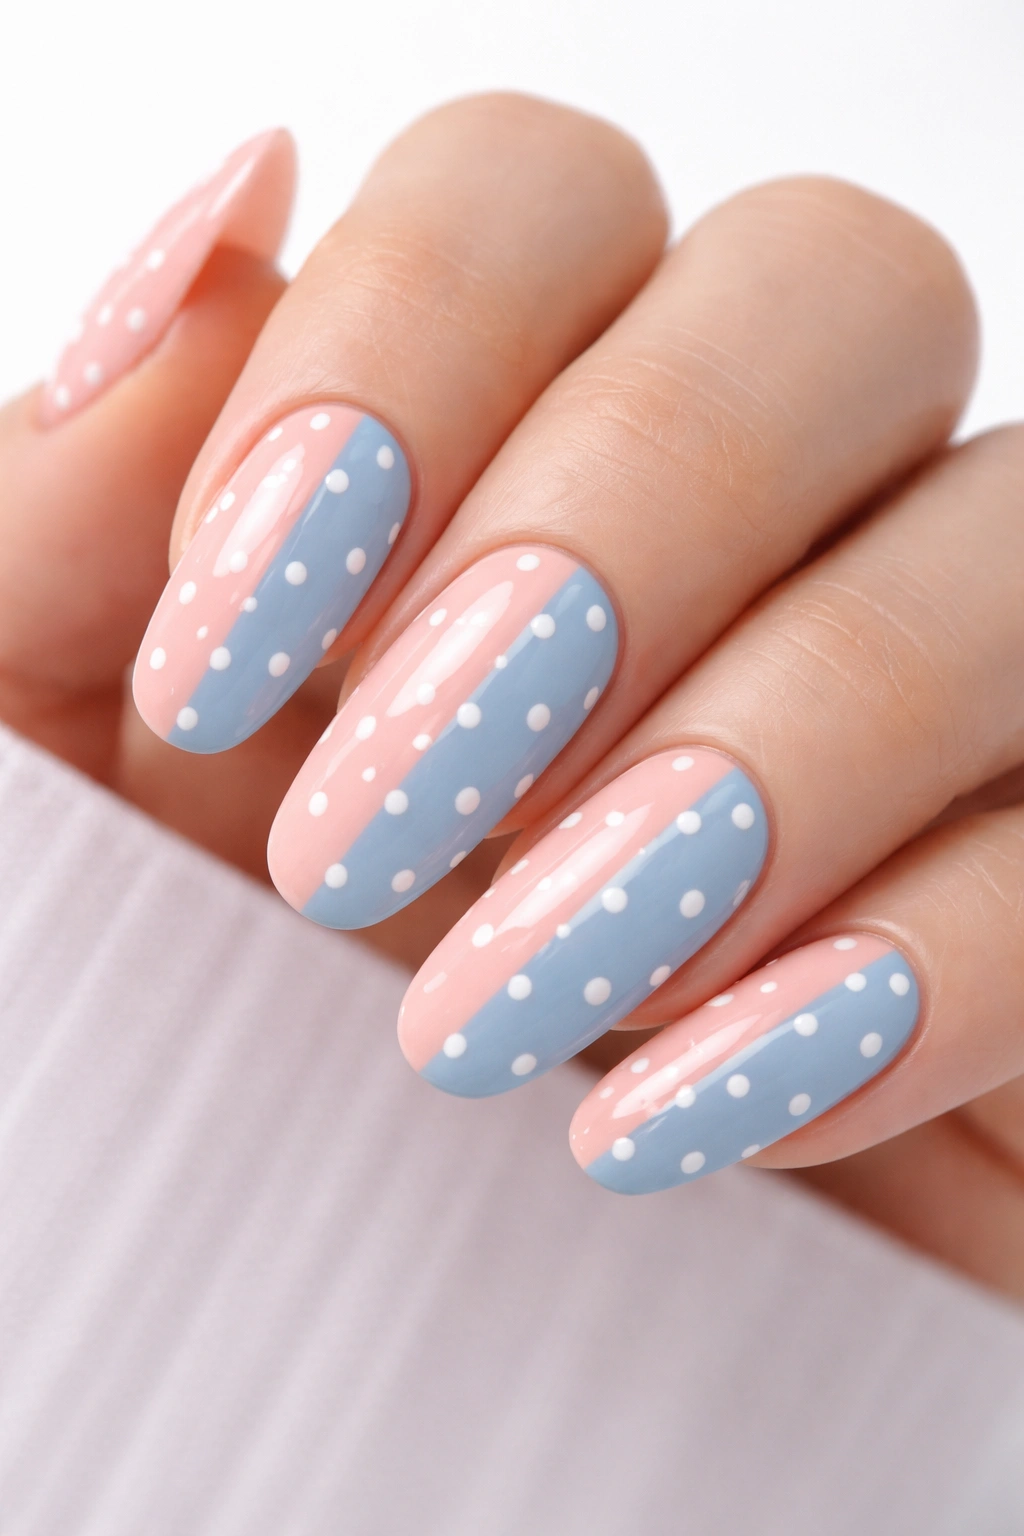
Divide each nail into two color sections, then add dots in a contrasting shade across both sections. You might paint the left half of your nail in blush pink and the right half in soft blue, then add white dots across the entire nail.
The Power of Divided Colors
Two-tone designs feel contemporary and graphic while the dots add a softer, playful element. This design works particularly well when you choose colors that complement each other — pastels with pastels, jewel tones with jewel tones, or neutrals with a single bold accent color.
Two-Tone Dot Technique
- Use a thin brush or nail striping tape to cleanly divide your nail into two color sections
- Paint each section carefully, allowing the dividing line to be either crisp or slightly soft depending on your preference
- Once both colors dry completely, add dots across the entire nail surface
- Dots that cross the color division line create visual continuity between the two shades
- Matte topcoat emphasizes the two-tone separation, while gloss makes it feel more cohesive
Pro tip: If you’re not confident drawing a straight line freehand, use nail tape to create a precise division, paint each color, then carefully remove the tape.
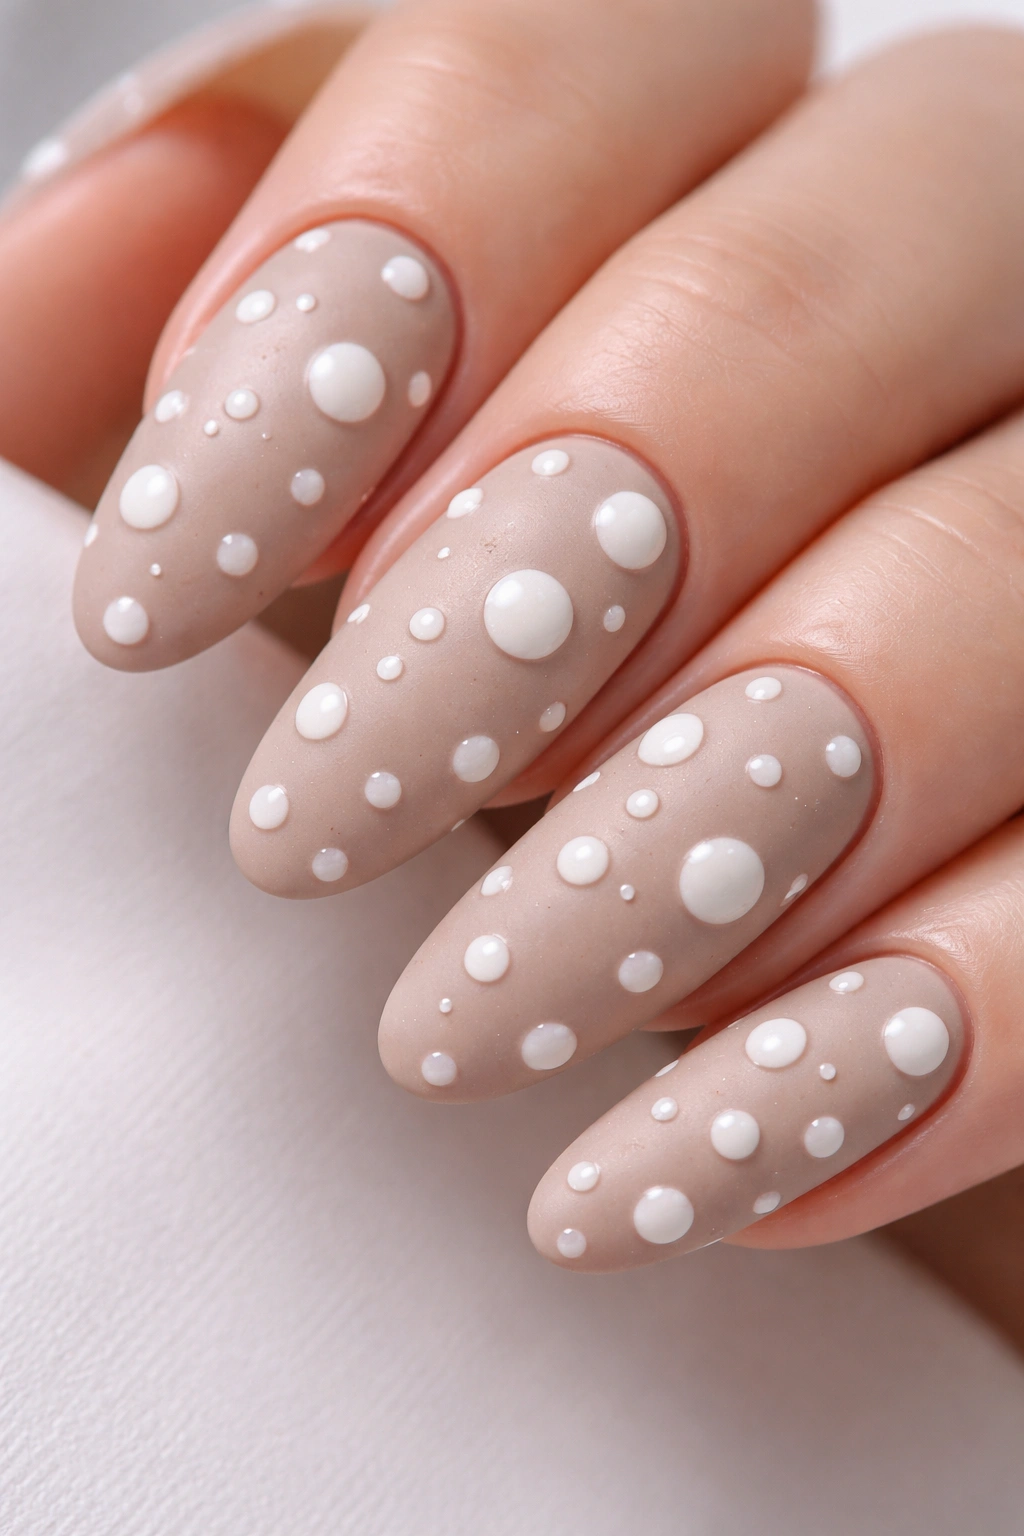
11. Pastel Dot Dreams
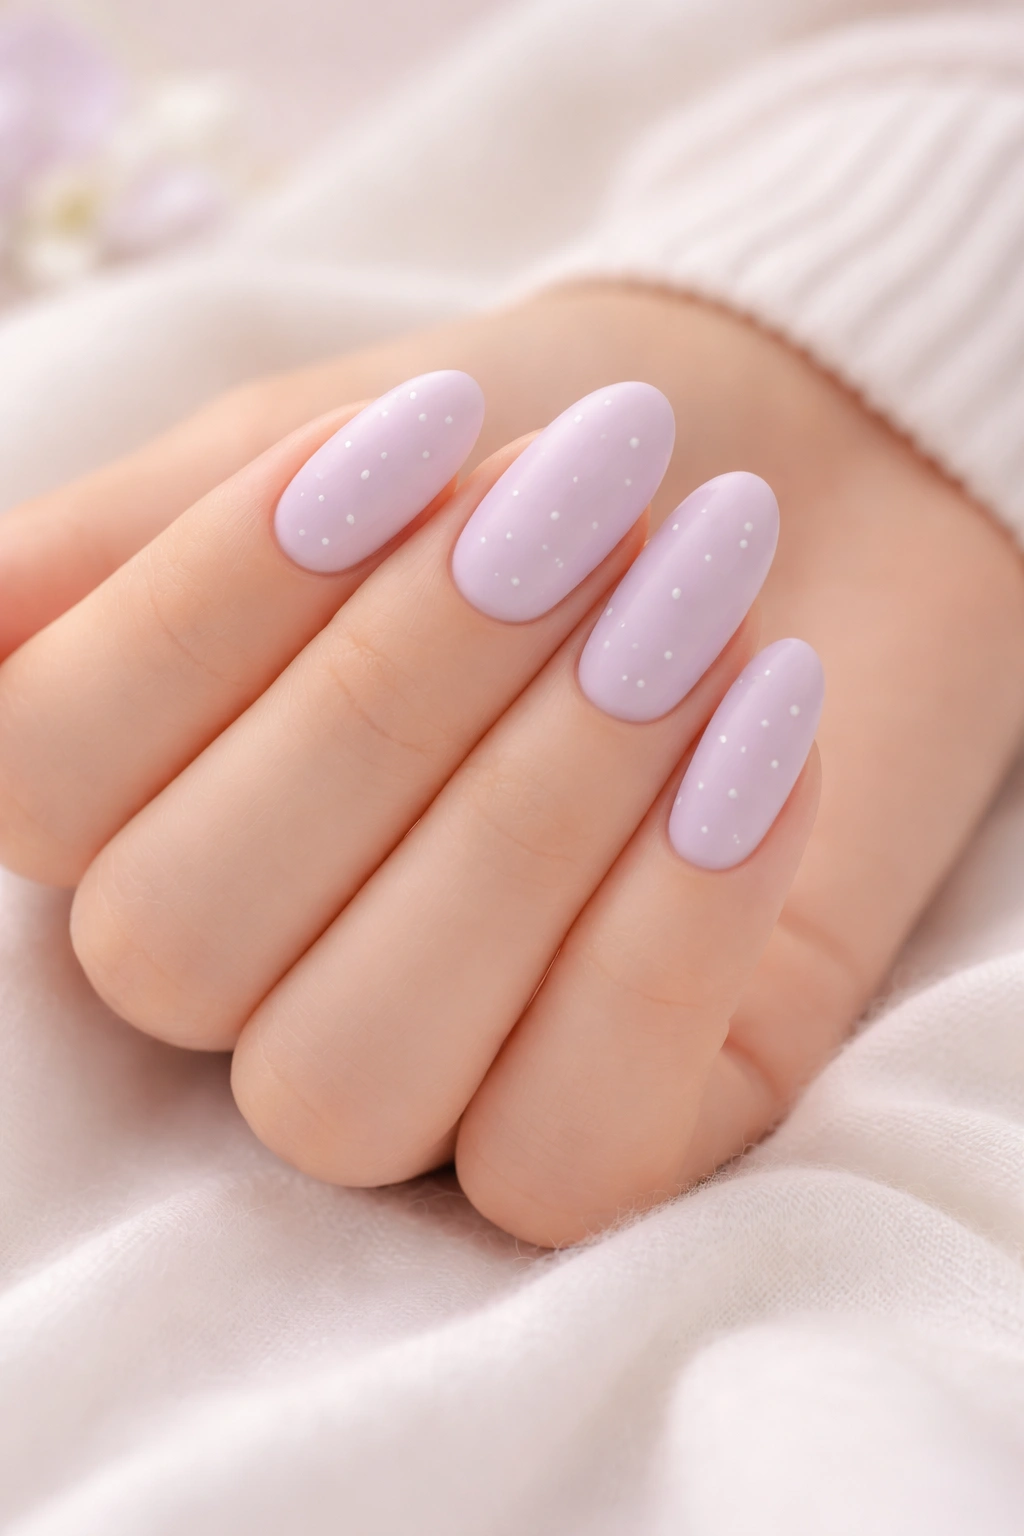
Soft, dreamy pastels paired with delicate dots create an aesthetic that feels fresh and gentle. Paint your long round nails in a creamy pastel base — soft lavender, pale yellow, powder blue, or mint green — then add tiny dots in white, pale pink, or a slightly deeper shade of your base color.
The Charm of Pastel Color Stories
Pastel designs feel inherently playful and approachable. They’re forgiving — pastels are soft enough that slight imperfections in dot placement feel charming rather than noticeable. This design works year-round and pairs beautifully with nearly any outfit or occasion.
Pastel Dot Details
- Use thinner polish formulations for pastels; many pastel shades benefit from an extra thin coat for true color
- Keep dots small and delicate in proportion to your nail — pastels read as more fragile than bolder colors
- Consider creating dot patterns that feel organic: scattered dots, gradient arrangements, or gentle lines of dots
- A matte topcoat enhances the soft, dreamy quality of pastels
- Layer white dots over pastel bases for a cloud-like effect
Worth knowing: Many pastel polishes require three coats for full opacity, so plan accordingly and ensure each layer dries completely.
12. Negative Space Dots
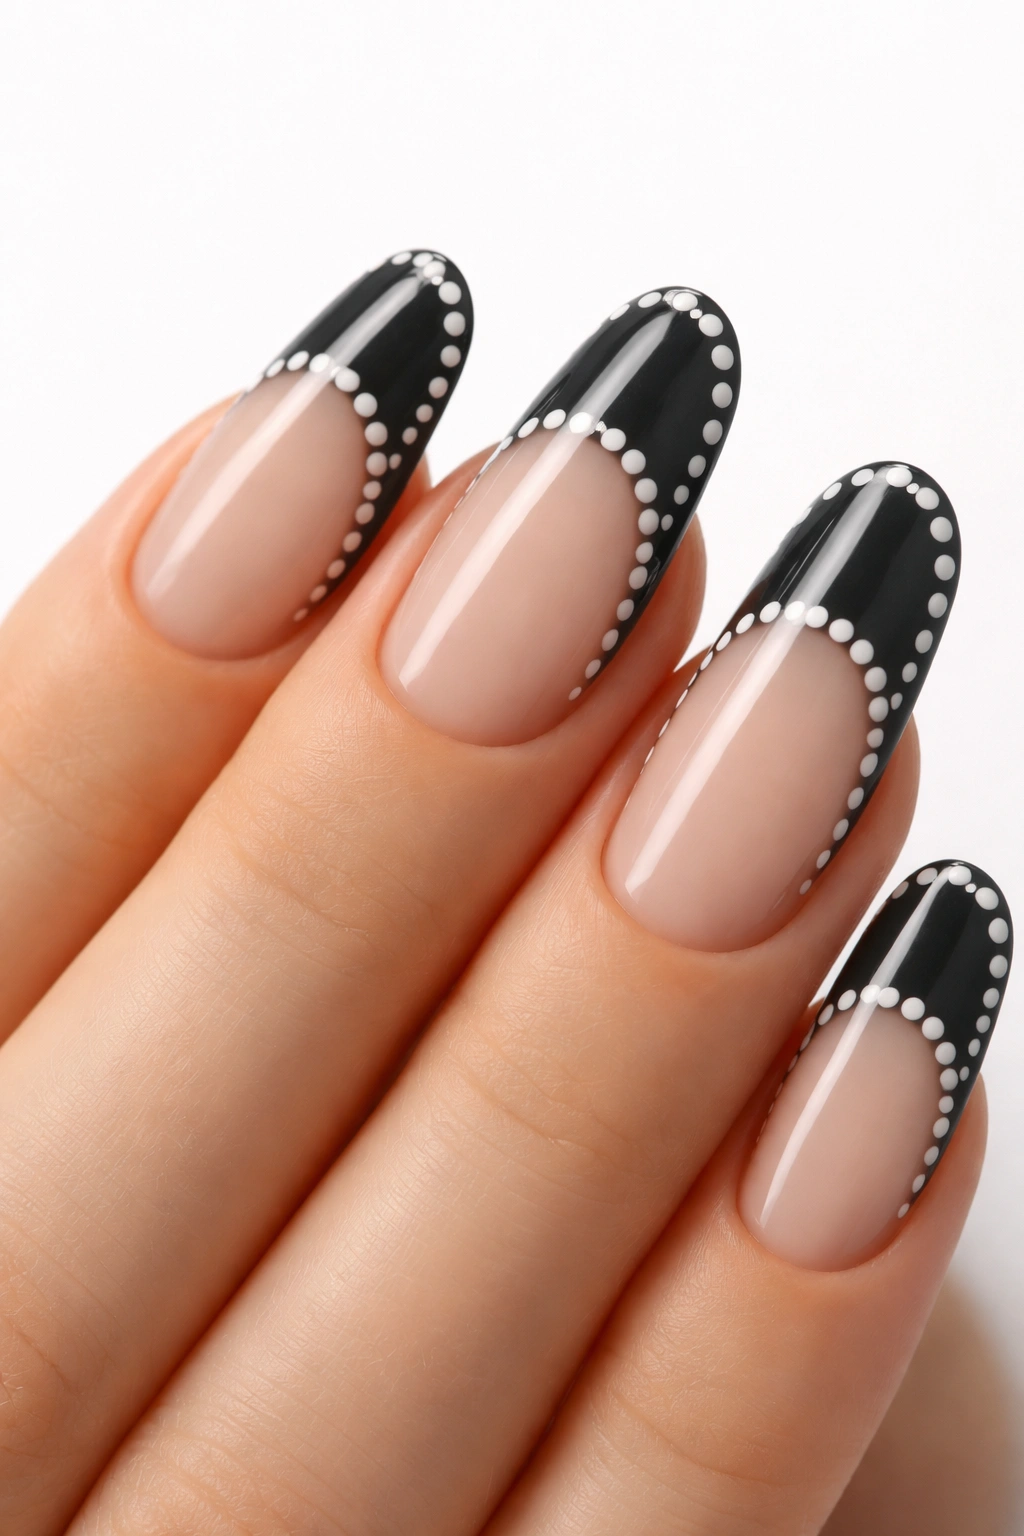
This modern design uses dots to outline sections of your nail, leaving the nail base showing through. You might create a dot circle with empty space inside, or frame the edge of your nail with dots while leaving the center bare.
The Contemporary Appeal of Negative Space
Negative space nail designs feel artistic and intentional, perfect for people who want something visually interesting without maximum color coverage. Dots work beautifully for creating these outlined shapes because dots are small enough to be controlled and precise.
Negative Space Dot Technique
- Sketch your negative space shapes lightly with a pencil or nail marker before applying polish
- Use a fine dotting tool to carefully outline your shapes with dots
- Leave the interior of your outlined shapes completely bare — that empty space is what makes this design read as intentional
- Consider using a darker or contrasting polish color for dots so they stand out against the base
- Matte topcoat on the dots with either matte or gloss on the bare nail creates interesting texture contrast
Pro tip: The most striking negative space designs use clean shapes — circles, diamonds, triangles — rather than complex abstract forms.
13. Pearl Dot Elegance
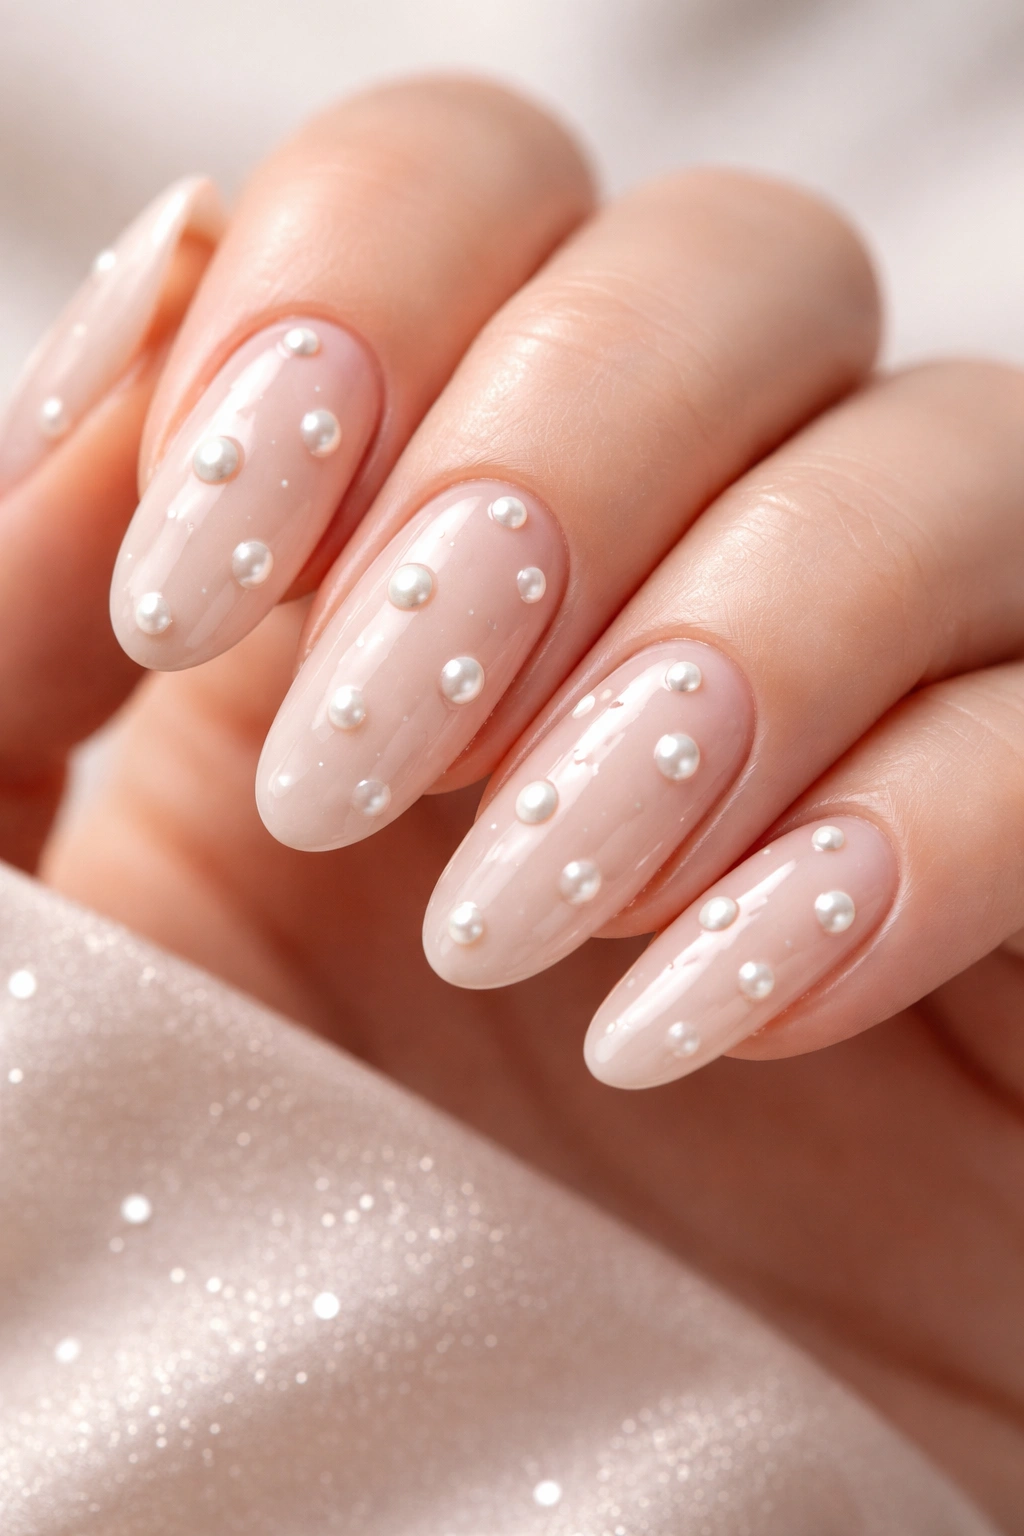
Pearl-finish polishes create a sophisticated shimmer that’s more subtle than glitter but more dimensional than crème finishes. Use pearl or opal-effect polish for dots over a solid base, or create a pearl base with contrasting pearl dots in a slightly different shade.
Pearl Polish Sophistication
Pearl finishes feel luxurious and refined while maintaining the playfulness that dots bring to any design. They reflect light beautifully, making your nails look longer and more polished. Pearl dots work across all seasons and occasions because their subtlety feels appropriate everywhere.
Pearl Dot Application
- Pearl polishes sometimes require a slightly heavier hand than crème polishes — use gentle pressure when dotting
- Layer pearl dots at varying sizes for visual interest without overwhelming
- Pearl-on-pearl designs (same pearl shade in different sizes) create a monochromatic, elegant effect
- Consider mixing pearl dots with metallic accents for extra dimension
- Gloss topcoat is essential for pearl finishes; it amplifies the shimmer
Worth knowing: Some pearl polishes have subtle color shifts depending on lighting and angle — test your chosen shades in different light before committing to the full design.
14. Holographic Dot Sparkle
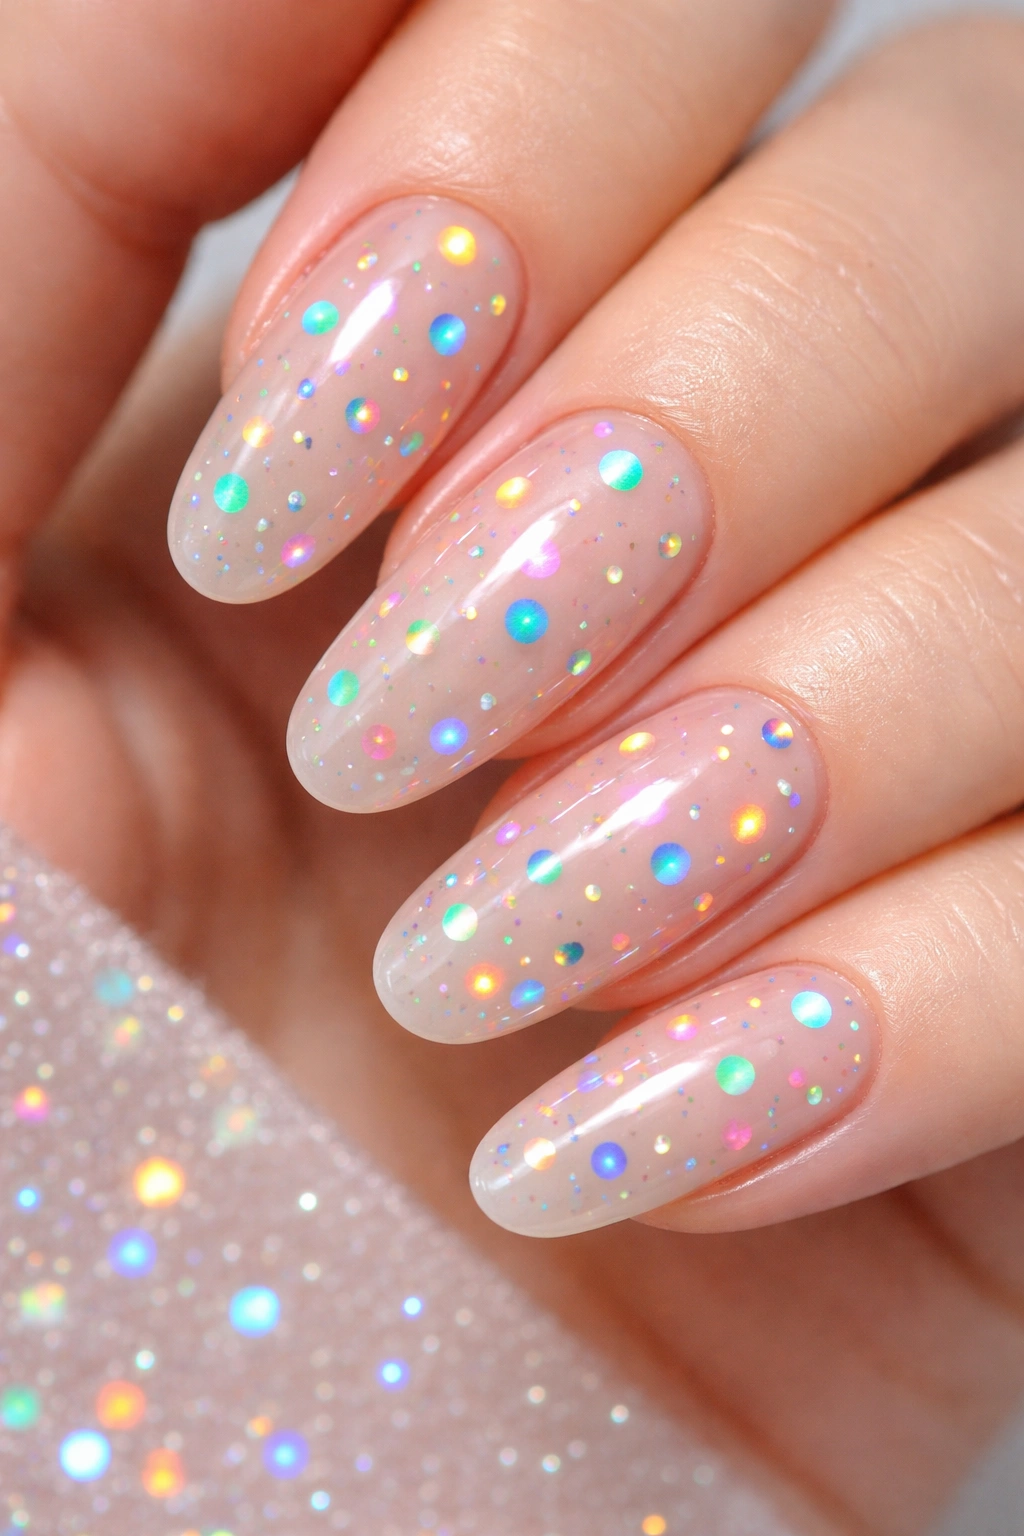
Holographic polishes create a rainbow-shifting effect that catches light in spectacular ways. Apply holographic polish as dots over a neutral base like white, pale gray, or soft nude for maximum color impact and visual interest.
The Wow Factor of Holographic Effects
Holographic designs turn heads. The rainbow shimmer means your nail color appears different in natural light, artificial light, and indirect light. Dots in holographic polish deliver this wow factor in a controlled way — dramatic enough to be eye-catching but not so saturated that the effect feels overwhelming.
Holographic Dot Execution
- Holographic polishes often require 3-4 coats for true holographic effect, so apply thin, even layers
- Use a dotting tool and work methodically; holographic polish can be slightly thick
- Layer dots across your entire nail or concentrate them in a specific area for an accent nail effect
- Top-coat is essential for holographic finishes — it seals the effect and enhances the color shift
- Photograph your nails in different lighting to fully appreciate the holographic effect
Pro tip: Mix holographic dots with matte base colors for maximum contrast — the holographic shimmer stands out dramatically against matte finishes.
15. Matte and Glossy Dots
This design plays with texture as much as color. Paint your nails with a matte topcoat, then apply dots with a glossy polish or glossy topcoat over certain dots. The texture contrast creates visual depth and interest.
Texture as Design Element
Combining matte and gloss finishes adds a sophisticated, intentional quality to your nail art. This approach appeals to people who appreciate nail design as a full sensory experience — not just color, but texture as well. The contrast is visible even from a distance, making this design especially eye-catching.
Matte and Glossy Dot Technique
- Paint your base and apply matte topcoat, allowing it to cure completely
- Apply dots with a gloss polish (or a regular polish with gloss topcoat), creating scattered or patterned dots
- The glossy dots will appear raised and dimensional against the flat matte background
- Alternatively, paint glossy dots first, then apply matte topcoat to everything except those dots
- Color contrast plus texture contrast creates maximum visual interest
Worth knowing: Matte and gloss combinations work best when you limit yourself to two colors maximum — adding a third color risks making the design feel cluttered rather than intentional.
Final Thoughts
Dot nail designs work so brilliantly with long round nails because they bridge playfulness and sophistication. Whether you choose a minimalist single dot, go full-color rainbow scattered, or explore the texture possibilities of matte and gloss combinations, dots deliver personality with accessibility.
The real power of these designs lies in their flexibility. You can adapt any of these fifteen approaches to match your current mood, outfit, or the occasion at hand. Feeling bold? Go neon or holographic. Preferring subtlety? Choose minimal dots in a complementary shade. The dotting tool becomes your paintbrush, and your long round nails become the canvas for whatever playful vision you have in mind.
Start with the design that speaks to you most, and don’t hesitate to modify colors, dot sizes, or placement to match your personal aesthetic. Your nails are an extension of your personality — make them tell the story you want to tell. The beauty of dots is that they’re endlessly forgiving, so even if your first attempt isn’t perfect, the playful, organic charm of a dot design makes slight imperfections feel entirely intentional.
