

There’s something about gold ombre nails that feels like liquid sunshine melting across your fingertips. The way warm tones blend seamlessly from one shade to another creates this gorgeous gradient effect that’s both luxurious and surprisingly wearable.
If you’ve been scrolling through nail inspo and feeling torn between going bold or staying subtle, gold ombre gives you the best of both worlds. You get that eye-catching shimmer without screaming for attention. It’s the kind of manicure that catches light beautifully, elongates your fingers, and pairs with pretty much everything in your closet.
The beauty of gold ombre lies in its versatility. You can go soft with champagne tones that whisper elegance, or lean into rich bronze-gold fades that make a statement. The gradient technique works magic on any nail shape—whether you’re rocking almond, square, or coffin nails.
What makes gold particularly special is its warm, rich quality. Unlike cooler metallics, gold brings this cozy opulence that feels celebratory without trying too hard. It’s got history on its side too—gold has symbolized prosperity and beauty across cultures for centuries, so wearing it on your nails taps into something deeply appealing.
Whether you’re planning a DIY sponge gradient at home or booking time with your nail tech, these 10 gold ombre nail designs will give you that smooth, warm fade you’re after. Each look offers something different, from understated elegance to full-on glamour.
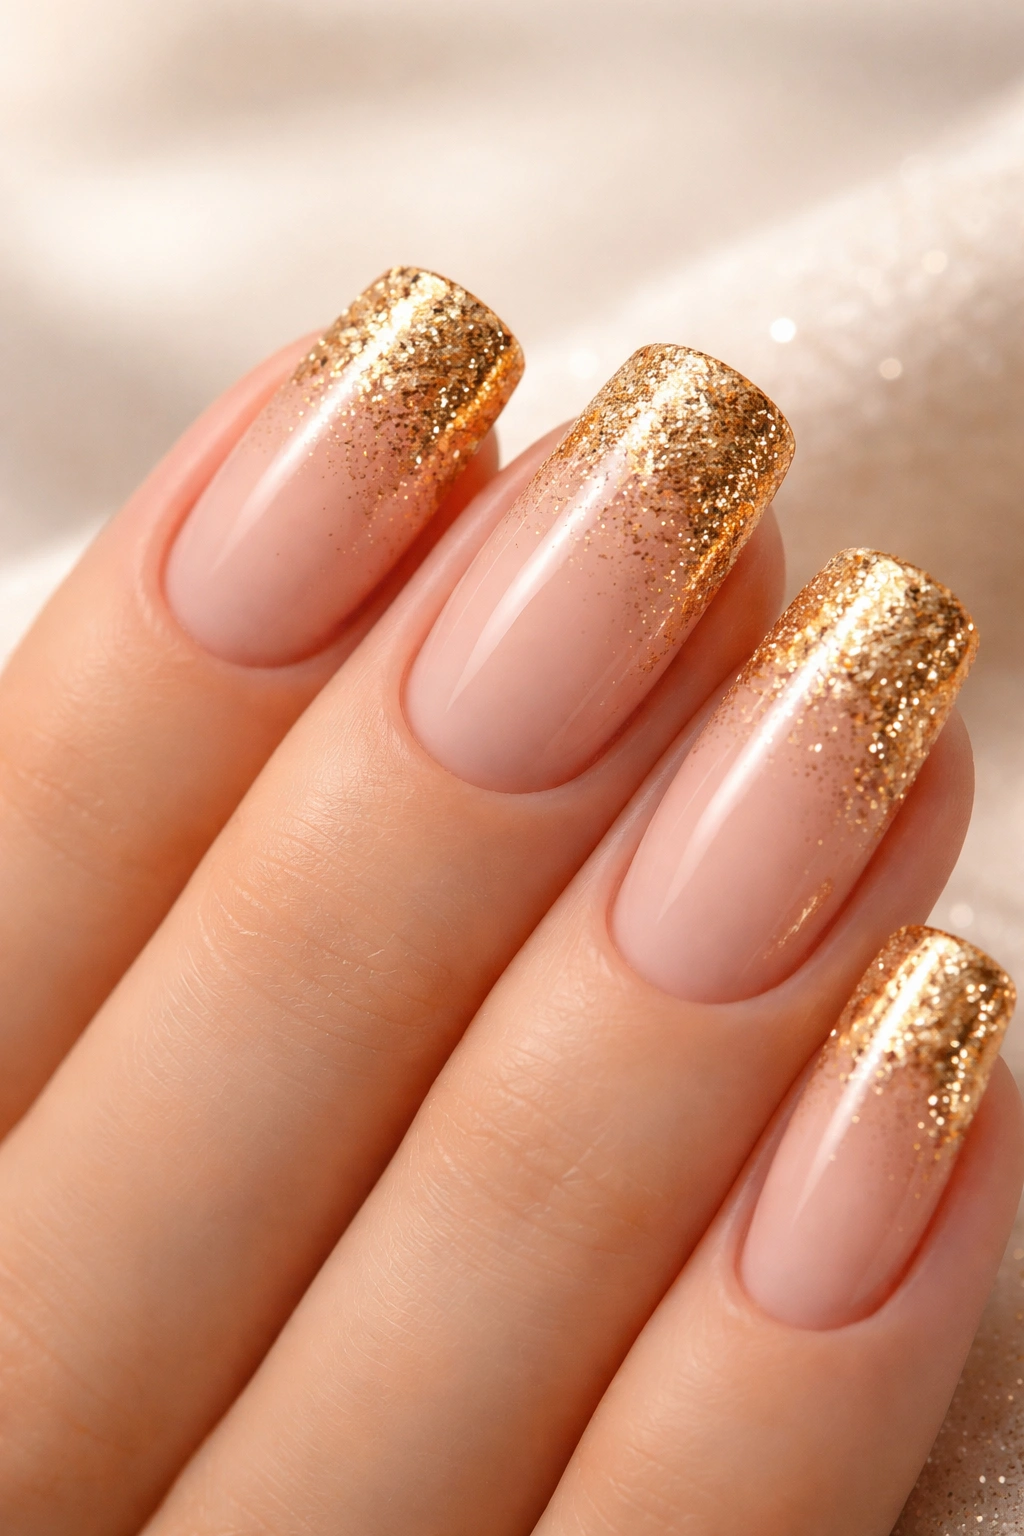
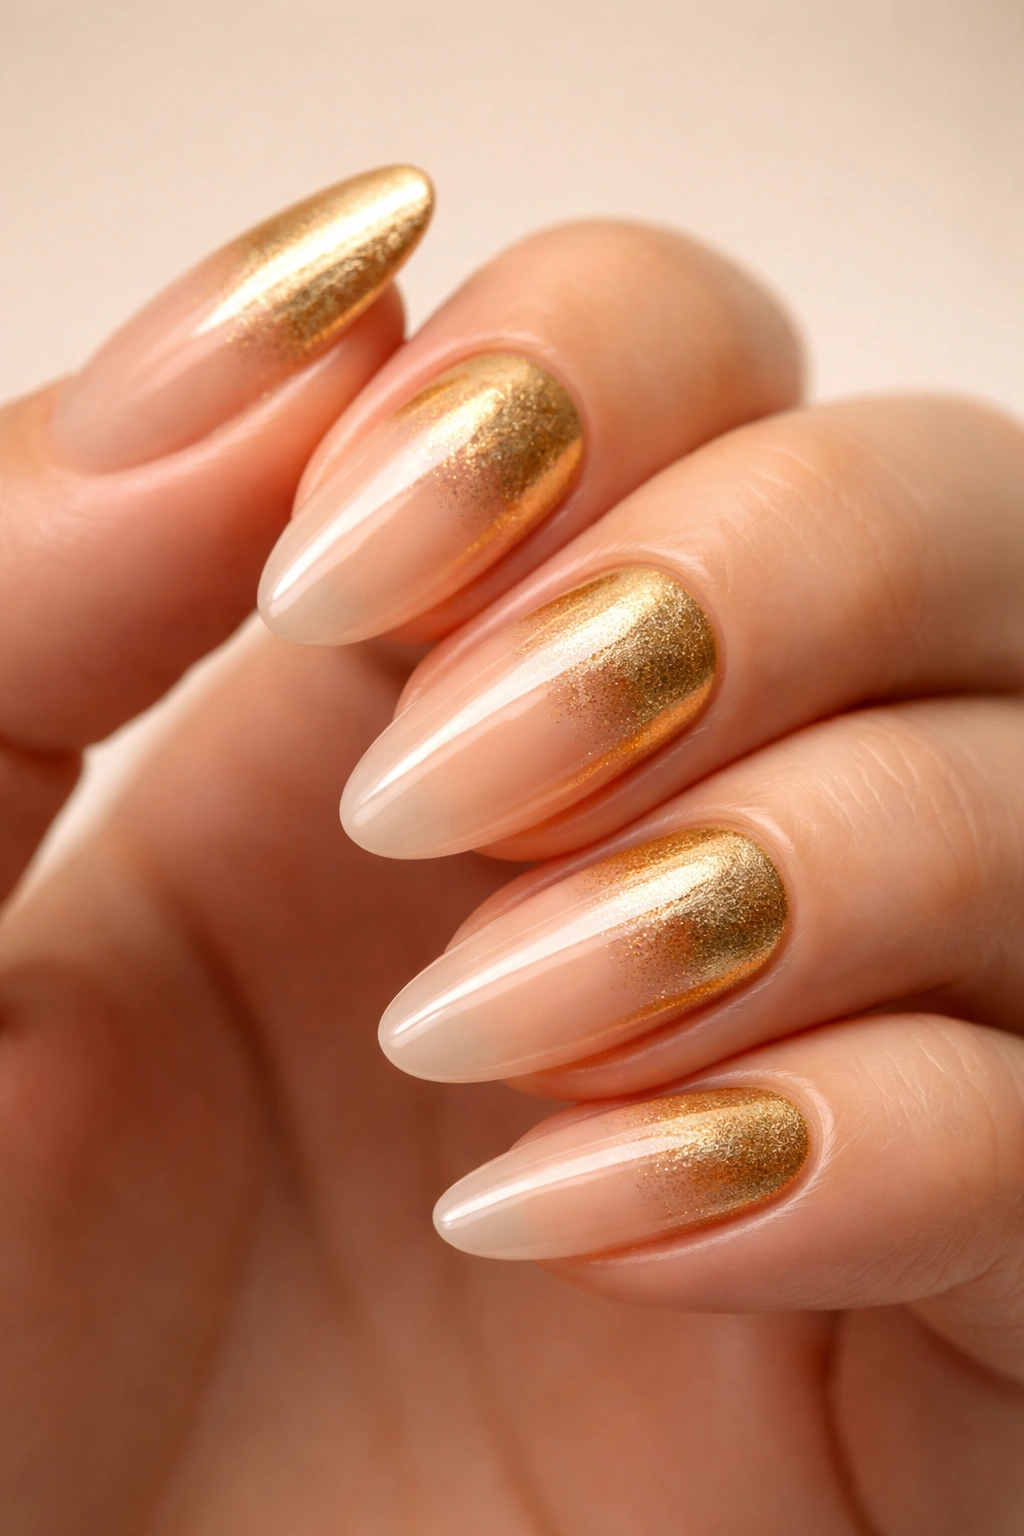
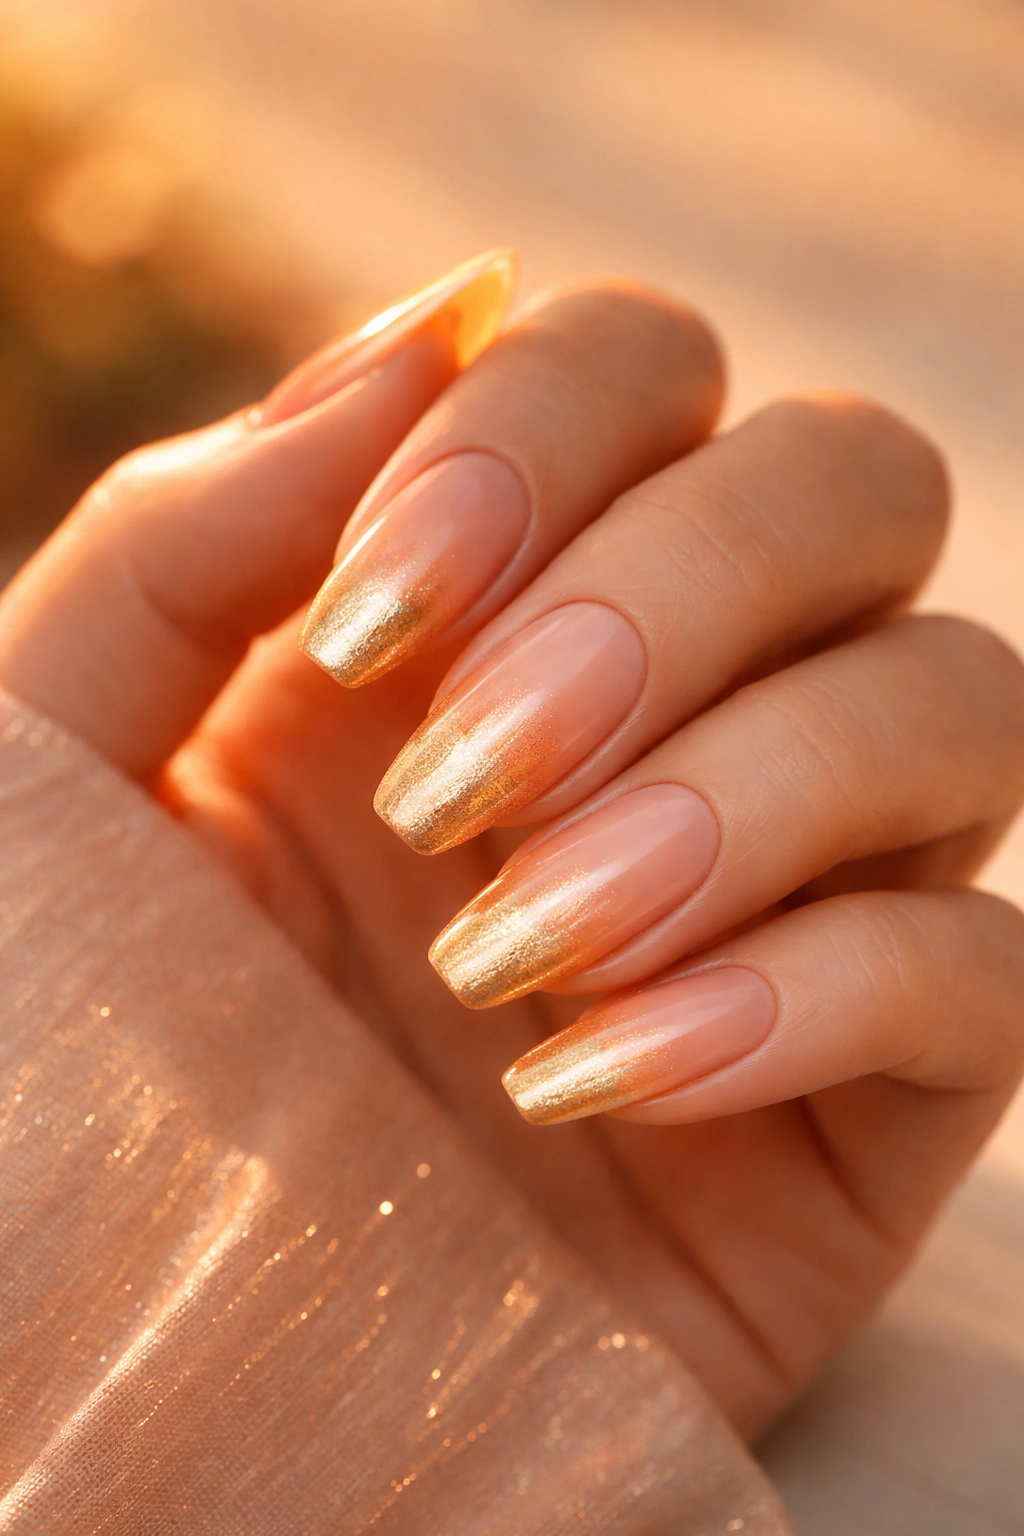
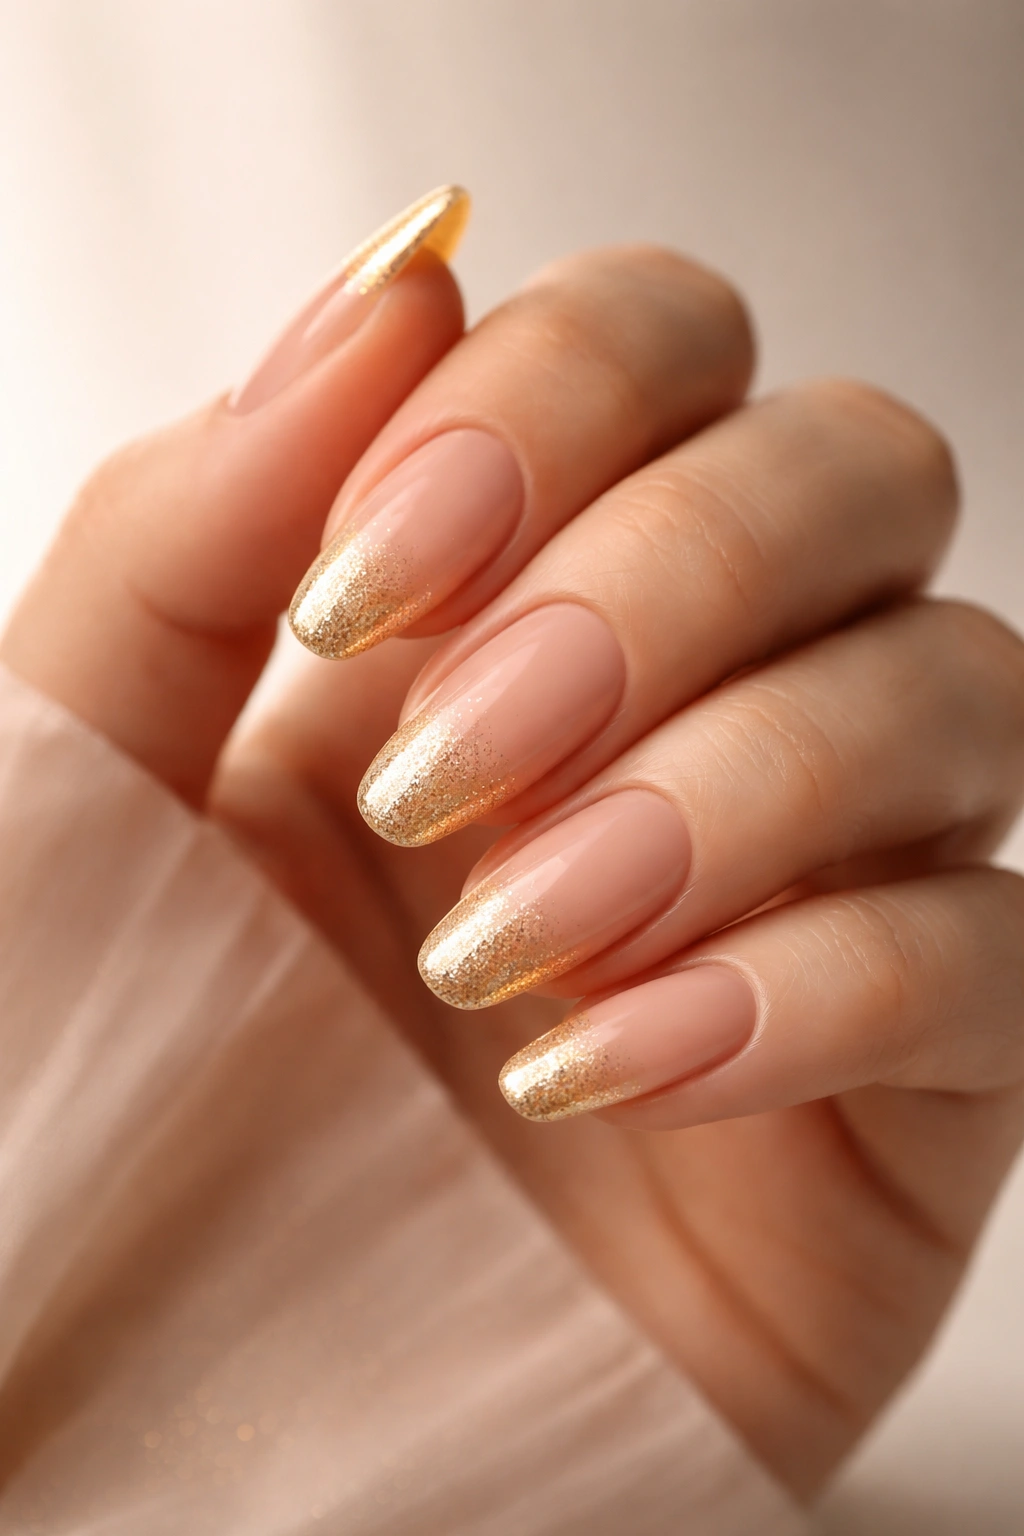
1. Classic Nude to Gold Fade
This is the gold ombre that started it all. A soft nude base at your cuticle gradually melts into rich gold at the tips, creating that seamless transition everyone loves.
The nude-to-gold combo is universally flattering because it complements every skin tone. The neutral base keeps things grounded while the gold tips add just enough sparkle to feel special.
Why It’s Timeless
This design works for literally any occasion. Brunch with friends? Perfect. Wedding guest? Absolutely. Regular Tuesday? Why not. The gradient is gentle enough for professional settings but still has personality.
The key to nailing this look is choosing the right nude shade. Go for something that’s close to your natural nail color rather than stark white or overly pink. That way, the transition feels organic and smooth.
Application Tips
Use a makeup sponge to dab the gold polish starting at your tips and working backward. Build the color gradually with multiple thin layers rather than one thick application. The sponge creates that airbrushed effect that makes the fade look seamless instead of striped.
Pro tip: A glossy top coat makes the gold reflect light beautifully and gives your whole hand that expensive glow.
2. Rose Gold Gradient
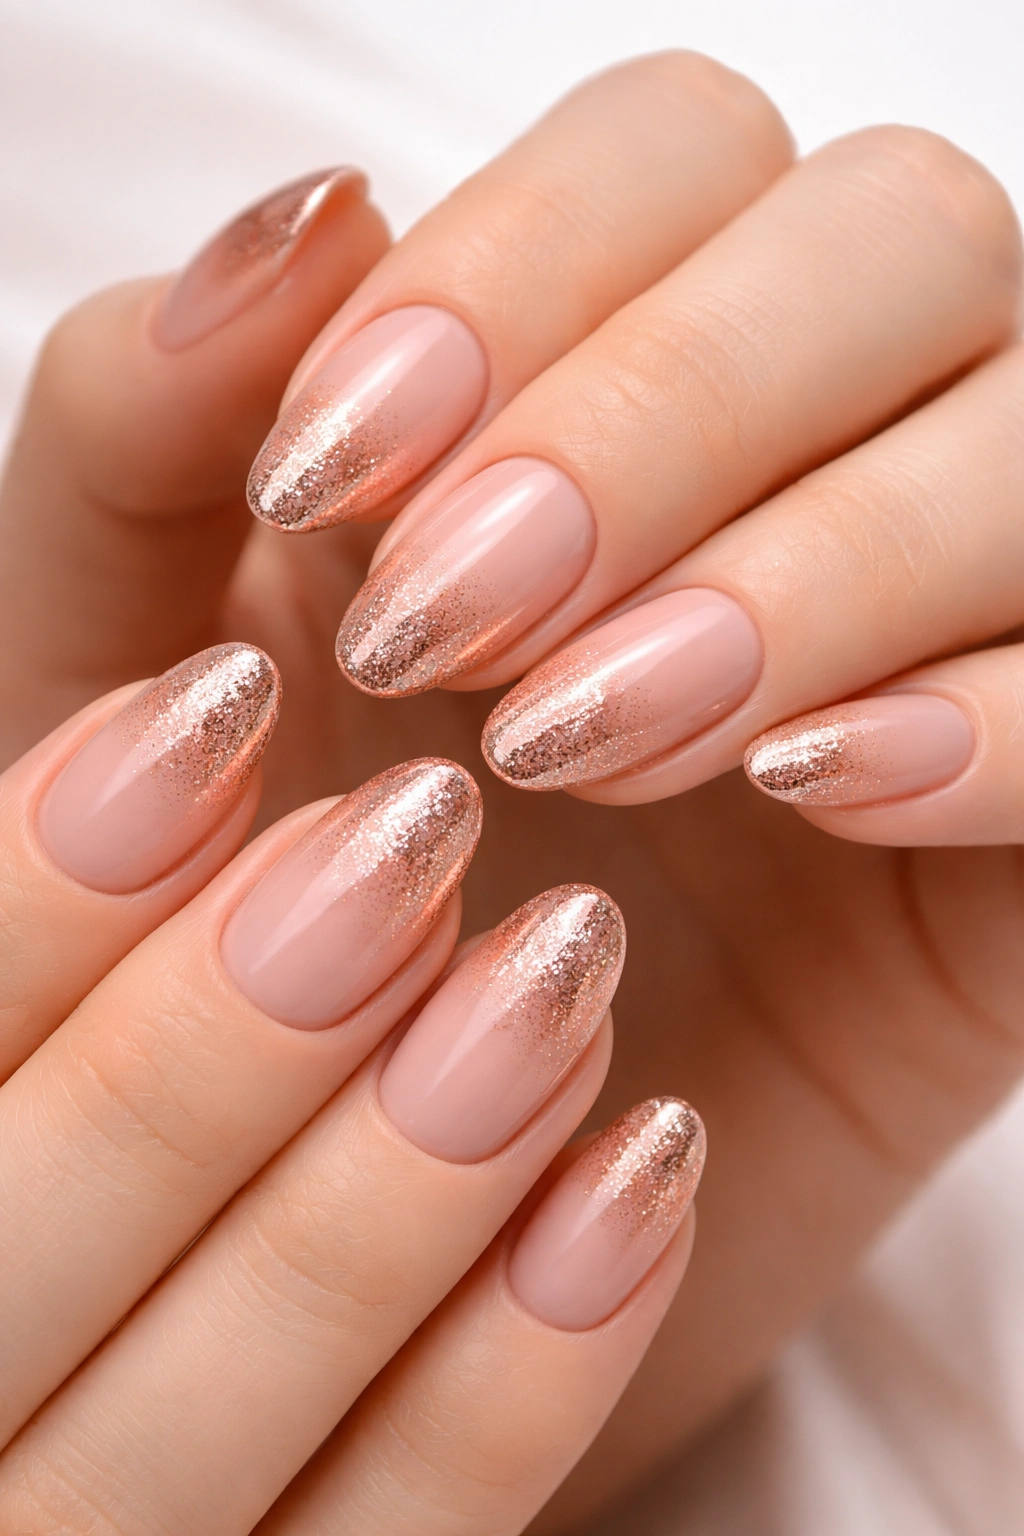
For those who find yellow-gold a bit too warm, rose gold ombre nails offer a softer, more romantic alternative. This peachy-pink metallic shade has a subtle coolness that feels modern and feminine.
Rose gold sits perfectly between pink and gold, giving you that metallic shine with a gentle blush tone. It’s like wearing jewelry on your fingertips—delicate but definitely noticeable.
What Makes It Special
The pinkish undertones in rose gold make it incredibly wearable. It reads as neutral from a distance but up close, there’s this gorgeous shimmer that elevates the whole look.
This gradient works beautifully when you start with a soft blush pink at the base and deepen into rose gold toward the tips. The color family stays cohesive, so the blend happens almost effortlessly.
Styling Suggestions
Rose gold pairs wonderfully with autumn wardrobes—think camel coats, cream sweaters, and burgundy scarves. But honestly, it transitions through seasons beautifully because of its neutral-leaning quality.
Try adding a matte top coat over rose gold ombre for a completely different vibe. The matte finish makes the metallic look velvety and sophisticated, perfect when you want something unique without going over the top.
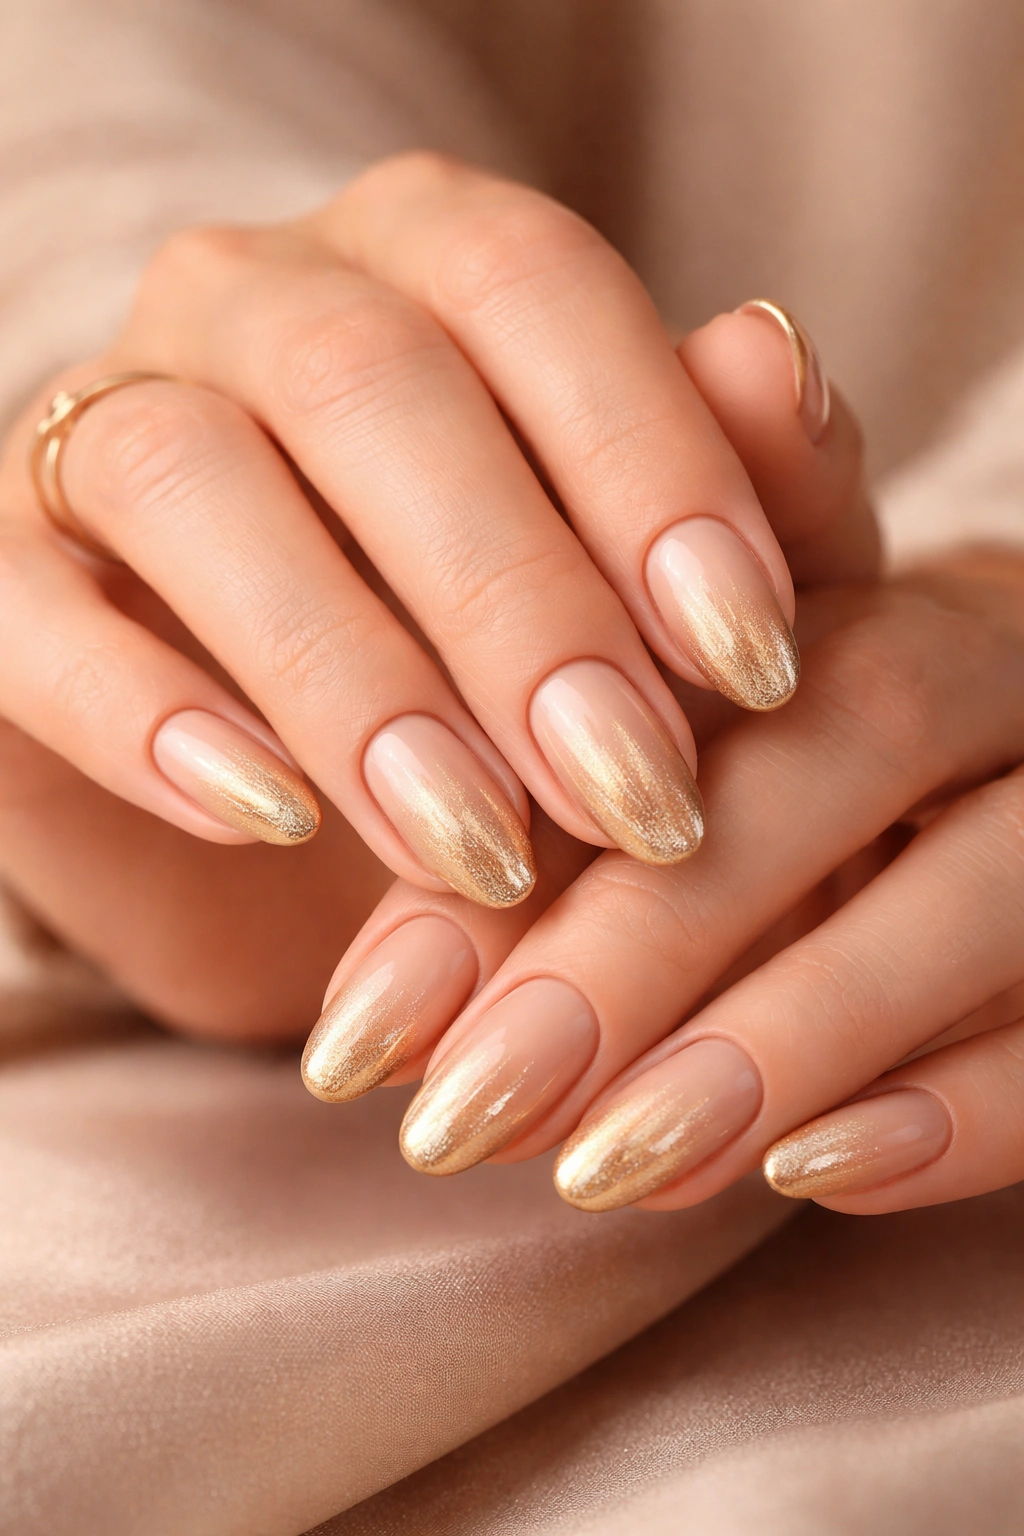
3. Champagne Shimmer Ombre
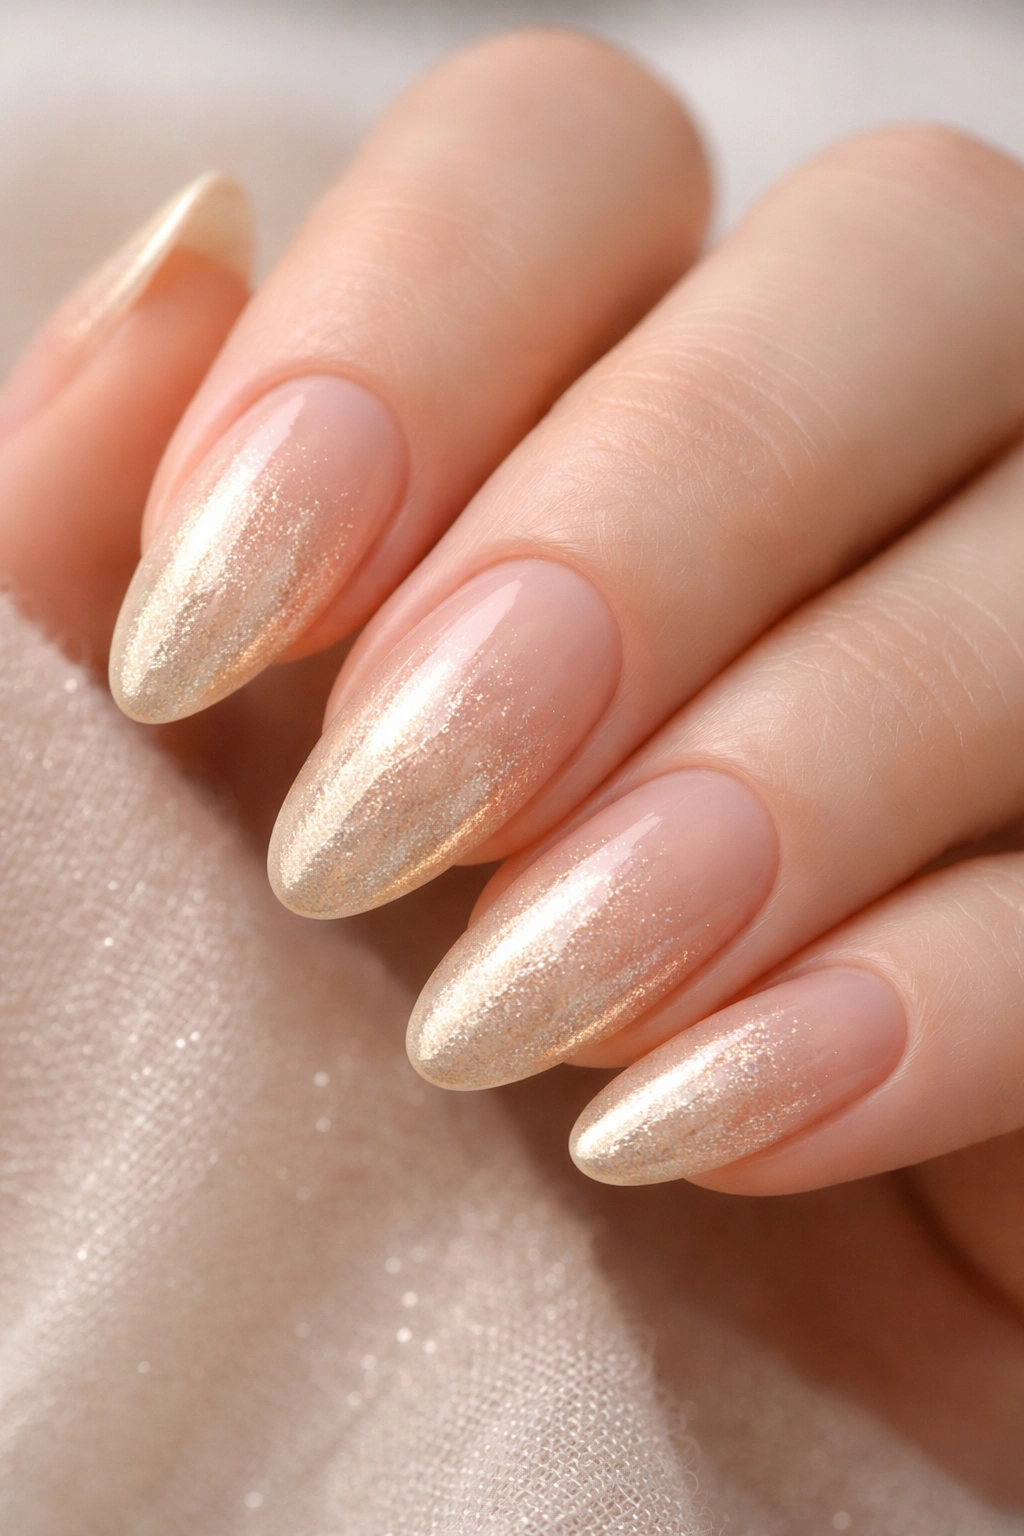
Champagne gold is the “quiet luxury” of the ombre nail world. This pale, shimmery gold-beige creates an understated gradient that looks polished and refined.
Think of champagne ombre as the elegant older sister of bolder gold designs. It’s got all the shimmer but in a whisper rather than a shout.
The Sophistication Factor
Champagne tones have this inherent elegance—like silk slip dresses and pearl earrings. When you fade from sheer nude into soft champagne gold, you get a manicure that feels expensive without being flashy.
The shimmer in champagne polish catches light in the most flattering way. It’s subtle enough that it doesn’t compete with your outfit or jewelry, but interesting enough that people notice your hands.
Perfect For Any Length
Champagne ombre looks stunning on short natural nails. The light, airy quality of the color doesn’t overwhelm smaller nail beds, and the gradient actually makes short nails appear longer.
Layer the champagne shimmer gradually from your tips backward, letting it fade into a sheer nude base. The result is this luminous, almost pearlescent effect that photographs beautifully.
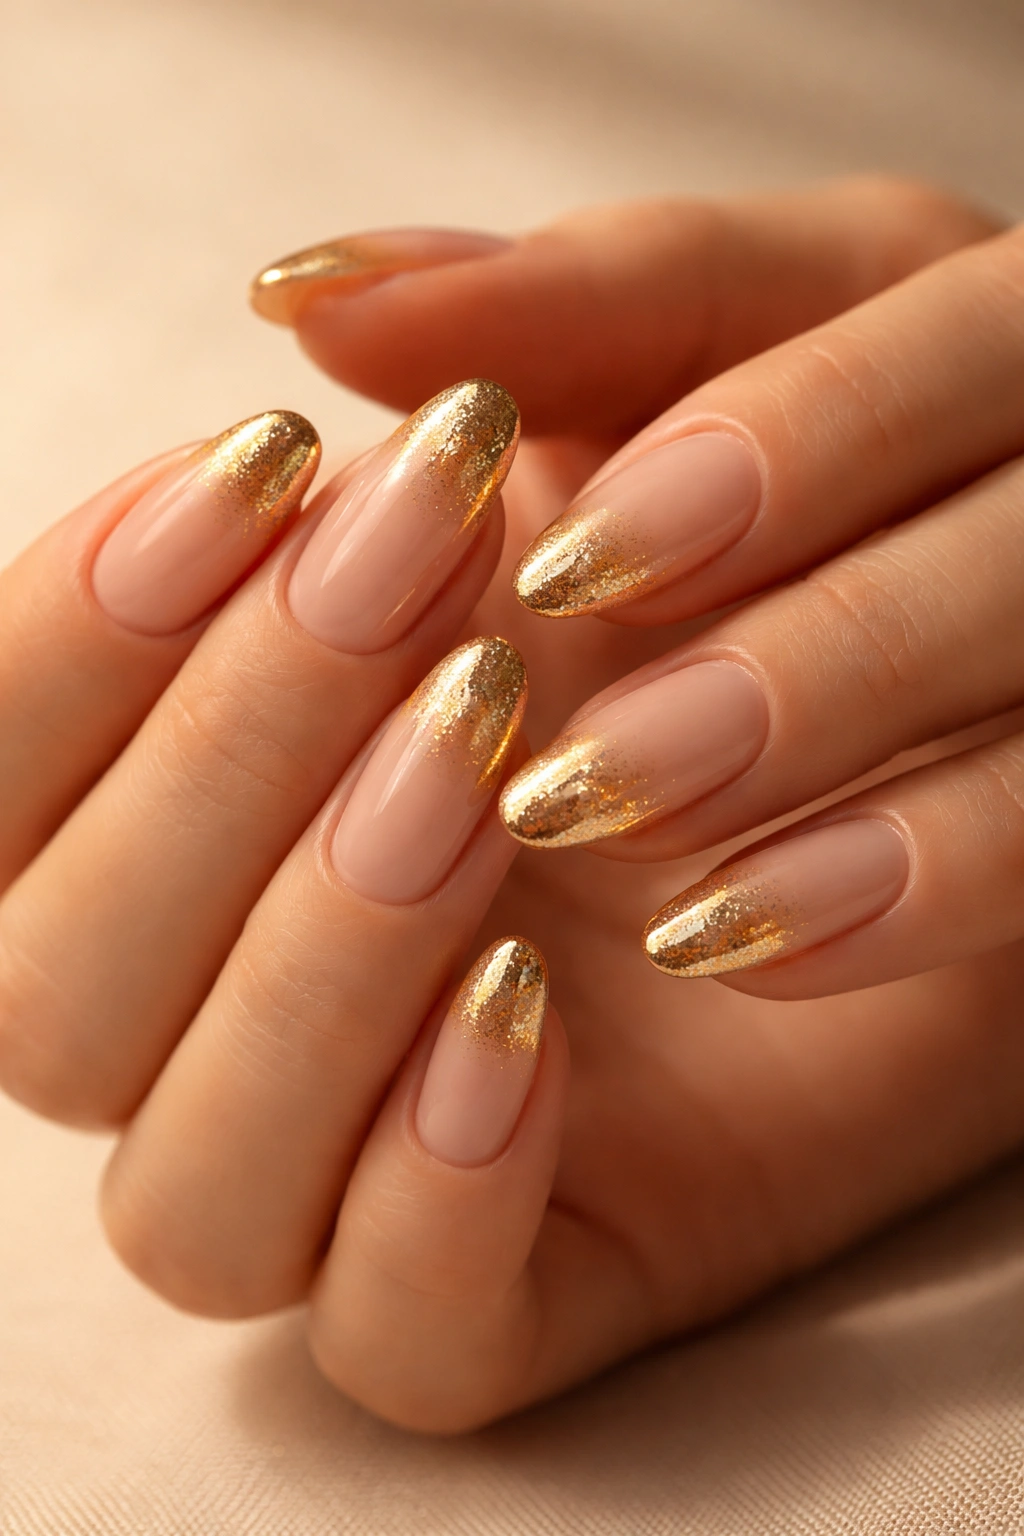
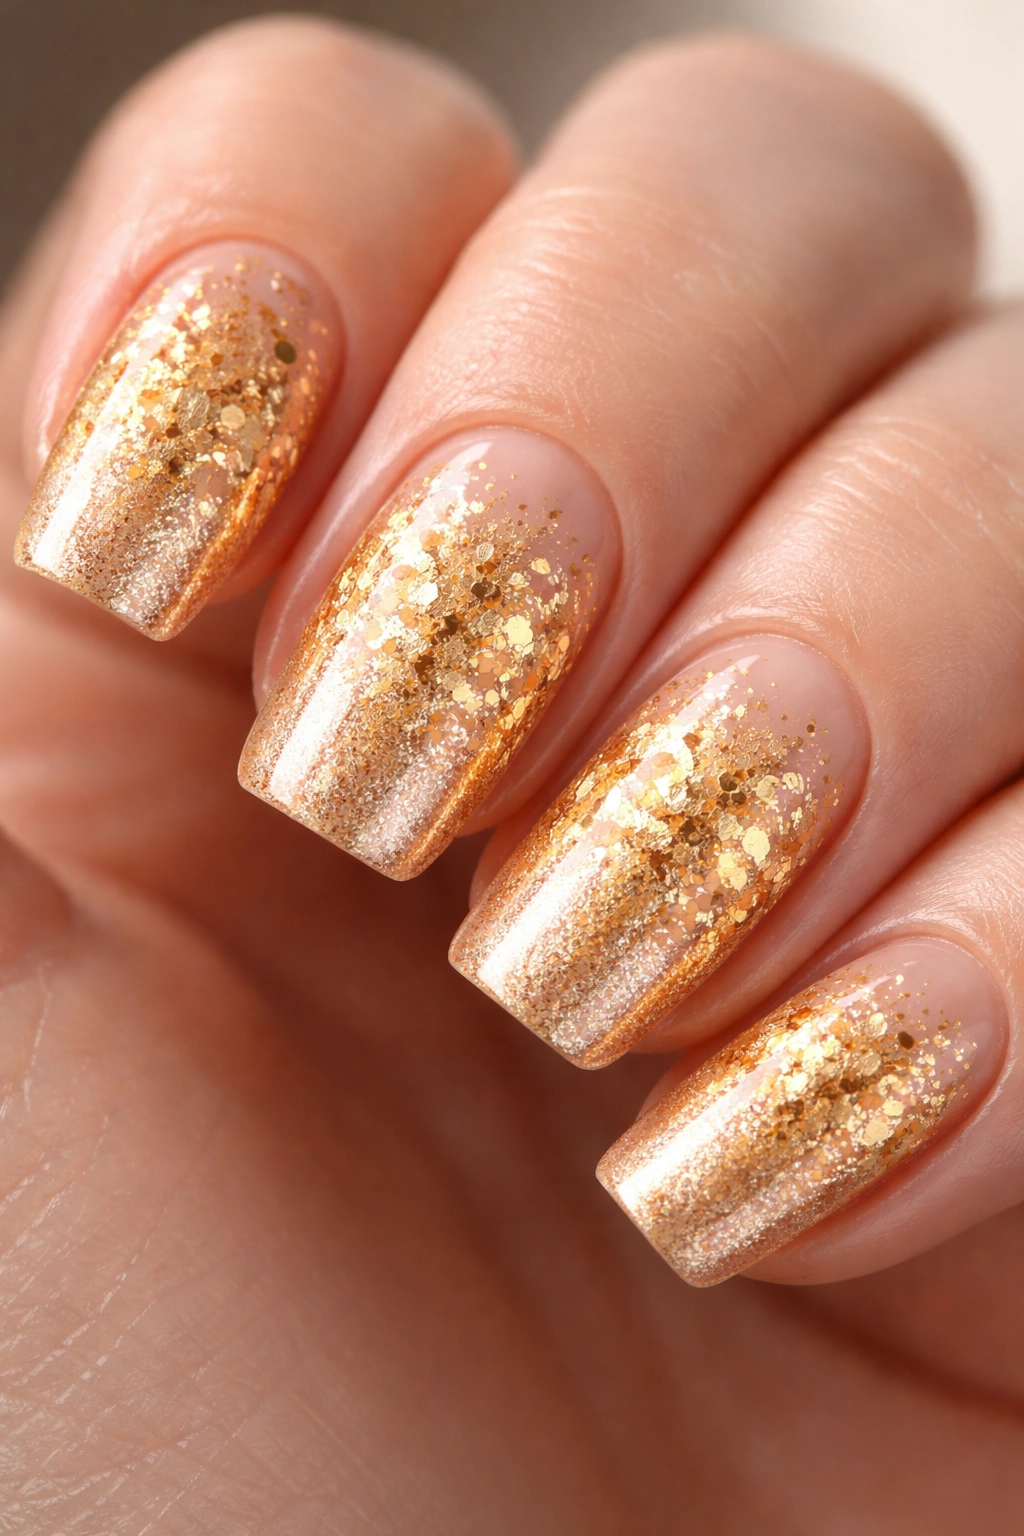
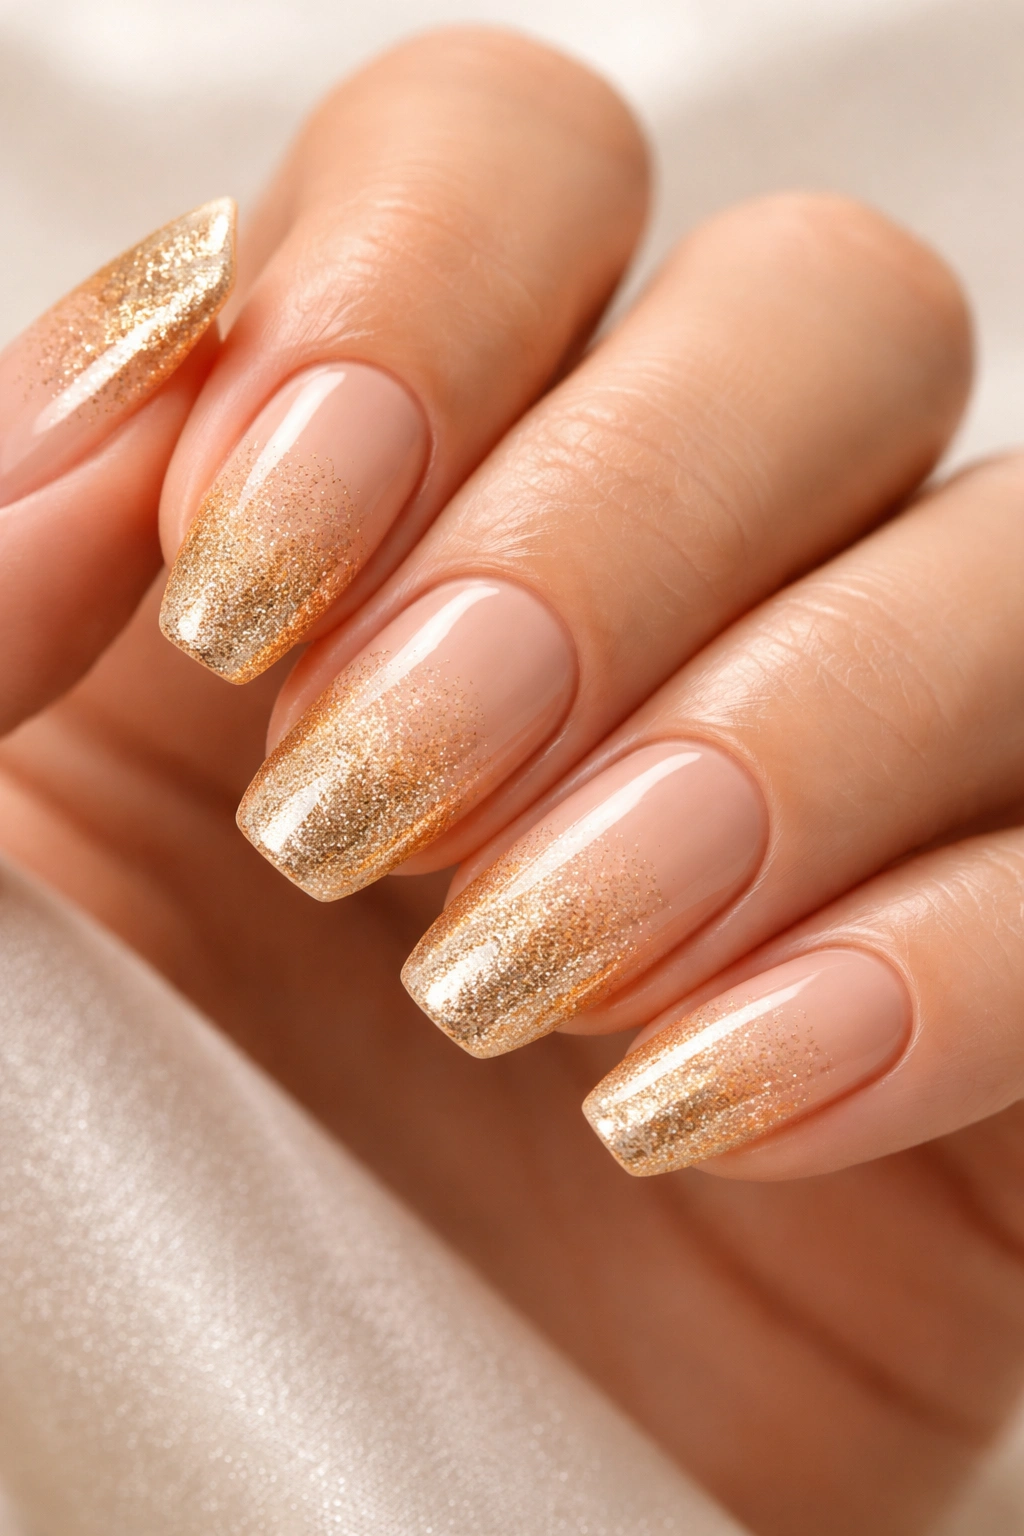
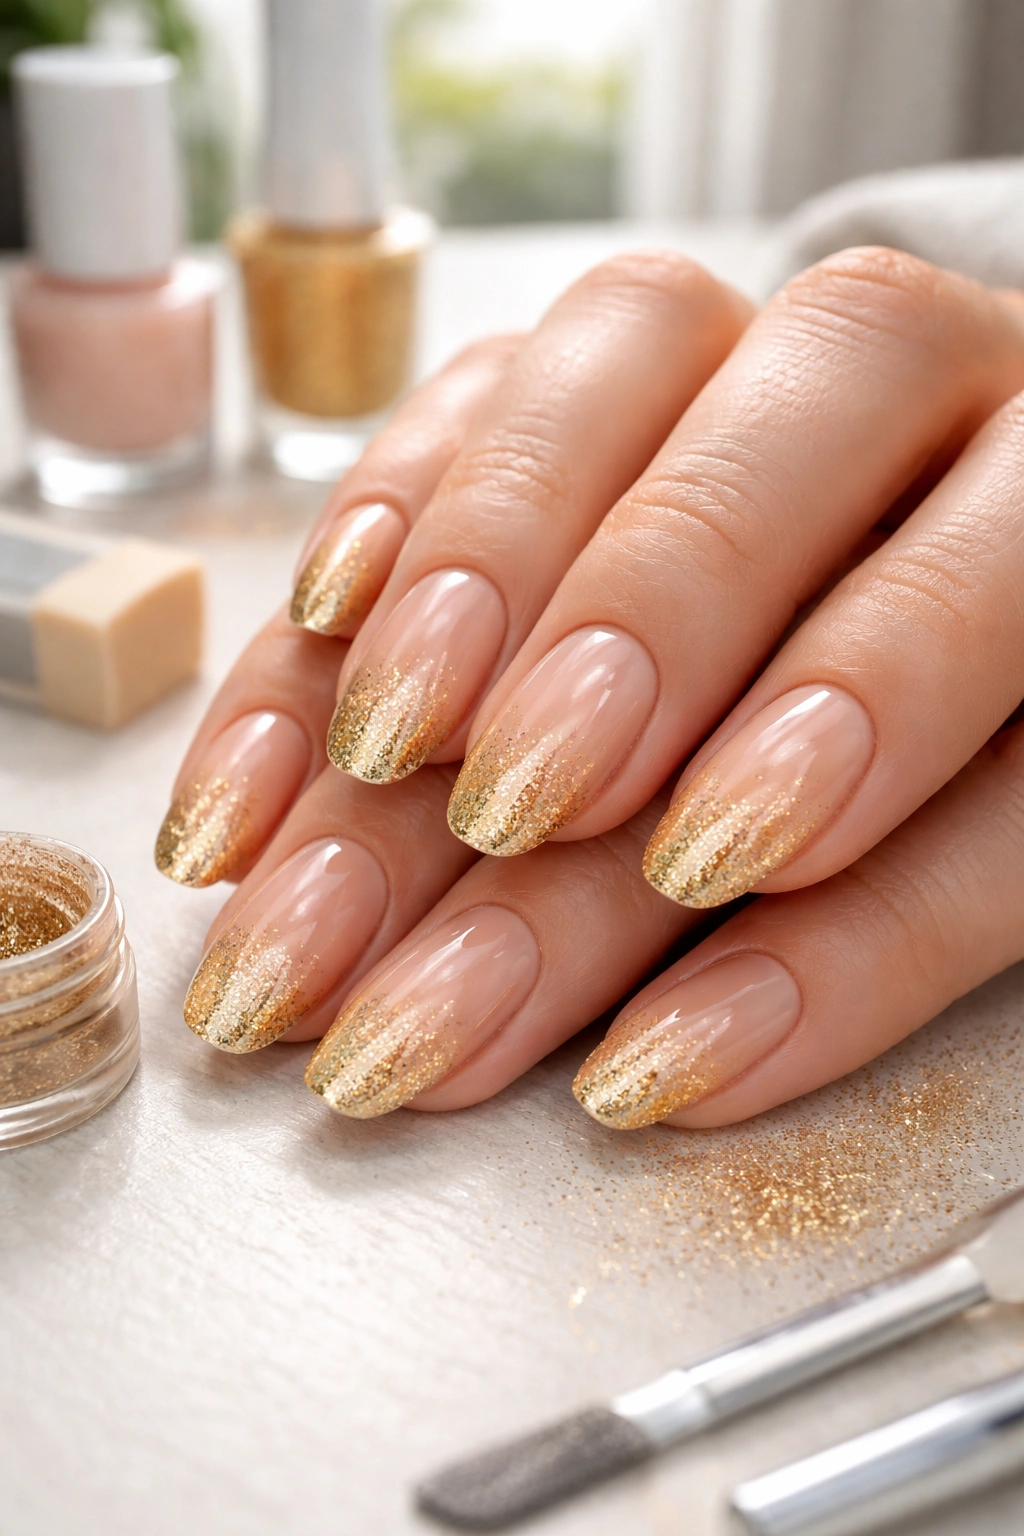
4. Gold Glitter Tip Fade
If you want sparkle with purpose, a gold glitter gradient concentrates all that shimmer right where it makes the most impact—at your tips.
This design starts with a solid nude or soft pink base, then builds gold glitter density from the middle of your nail outward. By the time you reach the tips, it’s full-on sparkle city.
Maximum Impact, Minimum Effort
The beauty of glitter ombre is how forgiving it is. You don’t need perfect blending technique because the random scatter of glitter particles creates the gradient naturally.
Just dab glitter polish onto a sponge and press it onto the top half of your nails. Do another layer focusing more on the tips. The glitter falls where it wants, creating an organic, dimensional fade.
When to Wear It
Gold glitter gradients bring festive energy—they’re perfect when you want your manicure to feel celebratory. Think dinner parties, date nights, or any time you’re dressing up a bit.
The concentrated glitter at the tips also has a practical side: it hides any tip wear better than solid colors. As your manicure grows out, the glitter camouflages the regrowth line.
5. Bronze to Gold Transition
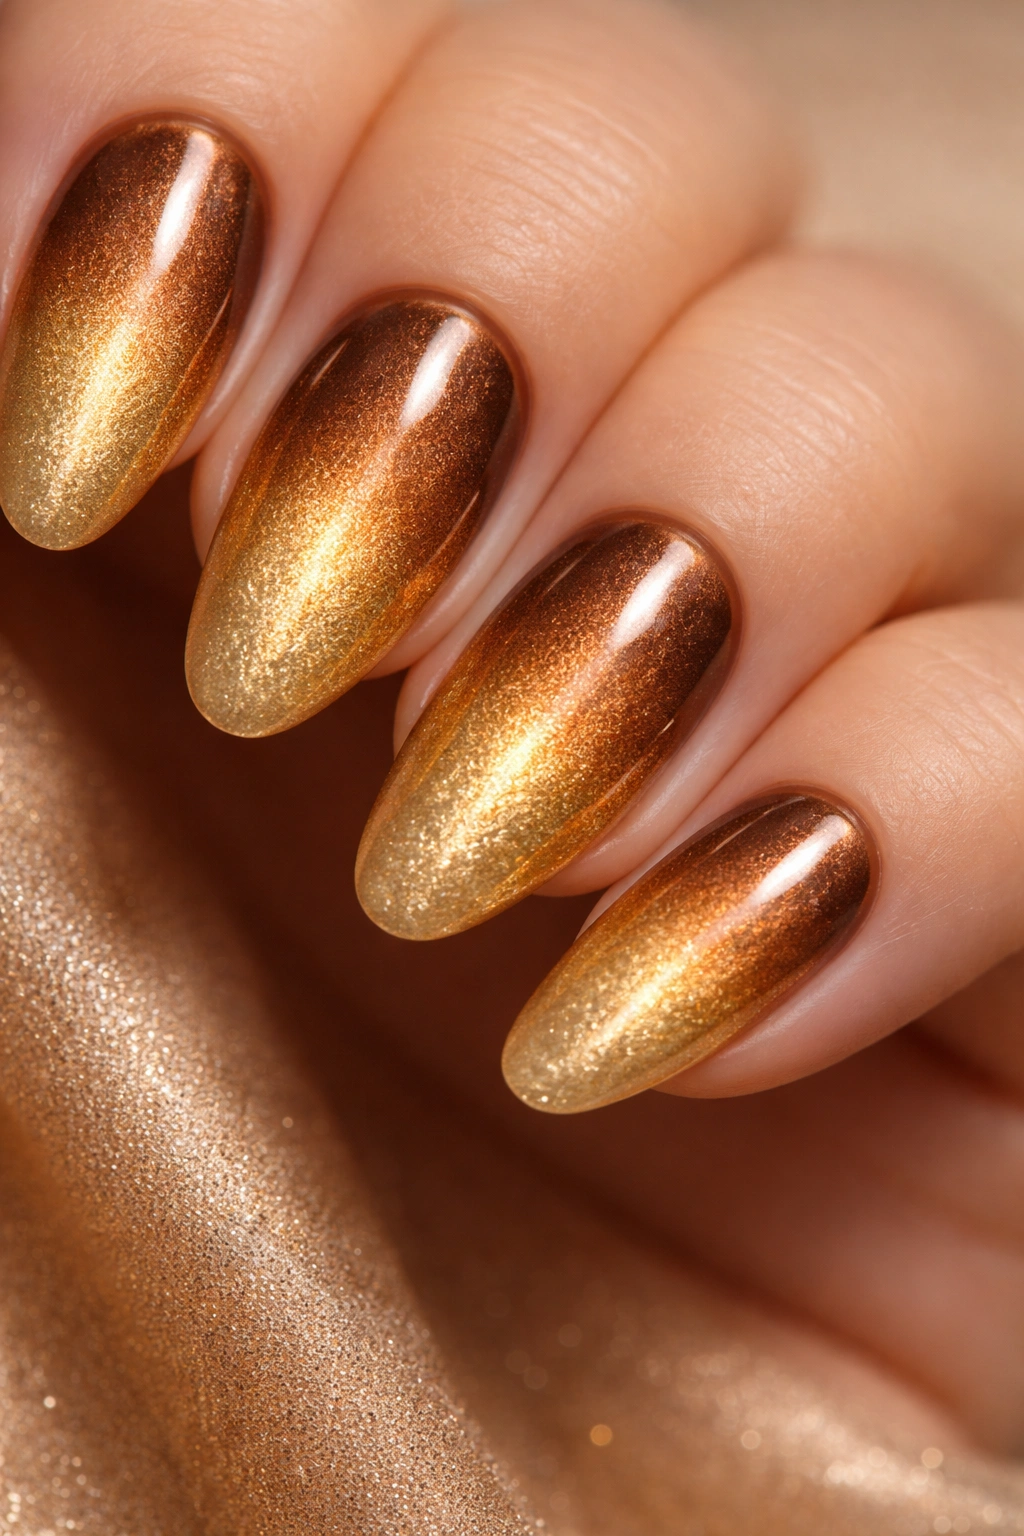
This warm metallic ombre goes deeper and richer than standard gold fades. Bronze at the cuticle gradually lightens into bright gold at the tips, creating serious depth and dimension.
The bronze-to-gold gradient feels earthy and luxurious at the same time. It’s got that sun-kissed quality—like golden hour caught on your nails.
Why the Combo Works
Bronze and gold are color cousins, so they blend together seamlessly without that jarring line some ombre designs get. The transition feels natural, like one color is literally melting into the other.
The deeper bronze anchors the design and prevents it from looking too bright or flashy. You get visual interest without it reading as “too much” for everyday wear.
Seasonal Flexibility
Bronze-gold ombre leans into fall and winter aesthetics beautifully. It pairs perfectly with rust, olive, chocolate brown, and all those cozy autumn tones you’re probably wearing.
But don’t box it into one season. The warm metallic quality also looks stunning against summer tans and works year-round with neutral wardrobe staples.
Apply the darker bronze polish fully at the base, then use your gold shade on a sponge to gradually lighten toward the tips. The key is blending where the two colors meet so there’s no harsh line.
6. Gold Foil Ombre
Gold foil creates texture in your ombre that regular polish can’t match. Instead of a smooth color fade, you get irregular metallic flakes scattered across your nails in a gradient pattern.
This technique uses actual gold foil sheets or flakes, applied more densely at the tips and gradually dispersing toward the cuticle. The result is an artistic, almost abstract effect.
The Organic Appeal
Because foil pieces are irregular and hand-placed, no two nails look exactly the same. That organic, imperfect quality is what makes this design feel artistic rather than cookie-cutter.
The foil catches light differently than polish—it’s more reflective and dimensional. When you move your hands, you get these gorgeous flashes of gold that are seriously eye-catching.
DIY Considerations
Foil ombre can be tricky at home. You need nail glue or special foil adhesive, plus actual gold foil (craft store foil often works). Place more foil pieces at your tips, then gradually decrease density as you move toward the cuticle.
If the manual application feels too fussy, look for gold foil-effect polishes that mimic the look without the actual foil. They won’t have quite the same texture, but they’re way easier to work with.
7. Reverse Gold French Fade
Instead of fading gold toward your tips, flip the script. Put the gold at your cuticle area and fade into nude or white tips for an unexpected twist on the classic French manicure.
This reverse ombre design keeps the modern French tip aesthetic but adds that liquid gold pooling near your cuticles. It’s unexpected and totally chic.
Why It Looks Fresh
The reverse direction catches people off guard in the best way. They’re used to seeing French tips or standard ombre, but starting with gold at the base feels new and intentional.
The design also highlights your cuticle area, drawing attention to clean, well-maintained nail beds. It’s a subtle flex that shows you pay attention to details.
Best Application Method
Paint your entire nail with a nude or soft white polish first. Once dry, use a sponge to apply gold polish starting at your cuticle, fading it out as you reach the middle of your nail.
The sponge should barely touch the nail by the time you’re halfway up—that creates the softest, most gradual fade. Clean up any messiness around your cuticles with a small brush dipped in acetone.
8. Warm Caramel to Gold
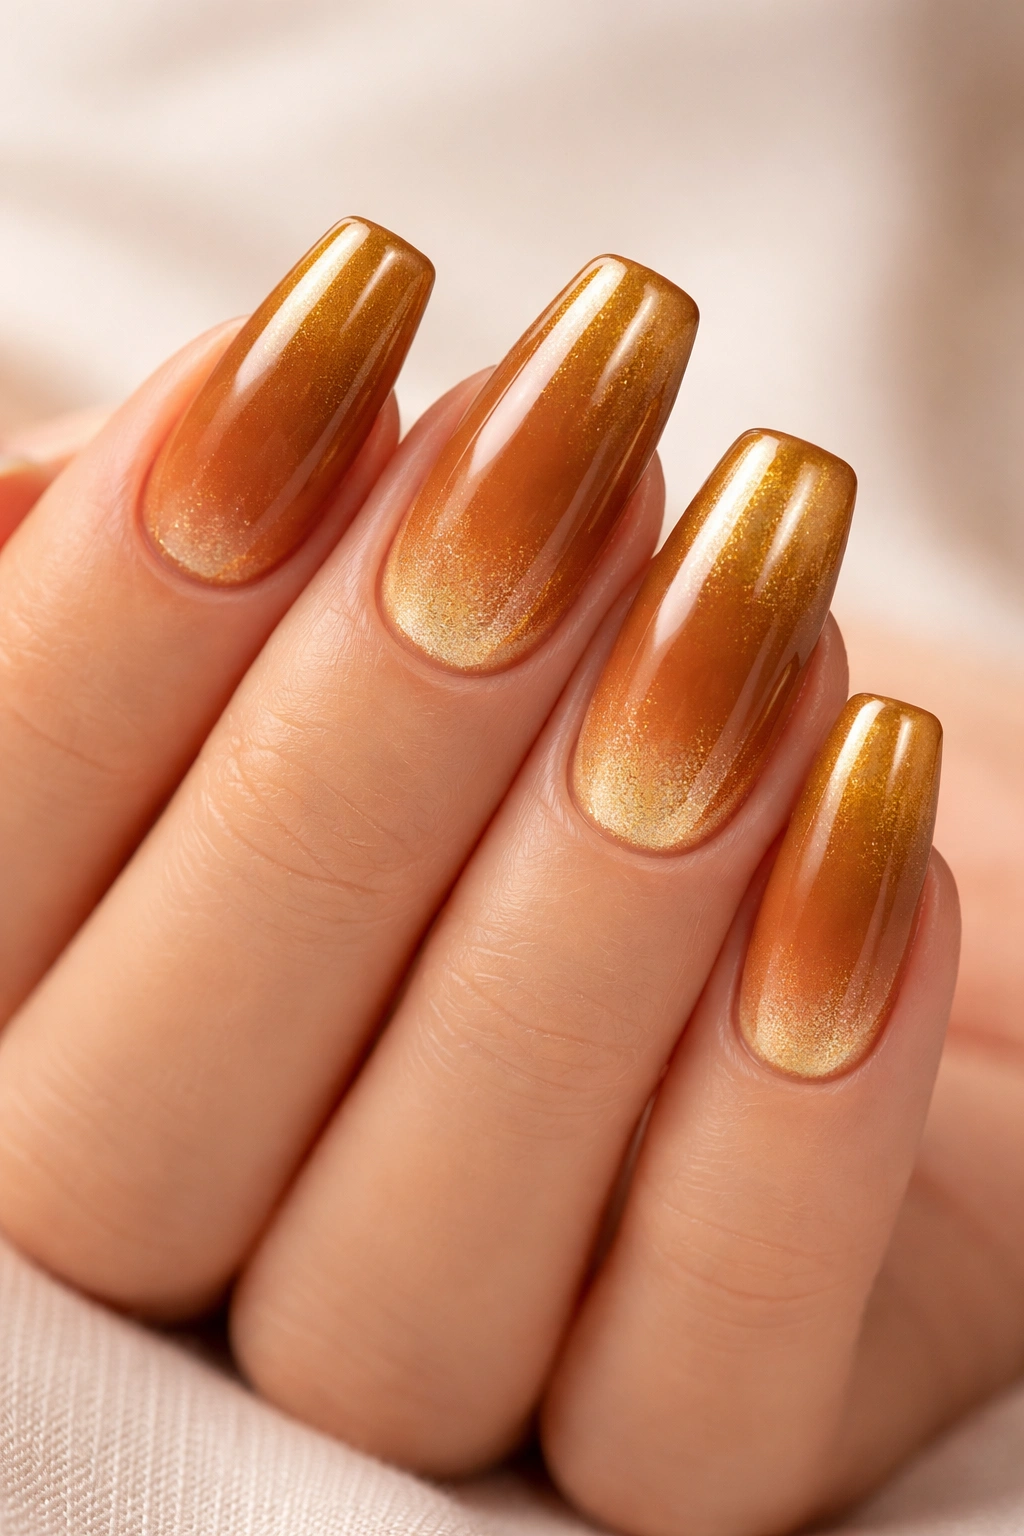
This rich, toffee-toned ombre starts with deep caramel at the base and gradually lightens into warm gold at the tips. It’s cozy luxury in manicure form.
Caramel-gold fades have serious depth because both colors live in the brown-gold family. The transition feels cohesive and smooth, like watching honey drip in slow motion.
The Comfort Factor
There’s something incredibly cozy about caramel tones. When you pair them with gold, you get a manicure that feels like cashmere sweaters and warm lattes—comforting but still polished.
This color combo is especially stunning against medium to deeper skin tones, where the warm caramel enhances natural undertones beautifully.
Texture Options
Try this ombre with a glossy finish for that wet-looking shine that makes the colors appear super saturated and rich. The gloss amplifies the warmth and makes your nails look professionally done.
Alternatively, a matte top coat transforms caramel-gold into something more modern and edgy. The matte finish softens the metallic intensity of the gold while making the caramel look velvety.
9. Peachy Gold Sunset
This coral-influenced gold ombre brings warmth with a hint of orange-pink. Starting with a peachy nude and fading into warm gold creates a sunset-on-your-fingertips effect.
The peachy undertones add a playful, youthful quality to gold ombre. It’s still sophisticated but has more personality than straight nude-to-gold.
Summer Vibes Year-Round
Peachy gold ombre feels inherently summery—like golden hour light hitting bare shoulders. But that warm glow translates beautifully across seasons when you need a pick-me-up.
The peach tones are flattering on almost everyone because they have both pink and yellow undertones. That makes them incredibly wearable and easy to style with your existing wardrobe.
Creating the Blend
Start with a sheer peach polish as your base. Then blend gold from the tips backward, letting the two colors overlap in the middle. The peach tints the gold slightly where they meet, creating this gorgeous in-between shade.
Add fine gold shimmer polish over the entire nail for an extra layer of dimension. The shimmer unifies the gradient and adds that sunset sparkle.
10. Molten Gold Chrome
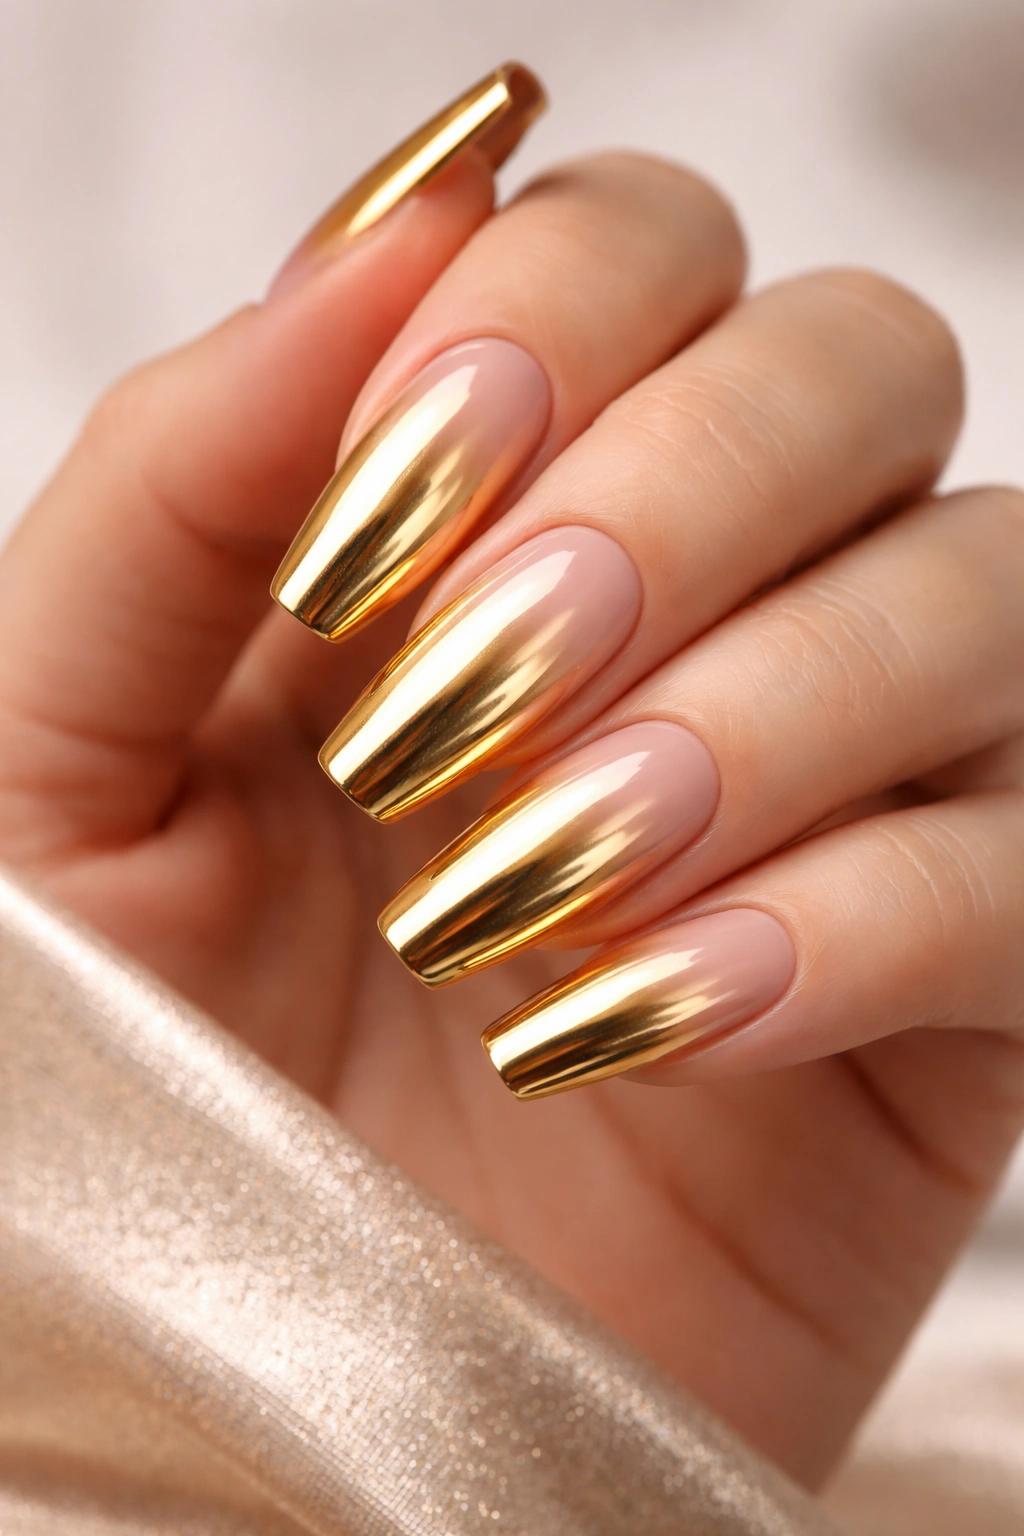
For full-on metallic drama, chrome powder over an ombre base creates that liquid-metal effect. This is gold ombre taken to its most high-impact finish.
Chrome gives you a mirror-like reflective quality that regular metallic polish can’t achieve. When applied over an ombre gradient base, the chrome enhances the fade while adding serious shine.
The Statement Factor
Molten gold chrome doesn’t whisper—it speaks clearly. This is the gold ombre you wear when you want your manicure to be part of the conversation.
The ultra-reflective finish makes your nails look almost three-dimensional. Light bounces off them in a way that’s mesmerizing and definitely selfie-worthy.
Application Process
Chrome requires gel polish and special chrome powder rubbed onto a tacky layer. For ombre, you’d first create a gradient using nude and gold gel polish, cure it, then apply the chrome powder over everything.
The chrome powder works best when applied by a professional unless you’re already comfortable with gel systems at home. The buffing technique makes all the difference in achieving that flawless mirror finish.
Fair warning: Chrome shows every imperfection on your nail surface, so proper prep is everything. Buffing and smoothing your nails beforehand ensures the chrome looks smooth rather than bumpy.
How to Make Your Gold Ombre Last
Getting that perfect gradient is one thing—making it last is another. Whether you’ve done your nails at home or visited a salon, a few smart moves will keep your gold ombre looking fresh longer.
Base coat is non-negotiable. It protects your natural nail from staining (gold pigments can leave residue) and gives polish something to grip onto. Skip it and your manicure lifts in days instead of weeks.
Apply thin layers of polish rather than thick globs. Thick polish takes forever to dry, bubbles easily, and chips faster. Multiple thin coats give you better color payoff and longer wear.
Seal Those Tips
After your ombre is dry, swipe top coat over your nail tips specifically. This area takes the most abuse, so giving it extra protection prevents the gold from chipping at the edges.
Reapply top coat every 2-3 days if you want to seriously extend wear time. It refreshes the shine and adds another protective layer against daily wear and tear.
Smart Maintenance Habits
Wear gloves when you’re doing dishes, cleaning, or working with water for extended periods. Gold polish doesn’t peel easily, but constant water exposure will break down any manicure faster.
If you get a small chip, don’t pick at it. Dab a bit of gold polish right on the chip, let it dry, then seal with top coat. Often you can disguise minor damage and get a few more days out of your manicure.
Keep cuticle oil handy and use it daily. Hydrated cuticles and nail beds mean healthier nails overall, plus the oil makes your gold ombre look glossy and fresh even as it grows out.
Choosing Your Gold Shade
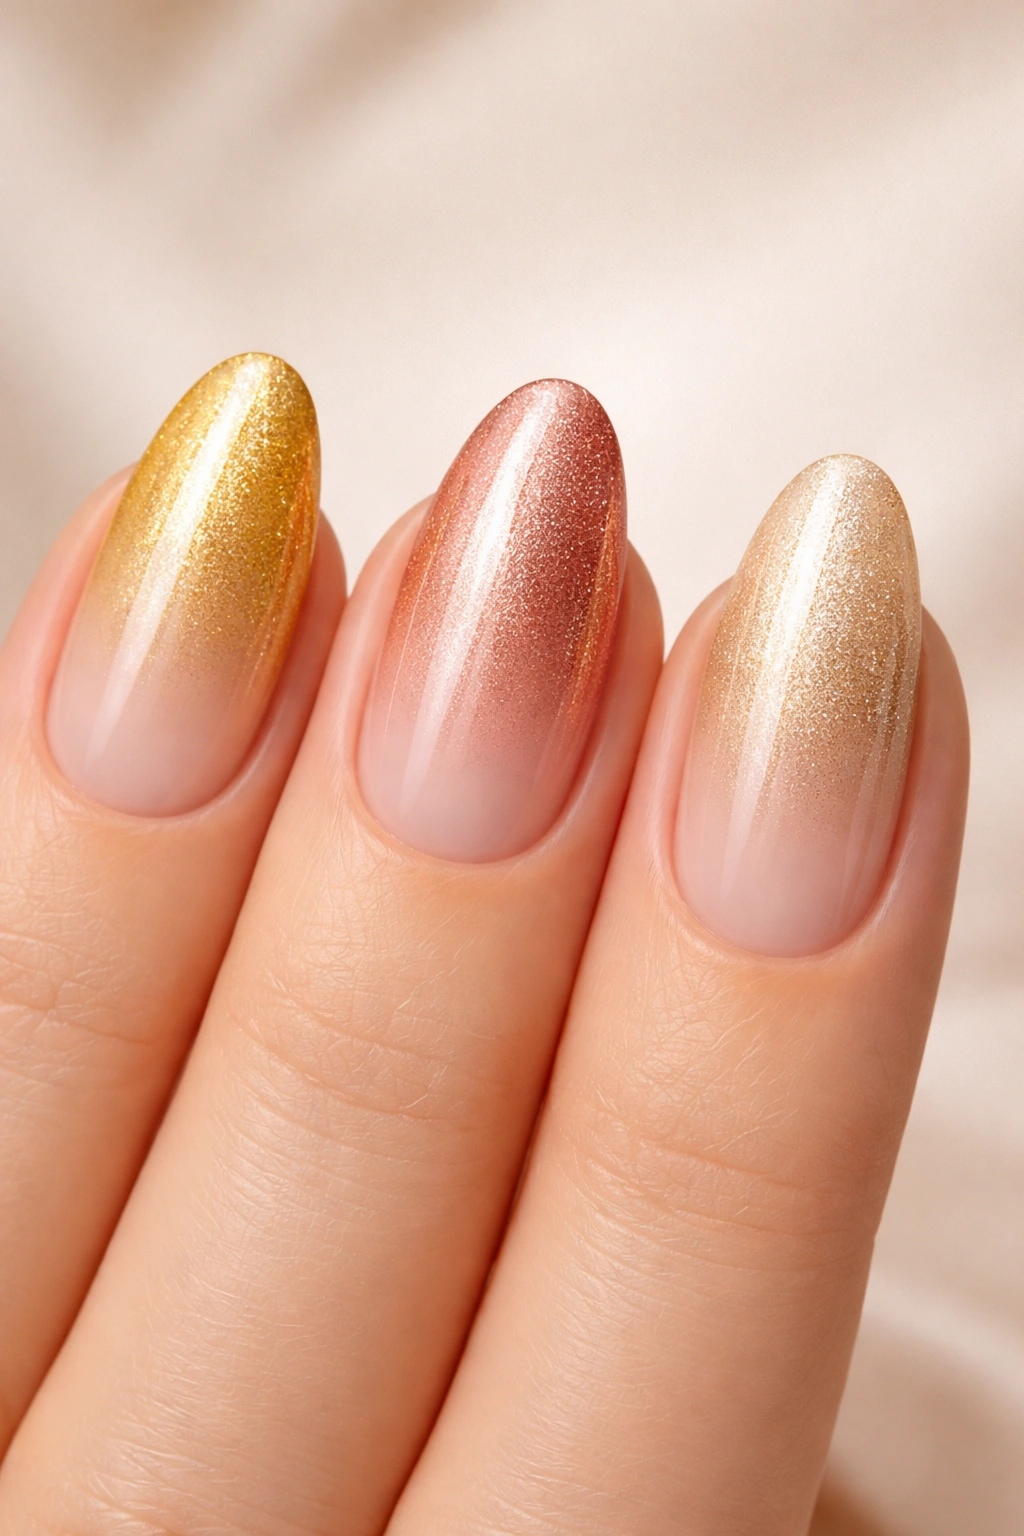
Not all golds are created equal. The difference between yellow-gold, rose gold, and champagne changes the entire vibe of your ombre.
Yellow gold is classic and warm—the color you probably picture when someone says “gold.” It’s bold, rich, and makes a clear statement. Perfect if you love traditional luxury aesthetics.
Rose gold leans pink and feels softer, more romantic. It’s got massive appeal because it reads as both neutral and special at the same time. Great choice if you want metallic with a gentler touch.
Consider Your Undertones
Warm skin undertones (olive, golden, peachy) typically look amazing in yellow gold and bronze-gold shades. These enhance your natural warmth and create a harmonious, glowing effect.
Cool skin undertones (pink, red, blue) often pair beautifully with rose gold or champagne tones. The slight pink in rose gold complements cooler undertones without clashing.
Neutral undertones are lucky—you can wear any gold shade and look fabulous. Experiment with different tones to see which makes you feel most like yourself.
Polish vs. Powder
Gold polish is straightforward and DIY-friendly. You paint it on like any other color, and glossy top coat gives it shine. Polish works for creating traditional ombre fades with sponges or brushes.
Chrome powder creates that ultra-reflective, mirror-like finish. It requires gel polish and curing under a lamp, so it’s more involved. The payoff is that seriously eye-catching metallic finish.
Gold glitter polish falls somewhere in between—easier than chrome but more textured than regular polish. The sparkle particles create dimension and catch light beautifully without needing special equipment.
DIY Gold Ombre at Home
Creating gold ombre yourself is absolutely doable with the right approach. You don’t need professional tools—just a few key supplies and some patience.
Your shopping list: Base coat, nude polish (close to your skin tone), gold polish, makeup sponges (the cheap foam wedges work great), top coat, and acetone for cleanup.
Start with clean, shaped nails. Push back your cuticles and lightly buff your nail surface to remove shine. This helps polish stick better and last longer.
The Sponge Technique
Apply base coat and let it dry completely. Then paint your entire nail with the nude polish—this is your foundation color.
Once the nude is dry, paint stripes of your nude and gold polish side-by-side on the makeup sponge. They should overlap slightly where they meet.
Lightly dampen the sponge with water first—this keeps it from soaking up all your polish. Dab the sponge onto your nail with a gentle bouncing motion, not dragging. Start at your tips and work backward.
Building the Gradient
One pass probably won’t give you full color. Let the first layer dry for a few minutes, then repeat the sponging process. Build the opacity gradually—two to three applications gives you good color with a smooth fade.
The sponge will get polish all over your skin. Don’t stress about it during application. Once everything’s dry, dip a small cleanup brush (or cotton swab) in acetone and clean up the edges.
The secret sauce: Apply a thick, glossy top coat once you’re happy with the gradient. This smooths out any texture from the sponge and makes the fade look seamless instead of patchy.
When to Choose Gold Ombre
Gold ombre works for more occasions than you might think. Its versatility is part of what makes this design so popular.
Special events are obvious winners—weddings, parties, celebrations. Gold brings that festive, elevated feeling without requiring intricate nail art. It’s fancy enough to feel special but clean enough to stay elegant.
Professional settings are surprisingly gold-ombre-friendly, especially if you go with softer tones. Champagne or nude-to-light-gold fades read as polished and put-together rather than flashy. The gradient creates visual interest without breaking dress codes.
Everyday Luxury
Here’s the thing—you don’t need a reason to wear gold ombre. If it makes you feel good when you look at your hands, that’s reason enough.
Gold adds this little boost to your everyday movements. Typing at your laptop, holding your coffee cup, gesturing while you talk—suddenly these mundane moments have a bit of sparkle.
The warm tones are incredibly mood-lifting. When everything feels gray and blah, looking down at your hands and seeing that golden glow can genuinely brighten your day.
Final Thoughts
Gold ombre nails master the art of the smooth, warm fade—giving you that seamless gradient effect that feels both luxurious and effortlessly wearable. From subtle champagne whispers to bold molten chrome, there’s a gold ombre style that fits your personality.
The beauty of this nail trend lies in its flexibility. You can keep it minimal with nude-to-gold fades for everyday elegance, or lean into drama with glitter, foil, or chrome finishes when you want to make a statement.
What makes gold ombre particularly special is how the warm tones flatter virtually everyone. The gradient technique elongates your fingers, and gold’s reflective quality catches light in the most flattering ways.
Whether you’re sponging on a DIY gradient at home or having your nail tech create a custom blend, the smooth transition from one warm tone to another creates visual interest without overwhelming your look. It’s sophisticated enough for important occasions but totally appropriate for regular life.
The ten gold ombre designs we’ve covered give you options for every mood and skill level. Start with something simple like a classic nude-to-gold fade, then experiment with different textures and finishes as you get more comfortable.
Your nails are one of the first things people notice when they meet you—and one of the things you see most throughout your day. Making them beautiful isn’t frivolous; it’s a small act of self-care that genuinely impacts how you feel.
So grab that gold polish, pick your favorite gradient style, and give yourself that warm, luxurious fade. Your fingertips deserve to shine.
