

Green and nude nails are having a moment, and honestly? They deserve it. This color combo strikes that sweet spot between bold and understated, earthy and polished. It’s the manicure equivalent of a linen dress with gold jewelry—effortlessly chic without trying too hard.
What makes this pairing so satisfying is how the muted warmth of nude tones balances the freshness of green. Whether you’re drawn to soft sage, deep olive, or bright pistachio, there’s a nude shade that’ll ground it beautifully. The result feels organic, like you plucked your color palette straight from a sun-drenched garden.
Green brings energy and a touch of the unexpected, while nude keeps things wearable and elegant. Together, they create dimension without clutter, making your nails look intentional rather than overdone. Plus, this combo works across all nail shapes and lengths—short, long, almond, square, you name it.
Think of green and nude as the ultimate neutral duo with personality. They’re versatile enough for work meetings but interesting enough for weekend brunch. They transition smoothly through seasons, fitting just as well with autumn knits as they do with summer sandals.
If you’ve been stuck in a beige-and-pink rut or feel intimidated by full-on color, this is your gateway. Green and nude nails don’t scream for attention—they whisper sophistication with a hint of adventure. And that whisper? It’s louder than you think.
Ready to give your nails a fresh, earthy upgrade? Here are ten green and nude combinations that prove this pairing is anything but boring.
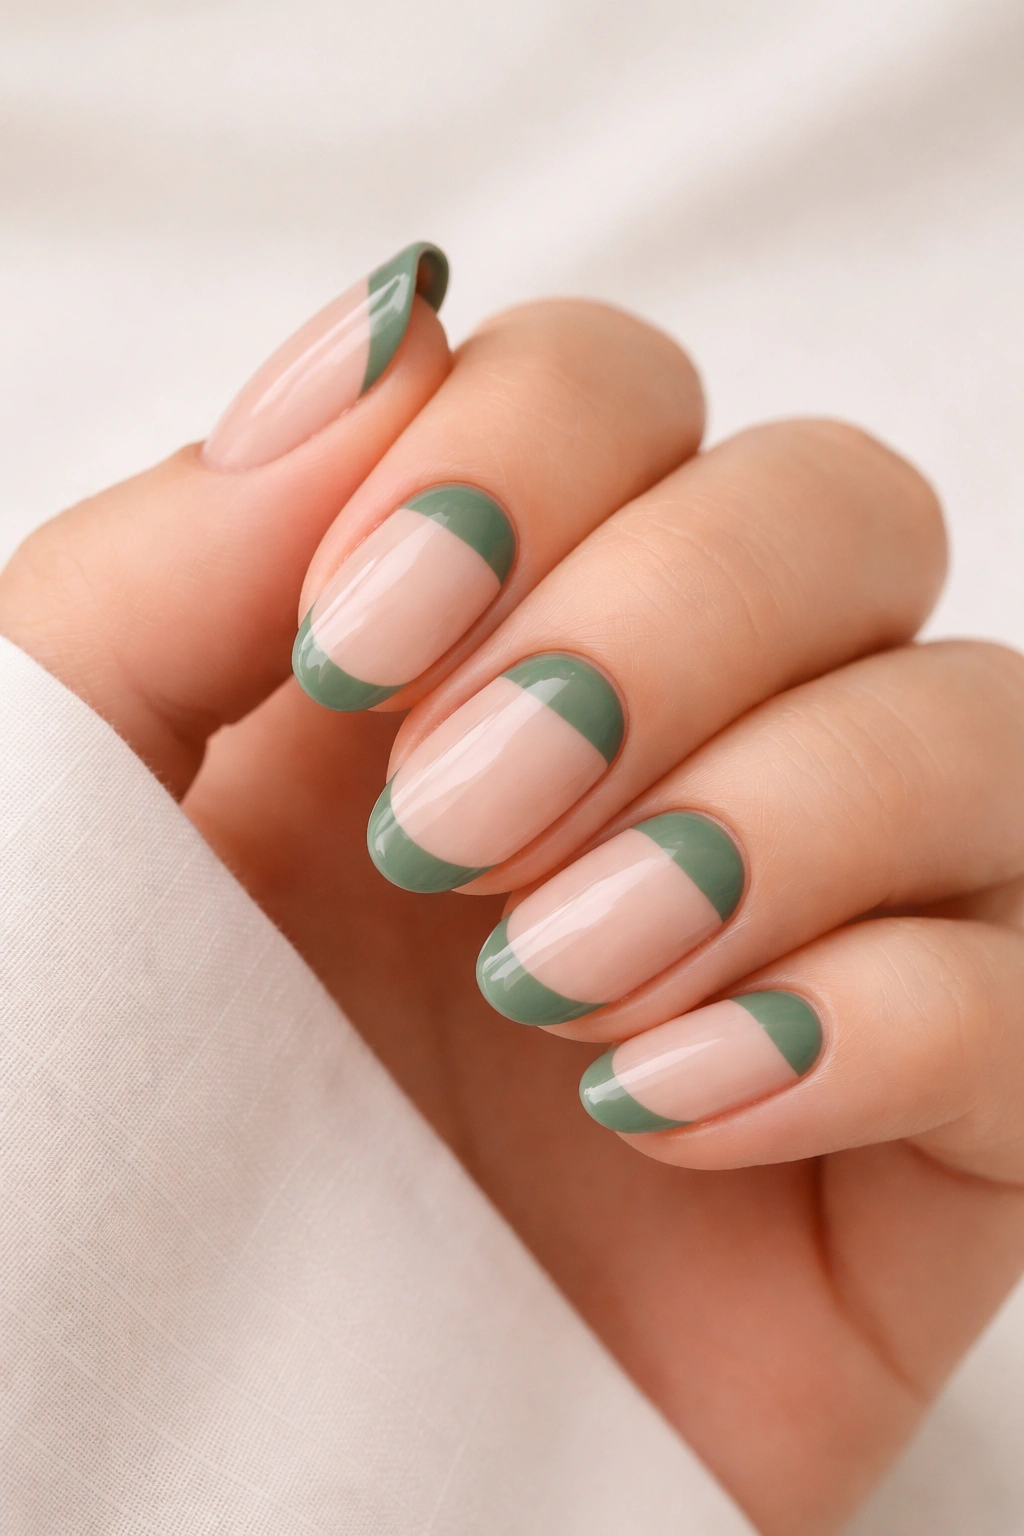
1. Sage Green French Tips on Nude Base

This design flips the script on classic French tips by swapping white for a soft, muted sage green. The nude base keeps things grounded and natural, while those green tips add just enough color to feel modern and fresh.
Why It’s a Crowd-Pleaser
Sage green has become a go-to for anyone who wants color without the commitment of something loud. It’s calm, sophisticated, and ridiculously flattering on all skin tones. When you pair it with a sheer or creamy nude base, you get a look that feels polished but not precious. The French tip shape naturally elongates your fingers, and the earthy green keeps it from feeling too formal or dated. It’s the kind of manicure that works whether you’re typing emails or toasting champagne.
How to Nail the Look
For the cleanest lines, use nail guides or tape to section off your tips before applying the sage polish. Apply two thin coats for even coverage, and don’t skip a glossy top coat—it makes the color pop and keeps everything smooth. If you want a softer vibe, try a sheer nude base instead of opaque. You can even add a thin metallic gold line where the nude meets the green for a hint of glam. This design is beginner-friendly and takes less than 30 minutes if you’re doing it yourself.
Pro tip: Keep your sage shade on the cooler, grayer side to avoid it looking too bright or springy. You want earthy, not Easter.
2. Marbled Swirl Mix
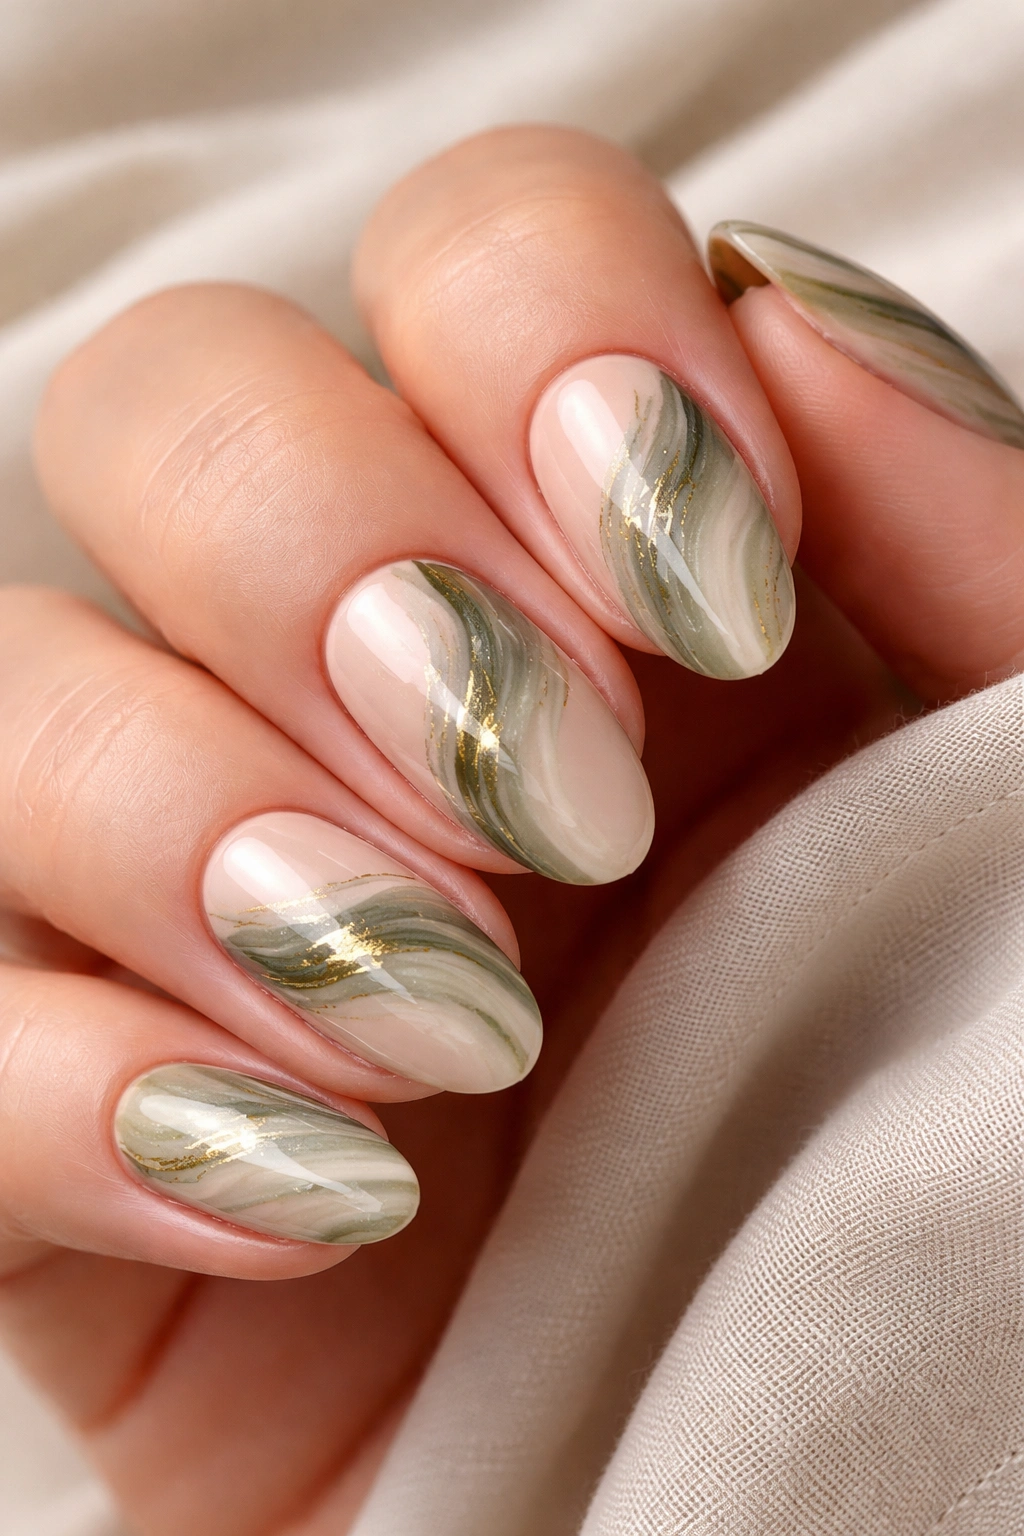
Marbling brings an artsy, organic feel to your nails, and when you blend green and nude together, the effect is stunning. Each nail becomes a tiny, one-of-a-kind canvas with soft swirls that mimic natural stone or watercolor.
What Makes It Stand Out
The beauty of marble nails is in the unpredictability. No two nails look exactly the same, which gives the design a handmade, high-end quality. When you swirl olive or moss green with warm beige or taupe, you get depth and movement without overwhelming the eye. The colors bleed into each other in a way that feels effortless and abstract. It’s a great option if you love texture and detail but want to avoid rigid patterns or bold graphics.
Easy DIY Marbling
You don’t need to be a nail artist to pull this off. Start with a nude base coat, then drop small amounts of green polish onto the wet nude while it’s still tacky. Use a thin brush, toothpick, or dotting tool to gently swirl the colors together—don’t overmix, or you’ll lose the marble effect. Let it dry completely, then seal with a high-shine top coat. For extra dimension, try layering different shades of green (like sage and forest) with two nude tones. The more variety, the richer the marble effect.
Fun fact: Marbled nails look even better after a few days of wear when the edges soften slightly. They age well, which is rare for nail art.
3. Negative Space Geometric
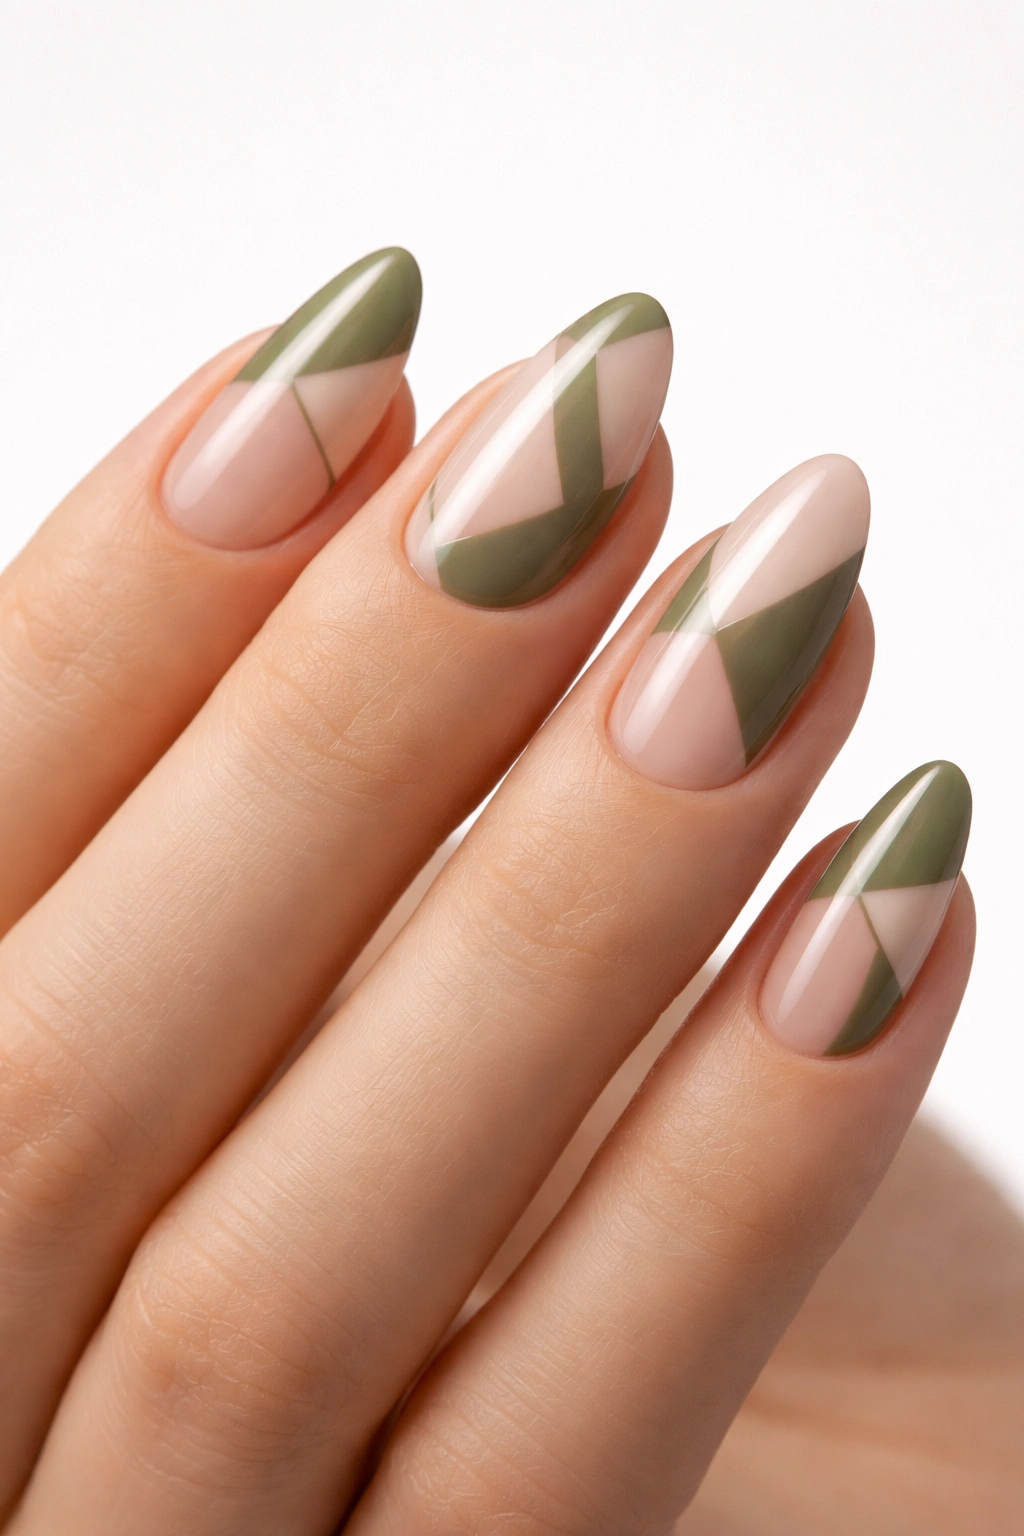
Negative space designs let your natural nail peek through, creating contrast and breathing room. Pair strategic cutouts with green and nude polish, and you’ve got a minimalist manicure that’s anything but basic.
Why Negative Space Works
Leaving parts of your nail bare adds a modern, editorial vibe that feels intentional and clean. It also breaks up color in a way that’s visually interesting without being busy. When you use green and nude in geometric shapes—think triangles, curves, or asymmetrical blocks—the natural nail becomes part of the design rather than just background. This approach works especially well on shorter nails, where too much color can feel heavy. It’s fresh, airy, and surprisingly versatile.
Design Ideas to Try
You could paint half your nail in nude and the other half in olive green, leaving a thin strip of natural nail down the center. Or try a diagonal split with one side green, one side nude, and a clear gap between them. Another option: paint the base of your nail nude, the tip green, and leave a crescent or triangle of bare nail in between. Use striping tape or vinyl guides to get sharp, clean edges. Finish with a clear top coat to unify everything and protect the design.
Pro tip: Make sure your natural nails are clean, buffed, and well-shaped before starting—negative space puts them front and center.
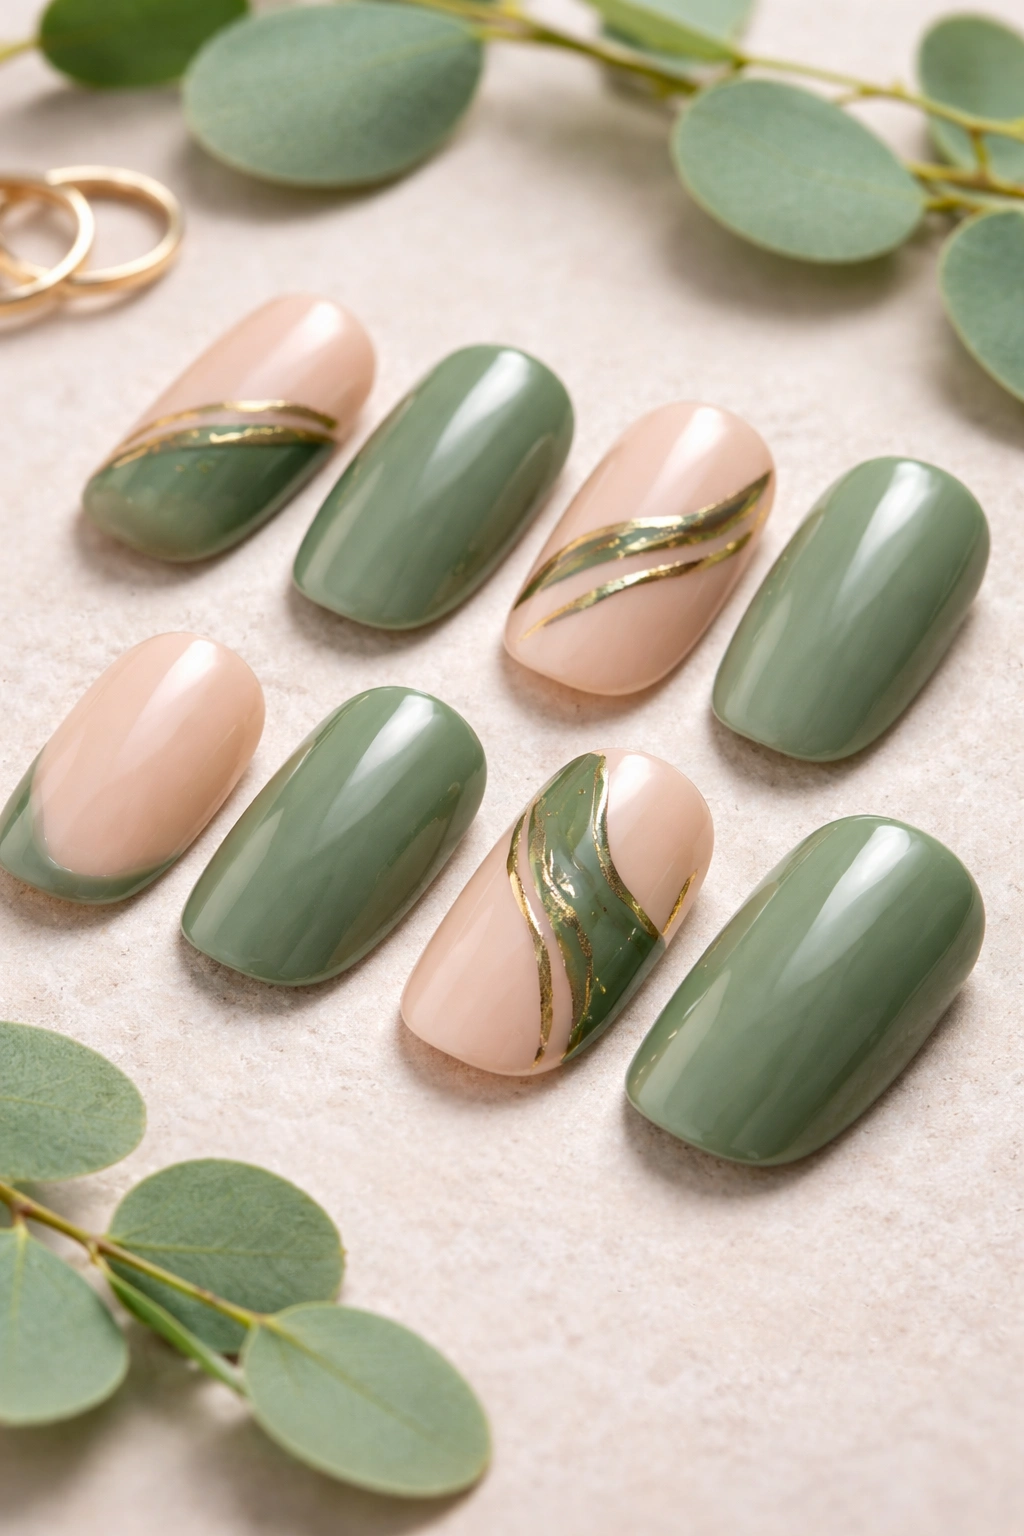
4. Olive Green Side Swoops
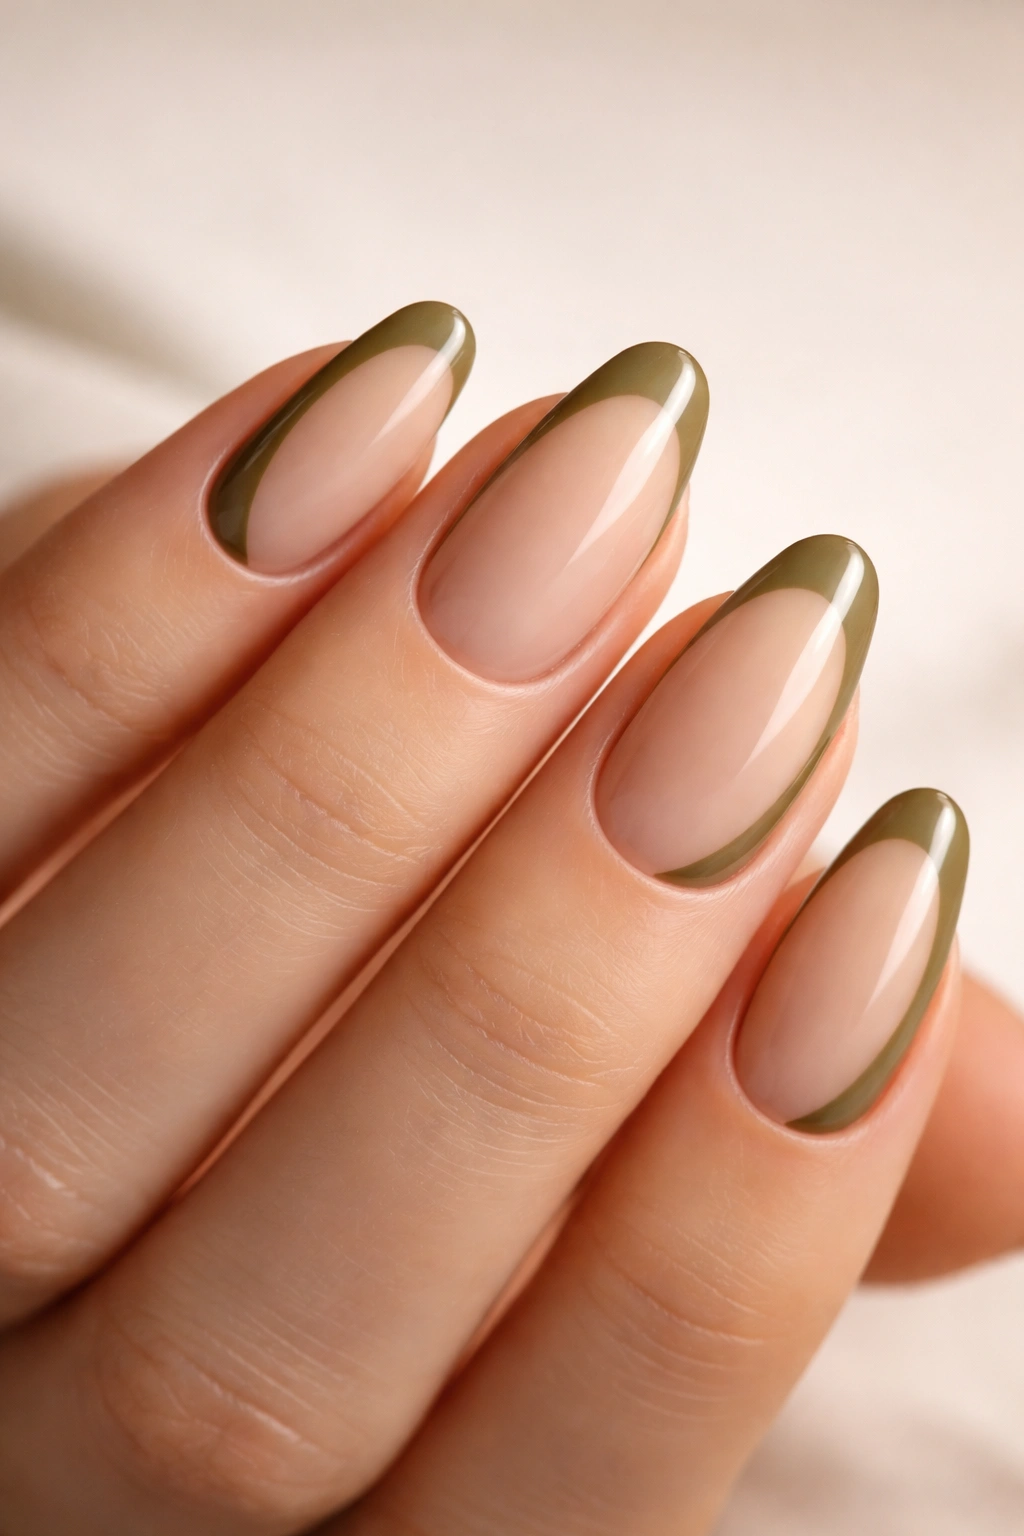
Side swoops are curved lines that flow along the side edge of your nail, creating a soft, organic frame. When done in olive green with a nude base, they add movement and elegance without taking over the whole nail.
Key Benefits
This design is subtle but sculptural. The swooping curve draws the eye and creates the illusion of longer, slimmer fingers. Olive green—being more muted and earthy than brighter greens—keeps the look grounded and sophisticated. The nude base lets the swoop stand out while still feeling cohesive and balanced. It’s a great middle ground if you want nail art but don’t love the look of fully painted accent nails or loud patterns.
What to Know Before You Start
Side swoops require a steady hand or a thin nail art brush, but they’re more forgiving than you’d think. Start by painting your entire nail in nude polish. Once dry, load a fine brush with olive green and draw a gentle S-curve along one side of the nail, starting near the cuticle and sweeping toward the tip. You can do this on every nail or just a few accent fingers. For a bolder take, add a second swoop in a darker green or a metallic gold. Seal everything with a glossy top coat to smooth out any texture and give it a finished, professional look.
5. Gradient Ombré Blend
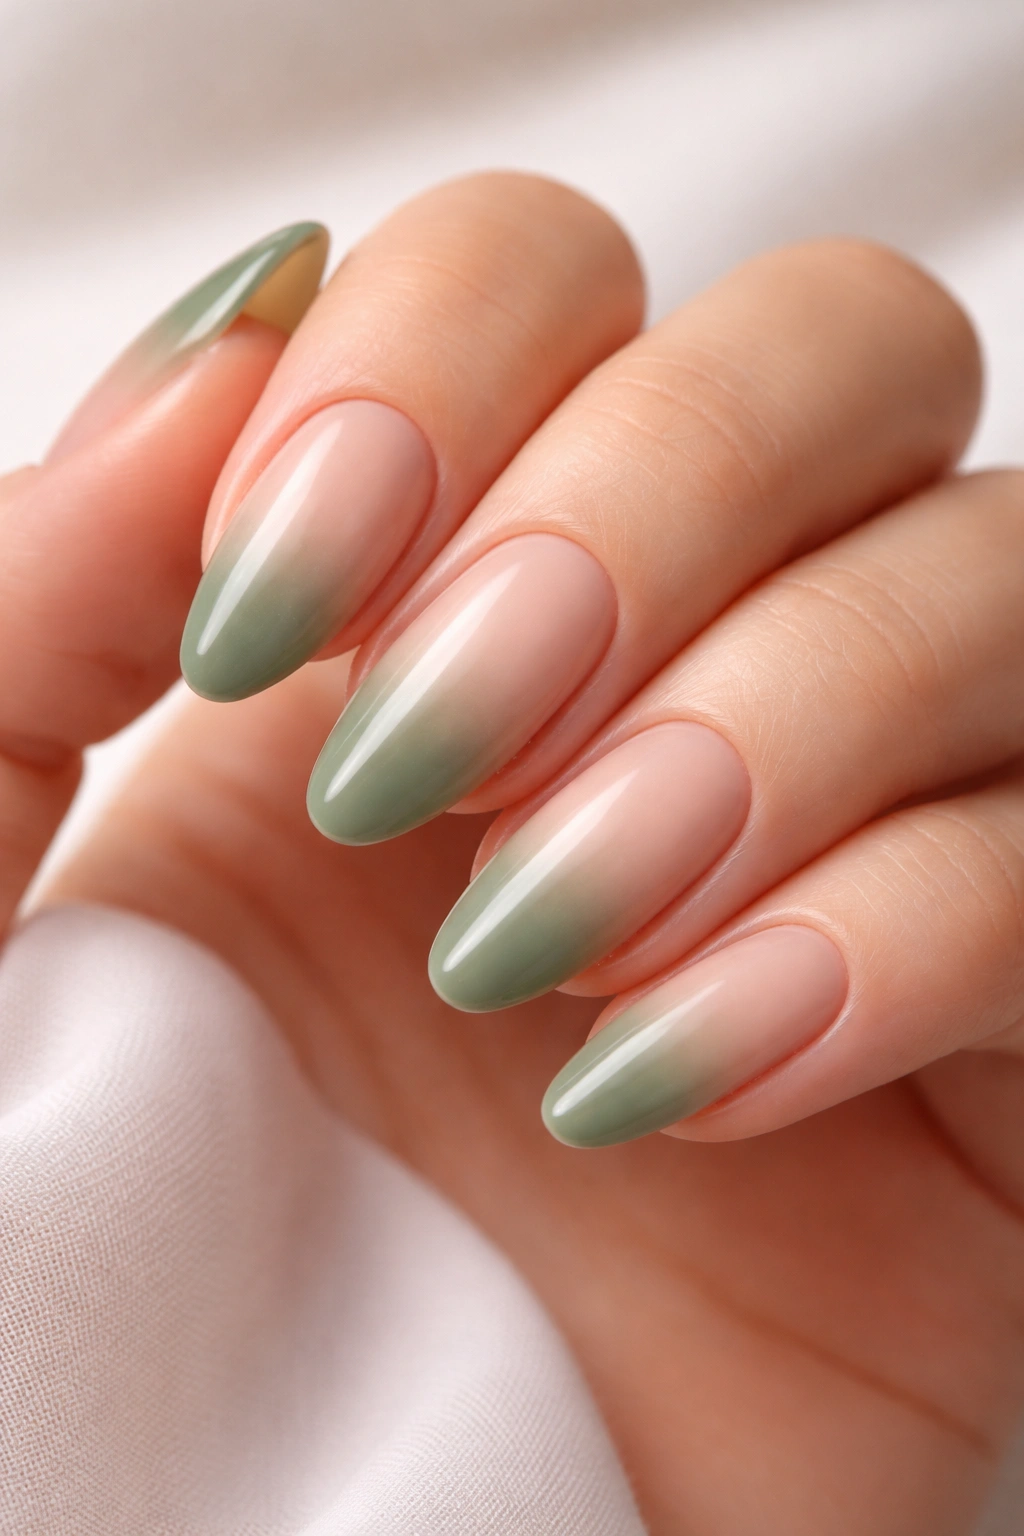
Ombré nails transition one color into another in a soft, seamless fade. When you blend a muted green into a warm nude, the result is dreamy, dimensional, and surprisingly wearable.
Why It’s Worth Trying
Gradient nails give you the best of both colors without the hard lines or structure of traditional nail art. The fade effect feels soft and romantic, almost like a sunset or a watercolor painting. When you choose shades in the same tonal family—like a mossy green and a sandy nude—the blend feels natural and cohesive. It’s also incredibly flattering because the gradient adds depth and makes your nails look longer and more polished.
How to Create a Smooth Fade
The easiest way to achieve ombré at home is with a makeup sponge. Paint your nail with the lightest color (usually nude) as a base. Then, apply both your nude and green polish onto a small piece of sponge, slightly overlapping where you want the fade to happen. Dab the sponge onto your nail in a gentle bouncing motion, reloading with polish as needed. The sponge blends the colors together as it transfers them. Clean up the edges with a brush dipped in nail polish remover, then finish with top coat. It might take a couple of tries to get the transition just right, but the effect is worth it.
Fun fact: Ombré nails look best when the color shift happens around the middle of the nail, not too high or too low.
6. Floral Accent Nails
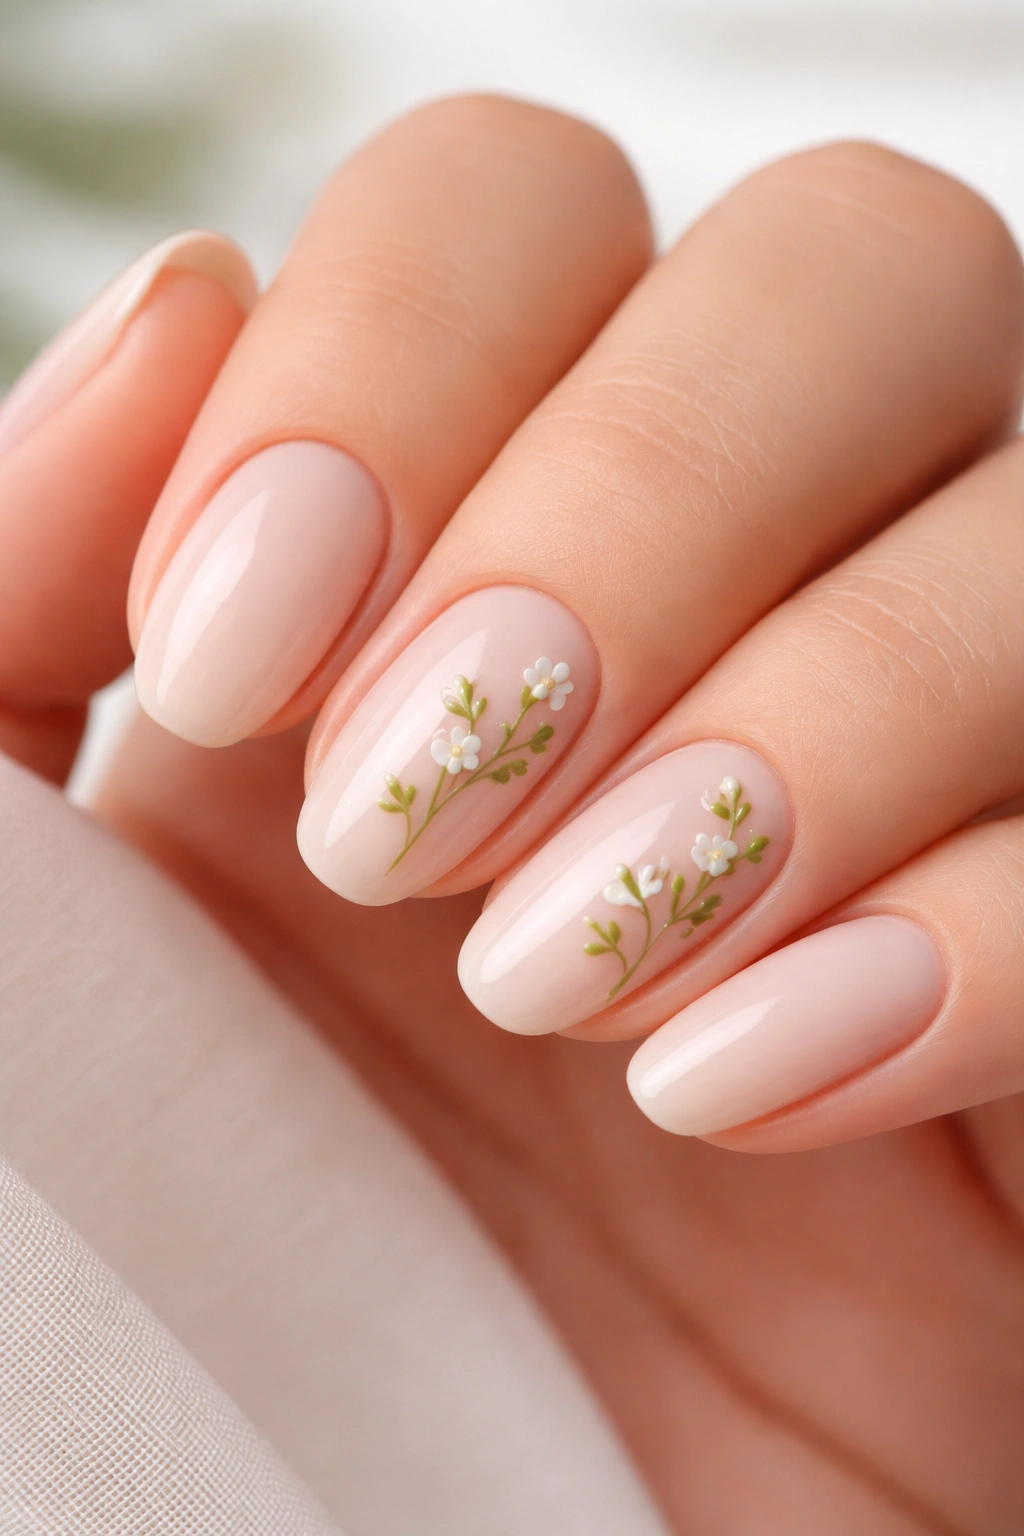
Tiny painted flowers on a nude base with green leaves or petals bring a botanical, feminine vibe to your fingertips. This design is delicate, detailed, and perfect if you love a bit of whimsy.
What Makes It Special
Floral nail art feels personal and artistic, like wearing a miniature garden on your hands. When you use nude as the canvas and green for stems, leaves, or petals, the design stays soft and earthy rather than overly cutesy. You can keep it minimal with a single daisy on one or two accent nails, or go full garden with clusters of blooms across your entire hand. Either way, it’s a look that invites compliments and feels handmade.
Quick Facts
- Use a fine detail brush or nail art pen for the petals and stems
- White or cream petals with green leaves are classic and easy
- A matte top coat gives florals a soft, painted-paper feel
- Great for spring and summer, but works all throughout the year with deeper greens
Pro tip: If freehand painting feels intimidating, grab some floral nail decals or stickers. Apply them over your nude base, seal with top coat, and nobody will know the difference.
7. Chrome Green with Nude Balance
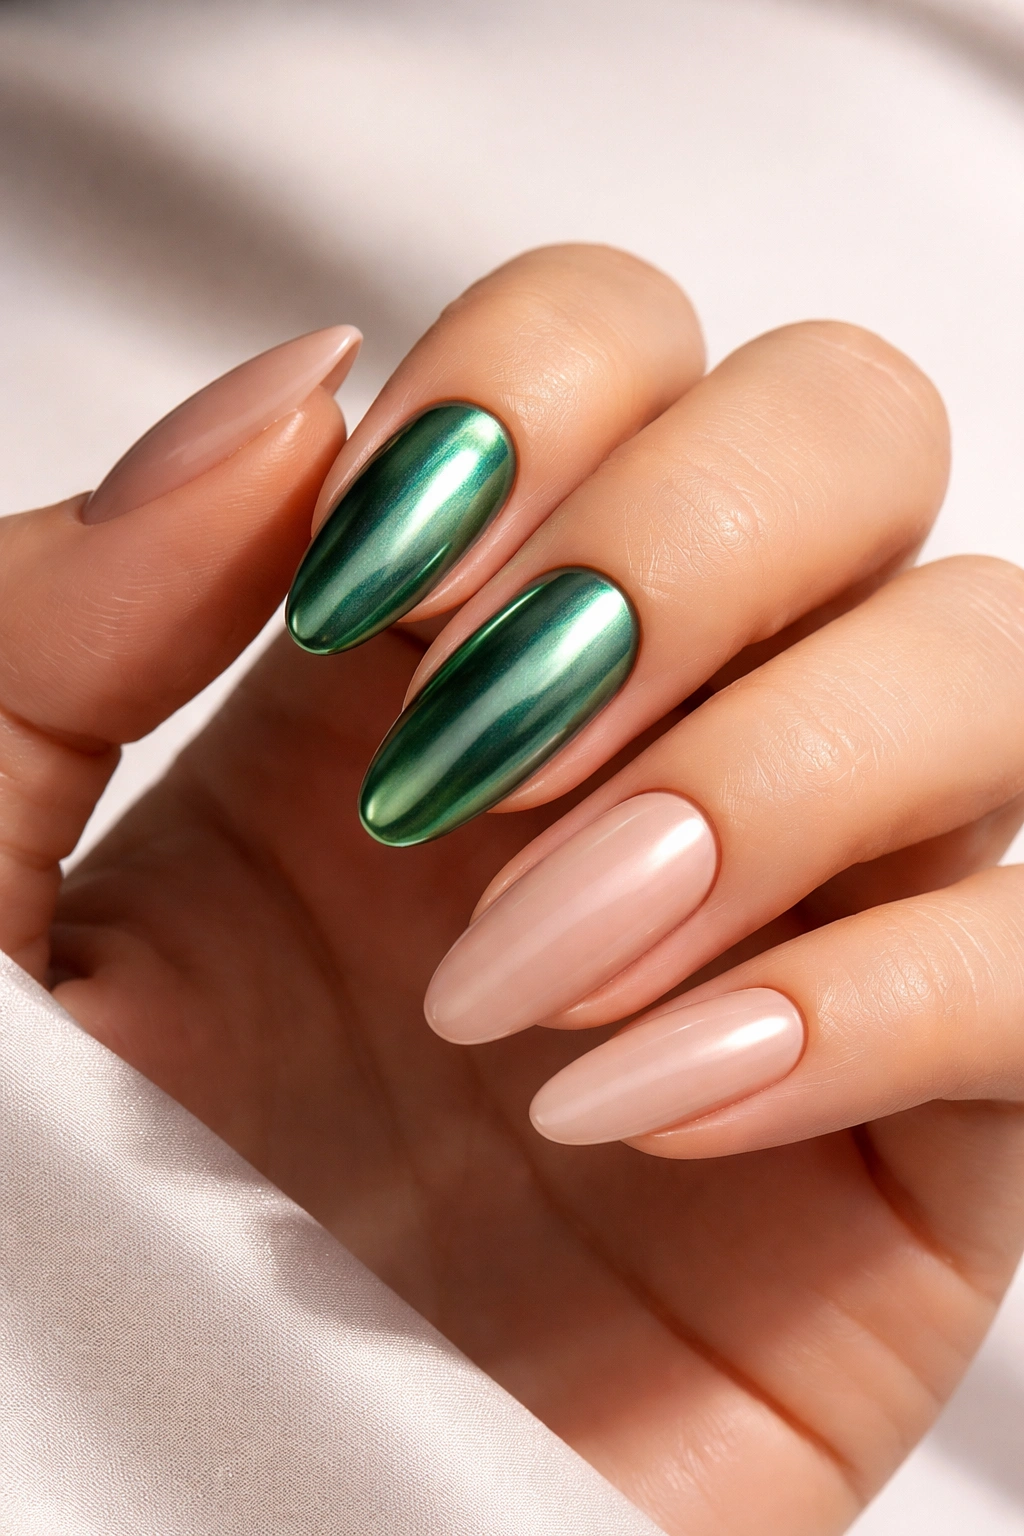
Chrome finishes have that reflective, almost liquid-metal look that catches light from every angle. Pair a shimmery green chrome with classic nude nails, and you’ve got a manicure that’s both futuristic and grounded.
How It Hits Different
Chrome powder or polish transforms any color into something dimensional and eye-catching. When you apply it over a light green base, you get a pearlescent, glowing effect that shifts in the light. But chrome can feel intense, so balancing it with nude nails keeps the look wearable and prevents it from skewing too costume-y. You might do two or three chrome green nails per hand and leave the rest in a creamy nude. The contrast is bold without being overwhelming.
How to Use It
If you’re using chrome powder, apply it over a no-wipe gel top coat while it’s still tacky, then buff it in with a silicone tool or your finger. For regular polish, look for chrome nail polish in shades like mint, sage, or olive—they’re becoming easier to find. Apply two coats over your base color, then seal with a glossy top coat to protect the finish. The nude nails can be matte or glossy depending on the vibe you’re going for. Matte nude with glossy chrome? Chef’s kiss.
8. Abstract Line Art
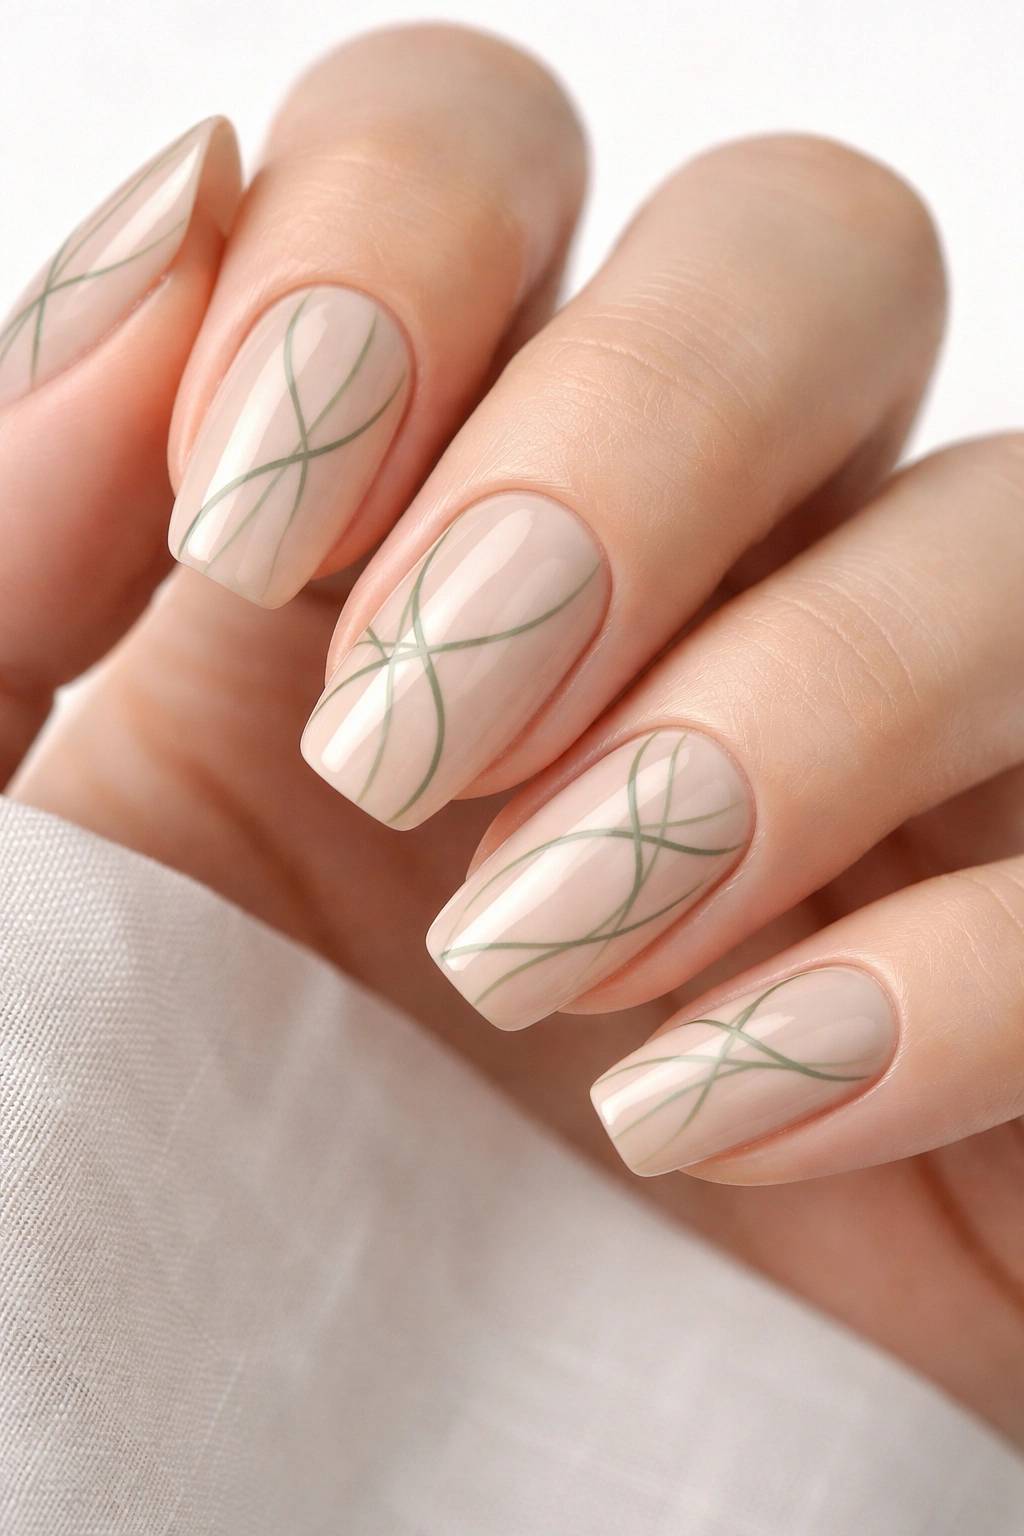
Thin, freeform lines in green drawn over a nude base create an abstract, artistic effect that feels modern and unique. This design is all about imperfection and creative expression.
Why It Works
Abstract line art is forgiving because there’s no “right” way to do it. Squiggles, loops, dots, and dashes all work together to create something that feels intentional and stylish. When you use a deep green or olive tone against nude, the lines stand out clearly without looking harsh. It’s minimalist but interesting, and the freehand approach gives each nail its own personality. Think of it as doodling on your nails—but make it fashion.
What to Know
Grab a fine nail art brush or a striping brush and load it with green polish. Without overthinking it, draw loose curves, wavy lines, or geometric shapes across your nude-painted nails. You can keep it sparse (just a few lines per nail) or go more dense and layered. The key is to keep your hand relaxed and let the brush move naturally. If you make a “mistake,” just add another line—it all becomes part of the design. Finish with a glossy top coat to unify the look and add shine.
Pro tip: Use a slightly darker or lighter nude as your base so the green lines have better contrast and don’t get lost.
9. Pistachio and Beige Checkerboard
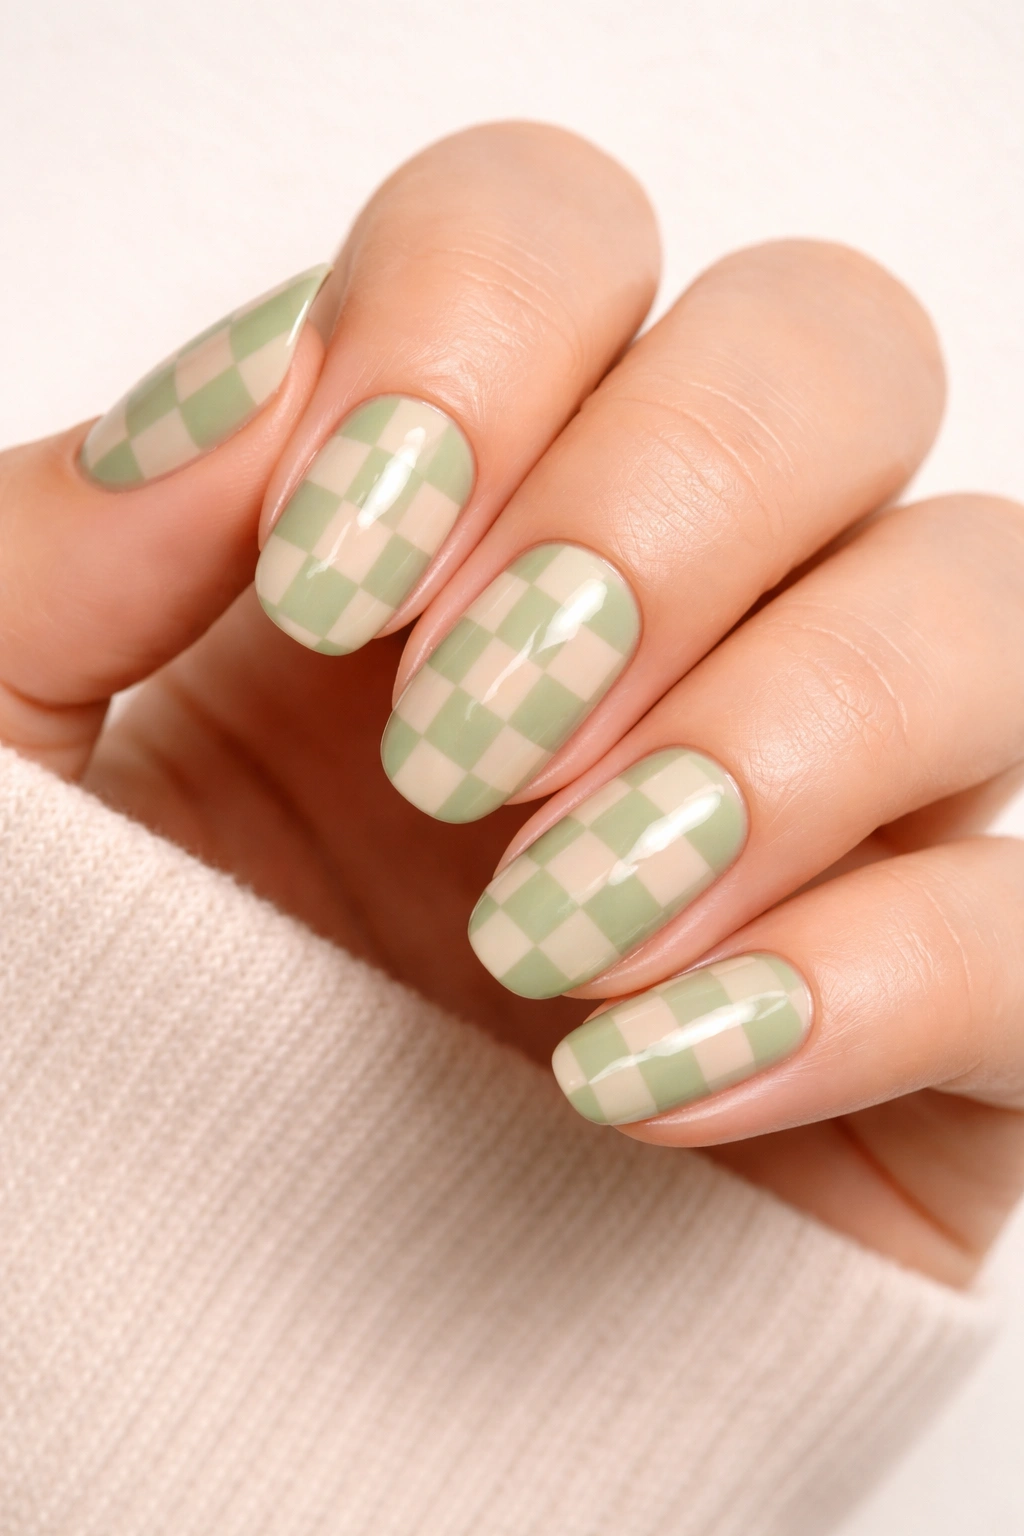
Checkerboard nails are having a moment, and for good reason. The pattern is playful, retro, and instantly recognizable. Swap the usual black and white for pistachio green and warm beige, and you’ve got a softer, more sophisticated take.
Why You’ll Love It
Checkerboard adds structure and rhythm to your nails without feeling too serious. The repeating squares create visual interest and make your nails feel coordinated and polished. Pistachio green—pale, slightly muted, and oh-so-earthy—pairs beautifully with a creamy beige to create contrast without harshness. It’s quirky but tasteful, and it works on both short and long nails. Plus, it’s easier to DIY than it looks.
Tips for Perfect Squares
Start by painting your entire nail in beige. Once dry, use a thin brush or nail art pen to draw a grid of vertical and horizontal lines, dividing your nail into small squares. Then, fill in every other square with pistachio green, like a checkerboard. You can make the squares tiny and detailed or go bigger and bolder depending on your nail length and patience level. For super-clean lines, use striping tape as a guide. Finish with a glossy top coat, and boom—instant nail art that looks way more complicated than it actually was.
10. Minimalist Half-Moon Design
The half-moon manicure highlights the crescent shape at the base of your nail, leaving it bare or painting it in a contrasting color. Use nude on the body of the nail and green on the half-moon (or vice versa) for a clean, graphic look.
What Makes It Timeless
Half-moon nails have been around for decades, and they’ve never really gone out of style. There’s something elegant and vintage about them, but they still feel modern when done in the right colors. Green and nude create a soft, earthy version of this classic that’s less dramatic than red and gold but just as chic. The curved line adds shape and structure, making your nails look longer and more refined.
How to Achieve Clean Curves
You can use reinforcement stickers (the kind made for French tips) placed upside down at the base of your nail to create the half-moon shape. Paint your entire nail in nude, let it dry, then place the sticker and paint the exposed half-moon in green. Peel off the sticker while the polish is still slightly wet for the cleanest line. Alternatively, paint the half-moon first in green, let it dry, then carefully paint the rest of the nail in nude, leaving the crescent bare. Either way works—it just depends on which feels easier for your hand control.
Fun fact: You can reverse the design by making the half-moon nude and the rest of the nail green for a bolder take on the same concept.
Wrapping Up
Green and nude nails prove you don’t need neon or glitter to make a statement. This pairing is elegant, earthy, and endlessly adaptable, whether you’re into minimalist vibes or detailed designs. From marbled swirls to abstract line art, each look on this list offers a fresh way to wear these two colors together.
What’s great about this combo is how forgiving it is. Green adds personality without being loud. Nude keeps things classy without feeling boring. Together, they create balance, dimension, and a look that feels both intentional and effortless.
So if your nails have been stuck in a rut, give green and nude a try. Pick the design that speaks to you, grab your polish, and let your fingertips do the talking. You might just find your new signature look hiding in this earthy, elegant mix.
