

10 Teal and Gold Nail Combos That Stun
There’s something undeniably captivating about the pairing of teal and gold on your fingertips. It’s one of those color combinations that manages to feel both luxurious and approachable at the same time. The deep, jewel-toned richness of teal paired with the warm shimmer of gold creates a visual harmony that catches light beautifully and turns heads wherever you go.
Teal brings that perfect balance between blue’s calming energy and green’s refreshing vibe. It’s a shade that flatters nearly every skin tone, which partly explains why it’s become such a favorite in nail art circles. Gold, on the other hand, adds that touch of opulence without feeling overdone. When these two colors meet on your nails, magic happens.
What makes this pairing particularly special is its versatility. You can dress it up for formal events or tone it down for everyday wear. The combination works beautifully across different nail lengths, shapes, and styles. Whether you’re drawn to minimalist designs or prefer something more elaborate, teal and gold can adapt to match your personal aesthetic.
These aren’t just pretty colors—they’re a statement. Teal and gold nails communicate confidence and creativity. They show attention to detail and an appreciation for color harmony. If you’ve been searching for a manicure that feels special without trying too hard, you’ve found it.
Let’s explore ten stunning ways to wear this gorgeous color combination. Each design brings its own personality while maintaining that sophisticated teal-and-gold foundation.
1. Classic Teal Base with Gold Foil Accents
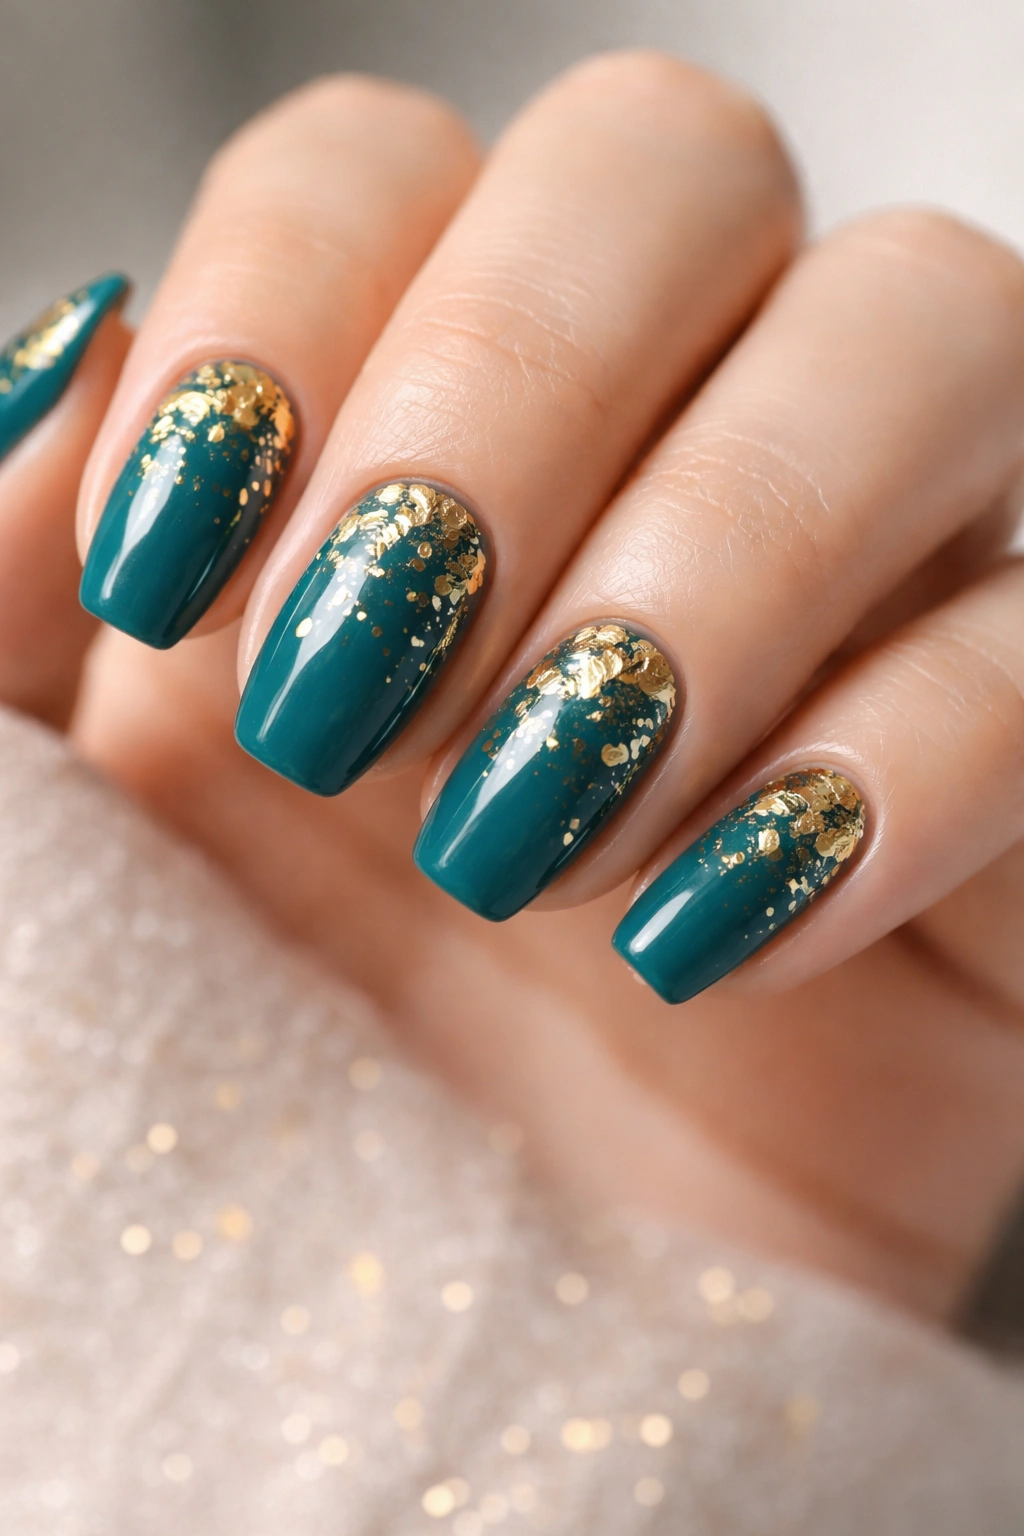
Sometimes the most straightforward approach delivers the biggest impact. A solid teal base adorned with scattered gold foil pieces creates an effortlessly chic look that’s easier to achieve than you might think.
The beauty here lies in the contrast. Your deep teal polish provides a rich, saturated canvas while irregular pieces of gold foil catch the light from every angle. It’s like wearing tiny pieces of treasure on your fingertips. This design works particularly well because it doesn’t require precise placement—the random nature of foil application actually adds to its charm.
Why This Design Works
The foil technique adds incredible dimension without complex nail art skills. You can apply gold foil pieces in concentrated areas for drama or scatter them lightly for subtle sparkle. The irregular edges of the foil create interesting texture that makes each nail unique.
This combination translates well across different teal shades too. Lighter, aquamarine teals give a breezy, coastal feel while deeper ocean teals create something more mysterious and evening-appropriate. The gold foil elevates whichever shade you choose, adding that luxe factor instantly.
Application Tips
Start with two coats of your chosen teal polish, allowing proper drying time between layers. Apply a thin layer of foil adhesive or clear gel to areas where you want gold accents. Press gold foil sheets firmly onto the tacky surface, then peel away carefully. The foil transfers to your nails, creating those gorgeous metallic patches.
Seal everything with a quality top coat to protect your design and smooth out any texture from the foil edges. This step makes the difference between a design that lasts days versus one that chips quickly.
2. Gold-Tipped Teal French Manicure
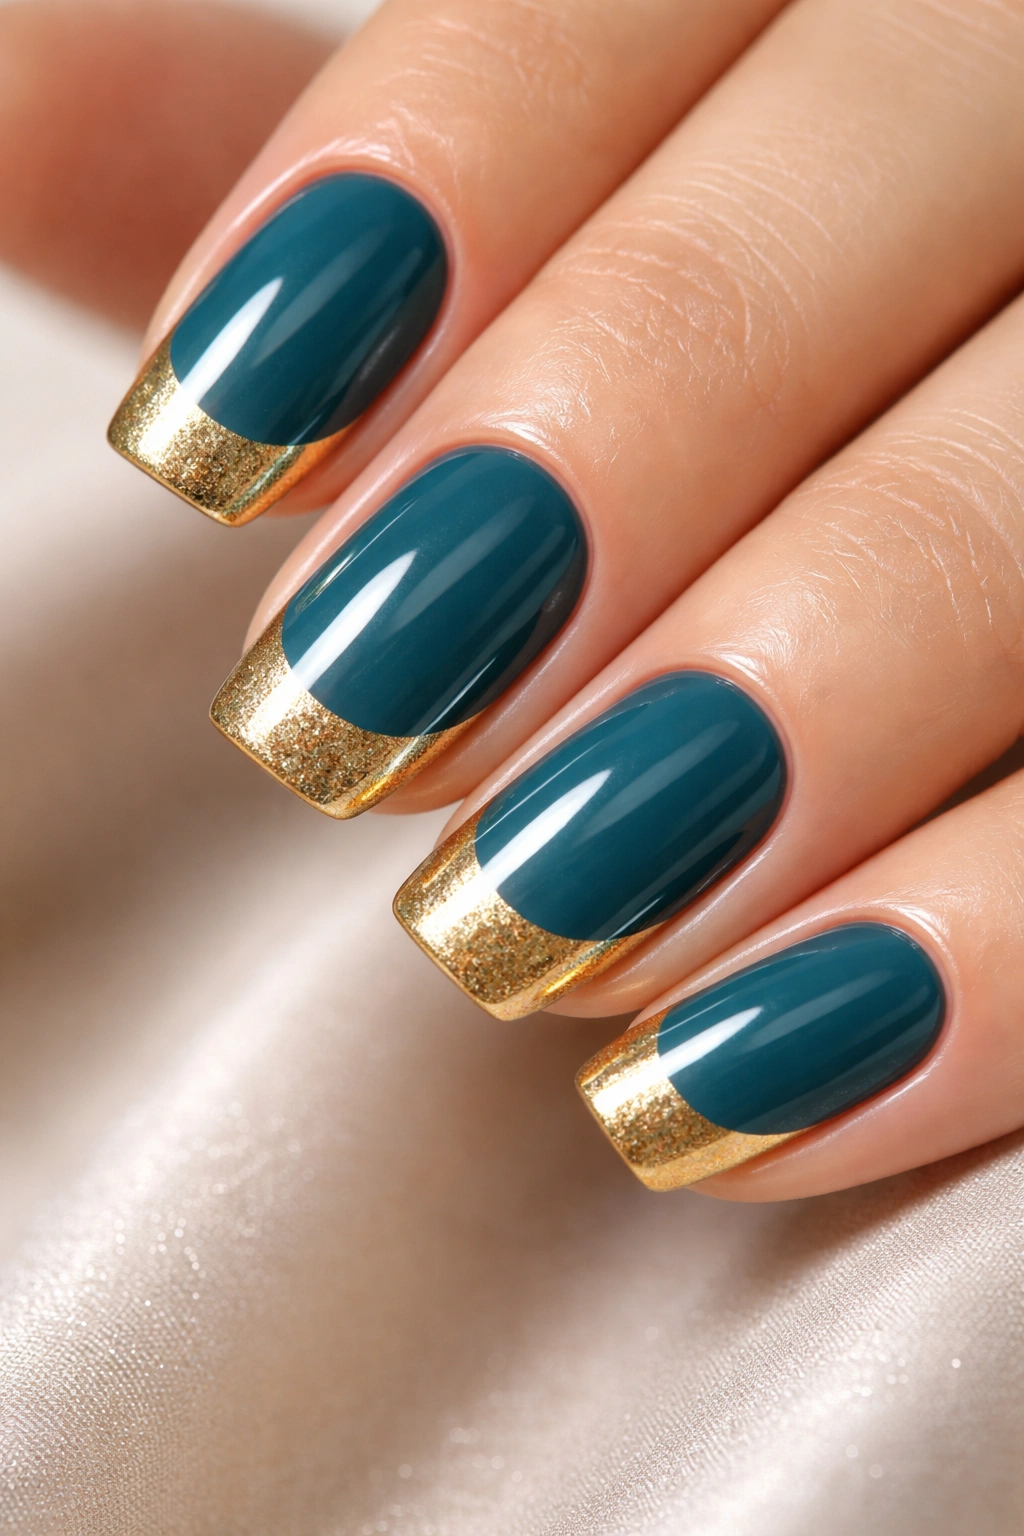
French manicures have evolved beyond white tips, and swapping in metallic gold creates something truly special. This twist on the classic maintains that timeless sophistication while injecting personality and warmth.
The technique involves painting your nails in a rich teal shade, then carefully applying gold polish to just the tips. The contrast between the jewel-toned base and shimmering gold tips creates visual interest that’s polished enough for professional settings yet distinctive enough to showcase your style.
Creating the Perfect Tip
The key to nailing this look is achieving clean, even lines where teal meets gold. Nail guides or striping tape help create that crisp edge. Position them slightly below where you want your gold tip to end, paint over with gold polish, then carefully remove the tape while the polish is still slightly wet.
For a modern take, try varying the tip thickness on different nails. Some can have thin gold crescents while others feature wider bands. This variation keeps the design from feeling too uniform or dated.
Finish Options That Transform the Look
A glossy top coat gives traditional elegance, while a matte finish creates contemporary sophistication. You could even do glossy teal with matte gold tips for an interesting texture contrast. Mixing finishes adds another design element without additional complexity.
This combination works beautifully for those who want to experiment with color but maintain some connection to classic nail aesthetics. It’s familiar enough to feel comfortable but distinctive enough to feel fresh.
3. Teal Marble with Gold Veining
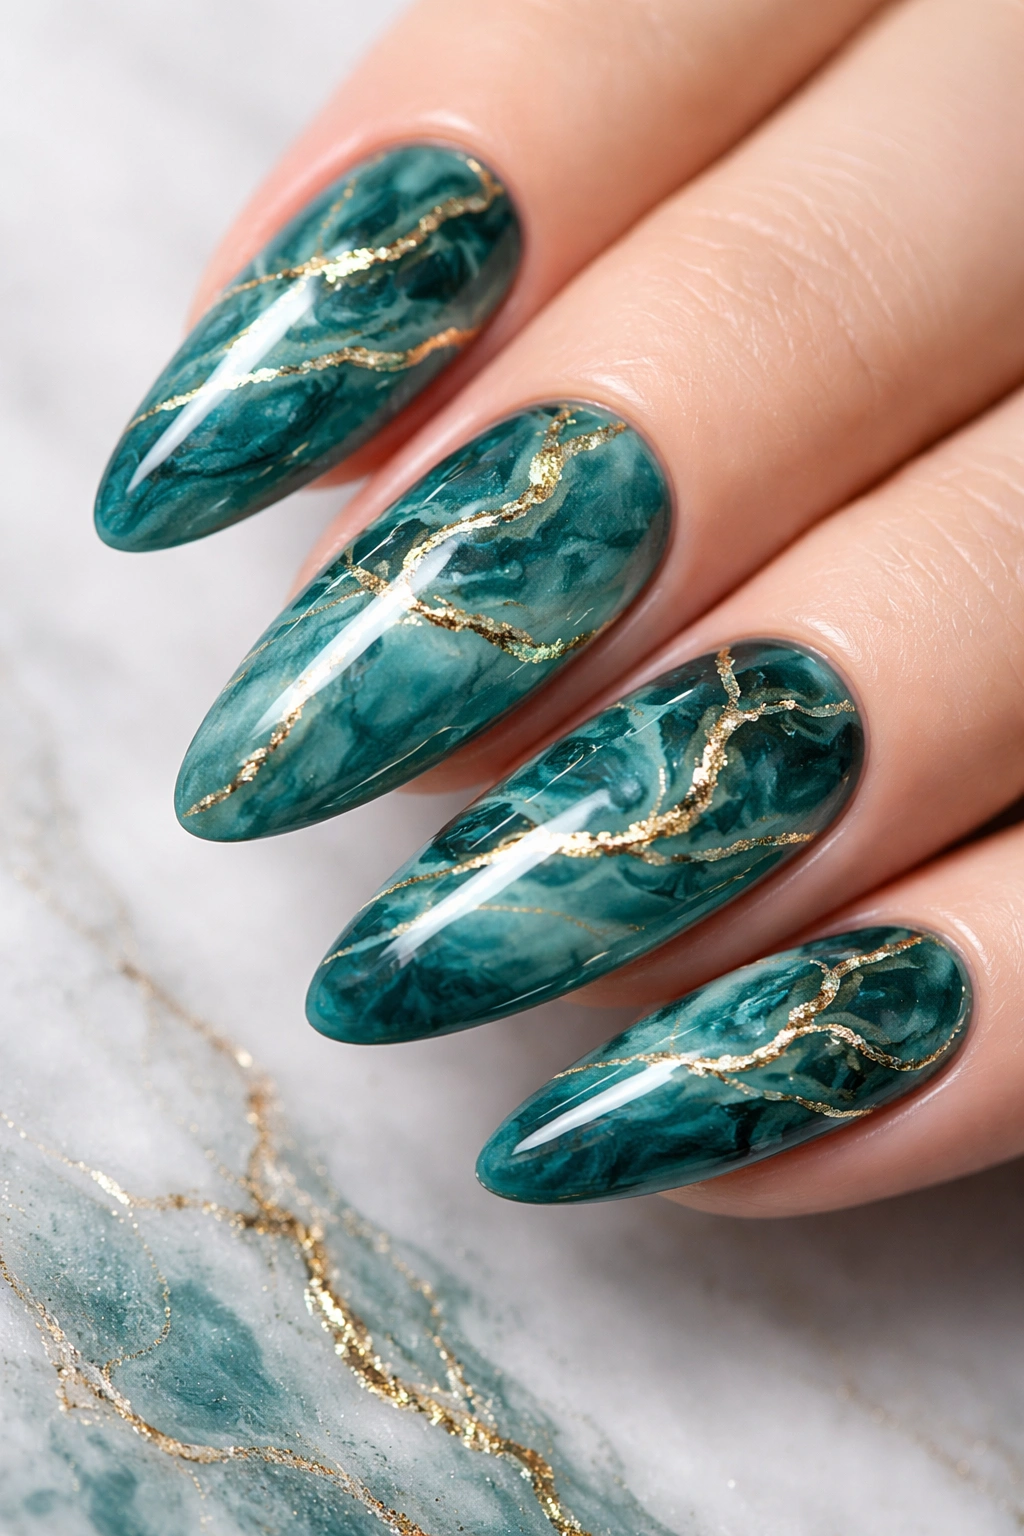
Marble effects bring an artistic, high-end quality to nails that looks far more complex than it actually is. When you incorporate teal as the primary marble color with gold veining running through it, you create something that resembles precious stone.
The swirling, organic patterns of marble nail art mean no two nails look exactly alike. This uniqueness adds to the appeal—your manicure becomes a collection of miniature artworks rather than a uniform color application.
How to Achieve the Marble Effect
Several techniques work here. Water marbling involves dropping teal and white polish onto water’s surface, swirling them together, then dipping your nail through the pattern. The blooming gel method uses special gel that creates organic spread patterns when mixed with regular gel polish.
For gold veining, use a thin nail art brush to paint delicate lines that follow the natural flow of your marble pattern. Think about how veins run through actual marble—irregular, branching, and never perfectly straight. This imperfection makes it look authentic.
Color Variations to Try
Lighter teal with white creates soft, ethereal marble reminiscent of turquoise stone. Deeper teal with navy or black creates dramatic, moody marble. Adding gold veining to either variation brings that luxe element that ties the whole design together.
The marble technique also disguises minor application imperfections, making it surprisingly beginner-friendly despite its sophisticated appearance. If you’re concerned about getting everything perfect, this design offers some forgiveness.
4. Geometric Teal and Gold Patterns
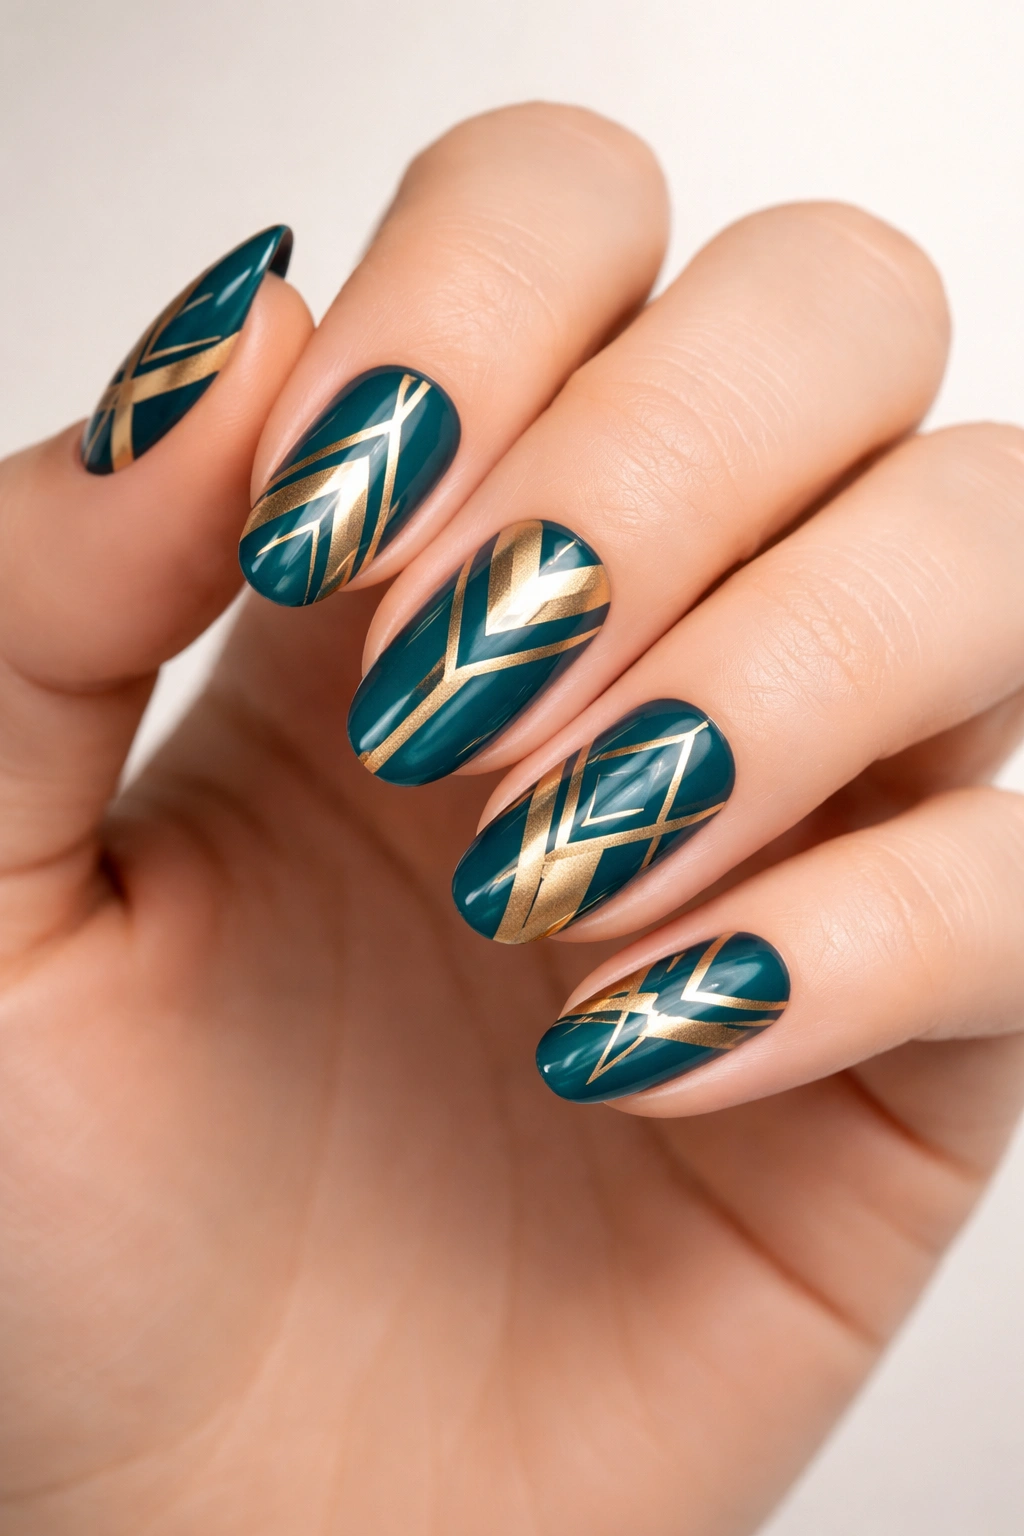
Clean lines and structured shapes give teal and gold nails a modern, architectural feel. Geometric designs range from simple stripes to complex angular patterns, all sharing that crisp, intentional aesthetic.
This style suits those who appreciate minimalist design and structured beauty. There’s something satisfying about the precision of geometric nail art—it demonstrates control and attention to detail while creating bold visual impact.
Design Ideas That Pop
Try diagonal color-blocking where teal and gold split the nail at an angle. Alternating triangles pointing up and down create a zigzag effect. Thin gold stripes over a teal base add subtle sophistication. Chevron patterns feel playful and energetic.
Negative space designs work particularly well with this color combination. Leave portions of the nail bare while painting geometric teal and gold sections. The natural nail color becomes part of the design, creating breathing room between the bold colors.
Tools That Make It Easier
Striping tape is your best friend for geometric designs. Apply it to create boundaries between colors, paint over it, then remove it to reveal crisp lines. Nail vinyls in various shapes (triangles, circles, chevrons) help create precise geometric sections without freehand painting.
Dotting tools create perfect circles for polka dot patterns or circle-based geometric designs. A thin striping brush lets you paint fine lines for more detailed geometric work. Having the right tools transforms geometric nail art from frustrating to enjoyable.
5. Teal Ombre Fading to Gold Glitter
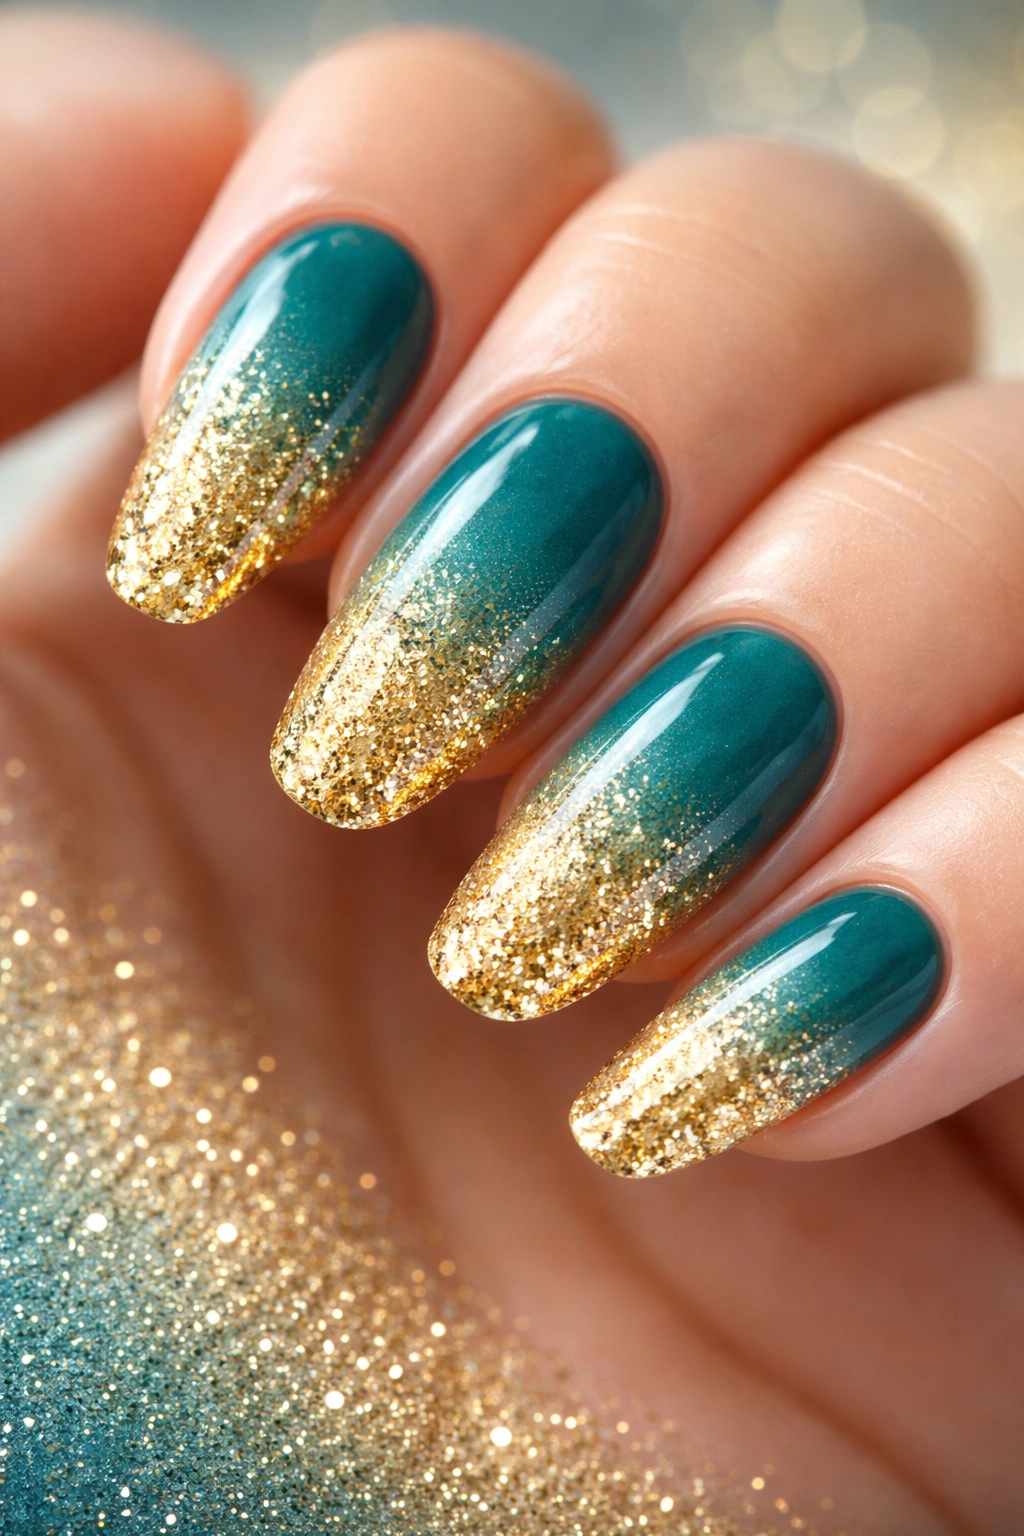
Gradient designs have staying power because they’re genuinely beautiful and surprisingly wearable. A teal-to-gold ombre creates a seamless color transition that feels cohesive rather than contrasting.
The ombre technique blends your colors so smoothly that you can’t quite tell where teal ends and gold begins. This creates visual flow across the nail and even across your whole hand when you fan out your fingers.
Achieving a Smooth Gradient
The sponge method works beautifully here. Paint stripes of teal, a transitional shade (perhaps a gold-green), and gold glitter polish onto a makeup sponge. Press and roll the sponge onto your nail in a dabbing motion. The colors blend together on the nail surface.
Don’t worry if the first coat looks patchy—gradients typically need two or three applications to build up opacity and achieve that smooth transition. Let each layer dry slightly before applying the next.
Why Gold Glitter Works Perfectly
Gold glitter at the tips creates sparkle that catches light beautifully while maintaining connection to the teal base. The glitter particles create texture and dimension that flat polish can’t achieve. As the gradient fades upward, the glitter becomes the dominant element, creating a natural focal point at your nail tips.
This design works especially well for special occasions when you want something eye-catching. The shimmer and color transition together create movement and interest that photographs beautifully.
6. Matte Teal with Glossy Gold Accents

Mixing finishes adds sophistication and visual interest without requiring complex designs. The contrast between a velvety matte teal base and shiny gold details creates texture variation that makes your nails more dynamic.
Matte polish has a contemporary, fashion-forward quality. It softens bold colors and gives them an expensive, refined appearance. When you add glossy gold elements to this matte canvas, those shiny areas stand out dramatically.
Design Approaches Worth Trying
Keep the gold accents minimal—a single glossy gold stripe down the center of each nail over matte teal. Paint matte teal on all nails except one accent nail per hand done in glossy gold. Create matte teal with small glossy gold dots scattered across a few nails.
The key is letting the finish contrast do the heavy lifting. You don’t need elaborate patterns when the textural difference between matte and gloss creates inherent interest. Simple designs often look most sophisticated with this technique.
Application Considerations
Always apply matte top coat as your final step—it’ll make any glossy elements matte too if they’re already on the nail. Instead, plan ahead: apply your teal polish with regular top coat to those areas that will stay glossy, then carefully apply matte top coat only to the sections you want matte.
Alternatively, paint everything with matte top coat, then go back and add glossy gold accents on top. This works particularly well for dots, stripes, or other designs applied with a detail brush. The glossy gold sits on the matte surface, creating that beautiful contrast.
7. Teal Chrome with Gold Striping
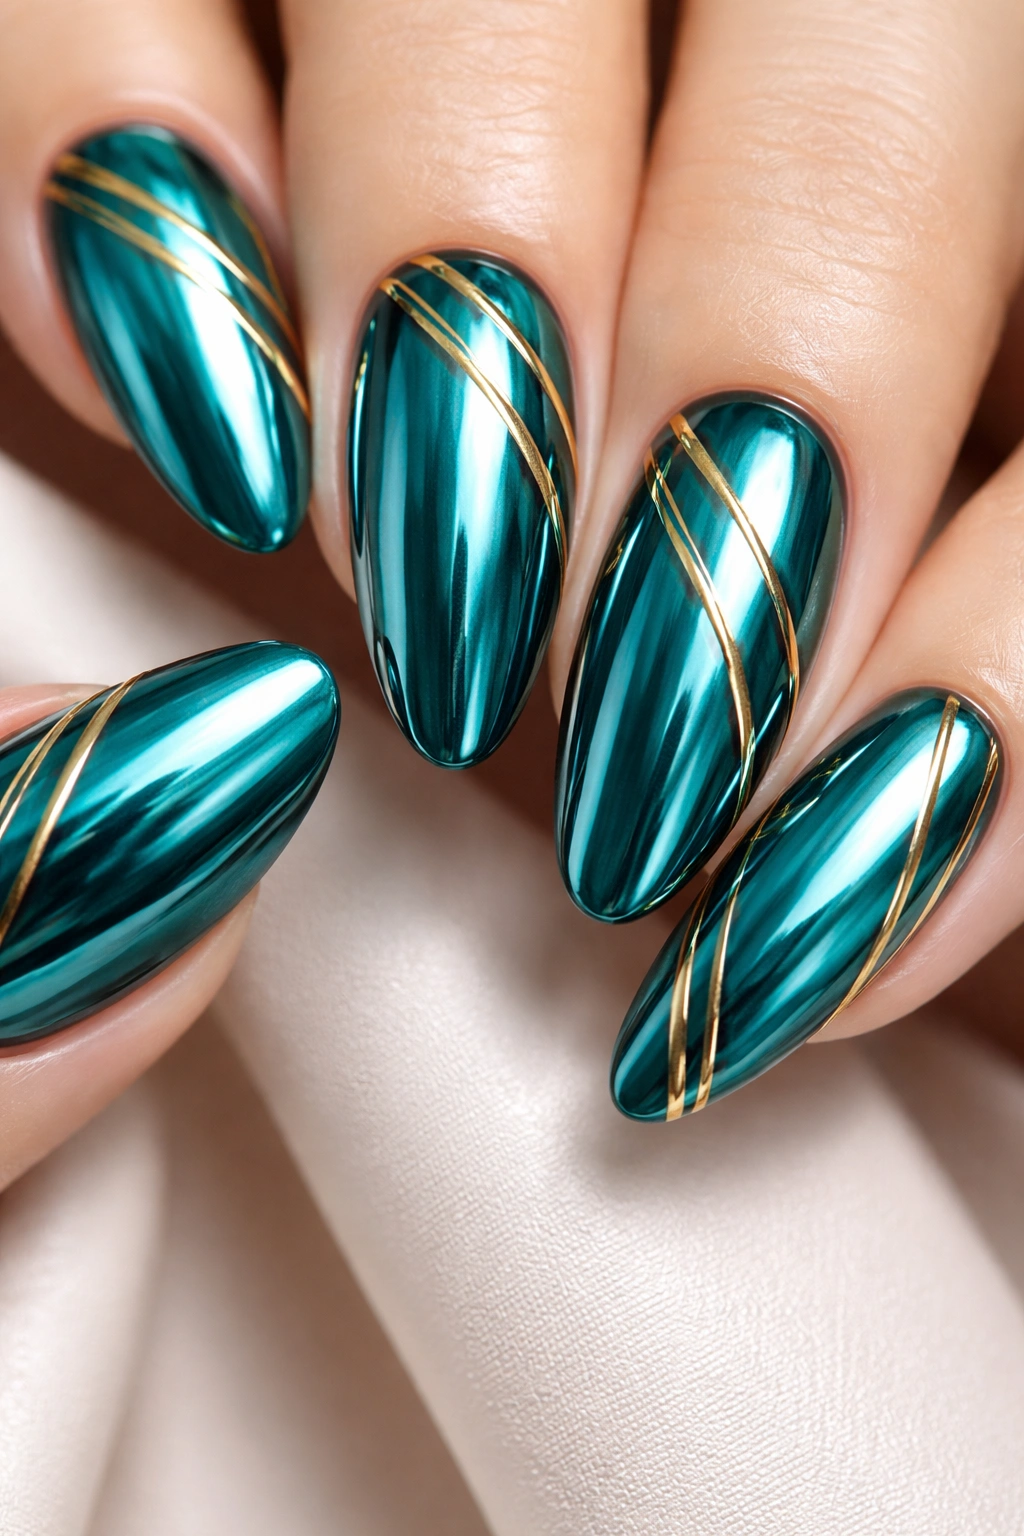
Chrome nails offer that eye-catching metallic mirror finish that’s been consistently popular. Teal chrome has a futuristic, high-shine quality that looks almost liquid. Adding thin gold stripes over this reflective base creates stunning contrast.
The chrome powder creates a smooth, reflective surface that catches and bounces light differently than regular polish. It’s mesmerizing—your nails literally shine like polished metal. This high-impact finish pairs beautifully with the warm glow of gold details.
Creating Chrome Nails
Chrome powder requires gel polish as a base. Apply your teal gel polish and cure it completely. Add a no-wipe top coat and cure again. While the nail is still warm from the lamp, rub chrome powder over the surface using a silicone tool or your finger. Buff until you achieve that mirror finish.
The powder adheres to the gel, creating that signature chrome effect. Seal it with another layer of gel top coat to protect the chrome and ensure longevity. Skip this final sealing step and your chrome will rub off within hours.
Adding Gold Striping Details
Once your teal chrome is sealed and cured, use gold striping tape or paint thin gold lines using a nail art brush and gold gel polish. The gold creates beautiful contrast against the cool-toned teal chrome. Vertical stripes elongate the nail visually, while horizontal or diagonal stripes create different effects.
Seal your gold details with another layer of top coat. The combination of reflective teal chrome and gold accents creates dimension and luxury that’s hard to achieve with regular polish.
8. Teal Base with Gold Rhinestone Details
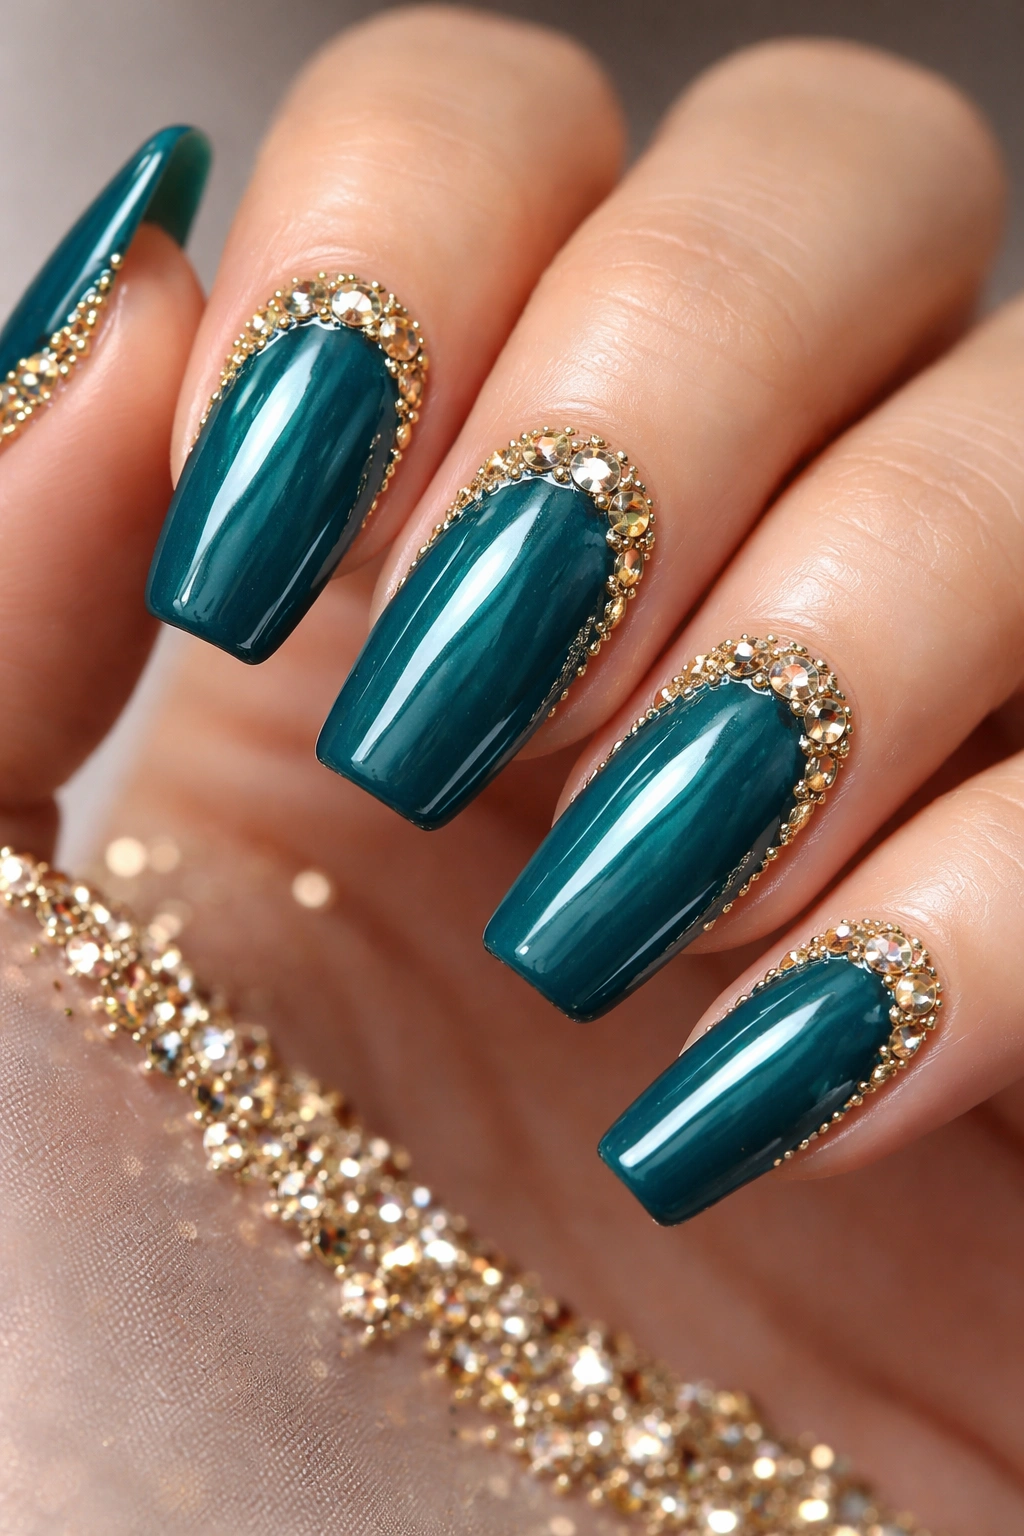
Rhinestones and nail gems add three-dimensional sparkle that takes manicures from pretty to show-stopping. A teal base scattered with gold or gold-toned rhinestones creates glamorous nails perfect for special occasions.
The beauty of rhinestones is their versatility. You can go minimal with just a few small stones or cover entire accent nails in gem-encrusted designs. Either approach looks intentional and beautiful when done on a teal base with gold stones.
Placement Ideas That Shine
Create a diagonal line of rhinestones from one corner of the nail to the opposite corner. Cluster several stones of varying sizes around the cuticle area. Place a single larger rhinestone at the center of each nail. Outline the entire nail edge with tiny gold stones.
Accent nails work particularly well for rhinestone designs. Keeping the embellishments to one or two nails per hand prevents the look from becoming overwhelming while still delivering that glamorous impact you’re after.
Making Rhinestones Stay Put
Nail glue or gel top coat both work for rhinestone application, though gel provides stronger hold. Place a small dot of adhesive where you want the rhinestone, then use tweezers or a dotting tool to position it precisely. Press down firmly to secure.
Once all your rhinestones are placed, carefully apply top coat around them, allowing it to seal the edges while avoiding covering the stone surfaces completely. Rhinestones shine brightest when they’re not buried under layers of top coat.
9. Teal and Gold Abstract Swirls

Abstract nail art feels artistic and expressive without requiring perfect execution. Swirling teal and gold together creates organic, flowing patterns that look sophisticated and intentional even when they’re completely improvised.
The freeform nature of abstract designs means you can’t really make mistakes—whatever patterns emerge become “the design.” This freedom makes abstract nail art surprisingly relaxing to create. You’re not trying to replicate anything specific; you’re just playing with color.
Techniques for Beautiful Swirls
Apply teal as your base and let it dry completely. Add random blobs or lines of gold polish. Use a thin brush or dotting tool to drag through the gold, creating swirls and curves. The gold spreads and blends slightly with the teal at the edges, creating that abstract, artistic effect.
Water marbling creates abstract swirls too. Drop teal and gold polish onto water, swirl with a toothpick, then dip your nail through the pattern. Each nail emerges with a unique abstract design. The unpredictability is part of the appeal.
Color Layering for Depth
Adding white or lighter teal into your swirl mix creates additional dimension. The multiple colors swirling together look more complex and artistic. Metallic gold moves differently through polish than regular colors, creating interesting effects as it mingles with other shades.
Top coat is essential here—it smooths out any texture from layered colors and makes your abstract design look professionally finished. The glossy seal also intensifies the colors, making them appear richer and more saturated.
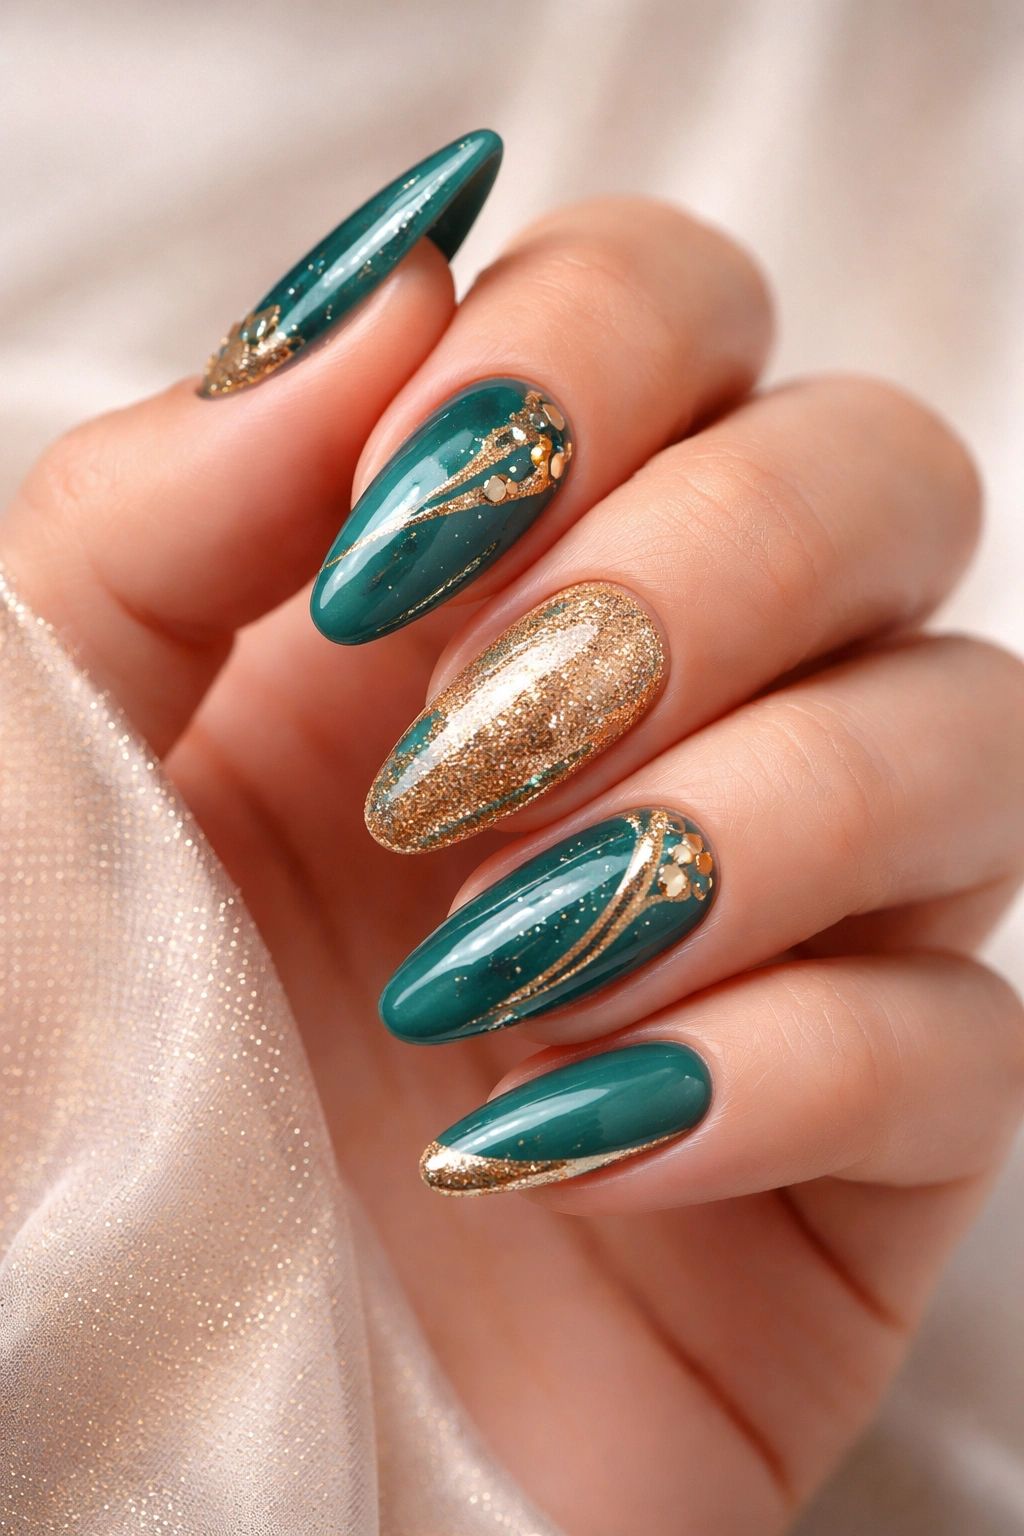
10. Gold Glitter Accent Nail with Teal Base
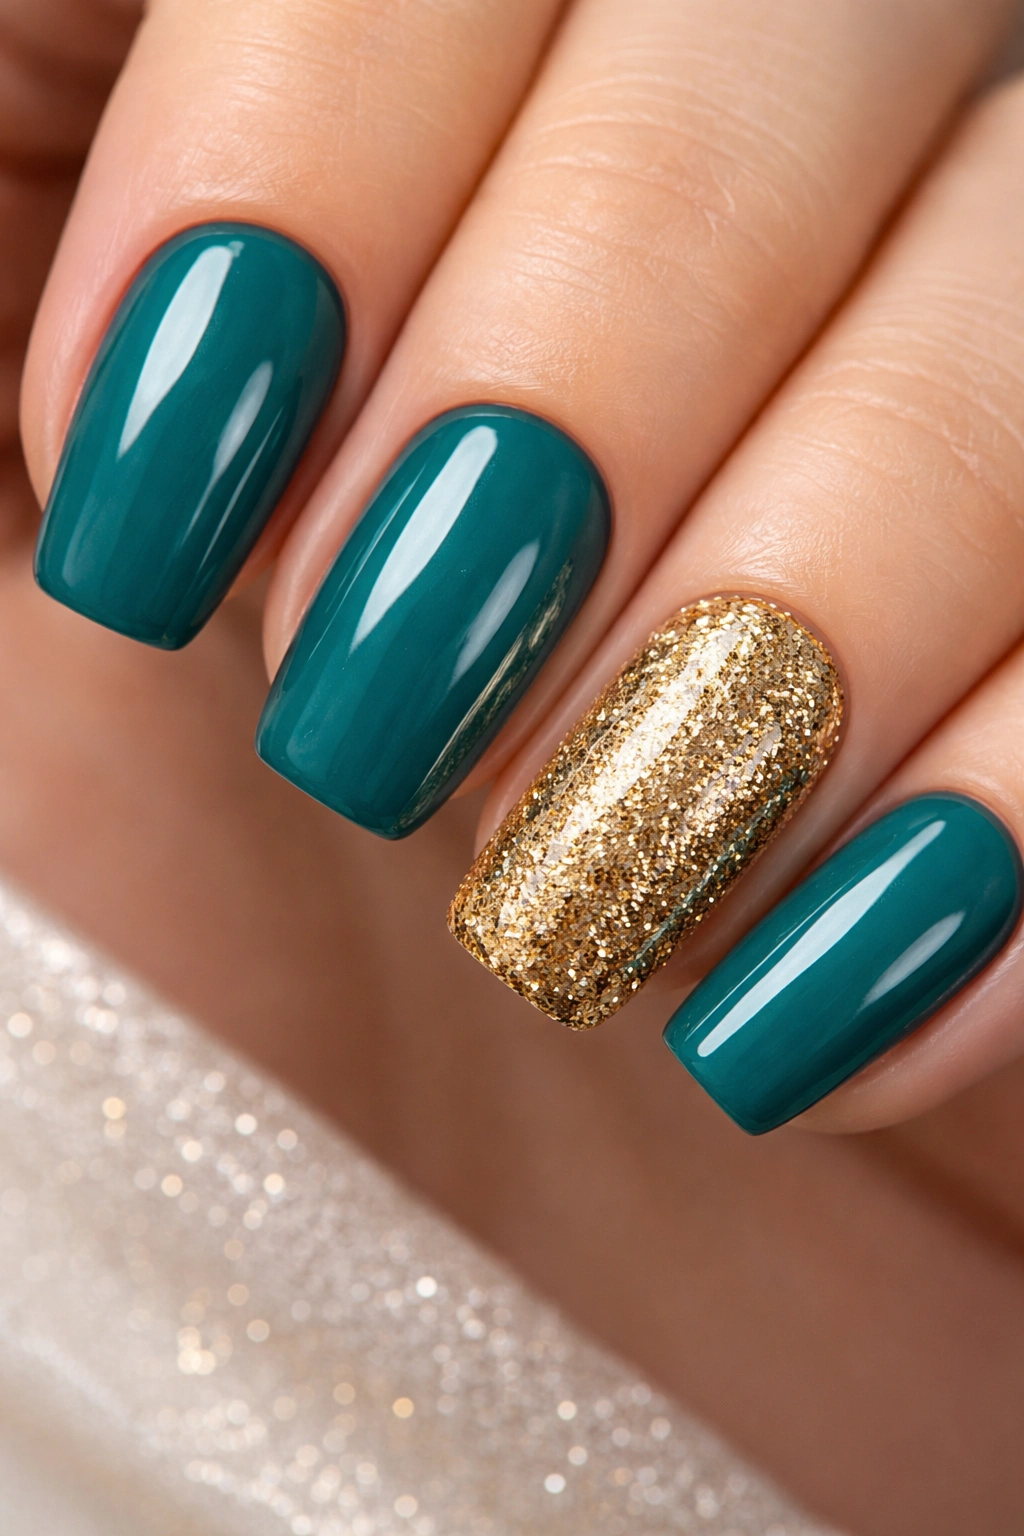
Sometimes restraint creates the most impact. Painting most nails in solid teal with one or two gold glitter accent nails creates a balanced design that’s eye-catching without being overwhelming.
The accent nail technique has remained popular because it works. It gives you a way to incorporate bold elements (like full-coverage glitter) without committing your entire manicure to that intensity. The contrast between simple and embellished creates visual interest.
Choosing Your Accent Placement
The ring finger is the traditional accent nail position, though you can choose any finger. Some people do two accent nails per hand—ring and middle fingers, or thumb and ring finger. There’s no wrong answer; it comes down to personal preference.
Consider your hand size when deciding how many accent nails to do. Smaller hands sometimes look better with just one accent per hand, while larger hands can balance two accented fingers beautifully. Hold up your hands and visualize different options.
Gold Glitter Selection Matters
Chunky gold glitter creates bold, statement sparkle. Fine gold shimmer looks more refined and catches light subtly. Gold flakies (larger, irregular glitter pieces) create texture and dimension. Gold chrome glitter gives that reflective metallic quality.
You might even layer different gold glitters over your accent nail—start with fine shimmer as a base, then add some chunky pieces for dimension. This layering technique creates depth that single glitter formulas can’t achieve. Seal everything with a thick top coat to smooth down any texture from larger glitter pieces.
Wrapping Up
Teal and gold nails offer something special—a color combination that feels both timeless and fresh. These ten approaches give you options whether you prefer minimalist elegance or maximum glamour. The versatility of this pairing means you can adapt it to match your personal style and the occasion.
What makes teal and gold particularly wonderful is how forgiving it is. The colors complement each other so naturally that even simple designs look intentional and polished. You don’t need advanced nail art skills to create something beautiful with these shades.
The designs shared here work across different nail lengths and shapes. Short nails can rock geometric patterns or simple accent nails. Longer nails provide more canvas for elaborate marble effects or rhinestone placement. Every nail type can wear teal and gold successfully.
Don’t be afraid to experiment and make these ideas your own. Mix elements from different designs—maybe teal marble with gold rhinestones, or chrome finish with foil accents. The beauty of nail art is that it’s temporary. You can try something bold knowing you’ll have fresh nails in a couple weeks.
Whether you’re heading to a special event or just want to treat yourself to gorgeous nails, teal and gold delivers. This combination photographs beautifully, complements most wardrobes, and flatters all skin tones. It’s one of those rare color pairings that genuinely works for everyone.
Grab your favorite teal polish and some gold accents. Your stunning new manicure awaits.
