

Mocha mousse nails have taken over as the go-to neutral for anyone craving warmth and sophistication at their fingertips. Think of it as the polish equivalent of your favorite cozy drink—rich, creamy, and endlessly comforting. This shade sits beautifully between chocolate and coffee, offering an earthy elegance that feels both grounded and luxurious.
What makes this color so special? It’s the perfect bridge between bold and subtle. Unlike stark nudes that can wash you out or deep browns that feel too heavy, mocha mousse strikes that sweet spot. The creamy undertones soften the richness, creating a shade that flatters every skin tone without trying too hard.
The beauty world has embraced this warm brown with open arms, and it’s not hard to see why. These nails work for literally everything—your morning coffee run, that big presentation, date night, or lazy weekends. They’re sophisticated enough for professional settings yet soft enough to feel approachable and lived-in.
Whether you’re drawn to glossy finishes that catch the light or prefer something more muted and matte, mocha tones adapt beautifully. You can keep them simple and minimalist or layer on the nail art. From marble effects to metallic accents, this shade serves as the most versatile canvas you’ll find.
Ready to explore the delicious world of mocha mousse manicures? We’ve rounded up ten stunning interpretations that showcase just how flexible—and flattering—this creamy warm tone can be.
1. Classic Solid Mocha
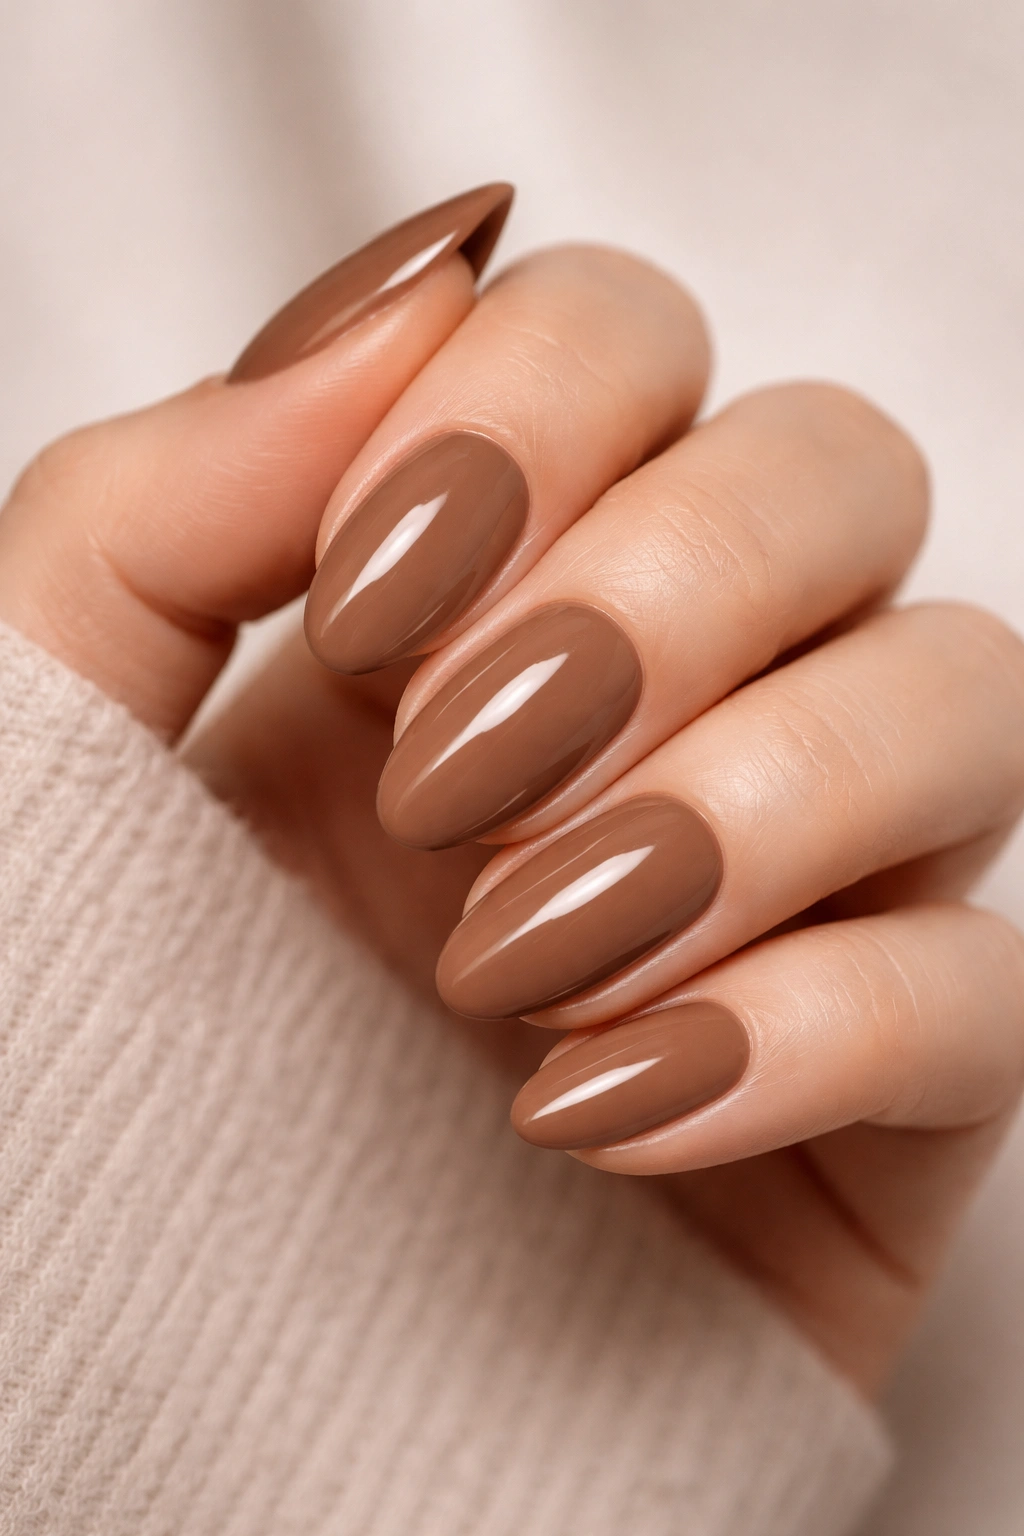
There’s something to be said for simplicity, and a solid coat of mocha mousse proves that sometimes less really is more. This look strips away all the extras and lets the color do the talking. It’s polished without being stuffy, neutral without being boring.
Why It Works
The magic lies in that creamy brown base. It’s warm enough to add color to your hands but subtle enough that it won’t clash with anything in your closet. You’ll find yourself reaching for this shade when you want your nails to look intentional but effortless—like you naturally have gorgeous hands and didn’t spend an hour at the salon.
This finish pairs beautifully with gold jewelry, creates contrast against white and cream clothing, and adds warmth when you’re wearing cooler tones like navy or grey. The single-shade approach also elongates your fingers, especially on almond or oval nail shapes.
Application Tips
- Apply a base coat to prevent staining and create a smooth surface
- Use thin layers rather than one thick coat to avoid bubbling
- Two coats typically give you that rich, opaque coverage
- Finish with a glossy top coat for that glass-like shine, or go matte if you prefer something more modern
Pro tip: If your mocha shade looks slightly uneven after the first coat, don’t panic. The second layer will even everything out and give you that creamy, mousse-like finish the trend is named after.
2. Glazed Mocha Mousse
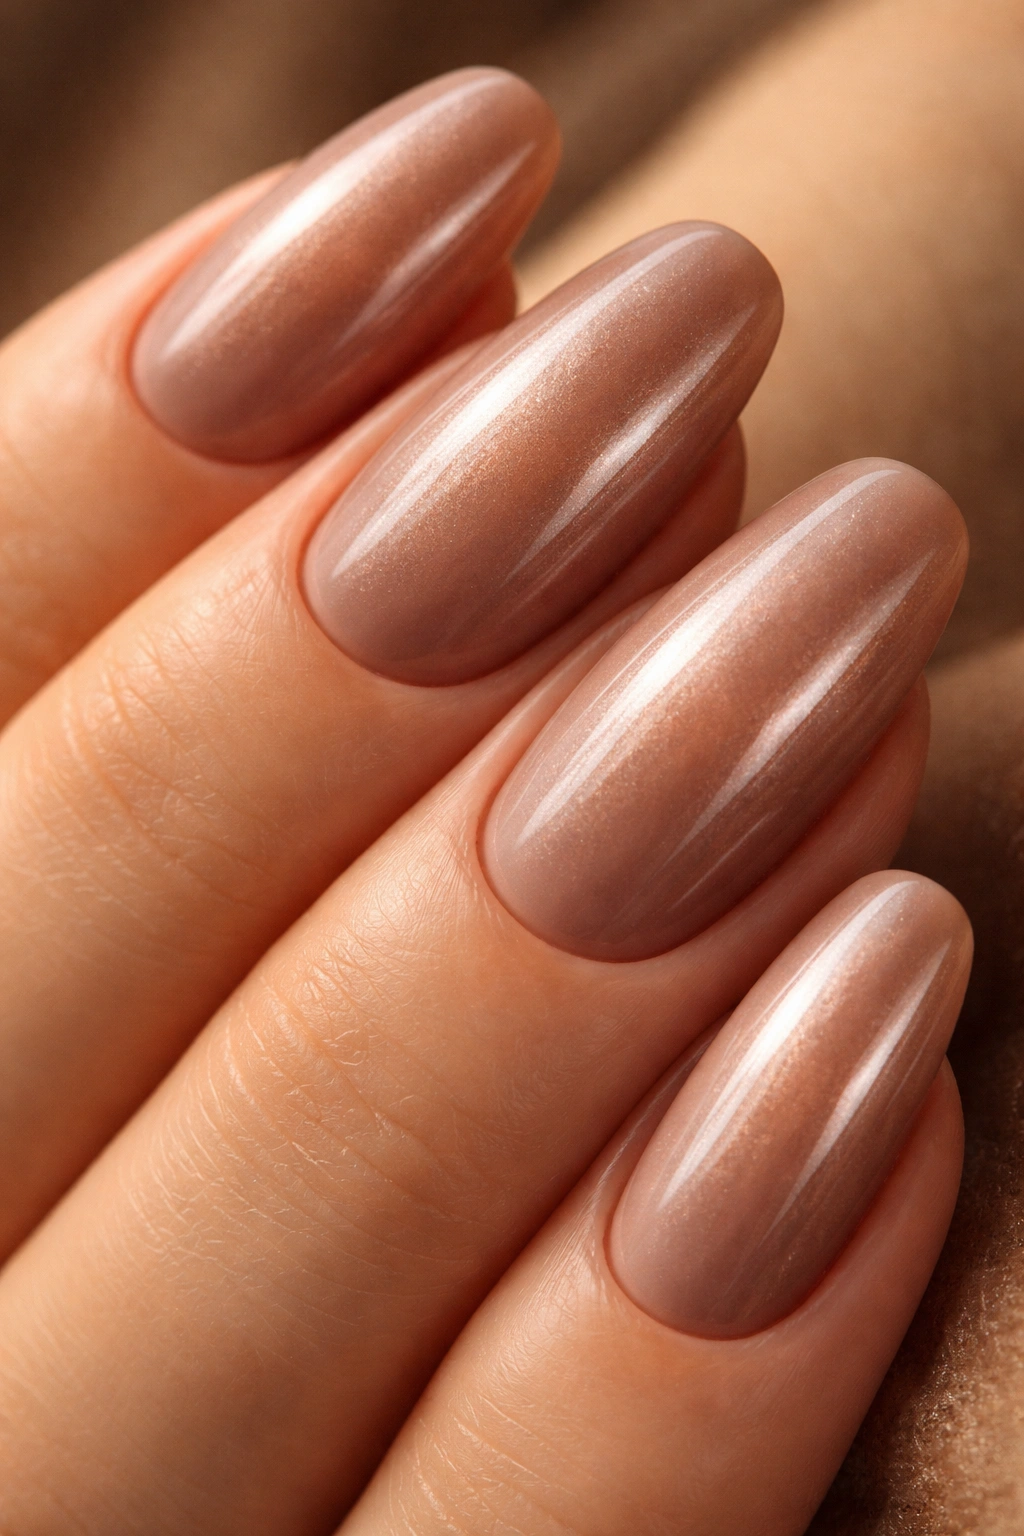
Imagine the shiniest, most light-catching donut glaze you’ve ever seen, but make it brown. That’s glazed mocha mousse nails. This look takes your creamy brown base and adds a pearlescent, almost wet-looking finish that seems to glow from within.
What Makes It Special
The glazed effect creates dimension and movement. As you move your hands, the light hits different angles and creates this gorgeous shimmer that’s noticeable without being over-the-top sparkly. It’s like your nails have been dipped in melted chocolate with a hint of shimmer mixed in.
This technique works particularly well with mocha tones because the warmth of the brown plays beautifully with gold and bronze pearl pigments. You get depth and sophistication with just enough visual interest to keep things from feeling flat.
Creating the Look
Start with your mocha base color—go for something in the medium brown range for this one. Once that’s cured or dried, layer on a pearl or chrome powder using a silicone tool or your finger. Buff it gently into the surface. The key is building up the glaze gradually rather than going heavy-handed right away.
- Use fine pearl powders in champagne or gold tones
- Work the powder in circular motions for even coverage
- Seal everything with a glossy top coat
- Consider leaving the cuticle area slightly less glazed for a natural gradient
Fun fact: The glazed nail trend works on any nail length, but it looks especially stunning on shorter, natural nails where the light can hit the entire surface at once.
3. Mocha French Tips
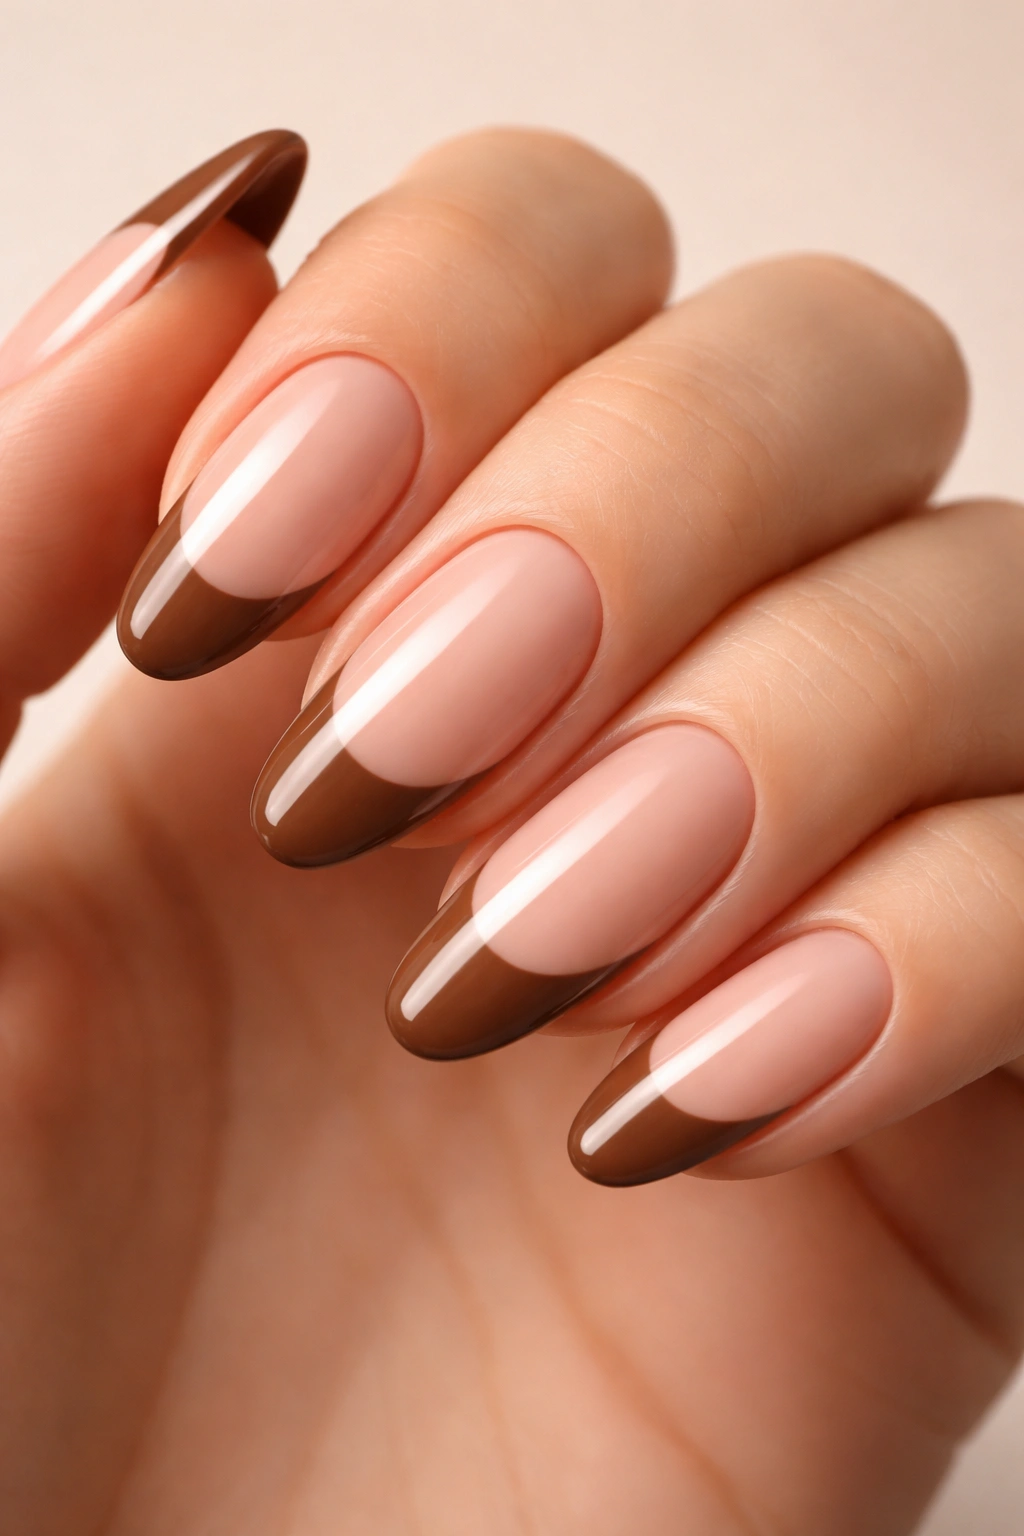
French manicures have gotten a major upgrade, and mocha mousse is leading the charge. This take on the classic swaps out stark white tips for warm, chocolatey ends. The result? A manicure that feels both timeless and totally fresh.
Why You’ll Love This Twist
Traditional French tips can feel a bit dated or too bridal for everyday wear. Mocha tips solve that problem by adding warmth and modernity. The brown plays beautifully against a sheer nude or soft beige base, creating contrast that’s noticeable but not harsh.
This style elongates your nails naturally, drawing the eye upward without the stark line that white tips create. It’s sophisticated enough for work environments where bold colors might feel out of place, yet interesting enough that you won’t feel like you’re playing it too safe.
Design Variations
You’ve got options here. Go for a classic thin line along the tip, or make it thicker and more graphic. Try a rounded shape for softness, or keep it straight for a modern edge. Some nail artists even reverse it—mocha base with nude tips.
- Pair with a milky nude or soft pink base
- Keep the tip line clean and precise for a polished look
- Try a gradient where the brown fades into the base color
- Consider asymmetric tips on different fingers for visual interest
Pro tip: Use a fine brush or nail tape to get that crisp line. If you’re not confident with freehand, tape guides are your best friend and peel away to reveal perfectly shaped tips every time.
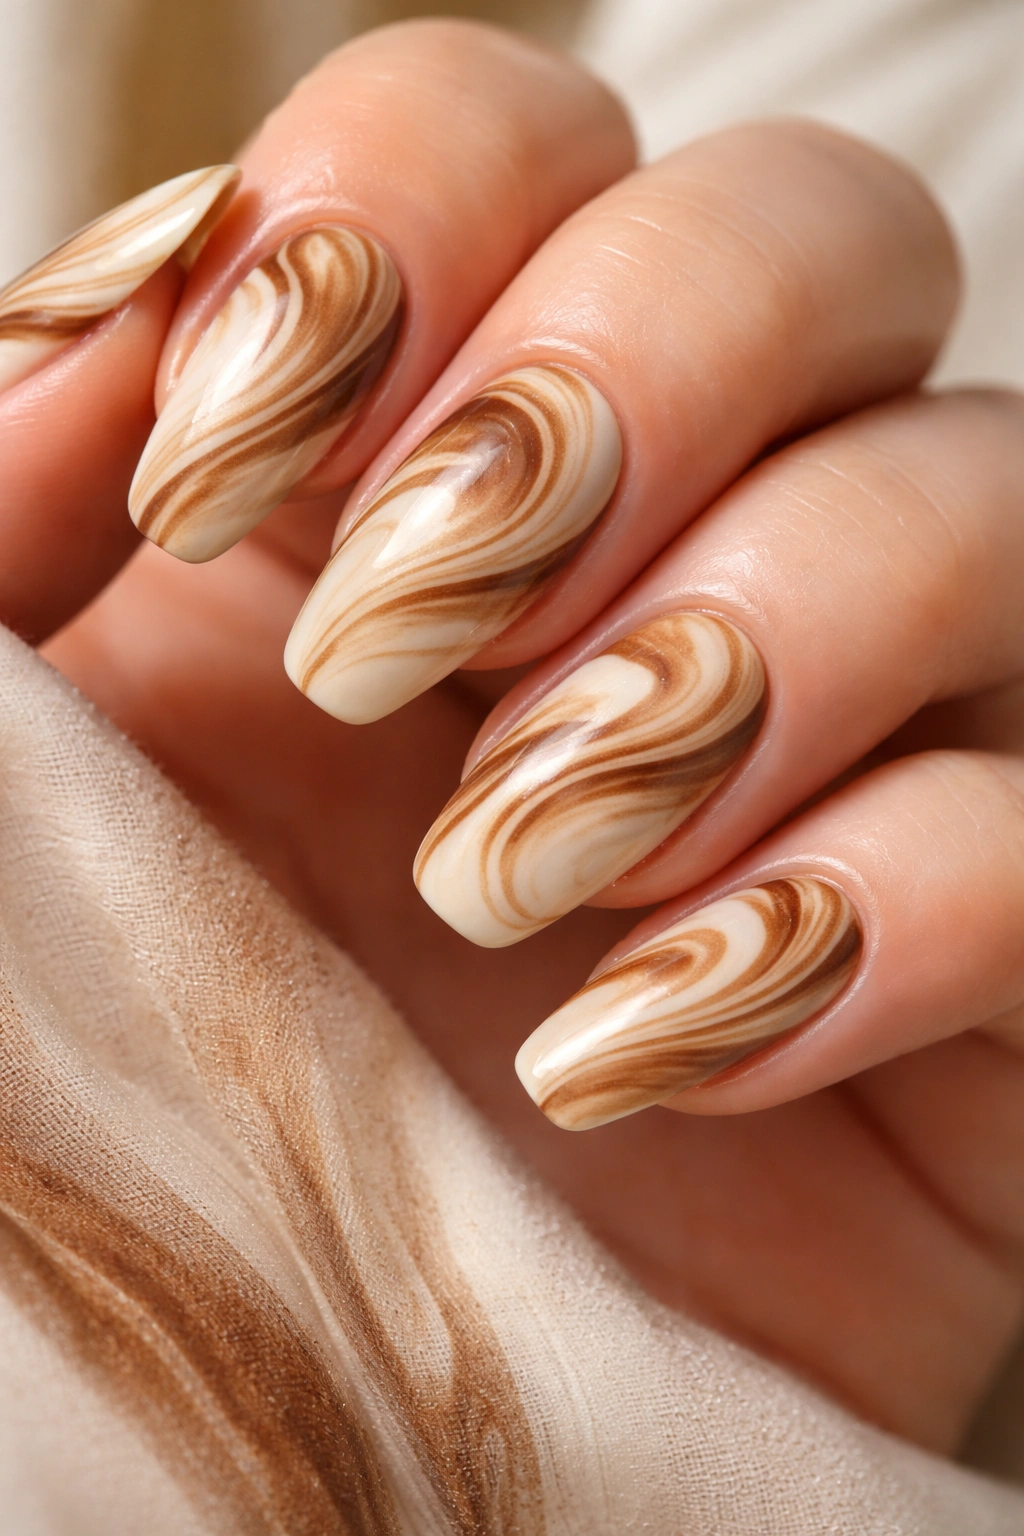
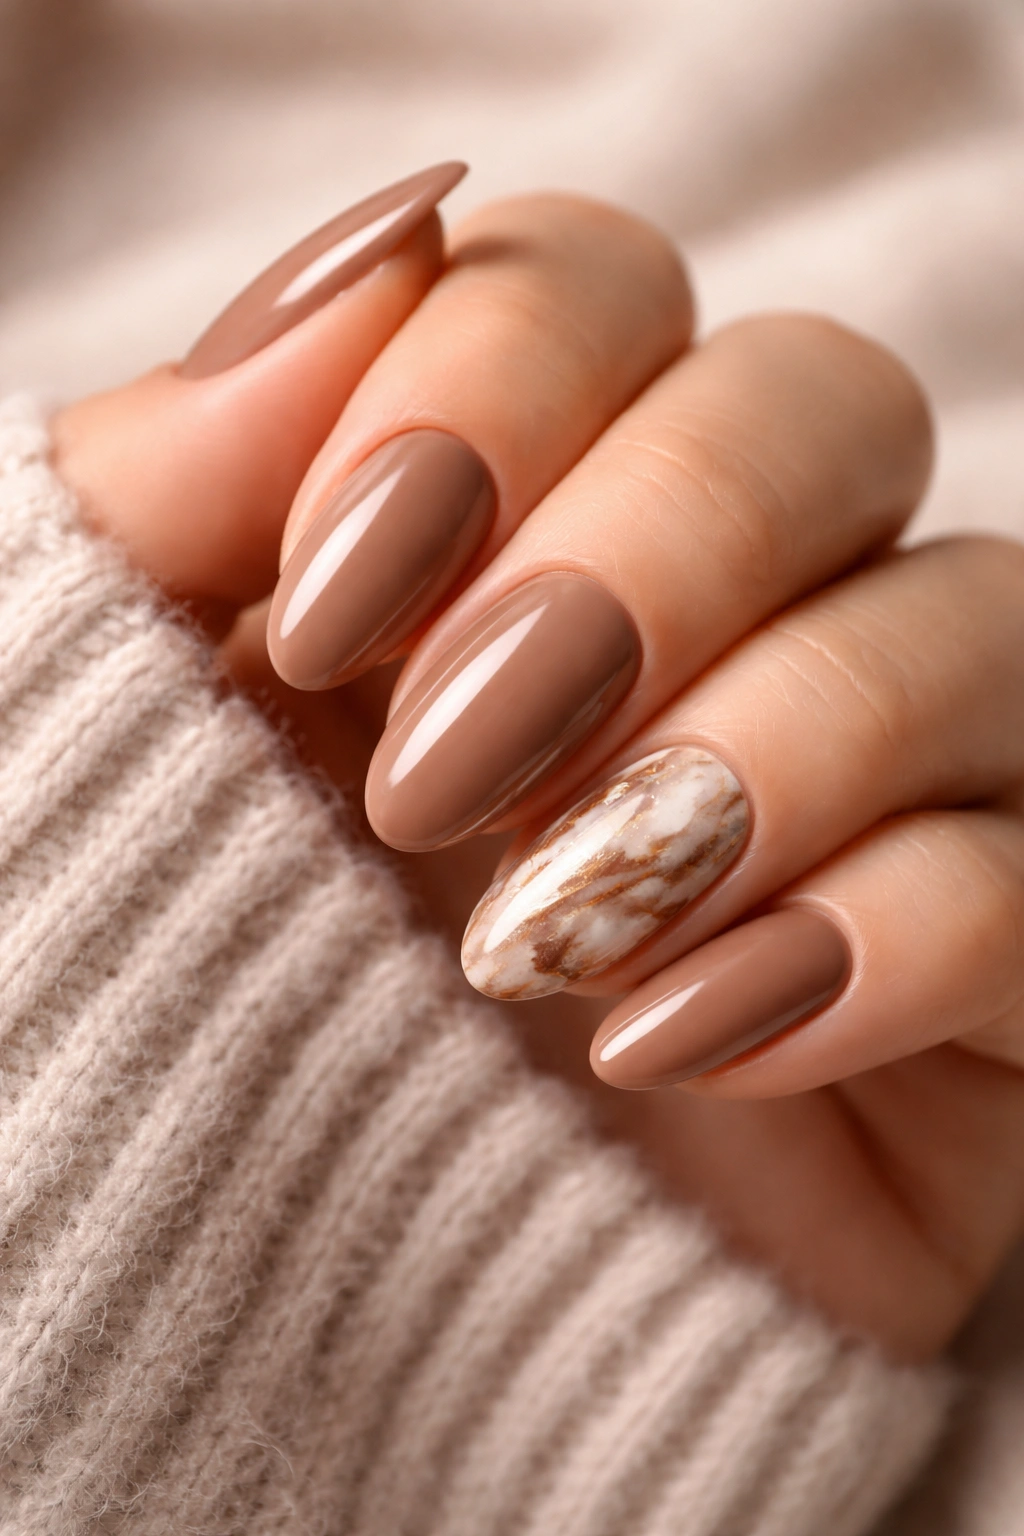
4. Chocolate Marble Swirls
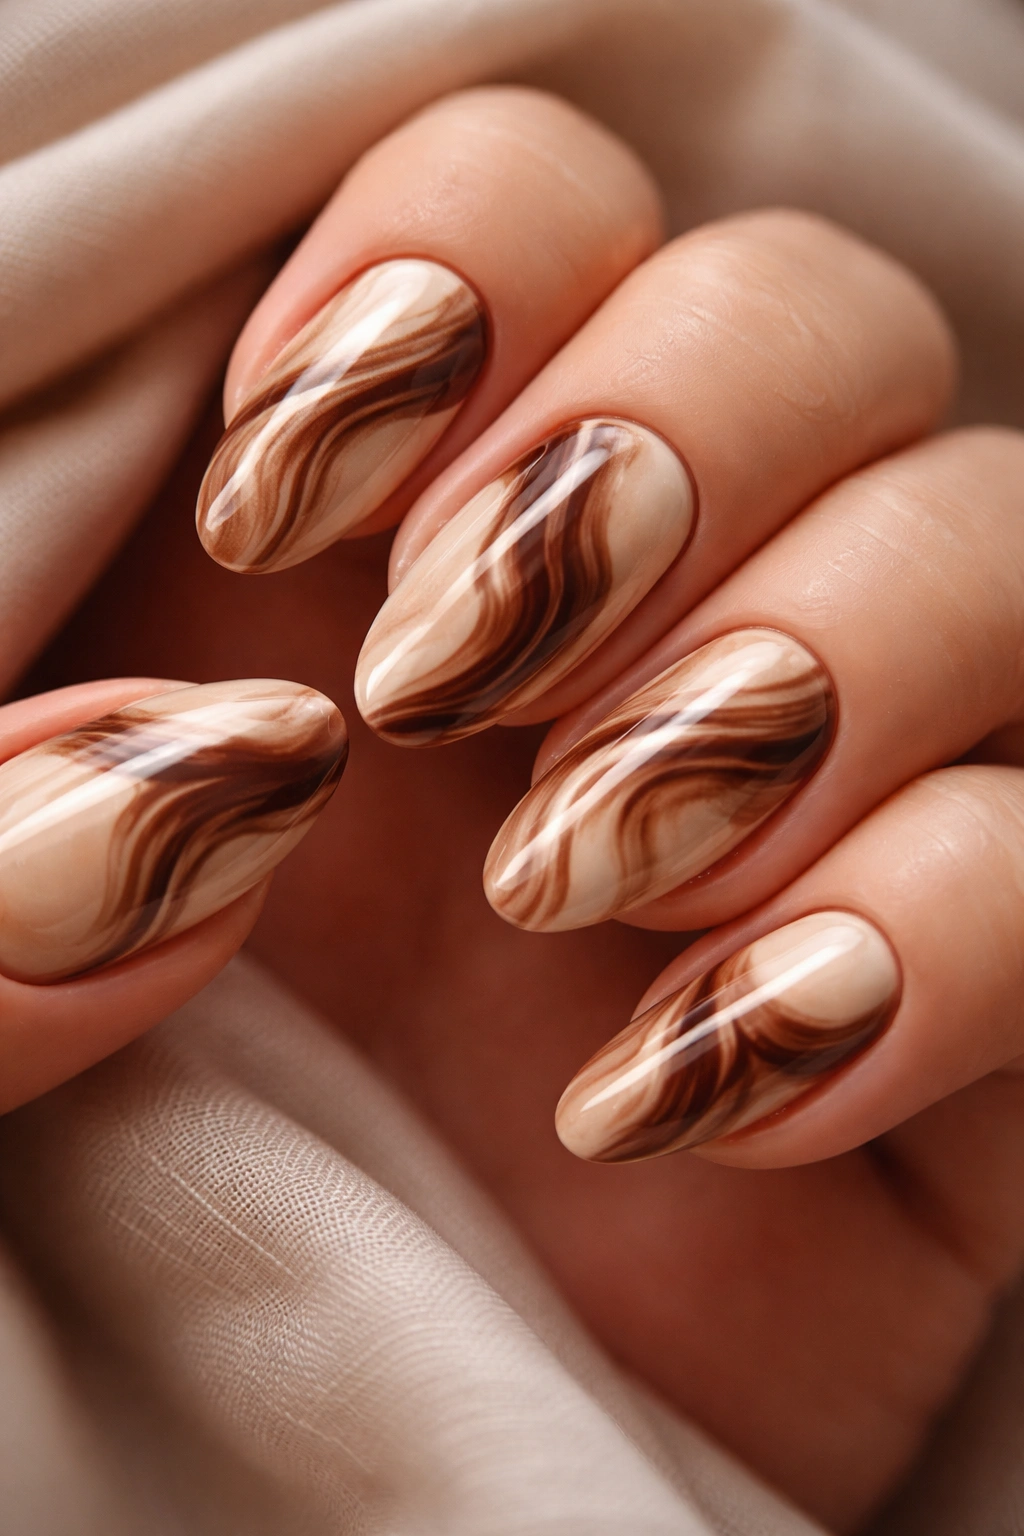
Marble nails have staying power because they’re essentially wearable art, and when you do them in mocha tones, they take on this luxurious, almost edible quality. Think swirled lattes, rich ganache, or those gorgeous brown-and-cream stones you see in high-end countertops.
The Artistic Appeal
Each nail becomes its own unique piece with marble effects. No two will look exactly the same, which adds to the organic, natural feel. The combination of light cream, medium mocha, and deeper chocolate browns creates depth that flat color can’t match.
This design feels expensive and custom without being flashy. It’s complex enough to catch attention but stays within that neutral, wearable zone that makes it appropriate for virtually any setting.
How to Achieve the Effect
You can create marble nails several ways. The water marble technique involves dropping polish into water and swirling it, but that takes practice. An easier method uses a fine brush or dotting tool to drag and blend colors directly on the nail while they’re still wet.
- Start with a cream or beige base
- Add irregular lines and blobs of mocha and darker brown
- Use a thin brush to drag and swirl the colors together
- Don’t overmix—you want distinct veins, not mud
- Seal with top coat to blend everything smoothly
Remember: The beauty of marble is in its imperfection. Those irregular patterns and unexpected color combinations are what make it look natural and high-end.
5. Mocha Chrome Finish
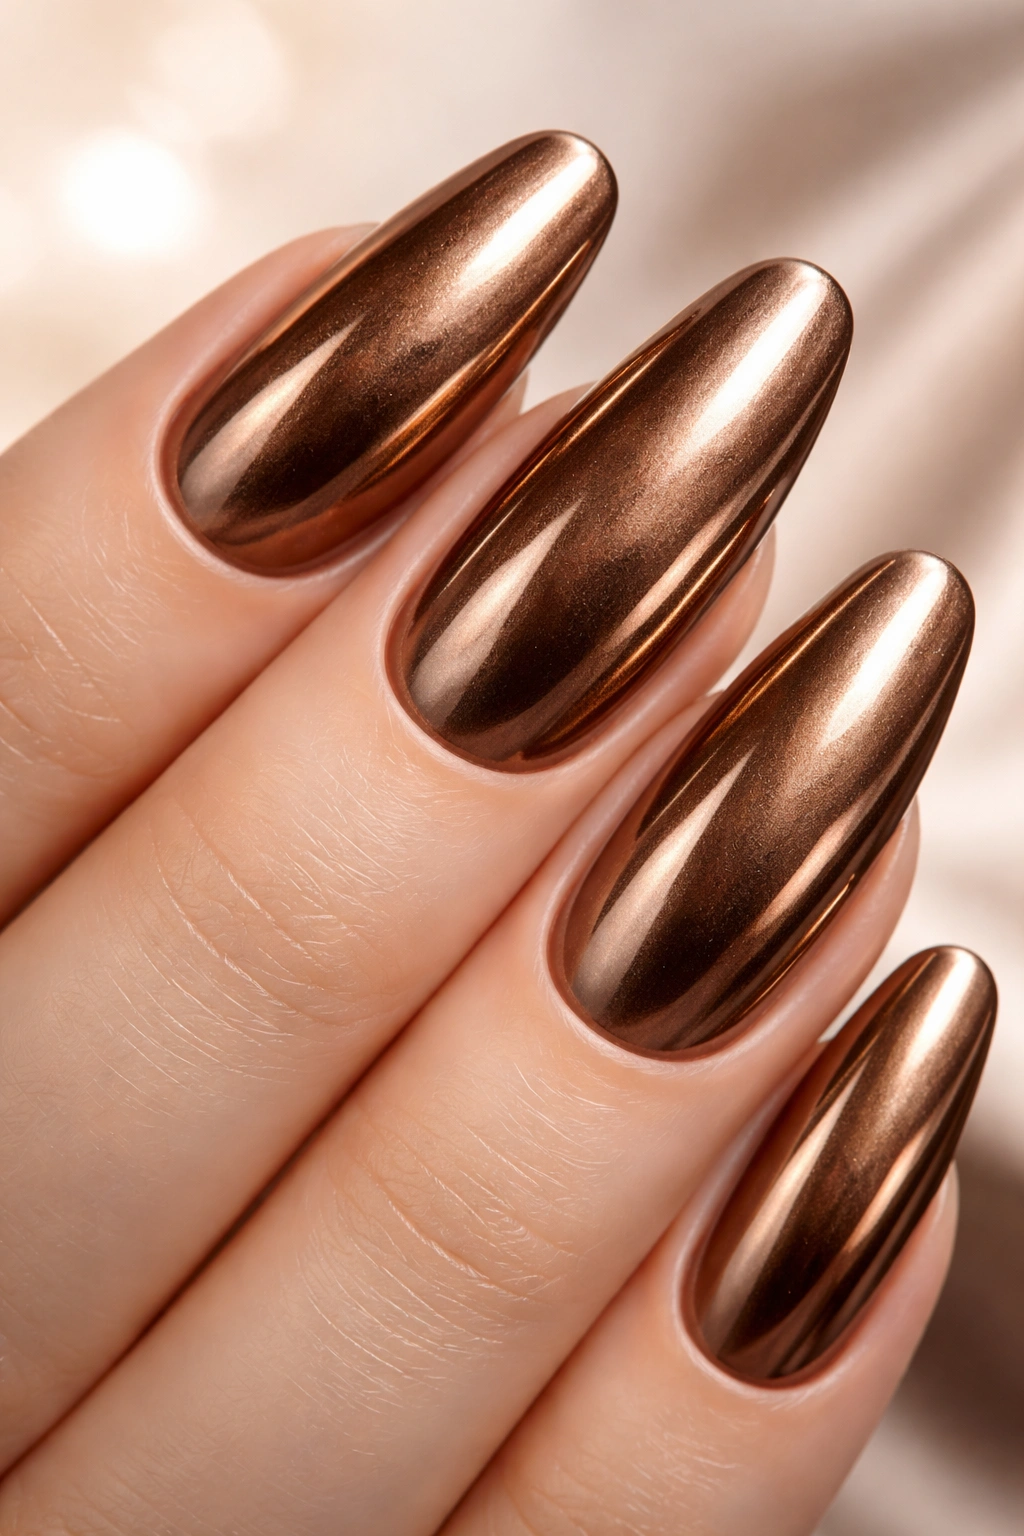
If you want your mocha mousse nails to make a statement, chrome is where it’s at. This finish transforms your creamy brown into a futuristic, mirror-like surface that reflects light like metallic liquid. It’s bold without being loud, if that makes sense.
The Metallic Difference
Chrome powder creates an entirely different vibe than regular polish. Your mocha base takes on this almost molten quality, like melted bronze or copper. The effect is sleek, modern, and definitely eye-catching, but the warm brown tones keep it from feeling too cold or robotic.
This look works beautifully for anyone who loves metallics but finds silver and gold too flashy. Bronze and copper chromes over mocha bases hit that sweet spot between understated and “wow, where’d you get those nails done?”
Application Process
Chrome requires a bit more effort than regular polish, but the payoff is worth it. You’ll need chrome powder (go for bronze, copper, or rose gold with mocha bases) and a no-wipe top coat underneath to make the powder stick properly.
- Apply your mocha base and cure it completely
- Add a layer of no-wipe gel top coat and cure
- While slightly tacky, rub chrome powder onto the nail with a silicone tool
- Buff until you get that mirror finish
- Seal with regular top coat to protect the chrome
Pro tip: Chrome shows every imperfection, so make sure your base layers are smooth and even. Any bumps or ridges will show through and disrupt that seamless metallic look you’re going for.
6. Latte Ombre Gradient
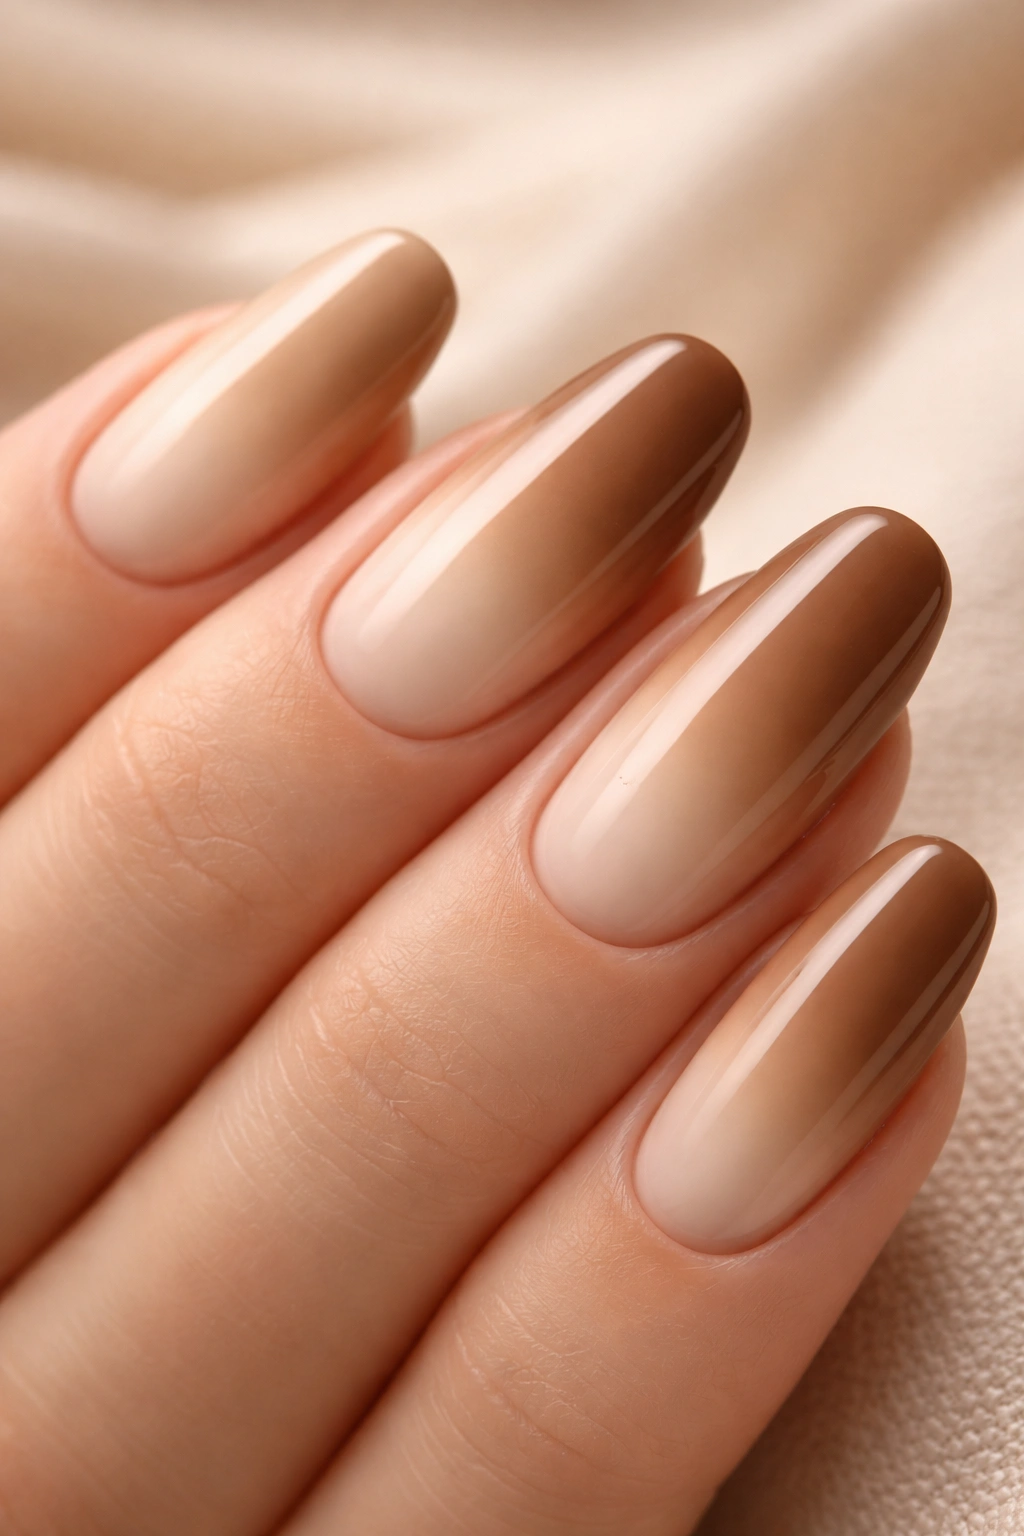
Ombre never goes out of style, and when you do it with shades of mocha and cream, you get this gorgeous gradient that looks like perfectly steamed milk meeting espresso. The effect is soft, blended, and incredibly flattering.
The Gradient Appeal
What makes latte ombre so appealing is how it mimics something naturally beautiful—that moment when coffee and milk swirl together before they’re fully mixed. It’s familiar and comforting, which makes it easy to wear despite being technically nail art.
The transition from light at the cuticle to darker at the tip (or vice versa) creates visual length. Your nails appear longer and more tapered, which is why this technique is a favorite for shorter natural nails that could use a little extra oomph.
Creating the Blend
You’ll need at least two shades—a light cream or beige and a richer mocha brown. Some people use three or four shades for an even smoother gradient. The key is blending where the colors meet so there’s no harsh line, just a smooth fade.
- Paint your lightest shade as the base
- Use a makeup sponge to dab on the darker shade
- Work the colors together where they meet with gentle dabbing motions
- Build up the darker color gradually at the tips
- Clean up edges with acetone and a brush
- Finish with glossy top coat to smooth everything out
Keep in mind: Ombre can use up a bit more product than solid colors because you’re layering and blending. Have enough of each shade on hand before you start so you’re not scrambling mid-manicure.
7. Mocha Cat Eye Effect

Cat eye nails bring that mesmerizing, magnetic quality to your mocha mousse look. When you hold a magnet over wet polish with metallic particles, they shift and create this concentrated stripe of shine that moves when you angle your nails. It’s like having liquid metal on your fingertips.
What Makes It Mesmerizing
The cat eye effect adds depth and dimension that flat color simply can’t achieve. With mocha tones, you get this rich, almost gemstone-like quality—think tiger’s eye or smoky quartz. The magnetic stripe catches light and draws the eye, making your nails a genuine conversation starter.
This technique works especially well with brown shades because the metallic particles show up gorgeously against the warm, dark base. You get contrast and movement without needing multiple colors or complicated designs.
The Magnetic Process
You’ll need special cat eye polish that contains metallic particles, plus a magnet (usually included with the polish or sold separately). The magic happens when you hold the magnet close to the wet polish—the particles shift toward it, creating that concentrated line of shimmer.
- Apply base coat and cure
- Paint on your mocha cat eye polish
- Before curing, hold the magnet over the nail for 5-10 seconds
- Keep the magnet steady—any wobbling will blur the effect
- Cure the polish to lock in the pattern
- Experiment with magnet angles for different stripe placements
Pro tip: Try holding the magnet at different angles or positions. Straight across the middle gives you a classic cat eye stripe, while diagonal creates something more dramatic. Some magnets have different patterns for various effects.
8. Cappuccino Swirl Nail Art
Coffee art isn’t just for your morning latte anymore. Cappuccino swirl nails take inspiration from those gorgeous foam designs baristas create and translate them into wearable nail art. The result is playful, artistic, and absolutely on-theme for mocha mousse.
The Artistic Touch
What’s beautiful about this design is its organic, freehand quality. Unlike precise geometric patterns or perfect lines, coffee swirls are meant to look fluid and natural. You’re mimicking something that exists for just a moment before it’s stirred away, which gives these nails an ephemeral, artistic vibe.
The combination of cream and various brown tones creates dimension and interest while staying firmly in neutral territory. It’s nail art that won’t clash with your wardrobe or feel too bold for conservative settings.
Creating the Swirls
This design works best when you’re not overthinking it. You’ll use a thin brush or dotting tool to create curved lines and spirals that mimic milk being poured into coffee. Start with a base in your lightest shade, then add progressively darker browns in swirling patterns.
- Apply a cream or light mocha base
- Use a thin nail art brush to paint flowing curves
- Layer different shades of brown for depth
- Think circular motions and organic shapes
- Don’t worry about perfection—coffee swirls are naturally irregular
- Add a glossy top coat to blend the design
Fun fact: You don’t need to be an artist to pull this off. Coffee swirls look best when they’re loose and natural, so those imperfect lines actually add to the charm rather than detract from it.
9. Mocha with Gold Foil Accents
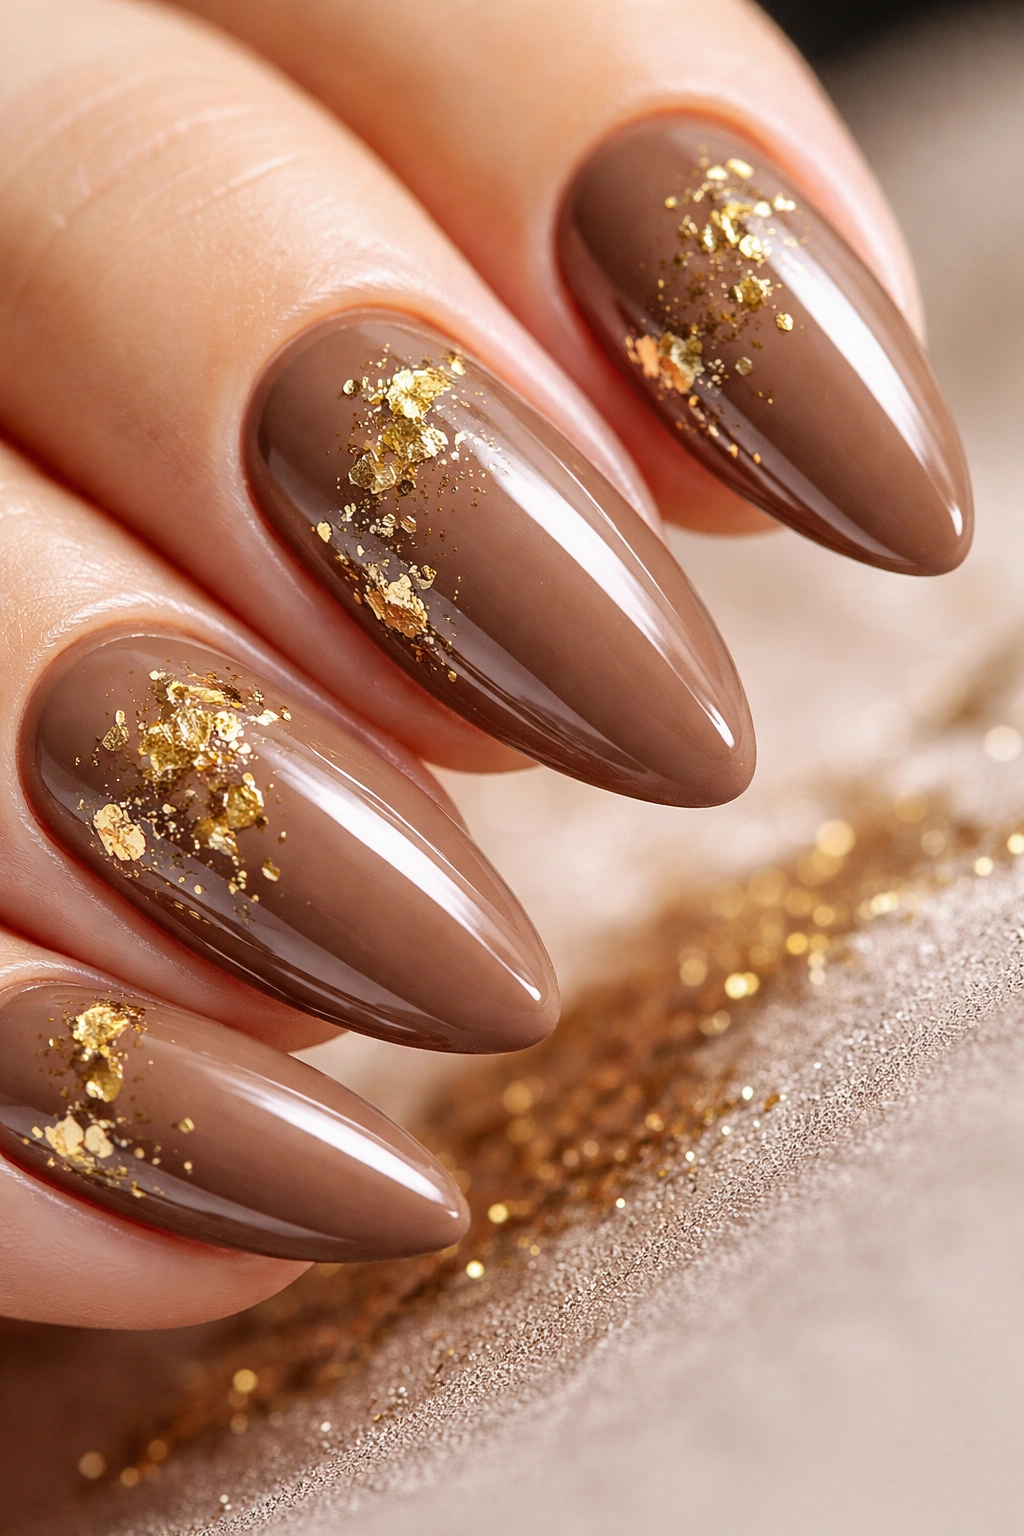
Sometimes your mocha mousse nails need just a touch of glam, and that’s where gold foil comes in. These tiny metallic flakes catch the light and add luxury without overwhelming the warm, cozy vibe of your brown base. Think of it as jewelry for your nails.
The Luxe Factor
Gold and brown is a combination that’s worked in fashion and design for centuries. There’s something inherently rich about pairing warm metallic tones with deep, chocolatey browns. The gold adds a celebratory quality while the mocha keeps everything grounded and wearable.
This look works beautifully for anyone who wants something a little extra without committing to full-on glitter or rhinestones. The foil flakes are noticeable but not overwhelming, sophisticated but not stuffy.
Application Technique
Gold foil is easier to work with than you might think. You can buy it in sheets or as individual flakes. The key is applying it over a tacky surface so it adheres properly, then sealing it in with top coat so it doesn’t flake off.
- Paint your mocha base and let it get slightly tacky
- Press small pieces of gold foil onto the nail where you want them
- Use tweezers for precise placement
- Pat down gently to ensure adhesion
- Apply top coat carefully to seal without moving the foil
- Consider concentrating foil near the cuticle or tips for an intentional look
Pro tip: Less is often more with foil accents. A few strategic pieces make more impact than covering the entire nail. Try a scattered pattern or concentrate the gold on one or two accent nails for balance.
10. Velvet Mocha Matte
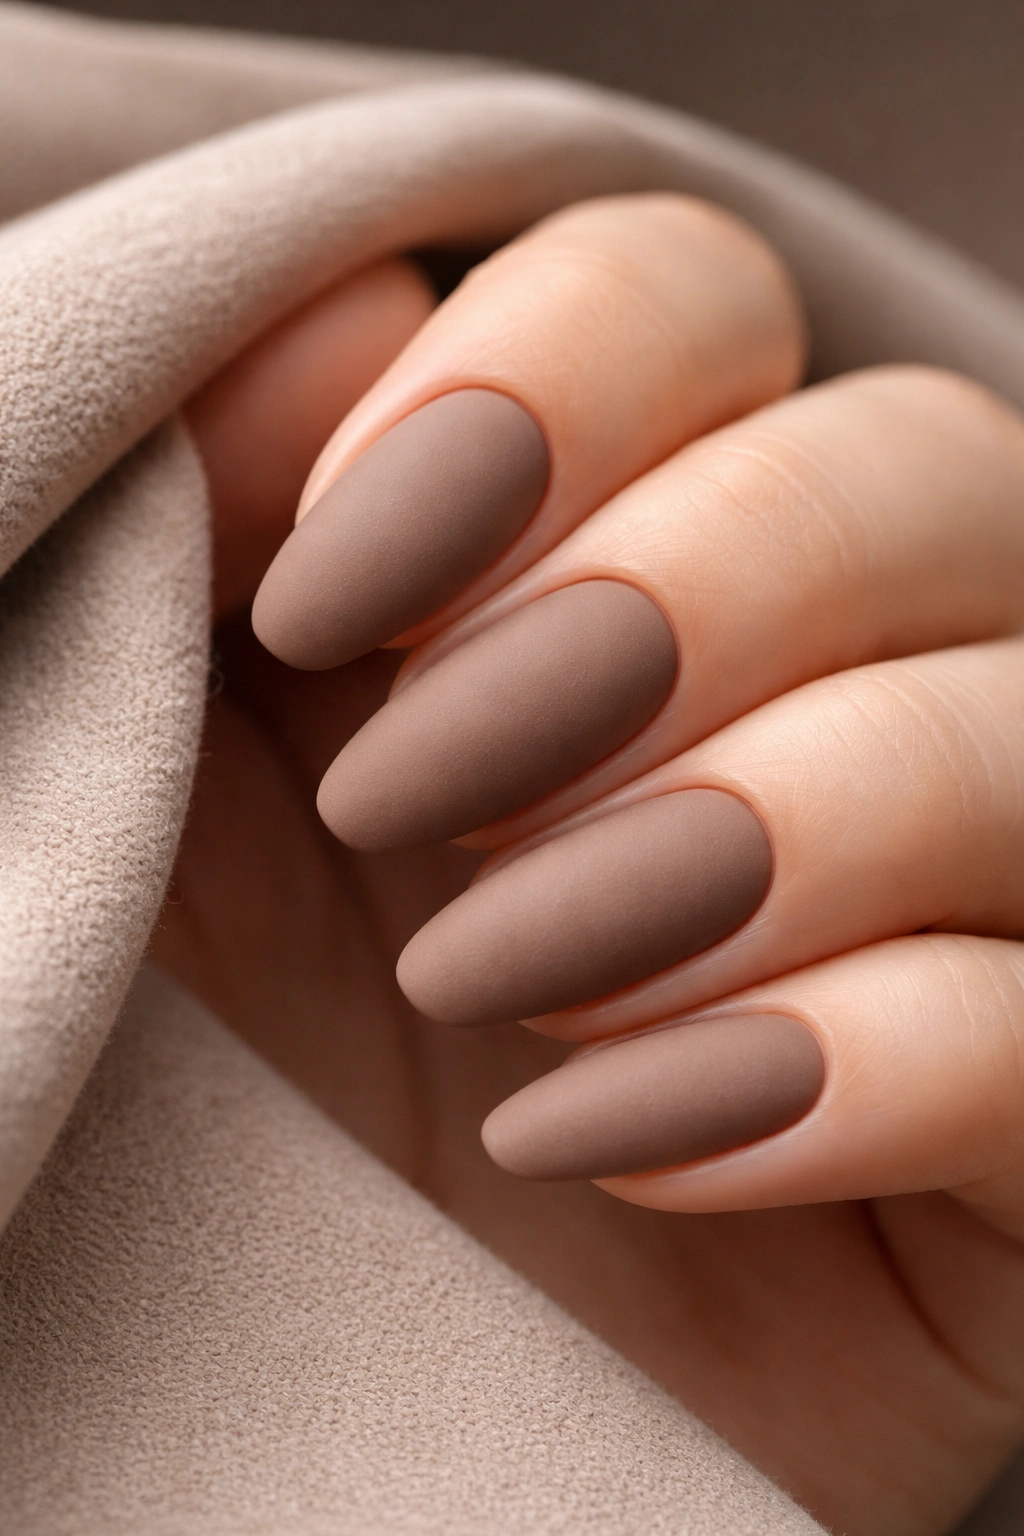
Glossy finishes get a lot of attention, but matte nails have their own sophisticated appeal, especially in mocha mousse tones. The velvet matte finish takes away all shine and creates this soft, touchable surface that looks almost fabric-like. It’s modern, unexpected, and feels very high-end.
The Matte Appeal
Matte finishes change the entire mood of a color. That same mocha shade that looked polished and sleek in glossy suddenly becomes edgy and contemporary when you take away the shine. It’s subtle but striking—people will notice your nails but might not be able to pinpoint exactly what makes them different.
The velvety texture feels luxurious and deliberate. It shows that you’re someone who pays attention to details and isn’t afraid to try something a bit different from the standard glossy manicure everyone else is wearing.
Achieving the Velvet Finish
Getting a proper matte finish is simple—you just need the right top coat. Matte top coats are formulated to dry to that flat, non-reflective surface. Make sure you’re applying it over a completely cured or dried base so you don’t disturb your color.
- Apply your mocha base and let it cure completely
- Use a matte top coat specifically designed for this finish
- Apply in thin, even strokes without going over areas twice
- Let it dry completely without touching
- Avoid hand cream or oils right after application—they can create shiny spots
Keep in mind: Matte finishes can show smudges and fingerprints more than glossy ones, so you might need to refresh your top coat more frequently. But that velvet texture is absolutely worth the little extra maintenance.
Choosing Your Perfect Mocha Shade

Not all mocha mousse shades are created equal, and finding your perfect match comes down to a few key factors. Your skin tone plays a role, sure, but so does your personal style and where you’ll be wearing these nails.
For fair skin tones, lighter mocha shades with more cream and caramel undertones prevent the brown from looking too harsh. Think cappuccino rather than espresso. These softer browns complement without creating too much contrast.
Medium skin tones can pretty much wear any variation of mocha mousse and look stunning. This is your playground—experiment with everything from light latte to rich chocolate. The warmth in your skin brings out the coziness in these brown tones.
Deeper skin tones look incredible in richer, more saturated mocha shades. Don’t shy away from those darker browns with red or mahogany undertones. These colors create beautiful dimension against darker skin and won’t wash you out like lighter shades might.
Beyond skin tone, consider your lifestyle. If you’re in a conservative professional environment, stick with medium mochas that read as sophisticated neutrals. If you’ve got more freedom, play with those darker chocolates, chrome finishes, and bold nail art.
Making Your Mocha Mousse Manicure Last

You’ve invested time (and possibly money at the salon) into these gorgeous nails, so let’s make sure they stick around looking fresh. A few simple habits can add days to your manicure life.
Start with prep. Clean, dry nails are essential. Any oils, lotions, or moisture on your nail plate will prevent polish from adhering properly. Use a nail cleanser or rubbing alcohol to wipe down your nails right before you start painting.
Don’t skip the base coat. This isn’t optional—it’s the foundation that helps your color grip onto the nail. Base coats also prevent staining, which matters when you’re wearing browns that can leave behind pigment. Let it dry completely before adding color.
Thin layers win. It’s tempting to slap on thick coats to get opacity faster, but that’s a one-way ticket to chipping. Thin layers dry more evenly and bond better. Yes, you’ll need two or three coats instead of one, but they’ll last way longer.
Cap the edges. This means running your brush along the tip of your nail with each coat—base, color, and top. It seals the edge and prevents polish from peeling up from the tip, which is where chips usually start.
Give it time. Even if your polish feels dry to the touch, it’s not fully hardened for several hours. Avoid hot water, heavy use of your hands, or anything that puts pressure on your nails for at least two hours after painting. Patience here pays off.
Maintain with care. Wear gloves when you’re doing dishes or cleaning. Apply cuticle oil daily to keep the nail area hydrated and prevent polish from drying out and cracking. Touch up your top coat every few days to refresh the shine and seal any wear spots.
Mocha Mousse for Every Occasion

One of the best things about these warm brown nails? They truly work everywhere. You’re not stuck saving them for specific events or worrying they’ll look out of place.
At work, mocha mousse nails read as professional and polished without being boring. They’re neutral enough for conservative dress codes but interesting enough that you don’t feel like you’re playing it completely safe. Stick with classic solid colors or subtle chrome for the office.
For special events, dress them up with gold accents, marble designs, or high-shine glazed finishes. The brown tones are sophisticated enough for weddings, fancy dinners, or any occasion where you want to look put-together without going too bold.
Everyday life is where mocha mousse really shines. These nails go with literally everything in your closet. Wearing all black? The warmth of brown adds dimension. Got on a white tee and jeans? Mocha nails pull the look together. Even bright colors and patterns play nicely with these neutral tones.
Date night benefits from the cozy, approachable energy that brown nails give off. There’s something warm and inviting about these tones that feels intimate and relaxed, not trying too hard.
Wrapping Up Your Mocha Mousse Journey
Mocha mousse nails offer something genuinely special in the nail world—a color that’s both on-trend and timeless, neutral and interesting, wearable and beautiful. Whether you’re drawn to simple solid shades or elaborate nail art, these creamy warm tones provide the perfect canvas.
The versatility is what keeps people coming back. You can wear mocha mousse a hundred different ways and never feel like you’re repeating yourself. Switch up the finish, add some nail art, try different techniques—the options are genuinely endless.
What matters most is finding the version that makes you feel like yourself. Maybe that’s a simple glossy mocha on short natural nails. Maybe it’s full-on chrome with stiletto tips. Both are valid, both are gorgeous, and both capture that warm, comforting energy that makes this trend so appealing.
Your nails are one of those details that you see constantly throughout the day. Having them painted in something that makes you happy, that feels like you, impacts your mood in small but real ways. If mocha mousse is calling to you, answer that call. Try one of these ten looks, or use them as inspiration to create something entirely your own.
The beauty of a trend this versatile is that there’s no wrong way to wear it. So grab your favorite brown polish, get creative, and enjoy those creamy, warm, absolutely gorgeous mocha mousse nails.
