

Achieving professional-quality gel nails from home isn’t as intimidating as it might seem. Whether you’re looking to save money on salon visits or simply want the convenience of painting your nails whenever you like, gel manicures at home are absolutely achievable with the right tools, knowledge, and a bit of practice. The difference between a successful DIY gel mani and a frustrating disaster often comes down to understanding the fundamentals—proper prep work, applying thin layers, using quality products, and knowing exactly what to watch for along the way.
This comprehensive guide walks you through every step of the process, from gathering your supplies to troubleshooting common problems that catch beginners off guard. You’ll discover the insider tips that experienced nail technicians use, learn which products actually deliver results, and understand the “why” behind each step so you can confidently create salon-grade nails in your own space.
Why Investing in At-Home Gel Nails Makes Financial and Practical Sense
The cost-benefit analysis is compelling. A single professional gel manicure runs somewhere between $40 and $80 depending on your location and the salon’s pricing, and those nails typically last two to three weeks before needing a fill or complete refresh. That adds up to spending $500 to $1,000 annually just on manicures. A quality at-home gel kit costs around $100 to $150 initially, which pays for itself after just two professional appointments.
Beyond the economics, there’s the lifestyle factor. Professional nail appointments demand time and coordination—driving to and from the salon, waiting for a technician, and blocking out an hour or more of your day. Doing your own nails lets you paint whenever inspiration strikes, experiment with colors and designs without worrying about salon costs, and skip the occasional awkward small talk or uncomfortable salon experience altogether.
The barrier to entry is genuinely low these days. Gel nail products and tools have improved dramatically over the years, making the process more forgiving for beginners. You’re not competing with salon professionals; you’re simply applying polish to your own nails with patience and attention to detail. After two or three applications, most people see significant improvement in their technique.
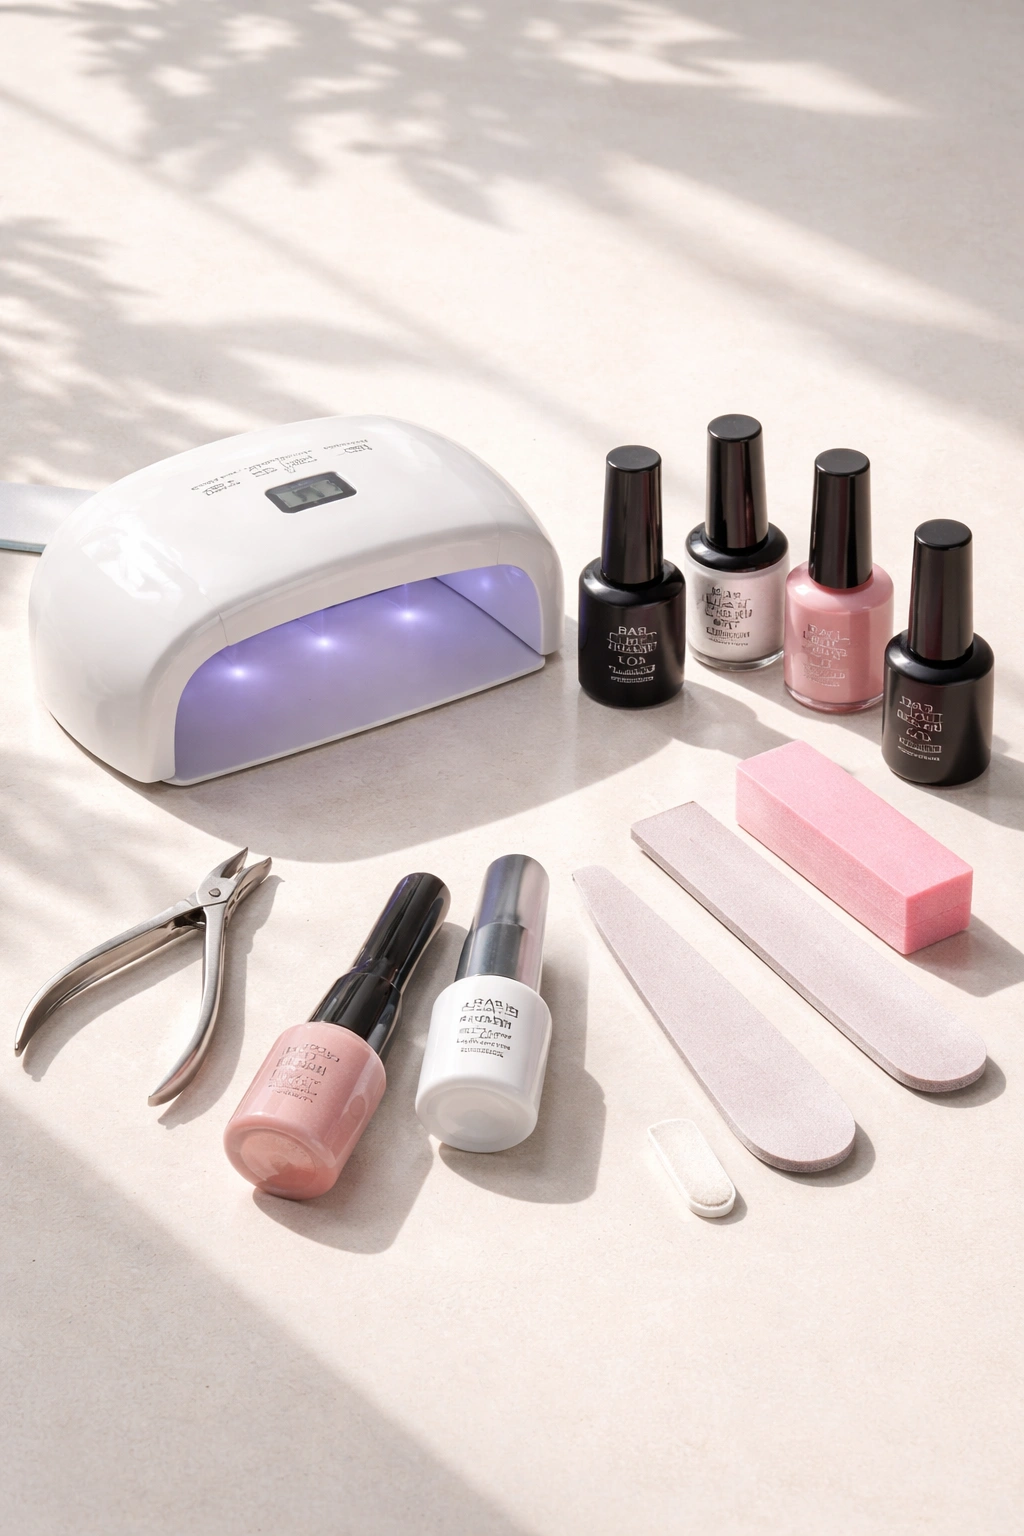
Essential Supplies Every Home Gel Manicure Setup Requires
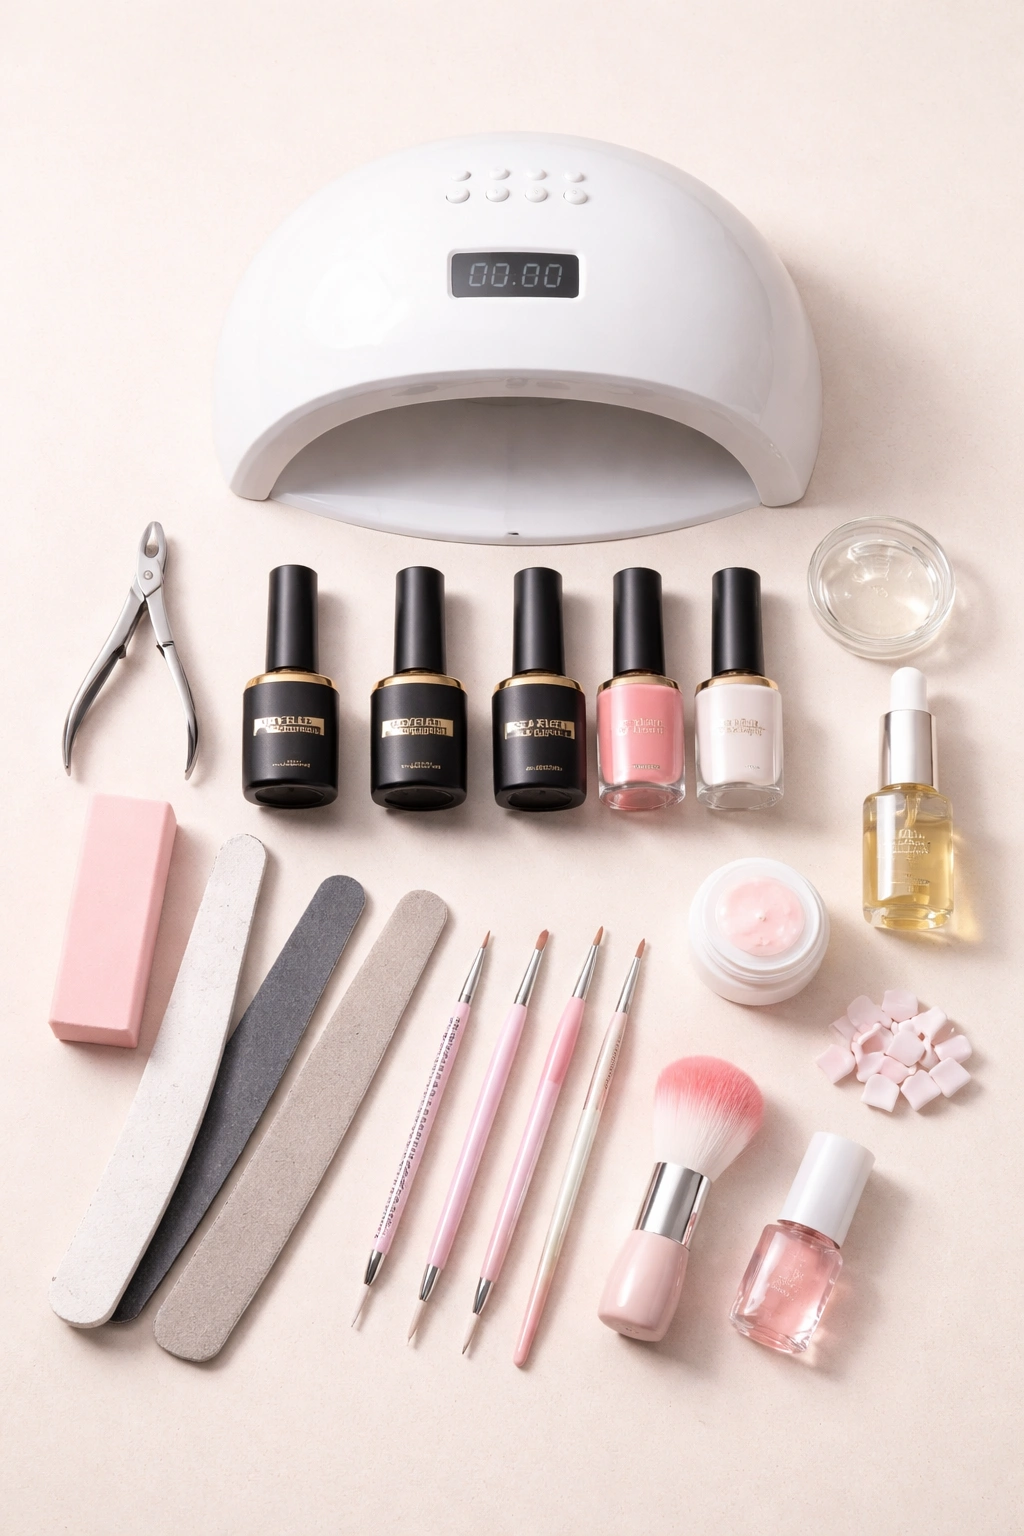
Before you start, assembling the right materials is non-negotiable. Poor-quality products or missing supplies almost guarantee frustration, so it’s worth investing in reputable brands from the beginning.
The curing lamp is the one item you absolutely cannot skip. Gel polish doesn’t dry like regular polish—it requires light activation to harden and set permanently. You have two options: LED lamps cure significantly faster (typically 30-60 seconds per layer) and are gentler on skin, while UV lamps work just fine but require longer curing times (up to 2-3 minutes per layer). An LED lamp is the superior choice for home use, both for speed and safety. Look for lamps with adjustable timer settings—5-second, 30-second, 60-second, and continuous modes give you flexibility for different products.
Gel polish products require a specific system approach. You’ll need a pH bond or dehydrator (essentially rubbing alcohol or a specialized dehydrating primer) to remove oils and create adhesion. Then comes the base coat, color coat(s), and top coat—and these must all be gel formulas compatible with each other. Mixing brands sometimes works, but sticking with one brand throughout eliminates guesswork. Gelish, OPI GEL, Gellen, and ORLY are consistently reliable brands that deliver good results for home users.
Preparation and finishing tools are equally important:
- Glass or metal nail file (not traditional emery boards, which damage nails)
- Nail buffer with multiple grit levels for smoothing and shaping
- Cuticle pusher and remover (metal tools work better than plastic)
- Lint-free wipes (crucial—regular cotton leaves fibers that ruin your manicure)
- Isopropyl alcohol or rubbing alcohol (100% strength for removing oils and sticky residue)
- Cuticle oil (for nourishing after application)
- Nail file or coarse buffer (to break the seal before removal)
- 100% acetone (non-negotiable for removal—anything weaker won’t work)
- Cotton pads or balls (for soaking during removal)
- Optional: gel nail kit with pre-assembled supplies
If the individual-item approach feels overwhelming, several brands sell complete starter kits containing most essentials. These kits often represent good value and take the guesswork out of product compatibility.
Preparing Your Nails: The Foundation of Long-Lasting Gel
Preparation is where most at-home failures originate. You could have perfect technique with the gel application itself, but if your nails aren’t properly prepped, the polish will lift within days. This step cannot be rushed.
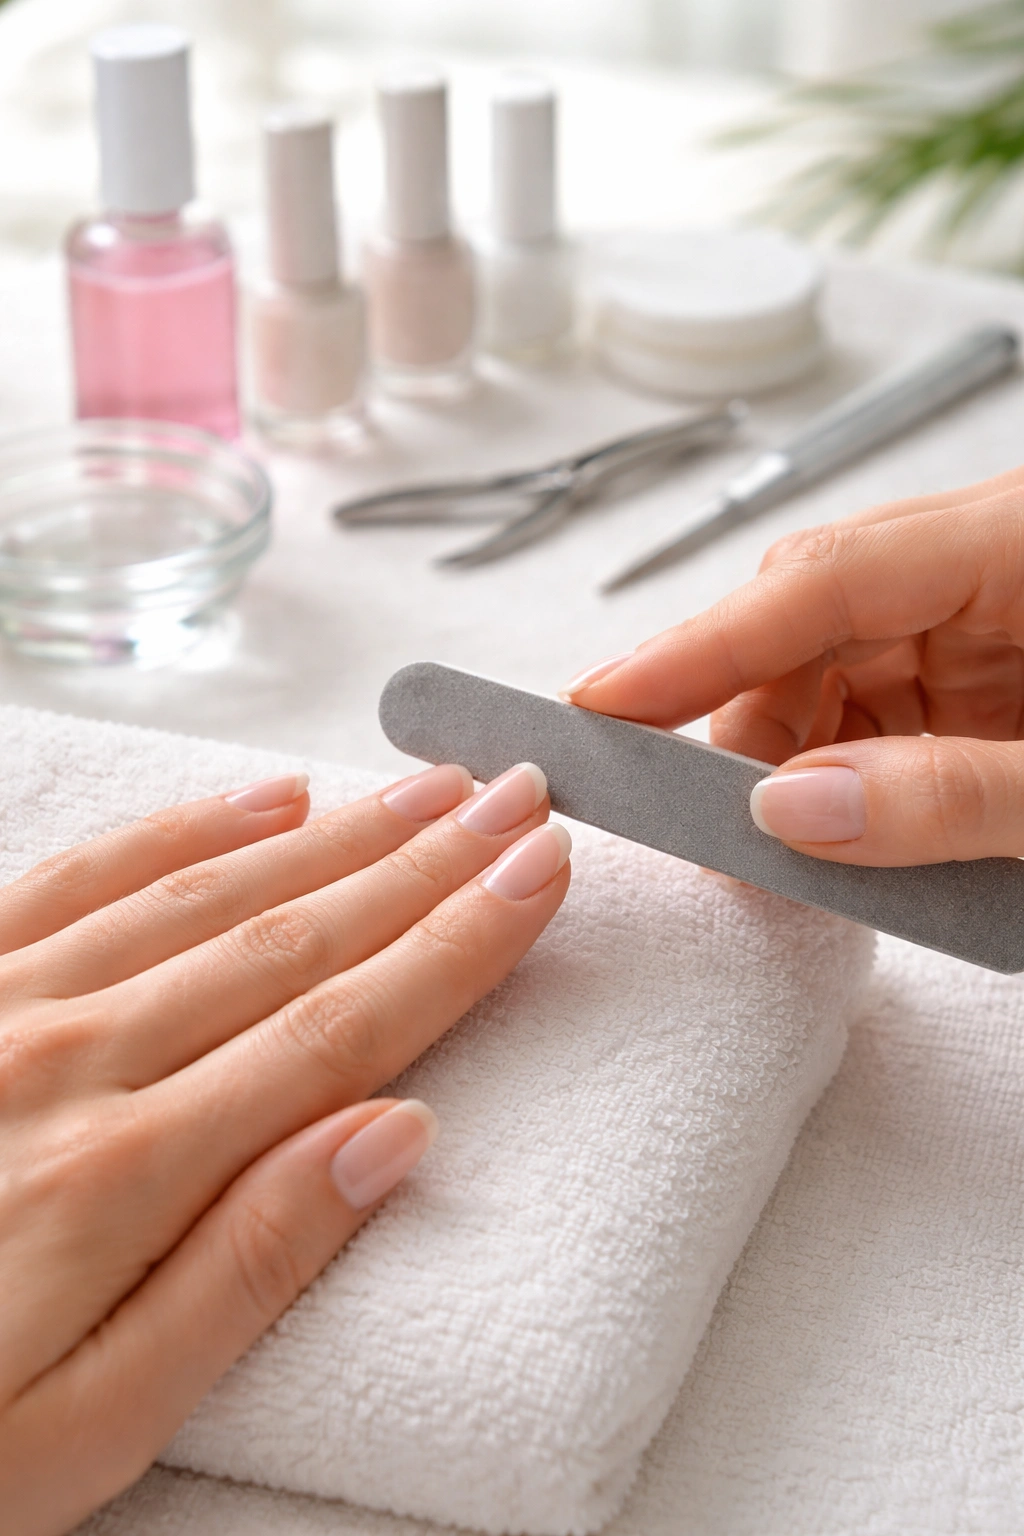
Start by removing all old polish and thoroughly washing your hands with soap and water. Dry completely—any moisture interferes with gel adhesion. Next, assess your nail length and shape. Unlike acrylic nails, gel polish cannot be shaped after application, so you must decide on your desired shape (round, square, almond, coffin, or oval) and file accordingly before any gel touches your nails.
Use gentle, one-directional filing motions rather than sawing back and forth, which creates tiny fractures along the nail edge. File at a 45-degree angle, working from the outside edges toward the center of each nail to prevent splitting.
Once your nails are shaped, gently buff the entire surface with the smooth side of a nail buffer. You’re not trying to remove the nail—just the shine. This creates microscopic texture that helps gel polish grip the nail plate. Buff lightly with feathering motions rather than circular ones to avoid creating heat or damaging the nail structure.
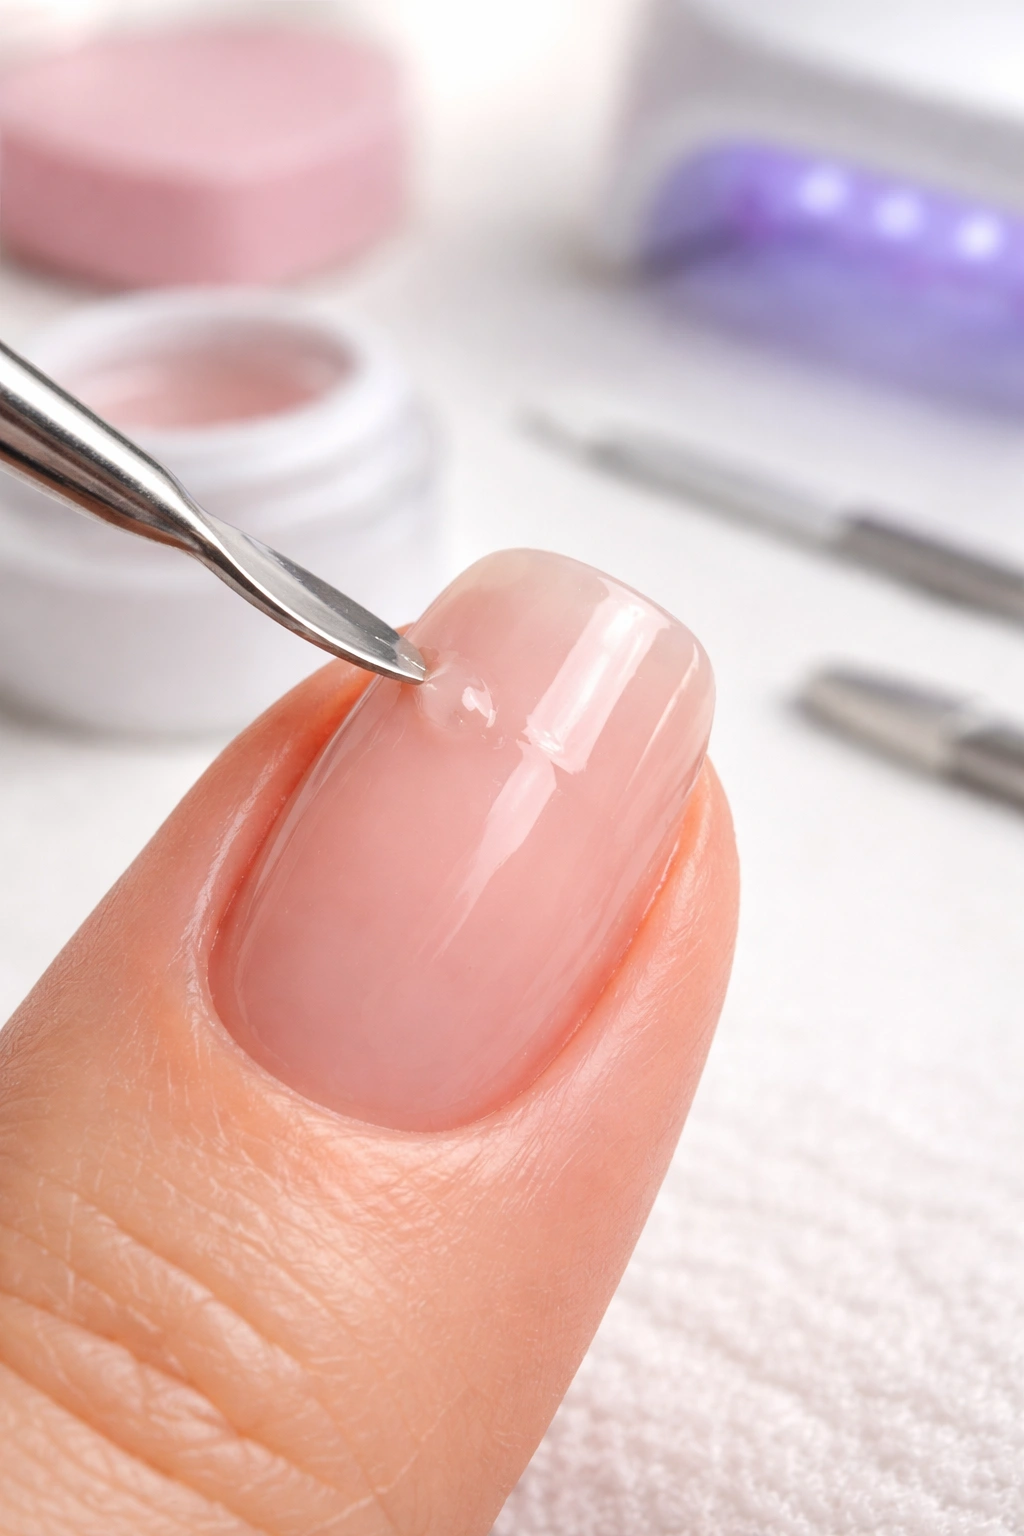
Pushing back and cleaning cuticles is the next critical step. Apply cuticle remover liquid (if you have it) and let it sit for about one minute to soften the cuticle tissue. Use your cuticle pusher to gently push cuticles away from the nail plate—never scrape aggressively or you’ll damage the nail matrix underneath. If you have visible dead skin or cuticle buildup, you can trim it away carefully with cuticle clippers, but the main goal is simply pushing it back far enough that gel polish won’t touch it during application.
Clean your nails thoroughly with a lint-free wipe soaked in isopropyl alcohol or your nail dehydrator. Wipe each nail carefully, getting into the edges and around the cuticle area. This removes oils, dust, and any remaining debris. This single step makes an enormous difference in how long your gel manicure lasts.
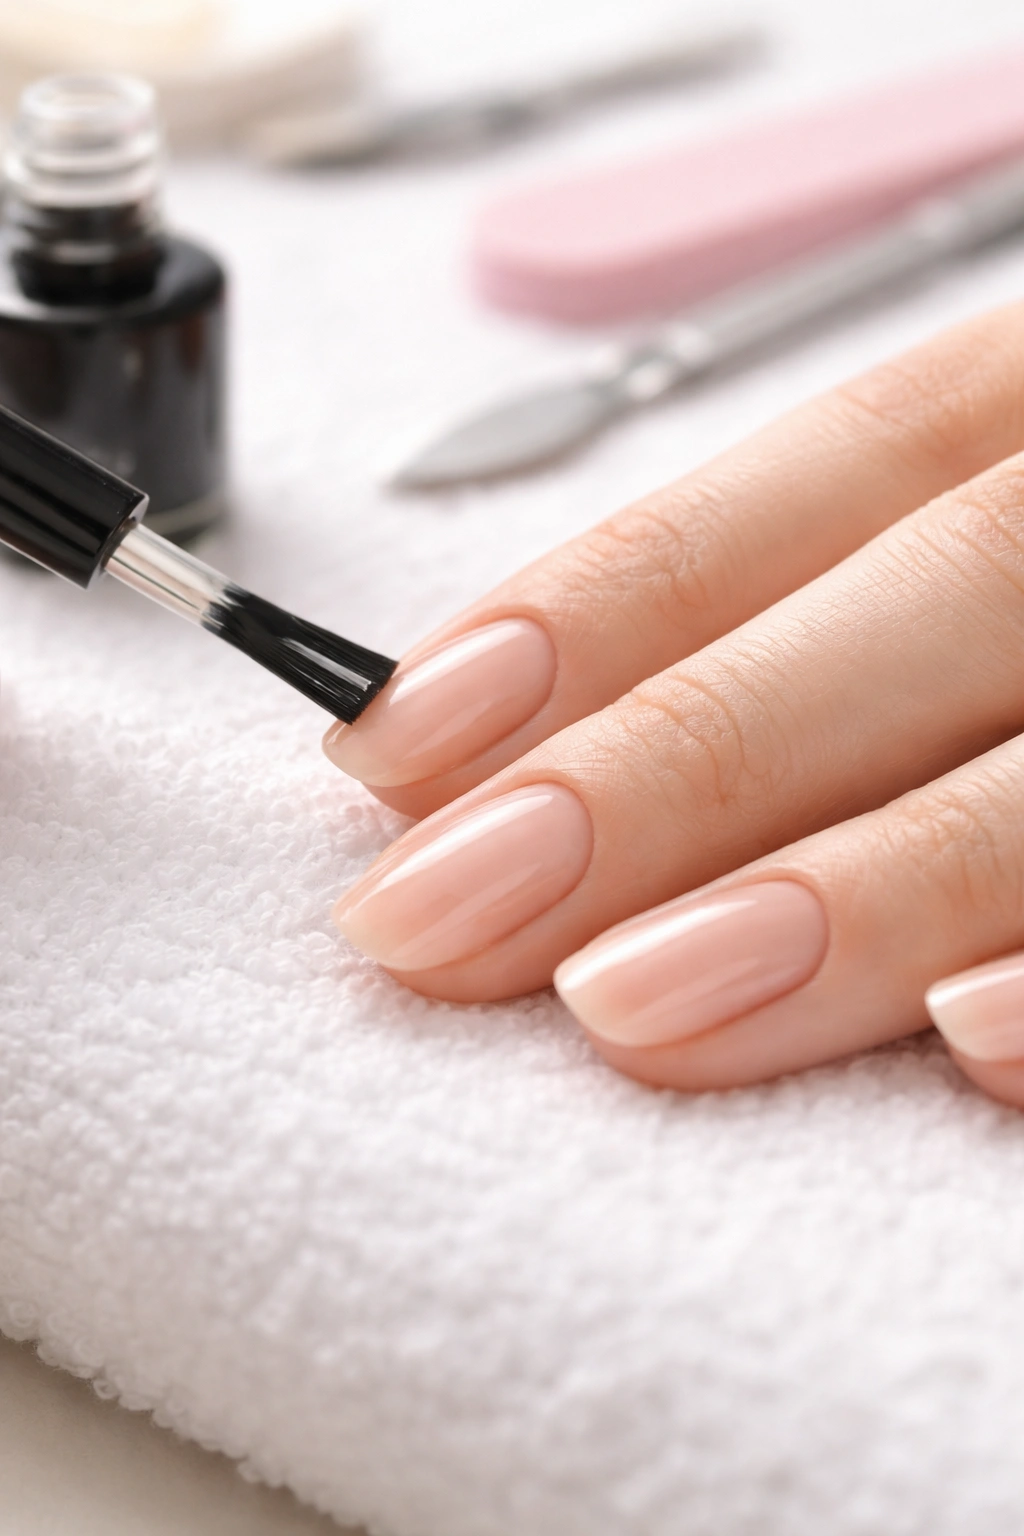
Applying the pH Bond or Primer Layer
The pH bond (also called dehydrator or primer) is essentially a final prep step that dehydrates your nail and creates a chemical foundation for the base coat to bond. It’s simple but essential, especially if you have naturally oily nails or live in a humid environment.
Apply the pH bond according to your product’s instructions—typically you’re painting a thin layer across each nail and letting it dry for 30 seconds to a minute. If you’re using isopropyl alcohol instead, apply it with your lint-free wipe and let it air dry completely. You do not cure the pH bond under the lamp; it’s strictly a prep product.
Some people skip this step entirely and go straight to base coat, and it can still work. However, adding the pH bond significantly improves adhesion, especially for those whose gel tends to lift prematurely. If you notice your gel lifting after a day or two despite everything else being done correctly, reintroducing a pH bond is the first troubleshooting step to try.
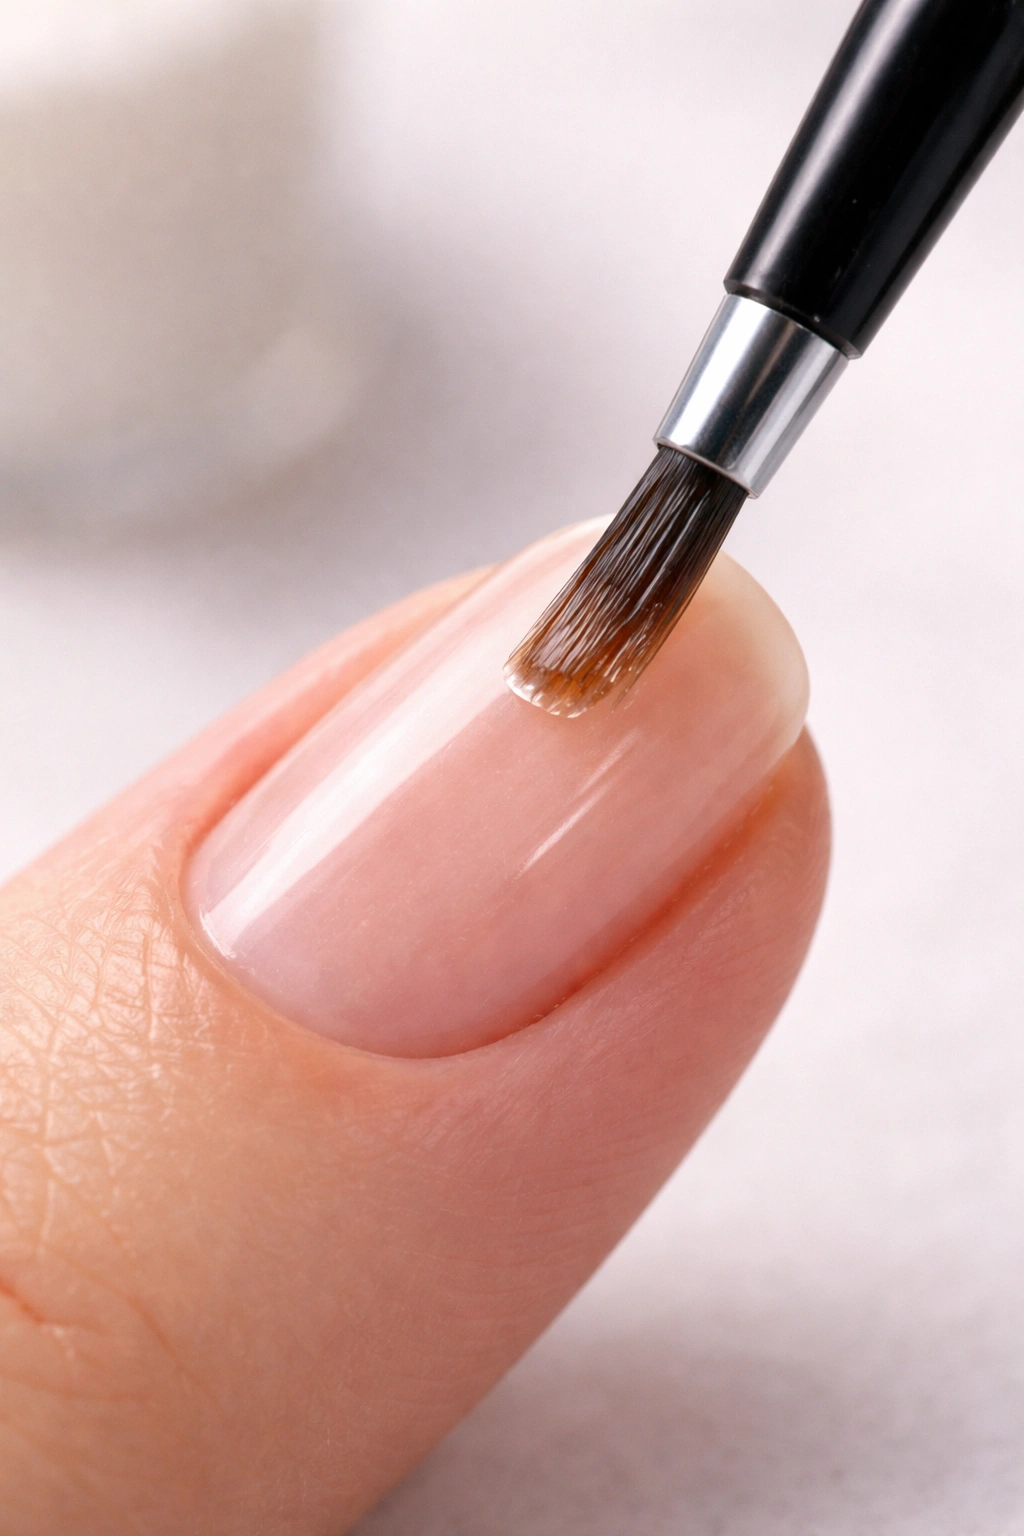
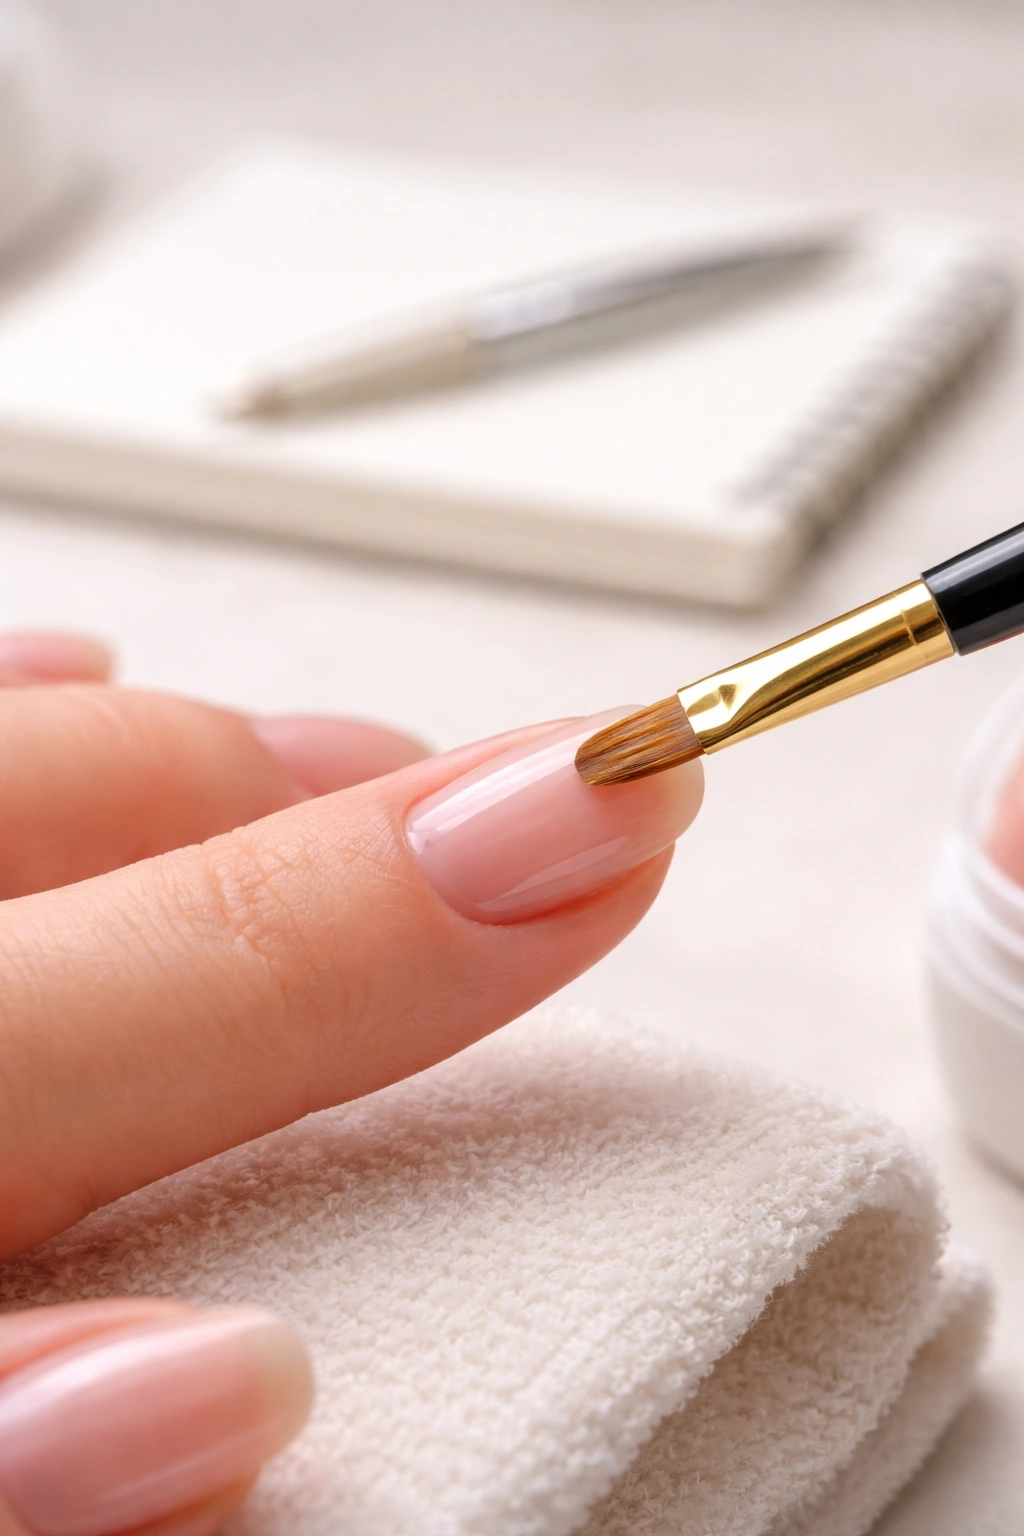
Applying the Base Coat: Thin Is the Golden Rule
The base coat creates the foundation for your color and top coat, and getting this layer right determines whether your manicure lasts two weeks or two days. The cardinal rule: apply an extremely thin layer. This seems counterintuitive—surely more product means better coverage? The opposite is true. Thick base coats trap uncured monomer near the nail surface, creating soft spots that cure unevenly and lift easily.
Dispense a small bead of base coat on your brush applicator and apply it in one smooth stroke from cuticle to free edge, keeping it away from your skin and cuticles. If you get base coat on your skin, use an acetone-dipped brush or small applicator to clean it off before curing—any gel touching skin will eventually cause lifting as you move your hands throughout the day.
Seal the free edge by running the brush along the tip of your nail, essentially wrapping the polish around the edge. This creates a seal that prevents moisture from getting underneath and causing lifting.
Cure according to your lamp’s specifications—typically 30 seconds for LED lamps or 60-90 seconds for UV lamps. Different products vary, so check your specific gel polish instructions. Once cured, the base coat should feel hard and slightly sticky (that tackiness is normal and will be addressed later).
Applying Gel Color Polish: Building Coverage with Multiple Thin Coats
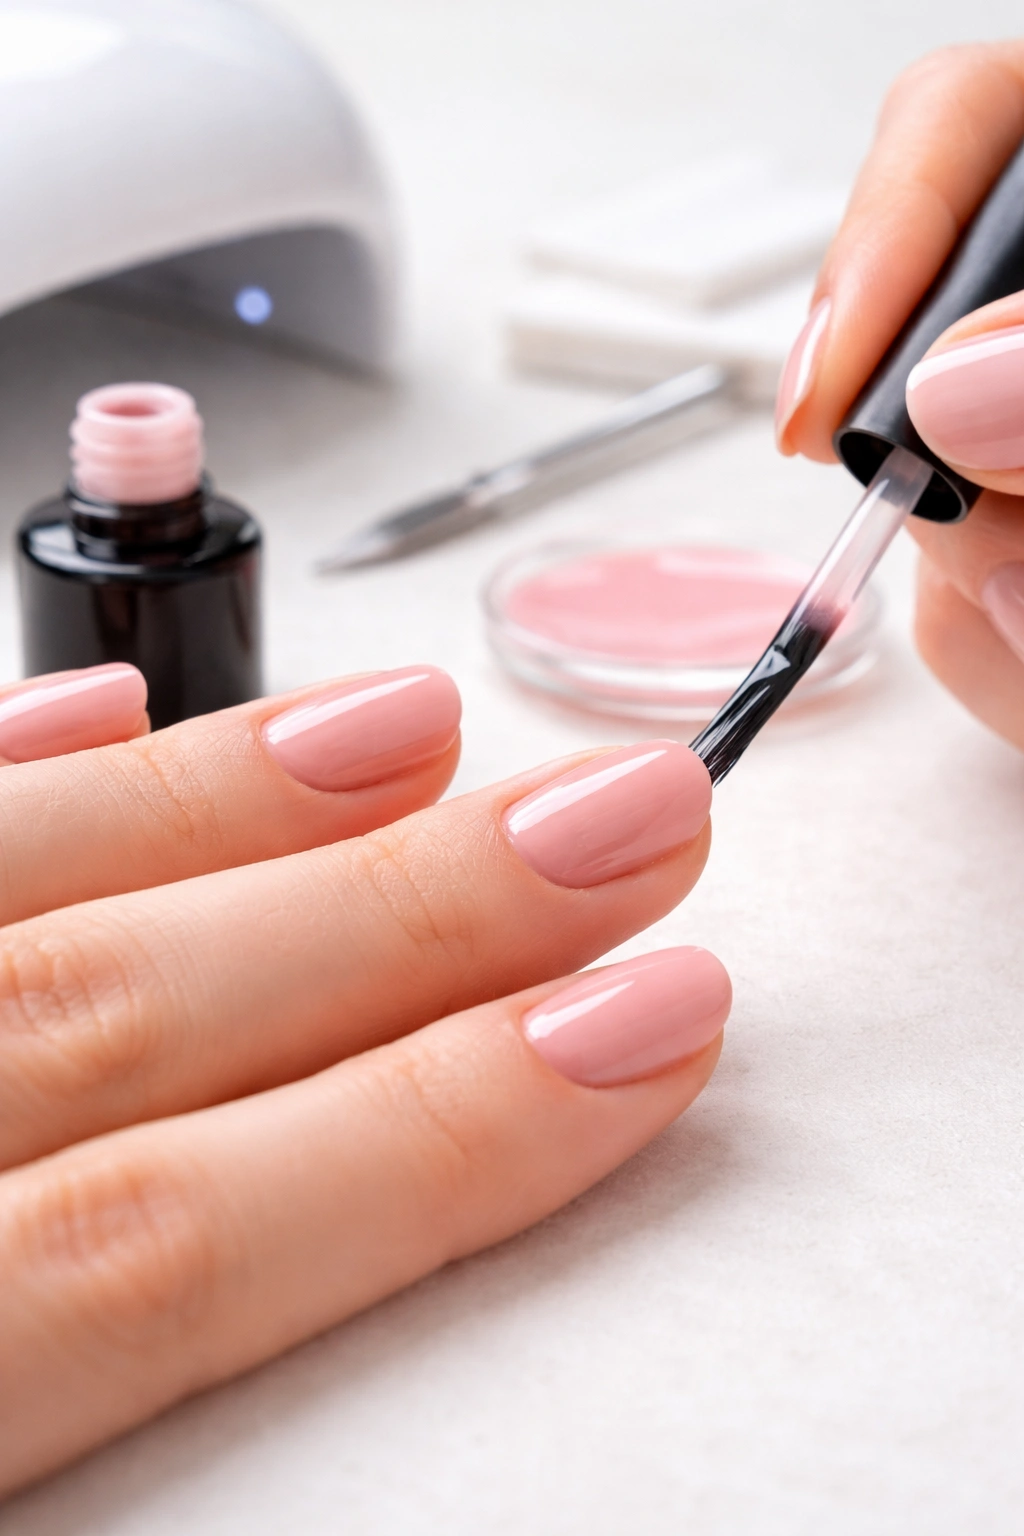
Now comes the fun part. Apply your first coat of gel color in the same manner as the base coat: a thin, even layer from cuticle to free edge, sealing the edge, and staying off your skin.
It’s completely normal and expected for the first coat to look streaky and patchy. That’s not a problem—the second coat will even everything out. Cure the first coat for your lamp’s recommended time.
Apply your second coat using the identical technique, and again seal the free edge. This second coat will look significantly more opaque and complete. Cure it thoroughly.
Evaluate coverage after the second coat. If your color looks fully opaque and even, you’re done with color application. If you can still see any streakiness, patchiness, or nail showing through, apply a third thin coat and cure. More than three coats is rarely necessary and actually works against you by building up thickness that’s harder to remove later.
The key insight that changes everything: think of application as building coverage gradually rather than trying to get full coverage in one thick stroke. Three thin coats that cure evenly will look better and last longer than two thick coats that cure unevenly.
Understanding the Curing Process and LED vs. UV Lights
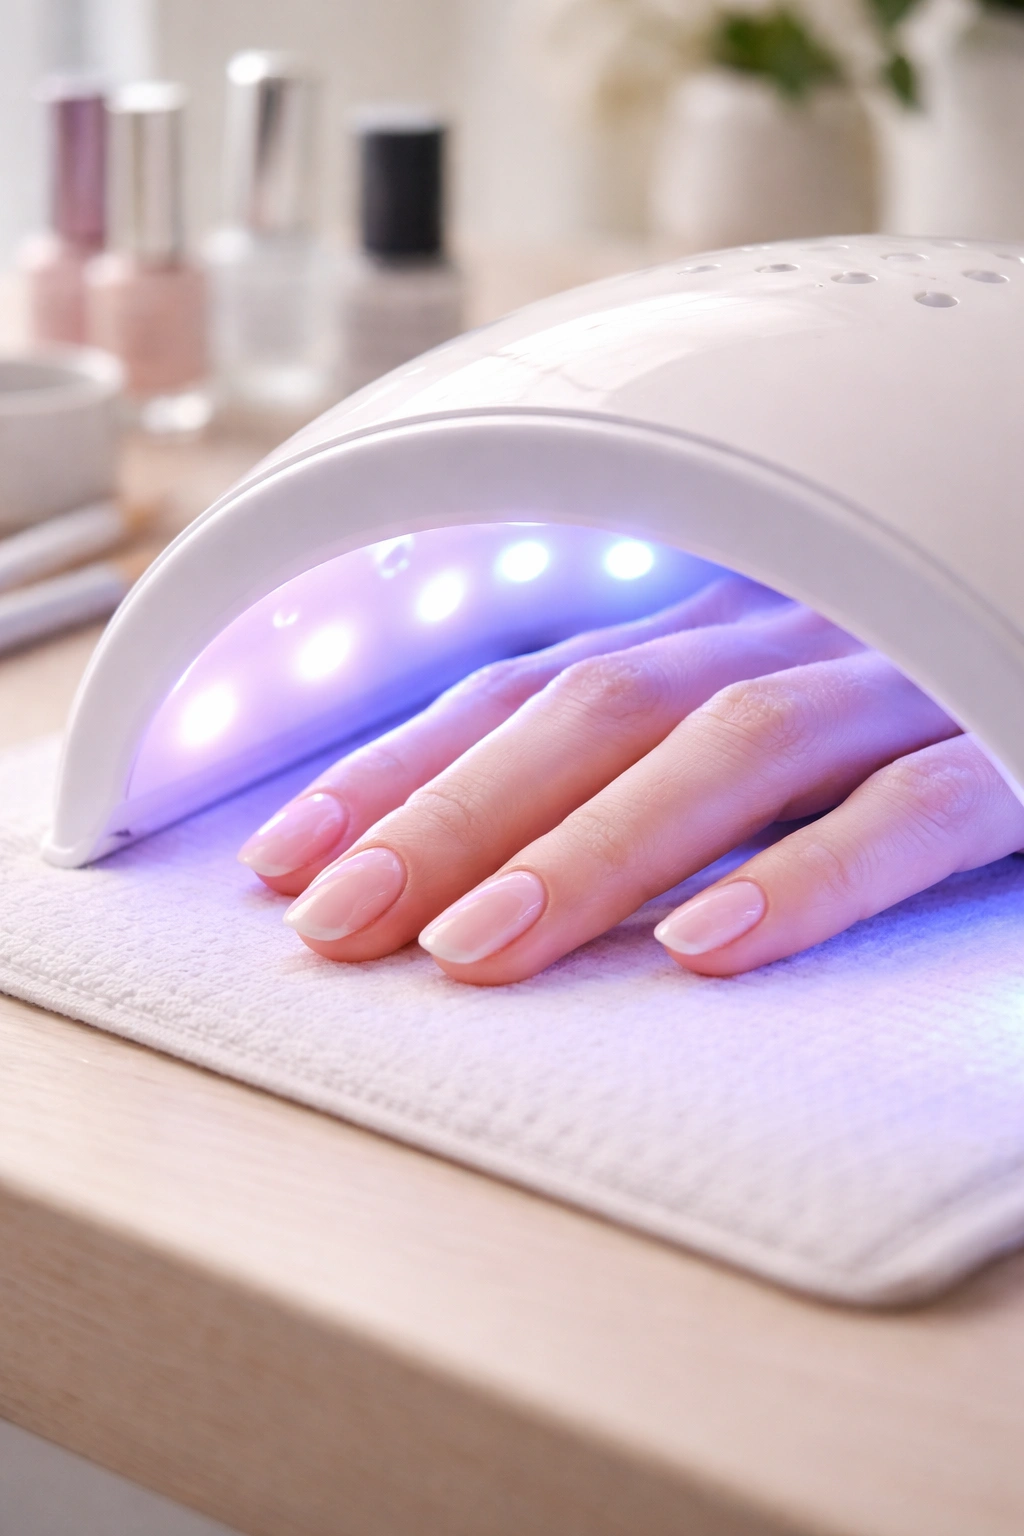
Curing is where the chemistry of gel polish happens. Gel polish contains photoinitiators—light-sensitive compounds that trigger polymerization (hardening) when exposed to specific light wavelengths. Without proper curing, your gel remains tacky and soft forever.
LED lamps emit light in the 365-405 nanometer range, which cures gel polish quickly and effectively. Most LED lamps cure gel in 30-60 seconds per layer. They’re energy-efficient, safer on your skin with minimal heat, and faster overall, making them ideal for home use.
UV lamps emit broader light wavelengths and typically require 2-3 minutes per layer. They’re less expensive upfront but slower and generate more heat during curing (which some people find uncomfortable during extended sessions).
For most home users, an LED lamp is the superior choice because of speed and convenience. However, not all gels cure under LED—some older gel formulas or budget brands only work with UV. Always check your gel polish’s label to confirm LED compatibility before purchasing.
During curing, keep your hand steady and centered under the lamp. Some people experience an uncomfortable heat sensation, especially during longer curing times. This is normal and happens because the curing process generates warmth. If it becomes uncomfortable, hold your hand slightly away from the lamp (about an inch) during the final 10-15 seconds—you’ll still get full cure without the heat sensation.
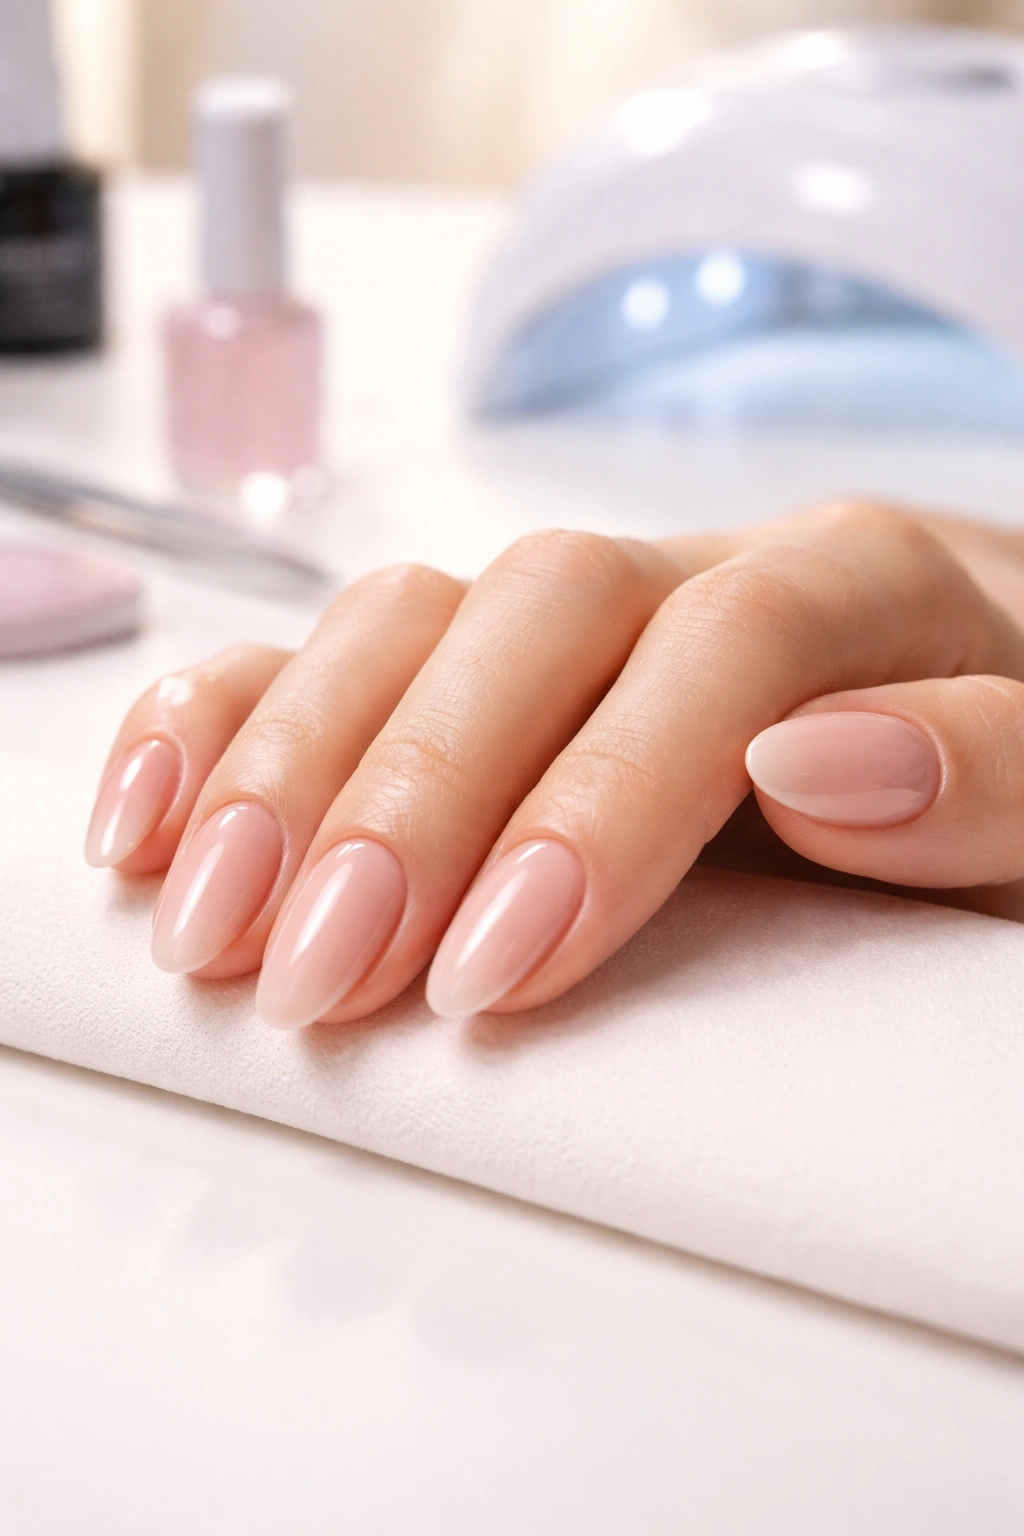
Protecting with Top Coat: The Glossy Seal
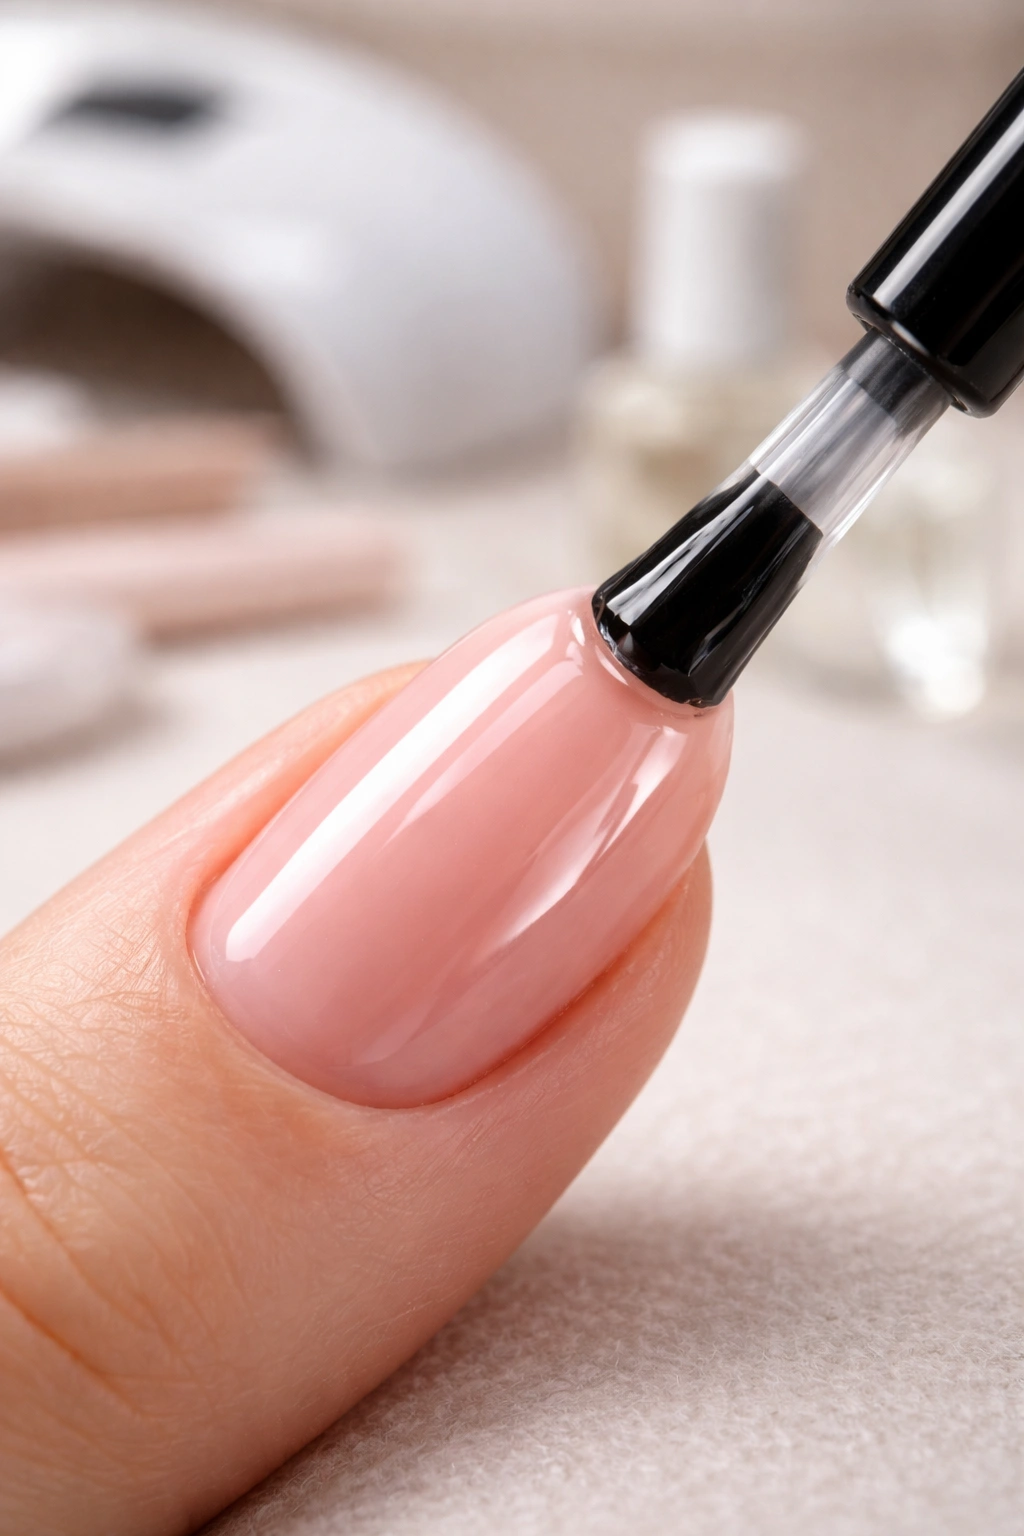
The top coat serves two purposes: it seals your color and protects it from chipping, and it adds that gorgeous glossy shine that makes gel nails look professionally done. Apply the top coat in the exact same manner—thin layer, seal the free edge, stay off the skin.
Some gel top coats are thinner and more prone to running off the sides of your nail. Apply slowly and deliberately to avoid excess dripping onto your skin or cuticles. Use your small brush to clean up any overflow immediately before curing.
Cure the top coat thoroughly according to your lamp’s instructions. Many top coats cure in 30 seconds under LED or 60 seconds under UV, but verify your specific product’s timing.
Removing the Sticky Residue Layer
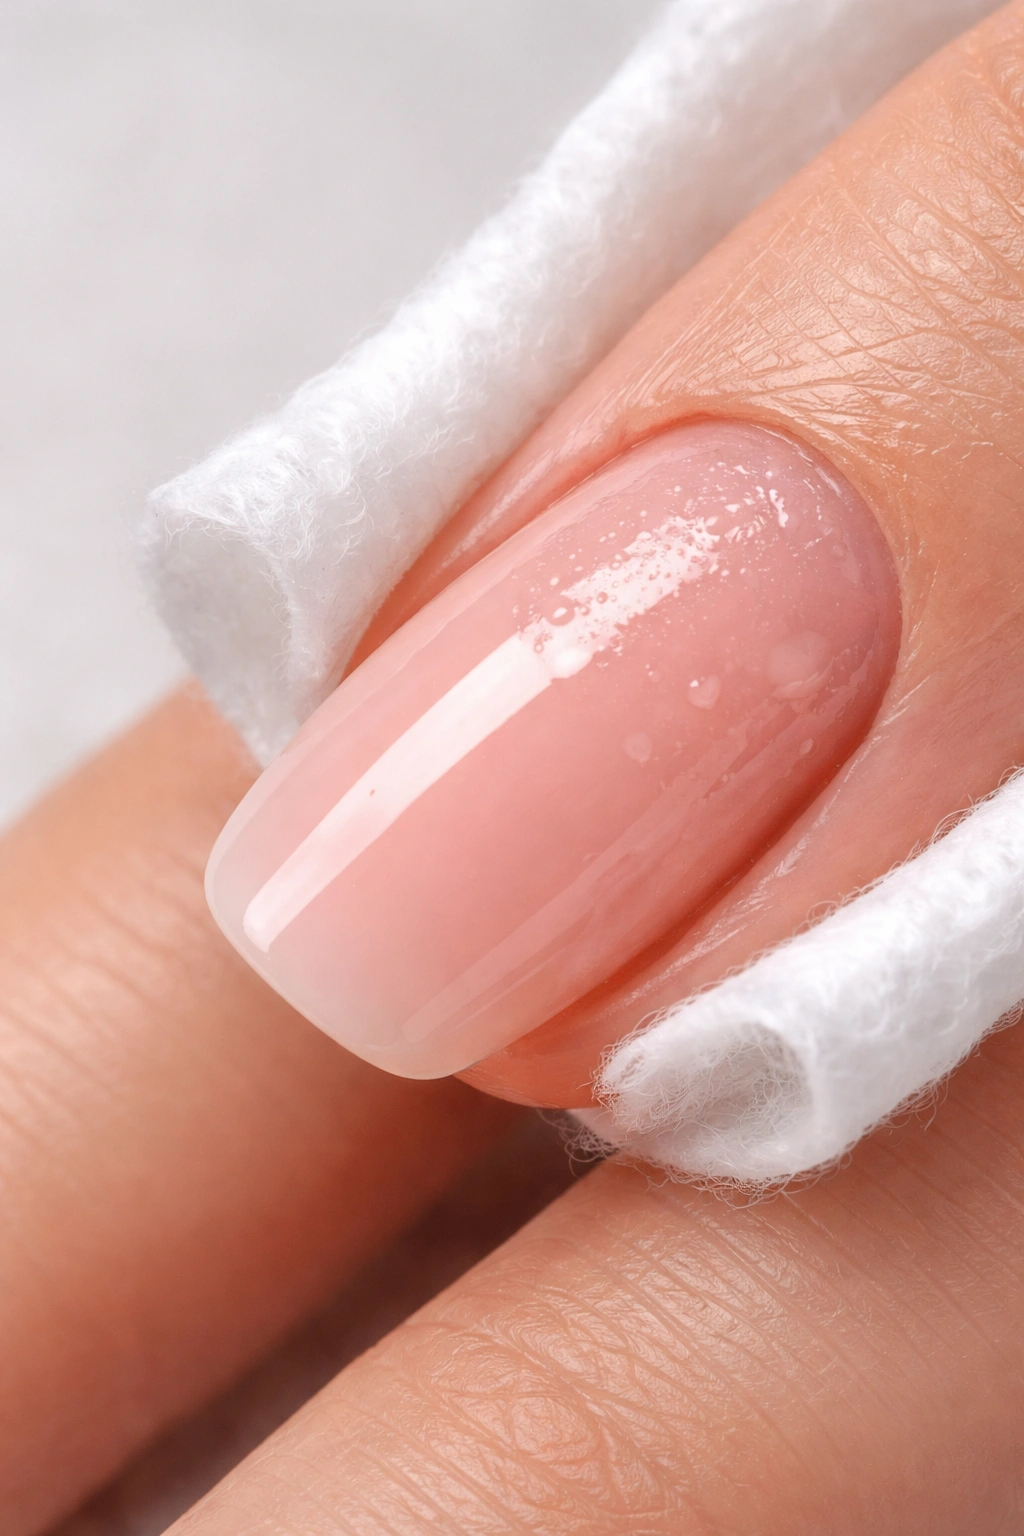
After curing the top coat, your nails will feel tacky or sticky to the touch. This is the inhibition layer—uncured monomers that rise to the surface during curing. It’s completely normal and easily removed. Don’t panic or assume your manicure didn’t cure properly.
Simply dip a lint-free wipe in 100% isopropyl (rubbing) alcohol and gently wipe each nail. The tackiness disappears immediately, leaving a perfectly smooth, hard, glossy surface. You can now touch your nails and start using your hands without worrying about ruining your manicure.
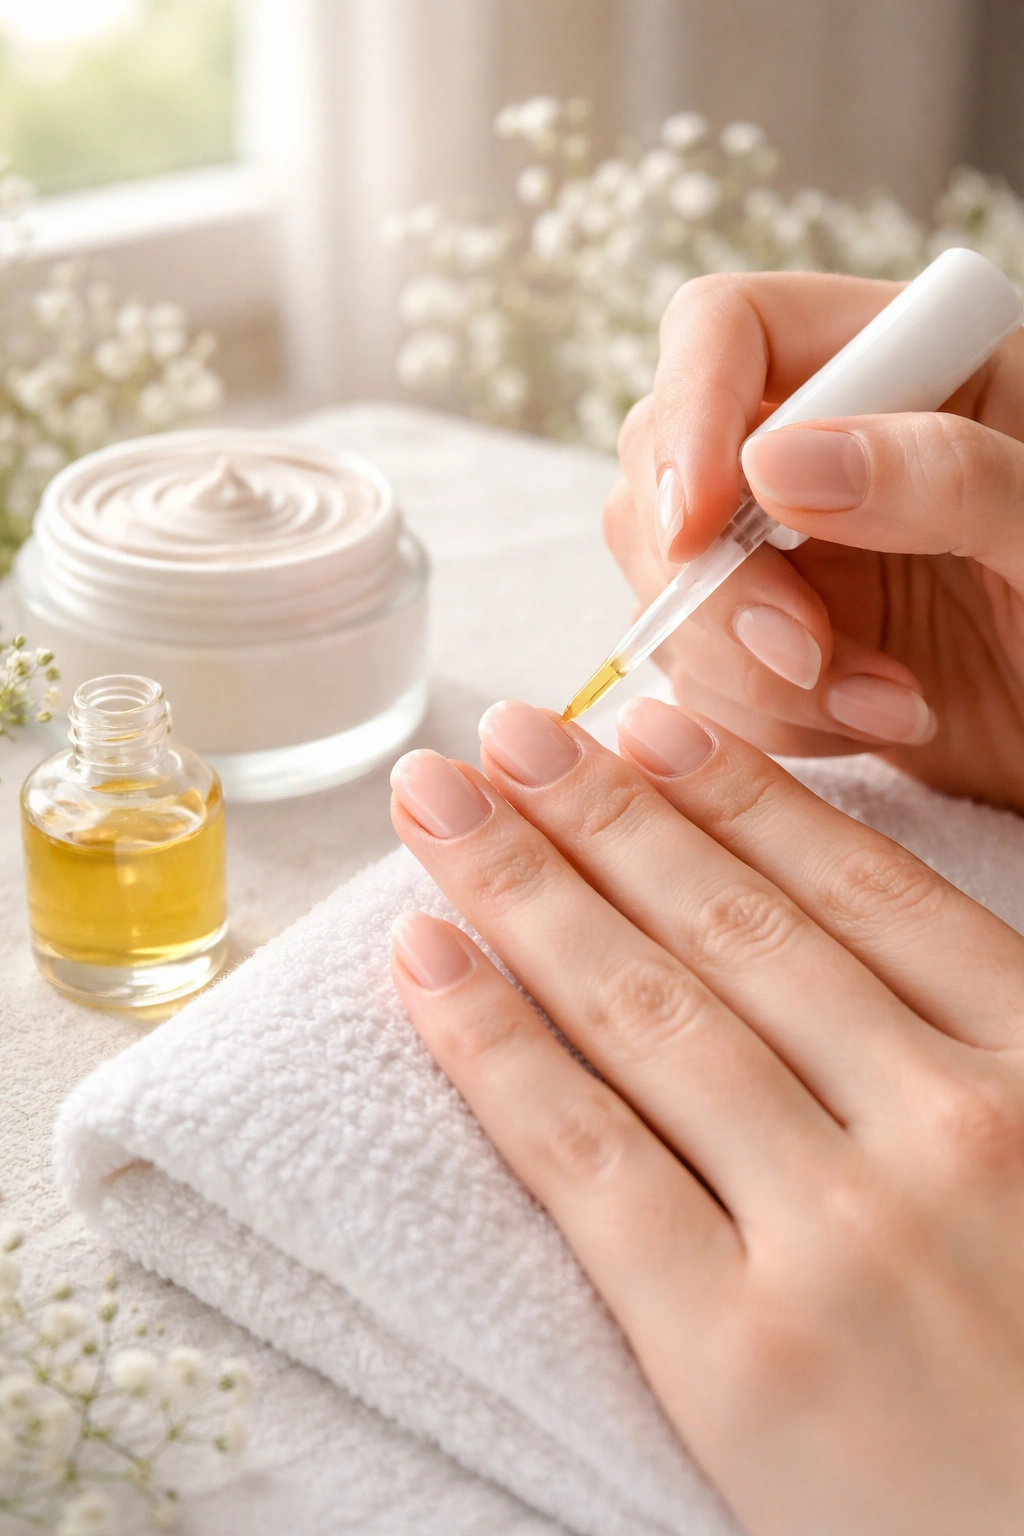
If you’d like, finish with a light application of cuticle oil massaged into the skin around your nails. This rehydrates the cuticle area after the dehydrating alcohol and pH bond used during application.
Troubleshooting Common Problems Before They Ruin Your Manicure
Polish bubbling or cloudy appearance almost always means one thing: thick application. When layers are too thick, the light from your lamp can’t penetrate to the bottom, leaving uncured monomer trapped inside. The solution is simple but requires redoing the manicure: thinner coats. Many frustrated beginners make this mistake the first time—you’re not alone if it happens to you.
Gel lifting at the edges within a day or two indicates insufficient preparation. Either your nails weren’t buffed enough, oil remained on the nail plate, or gel was applied to your skin/cuticles (which lifts as you use your hands). The fix: restart and pay meticulous attention to buffing and cleaning, and use your small brush with acetone to remove any gel touching skin before curing each layer. This is the most common issue beginners encounter, and it’s entirely preventable with careful prep.
Polish sliding or not adhering evenly suggests your gel might not be curing fully. Confirm your LED lamp is actually working by checking if it illuminates. Some cheaper lamps have weak bulbs or poor coverage. If your lamp seems fine, try curing for longer than the product instructions recommend as a test—if that fixes it, your lamp might need replacement.
Chipping or peeling within a few days typically stems from either incomplete edge sealing or getting gel on your cuticles. Deliberately seal the free edge with every layer, and clean off any product on or near your cuticles before curing. Also verify you’re using actual gel products, not regular polish with a gel top coat—that combination won’t work.
Extending Wear Time: Habits That Protect Your Manicure

Your gel manicure can realistically last 10-14 days with proper care (some people stretch theirs to three weeks). Here’s how to maximize longevity.
Avoid water exposure for the first hour after application. While gel is cured and hard immediately, giving it time to fully stabilize prevents edge lifting. Postpone washing dishes or taking a shower if possible.
Cap the free edge during application—this is worth emphasizing again because it makes a dramatic difference. Every layer (base, color, top coat) should extend slightly over the tip of your nail, creating a seal. This protects against chipping from daily activities like typing or texting.
Moisturize your cuticles regularly throughout your manicure’s lifespan. Dry, brittle cuticles are the enemy of adhesion. Apply cuticle oil every 1-2 days and use regular hand lotion daily.
Wear gloves during harsh activities. Dish soap, cleaning products, pool chlorine, and gardening can all break down gel more quickly. Gloves aren’t just for salon technicians—they’re smart protection for your manicure.
Resist picking or peeling if an edge starts to lift. This is genuinely the hardest part for many people. The temptation to pick is strong, but peeling gel off manually removes layers of your natural nail, leaving them thin and brittle. File the lifted edge smooth instead, and if it’s a very small edge, apply a thin layer of top coat and re-cure to reseal it temporarily.
Safely Removing Gel Polish: The Process That Matters Most
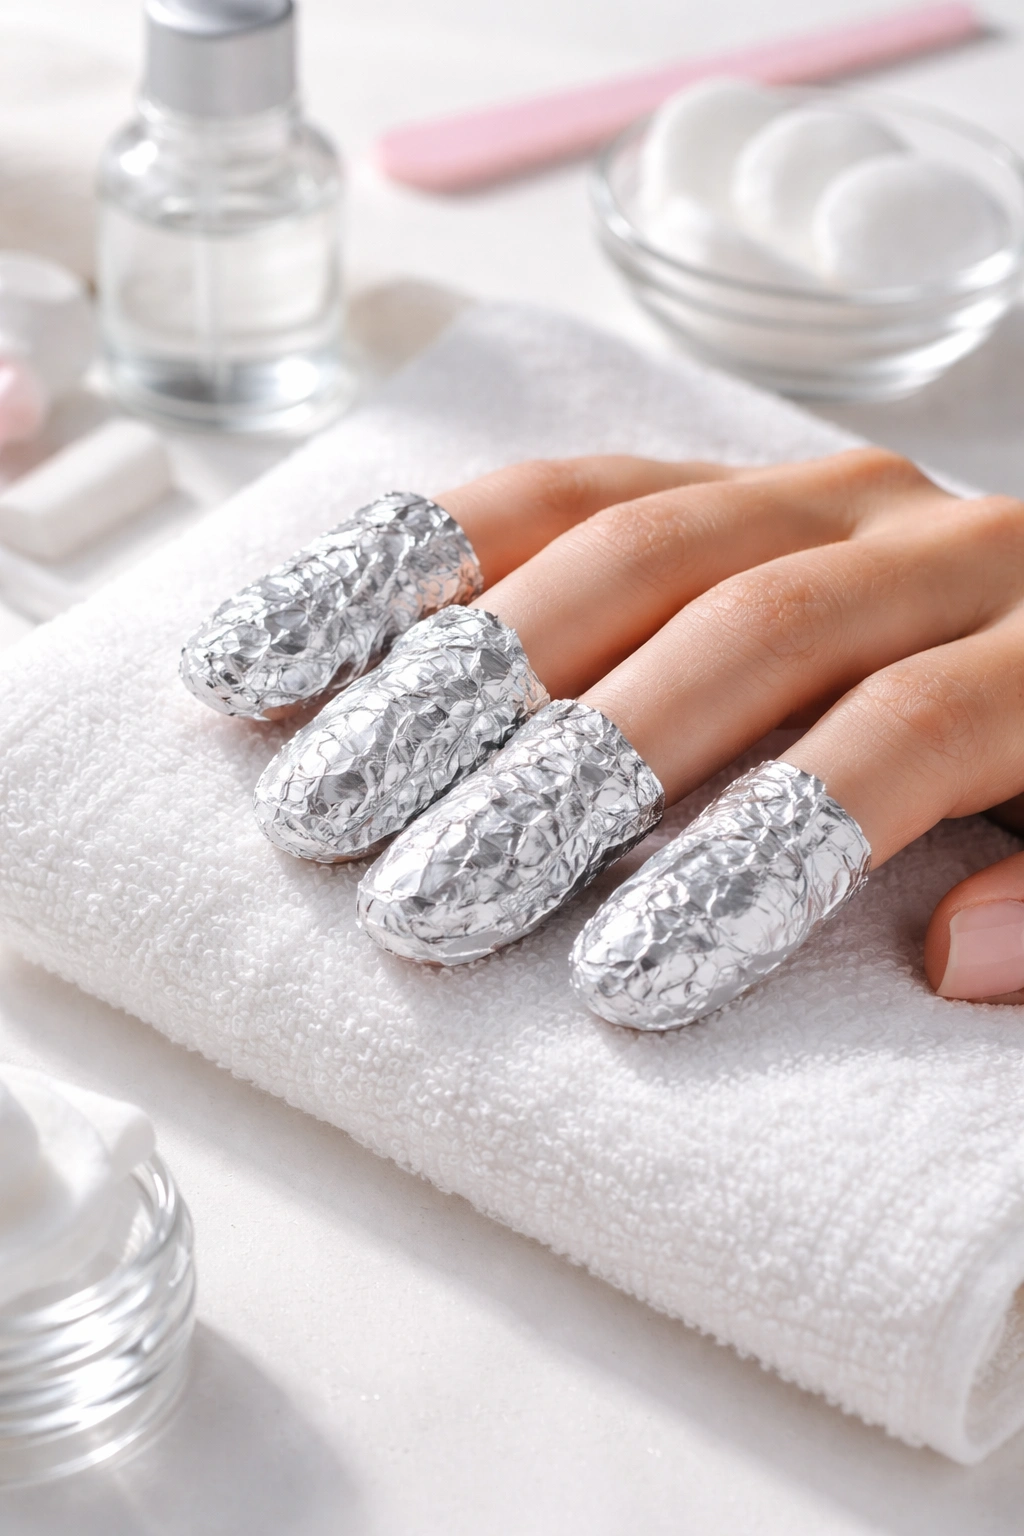
Improper removal causes more damage to natural nails than anything else. Never peel gel polish off—this is non-negotiable. You’ll remove your nail layers along with the gel.
File off the shine using a coarse file (180-grit or higher). Work gently, just breaking the sealed surface so acetone can penetrate. You’re not trying to file down to bare nail, just removing the glossy top layer. This takes just a couple of minutes but makes the soaking step dramatically more effective.
Soak cotton pads in 100% acetone (no dilution). Place a soaked pad on each nail and wrap your fingertip tightly with aluminum foil to hold the pad in place and prevent acetone from evaporating. Wait 15-20 minutes.
Remove the foil and check one nail. The gel should be softened and lifting. Use a cuticle pusher or wooden stick to gently nudge the gel off—it should come away fairly easily. If it’s still firmly stuck, re-wrap and soak for another 5-10 minutes rather than forcing it.
Buff your nails smooth once all gel is removed. Acetone is extremely drying, so immediately follow with generous applications of cuticle oil and hand cream. Your nails may feel slightly thin or sensitive for a day or two—this is temporary and resolves with moisture.
Aftercare and Nail Health Between Manicures
Your natural nails need recovery time between gel applications. Most professionals recommend waiting at least 1-2 weeks before applying gel again after removal. Use this time to deeply moisturize and let your nails regain strength.
Apply cuticle oil every single day during the break period. Use a rich hand cream multiple times daily. Keep your nails trimmed to moderate length to prevent breakage. If your nails feel brittle or weak, a break of 3-4 weeks gives them maximum recovery time.
Some people find that taking a biotin supplement supports nail health, though the evidence for this is mixed. What definitely works: consistent moisturizing, staying hydrated generally, and avoiding harsh chemicals.
Fine-Tuning Your Technique After Your First Application
Your first gel manicure at home won’t be perfect—and that’s fine. You’re learning a skill, not performing surgery. Most people’s technique improves dramatically by the third application.
Pay attention to what worked and what didn’t. Did your base coat feel too thick? Next time, apply even less. Did one nail lift early? Think back to whether you sealed that edge properly. Small adjustments compound into increasingly better results.
Consider keeping notes on your first few attempts: which brand of gel you used, how long you cured, what problems emerged, and how long it lasted. This personalized data helps you troubleshoot and refine your process faster than generic instructions alone.
After 3-4 applications, you’ll develop enough muscle memory and intuition that the process becomes genuinely enjoyable rather than stressful. You’ll find yourself experimenting with new colors, developing artistic designs, and genuinely looking forward to doing your nails instead of viewing it as a task.
Key Takeaways
At-home gel nails are absolutely achievable with proper supplies, careful preparation, and attention to thin-layer application. The investment in a quality lamp and gel products pays for itself quickly, and the convenience of never again coordinating a salon appointment is genuinely life-changing for many people.
Remember that preparation is half the battle—buffing, dehydrating, and cleaning your nails properly prevents most problems before they start. Apply thin, even layers and trust that multiple coats build better coverage than one thick coat. Seal your edges, keep gel off your skin, and cure thoroughly. If problems do arise, troubleshoot methodically rather than scrapping the whole manicure.
Most importantly, be patient with yourself during the learning curve. Your nails don’t need to look salon-perfect on your first try. They need to look better with each successive application, and they absolutely will as you develop the feel for the products and process. Within a few weeks, you’ll genuinely forget what it felt like to pay someone else for this, and you’ll be confidently maintaining beautiful nails whenever you want them.
