

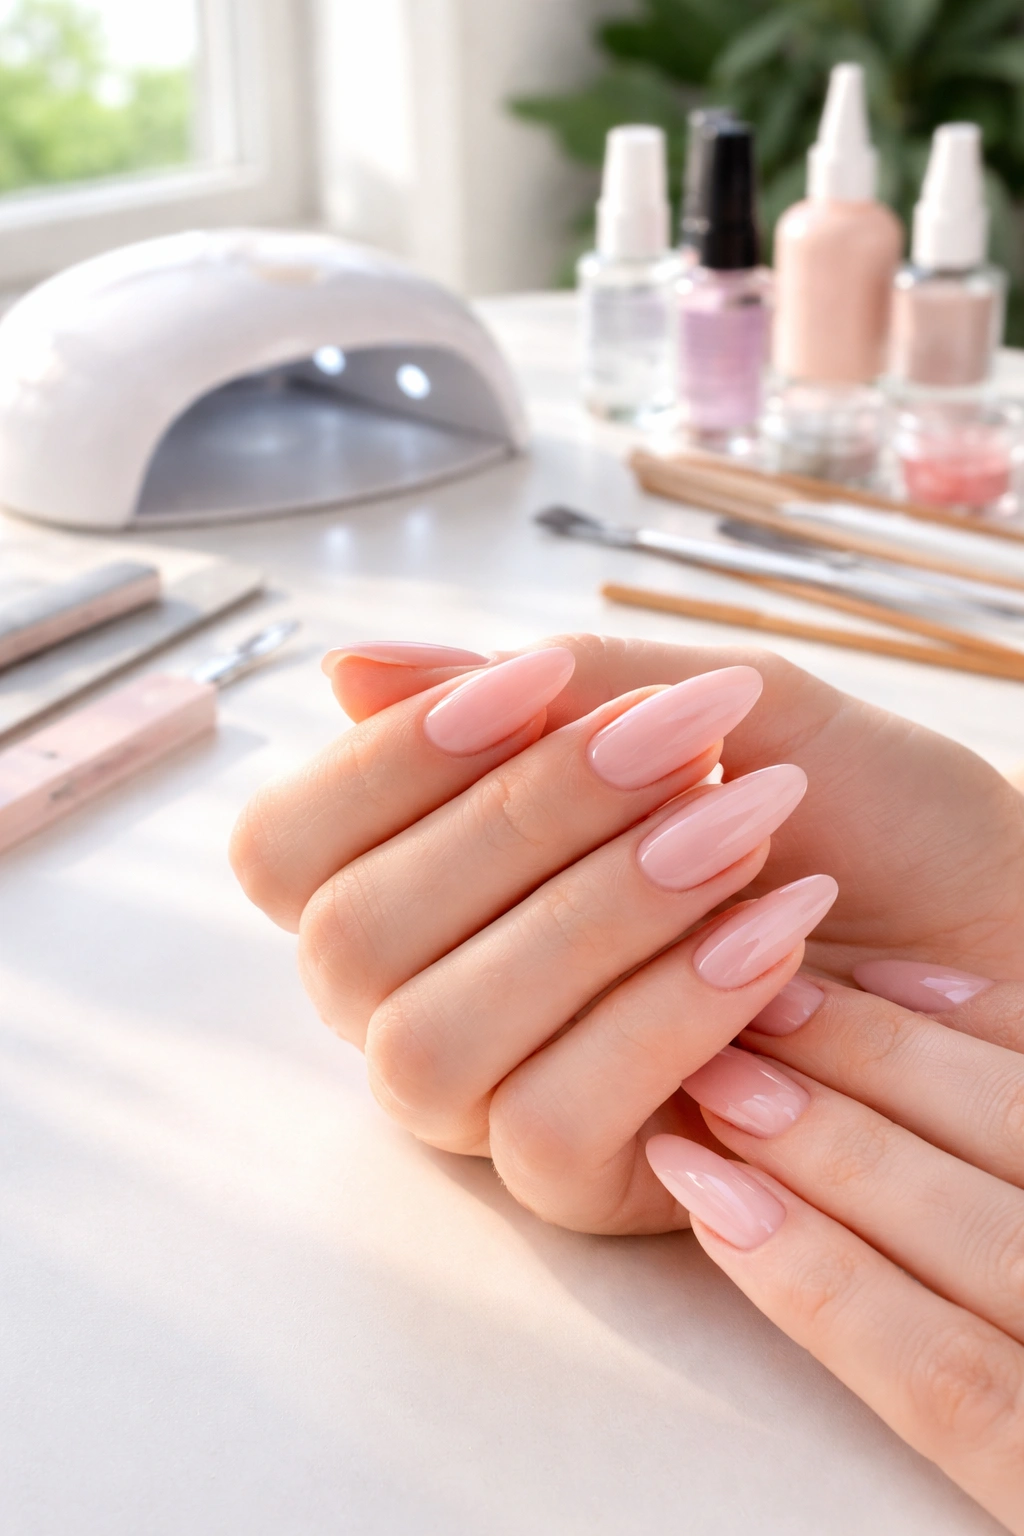
Getting professional acrylic nails every two or three weeks can add up quickly—often costing more than you’d expect over the course of a year. But here’s the thing: you don’t have to keep paying a salon for beautiful, long-lasting nails. Learning to do acrylic nails at home is absolutely achievable for beginners, and once you understand the fundamentals and practice a few times, you’ll have the skills to maintain stunning nails on your own schedule and budget. The process might seem intimidating at first—all those chemicals, bottles, and brushes can look like a professional chemistry lab. But the reality is that acrylic nail application follows a logical sequence of steps, and with patience, the right supplies, and a willingness to practice, you’ll soon be creating salon-quality results in your own home.
Why Learn to Do Acrylic Nails at Home
The most obvious reason to learn this skill is savings. Professional nail fills every three weeks cost between $30 to $50 per appointment, and that’s just for maintenance between full sets. Over a year, you’re spending $500 to $1,000 just keeping your nails looking good. When you do acrylics at home, your only ongoing expense is restocking supplies—acrylic powder, monomer liquid, and the occasional nail tip refill. After your initial investment in tools and materials (typically $50 to $100), you’ll recoup that cost in just a few fill-in appointments you won’t have to book.
Beyond the financial advantage, there’s real value in having control over your nail schedule. You’re not scrambling to fit an appointment into a salon’s calendar or rescheduling when something comes up last minute. You can touch up your nails at midnight on a Friday if you want to. You can experiment with different colors, designs, and shapes without worrying about wasting appointment time or paying extra for custom nail art.
There’s also something genuinely satisfying about the ritual itself. Creating your own nails becomes a therapeutic, meditative process—and you end up with a wearable piece of art you made with your own hands. Many people find the detailed, repetitive nature of acrylic application genuinely relaxing.
Understanding What Acrylic Nails Actually Are
Before you start buying supplies and prepping your nails, it helps to understand what you’re actually working with. Acrylic nails are a combination of two chemical components: a liquid monomer and a powder polymer. When these two substances mix together, they undergo a chemical reaction that creates a hard, durable plastic-like material that adheres to your natural nail or to a nail tip.
The powder is typically made from polymethyl methacrylate (PMMA) or a similar acrylic polymer, and it comes in various colors—clear, white, pink, or any custom shade you can imagine. The liquid monomer is usually ethyl methacrylate (EMA), which is the safer alternative to methyl methacrylate (MMA). This distinction matters: MMA is what dentists use for dental work, and it’s far too inflexible and potentially damaging for natural nails. Always check your monomer labels and ensure they contain EMA, not MMA.
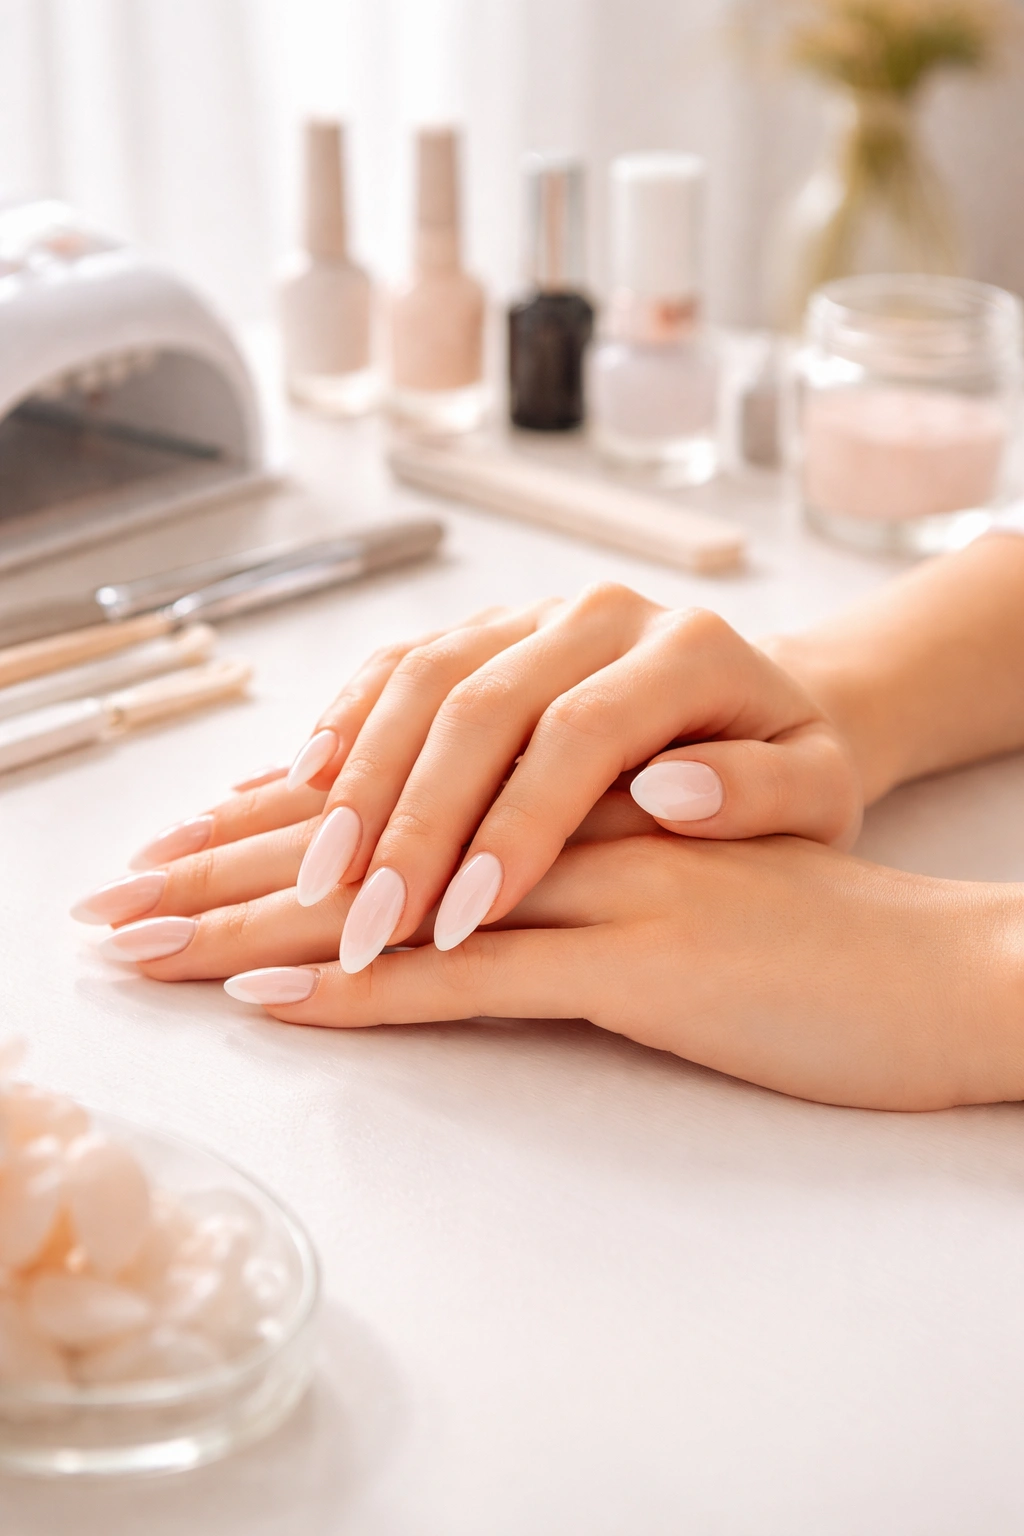
The beauty of acrylics is their durability. Once cured, they’re stronger and longer-lasting than gel nails or regular polish—which is why they’re the gold standard for people who want nails that can withstand daily wear and tear. They also provide an excellent canvas for nail art, and they’re easy to customize in terms of length and shape.
Gathering Your Complete Supply Kit
You can’t build acrylics without the right supplies, and trying to improvise with the wrong tools will lead to frustration and poor results. Here’s what you absolutely need to get started:
Essential supplies for acrylic application:
- Acrylic liquid monomer (EMA-based, not MMA)
- Acrylic powder in at least two colors (clear/natural, white, and a color of your choice)
- Nail tips (also called artificial nail tips or false nail tips)
- Nail tip glue (cyanoacrylate adhesive, specifically formulated for nails)
- Nail dehydrator or nail prep solution (removes oils and moisture)
- Nail primer (acid-free primers are gentler and still effective)
- Acrylic brush (size 10 or 12 is ideal for beginners)
- Dappen dish (a small glass or ceramic bowl specifically for mixing acrylic)
- Nail file (180-grit for shaping, 240-grit for smoothing, 400-grit and higher for finishing)
- Nail buffer (to dull the shine on natural nails before application)
- Cuticle pusher (wooden or metal)
- Lint-free wipes or paper towels
- Acetone (pure acetone, useful for cleaning and removal)
- Top coat (gel top coat if you have a UV/LED lamp, or air-dry top coat)
- Nail clippers designed for acrylic (regular clippers won’t work well)
Optional but genuinely helpful supplies:
- UV or LED lamp (makes top coat application faster, though air-dry options exist)
- E-file with various bits (makes shaping faster, but a hand file works fine for beginners)
- Nail forms (if you want to sculpt nails without tips)
- Pinching tool (helps shape the nail’s curve)
- Cuticle oil
- Training hand or practice nails (brilliant investment before working on your own hands)
Many beginners make the mistake of buying the cheapest kit they can find. Here’s the reality: cheap acrylic monomer and powder often produce inconsistent results, strong chemical odors, and poor adhesion. Spending a bit more upfront for mid-range or professional-grade supplies will save you endless frustration. Brands that professionals use—Young Nails, V Beauty Pure, and similar—are worth the investment.
Prepping Your Natural Nails: The Foundation Everything Depends On
Professional nail technicians will tell you that 80% of acrylic success comes from proper nail preparation. This step cannot be rushed or skipped, no matter how eager you are to see the finished result. If your natural nails aren’t properly prepped, the acrylic tips won’t stick, or they’ll lift and pop off within days.
Start by washing your hands thoroughly with soap and warm water. This removes surface dirt and slightly softens your cuticles, making the next steps easier. If you have any old nail polish on, remove it completely using an acetone-based nail polish remover—don’t use non-acetone removers, as they’re less effective at stripping the nail completely clean.
Next, trim your natural nails to a short length, roughly to where the white of your nail just starts to show (the smile line). Use proper nail clippers, not scissors. The reason for keeping them short: when you apply nail tips, your natural nail provides the foundation. If your natural nails are too long, the weight and leverage of the tips can cause them to snap off at the nail bed, which is painful and damaging.
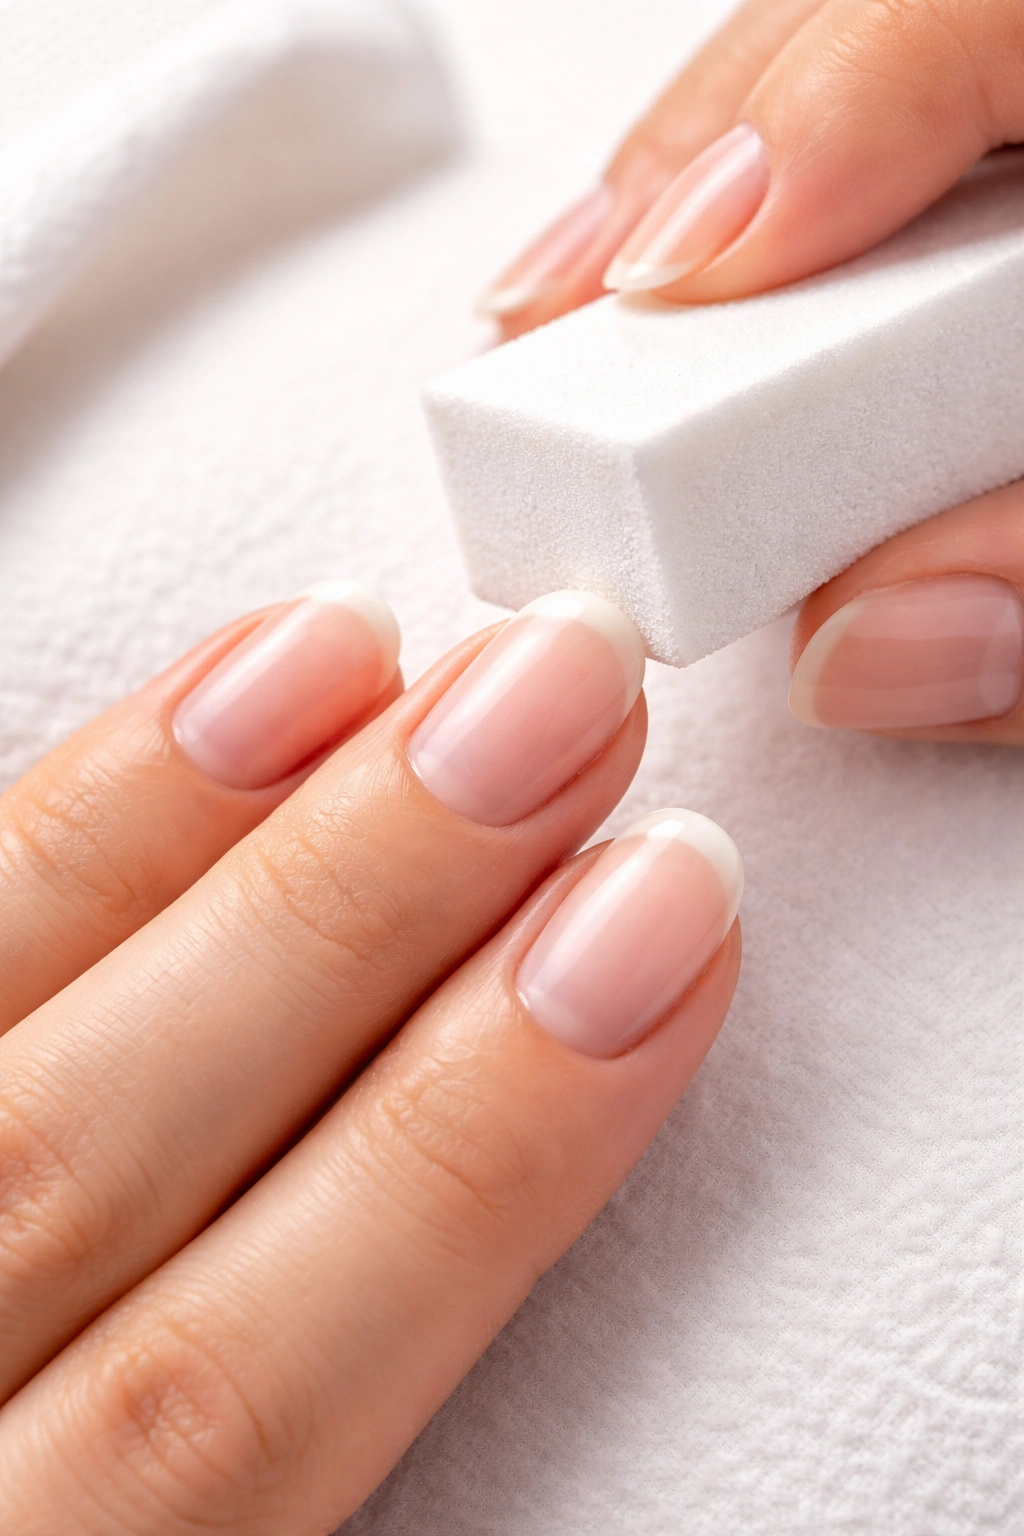
Now comes the buffing step, which many beginners underestimate. Your natural nails have a shiny coating that prevents adhesive from bonding properly. Take a soft nail buffer or a 180-grit file and gently buff the entire surface of each nail, moving in one direction (side to side works well). You’re not trying to sand the nail down to nothing—just enough to dull that glossy shine. The surface should look matte when you’re done.
After buffing, use a wooden cuticle pusher to gently push your cuticles back. Work slowly and carefully; you’re not trying to cut or damage the cuticle tissue, just move it away from the nail bed so the acrylic tips sit flush against your nail. If your cuticles are particularly stubborn, soak your fingertips in warm water for a few minutes first to soften them.
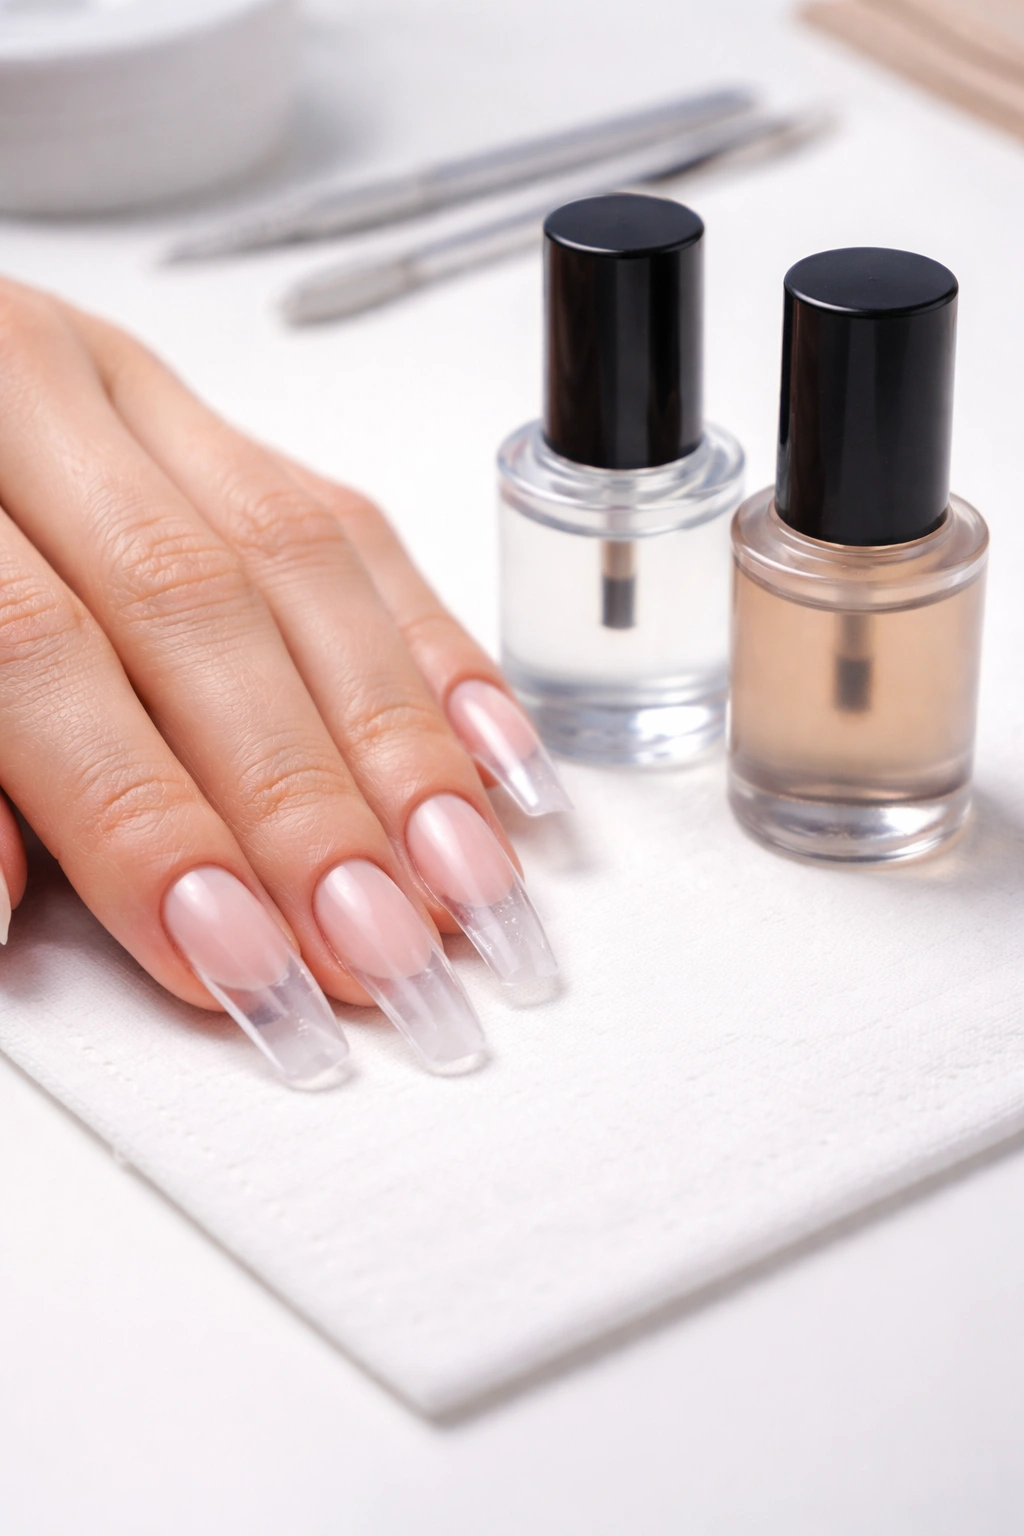
Once your cuticles are pushed back, apply nail dehydrator to the entire nail surface using a lint-free wipe or applicator. Dehydrator removes oils and any remaining moisture from your nail bed. You’ll see your nails take on a slightly chalky or matte appearance—that’s exactly what you want. Let this dry for a moment (usually 30 seconds to a minute), then apply acid-free nail primer. The primer creates a chemical bond between your natural nail and the nail tip, significantly improving adhesion.
Some primers have a light color and are easier to see; others are clear. Either way, apply a thin, even coat across the entire nail surface, from just above the cuticle to the tip. Don’t glob it on—a light coating is more effective than a thick one. Let the primer dry before moving to the next step (usually just a minute or so).
Choosing and Applying Nail Tips
Nail tips come in dozens of shapes, sizes, and materials. Your first decision is size: you need to select tips that match the width of your natural nails. Most tip boxes come with a range of sizes (typically 0-10 or similar numbering). Lay out all the sizes and find the one that sits flush on each of your fingertips—it should cover your nail width without gaps on the sides or overlapping your skin.
Don’t assume all ten nails need the same size tip. Many people have slightly different nail widths on different fingers, so select individually for each nail. If a tip is slightly too wide, you can file it down; if it’s too narrow, it won’t adhere properly and will feel loose.
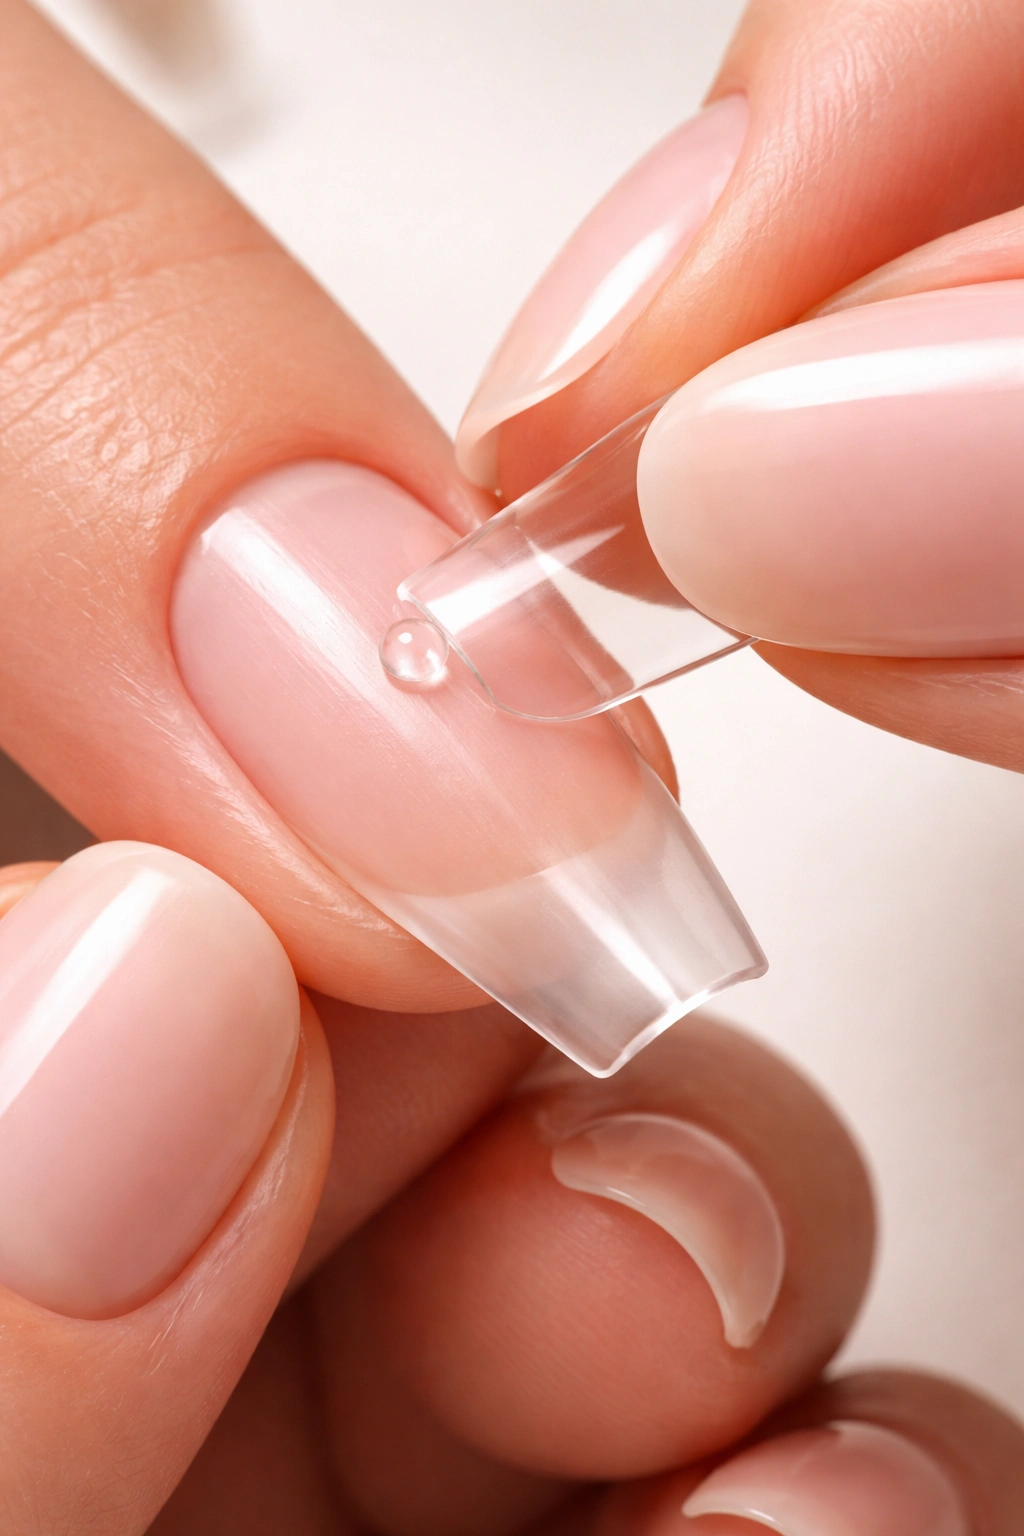
Once you’ve selected all ten tips, apply a small dot of nail glue to the tip’s base (the part that will contact your natural nail). Don’t use more than a tiny drop—excess glue will squish out the sides, get on your skin, and create a mess. Press the tip onto your nail at a slight angle (rather than straight on), then lower it flat. Apply gentle but firm pressure for about five to ten seconds while the glue sets. You should feel the tip lock into place.
Check that the tip is centered and not crooked. If it is crooked and the glue hasn’t fully set yet, gently wiggle it off, clean both surfaces with a bit of acetone, and reapply. Once all ten tips are attached and the glue is fully dry (usually two to three minutes), trim them to your desired length using nail clippers designed for acrylic nails. Regular clippers can crack acrylic tips.
After trimming, file the tips into your chosen shape—square, oval, almond, coffin, or whatever style you prefer. At this stage, your tips might have a visible seam where they join your natural nail. File gently along this seam with a medium-grit file, then smooth it with a higher-grit file and a touch of acetone on a lint-free wipe. The goal is a seamless blend where you can’t feel or see a ridge.
The Importance of Primer and Dehydrator: Don’t Skip This
It’s tempting to rush from tip application straight to the acrylic mixture, but applying primer and dehydrator a second time (once your tips are attached) is crucial. This step removes any oils or dust introduced during the tipping process and ensures the acrylic will bond securely to both your natural nail and the tip.
Apply dehydrator again to all ten nails and let it dry. Then apply a fresh coat of primer. This double-coat approach dramatically reduces lifting and separation later on. Yes, it adds a few minutes to your timeline, but it saves you from the disappointment of nails popping off after a few days.
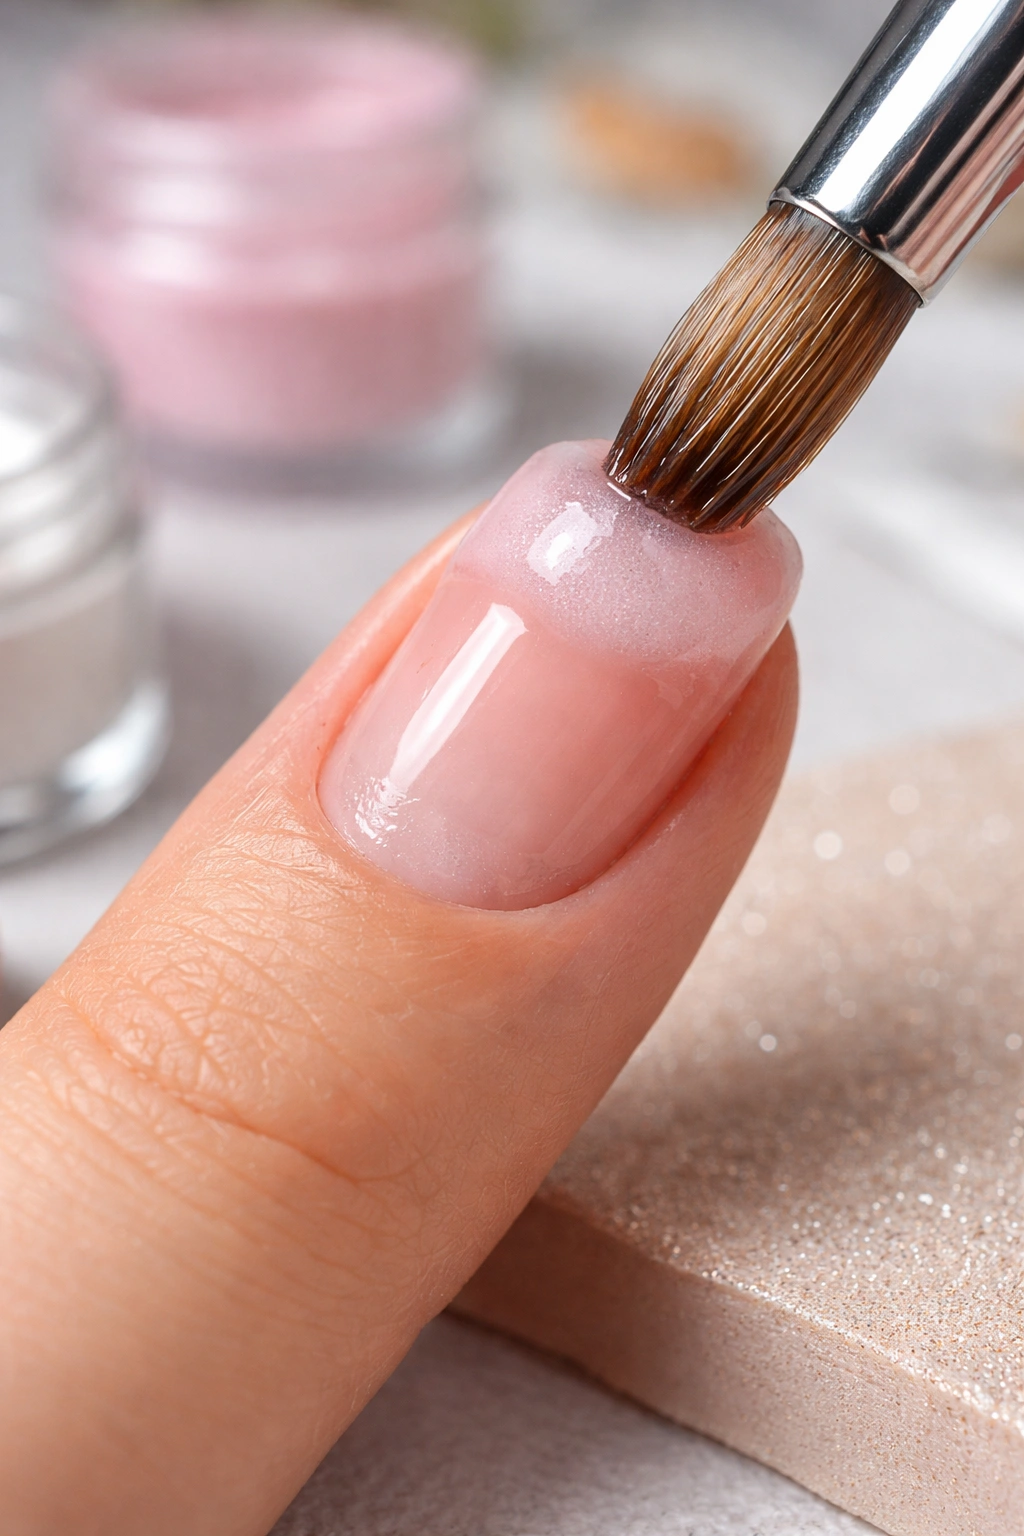
Creating the Perfect Acrylic Bead: The Heart of the Skill
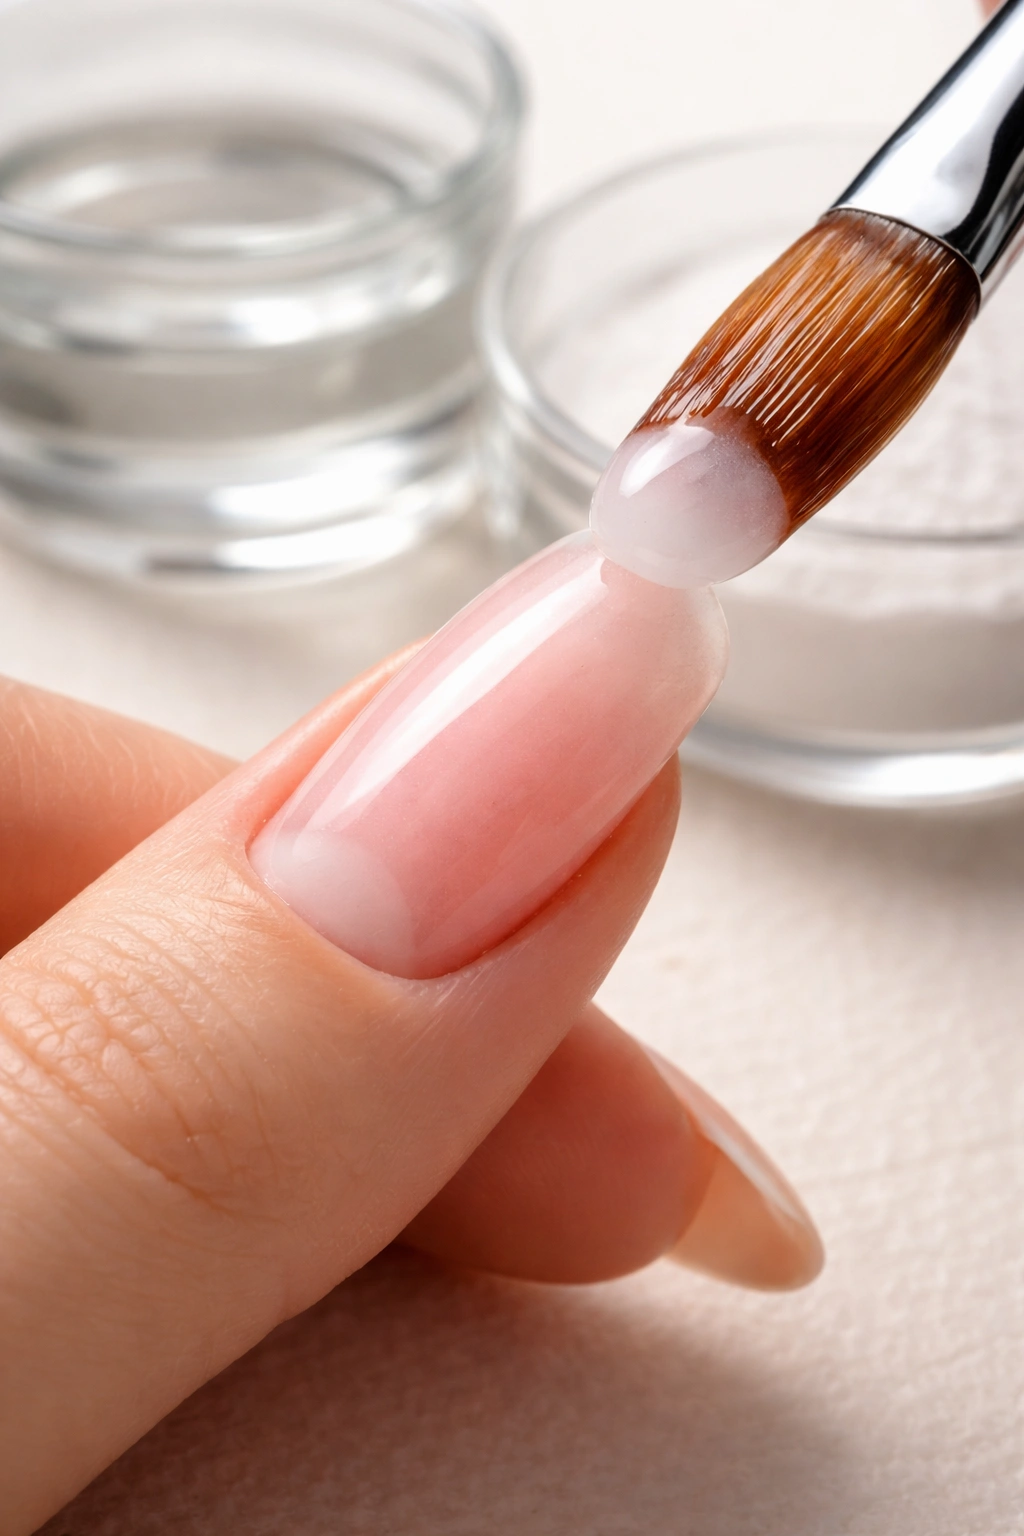
This is where acrylic application becomes an art form. Creating a proper acrylic bead—the small ball of acrylic mixture that you’ll apply to your nails—takes practice, but once you understand the technique, it becomes almost automatic.
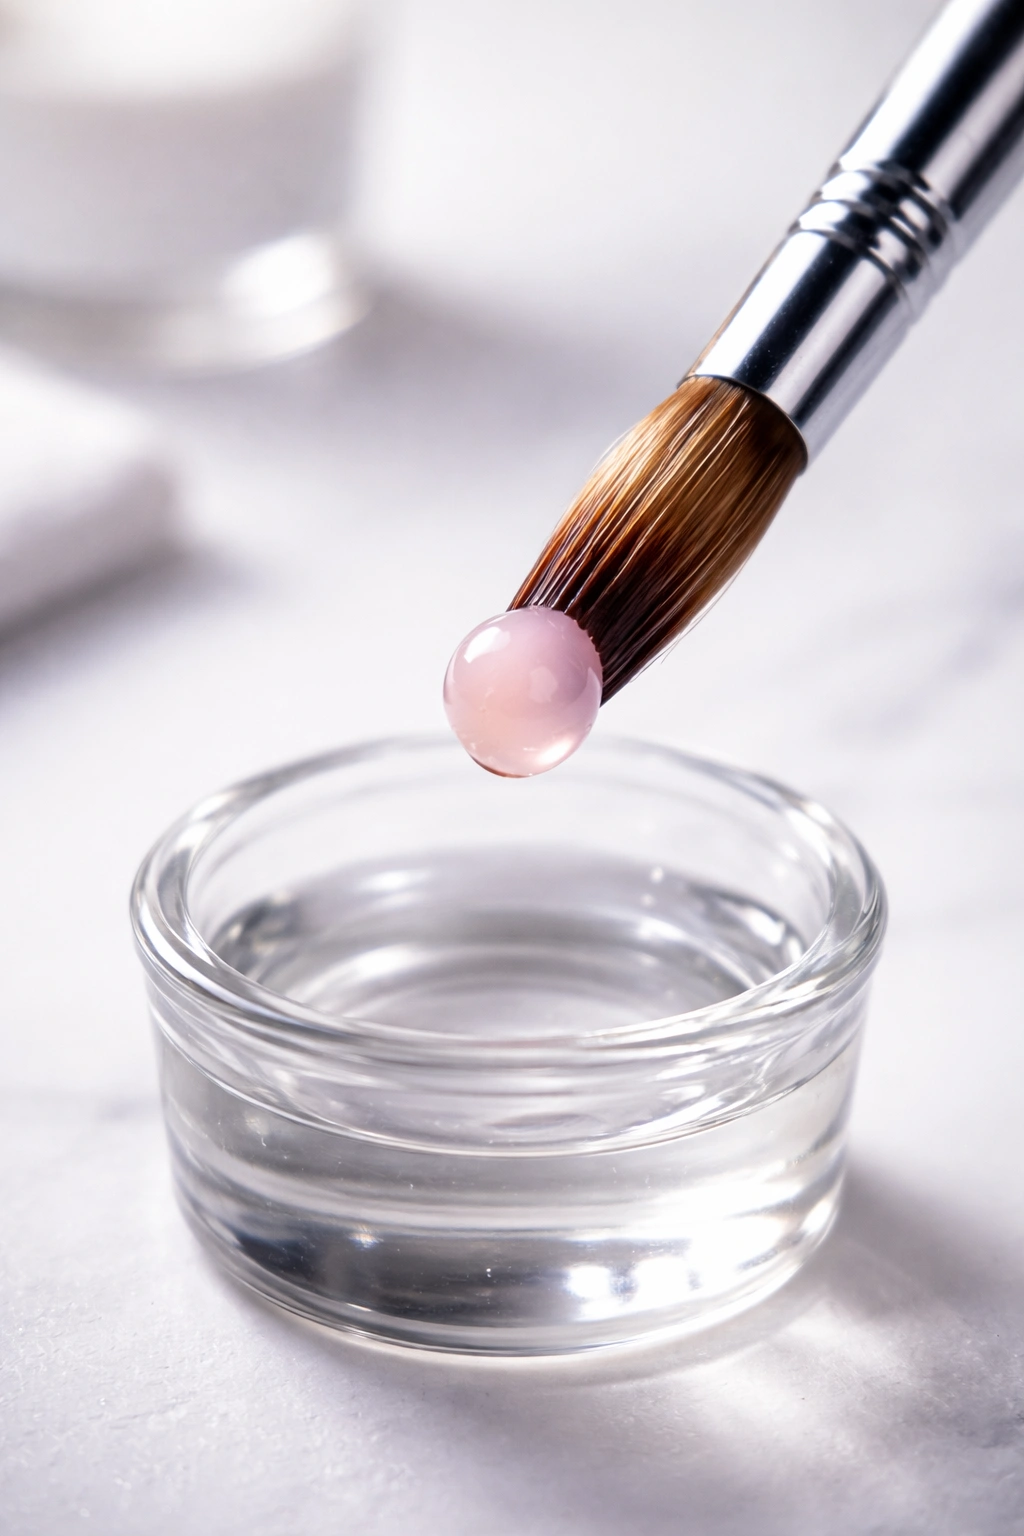
Pour your acrylic monomer liquid into your dappen dish. The dish should be clean and dry. Now dip your acrylic brush into the liquid, pushing it all the way to the bottom of the dish. You’ll see bubbles rise to the surface—that’s air leaving the brush fibers. Once the bubbles stop, tap the brush against the inside edge of the dish to remove excess liquid. The brush should be wet but not dripping.
Now dip the brush into your acrylic powder, twirling and rotating it gently so powder clings to the wet brush. Continue rotating and dipping until a small, cohesive ball of acrylic forms at the tip of the brush. This ball should be about the size of a small pea or a bead of acrylic sealant. The consistency is crucial: the ball should be moist and slightly shiny, not dry and chalky, and definitely not so wet that it drips off the brush.
This balance takes practice to master. If your bead is too dry, it won’t spread smoothly and will look clumpy. If it’s too wet, it will be runny and hard to control. The best way to learn is to practice creating beads on a paper towel a few times before applying them to your nails. You’ll quickly develop a feel for the right ratio of liquid to powder.
Once you’ve created a proper bead, gently press it onto the nail (starting near the cuticle) and allow it to self-level slightly under its own weight. The acrylic bead naturally wants to settle and spread, which is part of what makes this process work. Don’t apply excessive pressure or try to brush the bead all over the nail immediately—let it do some of the work for you. Then use gentle, directional brushstrokes (always moving from the cuticle toward the tip) to spread and smooth the acrylic. Wipe your brush on a lint-free wipe between strokes to prevent acrylic from building up on the brush and creating clumps.
Applying Acrylic to Each Nail: The Core Technique

You’ll likely need multiple beads per nail to achieve full, even coverage. Many professionals divide the nail into three sections: cuticle to middle, middle to free edge, and the very tip. This approach gives you better control and a more professional result than trying to cover the entire nail with one large bead.
Start with the cuticle section. Create a bead, place it near the cuticle (but not touching it—leave about 1mm of space), and smooth it across that section. Then create a second bead for the middle section and blend it into the first. Finally, add a bead to the free edge (the part extending beyond your natural nail) and blend it into the middle section. The goal is a smooth transition with no visible lines or ridges where the beads meet.
Apply consistent, gentle pressure as you brush. Many beginners make the mistake of either pressing too hard (which distorts the acrylic) or not pressing hard enough (which leaves it lumpy and uneven). Think of your brushstrokes as gentle smoothing motions, not aggressive spreading.
For each nail, you’ll repeat this process until you have even coverage from cuticle to tip. Some nails might need two beads, others three—it depends on how wide your nail is and how much acrylic you’re picking up with each bead. The key is patience: rushing this step leads to uneven nails that look sloppy.
Between each nail, wipe your brush clean on a lint-free wipe. Some people dip their brush in monomer liquid again to clean it; others simply wipe it dry. Both approaches work. Just make sure your brush is clean before you create your next bead, or old, partially-cured acrylic will affect the consistency of your new bead.
Letting Acrylic Cure Properly: Temperature Matters
Once you’ve applied acrylic to all ten nails, you need to let it cure (harden). Acrylic is temperature-sensitive, and the temperature of your workspace dramatically affects curing time. A warmer room (around 75°F or 24°C) will cause acrylic to cure faster—sometimes too fast, making it difficult to work with. A cooler room (around 68-72°F or 20-22°C) slows the curing process, giving you more time to perfect each nail before it hardens.
As a beginner, you actually want a slightly cooler workspace. The slower curing time gives you longer to smooth out imperfections and make adjustments before the acrylic sets. Once you’re comfortable with the application process, you can adjust your room temperature to suit your preferred working speed.
Don’t speed up curing by using fans or blow dryers. The acrylic needs to cure at its natural pace. Artificially speeding it up can create stress in the acrylic layer and cause the nails to become brittle or prone to cracking.
The typical curing time is around 10 minutes, though it can vary depending on your room temperature and the specific products you’re using. You’ll know the acrylic is fully cured when you tap a nail with the back of your brush handle—if it makes a sharp clicking or tinging sound, the acrylic is hard. If it sounds hollow or dull, it needs more time.
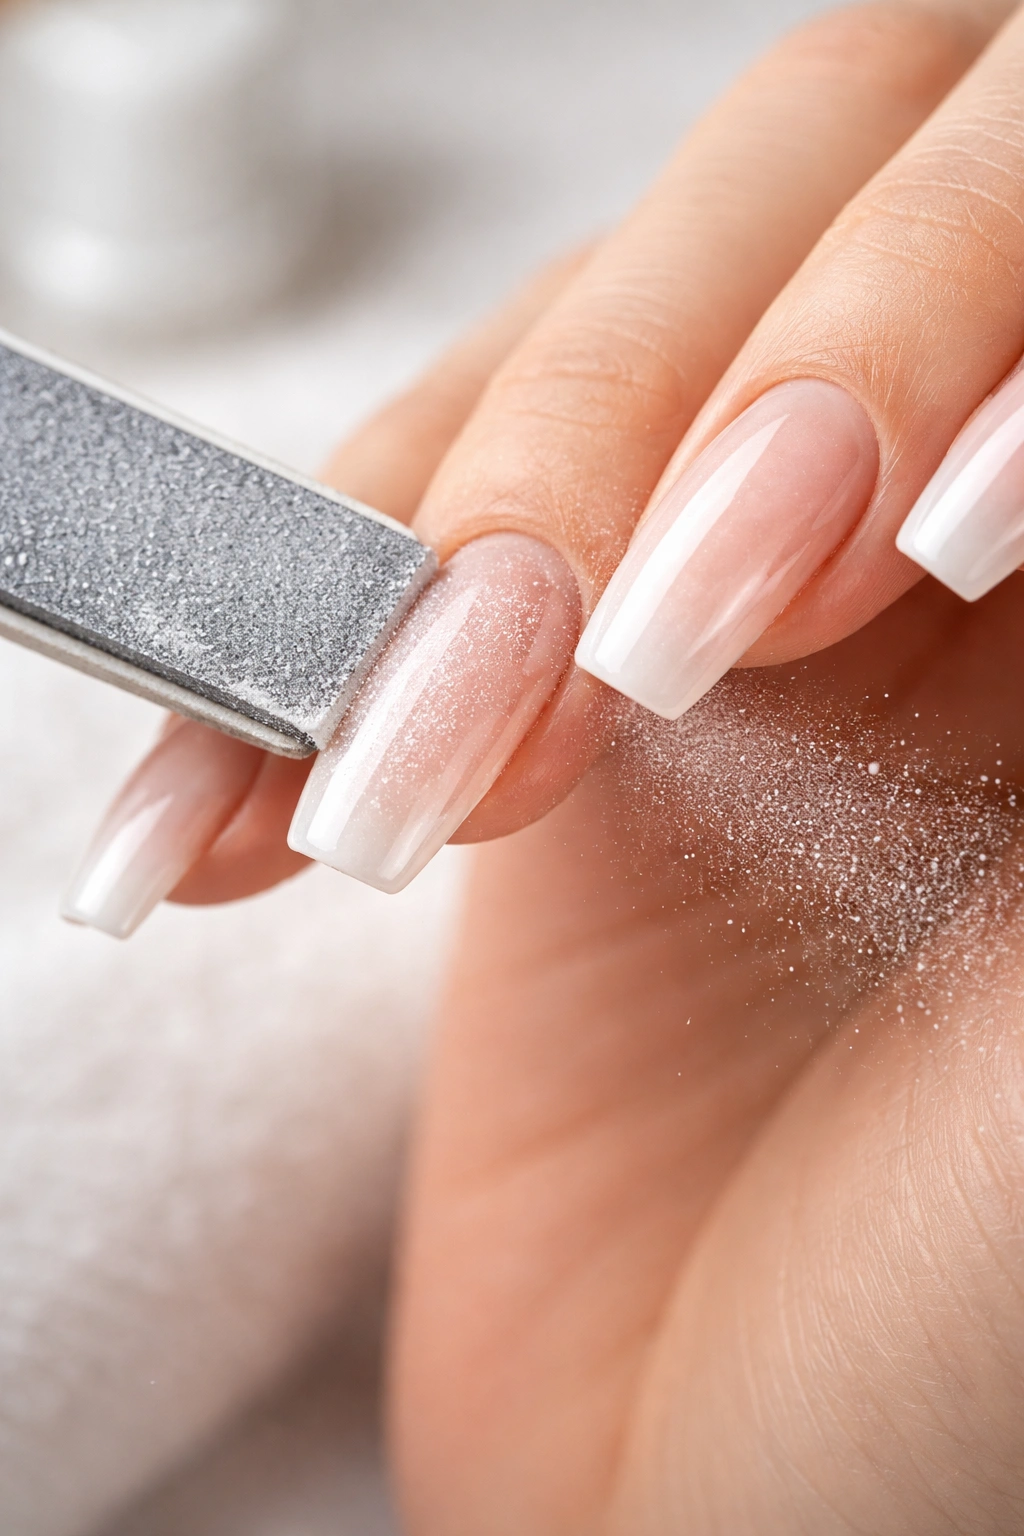
Shaping and Finishing Your Nails: The Polish
Once your acrylic is fully cured, you have a solid foundation that you can now shape and refine. Many beginners prefer to do rough shaping before the acrylic fully hardens (while it’s still slightly soft), but if you missed that window, don’t worry—hardened acrylic is still shapeable with proper files.
Start with a coarser file (180-grit) to do the bulk of the shaping. Define the free edge (the part extending past your natural nail), smooth the sides, and shape the tip to your preferred style. As you file, you’ll notice dust accumulating—wipe it away occasionally with a lint-free wipe so you can see what you’re doing.
Once you’re happy with the shape, move to progressively finer files. Use 240-grit to smooth out the scratches left by the 180-grit file, then 400-grit and higher for the final polish. If you work your way up to a 1000-grit or higher file, you can achieve a naturally glossy finish that doesn’t require polish.
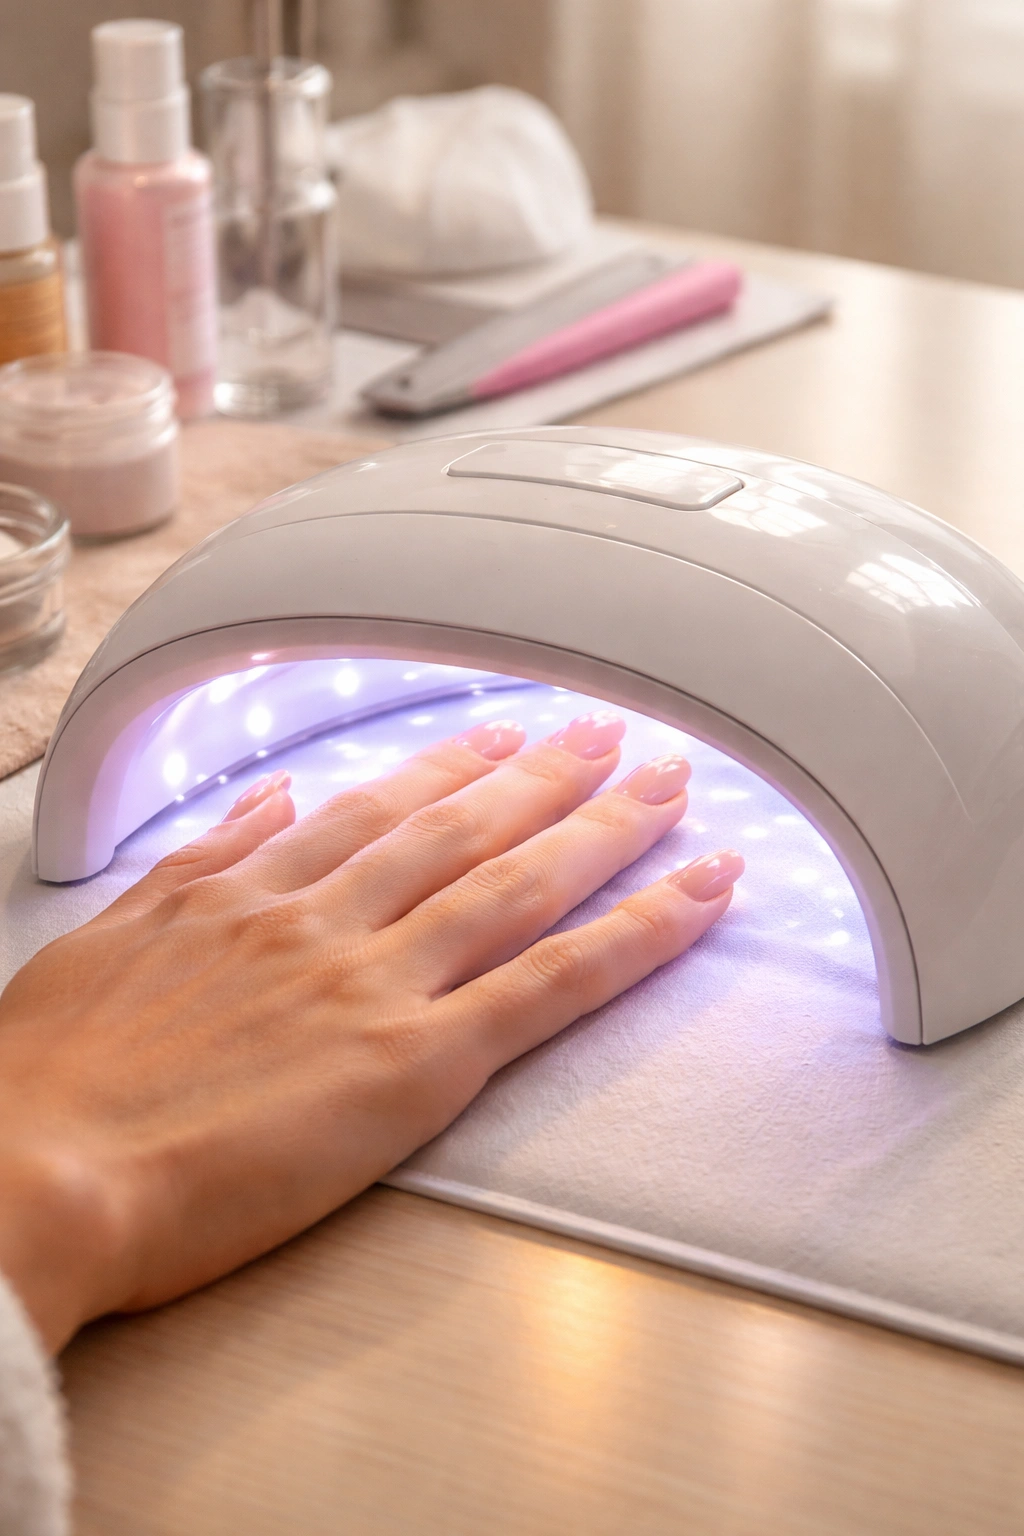
After shaping, apply a top coat. If you have a UV or LED lamp, use a gel top coat and cure it according to the product’s instructions (usually one to three minutes). If you’re using air-dry top coat, apply it and let it dry naturally—this takes a few minutes.
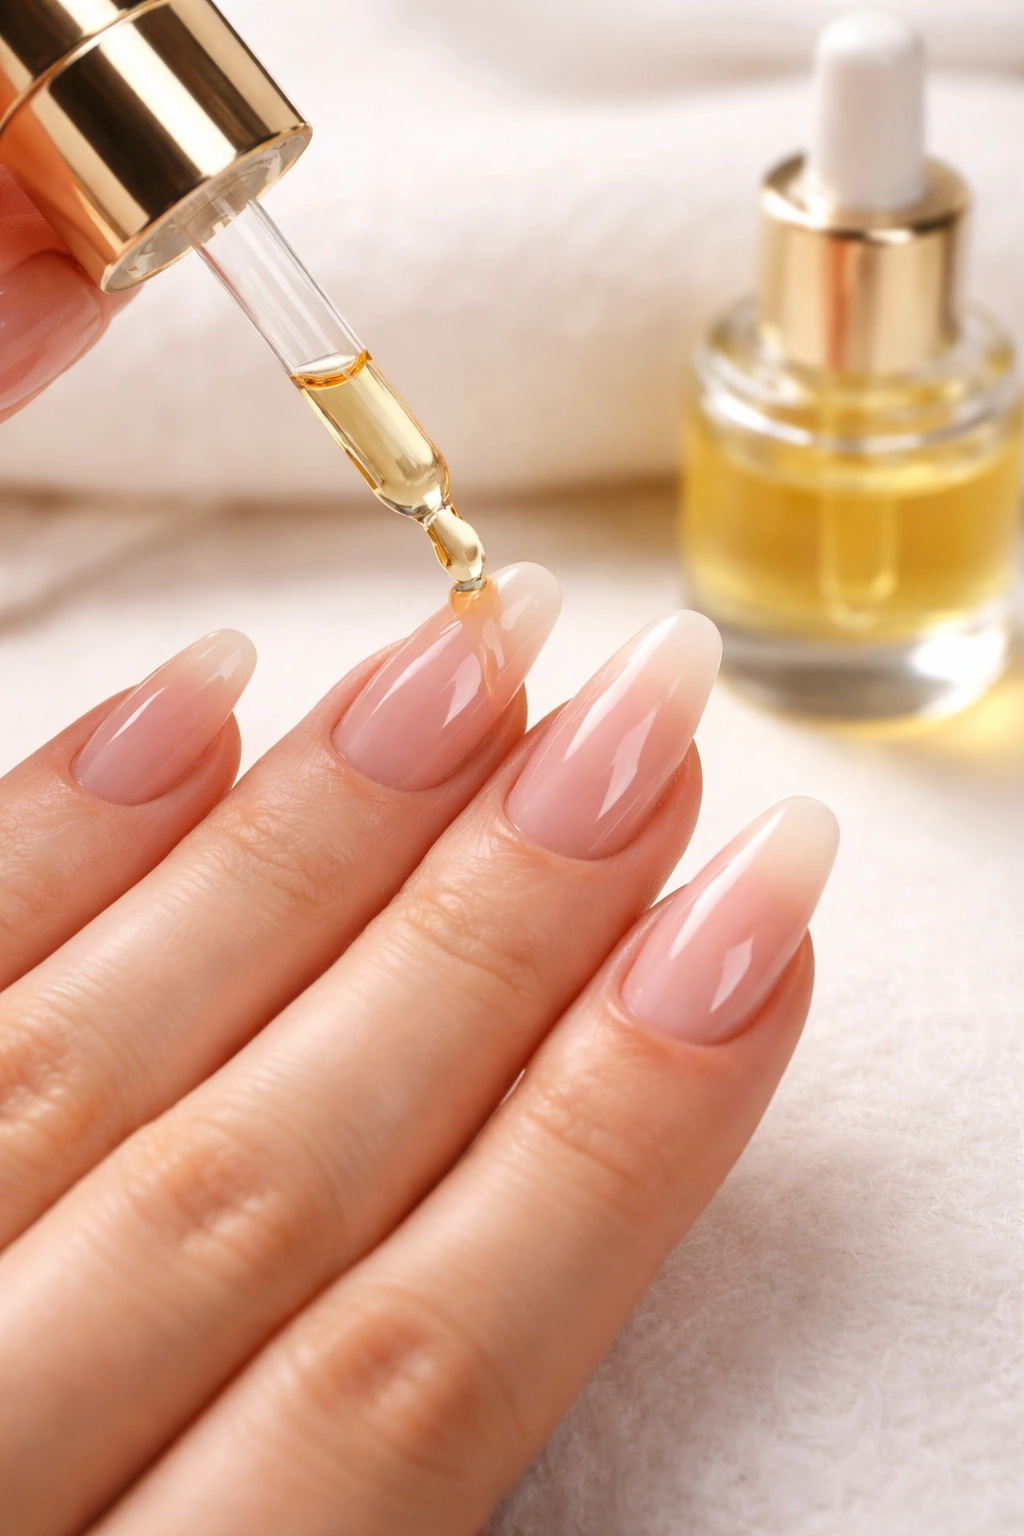
Finish by applying a small amount of cuticle oil to the cuticle area of each nail and rubbing it in with your fingertip. This hydrates your cuticles and gives your nails a polished, finished appearance. Your nails are now complete and ready to show off.
Common Beginner Mistakes and How to Avoid Them
Most beginners encounter similar challenges when first learning acrylic application. Knowing what these mistakes are means you can actively avoid them.
Over-application of product. New nail technicians often apply too much acrylic in one go, creating thick, lumpy nails that take forever to file smooth and look unnatural. Remember: it’s easier to add more product than to remove it. Start with smaller beads and build up gradually. Thin, even layers look more professional than one thick layer.
Applying acrylic to the cuticle. Acrylic should sit on your nail, not on your skin. If you apply acrylic too close to or on top of your cuticle, it will feel uncomfortable, irritate your skin, and won’t last as long. Leave about 1mm of space between your cuticle and where the acrylic starts.
Using a brush that’s too wet or too dry. The brush balance is critical. If it’s too wet, your bead will be runny and hard to control. If it’s too dry, it will be clumpy and won’t spread smoothly. Practice creating beads on a paper towel until you develop consistency.
Skipping primer or dehydrator. This is the fastest way to guarantee lifting and separation. No matter how carefully you apply the acrylic, it won’t stick if your nail isn’t properly prepped. Never rush this step.
Working in a poorly ventilated space. Acrylic fumes are genuinely unpleasant and potentially harmful with prolonged exposure. Open a window, use a fan, or work near an air purifier. Your health is worth it.
Pressing too hard while brushing. Aggressive brushing distorts the acrylic bead and creates an uneven surface. Use gentle, directional strokes and let the acrylic’s natural properties do some of the work.
Not letting acrylic cure fully before filing. File too early, and you’ll distort the shape and create an uneven surface. Wait for that distinctive click sound when you tap the nail.
Maintaining Your Acrylic Nails Between Fills
Your acrylic nails will last two to four weeks depending on how fast your natural nails grow. Every two to three weeks, you’ll need a fill-in appointment or maintenance session. During a fill, a nail technician (or you, if you’re doing it yourself) applies fresh acrylic to the gap that’s appeared between your cuticle and the acrylic as your natural nail has grown.
To do a fill yourself, you’ll follow a similar process to your initial application, but you’ll use an e-file or hand file to blend the seam between your old acrylic and your natural nail. It’s trickier than a full set because you’re working with less real estate, so take your time.
Between fills, care for your nails by keeping them dry (excessive water exposure softens acrylic over time), wearing gloves when doing dishes or cleaning, and avoiding using your nails as tools to open packages or scrape stickers. Apply cuticle oil daily to keep your cuticles healthy and hydrated. This makes your nails look better and prevents the natural nail underneath from becoming too dry and brittle.
Removing Acrylic Nails Safely: Don’t Rush This
When you’re ready to remove your acrylic nails—whether because you want a break or because they’ve grown out too much—do it properly. Never peel, pick, or forcefully pull acrylic nails off. This tears away layers of your natural nail and can cause serious damage that takes months to recover from.
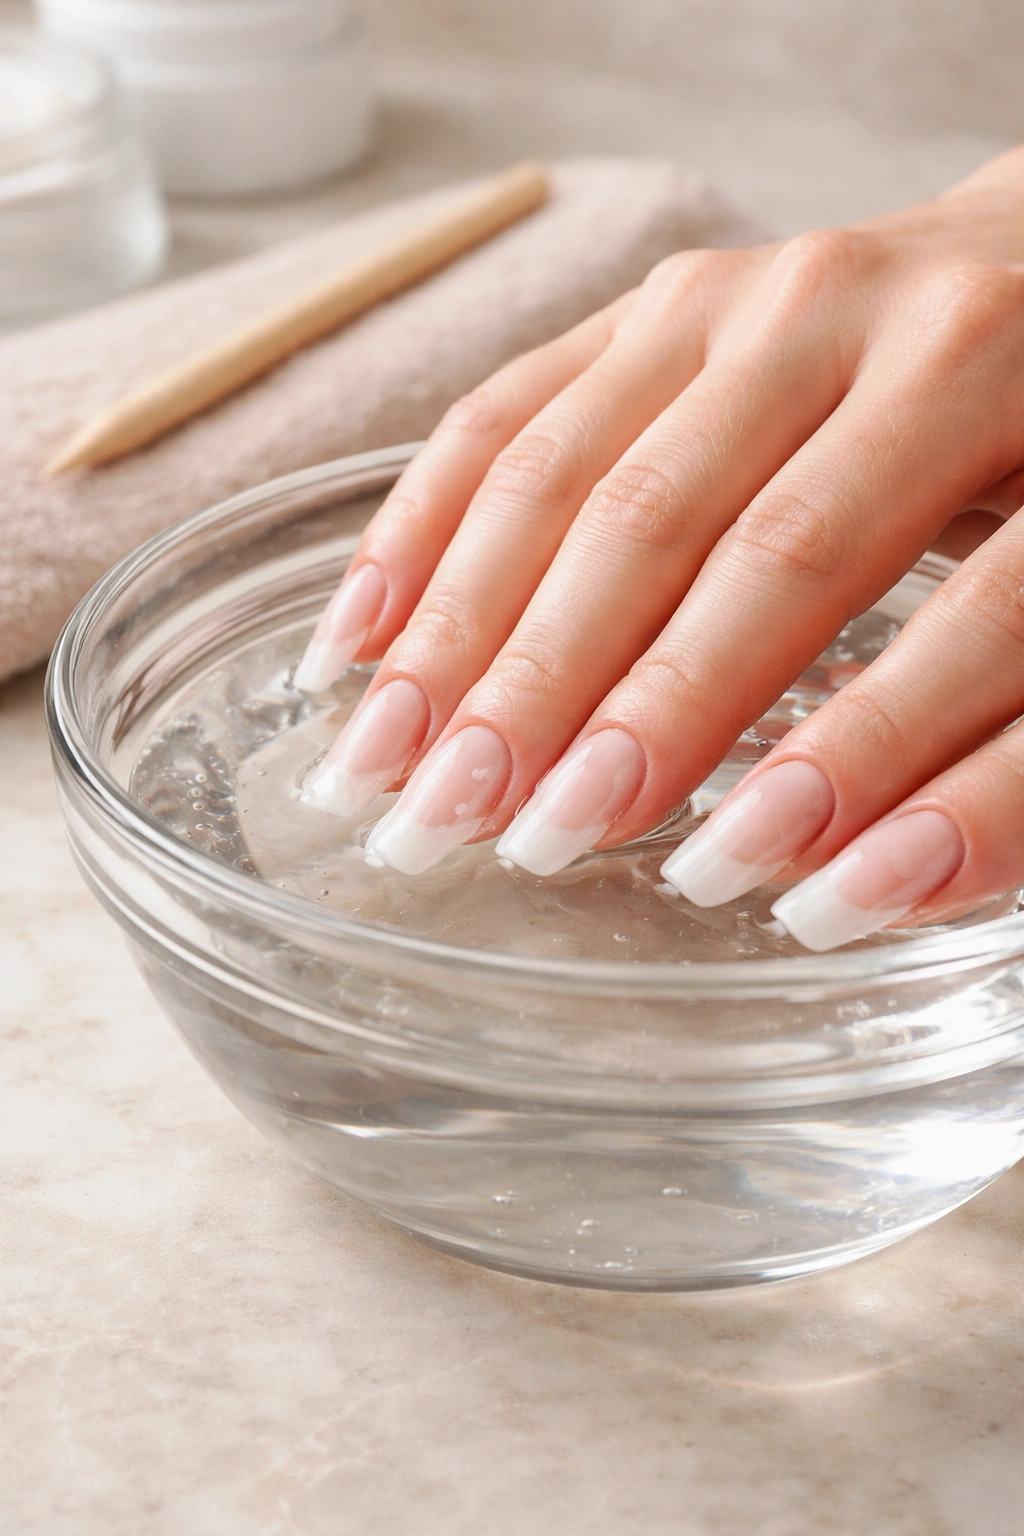
The safest removal method is acetone soaking. File down the top surface of the acrylic (being very careful not to file your natural nail), then soak your nails in a bowl of pure acetone for 15 to 20 minutes. The acrylic will begin to soften and lift. Use a cuticle pusher or wooden stick to gently ease the softened acrylic away from your natural nail. If it’s not lifting easily, soak longer—patience is critical here.
Once removed, your natural nails will look thin and possibly discolored. This is temporary. Apply cuticle oil generously, keep your nails trimmed short, and avoid applying more acrylic for at least a week or two (ideally longer). Give your natural nails a break to recover and rebuild their strength.
Final Thoughts
Learning to do acrylic nails at home is a skill that rewards patience and practice. Your first set might not be perfect—the acrylics might be slightly lumpy, the shape might not be exactly what you wanted, or they might lift sooner than expected. That’s completely normal. Each attempt teaches you something, and by your third or fourth set, you’ll start seeing noticeable improvement.
The financial savings alone make this worth pursuing, but there’s something deeper too: the satisfaction of creating something beautiful with your own hands and the confidence boost that comes with self-sufficiency. You’ll never look at someone’s perfectly manicured nails the same way once you understand the skill and attention that goes into them.
Start with high-quality supplies, invest time in proper nail prep, and don’t rush the application process. Practice your bead technique before committing to your nails. Watch tutorial videos, ask questions in nail enthusiast communities online, and remember that professionals didn’t get good overnight either. You’ve got this, and gorgeous at-home acrylics are absolutely within reach.
