

No matter how obsessed you are with hand hygiene, that dark line of grime lurking beneath your fingernails has probably caught you off guard. You wash your hands regularly, you keep them moisturized, and yet—there it is, a stubborn accumulation of dirt that somehow manages to persist despite your best efforts. Here’s the thing: cleaning under your nails isn’t just a cosmetic concern. That grimy underbelly is actually a breeding ground for bacteria, fungi, and other pathogens that can easily transfer to your face, food, and other people. Research shows that all 20 college students tested carried bacteria under their nails, including Staphylococcus and Pseudomonas—organisms that can cause genuine health problems if they get into cuts, eyes, or your mouth.
The good news? Once you understand what’s actually happening under there and learn the right techniques, keeping your nails pristine becomes remarkably straightforward. This isn’t about obsessive scrubbing or using harsh tools that damage your nail bed. It’s about working with your nails, not against them. The most effective approach combines proper daily habits with targeted deep-cleaning techniques when needed. You don’t need expensive products or professional equipment—just knowledge, the right tools, and a consistent routine.
What’s Really Accumulating Under Your Nails
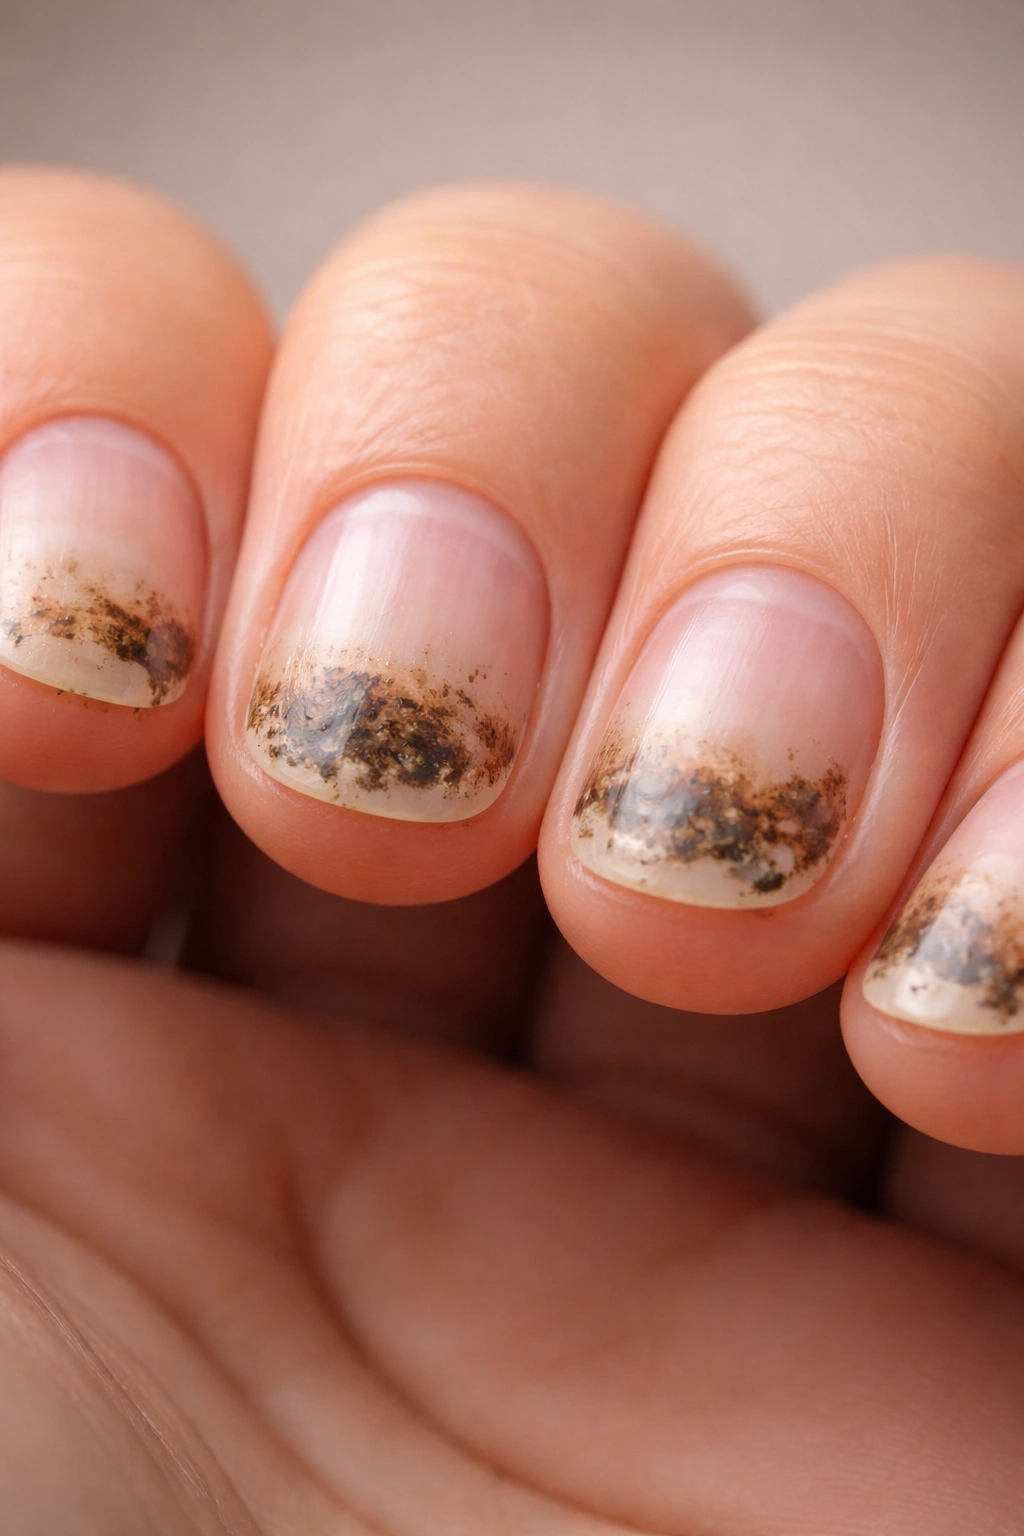
Your fingernails are made primarily of keratin, a protein that also forms the outer layer of your skin. When keratin debris and skin cells naturally shed underneath your nail, they accumulate in that dark space and turn grayish when they come into contact with dirt and oil. Think of it as a perfect storm of ingredients: the structural material of your nail itself, combined with daily environmental exposure, plus personal care products like lotion residue and soap buildup.
But it’s not just inert dirt. Personal care products regularly migrate under your nails—when you apply moisturizing cream to your hands, some of it inevitably gets trapped in that undersurface area. Makeup, if you use your hands near your face, also finds its way underneath. If you work with your hands (gardening, mechanic work, cooking, or even just dipping your fingers into snack bags), you’re adding soil, grease, food particles, and other visible debris into the mix.
The real concern emerges when that buildup changes color to greenish or dark brown. A greenish tint usually signals bacterial growth, which can progress to infection—particularly for people wearing artificial nails like acrylics or gel manicures. These longer, artificial extensions create micro-openings and trap moisture, making them perfect environments for bacterial colonies to establish themselves. Acrylic and gel nails carry substantially higher infection risk than natural nails because of these structural factors.
Why Cleaning Under Your Nails Matters More Than You Think
It’s tempting to dismiss grimy nails as just a vanity issue. That assumption misses the genuine health implications entirely. Your hands are constantly in contact with your face, your food, and other people. Every time you rub your eyes, touch your mouth, or eat with your hands, you’re creating a direct pathway for pathogens living under your nails to reach mucous membranes where they can cause infection.
Bacteria aren’t the only concern. Fungal pathogens—particularly dermatophytes—commonly hide under nails and can cause onycholysis (nail separation from the nail bed), nail thickening, discoloration, and increased brittleness. Pinworm infections, a parasitic condition spread through the fecal-oral route, can also develop from neglected nail hygiene. This isn’t hypothetical: these infections are preventable through basic nail care, which makes skipping this step a genuine health risk, not just an aesthetic oversight.
Healthcare workers, food handlers, and caregivers face even greater responsibility because they’re transmitting pathogens to vulnerable populations. But even if you work in a low-risk environment, maintaining clean nails reduces your baseline infection risk across the board. Clean nails also look noticeably better—you’ll present a more polished appearance and feel more confident about your hands.
The Foundation: Proper Hand Washing Technique

Before you reach for any specialized tools, you need to master basic hand washing—specifically, the parts most people skip. Lukewarm water works better than hot water for nail cleaning because it loosens debris without overdrying your skin. Hot water can make nails brittle and cuticles flaky, actually making your nails more vulnerable to damage.
Start by wetting your hands completely, then point your fingertips downward so water flows underneath your nails and flushes out loose particles. This directional washing matters—if you hold your hands palms-up, dirty water just runs back off without actually cleaning under the nails. Work soap under your nails using the pads of your fingers, creating friction that dislodges surface dirt. Wash for at least 15-30 seconds total—this duration actually matters for pathogen removal.
Dish soap outperforms regular hand soap for nail cleaning because it cuts through oils and grease more effectively. That’s exactly what you need when dirt is bound to oily residue under your nails. Antibacterial soaps provide extra protection, though the difference is modest if you’re using proper technique. The soap itself kills germs, while the water rinses them down the drain. Alcohol-based hand sanitizers, by comparison, are less effective at removing visible dirt and actually weaken your nails over time.
When rinsing, direct water downward from wrist to fingertips so dirty water doesn’t pool and run back under your nails. Pat your hands dry—don’t rub them—because excess moisture softens nails and can lead to breakage. Make this part of your routine after every single hand wash, not just occasionally. Consistency is what creates actual change in nail appearance and health.
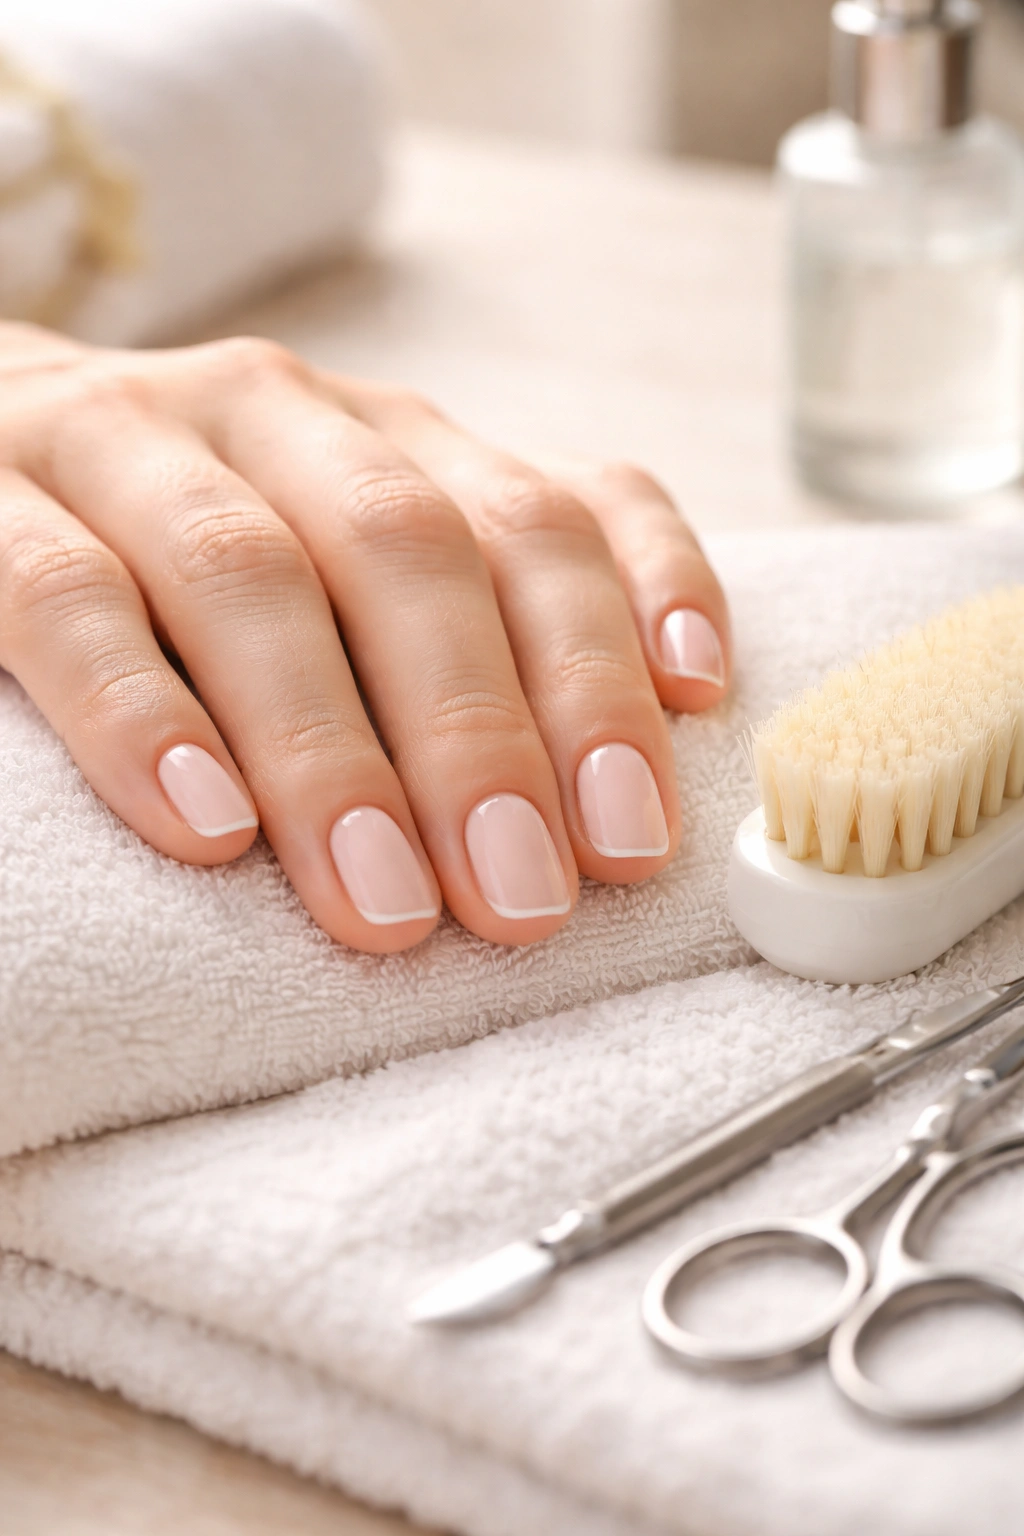
Using a Nail Brush for Daily Maintenance
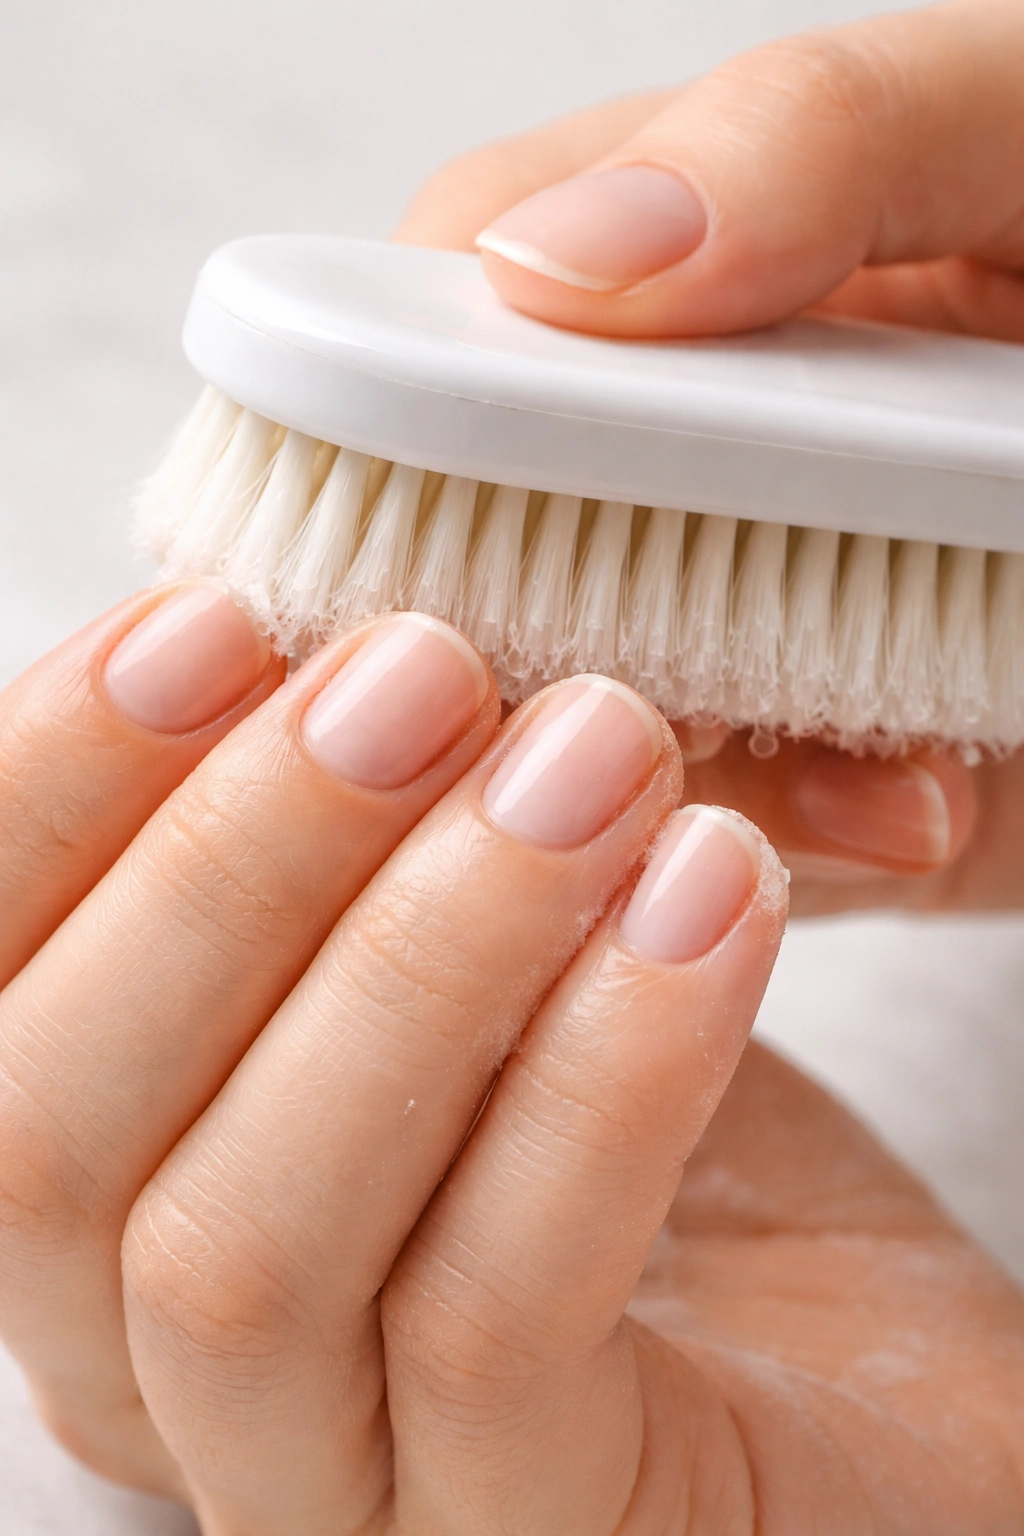
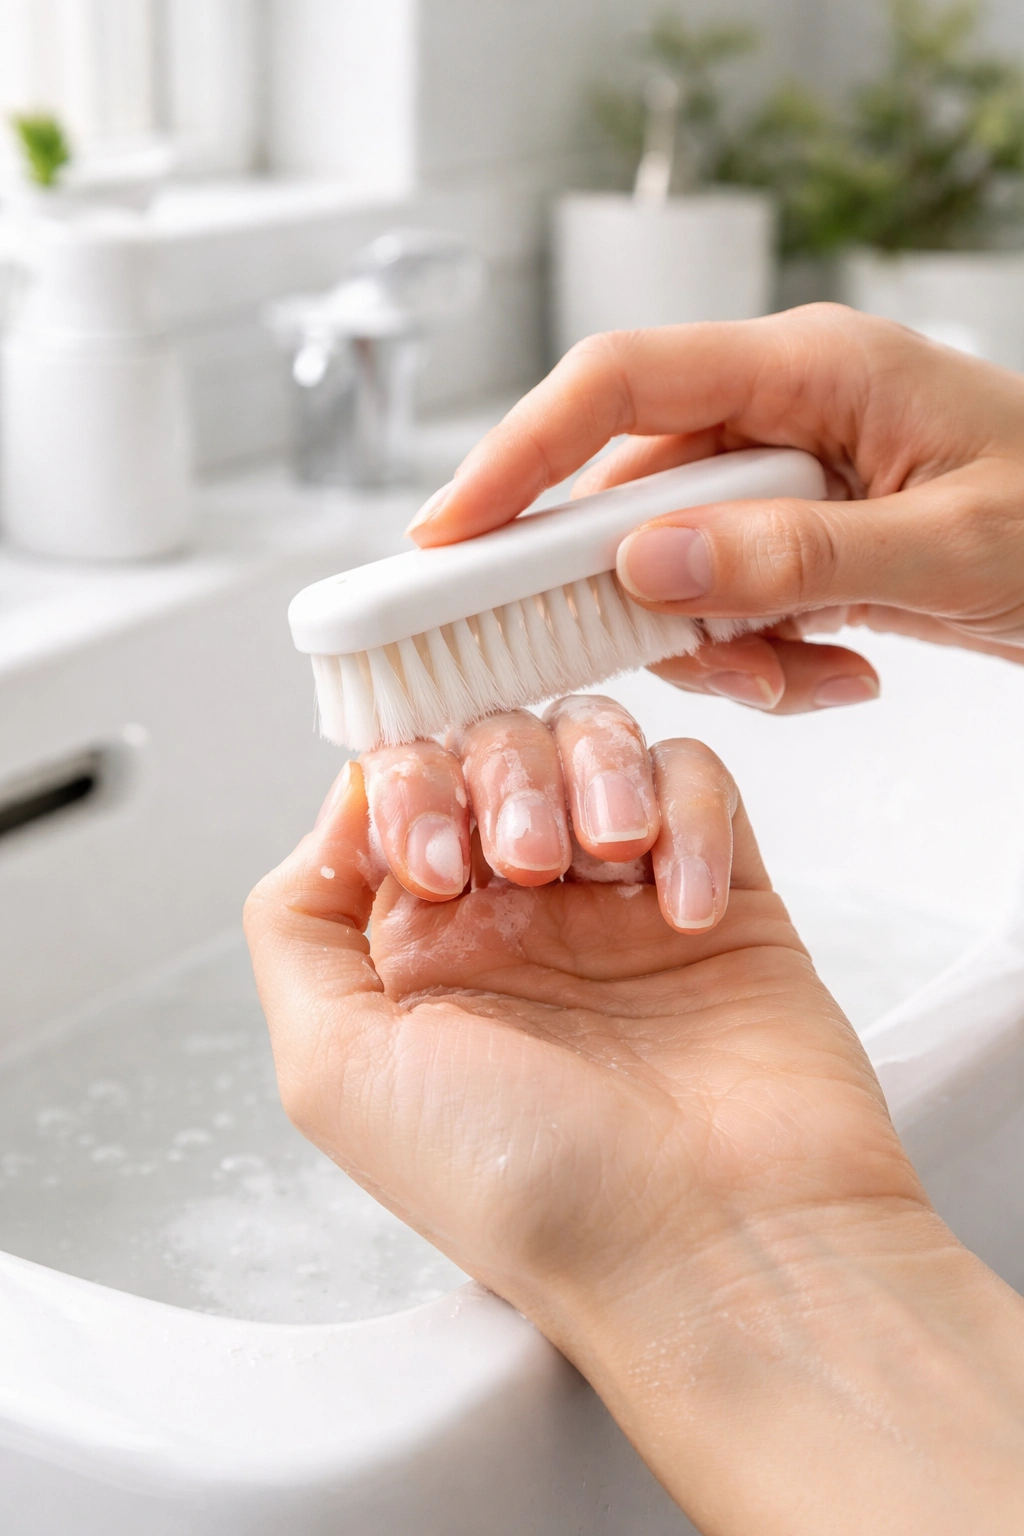
A good nail brush is perhaps the single most effective tool for regular under-nail cleaning. Unlike metal scrapers or pointed instruments that risk damaging the delicate skin underneath your nail, a soft-bristled brush cleans effectively without injury. A dedicated nail or manicure brush works best, but a new, unused toothbrush is a perfectly acceptable substitute.
Choose a brush with soft to medium-firm bristles—extra-soft if you have sensitive nails or fragile skin. Small, ergonomic handles make maneuvering easier. Natural bristle brushes provide gentle cleaning and dry quickly, while synthetic brushes are more durable and better at removing stubborn debris. Aim to keep separate brushes for daily maintenance and for deep-cleaning sessions, since the latter involves more aggressive scrubbing.
The technique matters more than the tool. Wet your brush with warm water and add a small amount of antibacterial soap or hand wash. Hold the brush at a 45-degree angle toward your fingertips, then use short side-to-side motions. Gentle pressure is the key—you want to clean, not gouge. Push the bristles under your nail and scrub back and forth along the undersurface. If you’re brushing multiple nails at once, move systematically from pinky to index finger so you don’t miss any.
It’s substantially easier to clean under your nails when they’re freshly softened by water, which is why the shower is an ideal time for this maintenance. Your hands are already wet, the warm water has softened any debris, and you’re in a natural rhythm with hand washing. After brushing, rinse thoroughly with clean water and dry your hands completely.
Crucially, rinse your nail brush after every use and allow it to air-dry with bristles facing down. Replace your brush every 3-4 months—bristles degrade over time and can actually start harboring bacteria rather than removing it. This might seem obsessive, but nail brush maintenance directly impacts effectiveness.
The Orange Stick Method for Precise Cleaning
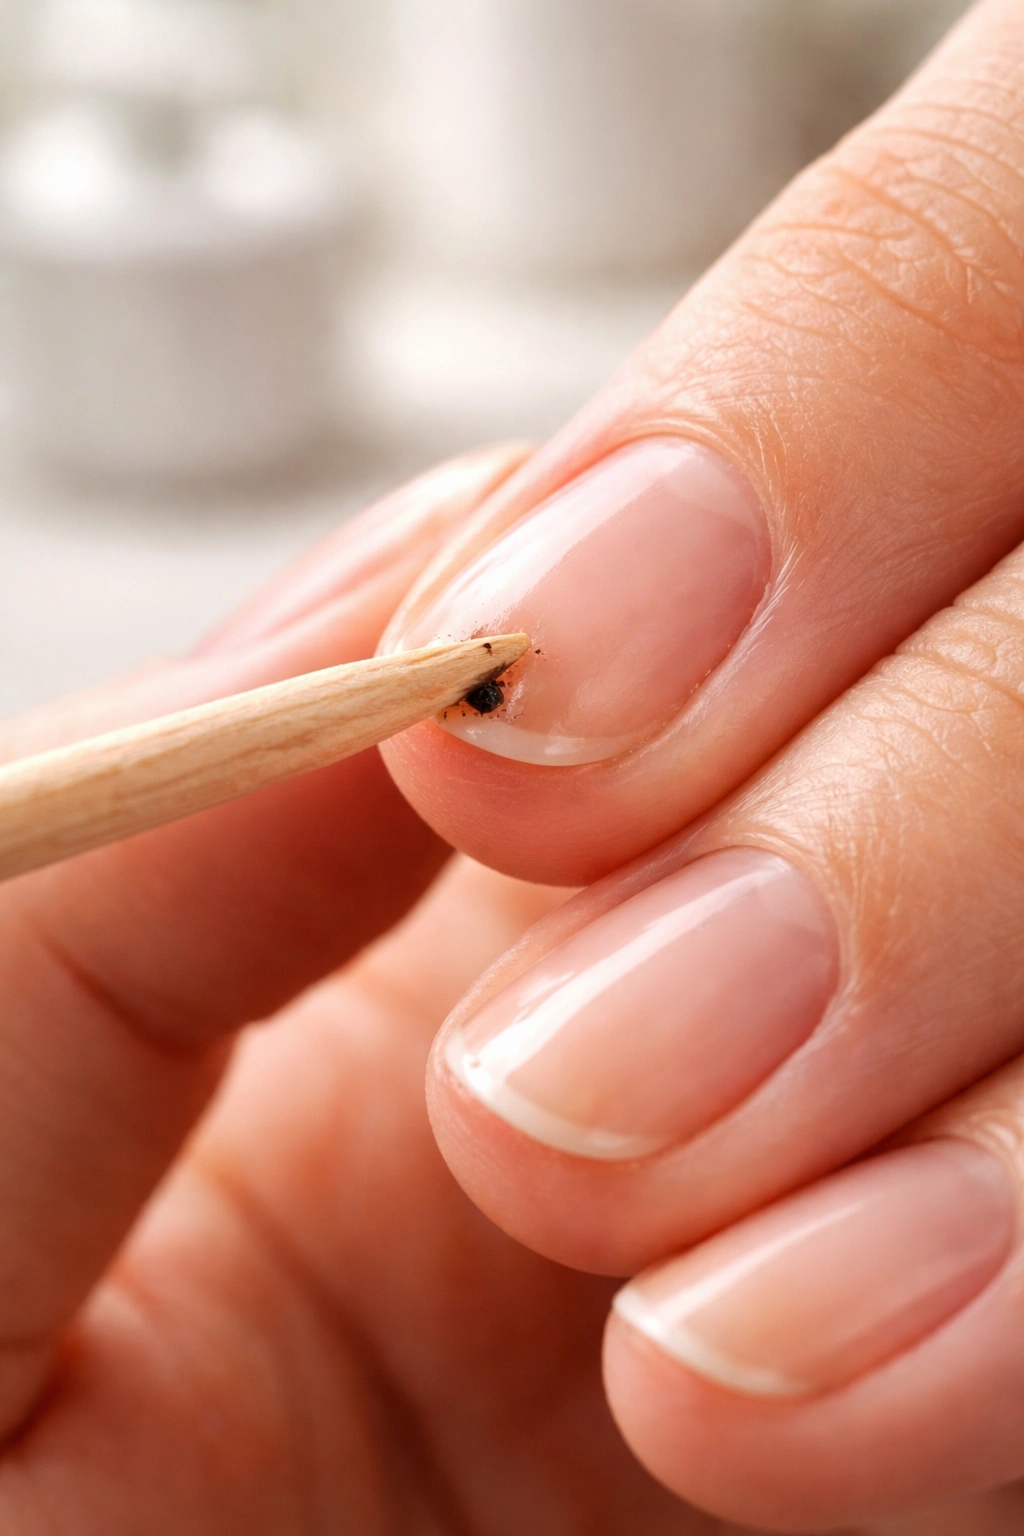
An orange stick is a wooden tool with a pointed end on one side and a sloping flat edge on the other—almost like a tiny flat-head screwdriver for your nails. It’s explicitly designed for this purpose and works remarkably well when used correctly. The flat edge is generally safer than the pointed end because you have better control and less risk of accidentally breaking the sensitive skin under your nail.
Always start with clean, dry hands. It’s substantially easier to remove dirt from underneath your nails when they’re dry rather than soft from washing. Good lighting matters too—bathroom lighting allows you to actually see what you’re doing. Gently press the edge of the orange stick under your nail, being exceptionally careful not to separate the skin from the nail bed. If you do that, you create a pocket that traps moisture and bacteria, making infection more likely.
Starting at one corner of your finger, gently insert the edge of the stick. Press down until you feel resistance from your finger—don’t force it deeper. Slide the orange stick from corner to corner, pushing out dirt as you go. Wipe the debris onto a napkin between passes. Continue until the orange stick comes away clean, indicating you’ve removed everything loose underneath.
The pointed end can work if you’re extremely careful, but most people find the flat edge safer and more effective. Some people wrap the end of their orange stick with a small piece of cotton for gentler cleaning, particularly for sensitive nails. Consider replacing wooden orange sticks regularly since they can harbor bacteria in tiny cracks and grooves. Avoid using pencils—the lead will stain your nails and won’t actually clean effectively.
Tackling Stubborn Buildup with Apple Cider Vinegar
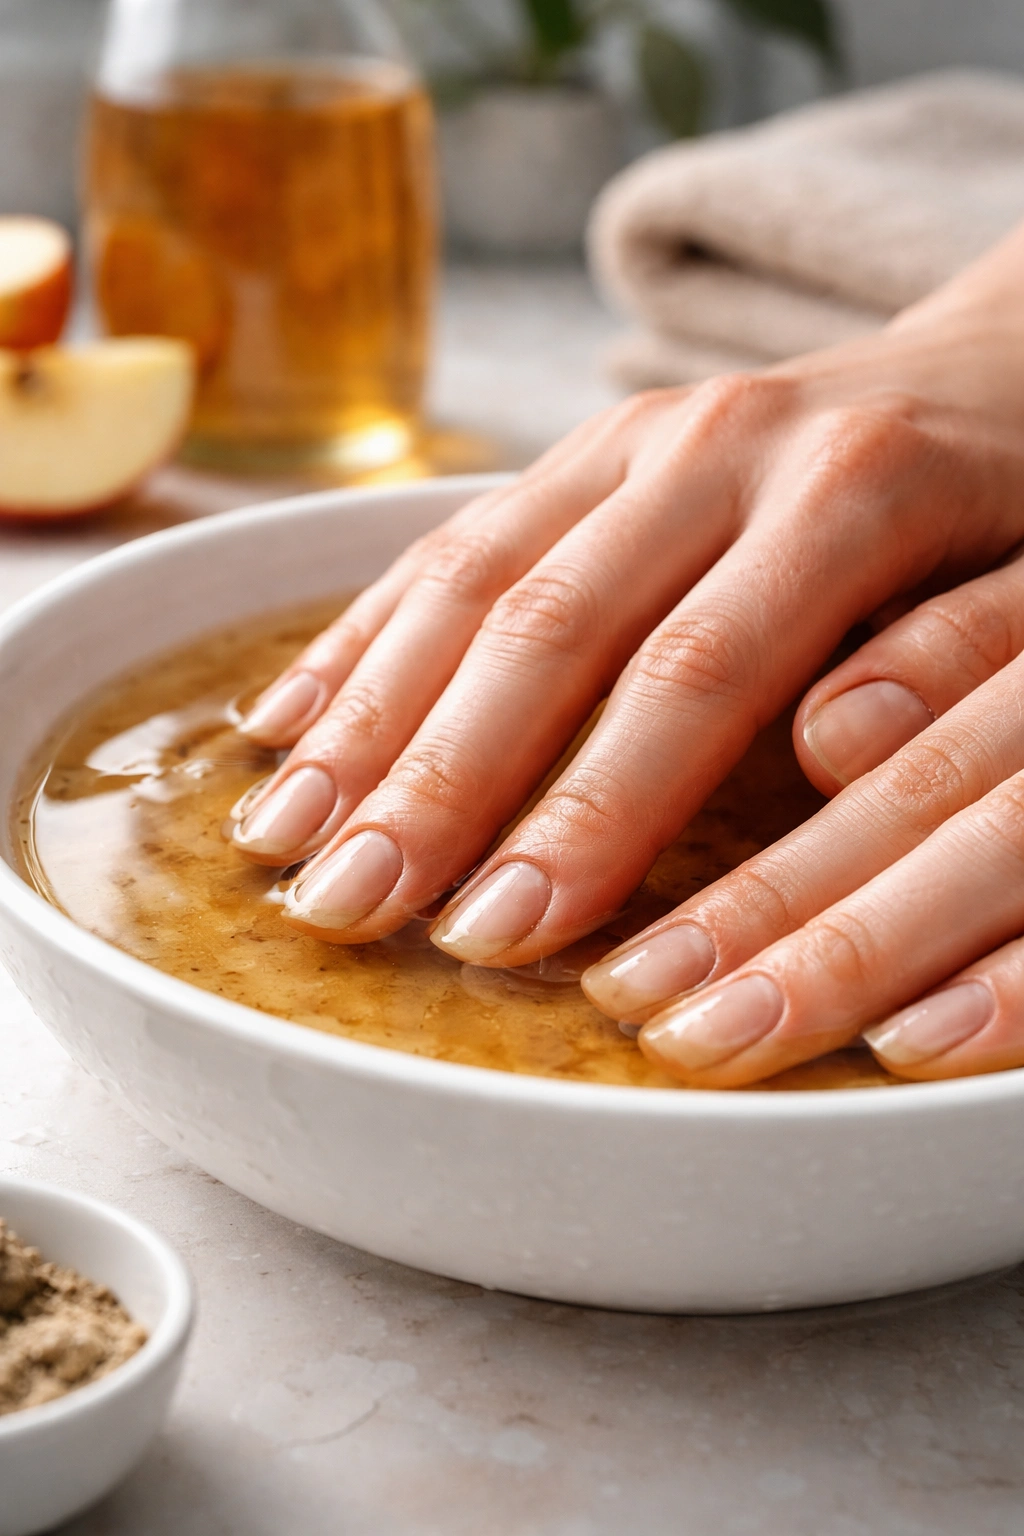
When regular washing and brushing don’t fully address discoloration or stubborn debris, apple cider vinegar is remarkably effective. Apple cider vinegar is rich in malic and acetic acids, which have documented cleansing and anti-fungal properties. These acids help whiten nails, prevent infection, and break down stubborn grime that soap alone might miss.
Mix equal parts apple cider vinegar and clean water in a bowl. Don’t skip diluting it—undiluted vinegar can irritate sensitive skin and overly dry your nails. Soak your fingertips in the mixture for 15-20 minutes. During this time, the acids soften and loosen debris, making it easier to remove. After soaking, use a soft brush to gently scrub under your nails. The loosened dirt comes away much more easily than it would without the soak.
You’ll likely notice your nails looking brighter and cleaner after this treatment. The lightening effect is genuine, not just visual trickery—the vinegar is actually removing stain compounds and whitening agents are doing their work. Use this method once or twice weekly for maintenance, or more frequently if you’re dealing with significant discoloration.
One important note: If you have cuts or irritated skin on your hands, dilute the vinegar with even more water to prevent stinging. Always rinse thoroughly with clean water afterward and apply a good hand moisturizer, since vinegar can dry your skin out somewhat. Don’t use vinegar soaks if you have extremely delicate or sensitive nails—it might be too harsh for your nail structure.
Creating a Whitening Paste with Baking Soda
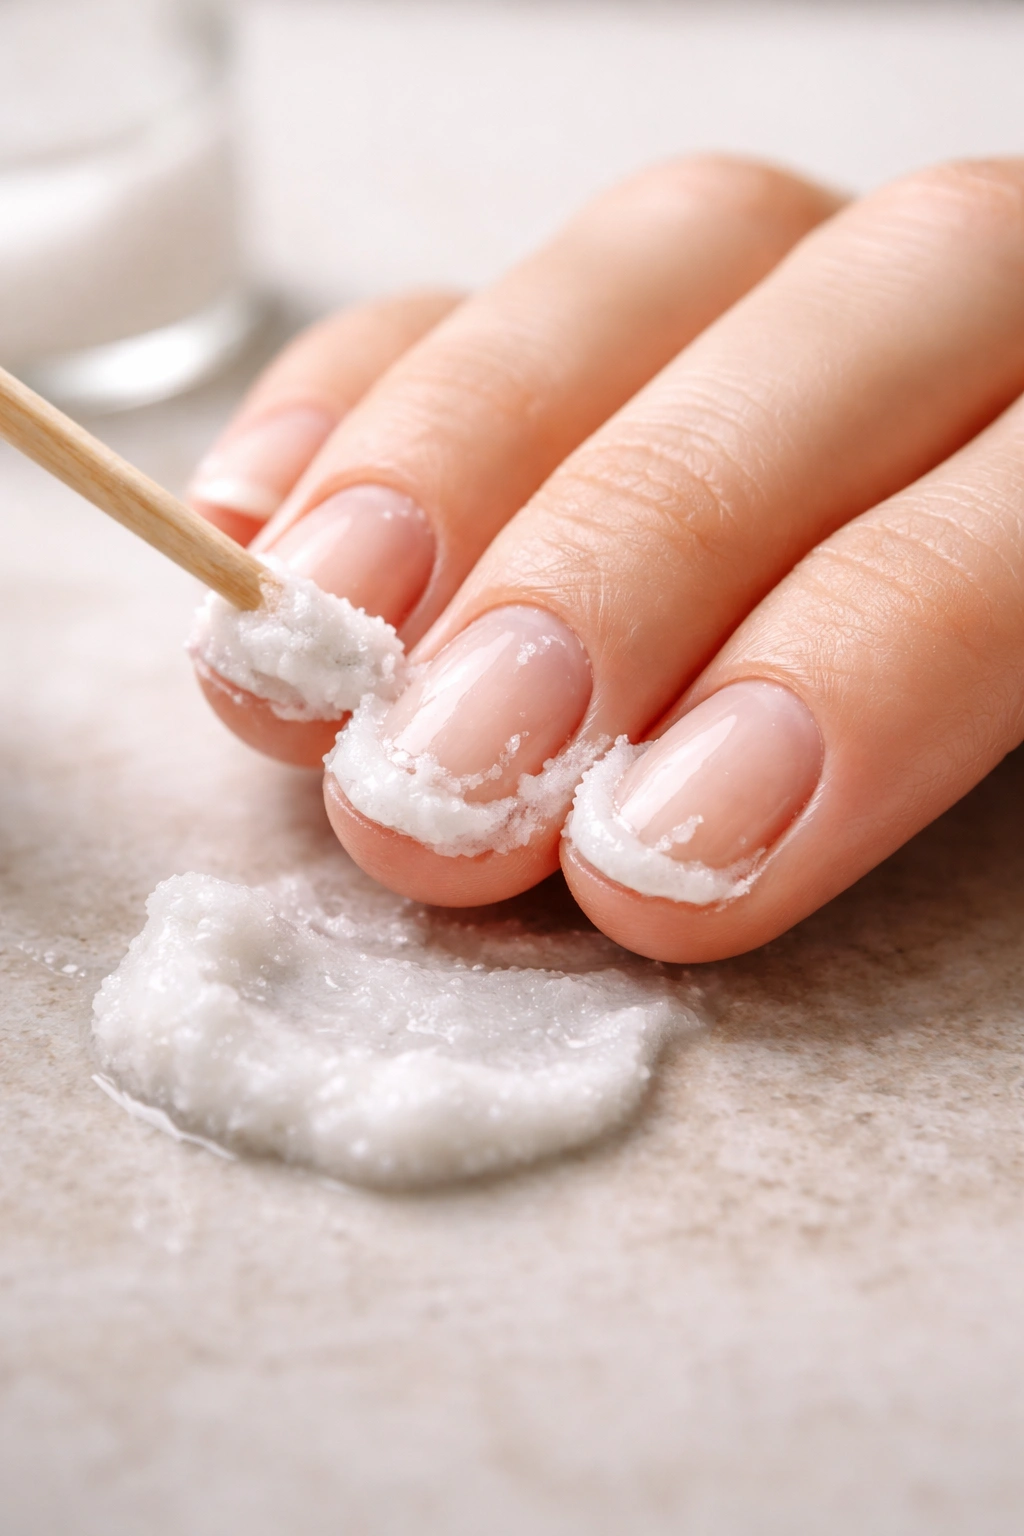
Baking soda forms a gentle abrasive that removes stubborn grime without harsh chemicals. This method works particularly well when combined with hydrogen peroxide, which has mild bleaching properties that help restore nail whiteness. Mix one tablespoon of baking soda with enough water to create a thick paste—you want it to be spreadable but not runny.
Apply the paste under your nails with an orange stick or an old toothbrush. Let it sit for 1-2 minutes so the gentle abrasiveness can work on stuck-on debris. Gently scrub in circular motions, focusing on the undersides where discoloration lives. The paste will break down and loosen stubborn dirt without the aggressive scraping that can damage your nail bed.
For extra cleaning power, add a few drops of hydrogen peroxide to your baking soda paste. Hydrogen peroxide is a mild disinfectant that kills bacteria while the baking soda mechanically removes the debris. Let this stronger mixture sit for up to 5 minutes before scrubbing. After you finish, rinse thoroughly with warm water to remove all the paste residue.
Your nails will look noticeably cleaner and brighter after this treatment. Use baking soda paste once weekly for maintenance, or more frequently if you’re working through significant discoloration. This method is gentler than commercial whitening products and avoids harsh chemicals altogether—a genuine win if you prefer natural approaches.
Using Lemon Juice for Natural Whitening
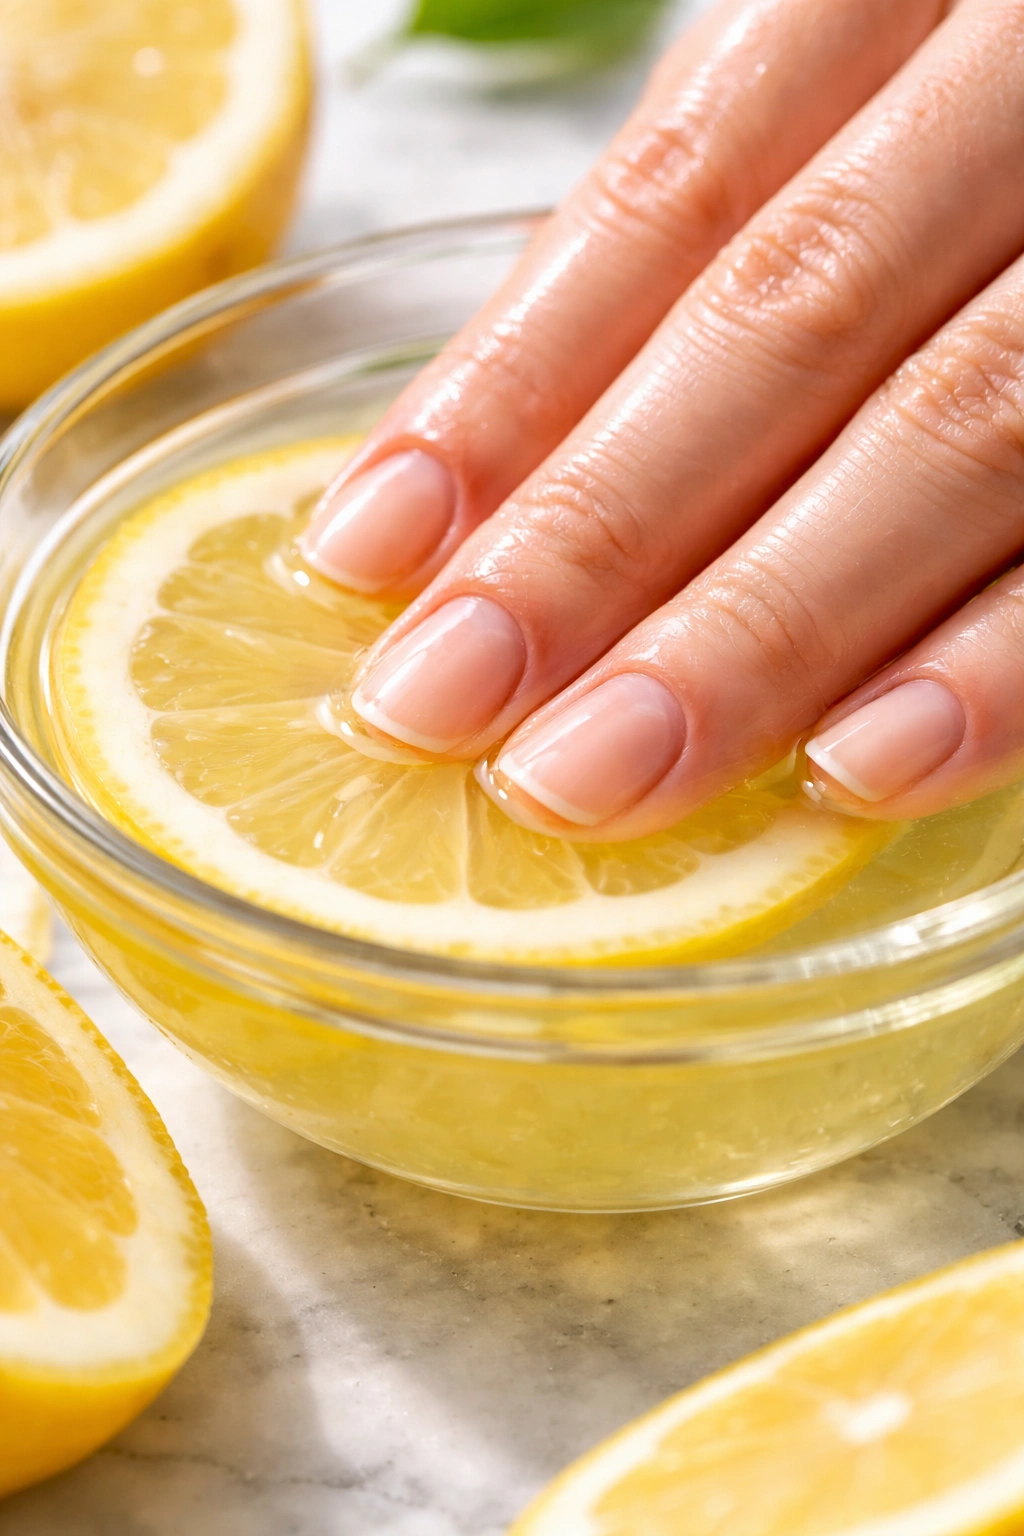
Lemon juice offers another natural solution that leverages citric acid to whiten and cleanse. Cut a fresh lemon in half and squeeze the juice directly into a bowl. You can use bottled lemon juice if fresh isn’t available, though fresh is marginally more effective. Avoid adding water to pure lemon juice—you want the full concentration of citric acid for maximum effect.
Soak your fingertips in the lemon juice for 5-10 minutes. The acid breaks down stubborn dirt and helps eliminate bacteria while simultaneously brightening yellowed nails. After soaking, use a soft brush to gently scrub under your nails. The loosened dirt comes away cleanly. Lemon juice can lighten stains from dark nail polish or tobacco and restore nails to their natural brightness.
If you have cuts or sensitive skin, dilute the lemon juice with water. Undiluted lemon juice can sting quite a bit on broken skin. Always rinse thoroughly with warm water afterward and immediately apply a good hand moisturizer. Lemon juice is mildly drying, so you want to counteract that moisture loss. Repeat this treatment once or twice weekly for maintenance.
The whitening effect from lemon juice is genuine—you’re not just removing surface stain, you’re actually lightening the nail through the action of the acid. This makes it particularly useful for people who regularly wear dark nail polish and notice yellowing underneath.
Avoiding These Common Cleaning Mistakes
Most people make predictable mistakes when cleaning under their nails, and these errors actually undermine your hygiene efforts rather than improving them. Never use metal tools if you can avoid it. Scissors, utility knives, or metal nail picks can scratch and damage the delicate skin underneath your nail. This creates tiny wounds where bacteria love to establish infections. Metal tools are also more likely to accidentally cut the skin, introducing pathogens directly into an open injury.
Don’t use excessive pressure or aggressive scraping motions. This isn’t about force—it’s about consistent, gentle technique. People often think harder scrubbing equals cleaner nails, when actually it just damages tissue. Your nail bed is delicate tissue, and you can permanently injure it by being too rough.
Buffing your nails too frequently is another common error. While some buffing is fine for smoothing ridges and creating shine, overdoing it thins your nails and makes them weak and brittle. Limit buffing to once or twice monthly at most. If you buff and file regularly, you’re accelerating nail weakening.
Another mistake is skipping tool sanitation. If you share nail tools with family members or use tools at a salon without knowing their cleaning protocols, you’re sharing pathogens. Always clean your tools with warm, soapy water, rinse well, and wipe with isopropyl alcohol before using them. This prevents bacterial growth and cross-contamination.
Finally, don’t neglect cuticles. Many people focus entirely on under-nail cleaning while ignoring the cuticle area. Cuticles protect your nail and the skin around it. Keep them hydrated with cuticle oil and never cut or pull at them. A dry, damaged cuticle is an invitation for infection.
Cleaning Toenails: Special Considerations
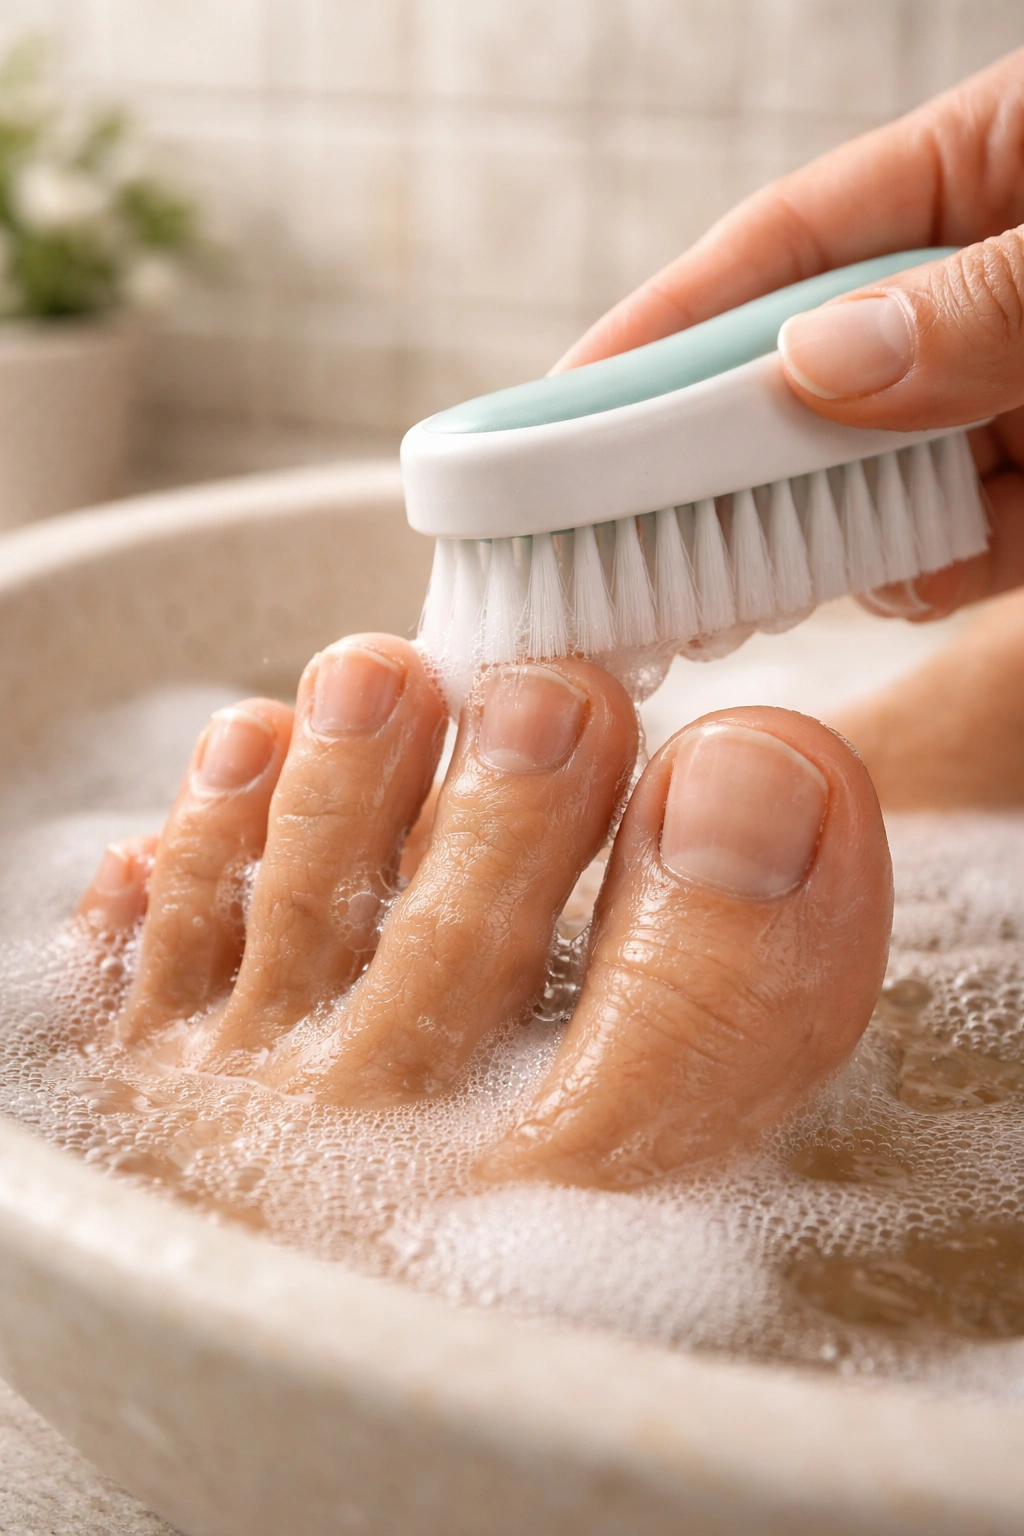
Toenails accumulate dirt differently than fingernails because your feet spend time in socks, shoes, and generally enclosed environments. Start with a foot soak in warm, soapy water for 10 minutes. This softens any stubborn debris and makes it easier to clean without aggressive scrubbing. A loofah, sponge, or washcloth helps you reach around toenails effectively.
After soaking, use a dedicated toenail brush with firm (but not harsh) bristles. Toenail brushes are typically sturdier than fingernail brushes because toenail debris tends to be more stubborn. Brush under and around each toenail, paying special attention to any discoloration or visible grime. Rinse completely with clean water.
Avoid using any sharp tools under toenails. The position makes it harder to control precision, and foot circulation is more sluggish than hand circulation, meaning infections take longer to heal if they do occur. Stick with soft brushes and gentle techniques. If you have chronic foot problems or difficulty reaching your feet, professional podiatrist care is genuinely worth considering.
Dry your feet thoroughly after cleaning. Moisture trapped under toenails encourages fungal growth, and fungi cause far more trouble with toenails than with fingernails. Some people find it helpful to place a towel on the ground and bunch it with their toes to dry between toenails. Apply lotion to feet and toenails, then allow it to dry completely before putting socks back on.
Maintaining Clean Nails Through Prevention
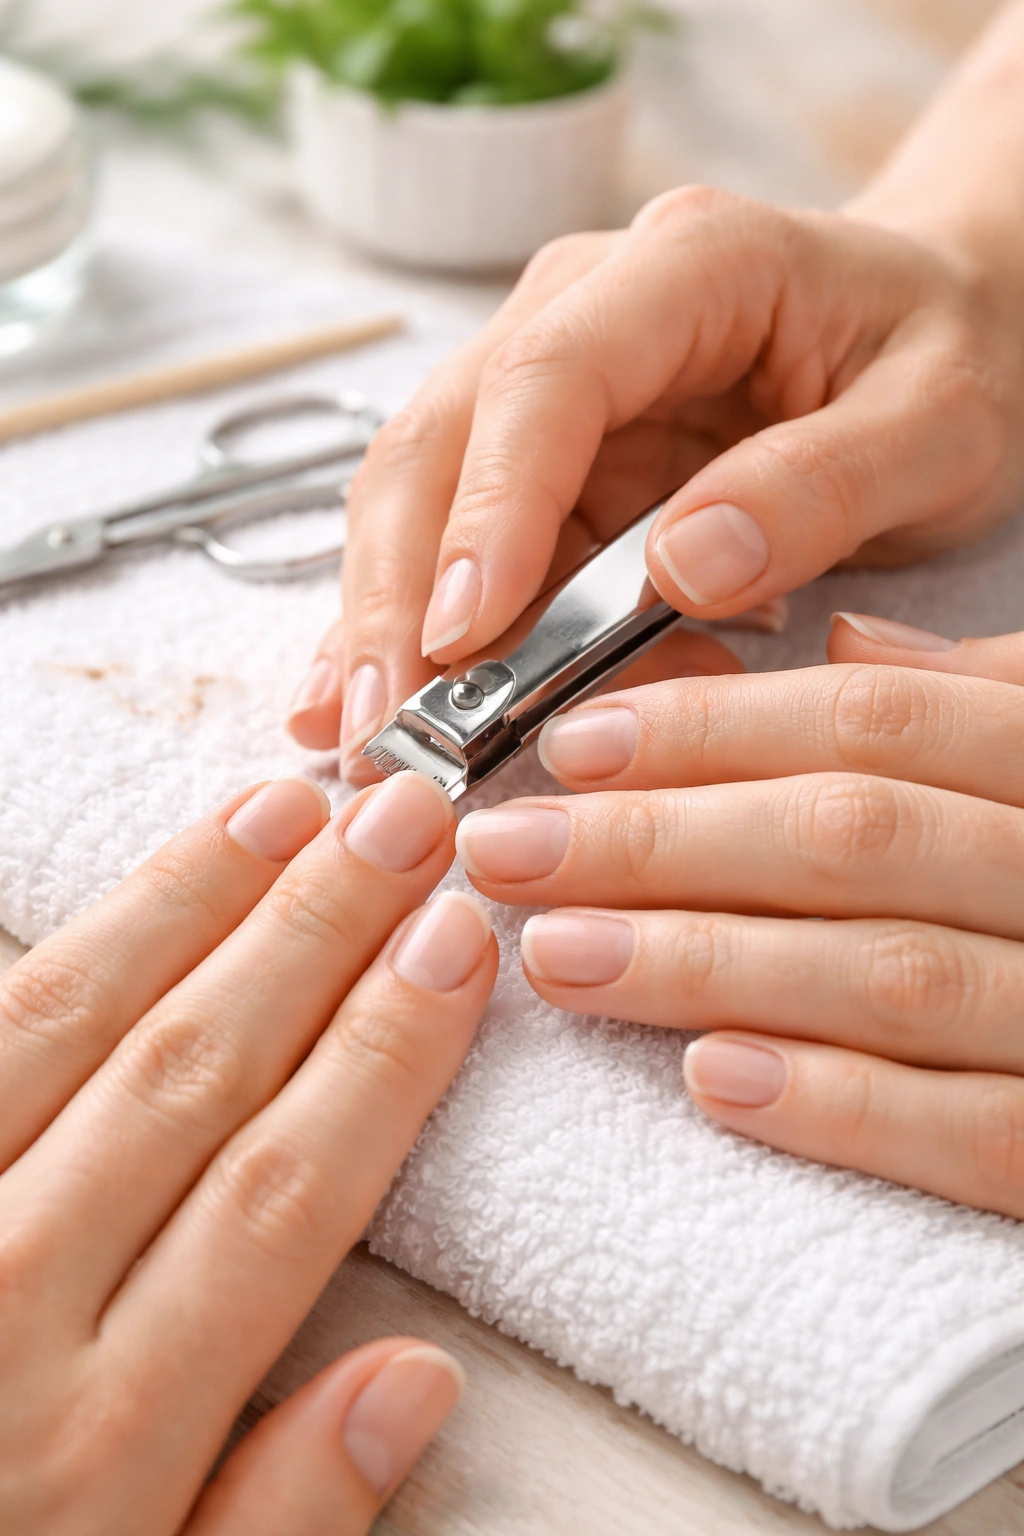
The easiest dirt is dirt you never collect in the first place. Keep your nails trimmed to a reasonable length. Shorter nails naturally collect less dirt because they extend less beyond your fingertips, creating fewer surfaces for grime to accumulate under. Trim nails every 1-2 weeks with proper nail clippers, cutting straight across rather than at angles. File smooth any rough edges that might catch dirt.
Wear gloves during activities that expose your hands to visible dirt—gardening, cleaning with harsh chemicals, cooking with staining ingredients like beets or turmeric, working on cars or machinery. Cotton-lined rubber gloves offer excellent protection without making your hands unbearably sweaty. Before removing gloves after dirty work, rinse them under running water to wash away surface dirt that might otherwise transfer to your nails.
If you don’t have gloves available, try this trick: dig your nails into a bar of white soap before doing messy work. This creates a protective barrier underneath your nails that actually prevents dirt from sticking. It sounds strange, but it genuinely works. After finishing the work, your nails wash clean along with the soap residue—the dirt comes away much more easily than it would have otherwise.
Wash your hands immediately after finishing dirty tasks rather than letting grime set in. The longer dirt sits under your nails, the more it compounds and hardens, making it harder to remove. Prompt washing is substantially more effective than delayed scrubbing.
Special Situations: Artificial and Gel Nails
Artificial nails create unique cleaning challenges because they’re longer, have micro-gaps, and often lift slightly from the nail bed. These factors create perfect conditions for bacteria and fungi to multiply. If you wear acrylics or gel nails, you should be more aggressive about cleaning under them than you would with natural nails.
Soak your nails in warm soapy water for 10-15 minutes to loosen debris thoroughly. Use a soft bristle brush with gentle motions—even though artificial nails are tougher than natural nails, the skin underneath is equally delicate. Try an orange stick wrapped in alcohol-soaked cotton for precision cleaning if standard brushing doesn’t fully remove debris.
Take regular breaks from artificial nails. Natural nails need recovery time to regain their strength. Give natural nails a break from polish and artificial overlays for 3-4 weeks once yearly. If you wear gel nails regularly, take a one-week break every 8 weeks. These breaks allow your nails to rehydrate and recover, significantly reducing infection risk.
If you notice any greenish discoloration under artificial nails, remove them immediately and see a healthcare provider. This is a sign of bacterial infection that requires professional attention rather than home treatment.
When to Seek Professional Help

Most under-nail dirt responds to home cleaning methods. However, persistent discoloration, thickened nails, excessive flaking, or visible separation from the nail bed all warrant professional evaluation. These symptoms can indicate fungal infections, bacterial infections, or other nail conditions that require medical treatment.
If you have diabetes, compromised immunity, or poor circulation, you should be extra cautious about nail injuries and more willing to seek professional care for persistent issues. These conditions slow healing and make infections more likely to become serious.
A dermatologist or podiatrist can determine whether discoloration is cosmetic staining or a genuine infection, and can provide appropriate treatment. Don’t assume home cleaning will fix problems that need medical intervention—getting professional assessment early is always the safer choice.
Final Thoughts
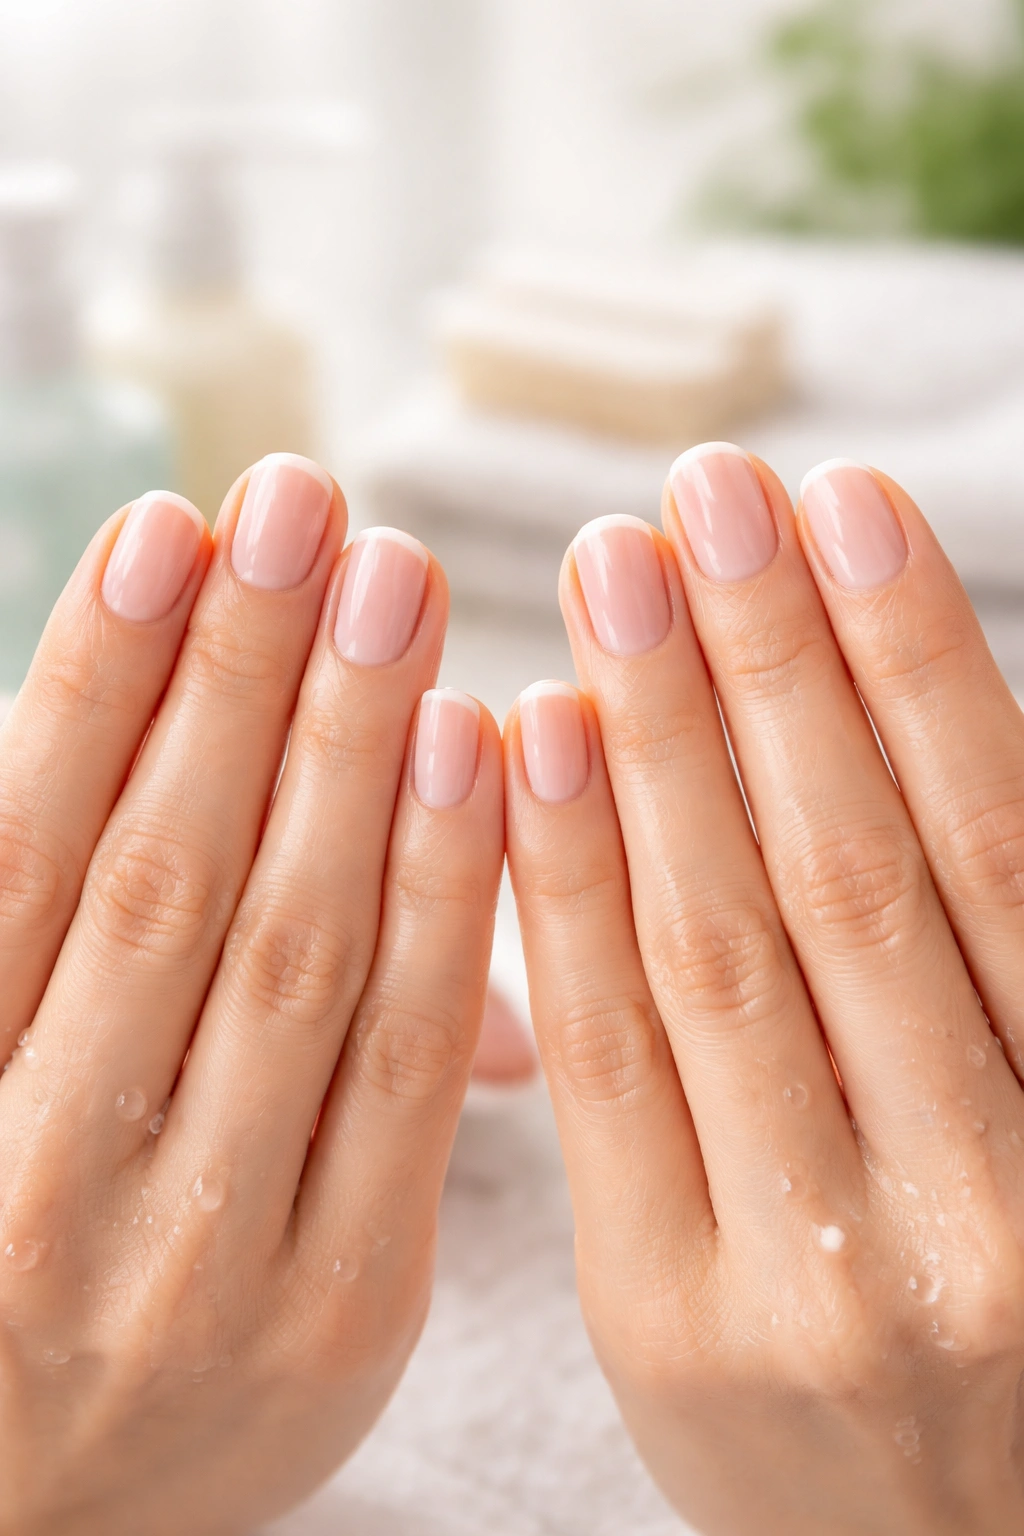
Clean nails are genuinely achievable through consistent, gentle technique rather than aggressive scrubbing or harsh products. The foundation is daily hand washing with proper attention to the undersurface—directing water downward, using soap under your nails, and drying thoroughly. Add a soft nail brush to your regular routine, use an orange stick when needed, and incorporate deep-cleaning methods like apple cider vinegar soaks or baking soda paste weekly.
The benefits extend beyond appearance. Clean nails reduce infection risk, prevent pathogen transmission, and actually make your hands look healthier and more polished. You’ll notice the difference not just in how your nails look, but in how they feel—stronger, more resilient, and genuinely clean.
Start implementing these techniques tomorrow, and within a few weeks you’ll see dramatic improvement. The key is consistency rather than intensity. Gentle, regular attention beats occasional aggressive cleaning every single time. Your nails—and your health—will thank you for the effort.
