

When you first hold a nail drill, it can feel like you’re gripping pure power—because you are. This seemingly simple tool spins at thousands of revolutions per minute, and in the wrong hands, it can cause serious damage to your nails, skin, and cuticles. But here’s the good news: with the right knowledge and approach, a nail drill becomes one of the most valuable tools in your at-home nail care arsenal. The difference between a nail tech who creates beautiful results and one who leaves clients with grooved, thinned nails isn’t talent—it’s understanding exactly how to handle the machine safely.
Most beginners make the same critical mistakes. They grip too hard. They press down instead of letting the rotation do the work. They hold the drill at the wrong angle. They use speeds designed for professionals on delicate natural nails. They linger in one spot too long and create friction burns. None of these errors have to happen to you if you learn the fundamentals before you power on.
This guide walks you through everything a beginner needs to know—not just the technical steps, but the mindset shift that separates safe, controlled drilling from reckless application. You’ll learn which speeds match which tasks, how to grip the handpiece for precision without fatigue, how to recognize when you’re about to cause damage, and how to practice without risk. By the end, you’ll understand not just what to do with a nail drill, but why each decision matters.
Understanding What a Nail Drill Actually Is and How It Works
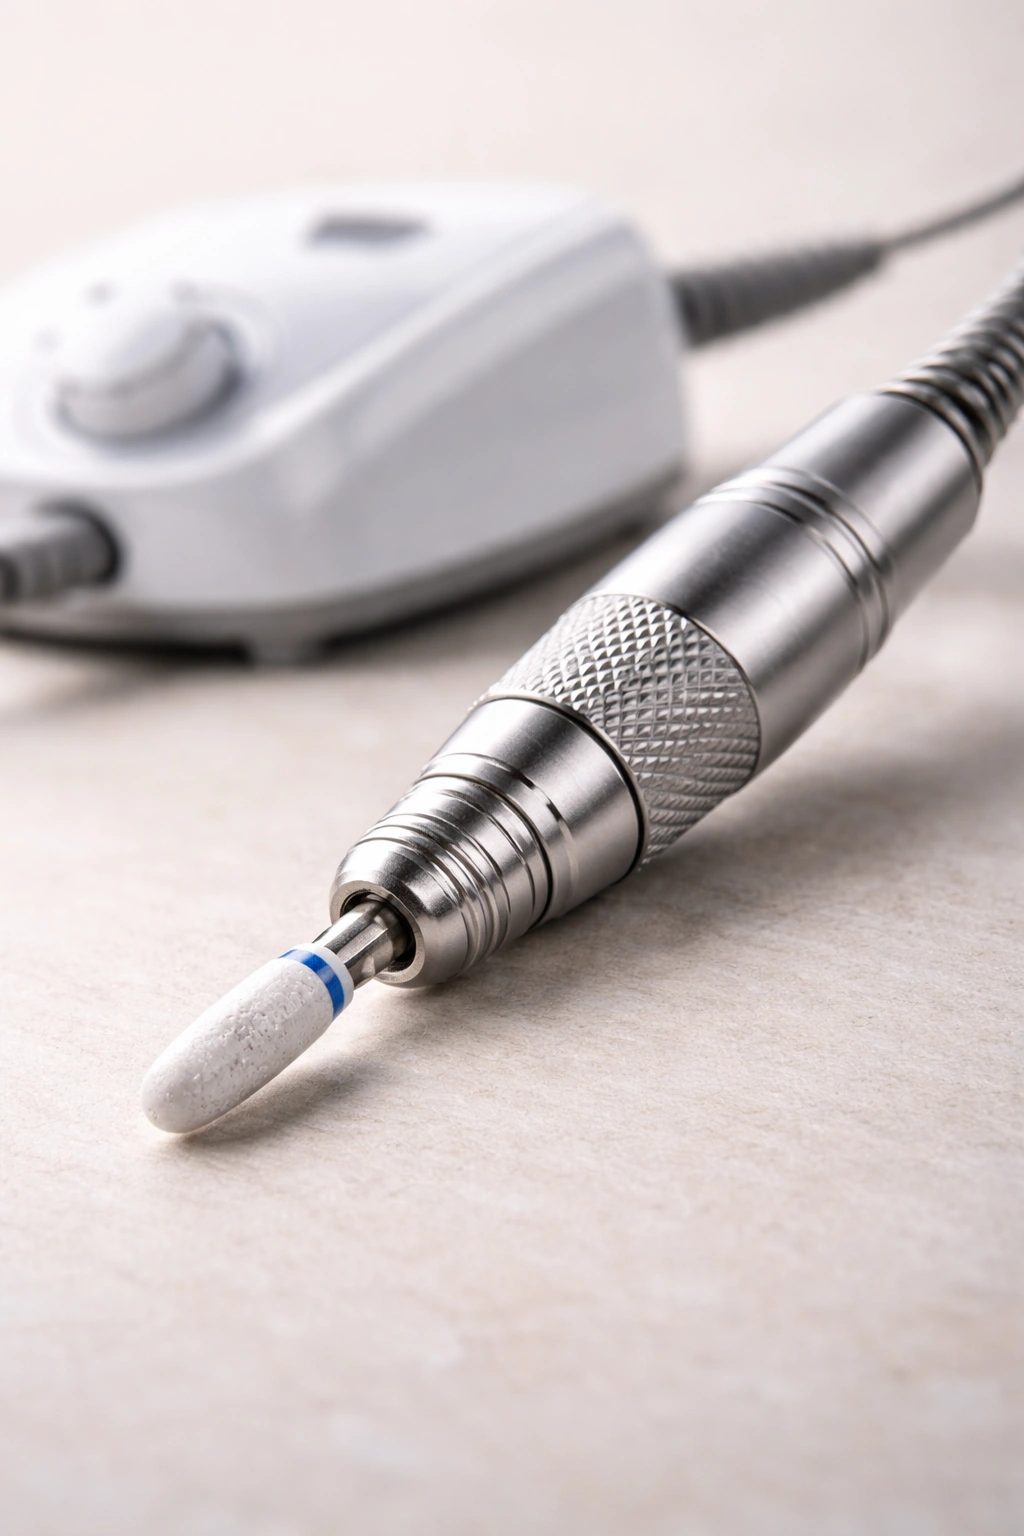
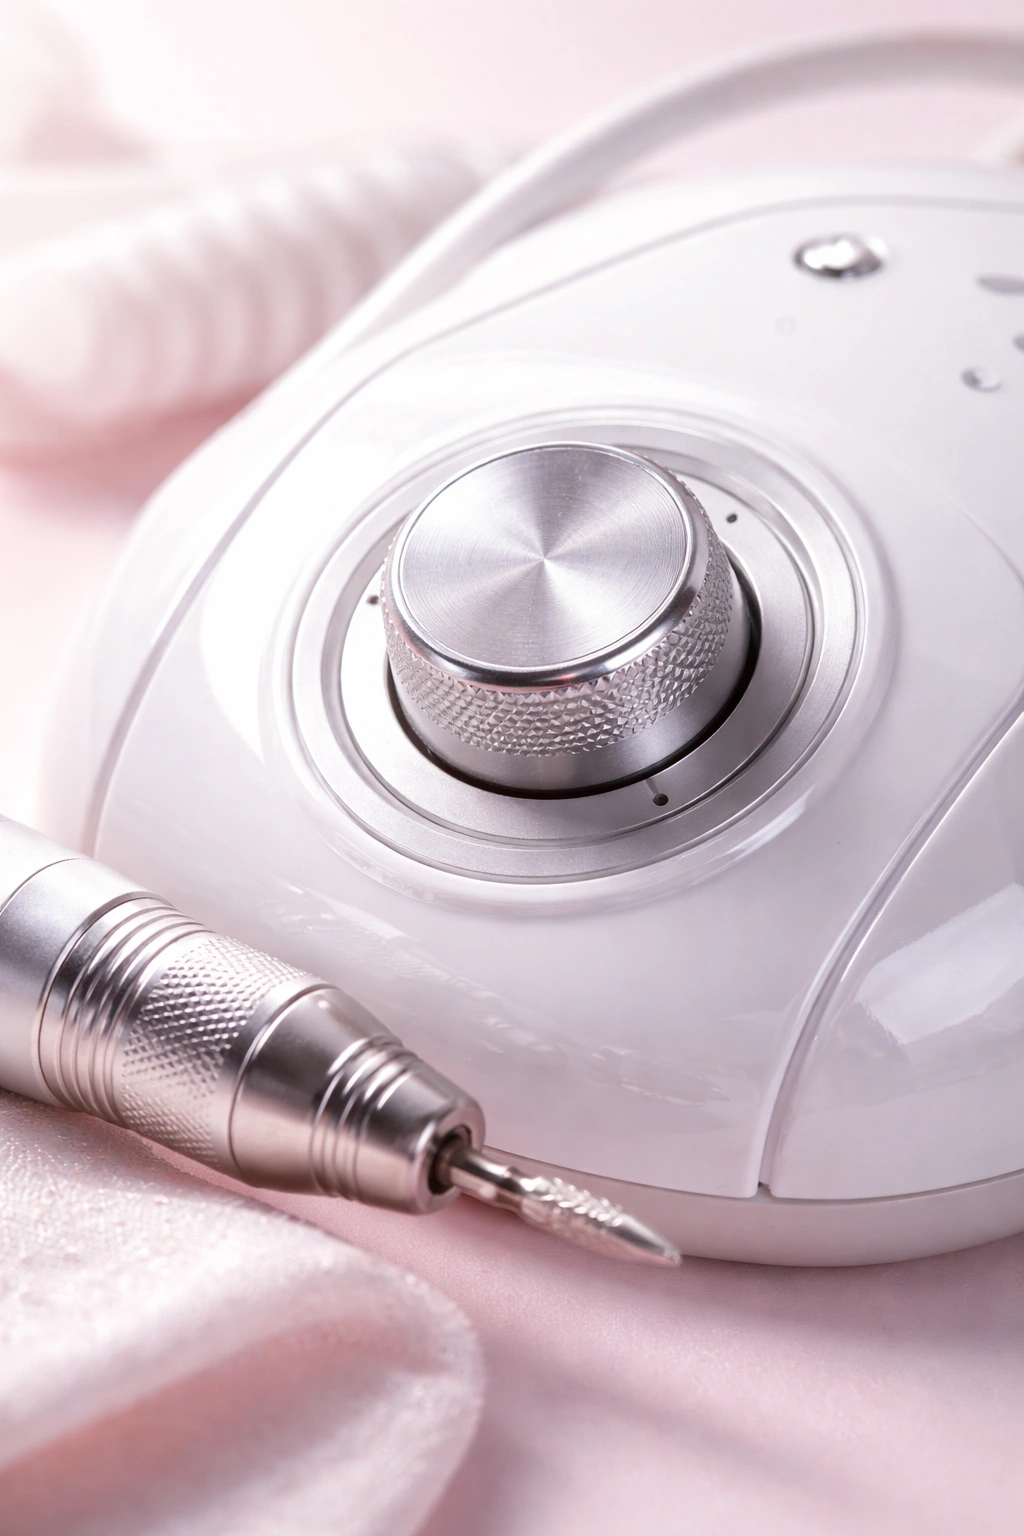
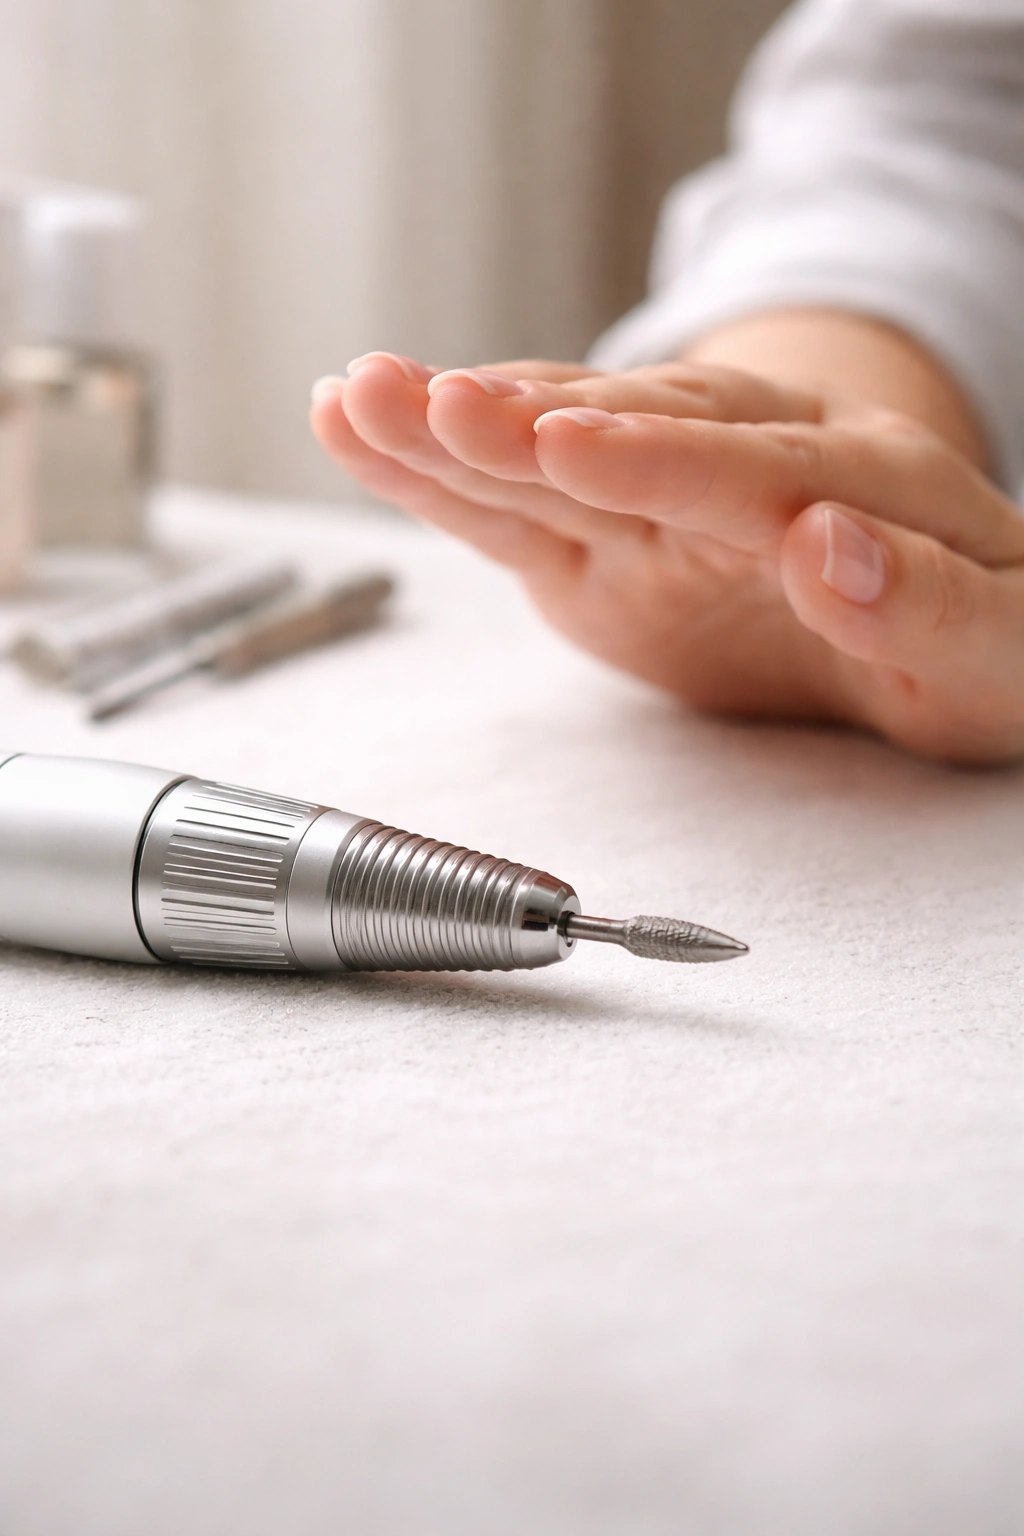
A nail drill is fundamentally an electric motor housed in a compact body, with a handpiece that holds interchangeable bits. The motor spins these bits at adjustable speeds, measured in RPM (rotations per minute). It’s not complicated, but understanding this basic anatomy helps you appreciate why control and technique matter so much.
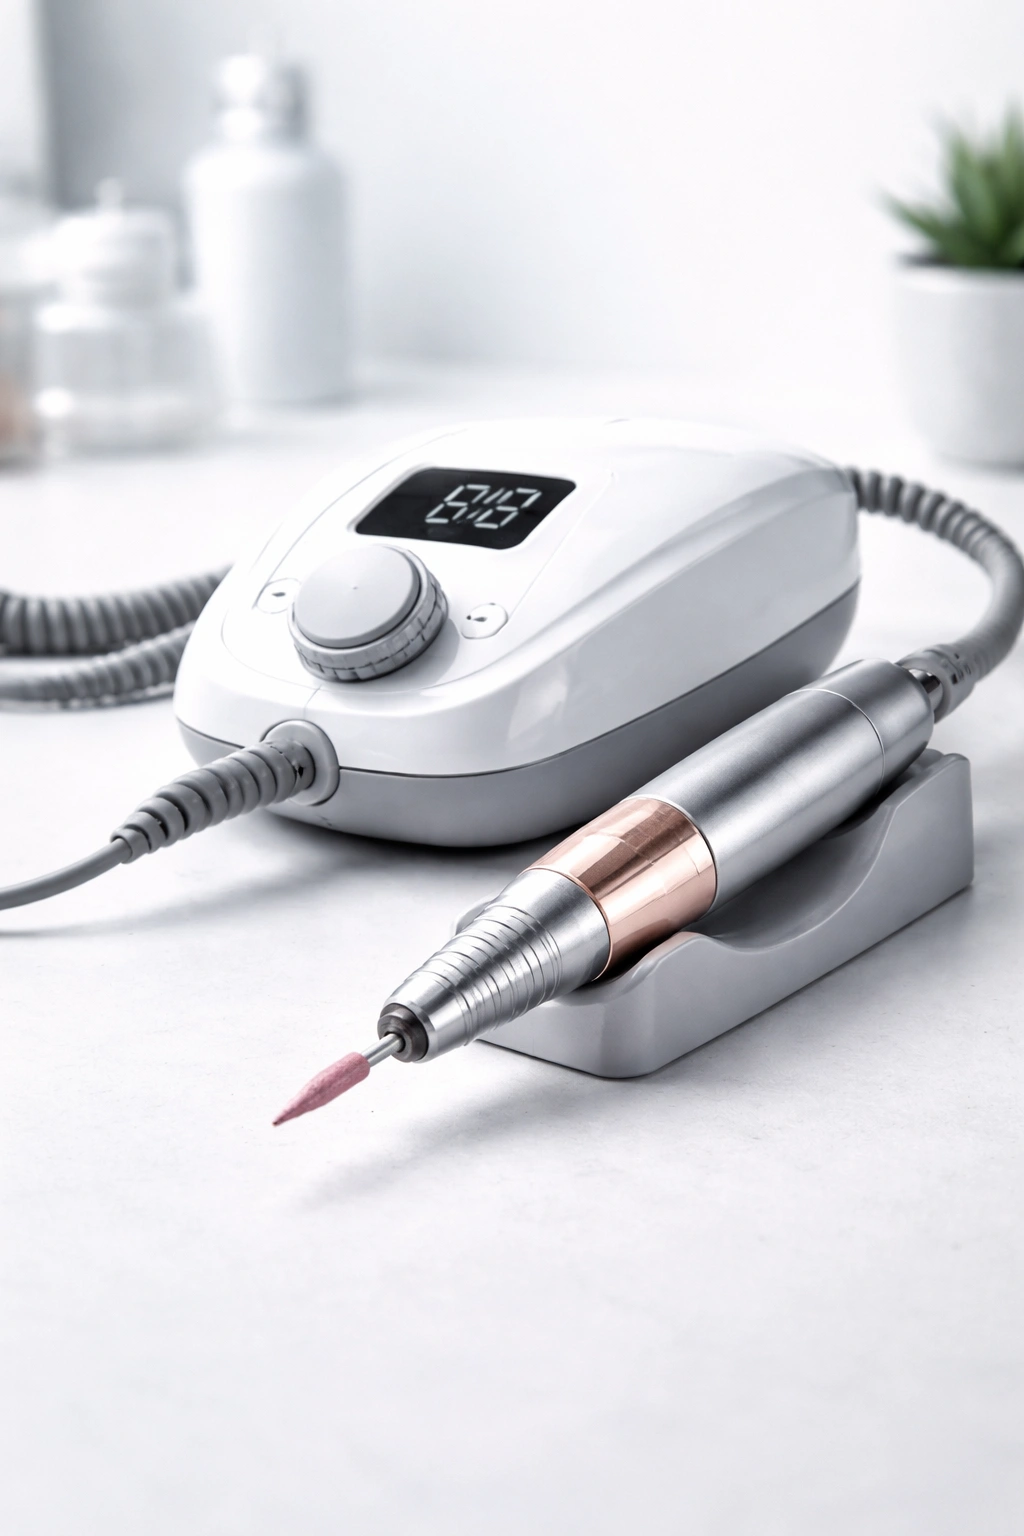
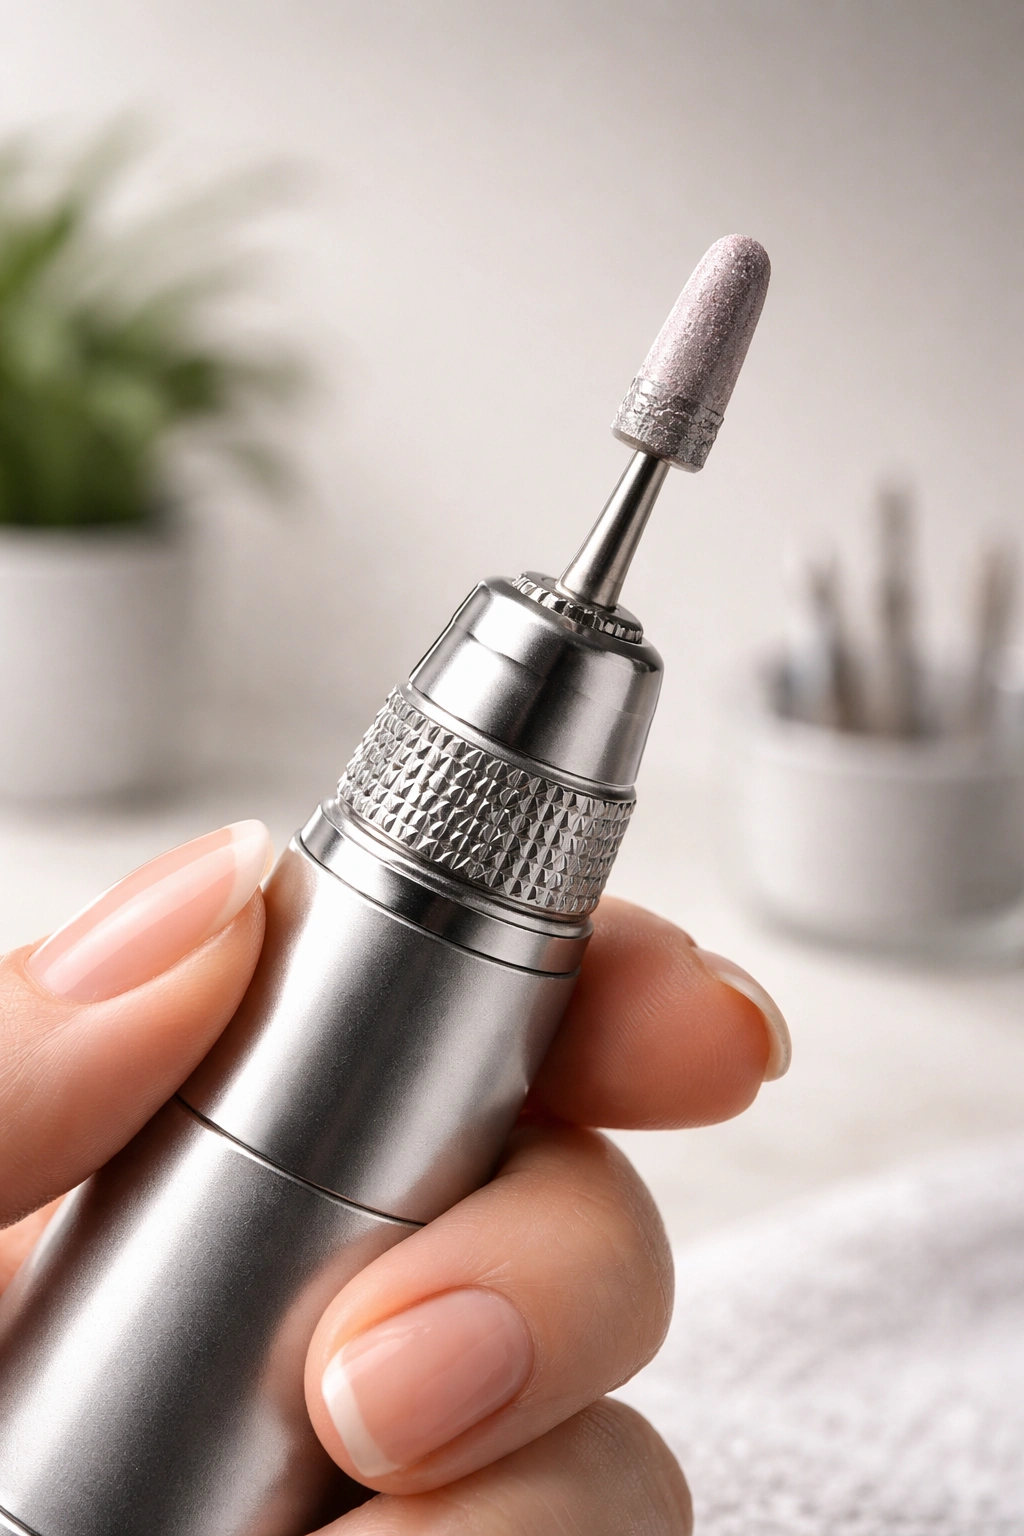
The main body contains the motor and the speed control mechanism. Most drills allow you to adjust the RPM from as low as 3,000 up to 30,000 or sometimes higher. The handpiece is what you actually hold—think of it as the business end of the tool. Inside the handpiece, a chuck or twist-lock mechanism holds the drill bits in place. The bits themselves are the actual working parts—they come in different shapes, materials, and sizes, each designed for specific tasks.
The key principle to grasp: the rotating bit does the work, not your pressure. Many beginners think they need to press down hard to make the drill effective. This is backward thinking that leads to heat buildup, nail damage, and frustration. The rotation creates the cutting or filing action. Your job is to guide the bit with precision and let it do its job. This fundamental shift in mindset—from “I need to force this to work” to “I guide the tool lightly and the rotation handles everything”—is what separates beginners who succeed from those who damage their nails.
Choosing the Right Nail Drill for Your Skill Level
Picking your first nail drill matters more than many beginners realize. A cheap, poorly made drill with weak motors will vibrate excessively, demand that you apply more pressure to achieve results, and make learning proper technique much harder. A quality drill with adequate power and minimal vibration will feel responsive and controlled, even at low speeds.
For home use as a beginner, look for a drill with adjustable RPM control—this is non-negotiable. You need the ability to set low speeds (3,000-5,000 RPM) for cuticle work and high speeds (12,000-15,000 RPM) for gel polish removal. The motor should have enough power to handle these tasks without bogging down or vibrating. A power rating of 35W to 45W is ideal for home use.
Cordless versus corded is worth considering. Cordless drills offer better freedom of movement without a cord getting tangled, but they require battery management. Corded drills provide consistent, uninterrupted power. For beginners, cordless is often easier to learn with because you’re not managing a cord while you’re already managing precision, pressure, and angle. However, if you’ll use the drill frequently, corded reliability might be worth the minor inconvenience of the power cable.
Weight and ergonomics matter when you’re learning. If you’re holding the handpiece for practice sessions, a heavier drill will cause hand fatigue and make it harder to maintain proper control. Look for a lightweight handpiece that fits comfortably in your grip. The handpiece should have a twist-lock or quick-change mechanism for swapping bits easily—fumbling with complex bit-changing systems during practice is frustrating and wastes time you could spend drilling.
Vibration is critical. Run your hand under a spinning drill bit if possible before buying. It should feel smooth, not chattering or buzzing aggressively. Excessive vibration makes precision difficult and increases hand fatigue. Quality brands in the professional or semi-professional range cost more upfront but feel dramatically different than budget options.
The Essential Bits You Actually Need as a Beginner
Bits are where confusion sets in fast. Walk into a beauty supply store and you’ll see dozens of bits in different shapes, materials, and sizes—barrel bits, cone bits, diamond bits, carbide bits, ceramic bits, flame bits, safety bits. Which ones do you actually need? The answer is: far fewer than you think.
As a beginner, start with these essentials:
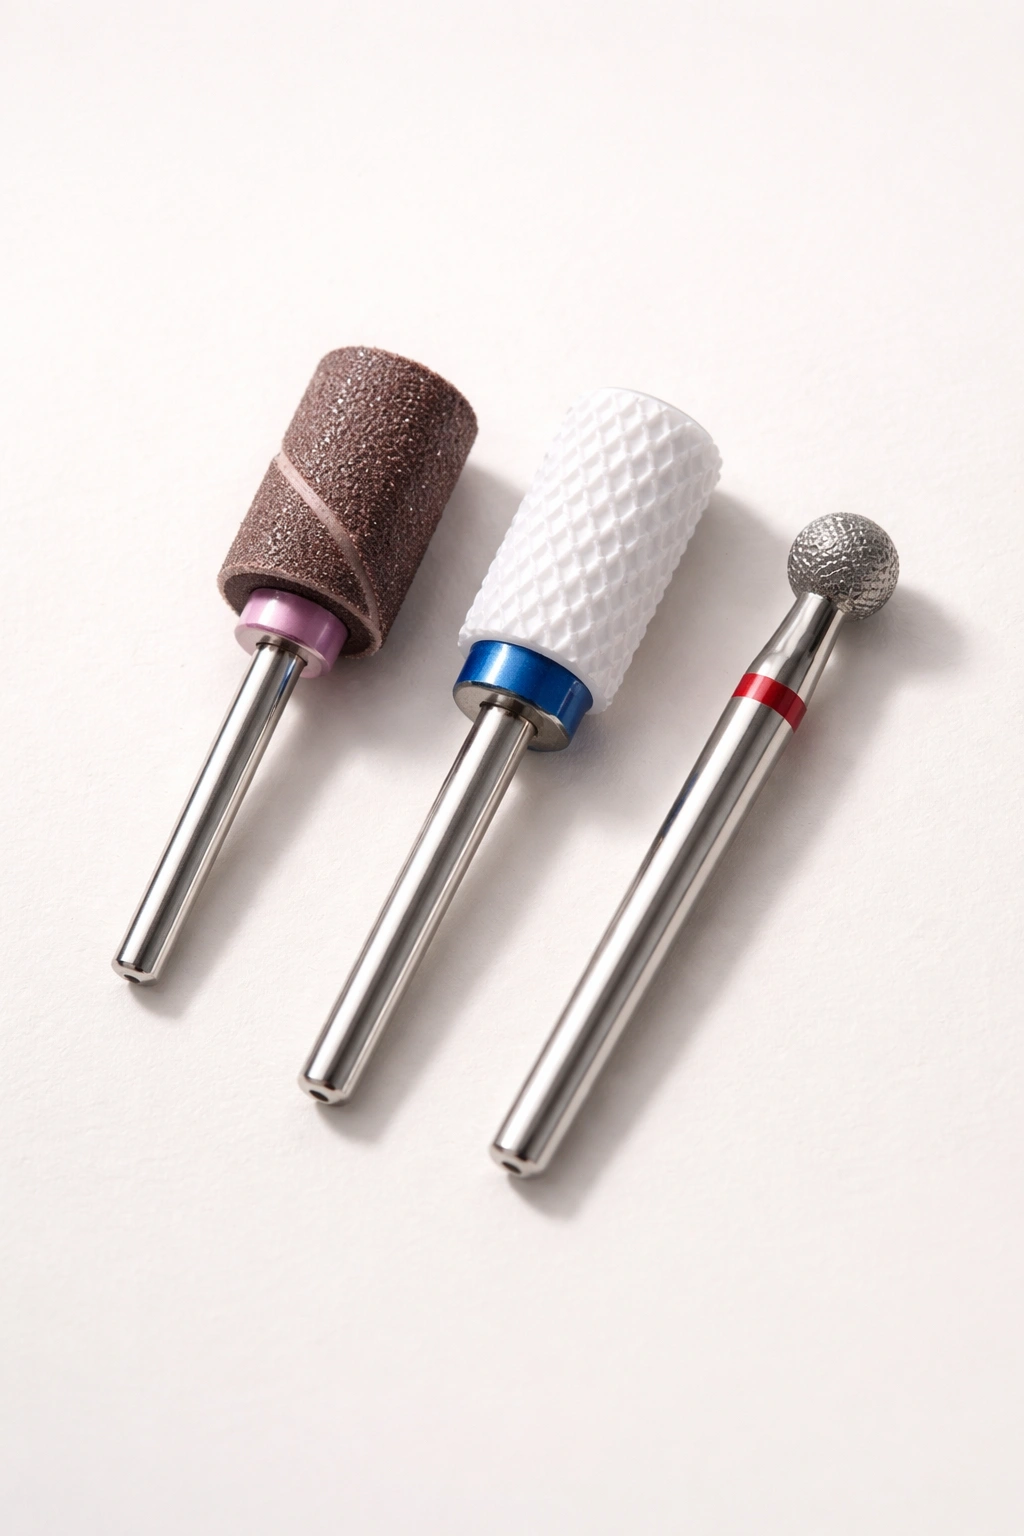
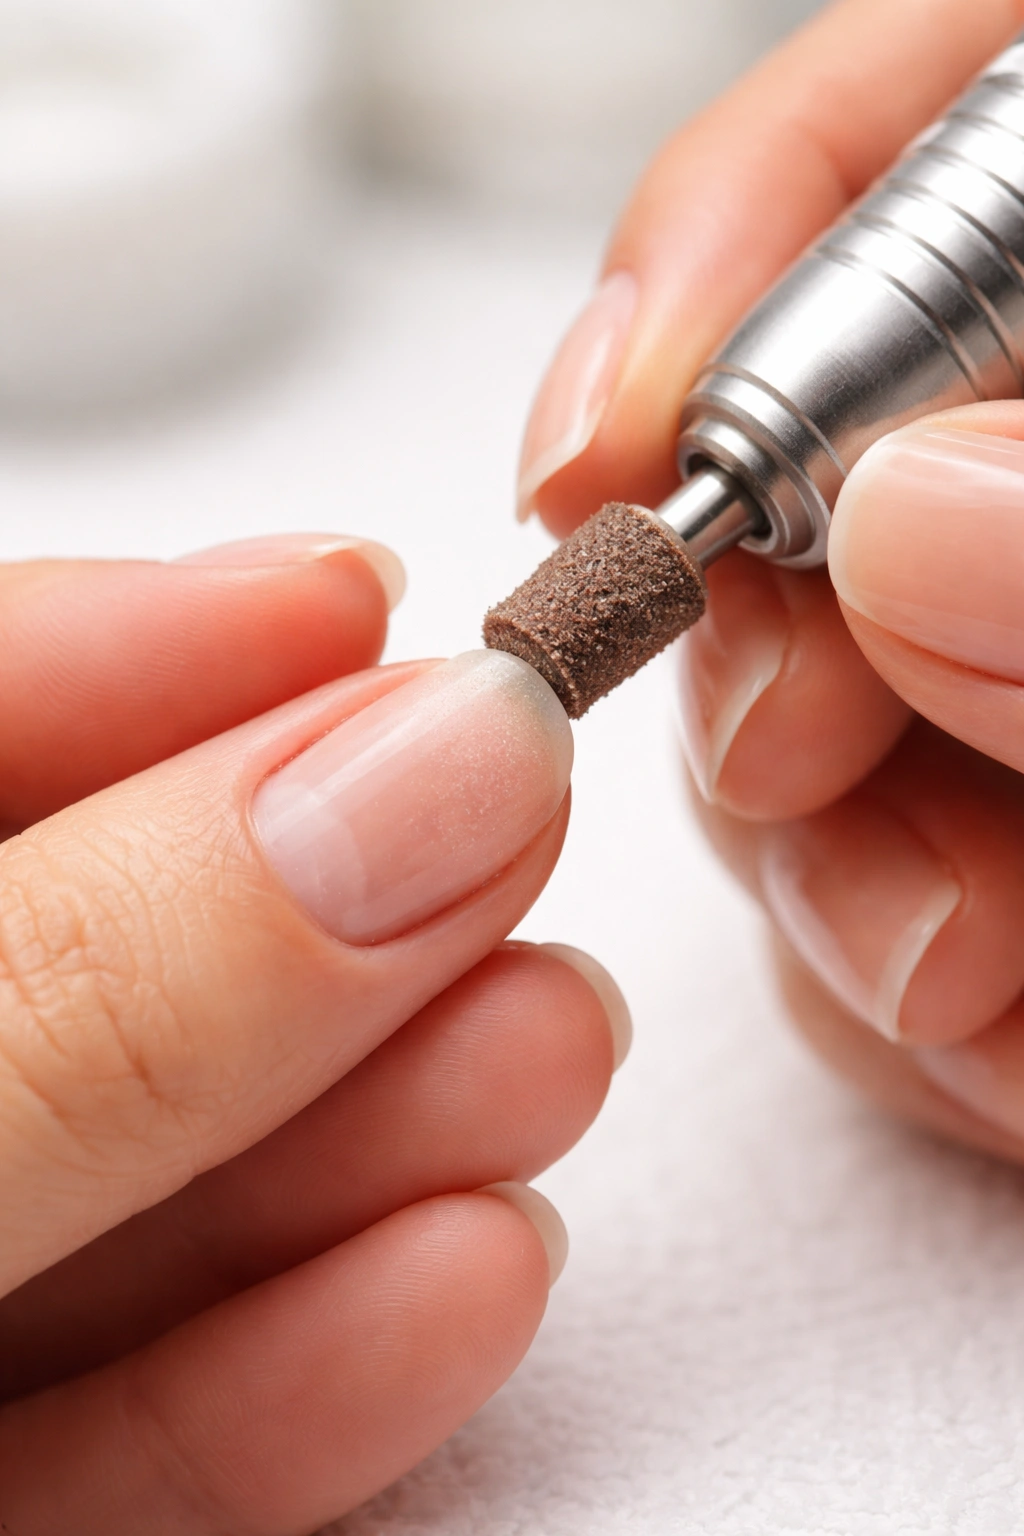
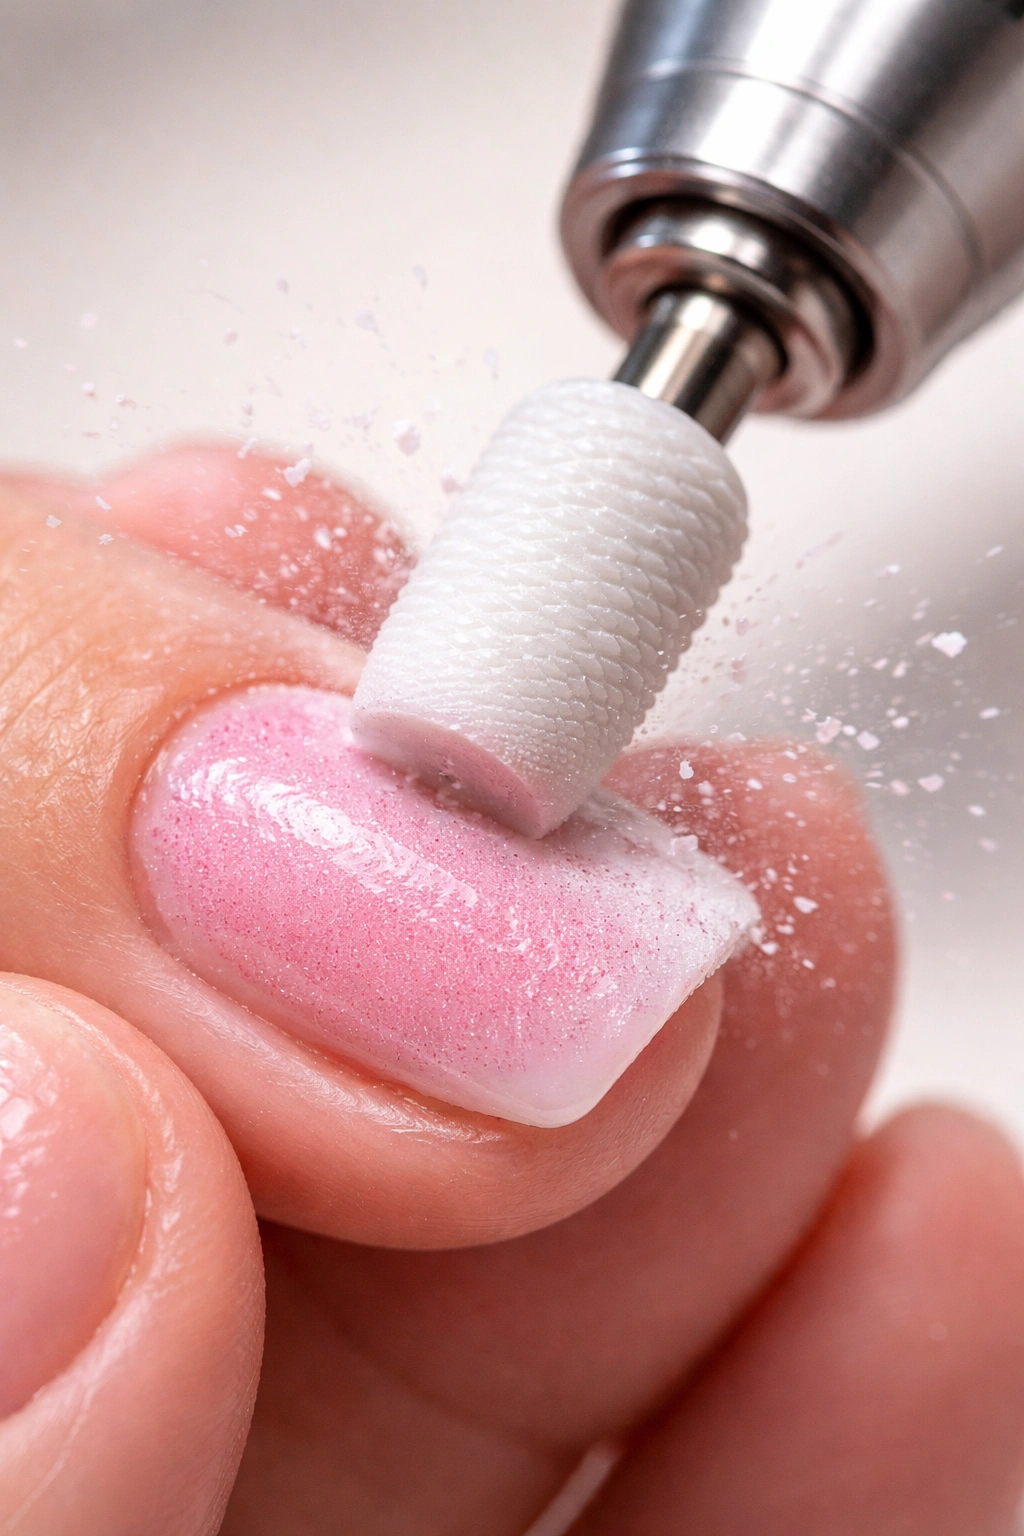
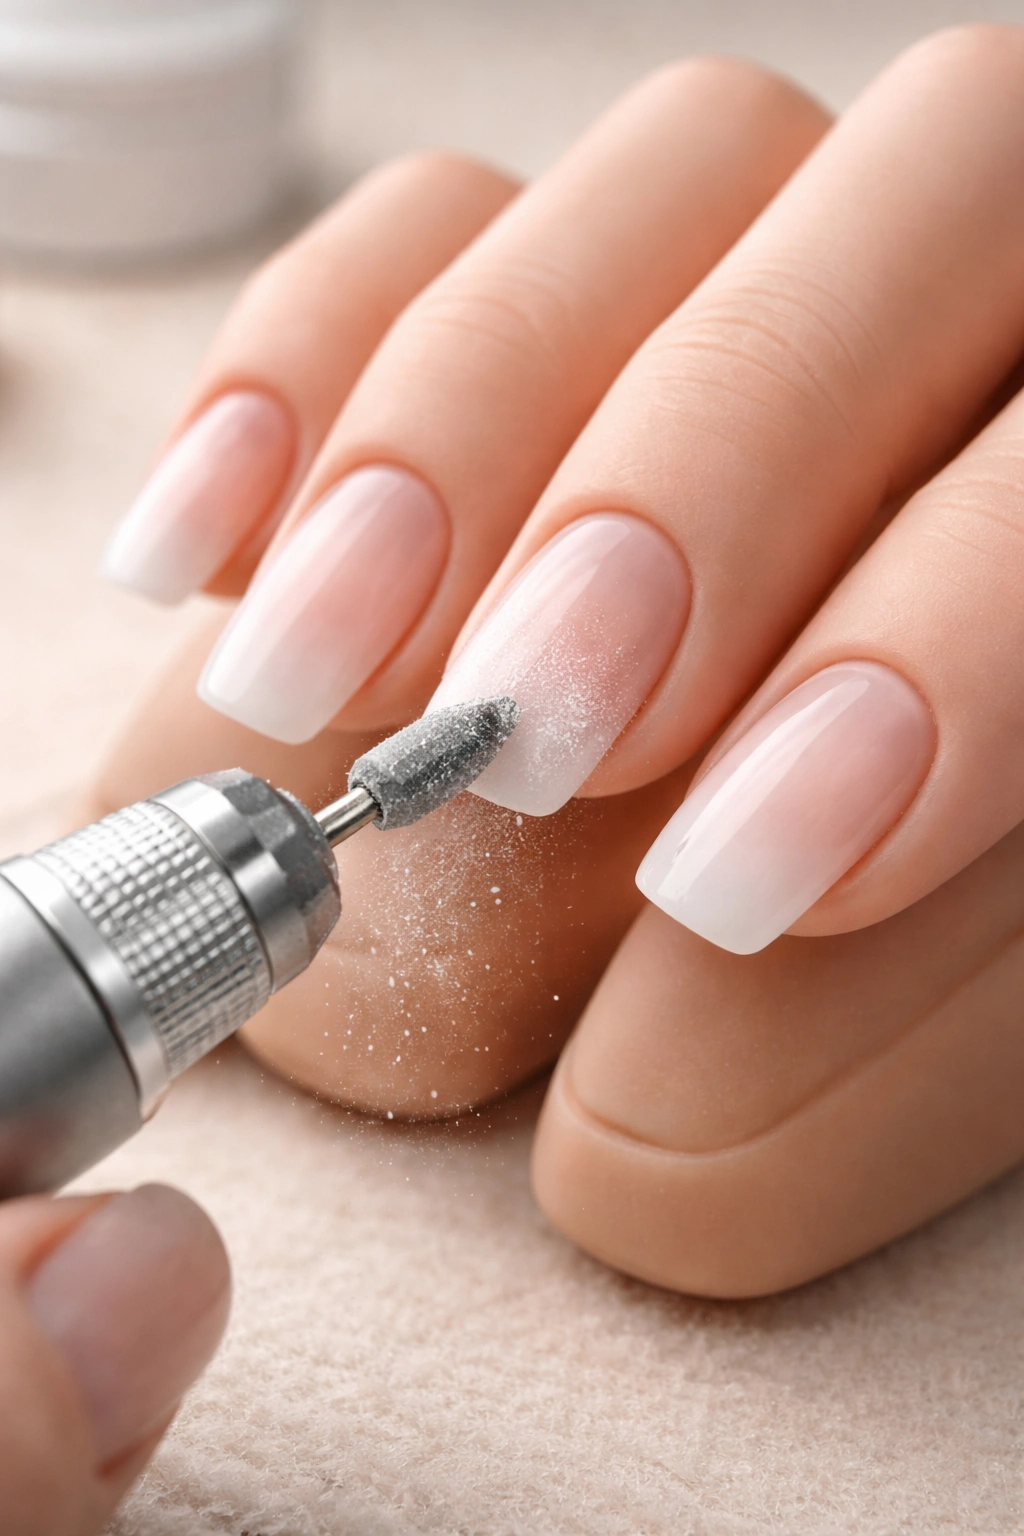
Fine-grit sanding band — This should be your primary tool for learning. Sanding bands (typically 240-grit) are safer on natural nails because they’re gentle and forgiving. They glide smoothly across the nail without grabbing, making them nearly impossible to damage nails with when you’re learning. Use this for shaping, smoothing, and basic nail prep.
Ceramic or carbide barrel bit (medium-grit) — Once you’re comfortable with sanding bands, add a medium-grit barrel bit for slightly faster work and for shaping acrylic or gel nails if you use those products. Ceramic bits generate less heat than carbide, making them a smarter choice for beginners.
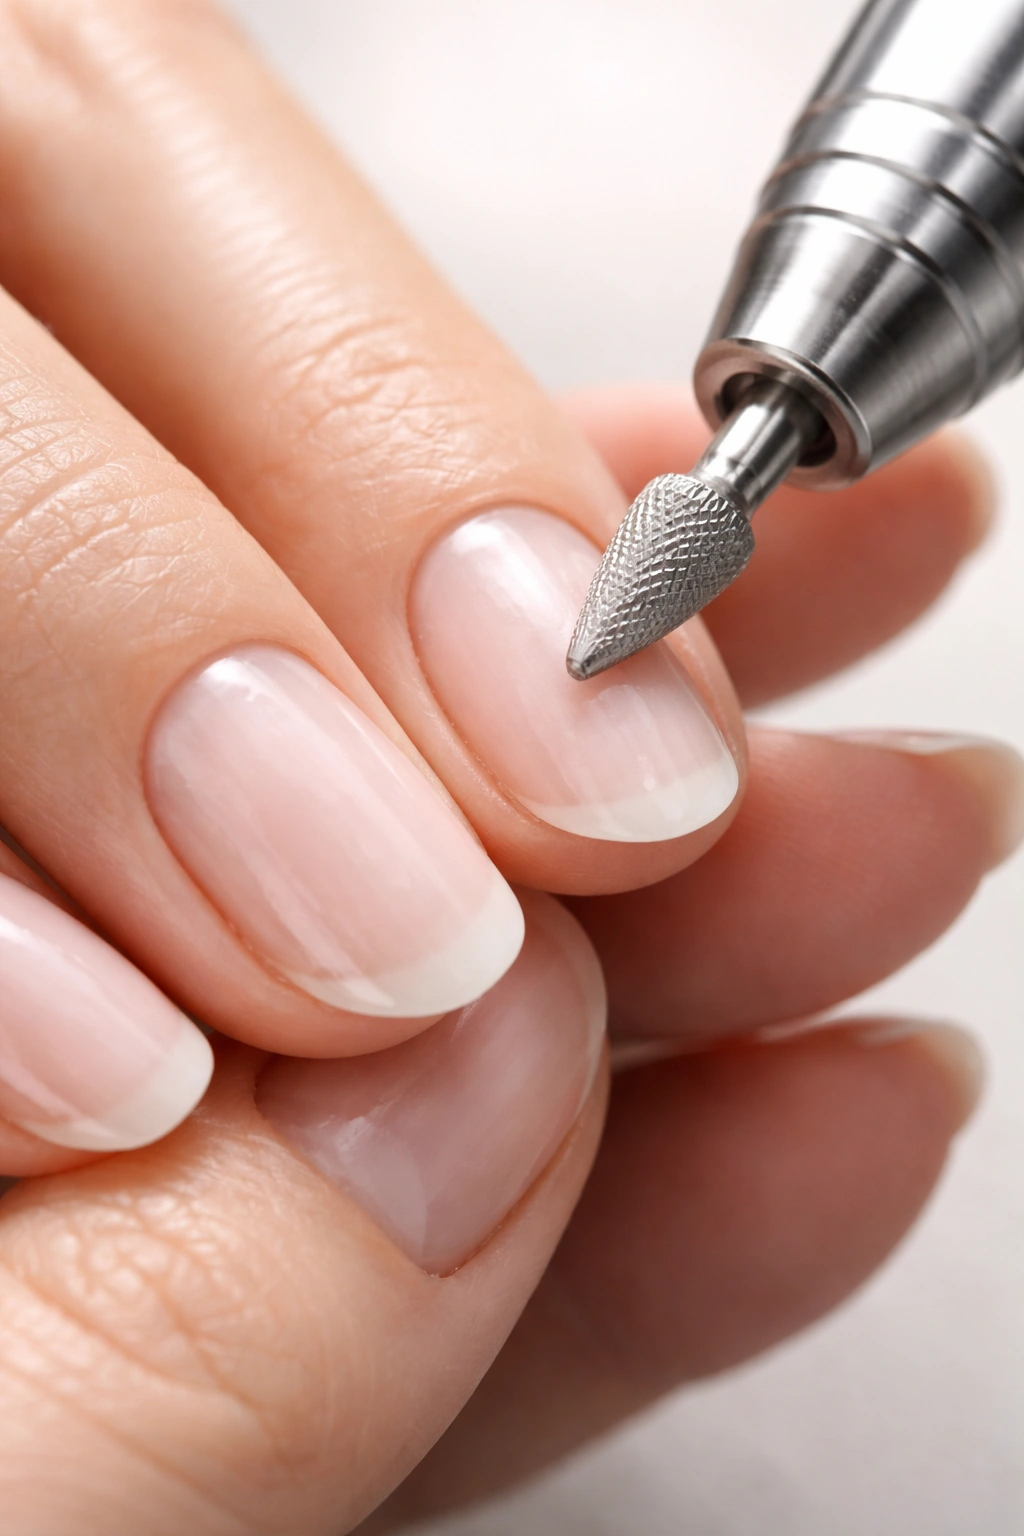
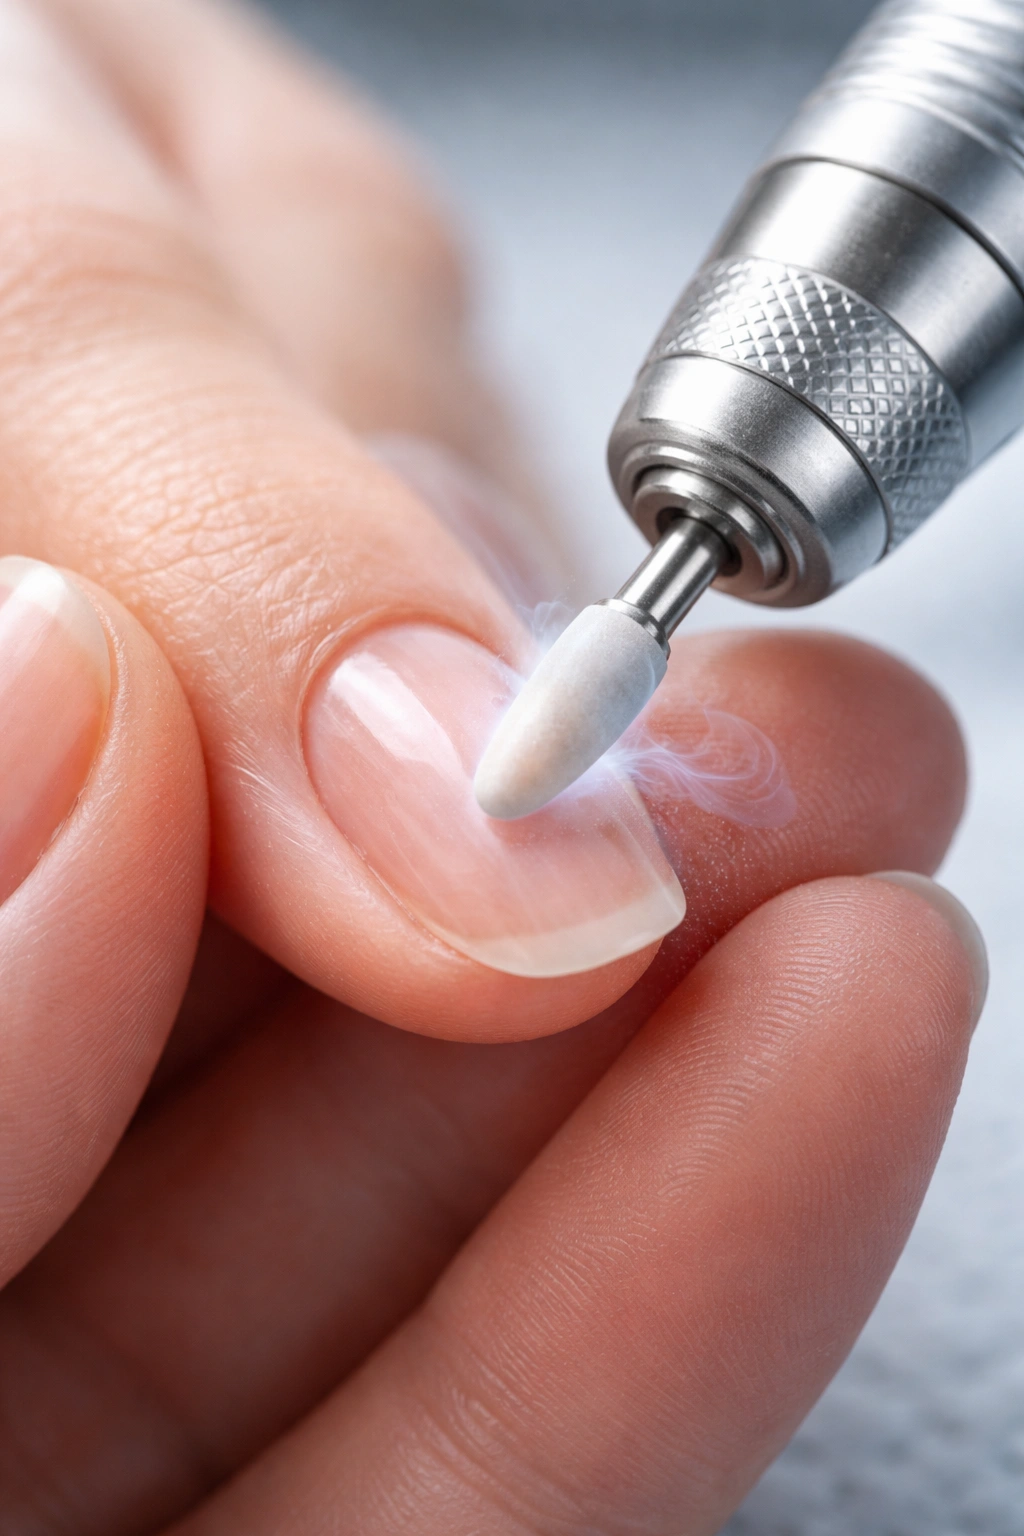
Diamond ball bit — This specialized bit is used at very low speeds for cuticle work. It’s designed to gently clean away dead skin around the nail base without damaging live tissue. This is a finishing touch, not something you’ll use during main nail shaping.
Buffer or polishing bit — Near the end of your nail work, a soft felt or rubber buffer smooths the surface to a shine. This completes the look and requires low speed.
Avoid coarse metal carbide bits until you have significant experience. These are aggressive, generate heat quickly, and are designed for removing thick products or acrylic nails—tasks that require skill to execute safely. Similarly, skip specialty bits with very specific purposes until you understand the basics. Buy a beginner’s kit that includes sanding bands and a few core bits rather than a massive assortment that will overwhelm you.
Preparing Your Workspace and Yourself for Safe Drilling
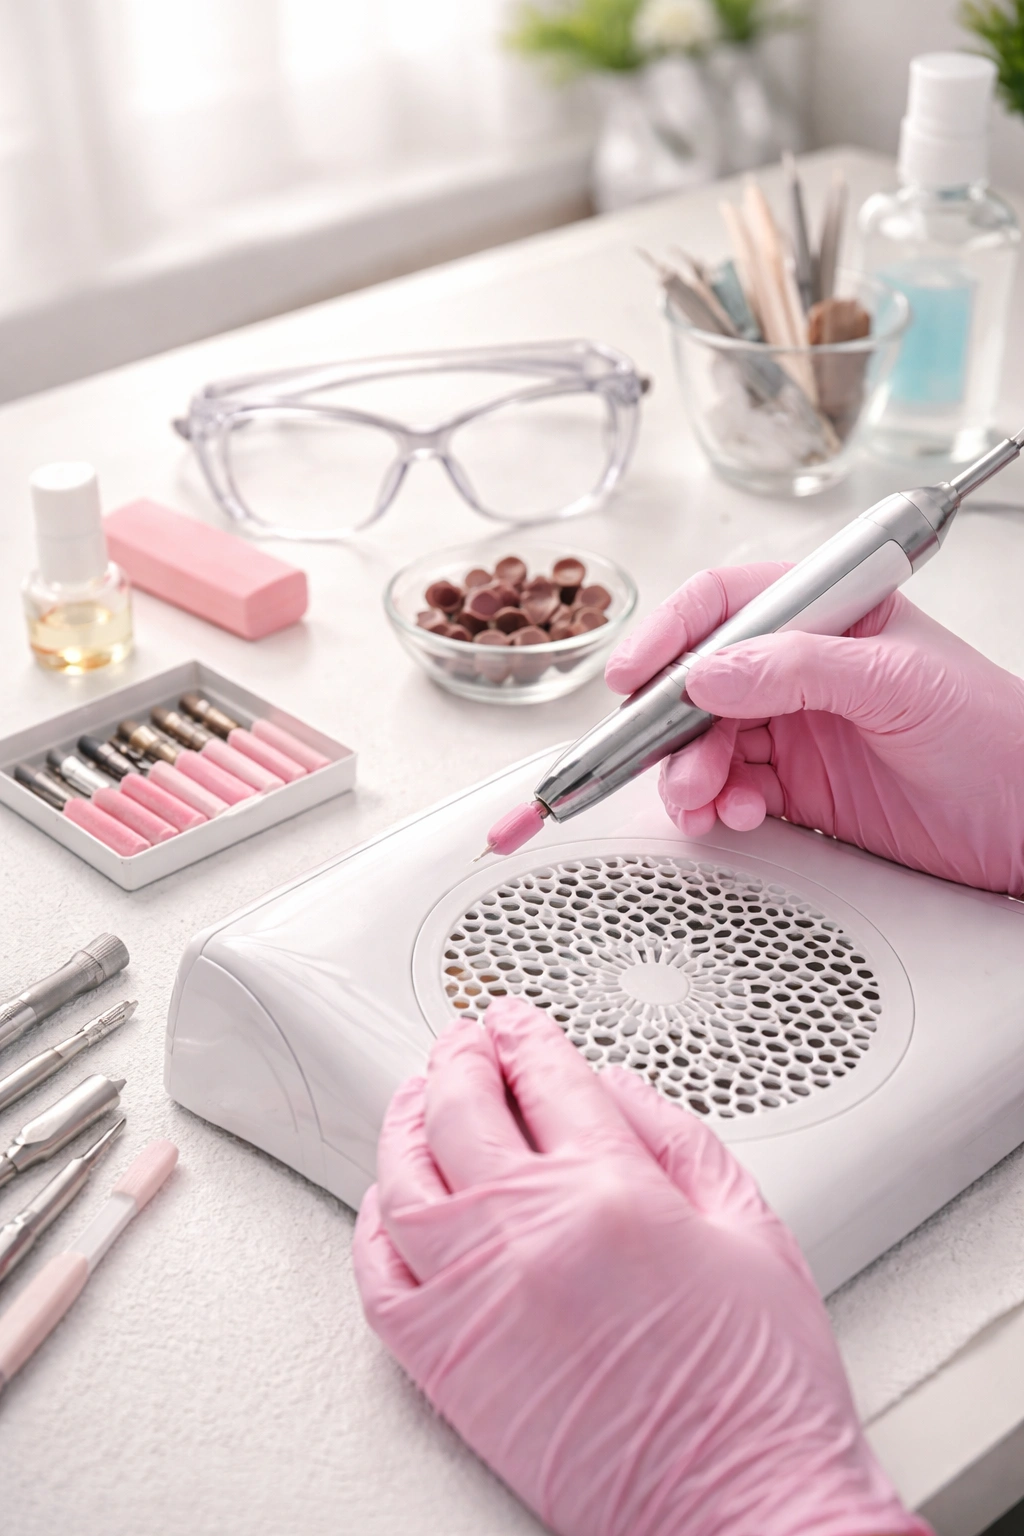
Where you work matters more than you might think. Your workspace needs good lighting so you can see exactly what you’re doing—shadows and poor visibility lead to accidents. Position a lamp or light source that illuminates your nails clearly without creating glare on the nail surface itself. You want to see fine details like the white edge of the nail, the nail fold, and the cuticle area with crystal clarity.
Ventilation is often overlooked but genuinely important. Nail drilling generates fine dust particles that float in the air—this is unavoidable even with good technique. Some professionals use nail dust collectors that attach to the handpiece or capture dust at the source. If you don’t have one, at least make sure air can circulate in your workspace. A simple portable fan pointed away from your work area (so dust doesn’t blow back onto your nails) helps.
Protect your eyes with safety glasses. This sounds cautious, maybe even overly so, but nail dust and debris particles can irritate eyes if they get in. Eye protection takes seconds and eliminates a genuine risk. Similarly, consider wearing a simple dust mask during longer drilling sessions, especially if you’re sensitive to fine particles.
Your hands and nails should be completely clean and dry before you start. Wash your hands with soap and water and dry them thoroughly. Moisture on the nail plate makes it slippery and prevents the drill bit from gripping properly—you’ll find yourself applying more pressure trying to compensate, which defeats the entire purpose. If nails are damp, give them at least five minutes to air-dry completely.
Trim and file your nails to your desired length before drilling. Use a regular hand file or nail scissors for this initial rough shaping. This saves your nail drill for precision work and prevents you from spending extra time with the powerful tool near your fingertips. If you’re removing existing polish, do that first too—let the nail plate be bare so you can see exactly what you’re working with.
Understanding RPM Settings: The Most Critical Safety Variable
RPM—revolutions per minute—is the single most important variable you control. Understanding which speed to use for which task is the foundation of safe drilling. Too-high speeds on delicate areas cause heat damage and friction burns. Too-low speeds on thick materials just frustrate you because nothing happens. Get this right, and everything else becomes easier.
Here’s a practical RPM reference that covers most beginner tasks:
3,000-5,000 RPM is low speed, reserved for cuticle work and fine detail. At this speed, you’re working on live skin and the delicate area around the nail fold. The slower rotation gives you maximum control and minimal risk of accidentally cutting skin. You can linger longer without overheating.
5,000-10,000 RPM is low-to-medium speed, perfect for shaping and smoothing natural nails. This is often where beginners do most of their learning work. The bit moves fast enough to accomplish real filing in a reasonable time, but slow enough that mistakes are visible and controllable. If something goes wrong, you have time to react and stop before serious damage happens.
10,000-15,000 RPM is medium-to-high speed, used for removing gel polish or working on thicker acrylic nails. This is where the drill really starts to work aggressively. Don’t venture into this range until you’ve mastered lower speeds and understand your drill’s behavior thoroughly.
15,000+ RPM is professional territory. Stay out of this range while learning. These speeds are appropriate for experienced technicians using specific bits on specific materials. For beginners, this is the speed range where damage happens.
The crucial habit: always start at the lowest speed and increase only when necessary. Before you touch the nail, turn on the drill at the lowest setting and practice the motion in the air. Feel how the bit moves. Feel the vibration. Get comfortable with the basic sensation before you make contact with a nail. Then, when you touch the bit to your nail, you’re already oriented to the tool’s behavior at that speed.
The Proper Grip: Holding the Handpiece Like Precision Matters
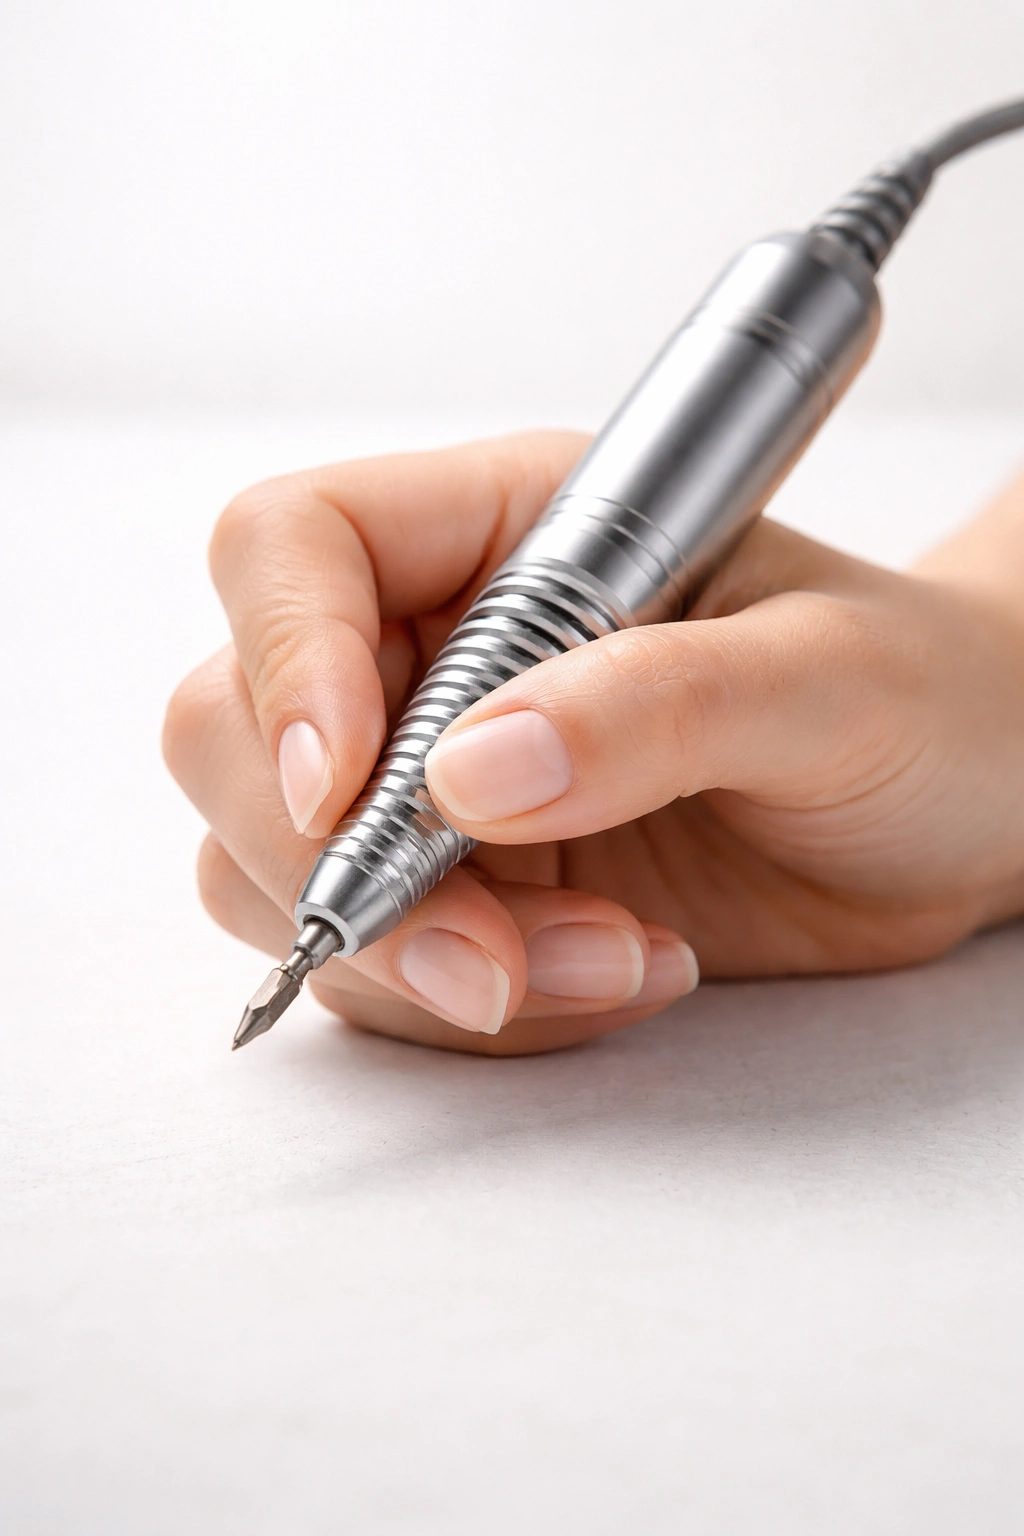
How you hold the nail drill handpiece directly determines your ability to control it. A tense, white-knuckle grip seems logical—you’re holding a powerful spinning tool—but tension is the enemy of precision and contributes to hand fatigue. You want a firm grip that’s simultaneously relaxed.
Hold the handpiece like you’re holding a pen or pencil. Not a vice grip. Not loosely. The kind of grip you’d use for careful writing. Your thumb, index finger, and middle finger guide the handpiece, while your ring and pinky finger rest on your other hand or the table for stability. This tripod grip gives you directional control without tension.
The stability anchor is critical and often overlooked. Rest your pinky finger on the hand you’re working on or on the table. This creates a fixed pivot point that prevents your hand from wavering. When you rest your working hand (the one holding the drill) on a stable surface, your movements become controlled and precise. You’re not free-floating the drill in space—you’re anchored, which makes micro-adjustments possible.
Your wrist should remain relatively straight, not bent at extreme angles. Bending your wrist excessively fatigues the forearm and makes control harder. Instead, move from the elbow slightly or adjust your whole arm position rather than just bending at the wrist. This might feel unnatural initially, but it preserves your wrist and allows better control.
Many beginners hold the drill perpendicular to the nail (straight up-and-down). The ideal angle is closer to 30-45 degrees, which is much more ergonomic and allows the drill to follow the natural nail contour more smoothly. The exact angle varies by task—cuticle work is more vertical, while edge shaping might be more angled—but think “gentle angle” rather than “straight on.”
Practice the grip and anchor points before you even turn the drill on. Hold the drill for 30 seconds in this position repeatedly until it feels natural. Your muscles need to learn this position so it becomes automatic, not something you’re thinking about while trying to control a spinning bit.
Mastering the Movement: The “Light Touch, Constant Motion” Technique
This is where theory meets practice. The fundamental motion is light, continuous, and never stationary. You move the bit across the nail constantly, never letting it linger in one spot for more than a second or two. This constant movement prevents heat buildup and prevents the bit from grinding too deeply into one area.
Most beginners press down into the nail thinking they need to apply force to make the drill work. This is the biggest mistake. The pressure should feel like a feather landing on the nail, not a tool pressing down. You’re not trying to force the bit into the nail—you’re guiding it across the surface and letting the rotation do the cutting or filing. If you feel the bit resisting heavily, that’s a signal to reduce pressure, not to press harder.
The motion itself should be smooth and deliberate. There are generally two effective motions for different tasks:
The gliding motion works for smoothing and general shaping. You move the bit across the nail in one consistent direction—from the cuticle area toward the free edge, or across the width of the nail. You don’t reverse direction repeatedly in one small area; that creates friction and heat. Instead, you glide across, lift the bit, reposition, and glide again.
The gentle flicking motion is used for more detailed work or edge refinement. This is a very light, almost tickling motion rather than heavy pressure. You’re not pressing; you’re barely grazing the surface, moving quickly in small motions. This gives you precision without depth.
The angle of approach matters. Keep the bit parallel to the nail surface or at a slight angle that follows the nail’s natural contour. Angling the drill too much can catch an edge and gouge the nail. Keep the approach smooth and square to what you’re working on.
Never stay in one spot. If you’re on the same nail area for more than two or three seconds, stop. Move to another area. Come back to that spot later with fresh contact. This prevents the cumulative heat that causes friction burns and nail plate damage.
Practice this motion repeatedly on an old piece of paper or cardboard before trying it on nails. Spend fifteen minutes just moving the unplugged drill in the correct motion, with the correct grip, with the correct angle. When you finally turn it on, your muscles already know what to do.
Working on Natural Nails: The “Gentle Approach” Strategy
Natural nails are thinner and more delicate than artificial nails or thick callused skin. They don’t have the durability of acrylic or gel products. This means your approach must be markedly different. The goal when drilling natural nails is light prep and shaping, never aggressive removal or deep grinding.
Natural nails should only ever be drilled with fine-grit sanding bands or very soft bits. Coarse metal carbide bits are off-limits when you’re learning on natural nails. The sanding band is your friend here—it’s nearly impossible to create serious damage with a fine sanding band because it’s inherently gentler than metal bits. Yes, it’s slightly slower, but that’s a feature, not a bug, when you’re learning.
The surface of the nail should be barely touched, not scraped or ground. You’re removing shine and minor irregularities, not chunking away layers. A good rule: if you can lightly run your fingernail across the nail surface and feel no rough spots or ridges, you’ve done enough. Over-buffing removes the natural protective layers and weakens the nail.
One common beginner mistake is drilling too close to the nail fold or cuticle area. Stay well away from the cuticle area and the matrix (the area where nail growth originates, under the skin at the base). Damage to the matrix can cause permanent damage to the nail’s growth pattern. If you want to work near the cuticle, use a specialized cuticle bit at very low speed, and stay on dead skin, not the actual nail.
The edge of the nail also requires a delicate touch. You can smooth and round edges, but don’t thin them excessively. The edge is already thinner than the rest of the plate; over-filing here can cause peeling and breakage. A few seconds with a fine sanding band per edge is typically enough.
Never use the drill to shorten natural nails significantly. Use a nail file or clipper first to get to your desired length, then use the drill only for finishing and smoothing. Drilling down a natural nail to a much shorter length removes too much nail structure.
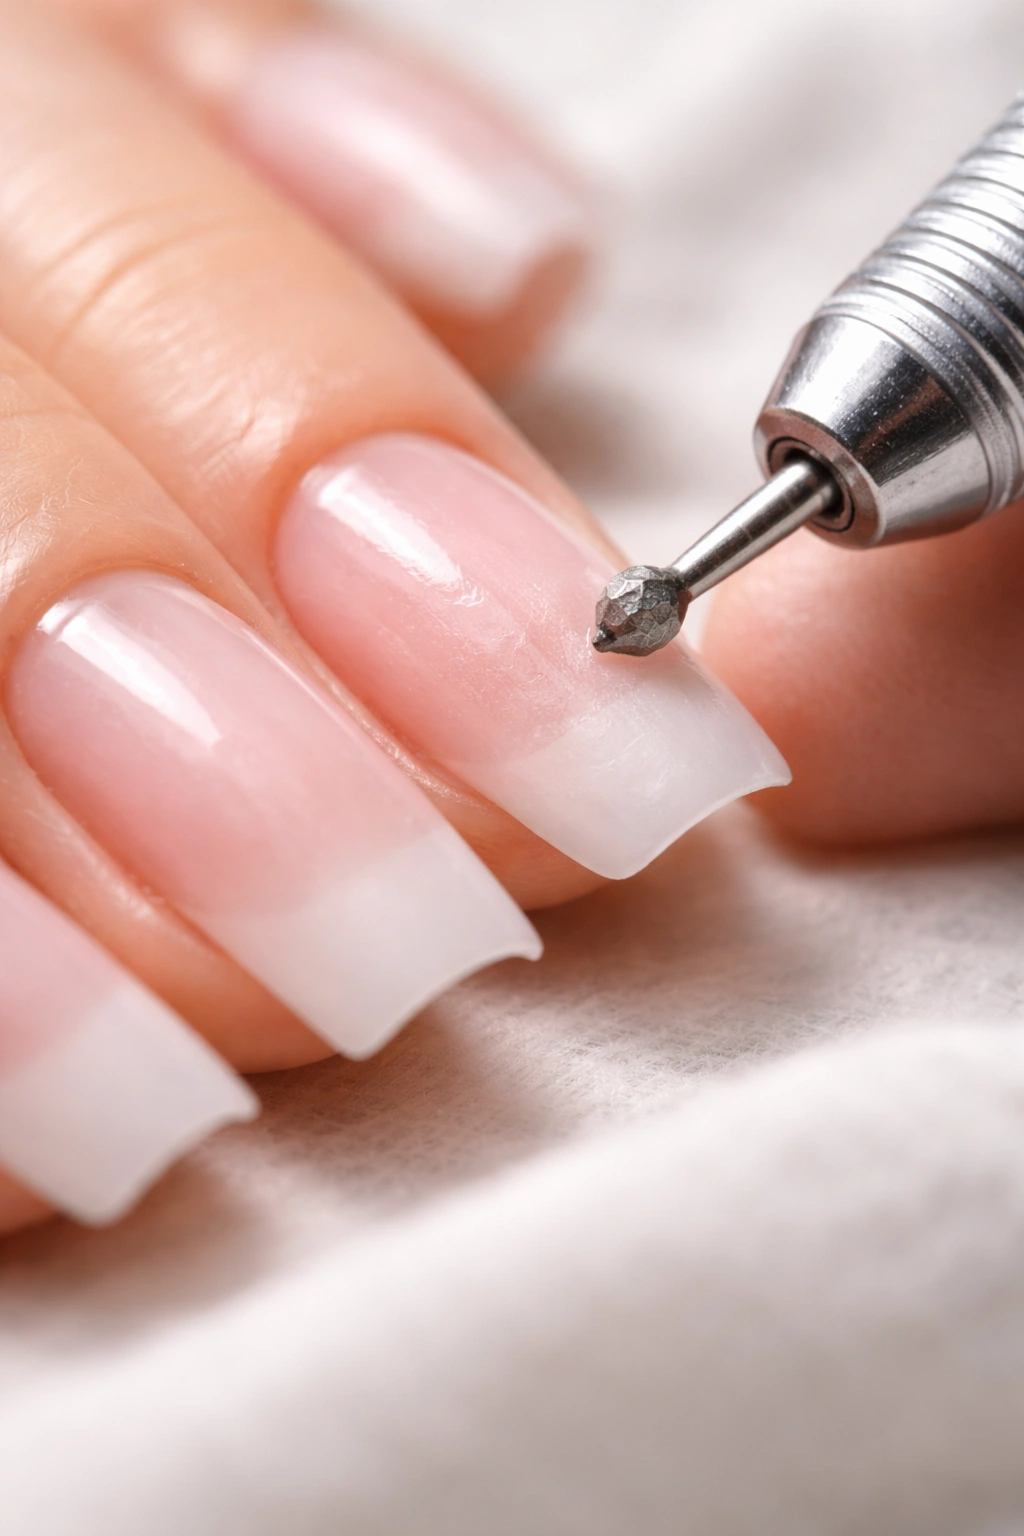
Removing Gel Polish and Acrylics: Higher Speeds, Strategic Approach
Once you’re comfortable with basic natural nail work, you might progress to removing gel polish or acrylic nails. This is where you’ll use higher speeds (12,000-15,000 RPM), but the principle remains the same: guided movement, never stationary pressure.
For gel polish removal, the typical approach is the “80% rule.” You use the drill to remove approximately 80% of the color and product. Once the color is mostly gone and the base coat becomes visible, you stop using the high-speed drill. The remaining layer soaks off in acetone for a few minutes, which you then remove gently. This protects your natural nail from the aggressive drill ever touching it.
Start at the surface of the gel, not the base. Work systematically across the surface to break the shine and remove color. Use a ceramic barrel bit rather than carbide if you have a choice—ceramic generates less heat. Move constantly; don’t hover in one spot. If the bit feels hot (you’ll feel warmth transferring through the handpiece), stop immediately and let everything cool for a minute.
For acrylic nails, the approach is similar but usually takes longer because acrylic is tougher. Use medium-to-coarse barrel bits at higher speeds (12,000-15,000 RPM). You’re removing the product systematically, getting it down to the natural nail level where it separates naturally or becomes thin enough to soak off. Again, the 80% rule applies—never drill all the way to the natural nail; leave a thin layer to soak off.
The key difference here is that you’re working with synthetic materials that can handle higher speeds, not delicate natural nails. You can work more decisively. But the principle of “guided motion, never stationary pressure” remains absolutely true. Stopping motion with the drill on is where acrylic removal typically causes problems.
Preventing Heat Damage and Friction Burns
Heat is the silent enemy of nail drilling. You can’t see the buildup until the damage is already done—a groove in the nail plate, a painful burn in the skin, or a weakened area that breaks weeks later. Understanding heat and preventing it is essential.
Heat builds from three sources: too much pressure, dwelling too long in one spot, and high speeds on delicate materials. The solution addresses all three: use low speeds initially, apply minimal pressure, and keep the bit moving constantly.
Friction burns feel like sharp, localized heat. You’ll know it if it happens—there’s a distinct “zing” when the friction creates too much heat too quickly. The nail plate develops a groove or gouge, and the surrounding skin can burn. If you ever feel that sensation, stop immediately. Your nail drill wasn’t damaged; your technique needs adjustment.
Prevention is straightforward: move faster. Don’t increase speed; increase the speed of your hand movement. If you’re working on an area and it starts feeling warm, move to a different part of the nail or a different nail entirely. Come back to that spot later when the area has cooled. Most friction burns are completely preventable just by not staying in one spot.
Feel the handpiece periodically. If the bit or the handpiece itself feels warm (not just a little warmth from friction, but noticeably hot), stop and allow everything to cool for several minutes. A hot drill is a sign you’ve been working too hard or too long. Take a break.
Humidity affects heat generation. Some people’s nails naturally generate more heat during drilling than others. If you’re someone whose nails heat up easily, reduce your speed further and take even more frequent breaks. Pay attention to your individual response.
Common Beginner Mistakes and Exactly How to Avoid Them
Every beginner makes predictable errors. Being aware of them in advance means you won’t fall into these traps yourself.
Pressing down instead of letting the rotation work is the most common mistake. This comes from the intuitive thought “I need to make this work harder.” The opposite is true. Reduce pressure and the drill works better. Catch yourself thinking you’re not getting results—instead of pressing harder, reduce speed, check your bit choice, or practice the motion more deliberately. Never respond to poor results by pressing harder.
Using speed that’s too high for the task is second. You see a professional working quickly and assume you need higher speeds. Professionals work at high speeds because they have years of muscle memory and can detect problems instantly. A beginner at high speed is a beginner at high risk. Start at the lowest speeds and increase only when you’re comfortable.
Lingering in one spot happens because you’re trying to perfect one area and get it exactly right. Stop. Move to another area. Your nail isn’t going to break if one spot takes thirty seconds of total work instead of being finished in ten. Perfecting one area by dwelling on it creates the heat and groove damage you’re trying to avoid.
Working on wet or damp nails is a frequent error. Even slightly damp nails slip under the bit. You apply more pressure to compensate, which leads to the pressure problem we already discussed. Ensure nails are completely dry before starting. If you’ve been working for a while and minor moisture accumulates, dry them again.
Not anchoring the working hand leads to wavering and unstable positioning. If you’re floating the drill in space without a stable anchor point, every small muscle movement causes deviation. Your precision suffers and you apply uneven pressure. Rest your hand on something stable. This is non-negotiable for control.
Forgetting to sterilize bits is a hygiene mistake that doesn’t cause immediate damage but creates risk. After every use, soak your bits in 70% isopropyl alcohol for at least ten minutes. Dry them thoroughly before storage. This prevents bacterial growth and fungal infections—invisible problems that become apparent weeks later.
Switching between Forward and Reverse without stopping the drill can damage the motor. Always turn the drill off before changing the rotation direction. This takes three extra seconds and prevents potentially expensive repairs.
Perfecting the Forward and Reverse Direction for Your Hand
Understanding which direction to use depending on which hand you’re working on and which hand you’re using the drill with requires a moment of thought, but it becomes automatic quickly.
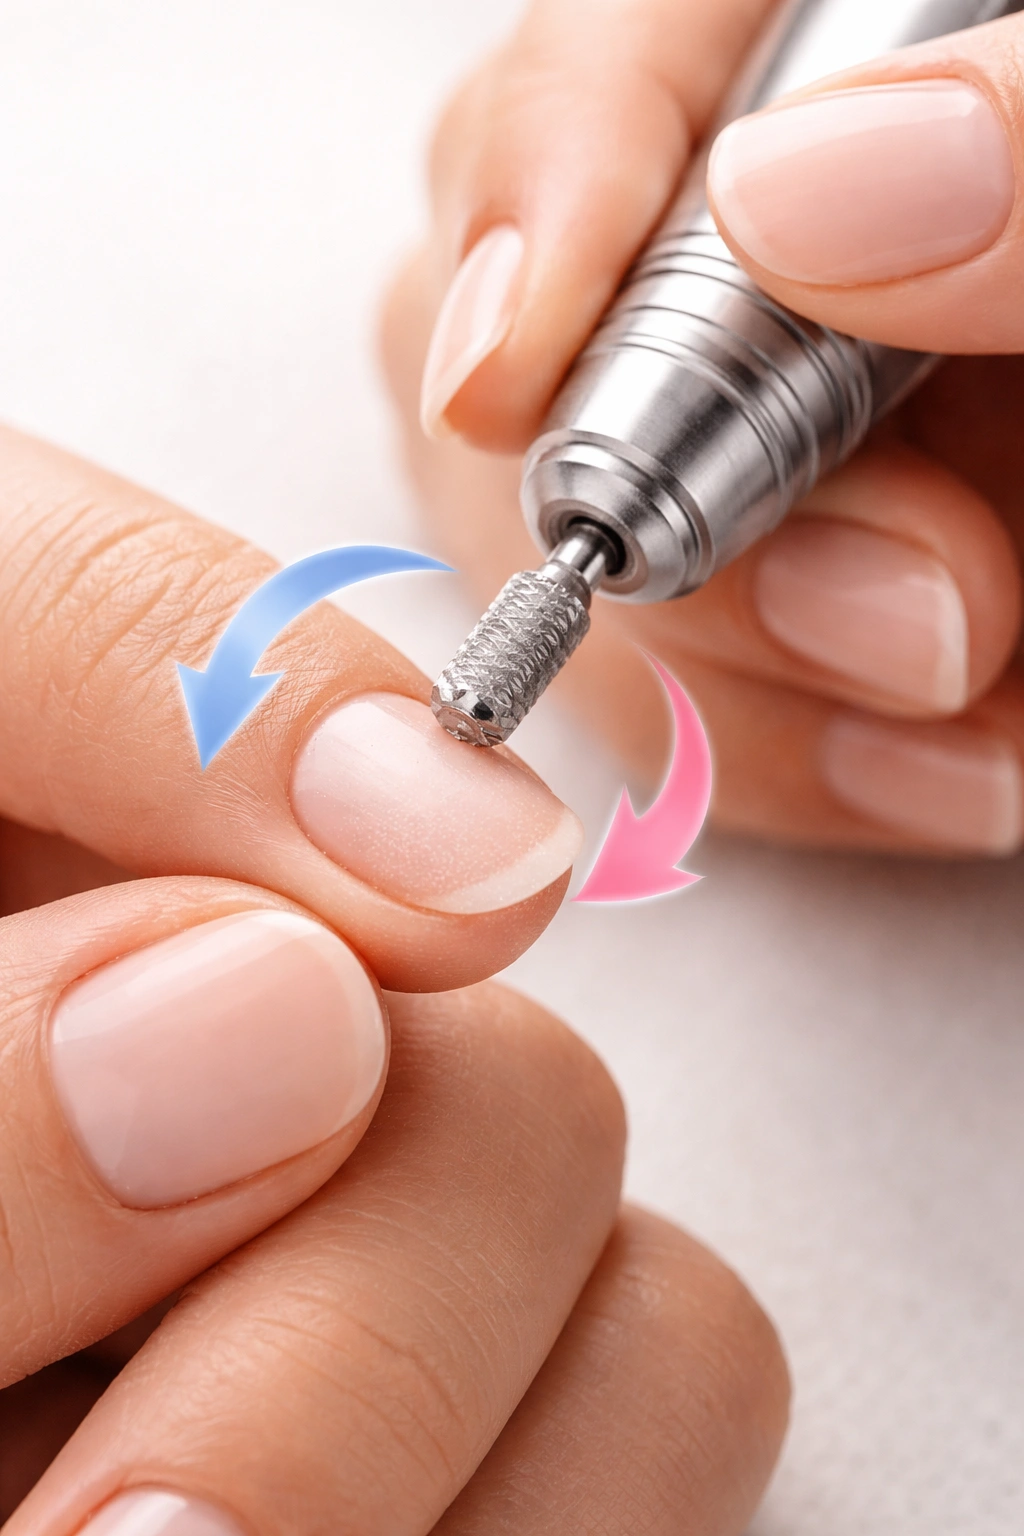
The basic principle: the bit should spin in the opposite direction of the motion you’re making. If you’re moving the drill from right to left across a nail, the bit should spin counterclockwise. If you’re moving from left to right, the bit should spin clockwise. This creates the most efficient cutting action.
For right-handed people drilling the left hand, you’ll typically use Forward. For the right hand, you’ll typically use Reverse. Left-handed people reverse this. But the real rule isn’t about your dominant hand—it’s about the direction the bit spins relative to your movement direction.
The easiest way to learn this: before you start, visualize the direction you’re moving your hand. Then set the forward/reverse switch so the bit spins opposite to that motion. If you’re not sure, try both briefly and feel which one seems to glide more smoothly across the nail. One direction will feel like the bit is skating across the nail, and the other will feel like it’s gripping and working. You want the gripping sensation.
This seems complicated in explanation but takes about a minute to understand hands-on. Spend one practice session deliberately switching the direction for different motions, and it becomes intuitive. Never switch the F/R switch while the drill is running—always power down first.
Building Stamina and Confidence Through Practice Sessions
Your first practice session shouldn’t be on your own nails. It should be on fake nail tips or practice hands—the kind you can buy inexpensively online or from beauty supply stores. These have the same basic properties as natural nails but you can’t damage your own nails while learning.
Start with simple shaping. Begin at the lowest speed. Practice holding the drill, anchoring your hand, and using the light-touch gliding motion. Spend fifteen minutes just getting comfortable with the motor running and the tool in your hands. This sounds basic, but it’s essential. Your nervous system needs to acclimate to the noise, the vibration, and the spinning bit before you add any complexity.
Progress to edge smoothing. Once the basic motion feels natural, focus on refining the edges of the practice nails. Use a sanding band and very low speed. Notice how the bit glides across the surface. Spend time feeling the difference between barely-touching pressure and pressing harder. Most people at this stage still press too hard—deliberately reduce pressure until you feel like you’re almost not contacting the nail at all, then add back just the slightest touch.
After you’re comfortable on practice nails (spend at least 30-45 minutes here, not just a few minutes), move to old press-on nails if you have them. These are slightly more realistic because they’re actual nail material, even if artificial. Work on shaping and smoothing these the same way.
Only after you’ve practiced on fake materials should you move to your own natural nails. When you do, start with simple tasks like smoothing existing nail edges or light shaping of nails that need work anyway. Don’t use your drill on nails that are already perfect and need nothing—start where there’s actual work to do but the stakes are low. A slightly over-smoothed edge isn’t a disaster; it grows out in a few weeks.
Each practice session should be relatively short—20-30 minutes maximum. Your hands will fatigue. Your focus will decline after extended practice. Stop before that happens. Ten sessions of thirty focused minutes each teaches you far more than one ninety-minute session where the last hour is on autopilot. Quality practice beats marathon sessions.
Maintaining Your Drill for Longevity and Safe Operation
A poorly maintained drill becomes unsafe. Dust accumulation affects performance, dull bits demand excessive pressure, and uncleaned pieces harbor bacteria. Maintenance is part of the safety equation.
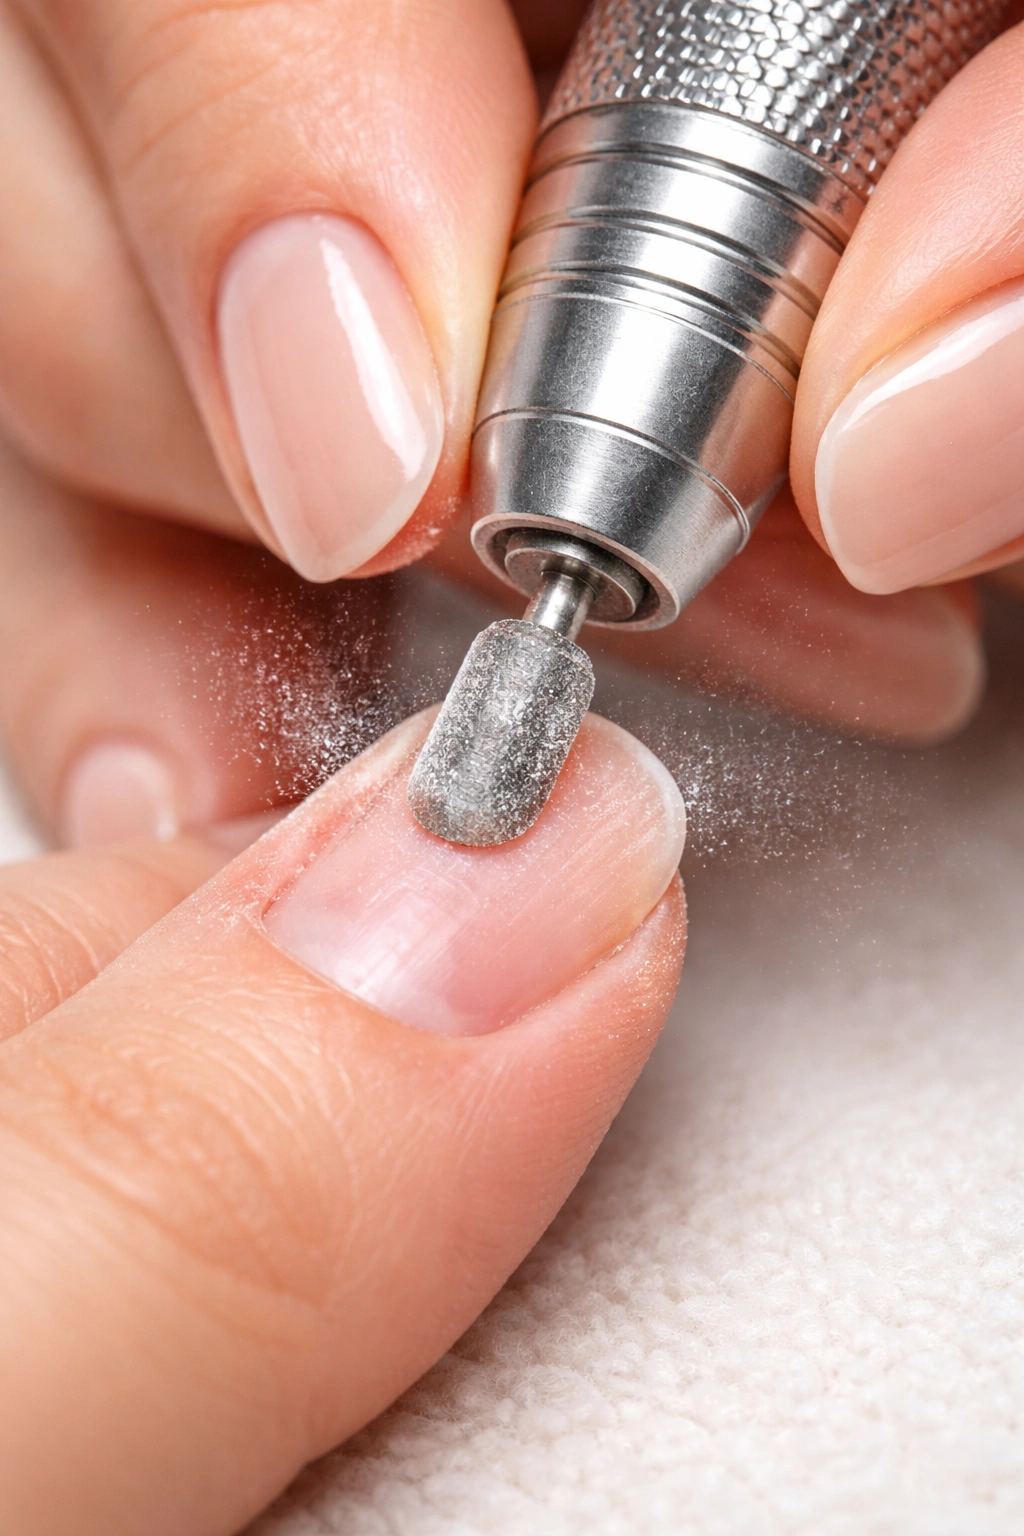
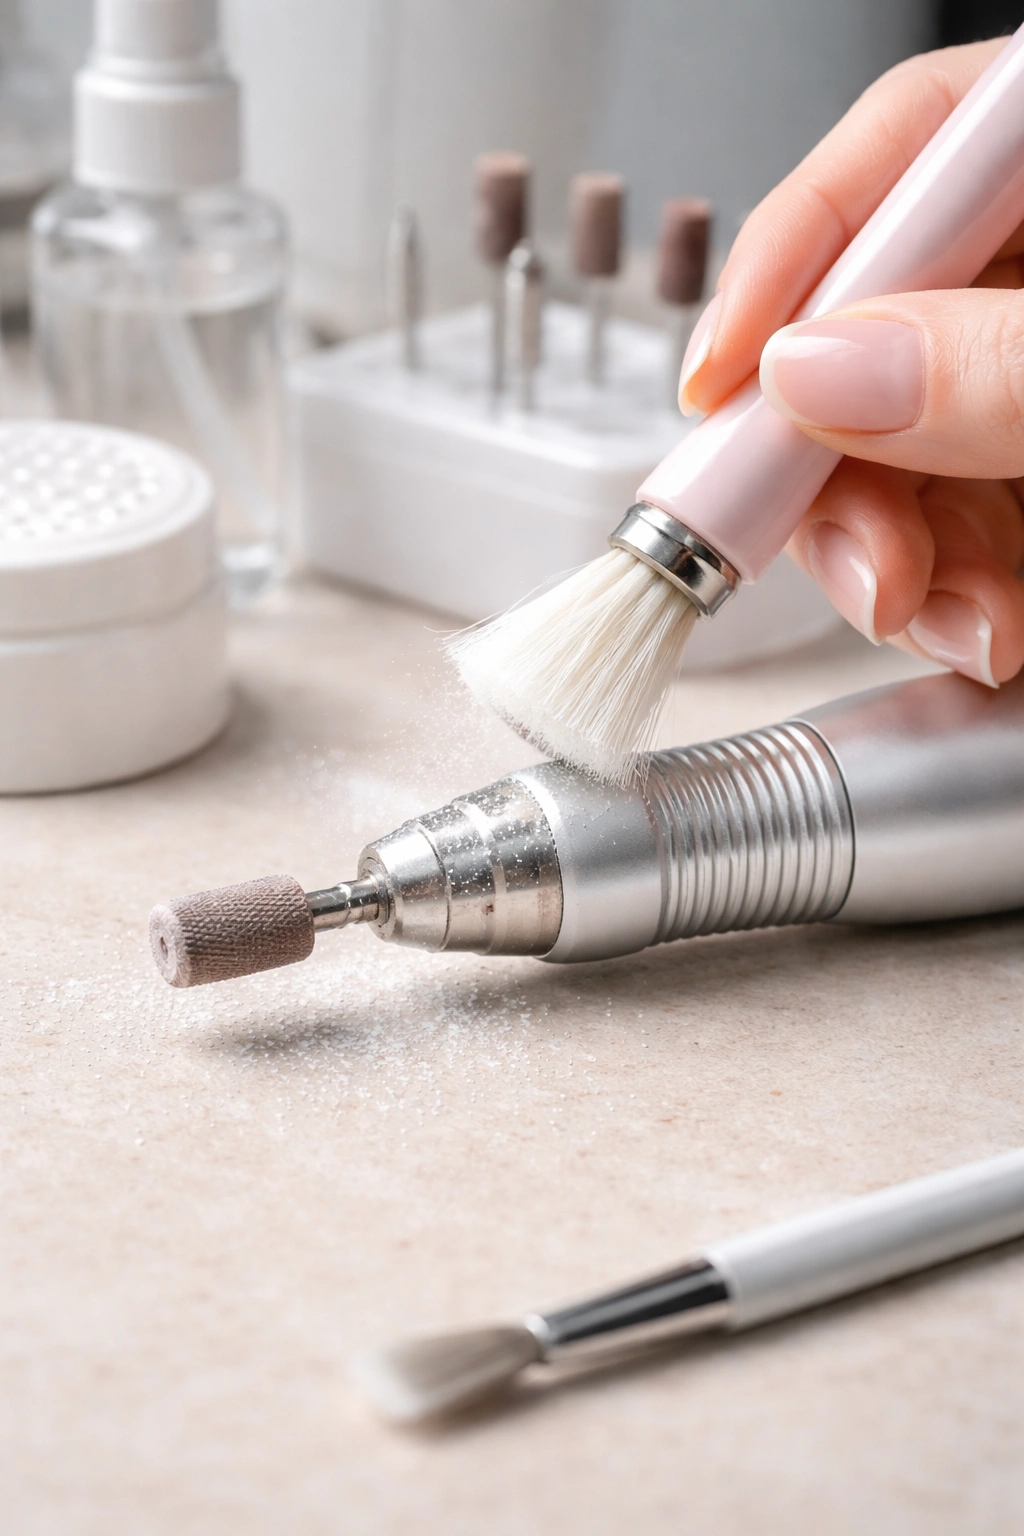
After every use, remove dust from the handpiece and bits with a soft brush. Don’t just wipe—actually brush away all visible dust. Dust buildup inside the handpiece can damage the chuck mechanism or collect around the motor. This takes ninety seconds.
Sanitize bits in 70% isopropyl alcohol after each use. Soak for about ten minutes, then dry thoroughly with a clean towel. Wet bits can rust and corrode. Store bits in a clean container away from moisture. Sanding bands should be discarded after each use and replaced—they’re consumables, not permanent tools. You can’t sterilize sanding bands effectively, so fresh bands each time ensure hygiene.
The handpiece itself can be wiped with a damp cloth, but never submerge it or allow liquid inside. The motor is sealed but not waterproof. Use a slightly damp cloth to wipe the exterior, then dry immediately.
The main body should be wiped clean of dust and debris. If your drill has a foot pedal, clean that too—dust accumulation can affect the switch mechanism. Store your drill in a clean, dry place. Don’t leave it sitting in a humid environment or direct sunlight, as both can affect the motor and electronics.
Check bits regularly for wear. Sanding bands lose their grit after use and need replacement. Metal bits can become dull or develop rough spots. If a bit feels like it’s catching or pulling instead of smoothing, it needs replacement. Dull bits require more pressure to work, which defeats the purpose of using a drill.
Troubleshooting: What’s Wrong When Something Feels Off
Despite best efforts, problems happen. Being able to diagnose issues quickly gets you back on track.
The bit is smoking or creating visible heat. This is a clear signal to stop immediately. Your speed is too high, your pressure is too much, or you’ve been in one spot too long. Let everything cool, reduce your speed by 25%, and try again with more frequent movement.
The bit isn’t cutting or filing effectively—it’s just sliding across. This usually means your speed is too low for the bit you’re using, or the bit is dull. Try increasing speed slightly (but not dramatically). If that doesn’t help, switch to a new bit. If the new bit works, the old one is worn and needs replacement.
The drill is vibrating excessively. The bit might not be seated properly in the chuck. Remove the bit and reinsert it, making sure it’s fully seated and any twist-lock is fully tightened. If vibration continues with a new bit, the chuck itself might be damaged or loose. Stop using the drill and consult the manufacturer’s support.
You feel sharp pain while drilling. Stop immediately. You’ve either hit a sensitive area (likely the matrix or live cuticle skin) or the bit is catching. Don’t push through pain. Assess what happened, adjust your position or technique, and try again at a lower speed.
The handpiece won’t hold the bit securely. The chuck (the part that grips the bit) might be damaged or the twist-lock mechanism might be stuck. Try gently cleaning the chuck with a dry cloth. If bits still won’t stay secure, the handpiece needs professional repair.
Most issues resolve by reducing speed, checking bit seating, or choosing a different bit. Very few problems require tool replacement if you catch them early.
Advancing Beyond Basics: What Comes Next
Once you’re comfortable with basic shaping and smoothing on natural nails, what’s the next progression? Cuticle work is a natural next step. This involves working around the nail fold at very low speeds (3,000-5,000 RPM) with specialized cuticle bits like diamond ball bits or diamond flame bits.
Cuticle work requires even more precision and lighter touch than basic nail work because you’re working on live skin. The technique is identical to your basic approach—light touch, constant gentle motion, never pressing—but at lower speeds and in a more delicate area. Practice this extensively on practice hands before attempting it on yourself.
Removing gel polish comes next if you use gel. The technique is the same removal process we discussed, but the confidence and speed you develop from basic work make this accessible. Start with the 80% rule, use medium speeds, and work systematically.
Acrylic nail removal and shaping is typically the most challenging beginner progression because acrylics are tough and require higher speeds and more aggressive bits. Build your fundamental skills thoroughly before attempting this.
The progression is always: natural nail basics → cuticle work → gel polish removal → acrylic work. This order exists because each step requires more control and precision than the last. Don’t skip steps hoping to speed up your learning. The comprehensive foundation from each step directly enables the next level.
Knowing When to Stop and When to Ask for Help
Honesty about your skill level matters more than pride. There will be moments where a task is beyond your current ability. Recognizing that limit and stopping is wisdom, not failure.
If you’ve been trying to shape your nails for twenty minutes and they don’t look right, stop. Come back when you have fresh hands and focus. Fatigue compromises precision. Frustration leads to pressing too hard. A professional manicurist or a more experienced friend can show you what you’re missing in five minutes in person. Online videos help tremendously but can’t correct your specific hand positioning.
If your nails are damaged—grooves, thinning, discoloration—from your drilling, stop immediately. Give your nails several weeks to grow out and heal. Analyze what went wrong (typically too much pressure or too much time in one area) and change that specific behavior next time. Continued drilling on already-damaged nails compounds the problem.
If you feel sharp pain or see bleeding, stop completely. You’ve crossed from nail plate into live tissue. This requires a break and usually means your technique needs serious adjustment. Pain is information. Listen to it.
Final Thoughts
Mastering a nail drill is a journey measured in practice hours, not days. The professionals you see working quickly with perfect results didn’t get there by rushing through beginner mistakes—they built foundational skills slowly and carefully, then developed speed and confidence on top of that foundation.
Your first few weeks should feel deliberate and careful. You’ll move slowly. You’ll question yourself. You’ll worry about making mistakes. This is exactly right. Speed develops naturally once technique is solid. A slow, precise beginner becomes a fast, precise professional. A fast beginner just becomes a fast person making expensive mistakes.
The rewards for patient, careful learning are substantial. You save money by managing your own nails at home. You develop a genuinely useful skill that impresses people. You understand your nails better and can give them better care. Most importantly, you do it safely—without the heat damage, grooves, thinned nails, or damaged cuticles that careless drilling causes.
Start with quality equipment, practice on fake nails, use low speeds, apply minimal pressure, move constantly, and trust the rotation to do the work. These fundamentals prevent 99% of beginner problems. Everything else—advanced techniques, higher speeds, specialty bits—builds naturally on this foundation.
Your nail drill is waiting. You now know exactly how to use it safely.
