

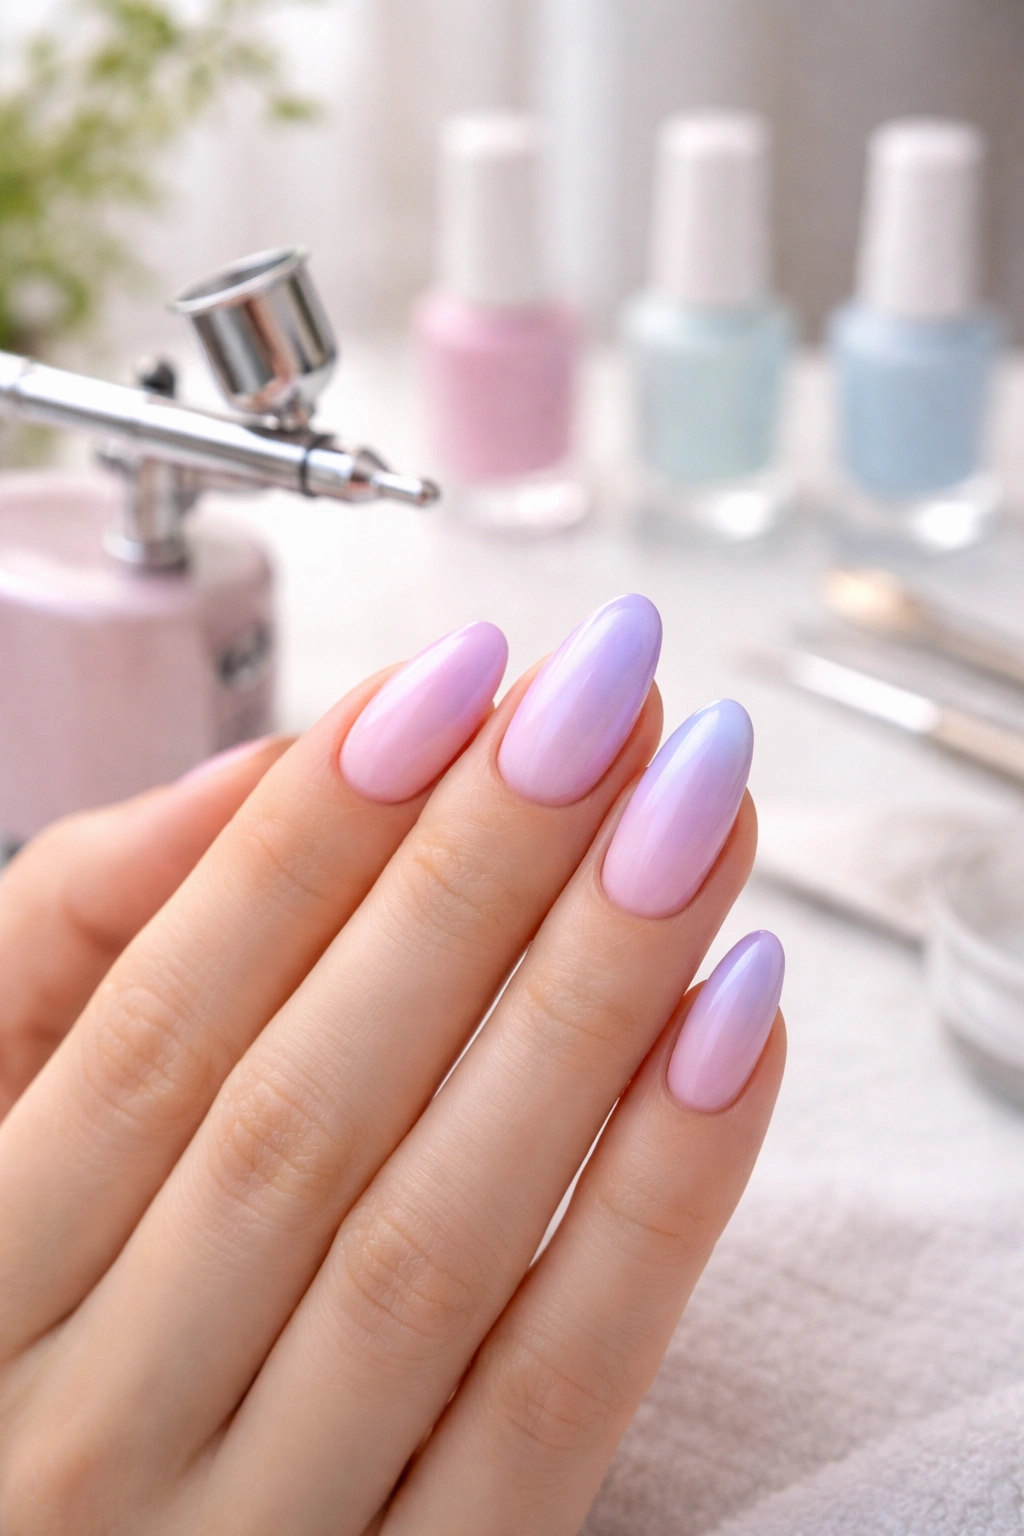
Airbrush nail art might sound intimidating when you first hear about it, but the truth is that creating salon-quality designs at home is completely achievable — even for beginners with no prior experience. What once required a trip to a high-end nail salon can now be done in your own space with the right tools, a bit of practice, and a solid understanding of the technique. The spray-on effect creates that flawless, dreamy gradient that you see on social media, and you can pull it off without years of training or professional certifications.
The beauty of airbrush nails is that they work on both natural nails and acrylics, last roughly as long as traditional manicures, and open up a world of creative design possibilities that brushes simply can’t replicate. Whether you’re chasing that soft aura nail look, creating smooth ombré transitions, or designing intricate stenciled patterns, an airbrush transforms what might seem like a complex artistic task into something genuinely manageable. The best part? You’ll save a tremendous amount of money over time compared to regular salon visits.
This guide walks you through every single step of the airbrush nail process — from selecting your first kit to sealing your finished design. You’ll understand exactly what equipment you need, why each piece matters, and how to use it confidently. Let’s break down what it actually takes to create stunning airbrush nails from your kitchen table.
Why Airbrush Nails Are Worth Doing at Home
Before investing in equipment, it helps to understand what makes this technique worth your time and money. Airbrush nails deliver results that hand-painting simply can’t match — the mist creates smooth, even color distribution without visible brushstrokes or clumpy coverage. You get that professional, polished finish every single time, regardless of your artistic skill level.
The financial argument is compelling too. A single professional airbrush manicure costs anywhere from $40 to $80, and if you’re someone who likes to refresh your nails every two to three weeks, that adds up to $800 to $1,500 annually. A decent beginner airbrush kit costs $80 to $150 upfront, and after that initial investment, your ongoing expenses are minimal — just paint and occasional cleaning supplies. You’ll recoup your investment within a few months and then enjoy years of essentially free manicures.
Beyond the money, there’s the creative freedom. You control every color choice, every design, every layer. You’re not limited to what a salon happens to have in stock or what a technician feels comfortable creating. Want a custom ombré blending five different shades? Done. Want to experiment with designs at midnight on a Sunday? Nobody’s stopping you. This level of control and accessibility transforms nails from a occasional luxury into a form of self-expression you can enjoy whenever inspiration strikes.
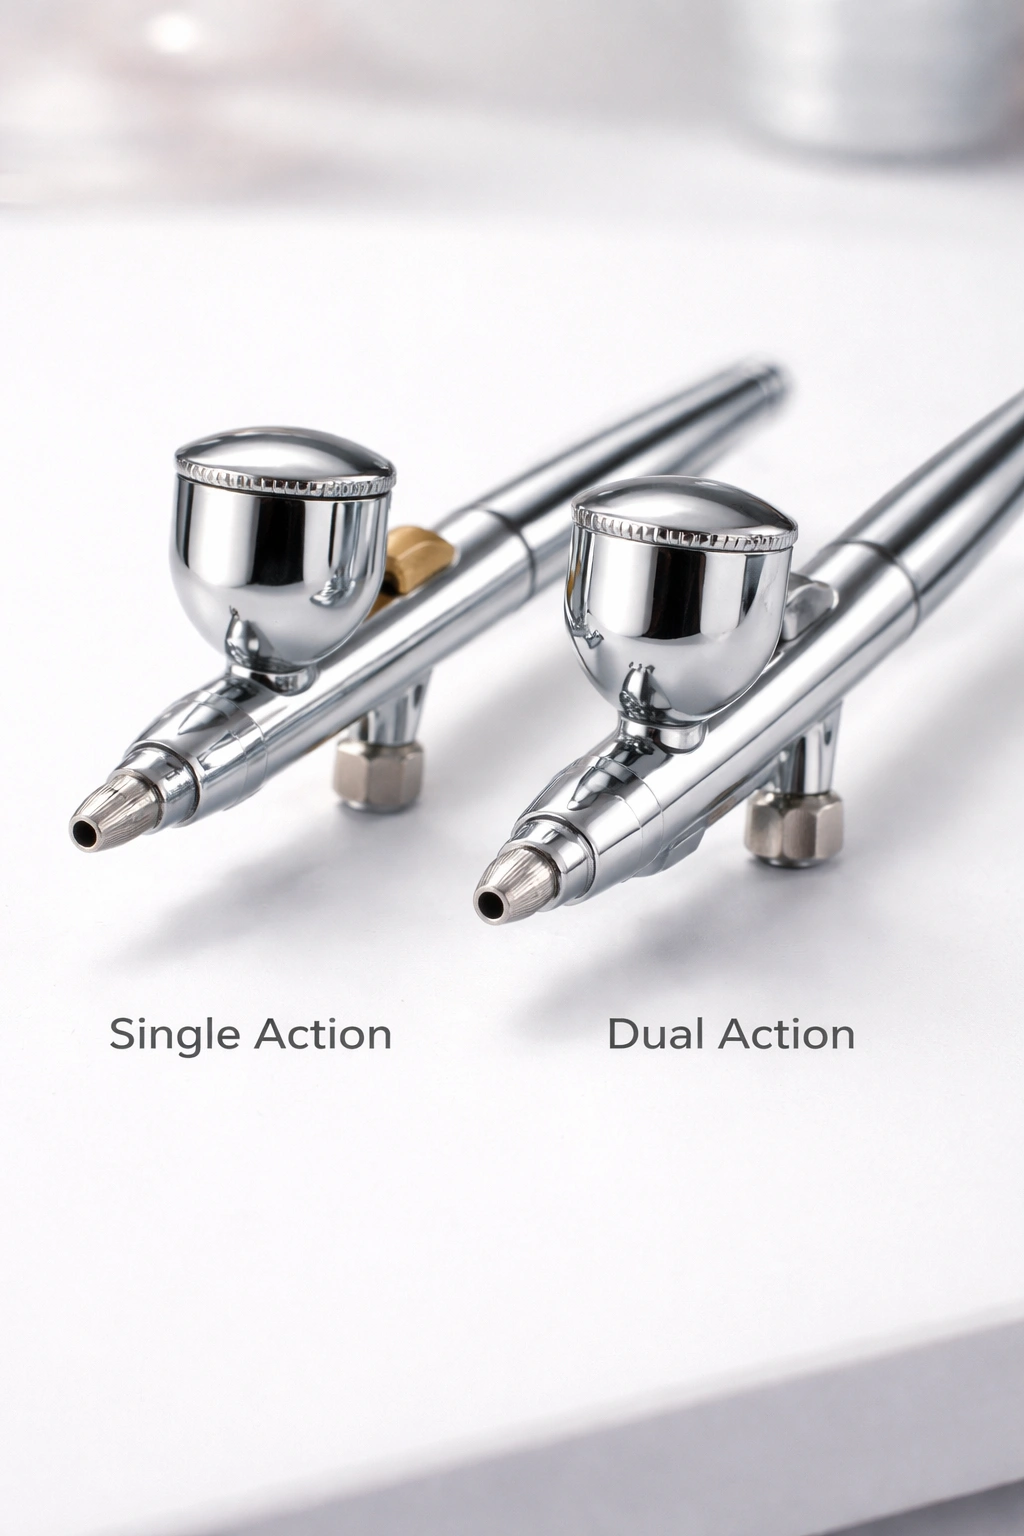
Choosing Between Single Action and Dual Action Airbrushes
Your first major purchasing decision is which type of airbrush gun to buy, and this choice will shape your entire experience with the technique. Understanding the difference between these two options helps you pick the right tool for your skill level and design goals.
Single action airbrushes operate with a straightforward mechanism: you press a button, air and paint release simultaneously in a fixed combination, and the amount of paint sprayed is predetermined. You don’t control the ratio — it’s set. This simplicity is actually the biggest advantage for beginners because there’s less to think about and fewer variables to manage. The gun is forgiving, the learning curve is gentle, and you can produce nice coverage quickly. The tradeoff is precision — single action airbrushes don’t excel at fine detail work, so if your designs involve thin lines, tiny dots, or intricate stencil work, you’ll notice limitations.
Dual action airbrushes give you separate control over air pressure and paint flow. You press the trigger down to release air, then pull it back to release paint, and how far you pull determines how much paint sprays. This setup demands more finesse and practice, but it rewards you with incredible precision and flexibility. Once you get comfortable with the trigger motion, dual action airbrushes let you create everything from hair-thin lines to full nail coverage without switching guns or changing settings. Most nail professionals use dual action because the control is worth the learning curve.
For beginners, a single action airbrush is genuinely the smarter choice. You’ll create beautiful nails immediately, build confidence, and learn foundational skills without becoming frustrated by overly complicated equipment. As you improve and crave finer detail work, you can always upgrade to dual action later. Many nail artists start with single action, master it, then transition to dual action once they’re ready for more advanced techniques.
Finding the Right Compressor for Your Needs
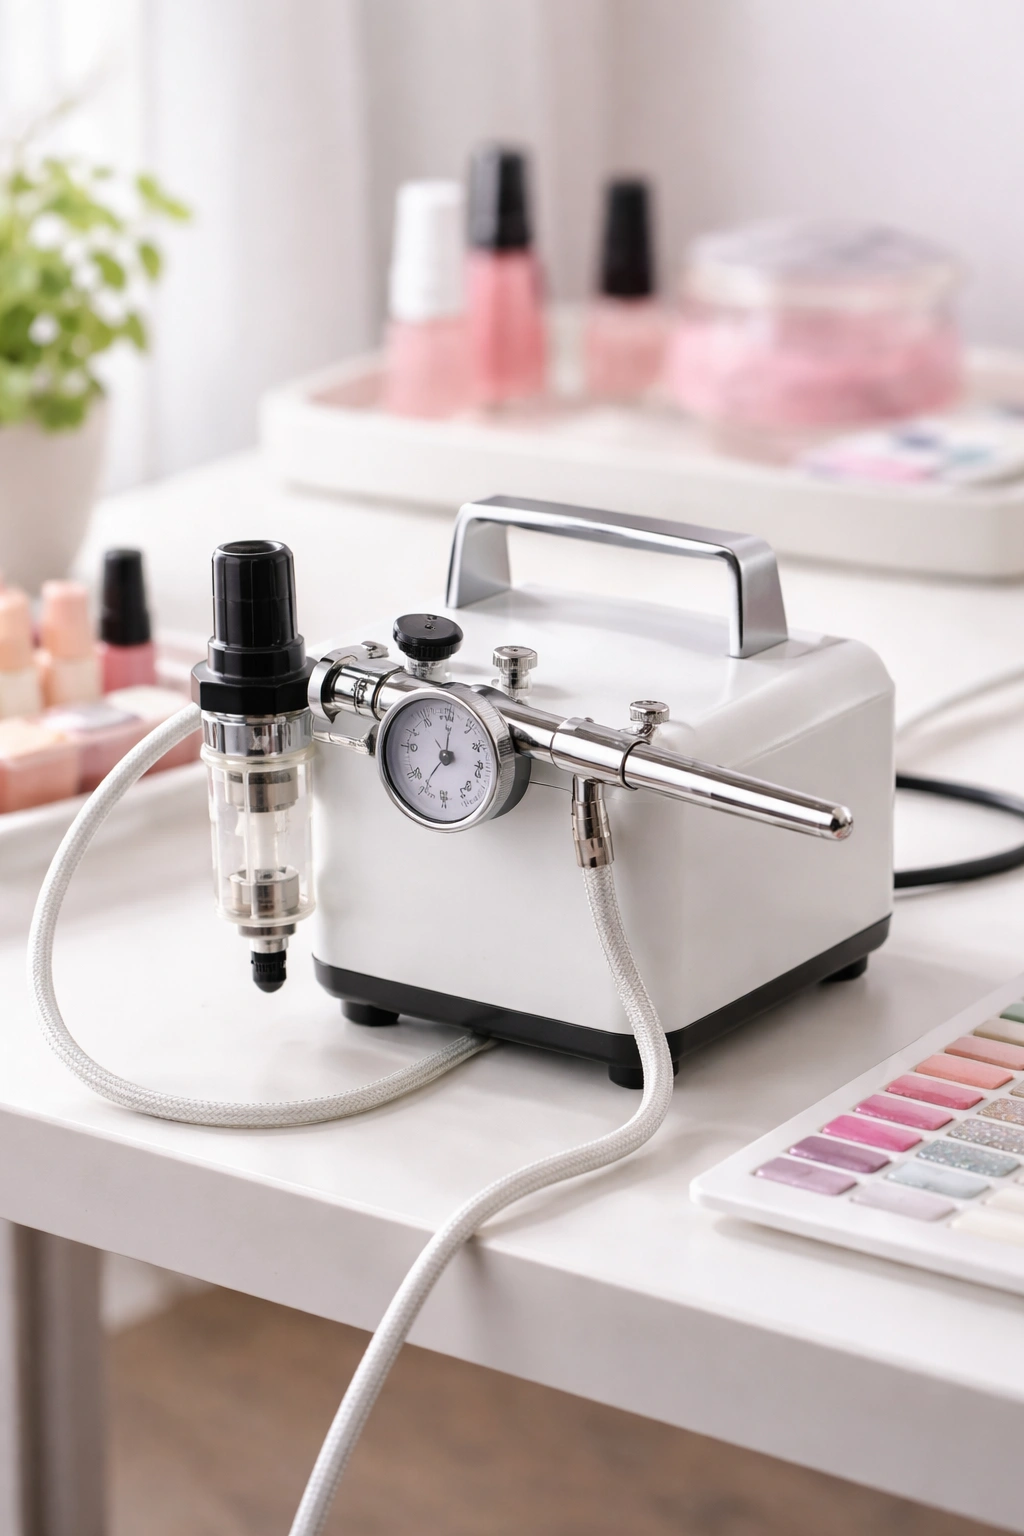
Every airbrush setup requires an air source, and that’s where the compressor comes in. Don’t let the term intimidate you — modern compressors designed for nails are small, portable, and user-friendly. They’re nothing like the giant industrial machines you’d see at an auto body shop.
For nail airbrushing specifically, you want a compact, portable compressor with consistent air pressure output. Look for specifications around 15-30 PSI (pounds per square inch) because nail painting doesn’t require high pressure — you’re spraying thin paints onto small surfaces, not coating cars. A compressor rated too high will actually make your work harder by delivering excessive force that’s difficult to control.
Size and portability matter more than raw power for home use. You don’t need a massive tank; you need something you can fit on a small table and put away easily when you’re done. Many beginner-friendly kits include a mini compressor about the size of a printer that runs on battery or USB power. These are genuinely convenient — you can work anywhere, cleanup is minimal, and storage isn’t a headache.
Pay attention to whether the compressor has a water separator and regulator. A water separator removes moisture that accumulates from compressed air, which prevents that moisture from mixing into your paint and ruining your finish. A regulator lets you adjust the PSI output, giving you more control over paint delivery. These aren’t luxuries — they’re practical features that improve your results. Many all-in-one beginner kits already include these built-in, which is one reason starter kits are genuinely good investments.
Understanding Water-Based Paints vs Regular Polish
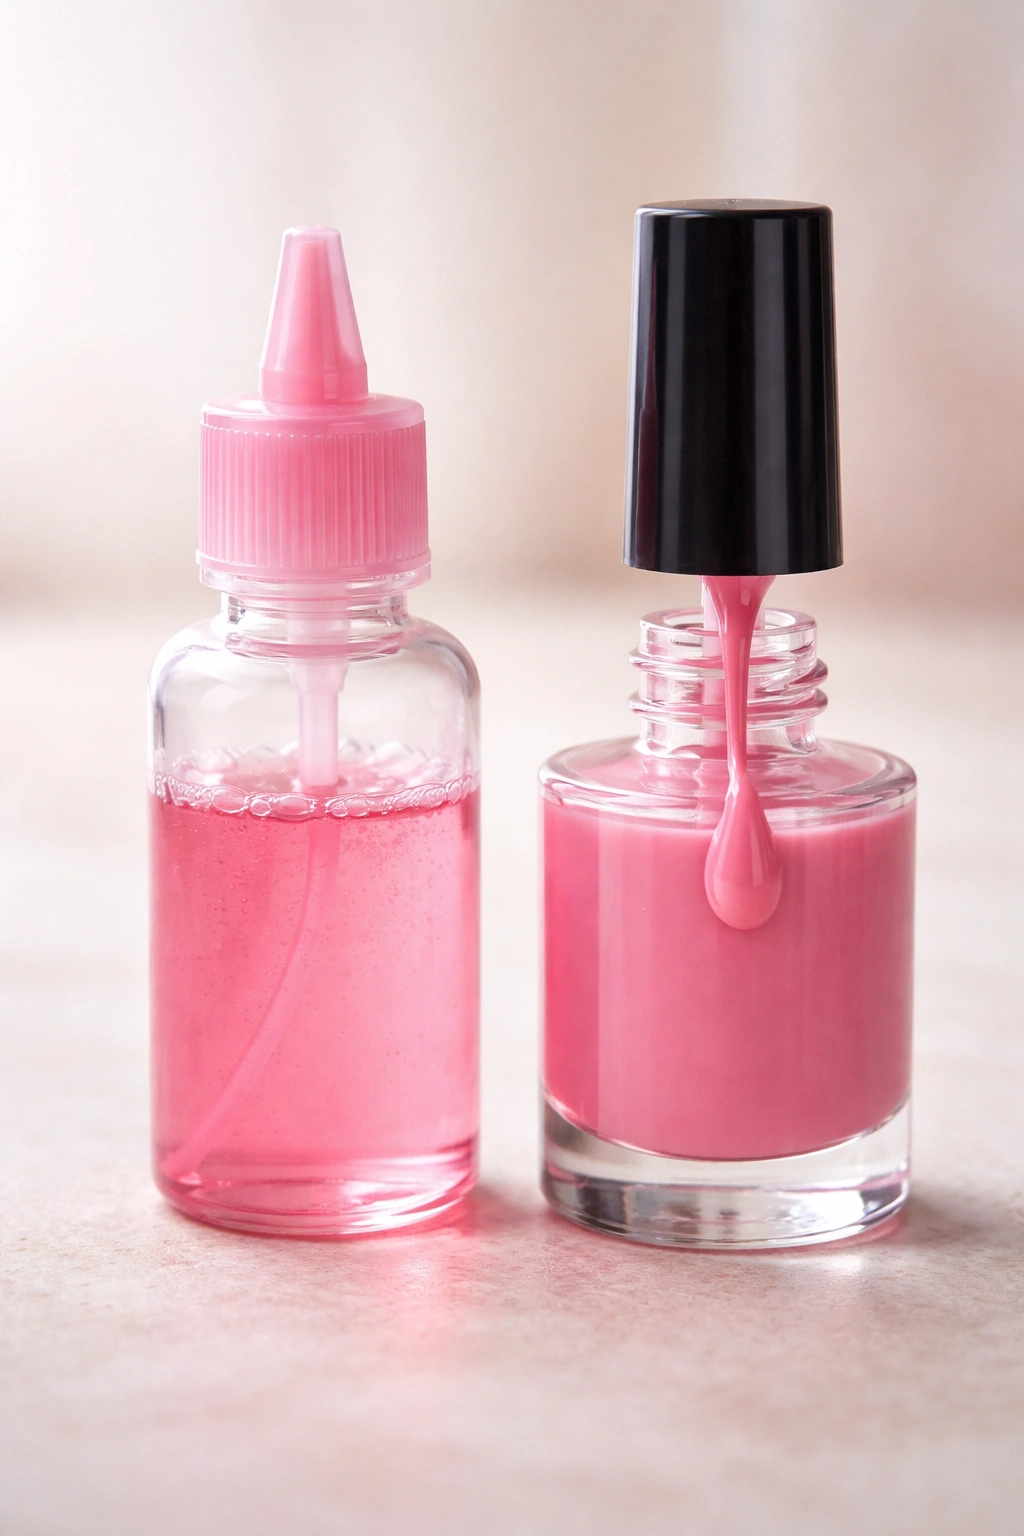
This is perhaps the single most important distinction to understand before you start: regular nail polish will absolutely clog your airbrush. This isn’t a myth or a guideline you can work around — it’s physics. Regular polish is formulated thick to apply with brushes and set quickly on nails. When you attempt to spray it through an airbrush, it gunks up inside the nozzle, clogs the tiny passages, and either stops spraying entirely or delivers an uneven, chunky result that ruins your design.
Water-based acrylic paints designed specifically for airbrush nail art are formulated completely differently. They’re much thinner, flow smoothly through the airbrush mechanism, atomize into a fine mist, and spray evenly across your nails. They adhere beautifully to a properly prepared nail surface, dry quickly, and are durable enough to last the same length of time as traditional polish — typically two to three weeks with normal wear.
Some nail techs thin out regular gel polish using acetone to create a sprayable consistency, and this works if you’re skilled at mixing the right ratio. For beginners, though, this adds an unnecessary complication. Stick with water-based airbrush paints specifically labeled for nail use. They come ready to spray (or with clear instructions for thinning), remove the guesswork, and prevent costly equipment damage.
The color palette available in water-based airbrush paints is genuinely expansive — metallics, glitters, pastels, neons, creams, shimmers. You can mix colors together to create custom shades, layer them for gradients, and achieve effects impossible with brushes. Once you start experimenting, you’ll realize that the paint limitations actually exist in your imagination, not in what’s available.
Setting Up Your Home Airbrush Station
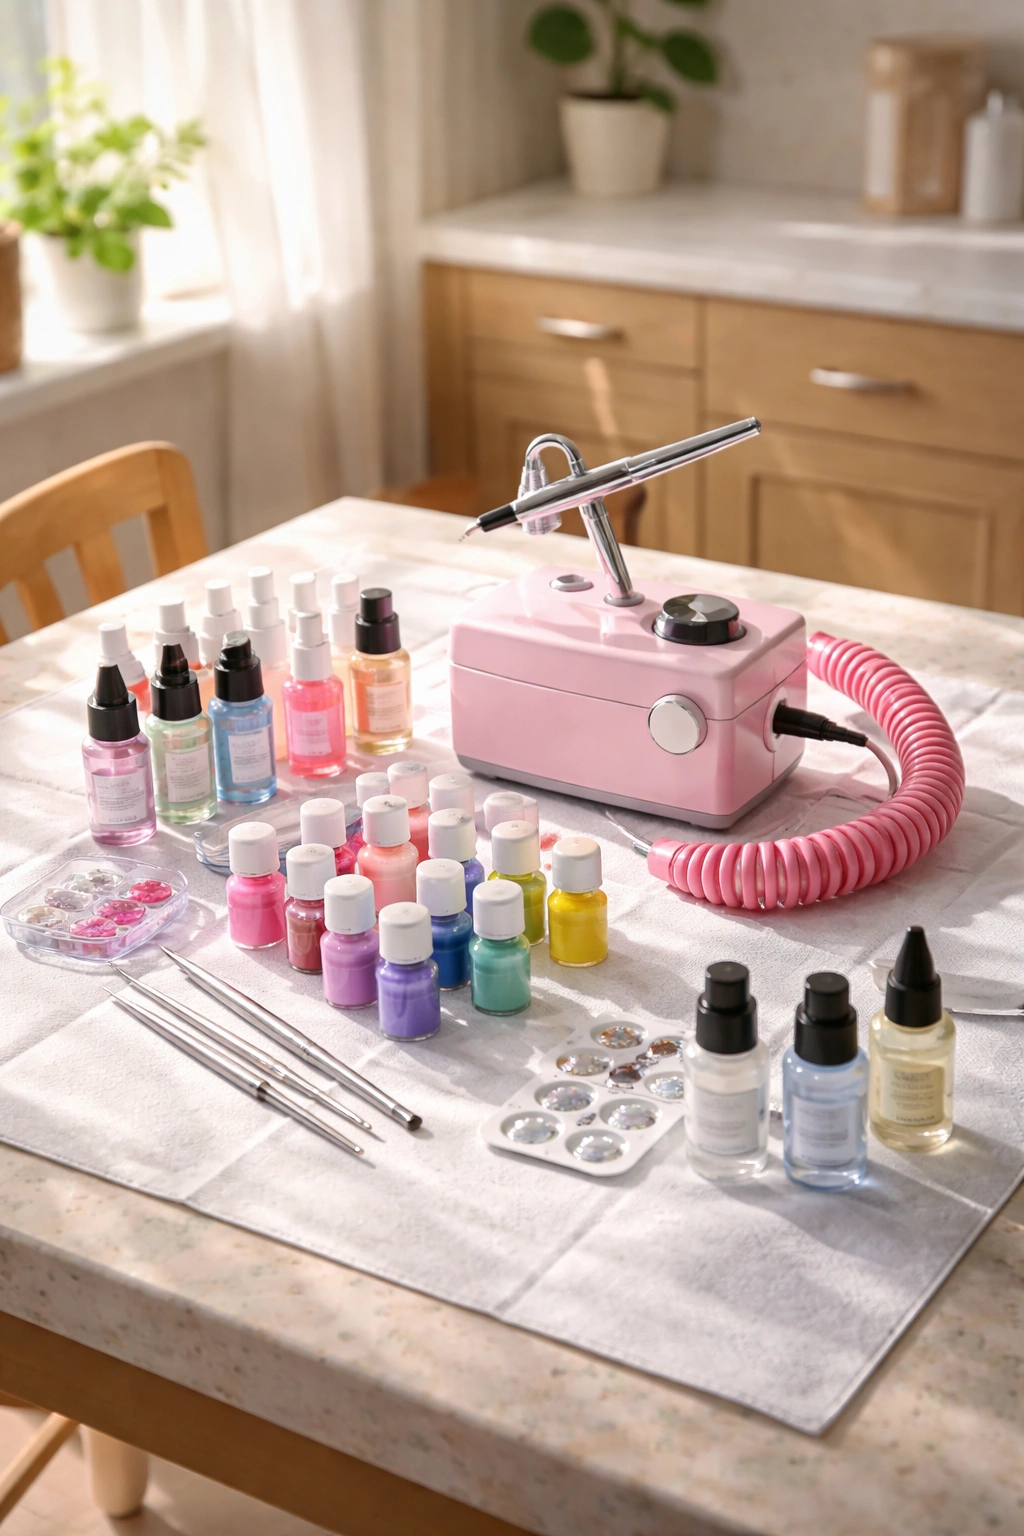
You don’t need a fancy studio or dedicated room — a simple kitchen table or bathroom counter works perfectly. What matters is having an organized, protected workspace where paint can spray without damaging your surroundings and where you can focus on technique.
Start by protecting your surface. Lay down newspaper, a plastic tablecloth, or a dedicated drop cloth that you designate specifically for this purpose. Overspray happens, especially when you’re learning, and it’s far better to have it land on disposable material than on your actual furniture. Beyond the immediate surface, clip or tape down a larger barrier behind and to the sides of your working area — a large piece of cardboard or poster board works fine and catches overspray you didn’t know was coming.
Gather all your supplies within arm’s reach before you start: your airbrush kit, compressor, paints, base coat, topcoat, stencils, tape, paper towels, and nail file. Having everything ready means you won’t scramble mid-project or waste time searching for supplies while your nails are prepped and waiting. This organization also prevents accidents like knocking over paint bottles or tangling the air hose.
Ventilation matters more than you might think. Even though water-based paints are much safer than traditional airbrush paints used in automotive work, you’re still creating an aerosol effect and inhaling some particles. Open a window, turn on a fan, or work in a naturally ventilated space. Some people wear a simple dust mask during airbrushing, which is completely reasonable. Your lungs will thank you, and you’ll notice fewer headaches during longer sessions.
Lighting is practical too. You want to clearly see your nail details and color application, so position yourself where natural light comes through or use a bright desk lamp. Poor lighting makes it genuinely difficult to see what you’re doing, leads to uneven coverage, and takes the fun out of the process.
Preparing Your Nails Like a Pro
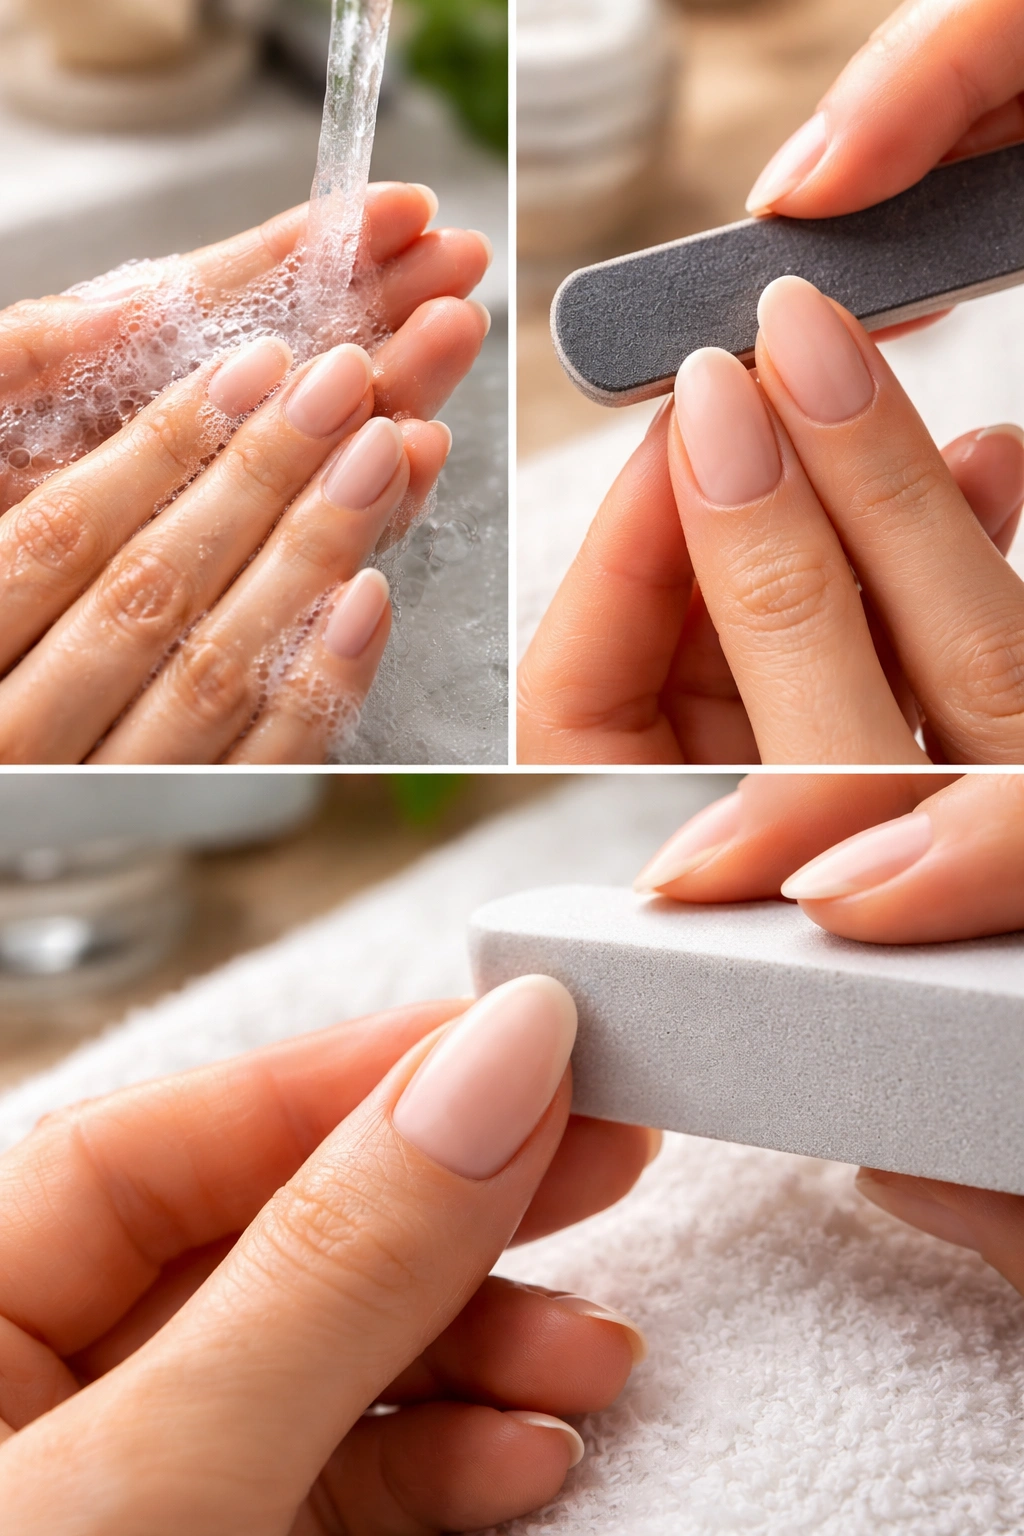
Beautiful airbrush designs start with properly prepared nails, and this step genuinely makes the difference between results that look amateur and results that look professional. Preparation is exactly what separates a mediocre airbrush manicure from one that actually impresses people.
Start by washing your hands thoroughly with soap and warm water, paying special attention to remove any oils, dirt, or lotion residue from your nail surface. Dry completely — any moisture left on your nails interferes with polish adhesion and causes uneven coverage. Pat dry with a clean towel rather than rubbing, which prevents dragging dirt back onto your nails.
File your nails to your desired shape — square, rounded, almond, or coffin. File in one direction rather than sawing back and forth, which prevents splitting and peeling. The shape you choose is entirely personal preference, but keep in mind that longer nails give you more surface area for intricate designs, while shorter nails work beautifully too, just with simpler patterns. After filing, use a buffer block to smooth the nail surface and create a slightly matte finish — this micro-roughness helps polish adhere better than a perfectly shiny nail.
Push back your cuticles gently using a cuticle pusher, and if you have hangnail or dead skin around the nail edges, trim it away carefully with cuticle nippers. This step isn’t purely aesthetic — clean cuticles also affect how evenly your paint covers. Cuticle buildup creates an uneven surface that causes patchy color application.
Use a nail dehydrator or rubbing alcohol on a cotton pad to remove any remaining oils from the nail surface. This final cleaning step is crucial because it ensures your base coat adheres properly and your topcoat seals completely. Skip this step and you might notice your design chipping sooner than expected.
Applying Base Coat Correctly
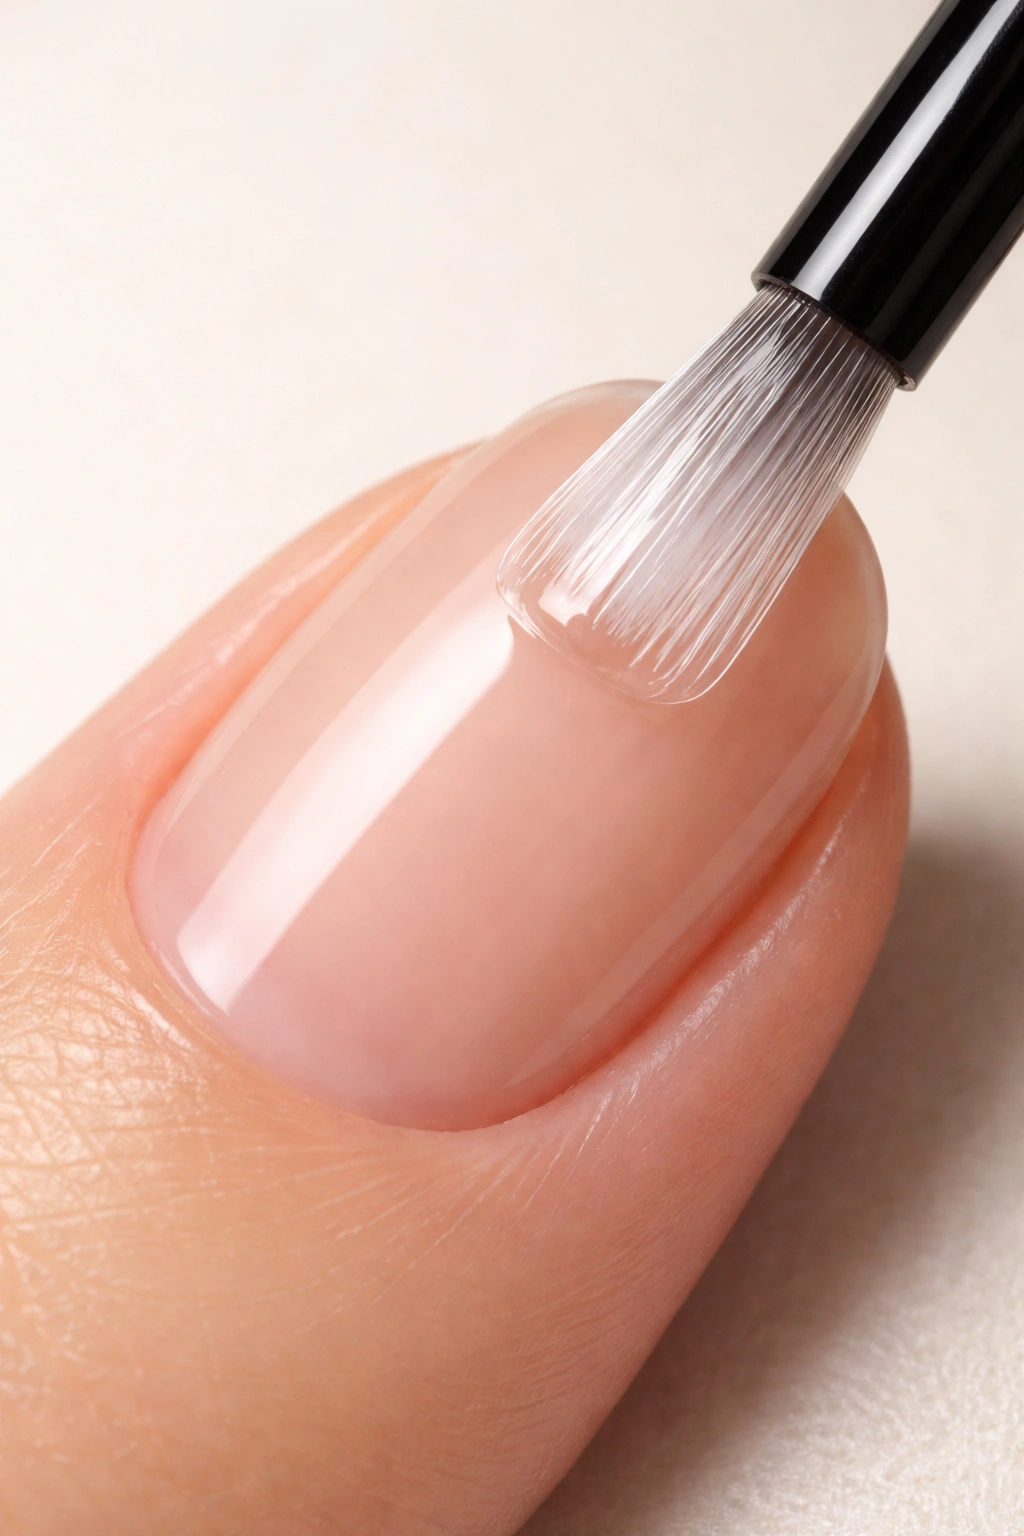
The base coat is your foundation, and treating it as such prevents problems down the line. You need a base coat formulated specifically for airbrush designs because regular base coats sometimes don’t provide adequate adhesion for water-based airbrush paints — the paint can peel off prematurely if the base isn’t right.
Apply the base coat in a thin, even layer using the provided brush. Don’t glob it on thinking more product equals better protection — actually, a thick base coat is more likely to be uneven and take forever to dry. One smooth coat is all you need. Paint from the cuticle area to the tip, making sure the entire nail surface is covered. Stroke direction doesn’t matter, but smooth, deliberate strokes prevent air bubbles from forming in the polish.
Let the base coat dry completely before proceeding. This typically takes about five minutes, but check your specific product’s instructions. Don’t rush this step — a tacky or partially wet base coat causes your airbrush paint to bead up and create an uneven finish. You want a completely set foundation.
If you’re using a gel base coat (which many nail techs prefer for the durability), cure it under your UV or LED lamp according to the product instructions — usually 30 seconds to 1 minute. Make sure not to wipe away the tacky layer that remains on top of gel unless your instructions specifically tell you to. That tacky layer actually helps the next coat of paint adhere.
Some nail artists apply a thin layer of white polish over the base coat to make colors pop brighter, especially if they’re using translucent or pastel shades. This is optional but genuinely effective if you want maximum color vibrancy.
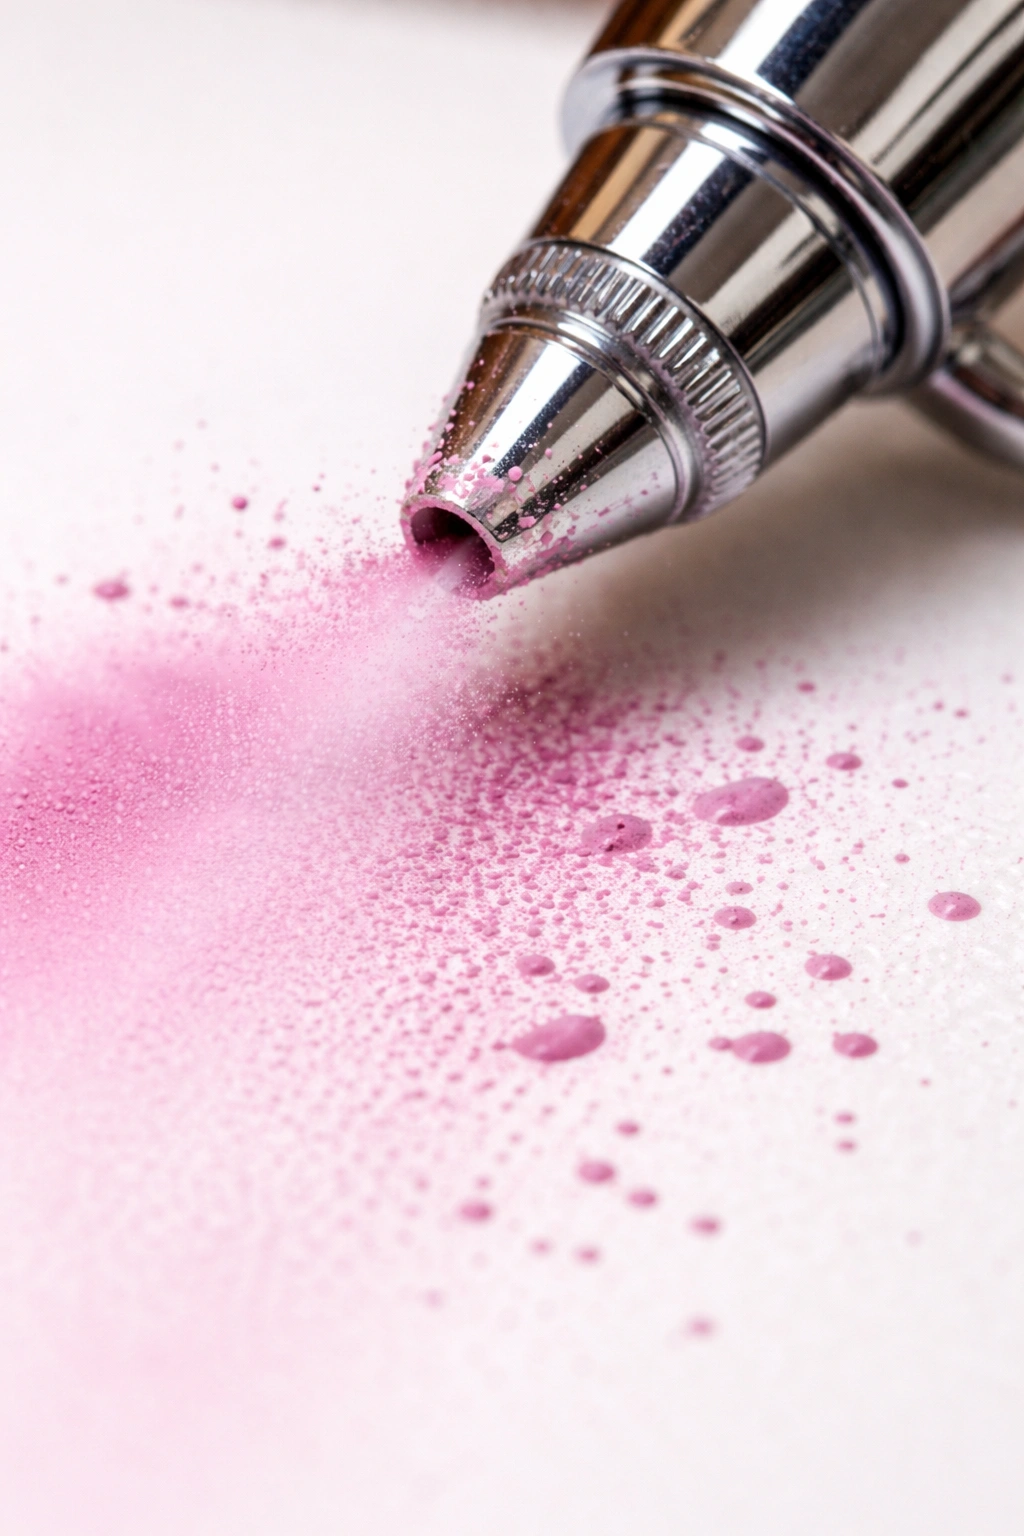
Loading and Testing Your Airbrush

Before you ever aim that airbrush at your finished nail prep, you need to load the paint and test that everything works correctly. This prevents surprises and lets you troubleshoot equipment problems on paper rather than on your nails.
Open your paint bottle and, using the small dropper or measuring spoon that came with your kit, add 4-6 drops of water-based airbrush paint into the paint cup at the top of your airbrush gun. This amount is plenty — nails require very little paint because you’re working with a tiny surface area. Too much paint in the cup makes a mess, increases overspray, and wastes product.
Screw the cup securely onto the gun, ensuring it’s tight but not so tight that you strip the threads. Connect the air hose to both the compressor and the airbrush gun, using firm hand pressure to twist the connectors tight. Make sure both connections are completely secure before turning on the compressor — a loose hose causes air leaks that reduce pressure and create inconsistent spray.
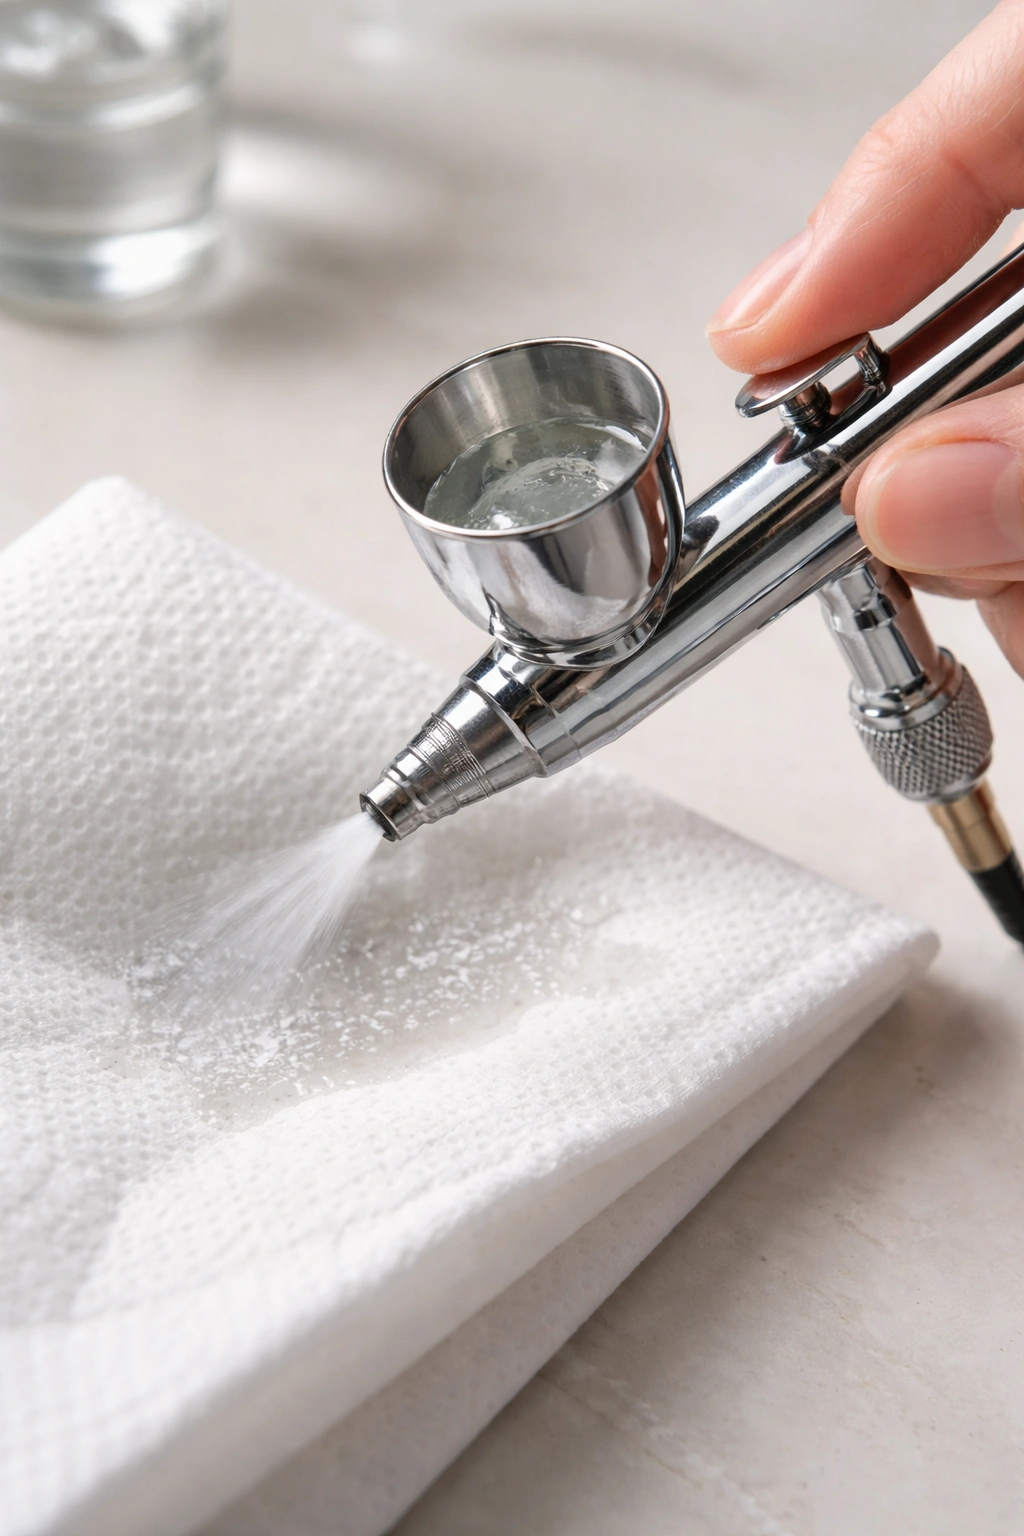
Turn on the compressor and immediately test your airbrush on a piece of scrap paper or a paper towel held at arm’s length. Pull the trigger and observe what comes out. You should see a smooth mist of paint that appears light and even. If the spray is chunky or spotty, the paint consistency isn’t right, and you’ll need to thin it further before applying it to your nails. If nothing comes out at all, check that all connections are tight and that the paint cup isn’t clogged.
Perform a few test strokes on the paper. Pay attention to spray consistency, distance from the surface, and how the paint feels being released. This is your no-pressure practice round where mistakes don’t matter. Get a feel for trigger sensitivity and how the paint flows. This test phase is invaluable — it builds confidence and lets you adjust technique before you commit to your nails.
Mastering Trigger Control and Hand Technique
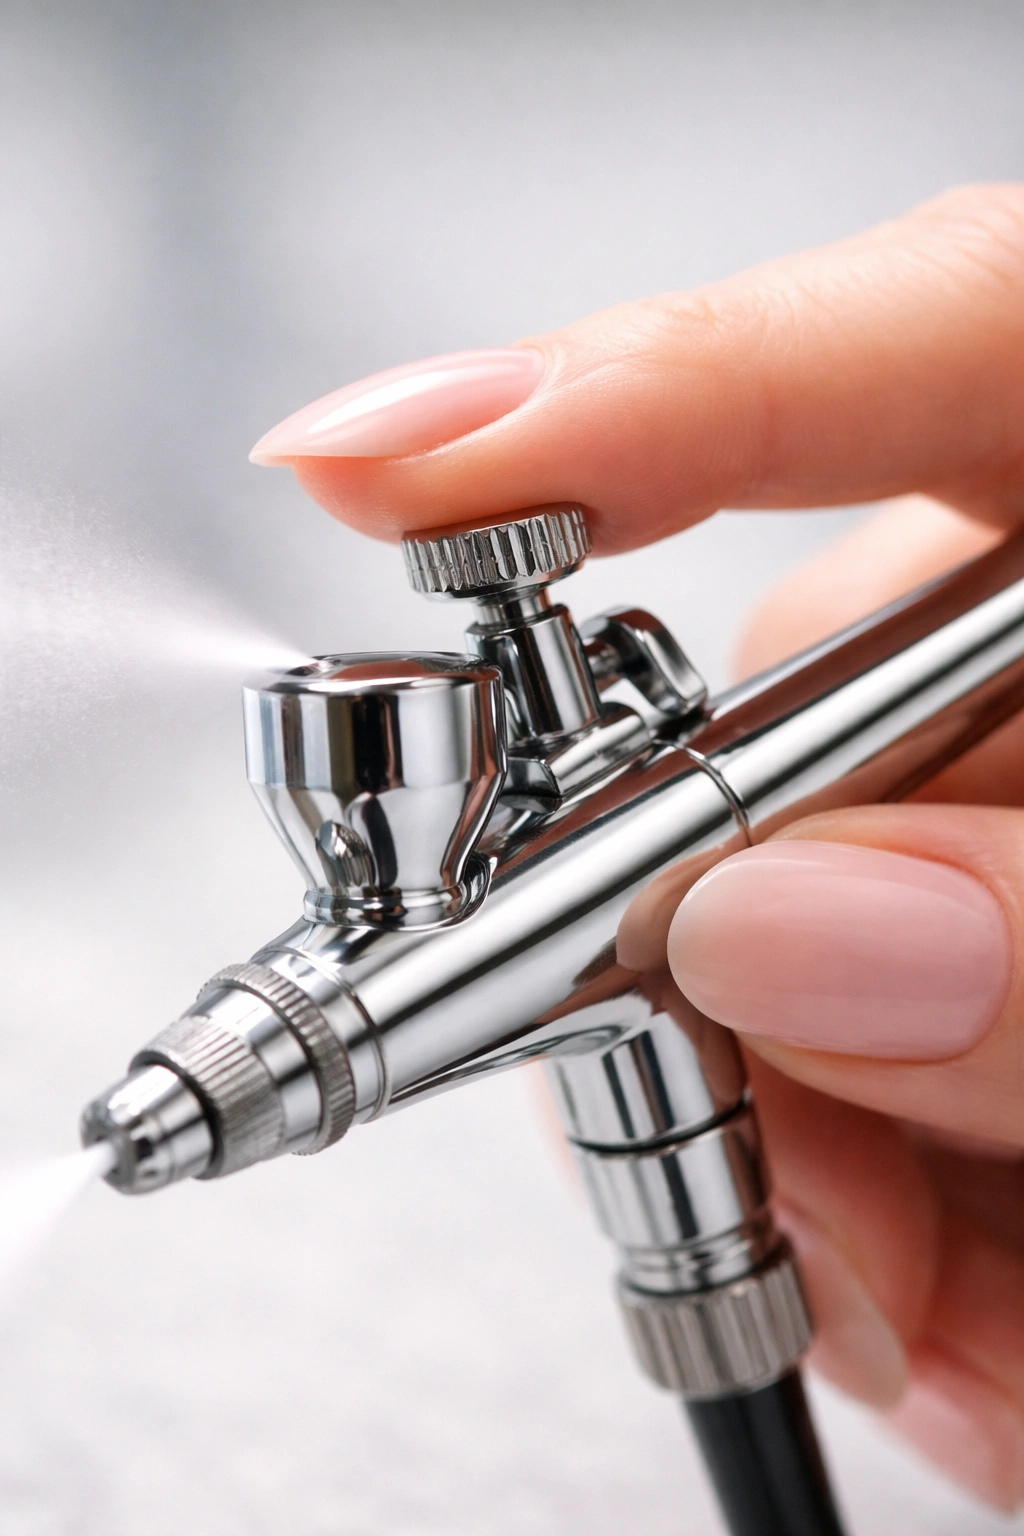
Trigger control is the foundational skill that separates nice airbrush nails from exceptional ones, and it’s something that genuinely improves with practice. This isn’t about talent — it’s about muscle memory and repetition.
If you’re using a single action airbrush, simply pressing the button releases a set amount of paint, so there’s less technique involved. Press, paint comes out, release. Focus on moving the gun smoothly and keeping your distance consistent.
For dual action airbrushes, the technique is slightly different. Press the trigger straight down to release air (you should hear a quiet hiss), then slowly pull the trigger back to gradually release paint. The further back you pull, the more paint flows. When you’re done, push the trigger forward to stop paint flow, but keep holding it down to maintain air flow for a moment. Finally, release the trigger completely. This motion becomes automatic with practice, but initially it requires conscious thought.
Hold the airbrush perpendicular to your nail (90 degrees, pointing straight at the surface) and maintain consistent distance — typically 2-3 inches from the nail. Too close and you apply heavy color that looks uneven; too far and the paint dries mid-air before reaching your nail. Find your comfort distance through testing and stick with it.
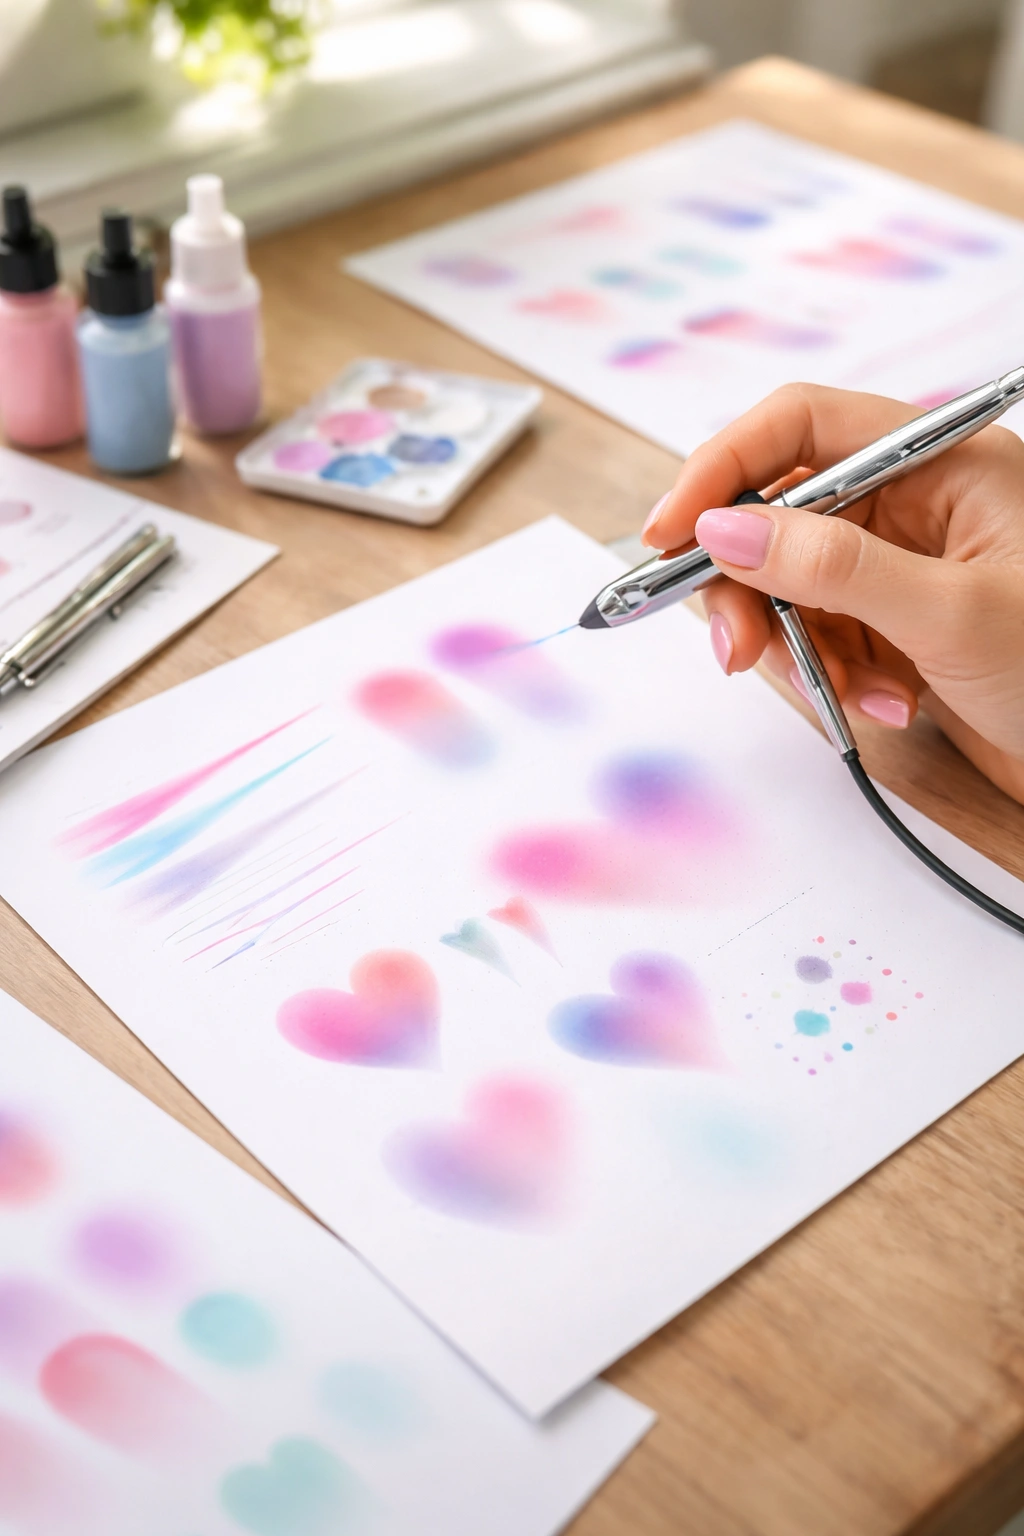
Move your hand in smooth, controlled motions — never jerk or hesitate. A smooth, flowing motion produces even color distribution. If you stop or stutter, you create darker spots where the paint accumulates. Practice on paper first, making long, smooth strokes, short dabs, and curved lines. This paper practice is where you develop the hand control that translates into beautiful nail designs.
Pressure matters too. Use light, gentle touch rather than gripping the airbrush tightly. A relaxed hand creates natural, flowing motions. Tension makes you stiff, which shows in your spray pattern. Breathe, relax your shoulders, and let your hand do the work smoothly.
Using Stencils to Create Professional Designs
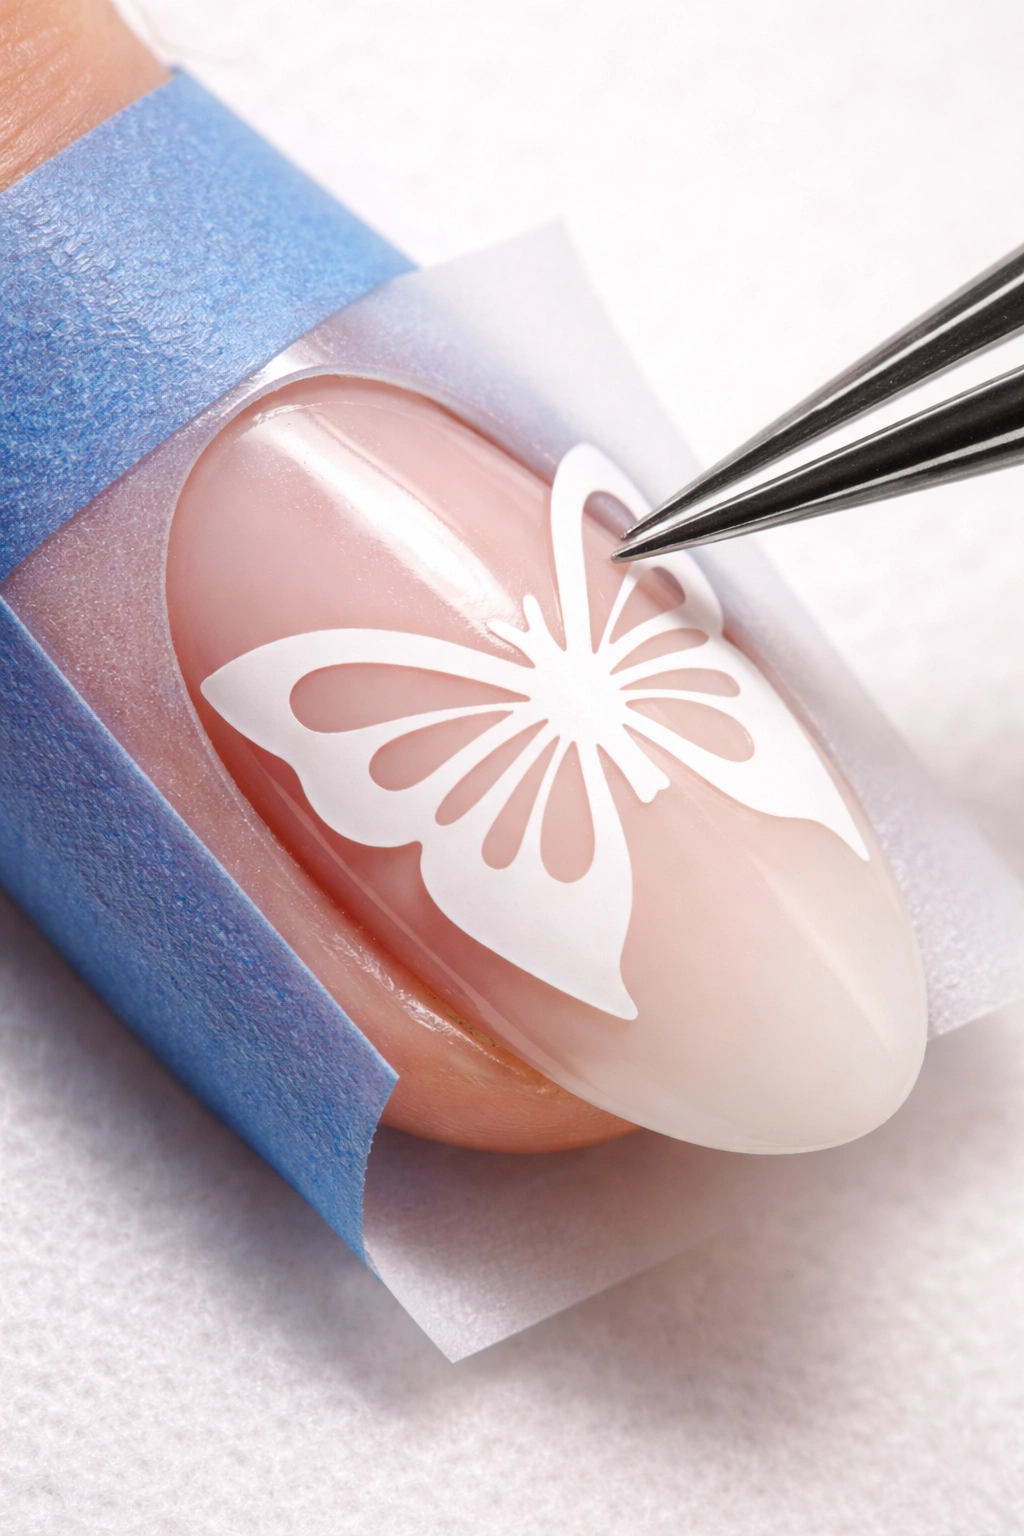
Stencils are honestly the secret weapon for beginners — they remove the artistic requirement and let you create professional designs immediately. Even experienced airbrush artists use stencils because they enable precise, repeatable patterns that would be incredibly difficult to freehand.
Stencils for airbrush nails come in several formats. Self-adhesive stencils have a sticky backing that adheres directly to your nail, positioning them perfectly without slipping. Plastic or paper stencils need to be held in place by hand. Reusable stencils withstand multiple uses and work with various nail sizes. Choose whatever format appeals to you, though self-adhesive stencils are genuinely more beginner-friendly because you don’t have to worry about the stencil moving mid-spray.
When placing a stencil, make sure your base coat is completely dry. Position the stencil on the nail so the design is where you want it. If it’s a self-adhesive stencil, gently press it down so it adheres fully and evenly — any bubbles or loose edges allow paint to seep underneath, ruining the crisp edge of your design.
Tape around the edges of your nail with painter’s tape or regular tape to catch any overspray and keep paint off your skin. Tear small pieces and place them around the nail perimeter, making sure you’re not covering any part of the nail you want to paint.
Now spray your chosen color over the stencil using smooth, light strokes. Start at one side and work across, maintaining even distance and speed. Build up color gradually with multiple light passes rather than trying to get full coverage in one heavy pass. Light coverage is controllable and looks better than heavy application that’s more likely to seep under stencil edges.
Once you’ve achieved your desired color saturation, carefully remove the stencil. Do this gently while the paint is still slightly wet — it peels away cleanly and reveals a crisp design edge. If you wait until the paint is bone dry, you risk dragging paint along with the stencil. Peel slowly and deliberately, using even pressure.
Layering Colors for Ombré Effects
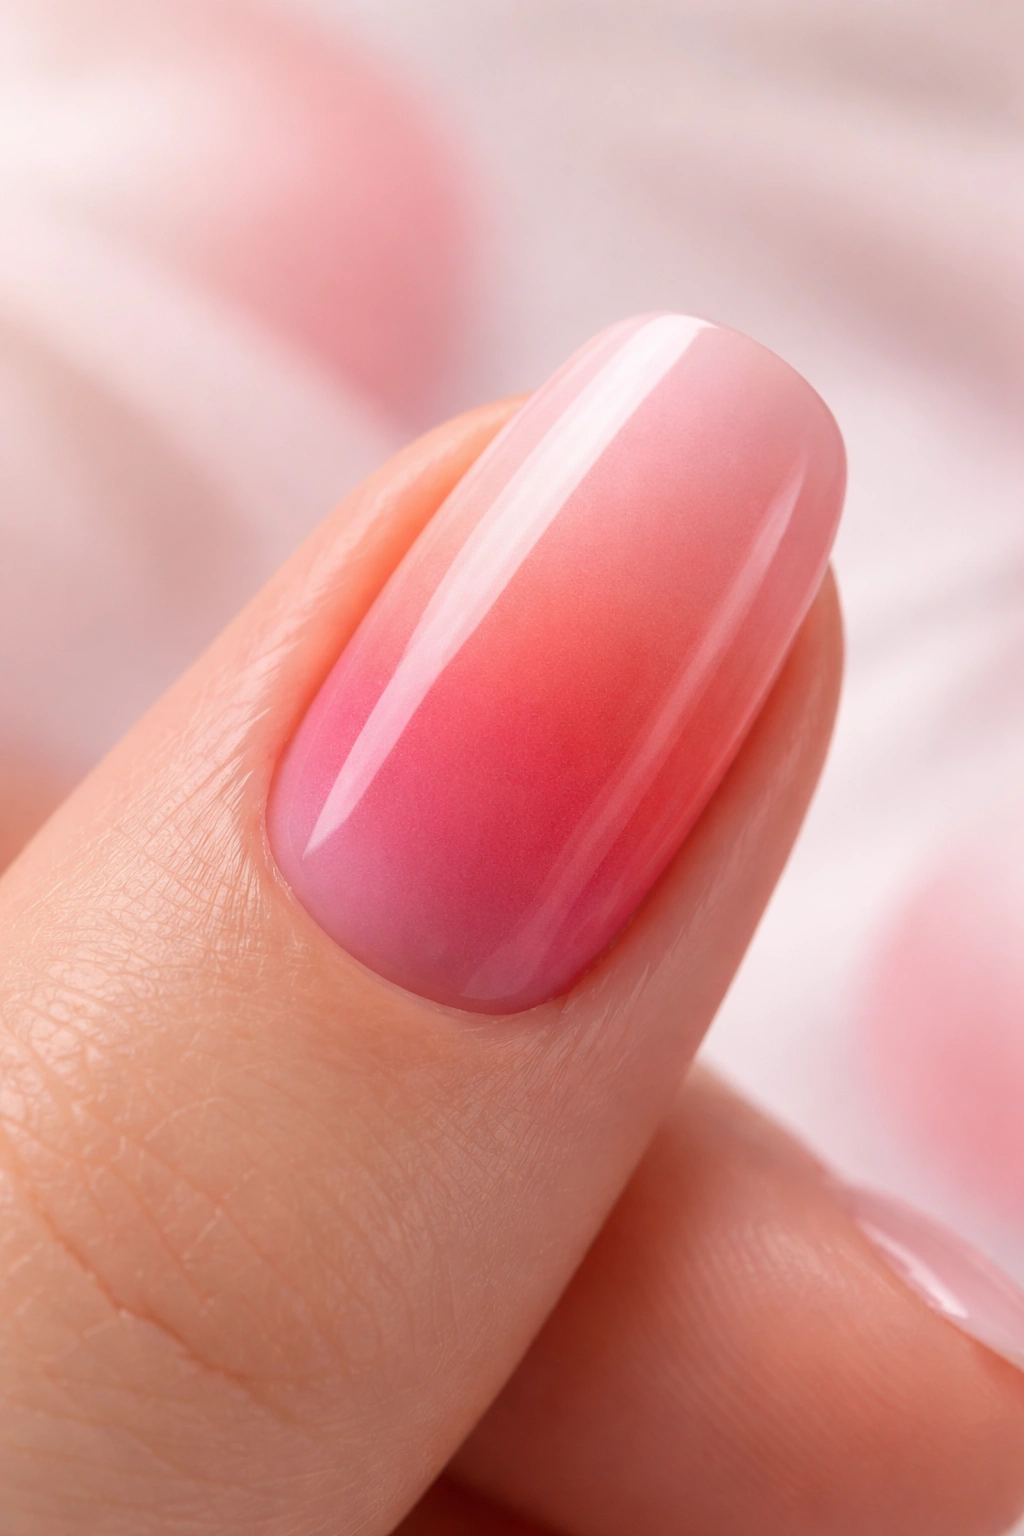
The ombré effect — that gorgeous gradient from one color to another — is one of the most popular airbrush nail designs, and it’s surprisingly simple to achieve with proper technique. Ombré showcases what airbrush does better than any other nail art method: smooth, blended color transitions.
Start with your lightest color and spray it across the entire nail as a base wash. Light coverage is fine at this stage — you’re not trying to fully cover yet, just establish your base tone. Let this first layer dry for a moment.
Next, spray your medium shade across the middle portion of the nail, allowing it to slightly overlap with the edges of your light base color. The overlapped area is where the blend happens. Don’t overthink this — airbrush naturally creates soft blending if you use multiple light passes rather than trying to create a perfect line.
Finally, spray your darkest shade in a concentrated area — typically the tip of the nail — and let it fade into the medium color. Build up darkness gradually by doing multiple light passes rather than trying to apply heavy coverage that looks muddy and opaque.
The magic happens when colors fade into each other rather than creating distinct lines. This happens naturally when you use the light-pass technique — you’re essentially feathering colors together. The key is patience and letting the airbrush do the work. Trust that multiple light applications create better results than fewer heavy applications.
Once you’ve achieved the gradient you want, let everything dry completely before proceeding to stencil or other details. Adding stenciled elements on top of an ombré base creates stunning layered designs that look far more complex than they actually are to create.
Troubleshooting Common Airbrush Problems
Even with good technique, problems happen sometimes, especially when you’re learning. Understanding how to diagnose and fix common issues prevents frustration and keeps you practicing effectively.
Clogged nozzle is the most frequent problem, usually caused by paint that’s too thick or paint residue left from a previous session. You’ll notice the spray becoming weak or stopping entirely. Solution: stop immediately, empty the paint cup, refill with airbrush cleaner, and spray into a paper towel until the spray is clear again. If that doesn’t work, you may need to disassemble the nozzle tip and soak it in cleaner for a few minutes.
Sputtering or uneven spray typically means your paint consistency is wrong. The paint is either too thick or too thin. If it’s too thick, thin it with a bit more water or thinning medium. If you’ve already added too much thinning agent, the paint is too thin and becomes transparent, so add more paint. You’re looking for the consistency of milk or light cream.
Paint beading up on your nails instead of adhering suggests your nail surface isn’t properly dehydrated or your base coat isn’t adequate. Go back and redo your prep — clean your nails with rubbing alcohol before applying the base coat, and make sure your base coat has dried completely.
Overspray landing on your skin is annoying but easily prevented with proper taping. If you’re consistently having issues, use painter’s tape around your fingers and apply liquid latex around your nails. These barriers catch overspray and peel away cleanly.
Weak air pressure makes it hard to atomize paint properly, resulting in blotchy coverage. Check that your compressor is turned on and that your air connections are tight. If pressure is still low, your compressor may need maintenance — clean any filters or check for water accumulation that reduces pressure.
Applying Topcoat and Sealing Your Design
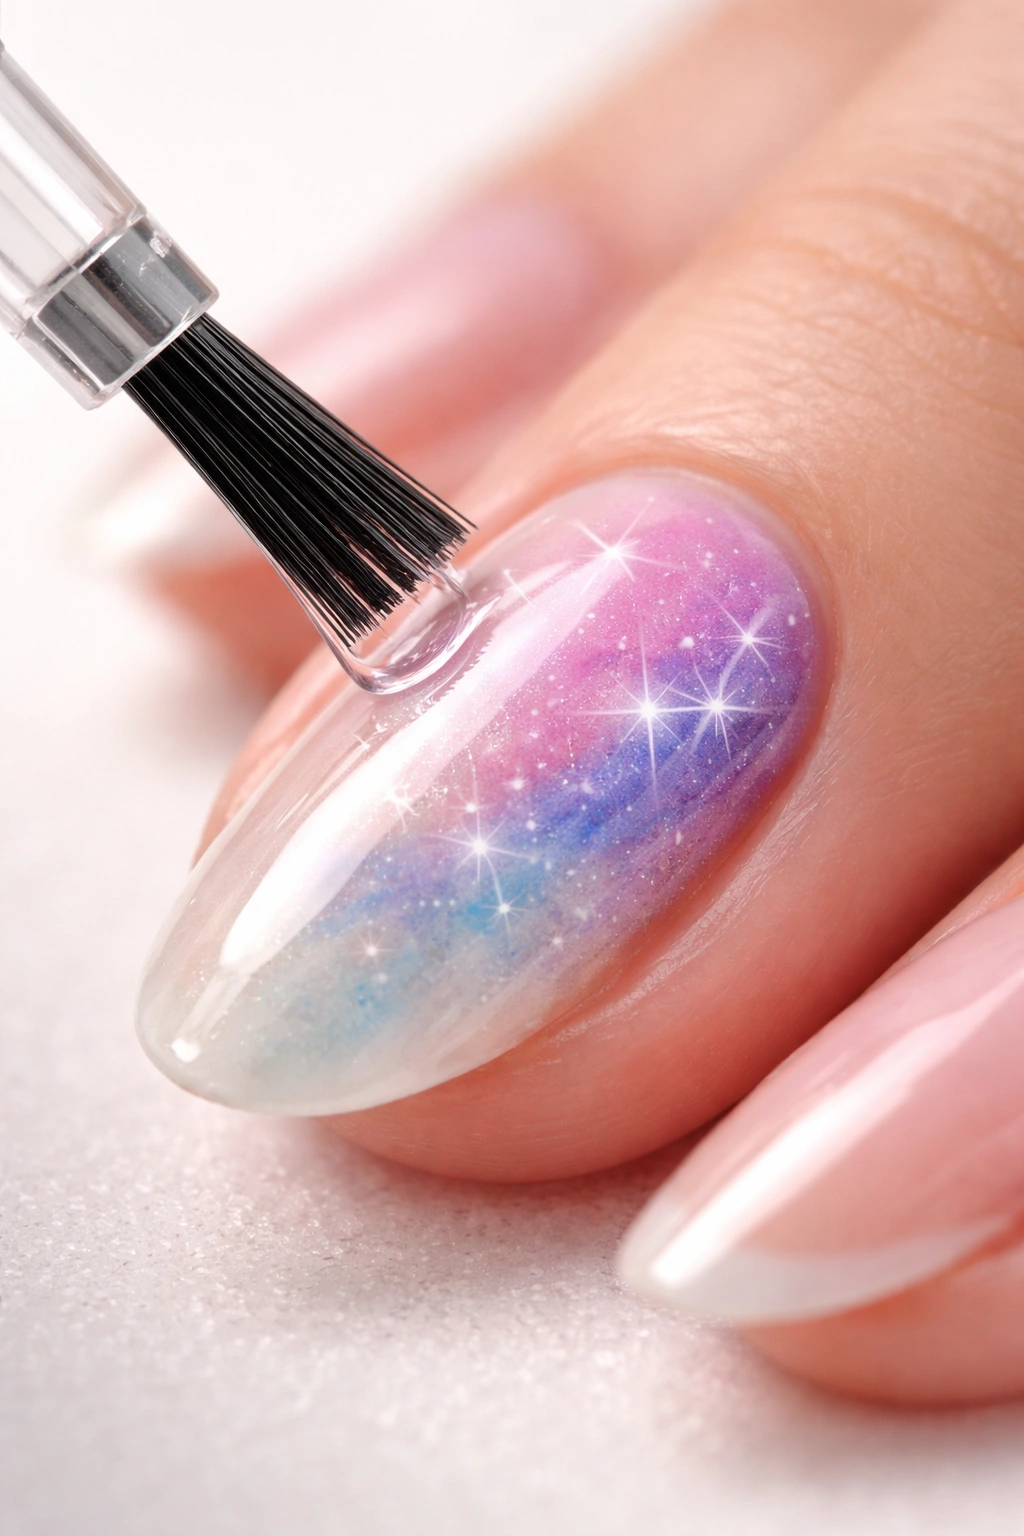
Once your airbrush design is complete and fully dry, topcoat seals everything and provides the protective layer that makes your manicure last. This step is genuinely important — don’t skip it thinking your nails will last fine without it.
Use a topcoat specifically formulated for airbrush designs if possible. Regular topcoat works, but airbrush-specific topcoats are formulated to adhere properly to water-based paint and provide maximum durability. Apply it the same way you applied your base coat — smooth, even layer, full coverage from cuticle to tip.
Some nail artists apply two thin topcoat layers rather than one thick layer, and this actually provides superior protection. Let the first layer dry briefly, then apply a second coat. This layering approach is especially smart if you’ve invested significant time in your design and want it to last as long as possible.
If you used a gel base coat, you’ll want to use a gel topcoat as well for consistency. Cure it under your UV or LED lamp according to product instructions. Wipe away the tacky layer with acetone-free nail polish remover if the product requires it.
Regular (non-gel) topcoats dry by air, which takes a few minutes. You know it’s fully set when the surface feels completely smooth and hard rather than tacky. Avoid getting your hands wet or doing anything with your nails for at least 30 minutes after applying topcoat — let it cure fully before subjecting your design to any stress.
Cleaning and Maintaining Your Airbrush
Proper cleaning after every single use is the only thing standing between a functional airbrush and an expensive paperweight. Paint dries inside the mechanism and clogs passages, rendering the gun unusable. Clean immediately after finishing your nails — don’t let paint set inside.
Empty any remaining paint from the cup into your original paint bottle. Pour airbrush cleaner (usually provided with your kit) into the cup, filling it about halfway. Screw the cup back onto the gun and spray the cleaner into a paper towel or small container. You’re pushing cleaner through the entire system to dissolve any paint residue.
Continue spraying until the cleaner comes out completely clear with no trace of paint color. This might take several refills of cleaner in the cup, depending on how much paint was in the system. This step is genuinely non-negotiable — incomplete cleaning leads to clogging.
Once you’ve flushed the system with cleaner, empty the cup again and use a soft brush (usually provided with cleaning kits) to gently brush away any visible paint residue from the cup interior and around the tip. Use acetone-free cleaner and a lint-free cloth to wipe down the exterior of the gun.
If your airbrush has a removable needle or nozzle, refer to your kit’s instructions for how to safely remove and clean these parts. Never force anything — needle tips are delicate, and forcing a stuck piece damages it. Soak removable parts in cleaner if they’re heavily gunked up.
Store your airbrush with the gun pointing downward so any remaining liquid drains out rather than sitting inside. Store it somewhere dust-free and where it won’t get knocked over. A simple cardboard box or a dedicated case works great.
Final Tips and Best Practices
As you develop your airbrush skills, certain practices will make your process smoother and your results more consistent. Keep these touchstones in mind as you practice.
Practice on paper endlessly. Every spare moment, grab a piece of scrap paper and practice trigger control, smooth motions, and consistency. This practice costs nothing and builds the muscle memory that translates into better nails. After 20 minutes of paper practice, sit down and do your nails — you’ll notice immediate improvement.
Keep detailed notes on paint ratios, times, and settings that work for you. Document which paint brands work best, how much thinning you needed, how long specific base coats took to dry. This information becomes your personal reference guide that eliminates trial-and-error.
Join airbrush communities online where people share techniques, troubleshoot problems, and post inspiration. Seeing what other people create inspires your own designs and exposes you to techniques you might not have considered.
Don’t compare your beginning work to other people’s advanced work. Every professional you see posting beautiful designs started exactly where you are now, fumbling through early attempts. Progress comes from consistent practice, not from natural talent. Trust the process, put in the practice, and your skill will develop.
Invest in quality basics rather than cheap knockoffs. A decent beginner airbrush kit costs more upfront than the absolute cheapest option, but it works reliably, produces better results, and lasts years instead of frustrating you within weeks.
Remember that mistakes aren’t failures — they’re learning opportunities. A design that didn’t turn out perfectly is still a manicure you created yourself, and each attempt teaches you something about technique, paint consistency, or trigger control that makes your next attempt better.
Airbrush nails absolutely seem intimidating before you start, but once you understand the equipment, practice the basic techniques, and develop confidence in your trigger control, you’ll realize it’s genuinely manageable. You’re creating beautiful art on your nails, saving money, and discovering a creative outlet that’s always available whenever inspiration strikes. Start with simple designs, master the fundamentals, and progressively work toward more complex patterns as your skills develop. Within a few weeks of regular practice, you’ll look at your nails and feel genuine pride in what you’ve created.
