

Your toenails deserve as much love and creativity as your fingernails, and the good news? You don’t need a professional or fancy equipment to make them look absolutely stunning. Toenail art has become one of the most accessible ways to express your personal style, whether you’re prepping for a beach vacation, a casual summer outing, or just want to brighten up your everyday look. The beauty of DIY toenail designs is that you can create salon-quality results from the comfort of your own home, often for just a fraction of the cost.
If you’re worried that toenail art is complicated or requires artistic talent, think again. The best designs for beginners are the ones that look impressive but require minimal skill to execute. Many of the most popular looks are actually based on simple techniques—dotting, striping, color blocking, and adding embellishments. With a few basic tools and a little patience, you’ll be amazed at what you can create. The key is starting with designs that build your confidence while teaching you foundational techniques you can use to develop more complex art down the road.
Before diving into the specific designs, it’s worth taking a few minutes to properly prepare your toenails. A good foundation makes all the difference. Start by trimming your toenails to a comfortable length using proper nail clippers, then file them into a neat shape—oval or rounded shapes work best for small nail canvases. Gently buff the surface of each nail with a nail buffer to smooth out ridges and create a uniform base. Next, soften your cuticles with a cuticle softener or oil, then gently push them back using a cuticle pusher. This gives you more nail surface to work with and creates that polished, professional look. Finally, apply a moisturizing lotion or cuticle oil around the edges, then finish with a base coat on each nail. This protective layer helps your polish adhere better and prevents staining.
Now you’re ready to transform your toes into tiny works of art. Let’s explore eight beginner-friendly designs that’ll have you feeling like a true nail artist.
1. Polka Dot Toenails
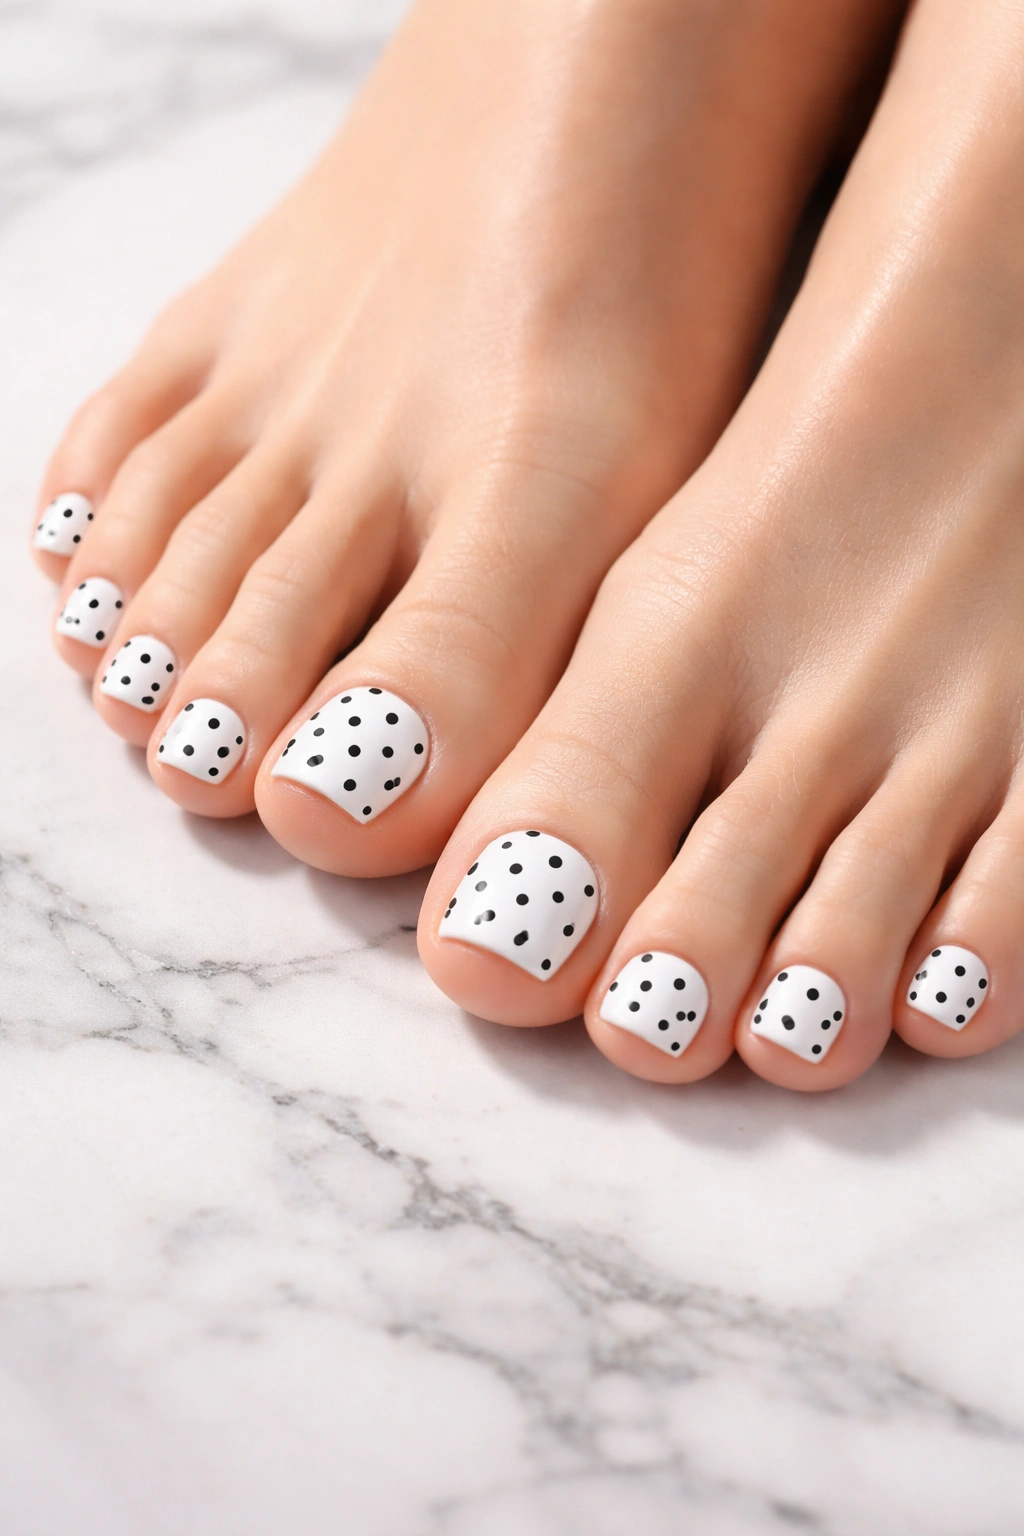
Polka dots are the ultimate beginner’s design, and for good reason—they’re foolproof, charming, and work with virtually any color combination you can imagine. This classic pattern suits every style, from preppy to playful to sophisticated, depending on your color choice.
Why Polka Dots Are Perfect for Beginners
The beauty of polka dots is that they require nothing more than a dotting tool and two nail polish colors. You don’t need perfect precision because slightly imperfect dots actually add to the vintage, handmade charm of the design. Even if one dot comes out a tiny bit wobbly, it blends right in with the others. This design is incredibly forgiving, which means you can relax and enjoy the process without stressing about making mistakes.
Simple Polka Dot Technique
- Paint all your toenails with your chosen base color (white, cream, or pastel shades work beautifully)
- Allow the base coat to dry completely—this is crucial so your dots don’t smudge into the base color
- Using a dotting tool, toothpick, or even the end of a bobby pin, dip it lightly into your contrasting nail polish color
- Create dots across each nail, spacing them roughly evenly for a balanced look
- Start with fewer dots and add more if you want a denser pattern—you can always add more, but removing dots is trickier
- Allow everything to dry, then seal with a glossy top coat
Pro tip: Vary your dot sizes slightly by pressing the dotting tool at different angles and with varying pressure. This creates visual interest and makes the design feel more organic and artistic.
2. Rainbow Gradient Dots
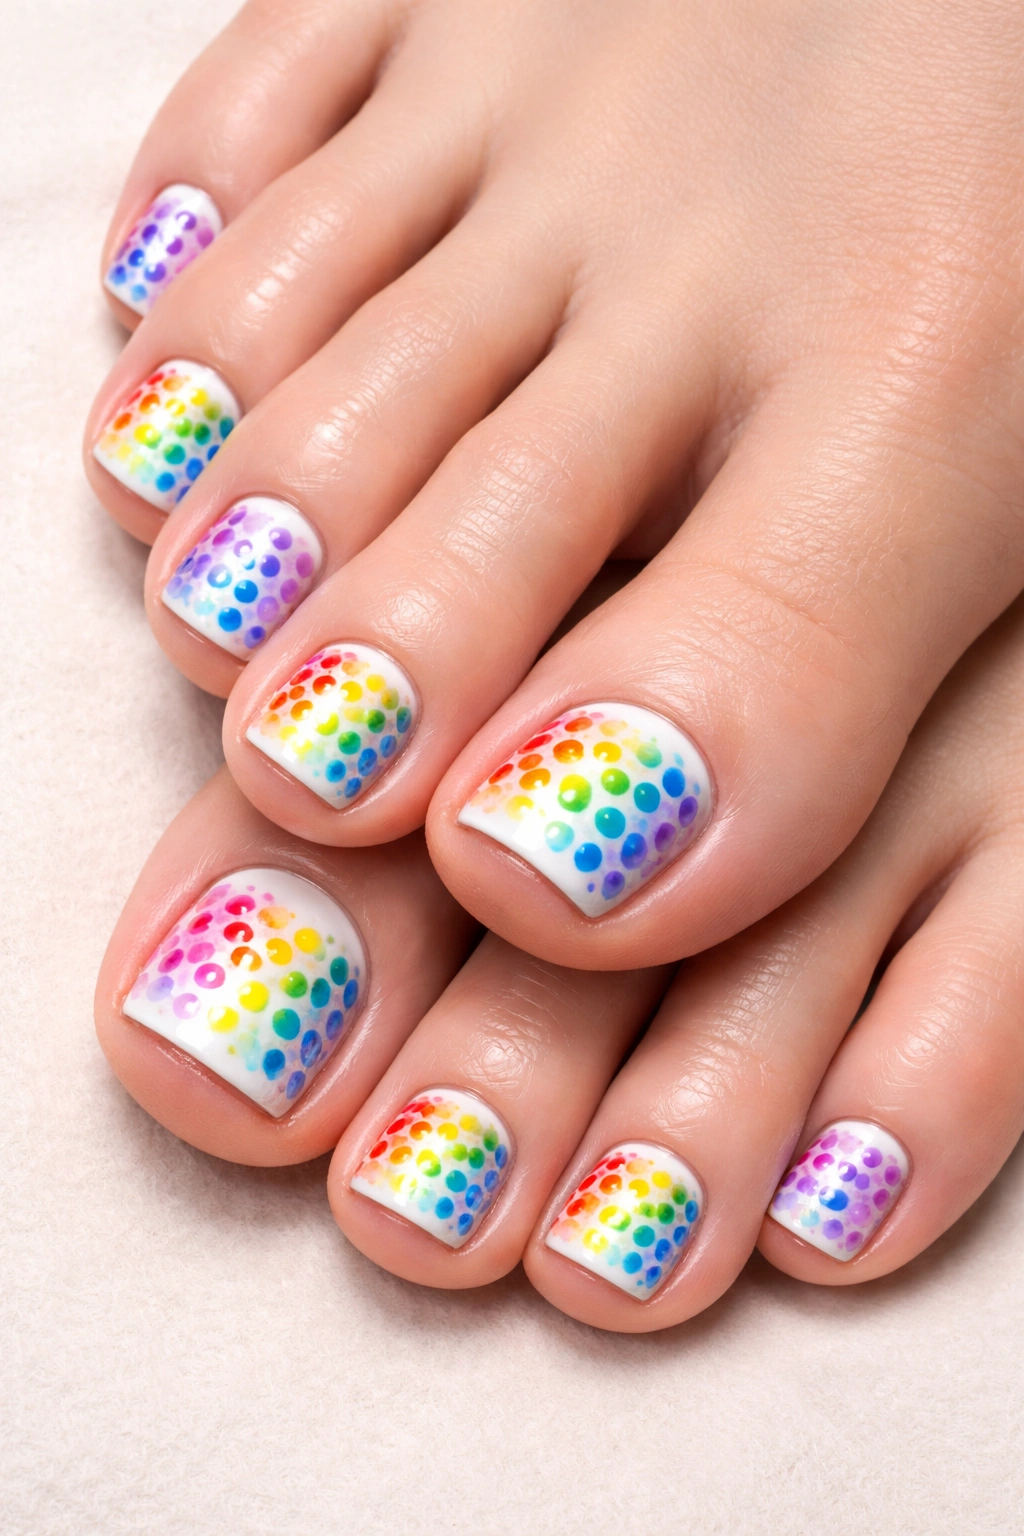
Take the polka dot concept and elevate it by using multiple bright colors across each nail, creating a rainbow effect. This design combines the simplicity of dotting with the visual impact of bold, multi-colored nail art.
Creating the Rainbow Effect
Start with a white or neutral base coat—this allows your colorful dots to really pop and appear vibrant. Instead of using just one contrasting color for your dots, select 4-6 bright, cheerful shades: red, orange, yellow, green, blue, and purple. Apply dots to each nail, but distribute the colors so that each toe features different colored dots in a rainbow pattern. You might put red and orange dots on your big toe, yellow and green on the next nail, and blue and purple on the others.
Design Tips for Success
- Work on one color at a time—apply all the red dots across your toes first, then move to orange, and so on
- This prevents you from mixing wet polish and accidentally smudging colors together
- Space your dots generously across the nail to avoid overcrowding and to keep the design clean and readable
- The contrasting colors will look most striking on a white or very pale base
- Use a matte top coat instead of glossy for a more modern, artistic feel
Worth knowing: This design works especially well for summer pedicures because the bright, cheerful colors evoke vacation vibes and pair beautifully with sandals and beach outfits. The rainbow theme is universally appealing and instantly uplifts your mood.
3. Nautical-Themed Toenails

Bring the charm of a seaside vacation to your toes with a nautical design featuring classic maritime elements. This design celebrates timeless beach aesthetics and works wonderfully for anyone who loves ocean-inspired looks.
Building Your Nautical Design
Begin with a navy blue base coat across all your toenails—this deep blue evokes the ocean and serves as the perfect canvas for white maritime accents. On your big toenail, create a simple white anchor using a thin nail art brush or toothpick. Start by drawing a vertical line for the anchor’s shaft, then add a curved loop at the top and two curved prongs at the bottom. It doesn’t need to be perfect; a slightly wonky anchor adds authentic charm.
For your other toenails, add horizontal white stripes using nail striping tape or a thin brush. These stripes resemble sailor suit details and create visual rhythm across your pedicure. On one or two nails, you can also add small white dots to represent rope details or decorative elements.
Nautical Design Elements to Explore
- Keep the design minimal—navy and white is the classic color combo, but you can introduce gold accents for added sophistication
- Add rhinestones or small gold beads along the cuticle line for extra glamour
- Paint a simple sailboat silhouette on one nail for variation
- Use a nail pen instead of a brush for cleaner, more controlled lines
- Consider adding a thin gold line accent to emphasize the anchor or stripes
Insider note: This design photographs beautifully and works perfectly for beach vacations, summer weddings, or any occasion where you want a polished, put-together look that whispers nautical elegance without screaming it.
4. Tropical Paradise Pedicure
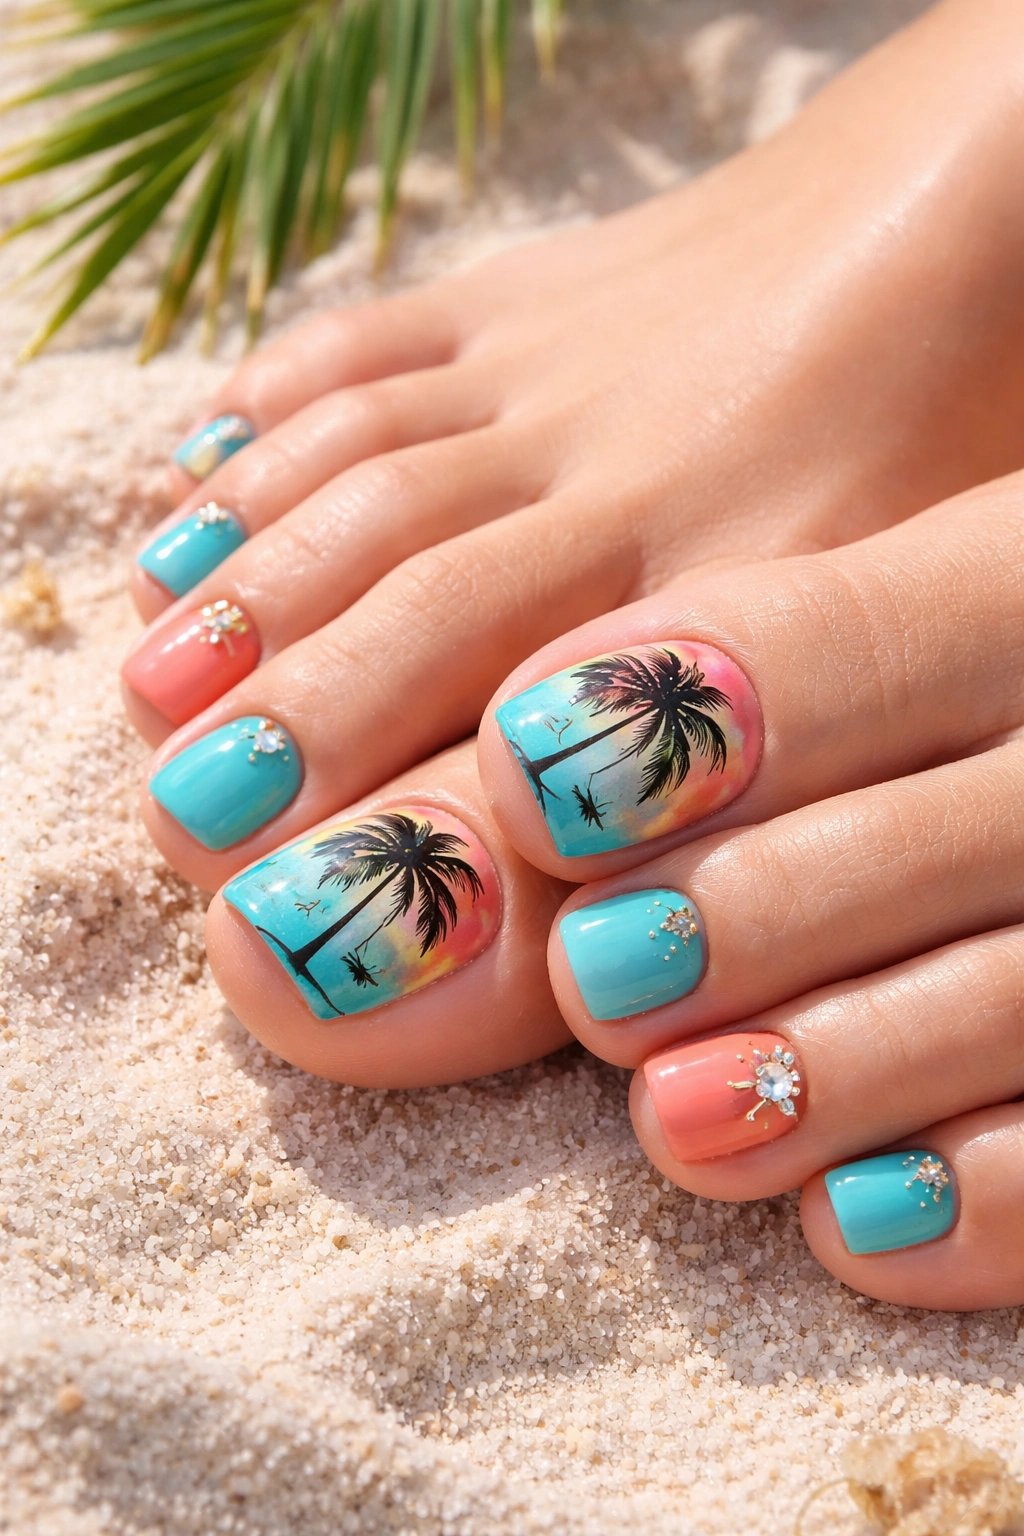
Transform your toenails into a lush tropical escape with vibrant colors and playful motifs that evoke sandy beaches, swaying palm trees, and island vibes.
Choosing Your Tropical Palette
Tropical designs thrive on color variety and boldness. Select a bright, sunny base color like turquoise, coral, or sunny yellow for most of your toenails. These colors immediately set a vacation mood and provide excellent backgrounds for accent details. On one or two toenails, you can switch to a complementary color—if your base is turquoise, try coral as an accent nail.
Creating Tropical Details
Using a thin nail art brush or toothpick dipped in black polish, paint palm tree silhouettes on one nail. Start with a thin vertical line for the trunk, then add curved lines extending upward and outward for the fronds. These don’t need to be botanically accurate—stylized, simplified palm trees are actually more charming and easier to execute. Add small dots in contrasting colors to represent coconuts or tropical flowers like hibiscus blossoms. You can also create palm leaf shapes around the edges of your nail using green polish for added botanical detail.
Tropical Design Variations
- Paint small flowers in the corners of nails using basic five-dot flower technique (create a center dot, then four dots around it)
- Add tiny pineapple shapes on accent nails using yellow and green polish
- Create a sunset gradient from orange to pink on one nail for island sunset vibes
- Use a matte top coat on some portions and glossy on others to create texture contrast
Pro tip: Layer your tropical design over a white or cream base instead of a bright color if you want a more refined, less bold version that works for professional settings or year-round wear.
5. Simple Floral Design
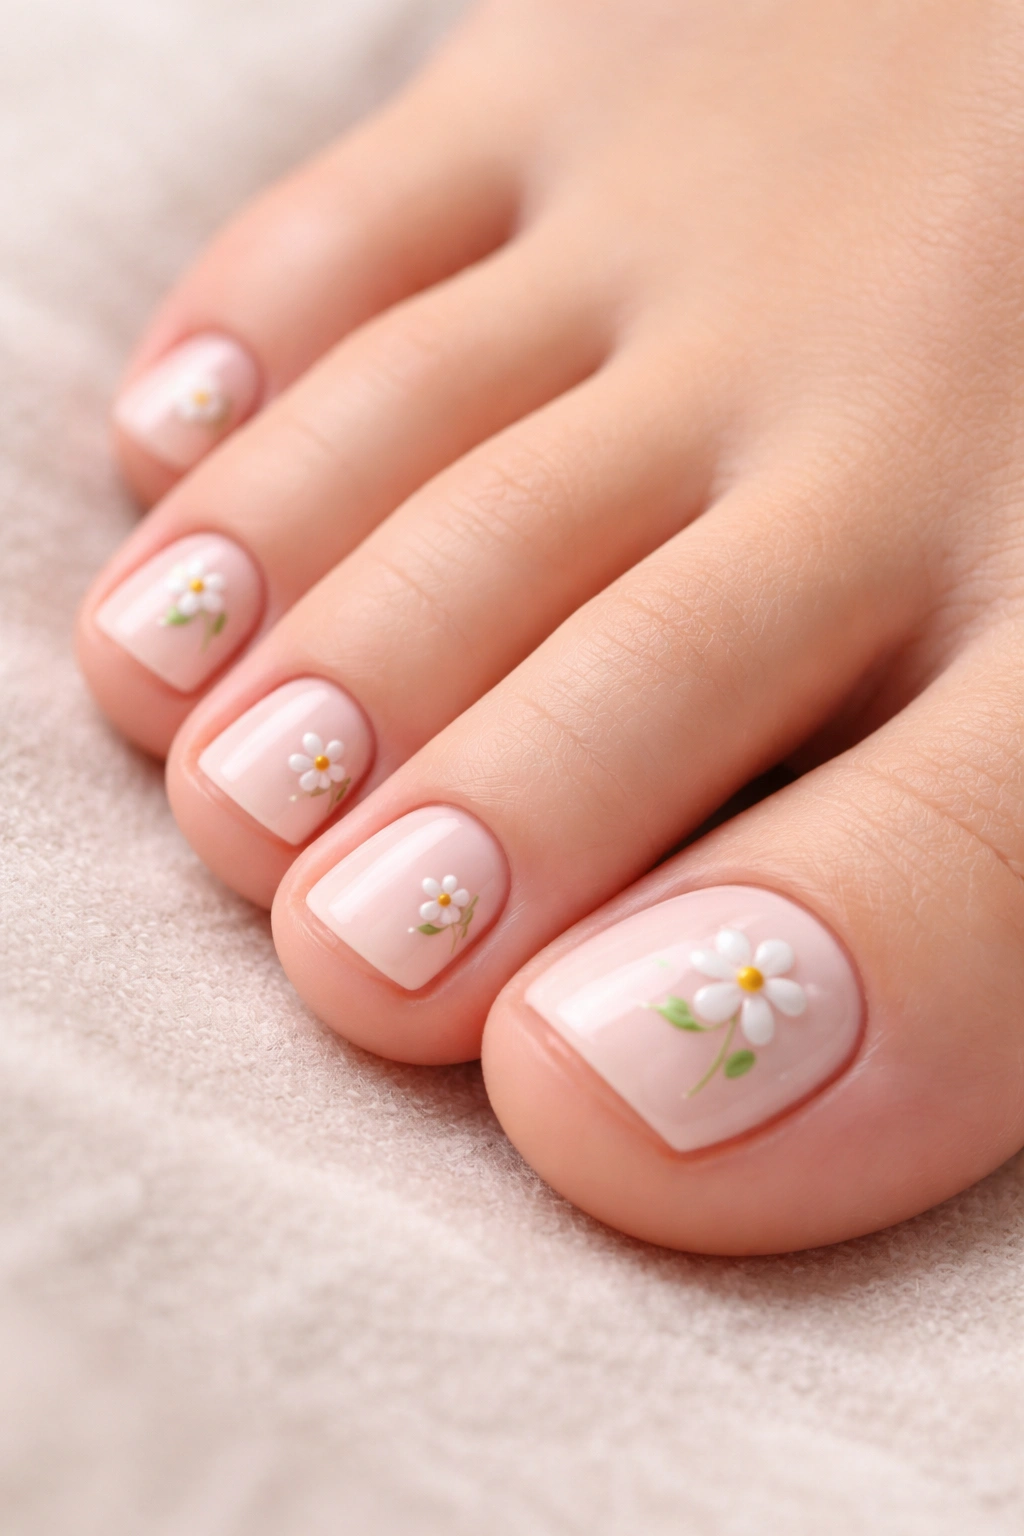
Floral toenail art brings natural beauty and feminine elegance to your feet, and the best part is that flowers don’t need to be perfectly realistic to look lovely. A simplified, stylized approach actually works better for small nail canvases.
The Five-Dot Flower Technique
This is one of the easiest and most versatile floral methods. Using a dotting tool, place a tiny dot in the center of your nail in one color (let’s say pink). Then, using the same dotting tool and a slightly different color (white, for example), create four dots around the center dot—one above, one below, one to the left, and one to the right. These five dots form a simple, charming flower shape. Add a tiny green dot or short curved line beneath the flower to represent a stem or leaf.
Creating a Complete Floral Pedicure
Paint your base color across all toenails—soft pink, cream, or white work beautifully for floral designs. Add your five-dot flowers to your big toenail as the focal point, creating perhaps 2-3 flowers on that nail with variations in spacing. On your other toenails, add single flowers or small clusters of 2-3 flowers for balance. Vary your flower colors slightly—use pink with white petals on one nail, purple with white on another, and coral with white on a third.
Floral Design Options
- Paint tiny green dots around the flowers to represent leaves or foliage
- Create a scattered wildflower pattern across multiple nails for a whimsical look
- Use a thin brush to paint simple leaf shapes between flowers
- Try a monochromatic approach using different shades of one color for flowers and leaves
- Add tiny rhinestones in the center of flowers for sparkle and dimension
Worth knowing: Floral designs work beautifully with nude or pastel bases and are perfect for spring and summer seasons, but also work year-round because florals are inherently timeless. This design pairs nicely with feminine sandals and dresses.
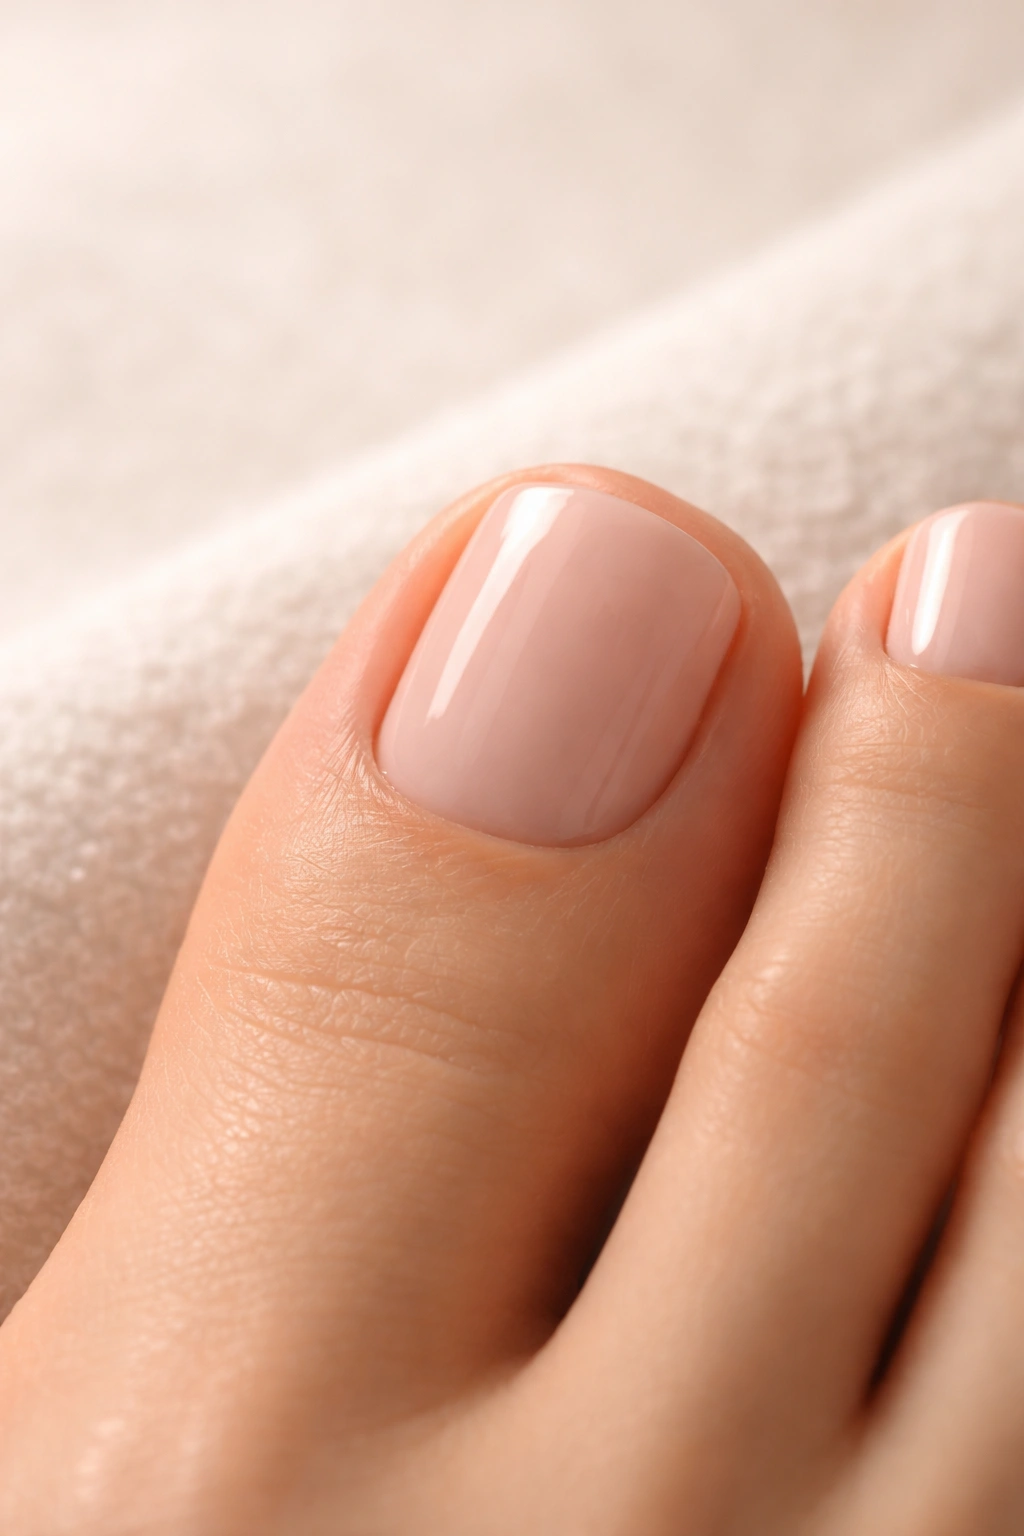
6. Nude Base with Gold Accents

Sometimes the most sophisticated designs are the simplest. A nude toenail base with strategic gold accents creates an elegant, polished look that works for virtually any occasion while making your feet look longer and more refined.
Selecting the Right Nude Shade
The key to perfect nude nails is choosing a shade that closely matches your specific skin tone. What reads as nude on one person might appear too pink, too yellow, or too brown on another. Hold several nude polish bottles against your skin in natural light and select the one that nearly disappears into your skin when applied. Apply thin, even coats—typically 2-3 coats create full opacity without streaks or patches. Allow each coat to dry completely before applying the next.
Adding Gold Elements Strategically
Once your nude base is completely dry, introduce gold accents on select nails to create visual interest. Paint a thin gold stripe down the center of your big toenail using a striping brush or nail pen. On another nail, create a diagonal gold stripe from the top corner to the bottom corner. On a third nail, apply a thin gold line along the cuticle edge. The key is restraint—you want the nude to remain the dominant color while gold provides elegant punctuation.
Sophisticated Accent Options
- Use gold leaf pieces or gold foil decals for a luxurious effect with minimal effort
- Paint thin gold lines using geometric patterns (triangles, diamonds, or abstract shapes)
- Add tiny gold rhinestones in a vertical line down the center of one nail
- Create a negative space design by painting a thin gold line, then leaving a gap, then another gold line
- Use matte gold polish instead of glossy for a more modern, understated aesthetic
Real talk: This design is your go-to for situations where you need to look polished but don’t want your nails to be the main attraction. It’s professional, grown-up, and effortlessly chic.
7. Striped Toenail Design
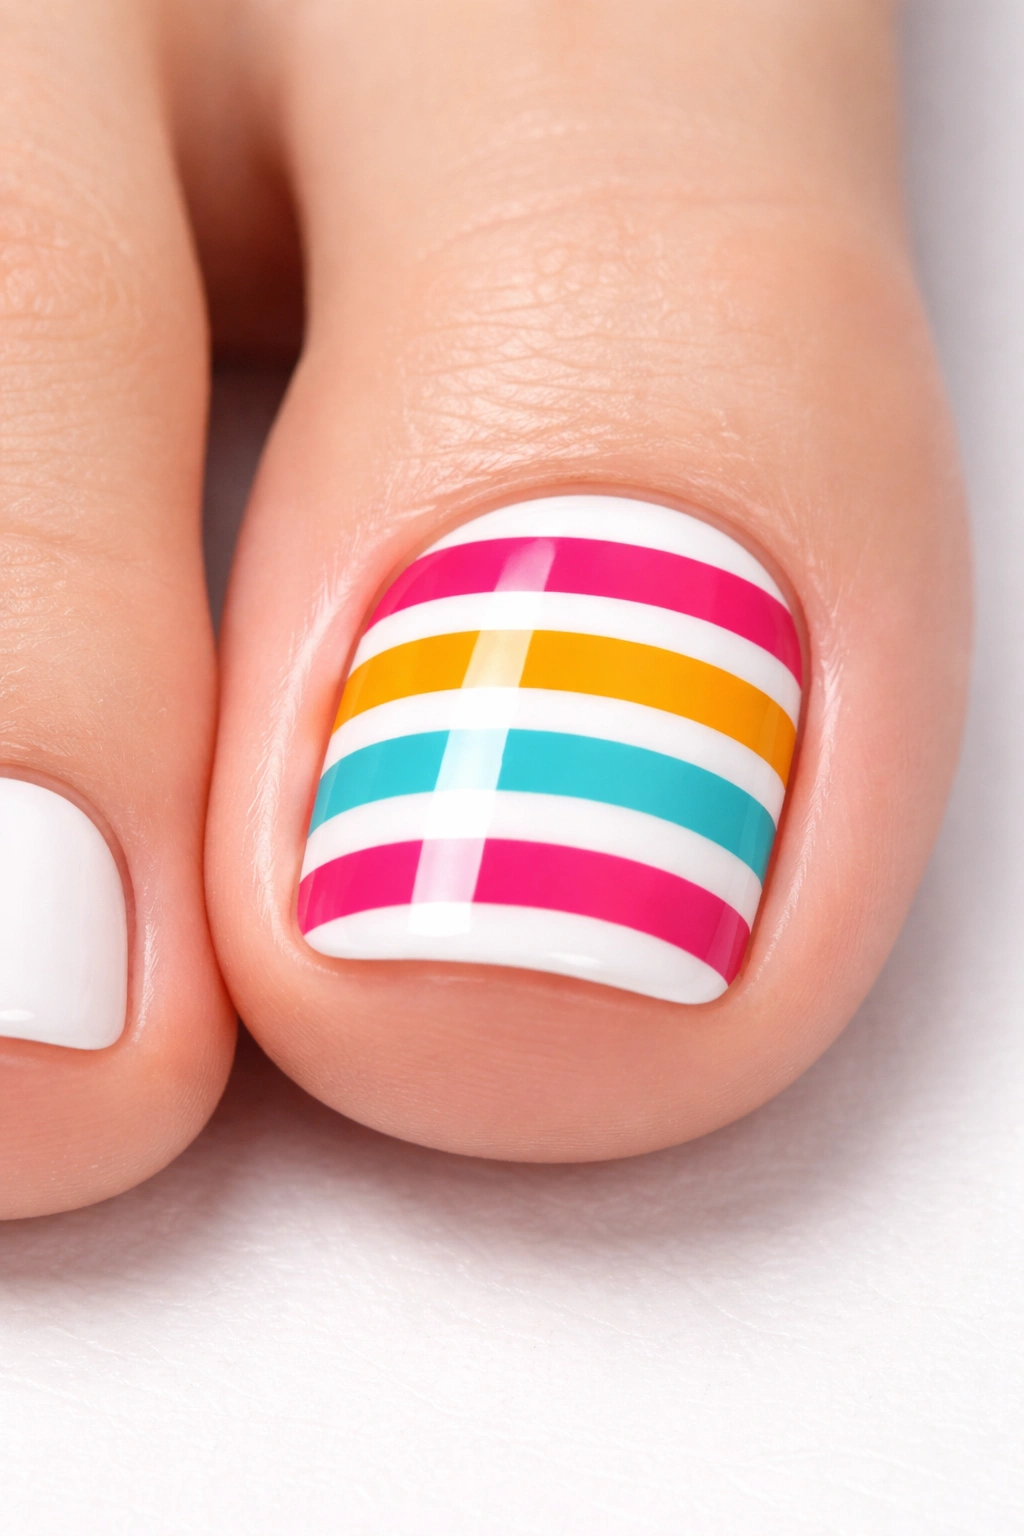
Stripes offer clean, graphic appeal and can range from subtle to bold depending on your color choices and stripe width. This design teaches you brush control and creates a contemporary, fashion-forward look.
Executing the Striped Look
Start with a solid base color across all your toenails. White, light pink, light blue, or even a darker shade all work beautifully. Once your base is completely dry, use a thin striping brush or nail art pen to create parallel lines in a contrasting color. You can paint horizontal stripes (running left to right across the nail), vertical stripes (running from cuticle to tip), diagonal stripes, or even a combination. The wider your stripes, the bolder the look; thinner stripes create a more delicate, refined appearance.
Stripe Pattern Variations
- Alternate between two colors in a striped pattern for visual interest
- Create thicker base stripes in one color with thinner accent stripes in another color running perpendicular
- Use metallic polish (gold, silver, or copper) for stripes over a neutral base for added glamour
- Try a candy-cane effect by alternating thick stripes of two colors
- Create asymmetrical stripes where some nails have horizontal stripes and others have vertical for a modern, artistic look
Tips for Clean Stripe Application
- Use nail striping tape to create perfect lines if you’re not confident with freehand brushwork
- Place the tape at the angle you want your stripes to run, then paint over it with your contrasting color
- Remove the tape while the polish is still wet for clean edges
- If you’re painting freehand, make small, controlled movements rather than trying to draw one long line across the nail
- Thin strokes with a dedicated striping brush create cleaner lines than using a standard brush
Insider note: Stripes are incredibly versatile and work with almost any color combination. Navy with white feels nautical, pink with white feels romantic, and black with white or gold feels modern and edgy.
8. Half-Moon Toenail Design
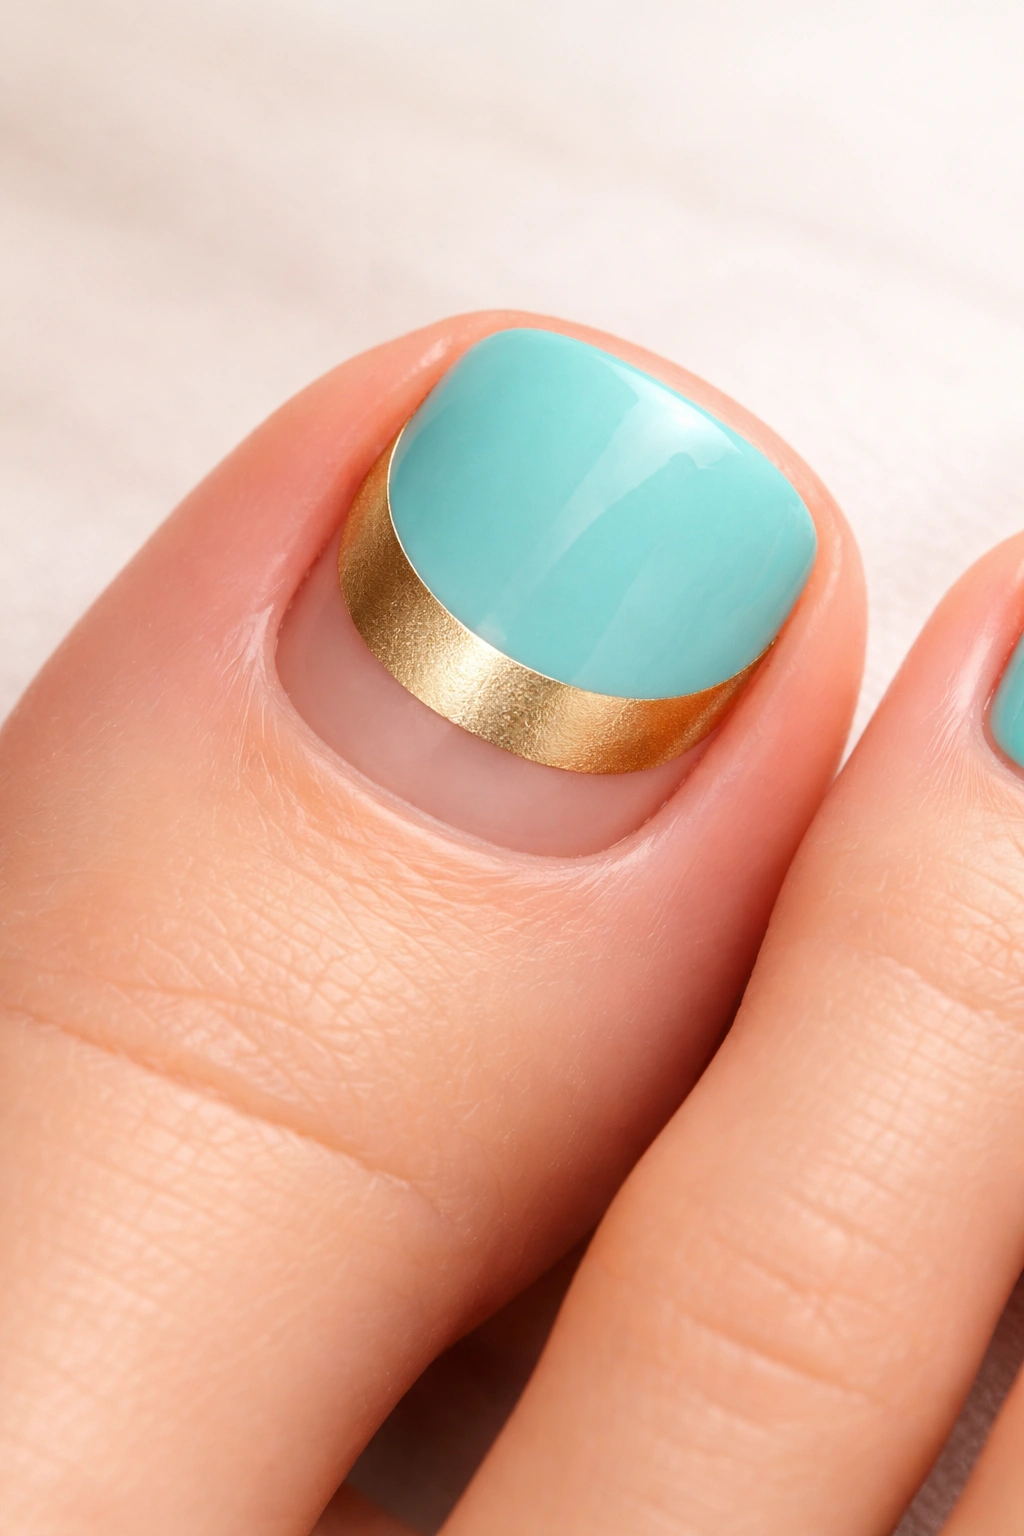
The half-moon design, also called a reverse French manicure, creates a geometric, modern look that’s more interesting than a traditional French tip while remaining completely achievable for beginners.
Understanding the Half-Moon Aesthetic
Instead of painting the tip of the nail (as in a French manicure), you paint a semi-circle or curved line near the cuticle area, leaving the rest of the nail bare or in a different color. This creates a striking graphic effect and works beautifully with contrasting colors. The half-moon can be a thin curved line or a thicker semi-circular band, depending on your preference.
Creating the Half-Moon Effect
Paint all your toenails with your base color—turquoise, coral, soft pink, or any color you love. Once dry, use nail striping tape to create a curved line near the cuticle area. Tape works beautifully for this because it helps you create clean, precise curves. Apply your contrasting color (gold, metallic silver, white, or a completely different shade) in a semi-circular band along the cuticle area. Remove the tape while the polish is still slightly wet for the cleanest edges. Allow everything to dry, then seal with a glossy or matte top coat.
Half-Moon Design Variations
- Alternate colors on different nails so some have one color combination and others reverse it
- Create very thick half-moons (nearly half the nail) for a bold graphic look
- Use metallic polish for the half-moon band over a matte base color for luxury and dimension
- Paint multiple thin curved lines instead of one thick half-moon for a more delicate aesthetic
- Combine the half-moon with dots, stripes, or florals in the remaining nail space for a hybrid design
Pro tip: The half-moon design elongates your toes visually because of the horizontal line it creates near the cuticle. It’s flattering on all nail shapes and sizes, making it one of the most universally adaptable designs in nail art.
Final Thoughts
The wonderful thing about learning toenail art is that every design you create builds your confidence and teaches you techniques you’ll use in future projects. These eight designs cover a range of difficulty levels and aesthetic styles, so you can start with the one that appeals to you most and gradually work through the collection.
Remember that perfection isn’t the goal—personality and creativity are. Some of the most charming nail art comes from slight imperfections that give it character and authenticity. Your dotting tool doesn’t have to create perfectly circular dots, your lines don’t have to be arrow-straight, and your flowers don’t have to look like they came from a botanical textbook.
Start with one design, practice it a few times, and let yourself enjoy the meditative, rewarding process of creating beauty on your own terms. Before you know it, you’ll have mastered these foundational techniques and be ready to experiment with more complex designs, color combinations, and embellishments. Your toenails are the perfect low-pressure canvas to explore your artistic side without the commitment or cost of salon services.
