

Your toenails are a small but mighty canvas for self-expression, and there’s absolutely no reason they shouldn’t get just as much love and creativity as your fingernails. Whether you’re preparing for a beach vacation, an outdoor wedding, or simply want to brighten up your everyday look with sandals, toenail designs offer an incredible opportunity to showcase your personality without the commitment of a full manicure. The beauty of pedicure art is that it lasts longer than hand nail designs—typically holding strong for two to three weeks—giving you an extended showcase for whatever aesthetic you choose.
The challenge, of course, is knowing where to start. With so many trending designs, color combinations, and artistic techniques available, it’s easy to feel overwhelmed when you’re sitting in the salon or browsing inspiration online. That’s exactly why we’ve gathered this collection of twelve genuinely cute toenail ideas that range from minimalist and elegant to bold and playful. Each design works beautifully for different occasions and personality types, meaning you’ll absolutely find something here that speaks to you.
These designs have been chosen because they’re not only visually stunning but also achievable—whether you’re working with a professional nail technician or attempting an at-home DIY pedicure. We’ve included designs that work across different seasons, various nail shapes, and multiple skill levels, so there’s truly something for everyone. Let’s explore some toenail inspiration that’s worth copying and personalizing for your own unique style.
1. Classic French Pedicure with a Twist

The French pedicure is legendary for a reason—it’s chic, universally flattering, and works with literally every outfit and occasion you can imagine. The traditional version features a soft pink or nude base with a crisp white tip, creating that timeless look that never falls out of style. But the beauty of this design is how endlessly customizable it is while still maintaining its elegant core.
Why This Design Stands Out
The micro French tip trend has elevated this classic even further, featuring an impossibly thin white line that feels contemporary and refined rather than dated. This slimmer interpretation suits modern aesthetics perfectly, especially if you prefer a more minimalist approach to nail art. The stark contrast between the creamy base and the clean white edge creates visual interest without feeling overwhelming or too busy.
How to Customize It
- Try a colored tip instead of white—soft pink, black, gold, or even a pastels like lavender or mint create entirely different vibes while keeping the French structure intact
- Add a delicate accent on your big toe, such as a tiny gem, a thin metallic stripe, or a hand-drawn detail
- Experiment with slightly thicker or angled tips to make the design feel more fashion-forward
- Layer a subtle shimmer or pearl finish over the base for added depth and dimension
Pro tip: If you struggle with getting a perfectly straight line at home, nail stencils or sticker guides make achieving salon-quality French tips surprisingly simple. Just apply the sticker along the tip line, paint your white polish over it, and peel away the sticker for a flawless edge every single time.
2. Watermelon Nail Art for Summer Vibes
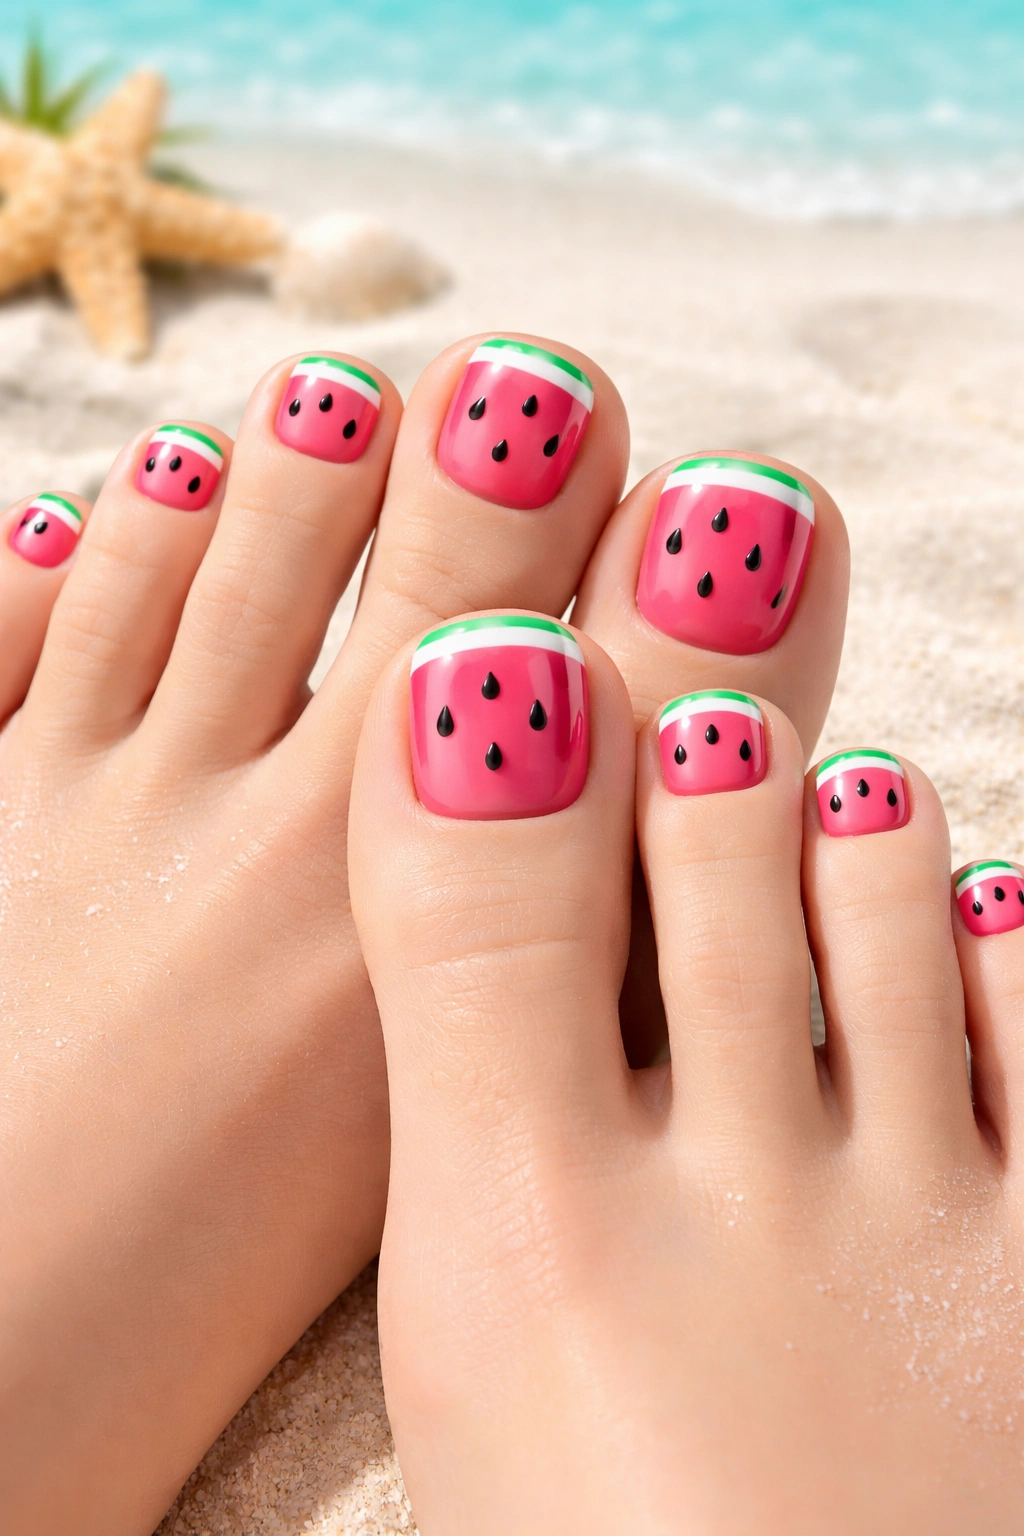
There’s something about watermelon nail art that instantly makes you feel like you’re on vacation, even if you’re just running errands around town. This fruity design combines bright, happy colors with a fun visual that everyone recognizes immediately. The contrast between the soft pink, crisp white, and fresh green creates a naturally balanced color palette that’s both playful and sophisticated.
What Makes This Design Pop
Watermelon nails work because they tap into our positive associations with summer, sweetness, and carefree vibes. The design translates beautifully onto toenails because you have more surface area to work with compared to fingernails, allowing for more detailed watermelon slices with seeds. Some versions add adorable 3D water droplets that give the illusion of freshness and juiciness, making the design feel almost edible.
Creating the Look
- Paint a soft pink or coral base coat as your foundation
- Add a white stripe near the tip to represent the rind
- Fill the remaining space with a fresh green outline to complete the watermelon slice effect
- Use a thin brush or dotting tool to add small black dots for seeds
- For extra dimension, try adding a gloss top coat over just the pink section while keeping the white matte
Worth knowing: This design photographs absolutely beautifully, making it perfect if you love sharing your nail looks on social media. The colors pop in natural sunlight, and the playful nature of the design instantly communicates warmth and personality.
3. Soft Pastels with Ombre Effect
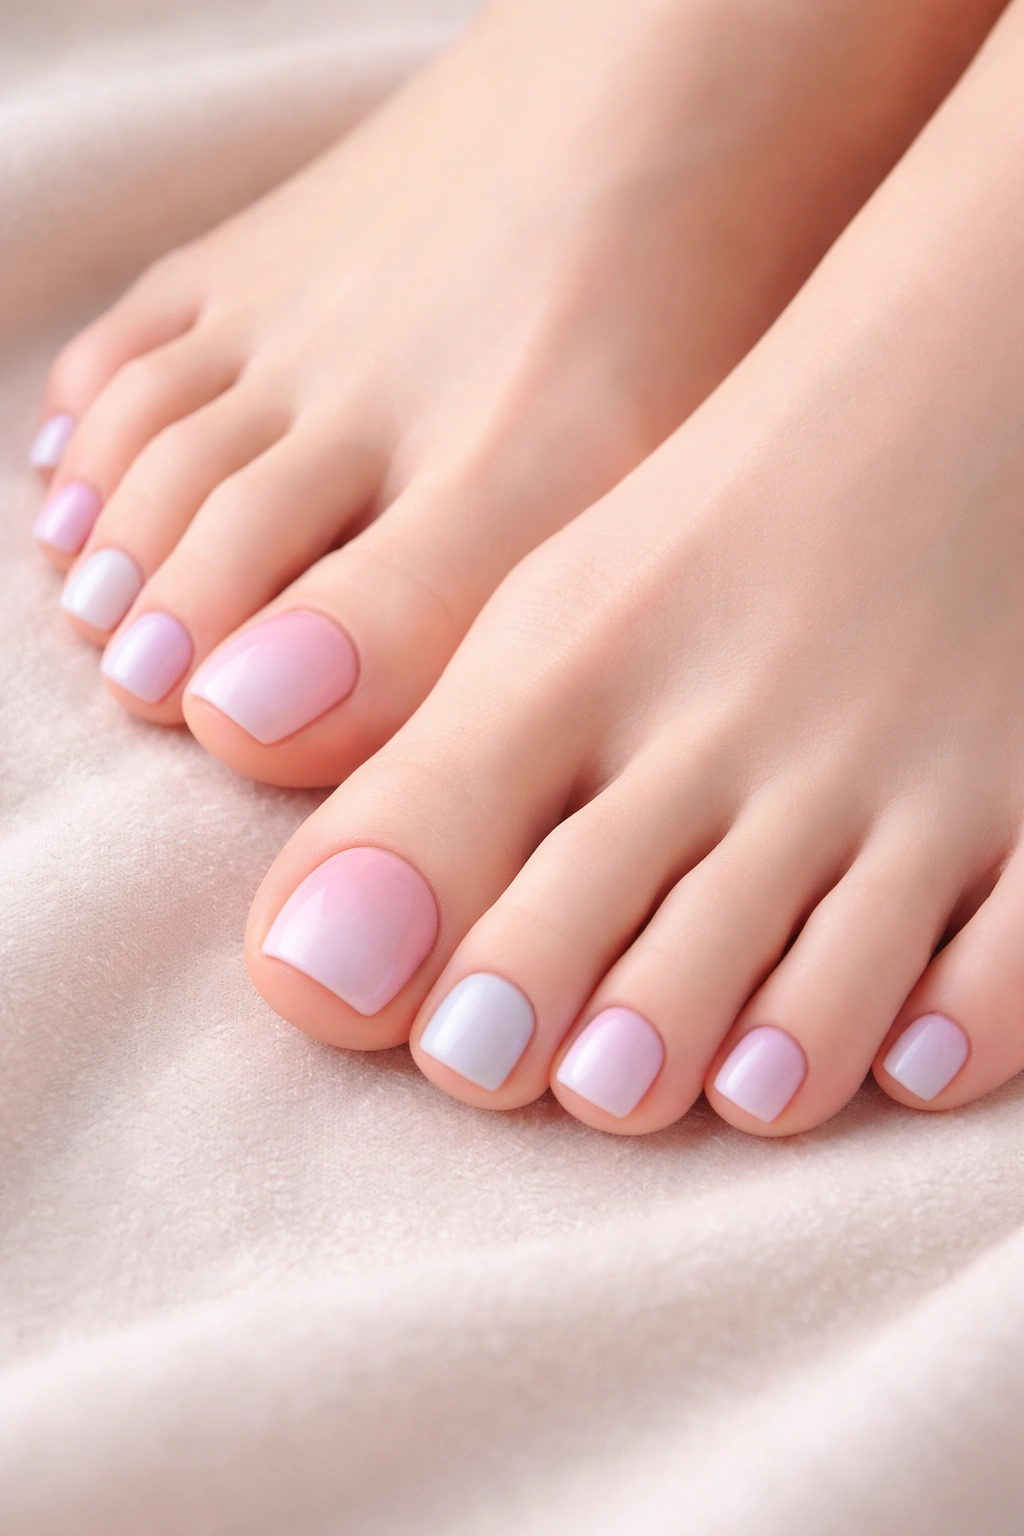
If you love subtle elegance but want something more visually interesting than a solid color, an ombre gradient across soft pastel shades is your answer. This design creates a dreamy, almost ethereal aesthetic that feels gentle and refined. The gradient typically moves from a lighter shade at the base to a slightly deeper shade at the tip, creating an effortless sense of depth and dimension.
The Appeal of Gradient Design
Ombre nails have maintained their popularity because they’re inherently flattering and work with virtually every skin tone. Pastels specifically add a softness that feels both modern and timeless. Popular pastel combinations include pale pink to lavender, soft blue to mint green, or peachy cream to coral. The gradient effect is what prevents the look from feeling babyish or too simple—it adds visual sophistication even when using the gentlest colors imaginable.
Application Tips for Success
- Use a makeup sponge or a specialized ombre sponge to blend the colors smoothly
- Apply thin coats and build gradually rather than trying to do it all in one application
- Seal the gradient with a glossy top coat for a polished, professional finish
- Consider adding one accent nail with a metallic detail or geometric pattern to elevate the look
Quick facts:
- Ombre effects work beautifully in both warm and cool undertones depending on your skin tone
- This design pairs wonderfully with neutral clothing, making it incredibly versatile
- The gradient technique takes practice but becomes easier with each attempt
- Gel polish holds ombre designs longer and maintains color vibrancy better than regular polish
4. Bold Neon with Geometric Patterns
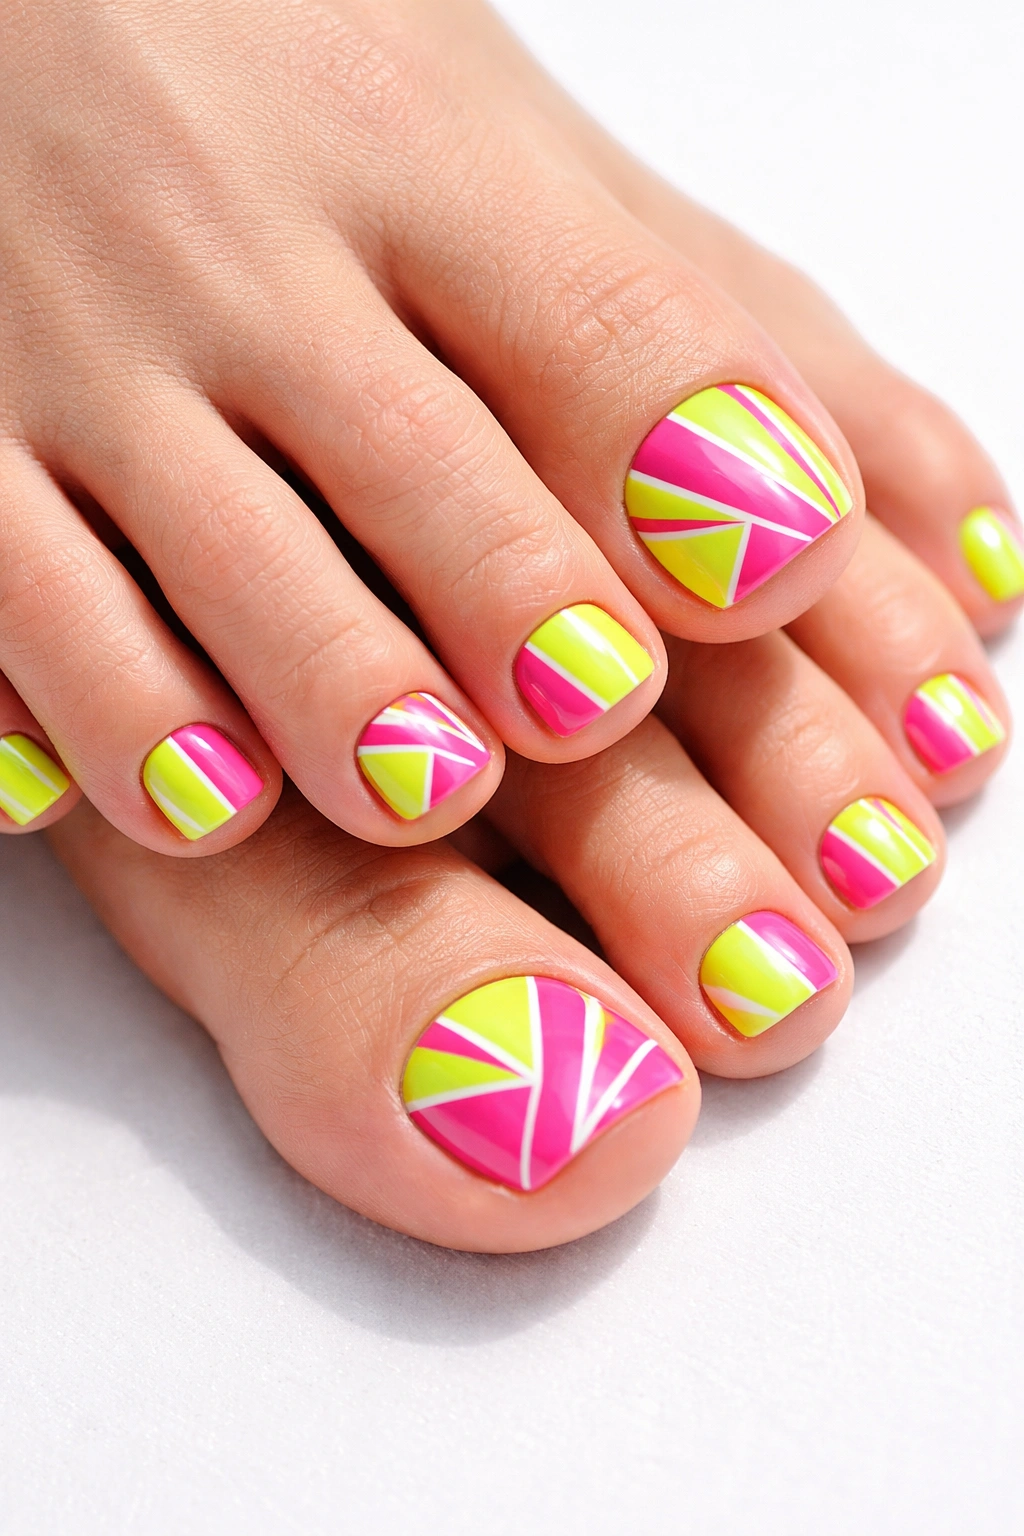
For those who want their toenails to genuinely stand out and make a statement, bold neon colors combined with geometric patterns create an undeniably eye-catching look. This design is perfect if you’re someone who loves making a confident fashion statement and isn’t afraid of color. Neon shades—hot pink, electric yellow, vibrant lime green, or bright orange—demand attention in the most fun way possible.
Why Geometric Patterns Elevate the Design
Pairing neon with geometric shapes (stripes, triangles, checkerboards, or abstract shapes) prevents the look from feeling chaotic or immature. Instead, the structured geometry adds an artistic, intentional quality that transforms bold colors into high-fashion statement nails. This combination works particularly well on toenails where you have the space to really develop the pattern without it feeling cramped or overwhelming.
Creating Impact
- Choose two complementary neon shades—such as hot pink and lime green, or electric blue and neon orange
- Use tape or a striping brush to create clean geometric lines
- Consider adding a solid neutral base on some nails (white, black, or nude) to balance the boldness
- Keep your big toes as the focal point with the most intricate or colorful geometric design
Insider note: Neon polish tends to be more opaque than regular shades, so you’ll typically need just two coats for full coverage. This also means they’re easier to apply at home than you might expect. The key is using quality neon polish from reputable brands, as cheaper versions can look washed out.
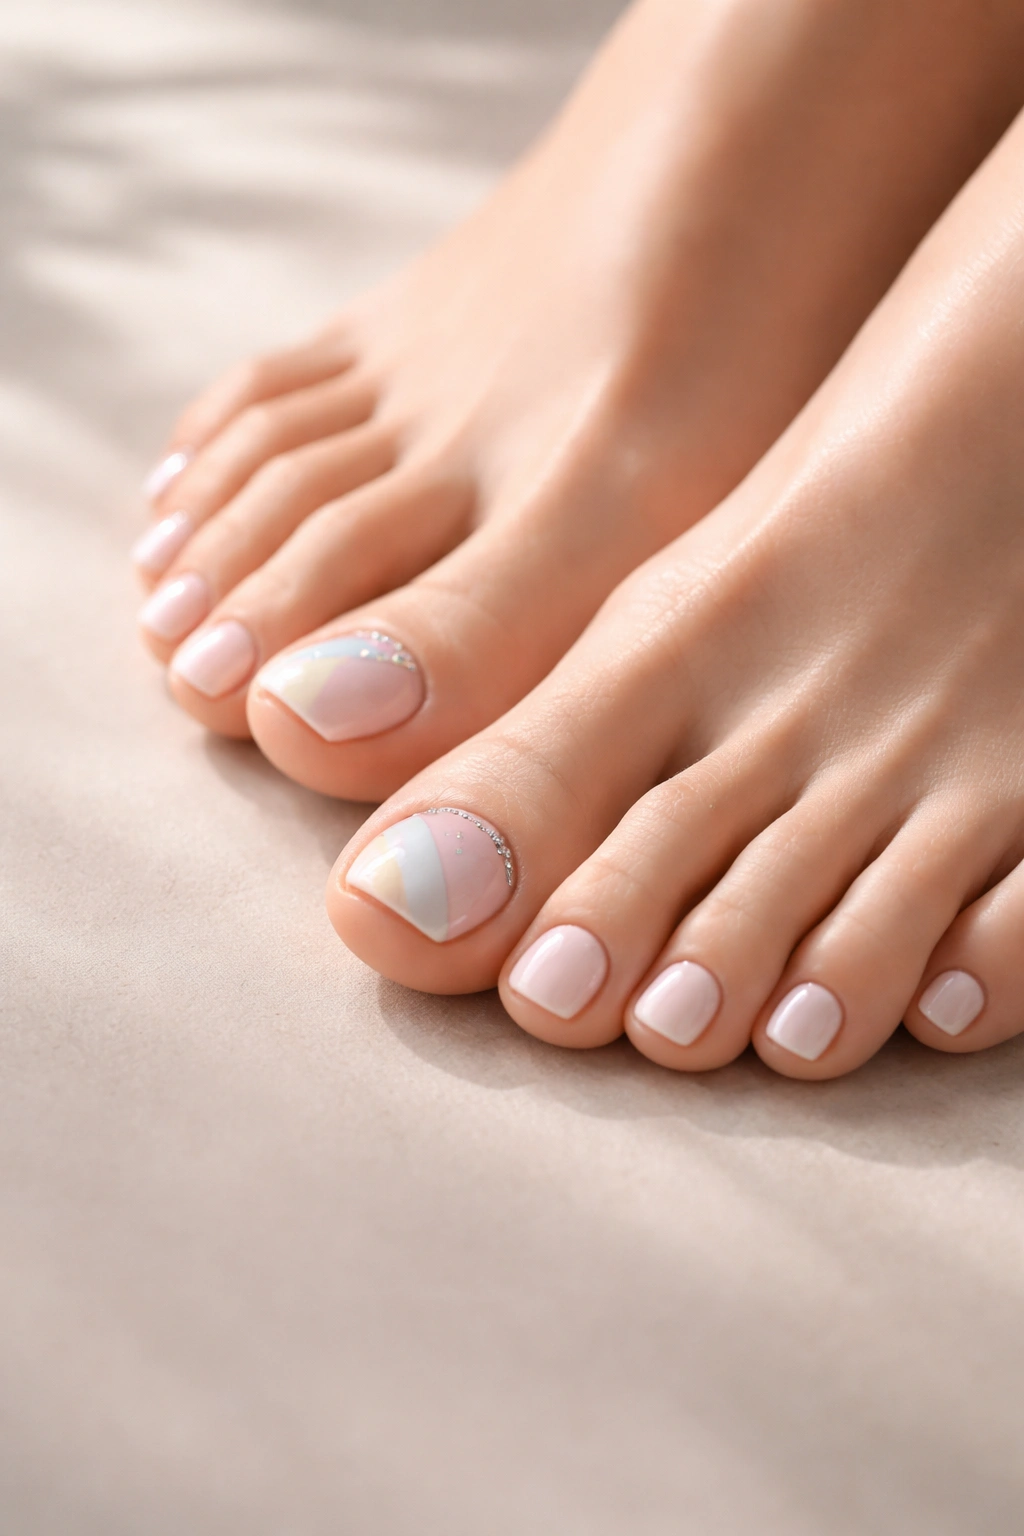
5. Elegant All-White Pedicure
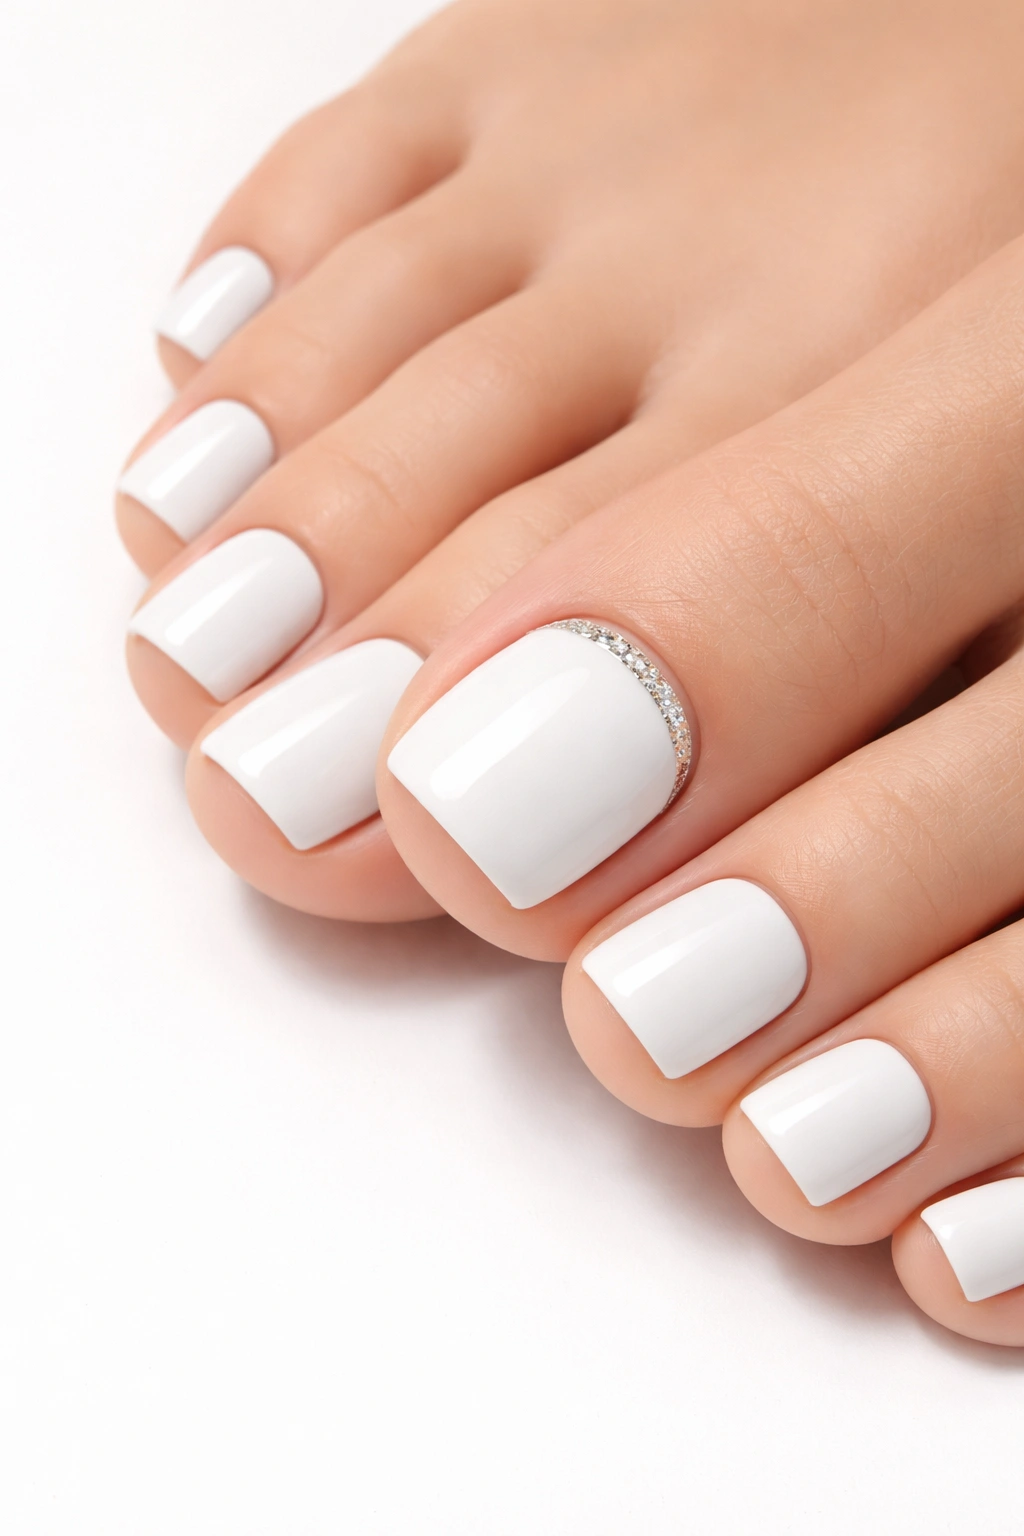
Sometimes the most stunning designs are the simplest ones, and an all-white pedicure is the ultimate proof of that principle. Pure white toenails create a crisp, clean aesthetic that feels simultaneously unexpected and utterly chic. This design works beautifully for formal occasions—weddings, proms, cocktail parties—but also makes a sophisticated everyday statement.
The Sophistication of Simplicity
All-white nails have a minimalist appeal that’s particularly flattering if you have warm or darker skin tones, where the contrast creates a striking visual effect. The color itself feels fresh, clean, and intentional, which is why it reads as high-fashion rather than boring or plain. This is a design where the quality of the polish application truly matters, as any streaks or uneven coverage becomes immediately visible against the white base.
Elevating the Look
- Invest in a high-quality white polish with excellent opacity and coverage
- Apply thin, even coats rather than one thick coat to avoid streaking
- Add a glossy top coat for professional shine, or try a matte finish for a modern, unexpected twist
- Consider adding a thin gold, silver, or metallic accent on your big toe for subtle sophistication
Worth knowing: Professional nail technicians often recommend a white gel manicure for the most pristine, long-lasting results. The gel formula provides exceptional opacity and durability that regular polish sometimes struggles to match.
6. Marble Nail Design with Metallic Accents
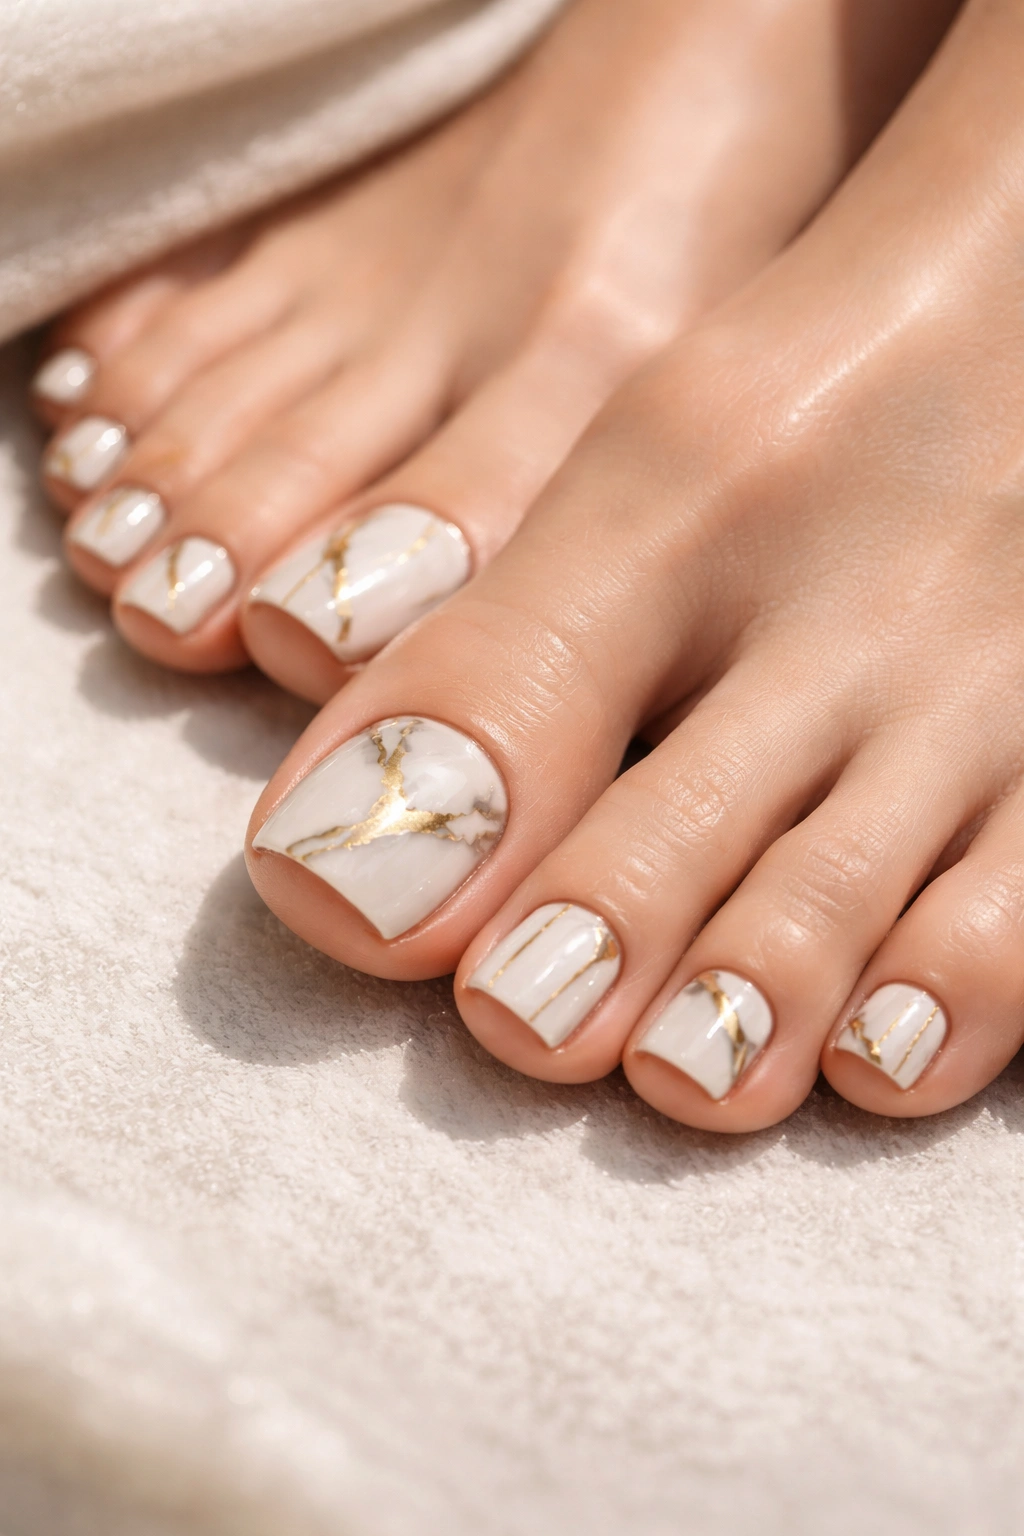
Marble nail designs create a luxe, sophisticated aesthetic that feels expensive and gallery-worthy. This technique mimics the veining and natural patterns found in actual marble stone, creating a timeless, high-end look. When you add metallic accents like gold or silver, the design becomes even more elevated and polished.
The Art of Marble
True marble nail design typically involves a white or nude base with thin black or gray veining that creates those characteristic stone patterns. You can also try variations with colors like soft gray, pale pink, or even jewel tones paired with metallics for a more personalized spin. The beauty of marble is that it’s entirely forgiving—the organic nature of the pattern means perfection isn’t necessary, and happy accidents often look intentional.
Achieving the Effect
- Start with your chosen base color—white and gray are traditional, but pastels work beautifully too
- Use a thin brush or even a toothpick to draw irregular, branching lines that mimic natural veining
- Seal with a top coat and add metallic accents with a striping brush or stamper for extra dimension
- Apply the metallic stripes along some of the veining to create visual interest
Quick facts:
- Marble designs are forgiving, making them perfect for DIY pedicures
- This pattern works across all seasons and occasions
- The design pairs well with minimalist jewelry and fashion
- Adding a glossy top coat enhances the sophisticated, polished appearance
7. Rainbow Gradient for Pride and Playfulness
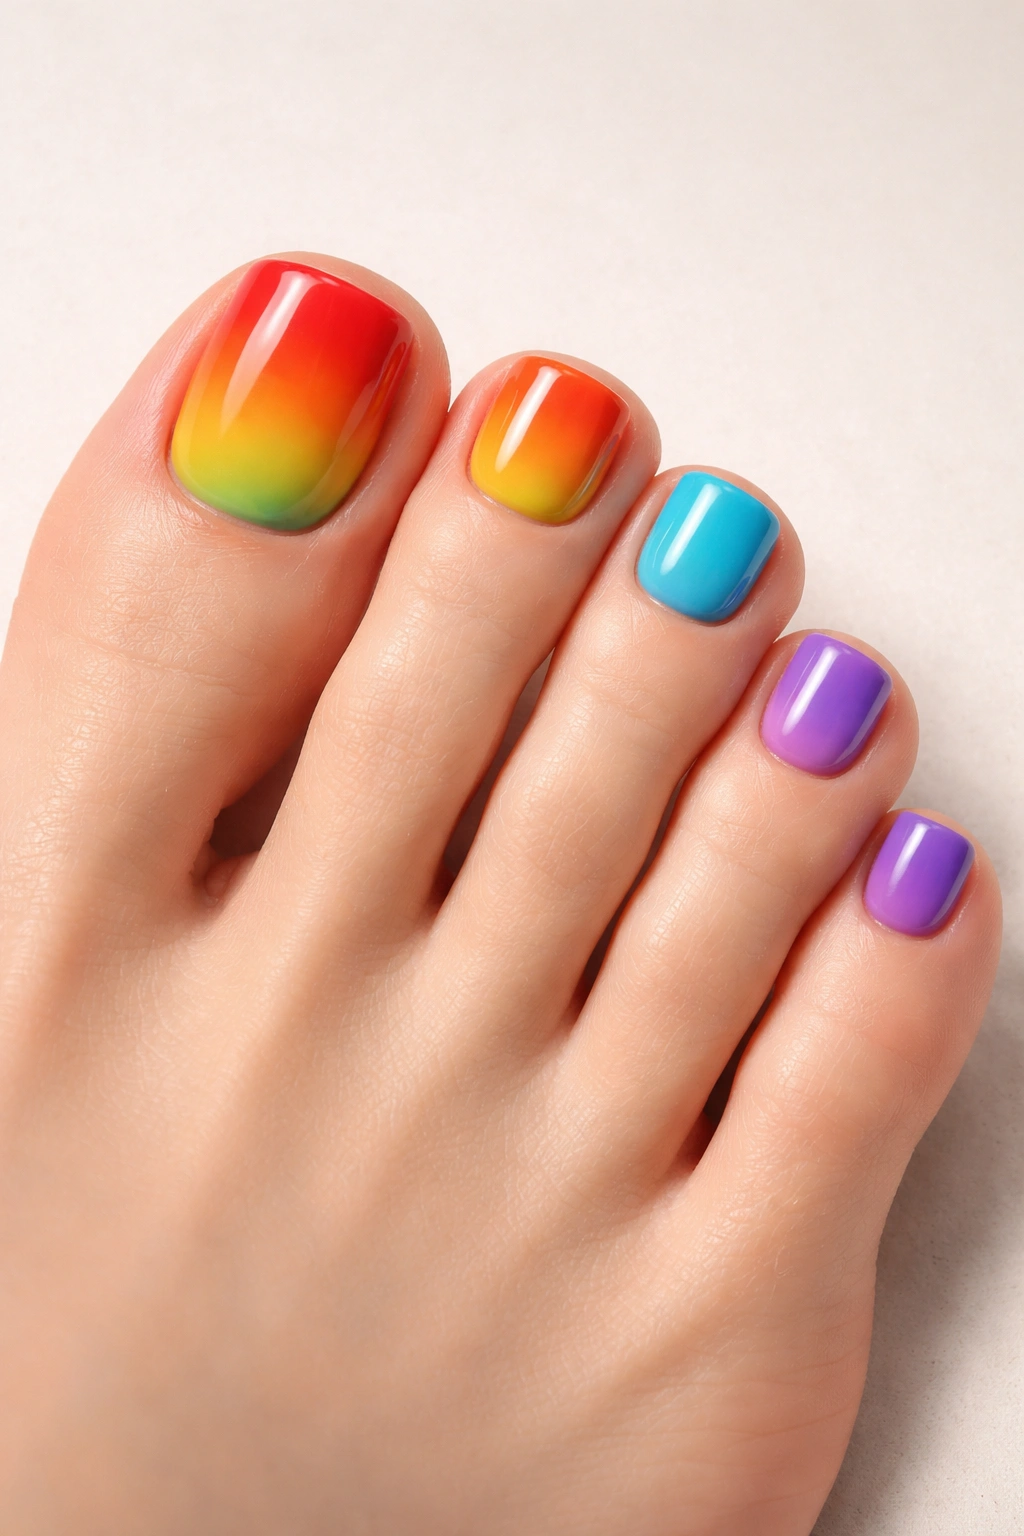
A rainbow gradient is pure joy captured on your toenails—it’s colorful, celebratory, and undeniably fun. This design can be subtle or bold depending on how you approach it, featuring all seven rainbow colors in a smooth gradient or blended across your five toes in distinct color blocks. Either way, the effect is cheerful and vibrant.
Why Rainbow Works on Toes
The gradient style prevents a rainbow from feeling childish or costume-like; instead, it reads as artistic and intentional. You have enough surface area on your toenails to make each color visible and distinct, creating a genuine rainbow effect rather than a muddled color mix. This design works beautifully for pride celebrations, summer events, or simply as a daily mood booster.
Creating the Rainbow
- Use pastel rainbow shades for a softer, more sophisticated look, or bright, bold hues for maximum impact
- Apply the colors as distinct blocks on each nail, or use an ombre sponge to blend them into a gradient
- Add shimmer or glitter to specific color sections for extra dimension
- Seal with a glossy top coat to make the colors pop
Pro tip: If you’re doing this at home, painting each toe in a different color block is easier than attempting a full gradient. Rainbow order (red, orange, yellow, green, blue, purple) reads clearly even on a small surface.
8. Glitter and Sparkle Accents
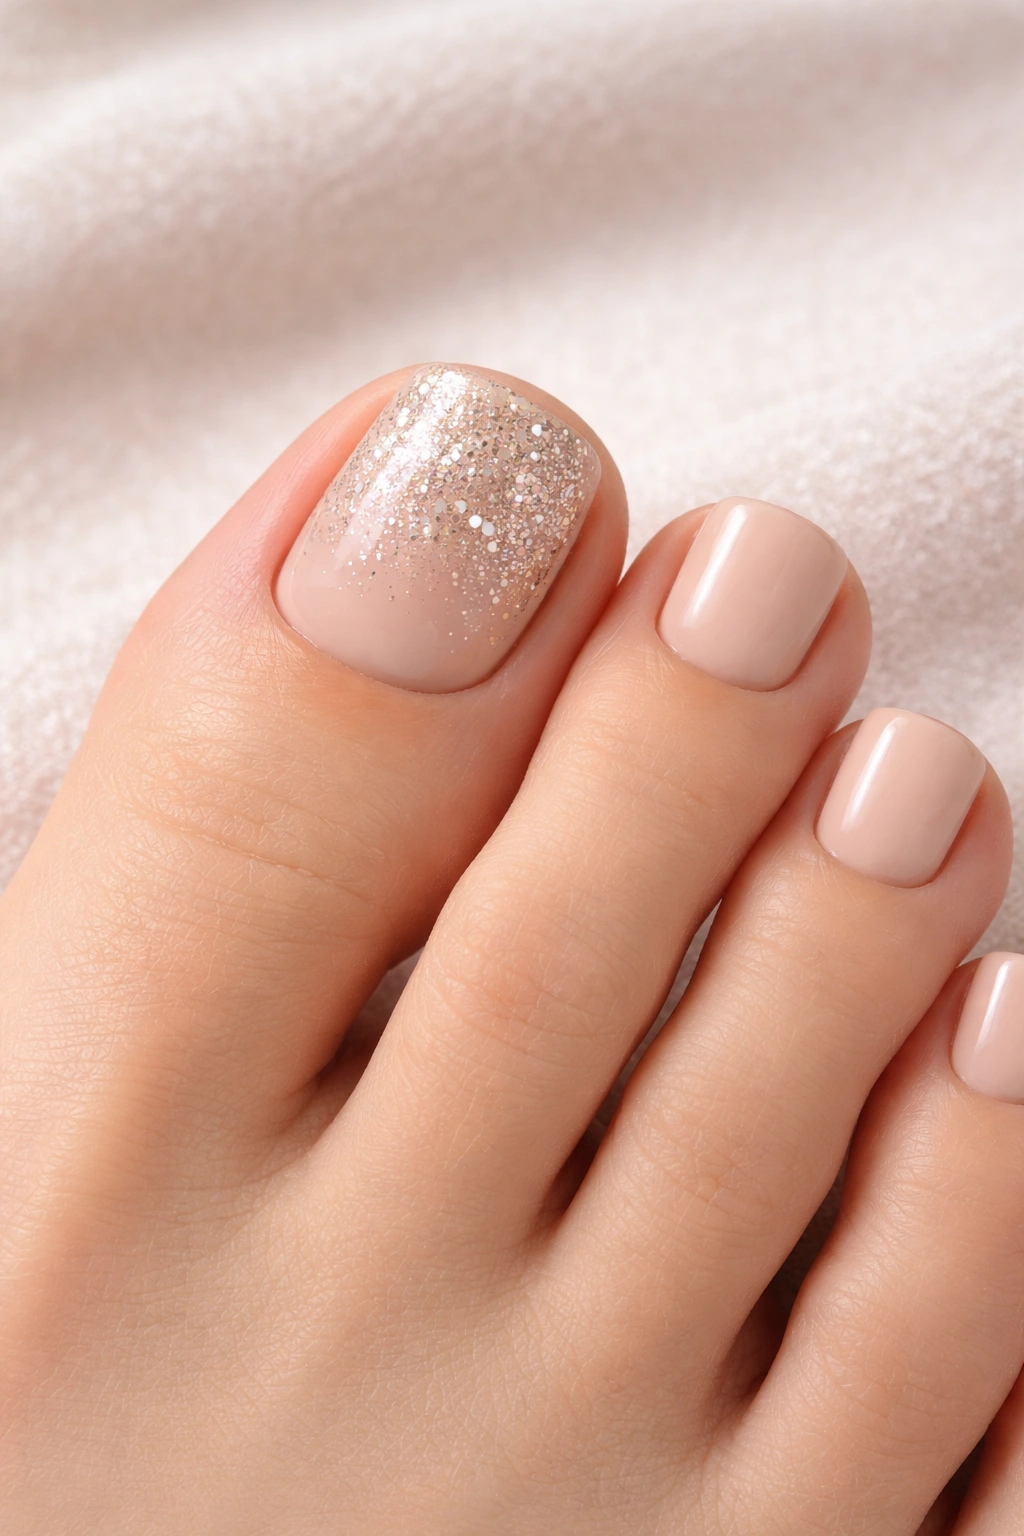
Sometimes you don’t need an entire intricate design—a strategically placed glitter accent can elevate your entire pedicure from nice to absolutely gorgeous. This approach is perfect if you love shimmer but want to maintain some minimalism, or if you’re doing an accent nail on your big toe while keeping the rest of your toenails relatively simple.
The Power of Strategic Sparkle
A nude or pastel base with glitter concentrated on just your big toe creates an intentional focal point without overwhelming the overall look. You could also try glitter tips (like a reverse French manicure where the tips are glitter instead of solid), or a glitter-only big toe while keeping other nails matte. The contrast between matte and shimmery finishes is what makes this work so effectively.
Glitter Application Methods
- Use a thick glitter polish for heavy, visible sparkle that’s easy to apply
- Apply a thin base layer first, then a glitter layer, then seal with glossy top coat
- Try a gradient where glitter fades from dense at the tip to sparse at the base
- Layer different colored glitters (holographic, champagne, multi-color) for complexity
Worth knowing: Quality glitter polishes apply much more smoothly than cheap versions, and they remove more easily when you’re ready for a change. The investment in better products makes the entire experience more enjoyable.
9. Minimalist Geometric Design

For those who appreciate clean lines and modern aesthetics, a minimalist geometric design offers sophistication without complexity. This might feature a single thin line across your nail, small geometric shapes on an accent toe, or subtle angular patterns that feel contemporary and intentional. The key is restraint—every line serves a visual purpose.
The Beauty of Geometric Simplicity
Geometric designs don’t require extensive artistic skill; they’re about precision and clean execution. Tape, stencils, or stampers make it incredibly easy to achieve perfect straight lines and shapes even if you’re new to nail art. This design works beautifully in monochrome palettes (white on nude, black on white, gold on blush) or with carefully chosen color combinations.
DIY-Friendly Geometric Ideas
- Paint a thin vertical or diagonal line down the center of each nail
- Create small triangles or squares on your big toe only
- Add angular shapes using painter’s tape as a guide
- Combine matte and glossy finishes for additional visual interest
Quick facts:
- Geometric designs work across all seasons and styles
- This approach is perfect for professional settings where you want nails that are stylish but not distracting
- Clean lines are easier to maintain than intricate details
- Minimal designs photograph beautifully in all lighting
10. Animal Print and Leopard Spots
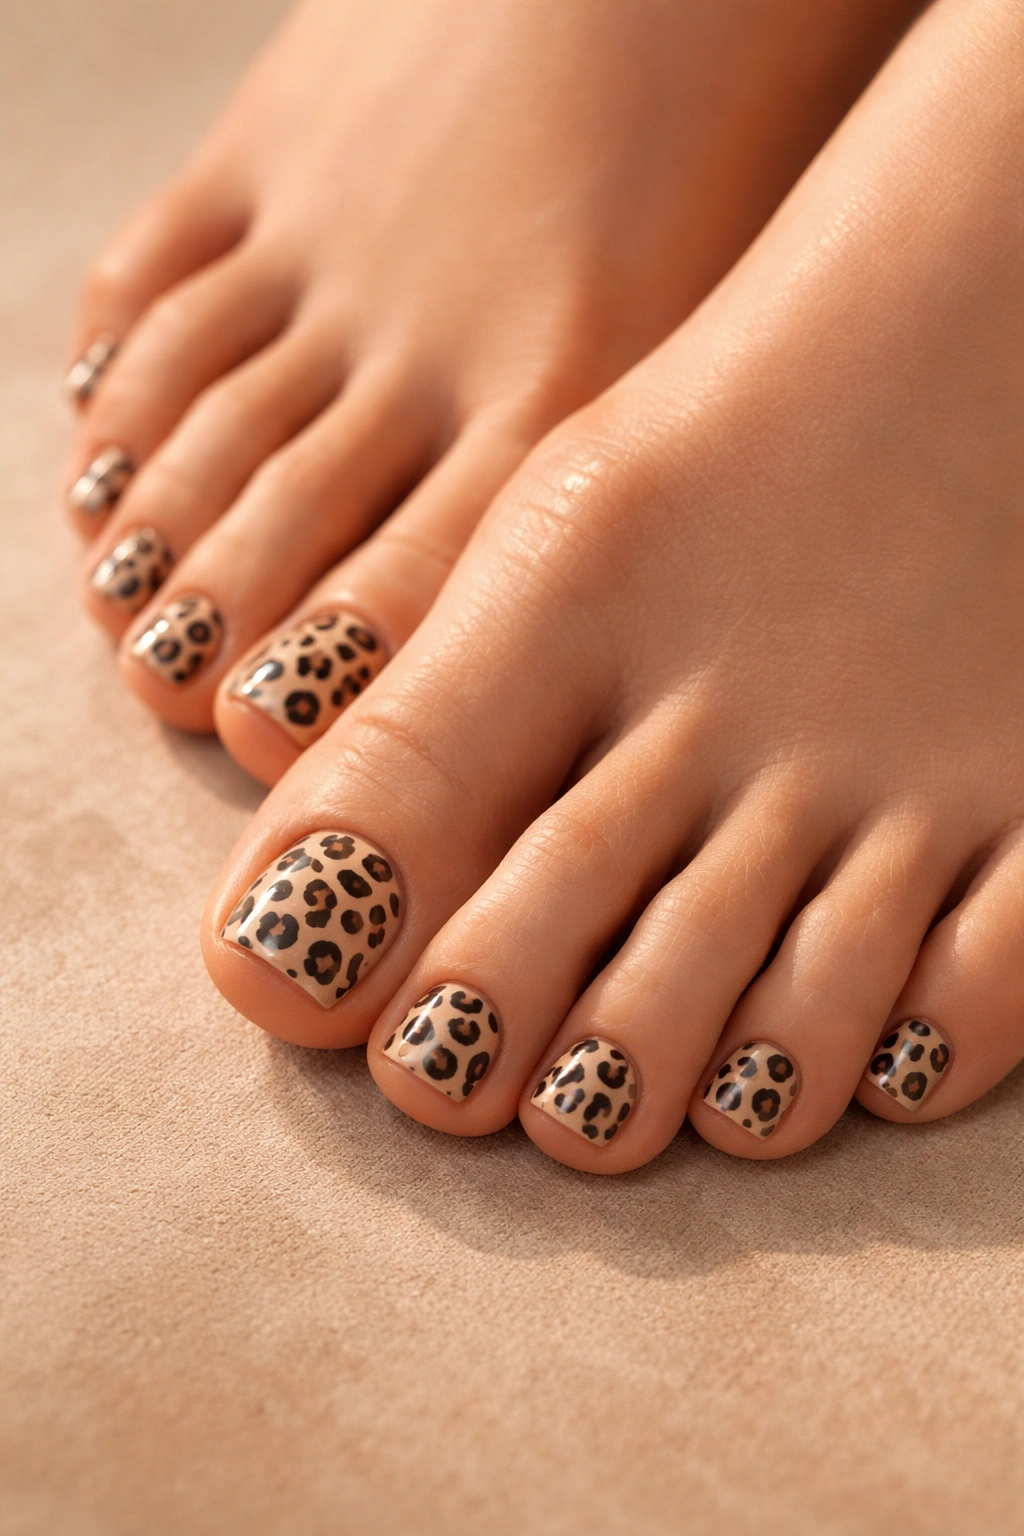
Animal print might seem bold, but when executed thoughtfully on toenails, it’s chic and undeniably cool. Leopard spots are the most popular animal print for nails—a pattern of irregular tan or cream-colored spots with black outlines on a neutral or warm-toned base. The design is playful enough to feel fun but sophisticated enough to wear in professional settings.
Why Leopard Never Goes Out of Style
Animal prints are enduring because they add visual texture and interest without requiring multiple colors. A leopard print pedicure works with warm neutrals, creates contrast against cool tones, and reads as effortlessly fashionable. The organic, imperfect nature of the spots means this design is forgiving—exact precision isn’t necessary, which makes it achievable at home.
Creating Convincing Leopard Spots
- Paint a cream, tan, or beige base color as your foundation
- Use a thin brush to paint irregular oval shapes, leaving space between them
- Outline each spot with black or dark brown for definition
- Add small black curves or lines within some spots for authenticity
- Keep your pinky toe or a couple of smaller toes as solid color to break up the pattern
Insider note: Some people find leopard print easier to achieve with nail stickers or wraps rather than freehand painting. This is a totally valid shortcut that delivers professional results without requiring artistic skill.
11. Floral Design with Garden-Inspired Elements
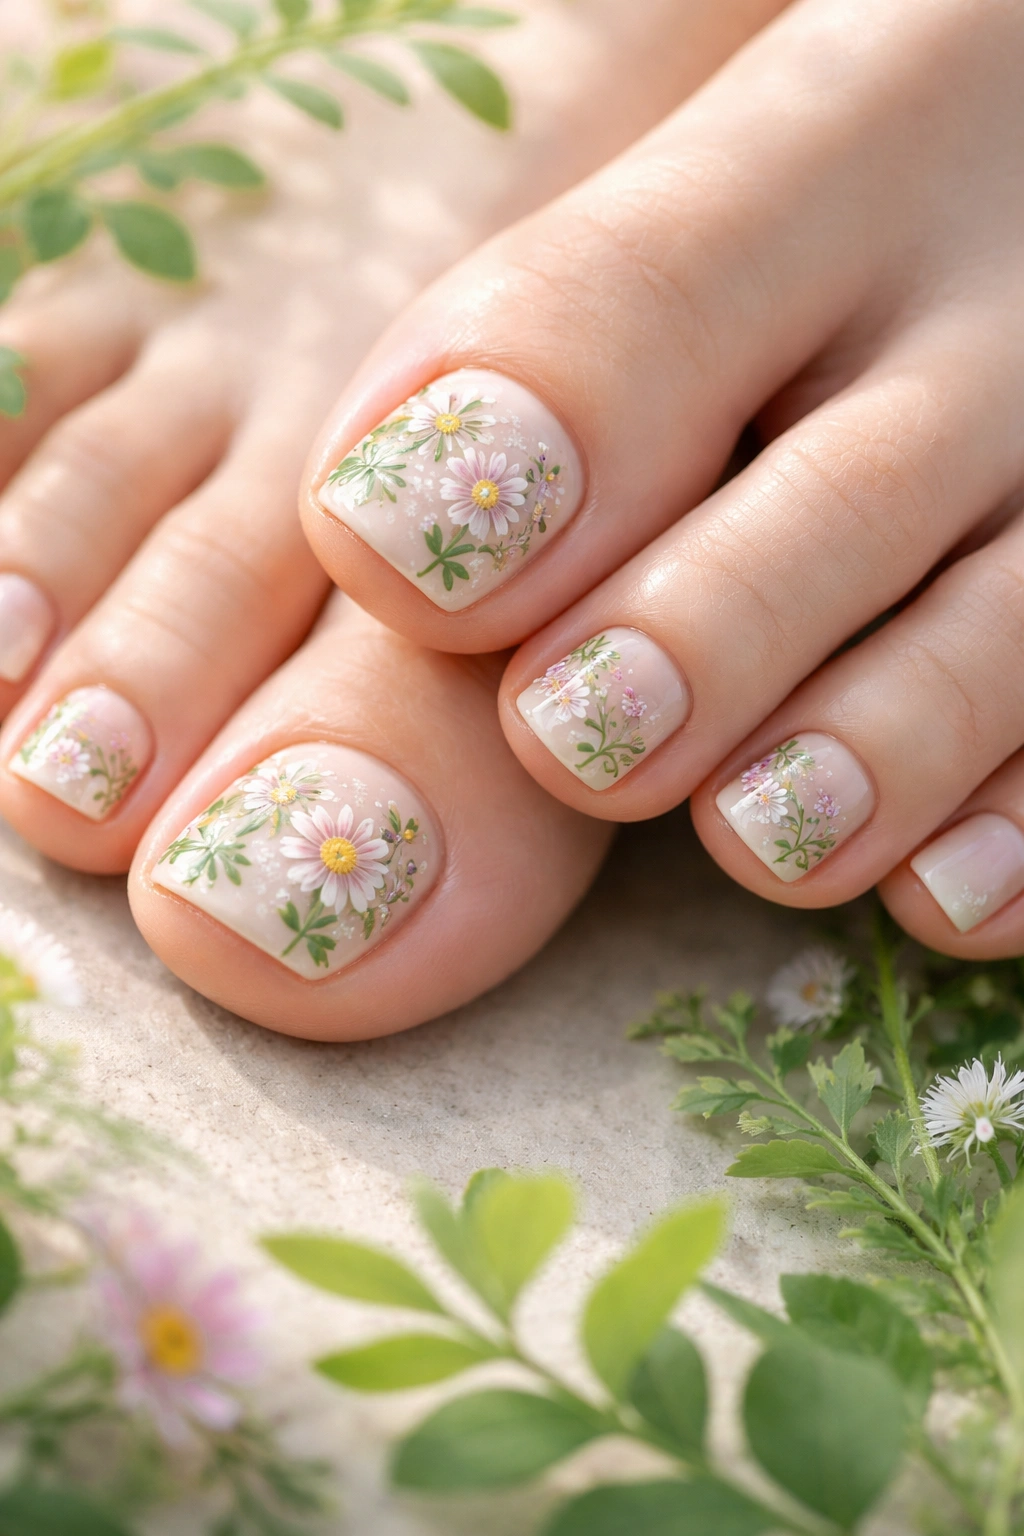
Floral toenail designs feel fresh, feminine, and naturally beautiful. From delicate hand-painted flowers to stylized botanical elements, florals work wonderfully on toenails because you have the canvas space to really develop the design. Pair flowers with leaves, stems, and greenery for a garden-inspired look that feels organic and artistic.
Making Floral Designs Work
Florals can range from tiny subtle flowers scattered across a pale base to larger, statement-making blooms on your big toes. The color palette you choose determines the overall feeling—pastels create a soft, romantic vibe, while bright colors feel summery and bold. Even a single large flower with some leafy details on your dominant toe can be enough to create a beautiful floral pedicure.
Design Approaches
- Paint small, delicate flowers in watercolor style for a romantic aesthetic
- Create larger, more graphic florals with defined petals and bold outlines
- Combine different flower types (tulips, daisies, roses) for visual variety
- Add stems and leaves in green to ground the design and create movement
- Use your big toes as the main canvas and smaller toes as supporting elements
Worth knowing: If you’re concerned about your painting skills, floral nail stickers and water decals offer beautiful results without requiring artistic expertise. Many nail artists use a combination of hand-painted elements and decals to create complex, professional-looking designs.
12. Chrome and Mirror Finish

Chrome nails represent the cutting edge of nail design technology—a reflective, mirror-like finish that catches light in absolutely mesmerizing ways. This futuristic aesthetic works beautifully on toenails, creating a luxe, high-shine look that feels expensive and fashion-forward. Chrome can be applied in traditional silver, gold, rose gold, or jewel-tone variations for different vibes.
The Magic of Chrome Polish
Chrome polish uses special metallic pigments that create a mirror effect without requiring additional powders or complicated application. When executed properly, chrome nails look like liquid metal on your toenails, creating an otherworldly effect that’s genuinely stunning. The finish is glass-smooth and incredibly reflective, making your toenails truly a showstopper.
Getting Professional Chrome Results
- Use a quality chrome polish from reputable brands—cheaper versions often look flat or streaky
- Apply thin, even coats using a specialized chrome brush or regular brush depending on the formula
- Use a glossy top coat to seal and enhance the reflective quality
- Consider combining chrome with other finishes—perhaps chrome on your big toe and a complementary solid color on smaller toes
- Keep nails well-maintained and filed smoothly, as any imperfections become visible with chrome
Pro tip: Chrome finishes show fingerprints and dust more readily than other polishes, so you might need more frequent touch-ups to maintain that pristine mirror effect. The stunning results are absolutely worth the minimal extra maintenance.
Final Thoughts
Your toenails deserve to be celebrated just as much as your fingernails, and these twelve designs offer something for every mood, occasion, and personal style. Whether you gravitate toward timeless elegance like the French pedicure, playful fun like watermelon or rainbow designs, or cutting-edge trends like chrome finishes, there’s absolutely a toenail design here that resonates with you.
The wonderful thing about pedicures is their longevity—most designs hold strong for two to three weeks, giving you an extended opportunity to enjoy your chosen aesthetic. This longer wear time also makes experimenting with new designs feel less risky; you can try something bold knowing you’re not locked into it forever, but you also get extended wear from designs you absolutely love.
Remember that these designs aren’t fixed formulas—they’re starting points for your own creativity. Mix and match elements, adjust colors to match your skin tone or personal palette, and personalize designs to make them uniquely yours. Whether you’re working with a professional nail technician or creating your own DIY pedicure at home, confidence in your choice is what ultimately makes any design look its absolute best.
