

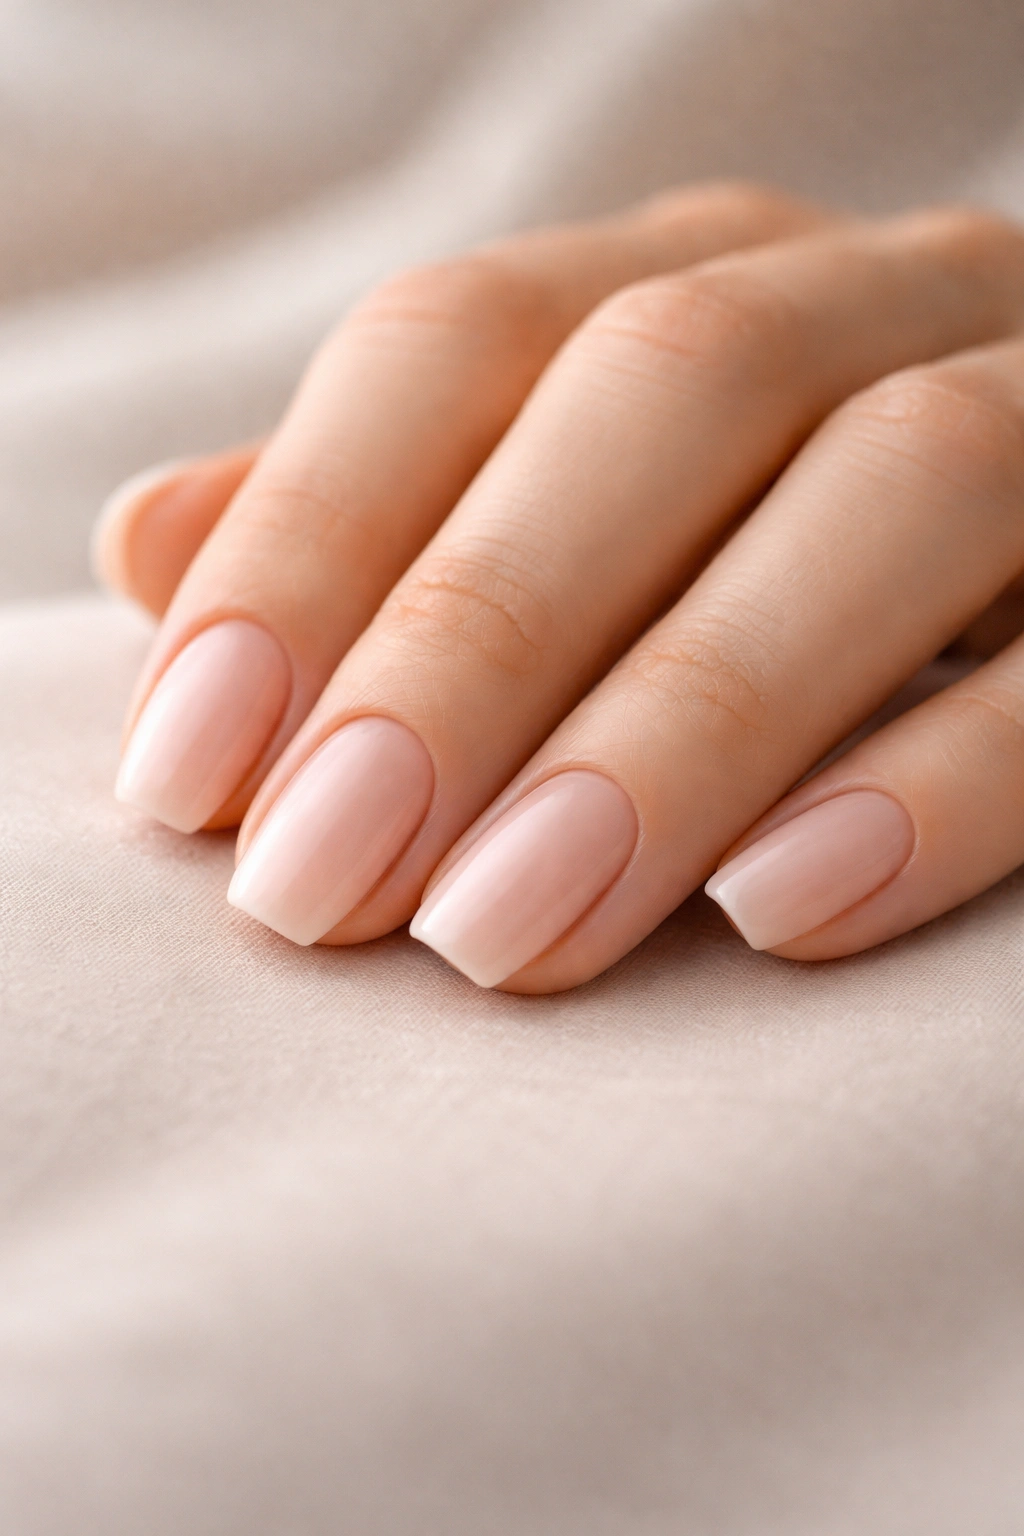
Soft square nails have become the go-to shape for anyone seeking a modern, elegant, and surprisingly versatile look. Unlike harsh geometric squares with sharp 90-degree angles, soft square nails offer rounded edges that feel softer and more forgiving while still maintaining that sophisticated, elongated appearance. They’re the perfect middle ground between classic rounded nails and bold square tips — flattering on almost every hand shape, comfortable to wear during daily life, and incredibly easy to style with virtually any nail art design.
What makes soft square nails so appealing right now is that they work beautifully with both minimalist aesthetic and statement designs. Whether you’re drawn to creamy nudes, playful pastels, delicate florals, or dramatic ombres, this nail shape acts as the perfect canvas. The slightly softened edges make the manicure feel less severe and more contemporary, which is why nail artists and celebrities have embraced this shape across all seasons and occasions.
The best part? Soft square nails don’t require complex skills or expensive salon treatments to maintain. You can absolutely achieve these designs at home with some patience and the right products. Each design below includes practical tips to help you recreate the look, whether you’re using gel, acrylics, or traditional polish. Let’s explore 20 stunning soft square nail designs that’ll inspire your next manicure.
1. Soft Pink Ballet
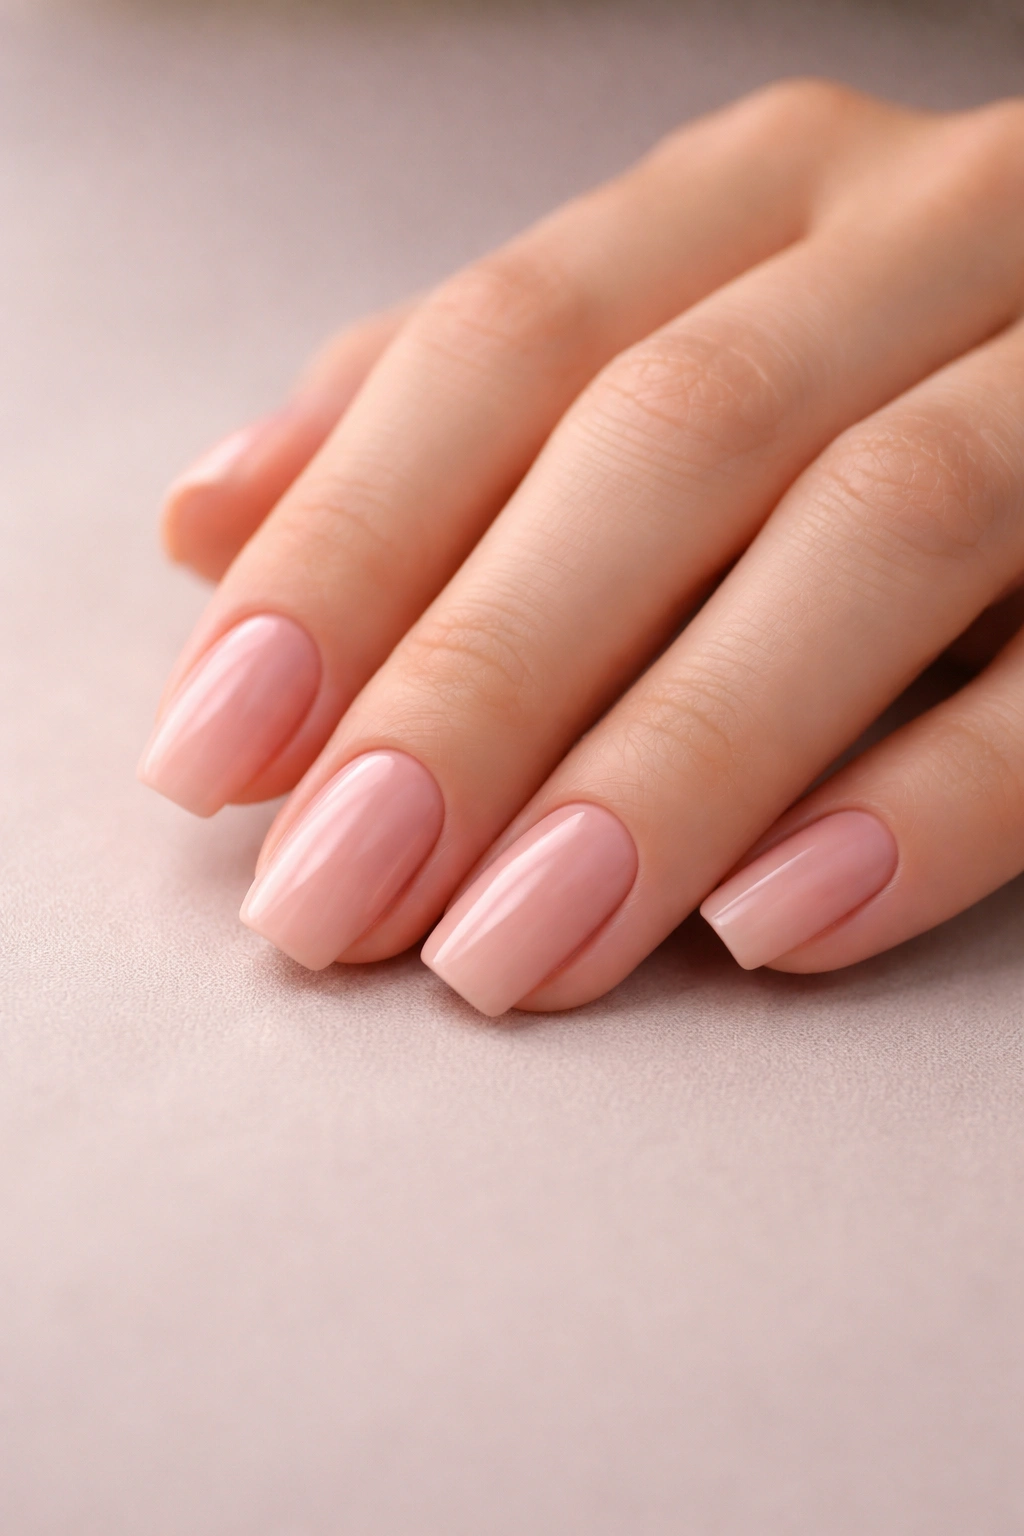
This timeless design captures the essence of elegance with a pale, dusty pink that’s warm without being too vibrant. Ballet pink works beautifully on soft square nails because the gentle color has a naturally sophisticated feel, almost like your nails are naturally radiant. The key to nailing this look is choosing a pink with subtle peachy undertones rather than pure pink — think more muted, more mature, more effortlessly chic.
Why This Design Works So Well
Ballet pink is a color that flatters virtually every skin tone and works in every setting imaginable. It’s professional enough for the boardroom, elegant enough for formal events, and casual enough for everyday wear. The soft square shape amplifies the refined quality of this shade, creating a manicure that feels intentional rather than accidental.
How to Perfect the Finish
- Use a creamy, opaque formula that requires two coats for full coverage and a smooth, even finish
- Apply a high-shine glossy top coat to make the pink glow subtly on your nails
- Avoid any matte finishes with this design — the luminosity is what makes it special
- Consider using a strengthening base coat to protect your natural nails from staining
- The paint should extend smoothly to the edges without any visible streaks or air bubbles
Pro tip: If your polish is too sheer after the first coat, don’t panic and apply three coats. Instead, apply a second coat while the first is still slightly tacky — this helps pigment adhere better and creates a smoother finish than layering on completely dry polish.
2. Nude Gradient
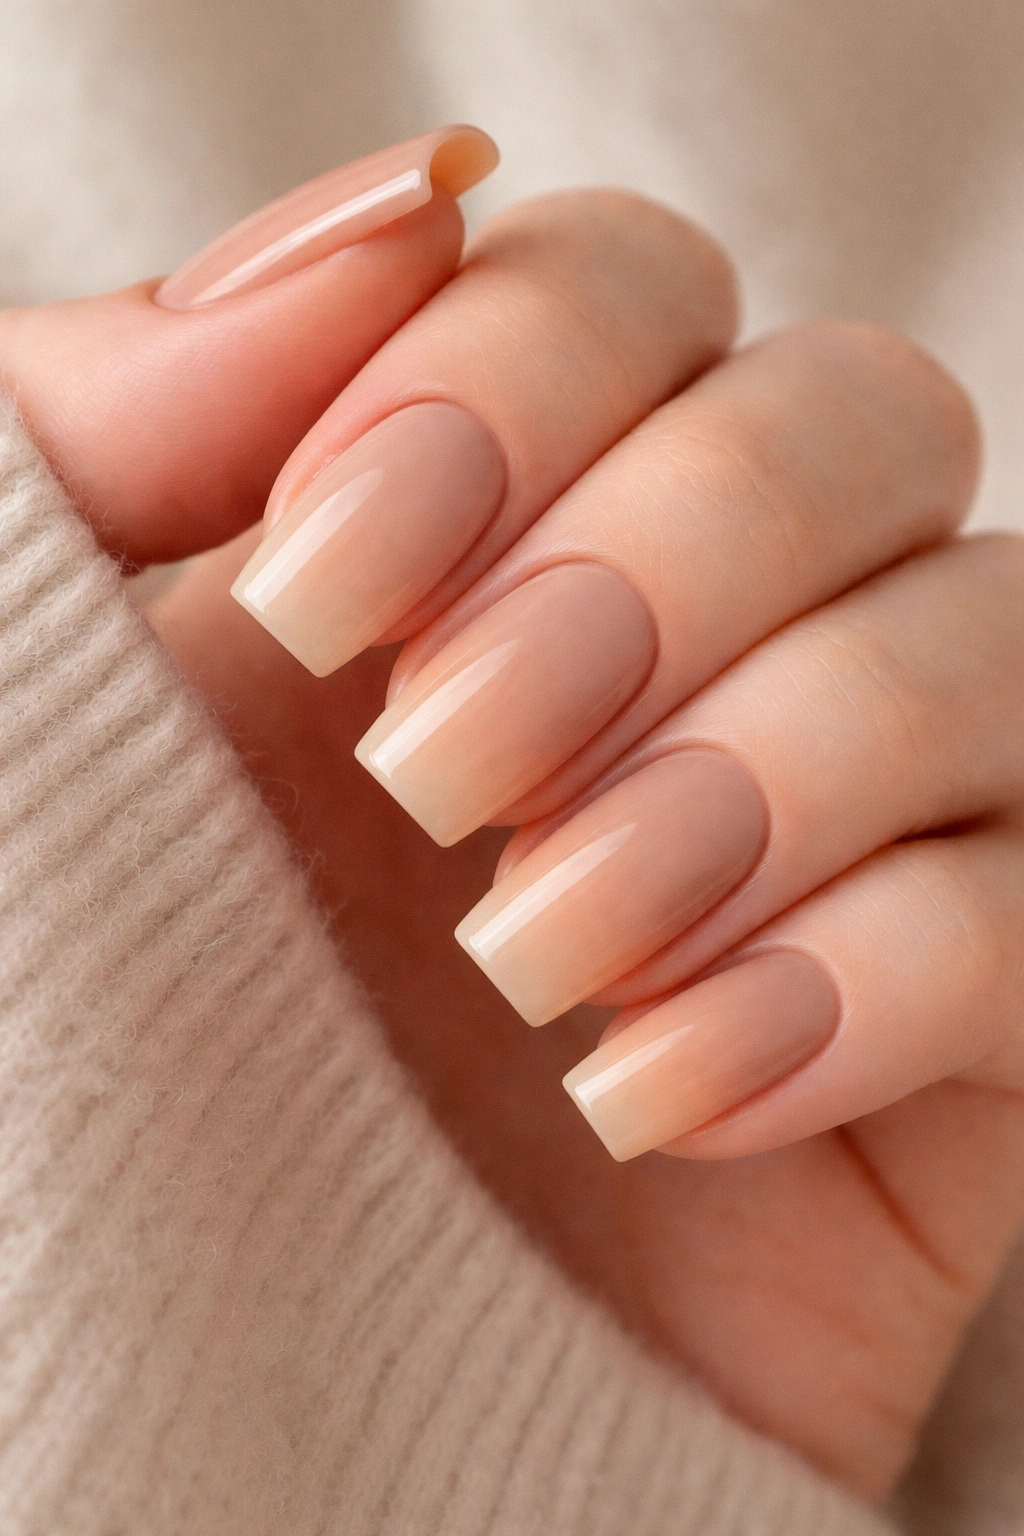
A nude gradient design uses two or more shades of beige, tan, and brown to create a seamless color transition across the nail. On soft square nails, this gradient feels sophisticated and modern, especially when you create the transition from the cuticle area to the tip. The visual effect is subtle but undeniably elegant — it looks like your nails are naturally glowing from within.
The Art of Blending Without Streaks
The secret to a beautiful gradient is using a damp makeup sponge to blend where two colors meet. Apply one color to the nail, then apply the second color slightly overlapping the first, and use the damp sponge to gently stipple the overlapping area. This creates a soft, hazy transition rather than a harsh line.
Essential Supplies and Techniques
- Choose three complementary nude shades that sit on a spectrum from light to dark
- A makeup sponge (the kind used for foundation) works perfectly for blending
- A glossy or soft matte top coat finishes the look beautifully
- Practice on a practice wheel first to understand how the colors blend
- Work quickly before polish dries, as dry polish won’t blend smoothly
This design takes a bit of practice, but the payoff is a manicure that looks airbrushed and intentional. It’s perfect if you want something that reads as elevated without any obvious nail art elements.
3. Creamy Nude with Gold Accent
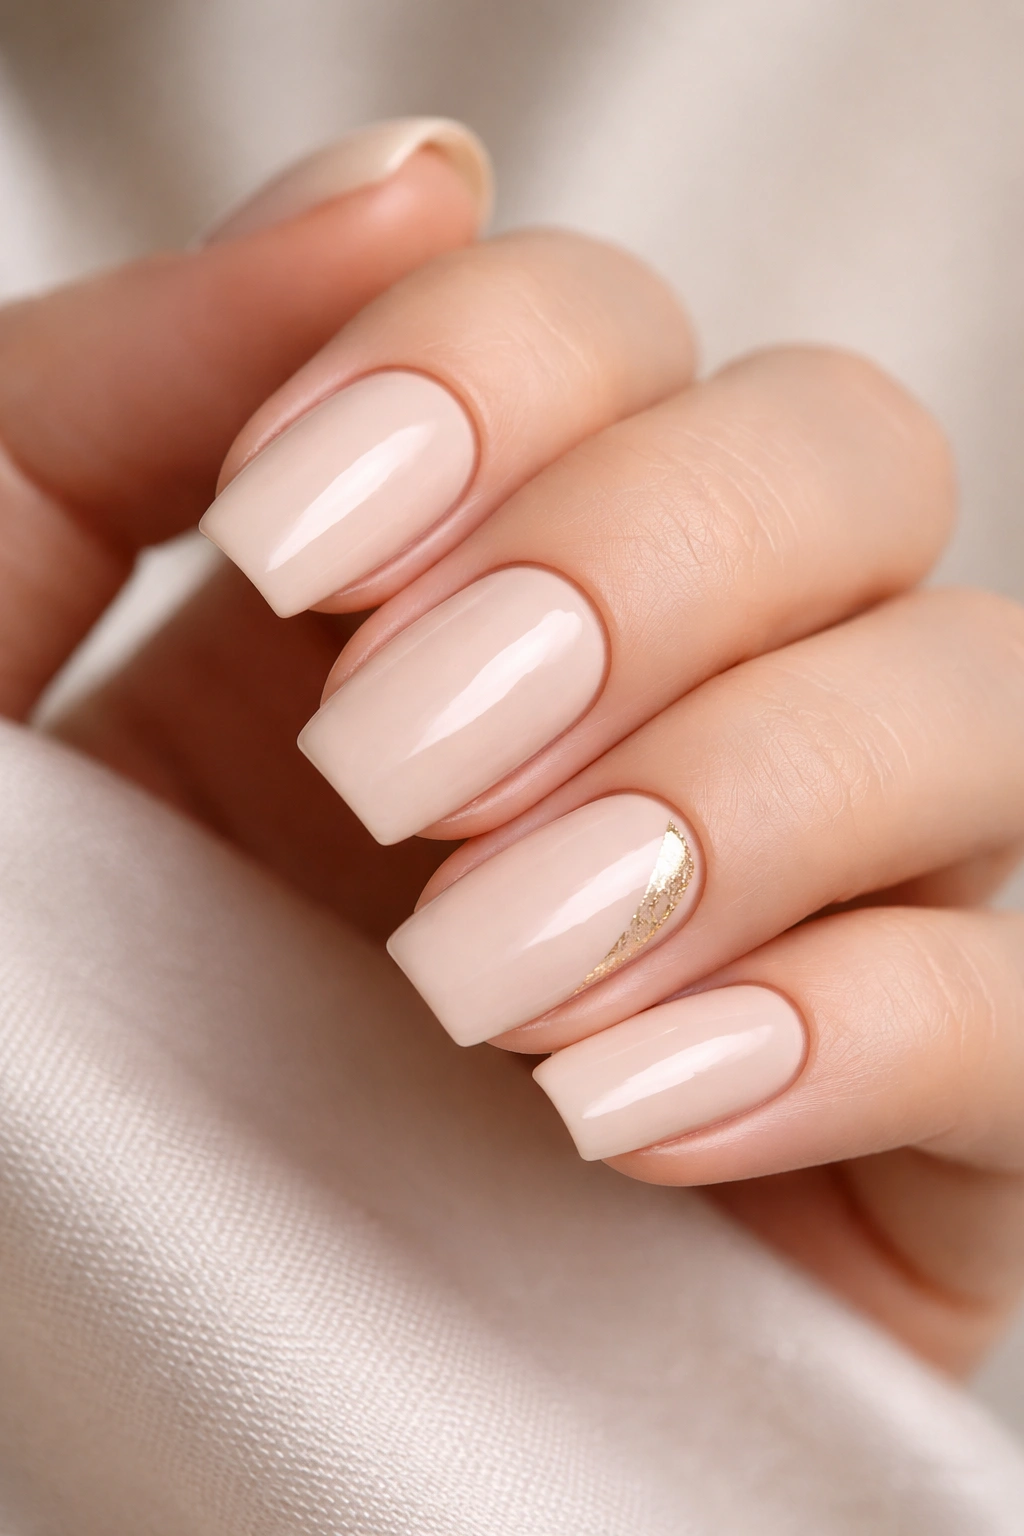
Here’s where minimalism meets glamour: a creamy nude base accented with delicate gold detailing. This design keeps the elegance of a simple nude while adding just enough sparkle to feel special. The gold can take many forms — a thin gold stripe down the center of each nail, a gold geometric pattern, or even just gold foil embedded in one accent nail.
Choosing Your Gold Details
The type of gold you choose dramatically changes the vibe of this design. Warm gold creates a more luxurious, expensive feel, while cooler champagne gold feels lighter and more modern. Metallic gold polish applies differently than gold foil — foil is bolder and more reflective, while polish gives a more subtle shine.
Application Tips for Flawless Gold Elements
- Start with your creamy nude base and let it fully dry before adding any gold
- If using gold polish as an accent, use a thin brush or a nail art pen for precision
- Gold foil requires a special adhesive layer or gel base to stick properly
- Keep the gold lines thin and intentional — a delicate single stripe is more chic than busy gold details
- A clear top coat protects the gold and ensures the design lasts through the entire wear period
Worth knowing: Gold accents show fingerprints and smudges more easily than solid color designs, so this look is best if you’re not doing heavy manual work with your hands.
4. Classic White Tips
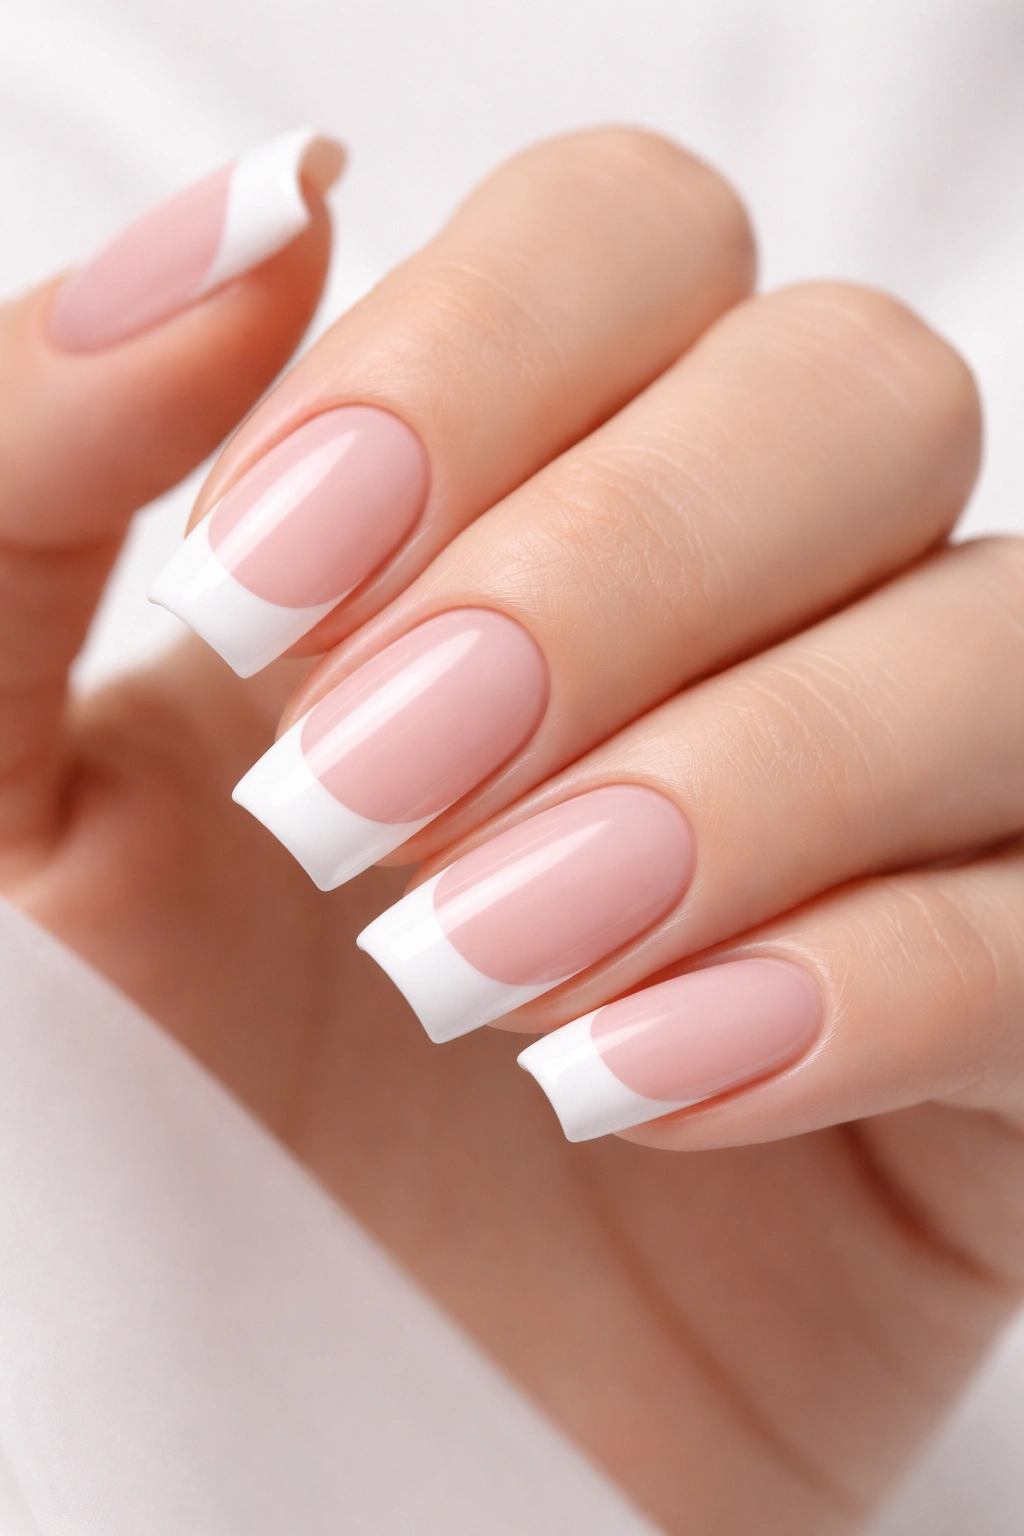
The eternal French manicure gets a refresh with soft square nails. Instead of the traditional rounded nail with a thin white line, soft square tips give you more substantial white at the end of each nail. This creates a bolder, more modern take on the French manicure while maintaining its clean, timeless elegance.
Why Soft Square Transforms the French Look
The extra surface area of square tips means you can make the white stripe thicker and more visible without looking overdone. This makes the design work better with modern fashion and contemporary aesthetics. The soft edges prevent the look from feeling too rigid or structured.
Achieving Perfectly Straight White Tips
- Use a thin brush or a nail art pen with white polish for the most control
- Guide yourself with a straight edge or even a credit card held gently against the nail
- The white should cover roughly the top quarter to third of the nail
- Apply two coats of white polish to ensure complete opacity
- Seal everything with a glossy top coat for that signature shine
Some people prefer a thin white line for a delicate look, while others love a thicker, more dramatic white section. Experiment to find what feels right for your hands and personal style.
5. Beige with Delicate Florals
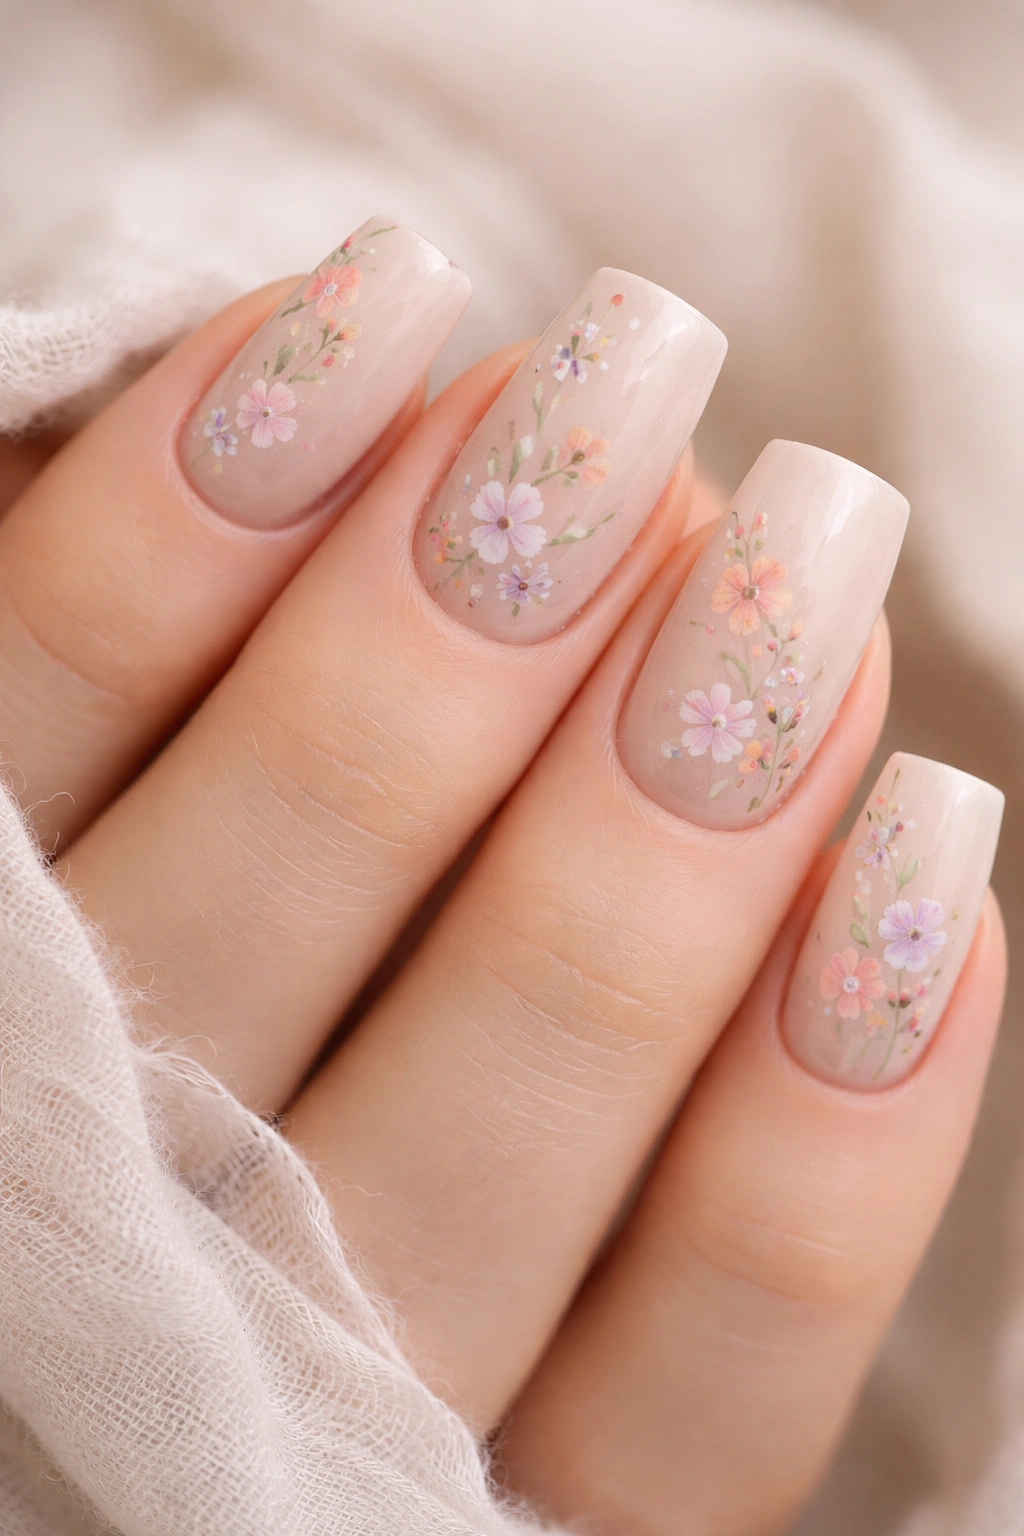
A soft beige base provides the perfect backdrop for delicate flower designs painted directly onto the nail. The flowers can be tiny and scattered, clustered in corners, or arranged in patterns across the nail. The key is keeping them dainty and realistic rather than cartoonish — think watercolor florals rather than bold botanical prints.
Creating Realistic Floral Details
Delicate florals require a steady hand and the right tools. A very fine detail brush or even a nail art pen works better than regular polish brushes. Paint tiny petals and leaves using soft colors — pale pink, cream, soft green, and lavender complement beige beautifully. The flowers should feel like they’re growing organically on the nail rather than looking deliberately placed.
Design Arrangement Ideas
- Cluster three small flowers in one corner with scattered green leaves
- Paint a vertical line of tiny flowers down the center of each nail
- Create an asymmetrical arrangement with more flowers on some nails and fewer on others
- Use a nude gradient as the base and add white flowers for contrast
- Include delicate stems and foliage to make the design feel botanical and intentional
Insider note: Real botanical reference photos help tremendously when painting florals. Spend a minute looking up actual flower shapes before you start painting — your designs will look infinitely more realistic.
6. Milky Ombre

This design transitions from a milky white at the base to a sheer, barely-there color at the tips. The result is a nail that looks ethereal and soft, almost like milk being stirred into water. Milky ombre works beautifully in soft pink, soft blue, soft peach, or even just white-to-clear for an ultra-minimal look.
Creating the Perfect Milky Effect
A milky ombre relies on very sheer, creamy polishes that build gradually with layers. The base needs to be more opaque, while the tip should become progressively more transparent. This requires careful blending and patience — rushing the process results in a cloudy, uneven finish rather than a soft gradient.
Step-by-Step Application Process
- Start with a white or very pale base color applied to the bottom third of the nail
- Mix the sheer color with a tiny bit of white to create an intermediate shade in the middle section
- Apply pure sheer color to the tip for the most transparent effect
- Use a damp sponge to gently blend where colors meet
- Apply thin coats rather than one thick coat — multiple thin layers look more refined
This design has an almost supernatural quality. It feels modern and artistic while remaining wearable for any occasion.
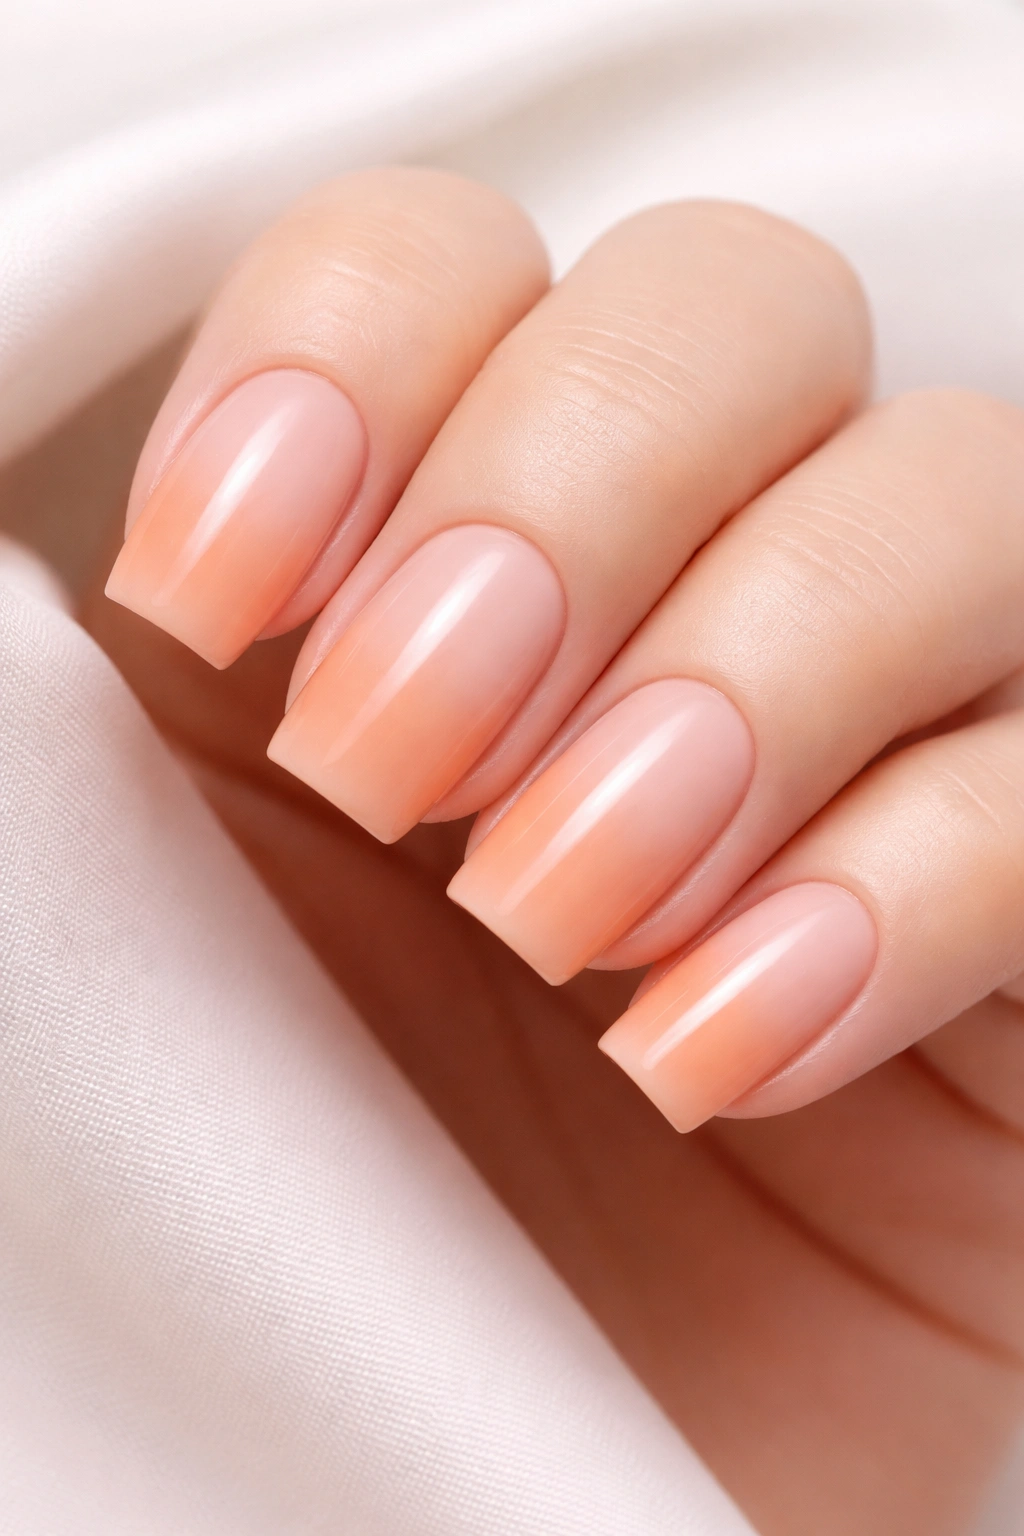
7. Soft Peach Perfection
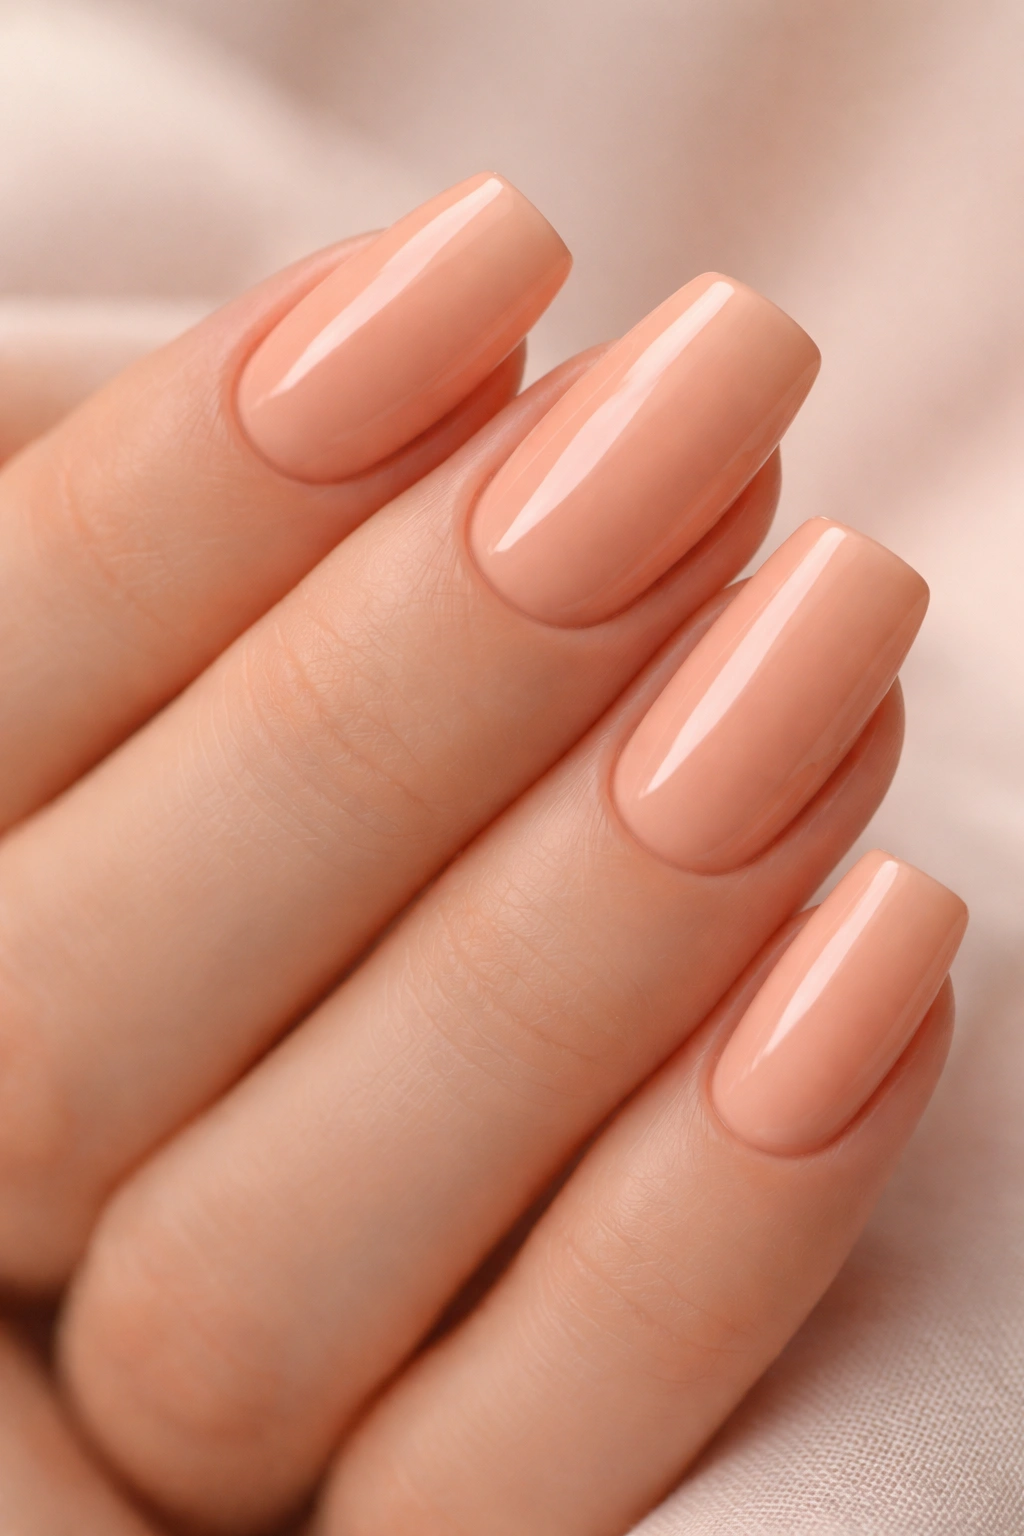
Peach is an underrated nail color that works beautifully on soft square nails. It’s warm, approachable, and has a subtle peachy glow that feels fresher than standard pink. A soft peachy tone sits perfectly in that warm, neutral zone where it complements almost every skin undertone. There’s something inherently optimistic about peach nails that makes them feel happy without being juvenile.
Choosing the Right Shade of Peach
The peach spectrum is wider than you might think. Warm peachy-orange tones feel vibrant and summery, while cooler, more muted peach shades feel sophisticated and earthy. A peachy tone with slightly more beige and less orange tends to feel more versatile and wearable year-round. Test the color in natural light before committing — lighting dramatically affects how peach appears on your nails.
Styling Your Peach Manicure
- A glossy finish makes peach appear more youthful and summery
- A soft matte finish gives peach a more sophisticated, earthy vibe
- Peach works beautifully with rose gold accents and metallic details
- Pair it with warm-toned clothing for a cohesive, intentional look
- The soft square shape prevents peach from feeling too playful or cutesy
Quick fact: Peach is one of the few colors that naturally complements both warm and cool undertones in skin, making it universally flattering across different ethnicities and complexions.
8. Cream with Minimalist Lines
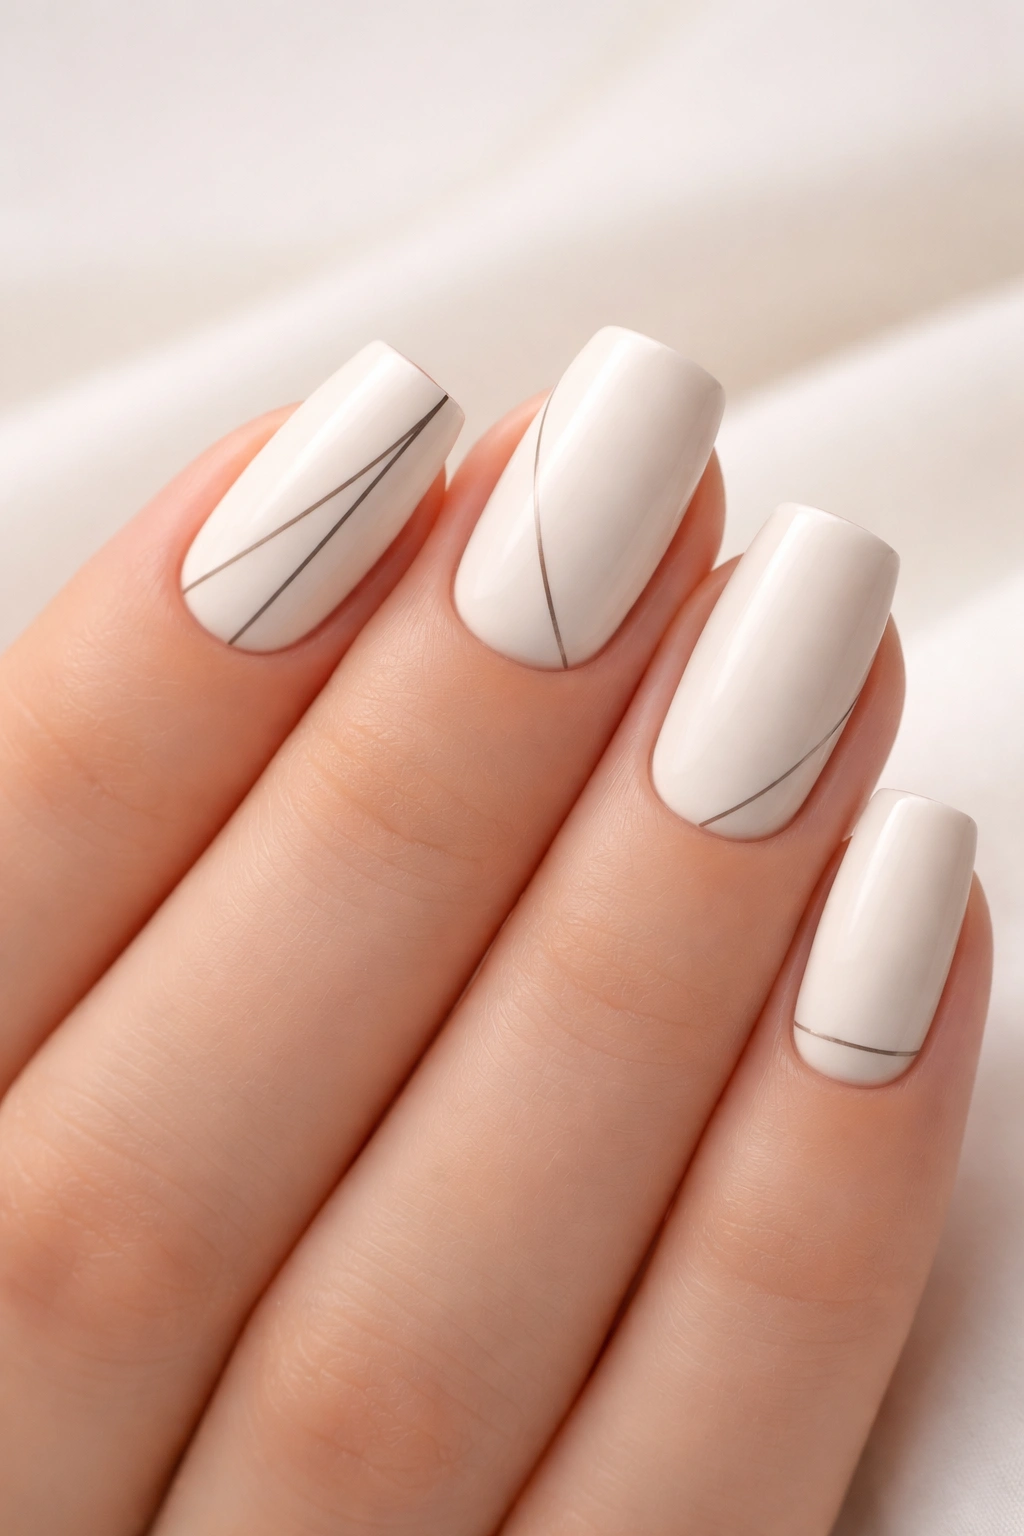
This design combines a creamy off-white base with thin, precise lines in black, gray, or nude. The lines can be geometric — straight stripes, angles, or segments — or organic like subtle abstract marks. The minimalist approach keeps everything feeling clean and intentional rather than busy or confused.
Line Work Techniques for Beginners
Achieving straight lines without a steady hand is absolutely possible with the right tools. Use a thin striping brush, a nail art pen, or even regular thin brush from your craft supplies. Guide your hand by resting your pinky finger on a flat surface and using it as an anchor point while you paint. Move your entire hand slowly rather than trying to steady just your brush hand.
Minimalist Line Design Ideas
- A single vertical line down the center of each nail
- Horizontal stripes at the bottom third, middle, or top of the nail
- Angular geometric patterns that create visual interest without overwhelming the nail
- Asymmetrical line placements on alternating nails
- Very thin lines (almost like thread) for an ultra-delicate effect
The beauty of this design is that even imperfect lines feel intentionally artistic. The minimalist aesthetic actually forgives small wobbles because they read as human and crafted rather than sloppy.
9. Warm Taupe with Glitter

Taupe is a sophisticated neutral that pairs perfectly with glitter accents on soft square nails. A warm taupe base feels like a grown-up neutral that’s more interesting than basic beige but still utterly wearable. Add glitter strategically — either throughout the entire nail for shimmer, on the tips for a subtle French-glitter hybrid, or on just one accent nail for understated sparkle.
Glitter Application Methods That Actually Work
Full glitter coverage looks best with fine, consistent glitter particles that don’t leave bare spots. Press the glitter into wet polish using a damp brush or sponge. Ombre glitter (more glitter at the tips, less at the base) creates a beautiful graduated effect. For partial glitter, use a glitter-infused polish designed for controlled application rather than loose glitter, which can be unpredictable.
Design Variations with Taupe and Glitter
- Full nail coverage in taupe with fine glitter mixed throughout for subtle sparkle
- Solid taupe base with a glittery ombre concentrated at the tips
- Taupe on most nails with one or two accent nails in pure glitter
- Glitter gradient that transitions from none at the base to full glitter density at the tips
- Combination of taupe with metallic glitter for a warm, luxurious feel
Pro tip: Always use a good top coat over glitter designs to prevent the glitter from catching on hair, clothing, or other surfaces. Gel top coats create a particularly smooth finish over glitter.
10. Ivory with French Twist
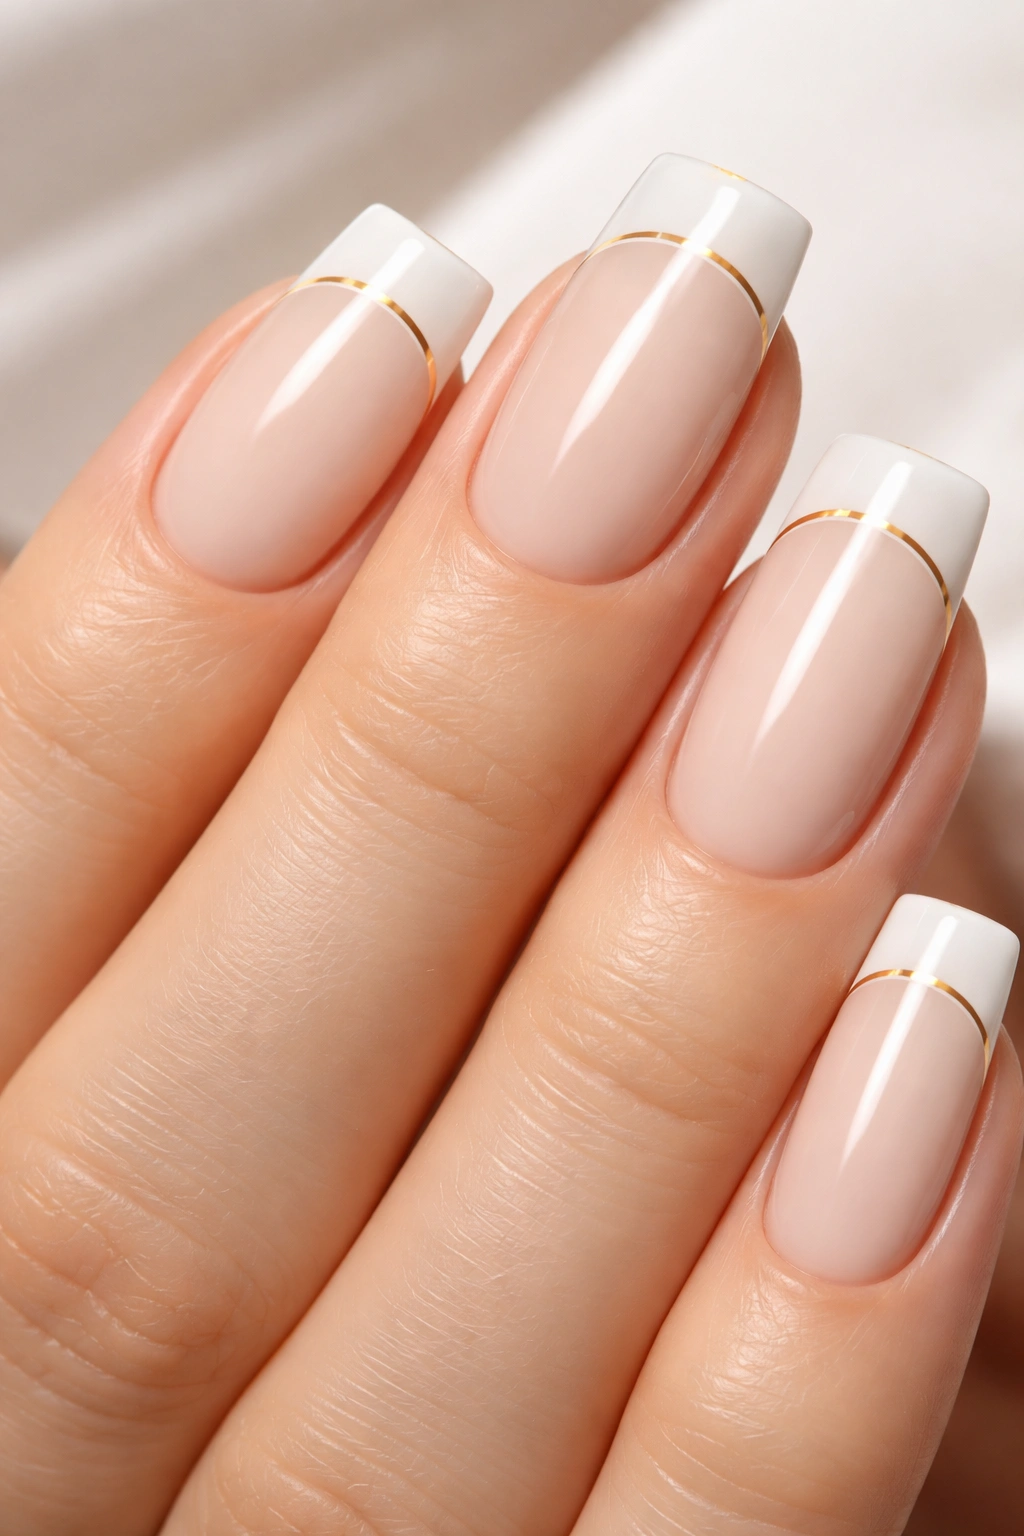
This design elevates the classic French manicure with a soft ivory base and a white or cream tip, then adds a delicate twist of color between them. The “twist” might be a thin gold line, a pale pink stripe, a soft gray accent, or even a barely-there shimmer. This intermediate line transforms a traditional design into something modern and unexpected.
Creating the Signature Twist Detail
The twist line needs to be thin and intentional — it’s an accent, not a dominant design element. Use a thin striping brush or nail art pen to apply the color. The line should sit roughly where the nail color naturally transitions (around the smile line of the nail). Make sure it’s perfectly straight across all nails for a polished, intentional look.
Color Combinations That Work
- Ivory base with white tip and a thin gold line creates warmth and luxury
- Ivory base with cream tip and a pale rose accent feels romantic and soft
- Ivory base with white tip and a gray line feels modern and cool-toned
- Ivory base with cream tip and a champagne shimmer is elegant and subtle
- The accent line doesn’t need to span the entire nail — just the center portion works beautifully
This design shows that you can take a classic look and make it fresh simply by adding thoughtful details. It’s elegant enough for weddings, professional enough for work, and creative enough to feel personal.
11. Soft Blush with Pearls
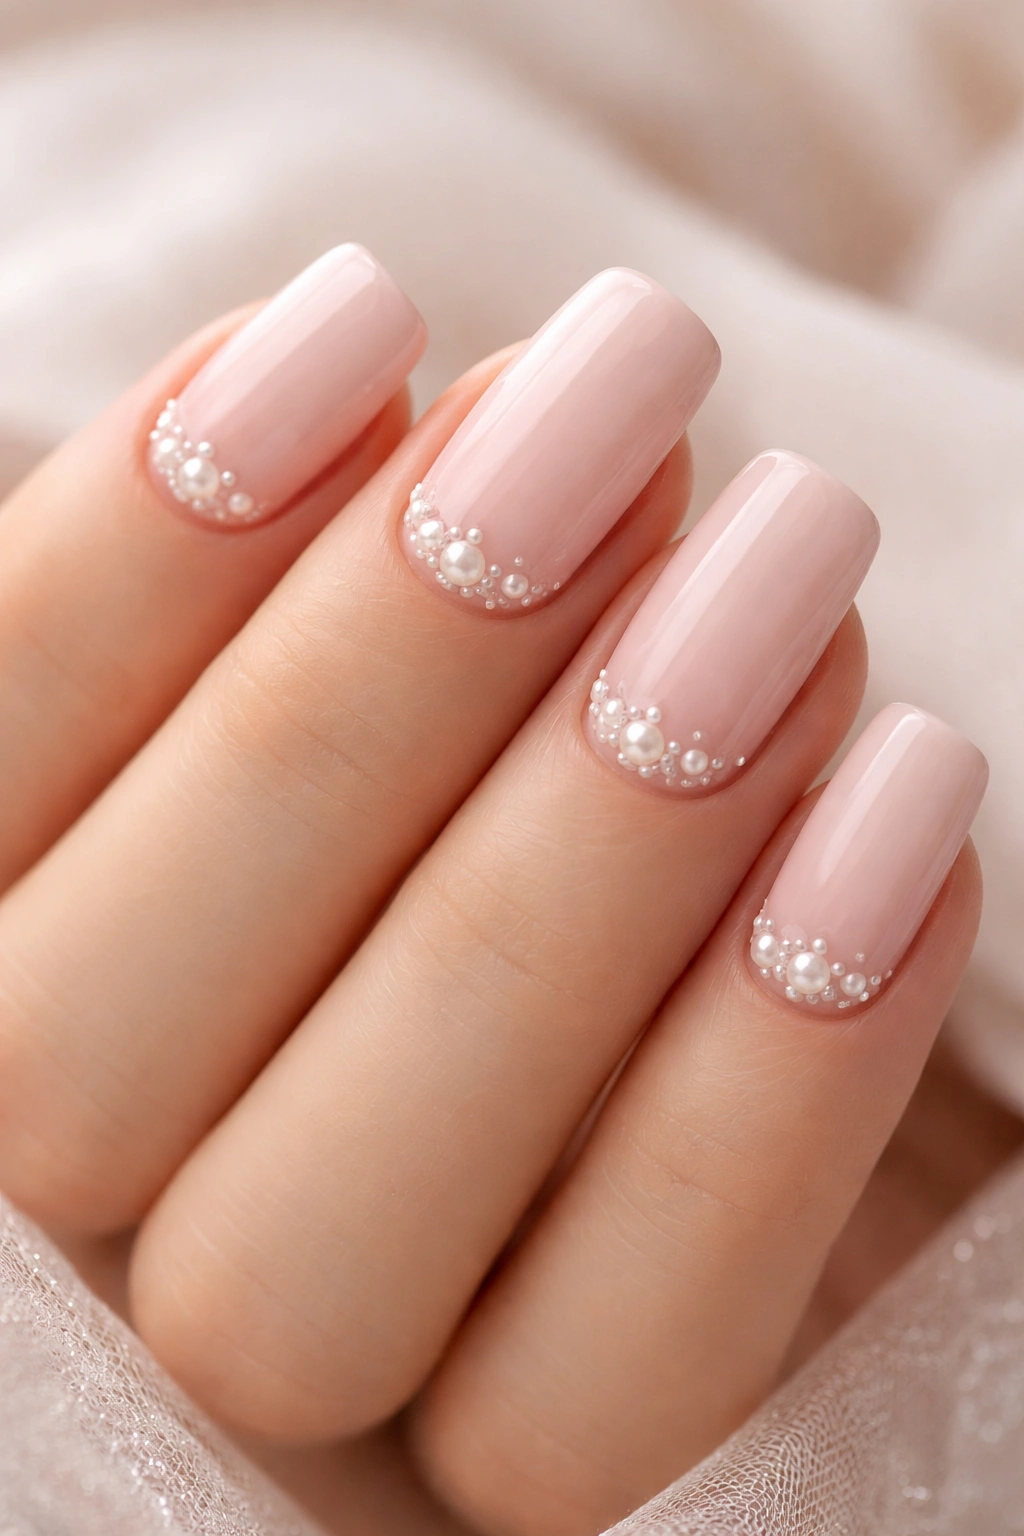
A soft blush pink base becomes truly luxurious when accented with pearl details. Pearls can be small beads positioned at the cuticle or tips, larger pearl accents creating an entire gradient effect, or even micro pearls scattered across the design. The soft square shape gives enough surface area for pearls to really shine without overwhelming the nail.
Working with Pearl Nail Accents
Pearl beads require a sticky base to adhere properly. Gel base coats work best because they stay tacky long enough to position the pearls. Apply the pearl to the sticky surface, then seal everything with a top coat once the base has cured. Make sure the pearls are positioned firmly enough that they won’t shift around inside the top coat.
Pearl Placement Ideas
- A single pearl at the center of each nail for subtle elegance
- A line of pearls down the center from cuticle to tip
- Pearl gradient with more pearls at the tips and fewer at the base
- Pearls clustered in one corner as an accent detail
- Scattered asymmetrical pearls for a more organic, less formal look
Worth knowing: Pearl beads add texture and slight thickness to the nail, so they’re best if you’re not typing heavily or working with your hands constantly. They also catch on things more easily than flat nail art.
12. Chamomile Dream
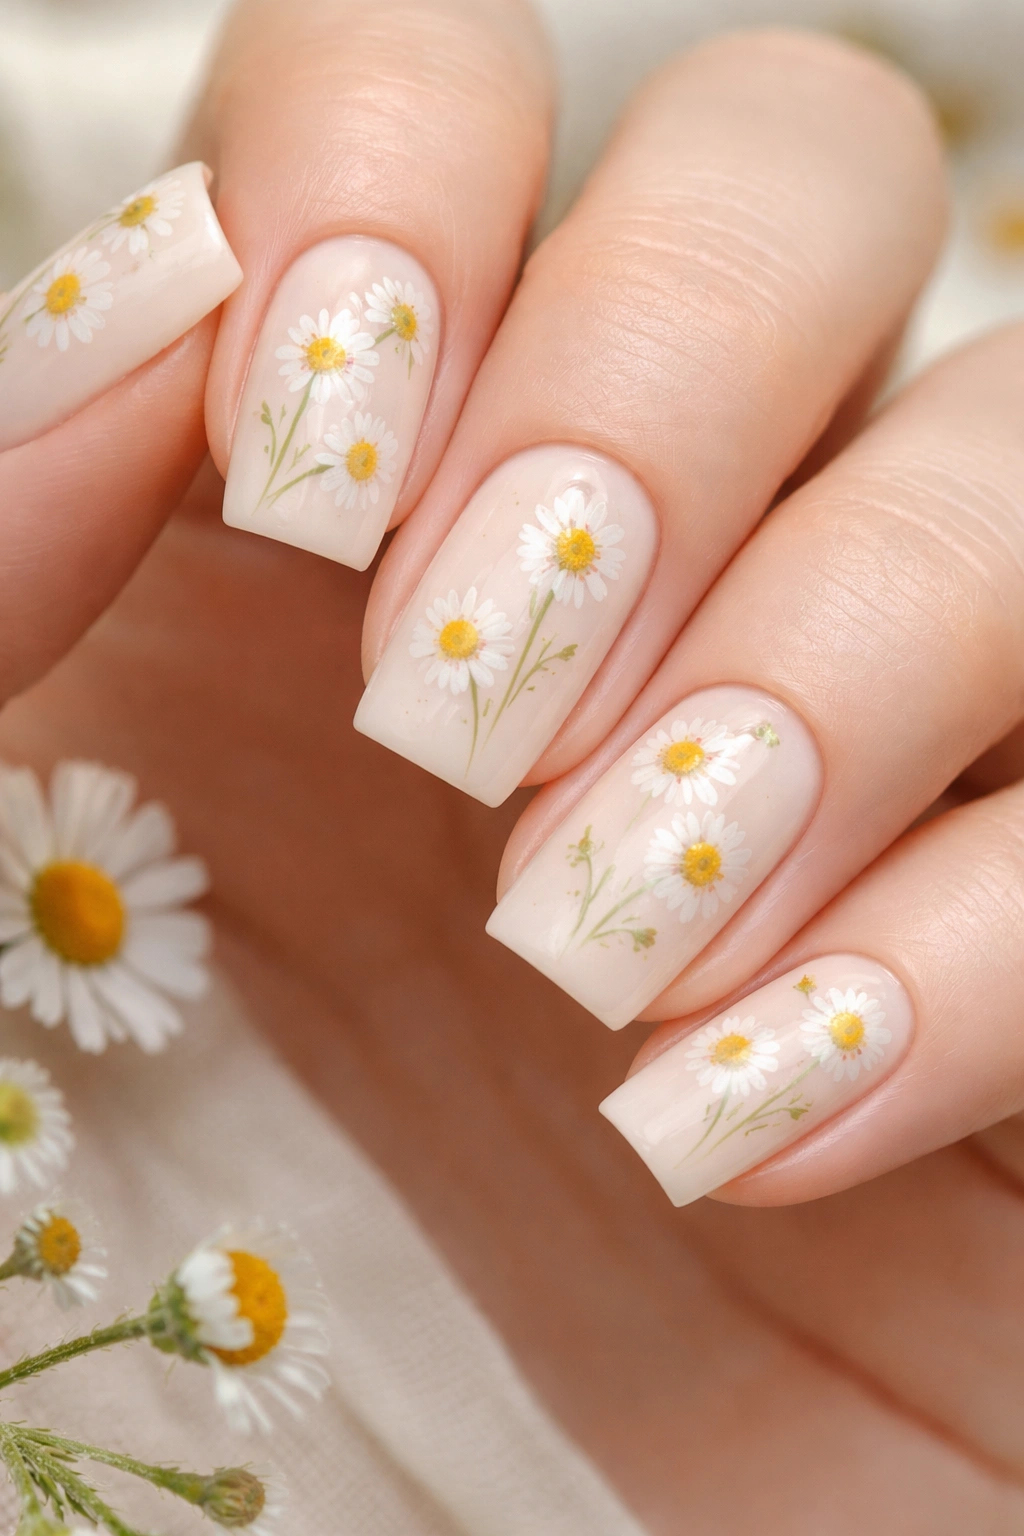
This soothing design features a pale cream base with delicate yellow and white chamomile flowers scattered across the nail. Chamomile flowers are simple enough to paint with a detail brush — just small yellow circles with white petals radiating from the center. Add tiny green leaves and stems to complete the botanical feel.
Painting Simple Chamomile Flowers
You don’t need to be an artist to paint chamomiles. Start with a tiny yellow dot, then use white polish to paint thin petals around the yellow center. A toothpick or thin brush handle can help create the fine detail work. Paint the flowers in a loose, organic pattern rather than perfectly symmetrical — this actually looks more realistic.
Creating a Cohesive Botanical Design
- Space flowers asymmetrically rather than in perfect rows
- Add varied stem lengths and leaf sizes for natural variation
- Include some leaves without flowers to add movement and visual interest
- Let some white of the nail show through rather than completely covering it with design
- Use pale green that’s muted rather than bright to maintain the soft aesthetic
This design has a calming, almost meditative quality. It pairs beautifully with natural, earthy aesthetics and feels fresh without being trendy or seasonal.
13. Creamy Caramel Swirl
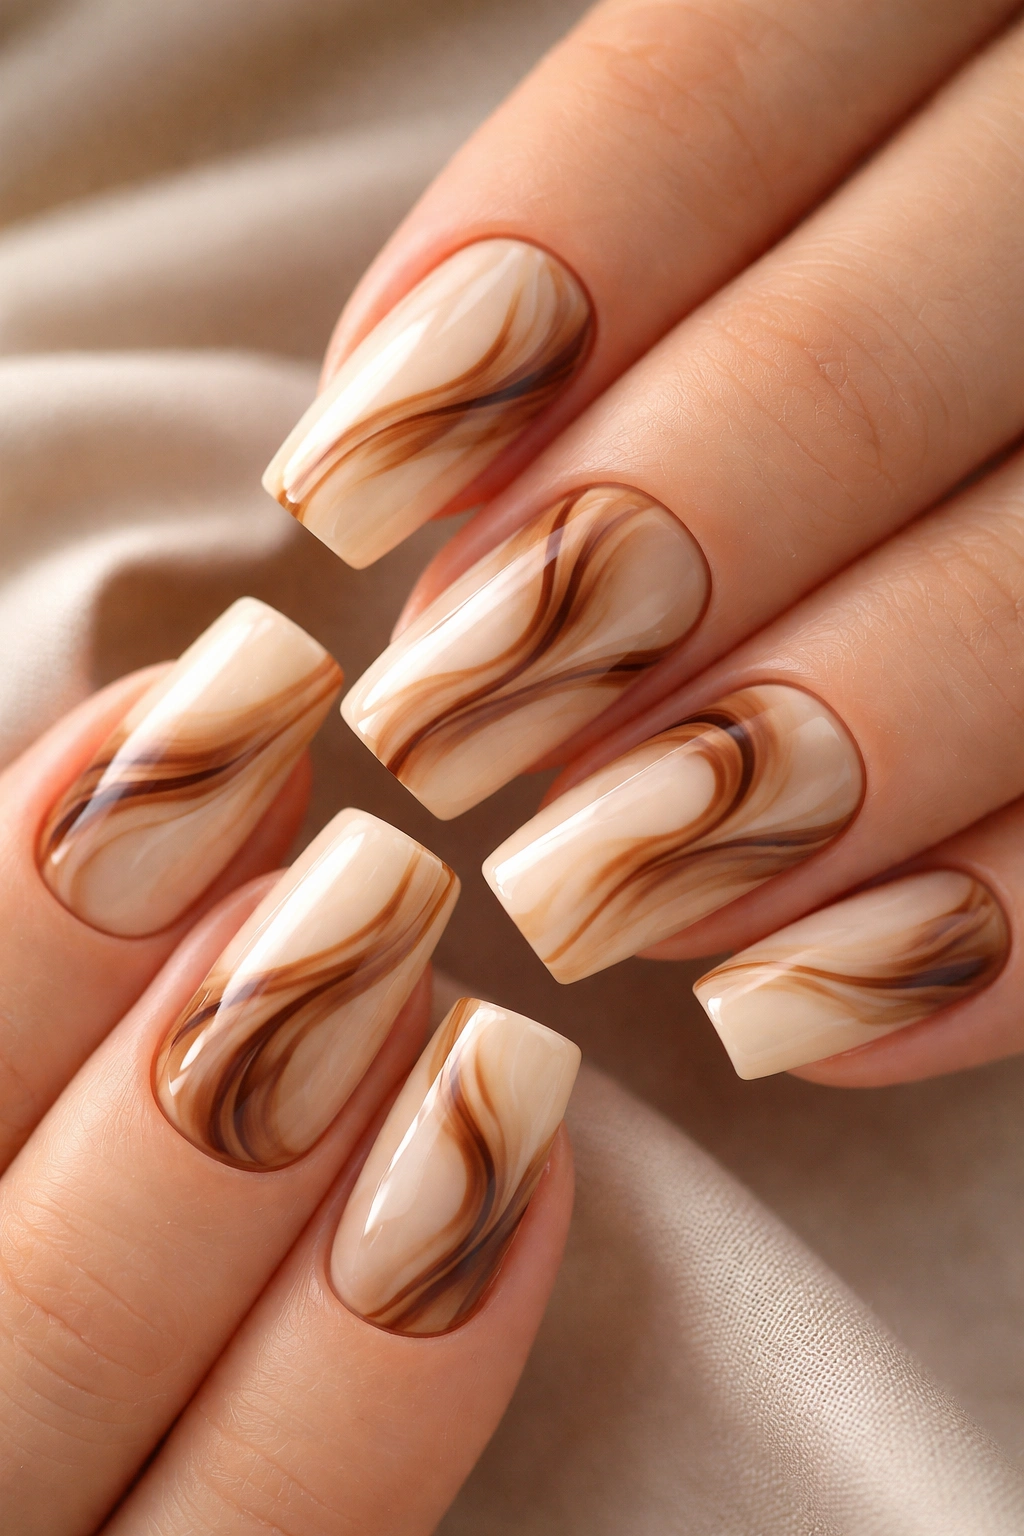
Swirl designs create gorgeous organic movement across the nail surface. Combine a creamy beige base with warm caramel and chocolate brown swirled together for a design that looks almost like marble or natural stone. The swirls appear as though they’re flowing across the nail, creating depth and visual interest.
Creating Perfect Swirls Without a Mess
The swirl technique involves applying one color, then immediately applying a second color nearby, then dragging a thin brush or toothpick through the colors to create the swirl effect. Work quickly before polish dries. You can drag horizontally, vertically, or at angles — each creates a different effect. Practice on a practice wheel first to understand how different colors blend together.
Swirl Techniques Worth Trying
- Horizontal swirls that flow left to right across the nail
- Vertical swirls from cuticle to tip for elongating effect
- Diagonal swirls that create dynamic movement
- Tight swirls that create almost marbled appearance
- Loose, minimal swirls with lots of base color showing through
The beauty of swirl designs is that slight imperfections actually enhance the organic, natural appearance. Perfectly symmetrical swirls can look artificial, but slightly uneven swirls look authentic and intentional.
14. Warm Vanilla with Geometric Design
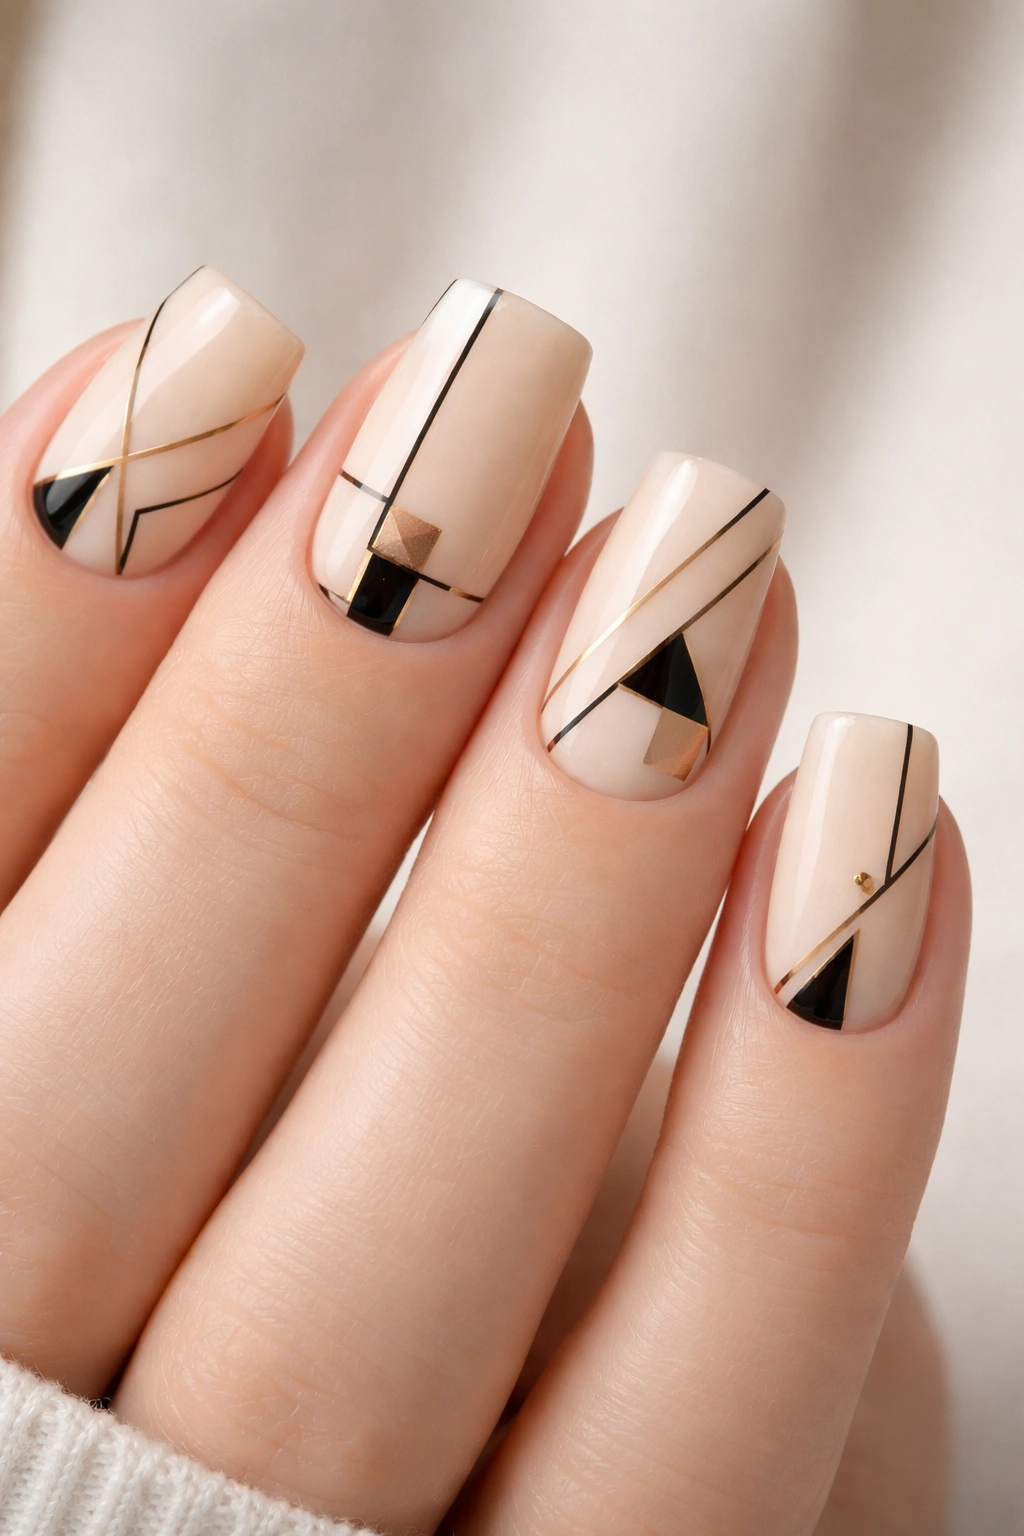
Vanilla is an incredibly soft, warm neutral that provides the perfect base for geometric nail art. Pair it with geometric shapes in black, gold, or a complementary color for a design that feels modern and artistic. Geometric designs work beautifully on soft square nails because the square shape itself has geometric qualities that enhance clean-lined patterns.
Creating Clean Geometric Patterns
Geometric designs require precision. Use painter’s tape to create straight edges, a thin brush for careful application, or even a nail art pen that gives you fine control. Think about the overall composition before you start — should the design be centered, off-center, or cover the entire nail? Should shapes be repeated or varied?
Geometric Design Ideas
- Minimalist grid pattern with thin black lines creating squares
- Angular triangles in the top or bottom corner
- Hexagon shapes scattered across the nail
- Vertical or horizontal lines creating a striped geometric effect
- Abstract angular shapes that create movement without being overly busy
Quick fact: Geometric designs feel more contemporary and modern than curves or florals, so they’re perfect if you want your manicure to feel trendy and current while still maintaining sophistication.
15. Soft Mauve Marble
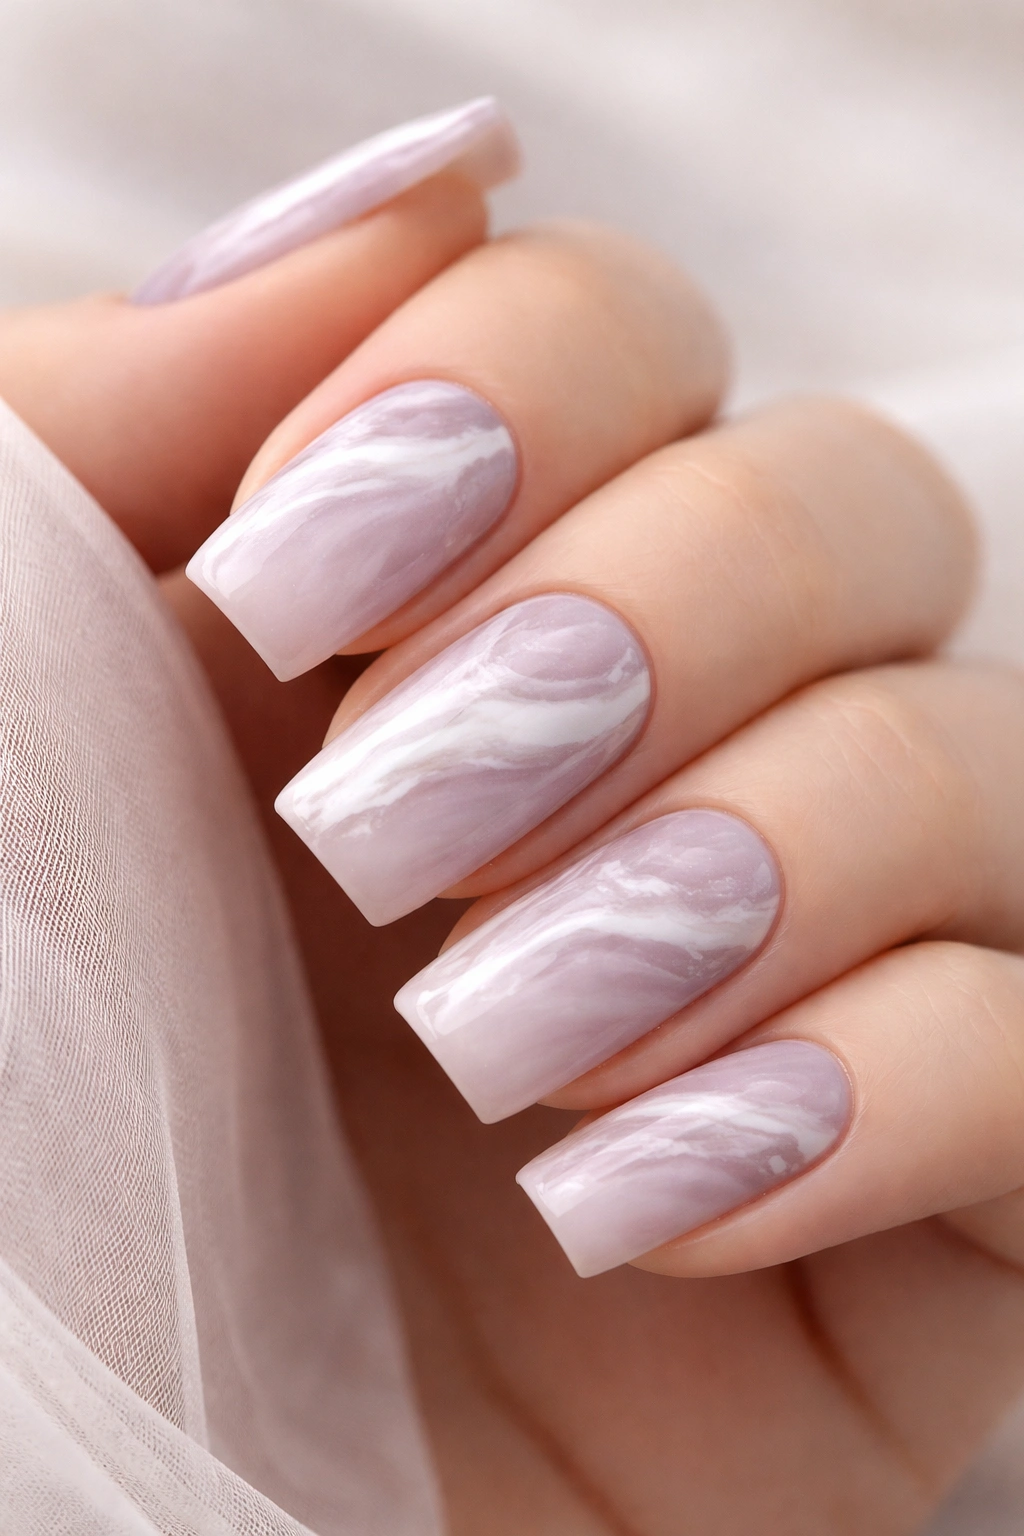
Mauve is experiencing a real moment in the world of nail color, and soft square nails are the perfect shape to showcase it. Create a marbled effect by swirling mauve with white, cream, or gray to create a sophisticated, almost stone-like appearance. The marbling technique makes this design look expensive and intentional.
Achieving Authentic-Looking Marble
Marble effects need at least three colors to look realistic: a base color, a lighter tone, and sometimes a very dark accent. Apply colors next to each other while they’re wet, then drag a thin tool through them to create the characteristic veined appearance of actual marble. The veins shouldn’t form perfect lines — real marble has organic, slightly irregular veining.
Marble Design Variations
- Mauve and white for a soft, romantic marble
- Mauve, gray, and white for a cooler, more sophisticated effect
- Mauve with just one other color for a more subtle, monochromatic marble
- Concentrated marble on tips with solid mauve at the base
- Full-nail marble with no solid color base
This design looks like you spent serious time at a high-end salon. The soft square shape makes the marbling look elegant rather than playful.
16. Peachy Nude Ombre
This ombre design transitions from a pale, creamy peach at the base to a warmer, more saturated peach at the tips. The gradient feels warm and approachable while maintaining the sophistication of an ombre design. It’s less dramatic than color-to-color ombres but equally beautiful and professional.
Creating Seamless Color Transitions
Monochromatic ombres (shades within the same color family) can actually be easier to create than multi-color ombres because the colors blend more naturally. Start with the palest shade at the base, layer the medium shade in the middle, and apply the darkest shade at the tips. Use a damp sponge to blend the transitions, but don’t over-blend — slight visible variation adds depth.
Peachy Ombre Shade Selection
- Pale peach as the base for a soft, barely-there tone
- Medium warm peach as the transition shade
- Rich peachy-orange as the tip color for maximum impact
- Alternatively, use peachy-beige at base, true peach in the middle, and coral at the tips for more dramatic effect
- Consider finish — glossy shows the colors most vibrantly, while matte creates a softer appearance
The beauty of this design is that it works in any lighting and with any outfit. It’s warm without being loud, colorful without being attention-grabbing.
17. Cream with Delicate Dots

Dot designs offer endless possibilities and work beautifully on soft square nails. A creamy base covered with precisely placed dots in a complementary color creates visual interest while maintaining elegance. Dots can be tiny and delicate, medium-sized and spaced evenly, or arranged in specific patterns.
Creating Perfect Dots Without Specialized Tools
You don’t need a dotting tool — use a toothpick, the end of a bobby pin, or a thin brush handle dipped in polish to create dots. Consistency matters more than size — nails with uniformly-sized dots read as intentional, while random sizes look more artistic and scattered. Experiment with placement — rows feel structured, while scattered dots feel organic and artistic.
Dot Pattern Ideas
- Evenly spaced rows of dots creating a grid-like pattern
- Concentrated dots on the tips with fewer dots at the base
- Scattered asymmetrical dots that feel organic and less formal
- Dots in varying sizes creating visual depth and interest
- Dots only on accent nails while other nails remain solid cream
This design has a charming, almost playful quality. It’s easier to execute than many designs, but the result looks carefully considered and intentional.
18. Soft Gray with Metallic Details
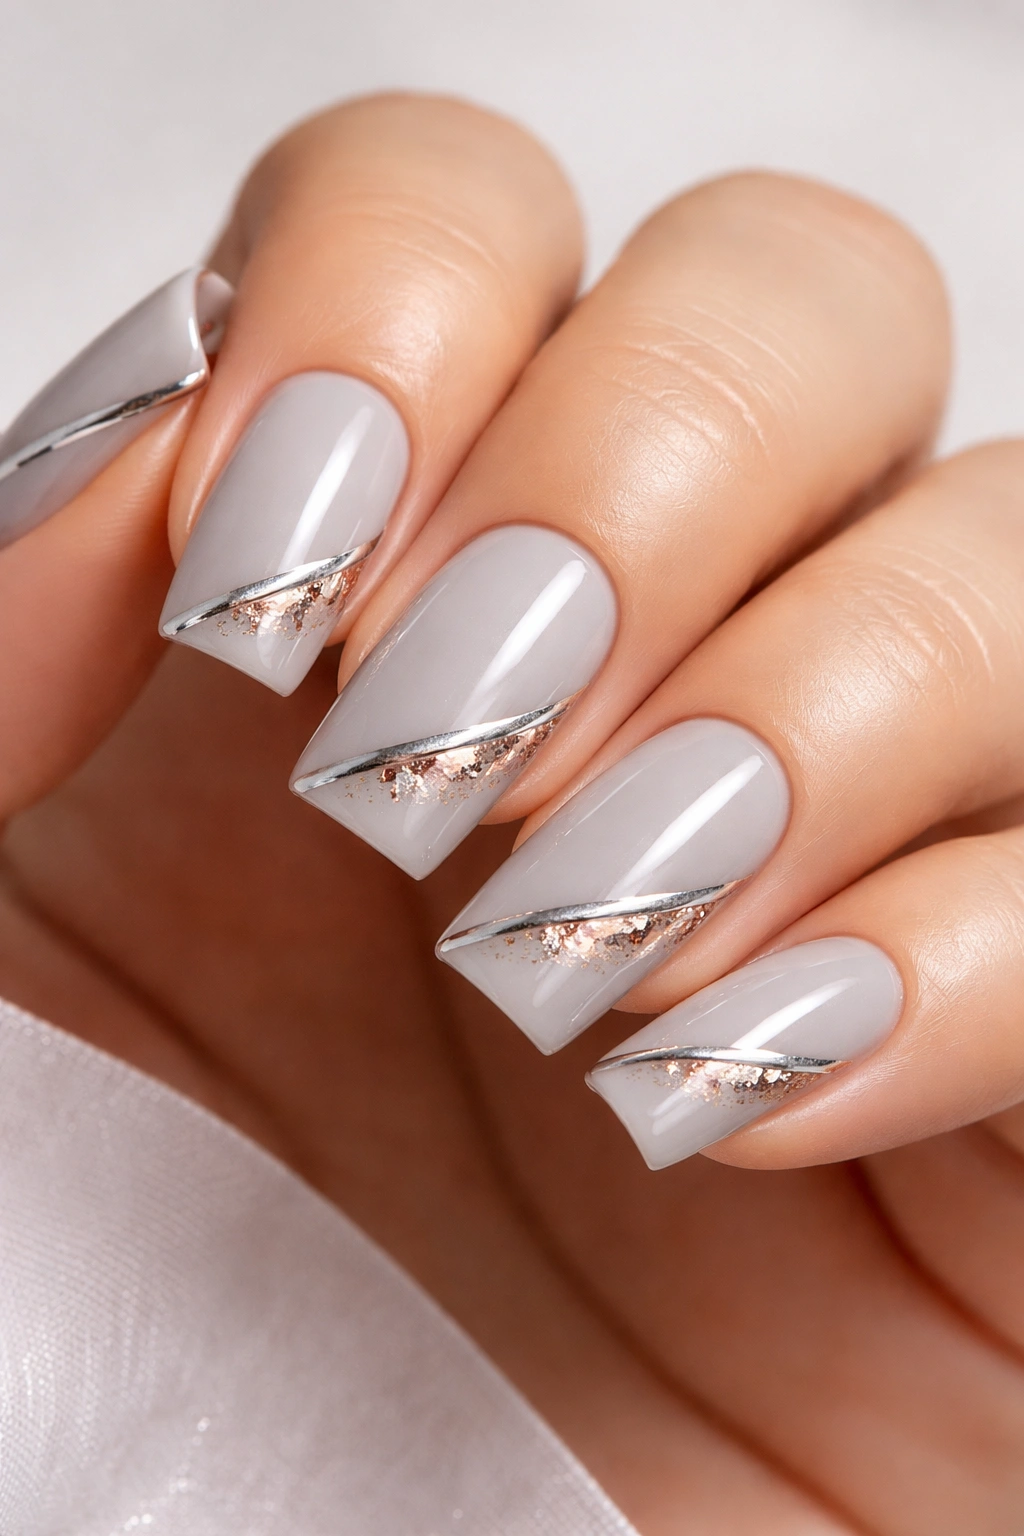
Soft gray provides a cool, sophisticated base that pairs beautifully with metallic accents. Gray is often overlooked in favor of warmer nudes, but on soft square nails, it creates an exceptionally elegant, modern look. Metallic details in silver, rose gold, or even holographic finishes add just the right amount of glamour.
Choosing the Right Gray Shade
Not all grays work equally well on nails. Grays that lean too blue can look sad or washed-out, while grays that lean too brown can appear muddy. Aim for a soft gray with barely perceptible warm or cool undertones — essentially a true neutral gray. The gray should be pale enough to feel soft rather than dark or moody.
Metallic Detail Options
- A thin silver stripe down the center of each nail
- Rose gold foil creating an ombre effect from base to tip
- Metallic tips like a sophisticated French manicure variation
- Scattered metallic accents or small geometric shapes
- A metallic glitter gradient concentrated at the tips
Pro tip: Gray metallic combinations work beautifully with cool skin tones and cooler-toned clothing and jewelry. If warm tones suit your coloring better, consider pairing gray with rose gold rather than silver.
19. Buttery Yellow with Pale Tips

This design brings subtle color while maintaining sophistication. A buttery yellow base (warm, soft, not bright) transitions to pale cream or white tips, creating an ombre effect that feels sunny without being childish. The soft square shape prevents the yellow from looking too playful.
Finding the Right Shade of Yellow
Yellow can be tricky because it has a tendency to either look too bright, too muted, or slightly greenish. Look for buttery yellows with warm undertones that feel creamy and soft rather than neon or highlighter-like. Test the color in natural light before committing — indoor lighting can make yellows appear completely different from how they’ll look outside.
Tip Color Options
- Pure white tips create maximum contrast and drama
- Pale cream tips for a softer, more blended appearance
- Very pale yellow tips that are barely distinguishable from the base
- Gold tips that echo the warmth of the yellow base
- Combination of yellow ombre with white tips for gradient effect
Yellow is an underrated choice that makes a quiet but distinctive statement. Pair it with gold jewelry and warm-toned clothing for a cohesive look.
20. Minimalist Beige with Chrome Accent
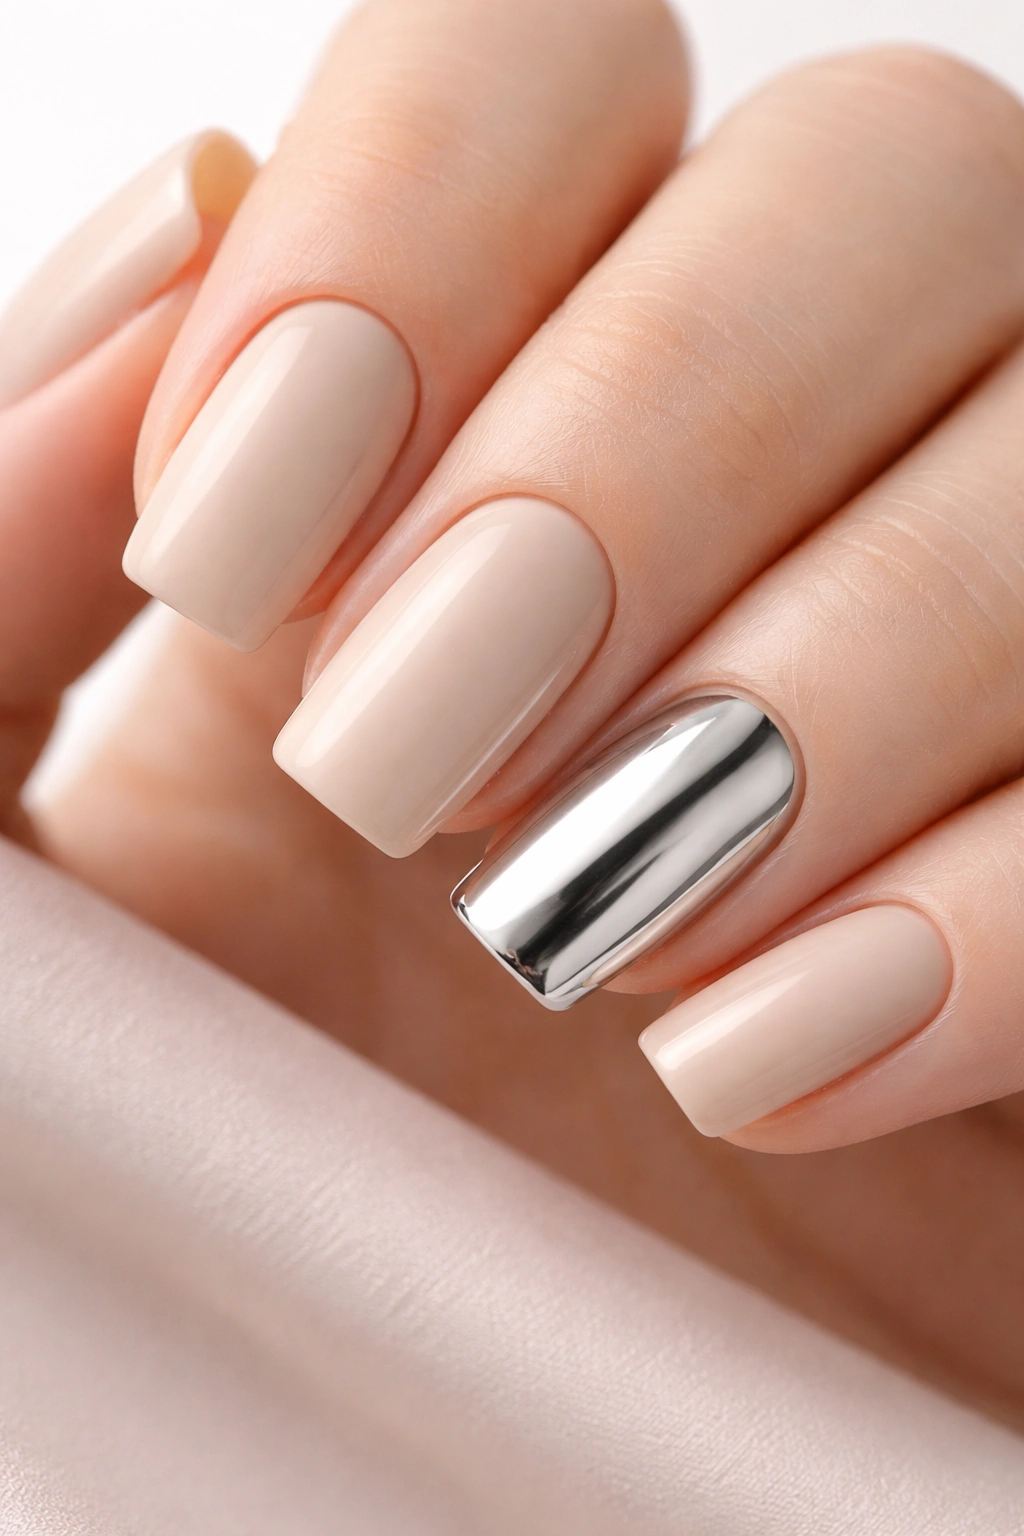
Chrome nails have become iconic, and this design shows how to use chrome in a sophisticated, minimalist way. Rather than full chrome nails (which can feel overwhelming), apply a soft beige base and add chrome details on one accent nail or in specific areas. The contrast between matte or glossy beige and reflective chrome creates visual interest.
Working with Chrome Polish
Chrome polish requires specific application techniques to activate the reflective properties. Apply the chrome polish to a sticky base (gel or sticky top coat from traditional polish), use a rubber or silk pad to rub the polish surface, and watch the reflective effect appear as if by magic. Seal it with a clear top coat to prevent the chrome from rubbing off.
Chrome Accent Placement Options
- A single accent nail with full chrome coverage while other nails remain beige
- Chrome tips creating a sophisticated French hybrid
- Chrome geometric patterns on beige nails
- Chrome ombre that transitions from none at the base to full chrome at the tips
- Scattered chrome accents like small dots or lines on beige nails
Chrome offers an almost futuristic quality that contrasts beautifully with soft, warm neutrals like beige. This combination feels both timeless and contemporary.
Final Thoughts
Soft square nails are genuinely the most versatile shape for experimentation because they’re forgiving, flattering, and work with virtually any design aesthetic. Whether you prefer minimalist elegance, romantic florals, bold metallics, or subtle color play, there’s a soft square design that perfectly matches your personal style. The shape itself communicates sophistication without requiring complicated nail art.
The 20 designs above represent just a starting point. Once you understand how different colors, finishes, and techniques work on soft squares, you can mix and match ideas to create designs that feel entirely your own. The key is choosing colors and details that genuinely appeal to you rather than following trends that don’t resonate — that’s what makes a manicure feel special rather than just following a pattern.
Every manicure is an opportunity to experiment, refine your technique, and discover what makes you feel most confident and beautiful. Start with designs that excite you, invest in good-quality polish and tools, and don’t hesitate to adjust designs to match your personal aesthetic. Your perfect soft square manicure is absolutely achievable.
